Socket Mobile USB-2 USB Bluetooth 2.0 Adapter User Manual usb adapter ug a
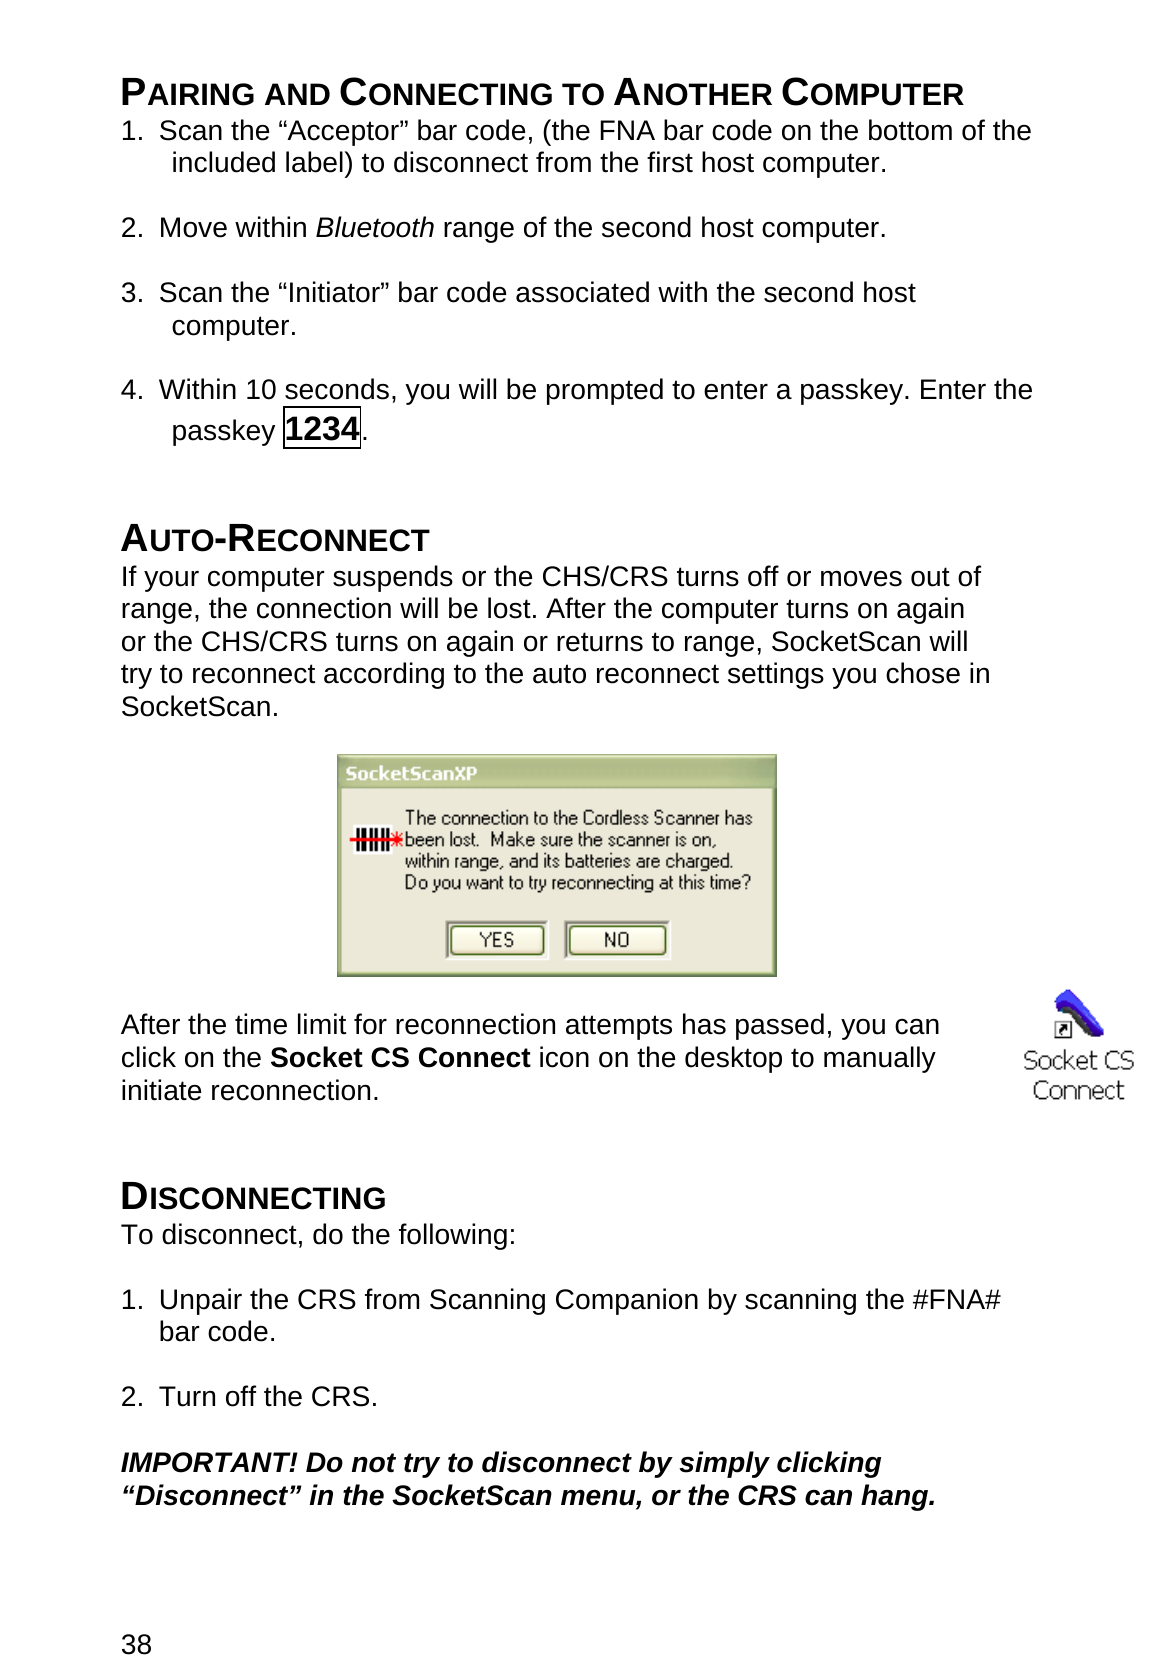
Socket Mobile, Inc. USB Bluetooth 2.0 Adapter usb adapter ug a
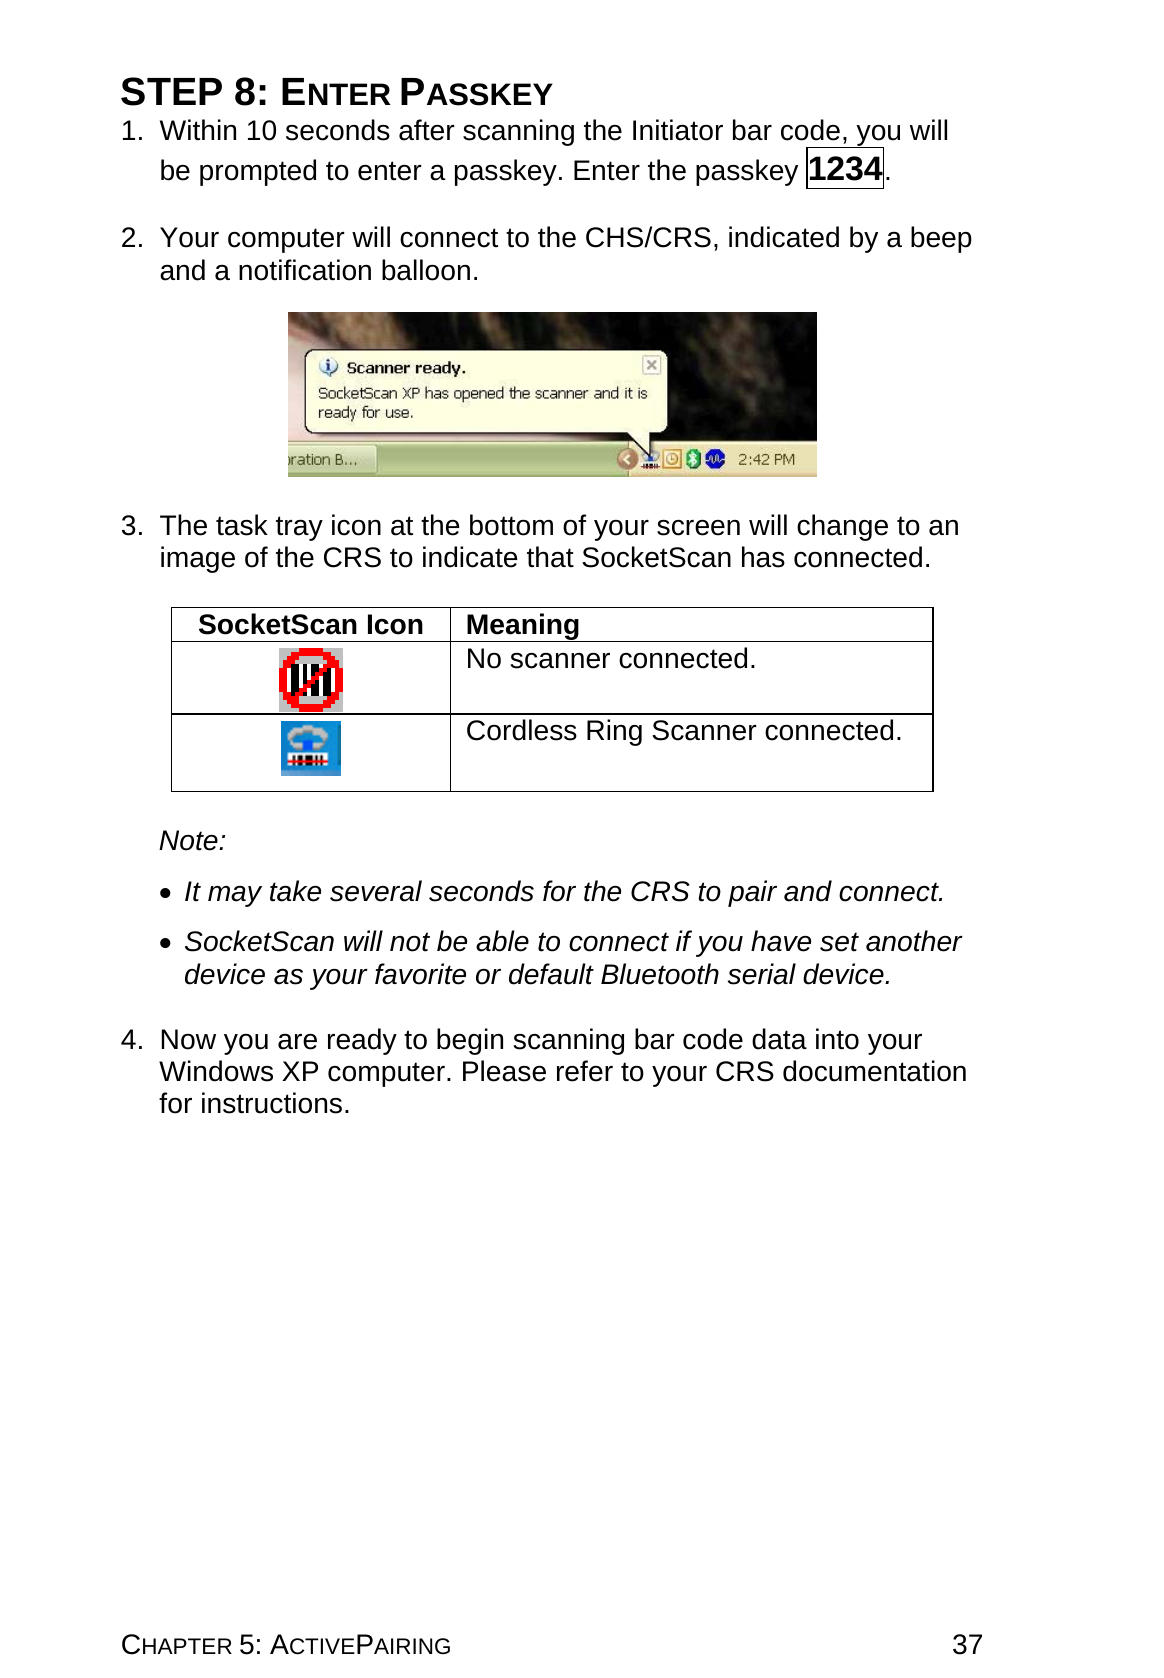
UserManual.wiki
>
Socket Mobile
>
USB 2 User Manual
Manual
Navigation menu
Upload a User Manual
Namespaces
Wiki Guide
HTML
PDF
Info
Views
User Manual
Discussion / Help
Navigation
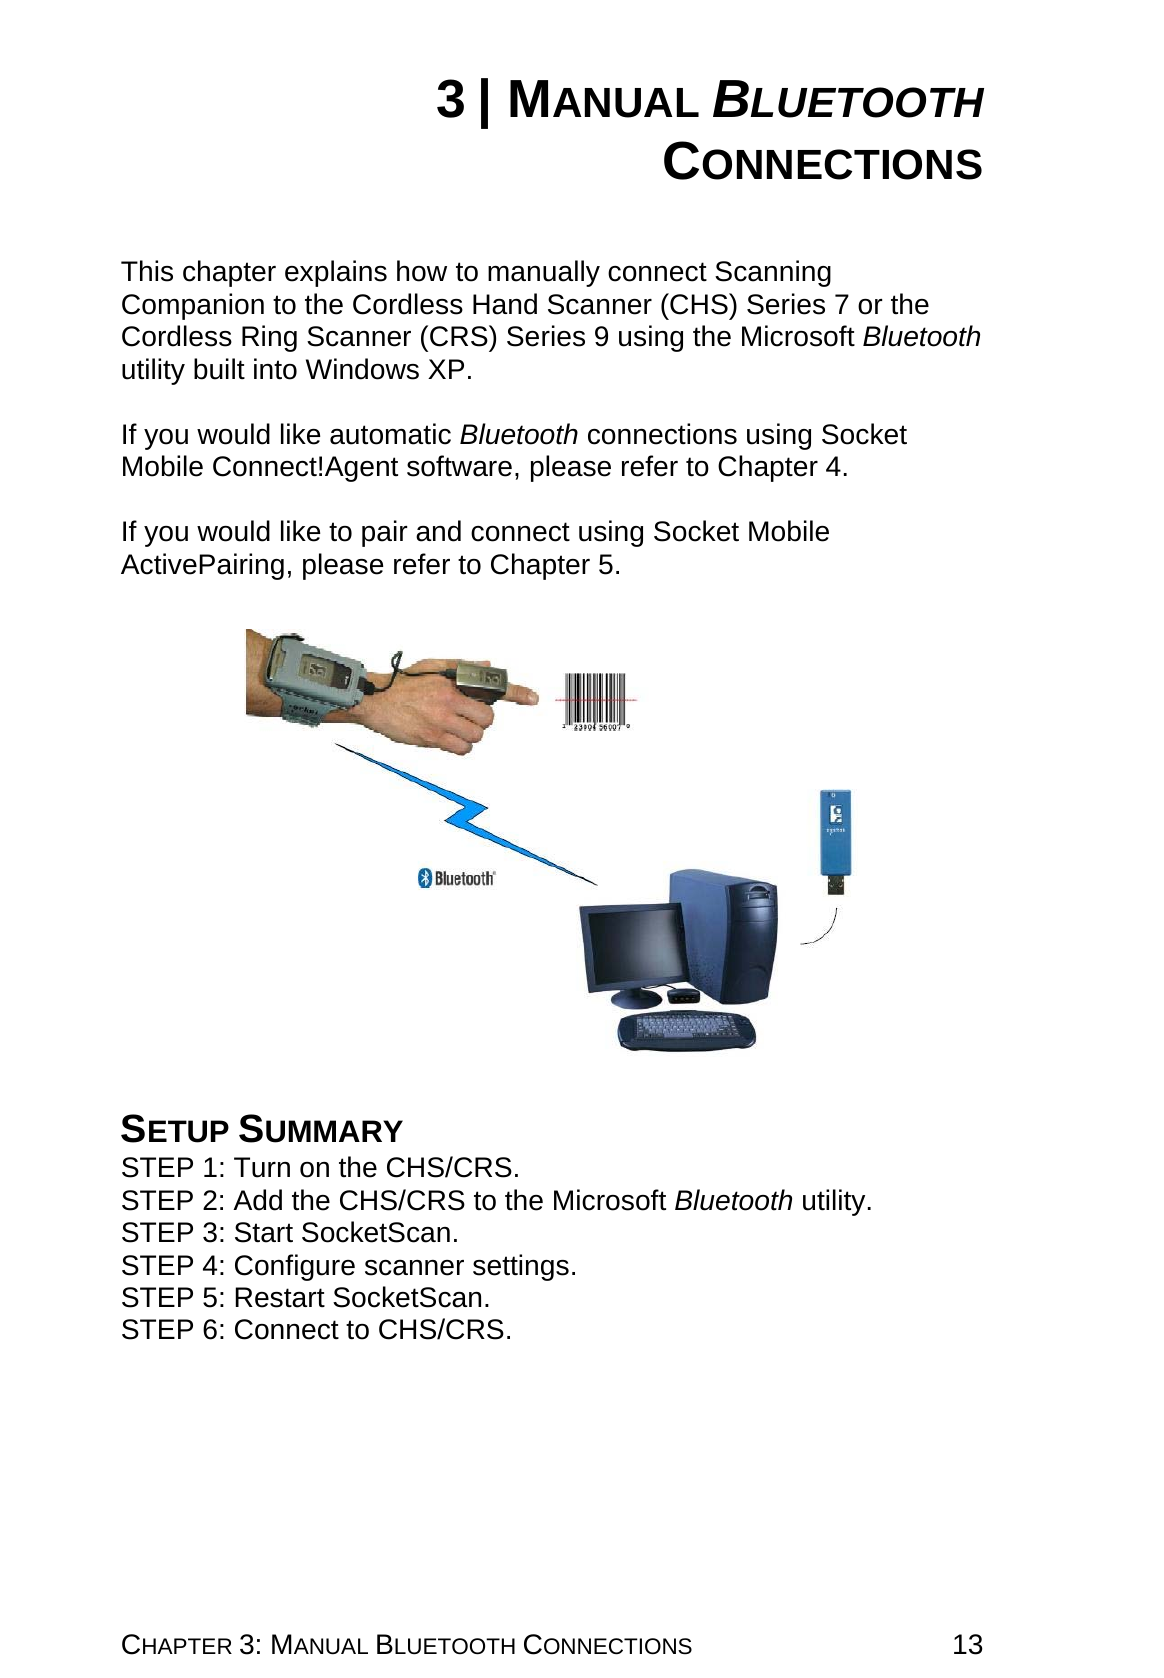
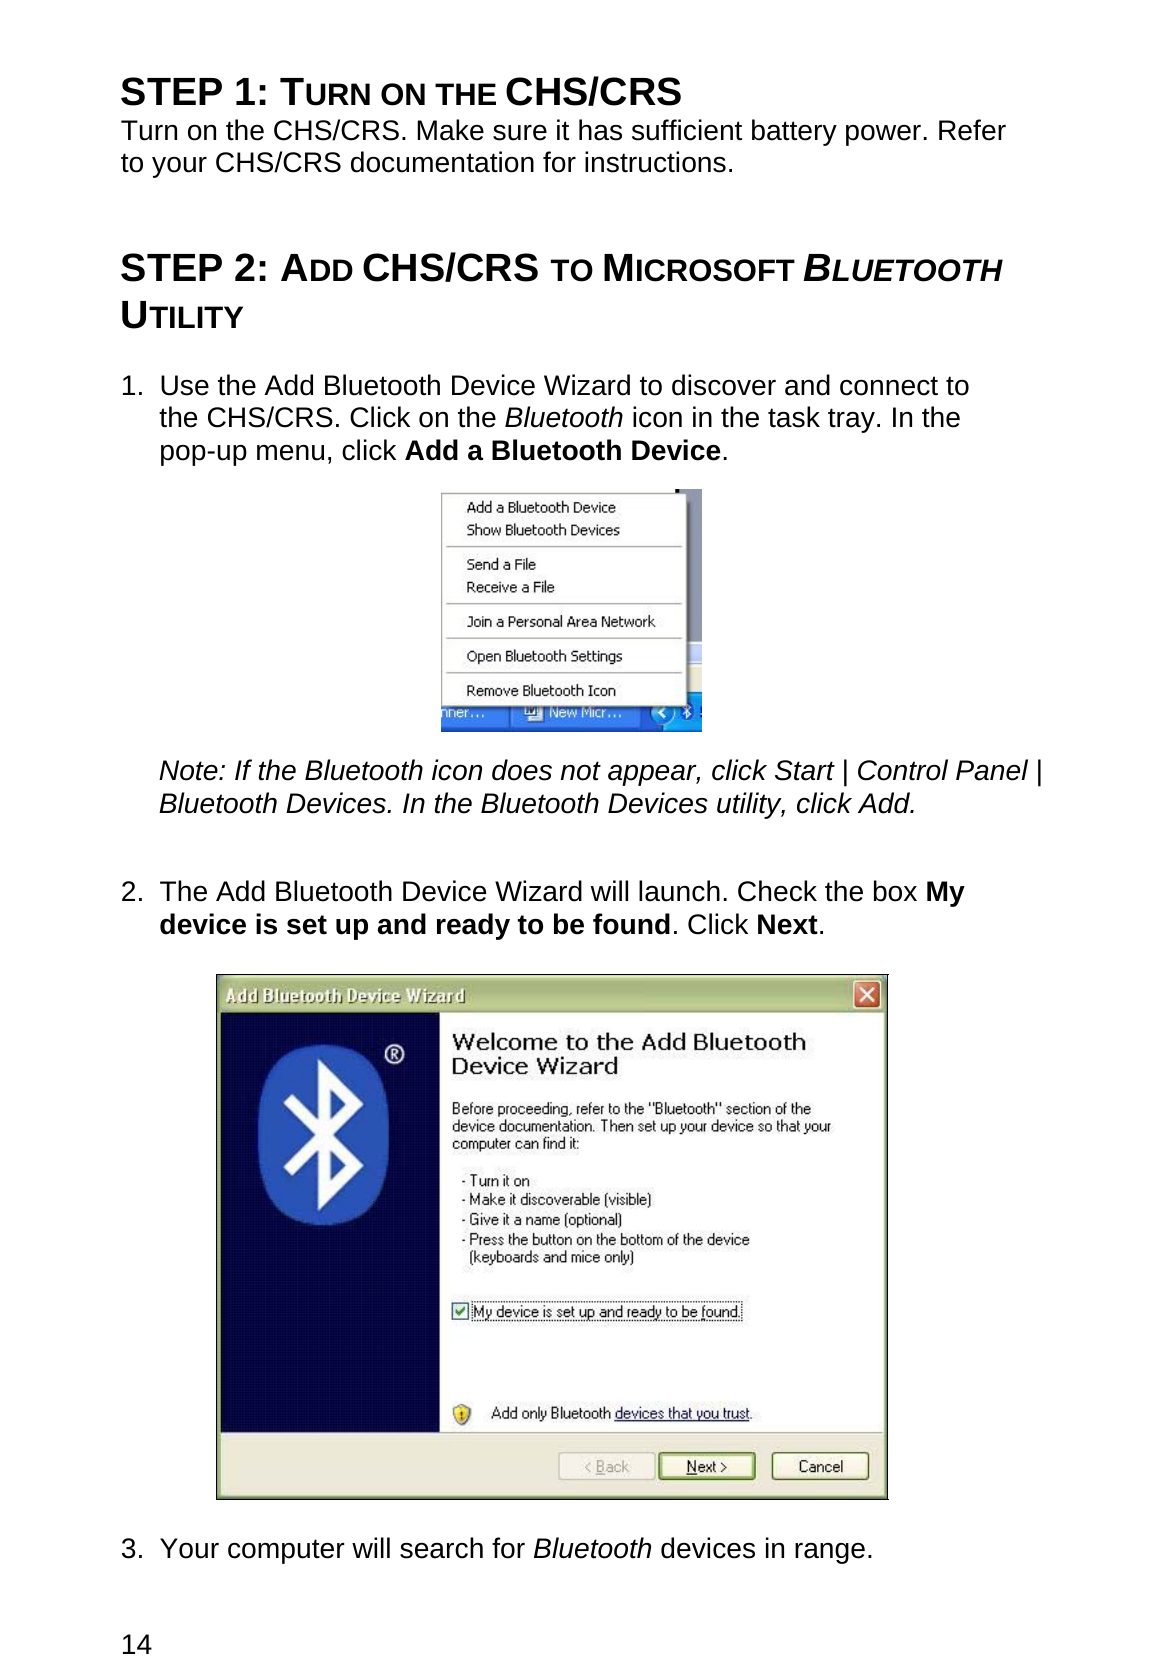
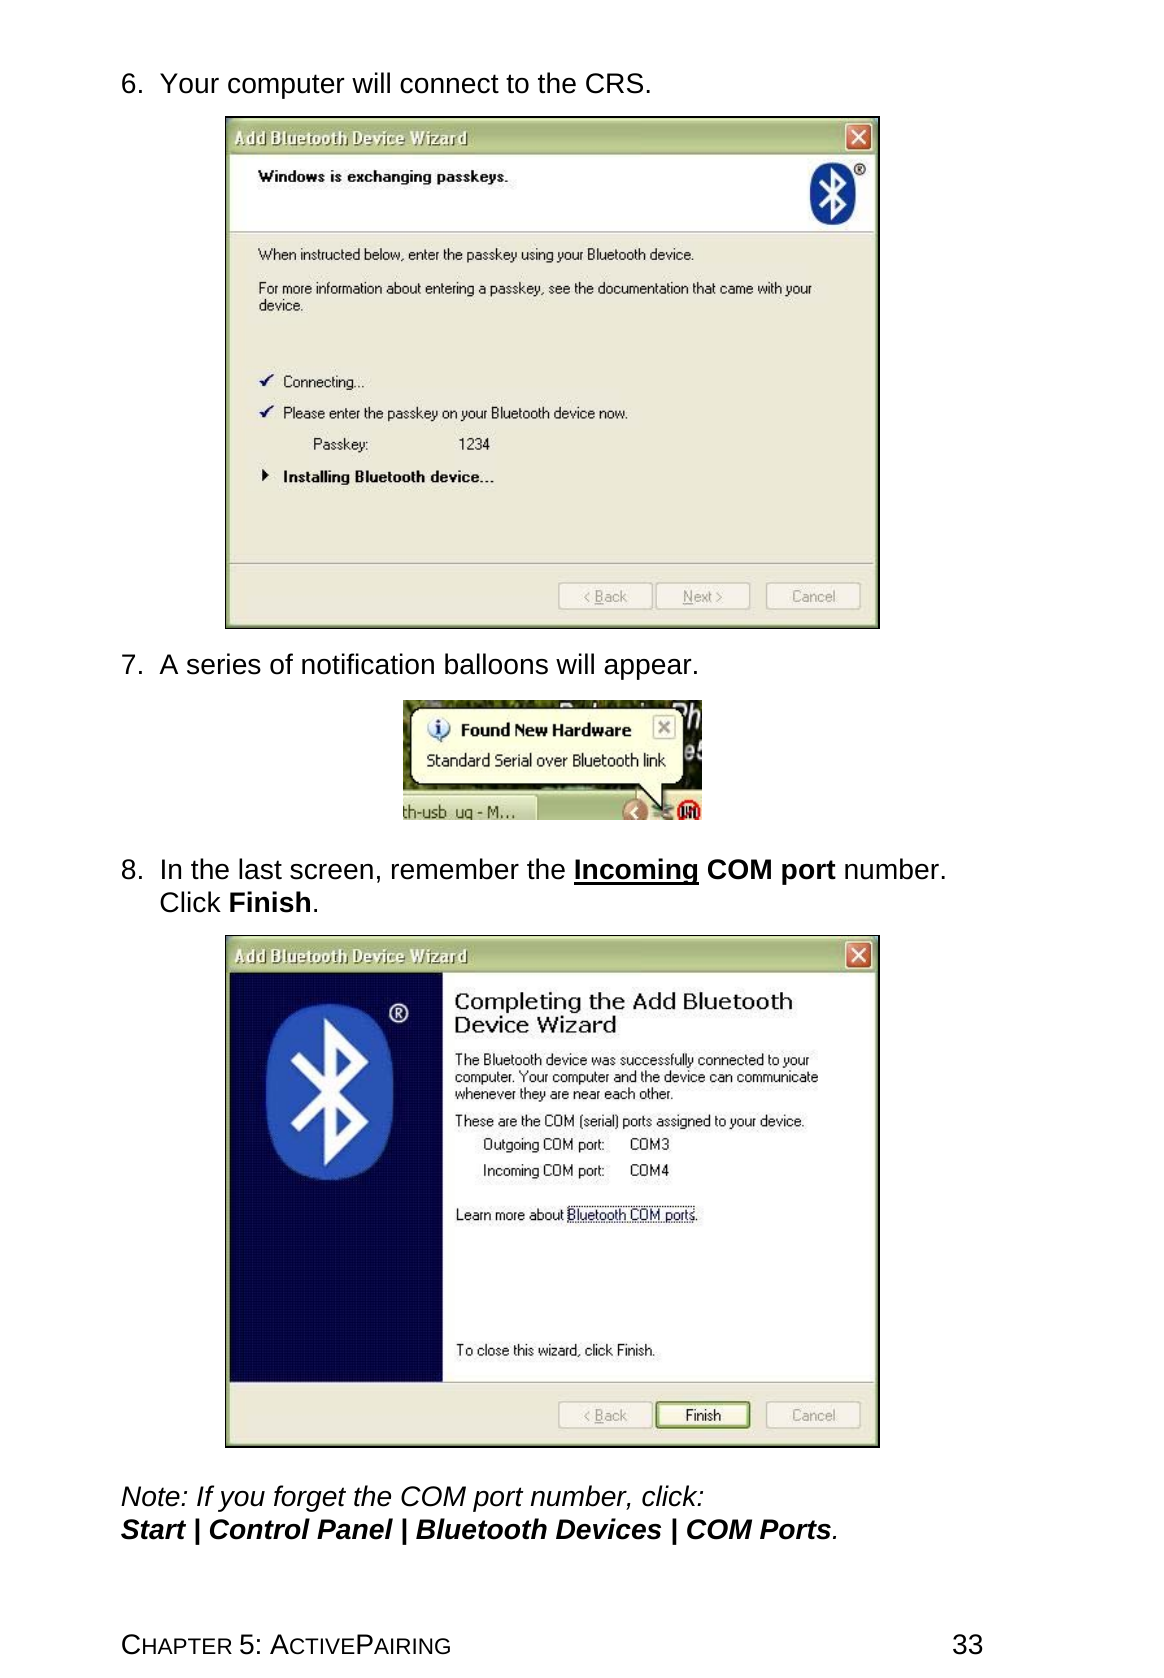
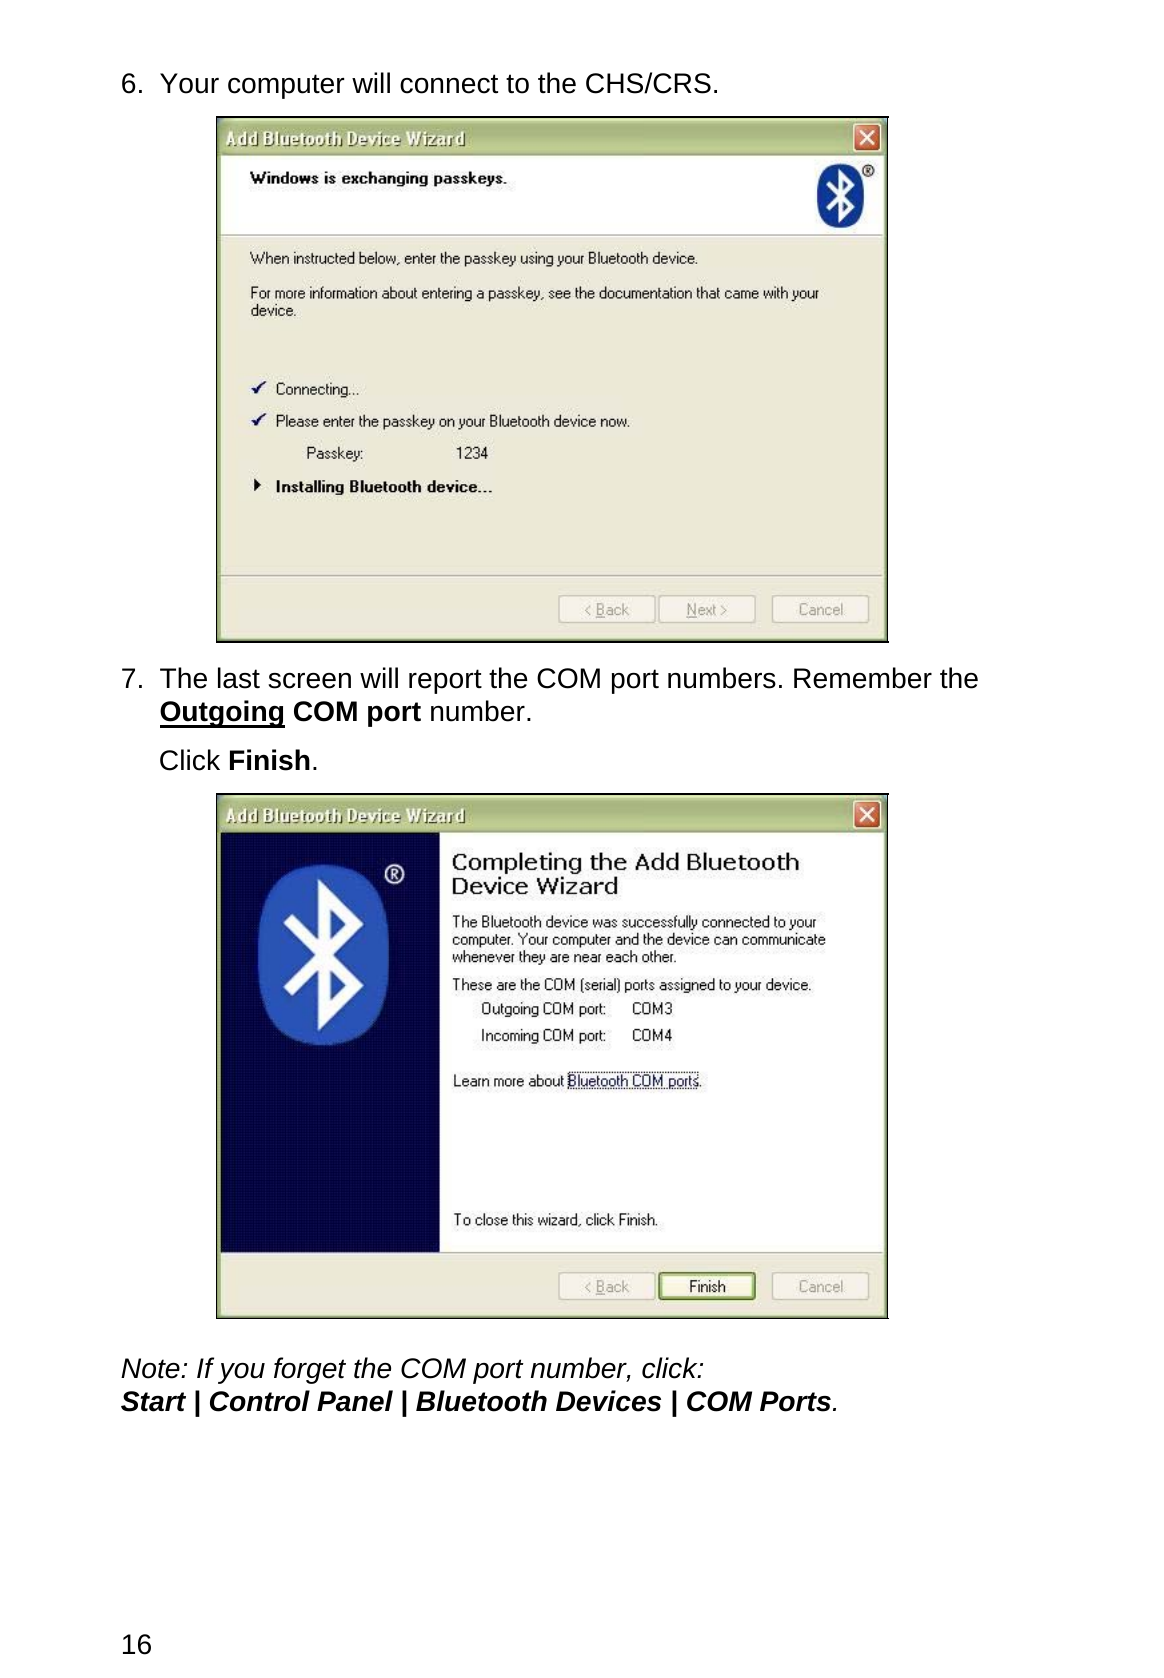
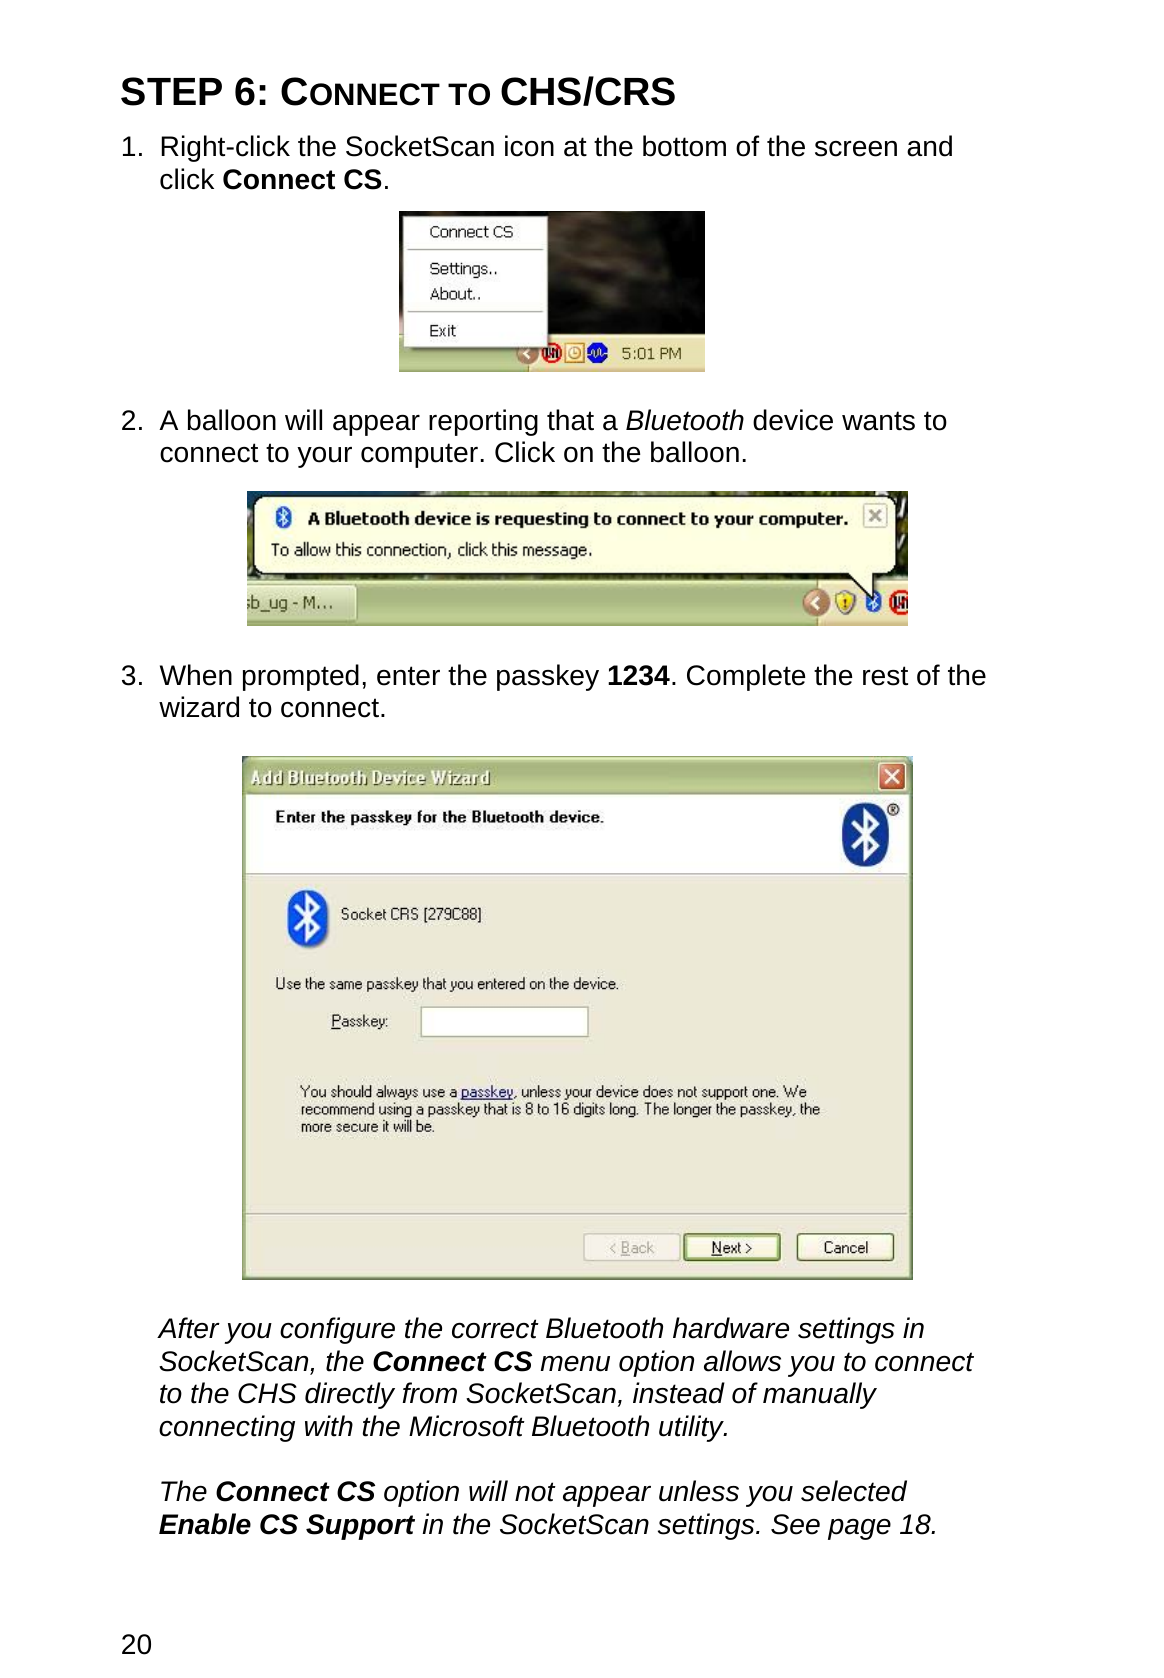
![CHAPTER 3: MANUAL BLUETOOTH CONNECTIONS 15 4. During the device search, select Socket CHS [xxxxxx] or Socket CRS [xxxxxx]. Click Next. The characters in brackets are the last 6 characters of the scanner’s Bluetooth MAC address. 5. In the next screen, select Use the passkey found in the documentation. Enter the default passkey 1234. Click Next.](https://usermanual.wiki/Socket-Mobile/USB-2/User-Guide-897530-Page-15.png)

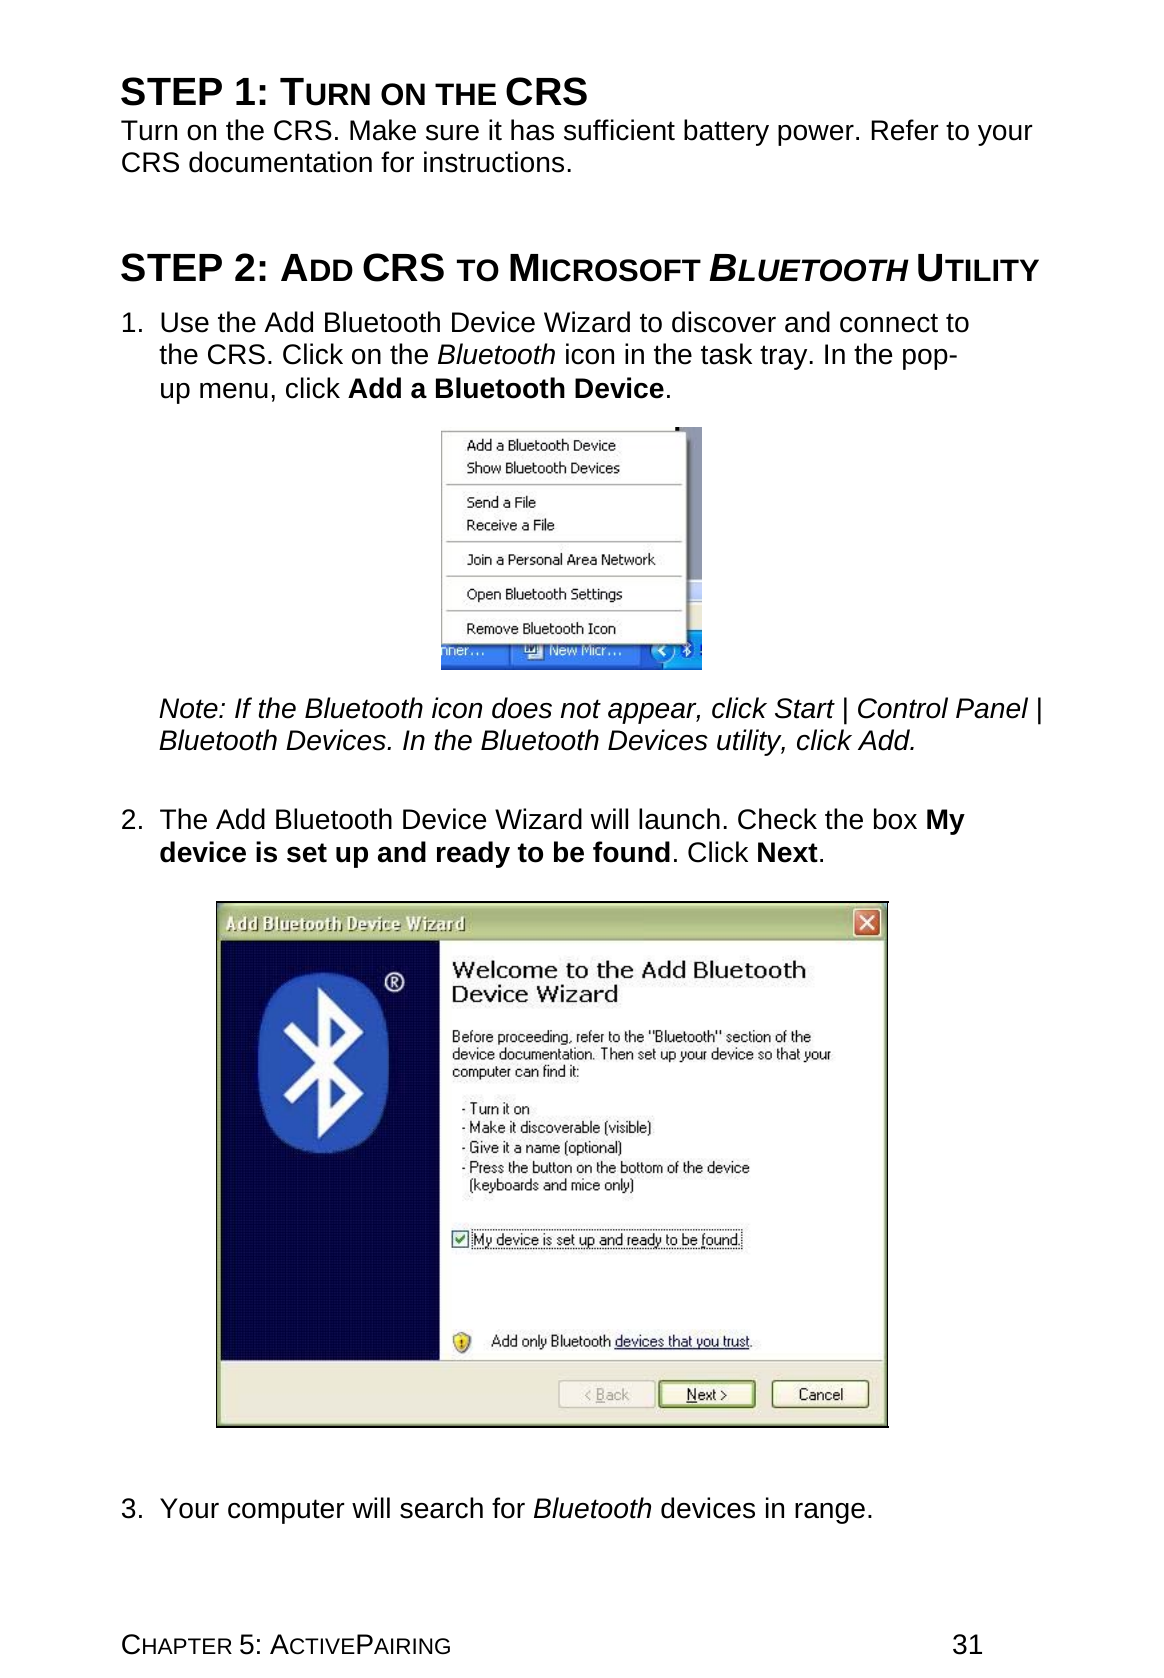
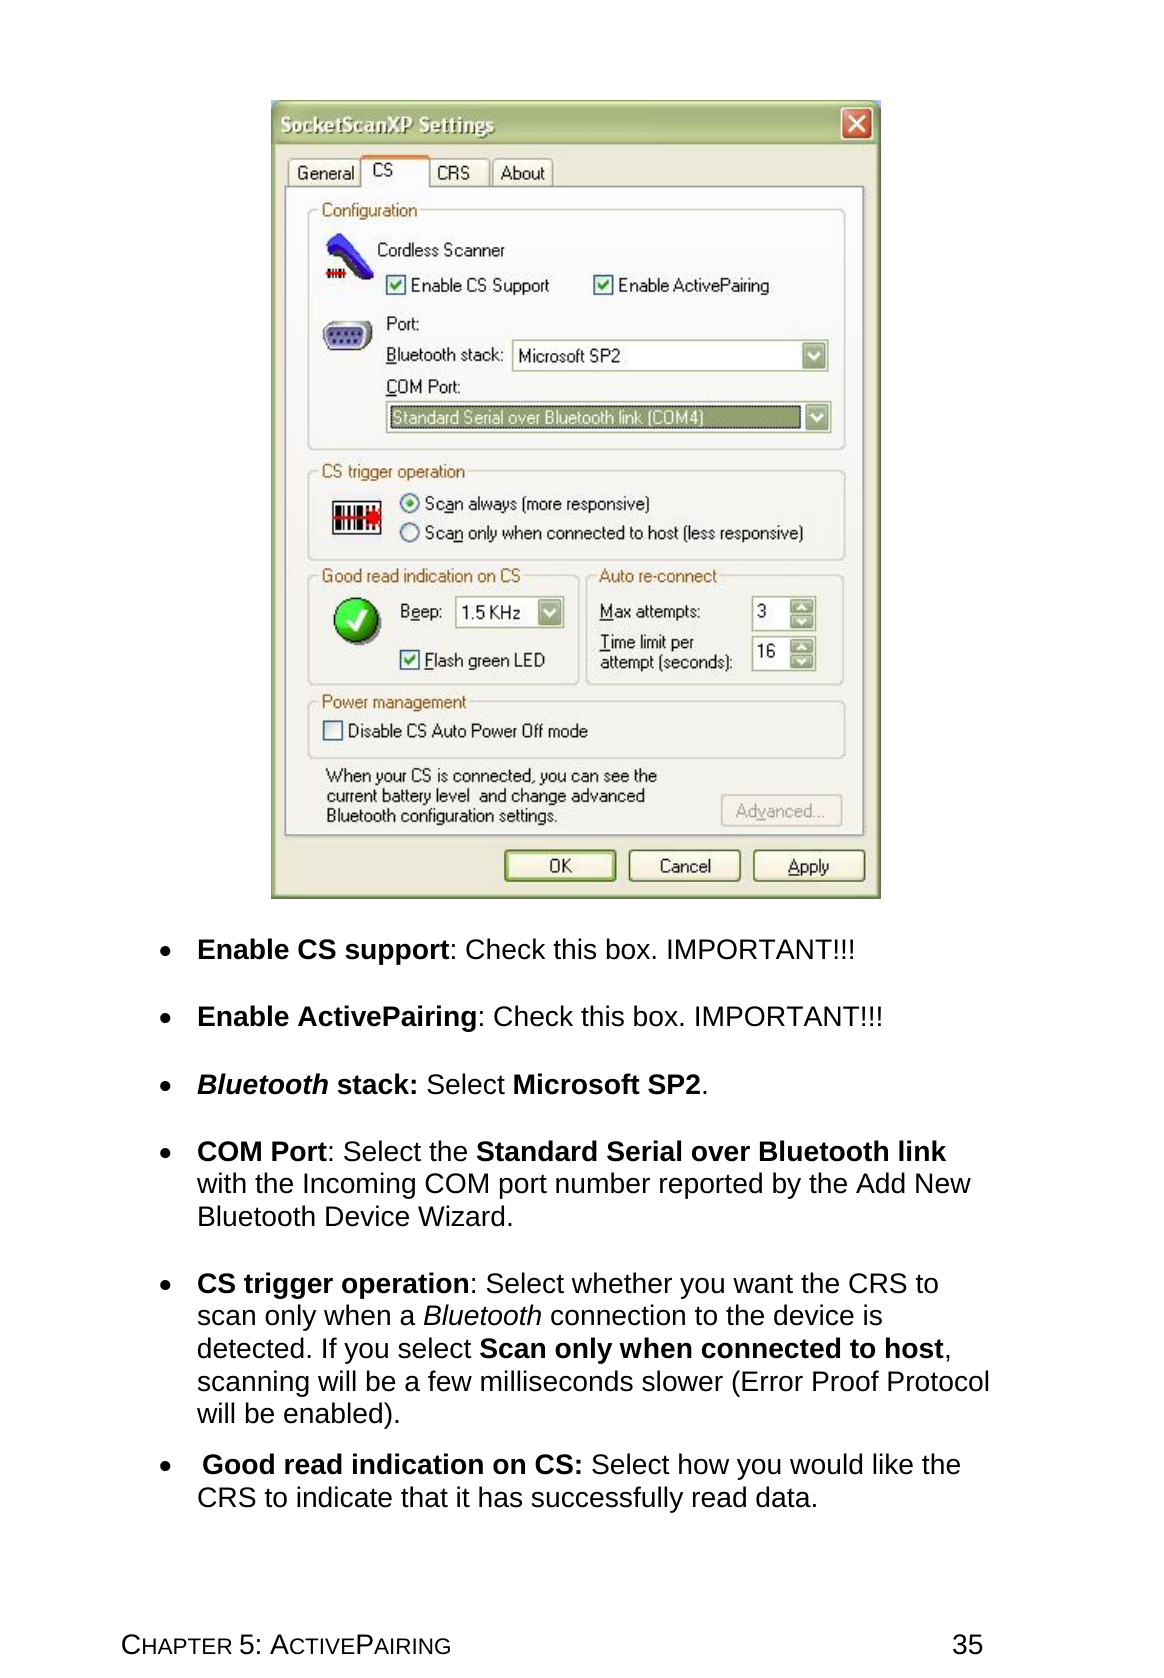
![32 4. During the device search, select Socket CRS [xxxxxx]. Click Next. The characters in brackets are the last 6 characters of the scanner’s Bluetooth MAC address. 5. In the next screen, select Use the passkey found in the documentation. Enter the default passkey 1234. Click Next.](https://usermanual.wiki/Socket-Mobile/USB-2/User-Guide-897530-Page-32.png)