Somfy Systems BR SWF Basic Remote Control BR-01 User Manual
Somfy Systems SWF Basic Remote Control BR-01 Users Manual
Users Manual
Thank you for purchasing this fine window treatment proudly constructed by us. Your shade has been custom-sized
to your personal specifications with the highest standards of quality and craftsmanship. We have confidence that it will
provide you with many years of beauty andeasy maintenance. Enjoy!
Follow the easy step-by-step instructions to install your shade. Should you need additional support, please feel free to
call our Customer Service Center at 1-800-221-6352 or email us at windowfashions@springswindowfashions.com. We
will be glad to help you. Again, we appreciate that you have chosen us to enhance the design and look of your home.
Gracias por adquirir este fino tratamiento de ventana orgullosamente fabricado para usted. Su persiana ha sido hecha
a la medida del cliente según sus especificaciones personales con los más altos estándares de calidad y trabajo
artesanal. Nosotros tenemos la confianza que le proveerá muchos años de belleza y fácil mantenimiento. ¡Disfrútela!
Siga las fáciles instrucciones “paso a paso"para instalar su persiana. Si necesita ayuda adicional, favor de proceder con
toda libertad llamando al Centro de Servicio al Cliente al teléfono 1-800-221-6352 o enviando un correo electrónico
awindowfashions@springswindowfashions.com. Estaremos muy dispuestos para ayudarle. Nuevamente, nosotros
apreciamos que nos haya escogido para mejorar el diseño y la apariencia de su hogar.
Merci d’avoir acheté ce superbe traitement de fenêtre que nous sommes fiers d’avoir exécuté pour vous. Votre
store a été fait sur mesure selon votre propre cahier des charges dans un souci d’excellence et de la plus haute
technicité. Nous ne doutons pas qu’il vous offrira des années de beauté et d’entretien facile Profitez-en bien !
Pour installer votre store, veuillez suivre les instructions détaillées. Si vous avez des questions n’hésitez pas à
prendre contact avec notre Centre de service après-vente en téléphonant au 1-800-221-6352 ou par courrier
électronique au windowfashions@springswindowfashions.com. Nous vous aiderons avec plaisir. Encore une fois,
nous vous remercions de nous avoir choisi pour améliorer et embellir votre intérieur.
2
Determine inside/ceiling or outside mount
Determine el montaje interior/de techo o exterior
Choisir la pose intérieure/au plafond ou extérieure
Place shade in desired location, mark corners
Coloque la persiana en la ubicación deseada, marque las esquinas
Placer le store dans l’emplacement souhaité, marquer les coins
3
Inside/ceiling mount
Montaje de techo/interior • Pose intérieure/au plafond
Outside mount
Montaje exterior • Pose extérieure
5
Mark screw locations; center additional brackets, if applicable
Marque la ubicación de los tornillos; centre los soportes adicionales, si
es aplicable
Marquer l’emplacement des vis; centrer les supports supplémentaires, le
cas échéant
Inside/ceiling mount
Montaje de techo/interior
Pose intérieure/au plafond
Outside mount
Montaje exterior
Pose extérieure
Optional extension bracket
Soporte de extensión opcional
Rallonge (en option)
1/4"
6,4 mm
1/4" to front of bracket for
flush mount
6,4 mm desde el frente del
soporte para un montaje a ras
6,4 mm jusqu’à l’avant
du support pour montage
encastré
6
If mounting the battery case, mark battery screw locations
If mounting the battery case, mark battery screw locations
If mounting the battery case, mark battery screw locations
Inside/ceiling mount
Montaje de techo/interior • Pose intérieure/au plafond
Outside mount
Montaje exterior • Pose extérieure
On right end of window, hold battery case 1" behind
and 2" to the left of the rear bracket screw location and
mark.
For a second reloadable battery
case
, mount the
second set 5" to the left of the first base and mark.
On right end of window, hold battery case 1” behind and
2” to the left of the rear bracket screw location and mark.
For a second reloadable battery
case
, mount the
second set 5” to the left of the first base and mark.
On right end of window, hold battery case 1” behind and
2” to the left of the rear bracket screw location and mark.
For a second reloadable battery
case
, mount the
second set 5” to the left of the first base and mark.
On right end of window, hold battery case 1/4" above and
to 2" the left of the left bracket screw location and mark.
For a second battery case, position base 5" tot he left of
the first base and mark screw locations.
On right end of window, hold battery case 1/4” above and
to 2” the left of the left bracket screw location and mark.
For a second battery case, position base 5” tot he left of
the first base and mark screw locations.
On right end of window, hold battery case 1/4” above and
to 2” the left of the left bracket screw location and mark.
For a second battery case, position base 5” tot he left of
the first base and mark screw locations.
4
Measure in from both ends and mark
Mida desde los dos extremos y marque
Mesurer à partir de chacune des extrémités et marquer
Inside/ceiling mount
Montaje de techo/interior • Pose intérieure/au plafond
Outside mount
Montaje exterior • Pose extérieure
6"
15,2 cm
1/16" drill bit
Broca de 1,6 mm
Mèche de 1,6 mm
1
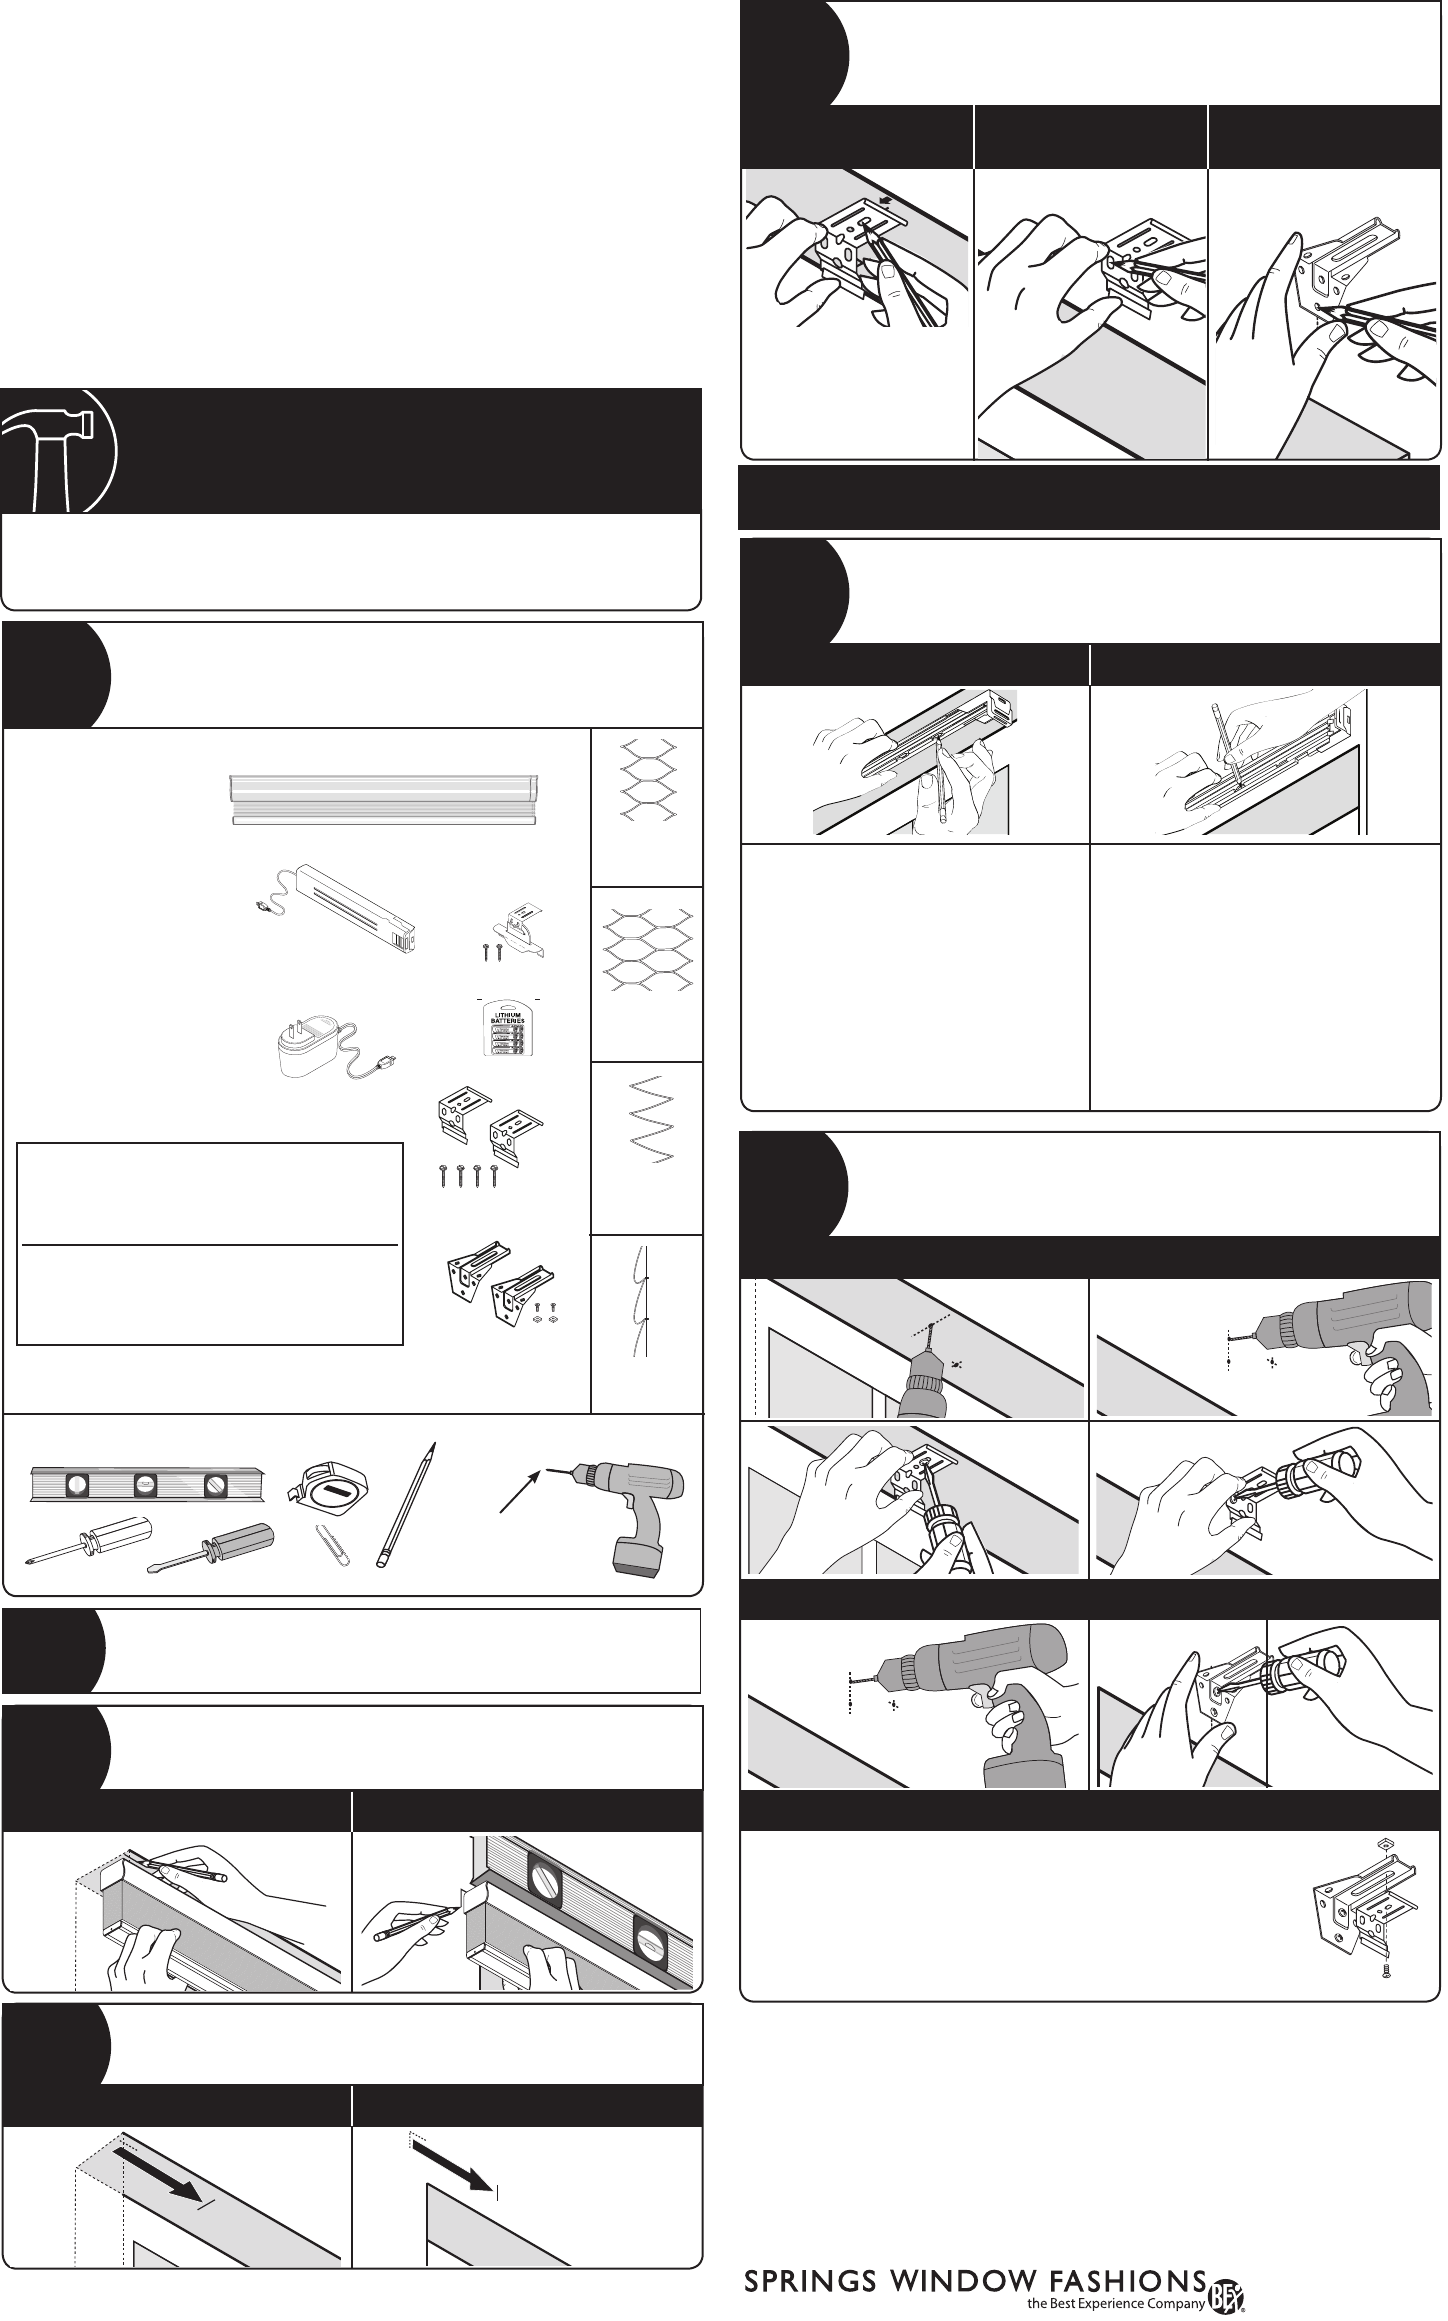
Everything needed to install your shade
Todo lo necesario para instalar su persiana.
Tout le nécessaire pour installer votre store
Tools needed • Herramientas necesarias • Outillage nécessaire
4
2
5
1
Shades over 3,600 in2 (4,200 Roman) will have 2 battery cases • Shades over 3,600 in2 (4,200
Roman) will have 2 battery cases • Shades over 3,600 in2 (4,200 Roman) will have 2 battery
cases
Single cell
Celda sencilla
Cellulaire simple
Double cell
Celda doble
Cellulaire double
Pleated
Plisada
Plissé
Bracket chart (items 3, 4, 8 & 10)
Tabla de soportes
Tableau des supports
Ordered width Bracket quantity
Ancho ordenado Cantidad de soportes
Largeur commandée Quantité de boîtier
Up to 42" • hasta 106,7 cm • jusqu’à 106,7 cm 2
421⁄16" to 72" • 106,8 cm hasta 182,9 cm • 106,8 cm jusqu’à 182,9 cm 3
721⁄16" to 102" • 183 cm hasta 259,1 cm • 183 cm jusqu’à 259,1 cm 4
1021⁄16” to 132” • 259,2 cm hasta 335,3 cm • 259,2 cm jusqu’à 335,3 cm 5
1321⁄16” to 144” • 335,4 cm hasta 365,9 cm • 335,4 cm jusqu’à 365,9 cm 6
6
Inside-/ceiling- or outside-mount motorized Cellular, Pleated, or Classic Roman Shade.
Inside-/ceiling- or outside-mount motorized Cellular, Pleated, or Classic Roman Shade.
Inside-/ceiling- or outside-mount motorized Cellular, Pleated, or Classic Roman Shade.
HOW TO INSTALL
CÓMO INSTALAR
COMMENT INSTALLER
79056-00 (07/14)
Springs Window Fashions • Middleton, WI 53562-1096 • www.springswindowfashions.com
6"
15,2 cm
1 Shade
2 Brackets/Screws
3 Optional Extension Brackets
4 Reloadable battery case (optional)
5 Battery hanger/Screws
6 Plug-in Transformer (optional)
7 8 AA Batteries (optional)
1 Shade
2 Brackets/Screws
3 Optional Extension Brackets
4 Reloadable battery case (optional)
5 Battery hanger/Screws
6 Plug-in Transformer (optional)
7 8 AA Batteries (optional)
1 Shade
2 Brackets/Screws
3 Optional Extension Brackets
4 Reloadable battery case (optional)
5 Battery hanger/Screws
6 Plug-in Transformer (optional)
7 8 AA Batteries (optional)
3
AA8
AA
AA
AA
AA
AA
AA
AA
AA
Draft-Image Review Only 141209 (6-1814)
MOTORIZATION ILLUSTRATIONS_Motorized shade install guide
OUTSIDE
MOUNT
INSIDE MOUNT
Draft-Image Review Only 141209 (6-1814)
MOTORIZATION ILLUSTRATIONS_Motorized shade install guide
OUTSIDE
MOUNT
INSIDE MOUNT
If using optional Battery Hanger, skip ahead to step 8
If using optional Battery Hanger, skip ahead to step 8
If using optional Battery Hanger, skip ahead to step 8
7
Drill holes, screw brackets into place, and battery case if applicable.
Drill holes, screw brackets into place, and battery case if applicable.
Drill holes, screw brackets into place, and battery case if applicable.
Inside/ceiling mount
Montaje de techo/interior • Pose intérieure/au plafond
Outside mount
Montaje exterior • Pose extérieure
Optional extension bracket
Soporte de extensión opcional • Rallonge (en option)
Optional extension bracket: assemble brackets
Soporte de extensión opcional: ensamble los soportes • Support de projection en option : assembler les supports
Attach headrail brackets to extension brackets using screws and nuts.
Conecte los soportes del cabezal con los soportes de extensión utilizando tornillosy
tuercas.
Fixer les supports de boîtier aux rallonges à l’aide des vis et des écrous.
Looped
Lazada
En boucle
7
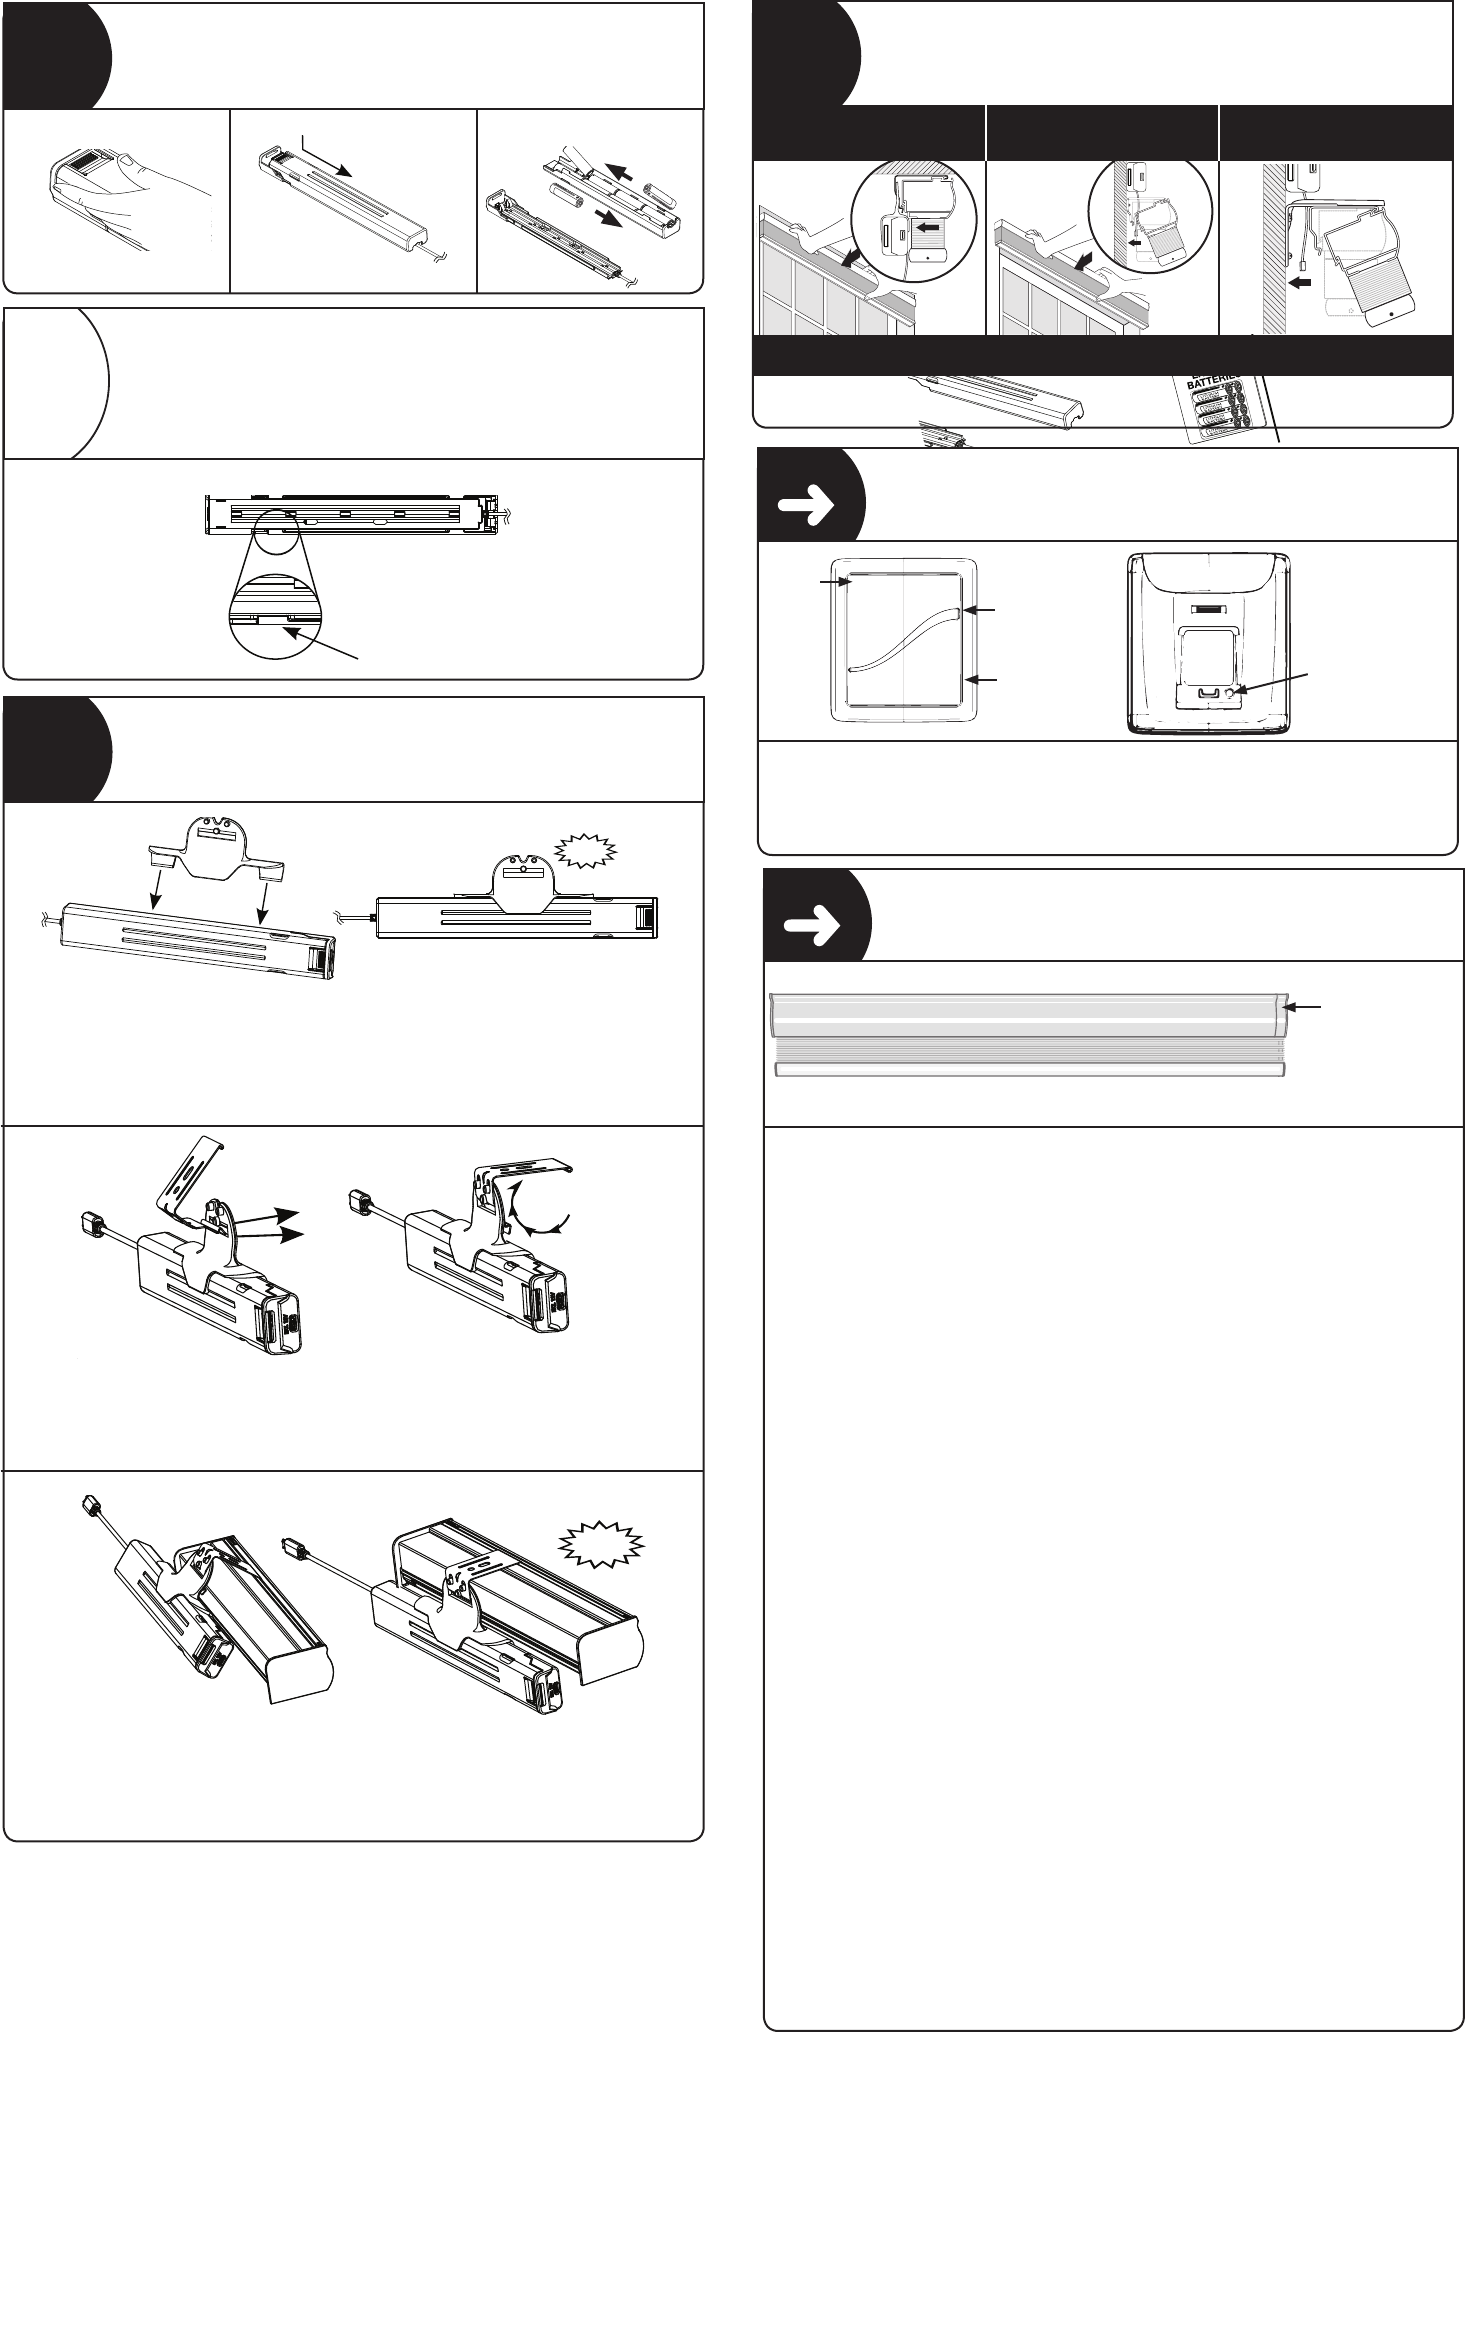
6Tilt the Headrail Bracket through the slot in the
Battery Hanger and press until snug
A B
SNAP
7Snap the Battery Pack Assembly on the backside of the window
shade
8Connect the wire lead from the
Battery Pack to the motor wire lead
A B
Shade
Headrail Bracket
Battery Pack Base
Battery Pack Lid
Battery Pack Hanger (optional)
8 AA Lithium Batteries
Screws (optional)
1
2
3
4
5
6
7
No tools required
Tools Needed - Herramientas necesarias - Outillage nécessaire
Hanger Bracket Option Screw Mount Option
1
7
2
1
6
AA
8
AA
AA
AA
AA
AA
AA
AA
AA
Everything needed to install your battery pack
2
Remove the Battery Pack Lid from the Battery Pack Base and insert batteries into the Battery Pack Lid
AB
Align battery polarity with
labels on Battery Pack Lid
34
5
3
Reattach the Battery Pack Lid to the Battery
Pack Base by aligning the pegs with the
slots
4
Slide the Battery Pack Lid into the base
while depressing the button to lock
5
Attach the Battery Pack Hanger to the assembled Battery Pack
SNAP
B
A
1. Adding
1. Adding
1. Adding
Shade
Headrail Bracket
Battery Pack Base
Battery Pack Lid
Battery Pack Hanger (optional)
8 AA Lithium Batteries
Screws (optional)
1
2
3
4
5
6
7
No tools required
Tools Needed - Herramientas necesarias - Outillage nécessaire
Hanger Bracket Option Screw Mount Option
1
7
2
1
6
AA
8
AA
AA
AA
AA
AA
AA
AA
AA
Everything needed to install your battery pack
2Remove the Battery Pack Lid from the Battery Pack Base and insert batteries into the Battery Pack Lid
AB
Align battery polarity with
labels on Battery Pack Lid
34
5
3Reattach the Battery Pack Lid to the Battery
Pack Base by aligning the pegs with the
slots 4Slide the Battery Pack Lid into the base
while depressing the button to lock
5Attach the Battery Pack Hanger to the assembled Battery Pack
SNAP
B
A
Attach the battery pack hanger to the assembled battery case.
Attach the battery pack hanger to the assembled battery case.
Attach the battery pack hanger to the assembled battery case.
Tilt the headrail bracket tthough the slot in the battery hanger and press until snug.
Tilt the headrail bracket tthough the slot in the battery hanger and press until snug.
Tilt the headrail bracket tthough the slot in the battery hanger and press until snug.
Attach bracket with Battery Case to shade.
Attach bracket with Battery Case to shade.
Attach bracket with Battery Case to shade.
6Tilt the Headrail Bracket through the slot in the
Battery Hanger and press until snug
A B
SNAP
7Snap the Battery Pack Assembly on the backside of the window
shade
8Connect the wire lead from the
Battery Pack to the motor wire lead
A B
Adjusting the upper or lower limits of your shade, Vitrual Cord™
Adjusting the upper or lower limits of your shade, Vitrual Cord™
Adjusting the upper or lower limits of your shade, Vitrual Cord™
If adjusting the upper or lower shade limits, follow these steps:
Bring the shade to the upper or lower limit by pressing Up or Down button.
Once at the limit, press and hold Up and Down buttons at the same time until shade jogs (a brief up and
down movement).
The control and shade endcap will flash orange and then green, confirming that you are in programming
mode.
Adjust the shade using the Up or Down button to your desired new limit.
Press and release the shade endcap, the shade will jog.
The new limit is saved to the shade and programming is complete. The shade endcap light no longer
flashes.
79056-00 (07/14)
Springs Window Fashions • Middleton, WI 53562-1096 • www.springswindowfashions.com
Mount shade, Battery Case and connect power cable.
Mount shade, Battery Case and connect power cable.
Mount shade, Battery Case and connect power cable.
10
Inside/ceiling mount
Montaje de techo/interior
Pose intérieure/au plafond
Outside mount
Montaje exterior
Pose extérieure
Optional extension bracket
Soporte de extensión opcional
Rallonge (en option)
Connect battery Cable
Conecte los alambres de la batería • Connecter les files de la pile
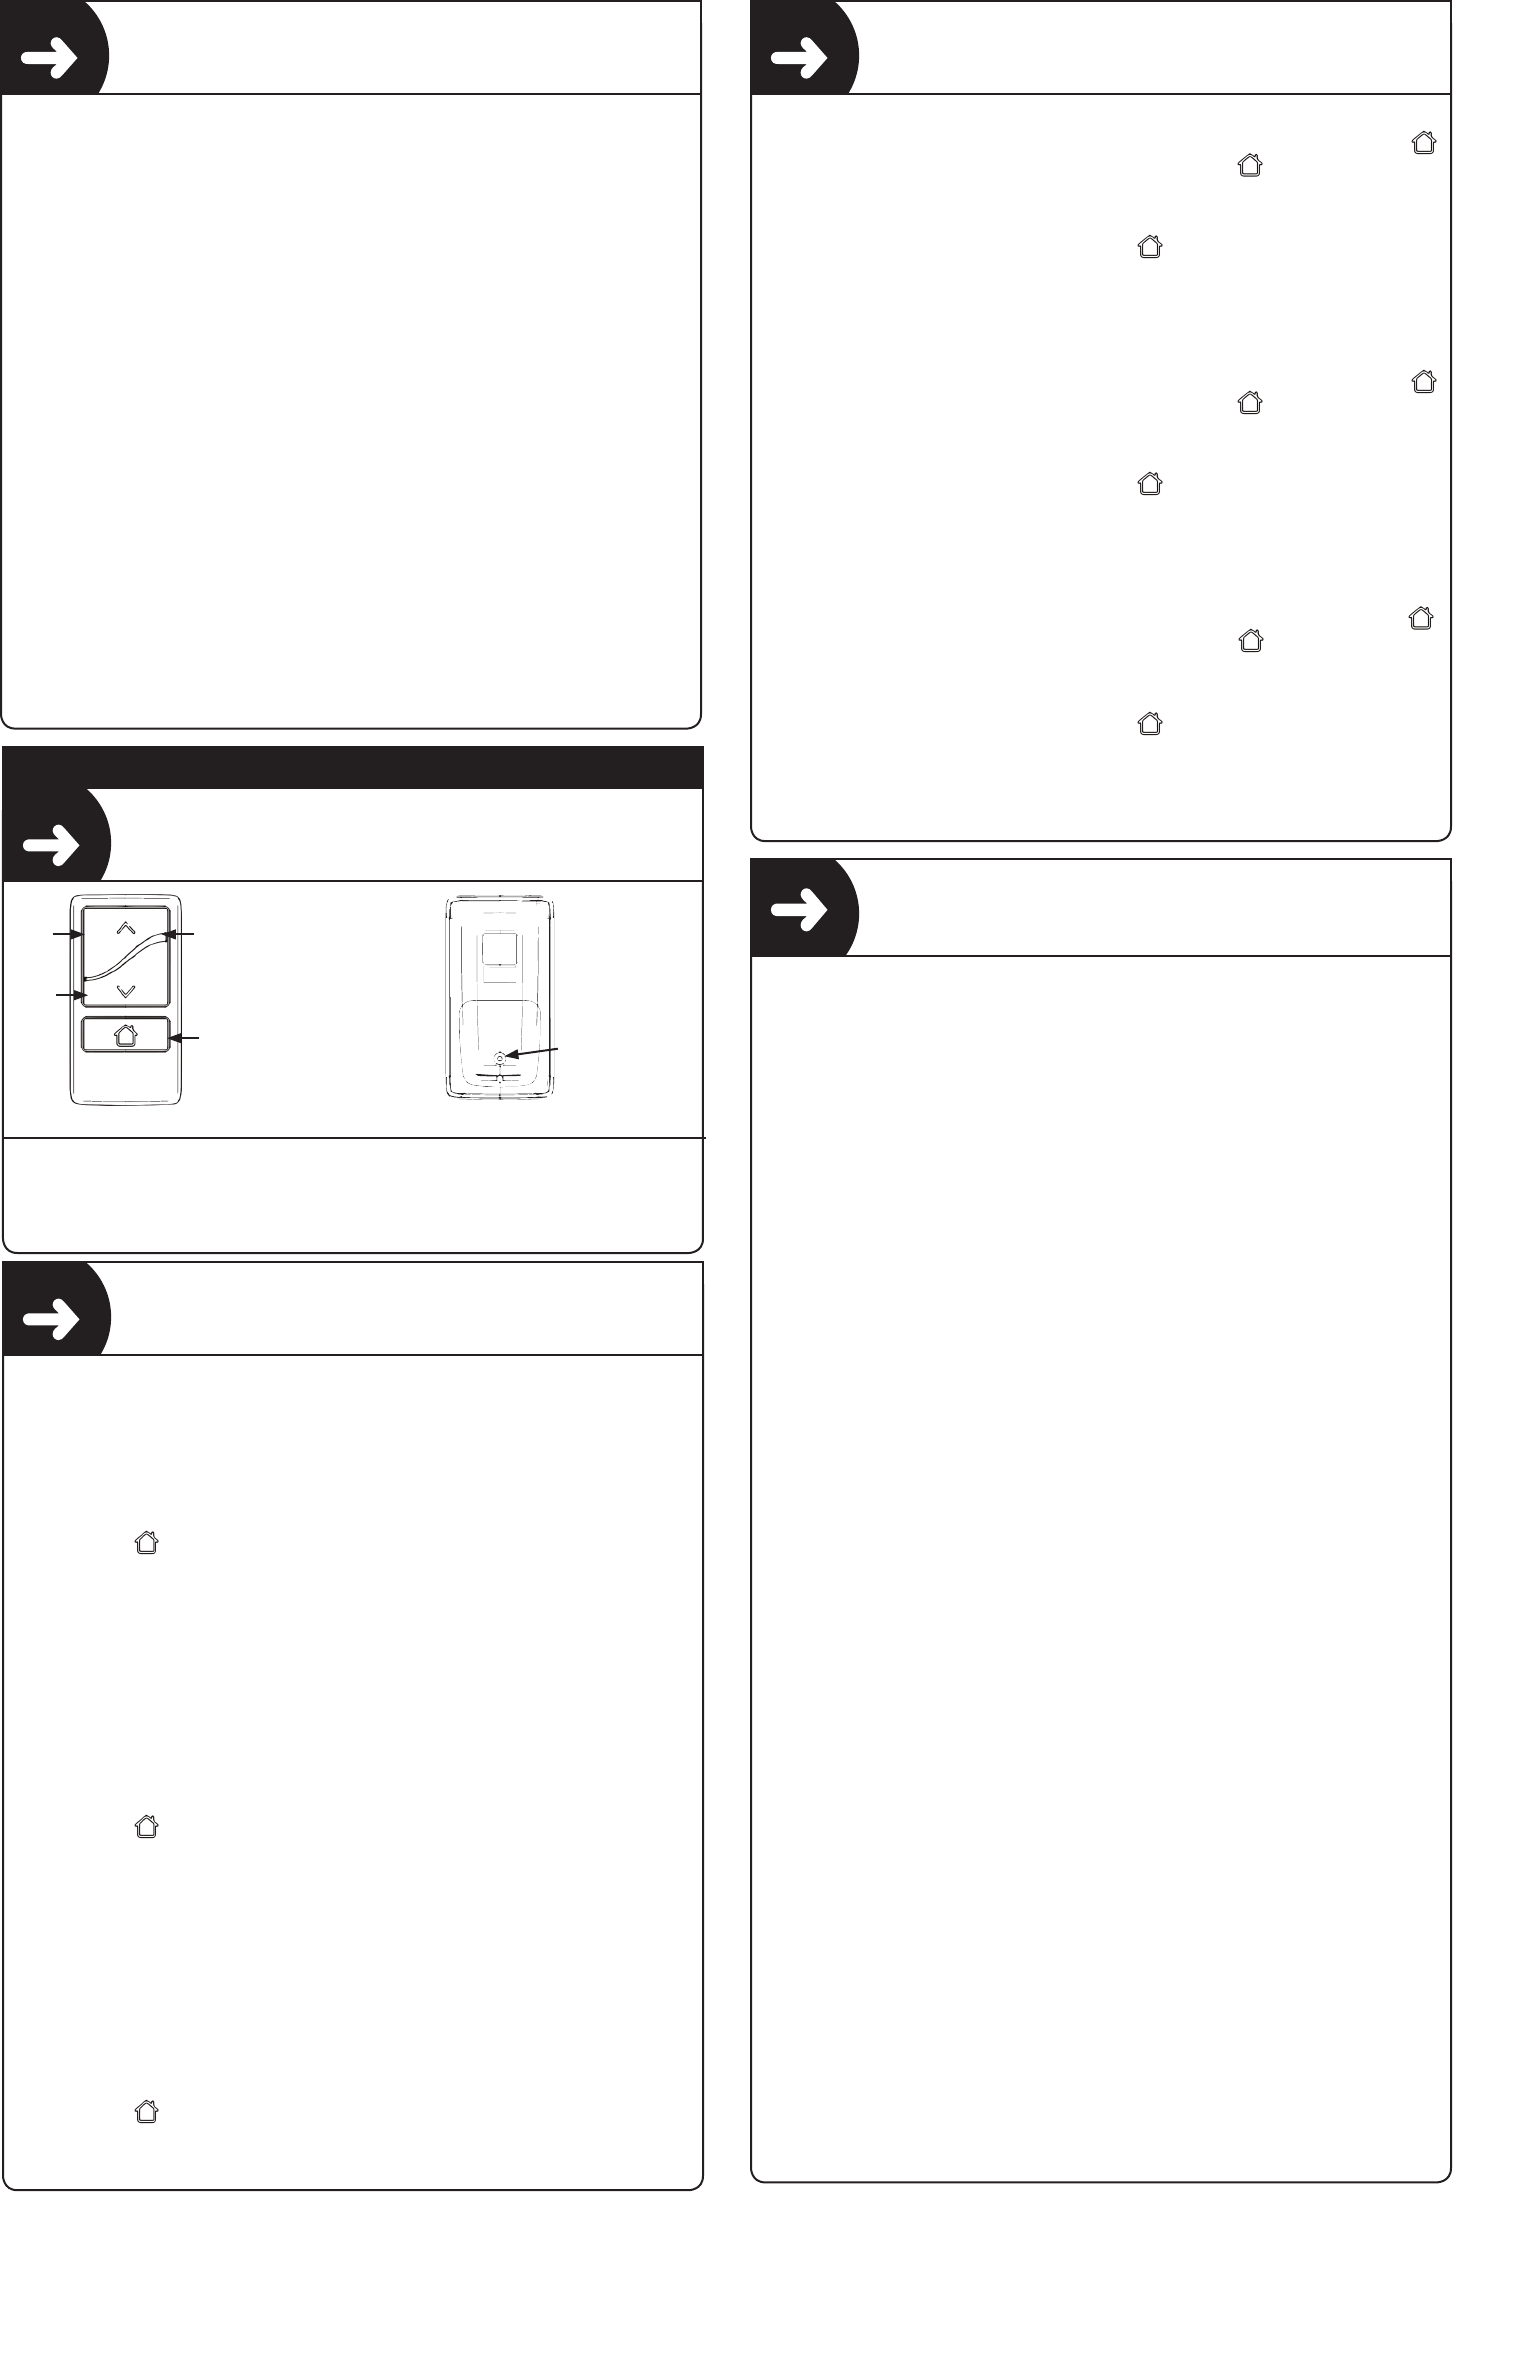
Operating your shade, Vitrual Cord™
Operando su persiana, Vitrual Cord™
Fonctionnement du store, Vitrual Cord™
Up
Up
Up
Down
Down
Down
Light Indicator
Light Indicator
Light Indicator
Program Button
Program Button
Program Button
Shade Endcap/
Push Button Control
Shade Endcap/
Push Button Control
Shade Endcap/
Push Button Control
Shade
Headrail Bracket
Battery Pack Base
Battery Pack Lid
Battery Pack Hanger (optional)
8 AA Lithium Batteries
Screws (optional)
1
2
3
4
5
6
7
No tools required
Tools Needed - Herramientas necesarias - Outillage nécessaire
Hanger Bracket Option Screw Mount Option
1
7
2
1
6
AA
8
AA
AA
AA
AA
AA
AA
AA
AA
Everything needed to install your battery pack
2Remove the Battery Pack Lid from the Battery Pack Base and insert batteries into the Battery Pack Lid
AB
Align battery polarity with
labels on Battery Pack Lid
34
5
3Reattach the Battery Pack Lid to the Battery
Pack Base by aligning the pegs with the
slots 4Slide the Battery Pack Lid into the base
while depressing the button to lock
5Attach the Battery Pack Hanger to the assembled Battery Pack
SNAP
B
A
Reattach the Battery Case lid to the Battery Case base by aligning the
pegs with the slots.
Reattach the Battery Case lid to the Battery Case base by aligning the
pegs with the slots.
Reattach the Battery Case lid to the Battery Case base by aligning the
pegs with the slots.
8
Shade
Headrail Bracket
Battery Pack Base
Battery Pack Lid
Battery Pack Hanger (optional)
8 AA Lithium Batteries
Screws (optional)
1
2
3
4
5
6
7
No tools required
Tools Needed - Herramientas necesarias - Outillage nécessaire
Hanger Bracket Option Screw Mount Option
1
7
2
1
6
AA
8
AA
AA
AA
AA
AA
AA
AA
AA
Everything needed to install your battery pack
2Remove the Battery Pack Lid from the Battery Pack Base and insert batteries into the Battery Pack Lid
AB
Align battery polarity with
labels on Battery Pack Lid
34
5
3Reattach the Battery Pack Lid to the Battery
Pack Base by aligning the pegs with the
slots 4Slide the Battery Pack Lid into the base
while depressing the button to lock
5Attach the Battery Pack Hanger to the assembled Battery Pack
SNAP
B
A
Shade
Headrail Bracket
Battery Pack Base
Battery Pack Lid
Battery Pack Hanger (optional)
8 AA Lithium Batteries
Screws (optional)
1
2
3
4
5
6
7
No tools required
Tools Needed - Herramientas necesarias - Outillage nécessaire
Hanger Bracket Option Screw Mount Option
1
7
2
1
6
AA8
AA
AA
AA
AA
AA
AA
AA
AA
Everything needed to install your battery pack
2Remove the Battery Pack Lid from the Battery Pack Base and insert batteries into the Battery Pack Lid
AB
Align battery polarity with
labels on Battery Pack Lid
34
5
3Reattach the Battery Pack Lid to the Battery
Pack Base by aligning the pegs with the
slots 4Slide the Battery Pack Lid into the base
while depressing the button to lock
5Attach the Battery Pack Hanger to the assembled Battery Pack
SNAP
B
A
8
Remove battery case lid, insert batteries into lid
Remove battery case lid, insert batteries into lid
Remove battery case lid, insert batteries into lid
9
Optional Battery Hanger
Optional Battery Hanger
Optional Battery Hanger
NOTE: Pressing the opposite direction button while shade is moving will stop the shade movement.
NOTE: Pressing the opposite direction button while shade is moving will stop the shade movement.
NOTE: Pressing the opposite direction button while shade is moving will stop the shade movement.
Shade
Headrail Bracket
Battery Pack Base
Battery Pack Lid
Battery Pack Hanger (optional)
8 AA Lithium Batteries
Screws (optional)
1
2
3
4
5
6
7
No tools required
Tools Needed - Herramientas necesarias - Outillage nécessaire
Hanger Bracket Option Screw Mount Option
1
7
2
1
6
AA
8
AA
AA
AA
AA
AA
AA
AA
AA
Everything needed to install your battery pack
2Remove the Battery Pack Lid from the Battery Pack Base and insert batteries into the Battery Pack Lid
AB
Align battery polarity with
labels on Battery Pack Lid
34
5
3Reattach the Battery Pack Lid to the Battery
Pack Base by aligning the pegs with the
slots 4Slide the Battery Pack Lid into the base
while depressing the button to lock
5Attach the Battery Pack Hanger to the assembled Battery Pack
SNAP
B
A
AA
BATTERIES
ALKALINE
AA
BATTERIES
ALKALINE
+
+
-
-
1. Adding
1. Adding
1. Adding
Setting -
Press Up or Down to operate shade with Single Channel Remote. Bring shade to desired position, press
Stop/Intermediate to stop the shade. At desired position, press and hold the Stop/Intermediate button,
the shade will jog. The position is saved to the shade, repeat to set a new home position.
Using -
Send the shade to the intermediate position by pressing the Stop/Intermediate button from any shade
position. Note: Shade should be stationary prior to pressing the Stop/Intermediate button, if the shade is
actively moving, the Stop/Intermediate button would need to be pressed twice.
1. Adding
1. Adding
1. Adding
Adjusting the Upper or Lower Limit of your shade, Single Channel Remote
Adjusting the Upper or Lower Limit of your shade, Single Channel Remote
Adjusting the Upper or Lower Limit of your shade, Single Channel Remote
1. Adding
1. Adding
1. Adding
1. Adding
1. Adding
1. Adding
Adding a control, Virtual Cord™
Adding a control, Virtual Cord™
Adding a control, Virtual Cord™
Setting an Intermediate (Home) Position, Single Channel Remote
Setting an Intermediate (Home) Position, Single Channel Remote
Setting an Intermediate (Home) Position, Single Channel Remote
Adding a Control, Single Control Remote
Adding a Control, Single Control Remote
Adding a Control, Single Control Remote
If the previous Virtual Cord™ is lost or damaged, follow these steps to add a new control.
Press and hold the shade end cap until the shade jogs (a brief up and down movement).
The control and shade endcap will flash green with solid red, confirming that you are ready to pair the
control.
On the back of the Virtual Cord™ control, use a paperclip or similar item, press and release the programing
button. The shade will jog.
Control is now saved to the shade.
If adding a new remote, follow these steps:
A. When the Virtual Cord™ is not present
Press and hold the shade endcap until the shade jogs. The shade endcap will flash green with, solid red.
Confirming that you are ready to pair the control.
On the back of the Single Channel remote, use a paperclip or similar item, press and release the
programming button. The shade will jog.
The control is now saved to the shade.
B. Using the Virtual Cord™ Control, Copy and Paste
On the back of the Virtual Cord™ Control, use a paperclip or similar item, press and hold the programming
button until the shade jogs. The shade endcap will flash green, with solid red.
On the back of the Single Channel remote, use a paperclip or similar item, press and release the
programming button. The shade will jog.
The control is now saved to the shade.
If adjusting the upper or lower shade limits, follow these steps:
Bring the shade to the upper or lower limit by pressing Up or Down button.
Once at the limit, press and hold Up and Down buttons at the same time until shade jogs. (A brief up and
down movement.)
The control and shade endcap will flash orange and green, confirming that you are in programming mode.
Adjust the shade using the Up or Down button to your desired new limit.
Press and hold the Stop/Intermediate button on the control, until the shade jogs.
The new limit is saved to the shade and programming is complete. The shade endcap light no longer
flahses.
For Optional Single Channel Remote
For Optional Single Channel Remote • For Optional Single Channel Remote
Operating your shade, Single Channel Remote
Operando su persiana, Single Channel Remote
Fonctionnement du store, Single Channel Remote
Up
Up
Up
Down
Down
Down
Light Indicator
Light Indicator
Light Indicator
Stop/Intermediate/Home Position
Stop/Intermediate/Home Position
Stop/Intermediate/Home Position Program Button
Program Button
Program Buton
79056-00 (07/14)
Springs Window Fashions • Middleton, WI 53562-1096 • www.springswindowfashions.com
NOTE: Pressing the opposite direction button while shade is moving will stop the shade movement.
NOTE: Pressing the opposite direction button while shade is moving will stop the shade movement.
NOTE: Pressing the opposite direction button while shade is moving will stop the shade movement.
1. Adding
1. Adding
1. Adding
Deleting a Control, Single Channel Remote
Deleting a Control, Single Channel Remote
Deleting a Control, Single Channel Remote
If you need to remove a control from a shade, follow these steps:
Press and hold the shade endcap until the shade jogs (a brief up and down movement). The shade endcap
will flash green and solid red, confirming that you are ready to unpair the control.
On the back of the Single Channel remote, use the paperclip or similar item, press and release the
programming button. The shade will jog.
The single channel remote is deleted, and will not operate the shade.
FCC STATEMENTS
This portable transmitter with its antenna complies with FCC/IC RF exposure
limits for general population / uncontrolled exposure.
Compliance Statement (Part 15.19)
This device complies with Part 15 of the FCC Rules. Operation is subject to the following two conditions:
1. This device may not cause harmful interference, and
2. This device must accept any interference received, including interference that may cause
undesired operation.
Warning (Part 15.21)
Changes or modifications not expressly approved by the party responsible for compliance could void the
user’s authority to operate the equipment.
INDUSTRY CANADA STATEMENTS
Section 7.1.3 of RSS-GEN
This Device complies with Industry Canada License-exempt RSS standard(s). Operation is subject to the
following two conditions: 1) this device may not cause interference, and 2) this device must accept any
interference, including interference that may cause undesired operation of the device.
Section 7.1.2 of RSS-GEN
Under Industry Canada regulations, this radio transmitter may only operate using an antenna of a type
and maximum (or lesser) gain approved for the transmitter by Industry Canada. To reduce potential
radio interference to other users, the antenna type and its gain should be so chosen that the equivalent
isotropically radiated power (e.i.r.p.) is not more than that necessary for successful communication.
DÉCLARATIONS D’INDUSTRIE CANADA
Section 7.1.3 DE RSS-GEN
Cet appareil se conforme à la (aux) norme(s) RSS exempte(s) de licence d’Industrie Canada. Son
fonctionnement est soumis aux deux conditions suivantes : 1) cet appareil ne doit pas causer de
l’interférence, et 2) cet appareil doit accepter toute interférence, y compris l’interférence qui peut causer un
fonctionnement indésirable de l’appareil.
Section 7.1.2 DE RSS-GEN
En vertu des règlements d’Industrie Canada, cet émetteur radio ne peut fonctionner qu’en utilisant une
antenne d’un type et d’une amplification maximale (ou inférieure) approuvés pour l’émetteur par Industrie
Canada. Pour réduire l’interférence radio potentielle aux autres utilisateurs, le type d’antenne et son
amplification doivent être choisis de manière à ce que la puissance isotrope rayonnée équivalente (pire) ne
soit pas supérieure à ce qui est nécessaire pour une communication réussie.
Customers located in the USA and Canada
contact our Customer Service Center at
1-800-221-6352
Springs Window Fashions LLC
P.O. Box 500, 8467 Route 405 South
Montgomery, PA 177521
Clientes de México: llamar al 01-800-909-0793
para obtener instrucciones sobre el lugar al que
deben enviar el producto para su reparación.
Importador en México:
Springs Window Fashions Sales Company de
México, S. de R.L. de C.V.
Carretera Federal Reynosa a Matamoros Sin
Número Edif 10A
Prologis Park, Ciudad Reynosa, Tamaulipas CP
88780
TEL. (899) 954-0361
FCC Interference Statement (Part 15.105 (b)
This equipment has been tested and found to comply with the limits for a Class B digital device, pursuant
to Part 15 of the FCC Rules. These limits are designed to provide reasonable protection against harmful
interference in a residential installation. This equipment generates uses and can radiate radio frequency
energy and, if not installed and used in accordance with the instructions, may cause harmful interference
to radio communications. However, there is no guarantee that interference will not occur in a particular
installation. If this equipment does cause harmful interference to radio or television reception, which can be
determined by turning the equipment off and on, the user is encouraged to try to correct the interference by
one of the following measures:
- Reorient or relocate the receiving antenna.
- Increase the separation between the equipment and receiver.
- Connect the equipment into an outlet on a circuit different from that
to which the receiver is connected.
- Consult the dealer or an experienced radio/TV technician for help.
FCC STATEMENTS
This portable transmitter with its antenna complies with FCC/IC RF exposure
limits for general population / uncontrolled exposure.
Compliance Statement (Part 15.19)
This device complies with Part 15 of the FCC Rules. Operation is subject to the following two conditions:
1. This device may not cause harmful interference, and
2. This device must accept any interference received, including interference that may cause
undesired operation.
Warning (Part 15.21)
Changes or modifications not expressly approved by the party responsible for compliance could void the
user’s authority to operate the equipment.
FCC Interference Statement (Part 15.105 (b)
This equipment has been tested and found to comply with the limits for a Class B digital device, pursuant
to Part 15 of the FCC Rules. These limits are designed to provide reasonable protection against harmful
interference in a residential installation. This equipment generates uses and can radiate radio frequency
energy and, if not installed and used in accordance with the instructions, may cause harmful interference
to radio communications. However, there is no guarantee that interference will not occur in a particular
installation. If this equipment does cause harmful interference to radio or television reception, which can be
determined by turning the equipment off and on, the user is encouraged to try to correct the interference by
one of the following measures:
- Reorient or relocate the receiving antenna.
- Increase the separation between the equipment and receiver.
- Connect the equipment into an outlet on a circuit different from that
to which the receiver is connected.
- Consult the dealer or an experienced radio/TV technician for help.
79056-00 (07/14)
Springs Window Fashions • Middleton, WI 53562-1096 • www.springswindowfashions.com
1. Adding
1. Adding
1. Adding
Changing Motor Direction
Changing Motor Direction
Changing Motor Direction
If shade raises when the down button is pressed, or if shade lowers when the up button is pressed, the
motor direction needs to be modified. Follow these steps to reverse direction:
Bring shade to the approximate half way point (shade should be moved away from upper and lower limit).
Using the control, press and hold the Up and Down buttons at the same time until the shade jogs.
If using the Virtual Cord™, press and release the shade end cap. The shade will jog.
If using the Single Channel Remote, press and hold the button until the shade jogs.
Motor direction is reversed, Press Up or Down button to confirm correct direction.