Sonim Technologies P32B003AA Mobile phone with GSM/GPRS/EDGE 1900 and Bluetooth User Manual
Sonim Technologies, Inc. Mobile phone with GSM/GPRS/EDGE 1900 and Bluetooth
UserManual.wiki
>
Sonim Technologies
>
P32B003AA User Manual
User Manual
Navigation menu
Upload a User Manual
Namespaces
Wiki Guide
HTML
PDF
Info
Views
User Manual
Discussion / Help
Navigation


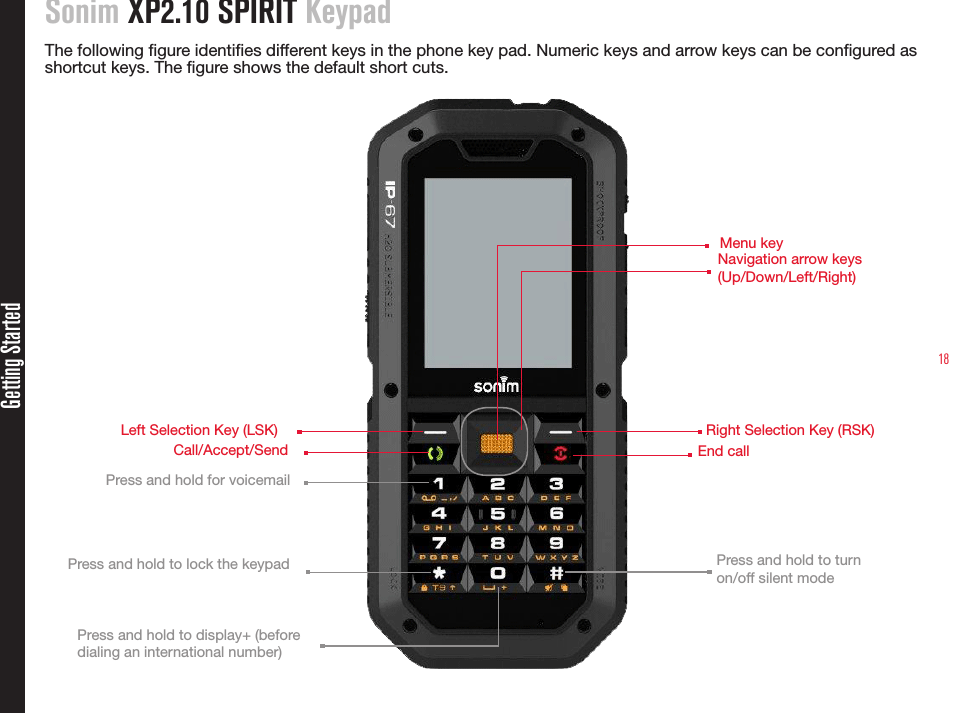
![19Getting StartedThe alpha-numeric keys comprise numbers from one to zero, alphabets from A-Z, plus [*] and [#] keys. By pressing the designated key you can input numbers or characters. Choose the appropriate text input option to enable you to use these keys efciently.Home screenCertain information is displayed when the phone is in standby mode, for example, the name of the service provider, date and time, battery charge status, GPRS connectivity. Other indicators may be displayed (if the feature is activated), like the alarm, call forward etc. The device with a fully-charged battery can remain in the standby mode for a duration of upto 200 hours.Operations in Home ScreenThe following can be accessed from the home screen.Press To AccessMenu Key Main MenuLeft Selection Key CalendarRight Selection Key ContactsCall/Accept/Send Key All Calls ListUp Arrow Main screen shortcutsDown Arrow Main screen shortcutsRight Arrow InboxLeft Arrow Music playerThe four functions that are performed usingthe arrow keys are set as factory defaults,however they can be changed. Select Menu >Settings > Phone> Shortcut key. Select the arrow key and select the shortcut. Data connectivitySignal strength indicatorDisplay iconsLSK command RSK commandService providerBattery charge indicator](https://usermanual.wiki/Sonim-Technologies/P32B003AA/User-Guide-1179332-Page-19.png)