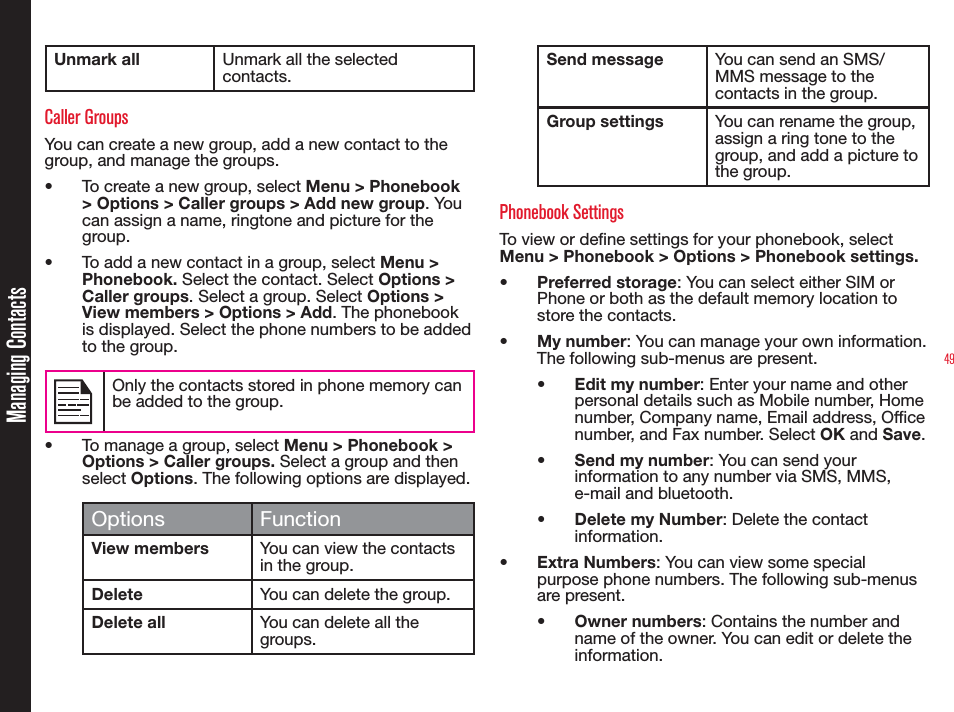
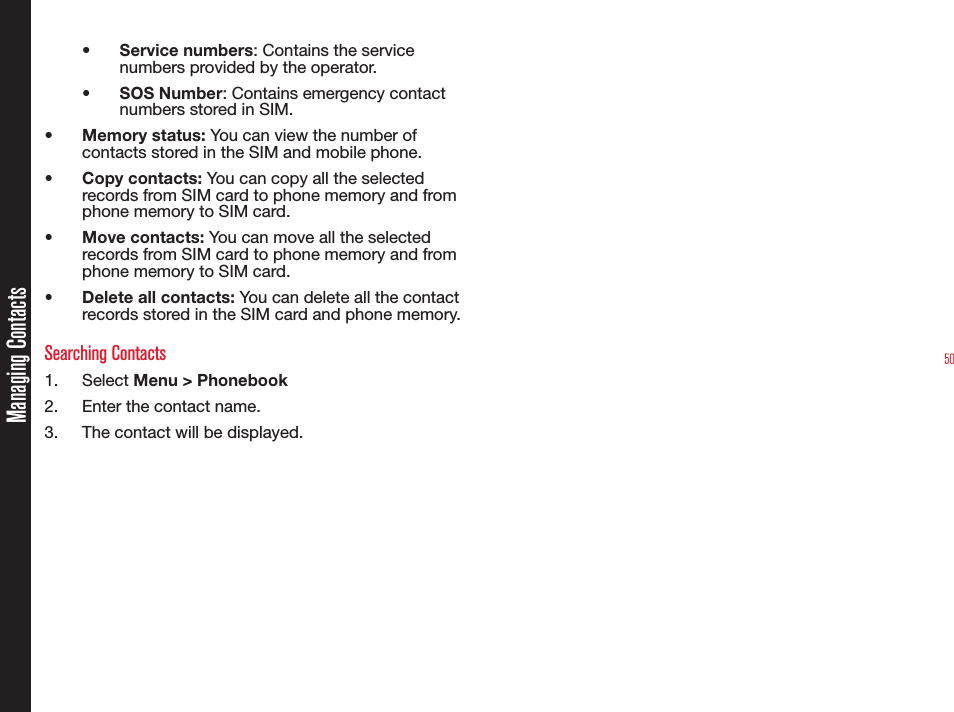
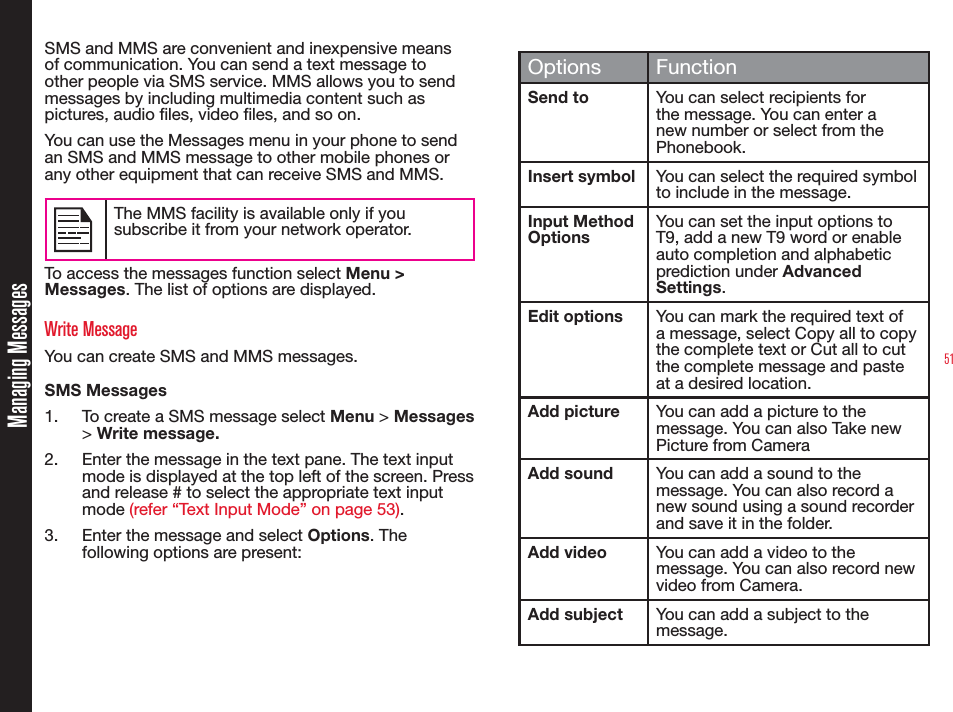
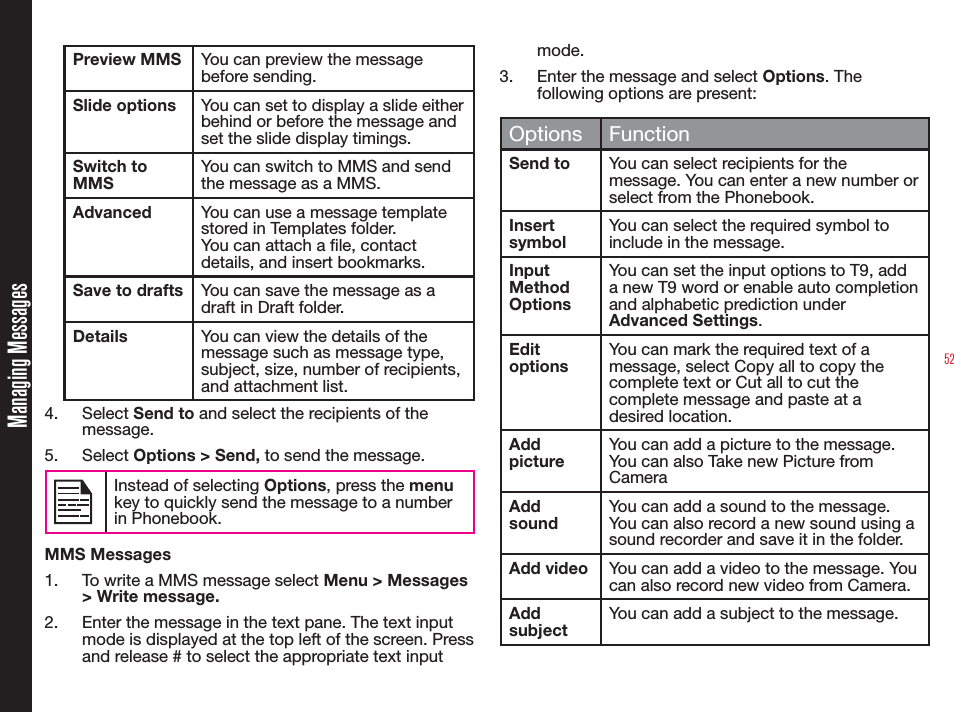
Sonim Technologies P35F008AA 3G Quad Band GSM/UMTS Digital Mobile Phone User Manual 15 XP5520 UserMan
Sonim Technologies, Inc. 3G Quad Band GSM/UMTS Digital Mobile Phone 15 XP5520 UserMan
UserManual.wiki
>
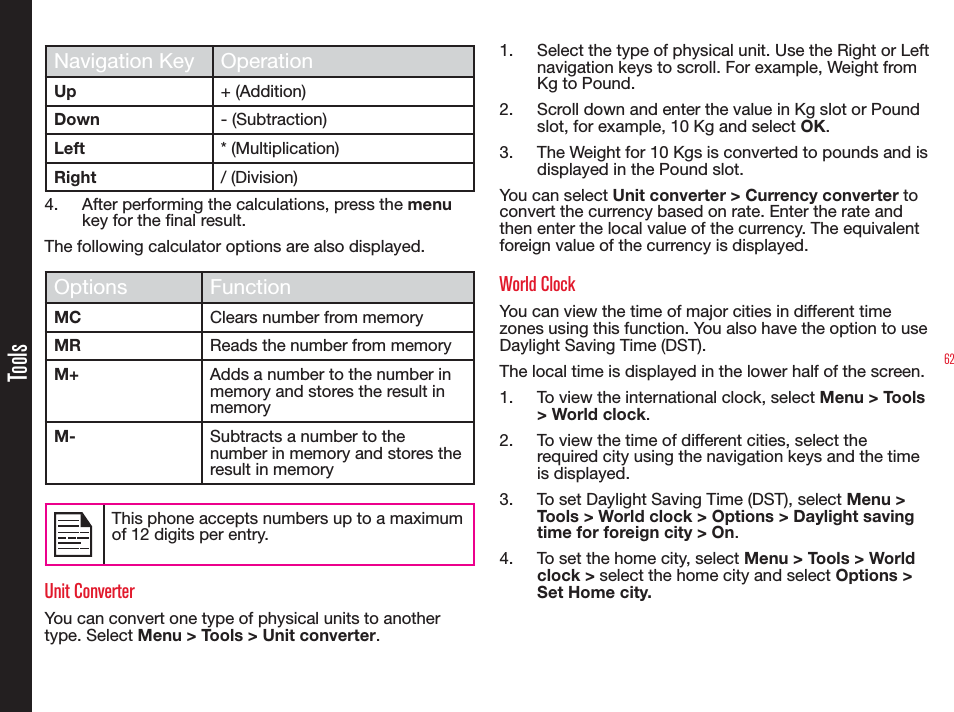
Sonim Technologies
>
P35F008AA User Manual
UserMan
Navigation menu
Upload a User Manual
Namespaces
Wiki Guide
HTML
PDF
Info
Views
User Manual
Discussion / Help
Navigation