Sonova USA TVCONNECTV2 Wireless audio transmitter User Manual ERC
Sonova USA Inc. Wireless audio transmitter ERC
User man
TV Connector
User Guide
2 3
Contents
1. Welcome 4
2. Getting to know your TV Connector 5
3. Getting started 8
3.1 Setting up the power supply 8
3.2 Supported audio connections 10
3.3 Connecting to an audio device 11
3.4 Optional: Connecting to an audio device
using the audio socket 12
3.5 Connecting the TV Connector to the
hearing aids 13
4. Daily use of the TV Connector 15
4.1 Adjusting the volume of the audio 17
4.2 TV Connector and phone calls 18
4.3 Switching o audio transmission 18
4.4 Understanding the indicator light (LED) 19
5. Troubleshooting 20
5.1 Testing the audio transmission 20
5.2 Questions and answers 21
6. Service and warranty 24
6.1 Local warranty 24
6.2 International warranty 24
6.3 Warranty limitation 25
7. Compliance information 26
8. Information and explanation of symbols 30
9. Important safety information 33
4 5
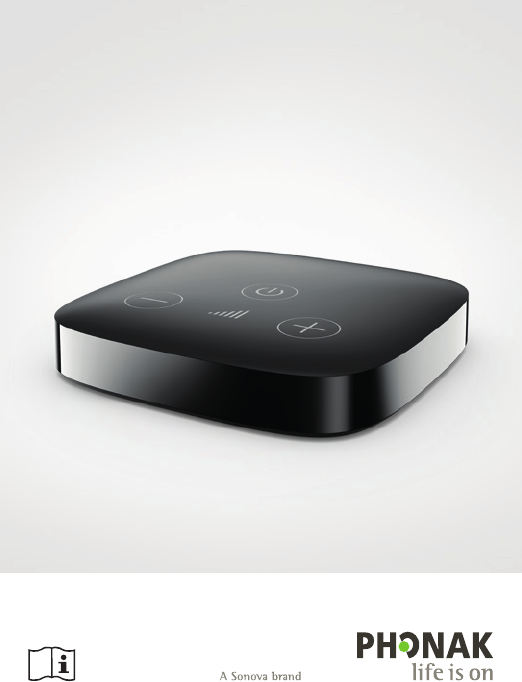
Congratulations on choosing the TV Connector.
The TV Connector allows you to connect your hearing
aids to your TV or other entertainment/communication
devices.
Please read this user guide carefully to discover how
to benefit from the features of your TV Connector.
If you have any questions, please consult your hearing
care professional or go to www.phonak.com/tvconnector
Phonak – life is on www.phonak.com
1. Welcome
CE mark applied: 2018
2. Getting to know your
TV Connector
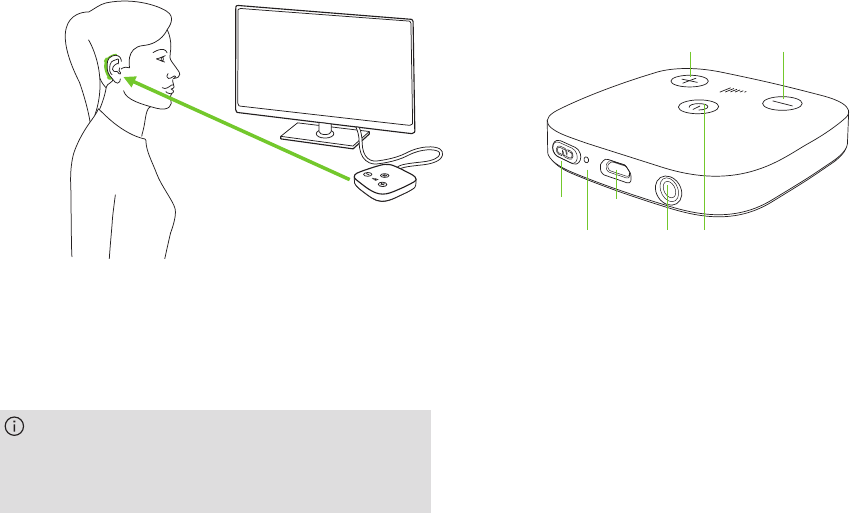
The intended use of the TV Connector is to establish
a wireless connection between your hearing aids
and a TV (or any other audio source). It sends audio
signals within a 15 meter (50 ft) radius wirelessly to
the hearing aids.
TV Connector is compatible with Audéo B-Direct and
Audéo M wireless hearing aids.
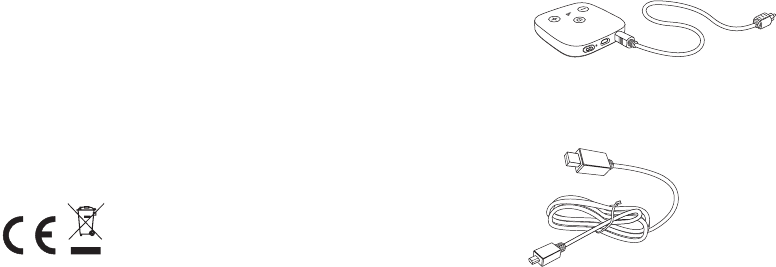
Toslink or Audio cable
USB cable
6 7
2.1 Device description
A Connect button
B Indicator light (LED)
C microUSB power socket
D Audio socket for optical (Toslink)
or 3.5mm jack (analog) cable
5 Power button
6 Volume up and down buttons (calibration)
B5
AC
66
D
TV Connector
Hearing aid
Up to 15 meters
(50 ft)
Line-of-sight between your hearing aids and
the TV Connector is not required. However,
environmental interference like walls or furniture
may reduce the operating range.
8 9
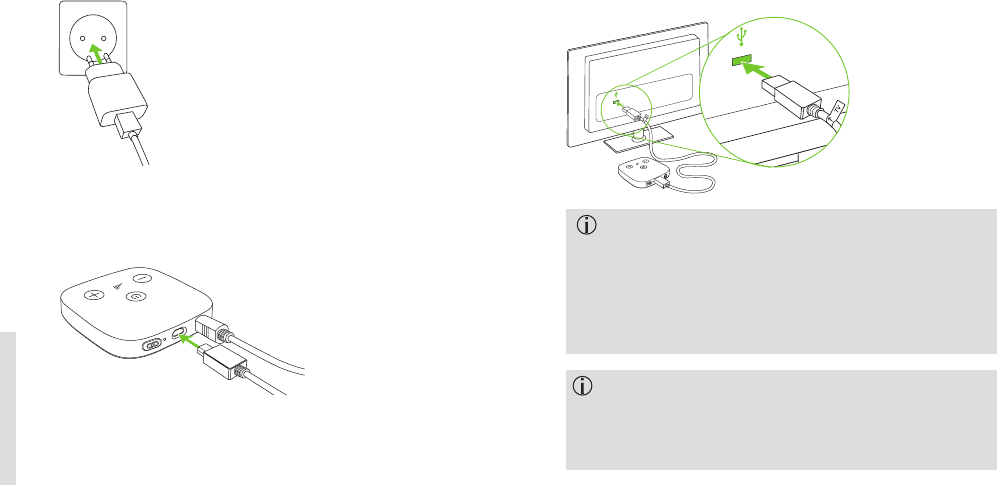
2. Insert the smaller end of the USB cable into the free
socket of the TV Connector.
3.1 Setting up the power supply
1. Plug the power supply unit into the socket outlet of
the mains power.
3. Getting started
Upon the very rst time powering the device,
the connection to the hearing aids will be initiated
automatically and the hearing aids will play a
conrmation tone.
The TV Connector will turn ON the rst time it is
connected to a power source. If the TV Connector
does not turn ON automatically when the power
supply is connected, press and hold the power
button for longer than 2 seconds to turn ON the
device.
Alternatively the TV Connector can be powered via USB
cable on the TV. Insert the larger end of the USB cable
into the USB socket of the TV.
10 11
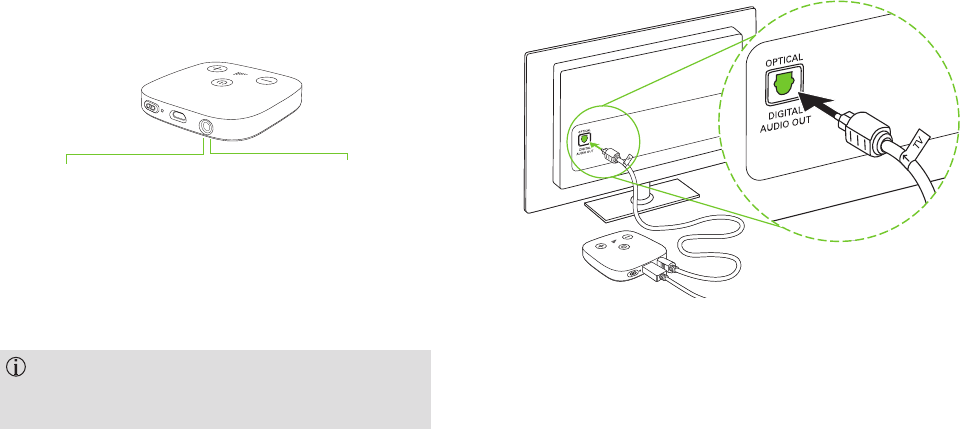
3.2 Supported audio connections
The TV Connector can be connected to any audio source
such as a TV, PC or HiFi system. It supports two different
audio cable inputs: Optical (Toslink) or Analog. Both of
the audio cables can be plugged into the dedicated
audio socket on the TV Connector.
Always connect the chosen audio cable of the TV
Connector to the audio OUTPUT of your TV or
alternative audio device!
Optical (Toslink)
Digital signal
Fiber optic cable
(preinstalled in
the TV Connector)
Analog
3.5 mm jack
(optional)
3.3 Connecting to an audio device
Connect the free end of the optical (TOSLINK) cable
into the optical digital audio output of your TV (or
audio source).
12 13
3.5 Connecting the TV Connector to the hearing aids
When the TV Connector is plugged into a power
source the very rst time upon installation, the
connection to the hearing aids will be initiated
automatically and the hearing aids will play a
conrmation tone.
To connect new hearing aids to the TV Connector follow
the steps:
J Press the Connect button
on the back, and the indicator
light will start blinking blue.
J Make sure the hearing aids are
switched on and within
1 meter (3 ft) of the
TV Connector.
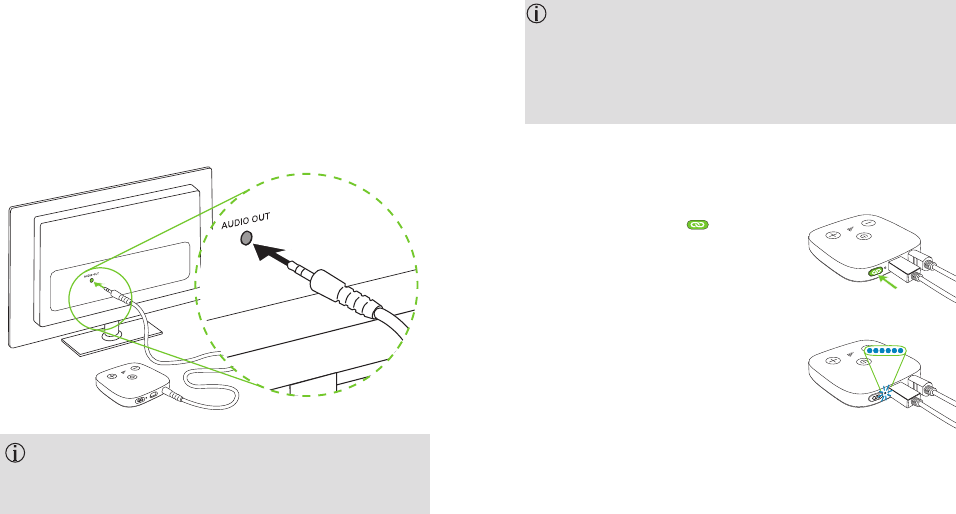
3.4 Optional: Connecting to an audio device using the
audio socket
Replace the supplied optical (Toslink) cable on the TV
Connector with the analog 3.5 mm cable. Insert one end
of the analog cable into the TV Connector and connect
the other end of the analog 3.5 mm audio cable into the
audio out port of your TV (or audio source).
Some TVs will switch o their loudspeakers when
using the headset socket – the TV will not be
audible for other people. See chapter 3.4.
14 15
The TV Connector will connect to any compatible
hearing aid, which is within the range during the
connection process. They will be automatically
connected again after the initial connection
process.
4. Daily use of the TV Connector
The TV Connector can receive and transmit Dolby
Audio™, stereo or mono audio signals. Please make
sure that no DTS audio setting is not used by the TV
(or audio source).
If present, this audio signal will be indicated by a
blinking red LED indicator light on the TV Connector.
Please change the audio signal to this (PCM) in
the audio settings menu of the TV. Alternatively,
switch to the analog 3.5 mm audio cable.
Switch ON your TV (or alternative audio device). If the
TV Connector is powered on, it will automatically
transmit the audio signal to the connected hearing aids.
J You will hear a confirmation
beep in your hearing aids when
the connection was successful.
This may take up to 10 seconds
J If no audio is present during the
connect process, beeps will be
played left/right during 5 seconds
after the confirmation beep of the
hearing aids
16 17
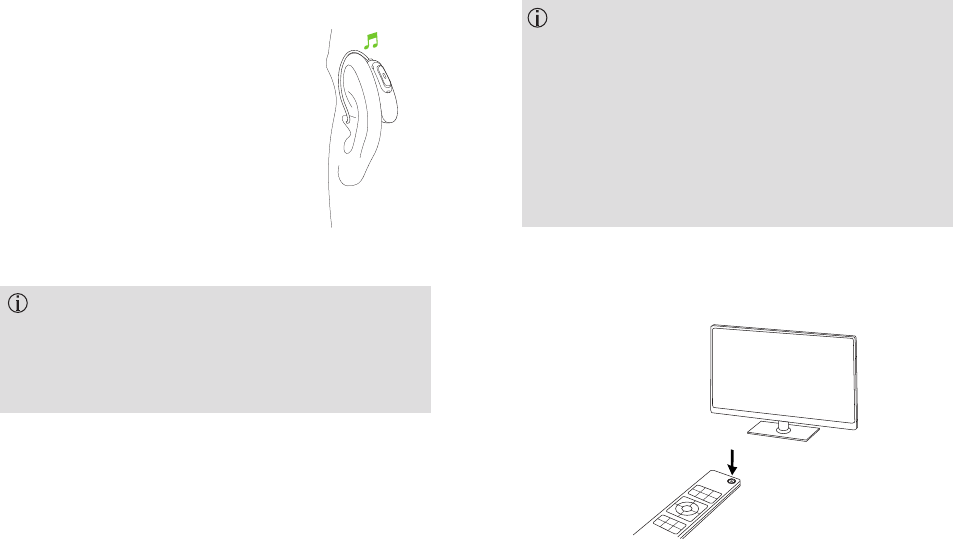
You will hear the sound of the TV/audio device directly
in your hearing aids.
Make sure the TV/audio device is switched on.
If no audio input is available, the TV Connector
automatically stops the audio transmission to the
hearing aids. The indicator light will be solid white
(standby mode).
If the hearing aids are out of range of the TV Connector
the audio transmission will be terminated. Once the
hearing aids are back into the range of TV Connector,
the audio signal will automatically resume streaming.
You might need to accept the
incoming audio signal on the
hearing aid by pressing the
hearing aid button.
4.1 Adjusting the volume of the audio from
transmitting from TV Connector
To adjust the volume of the audio from the TV Connector:
• Push the volume increase button (+) on top of the
TV Connector.
• Push the volume decrease button (-) on top of the
TV Connector.
A tune will be played in any connected hearing aid to
indicate that the volume has changed.
The volume can be adjusted independently of the
audio source (Toslink or analog). The individual
settings remain stored even after powering OFF the
TV Connector.
18 19
4.2 TV Connector and phone calls
If the hearing aids are connected to your cell phone,
you can still receive phone calls, even when using the
TV Connector.
In case of an incoming call, the hearing aids
automatically stop the audio signal from the TV
Connector and alerts will be played signalizing the
incoming call. After the call the hearing aids
automatically switch back to the TV Connector audio
signal.
4.3 Switching o audio transmission
To end the transmission of the audio signal, simply
switch o the TV or other connected audio sources.
The TV Connector will go into the standby mode
automatically. Alternatively, turn OFF the TV Connector
using the power button on the top of the device.
In this case turn ON the TV Connector using the power
button when using the TV Connector next time.
4.4 Understanding the indicator light (LED)
Solid green Switched on and
transmitting audio
Solid white Switched on but no audio
transmission (standby mode)
Blinking blue Connecting mode
Blinking red Wrong audio input format
(DTS)
No light Switched off

20 21
5. Troubleshooting
5.1 Testing the audio transmission
If you cannot hear the sound from the audio source (e.g.
TV), check the following options:
J Test the connection of the TV Connector to the
hearing aids
J Go through the steps described in chapter 3.5
J Test the connection of TV Connector to the audio
device (e.g. TV)
J Switch on the audio device and the Connector
J Make sure all cables are inserted properly into the TV
Connector and the audio device (e.g. TV)
J Make sure the audio cable is plugged into the audio
OUT plug of the audio source (e.g. TV)
J Check if the indicator light is solid green
5.2 Questions and answers
A summary of frequently asked questions and answers:
Causes What to do
I don‘t hear any sound although the TV is switched on and
connected to the TV Connector
No audio input available at the
TV Connector (indicator light is
solid white or blinking red).
Check if the optical cable
(Toslink) or 3.5mm
(analog) is inserted into
the TV Connector and the
audio source properly.
Check that the audio cable is
inserted at the audio output
of the audio source (e.g. TV).
Blinking red, wrong audio
input format (DTS) from
the audio source (e.g. TV).
Switch to Dolby Audio™ or
stereo (PCM) audio format
in the audio settings of your
source (e.g. TV). If this is not
possible, use the analog
3.5 mm audio cable instead.
J
J
J
22 23
Causes What to do
Cannot hear sound from the audio source, the LED indicator
is o
TV Connector is plugged in but
turned OFF.
Press and hold the Power
button on top of the TV
Connector for 2 seconds until
the LED turns on.
The indicator light is solid green but I cannot hear the TV
The TV Connector is not
connected to the hearing
aids.
Connect your hearing
aids as described in
chapter 3.
Causes What to do
After connecting the TV Connector, the TV loudspeaker is
switched o
You have selected the headset
output of the TV set.
Check the audio settings
of the TV to enable the
loudspeakers to be used in
parallel.
Please use the optical
(Toslink) cable instead of the
3.5mm jack (analog) cable to
connect the TV Connector to
an audio source (e.g. TV). See
chapter 3.4.
The volume during streaming is not comfortable (too low or
too high)
The dierent TV audio sources
have dierent output volume.
If TV Connector is
connected to the optical
(Toslink) socket of your
TV, adjust the volume by
using the volume
buttons of your hearing
aids or the environmental
balance functionality.
Alternatively, adjust the
volume of the TV Connector
using the volume buttons on
top of the device.
The audio from the TV loudspeakers is delayed compared to the
streamed audio in my hearing aids
The delay setting of the TV
loudspeakers is too high.
Adjust the audio delay time of
your TV loudspeakers (reduce
the delay) in the audio settings
menu of your TV.
J
J

24 25
6. Service and warranty
6.1 Local warranty
Please ask the hearing care professional, where you
purchased your devices, about the terms of the local
warranty.
6.2 International warranty
Phonak oers a one year limited international warranty,
valid as of the date of purchase. This limited warranty
covers manufacturing and material defects. The warranty
is valid only if proof of purchase is shown.
The international warranty does not affect any legal
rights that you might have under applicable national
legislation governing sale of consumer goods.
Authorized hearing
care professional
(stamp/signature):
6.3 Warranty limitation
This warranty does not cover damage from improper
handling or care, exposure to chemicals, immersion in
water or undue stress. Damage caused by third parties or
non-authorized service centers renders the warranty
null and void. This warranty does not cover any services
performed by a hearing care professional in his/her oce.
Serial number:
Date of purchase:
26 27
7. Compliance information
Europe:
Declaration of Conformity
Hereby Sonova AG declares that this product is in
compliance with the essential requirements of the Radio
Equipment Directive 2014/53/EU. The full text of the
Declaration of Conformity can be obtained from the
manufacturer or the local representative whose address
can be taken from www.phonak.com
Operation frequency: 2400 - 2483.5 MHz
Power level: <20 mW conducted power
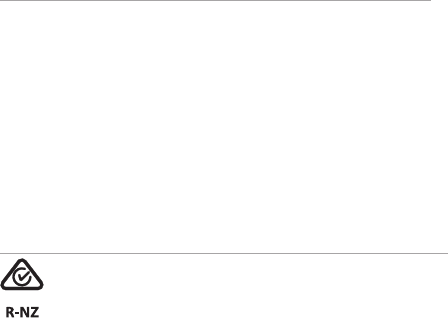
Australia/New Zealand:
Indicates a device’s compliance with applicable
Radio Spectrum Management’s (RSM) and
Australian Communications and Media Authority
(ACMA) regulatory arrangements for the legal sale
in New Zealand and Australia.
The compliance label R-NZ is for radio products
supplied in the New Zealand market under
conformity level A1.
Notice 1:
This device complies with Part 15 of the FCC Rules
and with Industry Canada‘s license – exempt RSSs.
Operation is subject to the following two conditions:
1) this device may not cause harmful interference, and
2) this device must accept any interference received,
including interference that may cause undesired
operation.
Notice 2:
Changes or modifications made to this device not
expressly approved by Sonova AG may void the FCC
authorization to operate this device.
Notice 3:
This device has been tested and found to comply
with the limits for a Class B digital device, pursuant
to Part 15 of the FCC Rules and ICES-003 of Industry
Canada.
These limits are designed to provide reasonable
protection against harmful interference in a residential
installation. This device generates, uses and can radiate
radio frequency energy and, if not installed and used in
2928
accordance with the instructions, may cause harmful
interference to radio communications. However, there
is no guarantee that interference will not occur in a
particular installation. If this device does cause harmful
interference to radio or television reception, which can
be determined by turning the equipment off and on,
the user is encouraged to try to correct the interference
by one or more of the following measures:
J Reorient or relocate the receiving antenna.
J Increase the separation between the device and
receiver.
J Connect the device into an outlet on a circuit dierent
from that to which the receiver is connected.
J Consult the dealer or an experienced radio/TV
technician for help.
Notice 4:
Japanese Radio Law Compliance.
This device is granted pursuant to the Japanese Radio Law
(電波法). This device should not be modied (otherwise
the granted designation number will become invalid).”
More details can be found in the data sheet which can
be downloaded from www.phonak.com/tvconnector
Notice 5:
FCC/Industry Canada RF Radiation Exposure
Statement
This equipment complies with FCC/Industry Canada RF
radiation exposure limits set forth for an uncontrolled
environment.
This equipment should be installed and operated with a
minimum distance of 20 cm between the radiator and
your body.
This transmitter must not be co-located or operating in
conjunction with any other antenna or transmitter.
30 31
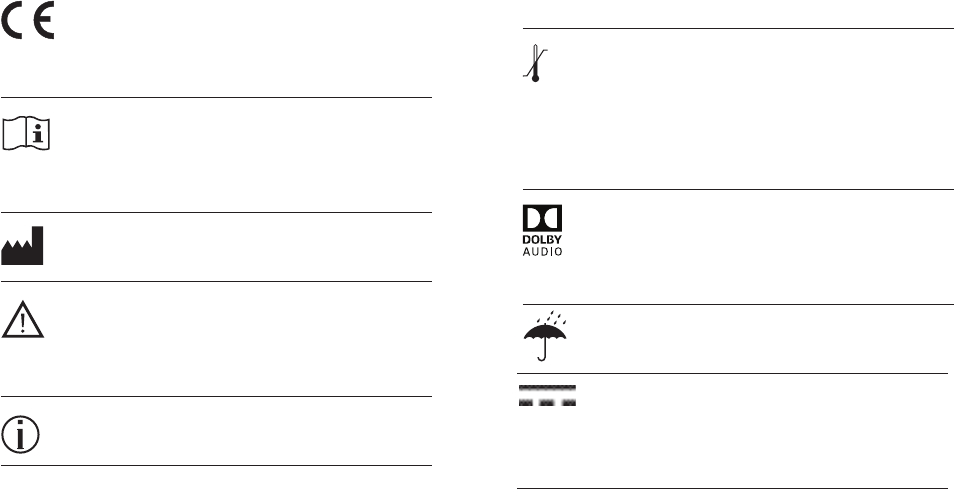
This symbol indicates that it is
important for the user to read and take
into account the relevant information
in this user guide.
The CE symbol is confirmation by
Sonova AG that this product meets
the requirements as the Radio
Equipment Directive 2014/53/EU.
8. Information and explanation of
symbols
Important information for handling
and product safety.
This symbol indicates that it is
important for the user to pay attention
to the relevant warning notices in this
user guide.
Indicates the device manufacturer.
Operating
conditions
The device is designed such that
it functions without problems or
restrictions if used as intended, unless
otherwise noted in this user guide.
The device is designed for Direct
Current (DC) power source with the
specied parameters dened on the
label of the product.
Temperature transport and storage:
–20° to +60° Celsius
(–4° to +140° Fahrenheit).
Temperature operation:
0° to +40° Celsius
(+32° to +104° Fahrenheit).
Manufactured under license from Dolby
Laboratories. Dolby, Dolby Audio, and
the double-D symbol are trademarks of
Dolby Laboratories. All rights reserved.
Keep dry.

3332
8. Information and explanation of symbols
Humidity during transportation and
storage: <90% (non-condensing).
Humidity operation: <90% (non-
condensing).
Atmospheric pressure: 500 hPa to
1500 hPa.
This symbol on the product or its
packaging means that it should not be
disposed of with your other household
waste. it is your responsibility to dispo-
se of your waste equipment separately
from the municipal waste stream. The
correct disposal of your old appliance
will help prevent potential negative
consequences for the environment and
human health.
Please read the information on the following pages
before using your device.
Hazard warnings
This device is not for children below 36 months.
It contains small parts that can cause choking, if
swallowed by children. Keep out of reach of
children and mentally challenged people or pets. If
swallowed, consult a physician or hospital
immediately.
TV Connector may generate magnetic elds. If any
inuence of the TV Connector on the Implantable
Device (e.g. pacemakers, debrillators, etc.) is
experienced, stop using the TV Connector and contact
your doctor and /or the manufacturer of the
Implantable device for advice.
9. Important safety information
34 35
Use only hearing aids that have been specially
programmed for you by your hearing care
professional.
Dispose of electrical components in accordance with
your local regulations.
Changes or modifications to any of the devices
that were not explicitly approved by Sonova AG are
not permitted.
External devices may only be connected if they
have been tested in accordance with the relevant
standards IEC 60601-1, IEC 60065, IEC 60950-1,
IEC 62368-1 or other applicable safety standards.
Only use accessories approved by Sonova AG.
For safety reasons, only use chargers supplied by
Sonova AG or stabilized chargers with a rating of
5 VDC, min. 500 mA.
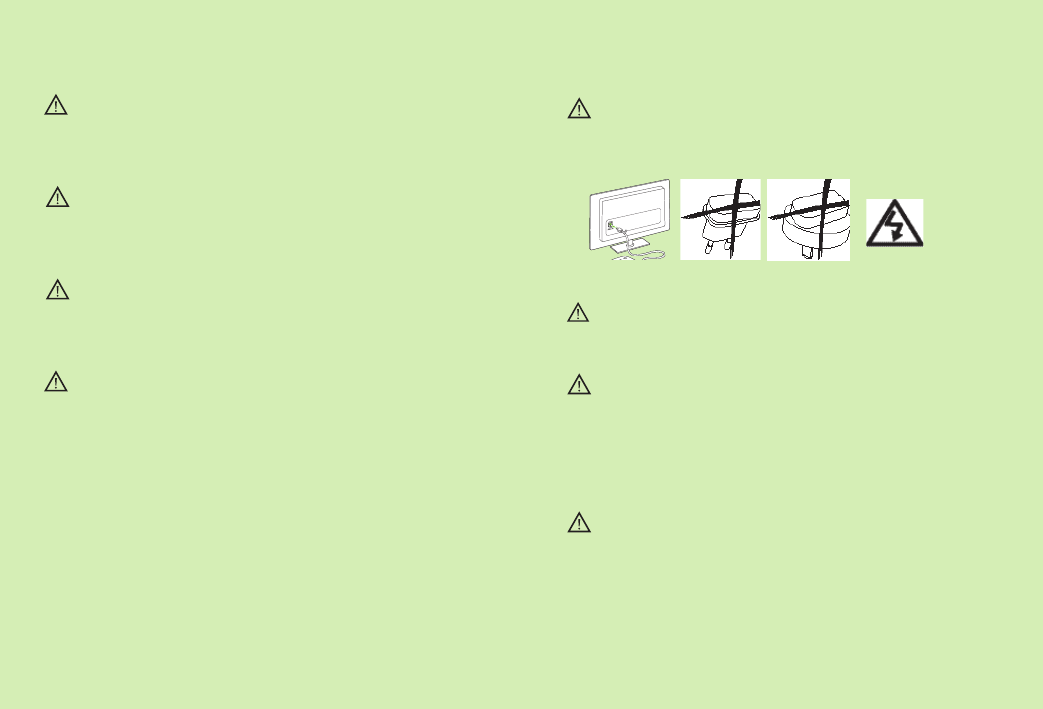
Caution: electric shock. Do not insert plug alone into
electrical outlets.
Do not use the device in explosive areas (mines or
industrial areas with danger of explosions,
oxygen rich environments or areas where ammable
anesthetics are handled) or where electronic
equipment is prohibited.
Opening the device might damage it. If problems
occur which cannot be resolved by following the
remedy guidelines in the troubleshooting section of
this user guide, consult your hearing care professional.

36 37
Product safety information
Protect the device connectors, plugs, power supply
from dirt and debris.
Do not use excessive force when connecting your
device to its different cables.
Protect the device from excessive moisture (bathing
or swimming areas) and heat sources (radiator).
Protect the device from excessive shock and
vibration.
Clean the device using a damp cloth. Never use
household cleaning products (washing powder,
soap, etc.) or alcohol to clean them. Never use a
microwave or other heating devices to dry the
device.
X-ray radiation, CT or MRI scans may destroy or
adversely affect the correct functioning of the
device.
If the device has been dropped or damaged, if it
overheats, has a damaged cord or plug, or has been
dropped into liquid, stop using your device and
contact authorized service centre.
Other important information
High-powered electronic equipment, larger electronic
installations and metallic structures may impair and
signicantly reduce the operating range.
Protect your eyes of the optical light from the optical
Toslink cable when plugged into the device or TV.

Notes

029-0515-02/V2.00/2018-07/na © 2018 Sonova AG All rights reserved
Manufacturer:
Sonova AG
Laubisrütistrasse 28
CH-8712 Stäfa
Switzerland
www.phonak.com