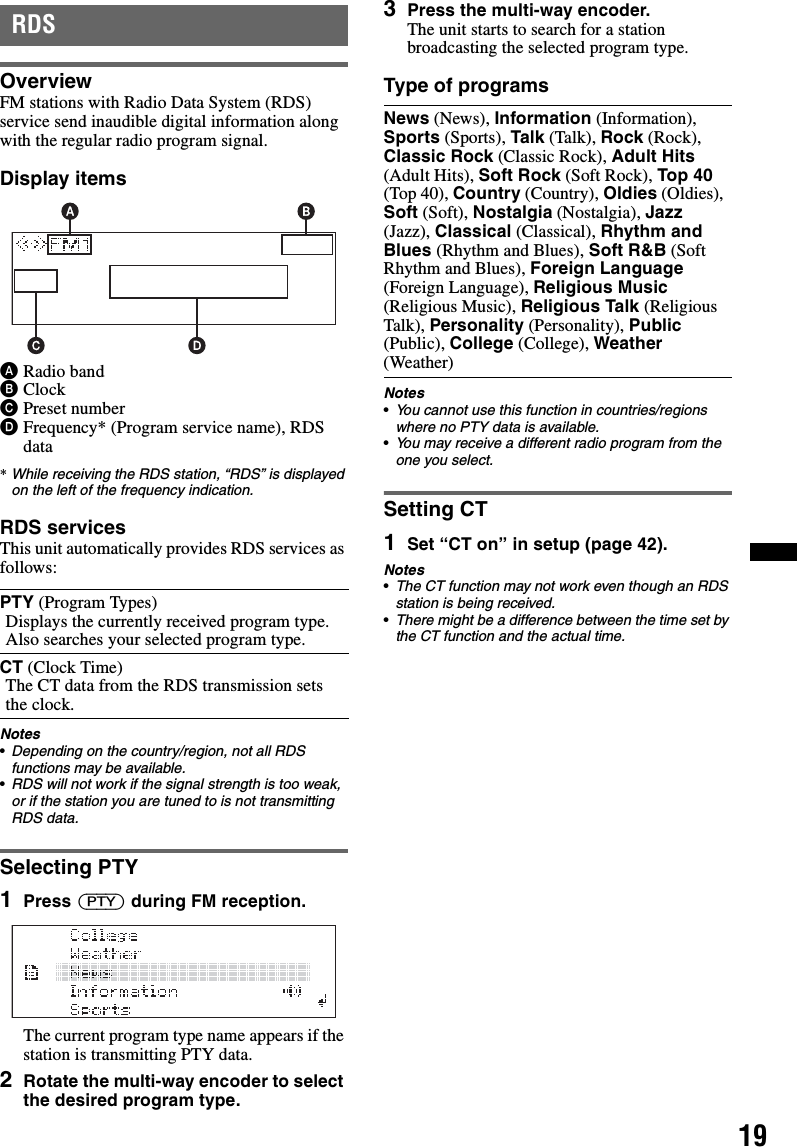
Sony Group DSXS310BT FM/AM Digital Media Player User Manual DSX S310BTX
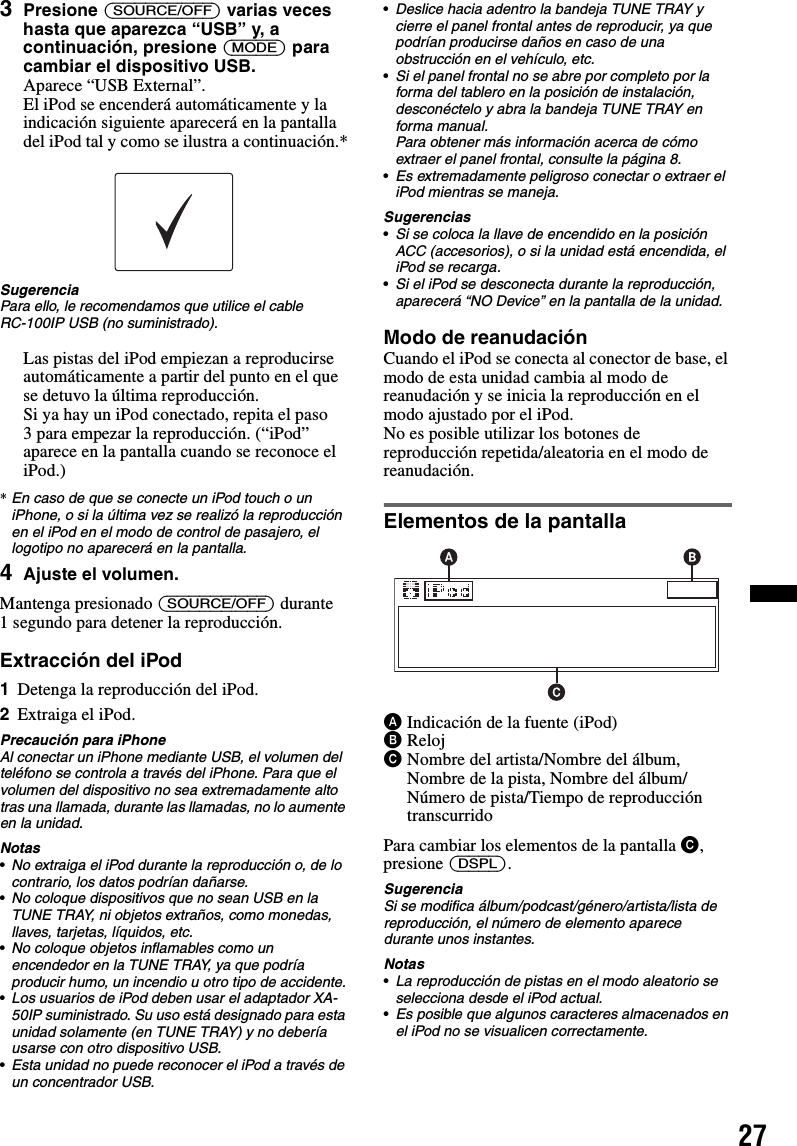
Sony Corporation FM/AM Digital Media Player DSX S310BTX
UserManual.wiki
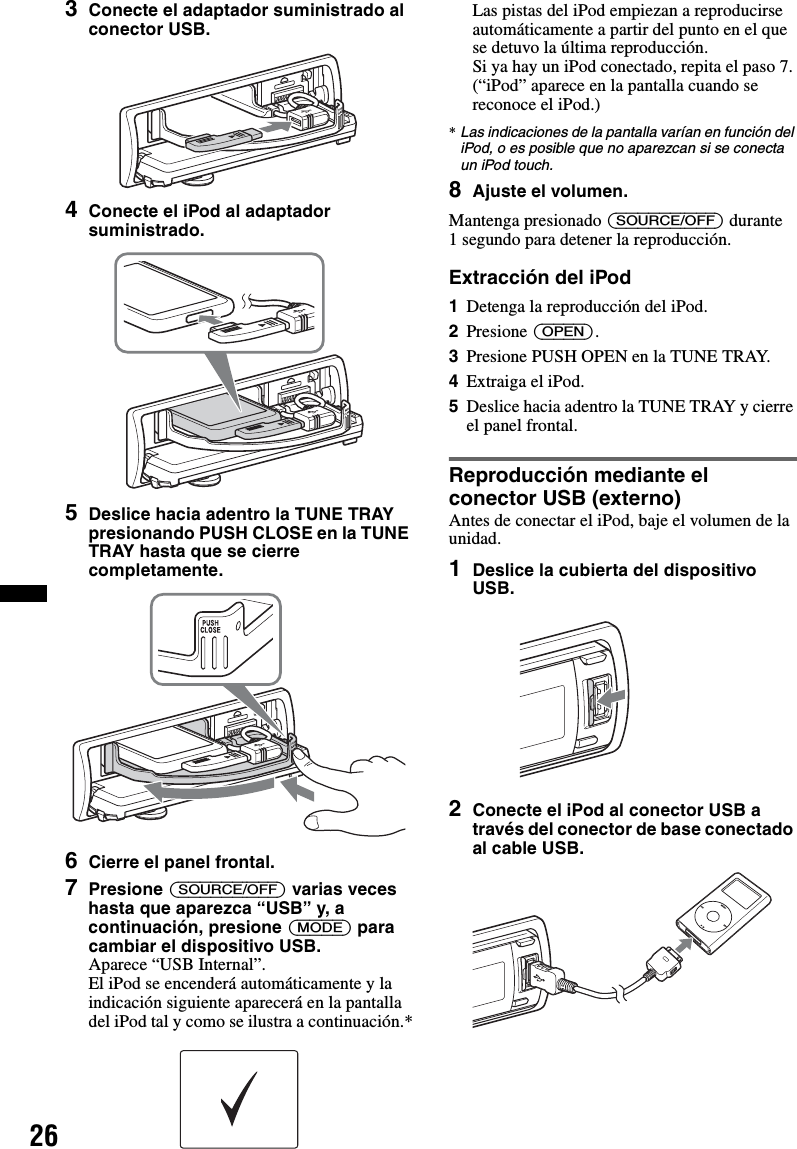
>
Sony Group
>
DSXS310BT User Manual
User_Manual
Navigation menu
Upload a User Manual
Namespaces
Wiki Guide
HTML
PDF
Info
Views
User Manual
Discussion / Help
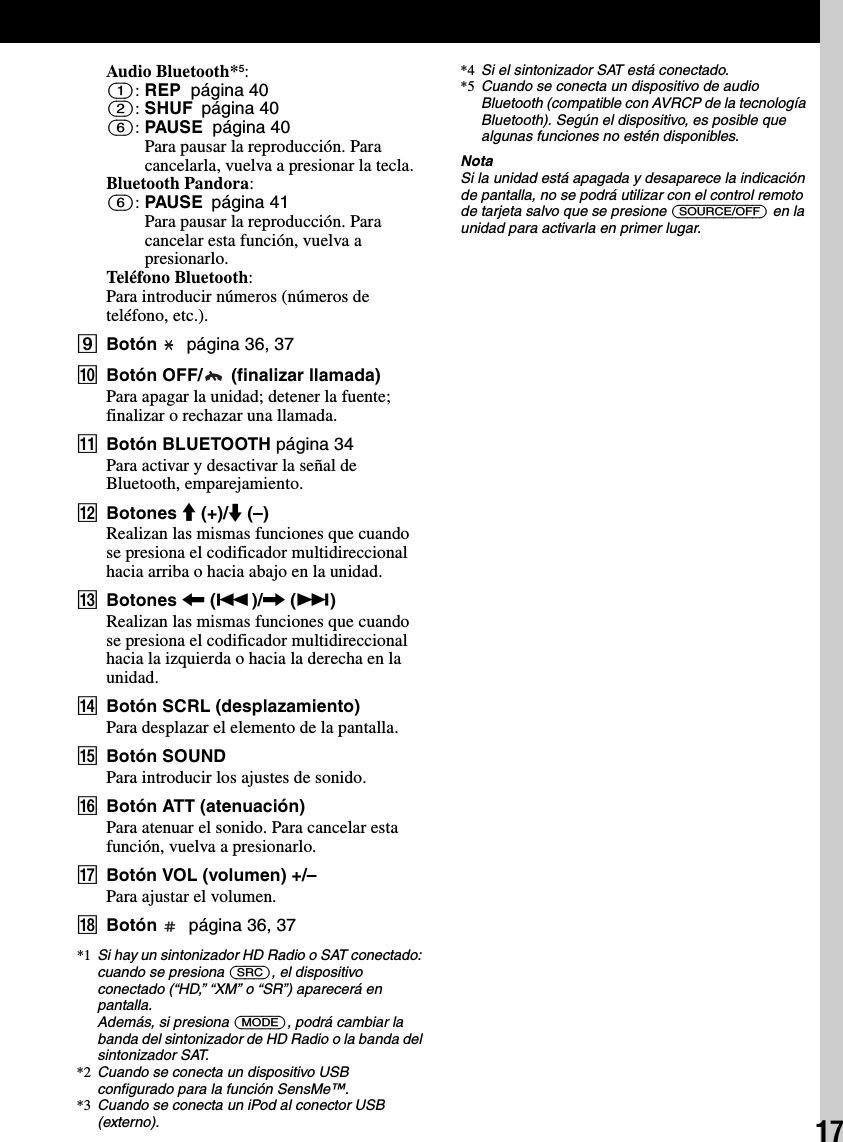
Navigation


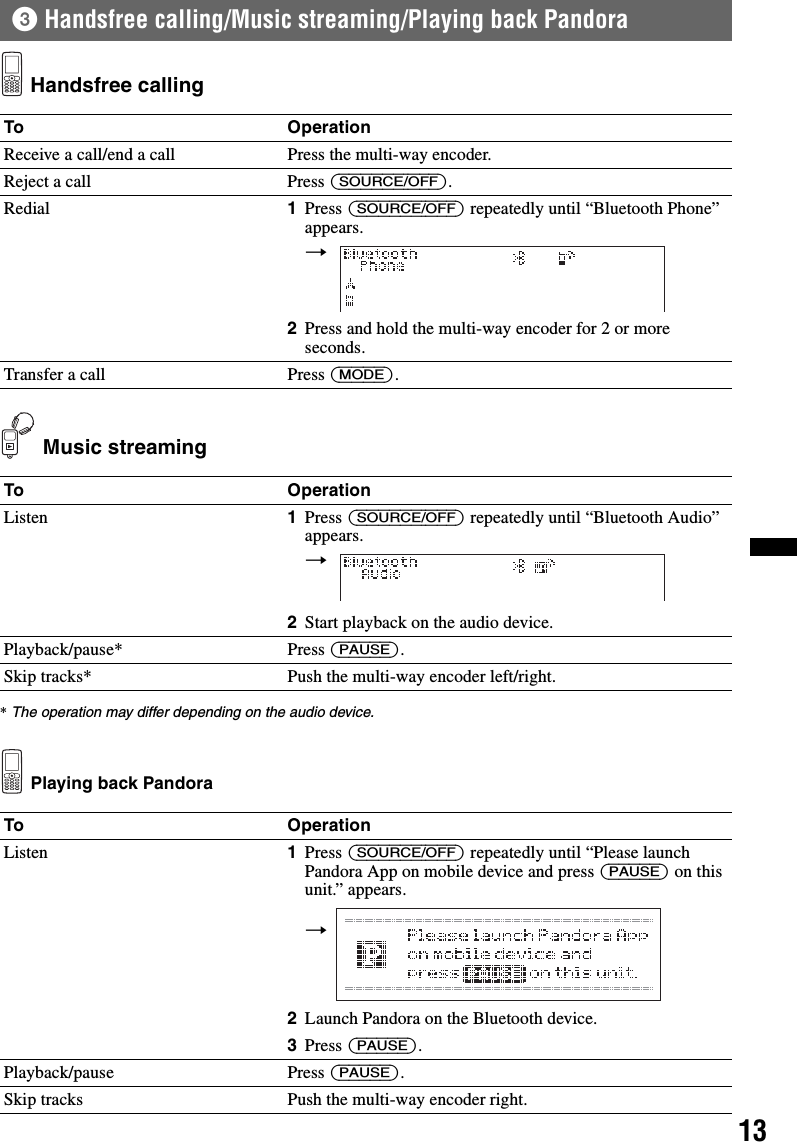


![37Music streamingListening to music from an audio deviceYou can listen to music of an audio device on this unit if the audio device supports A2DP (Advanced Audio Distribution Profile) of Bluetooth technology.1Connect this unit and the Bluetooth audio device (page 33).“ ” appears during connection.2Turn down the volume on this unit.3Press (SOURCE/OFF) repeatedly until “Bluetooth Audio” appears.4Operate the audio device to start playback.5Adjust the volume on this unit.Adjusting the volume levelThe volume level is adjustable for any difference between the unit and the Bluetooth audio device.1Start playback of the Bluetooth audio device at a moderate volume.2Set your usual listening volume on the unit.3Press the multi-way encoder.4Rotate the multi-way encoder until “Bluetooth Audio Level” appears, then press it.5Rotate the multi-way encoder to adjust the input level (“+ 18dB” – “0dB” – “– 8dB”).Operating an audio device with this unitYou can perform the following operations on this unit if the audio device supports AVRCP (Audio Video Remote Control Profile) of Bluetooth technology. (The operation differs depending on the audio device.)*1 Depending on the device, it may be necessary to press twice.*2 Press repeatedly until the desired setting appears.*3 You can also shuffle play by pressing and holding (ZAP/SHUF) on this unit.Operations other than the above should be performed on the audio device.Notes•Depending on the audio device, its information, such as title, track number/time, playback status, etc., may not be displayed on this unit. The information is displayed during Bluetooth Audio playback only.•Even if the source is changed on this unit, playback of the audio device does not stop.TipYou can connect a cellular phone that supports A2DP (Advanced Audio Distribution Profile) as an audio device and listen to music.Other settingsInitializing Bluetooth SettingsYou can initialize all the Bluetooth-related settings from this unit.1Press and hold the multi-way encoder.The menu list appears.2Rotate the multi-way encoder to select “BT Initialize,” then press it.The confirmation appears.3Rotate the multi-way encoder to select “Yes.”“Initializing...” appears while initializing the Bluetooth settings.4Press (BACK).The display returns to normal reception/play mode.NoteWhen disposing of this unit, phonebook data should be deleted with “BT Initialize.”To Do thisPlay Press (PAUSE).*1Pause Press (PAUSE).*1Skip tracks Push the multi-way encoder left/right [once for each track].Reverse/Fastforward Push and hold the multi-way encoder left/right.Repeat play Press (REP) on the card remote commander.*2Shuffle play Press (SHUF) on the card remote commander.*2*3Skip albums Push the multi-way encoder up/down.](https://usermanual.wiki/Sony-Group/DSXS310BT/User-Guide-1469656-Page-37.png)


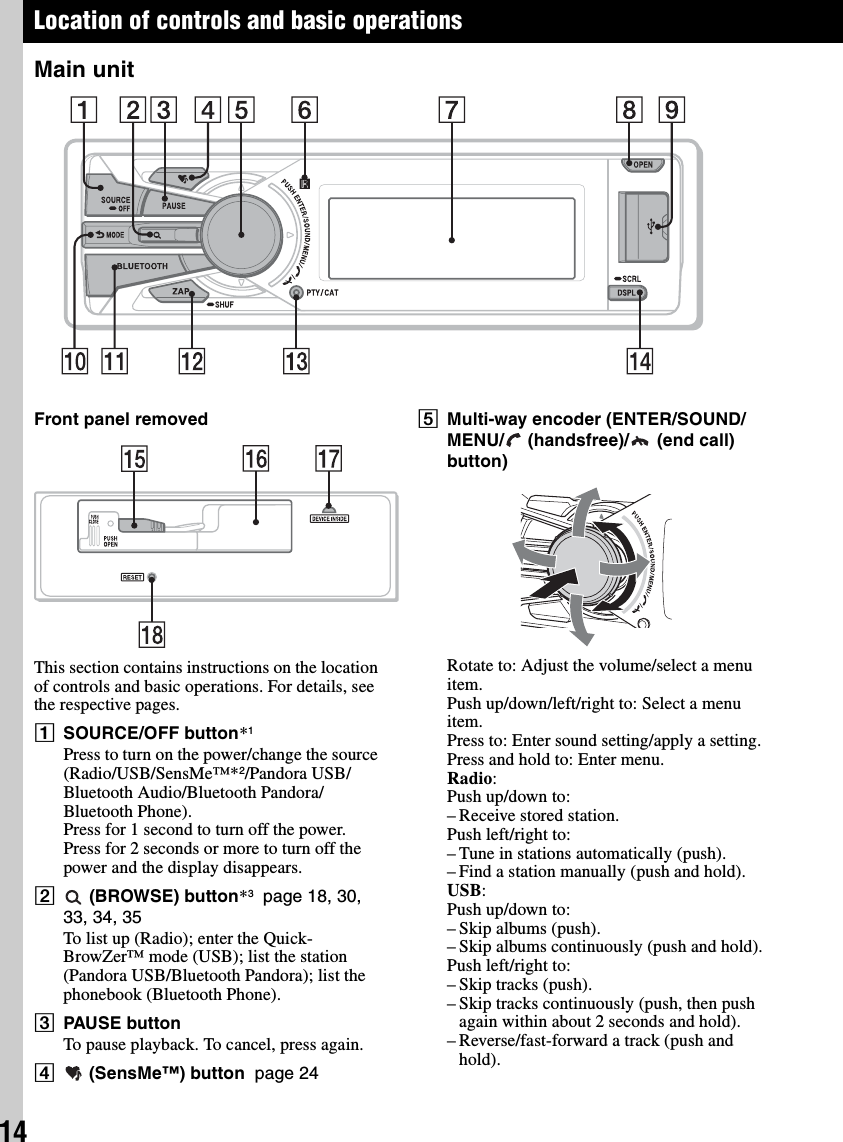
![40Operación de un dispositivo de audio con esta unidadPuede realizar las siguientes operaciones en esta unidad si el dispositivo de audio es compatible con AVRCP (Audio Video Remote Control Profile) de la tecnología Bluetooth. (La operación puede variar en función del tipo de dispositivo de audio).*1 Según el tipo de dispositivo, es posible que sea necesario presionar dos veces.*2 Presione varias veces hasta que aparezca el ajuste deseado.*3 Además, es posible reproducir en modo aleatorio. Para ello, mantenga presionado (ZAP/SHUF) en esta unidad.Cualquier otra operación se debe realizar directamente en el dispositivo de audio.Notas•En función del dispositivo de audio, es posible que no se muestre en esta unidad cierta información, por ejemplo, el título, el número de pista y la duración, el estado de la reproducción, etc. La información se muestra solamente durante la reproducción de audio Bluetooth.•Incluso si se cambia la fuente en la unidad, la reproducción de la señal del dispositivo de audio no se interrumpe.SugerenciaPuede conectar un teléfono celular que sea compatible con A2DP (Advanced Audio Distribution Profile), como un dispositivo de audio, y escuchar música.Otros ajustesInicialización de los ajustes de BluetoothEs posible inicializar todos los ajustes relativos a Bluetooth desde esta unidad.1Mantenga presionado el codificador multidireccional.Aparecerá la lista de menús.2Gire el codificador multidireccional para seleccionar “BT Initialize” y, a continuación, presiónelo.Aparece la pantalla de confirmación.3Gire el codificador multidireccional para seleccionar “Yes”.Aparece el mensaje “Initializing...” durante la inicialización de los ajustes de Bluetooth.4Presione (BACK).La pantalla vuelve al modo de recepción/reproducción normal.NotaAl desechar esta unidad, se deben eliminar los datos de la agenda telefónica mediante la función “BT Initialize”.Para Realice esta acciónReproducir Presione (PAUSE).*1Pausar Presione (PAUSE).*1Omitir pistas Presione el codificador multidireccional hacia la izquierda o hacia la derecha [una vez para cada pista].Retroceder/Avanzar Mantenga presionado el codificador multidireccional hacia la izquierda o hacia la derecha.Reproducir en forma repetida Presione (REP) en el control remoto de tarjeta.*2Reproducción aleatoria Presione (SHUF) en el control remoto de tarjeta.*2*3Omitir álbumes Presione el codificador multidireccional hacia arriba o hacia abajo.](https://usermanual.wiki/Sony-Group/DSXS310BT/User-Guide-1469656-Page-90.png)