Sony Group MHCV11 Home Audio System User Manual 010COV indb
Sony Corporation Home Audio System 010COV indb
MHC-V11_User Manual with English
MHC-V11
MHC-V11.4-582-493-11(1)
Home Audio System
Système audio
maison
Operating Instructions GB
Mode d’emploi FR
Manual de instrucciones ES
2GB
MHC
-
MHC-V11.4-582-493-11(1)
WARNING
To reduce the risk of fire or electric
shock, do not expose this apparatus to
rain or moisture.
To reduce the risk of fire, do not cover the
ventilation opening of the appliance with
newspapers, tablecloths, curtains, etc.
Do not expose the appliance to naked
flame sources (for example, lighted
candles).
To reduce the risk of fire or electric shock,
do not expose this appliance to dripping
or splashing, and do not place objects
filled with liquids, such as vases, on the
appliance.
As the main plug is used to disconnect
the unit from the mains, connect the unit
to an easily accessible AC outlet. Should
you notice an abnormality in the unit,
disconnect the main plug from the AC
outlet immediately.
Do not install the appliance in a confined
space, such as a bookcase or built-in
cabinet.
Do not expose batteries or appliances
with battery-installed to excessive heat,
such as sunshine and fire.
The unit is not disconnected from the
mains as long as it is connected to the
AC outlet, even if the unit itself has been
turned off.
Indoor use only.
CAUTION
The use of optical instruments with this
product will increase eye hazard.
Notice for the customers in the USA
Owner’s Record
The model and serial numbers are
located on the rear of the unit. Record
these numbers in the space provided
below. Refer to them whenever you call
upon your Sony dealer regarding this
product.
Model No.
Serial No.
Important Safety Instructions
1) Read these instructions.
2) Keep these instructions.
3) Heed all warnings.
4) Follow all instructions.
5) Do not use this apparatus near water.
6) Clean only with dry cloth.
7) Do not block any ventilation
openings. Install in accordance with
the manufacturer’s instructions.
8) Do not install near any heat sources
such as radiators, heat registers,
stoves, or other apparatus (including
amplifiers) that produce heat.
9) Do not defeat the safety purpose
of the polarized or grounding-type
plug. A polarized plug has two
blades with one wider than the
other. A grounding type plug has
two blades and a third grounding
prong. The wide blade or the third
prong are provided for your safety.
If the provided plug does not fit into
your outlet, consult an electrician for
replacement of the obsolete outlet.
10) Protect the power cord from being
walked on or pinched particularly at
plugs, convenience receptacles, and
the point where they exit from the
apparatus.
11) Only use attachments/accessories
specified by the manufacturer.
12) Use only with the cart,
stand, tripod, bracket,
or table specified by
the manufacturer, or
sold with the apparatus.
When a cart is used, use caution
when moving the cart/apparatus
combination to avoid injury from tip-
over.
13) Unplug this apparatus during
lightning storms or when unused for
long periods of time.
14) Refer all servicing to qualified service
personnel. Servicing is required when
the apparatus has been damaged in
any way, such as power-supply cord
or plug is damaged, liquid has been
spilled or objects have fallen into the
apparatus, the apparatus has been
exposed to rain or moisture, does
not operate normally, or has been
dropped.
The f
o
only
t
man
u
Othe
FCC t
e
NOT
E
This
e
foun
d
a Cla
s
Part 1
5
are d
e
prote
c
in a r
e
equip
radia
t
not in
with
t
interf
e
How
e
interf
e
instal
l
caus
e
or tel
e
deter
m
and o
corre
c
of th
e
Re
o
ant
e
Inc
r
eq
u
Co
n
on
a
whi
Co
n
rad
i
3GB
MHC-V11.4-582-493-11(1)
w
ater.
w
ith
r
ces
ding
e
y
pe
s
g
rd
e
ty.
into
n
for
t
let.
n
g
y at
and
h
e
es
s
m
tip-
d
for
e
rvice
w
hen
e
d in
c
ord
een
o
the
e
en
e
s
e
n
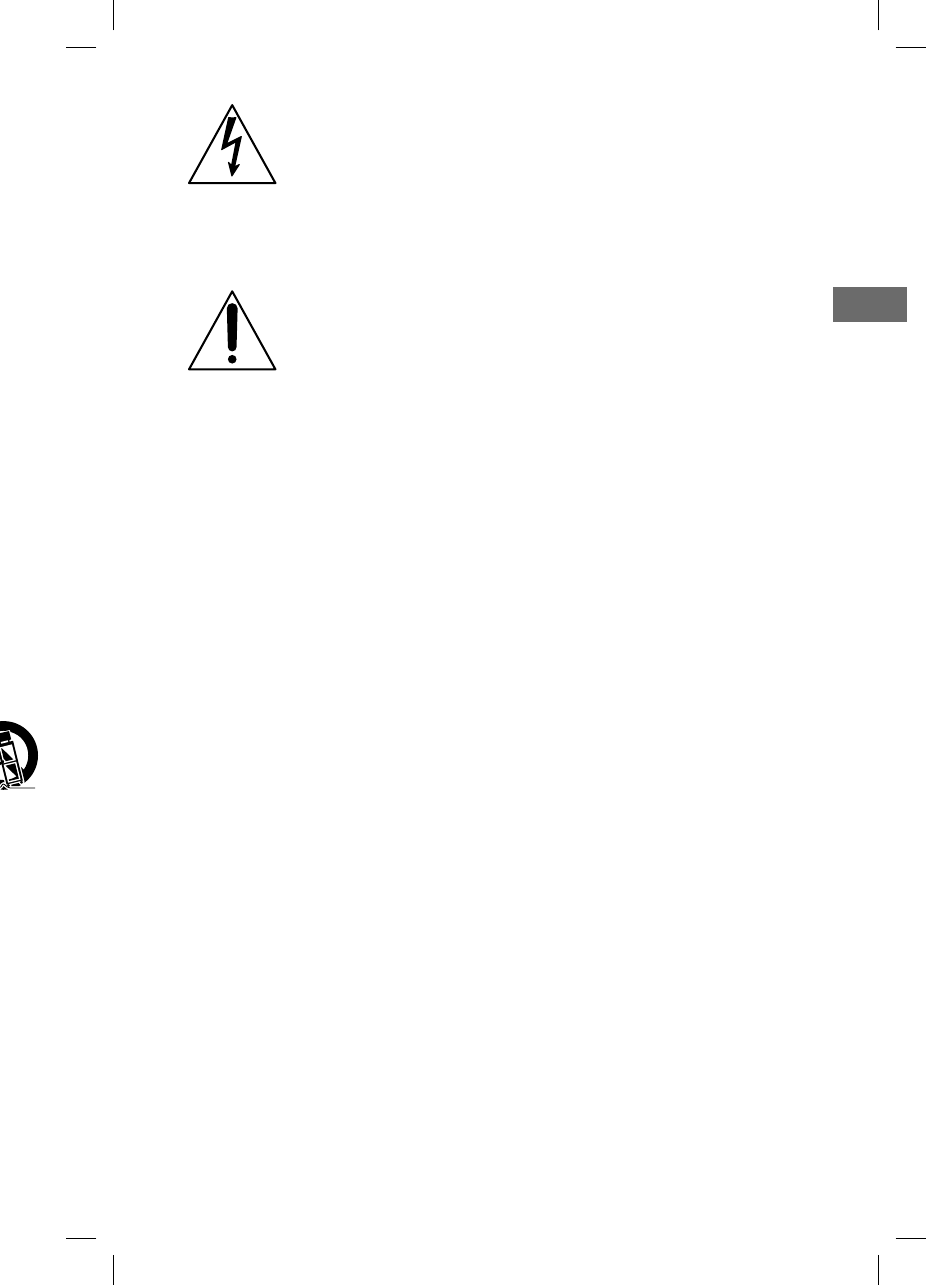
This symbol is intended
to alert the user to the
presence of uninsulated
“dangerous voltage”
within the product’s
enclosure that may be of
sufficient magnitude to
constitute a risk of electric
shock to persons.
This symbol is intended
to alert the user
to the presence of
important operating and
maintenance (servicing)
instructions in the
literature accompanying
the appliance.
The following FCC statement applies
only to the version of this model
manufactured for sale in the USA.
Other versions may not comply with
FCC technical regulations.
NOTE:
This equipment has been tested and
found to comply with the limits for
a Class B digital device, pursuant to
Part 15 of the FCC Rules. These limits
are designed to provide reasonable
protection against harmful interference
in a residential installation. This
equipment generates, uses and can
radiate radio frequency energy and, if
not installed and used in accordance
with the instructions, may cause harmful
interference to radio communications.
However, there is no guarantee that
interference will not occur in a particular
installation. If this equipment does
cause harmful interference to radio
or television reception, which can be
determined by turning the equipment off
and on, the user is encouraged to try to
correct the interference by one or more
of the following measures:
Reorient or relocate the receiving
antenna.
Increase the separation between the
equipment and receiver.
Connect the equipment into an outlet
on a circuit different from that to
which the receiver is connected.
Consult the dealer or an experienced
radio/TV technician for help.
CAUTION
You are cautioned that any changes or
modifications not expressly approved in
this manual could void your authority to
operate this equipment.
Properly shielded and grounded cables
and connectors must be used for
connection to host computers and/
or peripherals in order to meet FCC
emission limits.
This equipment must not be co-located
or operated in conjunction with any other
antenna or transmitter.
This equipment complies with FCC
radiation exposure limits set forth for an
uncontrolled environment and meets
the FCC radio frequency (RF) Exposure
Guidelines. This equipment has very low
levels of RF energy that it deemed to
comply without maximum permissive
exposure evaluation (MPE). But it is
desirable that it should be installed and
operated keeping the radiator at least
20cm or more away from person’s body
(excluding extremities: hands, wrists, feet
and ankles).
For customers in Canada
This equipment complies with Industry
Canada licence-exempt RSS standard(s).
Operation is subject to the following two
conditions:
(1) this equipment may not cause
interference, and
(2) this equipment must accept any
interference, including interference
that may cause undesired operation
of the equipment.
This equipment complies with IC
radiation exposure limits set forth for an
uncontrolled environment and meets
RSS-102 of the IC radio frequency (RF)
Exposure rules.
This equipment has very low levels of
RF energy that it deemed to comply
without maximum permissive exposure
evaluation (MPE). But it is desirable
that it should be installed and operated
keeping the radiator at least 20 cm
or more away from person’s body
(excluding extremities: hands, wrists, feet
and ankles).
GB
4GB
MHC
-
MHC-V11.4-582-493-11(1)
For customers in Europe and the
United Arab Emirates
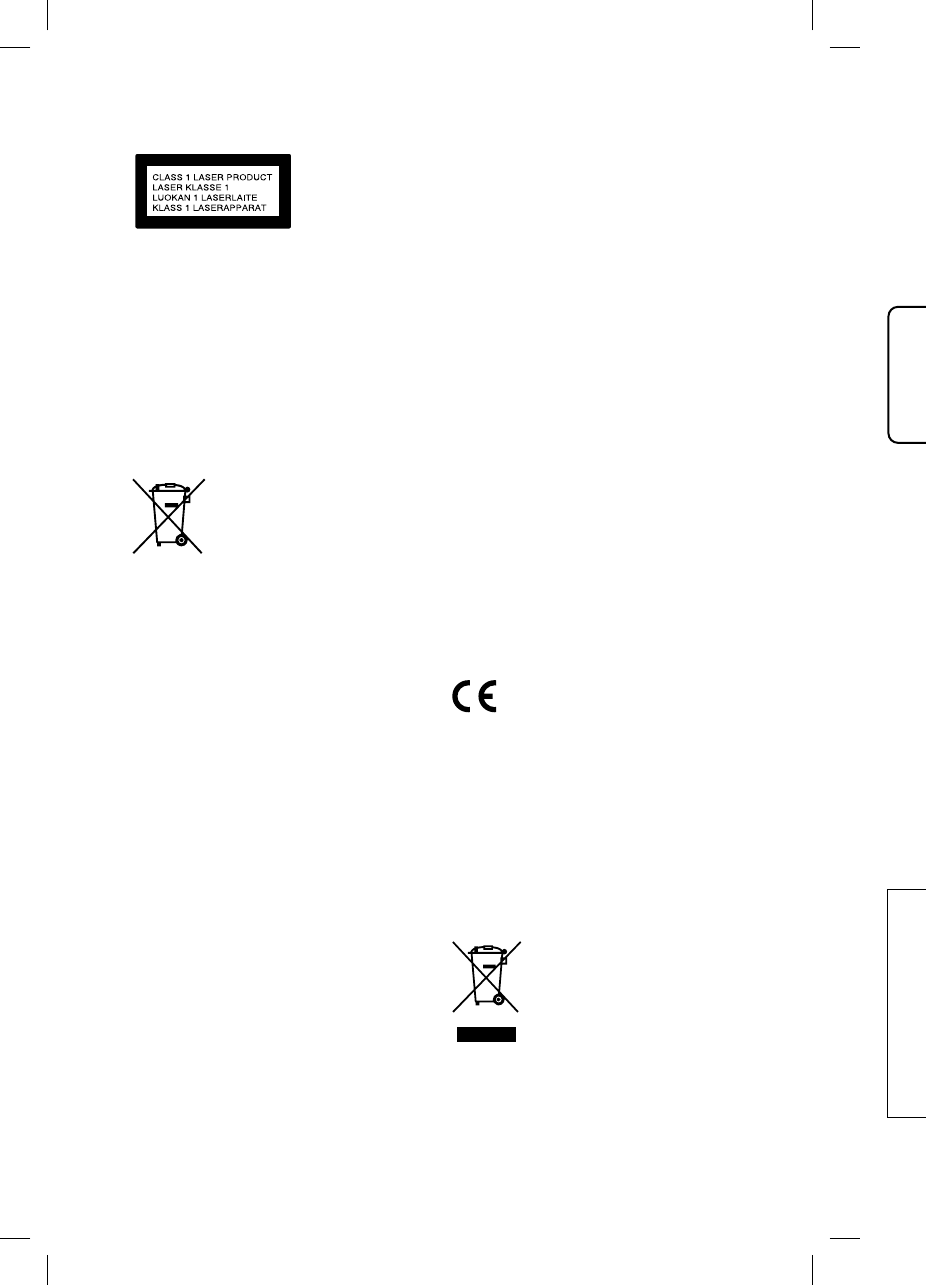
This product is classified as a Class 1
Laser product under IEC 60825-1:2007.
This label is located on rear surface of
the product.
For customers in Europe
Disposal of waste batteries and
electrical and electronic equipment
(applicable in the European Union
and other European countries with
separate collection systems)
This symbol on the product,
the battery or on the
packaging indicates that the
product and the battery shall
not be treated as household
waste. On certain batteries
this symbol might be used in
combination with a chemical symbol. The
chemical symbols for mercury (Hg) or
lead (Pb) are added if the battery
contains more than 0.0005% mercury or
0.004% lead. By ensuring these products
and batteries are disposed of correctly,
you will help prevent potentially negative
consequences for the environment and
human health which could otherwise be
caused by inappropriate waste handling.
The recycling of the materials will help to
conserve natural resources.
In case of products that for safety,
performance or data integrity reasons
require a permanent connection with an
incorporated battery, this battery should
be replaced by qualified service staff
only. To ensure that the battery and the
electrical and electronic equipment will
be treated properly, hand over these
products at end-of-life to the applicable
collection point for the recycling of
electrical and electronic equipment.
For all other batteries, please view the
section on how to remove the battery
from the product safely. Hand the battery
over to the applicable collection point for
the recycling of waste batteries. For more
detailed information about recycling of
this product or battery, please contact
your local Civic Office, your household
waste disposal service or the shop where
you purchased the product or battery.
Notice for customers: the following
information is only applicable
to equipment sold in countries
applying EU directives.
This product has been manufactured by
or on behalf of Sony Corporation, 1-7-1
Konan Minato-ku Tokyo, 108-0075 Japan.
Inquiries related to product compliance
based on European Union legislation
shall be addressed to the authorized
representative, Sony Deutschland GmbH,
Hedelfinger Strasse 61, 70327 Stuttgart,
Germany. For any service or guarantee
matters, please refer to the addresses
provided in the separate service or
guarantee documents.
Hereby, Sony Corp., declares that this
equipment is in compliance with the
essential requirements and other
relevant provisions of Directive 1999/5/
EC.
For details, please access the following
URL:
http://www.compliance.sony.de/
The validity of the CE marking is
restricted to only those countries where
it is legally enforced, mainly in the
countries EEA (European Economic Area).
This equipment has been tested and
found to comply with the limits set out
in the EMC regulation using a connection
cable shorter than 3 meters.
For customers in Australia and India
Disposal of Old Electrical
& Electronic Equipment
(Applicable in the
European Union and
other European countries
with separate collection
systems)
For c
u
Zeal
a
It sho
at lea
s
radia
t
extre
m
ankle
s
For c
u
Emir
a
Note
A Du
a
whic
h
one s
i
the o
t
mate
r
Com
p
this p
Musi
c
prot
e
This
p
discs
t
(CD)
s
discs
techn
recor
d
amo
n
do n
o
may
n
Thi
s
for
t
•Pl
di
•Tr
d
e
•Li
s
•Pl
B
L
•E
n
t
h
5GB
MHC-V11.4-582-493-11(1)
a
ct
o
ld
w
here
r
y.
ing
d
by
7
-1
a
pan.
nce
n
d
m
bH,
a
rt,
t
ee
e
s
s
e
9
/5/
i
ng
h
ere
A
rea).
d
o
ut
e
ction
n
dia
r
ical
e
nt
t
ries
i
on
For customers in Australia and New
Zealand
It should be installed and operated with
at least 20 cm and more between the
radiator and person’s body (excluding
extremities: hands, wrists, feet and
ankles).
For customers in the United Arab
Emirates
Note on DualDiscs
A DualDisc is a two sided disc product
which mates DVD recorded material on
one side with digital audio material on
the other side. However, since the audio
material side does not conform to the
Compact Disc (CD) standard, playback on
this product is not guaranteed.
Music discs encoded with copyright
protection technologies
This product is designed to play back
discs that conform to the Compact Disc
(CD) standard. Recently, various music
discs encoded with copyright protection
technologies are marketed by some
record companies. Please be aware that
among those discs, there are some that
do not conform to the CD standard and
may not be playable by this product.
This system is designed to be used
for the following purposes:
• Playing back music sources on
discs or USB devices
• Transferring music to USB
devices
• Listening to radio stations
• Playing back music sources on
BLUETOOTH devices
• Enjoying social gatherings with
the “Party Chain” function
About this manual
• This manual mainly explains
operations using the remote control,
but the same operations can also
be performed using the buttons on
the unit having the same or similar
names.
• Some illustrations are presented as
conceptual drawings, and may be
different from the actual products.

6GB
MHC
-
MHC-V11.4-582-493-11(1)
Table of Contents
About this manual ..................... 5
Guide to parts and controls ......8
Getting Started
Hooking up the system
securely .....................................12
Deactivating the
demonstration ..........................13
Inserting batteries ....................13
Carrying the system .................13
Changing the display mode .... 14
About the power
management ........................... 14
Disc
Playing a CD/MP3 disc .............15
Tuner
Listening to the radio ...............17
USB Device
Before using the USB device ... 18
Transferring music from a
disc ........................................... 18
Playing a file ............................20
BLUETOOTH
About the BLUETOOTH
wireless technology ..................21
Pairing this system with a
BLUETOOTH device .................. 22
Listening to music on a
BLUETOOTH device .................. 23
One Touch BLUETOOTH
Connection by NFC .................. 23
Playing back with high quality
sound codec (AAC/LDAC) ........24
Setting the BLUETOOTH
standby mode ......................... 25
Turning on or off the
BLUETOOTH signal ................... 25
Using “SongPal” via
BLUETOOTH .............................26
Sound Adjustment
Adjusting the sound ................ 26
Creating a party atmosphere
(DJ EFFECT) ............................... 27
Oth
e
Usi
n
fun
Sin
g
Enj
o
Sp
e
Usi
n
eq
u
Ch
a
dis
p
Usi
n
De
a
the
Set
t
fun
Add
Inf
o
de
v
Tro
u
Pre
Sp
e
Lic
e
No
t

7GB
MHC-V11.4-582-493-11(1)
....21
... 22
... 23
... 23
t
y
... 24
... 25
... 25
... 26
... 26
e
... 27
Other Operations
Using the Party Chain
function .................................... 28
Singing along: Karaoke ...........30
Enjoying music with the
Speaker Lights turned on .........31
Using an optional
equipment ................................31
Changing information on the
display ...................................... 32
Using the Sleep Timer ............. 32
Deactivating the buttons on
the unit (Child Lock) ................. 32
Setting the automatic standby
function .................................... 32
Additional Information
Information about compatible
devices ..................................... 33
Troubleshooting ...................... 33
Precautions .............................. 38
Specifications ...........................40
License and Trademark
Notice ....................................... 42
8GB
MHC
-
MHC-V11.4-582-493-11(1)
Guide to parts and controls
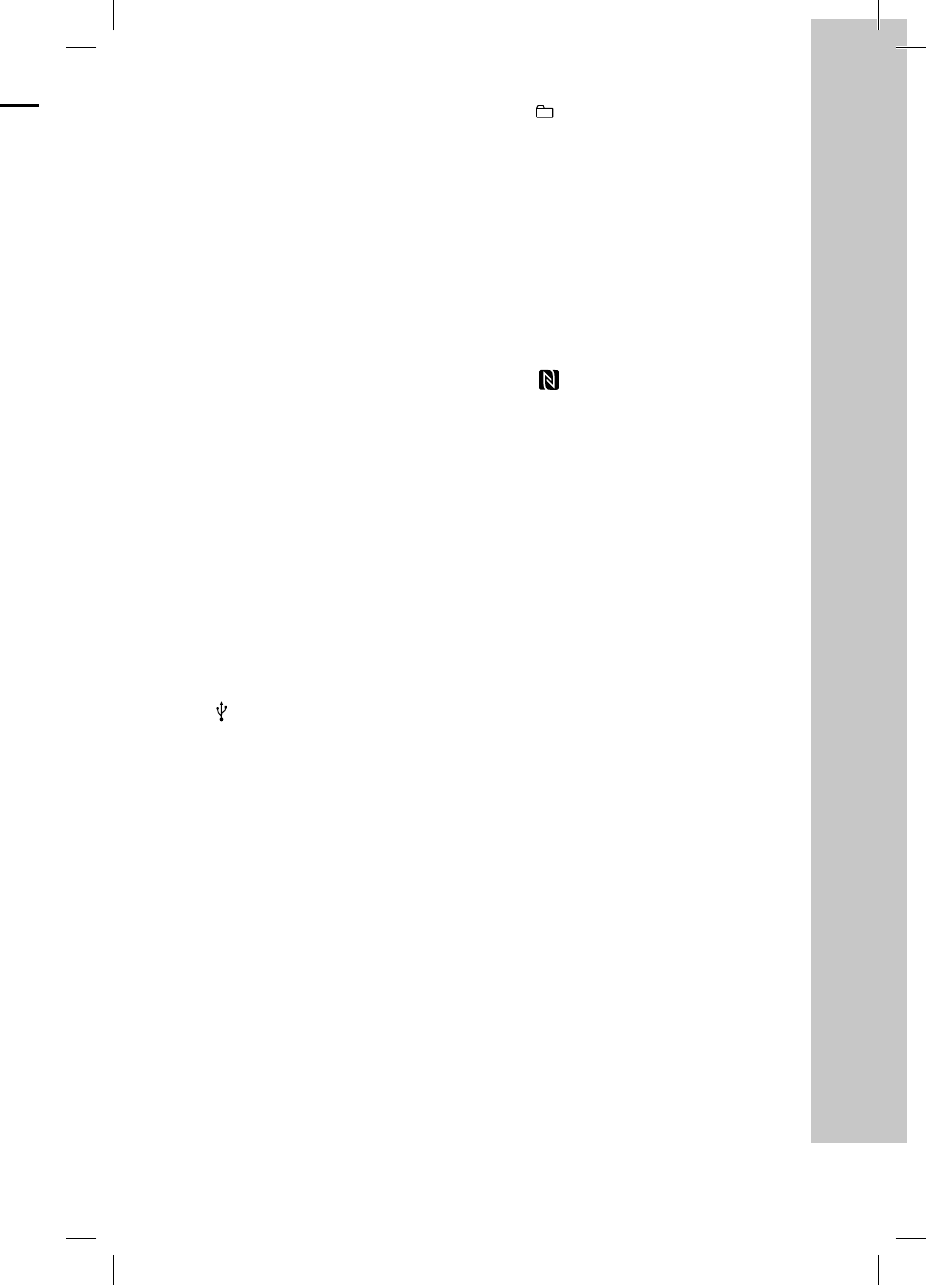
You can lock the buttons except (power) on the unit to prevent them from
being operated by mistake (page32).
Unit
* Do not look directly at the light-emitting parts when the Speaker Lights are turned on.
Speaker Lights*
(page31)
P
it
—
—
—
—
—
B
—
—
B
F
U
U
M
3
0
D
V
M
M
(
p
9GB
MHC-V11.4-582-493-11(1)
(power) button
Press to turn on the system, or set
it to standby mode.
(play)* button
— Press to start playback.
— When you hold down this button
for more than 2 seconds, the
built-in sound demonstration
will be played back. Press to
stop the demonstration.
(stop) button
— Press to stop playback. When
pressed twice, resume playback
can be canceled.
— Press to stop transfer during
music transfer.
— Press to stop the built-in sound
demonstration.
BLUETOOTH button
— Press to select the BLUETOOTH
function.
— Hold down to activate
BLUETOOTH pairing in the
BLUETOOTH function.
BLUETOOTH indicator (page21)
FUNCTION button
(USB) (REC/PLAY) port
Use to connect a USB device.
MEGA BASS button (page26,
30)
Display
VOCAL FADER button (page31)
MIC ECHO button (page31)
MIC LEVEL (MIN/MAX) knob
(page30)
+/– (select folder) button
Press to select a folder on a data
disc or a USB device.
/ (go backward/go
forward) button
Press to select a track or file.
TUNING+/– button (page17)
(open/close) button
Press to open or close the disc
tray.
(N-Mark) (page24)
DJ OFF, FLANGER, ISOLATOR
buttons (page27)
VOLUME/DJ CONTROL knob
— Turn to adjust the volume. You
cannot use this knob to adjust
the volume when DJ EFFECT is
selected.
— Turn to adjust the FLANGER and
ISOLATOR effect (page27).
Disc tray
Remote control sensor
MIC 1/2 jack
Use to connect the microphone(s).
* The button on the unit has a tactile
dot. Use the tactile dot as a reference
when operating the system.
10GB
MHC
-
MHC-V11.4-582-493-11(1)
Remote control
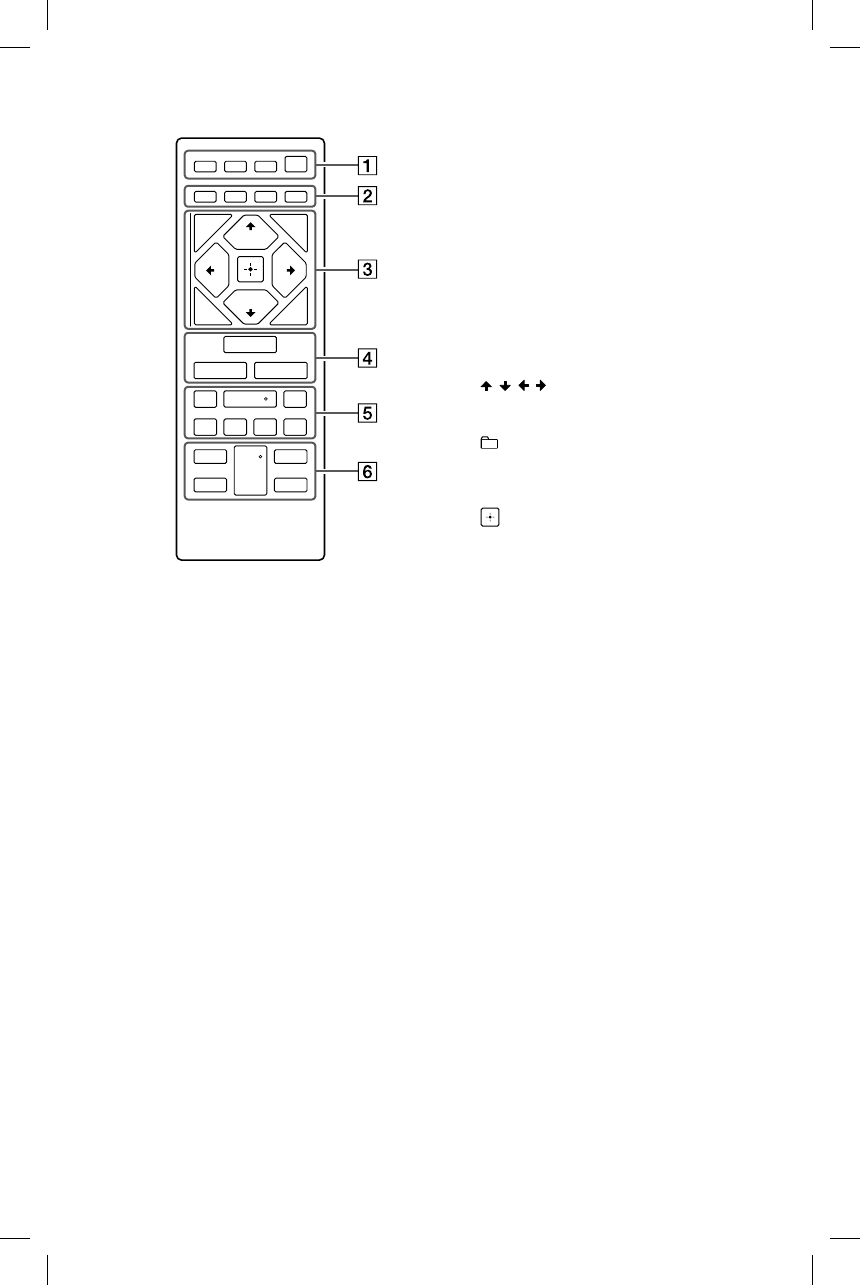
SPEAKER LIGHT button
(page31)
DISPLAY button
Press to change the information
on the display.
SLEEP button (page32)
(power) button
Press to turn on the system, or set
it to standby mode.
PLAY MODE button (page15,
20)
REPEAT/FM MODE button (page
15, 17, 20)
CLEAR button (page16, 21)
REC TO USB button (page19)
Press to transfer music from a disc
to the connected optional USB
device.
TUNING MODE button
(page17)
TUNER MEMORY button
(page17)
BACK button
Press to return to the previous
display.
OPTIONS button
Press to enter or exit options
menu.
/ / / buttons
Press to select the menu items.
+/– (select folder) buttons
Press to select a folder on a data
disc or USB device.
button
Press to enter/confirm the
settings.
FUNCTION button
Press to select a function.
MEGA BASS button (page26,
30)
EQ button (page26)
b
P
fi
T
U
P
f
o
P
P
P
r
e
—
—
—
V
M
K
(
p
V
P
* The
con
t
dot
sys
t

11GB
MHC-V11.4-582-493-11(1)
s
s
.
a
ta
/ (rewind/fast forward)
buttons (page15, 20)
Press to find a point in a track or
file during playback.
TUNING+/– button (page17)
(play)* button
Press to start playback.
/ (go backward/go
forward) buttons
Press to select a track or file.
PRESET+/– buttons (page17)
(pause) button
Press to pause playback. To
resume playback, press .
(stop) button
— Press to stop playback. When
pressed twice, resume playback
can be canceled.
— Press to stop transfer during
music transfer.
— Press to stop the built-in sound
demonstration.
VOCAL FADER button (page31)
MIC ECHO button (page31)
KEY CONTROL / buttons
(page31)
VOL +/– * button
Press to adjust the volume.
* The VOL + and buttons on the remote
control have a tactile dot. Use the tactile
dot as a reference when operating the
system.
12GB
MHC
-
MHC-V11.4-582-493-11(1)
Getting Started
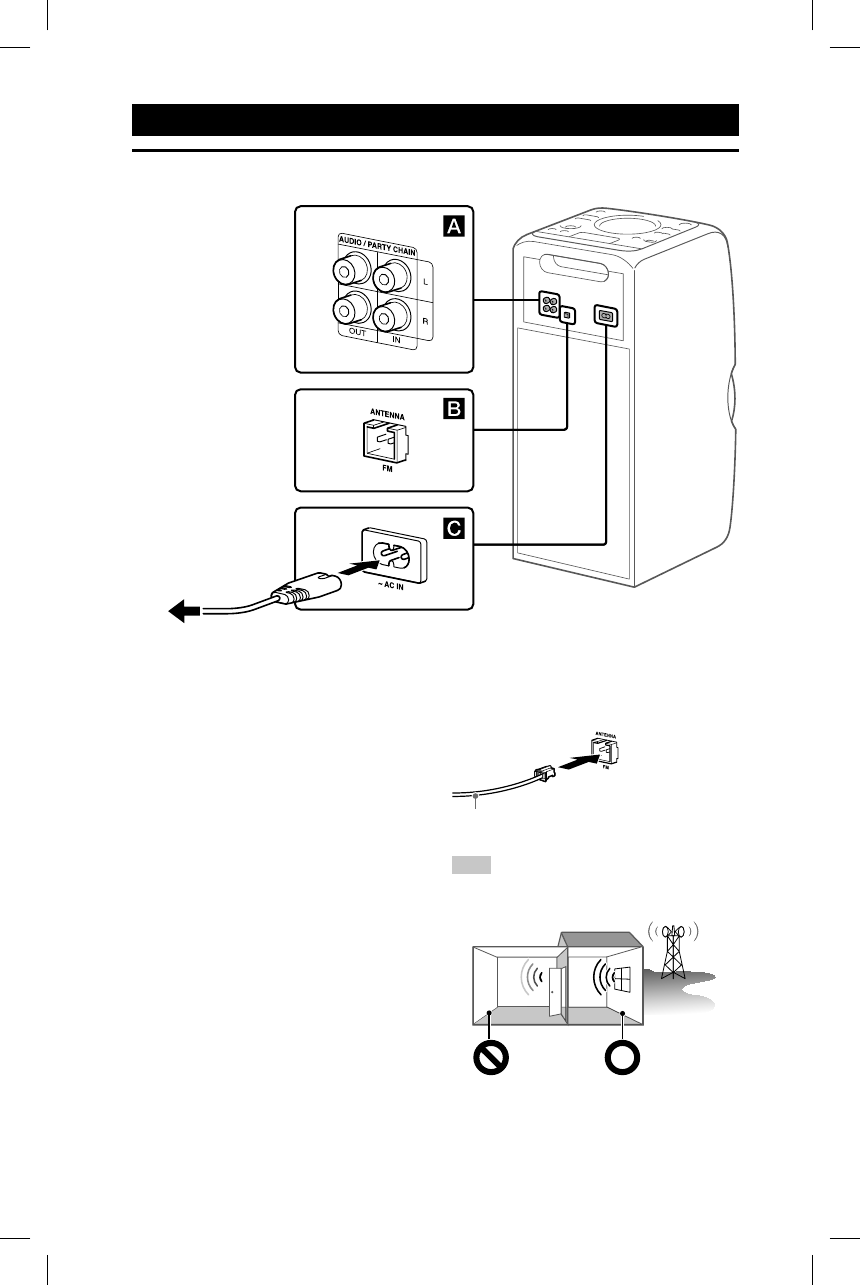
Hooking up the system securely
To wall outlet
Audio output and input jacks
Use an audio cord (not supplied) to
make either connection as follows:
• AUDIO/PARTY CHAIN OUT L/R
jacks
—Connect to the audio input jacks of
an optional equipment.
—Connect to another audio system
to enjoy the Party Chain function
(page28).
• AUDIO/PARTY CHAIN IN L/R jacks
—Connect to the audio output
jacks of a TV or an audio/video
equipment. The sound is output
through this system.
—Connect to another audio system
to enjoy the Party Chain function
(page28).
Antenna
Connect the FM lead antenna
(supplied).
Extend the antenna horizontally.
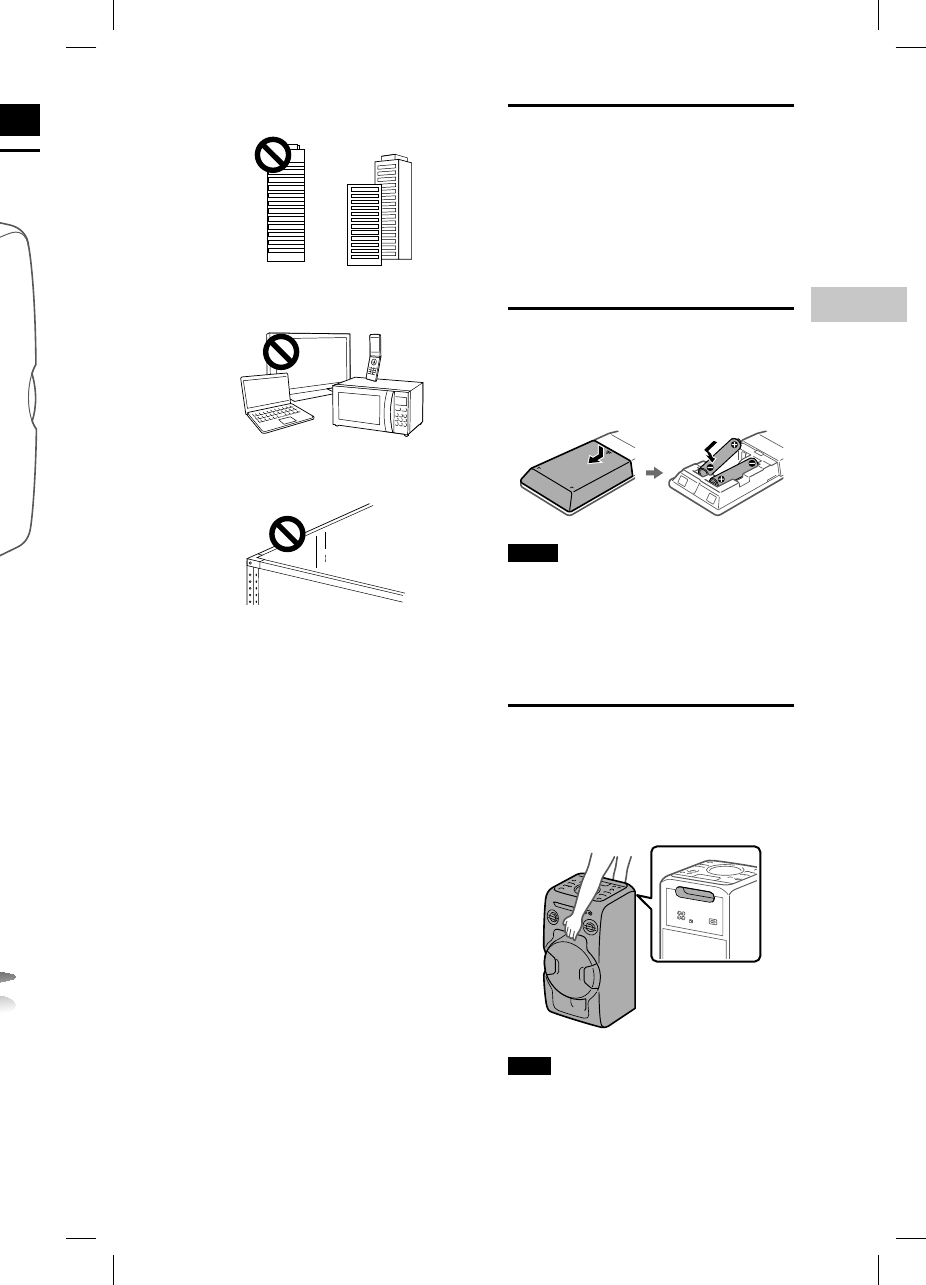
Hint
• Install the system in a location/orientation
with good reception.
Areas with
poor reception:
Far from
windows, etc.
Areas with
good reception:
Near windows,
etc.
• Avoi
•Kee
p
po
w
pick
i
P
o
Conn
to th
e
outle
t
Whe
n
the d
auto
m
on th
ends
.
13GB
Getting Started
MHC-V11.4-582-493-11(1)
t
ation
o
n:
s
,
• Avoid the following kinds of locations.
Between buildings
Nearby mobile phones,
electrical appliances
On steel desks or tables
• Keep the antenna away from the AC
power cord and the USB cable to avoid
picking up noise.
Power
Connect the AC power cord (supplied)
to the system, and then to the wall
outlet.
When the AC power cord is connected,
the demonstration (page14) starts
automatically. If you press to turn
on the system, the demonstration
ends.
Deactivating the
demonstration
To deactivate the demonstration
while the system is turned off, press
SPEAKER LIGHT repeatedly to select
Power Saving Mode (page14).
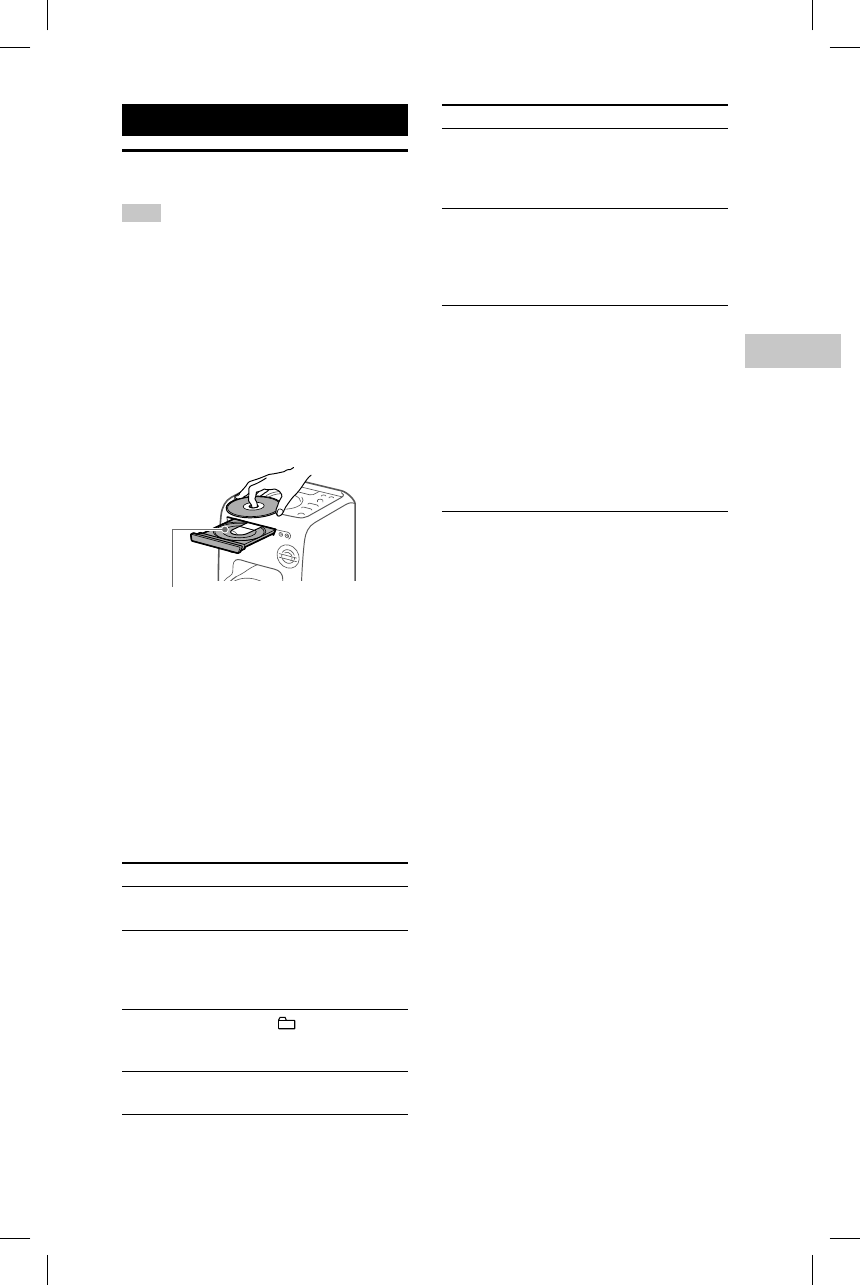
Inserting batteries
Insert two R03 (size AAA) batteries
(supplied), matching the polarities
shown below.
Notes
• Do not mix an old battery with a new one
or mix different types of batteries.
• If you do not use the remote control for a
long period of time, remove the batteries
to avoid damage from battery leakage
and corrosion.
Carrying the system
Before carrying the system, make
sure that there is no disc loaded and
no USB device is connected, and
disconnect all the cords.
Note
Correct hand placement while carrying the
system is very important to avoid personal
injury and/or property damage.

14GB
MHC-V11.4-582-493-11(1)
Changing the display
mode
Press SPEAKER LIGHT repeatedly
while the system is turned off.
Each time you press the button, the
display mode changes as follows.
Demonstration
The display scrolls messages about
the main features of this system with
the illumination turned on.
No display (Power Saving Mode)
The display and the illumination are
turned off to conserve power.
About the power
management
By default, this system is set to turn
off automatically in about 15 minutes
when there is no operation, and no
audio signal is detected. For details,
see “Setting the automatic standby
function” (page32).
15GB
Disc
MHC-V11.4-582-493-11(1)
Disc
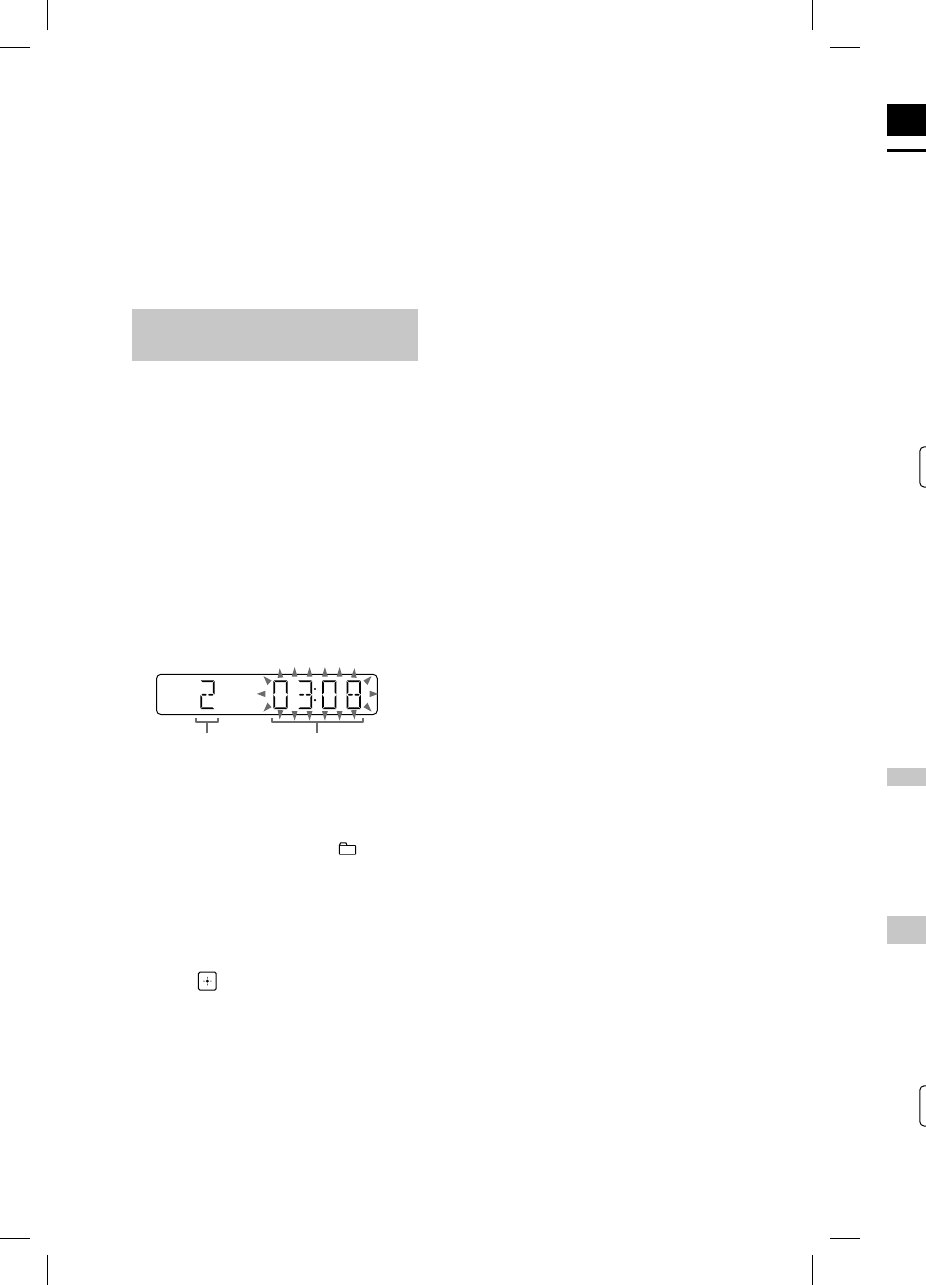
Playing a CD/MP3 disc
Hint
For playable discs, see “Precautions”
(page38).
1
Press FUNCTION repeatedly
until “CD” appears on the
display.
2
Place a disc.
Press on the unit to open the
disc tray, then place a disc with the
label side up in the disc tray.
When you play back an 8 cm
(xxin) disc such as a CD single,
place it on the inner circle of the
tray.
3
Press on the unit to close
the disc tray.
Do not forcibly push the disc tray
to close it as this may cause a
malfunction.
4
Press to start playback.
Other operations
To Do this
Pause
playback
Press . To resume
play, press .
Stop
playback
Press . To resume
play, press . To
cancel resume play,
press again.
Select a
folder on an
MP3 disc
Press +/–
repeatedly.
Select a track
or file
Press /.
To Do this
Find a point
in a track or
file
Hold down /
during playback, and
release the button at
the desired point.
Select Repeat
Play
Press REPEAT/FM
MODE repeatedly
until “REP ONE1),” “REP
FLDR2)” or “REP ALL3)”
appears on the display.
Change the
play mode
Press PLAY MODE
repeatedly while the
player is stopped. You
can select normal play
(“FLDR” for all MP3
files in the folder on
the disc), shuffle play
(“SHUF” or “FLDRSHUF”
for folder shuffle),
or program play
(“PROGRAM”).
1) “REP ONE”: Repeats the current track or
file.
2) “REP FLDR” (MP3 disc only): Repeats the
current folder.
3) “REP ALL”: Repeats all tracks or files.
Notes on playing MP3 discs
• Do not save other types of files or
unnecessary folders on a disc that has
MP3 files.
• Folders that have no MP3 files are skipped.
• MP3 files are played back in the order that
they are recorded onto the disc.
• The system can only play MP3 files that
have a file extension of “.mp3.”
• Even when file name has the correct file
extension, if the actual file differs, playing
this file may generate a loud noise by
which the system may malfunction.
• The maximum number of:
— folders is 256 (including the root folder).
— MP3 files is 999.
— folder levels (the tree structure of files)
is 8.
• Compatibility with all MP3 encoding/
writing software, recording device, and
recording media cannot be guaranteed.
Incompatible MP3 discs may produce
noise or interrupted audio or may not play
at all.
MHC
-
16GB
MHC-V11.4-582-493-11(1)
Tun
e
Lis
t
1
P
r
u
n
di
2
P
e
F
o
Pr
e
u
n
di
s
Sc
a
s
If
t
m
a
F
o
Pr
e
u
n
di
s
re
p
st
a
W
pr
o
n
a
(E
u
Hint
To red
statio
n
until “
off st
e
effect
,
Pre
s
1
T
u
2
P
r
s
e
m
Note on playing multisession discs
The system can play back continuous
sessions on a disc when they are recorded
in the same session format as the first
session. When a session recorded in a
different session format is encountered, that
session and the ones following it cannot be
played back. Note that even if the sessions
are recorded in the same format, some
sessions may not play back.
Creating your own program
(Program Play)
1
Press FUNCTION repeatedly
until “CD” appears on the
display.
2
Select the play mode.
Press PLAY MODE repeatedly until
“PROGRAM” appears on the display
while the player is stopped.
3
Select the desired track or file
number.
Press / repeatedly until
the desired track or file number
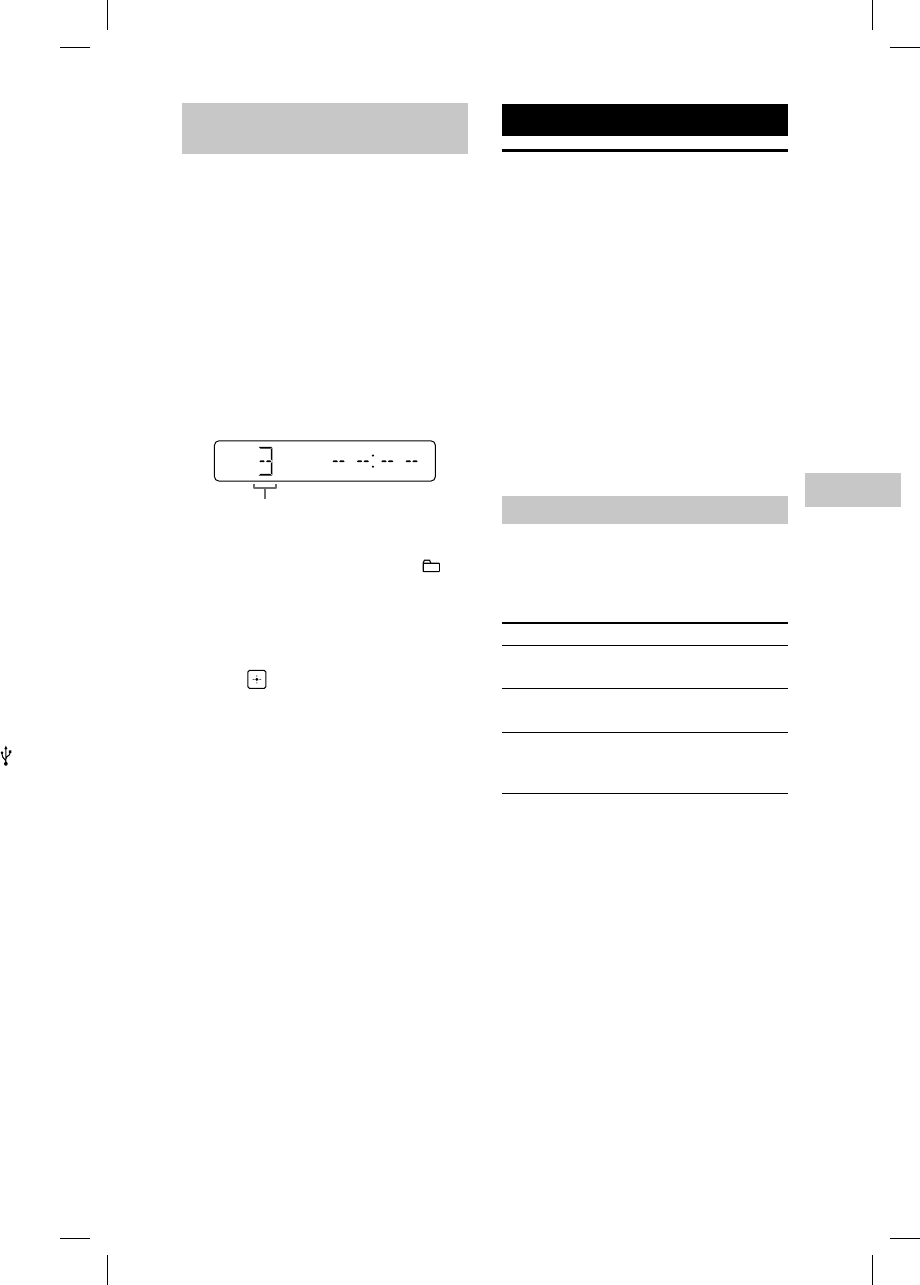
appears on the display.
Selected
track or file
number
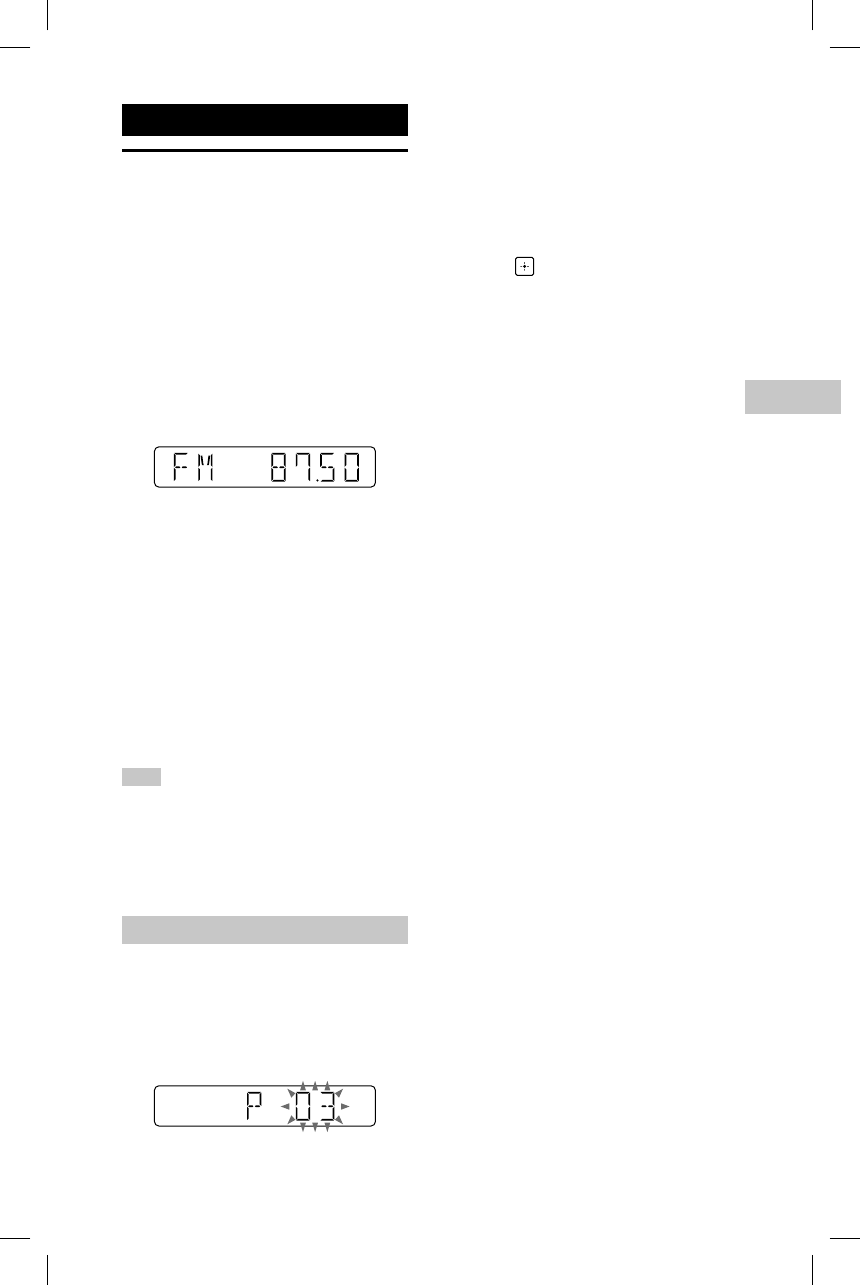
Total playing time
of the selected
track (CD-DA disc
only)
When programming MP3 files
in a specific folder, press +/–
repeatedly to select the desired
folder, and then select the desired
file.
4
Program the selected track or
file.
Press to enter the selected track
or file.
5
Repeat steps 3 through 4 to
program additional tracks or
files, up to a total of 64 tracks
or files.
6
To play your program of
tracks or files, press .
The program is cleared when
you perform one of the following
operations:
— changing the function.
— turning off the system.
— disconnecting the AC power
cord.
— opening the disc tray.
To play the same program again,
press .
To cancel Program Play
Press PLAY MODE.
To delete the last step from the
program list
Press CLEAR when playback is
stopped.
17GB
Tuner
MHC-V11.4-582-493-11(1)
Tuner
Listening to the radio
1
Press FUNCTION repeatedly
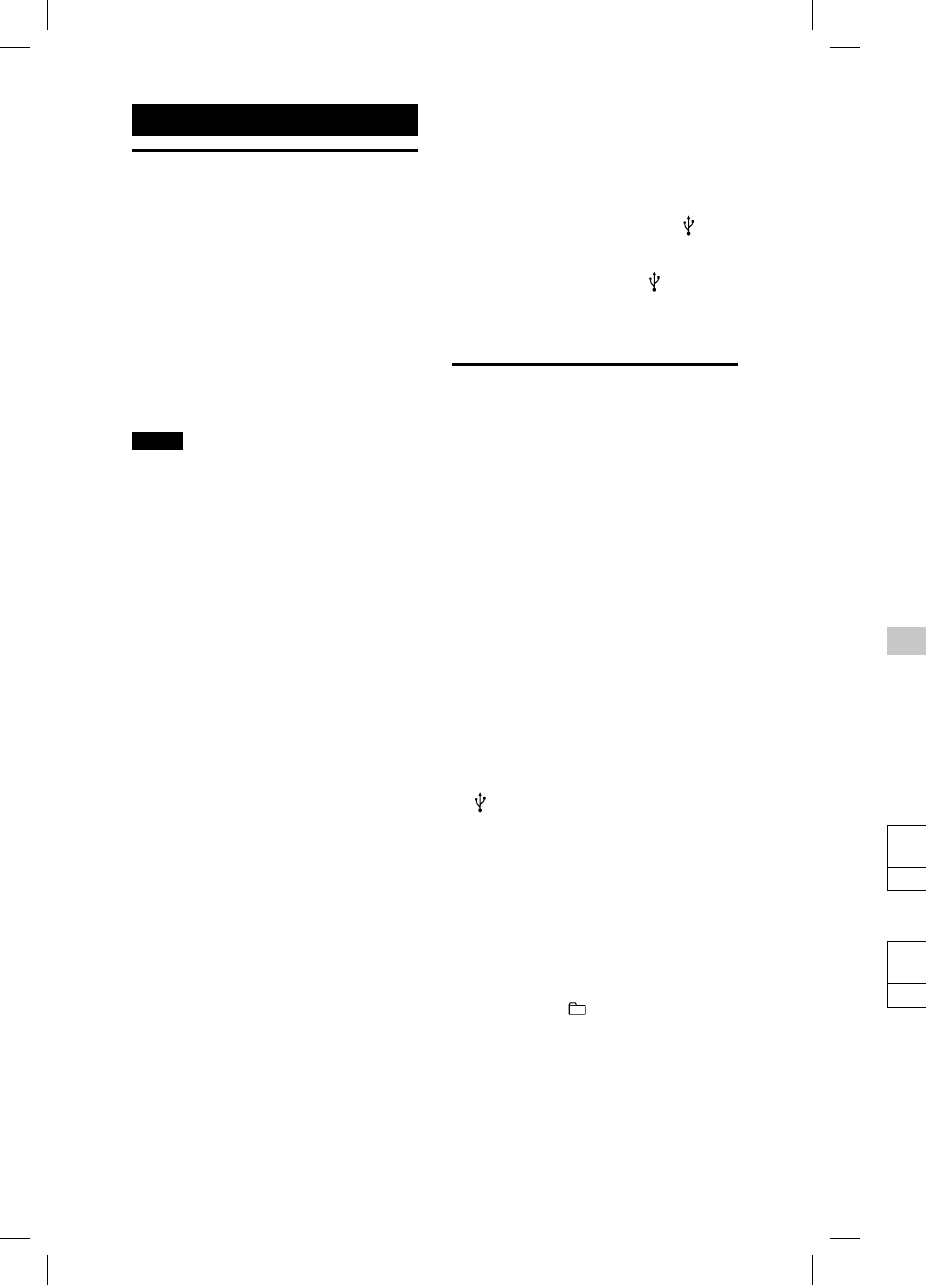
until “FM” appears on the
display.
2
Perform tuning.
For automatic scanning
Press TUNING MODE repeatedly
until “AUTO” appears on the
display, and then press TUNING+/–.
Scanning stops automatically when
a station is found.
If the scanning does not stop, press
to stop scanning, then perform
manual tuning (below).
For manual tuning
Press TUNING MODE repeatedly
until “MANUAL” appears on the
display, and then press TUNING+/–
repeatedly to tune to the desired
station.
When you tune to a station that
provides RDS services, the station
name appears on the display
(European model only).
Hint
To reduce static noise on a weak FM stereo
station, press REPEAT/FM MODE repeatedly
until “MONO” appears on the display to turn
off stereo reception. You will lose stereo
effect, but reception will improve.
Presetting radio stations
1
Tune to the desired station.
2
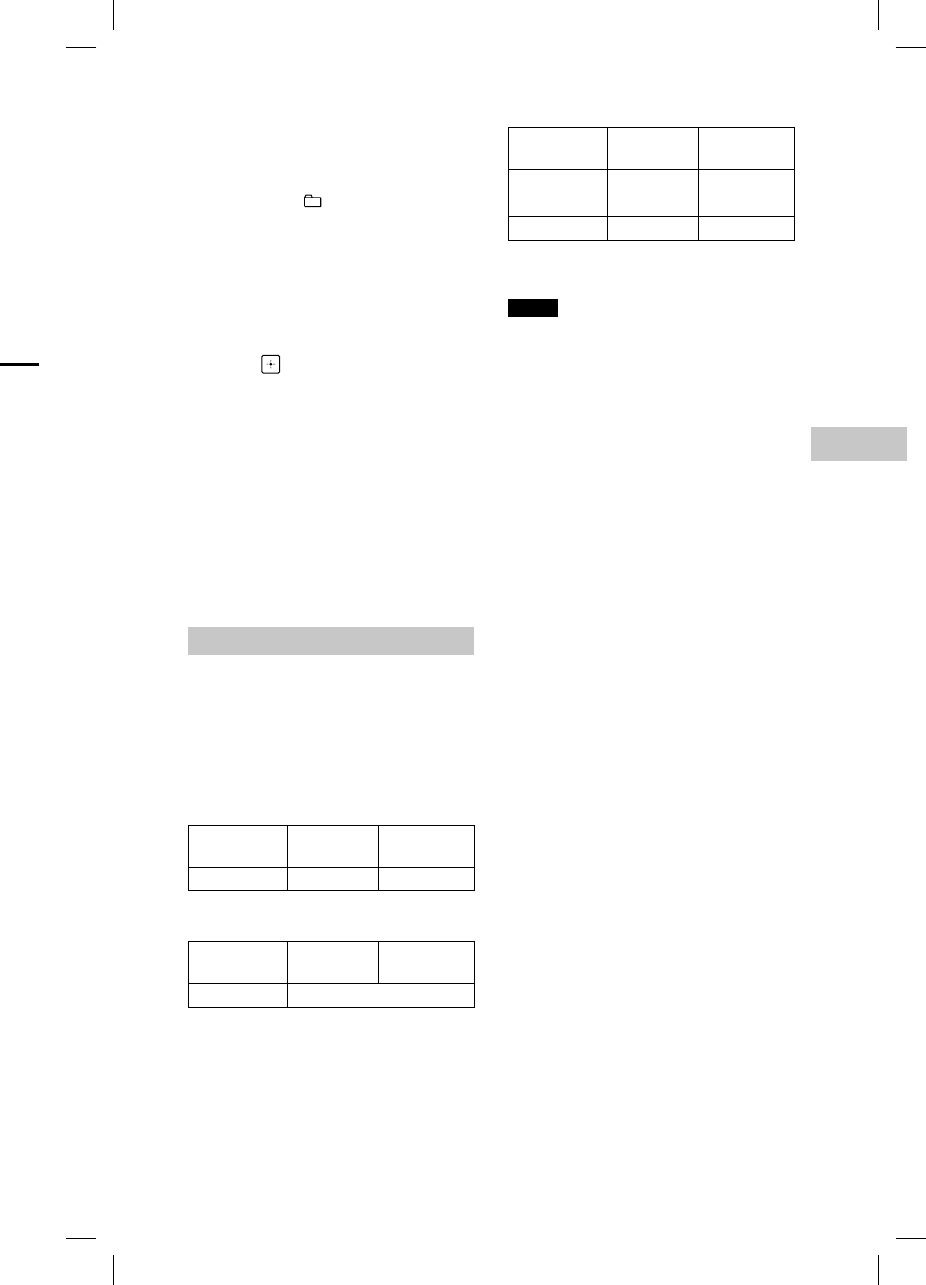
Press TUNER MEMORY to
select the tuner memory
mode.
3
Press PRESET+/– repeatedly
to select the desired preset
number.
If another station is already
assigned to the selected preset
number, the station is replaced by
the new station.
4
Press to store the station.
5
Repeat steps 1 through 4 to
store other stations.
You can preset up to 20 FM
stations.
The preset stations are retained
for about half a day even if you
disconnect the AC power cord or if
a power failure occurs.
To listen to the preset station
Press TUNING MODE repeatedly until
“PRESET” appears on the display then
press TUNING+/– repeatedly to select
the desired preset number.
ng
in,
18GB
MHC
-
MHC-V11.4-582-493-11(1)
F
o
Pr
e
or
th
T
o
fo
se
pr
e
fil
e
pl
a
5
P
r
“
R
6
P
r
T
h
a
p
D
o
th
W
“C
a
n
b
e
To st
o
Press
Fol
d
Whe
n
a “M
U
belo
w
gene
acco
r
sour
c
CD S
Y
Sou
r
CD-
D
MP3
f
Sou
r
MP3
USB Device
Before using the USB
device
For compatible USB devices, see
“Information about compatible
devices” (page33).
When using Apple devices with
this system, connect them via a
BLUETOOTH connection (page22).
Using Apple devices via a USB
connection is not supported.
Notes
• When USB cable connection is necessary,
use the USB cable supplied with the USB
device. See the operating instructions
supplied with the USB device for details
on the operation method.
• It may take a long time before “SEARCH”
appears on the display depending on the
type of USB device connected.
• Do not connect the system and the USB
device through a USB hub.
• When the USB device is connected, the
system reads all the files on the USB
device. If there are many folders or files on
the USB device, it may take a long time to
finish reading the USB device.
• With some connected USB devices, after
an operation is performed, there may
be a delay before it is performed by this
system.
• Compatibility with all encoding/writing
software cannot be guaranteed. If audio
files on the USB device were originally
encoded with incompatible software,
those files may produce noise or
interrupted audio, or may not play at all.
• This system does not necessarily support
all the functions provided in a connected
USB device.
• Do not remove the USB device during
transfer or erase operations. Doing so
may corrupt the data on the USB device or
damage the USB device itself.
To use the system as a battery
charger
You can use the system as a battery
charger for USB devices that have a
rechargeable function.
Connect the USB device to the
(USB) port.
The charging begins when the USB
device is connected to the (USB)
port. For details, refer to the operating
instructions of your USB device.
Transferring music from
a disc
You can transfer music from a disc
(CD-DA disc or MP3 disc) to a USB
device as follows:
• CD SYNC transfer: Transfers all the
CD-DA tracks from the CD-DA disc.
• MP3 folder transfer: Transfers MP3
files in a specific folder from the MP3
disc.
• REC1 transfer: Transfers a currently
playing track or MP3 file from the
disc.
1
Press FUNCTION repeatedly
until “CD” appears on the
display.
2
Connect the USB device to the
(USB) port.
3
Load a disc you want to
transfer.
4
Prepare for transfer.
Proceed to step 5 in case of CD
SYNC transfer.
For MP3 folder transfer
To transfer MP3 files in a specific
folder, press +/– repeatedly to
select the folder you want. Then
start playback and press once.
Make sure the elapsed playing time
has stopped on the display.
19GB
USB Device
MHC-V11.4-582-493-11(1)
For REC1 transfer
Press / to select the track
or MP3 file you want to transfer,
then start playback.
To transfer an MP3 file in a specific
folder, press +/– repeatedly to
select the folder you want, then
press / to select the MP3
file you want to transfer. Then start
playback.
5
Press REC TO USB.
“READY” appears on the display.
6
Press .
The transfer starts, then “USB REC”
appears on the display.
Do not remove the USB device until
the transfer is complete.
When the transfer is complete,
“COMPLETE” appears on the display
and audio files in MP3 format will
be created.
To stop transfer
Press .
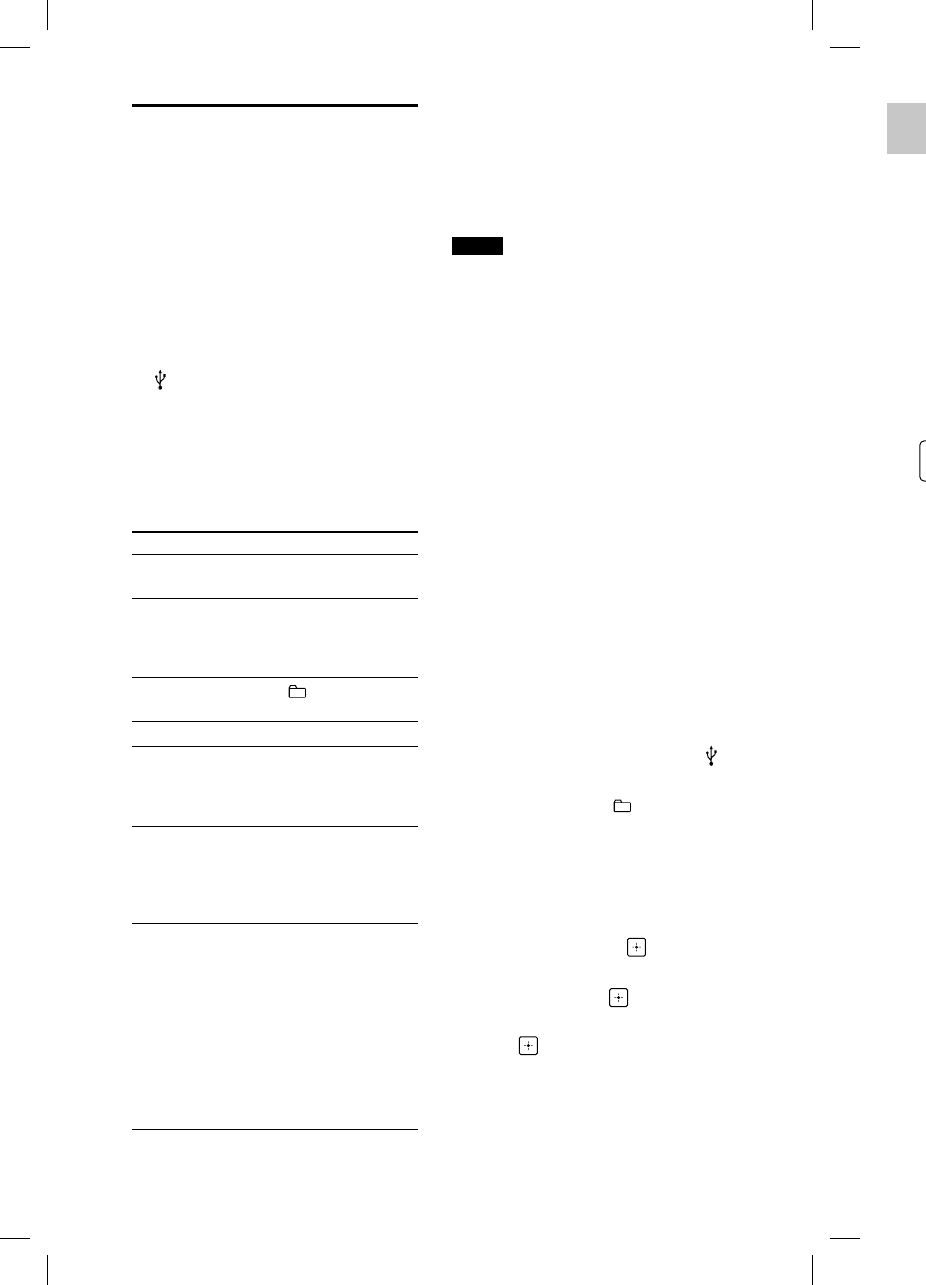
Folder and file generation rules
When transferring to a USB device,
a “MUSIC” folder is created directly
below “ROOT.” Folders and files are
generated within this “MUSIC” folder
according to the transfer method and
source as follows:
CD SYNC transfer
Source Folder
name
File name
CD-DA
“CDDA001”* “TRACK001”*
MP3 folder transfer
Source Folder
name
File name
MP3 Same as the source
REC1 transfer
Source Folder
name
File name
MP3
“MP3_REC1”
Same as the
source
CD-DA
“CD_REC1” “TRACK001”*
* Folder and file numbers are assigned
serially thereafter.
Notes
• If you start transfer in shuffle play or
repeat play mode, the selected play mode
is automatically changed to normal play.
• CD-TEXT information is not transferred in
the created MP3 files. This system does
not support the CD-TEXT standard.
• The transfer stops automatically if:
— the USB device runs out of space during
transfer.
— the number of audio files and folders
on the USB device reaches the limit
for the number that the system can
recognize.
• If a folder or file that you are trying
to transfer already exists on the USB
device with the same name, a sequential
number is added after the name without
overwriting the original folder or file.
• Do not use buttons on the remote control
or unit during transfer to prevent transfer
from stopping.
Note on copyright-protected content
The transferred music is limited to private
use only. Use of the music beyond this
limit requires permission of the copyright
holders.
e
ry
a
B
)
a
ting
m
c
t
he
i
sc.
M
P3
e
MP3
n
tly
h
e
l
y
o
the
D
f
ic
to
e
n
c
e.
time
MHC
-
20GB
MHC-V11.4-582-493-11(1)
Cre
a
(Pr
o
1
P
r
u
n
di
2
S
e
Pr
e
“P
w
h
3
S
e
Pr
e
d
e
di
s
S
W
fil
e
+/
fo
fil
e
4
P
r
Pr
e
5
R
e
p
r
t
o
6
T
o
p
r
T
h
y
o
o
p
—
—
—
T
o
pr
e
To ca
Press
To d
e
prog
r
Press
stop
p
Playing a file
The following audio file formats are
supported:
—MP3: file extension “.mp3”
—WMA: file extension “.wma”
1
Press FUNCTION repeatedly
until “USB” appears on the
display.
2
Connect the USB device to the
(USB) port.
3
Press to start playback.
4
Press VOL +/– to adjust the
volume.
Other operations
To Do this
Pause
playback
Press . To resume
play, press .
Stop
playback
Press . To resume
play, press 1). To
cancel resume play,
press again.
Select a
folder
Press +/–
repeatedly.
Select a file Press /.
Find a point
in a file
Hold down /
during playback, and
release the button at
the desired point.
Select Repeat
Play
Press REPEAT/FM
MODE repeatedly
until “REP ONE2),” “REP
FLDR3)” or “REP ALL4)”
appears on the display.
Change the
play mode
Press PLAY MODE
repeatedly while the
USB device is stopped.
You can select normal
play (“FLDR” for all
files in the folder
on the USB device),
shuffle play (“SHUF” or
“FLDRSHUF” for folder
shuffle), or program
play (“PROGRAM”).
1) When playing a VBR MP3/WMA file, the
system may resume playback from a
different point.
2) “REP ONE”: Repeats the current file.
3) “REP FLDR”: Repeats the current folder.
4) “REP ALL”: Repeats all files on a USB
device.
Notes
• This system cannot play audio files on the
USB device in the following cases;
— when the total number of audio files on
a USB device exceeds 999.
— when the number of folders on a USB
device exceeds 256 (including the
“ROOT” folder and empty folders).
These numbers may vary depending on
the file and folder structure. Do not save
other types of files or unnecessary folders
on a USB device that has audio files.
• The system can play back to a depth of 8
folders only.
• Files and folders are displayed in the order
of their creation on the USB device.
• Folders that have no audio files are
skipped.
• Note that even when file name has the
correct file extension, if the actual file
differs, the system may produce noise or
may malfunction.
To erase audio files or folders from
the USB device
1
Press FUNCTION repeatedly until
“USB” appears on the display.
2
Connect the USB device to the
(USB) port.
3
Press / or +/–
repeatedly to select the audio file
or folder you want to erase, then
start playback.
4
Press OPTIONS.
5
Press / repeatedly to select
“ERASE,” then press .
6
Press / to select “FOLDER” or
“FILE,” then press .
“ERASE??” flashes on the display.
7
Press .
When erasing is complete,
“COMPLETE” appears on the
display.
21GB
BLUETOOTH
MHC-V11.4-582-493-11(1)
Creating your own program
(Program Play)
1
Press FUNCTION repeatedly
until “USB” appears on the
display.
2
Select the play mode.
Press PLAY MODE repeatedly until
“PROGRAM” appears on the display
while the player is stopped.
3
Select the desired file number.
Press / repeatedly until the
desired file number appears on the
display.
Selected file number
When programming MP3/WMA
files in a specific folder, press
+/– repeatedly to select the desired
folder, and then select the desired
file.
4
Program the selected file.
Press to enter the selected file.
5
Repeat steps 3 through 4 to
program additional files, up
to a total of 64 files.
6
To play your program of files,
press .
The program is cleared when
you perform one of the following
operations:
— changing the function.
— turning off the system.
— disconnecting the AC power
cord.
To play the same program again,
press .
To cancel Program Play
Press PLAY MODE.
To delete the last step from the
program list
Press CLEAR when playback is
stopped.
BLUETOOTH
About the BLUETOOTH
wireless technology
BLUETOOTH wireless technology is a
short-range wireless technology that
enables wireless data communication
between digital devices. BLUETOOTH
wireless technology operates within a
range of about 10 meters (33 feet).
Supported BLUETOOTH version,
profiles and codecs
For details, see “BLUETOOTH section”
(page41).
About the BLUETOOTH indicator
In the BLUETOOTH function, the
BLUETOOTH indicator on the unit
lights up or flashes in blue to show the
BLUETOOTH status.
System status Indicator status
BLUETOOTH
standby
Flashes slowly
BLUETOOTH
pairing
Flashes quickly
BLUETOOTH
connection is
established
Lights up
the
a
d
er.
n the
l
es on
U
SB
on
ave
o
lders
of 8
order
h
e
e
s
e or
o
m
n
til
e
file
h
en
t
o
r
a
y.

22GB
MHC
-
MHC-V11.4-582-493-11(1)
Lis
t
BL
U
You
c
by co
BLUE
T
Chec
k
musi
c
—Th
e
BL
U
—Pai
r
(pa
g
Once
devic
play
b
/
1
P
r
u
n
f
u
“B
2
E
s
B
L
T
h
d
e
a
u
P
e
c
o
d
e
c
o
3
P
r
D
e
d
e
—
—
4
A
d
A
d
B
L
v
o
th
u
s
Note
•Wh
e
any
con
n
devi
• If yo
devi
con
n
disc
o
Pairing this system with
a BLUETOOTH device
Pairing is an operation where
BLUETOOTH devices register with each
other beforehand. Once a pairing
operation is performed, it does not
need to be performed again.
If your device is an NFC-compatible
smartphone, the manual pairing
procedure is not necessary. (See “One
Touch BLUETOOTH Connection by NFC”
(page23).)
1
Place the BLUETOOTH device
within 1meter (3 feet) from
the system.
2
Press BLUETOOTH on the
unit to select the BLUETOOTH
function.
“BT AUDIO” appears on the display.
Hints
• When there is no pairing information
on the system (for example, when you
use the BLUETOOTH function for the
first time after purchase), “PAIRING”
flashes on the display and the system
enters the pairing mode automatically.
In this case, proceed to step 4.
• If the BLUETOOTH connection is
established, terminate the BLUETOOTH
connection (page23).
3
Hold down BLUETOOTH on the
unit for more than 5seconds.
“PAIRING” flashes on the display.
4
Perform the pairing procedure
on the BLUETOOTH device.
For details, refer to the operating
instructions of your BLUETOOTH
device.
5
Select “MHC-V11” on the
display of the BLUETOOTH
device.
Perform this step within 5 minutes,
otherwise pairing will be canceled.
In this case, repeat from step 3.
Note
If passkey is required on the BLUETOOTH
device, enter “0000.” “Passkey” may
be called “Passcode,” “PIN code,” “PIN
number,” or “Password.”
6
Perform the BLUETOOTH
connection on the
BLUETOOTH device.
When pairing is completed and
the BLUETOOTH connection is
established, “BT AUDIO” appears on
the display.
Depending on the BLUETOOTH
device, connection may start
automatically after pairing is
completed.
Notes
• You can pair up to 8 BLUETOOTH devices.
If the 9th BLUETOOTH device is paired, the
oldest paired device will be deleted.
• If you want to pair with another
BLUETOOTH device, repeat steps 1 to 6.
To cancel the pairing operation
Press BLUETOOTH on the unit.
Erasing all the pairing
registration information
To erase all the pairing registration
information, the system should
be reset to the factory default
settings. See “Resetting the system”
(page37).
23GB
BLUETOOTH
MHC-V11.4-582-493-11(1)
Listening to music on a
BLUETOOTH device
You can operate a BLUETOOTH device
by connecting the system and the
BLUETOOTH device using AVRCP.
Check the following before playing
music:
—The BLUETOOTH function of the
BLUETOOTH device is turned on.
—Pairing has been completed
(page22).
Once the system and the BLUETOOTH
device are connected, you can control
playback by pressing , , ,
/ and /.
1
Press BLUETOOTH on the
unit to select the BLUETOOTH
function.
“BT AUDIO” appears on the display.
2
Establish connection with the
BLUETOOTH device.
The last connected BLUETOOTH
device will be connected
automatically.
Perform the BLUETOOTH
connection from the BLUETOOTH
device if the device is not
connected.
3
Press to start playback.
Depending on the BLUETOOTH
device,
— you may need to press twice.
— you may need to start playing an
audio source on the BLUETOOTH
device.
4
Adjust the volume.
Adjust the volume of the
BLUETOOTH device first. If the
volume level is still too low, adjust
the volume level on the system
using VOL +/–.
Notes
• When the system is not connected to
any BLUETOOTH device, the system will
connect to the last connected BLUETOOTH
device automatically when you press .
• If you try to connect another BLUETOOTH
device to the system, the current
connected BLUETOOTH device will be
disconnected.
To terminate the BLUETOOTH
connection
1
Press OPTIONS.
2
Press / repeatedly to select
“DISCONNECT,” then press .
Depending on the BLUETOOTH device,
the BLUETOOTH connection may be
terminated automatically when you
stop playback.
One Touch BLUETOOTH
Connection by NFC
NFC (Near Field Communication) is
a technology enabling short-range
wireless communication between
various devices, such as smartphones
and IC tags.
When you touch the system with an
NFC-compatible smartphone, the
system automatically:
—turns on in the BLUETOOTH function.
—completes the pairing and
BLUETOOTH connection.
Compatible smartphones
Smartphones with a built-in NFC
function (OS: Android™ 2.3.3 or
later, excluding Android 3.x)
Notes
• The system can only recognize and
connect to one NFC-compatible
smartphone at a time. If you try to connect
another NFC-compatible smartphone
to the system, the currently connected
NFC-compatible smartphone will be
disconnected.
• Depending on your NFC-compatible
smartphone, you may need to perform the
following steps on your NFC-compatible
smartphone in advance.
— Turn on the NFC function. For details,
refer to the operating instructions of
the NFC-compatible smartphone.
— If your NFC-compatible smartphone
has an OS version that is older than
Android 4.1.x, download and start
the “NFC Easy Connect” application.
“NFC Easy Connect” is a free application
for Android smartphones that can be
obtained from Google Play™. (The
application may not be available in
some countries/regions.)
H
u
tes,
e
led.
.
O
OTH
y
P
IN
d
a
rs on
H
v
ices.
d
, the
6.
n
m
”
24GB
MHC
-
MHC-V11.4-582-493-11(1)
LD
A
tec
h
tha
t
of
H
Au
d
BL
U
oth
e
cod
it o
p
con
v
con
thr
e
tho
s
tra
n
wir
e
un
p
me
a
opt
i
1) e
x
2) in
B
a
9
9
(8
Set
t
sta
n
The
B
enab
l
auto
m
the B
BLUE
T
1
P
r
2
P
r
“
B
3
P
r
t
h
•
•
Hint
Disabl
reduc
e
mode
1
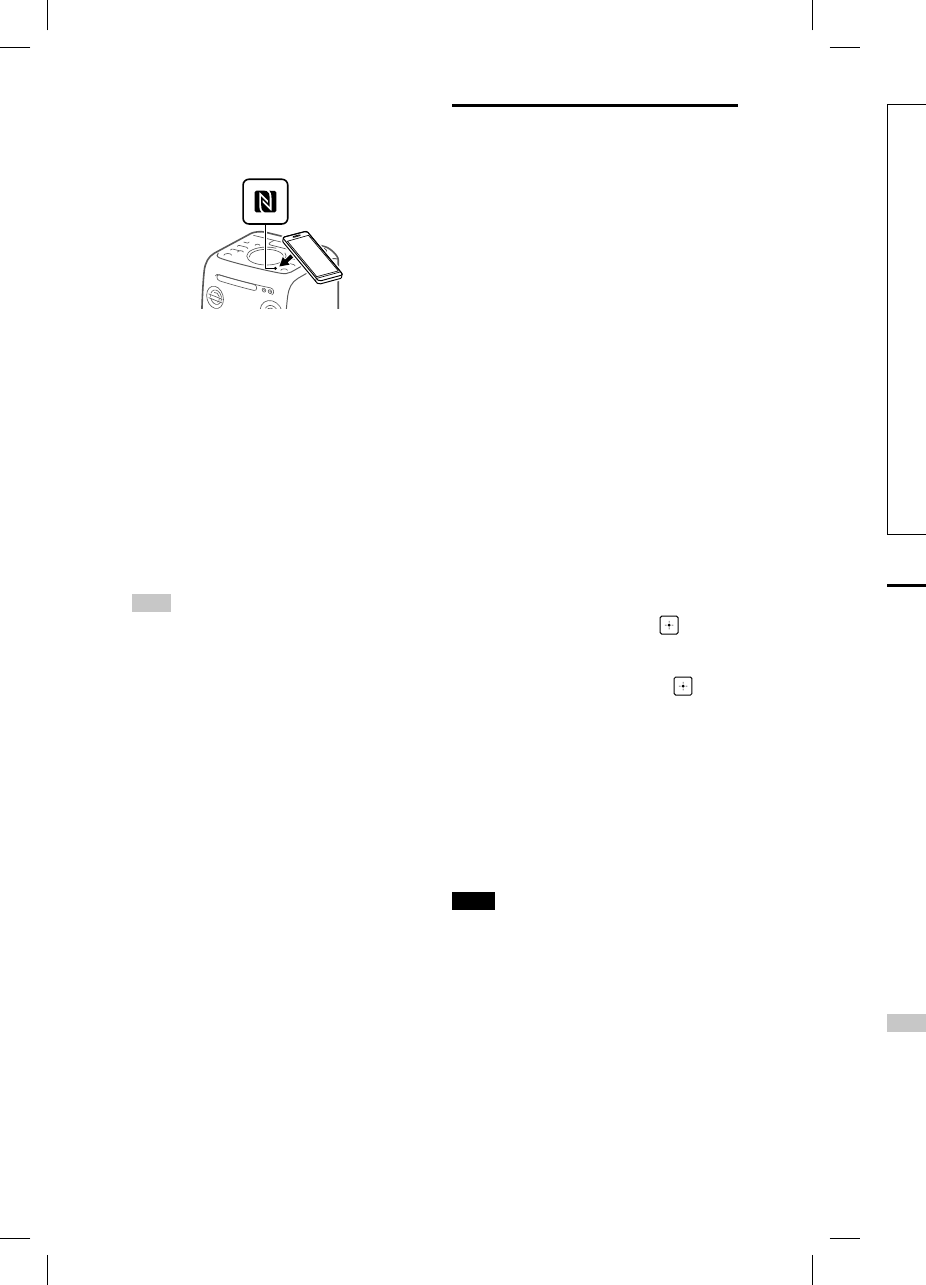
Touch the smartphone to the
N-Mark on the unit until the
smartphone vibrates.
Complete the connection by
following the instructions displayed
on the smartphone.
When the BLUETOOTH connection
is established, the BLUETOOTH
indicator on the unit stops flashing
and remains lit. “BT AUDIO” appears
on the display.
2
Start playback of an audio
source on the smartphone.
For details, refer to the operating
instructions of your BLUETOOTH
device.
Hint
If pairing and the BLUETOOTH connection
fail, perform the following.
— Remove the case from the smartphone
if using a commercially available
smartphone case.
— Touch the smartphone to the N-Mark on
the unit again.
— Relaunch the “NFC Easy Connect”
application.
To terminate the BLUETOOTH
connection
Touch the smartphone to the N-Mark
on the unit again.
Playing back with high
quality sound codec
(AAC/LDAC)
This system can receive data in the
AAC or LDAC codec format from a
BLUETOOTH device. It provides a
playback with higher sound quality.
The default setting of this system is
“ON.” To apply the changes of the
setting, you need to terminate the
BLUETOOTH connection (page23),
and then perform the BLUETOOTH
connection again.
1
Press BLUETOOTH on the
unit to select the BLUETOOTH
function.
“BT AUDIO” appears on the display.
2
Press OPTIONS.
3
Press / repeatedly to select
“BT:AAC,” then press .
4
Press / repeatedly to select
the setting, then press .
• ON: The system detects the
codec used on the source device
and automatically selects the
optimal codec from “SBC,” “AAC*”
or “LDAC*.”
• OFF: “SBC” is always applied
regardless of the codec used on
the source device.
* Available only when the codec is
supported by your BLUETOOTH device.
Note
You can enjoy higher sound quality
when the source device is compatible
with AAC/LDAC and this function is set
to “ON.” However, the sound may be
interrupted depending on the conditions
of the BLUETOOTH communication. If this
happens, set the function to “OFF.”
25GB
BLUETOOTH
MHC-V11.4-582-493-11(1)
LDAC is an audio coding
technology developed by Sony
that enables the transmission
of High-Resolution (Hi-Res)
Audio content, even over a
BLUETOOTH connection. Unlike
other BLUETOOTH compatible
coding technologies such as SBC,
it operates without any down-
conversion of the Hi-Res Audio
content1), and allows approximately
three times more data2) than
those other technologies to be
transmitted over a BLUETOOTH
wireless network with
unprecedented sound quality, by
means of efficient coding and
optimized packetization.
1) excluding DSD format contents
2) in comparison with SBC (Sub
Band Codec) when the bit rate of
990kbps (96/48 kHz) or 909 kbps
(88.2/44.1kHz) is selected
Setting the BLUETOOTH
standby mode
The BLUETOOTH standby mode
enables the system to turn on
automatically when you establish
the BLUETOOTH connection with a
BLUETOOTH device.
1
Press OPTIONS.
2
Press / repeatedly to select
“BT:STBY,” then press .
3
Press / repeatedly to select
the setting, then press .
• ON: The system turns on
automatically even when the
system is in standby mode.
• OFF: Turns off this function.
Hint
Disable the BLUETOOTH standby mode to
reduce the power consumption in standby
mode (eco mode).
Turning on or off the
BLUETOOTH signal
You can connect to the system
from a paired BLUETOOTH device
in all functions when the system’s
BLUETOOTH signal is set to on. The
BLUETOOTH signal is turned on by
default.
Use the buttons on the unit to perform
this operation.
Hold down EQ and ENTER for
about 5 seconds.
“BT ON” or “BT OFF” appears on the
display.
Notes
• You cannot perform the following
operations when you turn off the
BLUETOOTH signal:
— Pairing and/or connecting with
BLUETOOTH device
— Setting the BLUETOOTH audio codecs
— Setting the BLUETOOTH standby mode
— Using “SongPal” via BLUETOOTH
h
e
t
y.
is
e
,
H
O
TH
play.
e
lect
e
lect
e
vice
e
A
AC*”
d
on
e
vice.
t
o
ns
his
26GB
MHC
-
MHC-V11.4-582-493-11(1)
Cre
a
at
m
(DJ
Use t
h
this
o
1
P
r
s
e
•
•
2
T
u
C
O
e
f
To tu
Press
butt
o
Note
• The
whe
—t
u
—c
h
—a
c
f
u
• The
tran
s
audi
DJ E
F
• You
the
u
DJ E
F
the
r
Using “SongPal” via
BLUETOOTH
About App
You can control the system using the
free App “SongPal,” which is available
on both Google Play and the App
Store. Search for “SongPal” or scan the
two-dimensional code below, then
download the App to find out more
about the convenient features.
Notes
• If the “SongPal” application does not
work properly, terminate the BLUETOOTH
connection (page23), then perform
the BLUETOOTH connection again so that
the BLUETOOTH connection functions
normally.
• What you can control with “SongPal” varies
depending on the connected device.
• The specification and design of the
application may change without notice.
Sound Adjustment
Adjusting the sound
To Do this
Adjust the
volume
Press VOL +/–.
Generate
a more
dynamic
sound
Press MEGA BASS
repeatedly until
“BASS ON” appears on
the display.
Set the sound
effect
Press EQ repeatedly
until desired sound
effect is displayed.

27GB
Sound Adjustment
MHC-V11.4-582-493-11(1)
Creating a party
atmosphere
(DJ EFFECT)
Use the buttons on the unit to perform
this operation.
1
Press the following button to
select the effect type.
• FLANGER: Creates a deep
flanging effect that is similar to
the roar of a jet plane.
• ISOLATOR: Isolates a specific
frequency band by adjusting the
other frequency bands. This is
useful when you want to focus
on the vocals.
2
Turn the VOLUME/DJ
CONTROL knob to adjust the
effect level.
To turn off the effect
Press DJ OFF or the selected effect
button again.
Notes
• The DJ EFFECT is automatically turned off
when you:
— turn off the system
— change the function
— activate or deactivate the Party Chain
function
• The DJ EFFECT does not affect the
transferred audio files. Transferred
audio files will be generated without the
DJ EFFECT even if you have activated it.
• You cannot use VOLUME/DJ CONTROL on
the unit to adjust the volume when the
DJ EFFECT is activated. Press VOL +/– on
the remote control to adjust the volume.
r
s on
ly
d
.
28GB
MHC
-
MHC-V11.4-582-493-11(1)
Other Operations
Using the Party Chain function
You can connect multiple audio systems in a chain to create a more interesting
party environment and to produce higher sound output.
An activated system in the chain will be the “Party Host” and share the music.
Other systems will become “Party Guests” and play the same music as that being
played by the “Party Host.”
Setting up the Party Chain
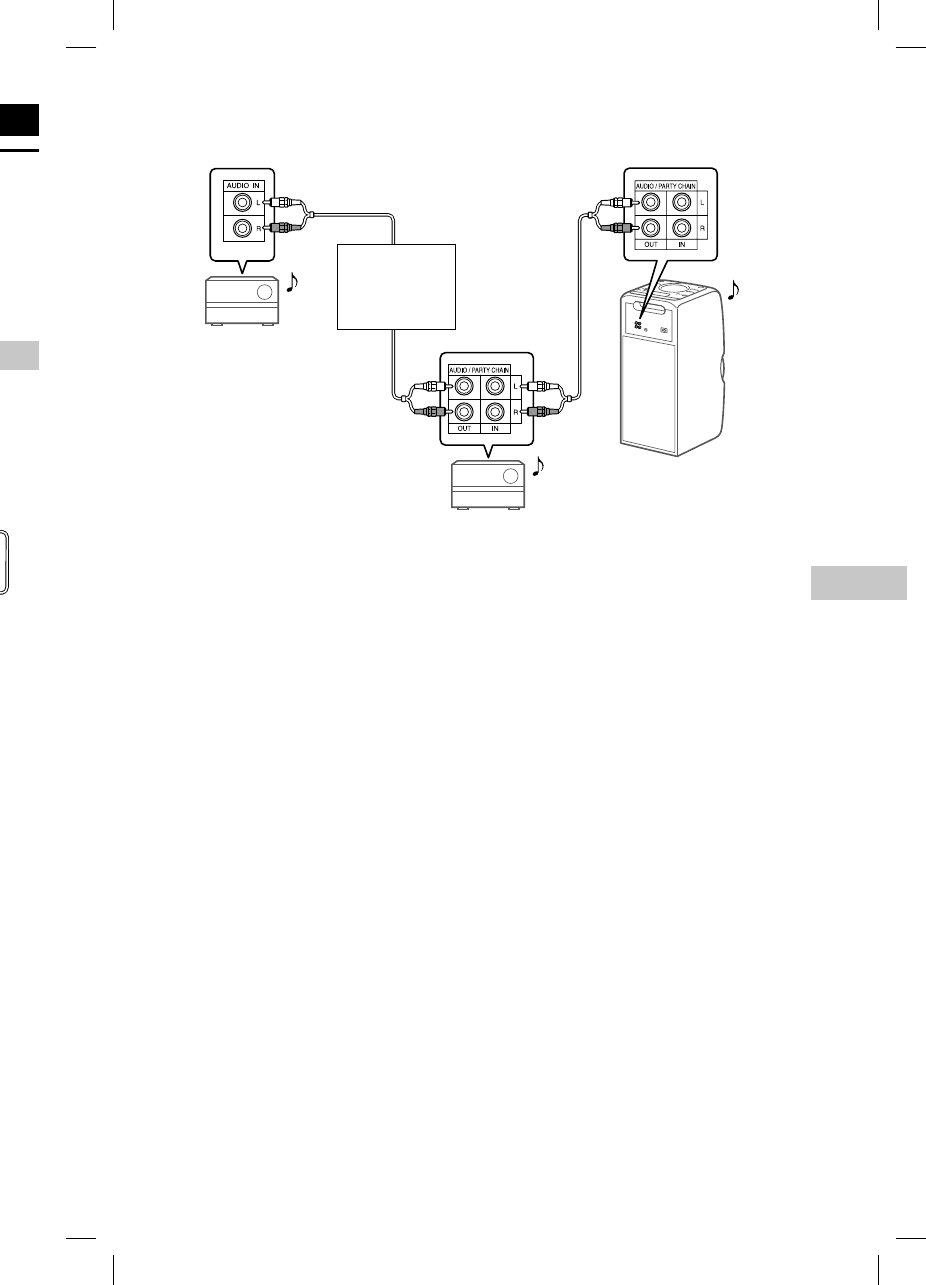
Set up a Party Chain by connecting all the systems using audio cords (not
supplied).
Before connecting cords, be sure to disconnect the AC power cord.
If all the systems are equipped with the Party Chain function
First system
Second system
Last system
Continue the
connection
until the last
system.
Example: When connecting using this system as the first system
• The last system must be connected to the first system.
• Any system can become a Party Host.
• You can change the Party Host to another system in the chain. For details, see
“To select a new Party Host” (page30).
• Make sure the function other than the Audio In function is selected. When the
Audio In function is selected, the Party Chain function cannot be activated.
If
La
s
Exam
* Con
Be
s
•Th
e
•Yo
u
sa
m
29GB
Other Operations
MHC-V11.4-582-493-11(1)
n
g
e
ing
e
e
he
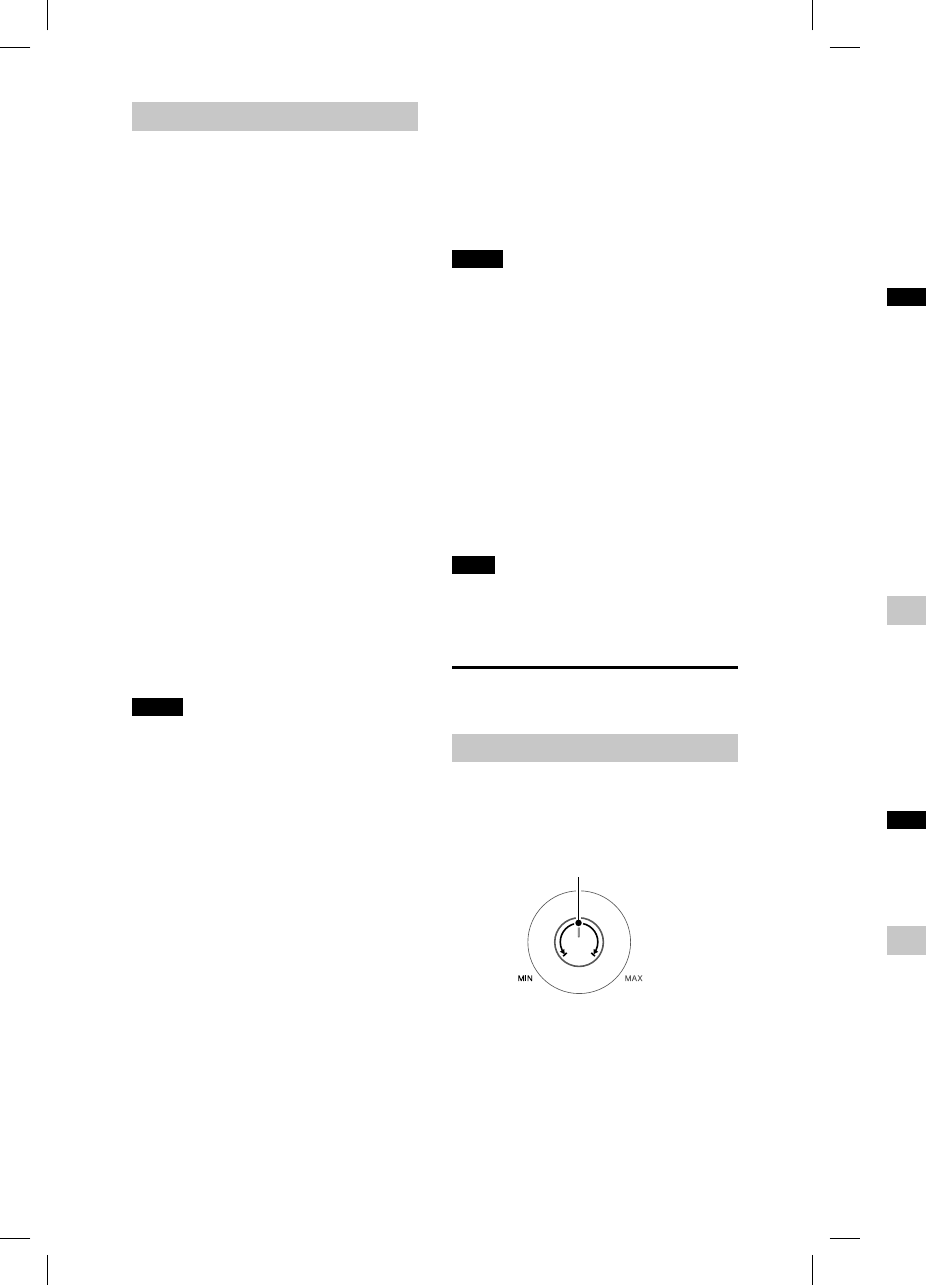
If one of the systems is not equipped with the Party Chain function
First system
Second system
Last system*
Continue the
connection
until the last
system.
Example: When connecting using this system as the first system
* Connect the system which is not equipped with the Party Chain function at the last system.
Be sure to select the Audio In function on this last system.
• The last system is not connected to the first system.
• You must select the first system as Party Host so that all systems are playing the
same music when Party Chain function is activated.
30GB
MHC
-
MHC-V11.4-582-493-11(1)
Enjoying the Party Chain
1
Plug in the AC power cord
and turn on all the systems.
2
Adjust the volume on each
system.
3
Activate the Party Chain
function on the system to be
used as the Party Host.
Example: When using this system
as the Party Host
Press FUNCTION repeatedly to
select the function you want.
When you connect using
(page28), do not select the
Audio In function. If you select
this function, the Party Chain
function cannot be activated.
Start playback, then hold down
MEGA BASS on the unit.
“PARTY CHAIN MASTER” appears
on the display. The Party Host
starts the Party Chain, and other
systems become Party Guests
automatically. All systems play
the same music as that being
played by the Party Host.
Notes
• Depending on the total unit of systems
you have connected, Party Guests may
take some time to start playing the music.
• Changing the volume level and sound
effect on the Party Host will not affect the
output on the Party Guests.
• The Party Guests continue playing the
music source from the Party Host even
if you change the function on any of the
Party Guests. However, you can adjust the
volume and change the sound effect on
any of the Party Guests.
• When you use the microphone on Party
Host, the sound will not be output from
Party Guests.
• When one of the systems in the chain
is performing USB transfer, wait for the
system to complete or stop the transfer
before you activate the Party Chain
function.
• For detailed operation on other systems,
refer to the operating instructions of the
systems.
To select a new Party Host
Repeat step 3 of “Enjoying the Party
Chain” on the system to be used as a
new Party Host. The current Party Host
becomes Party Guest automatically. All
systems play the same music as that
being played by the new Party Host.
Notes
• You can select another system as the
new Party Host only after the Party Chain
function of all the systems in the chain
has been activated.
• If the selected system does not become a
new Party Host after a few seconds, repeat
step 3 of “Enjoying the Party Chain.”
To deactivate the Party Chain
When using this system as the Party
Host, hold down MEGA BASS on the
unit.
When using another system as the
Party Host, press PARTY CHAIN on the
Party Host.
Note
If the Party Chain function is not deactivated
after a few seconds, perform the above
operation on the Party Host again.
Singing along: Karaoke
Preparing for Karaoke
1
Turn MIC LEVEL on the
unit to MIN to reduce the
microphone volume level.
Microphone volume range
2
Connect an optional
microphone to MIC 1 or MIC 2
jack on the unit.
Connect another optional
microphone if you want to sing in
duet.
3
S
t
a
n
v
o
r
e
e
f
4
S
t
m
Note
• Kara
mic
r
USB
• If h
o
—
m
s
y
—c
h
m
—l
o
—p
r
o
r
t
h
• Micr
to t
h
Usi
n
You
c
in st
e
Pres
s
to s
e
To ca
VOC
A
“V,FA
Note
To us
e
functi
o
conn
e
Cha
Pres
s
you
r
mod
31GB
Other Operations
MHC-V11.4-582-493-11(1)
r
ty
a
s a
Host
ly. All
h
at
o
st.
e
hain
in
me a
r
epeat
rty
h
e
e
n
the
i
vated
e
k
e
.
I
C 2
g
in
3
Start playing the music
and adjust the microphone
volume. Press MIC ECHO
repeatedly to adjust the echo
effect.
4
Start singing along with the
music.
Notes
• Karaoke mode is turned on when the
microphone is connected during CD or
USB function.
• If howling occurs:
— move the microphone away from the
system.
— change the direction of the
microphone.
— lower the microphone volume level.
— press VOL – to reduce the volume level
or press MIC ECHO repeatedly to adjust
the echo level.
• Microphone sound will not be transferred
to the USB device during USB transfer.
Using Vocal Fader
You can reduce the sound of the vocal
in stereo source.
Press VOCAL FADER repeatedly
to select “V,FADER ON.”
To cancel Vocal Fader effect, press
VOCAL FADER repeatedly to select
“V,FADER OFF.”
Note
To use the Vocal Fader in the CD or USB
function, turn on the Karaoke mode by
connecting the microphone.
Changing the key (Key Control)
Press KEY CONTROL / to suit
your vocal range in Karaoke
mode.
Enjoying music with the
Speaker Lights turned on
Press SPEAKER LIGHT repeatedly
until “LED ON” appears on the
display.
To turn off the Speaker Lights
Press SPEAKER LIGHT repeatedly until
“LED OFF” appears on the display.
Note
If the illumination brightness is glaring,
switch on the room lights or turn off the
illumination.
Using an optional
equipment
1
Press VOL – repeatedly until
“VOL MIN” appears on the
display.
2
Connect an optional
equipment to the AUDIO IN
L/R jacks on the unit using an
audio cord (not supplied).
3
Press FUNCTION repeatedly
until “AUDIO IN” appears on
the display.
4
Start playback on the
connected equipment.
5
Adjust the volume.
Adjust the volume of the
connected equipment first. If the
volume level is still too low, adjust
the volume level on the system
using VOL +/–.
Note
The system may enter standby mode
automatically if the volume level of the
connected equipment is too low. In this
case, increase the volume level of the
equipment. To turn off the automatic
standby function, see “Setting the automatic
standby function” (page32).
32GB
MHC-V11.4-582-493-11(1)
Changing information on
the display
You can view information, such as
track number, file/folder name, album
name and artist name.
Press DISPLAY repeatedly when
the system is on.
Notes on the display information
• Characters that cannot be displayed
appear as “_”.
• The following are not displayed;
— total playing time for an MP3 disc and a
USB device.
— remaining playing time for an MP3/
WMA file.
• The following are not displayed correctly;
— elapsed playing time of an MP3/WMA
file encoded using VBR (variable bit
rate).
— folder and file names that do not follow
either the ISO9660 Level 1/Level 2 in
the expansion format.
Using the Sleep Timer
The system turns off automatically
after the preset time.
Press SLEEP repeatedly to select
the desired time.
To cancel Sleep Timer, press SLEEP
repeatedly to select “OFF.”
Hints
• To check the remaining time before the
system turns off, press SLEEP.
• If you select “AUTO,” the system
automatically turns off after the current
disc or USB device stops, or within
100minutes.
Deactivating the buttons
on the unit (Child Lock)
You can deactivate the buttons
on the unit (except ) to prevent
misoperation, such as child mischief.
Hold down on the unit for
more than 5 seconds.
“LOCK ON” appears on the display.
You can only operate the system using
the buttons on the remote control.
To turn off the Child Lock function,
hold down on the unit for more
than 5seconds until “LOCK OFF”
appears on the display.
Note
Child Lock function cannot be activated
when you open the disc tray.
Setting the automatic
standby function
The system enters standby mode
automatically in about 15 minutes
when there is no operation or audio
signal output.
By default, the automatic standby
function is turned on.
To turn off the function, hold
down while the system is
on, until “AUTO STANDBY OFF”
appears on the display.
To turn on the function, repeat the
procedure until “AUTO STANDBY ON”
appears on the display.
Notes
• “AUTO STBY” flashes on the display about
2 minutes before entering standby mode.
• The automatic standby function does not
work in the following cases:
— during tuner function.
— when the Sleep Timer is activated.
— when microphone is connected.

33GB
Additional Information
MHC-V11.4-582-493-11(1)
Additional Information
Information about
compatible devices
About supported USB devices
• This system supports USB Mass
Storage Class only.
• This system supports FAT formatted
USB devices only (except exFAT).
• Some USB devices may not work
with this system.
About BLUETOOTH communication
for iPhone and iPod touch
Made for
• iPhone 6 Plus
• iPhone 6
• iPhone 5s
• iPhone 5c
• iPhone 5
• iPhone 4s
• iPhone 4
• iPhone 3GS
• iPod touch (6th generation)
• iPod touch (5th generation)
• iPod touch (4th generation)
Troubleshooting
Should you encounter a problem with
your system, find your problem in the
troubleshooting checklist below and
take the corrective action.
If the problem persists, consult your
nearest Sony dealer.
Note that if the service personnel
changes some parts during repair,
these parts may be retained.
If “PROTECT” appears on the
display
Immediately unplug the AC power
cord, and check the following items
after “PROTECT” disappears.
• Is anything blocking the
ventilation holes of the system?
• Is the USB port short-circuited?
After you have checked these
above items and found no
problems, reconnect the AC power
cord, and turn on the system. If the
issue persists, contact your nearest
Sony dealer.
General
The power does not turn on.
• Check that the AC power cord is
connected securely.
The system cannot be turned off
even though is pressed.
• You may have set the display
mode to the demonstration
mode unintentionally. Press
SPEAKER LIGHT repeatedly to select
Power Saving Mode (page14).
The system has entered standby
mode.
• This is not a malfunction. The system
enters standby mode automatically
in about 15minutes when there is
no operation or audio signal output
(page32).

34GB
MHC
-
MHC-V11.4-582-493-11(1)
USB
d
The
c
char
g
•Ma
k
co
n
The
U
prop
e
• If y
o
US
B
ma
y
co
m
—T
h
—F
i
d
—P
—T
h
—T
h
—
A
Ther
e
•Th
e
cor
r
rec
o
on
t
ap
p
Ther
e
soun
•Yo
u
de
v
co
m
•Tur
n
the
sys
t
•Th
e
or t
ha
v
pro
tra
n
•Th
e
au
d
file
de
v
There is no sound.
• Adjust the volume.
• Check the connection of the optional
equipment, if any (page12).
• Turn on the connected equipment.
• Disconnect the AC power cord, then
reconnect the AC power cord and
turn on the system.
There is no microphone sound.
• Adjust the microphone volume level.
• Make sure the microphone is
connected to the MIC 1 or MIC 2 jack
on the unit correctly.
• Make sure the microphone is turned
on.
There is severe hum or noise.
• Move the system away from sources
of noise.
• Connect the system to a different
wall outlet.
• Install a noise filter (commercially
available) to the AC power cord.
• Turn off surrounding electrical
equipment.
• The noise generated by the cooling
fans of the system may be heard
when the system is in standby mode
or during playback. This is not a
malfunction.
The remote control does not function.
• Remove the obstacles between the
remote control and the unit.
• Move the remote control closer to
the system.
• Point the remote control at the
system’s sensor.
• Replace the batteries (R03/size
AAA).
• Move the system away from the
fluorescent light.
There is acoustic feedback.
• Reduce the volume.
• Move the microphone away from
the system or change the direction
of the microphone.
Except , no buttons on the unit
work, and “LOCK ON” appears on the
display.
• Set the Child Lock function to off
(page32).
“SEARCH” or “READING” appears on
the display.
• Operate the system after the
message disappears.
Disc player
The disc tray does not open and
“LOCKED” appears on the display.
• Consult your nearest Sony dealer or
local authorized Sony service facility.
Playback does not start.
• Wipe the disc clean (page38).
• Reload the disc.
• Load the disc that this system can
play back (page38).
• Remove the disc and wipe away the
moisture on the disc, then leave the
system turned on for a few hours
until the moisture evaporates.
The sound skips.
• Wipe the disc clean (page38).
• Reload the disc.
• Move the system to a place with no
vibration.
Playback does not start from the first
track.
• Set the play mode to normal play
mode (page15).
• Resume Play has been selected.
Press twice. Then, press to
start playback.
Starting playback takes more time
than usual.
• The following discs can increase the
time it takes to start playback;
—a disc recorded with a complicated
tree structure.
—a disc recorded in multisession
mode.
—a disc that has not been finalized
(a disc to which data can be
added).
—a disc that has many folders.
35GB
Additional Information
MHC-V11.4-582-493-11(1)
USB device
The connected USB device cannot be
charged.
• Make sure the USB device is
connected securely.
The USB device does not work
properly.
• If you connect an unsupported
USB device, the following problems
may occur. See “Information about
compatible devices” (page33).
—The USB device is not recognized.
—File or folder names are not
displayed on this system.
—Playback is not possible.
—The sound skips.
—There is noise.
—A distorted sound is output.
There is no sound.
• The USB device is not connected
correctly. Turn off the system, and
reconnect the USB device, then turn
on the system and check if “USB”
appears on the display.
There is noise, skipping, or distorted
sound.
• You are using an unsupported USB
device. See “Information about
compatible devices” (page33).
• Turn off the system and reconnect
the USB device, then turn on the
system.
• The music data itself contains noise,
or the sound is distorted. Noise may
have entered during the transfer
process. Delete the file, and try
transfer again.
• The bit rate used in encoding an
audio file was low. Send an audio
file with higher bit rate to the USB
device.
“SEARCH” is displayed for an
extended time, or it takes a long time
before playback starts.
• The reading process can take a long
time in the following cases.
—There are many folders or files on
the USB device.
—The file structure is extremely
complex.
—The memory capacity is excessive.
—The internal memory is
fragmented.
“OVER CURRENT” appears on the
display
• A problem has been detected with
the level of electrical current from
the (USB) port. Turn off the system
and remove the USB device from the
(USB) port. Make sure there is no
problem with the USB device. If this
display pattern persists, contact your
nearest Sony dealer.
Erroneous display
• Characters that cannot be displayed
appear as “_”.
The USB device is not recognized.
• Turn off the system and reconnect
the USB device, then turn on the
system.
• You are using an unsupported USB
device. See “Information about
compatible devices” (page33).
• The USB device is not working
properly. Refer to the operating
instructions of the USB device on
how to deal with this problem.
s
on
y
.
e
r or
c
ility.
a
n
y
the
e
the
r
s
h
no
first
a
y
.
o
m
e
e
the
c
ated
n
z
ed
★

36GB
MHC
-
MHC-V11.4-582-493-11(1)
The
B
the s
y
the d
•Set
(pa
g
Con
n
•Th
e
att
e
su
p
ca
n
sys
t
•En
a
the
• Est
a
BL
U
•Th
e
ha
s
pai
r
•Era
s
inf
o
de
v
fac
t
an
d
ag
a
The
s
conn
e
•Th
e
de
v
• If t
h
sys
t
re
m
• If t
h
ele
c
a
w
de
v
mo
v
The s
cann
o
• Inc
r
BL
U
the
Ther
e
disto
• If t
h
sys
t
re
m
• If t
h
ele
c
a
w
de
v
mo
v
•Tur
n
co
n
Transferring results in an error.
• You are using an unsupported USB
device. See “Information about
compatible devices” (page33).
• The USB device is not formatted
correctly. Refer to the operating
instructions of the USB device on
how to format.
• Turn off the system and remove the
USB device. If the USB device has a
power switch, turn the USB device
off and on again after removing it
from the system. Then, perform the
transfer again.
• If the transfer and erase operations
are repeated multiple times, the
file structure within the USB device
becomes fragmented. Refer to the
operating instructions of the USB
device on how to deal with this
problem.
• The USB device was disconnected
or the power was turned off during
transfer. Delete the partially-
transferred file, and perform the
transfer again. If this does not fix
the problem, the USB device may
be broken. Refer to the operating
instructions of the USB device on
how to deal with this problem.
Audio files or folders on the USB
device cannot be erased.
• Check if the USB device is write-
protected.
• The USB device was disconnected
or the power was turned off during
the erase operation. Delete the
partially-erased file. If this does
not fix the problem, the USB device
may be broken. Refer to operating
instructions of the USB device on
how to deal with this problem.
Playback does not start.
• Turn off the system and reconnect
the USB device, then turn on the
system.
• You are using an unsupported USB
device. See “Information about
compatible devices” (page33).
Playback does not start from the first
track.
• Set the play mode to normal play
mode (page20).
• Resume Play has been selected.
Press twice. Then, press to
start playback.
Files cannot be played back.
• USB devices formatted with file
systems other than FAT16 or FAT32
are unsupported.*
• If you use a partitioned USB device,
only files on the first partition can be
played back.
• Files that are encrypted or protected
by passwords cannot be played
back.
• Files with DRM (Digital Rights
Management) copyright protection
cannot be played back by this
system.
* This system supports FAT16 and FAT32,
but some USB storage devices may not
support all of these FAT. For details,
refer to the operating instructions of
each USB storage device or contact the
manufacturer.
Tuner*
There is severe hum or noise, or
stations cannot be received.
• Connect the antenna properly.
• Change antenna location and its
orientation to obtain good reception.
• Keep the antenna away from the
AC power cord to avoid picking up
noise.
• Turn off nearby electrical equipment.
* Radio may not be received depending on
the radio wave conditions or the housing
environment in your area.
BLUETOOTH device
Pairing cannot be performed.
• Move the BLUETOOTH device closer
to the system.
• Pairing may not be possible if other
BLUETOOTH devices are present
around the system. In this case, turn
off the other BLUETOOTH devices.
• Make sure to enter the correct
passkey when selecting the
system’s name (this system) on the
BLUETOOTH device.

37GB
Additional Information
MHC-V11.4-582-493-11(1)
The BLUETOOTH device cannot detect
the system, or “BT OFF” appears on
the display.
• Set the BLUETOOTH signal to “BT ON”
(page25).
Connection is not possible.
• The BLUETOOTH device you
attempted to connect does not
support the A2DP profile, and
cannot be connected with the
system.
• Enable the BLUETOOTH function of
the BLUETOOTH device.
• Establish a connection from the
BLUETOOTH device.
• The pairing registration information
has been erased. Perform the
pairing operation again.
• Erase the pairing registration
information of the BLUETOOTH
device by resetting the system to
factory default settings (page37)
and perform the pairing operation
again (page22).
The sound skips or fluctuates, or the
connection is lost.
• The system and the BLUETOOTH
device are too far apart.
• If there are obstacles between the
system and your BLUETOOTH device,
remove or avoid the obstacles.
• If there is equipment that generates
electromagnetic radiation, such as
a wireless LAN, other BLUETOOTH
device, or a microwave oven nearby,
move them away.
The sound of your BLUETOOTH device
cannot be heard on this system.
• Increase the volume on your
BLUETOOTH device first, then adjust
the volume using VOL +/–.
There is severe hum, noise, or
distorted sound.
• If there are obstacles between the
system and your BLUETOOTH device,
remove or avoid the obstacles.
• If there is equipment that generates
electromagnetic radiation, such as
a wireless LAN, other BLUETOOTH
device, or a microwave oven nearby,
move them away.
• Turn down the volume of the
connected BLUETOOTH device.
Party Chain
Party Chain function cannot be
activated.
• Check the connections (page28).
• Make sure the audio cords are
connected correctly.
“PARTY CHAIN” is flashing on the
display.
• Select the function other than the
Audio In function (page30). You
cannot select the Audio In function
if you make a connection
(page28) while using the Party
Chain function.
• Hold down MEGA BASS on the unit.
• Try turning off the system, then
turning it back on again.
Party Chain function does not work
properly.
• Turn off the system. Then, turn it
back on again to activate the Party
Chain function.
Resetting the system
If the system still does not operate
properly, reset the system to factory
default settings.
1
Disconnect and reconnect the
AC power cord, and then turn
on the system.
2
Hold down and EQ on the
unit until “RESET” appears on
the display.
All user-configured settings, such
as preset radio stations and the
pairing registration information, are
reset to factory default settings.
first
a
y
.
o
T
32
v
ice,
a
n be
e
cted
t
ion
3
2,
n
ot
f
t
he
s
p
tion.
e
up
m
ent.
n
g on
u
sing
o
ser
t
her
t
turn
e
s.
the

38GB
MHC
-
MHC-V11.4-582-493-11(1)
On h
a
This s
y
Make
syste
m
On pl
• Do
n
posi
t
hot,
ade
q
vibr
a
• Be c
surf
a
(for
e
or d
i
• If th
e
cold
very
on t
h
cau
s
situ
a
syst
e
the
m
On h
e
• Hea
t
ope
r
alar
m
• Do
n
use
d
bec
a
hot.
• Do
n
On t
h
The b
u
magn
e
nearb
y
distor
t
wait 1
5
If ther
e
syste
m
Clea
n
Clean
moist
e
Do no
scouri
benzi
n
Messages
One of the following messages may
appear or flash on the display during
operation.
DISC ERR
You have loaded a disc that cannot be
played.
ERROR
You cannot transfer music to the USB
device because the USB device is
write-protected or the memory of the
USB device is full.
FULL
You tried to program more than 64
steps.
NO FILE
There are no playable files on the
CD-R/CD-RW discs or on the USB
device.
NO STEP
All of the programmed steps have
been erased.
NO USB
No USB device is connected or an
unsupported USB device is connected.
PARTY CHAIN GUEST
The system has become a Party Guest
as the Party Chain function has been
activated by a Party Host.
PARTY CHAIN MASTER
The system activated the Party Chain
function and has become a Party Host.
PLS STOP
You tried to perform an operation
that can be performed only when the
playback is stopped.
Precautions
Discs that this system CAN play
• Audio CD
• CD-R/CD-RW (audio data/MP3 files)
Discs that this system CANNOT play
• CD-ROM
• CD-R/CD-RW other than those recorded in
music CD format, conforming to ISO9660
Level 1/Level 2
• CD-R/CD-RW recorded in multisession
that have not ended by “closing the
session”
• CD-R/CD-RW of poor recording quality,
CD-R/CD-RW that have scratches or are
dirty, or CD-R/CD-RW recorded with an
incompatible recording device
• CD-R/CD-RW which is finalized incorrectly
• Discs containing files other than MPEG1
Audio Layer-3 (MP3) files
• Discs of non-standard shape (for example,
heart, square, star)
• Discs that have adhesive tape, paper, or
sticker attached to them
• Rental or used discs with attached seals
where the glue extends beyond the seal
• Discs that have labels printed using ink
that feels tacky when touched
Notes on discs
• Before playing, wipe the disc with a
cleaning cloth from the center outward to
the edge.
• Do not clean discs with solvents, such as
benzine, thinner, or commercially available
cleaners or anti-static spray intended for
vinyl LPs.
• Do not expose discs to direct sunlight
or heat sources such as hot air ducts,
nor leave them in a car parked in direct
sunlight.
On safety
• Completely disconnect the AC power cord
(mains lead) from the wall outlet (mains) if
it is not going to be used for an extended
period of time. When unplugging the unit,
always grip the plug. Never pull the cord
itself.
• Should any solid object or liquid get into
the system, unplug the system, and have
it checked by qualified personnel before
operating it again.
• AC power cord must be changed only at
the qualified service shop.

39GB
Additional Information
MHC-V11.4-582-493-11(1)
On handling the system
This system is not drip-proof or waterproof.
Make sure not to splash water on the
system or clean it with water.
On placement
• Do not place the system in an inclined
position or in locations that are extremely
hot, cold, dusty, dirty, or humid or lacking
adequate ventilation, or subject to
vibration, direct sunlight or a bright light.
• Be careful when placing the system on
surfaces that have been specially treated
(for example, wax, oil, polish) as staining
or discoloration of the surface may result.
• If the system is brought directly from a
cold to a warm location or is placed in a
very damp room, moisture may condense
on the lens inside the system, and
cause the system to malfunction. In this
situation, remove the disc, and leave the
system turned on for about an hour until
the moisture evaporates.
On heat buildup
• Heat buildup on the system during
operation is normal and is not a cause for
alarm.
• Do not touch the cabinet if it has been
used continuously at a high volume
because the cabinet may have become
hot.
• Do not obstruct the ventilation holes.
On the speaker system
The built-in speaker system is not
magnetically shielded, and the picture on
nearby TV sets may become magnetically
distorted. In this situation, turn off the TV,
wait 15 to 30 minutes, and turn it back on.
If there is no improvement, move the
system far away from the TV.
Cleaning the cabinet
Clean this system with a soft cloth slightly
moistened with a mild detergent solution.
Do not use any type of abrasive pad,
scouring powder, or solvent, such as thinner,
benzine, or alcohol.
On BLUETOOTH Communication
• BLUETOOTH devices should be used
within approximately 10 meters (33 feet)
(unobstructed distance) of each other.
The effective communication range may
become shorter under the following
conditions.
— When a person, metal object, wall
or other obstruction is between the
devices with a BLUETOOTH connection
— Locations where a wireless LAN is
installed
— Around microwave ovens that are in
use
— Locations where other electromagnetic
waves are generated
• BLUETOOTH devices and wireless LAN
(IEEE 802.11b/g) equipment use the
same frequency band (2.4 GHz). When
using your BLUETOOTH device near
a device with wireless LAN capability,
electromagnetic interference may occur.
This could result in lower data transfer
rates, noise, or inability to connect. If this
happens, try the following remedies:
— Use this system at least 10 meters
(33 feet) away from the wireless LAN
equipment.
— Turn off the power to the wireless
LAN equipment when using your
BLUETOOTH device within 10 meters
(33 feet).
— Use this system and BLUETOOTH device
as closer to each other as possible.
• The radio waves broadcast by this system
may interfere with the operation of some
medical devices. Since this interference
may result in malfunction, always turn off
the power on this system and BLUETOOTH
device in the following locations:
— In hospitals, on trains, in airplanes,
at gas stations, and any place where
flammable gases may be present
— Near automatic doors or fire alarms
• This system supports security
functions that comply with BLUETOOTH
specifications to ensure secure
connections during communication using
BLUETOOTH technology. However, this
security may be insufficient depending
on the setting contents and other factors,
so always be careful when performing
communication using BLUETOOTH
technology.
• Sony cannot be held liable in any way
for damages or other loss resulting from
information leaks during communication
using BLUETOOTH technology.
• BLUETOOTH communication is not
necessarily guaranteed with all
BLUETOOTH devices that have the same
profile as this system.
a
y
d
ed in
9
660
o
n
ty,
a
re
a
n
rectly
E
G1
mple,
r
, or
e
als
s
eal
nk
a
rd to
h as
a
ilable
d
for
h
t
,
e
ct
r
cord
a
ins) if
n
ded
e
unit,
c
ord
into
h
ave
f
ore
y
at

40GB
MHC
-
MHC-V11.4-582-493-11(1)
Disc
Syste
m
C
s
Laser
E
L
*
USB
(US
B
T
Sup
p
disc
s
Supp
o
M
W
Samp
M
3
W
*
Tun
e
FM st
e
F
Ante
n
F
FM tu
T
N
m
(
1
O
(
• BLUETOOTH devices connected with this
system must comply with the BLUETOOTH
specification prescribed by the Bluetooth
SIG, Inc., and must be certified to comply.
However, even when a device complies
with the BLUETOOTH specification, there
may be cases where the characteristics or
specifications of the BLUETOOTH device
make it impossible to connect, or may
result in different control methods, display
or operation.
• Noise may occur or the audio may
cut off depending on the BLUETOOTH
device connected with this system,
the communications environment, or
surrounding conditions.
Specifications
AUDIO POWER SPECIFICATIONS
POWER OUTPUT AND TOTAL HARMONIC
DISTORTION:
(The United States model only)
Left/Right Channel:
With 3ohms loads, both channels
driven, from 120 10,000Hz; rated
30watts per channel minimum
RMS power, with no more than
0.7% total harmonic distortion from
250milliwatts to rated output.
Amplifier section
The following are measured at
AC 120 V – 240 V, 50/60 Hz
Power Output (rated):
Left/Right Channel: 400 W + 400 W
(at 4 ohms, 1 kHz, 1% THD)
RMS output power (reference):
Left/Right Channel: 600 W + 600 W
(per channel at 4 ohms, 1 kHz)
Speaker section
Speaker system:
Tweeter + Woofer
Tweeter L/R:
50 mm (xxin), cone type
Woofer:
200 mm (xxin), cone type
Inputs
AUDIO/PARTY CHAIN IN L/R:
Voltage 2 V, impedance 47kilohms
MIC 1, MIC 2:
Sensitivity 1 mV, impedance
10kilohms
Outputs
AUDIO/PARTY CHAIN OUT L/R:
Voltage 2 V, impedance 1kilohms
41GB
Additional Information
MHC-V11.4-582-493-11(1)
Disc player section
System:
Compact disc and digital audio
system
Laser Diode Properties
Emission Duration: Continuous
Laser Output*: Less than 44.6μW
* This output is the value
measurement at a distance of
200mm from the objective lens
surface on the Optical Pick-up Block
with 7mm aperture.
USB section
(USB) port:
Type A, maximum current 1A
Supported audio formats (MP3
discs and USB devices only)
Supported bit rate:
MP3 (MPEG1 Audio Layer-3): 32kbps
320kbps, VBR
WMA*: 32kbps 192kbps, VBR
Sampling frequencies:
MP3 (MPEG1 Audio Layer-3):
32/44.1/48 kHz
WMA*: 44.1 kHz
* USB devices only
Tuner section
FM stereo
FM superheterodyne tuner
Antenna:
FM lead antenna
FM tuner section:
Tuning range:
North American and Brazilian
models: 87.5MHz – 108.0MHz
(100kHz step)
Other models: 87.5MHz – 108.0MHz
(50kHz step)
BLUETOOTH section
Communication system:
BLUETOOTH Standard version 3.0
Output:
BLUETOOTH Standard Power Class 2
Maximum communication range:
Line of sight approx. 10 m (33 feet)1)
Frequency band:
2.4 GHz band (2.4000 GHz –
2.4835GHz)
Modulation method:
FHSS (Freq Hopping Spread
Spectrum)
Compatible BLUETOOTH profiles2):
A2DP (Advanced Audio Distribution
Profile)
AVRCP (Audio Video Remote Control
Profile)
SPP (Serial Port Profile)
Supported codecs:
SBC (Sub Band Codec)
AAC (Advanced Audio Coding)
LDAC
1) The actual range will vary depending
on factors such as obstacles between
devices, magnetic fields around a
microwave oven, static electricity,
reception sensitivity, antenna’s
performance, operating system, software
application, etc.
2) BLUETOOTH standard profiles indicate the
purpose of BLUETOOTH communication
between devices.
N
S
O
NIC
n
els
a
ted
m
f
rom
0
0 W
0
0 W
h
ms
m
s

42GB
MHC
-
MHC-V11.4-582-493-11(1)
General
Power requirements:
North American model: AC 120V,
60 Hz
European, Russian, Indian, Thai,
Australian, and Argentine models:
AC220V – 240V, 50/60Hz
Brazilian model: AC120V – 240V,
60Hz
Other models: AC 120V 240V,
50/60Hz
Power consumption:
90W
Standby power consumption (at the
Power Saving mode):
When BLUETOOTH standby mode is
set to off: 0.5W (eco mode)
When BLUETOOTH standby mode is
set to on: 2.8W (all wireless network
ports on)
Dimensions (W/H/D) (Approx.):
290mm × 600mm × 265mm (xxin
× xxin × xxin)
Mass (Approx.):
9.0kg (xxlb xxoz)
Quantity of the system:
1 piece
Supplied accessories:
Remote control (1)
R03 (size AAA) batteries (2)
FM lead antenna (1)
AC power cord (1)
AC plug adaptor* (1) (supplied only
for certain areas)
* This plug adaptor is not for the use
in Chile, Paraguay and Uruguay. Use
this plug adaptor in the countries
where it is necessary.
Design and specifications are subject to
change without notice.
License and Trademark
Notice
• MPEG Layer-3 audio coding
technology and patents licensed
from Fraunhofer IIS and Thomson.
• Windows Media is either a registered
trademark or trademark of Microsoft
Corporation in the United States
and/or other countries.
• This product is protected by
certain intellectual property rights
of Microsoft Corporation. Use or
distribution of such technology
outside of this product is prohibited
without a license from Microsoft or
an authorized Microsoft subsidiary.
• The BLUETOOTH® word mark and
logos are registered trademarks
owned by Bluetooth SIG, Inc. and
any use of such marks by Sony
Corporation is under license. Other
trademarks and trade names are
those of their respective owners.
• The N Mark is a trademark or
registered trademark of NFC Forum,
Inc. in the United States and in other
countries.
• Android™ is a trademark of Google
Inc.
• Google Play™ is a trademark of
Google Inc.
• LDAC™ and LDAC logo are
trademarks of Sony Corporation.
•Ap
p
iPo
d
Inc
.
co
u
ma
•“M
a
iPh
o
acc
co
n
iPh
o
cer
t
Ap
p
is n
of t
saf
e
Ple
a
acc
aff
e
• All
o
tra
d
hol
d
ma

43GB
Additional Information
MHC-V11.4-582-493-11(1)
k
d
o
n.
tered
o
soft
s
h
ts
r
b
ited
t
or
a
ry.
d
s
d
h
er
e
s
.
r
um,
o
ther
o
gle
.
• Apple, the Apple logo, iPhone, and
iPod touch are trademarks of Apple
Inc., registered in the U.S. and other
countries. App Store is a service
mark of Apple Inc.
• “Made for iPod” and “Made for
iPhone” mean that an electronic
accessory has been designed to
connect specifically to iPod or
iPhone, respectively, and has been
certified by the developer to meet
Apple performance standards. Apple
is not responsible for the operation
of this device or its compliance with
safety and regulatory standards.
Please note that the use of this
accessory with iPod or iPhone may
affect wireless performance.
• All other trademarks and registered
trademarks are of their respective
holders. In this manual, TM and ®
marks are not specified.
MHC-V11.4-582-493-11(1)
©2015 Sony Corporation Printed in China 4-582-493-11(1)