Sony Group NWZX1000 Digital Media Player User Manual Instruction manual GB PDF
Sony Corporation Digital Media Player Instruction manual GB PDF
UserManual.wiki
>
Sony Group
>
NWZX1000 User Manual
User Manual
Navigation menu
Upload a User Manual
Namespaces
Wiki Guide
HTML
PDF
Info
Views
User Manual
Discussion / Help
Navigation
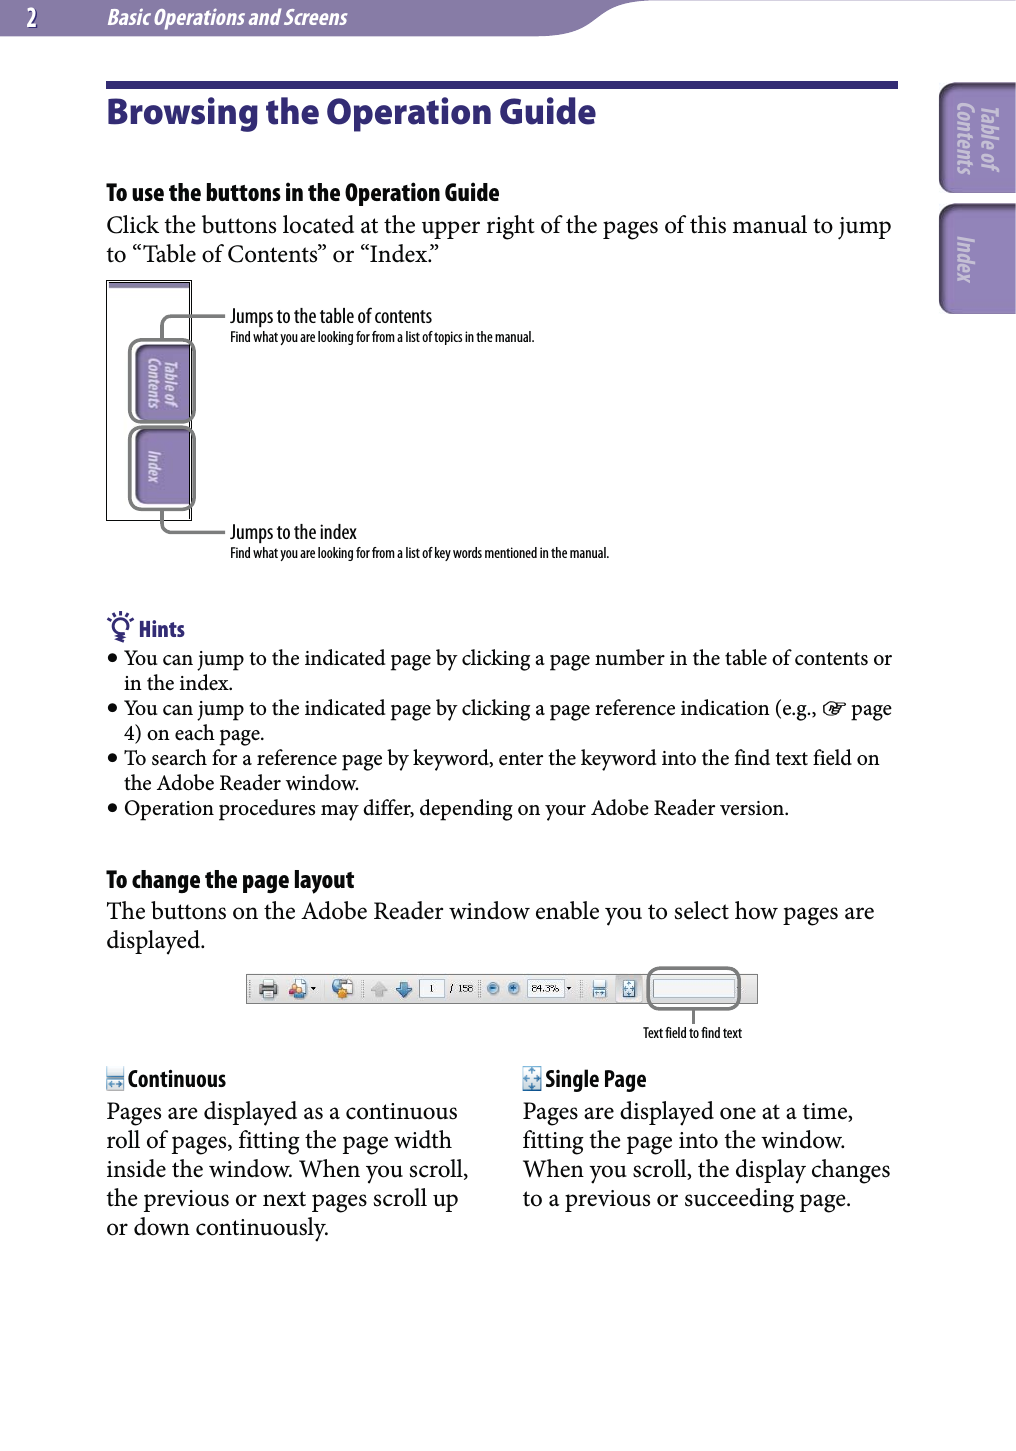


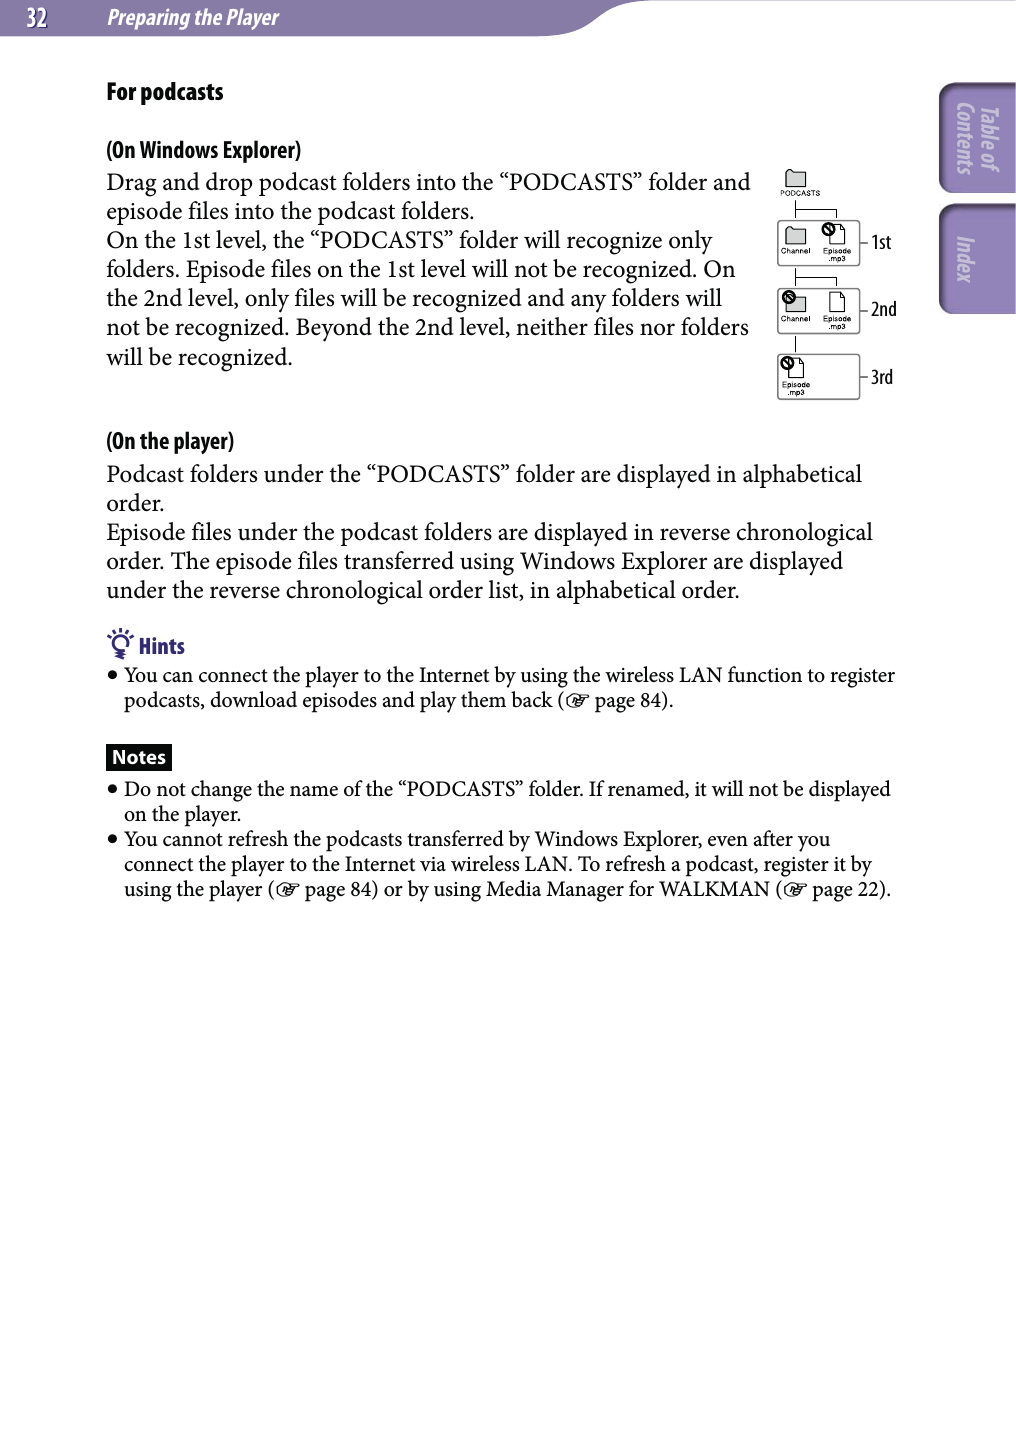
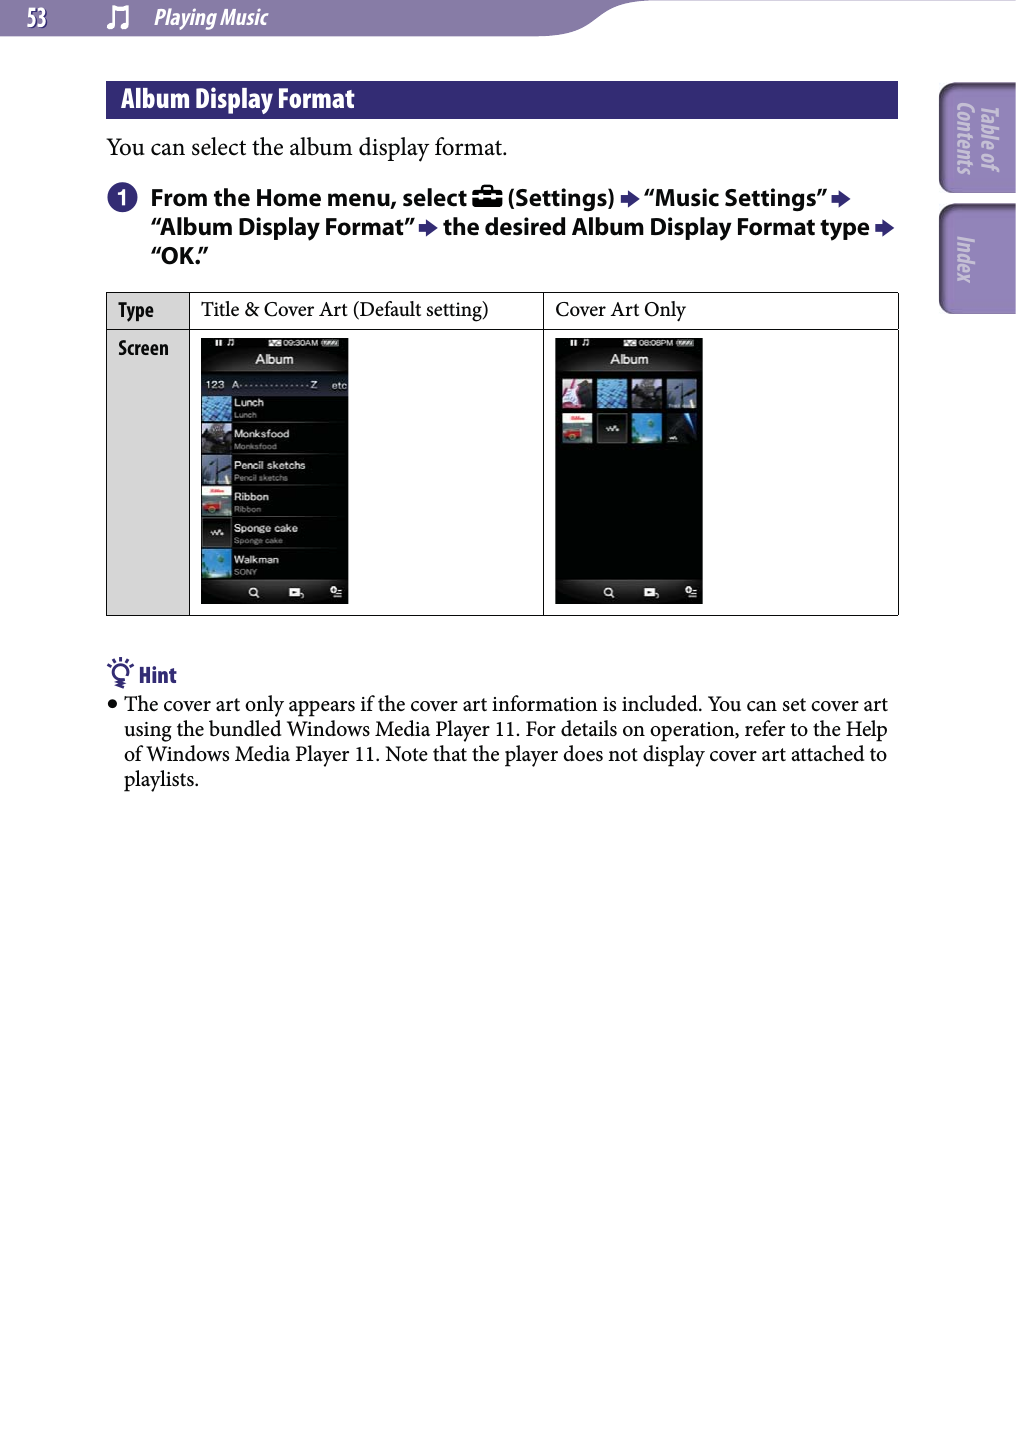
![Preparing the Player2828Transferring Music/Videos/Photos/PodcastsYou can directly transfer data by drag-and-drop using Windows Explorer on your computer.Playable data hierarchy has rules. To transfer data properly, see the following instructions.For details about the bundled software that can transfer data, see page 22. Hints Some computers that already have Windows Media Player 10 installed may encounter file limitations (AAC, video files, etc.) when transferring by drag-and-drop. If you install Windows Media Player 11 (for details, see “Installing the Operation Guide and software” of “Quick Start Guide”) from the supplied CD-ROM, you can solve this problem, then you can transfer by drag-and-drop again. Before installing Windows Media Player 11 on your computer, make sure to check whether your software or service corresponds to Windows Media Player 11. Data hierarchy may differ, depending on your computer environment. Some WMV files can be played back only by transferring using Windows Media Player 11.Notes Do not disconnect the USB cable while “Do not disconnect.” appears on the player, or the data being transferred may be damaged. If you turn on or restart the computer while the player is connected to the computer, the player may malfunction. In this case, press the RESET button of the player to reset it ( page 143). Disconnect the player from the computer before turn on or restart the computer. You cannot change the following folder names or delete them: “MUSIC,” “MP_ROOT,” “MPE_ROOT,” “VIDEO,” “PICTURES,” “PICTURE,” “DCIM,” “PODCASTS” and “FEEDS.” Do not change the folder or file names directly under the “MP_ROOT” folder or “MPE_ROOT” folder. Otherwise, they will not be displayed on the player. Connect the player to your computer using the supplied USB cable.Insert the connector of the USB cable into the player with the mark facing up. Select the player on Windows Explorer, and then drag and drop files.The player appears on Windows Explorer as [WALKMAN].Continued Table of Contents Index](https://usermanual.wiki/Sony-Group/NWZX1000/User-Guide-1065479-Page-28.png)


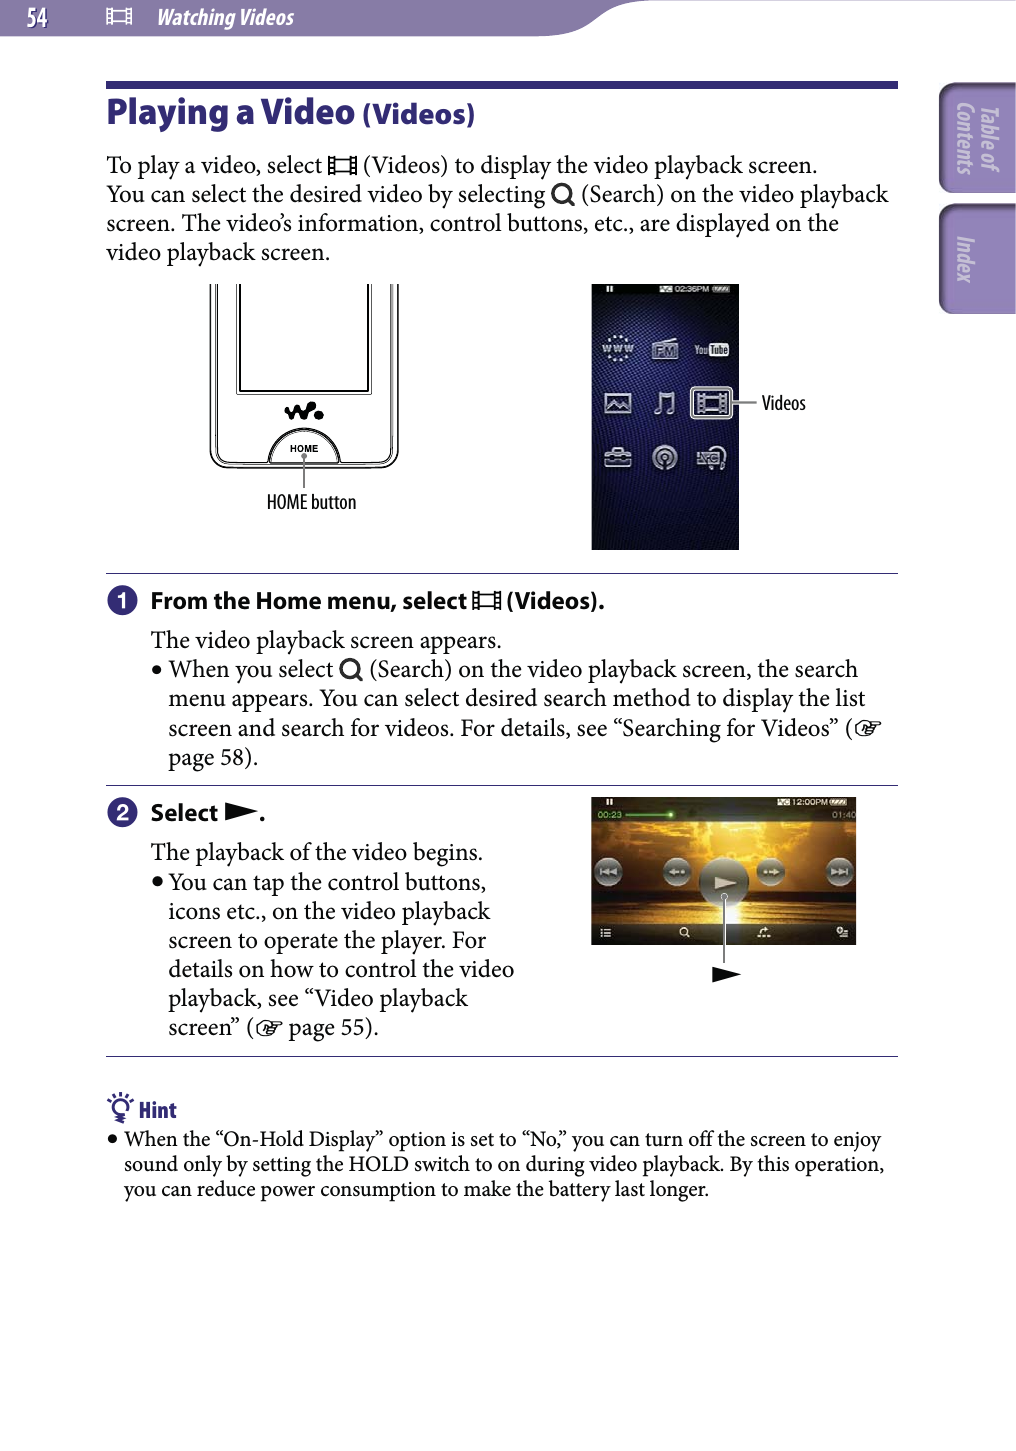

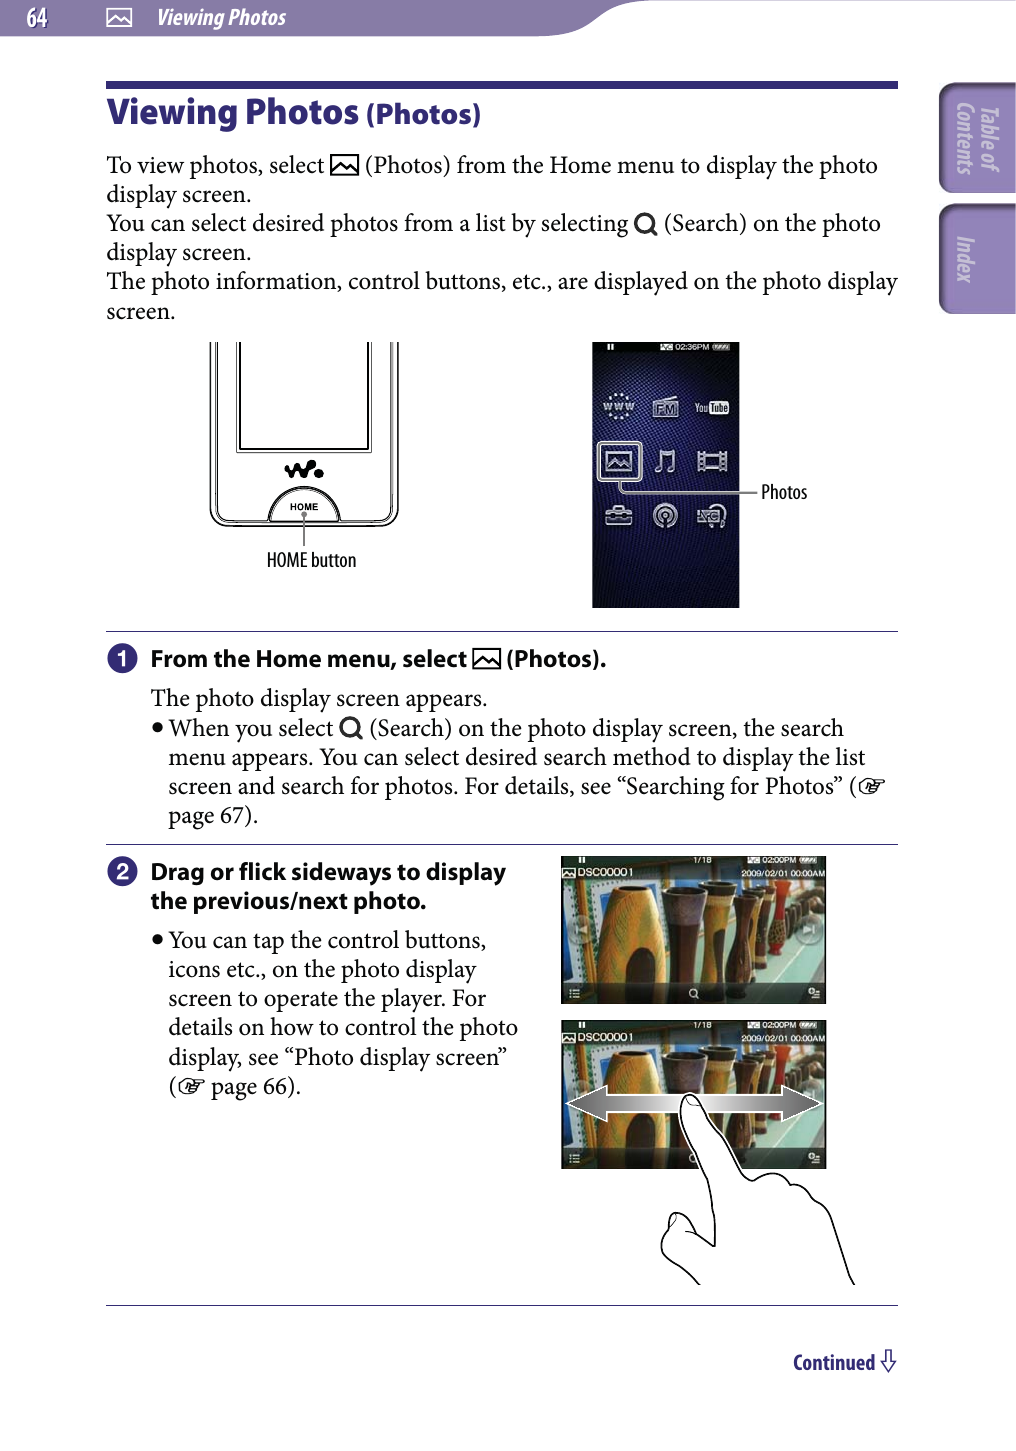
![Viewing Photos6565 Hints Playback of songs continues even while you are searching for photos in the photo folder lists or photo lists, or when the photo display screen is displayed. You can arrange photos transferred to the player by folder. Select the player (as [WALKMAN]) using Windows Explorer, drag and drop a new folder just under the “DCIM,” “PICTURES” or “PICTURE” folder. For details on data hierarchy, see page 31.Note If the size of the photo is too large, or the photo file is damaged, appears, and the photo cannot be displayed.Table of Contents Index](https://usermanual.wiki/Sony-Group/NWZX1000/User-Guide-1065479-Page-65.png)


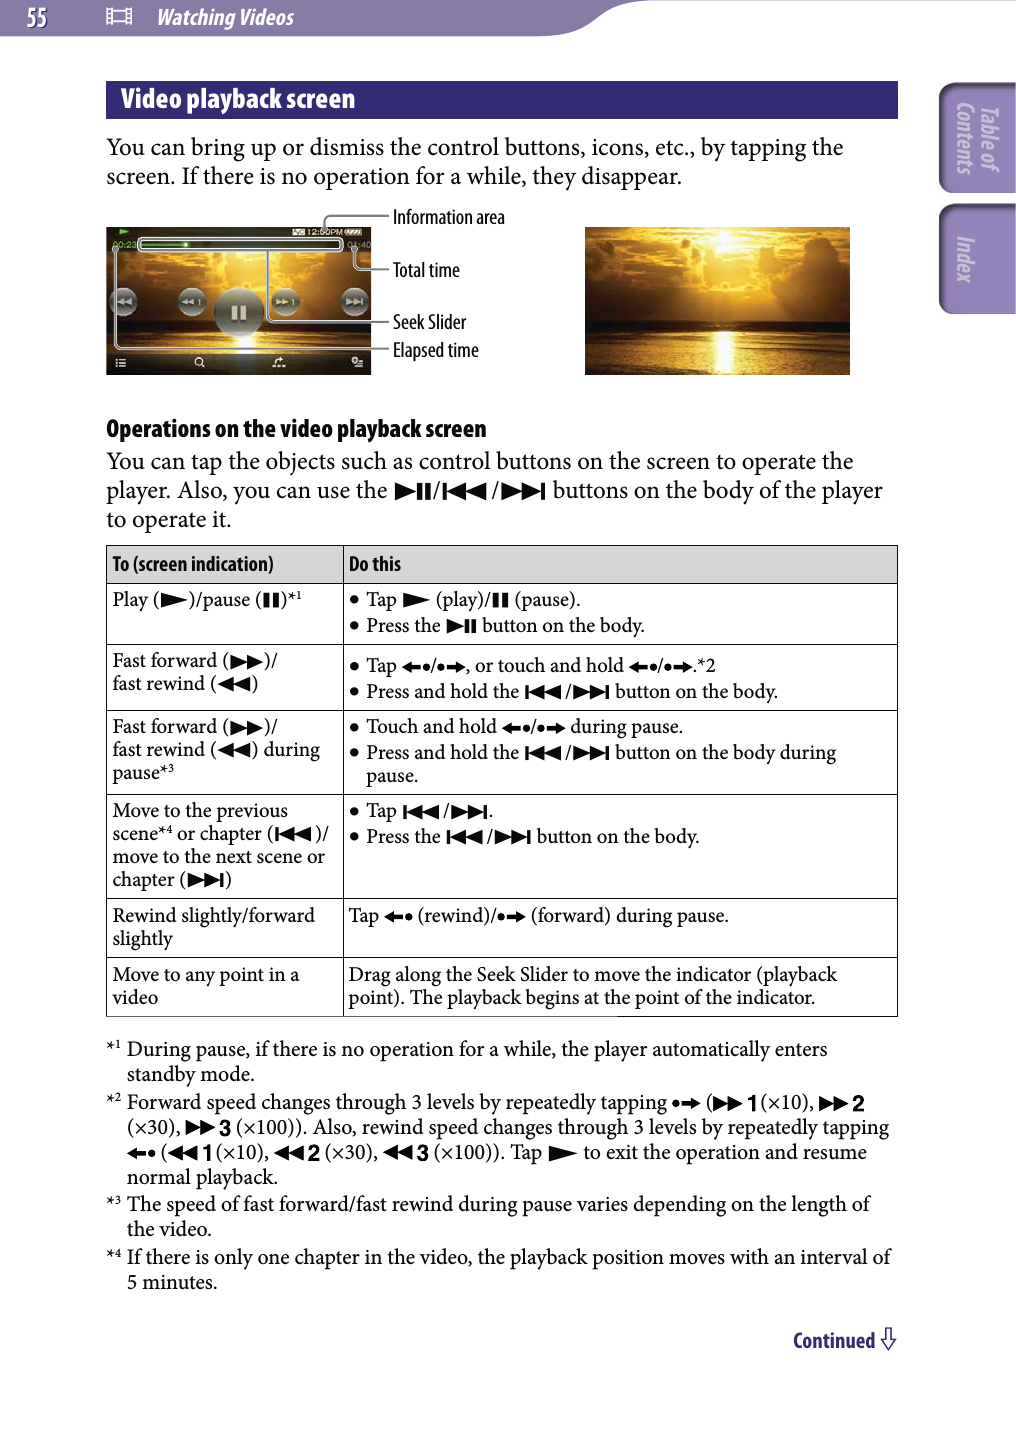
![Useful Facts141141Storing DataYou can store computer data into the built-in flash memory of the player by transferring the data from your computer using Windows Explorer, or another transfer capable software. If the player is connected to the computer, the built-in flash memory appears in Windows Explorer as [WALKMAN].Notes Do not use the bundled software while using Windows Explorer to interact with the built-in flash memory of the player. Do not disconnect the supplied USB cable while “Do not disconnect.” appears during data transfer. The data could be damaged. Do not format the built-in flash memory using Windows Explorer. If you want to format the built-in flash memory, format it on the player ( page 125). You cannot change the following folder names or delete them: “MUSIC,” “MP_ROOT,” “MPE_ROOT,” “VIDEO,” “PICTURES,” “PICTURE,” “DCIM,” “PODCASTS” and “FEEDS.” Do not change folder or file names directly under the “MP_ROOT” or “MPE_ROOT” folder. Otherwise, they will not be displayed on the player.Table of Contents Index](https://usermanual.wiki/Sony-Group/NWZX1000/User-Guide-1065479-Page-141.png)


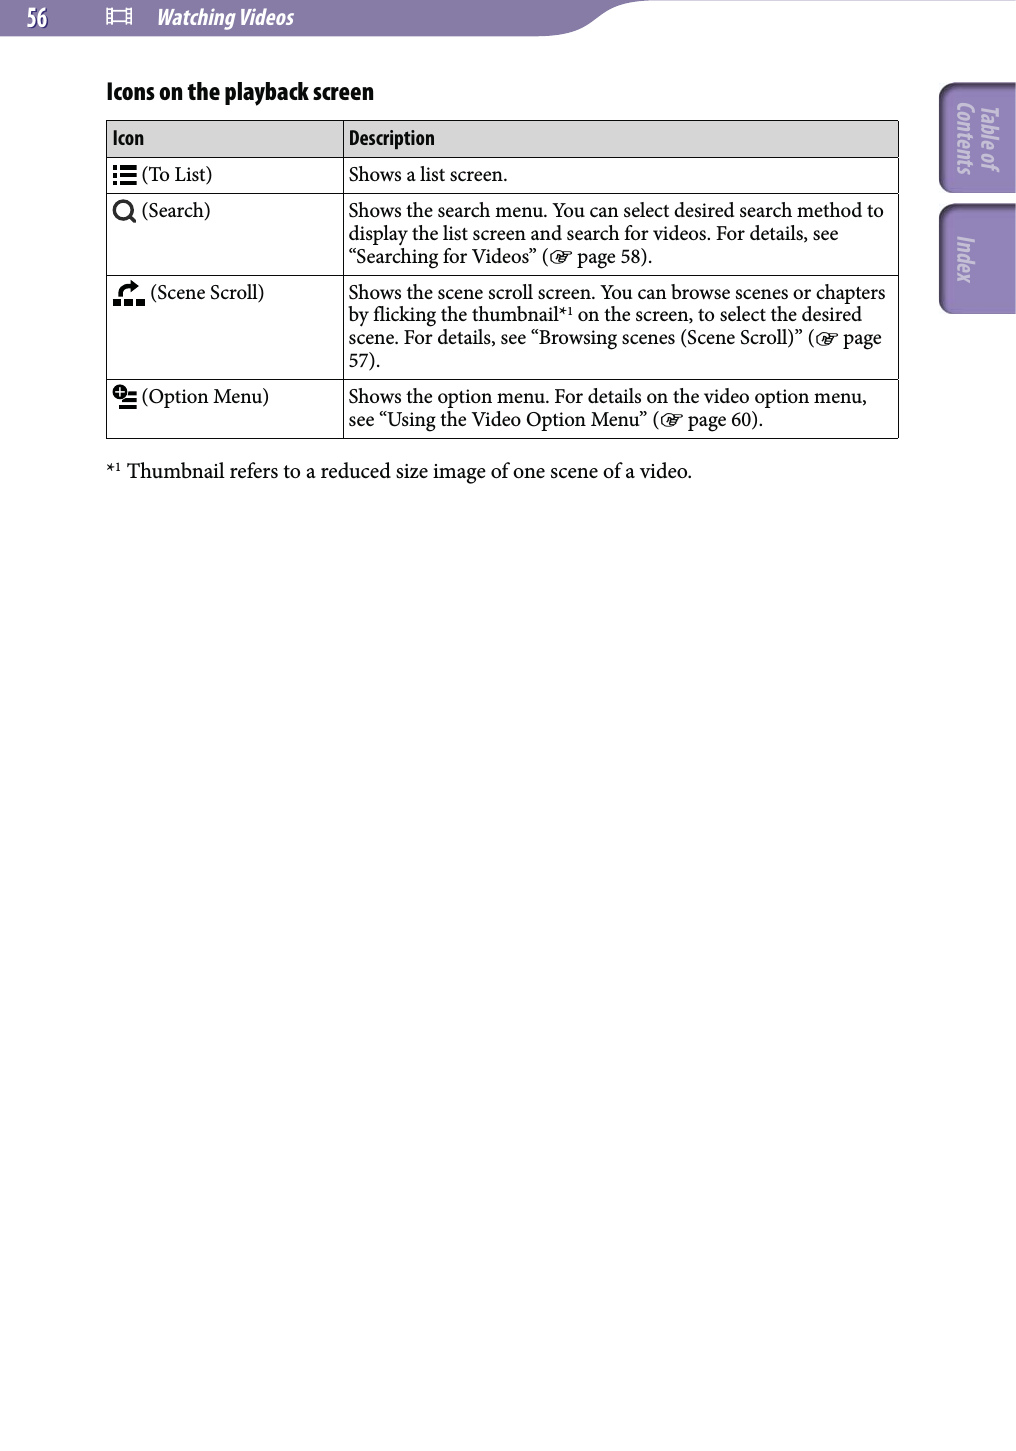
![Troubleshooting151151Connection with a computerSymptom Cause/RemedyCannot install the software. Your computer is installed with an operating system that is not supported by the player. Check the operating system of your computer ( page 177). Other software is running on Windows. If other software is running, it may interfere with installation. Particularly, be sure to stop security software because it can put a heavy load on the computer. There is not enough free space for the hard drive. The software requires 450 MB of hard drive space. Delete unnecessary files. Your account has no administrator privileges, or you have not logged in as the computer’s administrator. To install the software, log in with an account with administrator privileges or log in as the computer’s administrator. A message dialog is covered from your site by the install screen. Press and hold the [Alt] key and press the [Tab] key several times until the message dialog appears. Then follow the message.The progress bar on the install screen does not proceed. Or, the access lamp of the hard drive does not light for several minutes. Wait until the installation is completed, because it is progressing properly. The installation may take 30 minutes or more depending on the computer.The installer does not start up automatically. After inserting the CD-ROM, if the installer does not start up automatically, select [My Computer] (Windows XP) or [Computer] (Windows Vista) from the [start] menu on the task bar of Windows, then double-click the CD-ROM drive icon to start up the installer.Media Manager for WALKMAN does not start up. Your computer’s system environment has changed, perhaps due to an update of the Windows operating system.Continued Table of Contents Index](https://usermanual.wiki/Sony-Group/NWZX1000/User-Guide-1065479-Page-151.png)