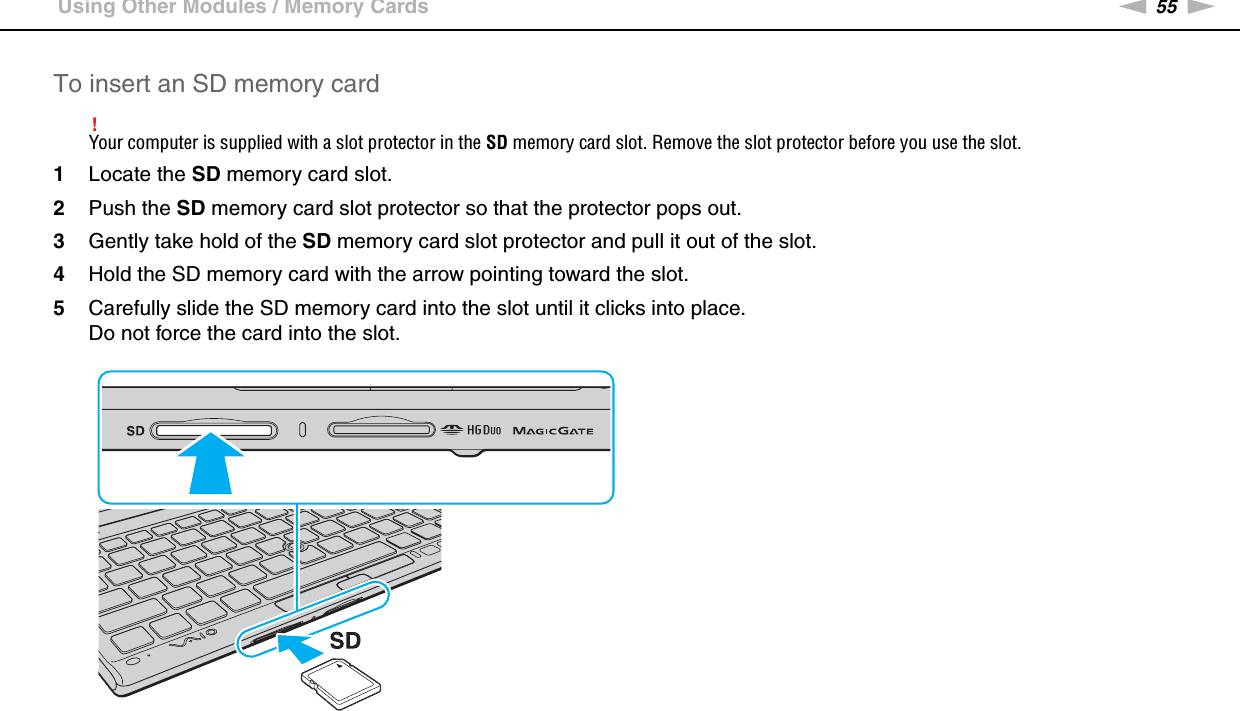
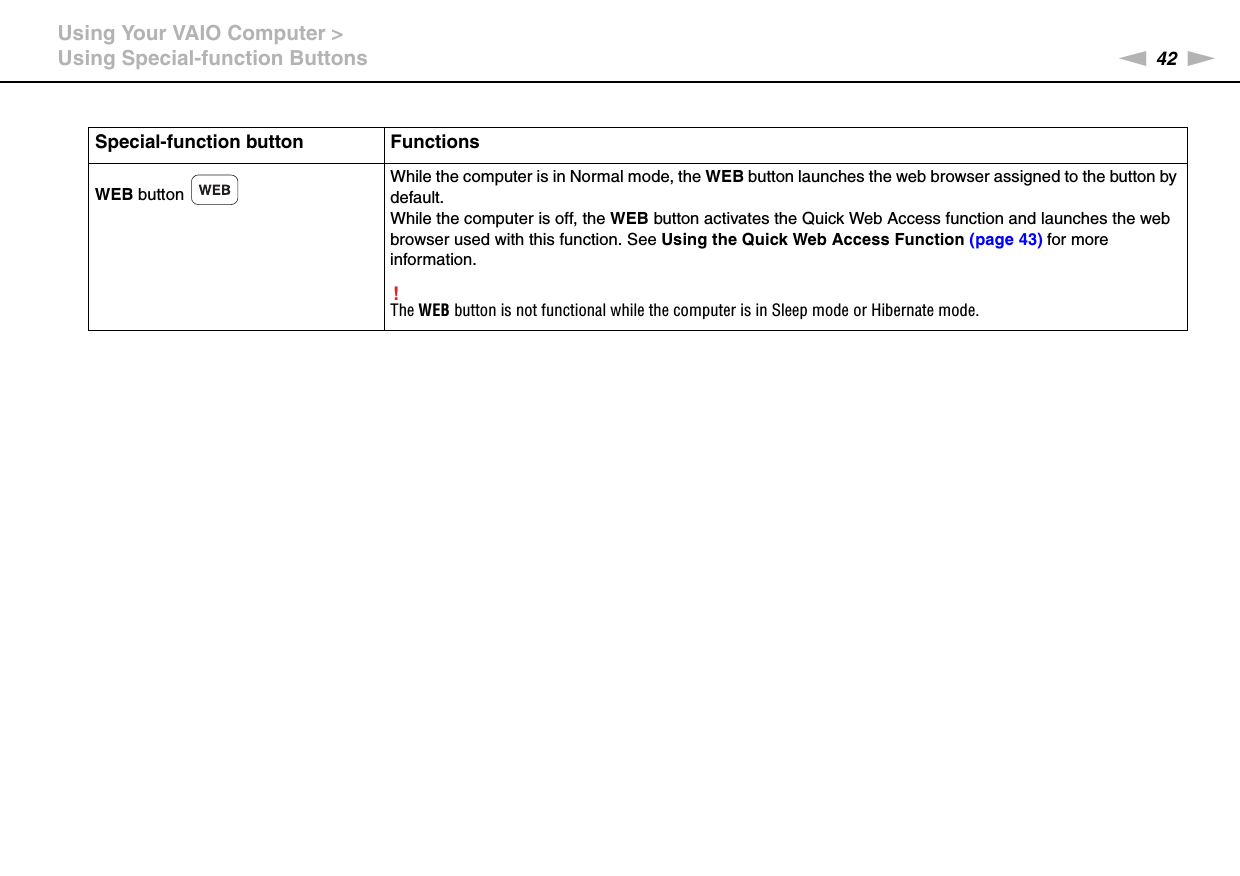
Sony Group PCG11111L Personal Computer User Manual 5200 UG US
Sony Corporation Personal Computer 5200 UG US
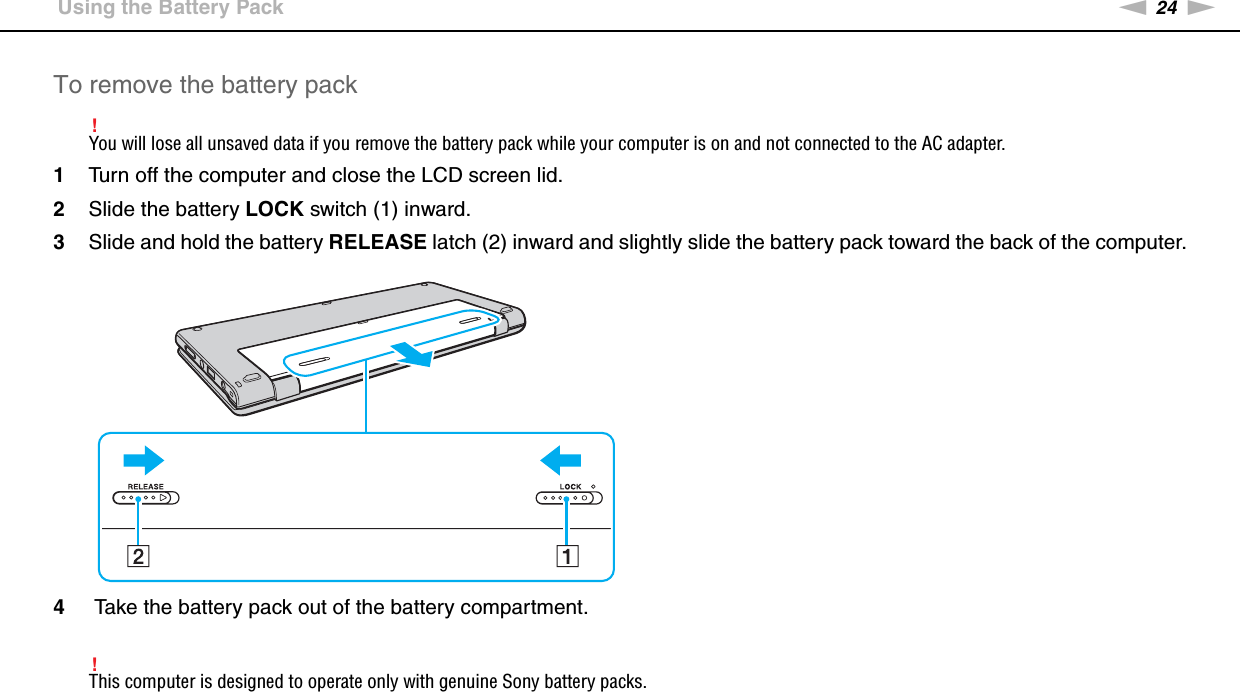
UserManual.wiki
>
Sony Group
>
PCG11111L User Manual
User manual rev
Navigation menu
Upload a User Manual
Namespaces
Wiki Guide
HTML
PDF
Info
Views
User Manual
Discussion / Help
Navigation
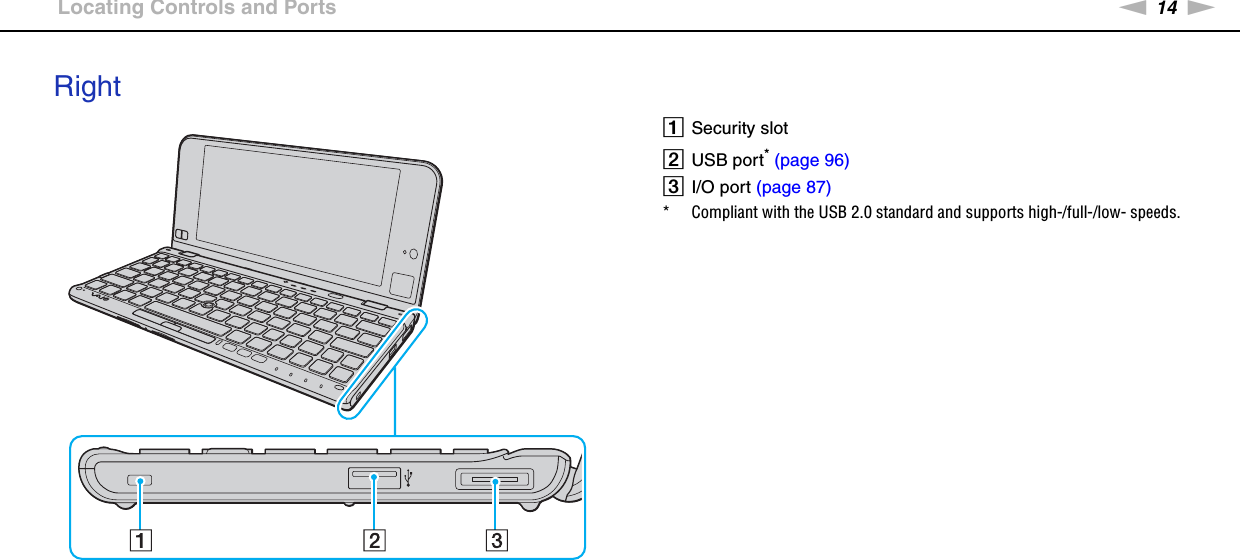
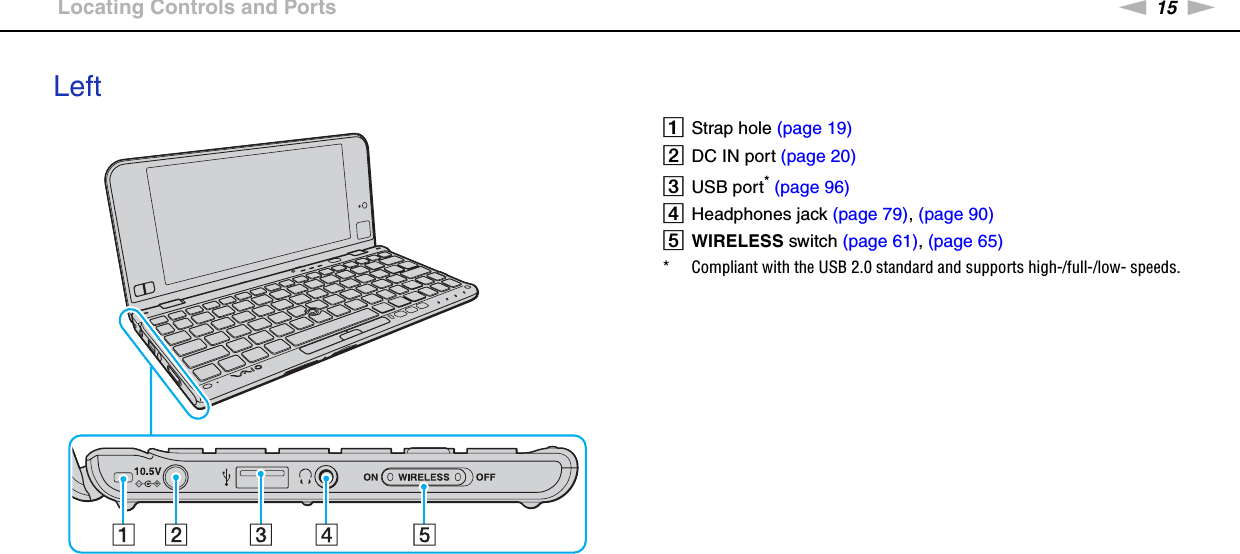

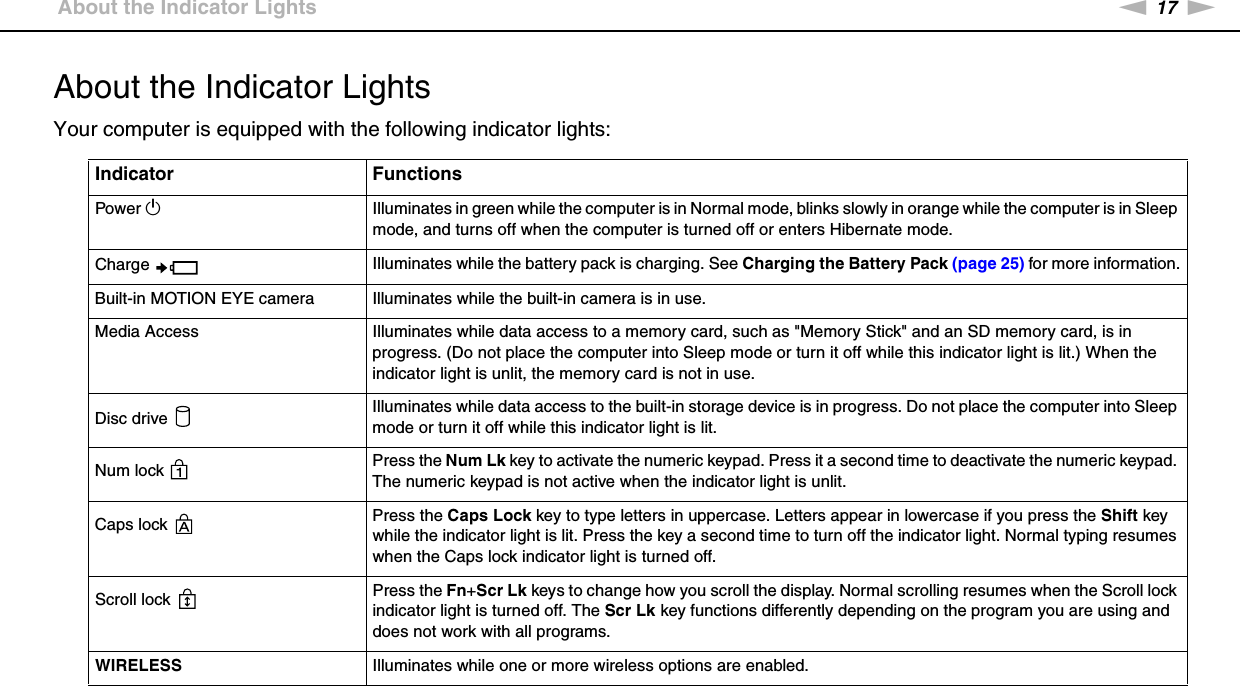
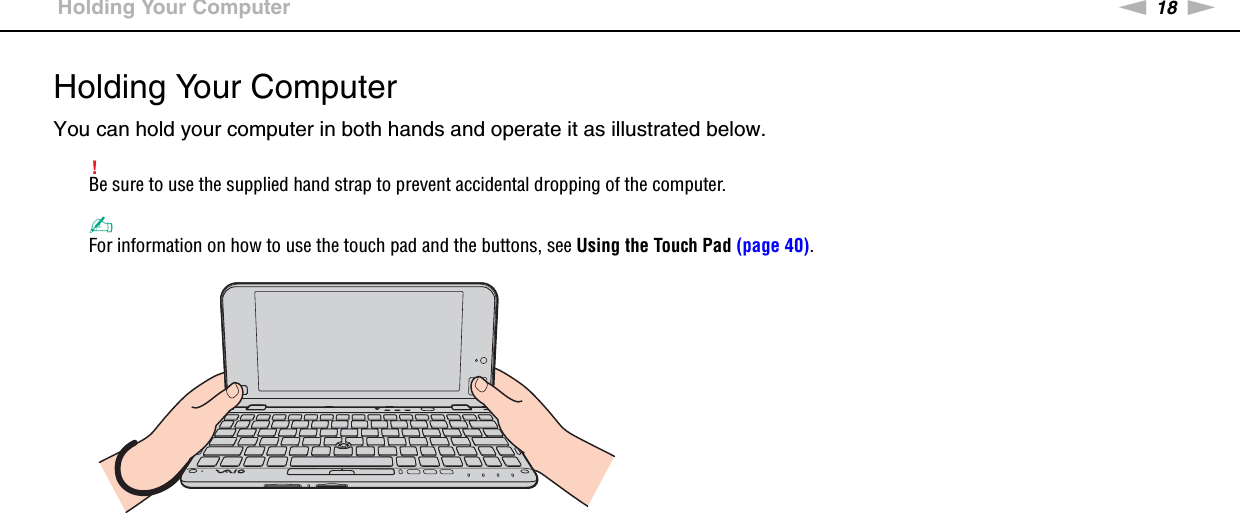

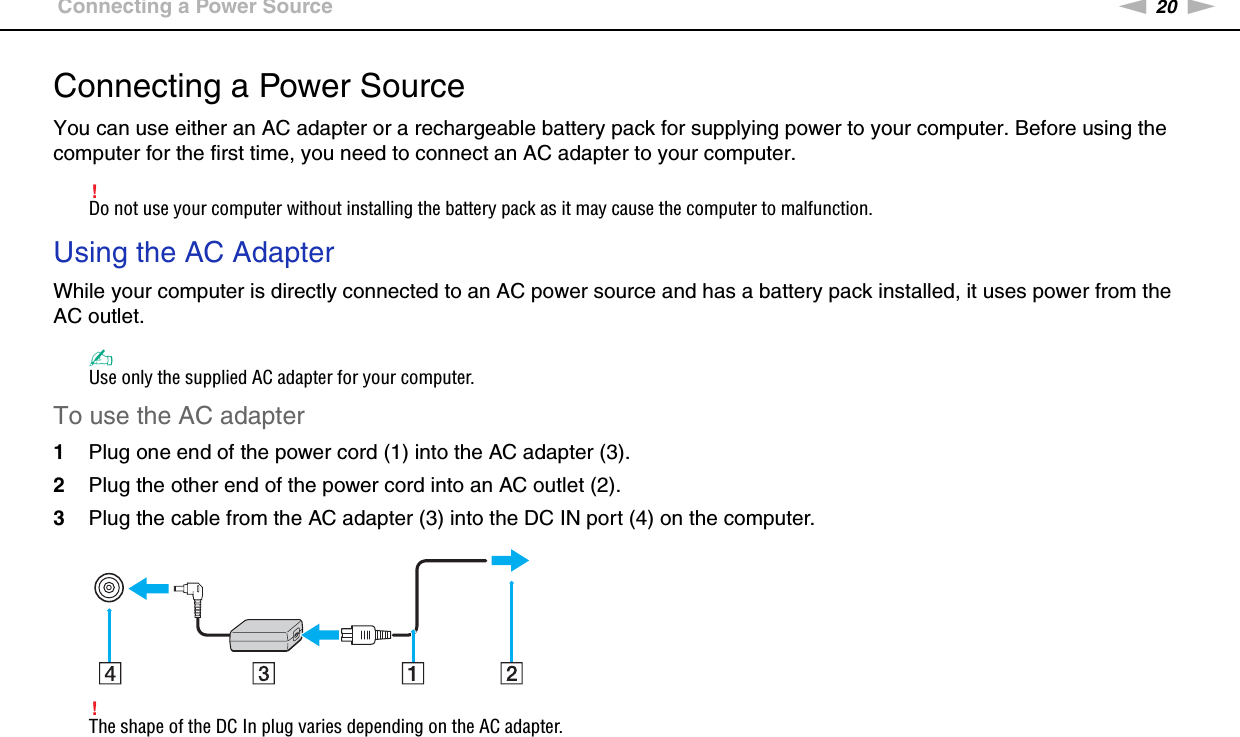


![46nNUsing Your VAIO Computer >Using "Memory Stick"Using "Memory Stick""Memory Stick" is a compact, portable, and versatile IC recording media especially designed for exchanging and sharing digital data with compatible products, such as digital cameras, mobile phones, and other devices. Because it is removable, it can be used for external data storage.Before You Use "Memory Stick"The "Memory Stick Duo" slot on your computer can accommodate the following sizes and types of media:❑"Memory Stick Duo"❑"Memory Stick PRO Duo"❑"Memory Stick PRO-HG Duo"!Your computer supports only Duo-size "Memory stick", and does not support standard-size "Memory Stick".For the latest information about "Memory Stick", visit [memorystick.com] at http://www.memorystick.com/en/.](https://usermanual.wiki/Sony-Group/PCG11111L/User-Guide-1261732-Page-46.png)