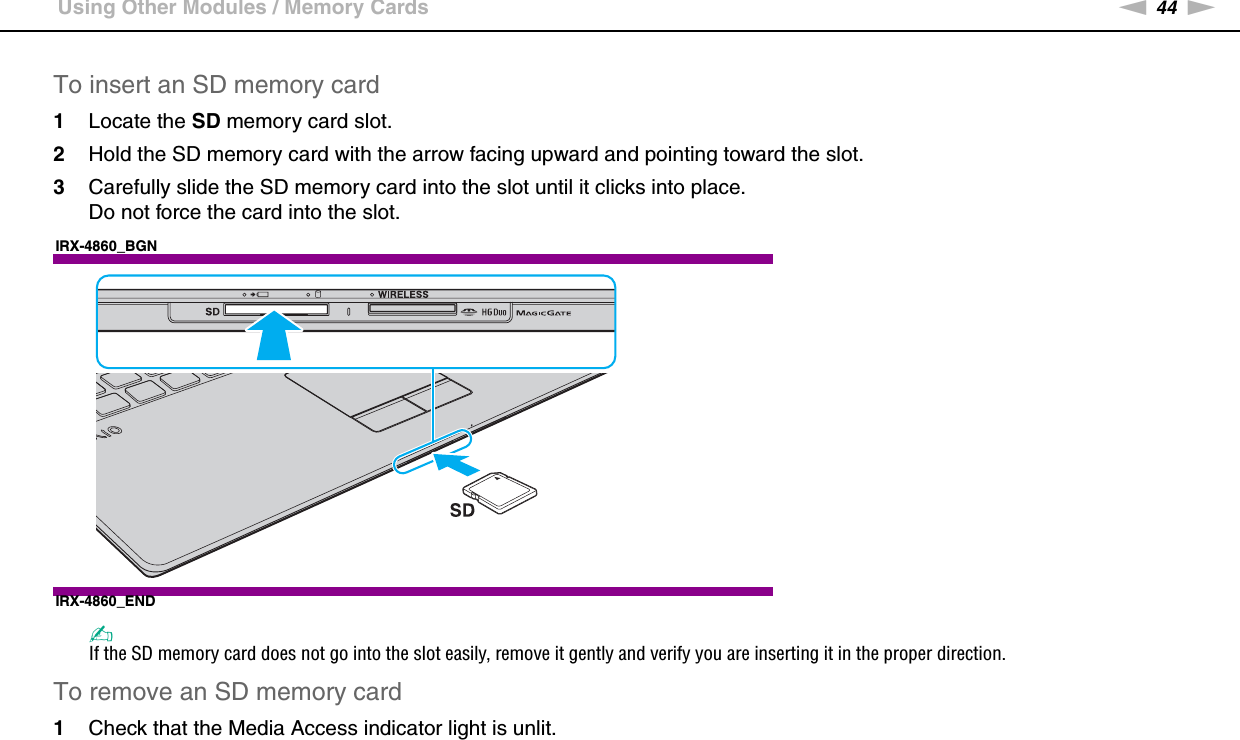
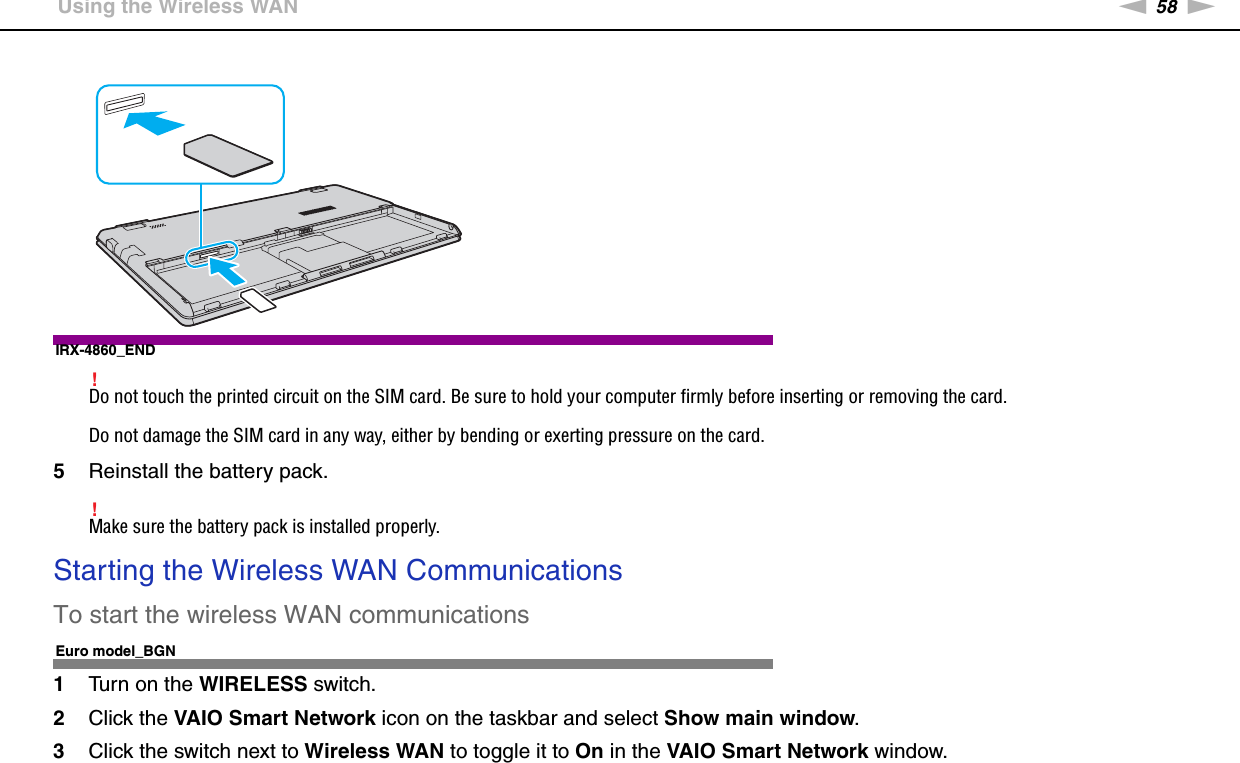
Sony Group PCG21112L Notebook PC User Manual 4860 UG
Sony Corporation Notebook PC 4860 UG
UserManual.wiki
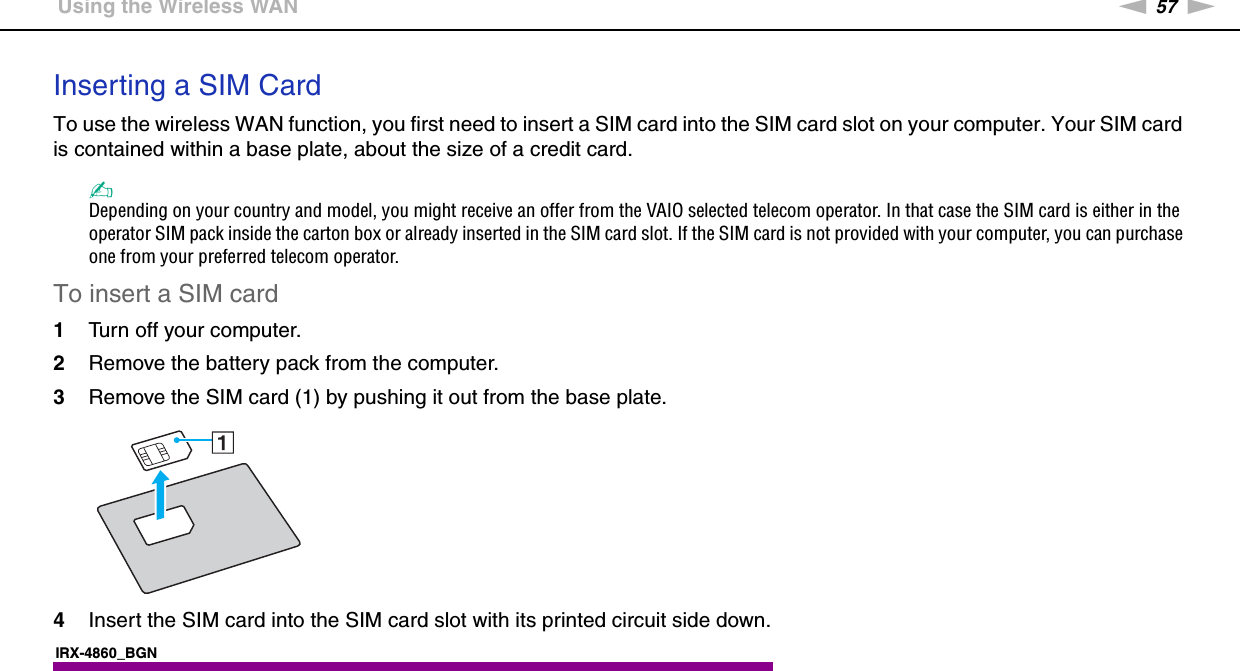
>
Sony Group
>
PCG21112L User Manual
>
User Manual
Contents
1.
User Manual Safety Guide
2.
User Manual
User Manual
Navigation menu
Upload a User Manual
Namespaces
Wiki Guide
HTML
PDF
Info
Views
User Manual
Discussion / Help
Navigation

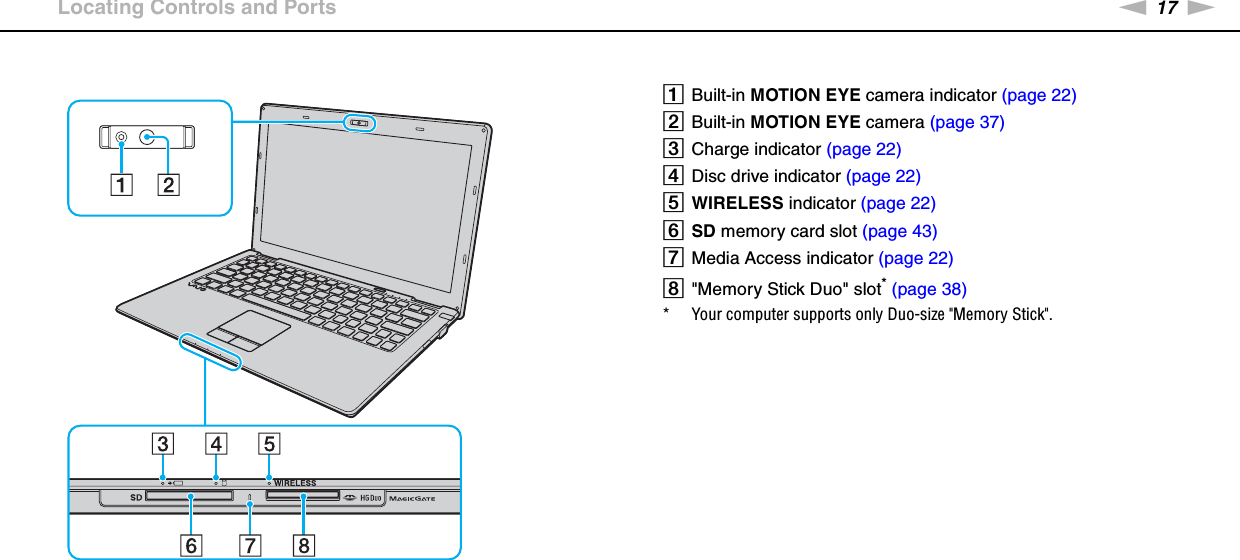
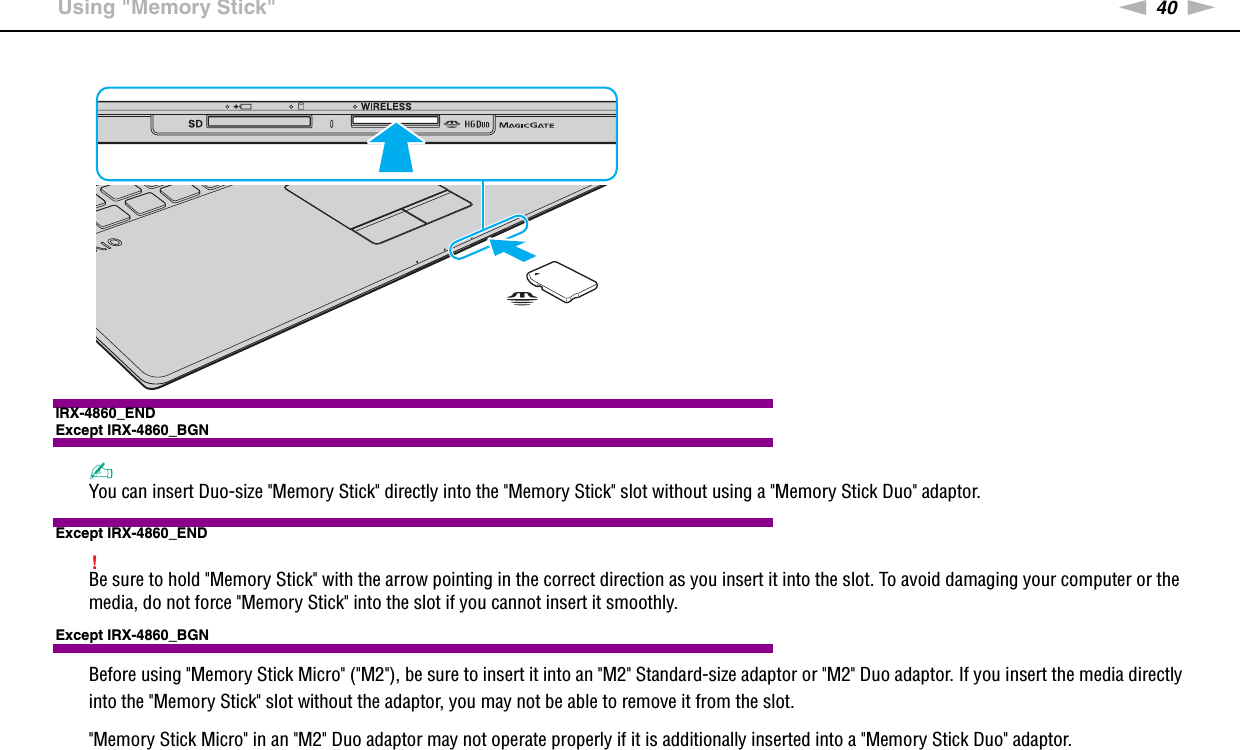
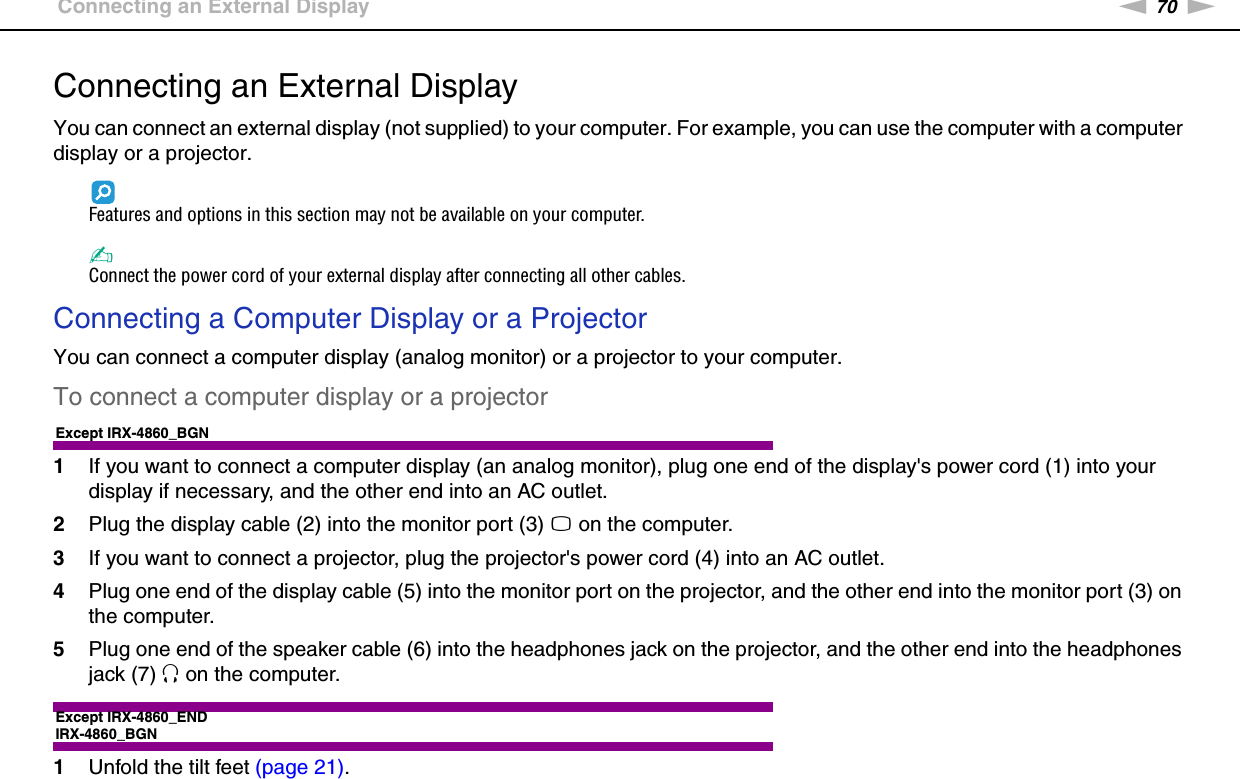
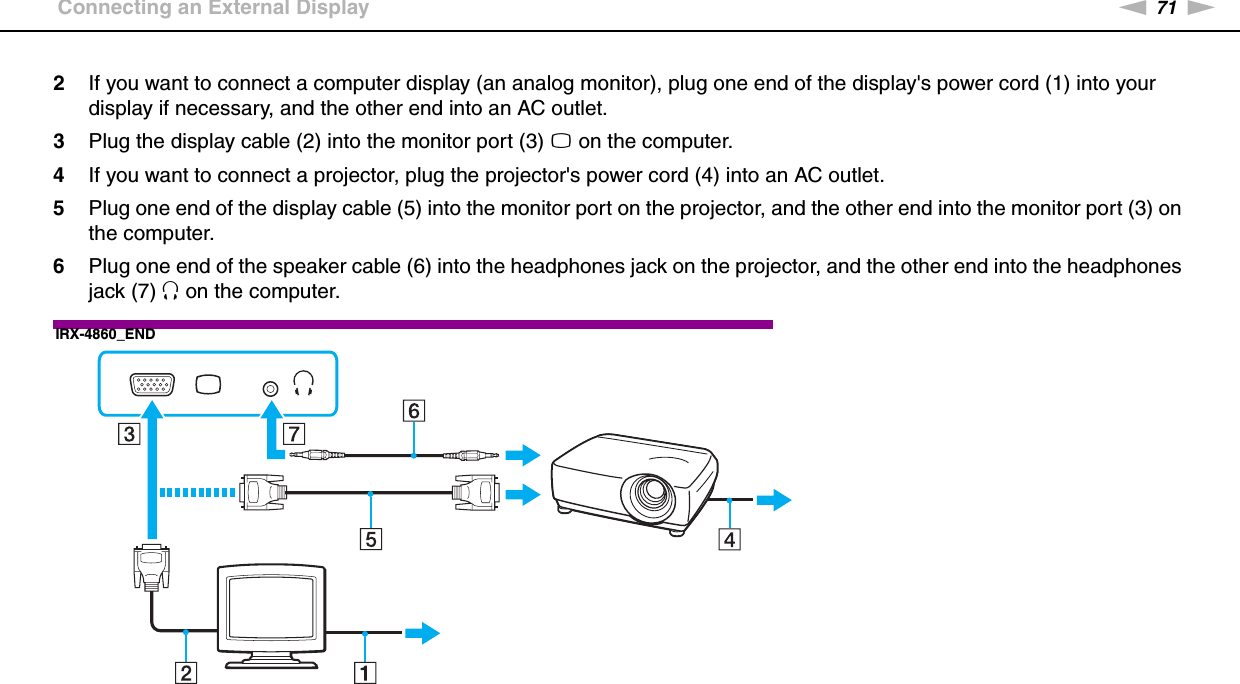
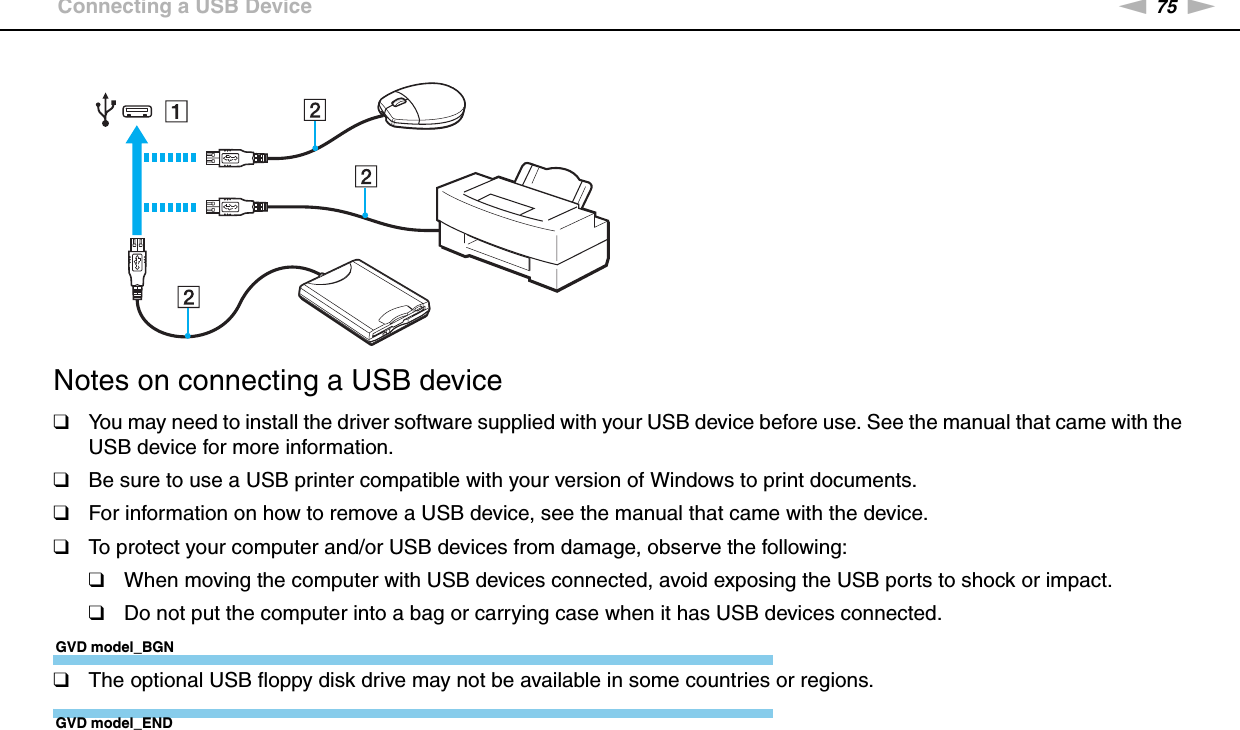
![39nNUsing Your VAIO Computer >Using "Memory Stick"Except IRX-4860_ENDIRX-4860_BGNThe "Memory Stick Duo" slot on your computer can accommodate Duo-size media and supports "Memory Stick PRO Duo" and "Memory Stick PRO-HG Duo" with high-speed data transfer and large data capacity capabilities.IRX-4860_ENDFor the latest information about "Memory Stick", visit [memorystick.com] at http://www.memorystick.com/en/. Inserting and Removing "Memory Stick"To insert "Memory Stick"1Locate the "Memory Stick Duo" slot.2Hold "Memory Stick" with the arrow facing upward and pointing toward the slot.3Carefully slide "Memory Stick" into the slot until it clicks into place.✍"Memory Stick" is automatically detected by your system and the contents of "Memory Stick" are displayed. If nothing appears on the desktop, click Start, Computer, and double-click the "Memory Stick" icon.IRX-4860_BGN](https://usermanual.wiki/Sony-Group/PCG21112L.User-Manual/User-Guide-1162979-Page-39.png)