Sony Group PCG4R1L Notebook PC User Manual VGN TT200 Series
Sony Corporation Notebook PC VGN TT200 Series
UserManual.wiki
>
Sony Group
>
PCG4R1L User Manual
>
User Manual
Contents
1.
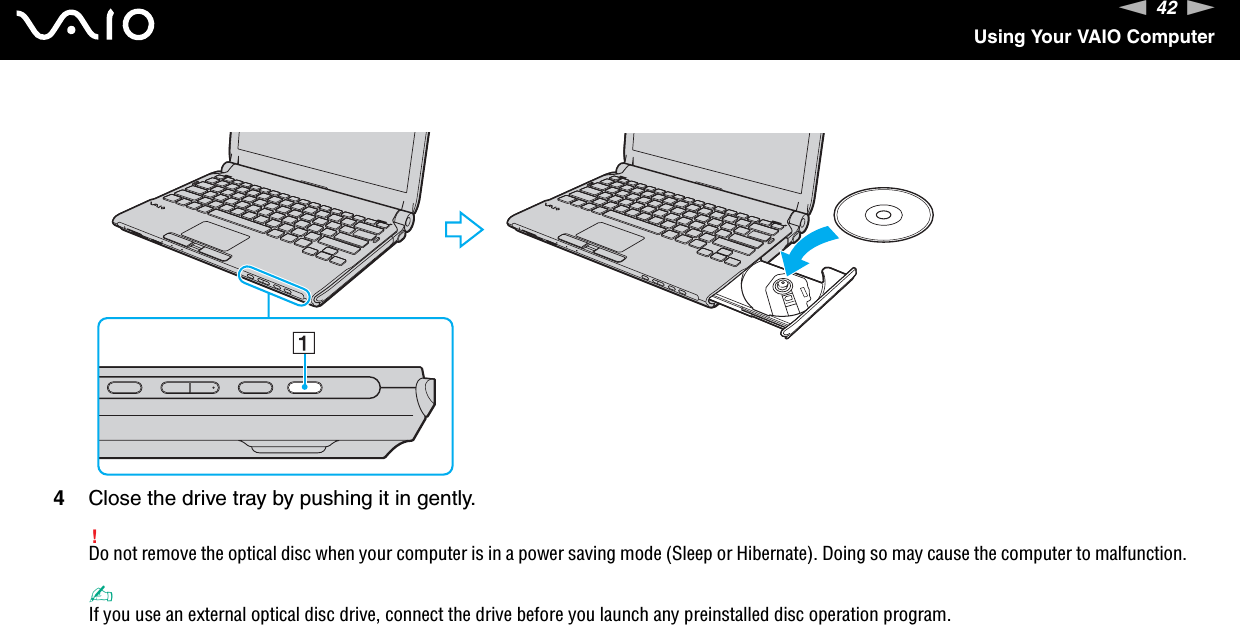
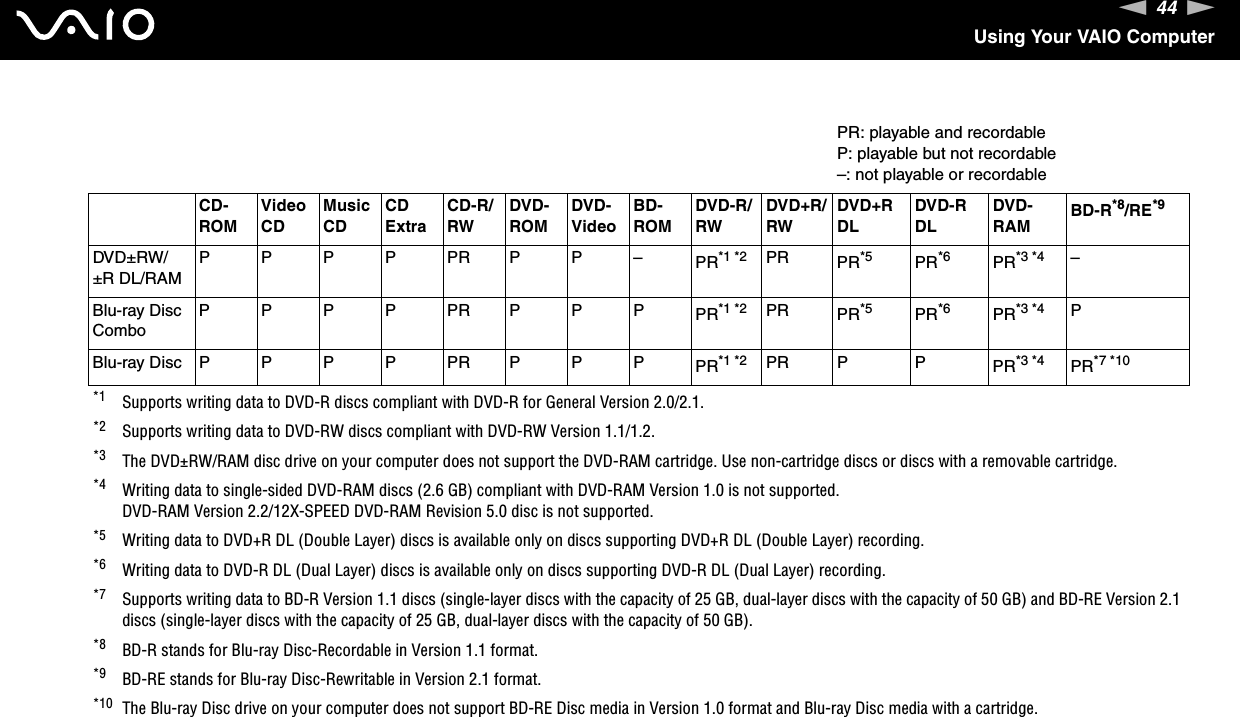
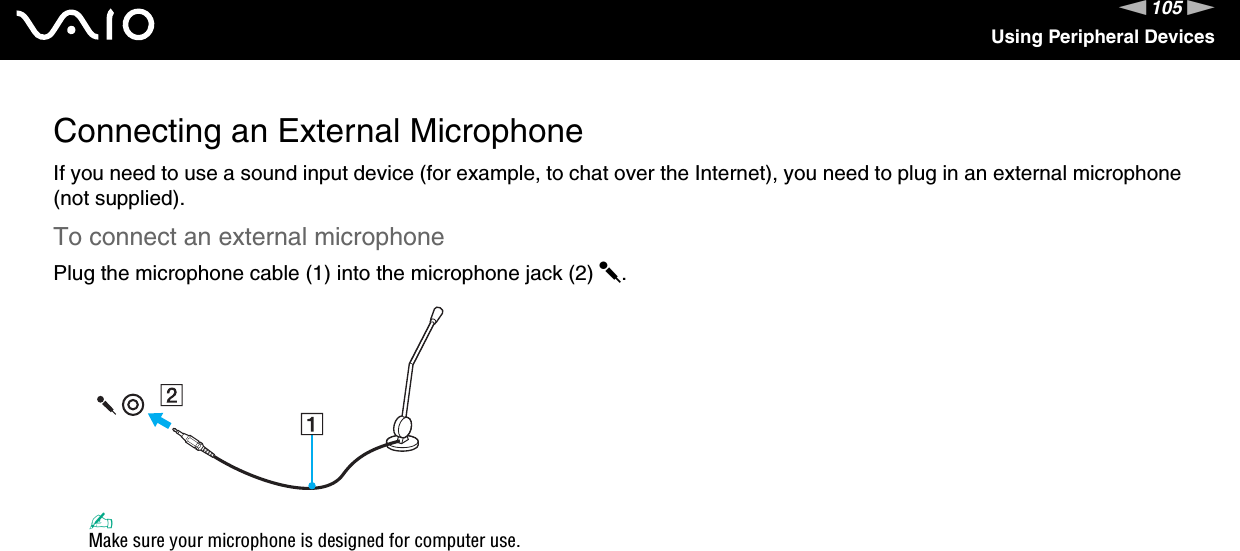
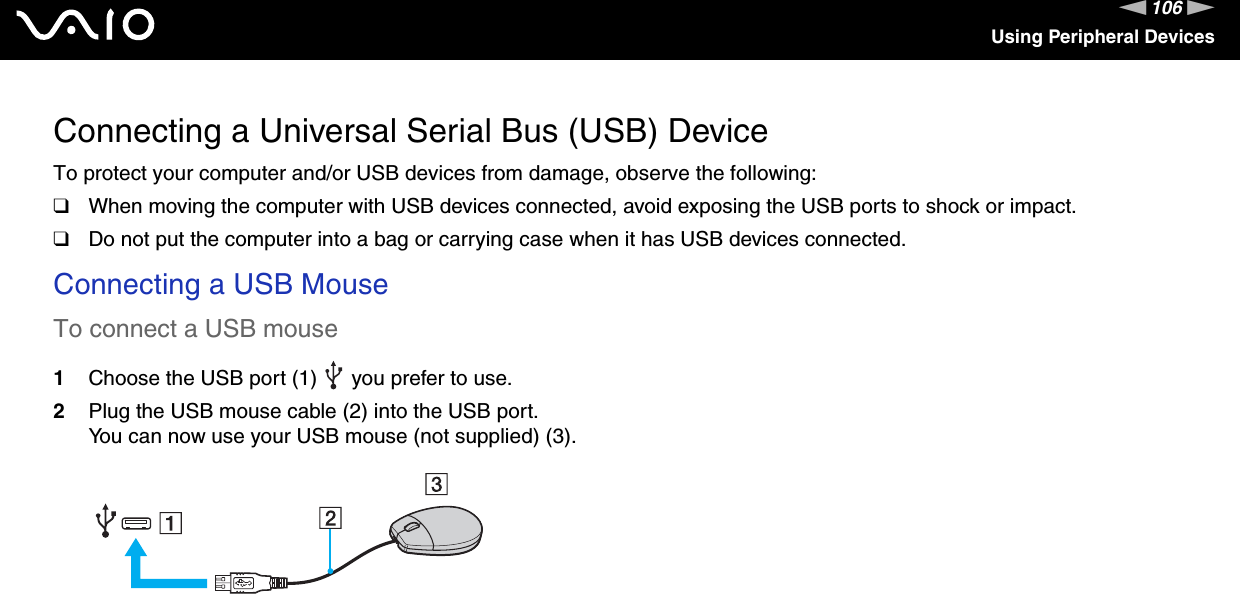
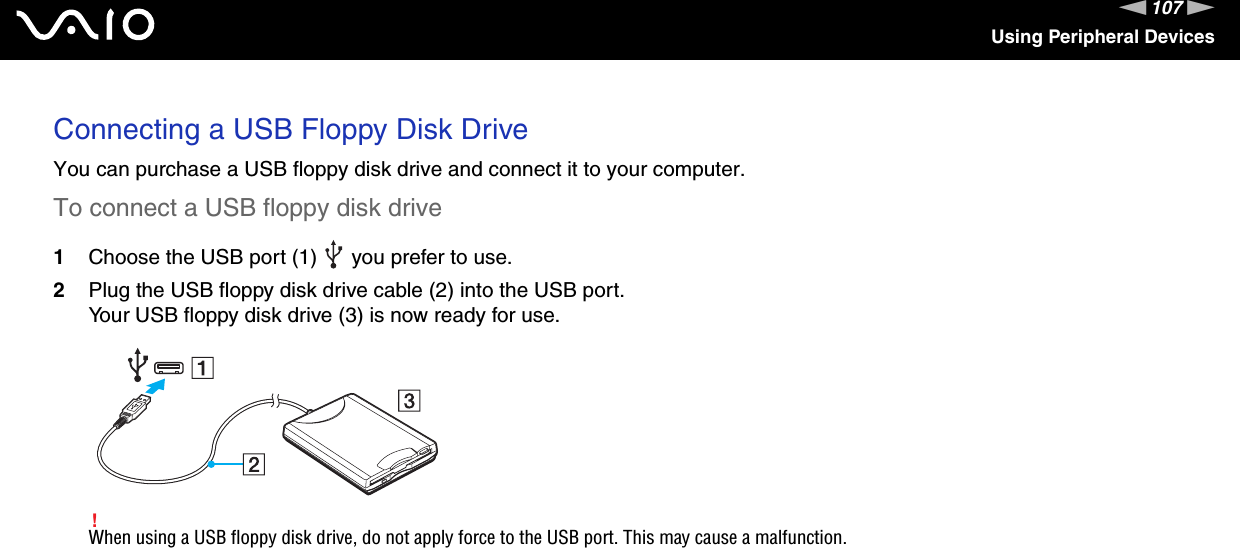
User Manual
2.
Safety Manual
User Manual
Navigation menu
Upload a User Manual
Namespaces
Wiki Guide
HTML
PDF
Info
Views
User Manual
Discussion / Help
Navigation