Sony Group PCWAC500 Wireless LAN PC Card User Manual PCWA C500
Sony Corporation Wireless LAN PC Card PCWA C500
UserManual.wiki
>
Sony Group
>
PCWAC500 User Manual
>
users manual A
Contents
1.
users manual A
2.
users manual B
3.
RF Exposure Info
users manual A
Navigation menu
Upload a User Manual
Namespaces
Wiki Guide
HTML
PDF
Info
Views
User Manual
Discussion / Help
Navigation


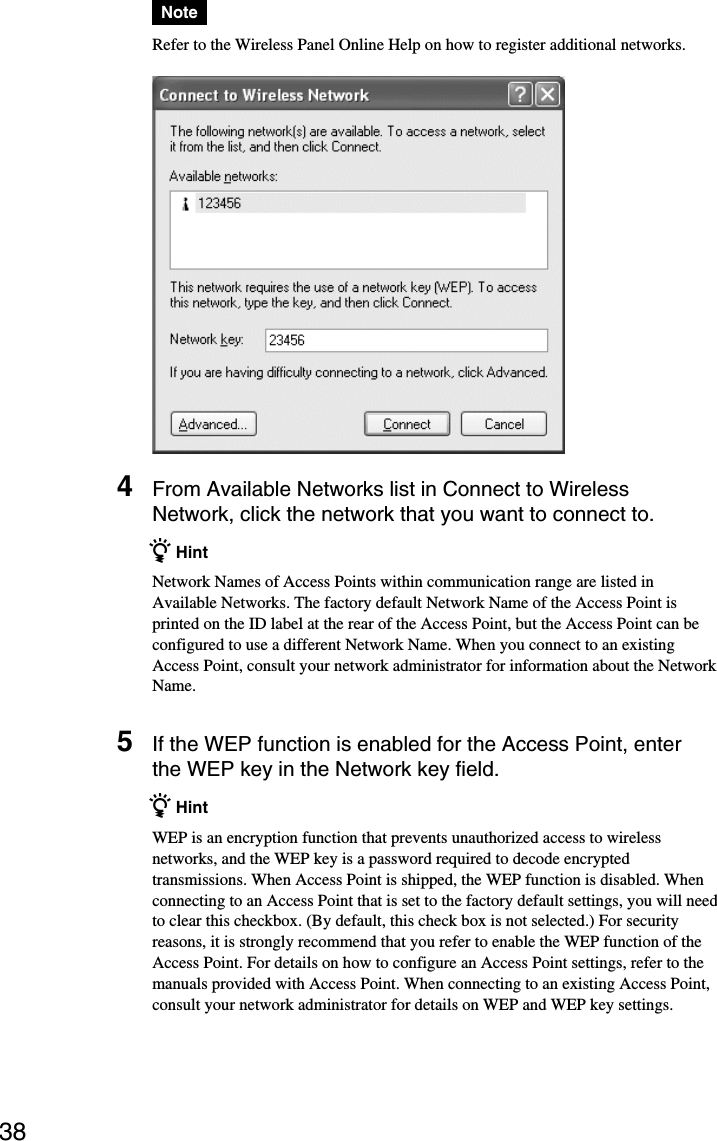
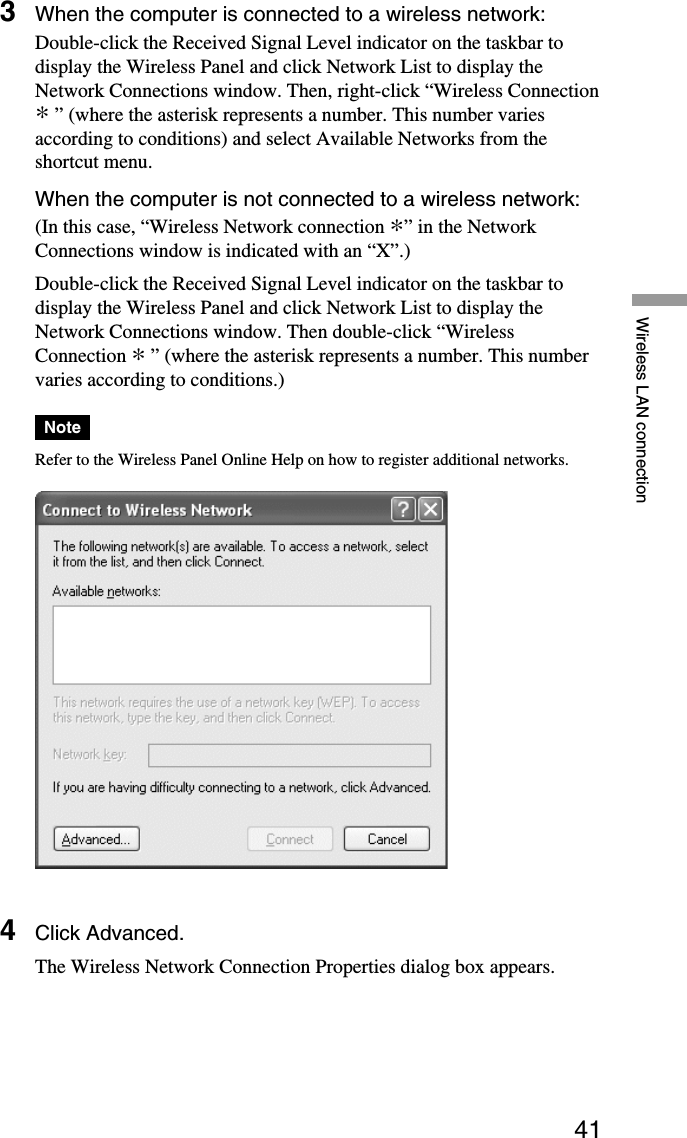
![32[ASCII/Hex]This is the format for entering the password (WEP key) requiredwhen connecting to networks where WEP is enabled. You can selectASCII (alphanumeric characters, and may include symbols) or Hex(hexadecimal notation).[Length]This is the length (bit length) for the WEP key (password) requiredwhen connecting to networks where WEP is enabled. You can selectfrom 40 bits or 104 bits. Generally, the longer the bit length, thebetter the security.[Key]This is the password required when connecting to networks whereWEP is enabled. The number of characters you can enter differsdepending on the ASCII/Hex and Length settings. (For moreinformation, refer to following table).ASCII/Hex 40 bits 104 bitsASCII 5 characters 13 charactersHex 10 characters 26 characters4When all of the items are set, click Next.The settings that you have made are displayed.](https://usermanual.wiki/Sony-Group/PCWAC500.users-manual-A/User-Guide-223231-Page-32.png)