Sony Group SGPT1211 Tablet Device User Manual ST
Sony Corporation Tablet Device ST
UserManual.wiki
>
Sony Group
>
SGPT1211 User Manual
>
user manual
Contents
1.
user manual
2.
user manual rev
user manual
Navigation menu
Upload a User Manual
Namespaces
Wiki Guide
HTML
PDF
Info
Views
User Manual
Discussion / Help
Navigation
![Read This FirstCongratulations on your purchase of a Sony tablet device.This help guide explains how to operate your tablet device and apps. Before you start using your tablet device,read the supplied Important Information (safety instructions).Charging the batteryThe battery charge level may be low when you purchase your tablet device. Charge the battery before you startusing your tablet device [Details].About software updateWhen you update the software, be sure to install the latest version of each app. Otherwise some apps may notstart.Related TopicOnline Support WebsitesGoogle Account](https://usermanual.wiki/Sony-Group/SGPT1211.user-manual/User-Guide-1737112-Page-5.png)
![Turning On Your Tablet DeviceNoteBefore turning on, see “Notes on Using the AC Adapter” [Details].1. Connect your tablet device to an AC outlet (wall socket) [Details].2. Press and hold the power button for three seconds.Your tablet device will turn on. When you turn on your tablet device for the first time, see “Before Use”[Details].Related TopicShutting Down Your Tablet DeviceTurning the Screen On/Off (Sleep Mode)Notes on Using the AC AdapterCharging the BatteryNotes on Using the BatteryReducing Battery Consumption](https://usermanual.wiki/Sony-Group/SGPT1211.user-manual/User-Guide-1737112-Page-6.png)
![Shutting Down Your Tablet DeviceNoteBefore shutting down your tablet device, see “Notes on Using the AC Adapter” [Details].1. Press and hold the power button until a list appears.2. Tap [OK].The tablet device will automatically turn off in a few seconds.NoteTo avoid losing unsaved data or causing your tablet device to malfunction, be sure to shut down your tabletdevice properly as described above.If you cannot shut down your tablet device as described above, press and hold the power button for about 10seconds to force it to shut down.If you cannot force your tablet device to shut down, press the reset button (hole) [Details].Related TopicTurning On Your Tablet DeviceTurning the Screen On/Off (Sleep Mode)Notes on Using the AC AdapterCharging the BatteryNotes on Using the BatteryReducing Battery Consumption](https://usermanual.wiki/Sony-Group/SGPT1211.user-manual/User-Guide-1737112-Page-7.png)
![Turning the Screen On/Off (Sleep Mode)You can turn off the screen (sleep mode) when you are not using your tablet device.1. Press the power button.The screen goes to sleep. To deactivate sleep mode and turn on the screen, press the power button again.HintYou can set the time until the screen automatically goes to sleep when the tablet device has not beenoperated for a given amount of time. Tap [ Apps & Widgets] - [ Settings] - [Display] - [Sleep], and selectthe desired time interval before going to sleep.You can also make settings to lock the screen when it is turned on after deactivating sleep [Details].Related TopicTurning On Your Tablet DeviceShutting Down Your Tablet DeviceNotes on Using the AC AdapterCharging the BatteryNotes on Using the BatteryReducing Battery Consumption](https://usermanual.wiki/Sony-Group/SGPT1211.user-manual/User-Guide-1737112-Page-8.png)
![Starting Wi-Fi CommunicationsYou first need to establish Wi-Fi communications between your tablet device and the Wi-Fi router. Make sure theWi-Fi router is set up. See the operating instructions supplied with your Wi-Fi router for more information such ashow to set up your Wi-Fi router. After confirming your Wi-Fi router settings, follow the steps below to turn on Wi-Fi on your tablet device.1. Tap [ Apps & Widgets] - [ Settings] - [Wi-Fi].2. Slide the [Wi-Fi] switch to the [ON] position.NoteTo reduce battery consumption, turn off Wi-Fi when not in use.The Wi-Fi antenna is built in to your tablet device. If you cover the antenna with your hands or other objectswhile connecting to the Internet using the Wi-Fi function, the communications quality may deteriorate [Details].To stop Wi-Fi communications1. Slide the [Wi-Fi] switch to the [OFF] position after step 1 in the above procedures to turn off Wi-Fi on yourtablet device.To find networks in range of your device1. Tap [ Apps & Widgets] - [ Settings] - [Wi-Fi].2. Slide the [Wi-Fi] switch to the [ON] position to turn on Wi-Fi.A list of the networks found within range is displayed.HintTo check the MAC address of your tablet device or other Wi-Fi details, tap (Option menu) -[Advanced].If a list of the networks is not displayed, tap [Scan] at the top right of the screen.3. Tap a desired network.4. When needed, enter a password or make settings.HintWhen you are in range and Wi-Fi is turned on, your tablet device will automatically reconnect to availablenetworks that it has connected to before.In the [Wi-Fi disconnect policy] menu displayed by tapping [ Apps & Widgets] - [ Settings] - [Wi-Fi] - (Option menu) - [Advanced] - [Wi-Fi disconnect policy], you can choose whether to keep the Wi-Fi connectionactive or not when applications such as Music player app during playback are running while the screen ofyour tablet device is turned off (sleep mode). If no application is running while in sleep mode, the Wi-Ficonnection will be disabled regardless of the selection chosen in [Wi-Fi disconnect policy].Related Topic](https://usermanual.wiki/Sony-Group/SGPT1211.user-manual/User-Guide-1737112-Page-17.png)
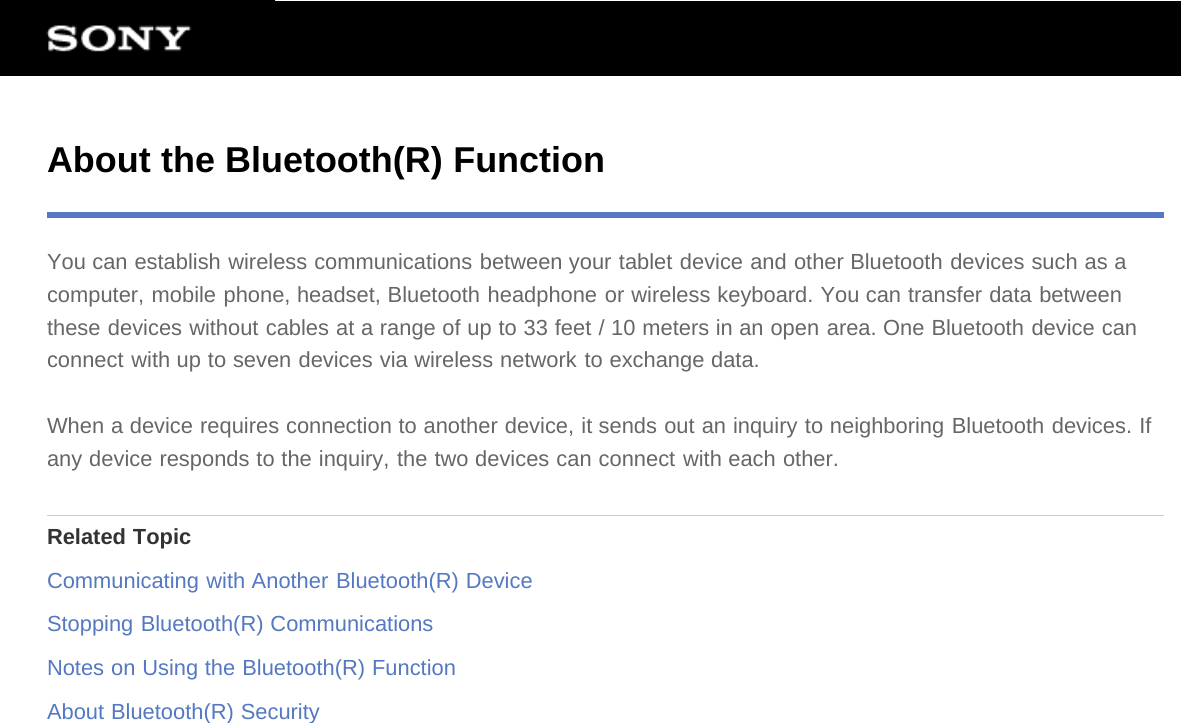
![Communicating with Another Bluetooth(R) DeviceYou can connect Bluetooth devices to your tablet device. Depending on the device, the procedure to establishconnection may vary. Refer to the operating instructions of the Bluetooth device. For details on Bluetoothcommunication, see “About the Bluetooth(R) Function” [Details].To turn on the Bluetooth feature1. Tap [ Apps & Widgets] - [ Settings] - [Bluetooth].2. Slide the [Bluetooth] switch to the [ON] position.NoteTo reduce battery consumption, turn off Bluetooth when not in use.The Bluetooth antenna is built in to your tablet device. If you cover the antenna with your hands or otherobjects while using the Bluetooth function, the communications quality may deteriorate [Details].To make your tablet device discoverableYou can allow a Bluetooth device to discover your tablet device when Bluetooth is turned on.1. Tap [ Apps & Widgets] - [ Settings] - [Bluetooth].2. Slide the [Bluetooth] switch to the [ON] position.3. Tap the model name of your tablet device.To pair with another Bluetooth deviceTo connect with a new Bluetooth device, you need to pair with it when Bluetooth is turned on. You only need todo this once for your tablet device and the new Bluetooth device to connect again. Just turn on the device thenext time.1. Make sure the Bluetooth device you are pairing with is in discoverable mode.NoteRefer to the operating instructions supplied with the Bluetooth devices for details.2. Tap [ Apps & Widgets] - [ Settings] - [Bluetooth].3. Slide the [Bluetooth] switch to the [ON] position.4. Tap [SEARCH FOR DEVICES] at the top right of the screen.The [AVAILABLE DEVICES] list is displayed.5. Tap the name of a device to connect with.6. Tap [Pair], or enter the device passkey (e.g. 0000) if necessary to connect to the Bluetooth device.When a connection is established with the device, the Bluetooth indicator appears in a status bar at thebottom right of the screen on your tablet device.](https://usermanual.wiki/Sony-Group/SGPT1211.user-manual/User-Guide-1737112-Page-21.png)
![To reconnect devicesTo reconnect your tablet device with the paired device, tap the device name in the [PAIRED DEVICES] list.Related TopicAbout the Bluetooth(R) FunctionStopping Bluetooth(R) CommunicationsNotes on Using the Bluetooth(R) FunctionAbout Bluetooth(R) Security](https://usermanual.wiki/Sony-Group/SGPT1211.user-manual/User-Guide-1737112-Page-22.png)
![Stopping Bluetooth(R) CommunicationsFrom your tablet device, you can unpair the Bluetooth devices it is paired with.1. Tap next to the name of the device you want to unpair your tablet device from in the [PAIRED DEVICES]list that .2. Tap [Unpair].HintTo reduce battery consumption, turn off Bluetooth when not in use.Related TopicAbout the Bluetooth(R) FunctionCommunicating with Another Bluetooth(R) DeviceNotes on Using the Bluetooth(R) FunctionAbout Bluetooth(R) Security](https://usermanual.wiki/Sony-Group/SGPT1211.user-manual/User-Guide-1737112-Page-23.png)

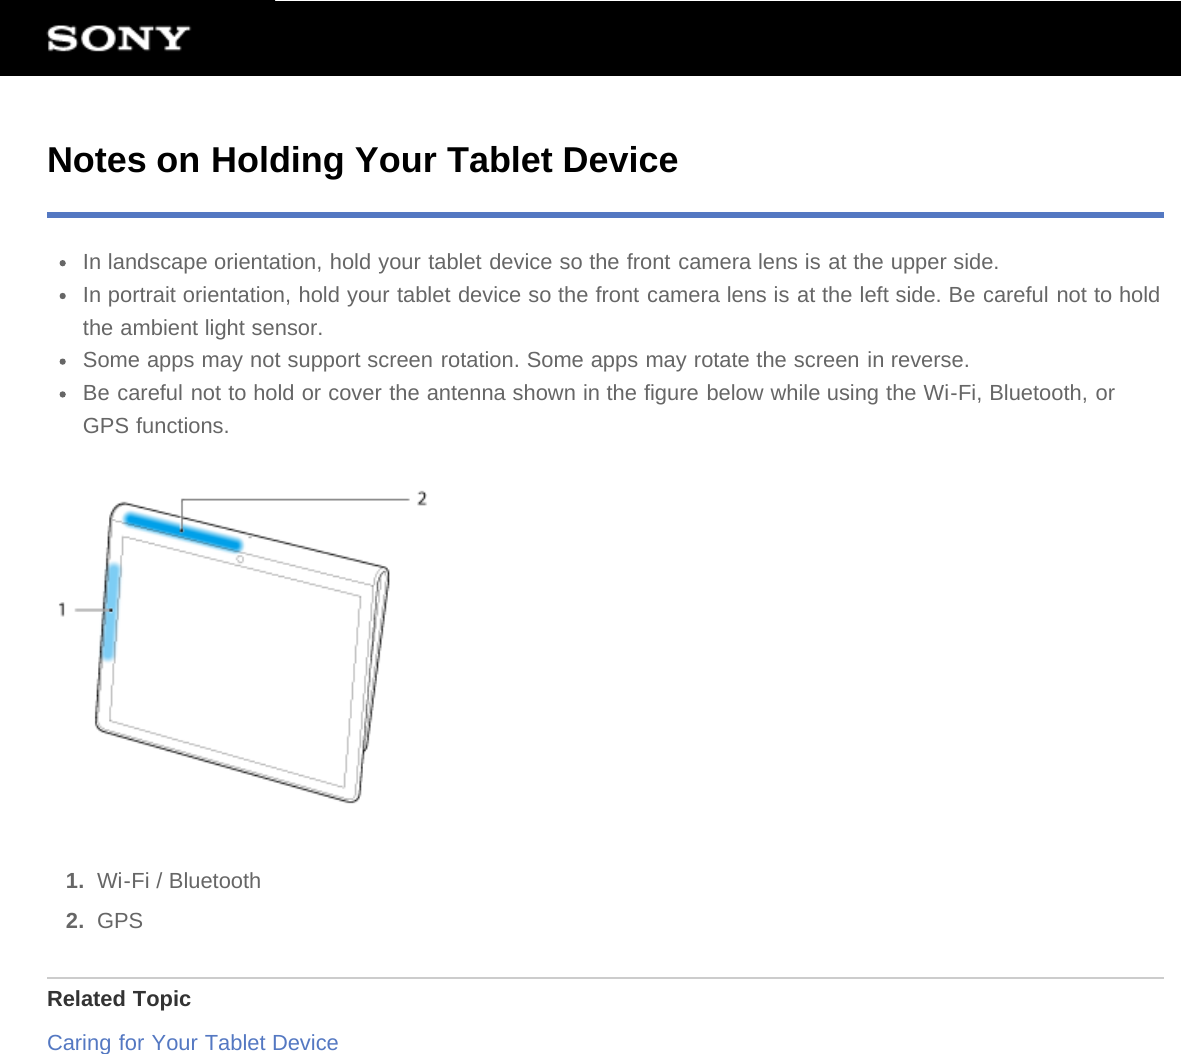
![About the GPS FunctionThe GPS (Global Positioning System) function provides location information by receiving signals from GPSsatellites. You can see the location where you are, where you are going, or directions to a destination on GoogleMaps with your tablet device by using the GPS function.NoteWhen other electronic devices are near your tablet device, electromagnetic waves or magnetic interferencefrom those may prevent your tablet device from providing accurate location information. Keep electronicdevices away from your tablet device.When your tablet device is in an area with poor reception of GPS signals, you may encounter positioningerrors. To receive more accurate information, avoid using your tablet device in the following locations.Inside buildings or vehiclesIn tunnels or undergroundUnder elevated tracksBetween tall buildingsIn dense treesIn valleysThe GPS antenna is built in to your tablet device. If you cover the antenna with your hands or other objectswhile using the GPS function, the positioning accuracy may deteriorate [Details].Related TopicEnabling the Location InformationDisabling the Location InformationNotes on Geomagnetic Sensor](https://usermanual.wiki/Sony-Group/SGPT1211.user-manual/User-Guide-1737112-Page-27.png)
![Enabling the Location InformationYou can set whether to receive location information via GPS satellites or wireless networks.1. Tap [ Apps & Widgets] - [ Settings] - [Location services].2. To enable reception of location information via wireless networks, tap [Google’s location service].To enable reception of location information via GPS satellites, tap [GPS satellites].A check mark is put in the box for that setting.NoteMove your tablet device as little as possible in an area with a clear view of the sky until the present location isdisplayed by the GPS function. The present location can be displayed quicker when stationary than whilemoving. If the present location is not displayed or if the wrong location is displayed, move to an area with aclear view of the sky.Related TopicAbout the GPS FunctionDisabling the Location Information](https://usermanual.wiki/Sony-Group/SGPT1211.user-manual/User-Guide-1737112-Page-28.png)
![Disabling the Location Information1. Tap [ Apps & Widgets] - [ Settings] - [Location services].2. Tap [Google’s location service] or [GPS satellites], whichever is selected, to deactivate that method.The check mark is removed from the box for that setting.Related TopicAbout the GPS FunctionEnabling the Location Information](https://usermanual.wiki/Sony-Group/SGPT1211.user-manual/User-Guide-1737112-Page-29.png)
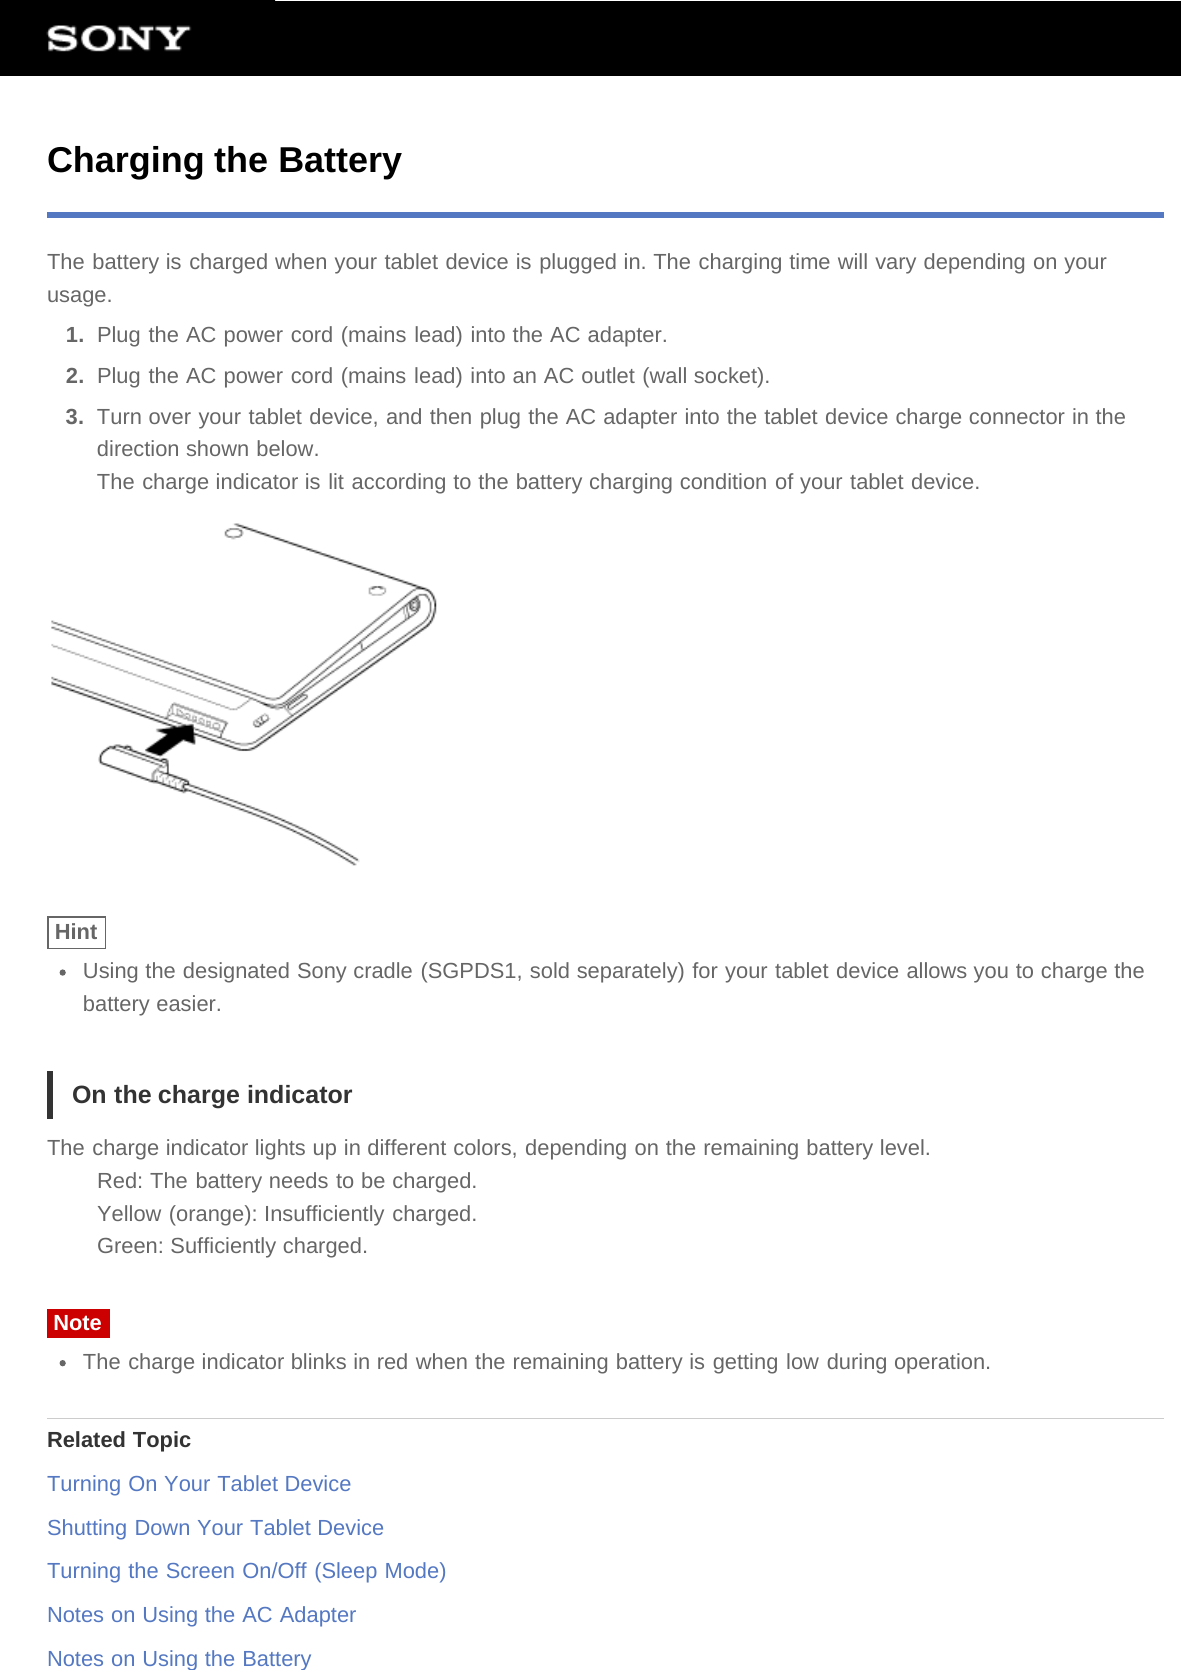
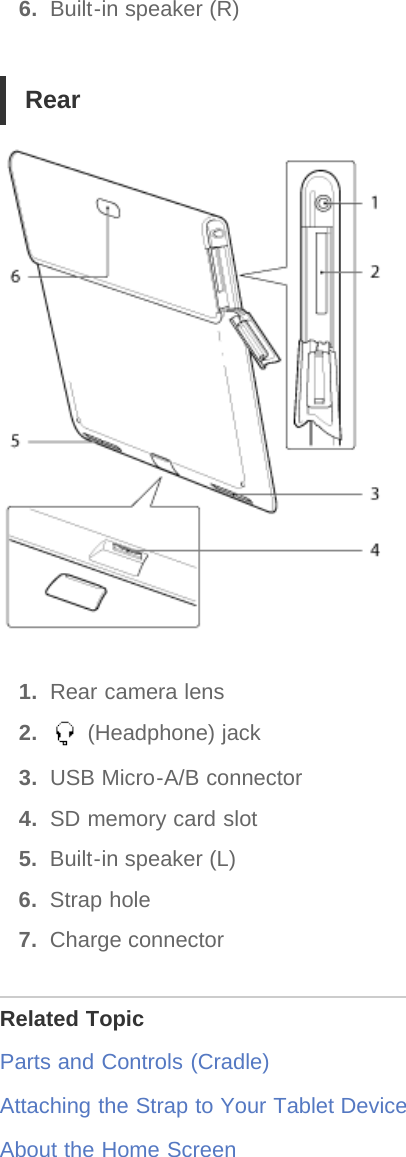
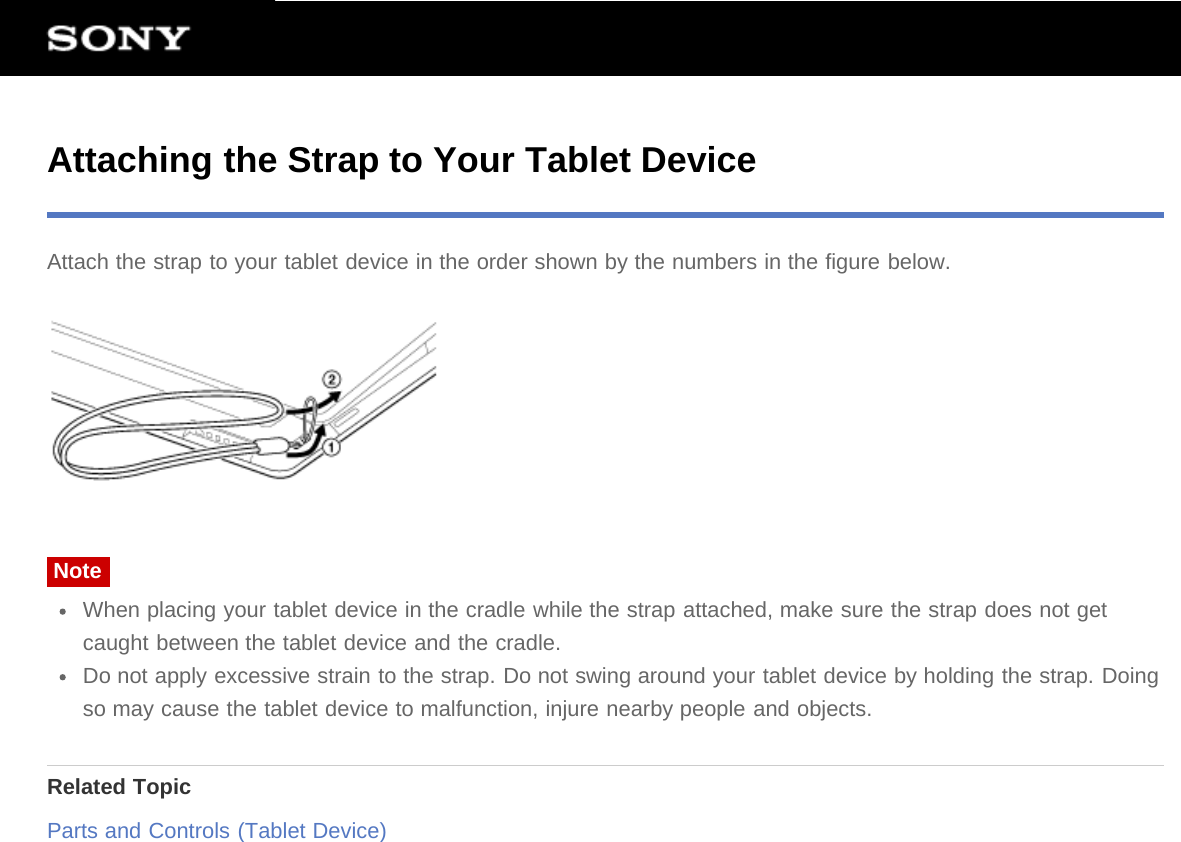
![Parts and Controls (Tablet Device)Front1. Microphone2. IR data port3. Ambient light sensor4. Touch screen5. Front camera lensSide1. Notification LED2. (Power) button3. Charge indicator [Details]4. VOL + / - (Volume) buttonsThe VOL + button has a tactile dot to help you operate your tablet device easier.5. Reset button (hole)](https://usermanual.wiki/Sony-Group/SGPT1211.user-manual/User-Guide-1737112-Page-35.png)
![Reducing Battery ConsumptionUsing your tablet device as described below will reduce battery consumption.Reduce the screen brightness (Tap [ Apps & Widgets] - [ Settings] - [Display] - [Brightness]).Disconnect the USB devices.Set a short period of inactivity for turning off the screen (sleep mode) automatically (Tap [ Apps & Widgets]- [ Settings] - [Display] - [Sleep]).Press the power button lightly to turn the screen off (sleep mode) when you will not be using your tabletdevice.Shut down your tablet device when you do not use it for a long time [Details].Turn off each feature when you do not use Wi-Fi, Bluetooth, or GPS.Related TopicTurning On Your Tablet DeviceShutting Down Your Tablet DeviceTurning the Screen On/Off (Sleep Mode)Notes on Using the AC AdapterCharging the BatteryNotes on Using the Battery](https://usermanual.wiki/Sony-Group/SGPT1211.user-manual/User-Guide-1737112-Page-45.png)
![Using the Built-in CameraYou can take photos and record videos using the built-in camera on your tablet device [Details].Related TopicNotes on the Built-in CameraCamera](https://usermanual.wiki/Sony-Group/SGPT1211.user-manual/User-Guide-1737112-Page-48.png)
![Checking the Android VersionYou can confirm the version of Android running on your tablet device.1. Tap [ Apps & Widgets] - [ Settings] - [About tablet].You can check the version of Android running on your tablet device in [Android version].Related TopicUpdating Android to the Latest Version](https://usermanual.wiki/Sony-Group/SGPT1211.user-manual/User-Guide-1737112-Page-50.png)
![Updating Android to the Latest VersionUpdate your tablet device to the latest version of Android.NoteOnce updating is done, you cannot return your tablet device to an older version of Android. Updating requiresthe remaining battery level to be at 50 % or greater and use of the AC adapter. Your tablet device may nolonger turn on if the battery is depleted while updating.The data stored on the internal storage (memory space in your tablet device) will not be erased by updating.There must be enough free space on the internal storage to download the update files when updating.Some applications may not be compatible with the updated version of Android, and they may no longer runafter updating.Be sure to check the Android version each application is compatible with before updating.Updating may take longer if you connect to the Internet using the wireless WAN (3G) function. In addition,large data charges may be incurred depending on the service you subscribe to.1. [ Apps & Widgets] - [ Settings] - [About tablet].2. Tap [System update].The screen to start updating is displayed when an update is available. Start updating by following theinstructions on the screen.Related TopicChecking the Android Version](https://usermanual.wiki/Sony-Group/SGPT1211.user-manual/User-Guide-1737112-Page-51.png)
![Searching for Apps MarketApps such as convenient tools and games can be downloaded to your tablet device from Android Market providedby Google.Tap [ Apps & Widgets] at the top right of the Home screen, followed by [ Market] on the displayedapplication launcher.You can also use Android Market from your computer.http://market.android.comThis site displays Android Market and allows you to manage apps you downloaded from Android Market andinstalled on your tablet device.](https://usermanual.wiki/Sony-Group/SGPT1211.user-manual/User-Guide-1737112-Page-57.png)
![About the Home ScreenApp shortcuts, status bars, widgets, and more are displayed on the Home screen. The Home screen consists offive pages, and you can flick left/right to scroll the pages.A: Quick search box/Quick launcherQuick search boxTap the box to easily search with Google [Details].Quick launcherTap icons in the Quick launcher to start apps. Since the Quick launcher is displayed on every page of theHome screen, registering apps you often use gives you quick access to them.HintTap and hold icons to sort them in the Quick launcher or move them in and out of the Quick launcher.B: Favorites/Apps & Widgets FavoritesTap this to start Favorites [Details]. Apps & WidgetsTap this to display the app list and the widget list [Details].C: WidgetYou can choose your favorite widgets from the widget list and place them on the Home screen [Details].D: Basic operation buttons (Back): Tap this to return to the previous screen. (Home): Tap this to display the Home screen. (Recent Apps): Tap this to display the apps used recently [Details].E: Small AppsYou can start an app also available as a Small Apps, even while another app is already in use. To start anotherapp, tap to display the Small Apps launcher and select the desired app. To set a shortcut, tap on theSmall Apps launcher and select an app.F: Digital clock](https://usermanual.wiki/Sony-Group/SGPT1211.user-manual/User-Guide-1737112-Page-62.png)
![Tap this to display the notification panel [Details].Related TopicAdding Apps or Widgets to the Home ScreenFavoritesApplication Launcher and WidgetsAbout the Notification PanelRotating the ScreenQuick SearchLocking the ScreenDisplaying Recent Apps](https://usermanual.wiki/Sony-Group/SGPT1211.user-manual/User-Guide-1737112-Page-63.png)
![Adding Apps or Widgets to the Home ScreenAdding apps icons or widgets to the Home screen allows you to start apps easily.1. On the page of the Home screen where you want to place apps icons or widgets, tap [ Apps & Widgets]at the top right of the screen.2. Select the item you want to add to the Home screen from [APPS] or [WIDGETS].3. Tap and hold the icon of the app or widget, drop it when the Home screen is displayed.The icon or widget is added to the page which you drop the icon or widget onto.To organize icons with foldersYou can use folders to organize icons on the Home screen.1. Tap and hold an icon, and then drag it on top of another icon.The two icons are then combined.2. Tap the combined icon, and then tap [Unnamed Folder].3. Enter a new folder name.The folder is shown with the new folder name.HintYou can add an icon to a folder by dragging and dropping the icon onto the folder.To remove an icon from a folder, tap to open the folder, and then drag the icon out of the folder. When allicons are removed from the folder, the folder is deleted automatically.To delete an icon from the Home screenTap and hold the icon and drag and drop it to (Remove).Related TopicAbout the Home ScreenFavoritesApplication Launcher and WidgetsAbout the Notification PanelRotating the ScreenQuick SearchLocking the ScreenDisplaying Recent Apps](https://usermanual.wiki/Sony-Group/SGPT1211.user-manual/User-Guide-1737112-Page-64.png)
![FavoritesIn Favorites, thumbnails for websites you frequently visit, and content such as videos, photos, music, books, orgames you have registered as favorites are displayed. As you can see all registered content items at once, youcan start the desired content with one tap, without starting/ending apps repeatedly.1. Tap [ Favorites] on the Home Screen.Favorites is displayed.2. Tap your favorite content displayed on the right side of the Favorites screen.Detailed information is displayed on the left side of the screen.3. Tap the content to use.The corresponding app starts to play back the content.HintTapping the content selected in step 2 again allows you to start playback of the content.Customizing the displayed items1. In Favorites, tap at the top right of the screen.2. Customize as follows. To add items:Select the desired item from the list on the left side of the screen, and tap it. To delete an item:Tap on the thumbnail on the right side of the screen. Or select the item to delete from the list on leftside of the screen, and tap it. To move an item:Drag and drop the thumbnail on the right side of the screen.3. When you finished customizing, tap at the top right of the screen.Related TopicAbout the Home ScreenAdding Apps or Widgets to the Home ScreenApplication Launcher and WidgetsAbout the Notification PanelRotating the ScreenQuick SearchLocking the ScreenDisplaying Recent Apps](https://usermanual.wiki/Sony-Group/SGPT1211.user-manual/User-Guide-1737112-Page-65.png)
![Application Launcher and WidgetsWhen you tap [ Apps & Widgets] on the Home screen, the application launcher or the list of widgets isdisplayed.The application launcher displays the icons of all available apps, allowing you to tap those to start an app. Thelist of widgets displays mini-applications that you can place on the Home screen. If an app is supplied with awidget, place the widget on the Home screen so that you can operate the app from the Home screen easily.Switching between the application launcher and the list of widgets1. Tap the [APPS] or [WIDGETS] at the top left of the screen.HintIf there are multiple pages in the application launcher, flick left to display other pages. The list of widgets isdisplayed after the application launcher.Sorting the application icons and widgets1. Tap at the top right of the screen and select a sorting method.[A to Z] : Sort by name.[Newest first] : Sort by date of update.Uninstalling an application1. In the application launcher, tap and hold the icon of the app you want to uninstall.2. Drag and drop the icon to [ Uninstall].Displaying the app information1. Tap and hold the icon of the app you want to check information of.2. Drag and drop the icon to [ App info].HintIf the Market app is installed, is displayed to the left of . You can start the Market app by tapping .Related TopicAbout the Home ScreenAdding Apps or Widgets to the Home ScreenFavorites](https://usermanual.wiki/Sony-Group/SGPT1211.user-manual/User-Guide-1737112-Page-66.png)

![Rotating the ScreenThe screen rotates when you turn your tablet device sideways shown below.NoteDepending on the application, the screen may rotate regardless of the direction of your tablet device.Some apps may not support screen rotation. Some apps may rotate the screen in reverse.Setting the screen to not rotate1. Tap [ Apps & Widgets] - [ Settings] - [Display] - [Auto-rotate screen] in that order to remove the checkmark.To set the screen to rotate againTap [Auto-rotate screen] again to add a check mark.Related TopicAbout the Home ScreenAdding Apps or Widgets to the Home ScreenFavoritesApplication Launcher and WidgetsAbout the Notification PanelQuick SearchLocking the ScreenDisplaying Recent Apps](https://usermanual.wiki/Sony-Group/SGPT1211.user-manual/User-Guide-1737112-Page-69.png)
![Locking the ScreenYou can lock the screen of your tablet device to prevent accidental touching of the screen from activatingoperations. If you activate the lock function, the screen is locked when the screen is turned off. You can alsoselect how to deactivate locking.To configure the lock function1. Tap [ Apps & Widgets] - [ Settings] - [Security] - [Screen lock] in that order.2. Tap the desired setting.3. Follow the on-screen instructions.Related TopicAbout the Home ScreenAdding Apps or Widgets to the Home ScreenFavoritesApplication Launcher and WidgetsAbout the Notification PanelRotating the ScreenQuick SearchDisplaying Recent Apps](https://usermanual.wiki/Sony-Group/SGPT1211.user-manual/User-Guide-1737112-Page-71.png)
![Entering TextWhen you want to enter texts, tap the text area to display the on-screen keyboard [Details].Related TopicUsing the On-screen KeyboardCutting and Pasting Text](https://usermanual.wiki/Sony-Group/SGPT1211.user-manual/User-Guide-1737112-Page-73.png)
![Using the On-screen KeyboardThe on-screen keyboard changes each time you tap the two keys below the left-side [Tab] key.A numerical keyboard can also be displayed. Tap [ Apps & Widgets] - [ Settings] - [ Language &input] in that order. Then tap next to [Standard keyboard] followed by [Number keys] to add a check mark.To set the input languageTap [ Apps & Widgets] - [ Settings] - [ Language & input] in that order. Then tap next to [Standardkeyboard] followed by [Input languages], and then put a check mark on the languages to use.To switch the input languageIf you have selected multiple languages to use for input, you can switch the input language by tapping thelanguage switching key at the bottom left of the on-screen keyboard. You can also select a language by tappingand holding the language switching key.Related TopicEntering TextCutting and Pasting Text](https://usermanual.wiki/Sony-Group/SGPT1211.user-manual/User-Guide-1737112-Page-74.png)
![Cutting and Pasting TextTo cut or copy text1. Tap and hold the text to cut or copy.The selected text is highlighted.2. Tap [COPY] or [CUT].NoteYou cannot cut or copy text while entering.HintIf you drag and drop the cursor that appears in step 1, you can change the range of text selected.To paste text1. Tap and hold the location to paste the text, and then tap [PASTE].HintIf you drag and drop the cursor that appears in step 1, you can change the location to paste the text.Related TopicEntering TextUsing the On-screen Keyboard](https://usermanual.wiki/Sony-Group/SGPT1211.user-manual/User-Guide-1737112-Page-75.png)
![Google AccountYou are required to sign up for a Google account to use services provided by Google, such as Gmail, Calendar,and Android Market. Those services are provided free of charge. Using the Google account, you can sync apps,such as Gmail, Calendar, and People, on your tablet device with those of their respective Google services.Using your current Google accountYou can use the Google account you have already have with a computer or smartphone. Input your accountname and password in the log in screen displayed for Google service apps.NoteMake sure that your tablet device is connected to the Internet when you sign up for a new Google account orlog-in.Signing up for a new Google account on your tablet deviceYou can sign up for a Google account when you use your tablet device for the first time or start a Google serviceapp for the first time.HintYou do not have to sign up for another Google account when you have already have one for your computer,etc.You can sign up for a Google account by tapping [ Apps & Widgets] - [ Settings] - [Accounts & sync] -[ADD ACCOUNT] (at the top right of the screen) - [Google] in that order.You can also sign up for a Google account by accessing Google (https://www.google.com/accounts/) directly.Related TopicBefore Use](https://usermanual.wiki/Sony-Group/SGPT1211.user-manual/User-Guide-1737112-Page-76.png)
![Changing the SettingsVarious settings of your tablet device can be changed in the settings menu.1. Tap [ Apps & Widgets] - [ Settings] and the desired items.2. Tap the individual menu items to change settings.The menu items are as follows:Wireless & networksWi-FiBluetoothData usageMore... (settings of Airplane mode, VPN, etc.)DEVICESoundDisplayStorageBatteryAppsPERSONALAccounts & syncLocation servicesSecurity Language & inputBackup & resetSYSTEMCradleDate & timeAccessibilityAbout tabletNoteDisplay may be distorted with some apps if you set [Font size] to [Large] or [Huge] in [Display]. If that occurs,set [Font size] to [Normal].](https://usermanual.wiki/Sony-Group/SGPT1211.user-manual/User-Guide-1737112-Page-77.png)
![Before UseWhen you use your tablet device for the first time, you can connect your tablet device to the Internet and sign into your Google account.HintYou may connect your tablet device to the Internet and sign in to your Google account later.1. After turning on your tablet device, select a language.2. Connect your tablet device to the Internet via Wi-Fi [Details].3. Follow the displayed instructions to sign in to your Google account.Related TopicGoogle Account](https://usermanual.wiki/Sony-Group/SGPT1211.user-manual/User-Guide-1737112-Page-78.png)
![List of AppsWhen you first purchase your tablet device, the following apps are preinstalled on it. You can start each app bytapping its icon.HintWhen (Option menu) appears at the top right of the screen, you can tap it to display the option menu. CalendarManage your schedule and synchronizing the schedule with Google Calendar [Details] BrowserBrowse Internet websites [Details] CameraShoot photos or movies [Details] PeopleManage contacts for your friends or colleagues [Details] Desk clockDisplay the current time [Details] EmailSend or receive PC e-mail messages [Details] Video playerPlay back movie files [Details] Music playerPlay back music files [Details]](https://usermanual.wiki/Sony-Group/SGPT1211.user-manual/User-Guide-1737112-Page-79.png)
![GalleryBrowse photos or play them back as a slide show [Details] File transferTransfer files between the internal memory and an SD memory card [Details] Remote controlUse your tablet device as a remote control [Details] DLNAExchange videos, music, and photos with other devices via the home network and play them back [Details] Social Feed ReaderAccess Social Networking Services such as Twitter or Facebook [Details] Wi-Fi checkerCheck the Wi-Fi connection of your tablet device [Details] Reader *1Purchase and browse eBooks content [Details] Help guideDisplay this Help guide via the network Select AppAccess websites that introduce Sony-recommended apps [Details] Registration *1Register your tablet device with Sony [Details] Video Unlimited *1Access Sony’s premium video delivery service [Details]1](https://usermanual.wiki/Sony-Group/SGPT1211.user-manual/User-Guide-1737112-Page-80.png)
![Music Unlimited *Access Sony’s cloud music delivery service [Details] Personal Space *1Access the website for Sony’s online imaging service [Details] PS Store *1You can purchase and download PlayStation games from the PlayStation(R)Store [Details]. Crash Bandicoot(R) *1Play this classic game for the first generation PlayStation (Controller of the PlayStation(R)3 system supported) Pinball HeroesPlay this pinball game (Controller of the PlayStation(R)3 system supported) MediaRemoteControl Sony devices supporting the MediaRemote app via the Wi-Fi network [Details] SettingsChange various settings of your tablet device [Details] MusicPlay back music CalculatorMake basic calculations [Details] GmailSend or receive Gmail Google SearchMake Google searches [Details]1](https://usermanual.wiki/Sony-Group/SGPT1211.user-manual/User-Guide-1737112-Page-81.png)
![Videos *Play back movie files you have rented from Android Market MapsFind your location and search destinations/routes (Google Maps) PlacesUse this information service for shops and places NavigationUse this Internet-aided GPS navigation system that includes a voice guidance function LatitudeCheck a friend’s current position on a map TalkChat by text/voice and make video calls (Google Talk) MarketDownload or purchase new apps YouTubeUse the YouTube video-sharing website Books *1Search and preview a wide range of books from libraries and publishers all over the world DownloadsUse the download manager to display or manage Internet content downloads Foursquare *1Share with friends and acquaintances information on shops and places you visit, or get money-saving information[Details].](https://usermanual.wiki/Sony-Group/SGPT1211.user-manual/User-Guide-1737112-Page-82.png)
![Crackle *1View full-length and full-size Hollywood movies and TV programs [Details]. chumby for Sony Tablet S *1Enjoy the content of more than 1,500 apps including those for news and weather, all from a single app [Details]. Ustream *1Stream live video using the built-in camera, and communicate with viewers [Details]. Zinio *1Use this app for the world largest bookstore application to enjoy the world top magazines as eBooks [Details]. Evernote *1Store memos, photos and voice messages on the cloud, and browse them from your computer and tablet deviceat any time [Details]. HD GamesDownload high quality games to your Android tablet from the Top HD Games at Gameloft's online store [Details].*1 Apps or services may not be available in some countries/regions.](https://usermanual.wiki/Sony-Group/SGPT1211.user-manual/User-Guide-1737112-Page-83.png)
![EmailYou can compose, send and receive e-mail messages in the same format as used on computers. You canregister multiple e-mail accounts. Your contacts list registered in the People app can be used to add the recipientaddress when composing a new e-mail message. You can also search or sort received e-mail messages.If using Microsoft Exchange Server, you can send and receive e-mails by connecting to Microsoft ExchangeServer.NoteAsk your network administrator, etc. about how to connect to Microsoft Exchange Server.1. Tap to start the Email app.Before setting an account: The screen to set an account is displayed.After an account has been set: The e-mail list screen is displayed. Tap the desired e-mail to display it.HintIf you cannot find the icon to start the app, look for it in the application launcher displayed by tapping [Apps & Widgets] at the top right of the Home screen.Setting an e-mail account1. Start the Email app.The screen to set an account is displayed.2. Input your e-mail address and password, and tap [Next].3. Following the instructions on the screen, set the e-mail account.When setting is complete, the e-mail list screen is displayed.To change settingsTap (Option menu) - [Settings] - (the e-mail account to be changed) - (the item to be changed) in that order.To add an e-mail accountTap (Option menu) - [Settings] followed by [ADD ACCOUNT], then proceed to step 3.To remove an e-mail accountTap (Option menu) - [Settings] - (the e-mail account to be removed) - [Remove account] in that order.Composing/Sending an e-mail1. On the e-mail list screen, tap at the top right of the screen.The e-mail composing screen is displayed.2. Input the recipient’s e-mail address at [To].](https://usermanual.wiki/Sony-Group/SGPT1211.user-manual/User-Guide-1737112-Page-84.png)
![3. Input the subject at [Subject].4. Input the message at [Compose email].5. Tap [SEND].The e-mail you composed is sent.HintTapping in step 2 allows you to input the address from those in the People app.Tapping in step 3 allows you to attach a file to your e-mail.Tapping [Save draft] while composing allows you to save the draft.Receiving e-mails1. On the e-mail list screen, tap at the top right of the screen.New e-mails are displayed in the inbox. Tap on the e-mails to open them.HintYou can set for each account the number of received e-mails to be put in a folder by tapping (Optionmenu) - [Settings] - [Messages per folder] on the e-mail list screen.To reply to an e-mailDisplay the e-mail you want to reply to, tap (Reply) or (Reply to all), compose your message, and tap[SEND].To forward an e-mailDisplay the e-mail you want to forward, tap (Forward), compose your forwarding message, and tap [SEND].Deleting an e-mail1. Tap the e-mail you want to delete on the e-mail list screen.The selected e-mail is displayed.2. Tap at the top right of the screen, followed by [OK].The e-mail is deleted.Sorting e-mails1. Tap (Option menu) - [Show sort buttons] on the e-mail list screenThe sort buttons are displayed.2. Tap the button of the desired sorting item among the items displayed.The e-mails are sorted according to the selected sorting item.Searching for an e-mail1. Tap at the top right of the screen on the e-mail list screen.The search box is displayed.2. Input a keyword, and then tap the key.](https://usermanual.wiki/Sony-Group/SGPT1211.user-manual/User-Guide-1737112-Page-85.png)
![HintThe search covers the subject, sender, and e-mail body of all the e-mails saved on the server.The results are displayed 10 at a time from the latest e-mails. To search for older e-mails, tap [Load moremessages].Making changes to multiple e-mailsYou can select multiple e-mails to move them to another folder or delete them together.1. On the e-mail list screen or on an e-mail screen, tap the check box of the desired e-mail to put a check in.The e-mails having a check mark are selected.2. When finished selecting e-mails, make changes to them such as moving them to another folder or deletingthem.](https://usermanual.wiki/Sony-Group/SGPT1211.user-manual/User-Guide-1737112-Page-86.png)
![BrowserThe Browser app lets you access and browse websites on the Internet. You can display/switch between multiplewebsites by using tabs.1. Tap to start the Browser app.HintIf you cannot find the icon to start the app, look for it in the application launcher displayed by tapping [Apps & Widgets] at the top right of the Home screen.Certain websites may not be displayed, because the browser does not support the photo/movie format orplug-in.You can launch the browser as a Small Apps. In this case, the following functions are not supported.Playing back flash contentBrowsing websites by using tabsBookmarks and access historiesBrowsing Websites1. Tap the address bar on the browser.The on-screen keyboard is displayed.2. Input the address (URL) of the desired website, and tap the key.NoteIf the content does not appear correctly, tap [Settings] followed by [Advanced] in the (Option menu), thentap [Enable Quick view] to remove the check.HintYou can search the Internet by inputting a keyword or phrase instead of the address (URL) in step 2.If the address bar is not displayed at the top of the screen, tap the tab.To add a tab, tap at the right end of the tabs list.To delete a tab, tap at the right end inside the tab.If the website is displayed differently from when browsed on a computer, tap (Option menu) at the top rightof the screen and put a check mark in [Request desktop site] in the menu. Then you can browse the websiteas on a computer.You can set desktop or mobile site for each tab.To view/delete the access historyTo view the websites you accessed previously, tap followed by [HISTORY] at the top left of the screen.To delete the history, tap after displaying the history.Using Bookmarks](https://usermanual.wiki/Sony-Group/SGPT1211.user-manual/User-Guide-1737112-Page-87.png)
![The bookmark function allows you to record addresses (URLs) of websites you visit frequently to allow you toaccess those sites quickly. You can also make shortcuts on the Home screen for addresses (URLs).To add a bookmark for an address (URL)Tap at the right of the address bar to check the detailed information, and then tap [OK].To make a shortcut on the Home screen for an address (URL)Tap at the right of the address bar, select [ Home screen] as the destination, and then tap [OK].To access a website from its bookmarkTap to call up the list of registered bookmarks. Tap the desired website from the list.](https://usermanual.wiki/Sony-Group/SGPT1211.user-manual/User-Guide-1737112-Page-88.png)
![CameraYou can shoot photos and movies using the built-in front and rear cameras. Various shooting settings such asimage size are also available. Location information also can be added to photos.1. Tap to start the Camera app.HintIf you cannot find the icon to start the app, look for it in the application launcher displayed by tapping [Apps & Widgets] at the top right of the Home screen.In order to add location information to the photos, GPS must be enabled or your tablet device must beconnected to the network when you take photos.You can view the photos and movies you recorded from Gallery app also.Shooting Photos/Movies1. Start the Camera app.Tap or at the right side of the screen to select photo or movie.2. Aim the camera to your subject, and tap or .For photos: A photo is shot.For movies: Movie recording starts. Tapping again stops recording.HintThe rear camera is equipped with an auto-focus function. After you tap , a photo is shot when the subjectcomes into focus.You can switch between the front camera and the rear camera by tapping or at the top right of thescreen.Shooting Panoramic Photos1. Start the Camera app.Tap at the right side of the screen.2. Point the camera at the edge of the your subject, and tap .Panoramic photo recording starts. Pan or tilt the camera to the end, and tap again to stop recording.HintWhen you hold your tablet device sideways, you can shoot landscape panoramic photos. When you hold yourtablet device upright, you can shoot portrait panoramic photos.](https://usermanual.wiki/Sony-Group/SGPT1211.user-manual/User-Guide-1737112-Page-89.png)
![CalculatorYou can use your tablet device as a calculator. In addition to four arithmetic operation of addition, subtraction,multiplication and division, trigonometric function, exponent function, logarithm, etc. are available.1. Tap to start the Calculator app.HintIf you cannot find the icon to start the app, look for it in the application launcher displayed by tapping [Apps & Widgets] at the top right of the Home screen.](https://usermanual.wiki/Sony-Group/SGPT1211.user-manual/User-Guide-1737112-Page-91.png)
![CalendarYou can manage your schedule on your tablet device. By registering your Google account, you can sync yourGoogle Calendar and your schedule data, making your schedule even more handy.If using Microsoft Exchange Server, you can manage your schedule by connecting to Microsoft Exchange Server.NoteAsk your network administrator, etc. about how to connect to Microsoft Exchange Server.1. Tap to start the Calendar app.The calendar is displayed.Tapping the icons at the top of the screen allows you to do the following operations. : Add schedules : Set a date to be displayed : Search for a schedule : Make detailed settings of the Calendar app[TODAY]: Display today’s schedule[MONTH]: Display the calendar by month[WEEK]: Display the calendar by week[DAY]: Display the schedule for one day[AGENDA]: Display the list of scheduled itemsHintIf you cannot find the icon to start the app, look for it in the application launcher displayed by tapping [Apps & Widgets] at the top right of the Home screen.You can change the month or date and time by flicking up/down/right/left on the schedule or mini-calendar.Adding a schedule1. Tap and hold the date and time you want to add a schedule for, and then tap [New event]. Or, tap .2. Input the starting date and time and details of the schedule, and then tap [ DONE] at the top right of thescreen.HintYou can have your tablet device notify you when close to the scheduled date and time.Changing a schedule1. Tap the schedule you want to change.2. Tap , input the item to be changed, and then tap [ DONE] at the top right of the screen.](https://usermanual.wiki/Sony-Group/SGPT1211.user-manual/User-Guide-1737112-Page-92.png)
![Deleting a schedule1. Tap the schedule you want to delete.2. Tap followed by [OK].NoteWhen you share the schedule on Google Calendar, choose the people with whom you share it very carefullyto prevent your schedule from being disclosed to undesired users.If your calendar is not synced with Google Calendar automatically, tap [ Settings] followed by [Accounts &sync], and check whether the switch at the top right of the screen is set to [ON].If your calendar is set to sync with Google Calendar automatically and you change the schedule on acomputer or other devices, your tablet device will connect with Google Calendar automatically. This maycause unexpected communications charge.](https://usermanual.wiki/Sony-Group/SGPT1211.user-manual/User-Guide-1737112-Page-93.png)
![PeopleYou can register names, phone numbers, addresses, etc. as frequently used contacts. By registering your Googleaccount, you can sync People with Gmail contacts, making them even more handy.If using Microsoft Exchange Server, you can manage your contacts by connecting to Microsoft Exchange Server.NoteAsk your network administrator, etc. about how to connect to Microsoft Exchange Server.1. Tap to start the People app.HintIf you cannot find the icon to start the app, look for it in the application launcher displayed by tapping [Apps & Widgets] at the top right of the Home screen.Registering contacts1. Start the People app.2. Tap [ALL] at the top left of the screen.3. Tap .4. Input the data, and tap [ DONE].The contact is registered.HintThe contact can also be registered by tapping (Back) at the bottom left of the Home screen in step 3.When you tap [ DISCARD], the data you are editing is discarded.To edit contactsTap the contact you want to edit, and then tap at the top right of the displayed screen.To delete contactsTap the contact you want to delete, and then tap (Option menu) - [Delete].To switch the display of the contactsTap (Option menu) - [Contacts to display] - (the account), you can switch the contacts list of each account.You can also specify all accounts or multiple accounts.Registering groups1. Start the People app.2. Tap [GROUPS] at the top left of the screen, and then tap .If you have multiple accounts, tap the account you want to register with.3. Input the group’s name, and then type the person’s name you want to be included.](https://usermanual.wiki/Sony-Group/SGPT1211.user-manual/User-Guide-1737112-Page-94.png)
![4. Tap [ DONE].The group is registered.Joining contactsYou can join the contact of a person who has two or more e-mail address, etc. and has been registered toseparate contacts.1. Start People app.2. Tap [ALL] at the top left of the screen.3. Tap one of his/her contacts, and then tap at the top right of the displayed screen.4. Tap (Option menu) - [Join].5. Tap the contact you wish to join with.The contact selected in step 5 is joined with the contact selected in step 3. The contact name after joiningthe contacts will be that of the contact selected in step 3.NoteIf your contacts are not synced with Google contacts automatically, tap [ Settings] followed by [Accounts &sync], and check that the switch at the top right of the screen is set to [ON].](https://usermanual.wiki/Sony-Group/SGPT1211.user-manual/User-Guide-1737112-Page-95.png)
![Desk clockThe clock is easy-to-see even from a distance and has a background that changes according to the time.You can use your tablet device as a desk clock by placing it on a designated Sony cradle (SGPDS1, soldseparately) for your tablet device.1. Tap to start the Desk clock app.The digital clock is displayed.Tapping the icons allows you to do the following operations. : Set the alarm : Start the Gallery app and slide show : Play back music : Return to the Home screenHintIf you cannot find the icon to start the app, look for it in the application launcher displayed by tapping [Apps & Widgets] at the top right of the Home screen.The time set for the alarm is displayed on the screen.Tap anywhere on the screen to can change the screen brightness between two levels.](https://usermanual.wiki/Sony-Group/SGPT1211.user-manual/User-Guide-1737112-Page-96.png)
![Music playerThe Music player app allows you to play back music content stored on your tablet device, an SD memory card orthe home network. You can also send ([Throw]) music content to another DLNA certified device and play it backon that device.The detailed information of the current album or song can be searched or displayed, and you can add cover artor lyrics to the content. Applying 12 TONE ANALYSIS to the music content gives you more ways to enjoy thatcontent. You can also adjust sound processing settings for playback by means such as the equalizer.1. Tap to start the Music player app.The browsing screen appears.HintIf you cannot find the icon to start the app, look for it in the application launcher displayed by tapping [Apps & Widgets] at the top right of the Home screen.Playing back music content on your tablet device1. Tap list items, folders, or albums to select the album, song, or playlist that you want to play back.Playback starts.HintA playback icon is displayed at the bottom right of the screen during playback.If you flick left or right the cover art on the playback screen displayed by tapping the cover art on the top leftof the browsing screen, information on the content currently playing and a song list are displayed.If you remove the headphones during playback, playback is paused automatically to prevent sudden loudsound from being emitted from the tablet device.Changing the displayTap the list on the left side of the browsing screen.[ Cover art view]: Displays the cover art of all albums.[ SensMe(TM) channels]: Categorizes the music content into channels according to the music typeautomatically. You can select the channel according to the time of the day or your mood.[ Library]: Displays the music content by song, album, artist, etc.Playing back music content on other devices by sending (Throwing) it from your tabletdeviceUsing your tablet device, you can send music content to another DLNA certified device via the home network andplay back the music content on that device [Details].NoteIf you display another screen by means such as tapping , while you are controlling another device](https://usermanual.wiki/Sony-Group/SGPT1211.user-manual/User-Guide-1737112-Page-97.png)
![(playback device) using your tablet device, return to the control screen via the notification panel.HintWhile you are sending content to another device, you can play back other content on your tablet device.Searching for related informationYou can easily search for information related to the currently playing music content.1. Tap the cover art at the top left of the browsing screen.The playback screen is displayed.2. Flick the cover art left twice.3. Tap the song title, artist name or album name that you want to search for.4. Select and tap from the list displayed the app that you want to use for the search.The search starts using the selected app.Adding cover art to an album or a songYou can add a photo or image you want to use as cover art to an album or a song.1. Tap the cover art at the top left of the browsing screen.The playback screen is displayed.2. Tap the option menu.3. Tap [Add cover art].4. Follow the on-screen instructions to specify the photo or image to use as cover art.NoteYou cannot add cover art to the content stored on an SD memory card.HintWhen adding cover art to an album, tapping and holding the album in the album list or the cover art viewallows you to proceed to step 3.To delete cover artIn step 3, tap [Delete cover art].Adding lyrics to a songYou can add or edit song lyrics in plain text. Your tablet device supports .lrc and .txt file formats.1. Tap the cover art at the top left of the browsing screen.The playback screen is displayed.2. Tap the option menu.3. Tap [Add lyrics].4. Follow the on-screen instructions to input or select the lyrics.To delete lyricsIn step 3, tap [Delete lyrics].](https://usermanual.wiki/Sony-Group/SGPT1211.user-manual/User-Guide-1737112-Page-98.png)
![Video playerThe Video player app allows you to play back video content stored on your tablet device, an SD memory card orthe home network. You can also send ([Throw]) video content to another DLNA certified device and play it backon that device. Scene searches can also be performed.Detailed information of the current video content can also be displayed, and you can even delete the videocontent.1. Tap to start the Video player app.HintIf you cannot find the icon to start the app, look for it in the application launcher displayed by tapping [Apps & Widgets] at the top right of the Home screen.You can copy video files to your tablet device by methods such as the following:Connect your tablet device to a computer via a Micro-USB cable to drag and drop video files.Purchase or rent the video files from Video Unlimited*1.*1 Video Unlimited is a video service available on Sony Entertainment Network.Playing back video content on your tablet device1. Tap folders or thumbnails to select the video content you want to play back.Playback then starts, and the playback screen appears.HintYou can play back video content purchased on Video Unlimited*1.Using the option menu on the playback screen, you can switch subtitles and sounds. You can also performactions such as zooming in or out.Tapping (fast-forward) will play back the video content at about 1.5 times faster. You can adjust theplayback speed to 10 times, 30 times, or 100 times (max) faster by tapping it further.If you remove the headphones during playback, playback is paused automatically to prevent sudden loudsound from being emitted from the tablet device.*1 Video Unlimited is a video service available on Sony Entertainment Network.Playing back video content on other devices by sending (Throwing) it from your tabletdeviceUsing your tablet device, you can send video content to another DLNA certified device via the home network andplay back the video content on that device [Details].NoteIf you display another screen by means such as tapping , while you are controlling another device(playback device) using your tablet device, return to the control screen via the notification panel.You cannot send to and play back on another device (playback device) video content purchased on Video](https://usermanual.wiki/Sony-Group/SGPT1211.user-manual/User-Guide-1737112-Page-100.png)
![Unlimited*1.HintWhile you are sending content to another device, you can play back other content on your tablet device.*1 Video Unlimited is a video service available on Sony Entertainment Network.Displaying detailed information about video content1. On the playback screen, tap the option menu.2. Tap [Details].Detailed information of the current video content is displayed.HintOn the video list screen, tap and hold the video content that you want to display information for, and thenproceed to step 2.When you tap the video title on the detailed information screen, you can search for information related to thecurrently playing video content.Deleting video content1. On the playback screen, tap the option menu.2. Tap [Delete].The video content is deleted.HintOn the video list screen, tap and hold the video content that you want to delete, and then proceed to step 2.Searching scenesYou can search for scenes in the video content that is currently playing back.1. On the playback screen, tap .The scene search screen is displayed.2. Flick the screen left/right to select the scene that you want to start, and then tap the scene.Playback starts from the scene that you select.HintWhen you tap the button at the center of the screen, you can change the length of scenes.Related TopicEnjoying Video ContentSupported FormatsAbout Sample Data](https://usermanual.wiki/Sony-Group/SGPT1211.user-manual/User-Guide-1737112-Page-101.png)
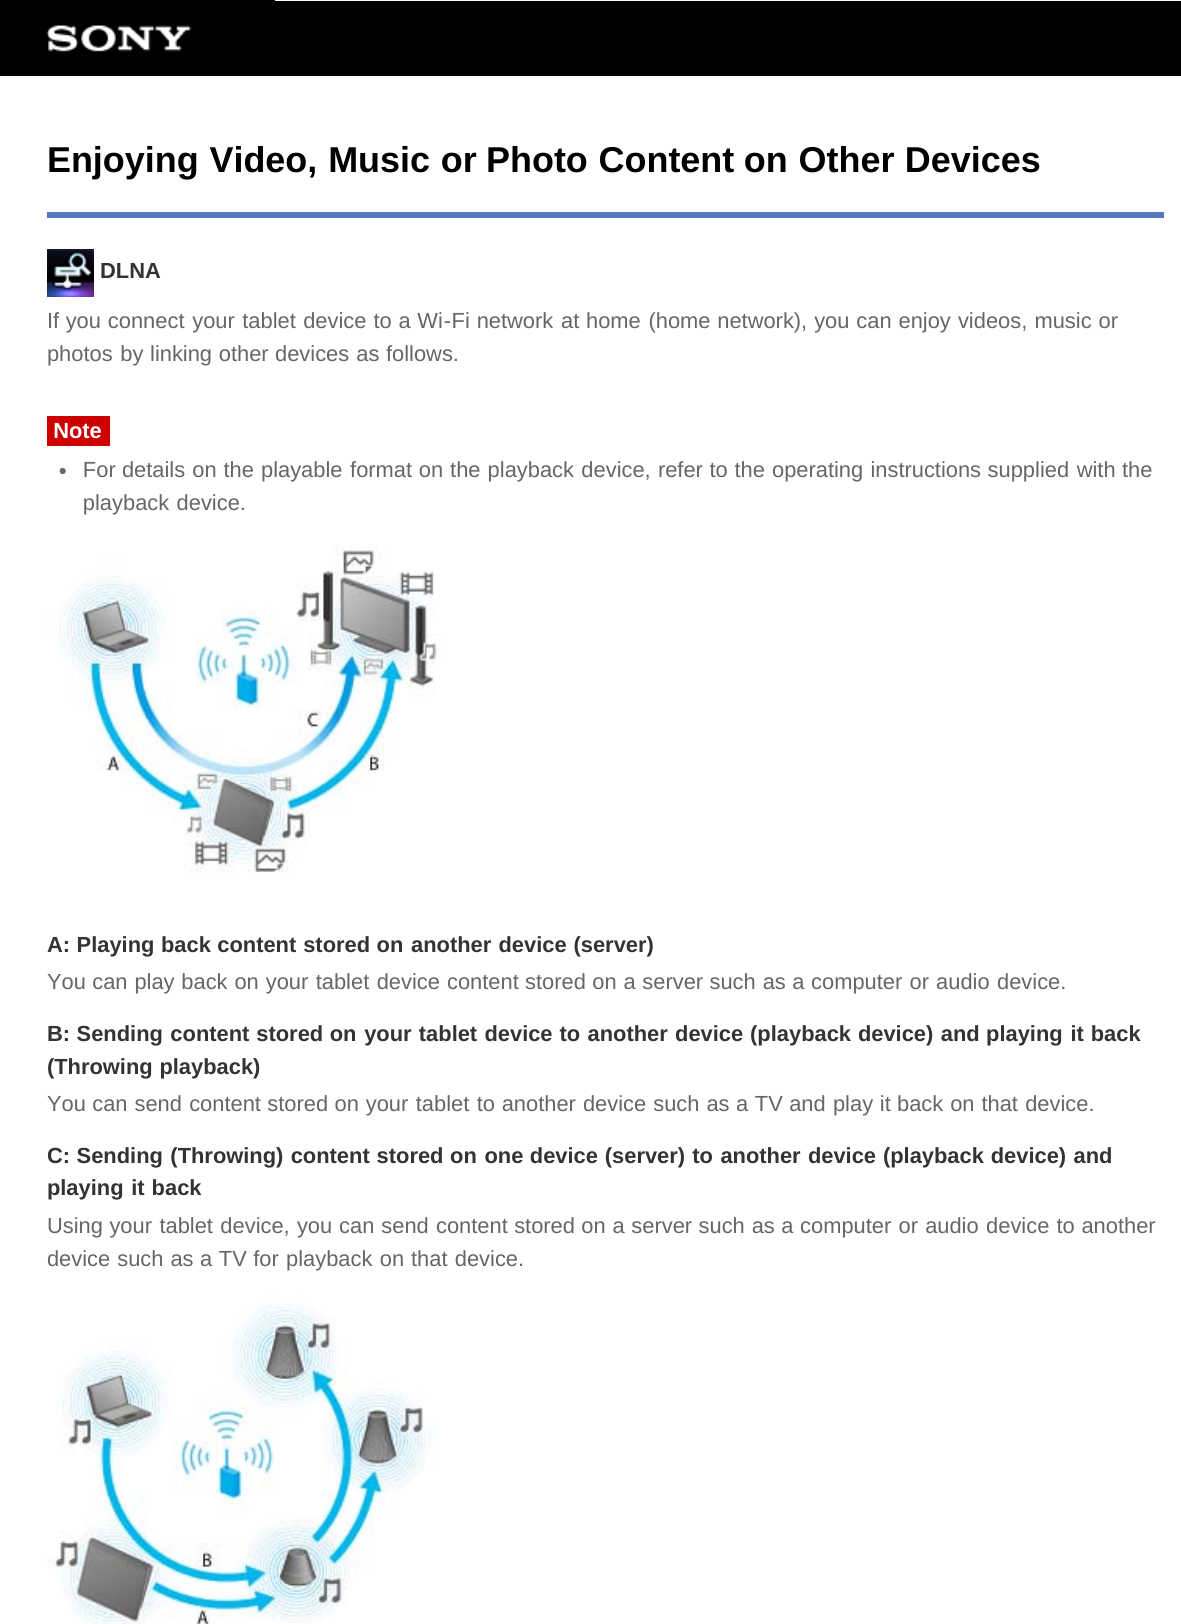
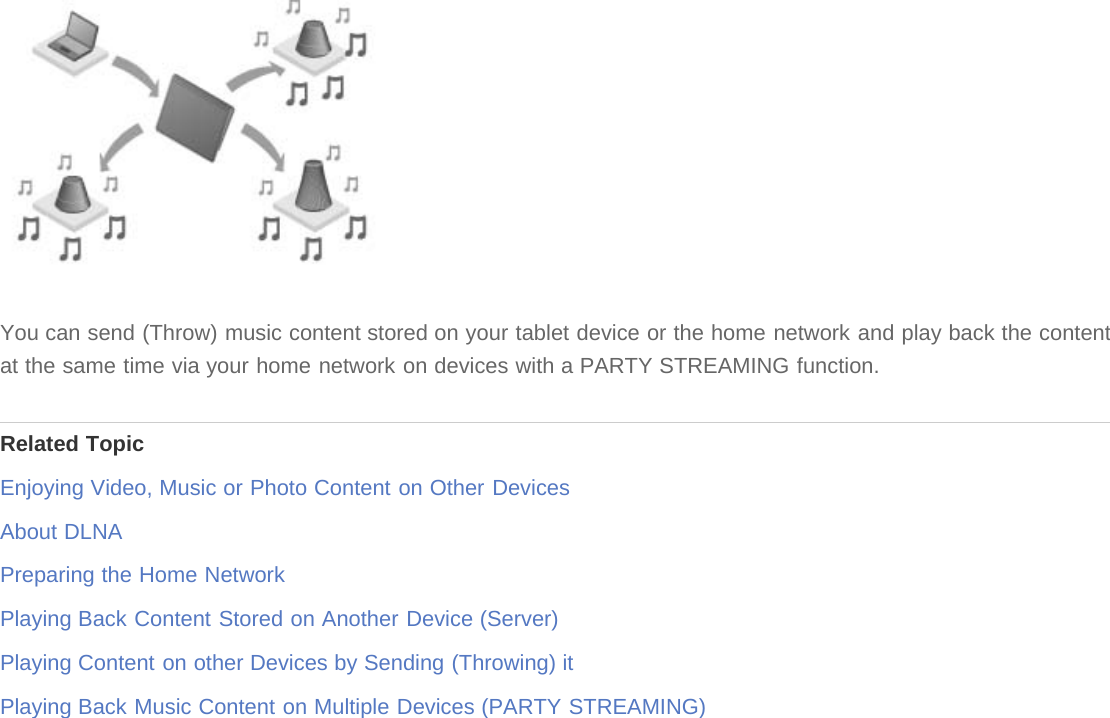
![What You Can Do Over the Home NetworkYou can do things like those shown below by connecting your tablet device to the Wi-Fi network in your home(home network).Playing back content stored on another device (server)If you connect your tablet device to a DLNA certified server (such as a computer) [Details], you can play back onthe tablet device video, photo, music, or other content stored on the media server.Sending (Throwing) content to another device and playing it backYou can send video, photo or music content stored on your tablet device to another device (playback device) andplay back the content on that device.HintUsing your tablet device, you can also send content stored on a server via the home network to anotherdevice (playback device) and play it back on that device.Sending (Throwing) music content to other devices and playing it back (PARTY STREAMING)](https://usermanual.wiki/Sony-Group/SGPT1211.user-manual/User-Guide-1737112-Page-102.png)
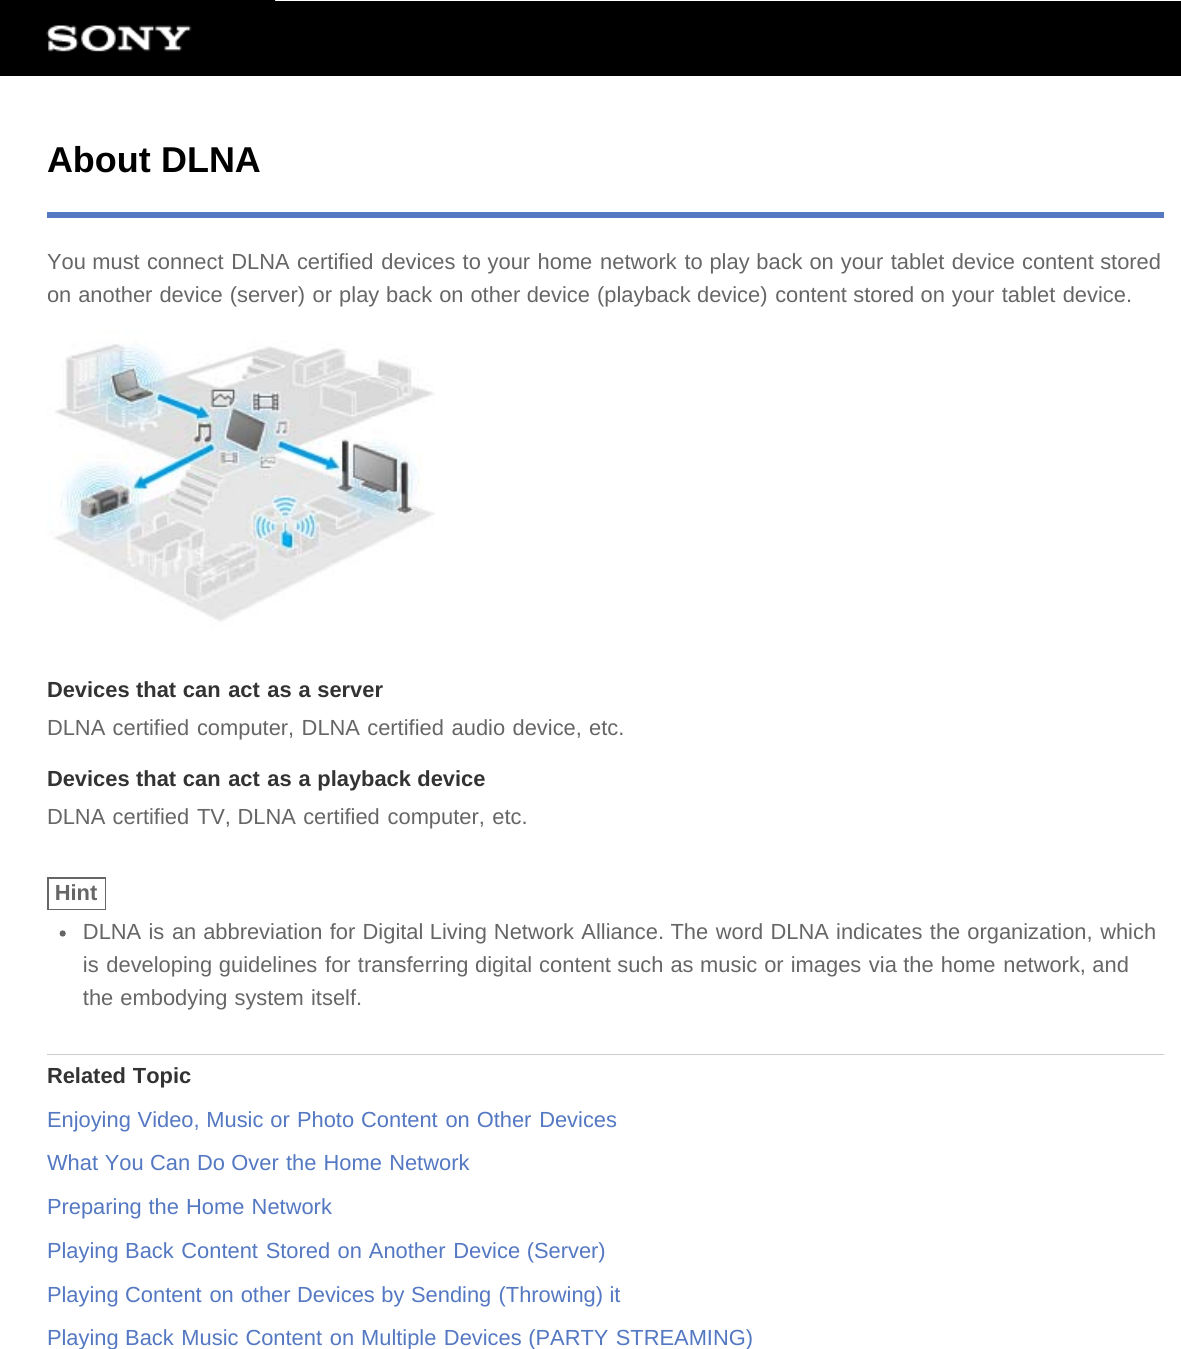
![Preparing the Home NetworkConnect the DLNA certified devices to the home network by the following procedure.Example: When you use a computer as a server and a TV as a playback device1. Connect to the Wi-Fi network the computer that will act as a server.For details on DLNA settings, see the operating instructions supplied with the computer.2. Connect to the Wi-Fi network the TV that will act as a playback device and to which content is sent.For details on DLNA settings, see the operating instructions supplied with the playback device.3. Connect your tablet device to the Wi-Fi network [Details].NoteDepending on the server or playback device, you may need to register your tablet device or the playbackdevice with the server. Otherwise, the content list of the server or content sent to the playback device will notbe displayed, causing an error on the playback device. For details, see the operating instructions suppliedwith the devices.Related TopicEnjoying Video, Music or Photo Content on Other DevicesWhat You Can Do Over the Home NetworkAbout DLNAPlaying Back Content Stored on Another Device (Server)Playing Content on other Devices by Sending (Throwing) itPlaying Back Music Content on Multiple Devices (PARTY STREAMING)](https://usermanual.wiki/Sony-Group/SGPT1211.user-manual/User-Guide-1737112-Page-105.png)
![Playing Back Content Stored on Another Device (Server)You can play back on your tablet device content such as videos, photos or music stored on the server [Details].Your favorite folders and content can also be bookmarked.You must make preparations in advance to use the home network [Details].1. Tap to start the DLNA app.When you start the DLNA app for the first time:A screen appears to explain what you can do and to describe the preparations needed.If you have used the DLNA app before:Servers are automatically searched for and the server list is displayed at the top of the screen.2. Tap the icon of the server holding the content you want to play back.3. Tap a list item, folder, etc. to select the content that you want to play back.An app that supports the content launches and playback starts.NoteYour tablet device cannot play back some content.If you remove the headphones during playback, playback is paused automatically to prevent sudden loudsound from being emitted from the tablet device.HintIf you cannot find the icon to start the app, look for it in the application launcher displayed by tapping [Apps & Widgets] at the top right of the Home screen.The folders selected to reach the current folder are listed in order under the server list. You can return toprevious folders by tapping items in the list.If the server cannot be found in step 2, refresh the server list from the option menu at the top right of thescreen.Bookmarked content and folders appear at the top of the screen with the server list. Tap bookmarks in step 2to select their content. If the bookmarked content is not displayed, tap next to the server icons to displaythe content.To bookmark folders or contentTap displayed at the right of each folder or content item that you want to bookmark.To delete a bookmarkTap and hold the bookmark that you want to delete from the bookmark list at the top of the screen, and thenselect [Delete bookmark].Related TopicEnjoying Video, Music or Photo Content on Other DevicesWhat You Can Do Over the Home NetworkAbout DLNA](https://usermanual.wiki/Sony-Group/SGPT1211.user-manual/User-Guide-1737112-Page-106.png)
![Playing Content on other Devices by Sending (Throwing) itVideo, photo or music content which can be played back on your tablet device is sent to another device (playbackdevice [Details]) via the home network and played back on that device. You can use this function with the Videoplayer (video), Gallery (photo), Music player (music) and DLNA apps.You must make preparations in advance to use the home network [Details].1. Tap the content you want to send to and play back.The content starts to be played back.2. Tap [ ] (Throw).3. Tap the icon of the device that you want to send the content to from the icon list of playback devices.Playback starts on the selected playback device. You can control playback using your tablet device.NoteSome content may not be played back on other devices (playback devices).If you display another screen by means such as tapping , while you are controlling another device(playback device) using your tablet device, return to the control screen via the notification panel.Content purchased at Video Unlimited*1 or copyright-protected content cannot be sent (Thrown) to and playedback on another device (playback device). To play back on another device, connect your tablet device to acomputer with a USB cable to transfer the content using Media Go.HintYou can also select and play back content stored on another device (server) using the DLNA app ([Details])and proceed to step 2.When you tap and hold a content of the Gallery app, you can proceed to step 2.When you tap [Throw] in the menu displayed by tapping and holding the content list in the DLNA, Videoplayer or Music player app you can also proceed to step 3 without playback.While you are sending content to another device, you can play back other content on your tablet device.*1 Video Unlimited is a video service available on Sony Entertainment Network.Related TopicEnjoying Video, Music or Photo Content on Other DevicesWhat You Can Do Over the Home NetworkAbout DLNAPreparing the Home NetworkPlaying Back Content Stored on Another Device (Server)Using Media Go](https://usermanual.wiki/Sony-Group/SGPT1211.user-manual/User-Guide-1737112-Page-108.png)
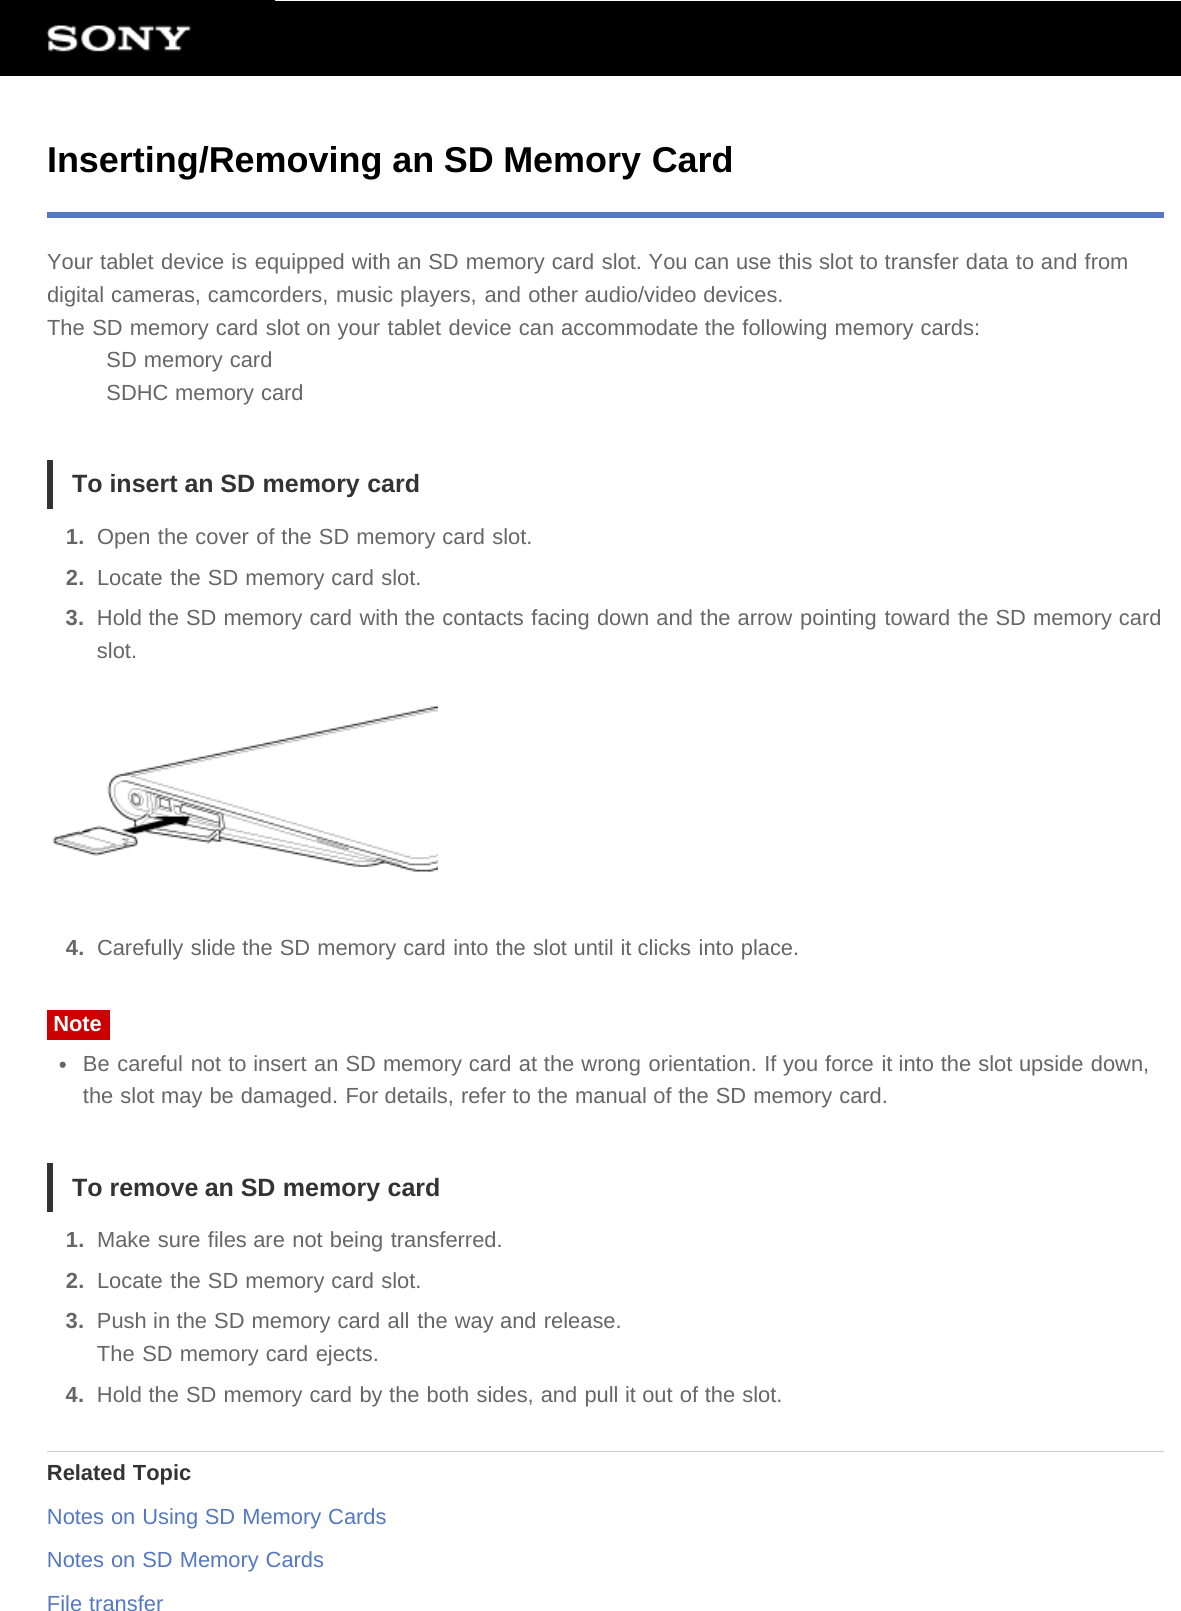
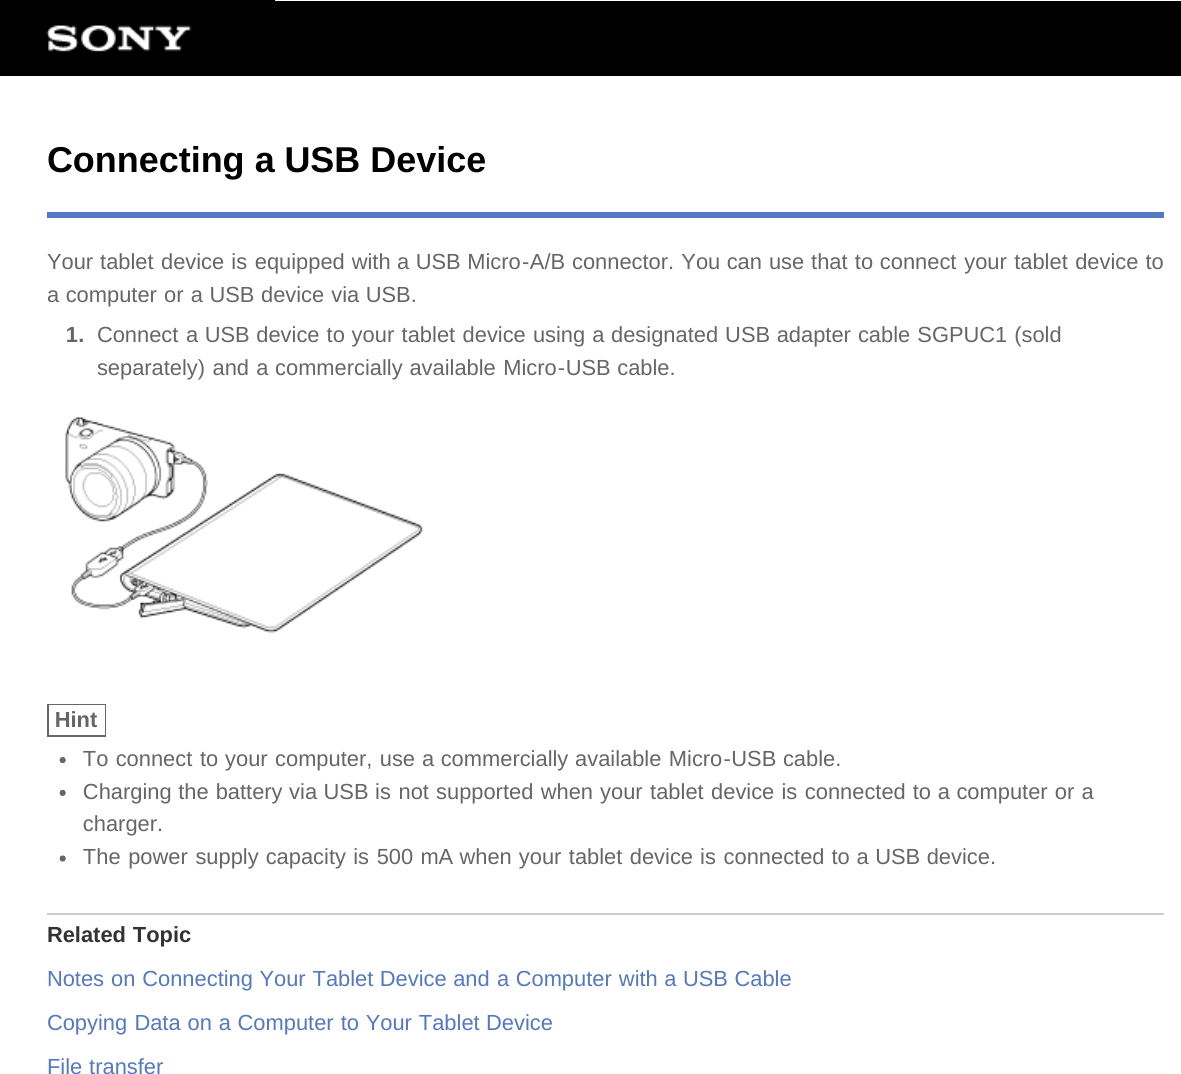
![File transferThe File transfer app enables you to transfer data between the internal memory of the tablet device and an SDmemory card as well as between the internal memory of the tablet device and recording media connected to theUSB Micro-A/B connector.To transfer data between the internal memory of the tablet device and an SD memory card1. Insert an SD memory card into the SD memory card slot.2. Tap to start the File transfer app.3. Tap the file or folder you want to transfer, and add a check.Tapping the recording media icon switches between the screens for importing and exporting.To move to a folder, tap the icon of the folder in the list. To display detailed information about the folder,tap and hold the icon of the folder.4. To select a destination folder, tap in [Import to] or [Export to].If you do not select a folder, the file is transferred to the [transferred] folder on the media.5. Tap or .File transfer starts.NoteDo not remove the media during data transfer.To transfer data between the internal memory of the tablet device and a recording mediaconnected to the USB Micro-A/B connector1. Connect recording media to the USB Micro-A/B connector.The confirmation screen appears.2. Tap [File transfer].The File transfer app starts. The procedures after this step are same as those for step 3 above.Related TopicInserting/Removing an SD Memory CardNotes on Using SD Memory CardsNotes on SD Memory CardsConnecting a USB Device](https://usermanual.wiki/Sony-Group/SGPT1211.user-manual/User-Guide-1737112-Page-109.png)
![Remote controlThe Remote control app enables you to use your tablet device as a remote control by registering it as the remotecontrol of various AV devices.You can use the “gesture” remote control feature operated by gestures such as flicking or sliding as well as the“full” remote control feature operated by tapping.1. Tap to start the Remote control app.HintIf you cannot find the icon to start the app, look for it in the application launcher displayed by tapping [Apps & Widgets] at the top right of the Home screen.Registering the remote control by setting the category and manufacturer of the deviceThe remote control is usually registered as follows.1. Start the Remote control app.2. Tap [ Register device] or [Register device].3. Tap [Easy registration].4. Register your tablet device as a remote control following the on-screen instructions.Execute [Remote control test] if needed.When you finished setting, the device list screen is displayed. Your tablet device can then be used as theremote.HintIf you cannot find the category or manufacturer, allow your tablet device to learn the remote control signalthen register it.Two or more devices may be displayed depending on the category or manufacturer. In this case, test theremote control operation with every “Type” displayed and select the one that works correctly.To register as a remote control for another deviceTap [ Register device] on the device list screen.Learning the remote control signal and registering itIf you cannot find the category or manufacturer of the device at [Easy registration], register the remote control asfollows.1. Start Remote control app.2. Tap [ Register device] or [Register device].3. Tap [Learn from a remote control].](https://usermanual.wiki/Sony-Group/SGPT1211.user-manual/User-Guide-1737112-Page-110.png)
![4. Select the category.A remote control is displayed on the screen.5. Tap the button you want to assign the signal to.6. When the menu screen is displayed, tap [Learn remote commands].7. Bring the remote control to be registered close to the IR data port of your tablet device, tap [Start], andpress the button to be learned on the remote control.When the button is registered, the screen returns to display the remote control.HintTo learn more button, repeat steps 4 to 7.Using your tablet device as a remote controlFollowing two kinds of remote control are available.“Full” remote controlYou can operate the device by tapping the buttons, just like an ordinary IR remote control.“Gesture” remote controlThis gives a new feel to remote control operations. The device reacts when it senses movement of yourfingers such as tapping and flicking on the touch screen, no matter where on the screen you touch. Thatway, you can operate the device instinctively, without looking at the screen of your tablet device.1. On the device list screen, tap the icon of the device that you want to control.The remote control screen is displayed, and you can control the device by tapping the screen. When you tapthe button on the top right of the remote control screen, you can switch between “gesture” and “full” remotecontrol.HintThe icon of the device appears at the top left of the remote control screen. By tapping buttons at the left andright of the icon, you can switch the device to be controlled.Related TopicOperating Various AV Devices on Your Tablet Device](https://usermanual.wiki/Sony-Group/SGPT1211.user-manual/User-Guide-1737112-Page-111.png)
![Social Feed ReaderThe Social Feed Reader app enables you to access SNS (Social Networking Services) such as Twitter orFacebook. Posts (articles) on multiple services are displayed together on the same screen. You can also filterposts by various conditions such as only posts with videos or photos attached.1. Tap to start the Social Feed Reader app.Before registering accounts: The screen to register to the account is displayed.After registering accounts: The post list screen is displayed.HintIf you cannot find the icon to start the app, look for it in the application launcher displayed by tapping [Apps & Widgets] at the top right of the Home screen.Related TopicSharing Exciting Experiences via Social NetworkRegistering a Twitter or Facebook accountSwitching the Posts (Article) DisplayedReading and Writing the Post (Article)Searching for Posts (Articles) or Friends](https://usermanual.wiki/Sony-Group/SGPT1211.user-manual/User-Guide-1737112-Page-112.png)
![Registering a Twitter or Facebook accountYou can register a Twitter or Facebook account with the Social Feed Reader app. You need to acquire a Twitteror Facebook account beforehand.1. Tap to start the Social Feed Reader app.The account setup screen is displayed.2. Tap the service to register from the service list displayed on the right of the screen.3. Authenticate the account on the service authentication page displayed automatically.The registered account is displayed on the left of the screen.4. Tap [OK].The post list screen for the registered account is displayed.NoteIf the post list screen is displayed in step 1, tap [Accounts] on the option menu.HintWith the Social Feed Reader, you can register one Facebook account and multiple Twitter accounts.To add an accountTap [Accounts] on the option menu of the post list screen to display the account setup screen, and then proceedto step 2.To delete an accountTap [Accounts] on the option menu of the post list screen to display the account setup screen, and then tap at the right of the account you want to delete.Related TopicSharing Exciting Experiences via Social NetworkSocial Feed ReaderSwitching the Posts (Article) DisplayedReading and Writing the Post (Article)Searching for Posts (Articles) or Friends](https://usermanual.wiki/Sony-Group/SGPT1211.user-manual/User-Guide-1737112-Page-113.png)
![Switching the Posts (Article) DisplayedThe Social Feed Reader app allows you to set filters for the posts (articles) to be displayed. The filtered sets ofposts are called “streams,” and multiple streams can be registered in Social Feed Reader. The registered streamsare displayed as tabs at the top left of the screen. You can easily switch between streams such as all posts byfriends, posts by close friends, replies and messages to you.1. Tap to start the Social Feed Reader app.The post list screen is displayed.NoteIf the account setting screen is displayed, register an SNS account [Details].Registering filters for displaying posts1. Tap the [ ] tab at the top of the post list screen.The [Create new stream] screen is displayed.2. Input a name for the stream, then tap [Add filter] and input filter.3. When finished, tap [Add].You can register multiple filters.To add more filters, tap [Add filter].4. When finished inputting filters, tap [OK].The registered stream is displayed at the top of the post list screen as a tab.To change the name of a stream or filters for displaying postsTap the tab of the stream you want to change on the post list screen, then tap [Stream settings for tab] in theoption menu.To delete a streamTap the tab of the stream you want to delete on the post list screen, then tap [Delete tab] on the option menu.NoteYou cannot delete [All friends] and [Search] tabs.You can change the name of the stream made from [Save search results as stream tab] on the option menufor search results, but not the filters.Displaying the streamTap the desired stream tab on the post list screen. Posts meeting the registered filter conditions are displayedwith the newest posts first.NoteWhen you select friends as stream filters for displaying posts, their posts will be displayed on the post list only](https://usermanual.wiki/Sony-Group/SGPT1211.user-manual/User-Guide-1737112-Page-114.png)
![when they have made posts recently.HintTapping followed by [Show only videos and pictures] at the top right of the screen will show only streamsthat includes posts with videos or photos attached.Related TopicSharing Exciting Experiences via Social NetworkSocial Feed ReaderRegistering a Twitter or Facebook accountReading and Writing the Post (Article)Searching for Posts (Articles) or Friends](https://usermanual.wiki/Sony-Group/SGPT1211.user-manual/User-Guide-1737112-Page-115.png)
![Reading and Writing the Post (Article)The Social Feed Reader app allows you to display all together posts (articles) on multiple services such as Twitterand Facebook. You can also write the same post on multiple services simultaneously.1. Tap to start the Social Feed Reader app.The post list screen is displayed.NoteIf the account setting screen is displayed, register an SNS account [Details].Reading postsPosts made by the people you follow on Twitter or your Facebook friends will be displayed on the post list screenin the order that they were written.HintTapping below the post will display the rest of article. Tap to hide it.Tapping the thumbnail at the right of the post allows you to access linked websites or photos or to search forposts using hashtags.To import new postsTap [Refresh] on the option menu of the post list screen.To reply to or comment on the postsTap the post on the post list screen, and then tap the appropriate icon for your intended operation.To look at the profile of the person who wrote a postTap the post on the post list screen, and then tap .Writing posts1. Tap at the top right of the post list screen.2. Tap the service you want to write a post to, and add a check.3. Write a post.4. When you are finished, tap [Send].The post is placed on the selected service.HintYou can post the same article to multiple services simultaneously.You can attach photos and videos or shorten links (URLs). Tap [Attach] or [Shorten URL] at the bottom of thescreen in step 3.](https://usermanual.wiki/Sony-Group/SGPT1211.user-manual/User-Guide-1737112-Page-116.png)

![Searching for Posts (Articles) or FriendsThe Social Feed Reader app allows you to search for posts (articles) or friends who have signed up for theservices.1. Tap to start the Social Feed Reader app.The post list screen is displayed.NoteIf the account setting screen is displayed, register an SNS account [Details].2. Tap the [Search] tab at the top of the post list screen.The search screen is displayed.3. Tap the account to search with.4. Tap , and select either of the following.To search for a post: [Search posts]To search for a friend: [Search people]5. Input keywords, and tap .The search result is displayed.HintTo search in all accounts simultaneously, select [All accounts] in step 3.Tap the search result for a post to check replies, comments, and profiles. To return to the search result, tapthe [Search] tab.Tap the search result for a friend to check the person’s profile. To return to the search result, tap the [Search]tab.To return to the post list screen, tap a stream tab ([All friends], etc.) at the top left of the screen.You can save the search result for a post as a tab. Select [Save search results as stream tab] on the optionmenu.Related TopicSharing Exciting Experiences via Social NetworkSocial Feed ReaderRegistering a Twitter or Facebook accountSwitching the Posts (Article) DisplayedReading and Writing the Post (Article)](https://usermanual.wiki/Sony-Group/SGPT1211.user-manual/User-Guide-1737112-Page-118.png)
![Select AppSelect App allows you to access a website that introduces a select range of apps appropriate for use with yourtablet device.1. Tap to show Select App website.The browser starts and displays the website.NoteYour tablet device must be made so it can access Android Market via your Google account beforedownloading from Android Market.Charges apply for some apps.A large volume of data is transferred when downloading and updating apps.HintIf you cannot find the icon to start the app, look for it in the application launcher displayed by tapping [Apps & Widgets] at the top right of the Home screen.Related TopicViewing Apps Recommended by Sony](https://usermanual.wiki/Sony-Group/SGPT1211.user-manual/User-Guide-1737112-Page-119.png)
![GalleryThe Gallery app allows you to show or play back photos or videos in your tablet device or Picasa web albums.You can send photos to another DLNA certified device and play them back on that device, and you can alsoeasily post photos to network services to share them.Detailed information of photos or videos can be displayed, and you can sort or filter photos or videos. You canalso edit photos and add a variety of effects.1. Tap to start the Gallery app.HintIf you cannot find the icon to start the app, look for it in the application launcher displayed by tapping [Apps & Widgets] at the top right of the Home screen.Playing back photos or videos on your tablet device1. Tap albums or thumbnails to select the photos or videos you want to play back.The selected photos or videos are played back on the playback screen.HintYou can play back photos or videos stored in Picasa web albums. If you set to sync with Picasa web albumsavailable with the Google account that you set with the Settings app, the Picasa web albums appear in youralbum list.Using the menu at the top right of the screen, you can sort photos or videos by details such as time or placethey were taken.By tapping and holding thumbnails in succession, you can select multiple photos or videos.You can control playback on the playback screen.To expand display area of photosTap at the top right of the photo playback screen. To cancel expansion, tap .To display photos full-screenTap [Fill display area] from the option menu of the photo playback screen. To cancel full-screen view, tap [Fit todisplay area].To display shooting locationTap or with the display area not expanded. If the photo has information on where it was shot, a mapappears with the location indicated on the map. To return to the thumbnails, tap .HintYou can shoot photos that include location information using the built-in cameras.Playing back photos on another device by sending (Throwing) them from your tablet device](https://usermanual.wiki/Sony-Group/SGPT1211.user-manual/User-Guide-1737112-Page-120.png)
![Using your tablet device, you can send photos to another DLNA certified device via the home network and playback the photos on that device [Details].NoteIf you display another screen by means such as tapping , while you are controlling another device(playback device) using your tablet device, return to the control screen via the notification panel.HintWhile you are sending content to another device, you can play back other content on your tablet device.Sharing photos or videos1. Tap and hold the album or thumbnail for photos you want to share, and then tap .2. Tap on the name of the service you want to use to share photos or videos.3. Post the photos or videos following the on-screen instructions.HintWhen you tap and hold thumbnails in succession, you can select multiple photos or videos.Playing back photos automatically (slide show)1. Select albums or thumbnails for photos you want to play back as a slide show, and then the tap .Slide show playback starts.Editing photos1. On the playback screen, tap (Option menu) - [Edit].2. Tap the edit icon at the bottom of the screen.You can add various effects to your photos.3. When finished editing, tap [SAVE].Related TopicSupported FormatsAbout Sample Data](https://usermanual.wiki/Sony-Group/SGPT1211.user-manual/User-Guide-1737112-Page-121.png)
![Video UnlimitedVideo Unlimited brings you a new world of entertainment on Sony’s Internet-enabled devices. Now you candownload your favorite videos to your tablet device and watch them anytime, anywhere.NoteThis app or service may not be available in some countries/regions.Internet usage fees may apply to use of this service. You are responsible for all applicable Internet fees.Contact the carrier you have a subscription with for more information.You can browse the content without signing in, however please make sure that you have a registered accountto purchase and download the content.Your tablet device must be connected to a network using Wi-Fi to use the preview feature.Your tablet device must be connected to a network using Wi-Fi to download the content you have purchased.Content you have purchased can be downloaded from [Download List].To download content, your current location must be the same as the country/region for your account.Check that there is enough free space to download the content.Support informationhttp://www.sonyentertainmentnetwork.com/supportTrademarksThe Sony Entertainment Network logo and “Sony Entertainment Network” are trademarks of SonyCorporation.Related TopicEnjoying Video Content](https://usermanual.wiki/Sony-Group/SGPT1211.user-manual/User-Guide-1737112-Page-122.png)
![About BackupYou should copy the data in your tablet device and store it on another storage device (backup). Various data,such as recorded images, downloaded music and video content, will be accumulated in your tablet device as youuse it. If unexpected problems occur with your tablet device, that data may be damaged or lost. As a preventivemeasure in case of such accidents, you should make frequent backups so you will be able to restore yourprecious data.NoteSome data cannot be copied on your tablet device.Some settings and applications may not have any backup method. Make written notes and keep them in asafe place.Data you can make backupYou can copy and store the following data with your tablet device for backup.Music/movie/eBook files without copyright protectionPictures/wallpapersThat data is stored in the following folders.Music files: \MusicWallpaper files: \PicturesMovie files: \MoviePicture files: \DCIMeBook files: \ReaderBacking up data (copying)Use the File transfer app to store the data on a commercially available SD memory card.1. Tap [ Apps & Widgets] followed by to start the File transfer app.2. Insert the SD memory card to your tablet device.3. Select the file/folder you want to copy from your tablet device.4. Tap .A folder called “\transferred” is created on the SD memory card, and the data is copied to that folder.NoteSince video content purchased at Video Unlimited*1 is copyrighted, you cannot back it up by the abovementioned method. Copy it on a computer using the computer software “Media Go.” Go here to learn moreabout Media Go application.http://mediago.sony.com/enu/introduction/*1 Video Unlimited is a video service available on Sony Entertainment Network.Related Topic](https://usermanual.wiki/Sony-Group/SGPT1211.user-manual/User-Guide-1737112-Page-134.png)
![Wi-Fi checkerThe Wi-Fi checker app enables you to check the Wi-Fi connection of your tablet device when a connectionproblem occurs.1. Tap to start the Wi-Fi checker app.2. Tap [Test] at the top right of the screen to start checking the connection.Items are checked in succession, and assumed causes and remedies are displayed.HintIf you cannot find the icon to start the app, look for it in the application launcher displayed by tapping [Apps & Widgets] at the top right of the Home screen.If you tap [ SETTINGS] at the top right of the screen, you can display the settings screen for the Wi-Ficonnection. Use to return to the Wi-Fi checker app. If you tap to display the Home screen, the settingsscreen appears when you start the Wi-Fi checker app the next time.Related TopicStarting Wi-Fi CommunicationsNotes on Using the Wi-Fi Function](https://usermanual.wiki/Sony-Group/SGPT1211.user-manual/User-Guide-1737112-Page-136.png)
![Copying Data on a Computer to Your Tablet DeviceIf you connect a computer to your tablet device using a commercially available Micro-USB cable ([Details]), youcan copy data on the computer to your tablet device. The copied data can then be played back on your tabletdevice.NoteDo not remove the Micro-USB cable during copying data. That may cause the data to be damaged.The copied data is stored in the internal memory. You cannot change the destination to store the data.Only copied data in supported file formats can be played back on your tablet device.Related TopicConnecting a USB DeviceNotes on Connecting Your Tablet Device and a Computer with a USB Cable](https://usermanual.wiki/Sony-Group/SGPT1211.user-manual/User-Guide-1737112-Page-137.png)

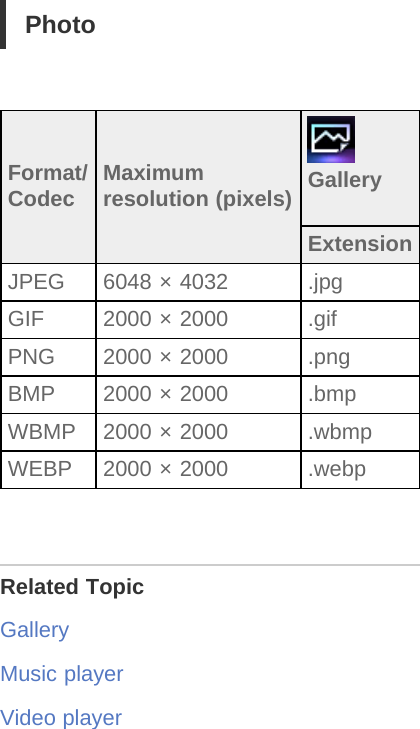
![Using Media GoMedia Go is computer software that supports content management and transfer between your tablet device andcomputer. By installing Media Go in your computer, you can transfer music, photos, and videos to your tabletdevice.NoteFor details on how to use Media Go, refer to the help in the main menu of Media Go.Installing Media Go on your computer1. Access http://www.sony.com/mediago/Tablet from your computer and download Media Go.2. Double-click the downloaded file.3. Install Media Go by following the instructions on the screen.If you are prompted to install additional software component during installation, download and install it asinstructed.Transferring content to your tablet device using Media Go1. Connect your computer to your tablet device with a commercially available Micro-USB cable [Details].2. Start Media Go by selecting it from the start menu of your computer.You can now transfer content between your tablet device and computer.NoteIf [Sony Tablet] is not displayed on the left of the Media Go screen, this means that your tablet device is notrecognized by the computer. Check whether or not the device driver is installed correctly.For details on using Media Go on the computer, refer to http://www.sony.com/mediago/TabletRelated TopicConnecting a USB DeviceNotes on Connecting Your Tablet Device and a Computer with a USB CableGalleryMusic playerVideo player](https://usermanual.wiki/Sony-Group/SGPT1211.user-manual/User-Guide-1737112-Page-140.png)
![Using a Controller of the PlayStation(R)3 SystemYou can connect a controller of the PlayStation(R)3 system to your tablet device by wired or wireless connection.Play games pre-installed on your tablet device and games downloaded from PlayStation(R)Store using aDUALSHOCK(R)3 or SIXAXIS wireless controller made by Sony Computer Entertainment Inc.Using a controller of the PlayStation(R)3 system with a wired connection1. Turn on your tablet device.2. Connect a controller to the USB Micro-A/B connector of your tablet device using a designated USB adaptercable SGPUC1 (sold separately) and a commercially available USB cable.The icon (charging the controller) and a message are displayed at the bottom right of the Home screenof your tablet device.1. Commercially available USB cable2. USB adapter cable SGPUC1 (sold separately)NoteOnly one controller of the PlayStation(R)3 system can be connected to your tablet device.HintThe battery of the controller is charged while the controller is connected to your tablet device using a USBcable. The controller will continue to be charged while connected to your tablet device using the USB cable,even if the screen turns off. We recommend that you connect the tablet device to an AC adapter whilecharging the controller.Using a controller of the PlayStation(R)3 system with a wireless connectionYou can establish a wireless connection between your tablet device and a controller of the PlayStation(R)3system using the Bluetooth(R) function. When connecting the controller to your tablet device for the first time, youneed to pair the controller with your tablet device.1. Turn on your tablet device.2. Tap [ Apps & Widgets] - [ Settings] -[Bluetooth] in that order, and then slide the [Bluetooth] switch tothe [ON] position.](https://usermanual.wiki/Sony-Group/SGPT1211.user-manual/User-Guide-1737112-Page-142.png)
![3. Connect a controller to the USB Micro-A/B connector of your tablet device using a designated USB adaptercable SGPUC1 (sold separately) and a commercially available USB cable.The icon (charging the controller) is displayed at the bottom right of the Home screen of your tabletdevice.4. Disconnect the controller from your tablet device.Paring will be completed.The controller icon displayed at the bottom right of the Home screen changes to the icon that shows thebattery charge level of the controller. : The battery has plenty of charge. : The battery has started losing its charge. : The battery charge level is low. : The battery has no charge. Charge the controller.NoteOnly one controller of the PlayStation(R)3 system can be connected to your tablet device.To connect the controller to your tablet device using the Bluetooth function, the controller’s battery must becharged.When paring your tablet device and the controller, you must connect them with a wired connection.Unlike other Bluetooth devices, the controller will not appear on the paired devices list of the tablet device[Details].When a paired controller is used with PlayStation(R)3 or another tablet device, it is un-paired from the originaltablet device is cleared.While using a controller of the PlayStation(R)3 system with a wireless connection, you cannot use Bluetoothdevices that support A2DP (Advanced Audio Distribution Profile) such as a Bluetooth equipped headphone. Ifyou use both devices at the same time, the sound may be interrupted.HintWhen you connect the controller to your tablet device and then tap - [The controller of thePlayStation(R)3 system is connected] at the bottom right of the Home screen, the “About the controller of thePS3(TM) system” screen appears. You can make the Bluetooth connection between the controller and yourtablet device by following the on-screen instructions.You only need to pair once for your tablet device and the controller to connect again. Just press the PSbutton of the controller the next time.Displaying the user guideWhen you tap - [The controller of the PlayStation(R)3 system is connected] at the bottom right of the Homescreen, the user guide appears.Turning off the controller of the PlayStation(R)3 systemWhen you connect a controller to your tablet device by a wired connection, shut down your tablet device first[Details].When you connect a controller to your tablet device by a wireless connection, perform one of the followingprocedures.Display the user guide, and then tap [Off].Turn off the screen (sleep mode) of your tablet device [Details].](https://usermanual.wiki/Sony-Group/SGPT1211.user-manual/User-Guide-1737112-Page-143.png)
![Playing Back Music Content on Multiple Devices (PARTYSTREAMING)You can send (Throw) music content stored on your tablet device or the home network and play back the contentat the same time via your home network on the devices with a PARTY STREAMING function. While using thePARTY STREAMING function, one of the devices to which the music content is sent from your tablet deviceautomatically becomes the “host” of PARTY playback, and the other devices are regarded as “guests.” You canuse this function with Music player (music) and DLNA apps.You must make preparations in advance to use the home network [Details].You can enjoy the PARTY STREAMING function with other devices that have this PARTY STREAMING logo(shown below).Playing back music content using the PARTY STREAMING function1. Make sure the devices on your home network that support the PARTY STREAMING function are turned onand are in the status that allows them to join a PARTY.2. Tap to start the Music player app.3. Tap the music content you want to send and play back.4. Tap [ ] (Throw).5. Tap [ON] to use the PARTY STREAMING function.The devices that support the PARTY STREAMING function are displayed with a check mark on the upperleft side.If there are any devices on which you do not want to play back the music content, tap the images of thatdevices. The check mark will be removed.](https://usermanual.wiki/Sony-Group/SGPT1211.user-manual/User-Guide-1737112-Page-145.png)
![6. Tap [Start].Playback using the PARTY STREAMING function starts on the selected devices. You can control playbackusing your tablet device.HintYou can also select to play back content stored on another device (server) using the DLNA app ([Details]) andproceed to step 5.When you tap [Throw] in the menu displayed by tapping and holding the content list in the DLNA or Musicplayer app, you can also proceed to step 5 without playback.Changing the devices that play back using the PARTY STREAMING function1. Tap [Change] on the playback screen.2. To join/leave a PARTY, tap the device image to add/remove the check mark.To turn off the PARTY STREAMING function, tap [OFF].Closing a PARTY1. Tap [Disconnect] on the playback screen.HintA PARTY closes by turning off the PARTY host device or by changing the music content that is playing backon the PARTY host device by another device on the home network.Adjusting the volume of the devices that are participating in a PARTYOn playback screen, you can adjust the volume of all the devices that are participating in a PARTY.1. Muting buttonTap this to turn off the volume.](https://usermanual.wiki/Sony-Group/SGPT1211.user-manual/User-Guide-1737112-Page-146.png)
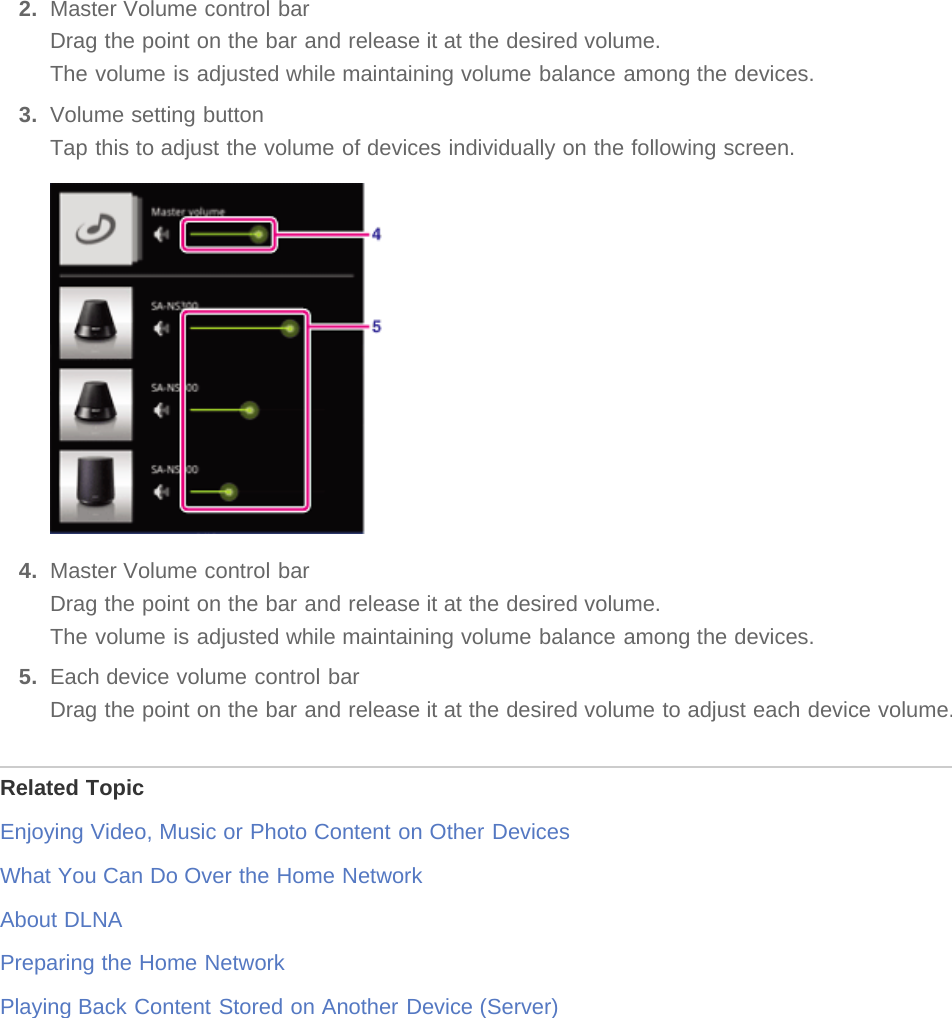
![RegistrationThe Registration app allows you to register your tablet device with Sony. Registering your tablet device allows usto maintain a record of your purchase in case of loss or theft and to inform you of important product updates andpromotions. It will also help us design products that meet your specific needs.1. Tap to start the Registration app.2. Read the End User License Agreement, and tap [Accept] to continue if you accept the agreement.Otherwise, tap [Decline] to exit the app.3. Enter your personal information. Only the fields with * are required. All other information is optional.4. By default, “Yes, I would like to receive information from Sony Electronics on products, services and specialoffers that may be of interest to me.” is checked. If you prefer not to receive future information from SonyElectronics, tap and uncheck the checkbox.5. Tap [Submit] to submit your registration information to Sony.NoteThis app or service may not be available in some countries/regions.If you would like to read additional information regarding Sony’s privacy policy, please tap on [Privacy Policy].](https://usermanual.wiki/Sony-Group/SGPT1211.user-manual/User-Guide-1737112-Page-148.png)

![The tablet device does not turn on.The battery may be extremely low on power.Connect your tablet device to an AC outlet (wall socket), and charge the battery.Your tablet device may be turned off completely.Press and hold the power button for three seconds to turn on your tablet device.When your tablet device is using power supplied from the outlet, make sure you have connected the tabletdevice and the AC adapter, the AC adapter and the AC power cord (mains lead), and the AC power cord(mains lead) and an AC outlet (wall socket) securely.When your tablet device is sitting in the cradle (sold separately), make sure you have connected the tabletdevice and the cradle, the cradle and the AC adapter, the AC adapter and the AC power cord (mains lead),and the AC power cord (mains lead) and an AC outlet (wall socket) securely.If you have not turned off your tablet device properly, the controller that controls the power supply may stopdue to a failure of the program. Press and hold the power button for about 10 seconds, or press the resetbutton to force the tablet device to turn off, and then turn on the tablet device again [Details].](https://usermanual.wiki/Sony-Group/SGPT1211.user-manual/User-Guide-1737112-Page-154.png)

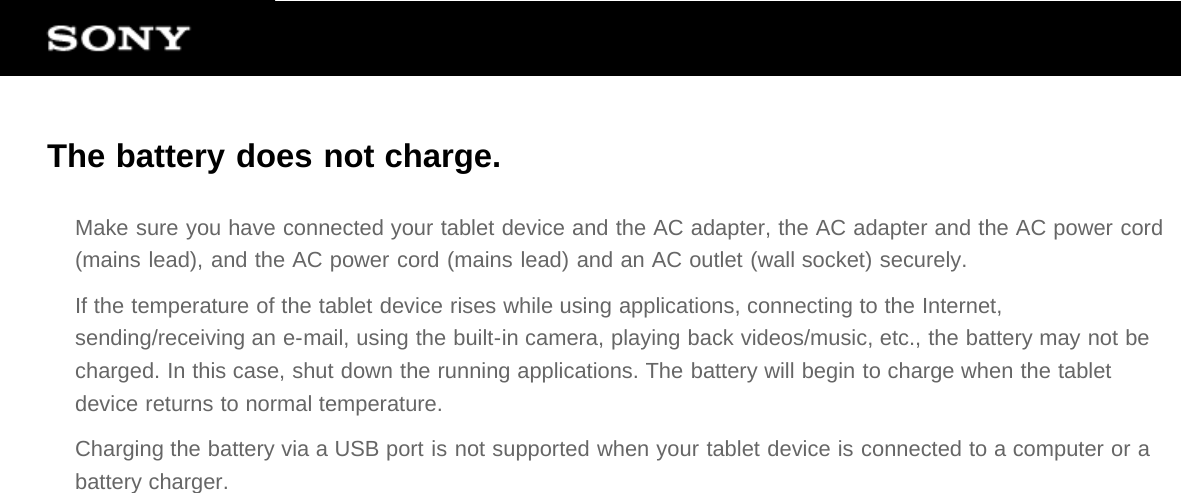


![The charge indicator blinks.The charge indicator blinks slowly (every 1 second) when the remaining battery level is 15% or less. Plug inyour tablet device and charge the battery [Details].The charge indicator does not blink while your tablet device is turning off, even though the remaining batterylevel is 15% or less.When the charge indicator blinks fast (every 0.5 seconds), your tablet device may be in need of repair. Stopusing the tablet device and contact the service/support center named in the warranty.](https://usermanual.wiki/Sony-Group/SGPT1211.user-manual/User-Guide-1737112-Page-159.png)
![The screen is dark.Make sure the screen brightness of your tablet device is not set at the lowest level.Make sure the remaining battery level is sufficient.Be careful not to cover the ambient light sensor.Outdoors on a clear day, you may feel the screen is dark.If you have the automatic brightness setting enabled, the brightness of the screen is adjusted automaticallyaccording to the surrounding brightness.Tap [ Apps & Widgets] - [ Settings] - [Display] - [Brightness] - [Automatic brightness] in that order toremove the check mark.](https://usermanual.wiki/Sony-Group/SGPT1211.user-manual/User-Guide-1737112-Page-161.png)
![There is a point that is not displayed properly on the screen.You may see tiny black points on the LCD screen on rare occasions. This does not indicate a malfunction[Details].](https://usermanual.wiki/Sony-Group/SGPT1211.user-manual/User-Guide-1737112-Page-162.png)
![A Bluetooth(R) device was not found.Make sure the Bluetooth function of your tablet device is turned on.Tap [ Apps & Widgets] - [ Settings] - [Bluetooth] in that order, and then slide the [Bluetooth] switch tothe [ON] position.Make sure the Bluetooth device you are pairing with is turned on.When you tap [ Apps & Widgets] - [ Settings] - [Bluetooth], and then tap [SEARCH FOR DEVICES] atthe top right of the screen, a Bluetooth device may not be found immediately because of the number ofdevices around your tablet device, the distance, the environment, radio wave propagation.Bring the Bluetooth device you are pairing with as close to your tablet device as possible, and try again.Make sure the Bluetooth device your are pairing with is in discoverable mode.The Bluetooth function of the commercially available Bluetooth device you are pairing with should be turnedon and the device should be in discoverable mode.When you disconnect a Bluetooth device you have connected to your tablet device once and connect itagain, connect the device after deleting registration by both the Bluetooth device and the tablet device.](https://usermanual.wiki/Sony-Group/SGPT1211.user-manual/User-Guide-1737112-Page-163.png)
![Your tablet device does not work.Press and hold the power button for about 10 seconds to force it to turn off, and then turn it on again [Details].If you cannot force your tablet device to turn off, insert a pin or other slim object into the reset button hole[Details].Contact the service/support center named in the warranty when the symptom does not go away.](https://usermanual.wiki/Sony-Group/SGPT1211.user-manual/User-Guide-1737112-Page-165.png)
![To reset your tablet device.Tap [ Apps & Widgets] - [ Settings] - [Backup & reset] - [Factory data reset], and then tap [Reset tablet]at the bottom of the menu on the right.All data in the data storage area is deleted, including the Google account information, the system data andsettings, and any application data you have downloaded.User data such as music, photos, and eBooks transferred from an SD memory card or a device thatconnects via USB is not deleted.To delete all user data such as music, photos, and eBooks, tap [Erase USB storage] to put a check in thecheck box, and then tap [Reset tablet].It is recommended that you make a backup copy of important data because the user data cannot berestored after being deleted.The tablet device restarts automatically.](https://usermanual.wiki/Sony-Group/SGPT1211.user-manual/User-Guide-1737112-Page-166.png)
![The sound from the speaker is distorted.Adjust the playback volume.Make sure the tablet device is sufficiently charged.If the sound effects are turned off, the sound might improve.Select [Off] for [Equalizer] and remove the check mark from [Dynamic normalizer] or [xLOUD(TM)] on thesetting menu when you use the [Music player] app.Remove the check mark from [Dynamic normalizer] or [xLOUD(TM)] on the setting menu when you use the[Video player] app.](https://usermanual.wiki/Sony-Group/SGPT1211.user-manual/User-Guide-1737112-Page-167.png)
![The screen brightness is not stable.When you set automatic adjustment of the screen brightness, the screen brightness is adjusted automaticallyaccording to the surrounding brightness.Tap [ Apps & Widgets] - [ Settings] - [Display] - [Brightness] - [Automatic brightness] in that order toremove the check mark.](https://usermanual.wiki/Sony-Group/SGPT1211.user-manual/User-Guide-1737112-Page-168.png)
![The screen brightness cannot be adjusted.When you set automatic adjustment of the screen brightness, you cannot adjust the screen brightnessmanually.Tap [ Apps & Widgets] - [ Settings] - [Display] - [Brightness] - [Automatic brightness] in that order toremove the check mark.](https://usermanual.wiki/Sony-Group/SGPT1211.user-manual/User-Guide-1737112-Page-169.png)
![The screen disappears/darkens unexpectedly.The screen goes to sleep automatically after a certain period of time to reduce battery consumption.The screen turns on again when you push the power button.When you want to change the time before the screen goes to sleep, tap [ Apps & Widgets] - [Settings] - [Display] - [Sleep] in that order to set the time.If you set the time to a longer interval before going to sleep, the battery will be consumed faster.](https://usermanual.wiki/Sony-Group/SGPT1211.user-manual/User-Guide-1737112-Page-171.png)
![The touch screen does not work as expected.Make sure you know how to use the touch screen [Details].If the touch screen is damaged (scratched, etc.), contact the service/support center named in the warranty.If the touch screen does not work, turn off your tablet device, and then turn it on again.If you cannot turn off your tablet device, press and hold the power button for about 10 seconds to force it toturn off, and then turn it on again [Details].If you cannot force your tablet device to turn off, insert a pin or other slim object into the reset button hole[Details].](https://usermanual.wiki/Sony-Group/SGPT1211.user-manual/User-Guide-1737112-Page-172.png)

![To erase the tap sound (operation sound).Tap [ Apps & Widgets] - [ Settings] - [Sound] - [Touch sounds] in that order to remove the check mark.Press and hold the VOL - (Volume) button of your tablet device until the volume indicator displayed on thescreen minimizes and the icon reverses.](https://usermanual.wiki/Sony-Group/SGPT1211.user-manual/User-Guide-1737112-Page-174.png)
![To turn off screen rotation.Tap [ Apps & Widgets] - [ Settings] - [Display] - [Auto-rotate screen] in that order to remove the checkmark.](https://usermanual.wiki/Sony-Group/SGPT1211.user-manual/User-Guide-1737112-Page-176.png)
![To deactivate the lock function/to use your tablet device withoutlocking the screen.Tap [ Apps & Widgets] - [ Settings] - [Security] - [Screen lock] in that order, then tap [None] todeactivate the lock function.](https://usermanual.wiki/Sony-Group/SGPT1211.user-manual/User-Guide-1737112-Page-177.png)
![The file cannot be displayed/be played back.The data may be damaged.Make sure the file format form of the data corresponds to that of your tablet device.Make sure the file is suitable for the playback format of the application.If the file cannot be displayed when you use the [Music player] app or the [Video player] app, execute [Updatedatabase] on the setting menu.](https://usermanual.wiki/Sony-Group/SGPT1211.user-manual/User-Guide-1737112-Page-180.png)
![Your tablet device cannot receive GPS signals or takes a long time forthe positioning.Move to an area with good reception of GPS signals, and with a clear view of the sky [Details].](https://usermanual.wiki/Sony-Group/SGPT1211.user-manual/User-Guide-1737112-Page-182.png)
![The results of GPS positioning may be different from the actuallocation.Move to an area with good reception of GPS signals, and with a clear view of the sky [Details].](https://usermanual.wiki/Sony-Group/SGPT1211.user-manual/User-Guide-1737112-Page-183.png)


![Your tablet device cannot connect to a Wi-Fi network.Make sure the Wi-Fi function is turned on.Tap [ Apps & Widgets] - [ Settings] - [Wi-Fi] in that order, and then slide the [Wi-Fi] switch to the [ON]position.Make sure there are no obstacles blocking the signal between devices, and the distance between devices isnot too far [Details].A connection may be made available by changing the channel settings of your access point.Make sure the [Network SSID] and the [Security] of your access point are set correctly.](https://usermanual.wiki/Sony-Group/SGPT1211.user-manual/User-Guide-1737112-Page-190.png)