Sony 47130J GSM/WCDMA/LTE, BT, DTS/UNII a/b/g/n/ac and NFC Data Transmitter User Manual PY7 47130J SG Startup Guide Manual
Sony Mobile Communications Inc GSM/WCDMA/LTE, BT, DTS/UNII a/b/g/n/ac and NFC Data Transmitter PY7 47130J SG Startup Guide Manual
Sony >
Contents
- 1. PY7-47130J_SG Startup Guide Manual
- 2. PY7-47130J_FCCstatement__0303
PY7-47130J_SG Startup Guide Manual
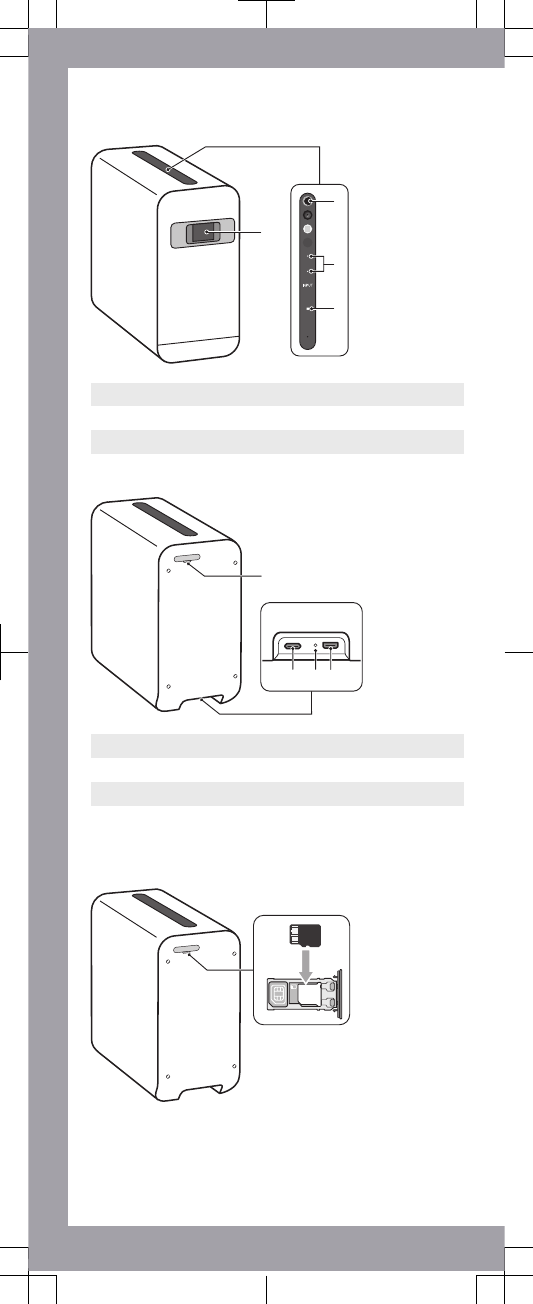
Device basics
2
4
3
1
1 Projection window (Laser aperture)
2 Power key
3 Volume keys
4 NFC
5
6 87
5 Memory card tray
6 Charger/USB Type-C™ cable port
7 LED indicator
8 HDMI™ Type-D port
To insert the memory card
microSD
1Drag out the memory card tray using your fingernail.
2Firmly place the memory card in the correct orientation
into the tray as shown in the illustration.
3Gently push the tray back into the slot until it fits into
place.
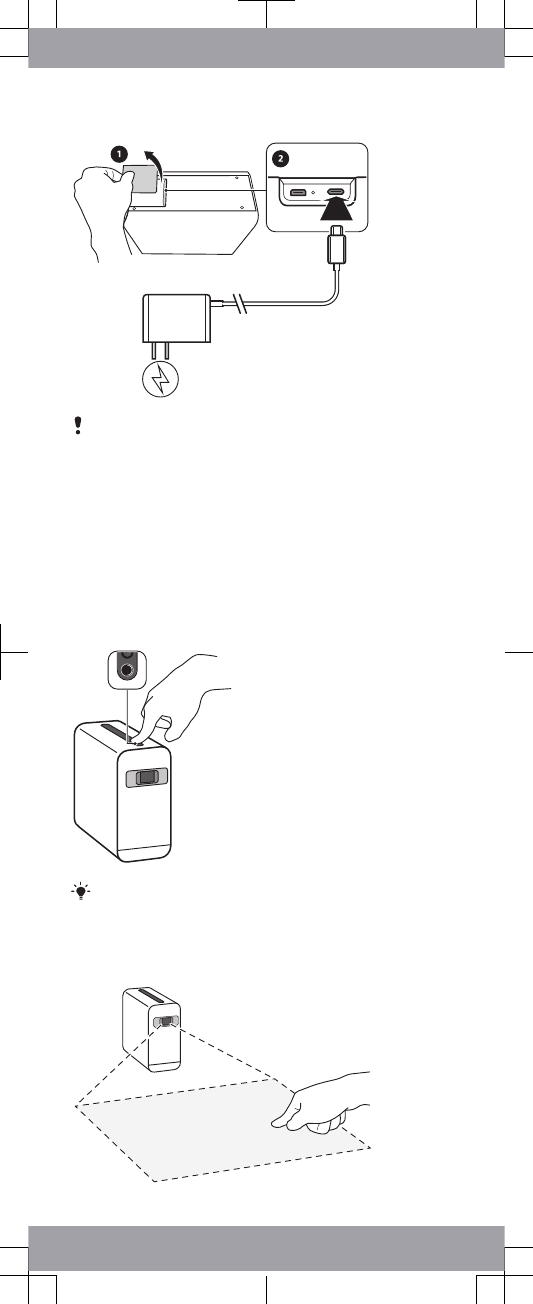
To turn on the device
It is important to use the provided USB Type-C charger
when charging your device, as other types of USB
chargers may damage or not charge your device.
1Remove the slot cover as show in the illustration.
2Plug the power cable into its slot as shown in the
illustration.
3Gently reattach the slot cover.
4Plug the charger into the power outlet. The LED indicator
next to the power cable slot lights up briefly. Make sure to
remove the protection film from the front of the device
before using it.
5Press and hold the power key until the volume buttons light
up.
The projection starts approximately 30 seconds after the
device is turned on. To turn off the device, press and hold
the power key then tap power off on the touchscreen.
To project the touchscreen
10:35
1Place the device on a clean, flat, horizontal surface as
shown in the illustration. Make sure that there are no
obstructions in the projection area.
2Navigate the projected screen using your finger.
The device will automatically pause projection if it is
moved or lifted during operation.
The first time you start your device, a setup guide helps
you to configure basic settings, personalise your device
and sign in to your accounts, for example a Google™
account.
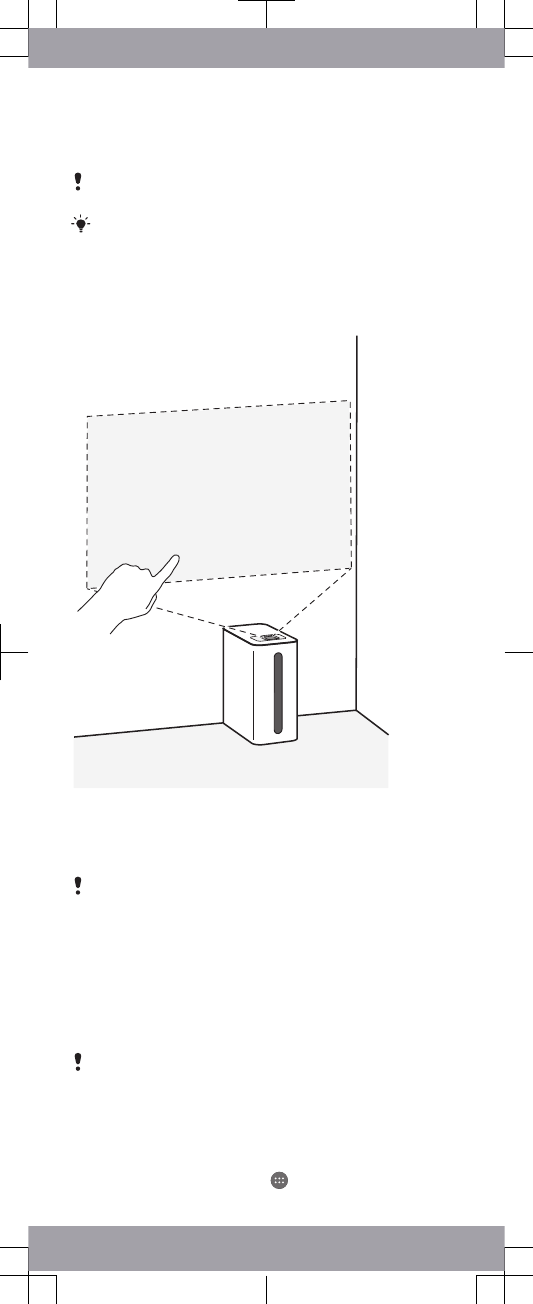
To project onto a wall
10:35
1Place the device next to the wall in the correct orientation
as shown in the illustration.
2To increase or decrease the projection area, reposition the
device further from or closer to the wall.
Touch functions are only available when the device is
projecting onto a horizontal surface, or onto a vertical
surface from a short distance.
Support for you
Access our support website directly on your device by
visiting
support.sonymobile.com
, to find user guides,
downloadable content, troubleshooting tips and contact
information.
Even if you don’t have a network connection, you can
access support contact information on your device.
Depending on the country or region where you purchased
your device, you can find this information directly in the
Support application.
To access the Support application
1From your Home screen, tap .
2Find and tap .
Connect to the internet when using the Support
application for the best available support.
Warranty and usage guidelines
For information about warranty and safety guidelines,
please read the Important information provided under
Settings > About projector > Legal information on your device.
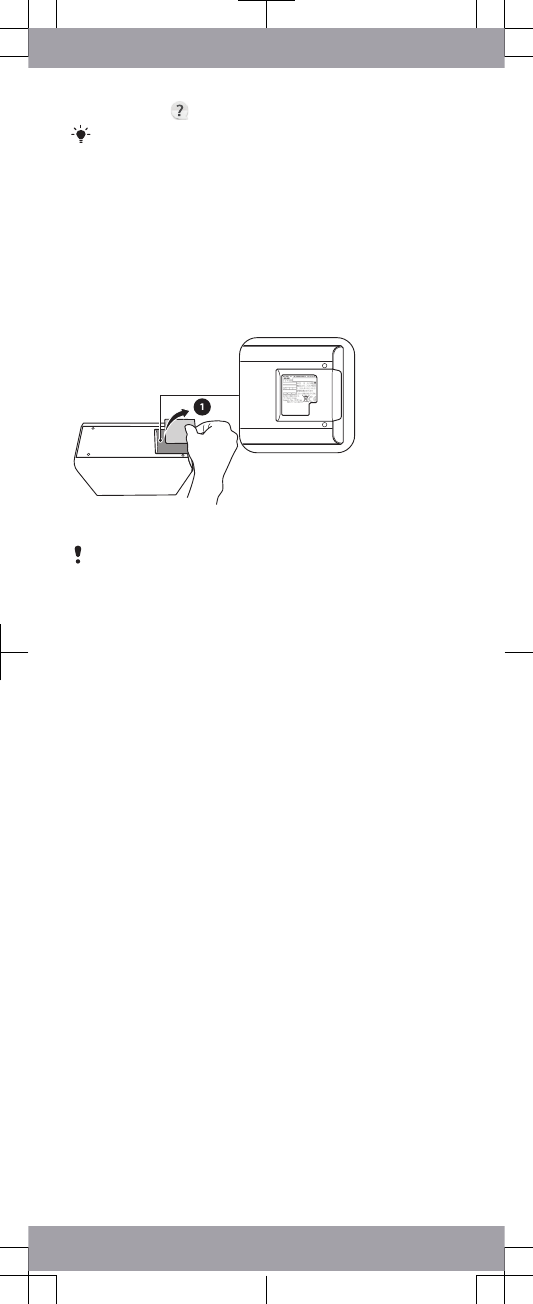
To view the CE mark and the FCC ID
•Remove the slot cover as shown in the illustration.
To see the full text of the EU declaration of conformity,
visit:
http://www.compliance.sony.de/
.
To view the regulatory compliance mark
•Open the dialpad, then enter *#07#.
Legal information
Publication number: XXXX-XXXX.1
This Startup guide is published by Sony Mobile Communications Inc. or its local affiliated company, without
any warranty. Improvements and changes to this Startup guide necessitated by typographical errors,
inaccuracies of current information, or improvements to programs and/or equipment, may be made by Sony
Mobile Communications Inc. at any time and without notice. Such changes will, however, be incorporated
into new editions of this Startup guide. All illustrations are for illustration only and may not accurately depict
the actual device.
See regulatory information such as the device CE mark in the relevant label tray in the device.
All product and company names mentioned herein are the trademarks or registered trademarks of their
respective owners. Any rights not expressly granted herein are reserved. Visit
www.sonymobile.com/global-
en/legal/
for more information.
Manufacturer: Sony Mobile Communications Inc., 4-12-3 Higashi-Shinagawa, Shinagawa-ku, Tokyo,
140-0002 Japan. For EU product compliance: Sony Belgium, bijkantoor van Sony Europe Limited, Da
Vincilaan 7-D1, 1935 Zaventem, Belgium.
© 2017 Sony Mobile Communications Inc. All rights reserved.
Supported frequency bands
Some frequency bands might be turned off in certain markets or by certain operators.
G1109
WLAN, 2.4G/5G, NFC
G1121
UMTS HSPA+ 800 (Band VI), 800 (Band XIX), 850 (Band V), 900 (Band VIII), 1700
(Band IV), 1900 (Band II),
2100 (Band I) MHz GSM GPRS/EDGE 850, 900, 1800, 1900 MHz LTE (Bands
1,2,3,4,5,7,8,12,17,19,20,26,28,38,39,40,41) WLAN, 2.4G/5G, NFC
Startup guide
Xperia™ Projector
G1109
Sony Mobile Communications Inc.
4-12-3 Higashi-Shinagawa, Shinagawa-ku, Tokyo, 140-0002 Japan
XXXX-XXXX.1
G1121