Sony A5880010 CDMA 2000 and GSM 900/1800/1900 GPRS mobile phone with Bluetooth and W-LAN User Manual PTX 947 Basic indb
Sony Mobile Communications Inc CDMA 2000 and GSM 900/1800/1900 GPRS mobile phone with Bluetooth and W-LAN PTX 947 Basic indb
Sony >
Contents
- 1. 08 user manual part 1
- 2. 08 user manual part 2
- 3. 08 user manual part 3
08 user manual part 1

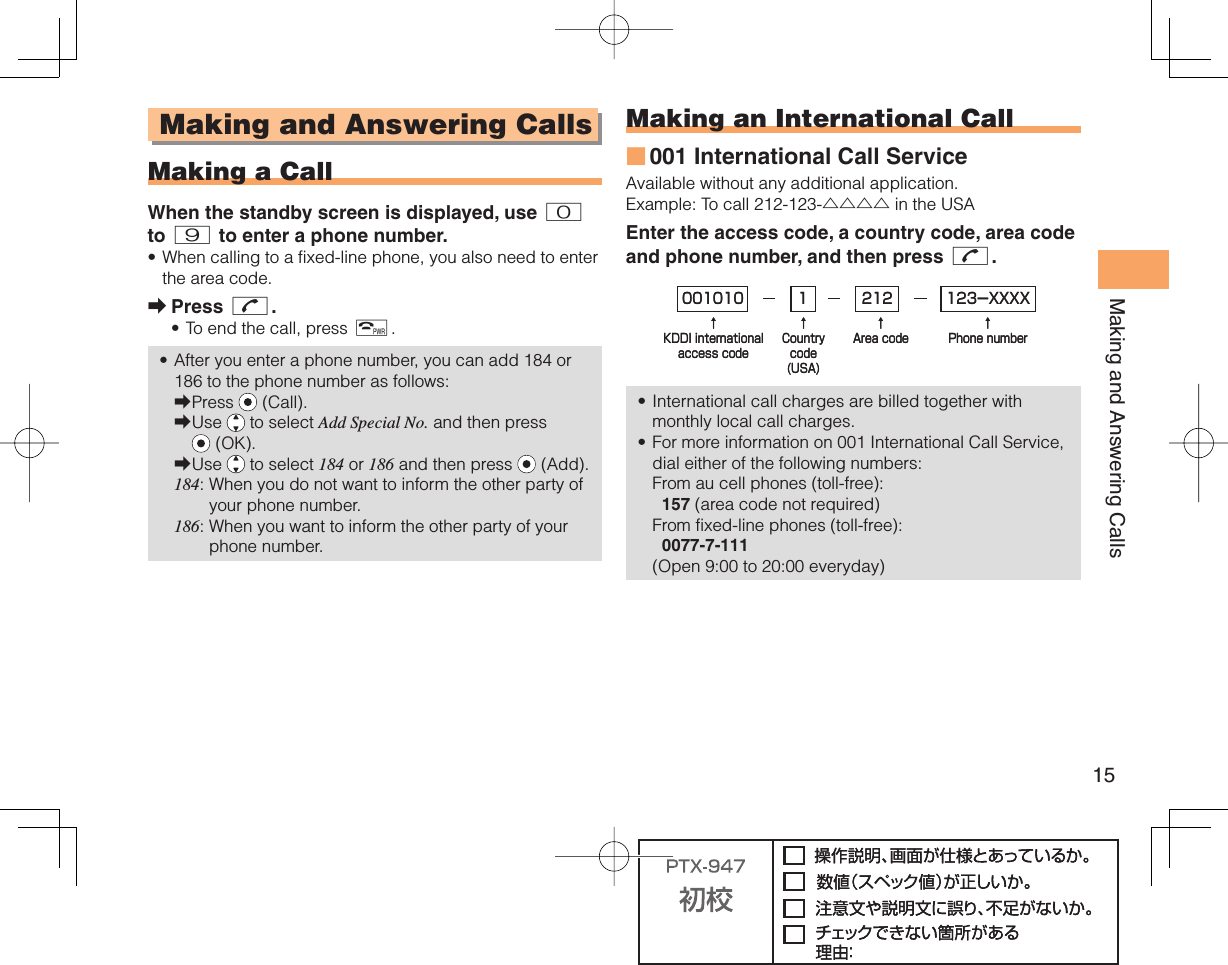
![10Getting ReadyHiding/Redisplaying the Notification WindowWhen the Notification window is displayed on the standby screen, you can temporarily hide it by pressing & (Back) and then display the Main menu by pressing c.To redisplay the hidden Notification window, press d when the standby screen is displayed. Turning On PowerHold down F for at least one second.You cannot receive or make calls if (out of range indicator) is displayed.Turning Off PowerWhen the standby screen is displayed, hold down F for at least one second.Switching the Display Language to EnglishYou can switch the display language for function names and other items to English.When the standby screen is displayed, press c.Use a to select 機能/設定 (Func/Settings) and then press c (選択 [Select]).■•■➡Notification windowNotification window Use j to select 画面表示 (Screen Display) and then press c (選択 [Select]).Use j to select Set Language and then press c (選択 [Select]).Use j to select English and then press c (Set). Initial Setup of E-mail and EZwebTo use e-mail and EZweb, you need to apply for an EZweb subscription. If you did not apply for an EZweb subscription at the time of purchase, contact an au shop or the au Customer Service Center.Also, before use, you need to configure initial settings. Your e-mail address is assigned automatically in the initial setup.When the standby screen is displayed, press L.Press c (OK).After a short while, your e-mail address is displayed.Press c (OK).The initial settings are complete.You can also configure initial settings by pressing or .Checking Your Phone Number and E-mail AddressWhen the standby screen is displayed, press c and then 0.➡➡➡➡➡•](https://usermanual.wiki/Sony/A5880010.08-user-manual-part-1/User-Guide-1392969-Page-12.png)
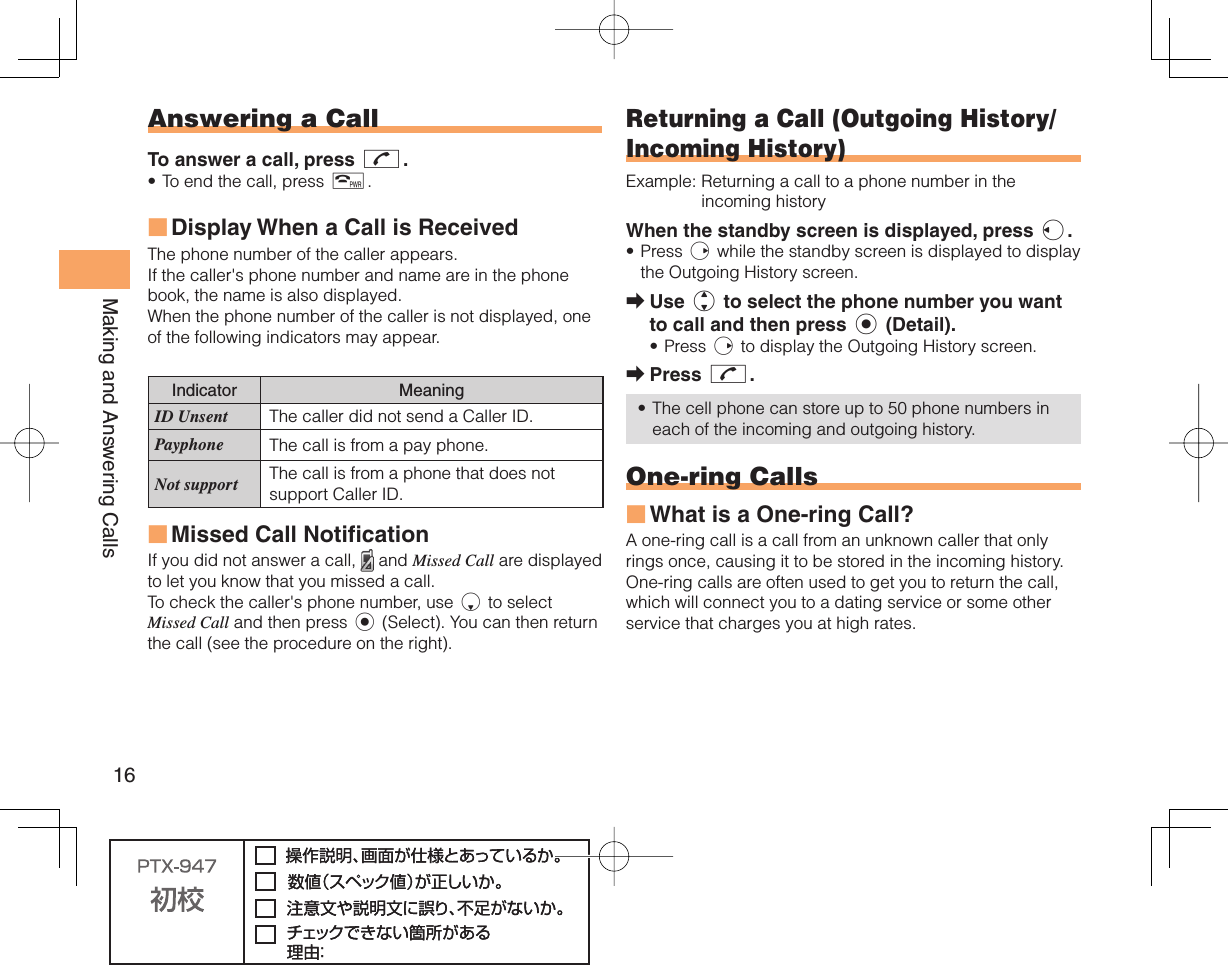
![20Global Function Global FunctionThe S006 supports Global Passport CDMA/GSM services. You can use your S006 overseas without any additional application. Setting the AreaExample: Setting to Overseas (Auto) modeWhen the standby screen is displayed, press c.Use a to select Global Function and then press c (Select).Precautions are displayed.Check the precautions and then press c (OK).Use j to select Area Setting and then press c (Select).Use j to select Overseas (Auto) and then press c (Select).Use j to select YES and then press c (OK).Some functions are not available when Area Setting is not set to Japan.➡➡➡➡➡• Obtaining the Latest PRL (Preferred Roaming List)Manually update and set the PRL (preferred roaming list) before traveling abroad.When the standby screen is displayed, press c.Use a to select Global Function and then press c (Select).Precautions are displayed.Check the precautions and then press c (OK).Use j to select PRL Setting and then press c (Select).Use j to select PRL Manual Update and then press c (Select).The cell phone connects to the server.Use j to select PRLダウンロード (Download PRL) and then press c (ダウンロード [Download]).Use j to select 最新ファイルはこちら (The Latest PRL) and then press c (Select).Press c (OK).The latest PRL is downloaded.The PRL (preferred roaming list) is the area information of overseas carriers offering international roaming service in partnership with KDDI (au).➡➡➡➡➡➡➡•](https://usermanual.wiki/Sony/A5880010.08-user-manual-part-1/User-Guide-1392969-Page-22.png)
![25Phone Book Phone Book Saving a Phone Book EntryWhen the standby screen is displayed, hold down & for at least one second.Use j to select [Name] and then press c (Select).Enter a name and then press c (OK).The [Reading] for the name is entered automatically.Use j to select [Phone No.1] and then press c (Select).Enter a phone number and then press c (OK).If the phone number is for a fixed-line phone, enter the phone number starting with the area code.Use j to select a phone number type and then press c (Select).Follow the next step to enter an e-mail address. If you do not want to enter an e-mail address, press % (Reg).Use j to select [E-mail Address1] and then press c (Select).Enter an e-mail address and then press c (OK).Use j to select an e-mail address type and then press c (Select).Press % (Reg).➡➡➡➡•➡•➡➡➡➡The phone book can store up to 1,000 entries. The cell phone automatically saves an entry to the lowest available memory number from 000 to 999.You can save five phone numbers and five e-mail addresses for each phone book entry.You can also assign a group No., and enter birthday, address, and other information. Dialing from the Phone BookWhen the standby screen is displayed, press &.Use a to select the entry containing the phone number you want to dial and then press c (Detail).Use j to select the phone number and then press c (Select).Use j to select Voice Call and then press c (OK). Editing Phone Book EntriesWhen the standby screen is displayed, press &.Select an entry and press c (Detail).Press & (Edit).Edit the contents and then press % (Reg).Use j to select Overwrite and then press c (OK).••••➡➡➡➡➡➡➡](https://usermanual.wiki/Sony/A5880010.08-user-manual-part-1/User-Guide-1392969-Page-27.png)
![30MailUsing C-mailC-mail is a service that uses phone numbers as addresses to exchange messages between au cell phones that support C-mail. A C-mail message can contain up to 50 double-byte (or 100 single-byte) characters.The C-mail send charge applies when sending C-mail. C-mail Safety BlockC-mail safety block is a function that allows you to reject C-mails that include URLs (http://△△△, https://△△△) or phone numbers in the C-mail message text.C-mail safety block is valid by default. Cancel the setting if you want to receive C-mails that include URLs and phone numbers in the message text. Creating and Sending C-mail MessagesWhen the standby screen is displayed, hold down L for at least one second.Use j to select Create New and then press c (Select).Enter text and then press c (OK).Use j to select [Address] and then press c (Edit).Use j to select Quote Adrs Book and then press c (OK).•■➡➡➡➡Use a to select a phone book entry and then press c (Detail).Use j to select a phone number and then press c (Select).Press & (Send). Reading Received C-mail MessagesWhen you receive a C-mail message, C-mail appears on the standby screen.Use d to select C-mail and then press c (Select).Press c (Select).: Indicates a read message.: Indicates an unread message.Use j to select the new message and then press c (View).Reading a C-mail Message from the C-mail MenuWhen the standby screen is displayed, hold down L for at least one second to display the C-mail menu, use j to select Inbox and then press c (Select). For subsequent operations, see "Reading Received C-mail Messages" above.➡➡➡➡➡••➡■](https://usermanual.wiki/Sony/A5880010.08-user-manual-part-1/User-Guide-1392969-Page-32.png)
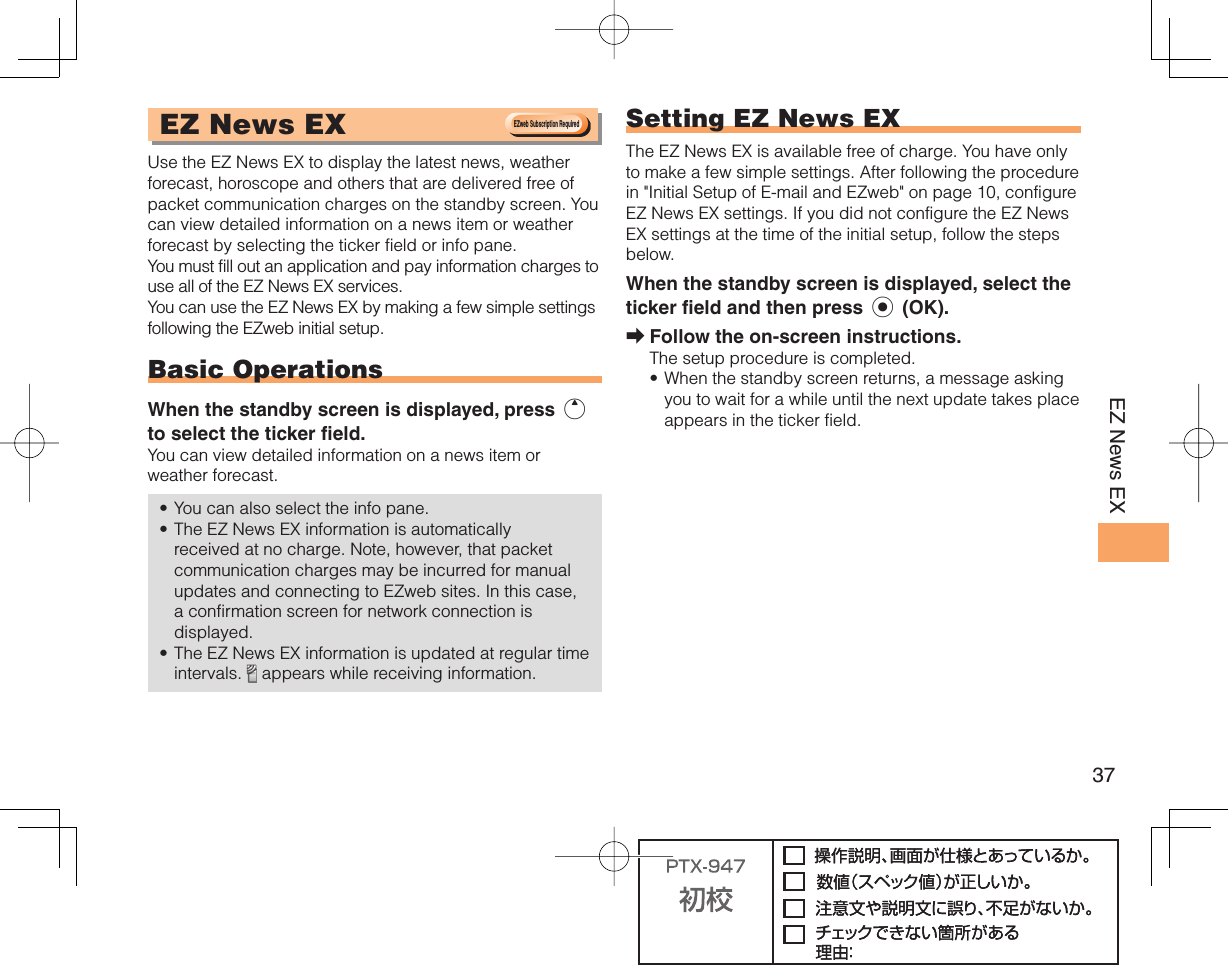
![38EZ News EX Canceling EZ News EXWhen the standby screen is displayed, select the ticker field and then press c (News).Press % (サブメニュー [Submenu]), use j to select サービス利用設定変更・解除 (Service Settings/Cancellation) and then press c (選択 [Select]). Use j to select サービス利用解除 (Service Cancellation) and then press c (選択 [Select]). Follow the on-screen instructions. Changing the Reception Settings for EZ News EX InformationYou can change the ring tone, vibrator and lamp settings under M216 NewsFlash Receive for reception of EZ News EX information.If you do not want the ring tone to sound when receiving EZ News EX information, set the volume to OFF.■➡➡➡■](https://usermanual.wiki/Sony/A5880010.08-user-manual-part-1/User-Guide-1392969-Page-40.png)
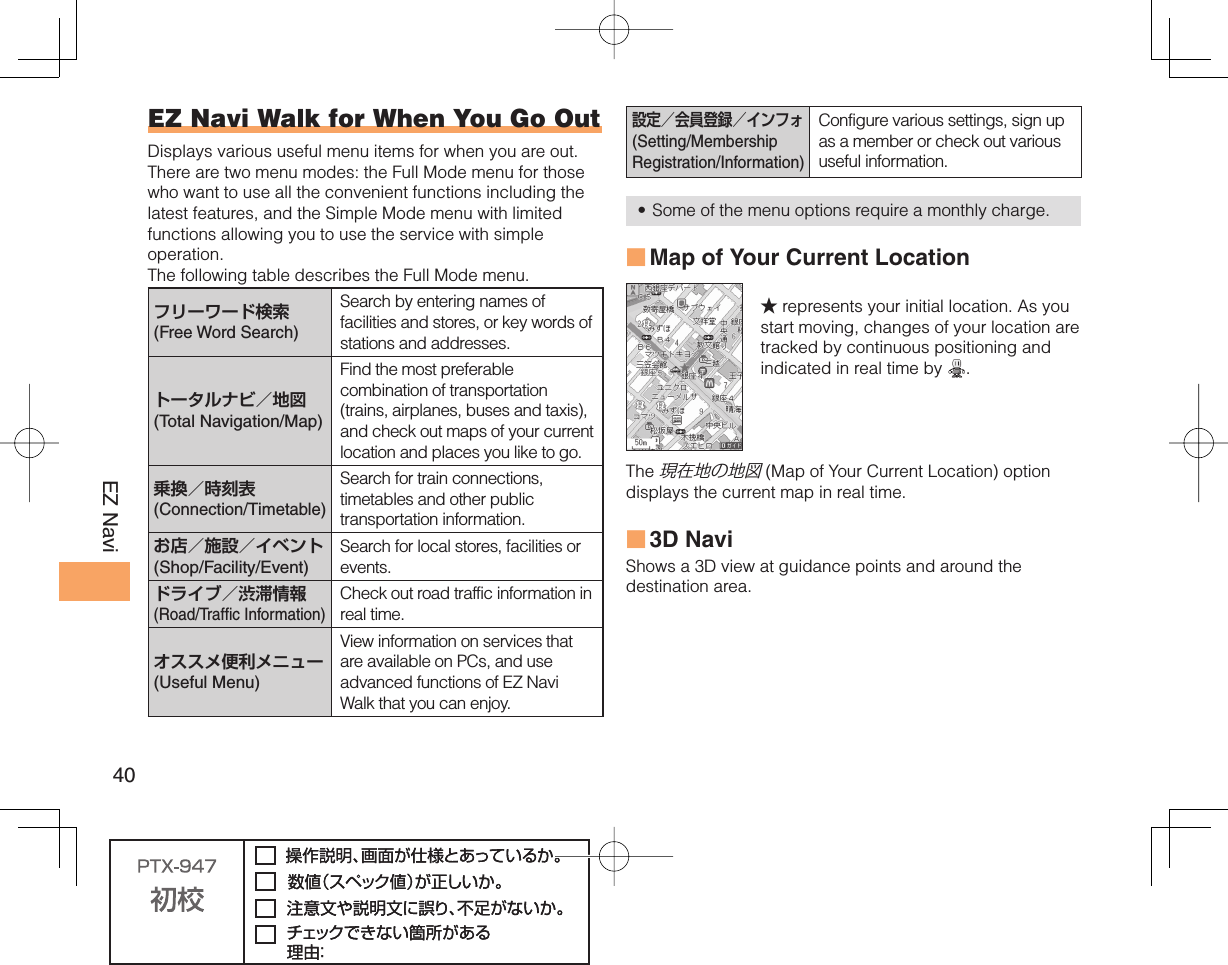
![39EZ Navi EZ Navi Using GPS (Global Positioning System), EZ Navi provides useful positional information services.When the standby screen is displayed, press R and then use s to select EZnavi.The packet communication charges for using EZ Navi services apply to the amount of data sent and received. Some services may require a separate information fee.Before using EZ Navi, you must configure initial settings of EZweb (page 10). Passenger Seat Navi for People in the Passenger Seat to Check the RoutePassenger Seat Navi guides the passengers to the destination with the best route using voice and map.Drivers are not allowed to use Passenger Seat Navi.•• Security Navi to Check Where Your Kids AreThe Security Navi application is made up of the following three functions:いつでも位置確認 (Auto Position Search [monthly charge]), エリア通知 (Area Message [no monthly charge]), 位置確認メール (Position Search Mail [no monthly charge])Using these functions, you can check the position of an au cell phone that supports Security Navi; and automatically receive a notification from the specified au cell phones when your kids enter (or are in) or leave (or are no longer in) the set area within a predetermined period of time.EZweb Subscription RequiredEZweb Subscription Required](https://usermanual.wiki/Sony/A5880010.08-user-manual-part-1/User-Guide-1392969-Page-41.png)
![41EZ Navi Evacuate Navi to Guide You Home or to Nearby Evacuation Areas during DisastersNearby public evacuation areas or the direction to your home can be determined using the map data pre-installed on the S006 (避難所マップ [Evacuate Area Map] ). Other useful contents can be downloaded from the 災害時ナビ (Evacuate Navi) section of the EZweb site.Some contents require a monthly charge. Use the information on the screen as a reference and always follow the instructions of police, fire and other municipal authorities. When using Evacuate Navi, checking your current position may take more time than usual depending on the status of the GPS satellites. •••](https://usermanual.wiki/Sony/A5880010.08-user-manual-part-1/User-Guide-1392969-Page-43.png)

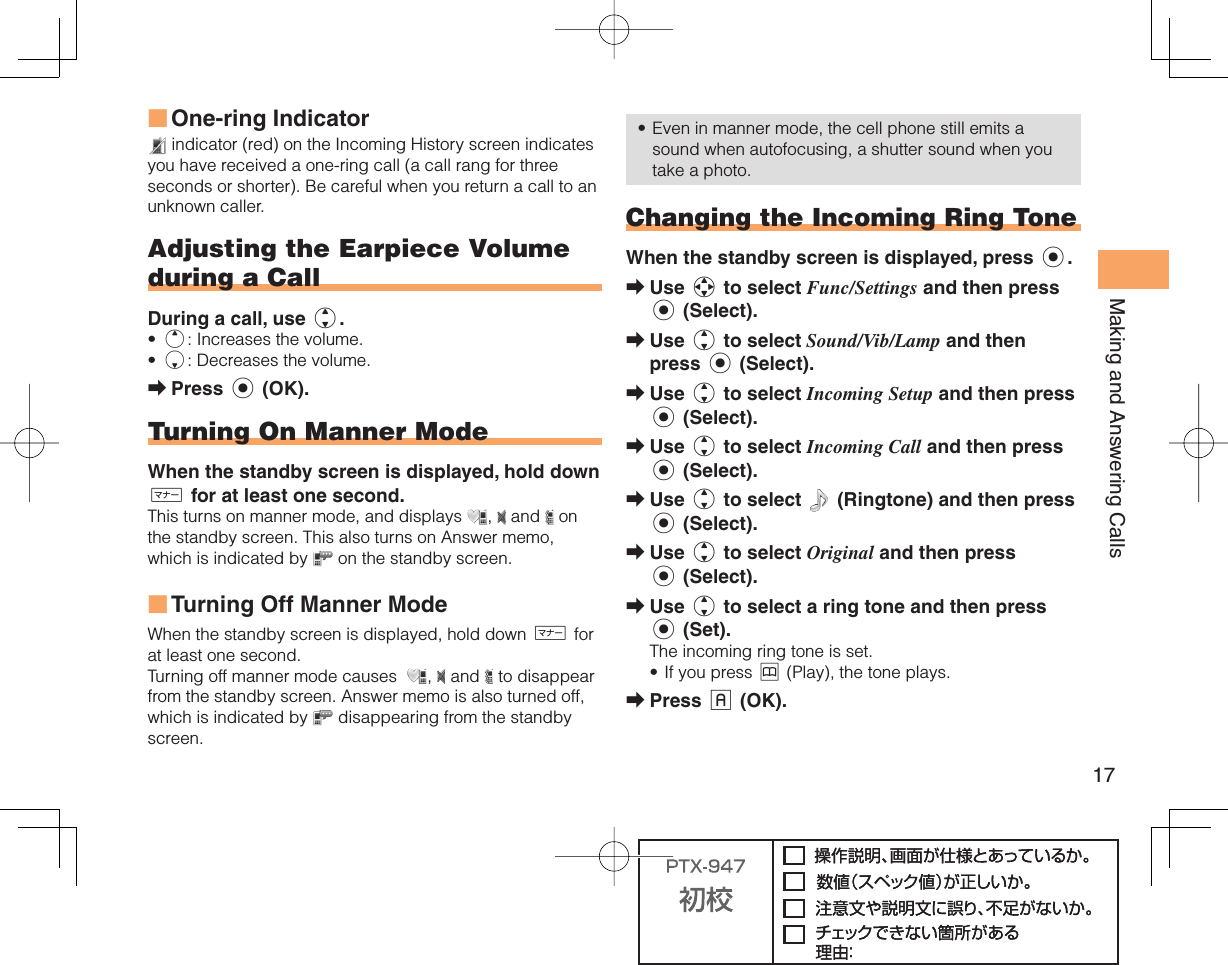
![43TV (1Seg) Initial Setup of au Media TunerTo watch TV (1Seg) using the au Media Tuner, you need to configure initial settings. When the standby screen is displayed, press c.Use a to select TV, press c (Select), use j to select TV (1Seg) and then press c (Select).Disclaimer notes are displayed.Use j to check the disclaimer notes, use j to select OK, and then press c (選択 [Select]). The initial setting screen for using the au Media Tuner is displayed. Follow the on-screen instructions to configure each setting. Then, the screen for setting TV (1Seg) channels appears. Use j to select オート設定(放送波) (Auto (Broadcasting wave)) and then press c (選択 [Select]).Automatic channel scanning begins. When receivable channels are found, the channel setup is completed.Select マニュアル設定 (Manual) to set the channel manually. ➡➡•➡•Watching TV (1Seg)When the standby screen is displayed, press c.Use a to select TV, press c (Select), use j to select TV (1Seg) and then press c (Select).To Change Channels Use s to change channels.You can select TV (1Seg) and EZ Channel-Plus/EZ Channel programs. Before using this feature, you must configure au Media Tuner initial settings (see the procedure on the left).Channels cannot be changed with when the data operation screen is displayed.➡■••EZ Channel-Plus/EZ Channel1ch 2ch …12chTV (1Seg)Change channels one by one. Program 16 Program 2 Program 1…EZ Channel-Plus/EZ Channel1ch 2ch …12chTV (1Seg)Change channels one by one. Program 16 Program 2 Program 1…](https://usermanual.wiki/Sony/A5880010.08-user-manual-part-1/User-Guide-1392969-Page-45.png)
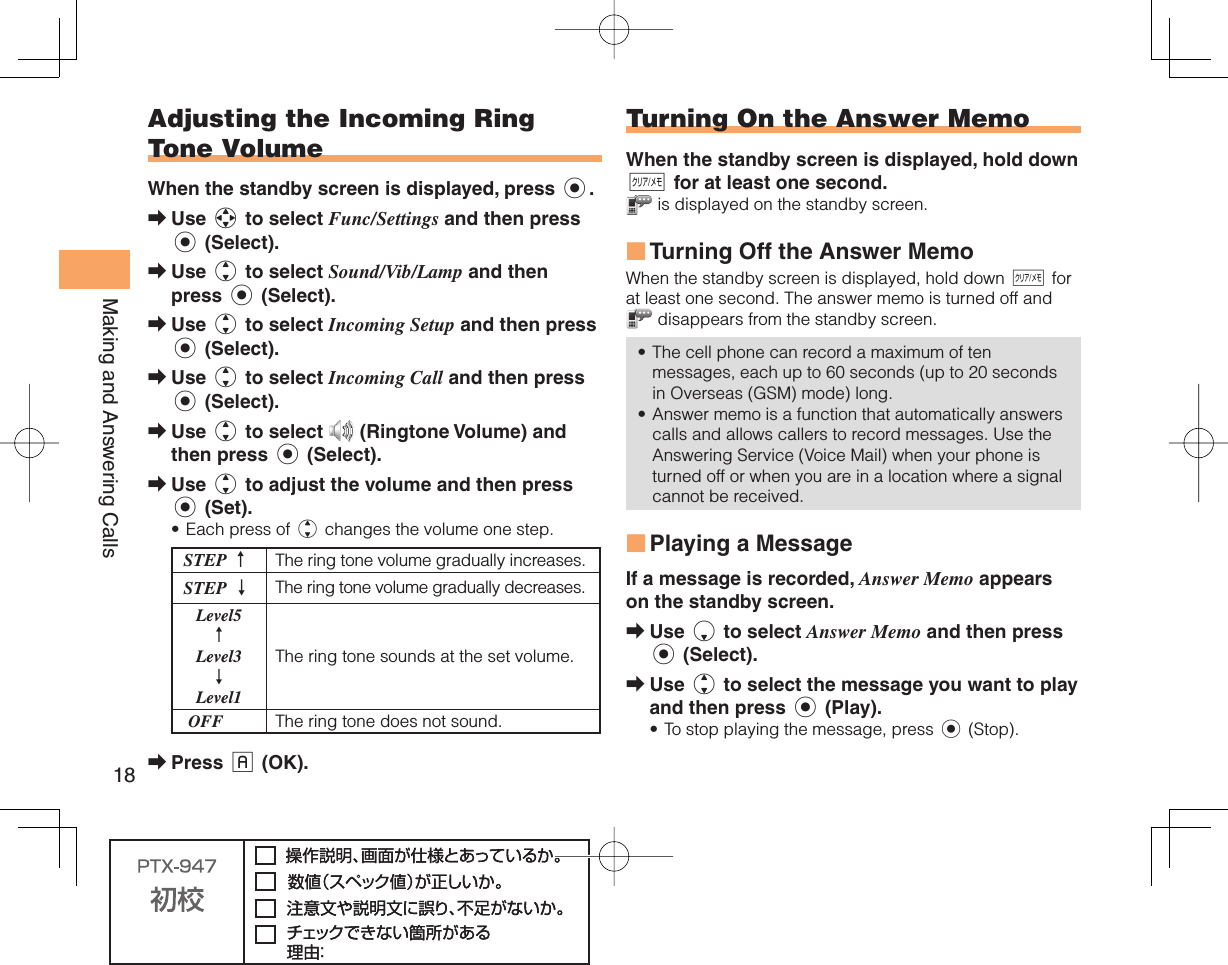
![44TV (1Seg) Basic OperationsLaunch TV (1Seg) to start receiving data broadcasts. The data operation screen appears when a data broadcast is received. Press & (Vol/Ch) on the data operation screen to switch to the TV operation screen. On the TV operation screen, pressing N switches the display.Use to adjust the volume. Exiting the au Media TunerPress F, use j to select はい (YES) and then press c (OK).•TV operation screenData operation screen& (Vol/Ch)& (戻る[Return])TV operation screenData operation screen& (Vol/Ch)& (戻る[Return])](https://usermanual.wiki/Sony/A5880010.08-user-manual-part-1/User-Guide-1392969-Page-46.png)
![45In Case of Loss of Your S006In Case of Loss of Your S006The Remote Ctrl Lock allows you to remotely activate the Auto Lock, FeliCa Lock, and Address Book Lock, preventing others from using your cell phone.Setting Conditions for Activating the Remote Ctrl LockYou can activate the Remote Ctrl Lock by calling your S006 a set number of times from a registered phone number within a specified period of time. When the standby screen is displayed, press c.Use a to select Func/Settings and then press c (Select). Use j to select Privacy/Rstr and then press c (Select). Use j to select Security Lock and then press c (Select). Use j to select Rem. Ctrl Lock and then press c (Select). Enter Lock No., and then press c (OK).Use j to select Valid No. and then press c (Select).Use j to select [Register New] and then press c (Select).➡➡➡➡➡➡➡Use j to select Direct Input, press c (OK), enter a phone number, and then press c (OK).Press % (Comp).Use j to select Duration (min) and then press c (Select).Enter a time and then press c (Set).This sets the time limit for receiving the set number of calls after the first call is received.You can set a time from one to ten minutes.Use j to select No. of Incm, and then press c (Select).Enter a number of calls, and then press c (Set).This sets the number of calls to receive to activate the Remote Ctrl Lock.You can set a number of calls from three to ten.Press % (Save).Use j to select YES and then press c (OK).➡➡➡➡••➡➡••➡➡](https://usermanual.wiki/Sony/A5880010.08-user-manual-part-1/User-Guide-1392969-Page-47.png)