Sony DCR DVD108 User Manual DIGITAL CAMCORDER Manuals And Guides L0702093
SONY Digital Camcorder Manual L0702093 SONY Digital Camcorder Owner's Manual, SONY Digital Camcorder installation guides
User Manual: Sony DCR-DVD108 DCR-DVD108 SONY DIGITAL CAMCORDER - Manuals and Guides View the owners manual for your SONY DIGITAL CAMCORDER #DCRDVD108. Home:Electronics Parts:Sony Parts:Sony DIGITAL CAMCORDER Manual
Open the PDF directly: View PDF ![]() .
.
Page Count: 136 [warning: Documents this large are best viewed by clicking the View PDF Link!]
2319496110
0SON 2-319-496-11 (1)
C
Digital Video Camera Recorder
Operating Guide
DCR-D VD 108/D VD308/
D VD608/D VD708
Getting Started
Editing
Utilizing recording media
Customizing your
camcorder
Using a Computer
Troubleshooting
Additional
Information
Quick
Reference
Spanish Quick Guide/
Gufa r_tpida en espafiol
Addilional information on lhis product and answers
Io frequenlly asked questions can be found at our
Customer Support Websile.
http://www.sony.net/
Printed on 70% or more recycled paper
using VOC (Volatile Organic Compound)
-free vegetable oil based ink.
Printed in China © 2007 Sony Corporation
M_MORVSTIEK,_, _InfoLITHIUM Q
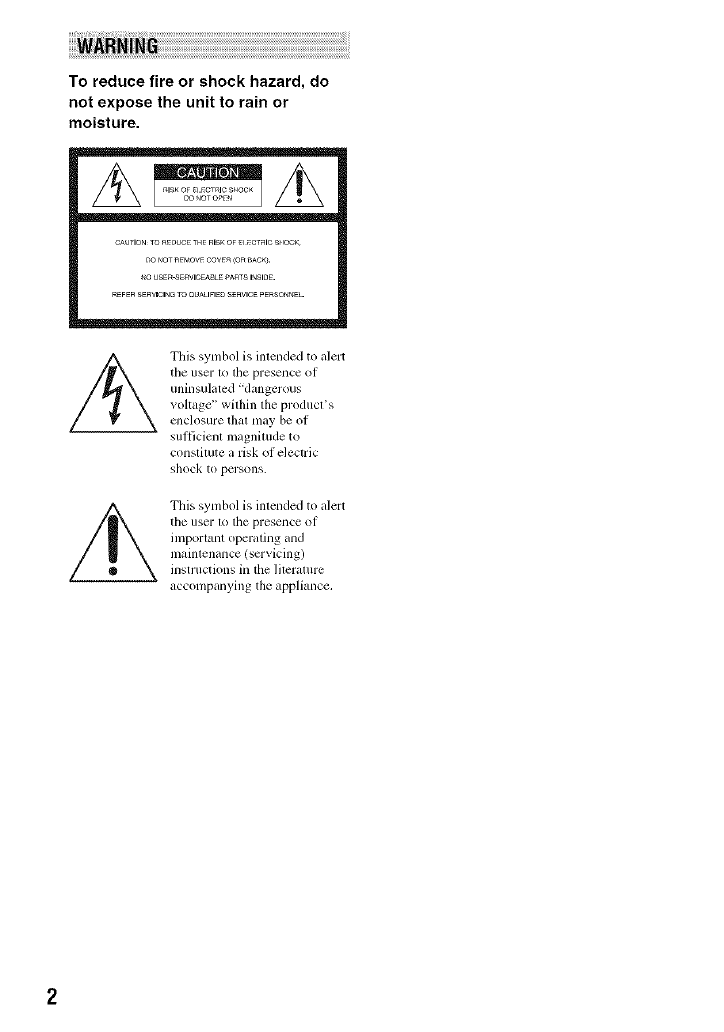
To reduce fire or shock hazard, do
not expose the unit to rain or
moisture.
CAUTIONTOa_UC_ THFRISKOF_ _CTalCS_IOCK
DO _OTR_MOVECOVER(OR_AC_.
_O USER-SERVICEaBLEPAaTSI_SlDE.
R_FERSERWCIN_TO aUA_IFIEDSERVICEPERSOnnEL
/_ This symbol is intended to alert
the user to the presence of
uninsuhlted "dangerous
v(_l_age _' within the produces
ellclosure [hal lllay be of
sufficient magnitude to
constitute a risk of electric
shock to persons.
This symbol is inlended to alert
the user 1_)tile presence: of
important operating and
maintenance (servicing)
insn uctions in the lileramre
accompanying the appliance,
IMPORTANTSAFEGUARDS
For your protection, please read these safety
instructions completely before operating
the appliance, attd keep this manual for
future reference.
Carefully observe all warnings, precautions
and instructions oil the appliance, or the one
described in the operating inslructions attd
adhere to them.
PowerSources
This set should be operaled only hom tile lype of
power source indicated on the marking label. If
you are nol sure of the lype of electrical power
supplied to your home. consuh your dealer or
local pow-er company. For lhose sets designed lo
operale ll'()nl baltely power, or other sources, relcr
to the operaling instruclions.
Polarization
This sel may be equipped with a polarized ac
power coM plug (a plug having one blade wider
than the olher).
Tills plug will fil inlo the i)ower outlel only one
way. This is a sal_:ty li:ature. If you are unable to
insert the plug lhlly into lhe oullet, lly reversing
the plug. [f tile plug should still lail to fit, conlacl
your electrician to have a suitable outlet installed.
Do not delcat the sal_:ty purl?ose of tile polarized
plug by Iorcing il in.
Overloading
Do not o_, erload wall outlets, extension cords or
corn enience receptacles beyond their capacity_
since Ibis cml result in firc or electric shock.
ObjectandLiquidEntry
Never push objects ot rely kind into the set
through openings as they may touch dangerous
vollage points or sllort out parts lhal couM rcsull
m a fire or electric sllock. Norm- spill liquid of any
kind on lhe set.
Attachments
Do not use _ittilclllnents llOl rccolnnlcllded by tile
iilanul_lc[urt2r, as they may cause hazards.
Cleaning
Unl)lug tile scl h'om tile wall outlet belbre
cle_ming or polishing it. Do not use liquid clemmrs
or aerosol cleaners. Use a cloth lightly dampened
with water lot cleaning the exterior of tile set.
Water andMoisture
Do not use power-line operated _ls near water
lbr examl?le, near a balhmb, washbowl, kilchen
sink, or laundry tub, in a wel basemenl, or near a
swimming pool, elc.
Power-CordProtection
Roule tim power cord so thai it is not likely to be
walked on or pinched by ilems placed upon or
againsl them, paying parlicular auemion to tile
plugs, receptacles, and lhe point wllere llle cord
exils liom tile appliance.
Accessories
Do not place tile set <inan unstable cart, stand,
tripod, bracket, or table. The sel may l_dl, causing
serious injmT to a child or an adult, and serious
damage to tile set. Use only a cart, sland, tripod,
brackel, or lable recommended by llle
illanul_lct/ir_2r.
Ventilation
The slols and openings in lhe cabinet arc provided
lbr necessmy venlilation. To ensure reliable
operation of the set, and to protect it liom
overhealing, lhese slots and openings musl never
be blocked or covered.
Never cover tile slots and openings wilh a clotll
or other nlaterials.
Never block tile slots and openings by placing
the set on a bed. sola, rug. or olher similar
Sul'l_lce.
Never place ltle set in a confined space, such as
a bookcase, or buih-in cabinel, unless proper
venlilation is provided.
Do not place tile set near or over a radiator or
Ileal register, or where il is cxposed 1o direct
sunligla.
Continued._ 3
INPORTANT SAFEGUARDS(go_i_sdl
Lightning
For added protectfim lor this _el during a fighlning
storm, or when it is lelt un_tlended and unused lor
long periods of time. unplug it l_x)m tile wall
outlcl and disconnect lhe antenna or cable system.
This will prevenl damage to the set due to
lighming and power-line surges.
SafetyCheck
Upon completion ol any scP4ce or repairs to tile
sel. ask tile service lechnician 1o perfimn routine
salcty checks (as specified by tile manul_,cturcr)
to determine tllal the set is in safi: operating
condilion.
DamageRequiringService
Unplug tim sel hx)m lhe wall oullel and rclcr
selvicing to qualified _rvice personnel under tile
lbllowing condilions:
When the power cord or plug is damaged or
frayed.
If liquid has be_n spilled or objects have hdlen
into the sel.
If the _t has been exposed to rain or water.
If the set has been subjecl to excessive shock by
being dropped, or lhe cabinet has b_n
damaged.
If lhe set does not opert_te normally when
Iollowing lhe operaling instructions. Adjust
only lhose controls thai are specified in the
operating instructions, hnproper adjuslmenl of
other controls may resuh in damage and will
often require extensive work by a qualified
technician 1_>rt2storc tile set to normal operalion.
Wllen file set exhibits a distincl change in
performance this indicales a need lor service.
Servicing
Do not altelnpl to ser_,ice lhe sel yourself as
opening or rclnoving covers may expose you to
dangerous voltage or olher hazards.
Relcr all servicing to qualified service personnel.
Replacementparts
Whcn replacement paris m'e required, be sure lhe
ser_ ice leclmician has used replacement paris
specilied by tile u/anul_cturer tllat llave tile same
charactcristics as tile original palls.
Unauthorized substitmions may rcsu]l ill fire.
electric sllock, or olher hazards.

Readthis beforeoperatingyourcamcorder
Before operating the unit, please read this
manual thoroughly, and retain it for futttre
reference.
CAUTION
Tile use of optical instrumenls with this producl
will increase eye ha/urd. Use of controls or
adjtlstlncnls or perfimnance of proccdures olher
than those specified herein may 1_3suh in
hazard(illS radiation exposure.
Replace tile baltcry with tile specified type only.
Otherwi_, filv or inju Umay result.
RECYCLINGLITHIUM-IONBATTERIES
Litlliuun-lon balteries are o
recyclable. You can help preserve
our ellVirOlll/lelll by relllrllillg
your used rechargeable batleries
tit the colleclion and recycling
location nearest you.
For more inlormation regarding recycling of
rechargeable batteries, call toll h-ee 1-800-822-
8837_ or visil hllp://www.rbrc.org/
Caution: Do nol handle damaged or leaking
Lithium-Ion batteries.
Batterypack
This de_ice con@ies w'ith Part 15 ol tile FCC
Rules. Operation is suhject 1o lhe lbllowing l\vo
condilions:
(1) This device may not cau_ halmild
interlcrence, and (2) this device musl accept any
inlerlcrence received, including inlerlcrcnce thai
may cau_ undesired operalion,
This Class B digital apparatus complies with
Cg,nadian ICES-003,
Owner'sRecord
Tile model and serial numbers are located on the
bollom. Record tile serial number in the space
provided below. Relcr to lhe_ numbers whenever
you call upon your Sony dealer regarding this
product.
Model No. DCR-
Serial No.
Model Nit. AC-
No,
If you have any questions aboul lhis producl, you
may call:
Sony CtlstOlllel" lnlorlnation Center
1-800-222-SONY (7669).
The number bdow is lor the FCC rclated malters
only.
RegulatoryInformation
Declaration of Conformity
Trade Name: SONY
Model Nit,: DCR-DVD108
Responsible Party:Sony Eleclronics Inc.
Addrcss: 16530 VizJ Esprillo, San Diego, CA
92127 U.S.A.
Telephone Nit.: 858-942-2230
This device complies with Part 15 of lhe PCC
Rules. Operation is subject 1o tile 6_llowing lwo
condilions: / 1) This device may not cau_
harmflfl interfi:rence, and (2) this device must
accept any intel_i:rence received, including
interfi:rence lhat may cause undesired operalion,
Continued._ 5
Rsad this b÷fo_÷0p÷rati_N y0_[rcamcord÷r (Sostissed}
Declaration of Conformity
Trade Name: SONY
Model No.: DCR-DVD308
Responsible Party:Sony Electronics hlc.
Address: 16530 Via Esprillo. San Diego. CA
92127 U.S.A.
Telephone No.: 85g-942-2230
This device complies with Part 15 of tile FCC
Rules. Operatkm is sul_iect to tile lollowing two
conditions: ( 1) This device nlay not cause
harmlhl interlcrcncc, and 12) this device nmst
accept any interli:rcnce rcceived, including
intm'lcrcncc that may cause undesircd operation.
CAUTION
You arc cautioned that any changes or
modifications not exprc_,sly approved in this
manu_d could void your authority to operate this
equipment.
Note
This equipment has becn tested and lound to
conlply with the linfits lot a Class B digital
device, pursuant to Part 15 of the FCC Rules.
These limits are designed to pro_ ide reasonable
protection against harmfifl interlcrcnce ill a
residential installation. This equipment generates,
uses. and call radiate radii) l?equency energy and.
if not installed and used in accordance with the
instructions, may cause harmlhl interlcrcnce to
radio conltllllnications.
However. tllel_ is no guarantee that interl_:rcnce
will not occur ill a particular installation. If this
equipmcnt does cause tlarmlhl interlcrcnce to
radio or television reception, which can be
deternlined by turning the equipnlent off and on,
tile user is encouraged to tl3' to correct tile
interlcrencc by one or nlorc of the lk)llowing
measures:
Reorient or relocatc tile receiving antenna.
Increase the separation betw_n tile equipment
and receiver.
Connect the equipment into an outlet on a
circuit dil]crem from lhat to which dm receiver
is connected.
Consuh the dealer or an experienced mdio/TV
technician lbr help.
Tile supplied interlace cable must be used with tile
equipment ill order to comply with tile limits lor a
digital device pursuant to Subpall Bof Part 15 of
PCC Rules.
This product is not intended to be serviced.
Should the product cease to lhnction in its
intended manner, it should be rcmmed to tile
nlanulacturer or to be discarded.
Forthe State of California, USAonly
Prechlorale Material - special handling may
apply, See
www.dtsc.ca.gov/h azardouswastc/per chlorate
Perchlorate Material: Lithiunl battcry contains
pcrchlorate.
Your camcorder is supplied with two
kinds of operations guides.
"Operating Guide" (This manual)
"First Step Guide" for using your
camcorder with the computer connected
(stored on the supplied CD-ROM)
Types of the disc you can use in your
camcorder
You can use the following discs only.
8cm DVD-RW
8cm DVD+RW
8cm DVD-R
8cm DVD+R DL
Use the discs with marks listed below. See
page 14 for details.
_W+RDL
For reliability durability of recording /
playback, we recommend that you use Sony
discs or discs with an _g_ *(lk_r
VIDEO CAMERA) mark lk_r your
camcorder.
0 Note
•Using a disc other than abo_e may cause tile
unsatishLctory recording/playback or you m_,y
not be able to renlove the disc li-onl your
caalcorder.
* Depcnding on tile place you bought, the disc has
_',2_°_ mark.
Typesof "MemoryStick"youcanuse
inyourcamcorder
You cm] use "Memory Stick Duo" marked
with MEMORY STIEg DUO or
MEMORYSTIEKPRO DuO (p. IOl ).
"Memory Stick Duo"
(This size can be used with your
camcorder.)
"Memory Stick"
(You cannot use it in your camcorder.)
•You cannot use any type of uteutory card
except "Memory Stick Duo."
•"Mmnory Stick PRO" and "Memory Stick
PRO Duo" can be used only with
"Mmuory Stick PRO" compatible
equipment.
• Do not attach a label or the like on a
"Mmnory Stick Duo" or a Memory Stick
Duo Adaptur.
When using a"Memory Stick Duo"
with "Memory Stick" compatible
equipment
Be sure to insert the "Memory Stick Duo"
into the Memory Stick Duo Adaptor.
Memory Stick Duo Adaptor
soNY
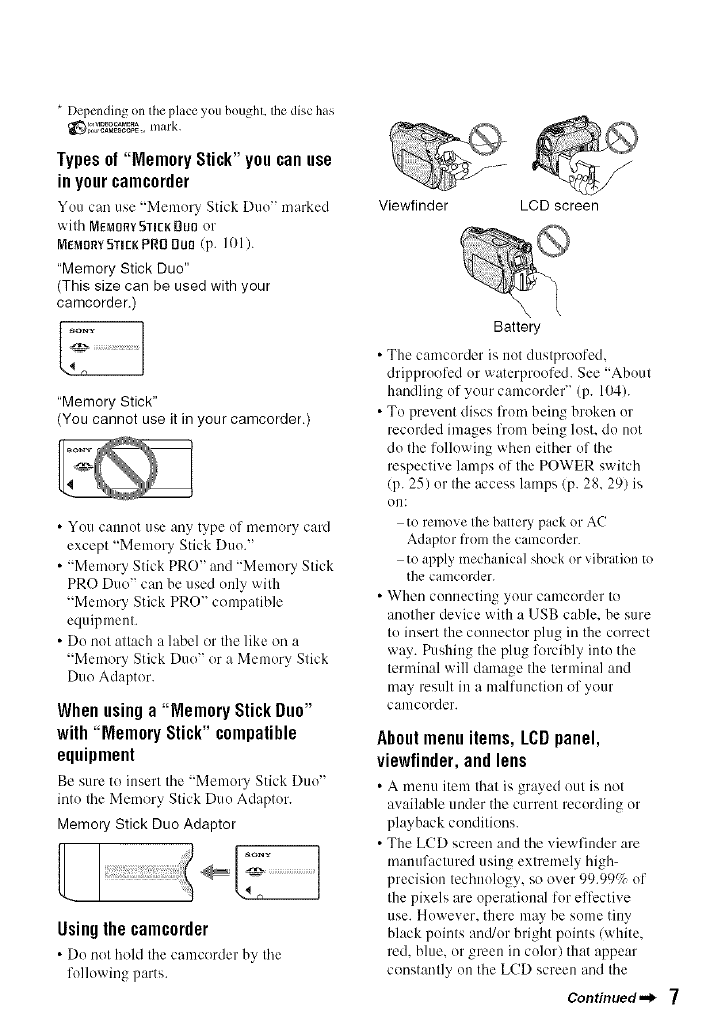
Using the camcorder
•Do not hohl the camcorder by the
following parts.
Viewfinder LCD screen
Battery
• The camcorder is not dustproofed,
dripproofed or waterproofed. See "About
handling of your camcorder" (p. 104).
• To prevent discs from being broken or
recorded images from being lost, do not
do the following when either of the
respective lamps of the POWER switch
(p. 25) or the access lamps/p. 28, 29) is
Om
to remove the battery pack or AC
Adaptor from the camcorder.
to apply mechanical shock or vibration to
the camcorder.
• When connecting your camcorder to
another device with a USB cable, be sure
to insert the commctor phlg in the correct
way. Pushing the plug lk_rcibly into the
terminal will damage the terminal attd
may result in a mNfunction of your
calucordeL
About menu items, LCD panel,
viewfinder,and lens
• A metal itenl th:lt is grayed out is uot
available under the current recording or
playback conditions.
• The LCD screen and the viewfinder are
manufactured using extreutely high-
precision technology, so over 99.99% of
the pixels are operatiomd for effective
use. However. there may be some tiny
black points and/or bright points (white.
red. blue. or green in color) that appear
constantly on the LCD screen and the
Continued._ 7
Rsad this bsfo_s ops_ati_S ya[_ camcords_ (Sostissed}
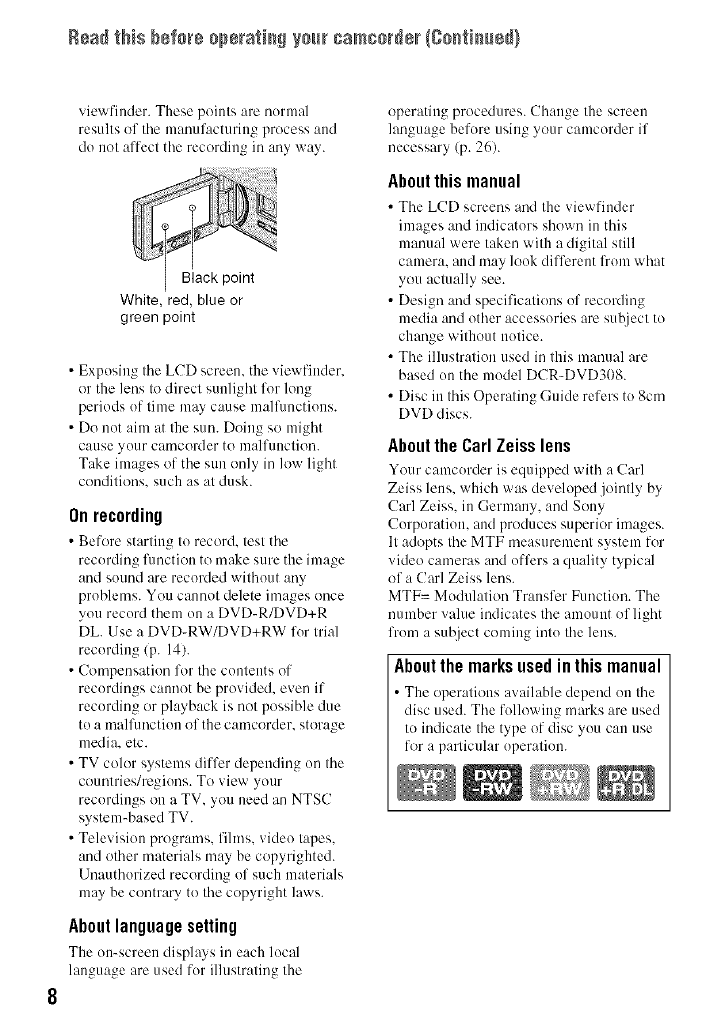
viewfiuder. These points are nurmal
results of tile manufacturing process and
do not affect the recordii]g in any way.
White, red, blue or
green point
• Exposing the LCD screen, the viewfinder.
or the lens to direct starlight for long
periods uf time may cause malflmctiuus.
• Do not aim at the sun. Doing so might
cause yuur camcorder to malfunction.
Take images of the sun only in low light
conditions, such as at dusk.
Onrecording
• Before starting to record, test the
recording flmction to make sure the bnage
and sound are recorded without any
problems. You cannot delete images once
you recurd them on a DVD-R/DVD+R
DL. Use a DVD-RW/DVD+RW fur trial
recording/p. 14).
• Compensation for the contents of
recordings cam/ot be provided, even if
recurding or playback is not possible due
to a malflmction of the camcorder, storage
media, etc.
• TV color systems differ depending un the
countries/regiuns. To view your
recordings on a TV, you need an NTSC
system-based TV.
• Television programs, fihns, video tapes,
and other materials may be copyrighted.
Unauthorized recording of such materials
may be contrary to the copyright laws.
About language setting
The on-screen displays in each local
language are used fur illustrating the
operating procedures. Change the screen
language befure using your camcorder if
necessary (p. 26).
Aboutthis manual
• The LCD screens and the viewfiuder
bnages and indicators shown in this
manual were taken with a digital still
camera, and may louk different from what
you actually see.
• Design and specifications uf recording
media and other accessories are subject to
change without nutice.
• The illustration used in this manual are
based un the mudel DCR-DVD308.
• Disc in this Operating Guide refers to 8cm
DVD discs.
About the Carl Zeiss lens
Your camcurder is equipped with :. Carl
Zeiss lens. which was developed jointly by
Carl Zeiss. in Germany, and Sony
Corporation. and produces superior images.
It adopts the MTF measurement system for
video cameras and offers a quality typical
of a Carl Zeiss lens.
MTF= Mudulation Transfer Function. The
number value indicates the amount of light
from a subject coming intu the lens.
Aboutthemarksusedinthismanual
• The operations available depend uu the
disc used. The following marks are used
tu indicate the type of disc yuu can use
for a particular uperation.
Table of Contents
IMPORTANT SAFEGUARDS ...... 3
Read this before operating your
camcorder .................................... 5
Subject examples and solutions
11
What you can do with your
camcorder .................................. 12
Choosing a disc .......................... 14
Using your camcorder ................ 16
"lJ_ HOME" and "o__--OPTION"
- Taking advantage of two types of
menus ........................................ 18
Step 1: Checking supplied items
.................................................... 21
Step 2: Charging the battery pack
.................................................... 22
Step 3: Turning the power on, and
setting the date and time ............ 25
Changing the language setting 26
Step 4: Preparing for recording
.................................................... 27
Step 5: Inserting a disc or a
"Memory Stick Duo" ................... 28
Recording and playing back with
ease (Easy Handycam) .............. 31
Recording ................................... 34
Zooming ........................................ 36
Recording sound with more presence
(5.1ch surround recording) (DOR-
DVD308/DVD708) ......................... 36
Recording in dark places (NightShot
plus) .............................................. 37
Adjusting the exposure for backlit
subjects ......................................... 37
Recording in mirror mode ............. 37
Selecting the aspect ratio (16:9 or 4:3)
(DCR-DVD308/DVD708) ............... 37
Playback ..................................... 39
Using PB zoom ............................. 41
Playing back a series of still images
(Slide show) .................................. 41
Playing the picture on a TV ........ 42
Making the disc compatible with
playback on other devices or DVD
drives (Finalizing) ....................... 44
re(OTHERS) category .............48
Deleting images .......................... 48
Dividing the image ...................... 50
Creating the Playlist ................... 51
Dubbing to VCR or DVD/HDD
recorders .................................... 54
Printing recorded images
(PictBridge compliant printer) ..... 55
(MANAGE DISC/MEMORY)
category ...................................... 57
Playing a disc on other devices
.................................................... 57
Finding the right disc (DISC
SELECT GUIDE) ........................ 58
Deleting all scenes on the disc
(Formatting) ................................ 59
Recording additional scenes after
finalizing .................................... 60
Continued"> 9
TaN÷ ofCo_te_ts(Co_ti_ed)
What you can do with the
(SETTINGS) category of the
HOME MENU ............................ 62
Using the HOME MENU ................ 62
List of the _ (SETTINGS) category
items .............................................. 63
MOVIE SETTINGS .................... 64
(Items for recording movies)
PHOTO SETTINGS ................... 66
(Items for recording still images)
VIEW IMAGES SET ................... 67
(Items to customize the display)
SOUND/DISP SET .................... 69
(Items to adjust beep and the
screen)
OUTPUT SETTINGS ................. 70
(Items for when connecting other
devices)
CLOCK/_LANG ........................ 71
(Items to set clock and language)
GENERAL SET .......................... 72
(Other setup items)
Activating functions using the
°.-=OPTION MENU ..................... 73
Using the OPTION MENU ............. 73
Recording items on the OPTION
MENU ............................................ 74
Viewing items on the OPTION MENU
....................................................... 74
Functions set in the OPTION MENU
.................................................... 75
What you can do with Windows
computer .................................... 80
Installing the "First Step Guide" and
software ..................................... 81
Viewing "First Step Guide". ........ 83
Using a Macintosh computer ..... 84
Troubleshooting ......................... 85
Warning indicators and messages
.................................................... 94
Using your camcorder abroad .... 98
Maintenance and precautions .. 100
Specifications ........................... 108
Identifying parts and controls ... 111
Indicators displayed during
recording/playback ................... 115
Glossary ................................... 118
Index ........................................ 119
10
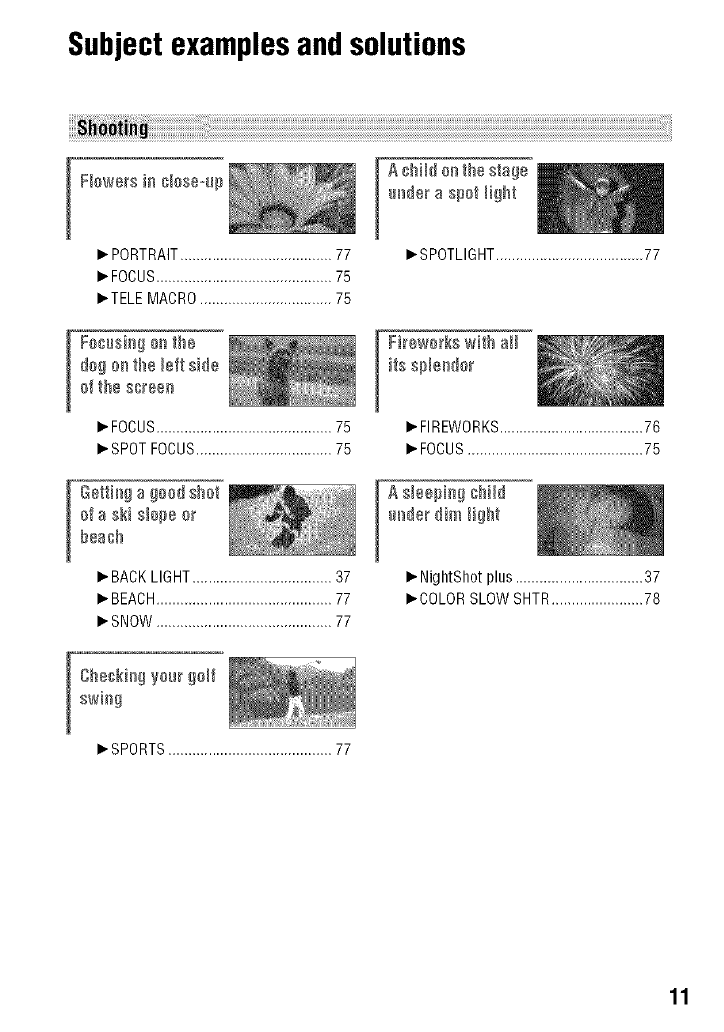
Subjectexamplesand solutions
[ F[ewers i_ _lese-Hp
_" PORTRAIT...................................... 77
_"FOCUS............................................ 75
_'TELE MACRO................................. 75
dog oe the left side
ef the sereee
_.FOCUS............................................75
_.SPOTFOCUS..................................75
[ @ettiega goed she'l
efa ski s[epe er
bea@
_.BACKLIGHT...................................37
_"BEACH............................................77
_"SNOW............................................77
[SPORTS......................................... 77
A @Hd eethe stage
_eder a spet _ight
_.SPOTLIGHT.....................................77
A s[eepieg @Hd
_. NightShot plus ................................ 37
_.COLOR SLOW SHTR....................... 78
11
12
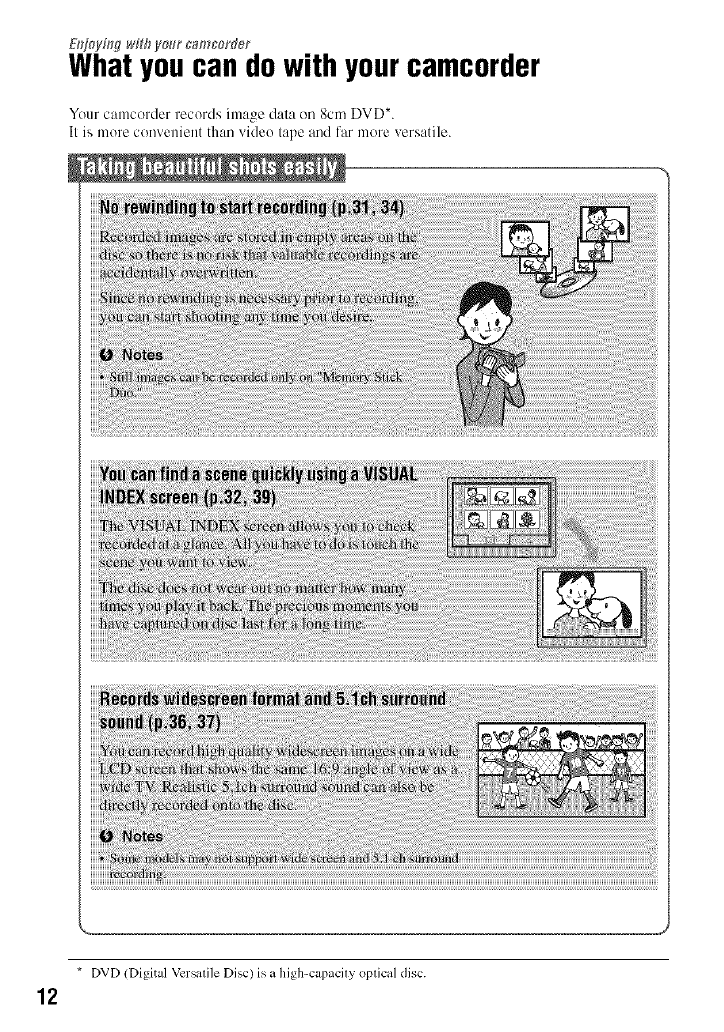
E_zj(_y#_gw#h your c_mcerder
Whatyoucan dowith yourcamcorder
Your camcorder records ima_ge dala (m 8cm DVD*.
II is more convenient than video lape and far more versatile.
i
* DVD (Digital Vcrsalile Disc) is a high-capacily oplical disc.
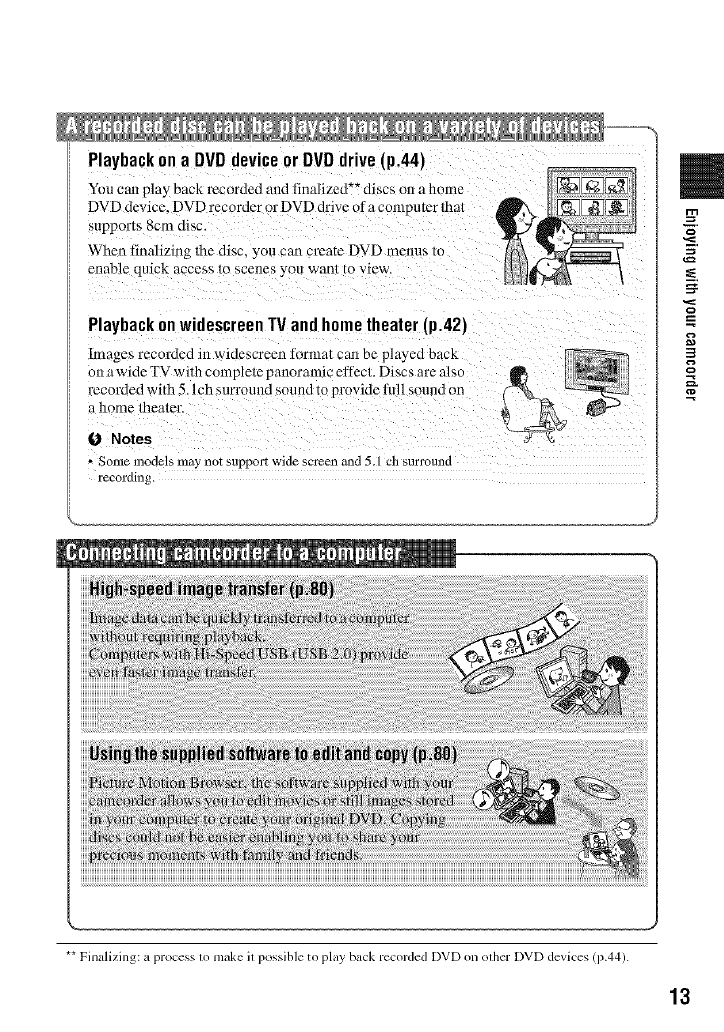
Playbackona DVDdeviceorDVDdrive[p.44)
You can play back recorded and finalized _* discs on a home
DVD device. DVD recorder or DVD drive of a contputer that
supports 8cm disc.
When finNizing the disc, you can create DVD menus m
enable quick access to scenes you Wahl 10 view.
PlaybackonwidescreenTVandhometheater(p.42)
hnages recorded in widescrecn lormat can be played back
on a wide TV with completc panoramic ellect. Discs are also
recoMed with 5.I ch surruund sound to pruvidc full sound on
a home theater.
0 Notes
- Some models may not support wide screen and 5.1 ch surround
recording,
** Finalizing: a process to make it possible to play back recorded DVD on other DVD devices (p.44).
13
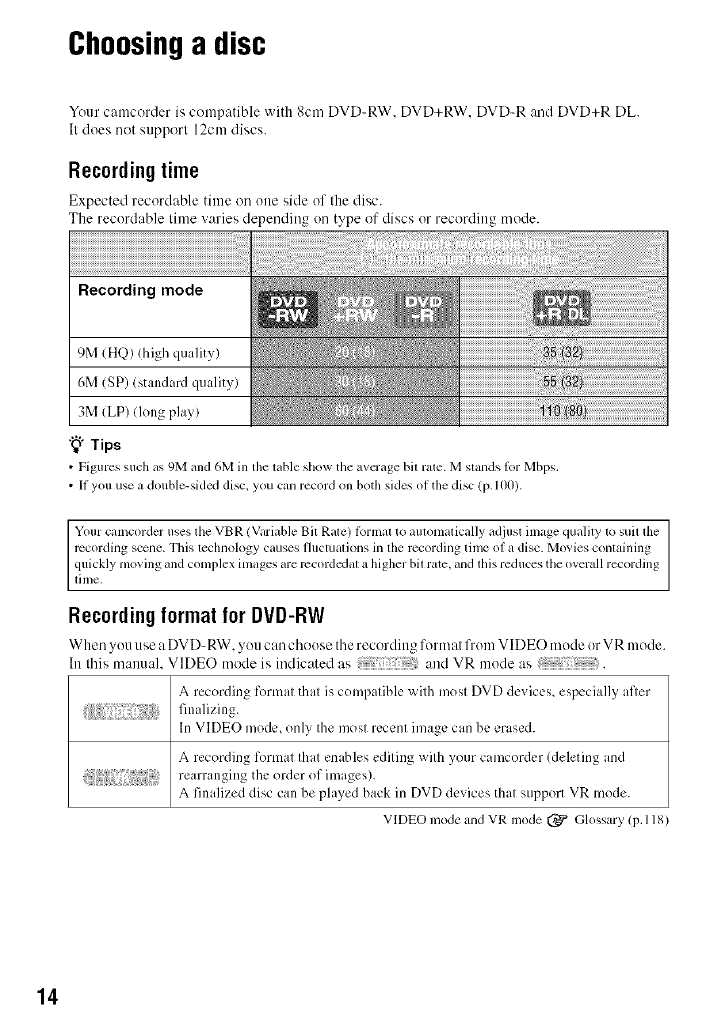
Choosinga disc
Your camcorder is compatible with 8cm DVD-RW. DVD+RW. DVD-R and DVD+R DL.
It does not support 12cm discs.
Recording time
Expected record:_ble time on one side of the disc.
The recordable time varies depending on type of discs or recording mode.
Recording mode
9M (HQ) (high quality)
6M (SP) (standard quality)
3M (LP) (long play)
"_° Tips
• Figures such _Ls9M m_d6M in the rubleshow the avcrage bit rate. Mstands lor Mbps.
• II you use _,double-sidcd disc_you can record on both sides ofthe disc (p.lO0).
Yourcamcorder uses the VBR (ViiriableBit Rate) Ibrn_atto automaticallyadjust image quality to suit the
rccording scene. This technology causes fluctuations in the recording time of a disc. Movies containing
quicklymoving andcomplex images armrccordcxlatahigher bitrate, and thisreduces the overallrecording
lilne.
Recording format for DVD-RW
When you use a DVD-RW. _ou can choose the recording format from VIDE(-) mode orVR mode.
ht this manual. VIDEO mode is indicated as and VR mode as .
A recording format that is compatible with most DVD devices, especially after
In VIDEO mode, only the most recent image can be erased.
A recording format that enables editing with your camcorder (deleting and
rearranging the order of images).
A finalized disc can be played back in DVD devices that support VR mode.
VIDEO mode and VR mode (_ Glossary (p,118)
14

Discformat features Figures in parentheses ( )indicate page numbers.
DVD-RW DVD+RW DVD-R DVD+RDL
o
# • 0.1 *3 • •
.1 Reicr lo the inslmction manual of your DVD device 1osee whether it supporls file VR mode of DVD-RW.
*2 Formalting deletes all recordings and relurns the recording lncdium to ils original cnlply stale (p.59). Even
when using a new disc, lormal it wilh your camcorder (i).28).
.3 Finalizing is required to play the disc in a DVD drive on a compuler. A DVD+RW thai is nol finalized may
cause lhe computer IOmall/lnclion.
15
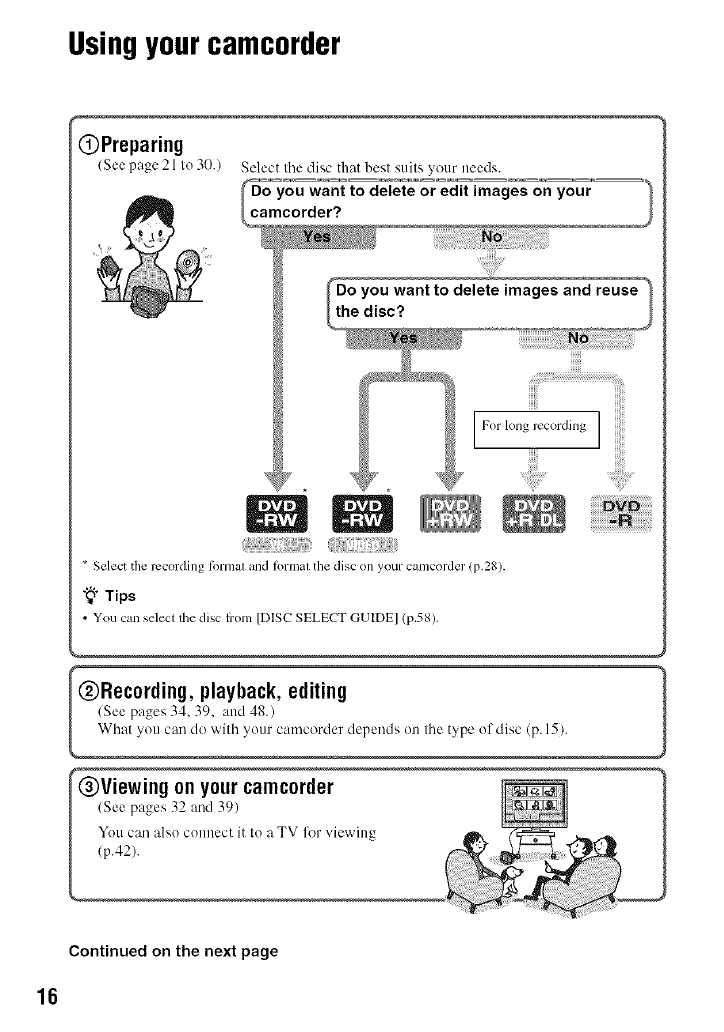
Usingyourcamcorder
OPreparing
(See page 21 to 30.) Select tile disc that best suits your needs.
_mYOU want to delete or edit images on
your
corder?
* Select the rccording timnal and formal tile disc on your camcorder (p.28).
"_° Tips
•You c.n select tht" disc h'om [DISC SELECT GUIDE] (p.58).
@Recording, playback, editing _1
,g on your camc0rder
Continued on the next page
16
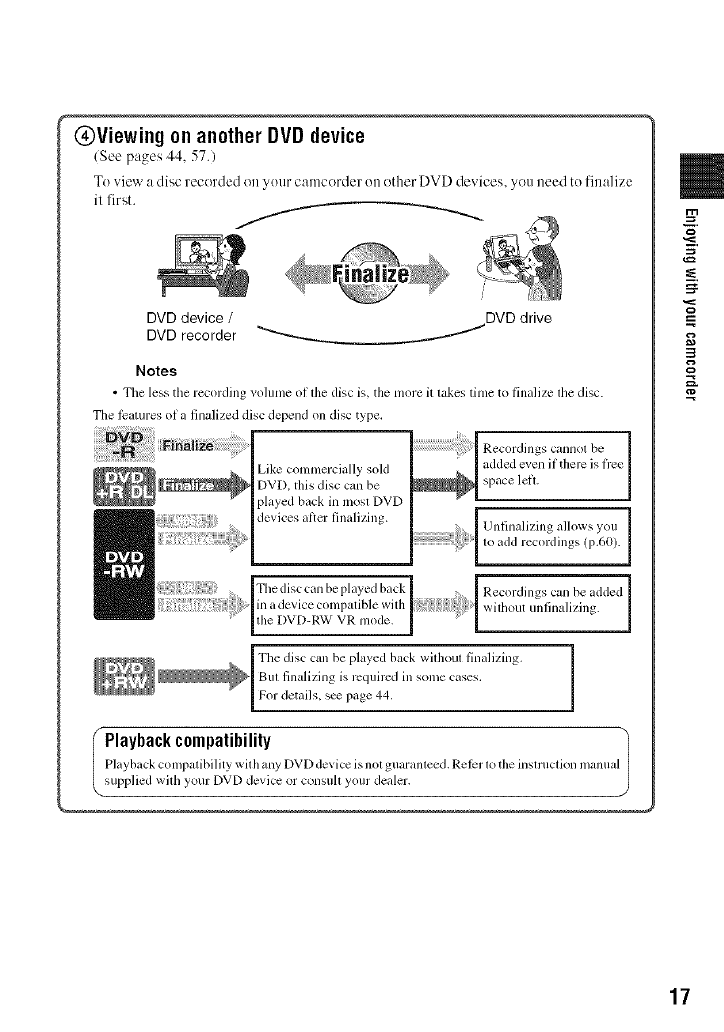
@Viewing on another DVD device
(See pages 44, 57.)
To ,,iew a disc recorded on your camcerder ()it ether DVD devices, you need to finalize
il first.
/
DVD device /DVD drive
DVD recorder "_'----_ /
Notes
•The less the recording volume ol the disc is. the more it takes time to finalize the disc.
The l_tures ol a finalized disc depend on disc type,
Like commercially sold
DVD. this disc can be
played back in most DVD
devices al_er finalizing.
Recordings cannot be
added even if there is fi'ee
space left.
Unfinalizing allows you
to add recordings (p.60).
Recordings can be added
without unlinalizing.
Fhe disc can be played back
in a device colnl)atible with
the DVD-RW VR mode.
The disc can be played back widmut finalizing.
But finalizing is required in some cases,
For details, s_ page 44.
IPlaybackcompatibility
Playback con/patibility wit h any DVD device isnot guaranteed. Rel_r to the instruction manua
supplied with your DVD device or consuh your dealer.
17
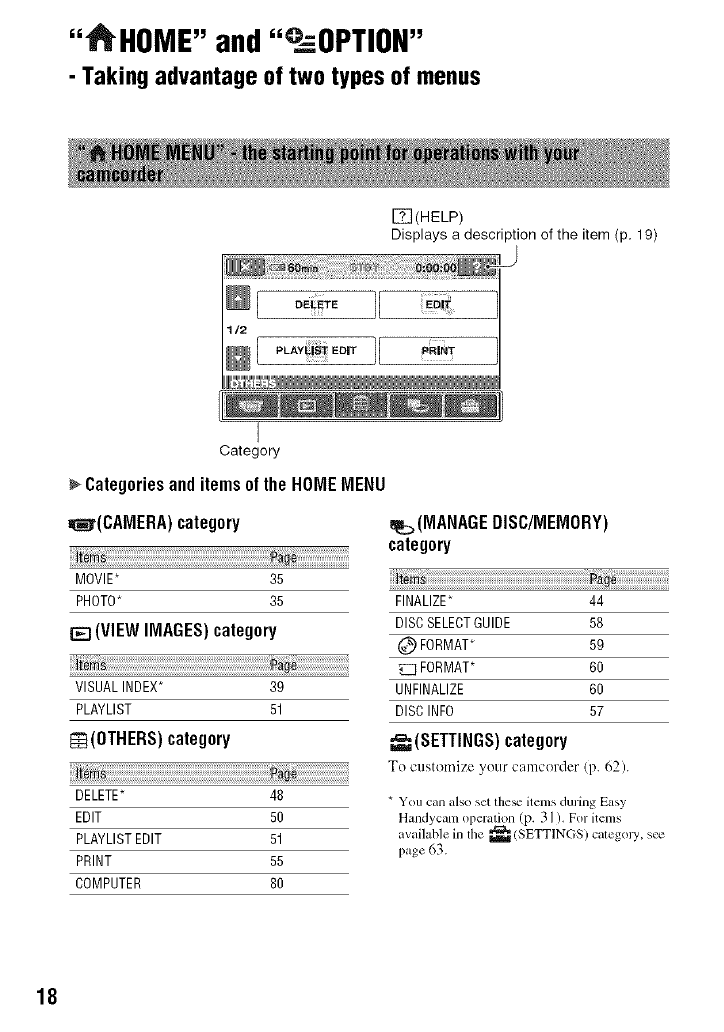
"_HOME" and"°_:=OPTION"
- Taking advantage of two types of menus
[_(HELP)
Displays a description of the item (p. 19)
eE_TOII
,LA,_Eo,,IJ "R'_'
1_1621
I
Category
Categoriesand itemsof the HOMEMENU
=I_r(CAMERA) category
_m
MOVIE* 35
PHOTO_ 35
[E] (VIEW IMAGES)category
VISUAL INDEX_ 39
PLAYLIST 51
re(OTHERS) category
_m
DELETE_ 48
EDIT 50
PLAYLIST EDIT 51
PRINT 55
COMPUTER 80
(MANAGEDISC/MEMORY)
category
FINALIZE_ 44
DISCSELECTGUIDE 58
(_ FORMAT_ 59
FORMAT* 60
UNFINALIZE 60
DISC INFO 57
(SETTINGS}category
To customize your camcerder (p. 62).
* You can also set the_ items during Easy
Handycam operation (p. 3 ] ). For items
a'ailable in lhe _(SETTINGS) caleg_ J3_ s_
page 63.
18
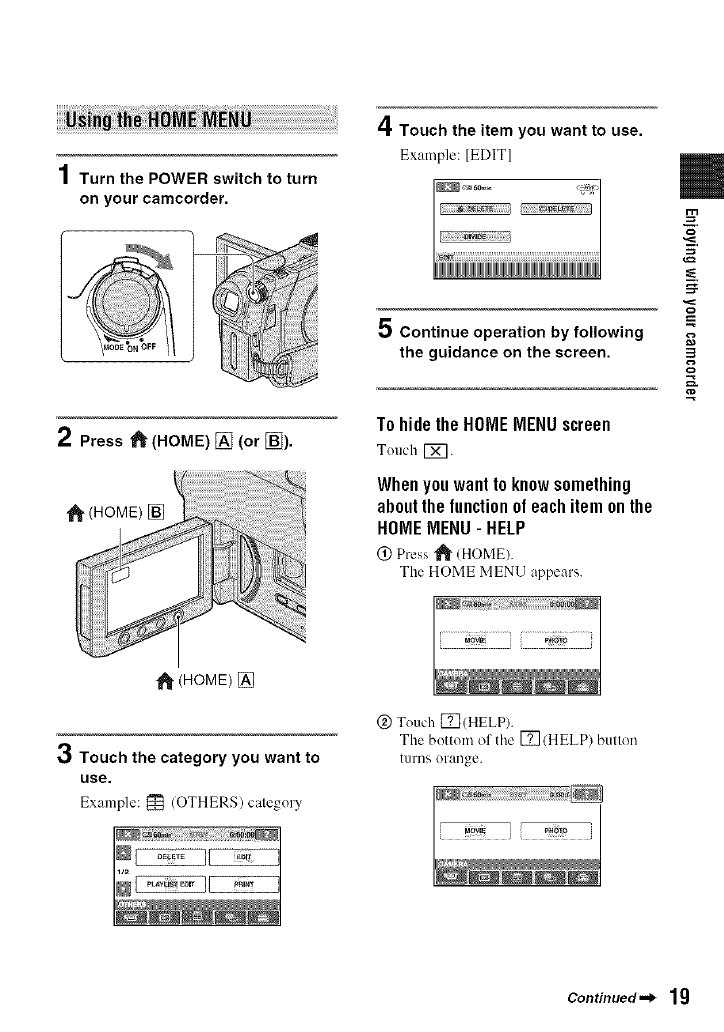
1Turn the POWER switch to turn
on your camcorder.
4Touch the item you want to use.
Example: [EDITI
2Press _ (HOME) [] (or []).
(HOME) []
5 Continue operation by following
the guidance on the screen.
To hide the HONE MENU screen
Touch [_.
When you want to know something
about the function of each item on the
HONE MENU- HELP
0 Press _ (HOME).
The HOME MENU appe:]rs.
_1_(HOME) []
3Touch the category you want to
use.
Example: _ (OTHERS) category
@ Touch ITI(HELP).
The bottom of tile [] (HELP) button
turns orange.
Continued._ 19
°°@HOME _ a_d _QsO?T_ON"(8o_ti_ed)
(_) Touch the item you want to know the
content.
When you touch an item, its explanation
appears on the screen.
To apply the option, touch [YES],
utherwise, touch [NO].
To deactivate the HELP
Tuuch [] (HELP) again in step 2.
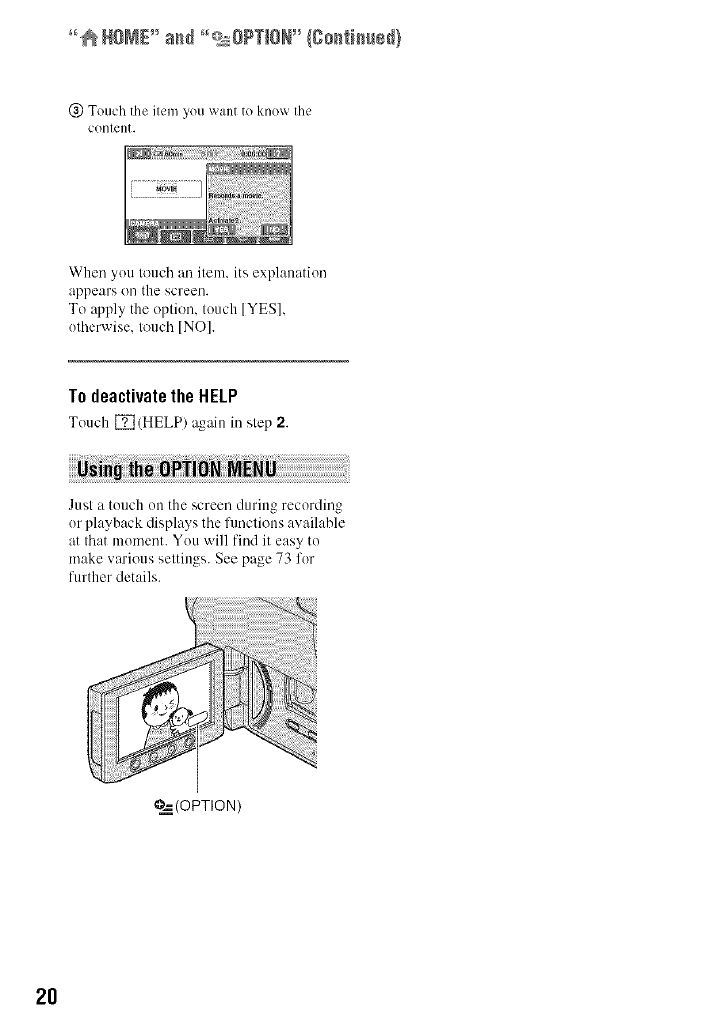
Just a touch uu the screen during recording
ur playback displays the fimctious available
at that mumeut. You will find it easy to
make various settings. See page 73 fur
further details.
?._ (OPTION )
2O
Step1: Checkingsupplieditems
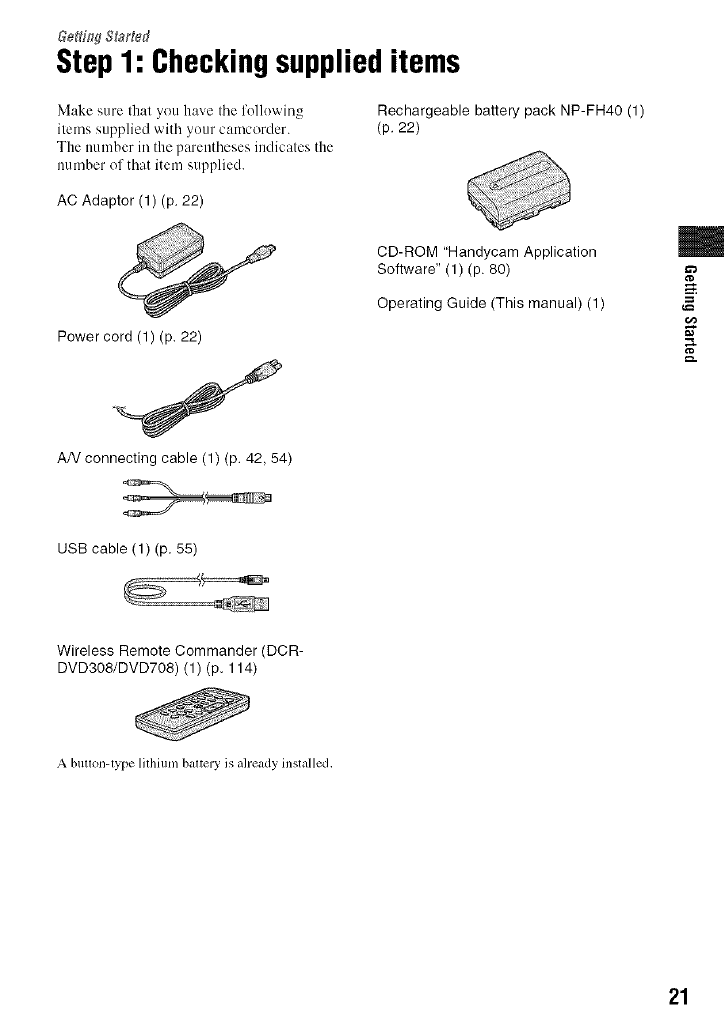
Make sure that you have tile folk)wing
items supplied with yuur camcorder.
The number in the parentheses indicates the
number of that item supplied.
Rechargeable battery pack NP-FH40 (1)
(p. 22)
AC Adaptor (1) (p. 22)
Power cord (1) (p. 22)
AN connecting cable (1) (p. 42, 54)
CD-ROM "Handycam Application
Software" (1) (p. 80)
Operating Guide (This manual) (1)
m
USB cable (1) (p. 55)
Wireless Remote Commander (DCR-
DVD308/DVD708) (1) (p. 114)
Abuu(m-type lithium battery is aheady installed,
21
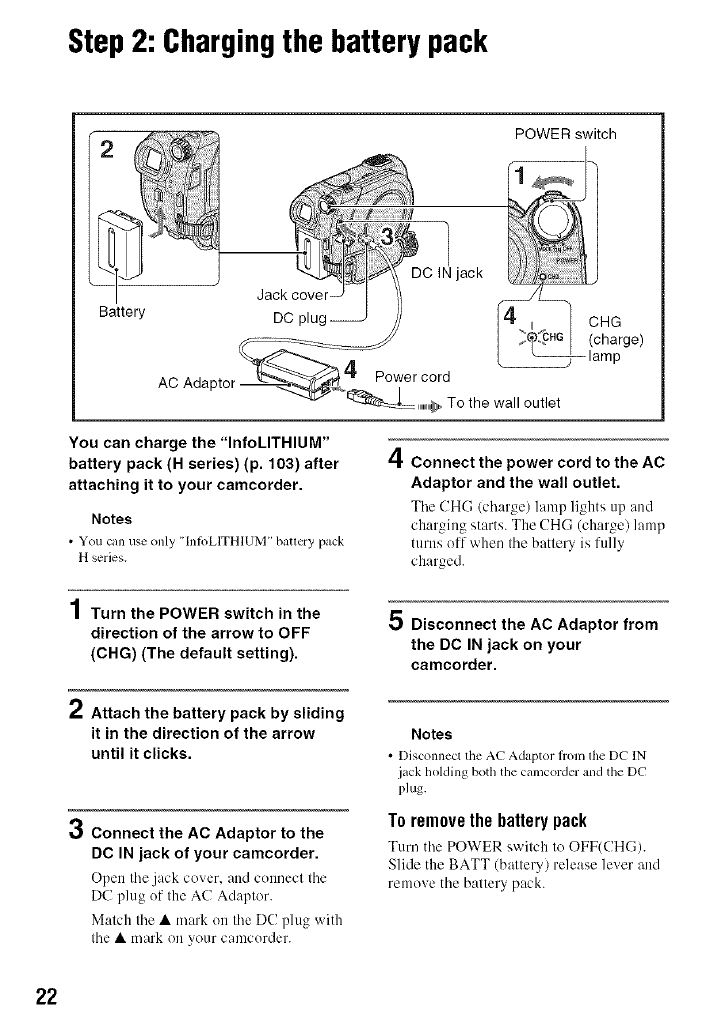
Step2: Chargingthe battery pack
Battery
AC Adaptor
l
Jack cover-
DC
POWER switch
4
IC IN jack
Ijt_ CHGI (charge)
_lamp
Power cord
To the wall outlet
You can charge the "InfoLITHIUM"
battery pack (H series) (p. 103) after
attaching it to your camcorder.
Notes
• You can use only "[n/oLITHIUM" battery pack
H series.
4Connect the power cord to the AC
Adaptor and the wail outlet.
Tile CH(-; (charge) lmnp lights up and
charging starts. The CHG (charge) lamp
turns off when tile battery is fully
charged.
4
/ Turn the POWER switch in the
direction of the arrow to OFF
(CHG) (The default setting).
5Disconnect the AC Adaptor from
the DC IN jack on your
camcorder.
rt Attach the battery pack by sliding
it in the direction of the arrow
until it clicks.
3Connect the AC Adaptor to the
DC IN jack of your camcorder.
Open tile jack cmer, and connect tile
DC plug of the AC Adaptor.
Match tile • mark on tile DC plug with
tile • mark on your camcorder.
Notes
• Disconnecl tile AC Adaptor trom the DC IN
jack holding both the camcorder mM the DC
plug.
To remove the battery pack
Turn tile POWER switch to OFF(CH(;).
Slide the BATT (battery) release lever and
remove the battery pack.
22
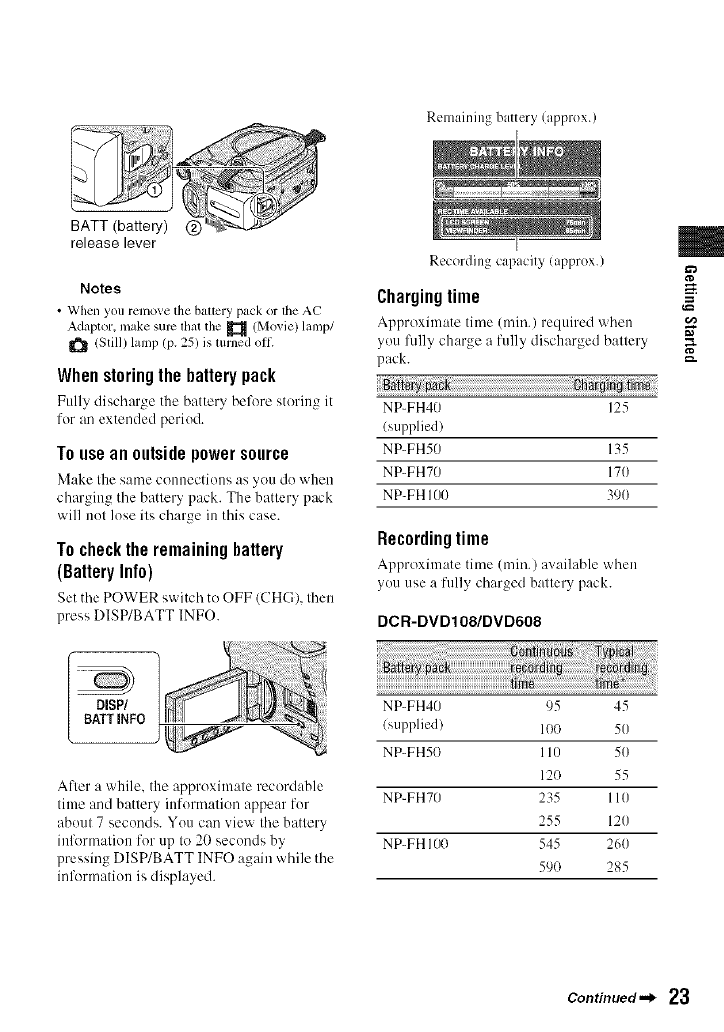
Remaining battery (approx.)
BATT (battery) (_)
release lever
Notes
•When you renlove the baltcry pack or llle AC
Adaptor, make sure lhat the _ (Movie) lamp/
_1_ (Still) lamp (p. 25) is mined oll_
When storing the battery pack
Fully discl'large the battery before stering it
for an extended period.
Touseanoutsidepowersource
Make the same connections as you do when
charging the battery pack. The battery pack
will not lose its charge in this case.
To check the remaining battery
(BatteryInfo)
Set the POWER switch to OFF (CHC), then
press DISP/BATT INFO.
DISP/ 1
BAITINFO j
After a while, the approximate recerdable
time and battery itfformatien appear for
about 7 seconds. You can view the battery
inlkwmation for up to 20 seconds by
pressing DISP/BATT INFO again while the
information is displayed.
, m
Recording capacity (approx.)
Charging time g
Approximate time (rain.) required when
you fidly charge a fully discharged battery
pack. =-
t,m0
NP-FH40 125
{supplied)
NP-FH50 135
NP-FH70 170
NP-FH 100 390
Recordingtime
Approximate time (rain.) available when
you use a fully char_ed baltery pack.
DCR-DVDIO8/DVD608
NP-FH40 95 45
(supplied) 100 50
NP-FH50 110 50
120 55
NP-FH70 235 110
255 120
NP-FH 100 545 260
59O 285
Continued._ 23
Step 2: gharg)_) the battery pack (go_ti_ed}
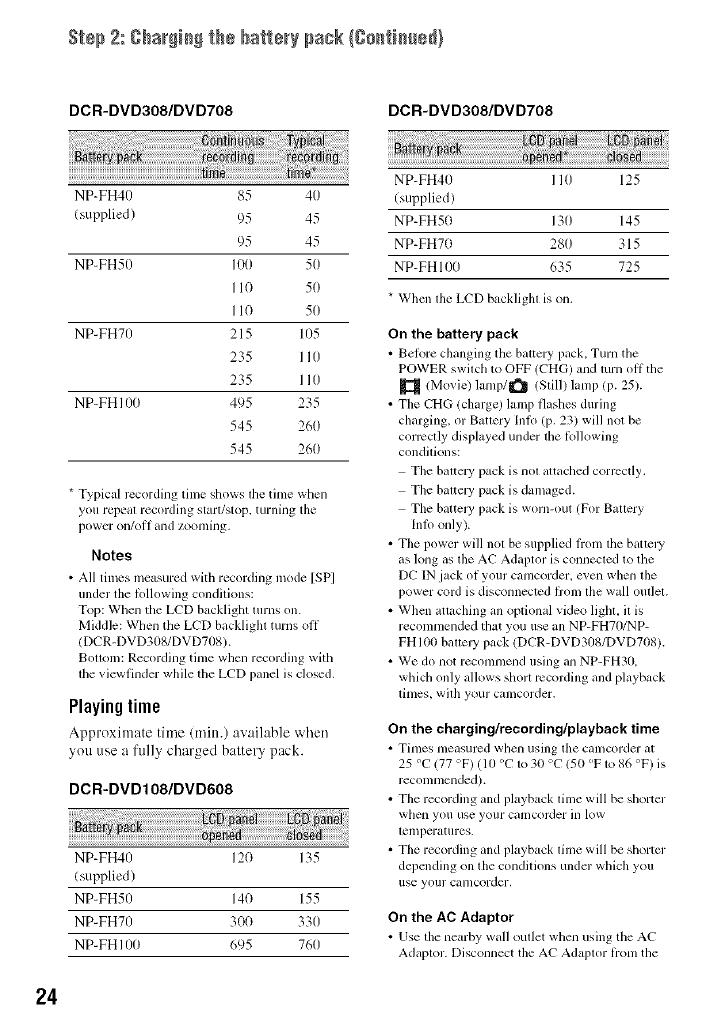
DCR-DVD308/DVD708
NP-FH40 85 40
tsupplied) 95 45
95 45
NP-FH50 I00 50
I 10 50
I 10 50
NP-FH7() 215 105
235 II0
235 II0
NP-FH 100 495 235
545 260
545 260
DCR-DVD308/DVD708
* Typical rccording tinle shows the tinle when
you repeal recording start/stop, turning tile
powcr on/off and zoonlillg,
Notes
• All times measured with recording mode [SP]
under the lollowing condilions:
Top: When tile LCD backlight turns on.
Middle: When tile LCD backlighl turns off
(DCR-DVD308/DVD708).
BOIIOU/:Recording tinle when recording with
the viewfinder while the LCD panel is closed.
Playingtime
Approximate time (rain.) av:dlable when
you use a fully charged battery pack.
DCR-DVD108/DVD608
NP-FH40 120 135
tsupplied)
NP-FH50 140 155
NP-FH70 300 330
NP-FH 100 695 760
NP-FH40 I I0 125
(supplied)
NP-FH50 130 145
NP-FH70 280 315
NP-FH 100 635 725
* When the LCD backlight is on.
On the battery pack
• Belore changing tile baltcry pack, Turn the
POWER swilch to OFF (CHG) mid turn oil the
(Movie) lanlp/_ (Still) hmlp (p. 25).
• The CT[G (charge) lamp flashes during
charging, or Battery Inlo (p. 23) will not be
convctly displayed under lhe lbllowing
condilkms:
The balicl3 _ pack is nol altached corrcctly.
Tile baltel 3, pack is damaged.
The battel3' pack is worn-out (For Baltery
Inlo only).
• The power will not be supplied hom the batter
as long as the AC Adaptor is connected to the
DC IN jack of your camcorder, even when lhe
power cord is disconnected flom lhe wall oullel.
• Whcn attaching all optional video lighl, il is
reconmlended that you use all NP-FH70/NP-
FHI00 balteJ 3' pack (DCR-DVD308/DVD708).
• We do not reconmlend using an NP-FH30,
which only allows sholl lvcording and playback
linles, wilh your calllcorder,
On the charging/recording/playback time
• Times Illeilsurcd whell using the Cillllcorder _11
25 °C (77 °F) (10 °C to 30 °C 150 °F to 86 °F) is
reconmlended).
• The recording and playback time will be shorter
when you use your camcol_Jer ill low
lemperatures.
• The recording and playback lime will be shorter
depending on the condilions under which you
use your camcorder.
On the AC Adaptor
• Use the nearby wall oullet when using tile AC
Adaplor. Disconnect tile AC Adaplor lionl the
24
wall outlet imnmdiately if any malflmction
occurs while using your catllcorder,
• Do nol use the AC Adaptor placed in a narrow
space, such as between a wall and lhrnimre.
• Do not shorl-circuit tile DC I?lug of tile AC
Adaptor or baltery lerminal wilh any mclallic
ot_iects. This may cause a malfunction.
• Even if your camcorder is lurned oil AC power
(house current) is still supplied to it wlfile
connected to the wall outlet via the AC Adaptor.
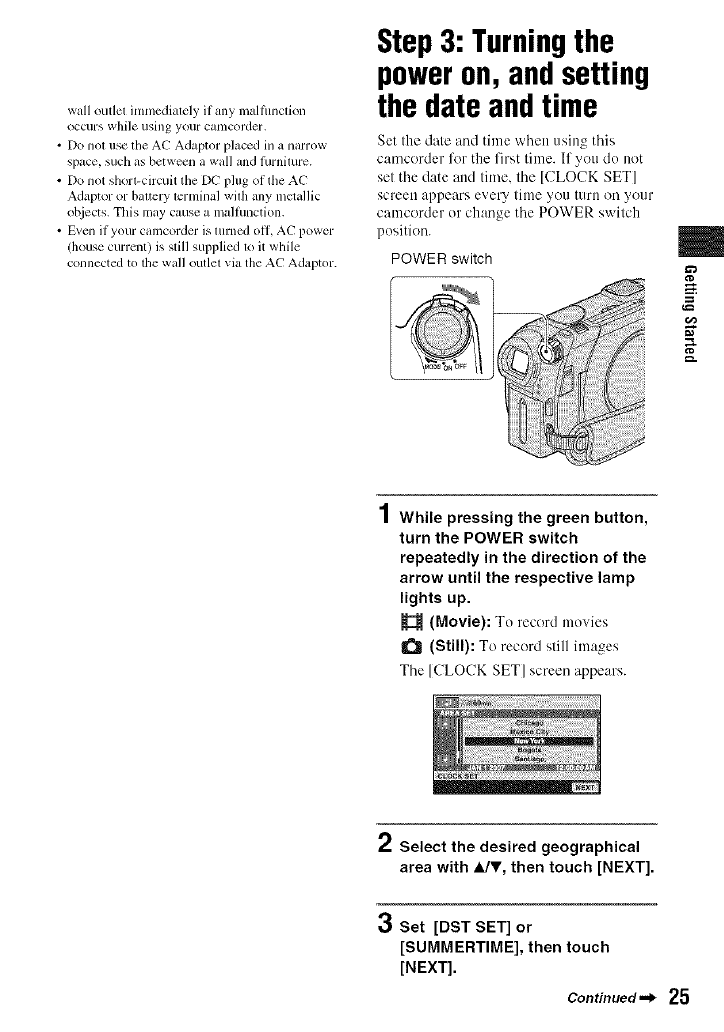
Step3: Turningthe
poweron, andsetting
the dateandtime
Set the date and time when using this
camcorder %r the first time. If you do not
set the date attd time, the [CLOCK SET]
screen appears every tittle you tllrll on your
camcorder or change the POWER switch
position.
POWER switch m
g
1While pressing the green button,
turn the POWER switch
repeatedly in the direction of the
arrow until the respective lamp
lights up.
(Movie): To record movies
(Still): To record still images
Tile [CLOCK SET] screen appears.
2Select the desired geographical
area with JJr, then touch [NEXT].
3Set [DST SET] or
[SUMMERTIME], then touch
[NEXT].
Continued,,_ 25

S_÷p3: TurN_gthep+w+r+_+a_ s+_i_gthe_at+a_ time(g+_i_+dl
4Set [Y] (year) with A/V.
5Select [M] with </b, then set the
month with A/V.
6Set [D] (day), hour and minute in
the same way, then touch [NEXT].
.7
/Make sure that the clock is
correctly set, then touch tuft.
The clock starts.
You can set any year up to tile year
2037.
camcorder without any operation attempted for
approximately 5 minutes, to save batte_ power
([A.SHUT OFF], p. 72).
"_° Tips
•Tile date and time does not appear during
recording, bul they are automatically recorded
on tile disc, and can he displayed during
playback (s_ page 67 thr [DATA CODEI).
• Refer lo page 99 for information concerning
"World lime difference."
• It the buttons on tile touch panel do not work
correctly, adjust the LCD screen
([CALIBRATION], p. 105).
You can change the on-screen displays to
show messages in a specified language.
Touch _ (HOME) _-
(SETTINGS)-+[CLOCK/
_ LANG]-+[ _LANGUAGE SET], then
select tile desired language.
26
To turn off the power
Turn tile POWER switch Io OFF (CH(-;).
T0 resetthe date andtime
Select _- (HOME)-+ _(SETTINGS)
[CLOCK/_LAN(;] _ [CLOCK SET],
and set tiledate and time.
0Notes
• It you do not use your camcorder tin" about 3
months,lfte buill-in rechargeable battcly gets
discharged and tile dale and time setlings [nay
be clearcd trom tile tlletlloly. In that case.
charge tile rechargeable battely and then scl tile
date and time again/P. 107).
•It takes a ti:w seconds tk)r your camcorder lo be
ready to shoot after lhe power is turned on. You
cannot operate your camcorder during this time.
• In file _tling al file lime (if purchase, lhe power
lurns off automatically if you leave your
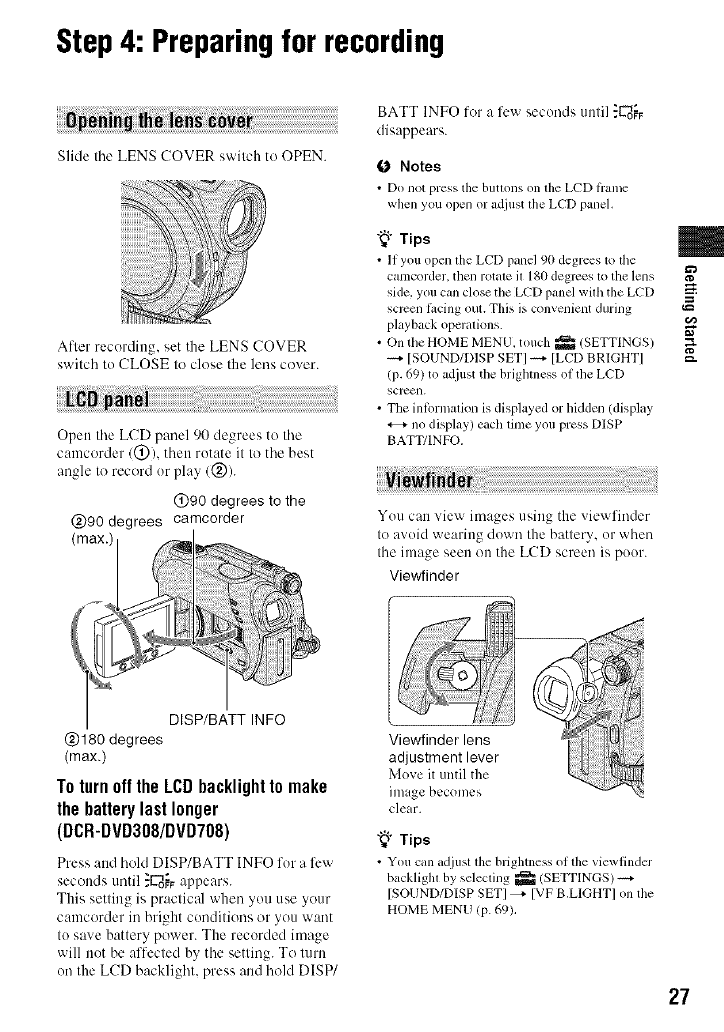
Step4: Preparingfor recording
Slide the LENS (;OVER swgch 1o OPEN.
Afler recording, set the LENS COVER
switch to (;LOSE to close the lens cover.
Open Ihe LCD panel 90 degrees to tile
camcorder/@), then rotate it to tile best
angle to record or play (@).
@90 degrees to the
@90 degrees camcorder
BATT INFO for a few seconds until :U'd_F
disappears.
ONotes
•Do not press the buttons on the LCD tiame
when you open or adjust lhe LCD panel.
"_° Tips
• It you open the LCD panel 90 degrees to the
camcoMer, then rotate it 18(1degrees to tile lens
side. you can close the LCD panel with the LCD
screen t_tcing out. This is convenient during '_=
playback operalions.
• On the HOME MENU. touch _ (SETTINGS)
-_- [SOUND/DISP SET] _ [LCD BRIGHT] =-
(p. 69) to adjust the brighmess ot the LCD
sorer311.
• The inlbrmalion is displayed or hidden (display
._+ no display) each time you press DISP
BATT/INFO.
You can view images using the viewfinder
to avoid wearing down the battery, or when
the image seen on the LCD screen is poor.
Viewfinder
@180 degrees
(max.)
To turn off the LCDbacklightto make
the battery last longer
(DCR-DVD308/DVD708)
Press and hold DISP/BATT INFO for a few
seconds until }C-_o_vappears.
This setting is practical when you use your
camcorder in bright conditions or you want
to save battery power. The recorded image
will not be affected by the setting. To turn
on the LCD backlight, press and hokl DISP/
Viewfinder lens
adjustment lever
Move it until the
image becomes
clear.
"_° Tips
• You cm_ adjust lhe brightness of lhe viewtindcr
backligla by selecling _/SETTINGS) ----+
[SOUND/DISP SETI _ [VF B.LIGHTI on the
HOME MENU (p. 69).
27
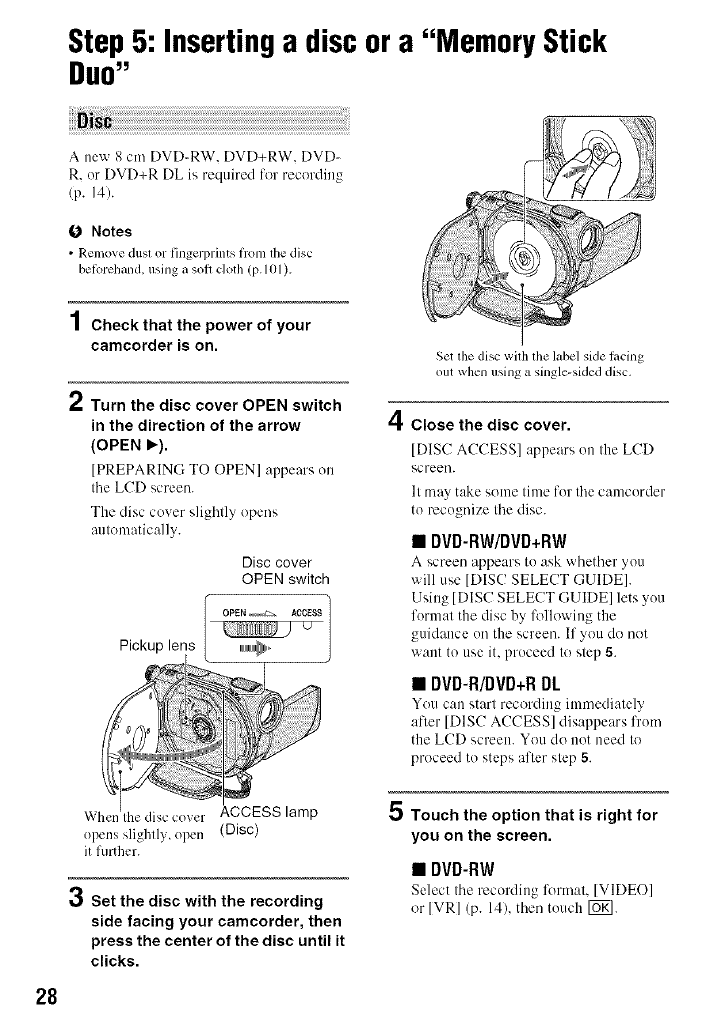
Step5: Insertinga discora "Memory Stick
DUO"
O Notes
• Remove dust or tingerprints from tile disc
beforehand, using a soil cloth (p. 101 ),
1Check that the power of your
camcorder is on.
2Turn the disc cover OPEN switch
in the direction of the arrow
(OPEN _).
[PREPARING TO ()PEN] appears on
the LCD screen.
The disc cover slightly opens
automatically.
Disc cover
OPEN switch
OPEN _ ACCESS
U
Pickup lens _,,,
Set lhe disc wilh the label side lacing
out when using asingle-skied disc,
4Close the disc cover.
[DISC ACCESS] appears on the LCD
screeo.
It may take some time for the camcorder
to recognize the disc.
• DVD-RW/DVD+RW
A screen appears to ask whether you
will use [DISC SELECT GUIDE[.
Using [DISC SELECT GUIDE] lets you
format the disc by following the
guidance on the screen. If you do not
want to use it, proceed to step 5.
•DVD-R/DVD+R DL
You c:m start recording immediately
afler [DIS(! ACCESS] disappears from
the LCD screen. You do not need to
proceed to steps after step 5.
ACCESS lamp
opens slightly, open (Disc)
it further.
Set the disc with the recording
side facing your camcorder, then
press the center of the disc until it
clicks.
5Touch the option that is right for
you on the screen.
•DVD-RW
Select the recording fora'mt, [VIDEO]
or [VR] (p. 14), then touch IOK].
28
• DVD+RW
Select tile aspect ratio of tile movie,
[16:9 WlDEI or [4:31, then louch lug].
6Touch [YES].
7Touch _when [Completed.] is
displayed.
When tile form:lltin_ is completed, you
can start recording on the disc.
"_° Tips
• When you use a DVD-RW while the Easy
Handycam operation (p. 31) is set, the
recording format is fixed to VIDEO
mode.
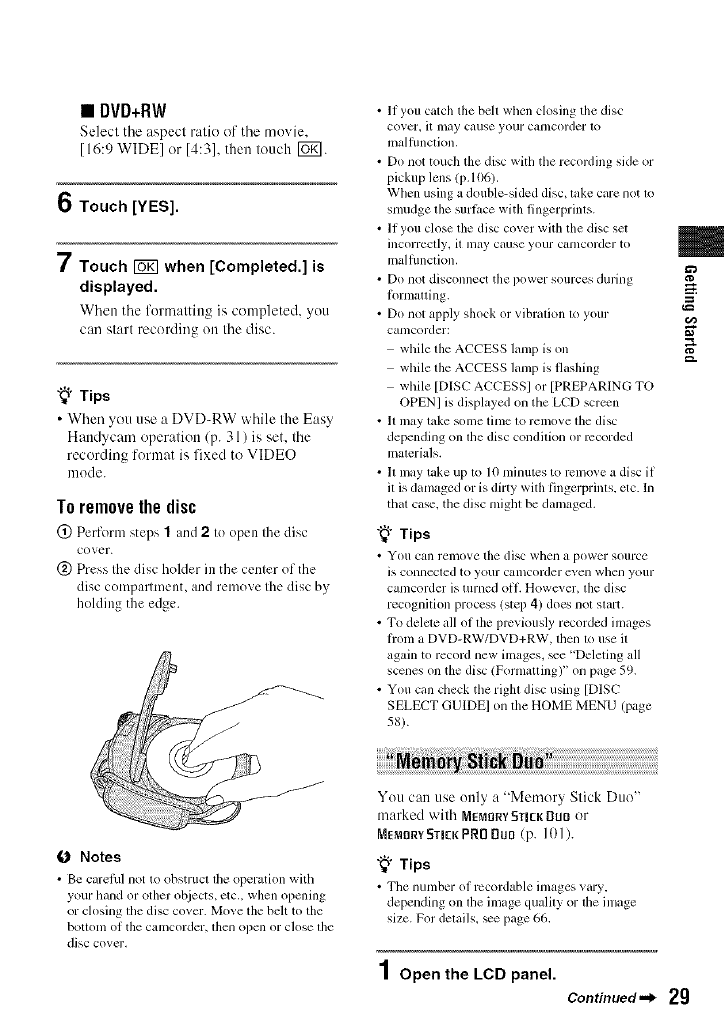
Toremovethedisc
@ Perform steps 1and 2to open the disc
cover.
@ Press the disc holder in the center of the
disc compartment, and remove the disc by
holding the edge.
€_ Notes
• Be carefill not to obstluct lhe operation with
your hand or other ohjects, etc., when opening
or ch)sing lhe disc covcr. Mo_e tile belt to the
boltonl of Ihe camcorder, then ()])ell or C]ose lhe
disc covm'.
• If you catch the belt when closing the disc
cover, it lnay cause your calllcorder 1o
malfimclion,
• Do not touch the disc with the recording side or
pickup lens (p. 106).
When using a double-sided disc, take care not to
smudge the surlitce with fingerprints.
• If you close the disc cover with the disc set
incorreclly, it may cause your C_lt/lcorder to
malflmction,
• Do not disconnect the power sources during
l_)rmatting.
• Do not apply shock or vibration to your
camcorder:
while the ACCESS lamp is on
while the ACCESS lamp is flashing
while [DISC ACCESSI or [PREPARING TO
OPENI is displayed on the LCD screen
• It Inay take some time to remove the disc
depending on lhe disc condilion or recorded
inaterials.
• It may take up to 10 minutes to remove a disc if
it is damaged or is dirty with fingerprinls, etc. In
that case, the disc mighl be damaged.
"_° Tips
• You can relllOVe the disc whell _1 power SOUlCe
is COllll_=cled to your Calllcorder ex,,el/whell youl-
camcorder is turned oil. However, the disc
recognition process (slep 4) does not slart.
• To delete all ol tile previously recorded ilnages
fronl a DVD-RW/DVD+RW, lhen 1o use il
again to record new ilnages, _e "Deleting all
scenes on the disc/Formatting)" on page 59.
• You can check the righl disc using [DISC
SELECT GUIDEI on the HOME MENU (page
58).
You can use only a "Memory Slick Duo"
marked wilh MEMORYSTICKDUO or
MEMORY5TICK PRO nun (p. 101).
"_i° Tips
• The numher of rccordahle images xary.
depending on the image quMity or file image
size. For details, _e page 66.
1Open the LCD panel.
Continued=,_ 29
m
g
g.
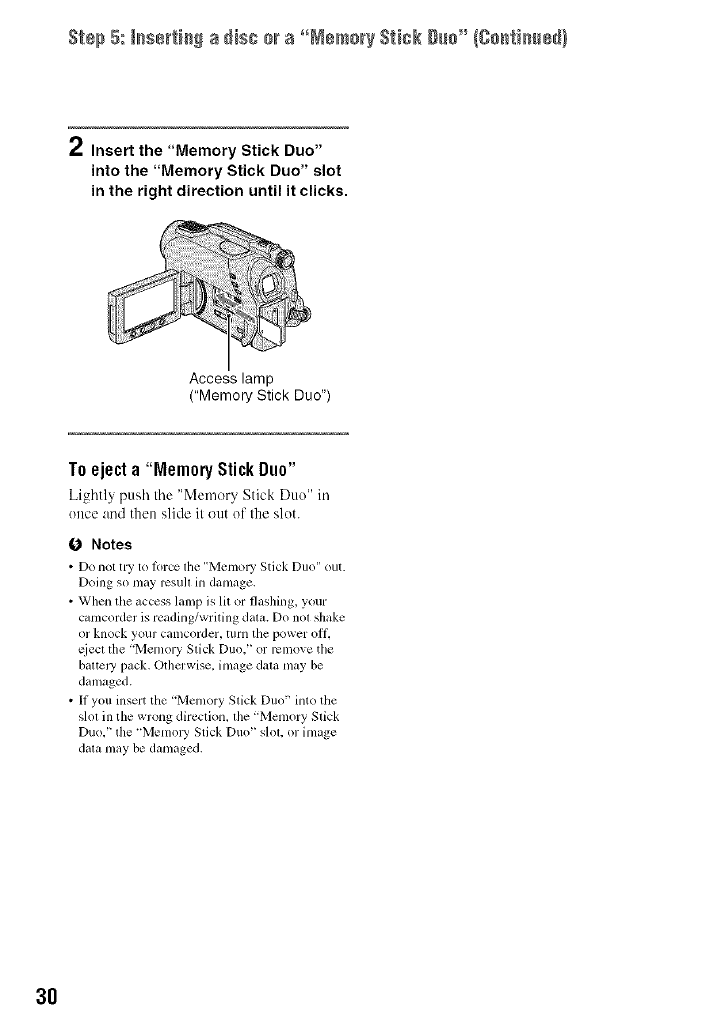
Step 5: _sertic_ a disc mra °°MemoryStick g_c"/gc_ticce_}
2Insert the "Memory Stick Duo"
into the "Memory Stick Duo" slot
in the right direction until it clicks.
Access lamp
("Memory Stick Duo")
Toeject a "Memory StickDuo"
Lightly push tile "Memory Stick Duo" in
once and then slide it out of the slot.
Notes
• Do not try to ]orce lhe "Me[no WStick Duo" out.
Doing so may rcsull in damage.
• When the access lamp is lit or flashing, your
ctmlcorder is reading/writing datz_.Do nol shake
or knock your camcorder, turn tile power oil
qiect tile "Memory Stick Duo." or rclllOVe tile
baltel3' pack. Othm:wise. image dala may be
damaged.
• If you insert the "Memory Stick Duo" into the
slol in the wrong direction, lhe "Memory Stick
Duo." tile "Me[no W Stick Duo" slol. or image
dala may be damaged.
3O
Re_ordin_LPlayback
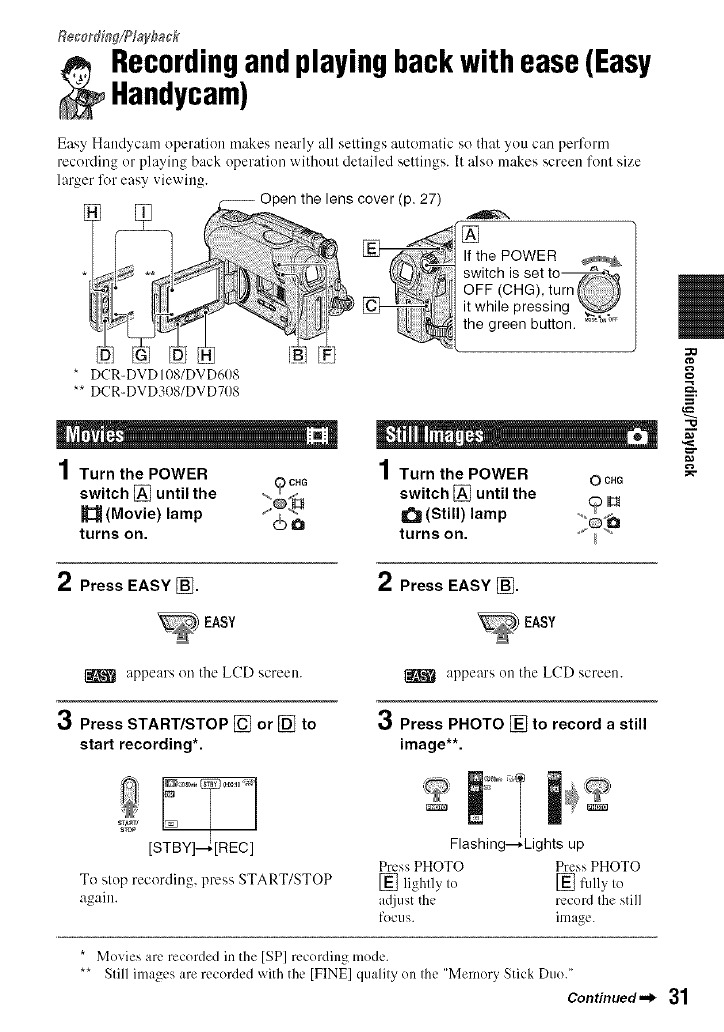
_: ecordingandplayingbackwithease(Easy
Handycam)
Easy Handycam operation makes nearly all settings automatic so that you can perlk_rm
recording or playing back operation without detailed settings. It also makes screen font size
larger lk_reasy viewing.
27)
* DCR-DVD 108/DVD6t)8
** DCR-DVD308/DVD708
1Turn the POWER )CHG
switch [] until the
(Movie) lamp ) O
turns on.
If the POWER
switch is set
OFF (CHG), turn
it while pressing
the green button.
1Turn the POWER OCHG
switch [] until the >I_
_(Still) lamp
turns on.
"O
2Press EASY []. 2Press EASY [].
EASY
appears on the LCD screen. appears on tbe LCD screen.
3Press START/STOP [] or [] to
start recording*.
3Press PHOTO [] to record a still
image**.
[S Flashing- Lights up
Press PHOTO Press PHOTO
To slop recording, press START/STOP [] lightly Io [] full) Io
ag,_dn, a({k,st the record Ihe still
focus, image.
*Movies are recorded in the [SP] recording mode.
** Slill images are recorded with the [FINE] qualily on Ihe "Memory Stick Duo."
Continued._ 31

Rsso_di_Sa_d NaYi_# back wi_h ÷ase (EasyHad@cam}(So_ti_sd}
1Turn the POWER switch [] to turn on your camcorder.
2Press I-_I(VIEW IMAGES) [] (or [_).
The VISUAL INDEX screen appears on file LCD screen. (It may take some time te
display the VISUAL INDEX screen.)
Returns tO the
Previous
Appears with tile inlage on
Next each oI tile tab that was
6lastly played ba,ck/rccorded
(_" h)r the still inlage).
Rcturns to the recordinl
scre_l]
Displays tile movies Displays tile still images
Start playing back.
Movies:
Touch _, then touch the moxie you want to view.
Relr]( _ eV SUAL I_,,_ . _-_iw>l I
INDEX creen I,
I_ -- Toggles Play _r
PaIISC _IS yoII tOllch
Beginnillg Ol tile scenc/_
pl'evious scene 001 JAN_ _ 2007I1 2007
,, , _ Z3:45AM I
11:23:45AM
St( 1 (got( tile I.....
V [SUAL INDEX screen) _
l[ Reverse/Forward
32
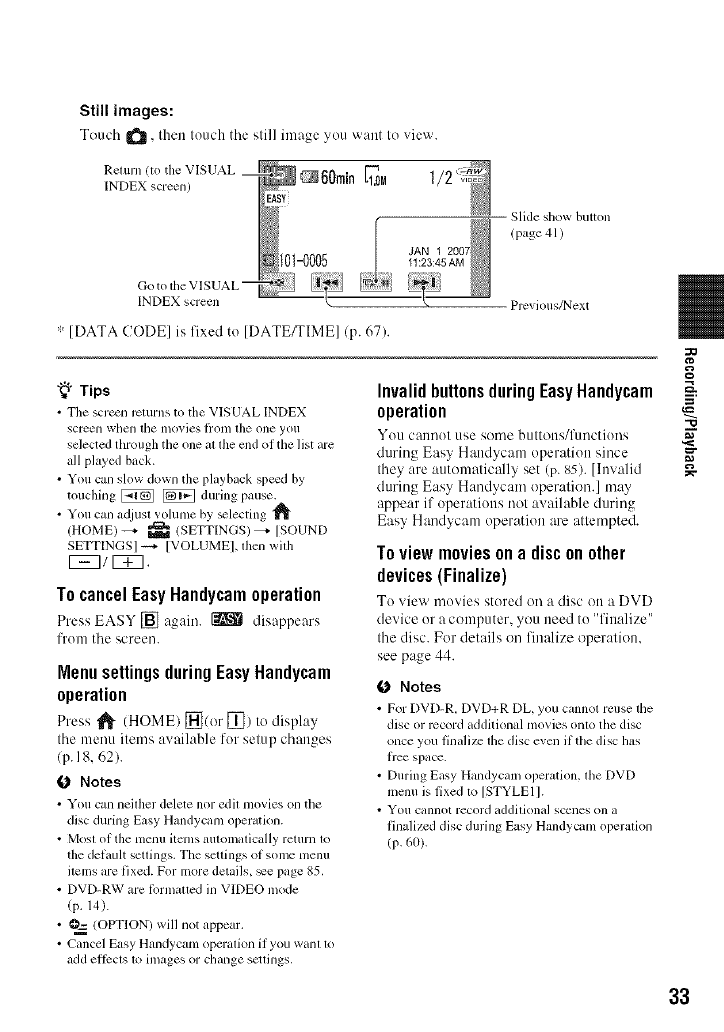
Still images:
Touch ItS, thentouchtile slill image you want It)_iew.
Return/to the VISUAL
INDEX screen)
INDEX screen
JAN 1
",:[DATA CODE] is fixed to [DATE/TIME]/p. 67).
Slide show button
! page 41 )
Previous/Next
"_° Tips
• The scr_n rcturns to the VISUAL INDEX
screen when tile ill(ivies li'oIll tile one yoll
selected through the one al file mid of the list are
all played back.
• You can slow down the playback spe_d by
touching _ _ during pause.
• You can adjust volume by _lecting
/HOME) -_- _ (SETTINGS) _ [SOUND
SETTINGS] _ [VOLUMEI, then with
[5E31 _.
To cancelEasyHandycamoperation
Press EASY [] again. _ disappears
['rom the screen.
Menusettingsduring EasyHandycam
operation
Press _ (HOME) _(or [_) to display
the menu items awfilable for setup changes
/p. 18, 62).
0 Notes
• You can neilher delete nor edil movies on tile
disc during Easy Handycmn oper_,rion.
• Mosl of the menu itmns *mtomalically return to
the delault setlings. The settings of some menu
ilelns are fixed. For more details, _e page 85.
• DVD-RW are lPrnlulled in VIDEO mode
(p. 14).
• O=_ (OPTION) will not appear.
• Cancel Easy Handycam operalion if you wahl 1o
add ellccts 1o images or change scuings.
InvalidbuttonsduringEasyHandycam
operation
You cannot use some buttotts/l)lnctions
during Easy H;mdycam operation since
they are autonmtically set (p. 85). [hlv:did
during Easy Handycam operation.] may
appear if operations not available during
Easy Handycam operation are attempted.
To view movies on a discon other
devices(Finalize)
To view movies stored on a disc on a DVD
device or a computer, you need to "finalize"
the disc. For details on finalize operation,
see page 44.
0 Notes
• For DVD-R. DVD+R DL, you cannot reuse tile
disc or record additional movies onlo the disc
once you finalize lhe disc even if the disc bs
fice space.
• During Easy Handycam operation, the DVD
menu is fixed to [STYLEll.
• You cannot record addilional sccnes on a
finalized disc during Easy Hmldyclun operation
(p, 60),
"10
33
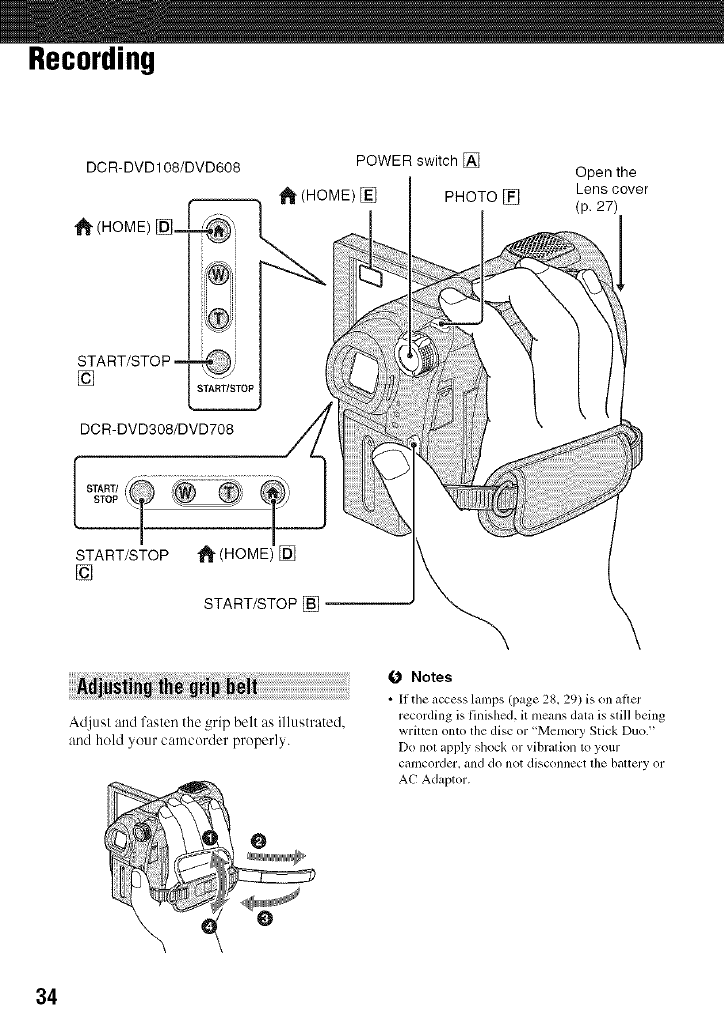
Recording
DCR-DVD108/DVD608 POWER switch []
1_ (HOME) [] PHOTO []
I
Open the
Lens cover
(p, 27)
[]
DCR-DVD308/DVD708
START/STOP []
Adjusl and fasten the grip belt as illustrated,
and hold your c,'-uncorder properly.
0 Notes
•lithe _ccess lanlps (page 28, 29) is on aflcr
recording is finished, it means data is still being
wriltcn onto the disc or "Memory Stick Duo."
Do not apply shock or vibration to your
camcorder, and do not disconnect the battery or
AC Adaptor.
34
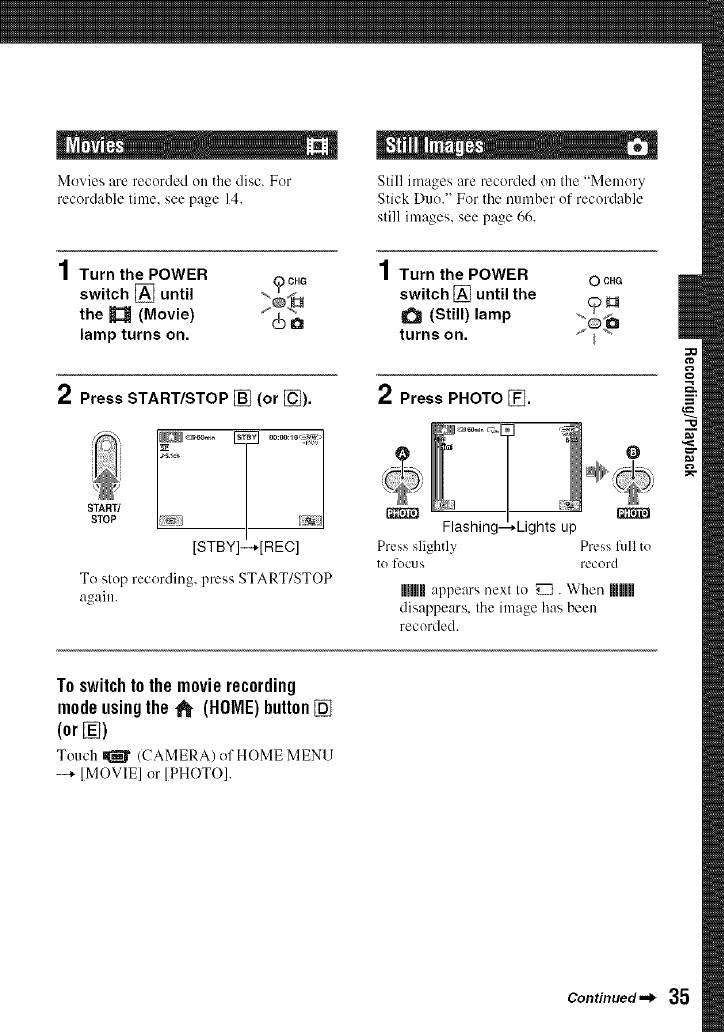
Movies are recorded on the disc. For
recordable lime. see page 14.
1Turn the POWER )CHG
switch [] until
the _(Movie) a
lamp turns on.
Still images are recorded on the "Memory
Stick Duo.' For tile number of recordable
still images, see page 66.
1Turn the POWER
switch [] until the
O(Still) lamp
turns on.
0CHG
2Press START/STOP [] (or [_).
START/
STOP
[STBY]-+[REC]
To slop recording, press START/STOP
again.
2Press PHOTO [_.
Flashing -Lights up
Press slightly Press lkfllto
to focus record
UImUappears next Io _. When mmH
disappears, the image h0.sbeen
recorded.
To switch to the movie recording
modeusingthe _(HOME)button[]
(or[])
Touch _ /CAMERA) of HOME MENll
-+ [MOVIE] or [PHOTO].
Continued._ 35

Rec0rdi_ {C0_ti_ed)
You can zoom in up to the magnifications
shewn in the following table.
(optical zoom)
DCR-DVD108/DVD608 40 ×
DCR-DVD308/DVD708 25 ×
You can atliust the magnification with tile
zeoin lever or tile zoon] butten Oil the LCD
frame.
ZOOII] lever, tile operation sound of lhe power
ZOOli] lever may also be i_corded.
• You cannot cllange tile zoonl speed with tile
zooll] buttons on tile LCD liame.
• Tile nlinimum possible distance between
camcorder and subject while maintaining sharp
locus is about 1 cnl (about 13/32 in.) lk)r wide
angle and about 80 cm (about 2 5/8 l_:ct) h)r
teleplloto.
"_° Tips
• Using [DIGITAL ZOOM] (p. 65) let you zoom
in further than the nlagnification shown in the
table.
Wider range of view:
(Wide angle)
Sound picked up by tile built-in micrephone
is converted to 5. l ch surround sound and
recorded.
Built-in microphone
36
Close view: (Telephoto)
* DCR-DVD 10g/DVD608
** DCR-DVD30S/DVD708
Move the power zoom lever slightly for a
slower zoom. Move it fltrther for a faster
zoom.
0 Notes
• [STEADYSHOT] may not reduce inlage
blurring as desired when the power zoom lever
is set to tile T (Tclephoto) side.
• Be sure to ke_p your finger on tile power ZOOll]
lever. If you move your finger oH lhe power
Your camcorder has Dolby Digit_d 5.1
Creator installed for recording 5.1ch
surround sound. Enjoy realistic sound when
playing tile disc on devices that support 5. I ch
surro/lnd SOtllld.
Dolby Digital 5.1 Creator. 5.1 ch surround sound
(_P Glossary lp.118)
0 Notes
• 5.1 ch sound is converted to 2ch when played back
on your camcorder.
• ,,b5.]Ch is displayed on lhe screen during 5.1ch
recording/playback.
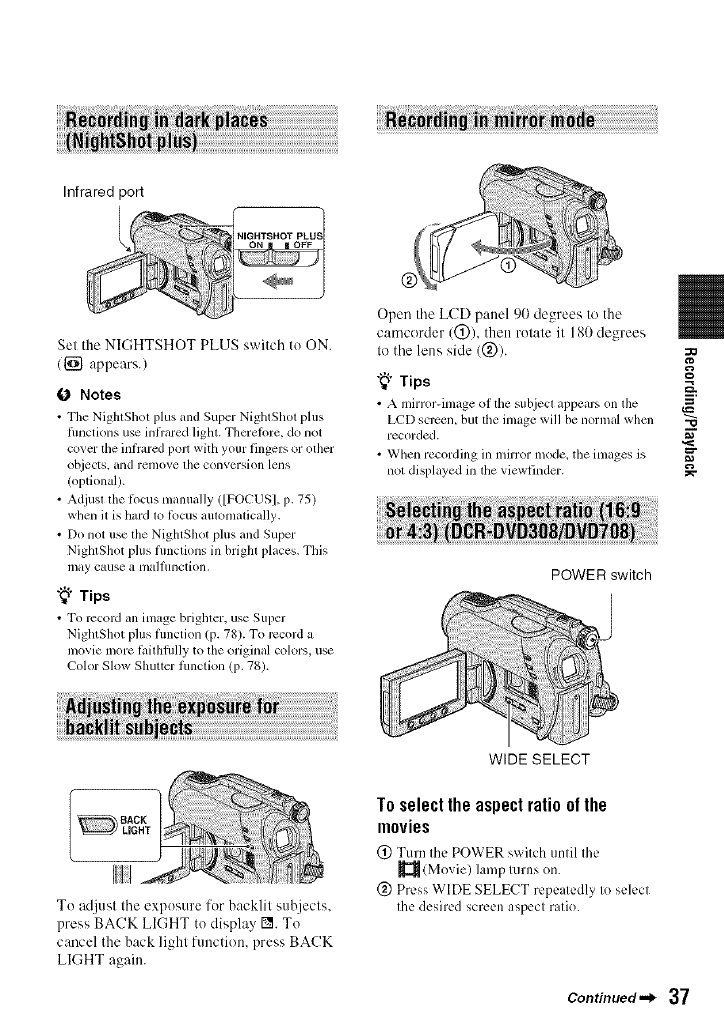
Infrared port
Sel the NIGHTSHOT PLUS switch to ON.
(1_ appears.)
0 Notes
• The NightShot plus m_d Super NightShot plus
fimctkms use in/)ared light. Thereiore, do not
cover the in/)'ared poJt with your fingers or other
ot_iects, and renlove file conversion lens
(optional/.
• Adjusl the locus manually ([FOCUSI, p. 75)
when it is hard 1o/bcus aulomalically.
• Do not use lhe NightShot plus and Super
NightShot plus flmctions in brighl places. This
may cause a ilia]Junction.
"_° Tips
• To rccoM an image brighter, use Super
NightShot plus t)lnction (p. 78). To rccord a
movie more ti,ithfiflly to the original colors, use
Color Slow Shutter lnnction (p. 78).
Open the LCD panel 90 degrees to the
camcorder (@), then rotate it 180 degrees
Io the lens side (@). :30
"_° Tips
• A mirror-image oi lhe subject appears on the
LCD screen, but tile image will be normal when "o
recorded. ,_
• When recording in mirror mode, the images is g
not displayed in the viewfinder. _--
POWER switch
............... HACK
LIGHT
To adjust the exposure for backlit subjects.
press BACK LIGHT to display I_. To
cancel the back light function, press BACK
LIGHT again.
WIDE SELECT
To select the aspectratio of the
movies
(_) Turn the POWER s_xitchuntil the
(Movie) lamp turns on.
(_) Press WIDE SELECT repeatedly to select
the desired screen aspect ratio.
Continued._ 37
"_° Tips
• Dillcrcnces in tile angle ol _icw hetween 16:9
(wide) and 4:3 vary depending on the zoom
position.
• When you view the movie on a TV, so [TV
TYPE] to [16:91 or [4:31 according to your TV
(16:914:3) (p. 42, 70).
• When viewing 16:9 (wide) pictures wilh [TV
TYPE] sm to [4:31, pictures may appear rough
depending on suhjects (p. 42).
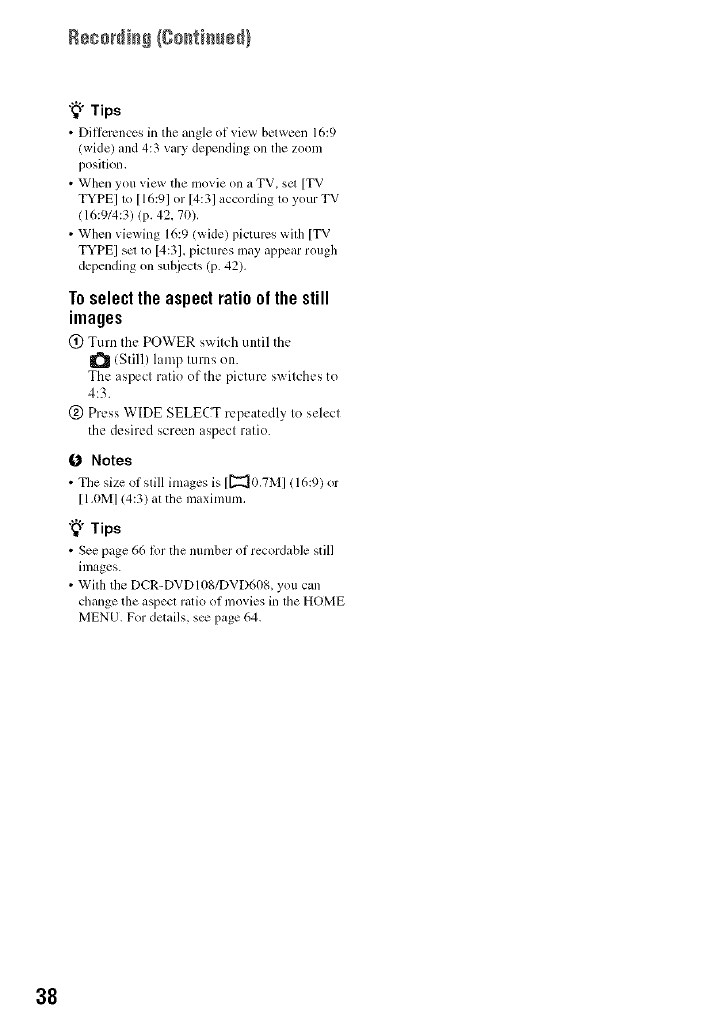
Toselect the aspect ratio ofthe still
images
(_) Turn the POWER switch until the
(Still) lamp turns on.
The aspect ratio of the picture switches to
4:3.
(_) Press WIDE SELECT repeatedly to select
the desired screen aspect ratio.
0 Notes
• The size ol still images is [[_0.7M] (16:9) or
[I.0MI (4:3) at the nlaximum.
"_° Tips
• See page 66 lor the number ol recordable still
inl_ges.
• With tile DCR-DVDI08/DVD608, you can
change file aspecl ratio of movies in file HOME
MENU. For details, s_ page 64.
38
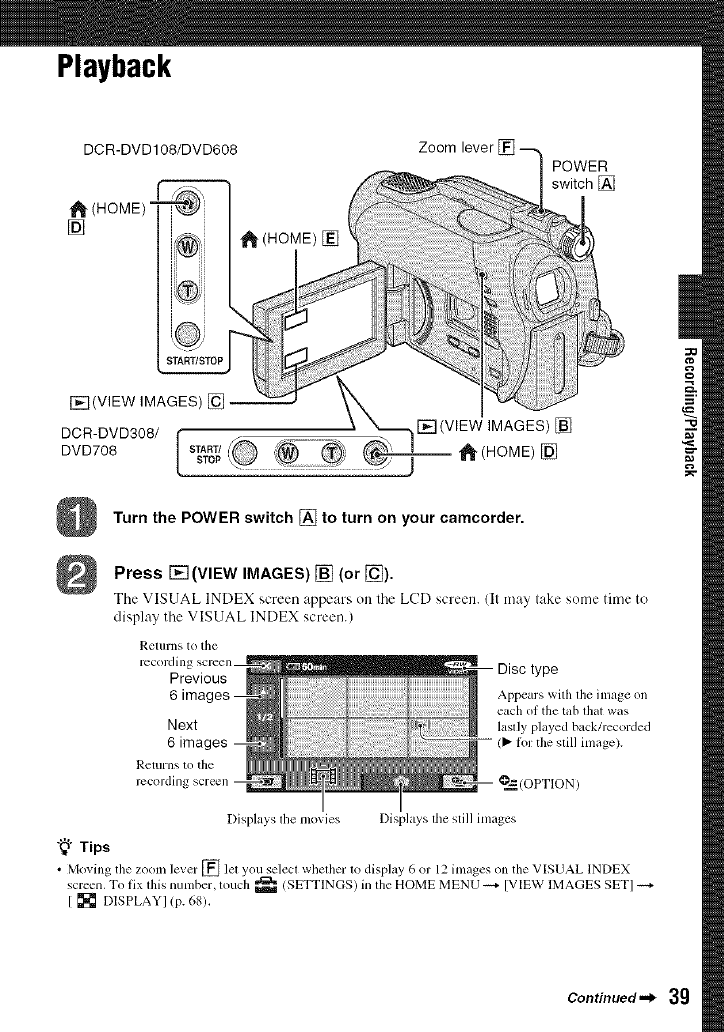
Playback
DCR-DVD108/DVD608
_-(HOME)=
[] 1_ (HOME) []
Zoom lever
POWER
switch []
Turn the POWER switch [] to turn on your camcorder.
Press F_ (VIEW IMAGES) [] (or [_).
Tile VISUAL INDEX screen appears on lhe LCD screen, lit may lake some time to
display tile VISUAL INDEX screen.)
ReItlI'IIS to the
recordinl
Previous
Next
6 ima(
Returns to tile
recording
Disc type
Appears with tile image on
each of tile tab lhat was
lastly played back/rccorded
/_ li)r the still image).
?,_'(OPTION)
Displays tile movies Displays tile still images
"_" Tips
• Moving the zoom level" [] let you select whether to display 6 or 12 images on tile VISUAL INDEX
screen. To fix lhis number, louch _ (SETTINGS) in file HOME MENU _ [VIEW IMAGES SETI
[ [] DISPLAYI (p. 68).
Continued._ 39
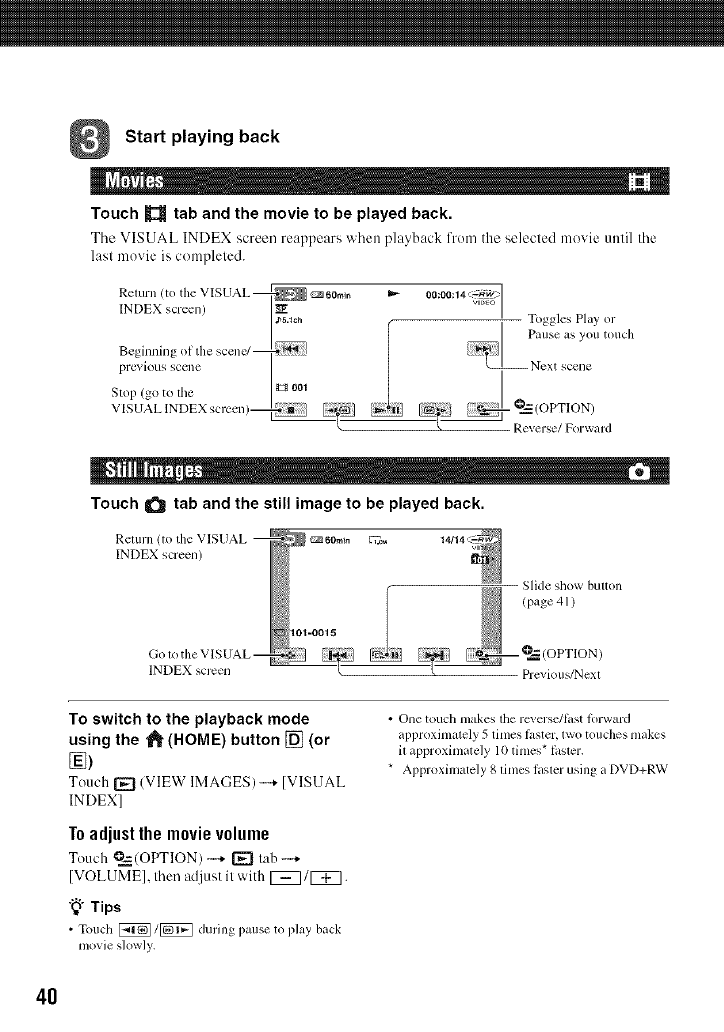
Start playing back
M m
Touch _tab and the movie to be played back.
Tile VISUAL INDEX screen reappears when playback fron/the selected movie until tile
last movie is compleled.
Return (to the VISUAL @_ _60m+n
INDEX screen)
j_.+oh
Beginning of the scen_
previous SCCIIC
Stll l) (go to the _001
V [SUAL lNDEX screen)
-- Togglus Play or
Pallse as you tOllch
.............+ °2a,.d
Touch _ tab and the still image to be played back.
Return (to tl_e VISUAL
INDEX screen)
60rain _=
INDEX screen
101-0015 +Slide show button
(page41)
Previous/Next
To switch to the playback mode
using the _" (HOME) button [] (or
Touch [_ (VIEW IMAGES)-+ IVISUAL
INDEX]
To adjust the movie volume
Touch @=_--(OPTION)-'+ [_ tah -...+
[VOLUME], then adjust it with [_/[_.
"_°Tips
•Touch [_/_ during pause to play back
movie slowly.
• One touch makes the rcxcrsc/litst forward
approximately 5 times l_ster, two touches makes
il approximale]y 10 times* li*sler.
* Approximately 8 times laster using a DVD+RW
4O
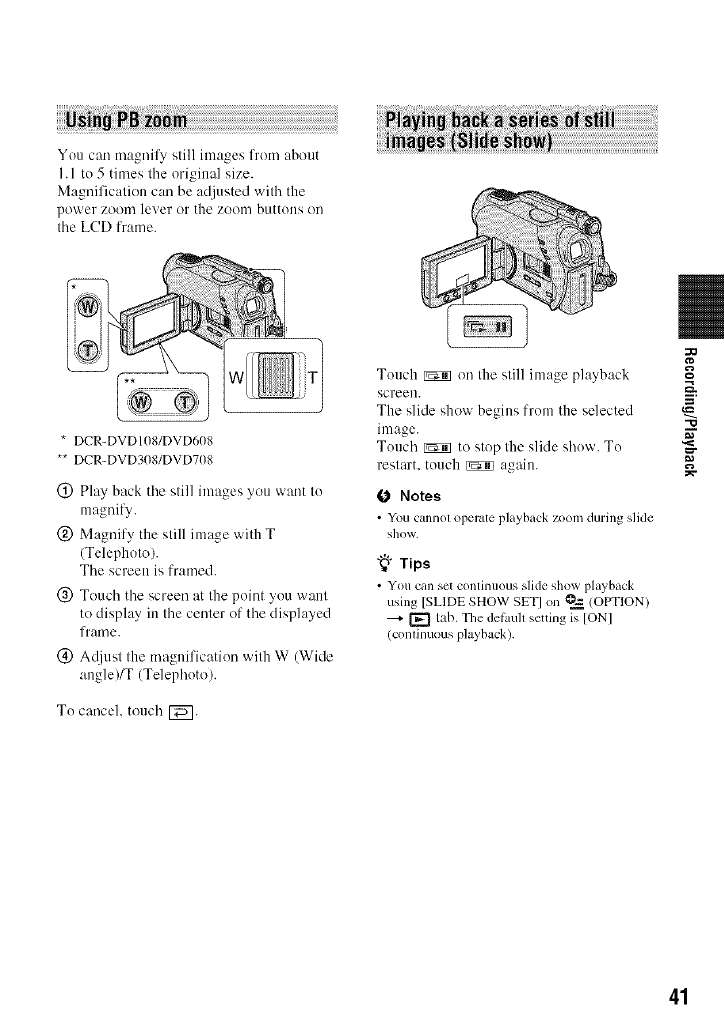
You can magnil_, still images from about
I. 1 to 5 times tile original size.
Magnification can be adjusted with the
power zooin lever or the zooin buttons on
the LCD frame.
* DCR-DVDIOS/DVD608
** DCR-DVD3OS/DVD708
(_) Play back tile still images you want to
magnify.
(_) Magnify the still image with T
(Telephoto).
Tile screen is lramed.
@ Touch tile screen at the point you want
to display in tile center of tile displayed
frame.
(_) A([iust the magnification with W (Wide
angle)/T (Telephoto).
To cancel, touch [_.
Touch _ on the still image playback
screen.
The slide show begins from the selected
image.
Touch _ to stop the slide show. To
restart, touch _ again.
(J Notes
• You cannol operate playback zoom during slide
show.
"_° Tips
• You can set continuous slide show pl_tyb_tck
using [SLlDE SHOW SET] on _ (OPTION)
--_- [_ tab. The del_luh setting is [ON]
/conlinuous playback).
-O
41
Playingthe pictureona TV
42
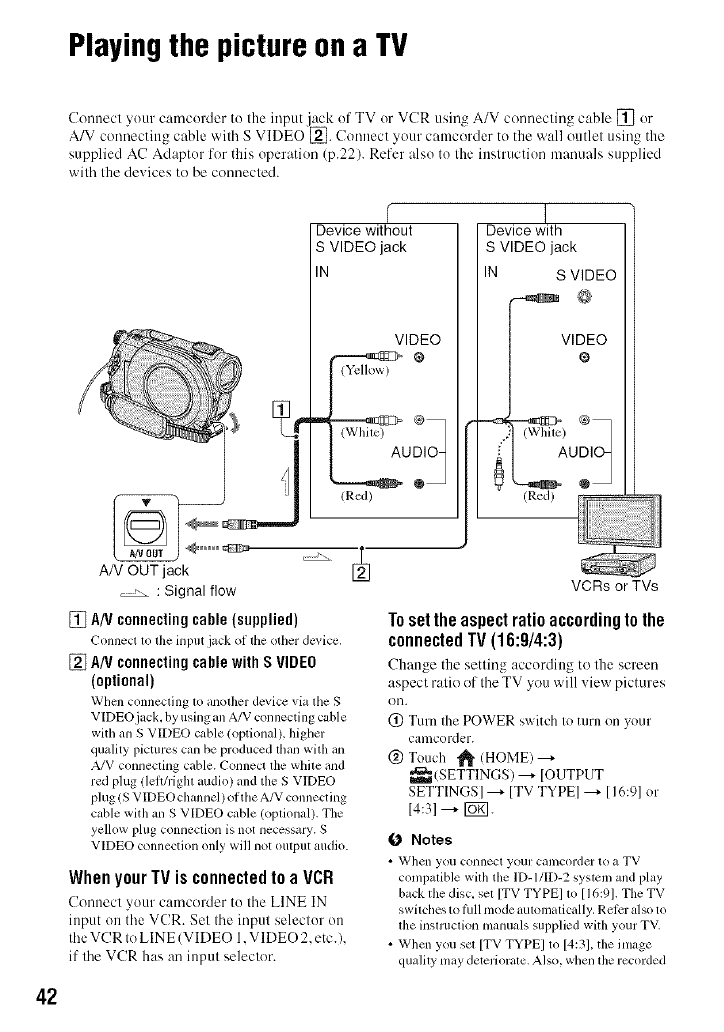
Cennecl your camcorder to Ihe input jack of TV or VCR usin_ A/V cennecling cable [] or
A/V cenr)ecting cable v,'ill_ S VIDEOE_. Connect your camcc'_rder to the wall cmtlel using the
supplied AC Adaptor for tiffs operation (p.22). Refer also to the inslruction manuals supplied
wifla Ihe de_ ices to be connecled.
AN OUT jack
, , : Signal flow
%
f
Device without
S VIDEO jack
IN
VIDEO
o:oj
/Red)
Device with
S VIDEO jack
IN S VIDEO
@
V,%EO
) ®7
/Red)
[] AN connectingcable(supplied)
(_'onnect 1o file hlput jack oI the other dc_,icc,
[] A/VconnectingcablewithS VIDEO
(optional)
When connecting to another device via the S
VIDEO jack, by using an A/V connecting cuble
witll an S VIDEO cable/optional), higller
quality pictures can be produced than with an
A/V connecting cable. Connect the wllile and
red plug !lelthighl audio) and file S VIDEO
plug/S VIDEO channel) of tile A/V connecting
cable with an S VIDEO cable (optional). The
yellow plug connection is not necessary. S
VIDEO connection only will not output audio.
When your TV is connected to a VCR
Connect your camcoMer to the LINE IN
input on the VCR. Set the input selector on
the VCR to LINE (VIDEO 1.VIDEO 2. etc.),
if the VCR has an input selector.
VCRs or TVs
Toset the aspectratio accordingto the
connectedTV(16:9/4:3)
Change the setting according to the screen
aspect ratio of the TV you will view pictures
Oil.
@ Turn the POWER switch to turn on your
camcorder.
@ Touch _!_ (HOME) --+
_ (SETTINGS) ---+ [OUTPUT
SETTINGS] ---+ [TV TYPE] ---+ [I 6:9] or
14:31 ---+ [_;].
O Notes
• '_VJlen you C'Ollnecl your cilmcorder to _1 TV
conlpalitqe with tile ID-I/ID-2 systeln and play
back file disc, sel [TV TYPEI 1o [16:91. The TV
switches to lhn nlode automatically. Ret_:ralso to
lhe insnuclkm nlanuals supplied witll your TV.
• When you sm [TV TYPE] to [4:31, the image
qualily nlay deteriorale. Also, wllen the recorded
picture's w, pect ratio swilches between 16:9
(wide) and 4:3, the image may jiuer.
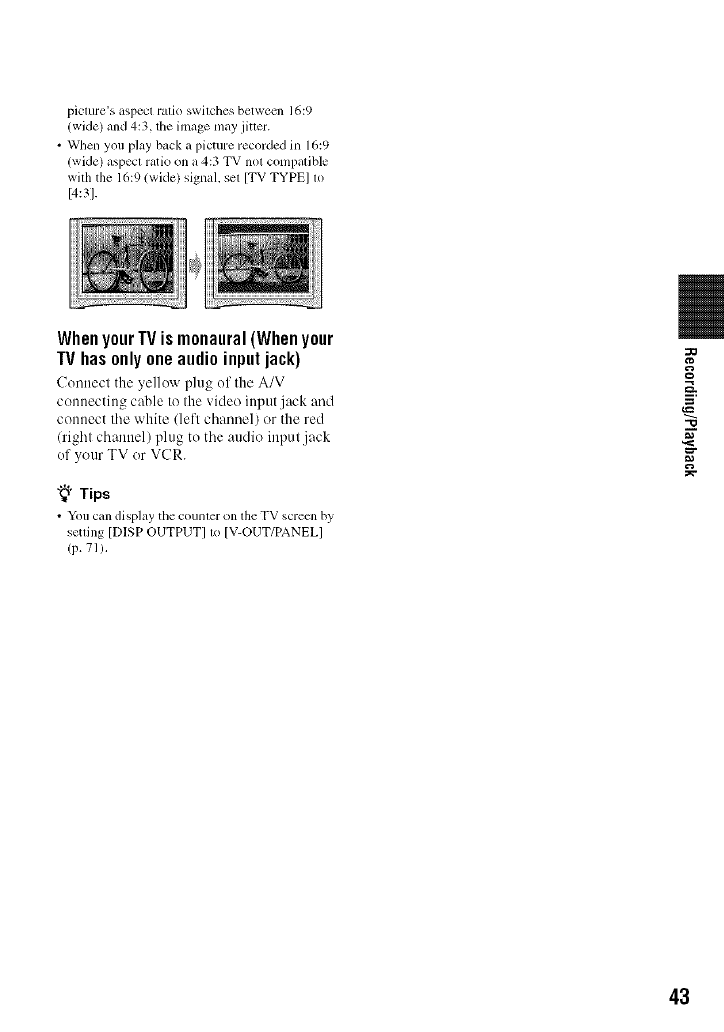
• When you play back a picture recorded in 16:9
(wide) aspecl ratio on a 4:3 TV not compatible
wilh the 16:9 (wide) signal, sel [TV TYPE] to
[4:3].
WhenyourIV ismonaural(Whenyour
IV hasonly oneaudioinputjack)
Connect the yellow plug of the A/V
connecting cable to the video input jack and
connect the white (left channel) or the red
(right channel) plug to the audio input jack
of your TV or VCR.
"_° Tips
• Yon can displzly the counter on the TV screcn by
setting [DISP OUTPUT] t_ IV-OUT/PANEL]
(p. 71),
-(3
43
Makingthe disccompatiblewith playbackon
otherdevicesor DVDdrives(Finalizing)
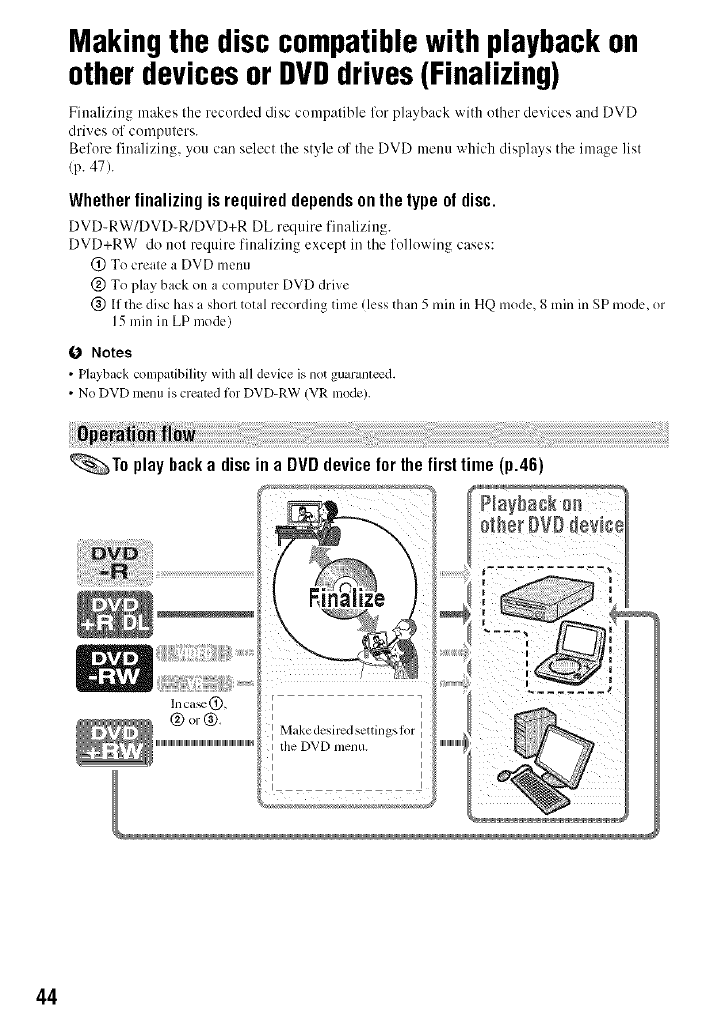
Finalizing makes the recorded disc compatible for playback with ()tiler devices and DVD
drives of computers.
Before finalizing, you ca(( select the style of the DVD menu which displays tile image list
(p. 47).
Whether finalizing is required depends on the type of disc.
DVD-RW/DVD-R/DVD+R DL require finalizing.
DVD+RW do not require finalizing except in the following cases:
(_) To create a DVD menu
@ To play back on a computer DVD drive
@ If the disc has a short total recording time (less than 5 rain ill HQ mode, 8 rain in SP mode, or
15 rain ill LP mode)
(J Notes
• Playback conlpatibility with all device is llOt gU_tl'alll_d.
• No DVD menu is created for DVD-RW (VR mode).
_.,_To play backa disc in a DVDdevicefor the firsttime (p.46)
Inca_(_),
® o,-®,
ItileDVD menu.
44
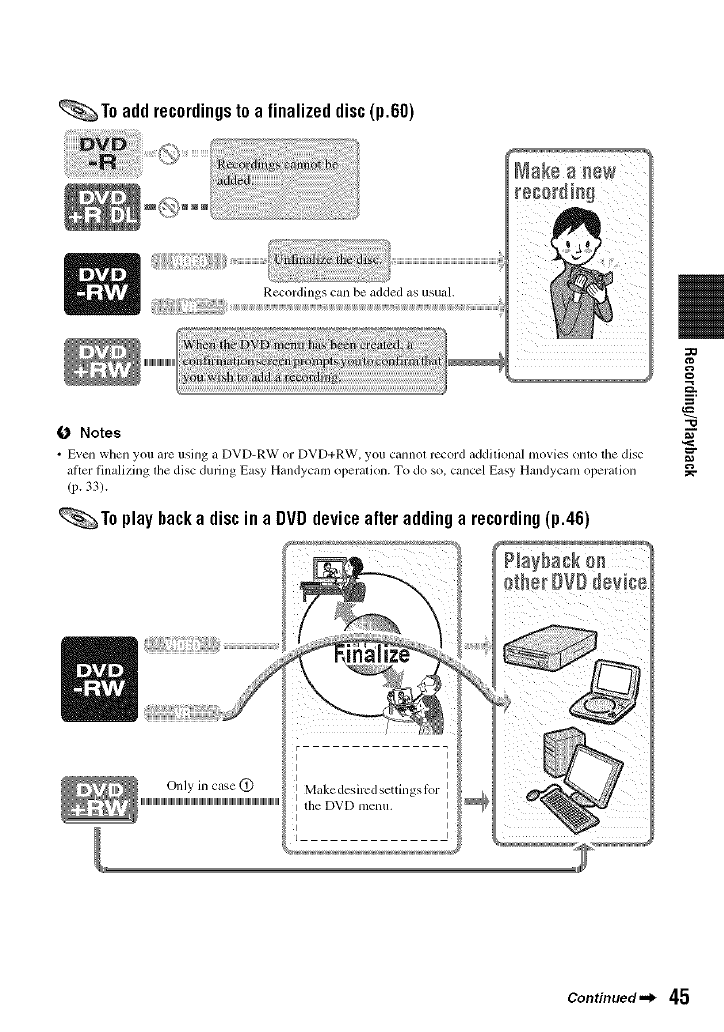
_To add recordingsto a finalized disc(p.60)
Recordings can be added as usual.
-o
O Notes
•Even when you are usillg a DVD-RXN or DVD+R_V, you calmot record additiollal movies ollto the disc m_
_ltter tinalizing d_e disc during Easy Handycam operation. To do so. cancel Easy Handycam operation
(p. 33).
_To play backa discina DVDdeviceafteraddinga recording(p.46)
Continued._ 45
Mak[a@th÷ dis_ co_pa?[N÷ wRhNayback oa o?h÷_devices o_DVDdHv÷s
O Notes
• It takes fl'om a mhmte to a maximum ol _veral
hours to finalize a disc. Tile shorter the amount
of material recorded on the disc, tile longer it
takes lor finalizing.
• Use the AC Adaptor as the power source to
prcvent your calncorder l]'om r/inning ()/it ol
power during finalizing.
• When you finalize a double-sided disc, you
nmst linalizc each side of the disc individually.
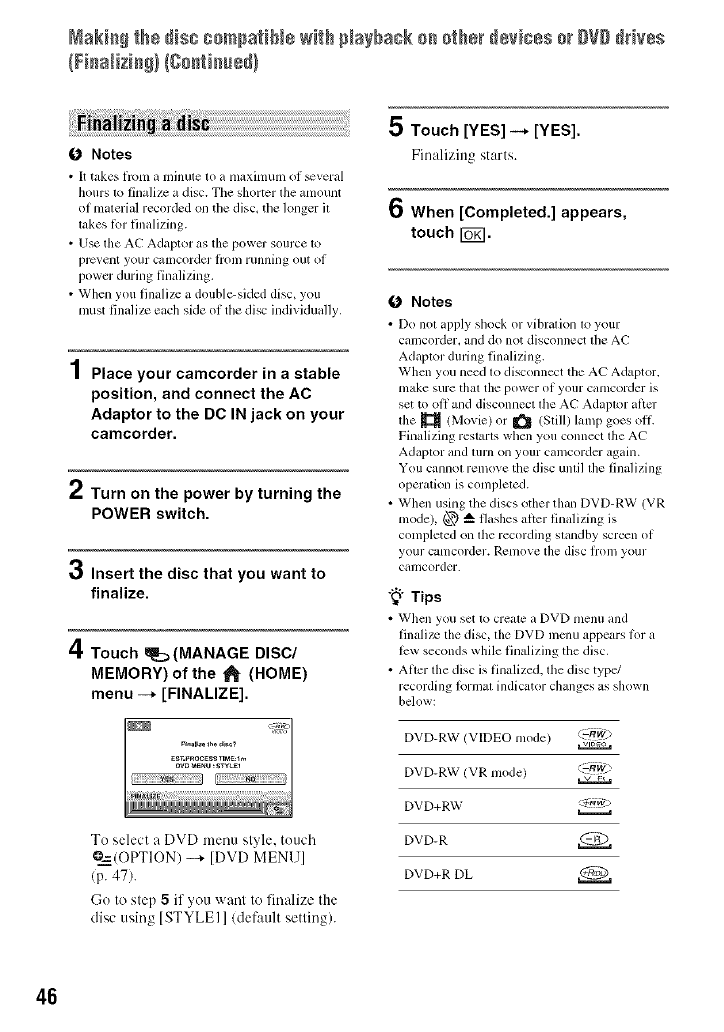
Place your camcorder in a stable
position, and connect the AC
Adaptor to the DC IN jack on your
camcorder.
iTurn on the power by turning the
POWER switch.
3Insert the disc that you want to
finalize.
4Touch _[:_(MANAGE DISC/
MEMORY) of the _[HOME)
menu -+ [FINALIZE].
To select a DVD menu style, touch
@=2=(OPTION) _ [DVD MENU]
(p. 47).
Go to step 5if you want to fin:dize the
disc using [STYLEI ]/default setting/.
5 Touch [YES] -* [YES].
Finalizing starts.
6When [Completed.] appears,
touch FU_I.
O Notes
• Do not apply shock or vihration to your
camcoMer, mid do not disconnect tile AC
Adaptor during finalizing.
When you need to disconnect tile AE"Adaptor.
nlake sure thai tile power ol your caIllcorder is
set to oil and disconnect file A(-" Adaptor alicr
tile _ (Movie) or _ (Still) lamp goes oil
Finalizing restarts when you connect the AC
Adaptor and 1111"11on your camcorder again.
You cannot remove tile disc until tile finalizing
operation is completed.
• When using the discs other than DVD-RW (VR
model, @ _ flashes alter finalizing is
completed on the recording standby screen of
your ca[llcorder. Rcnlove the disc lroll/ your
camcorder.
"_° Tips
• _Vhell you set [o crea[e a DVD l/lenu and
linalize tile disc, tile DVD nlenu appears lor a
lew seconds while finalizing the disc.
• After the disc is finalized, the disc type/
recording lormat indicator changes as shown
below:
DVD-RW (VIDEO mode) ,_:--k_)
DVD-RW/VR mode) :-RW2>
DVD+RW <_g,,v
DVD-R
DVD+R DL
46
To select a DVD menu style
:iiiji{iiil]ii;TiTi!_iiTJJiit
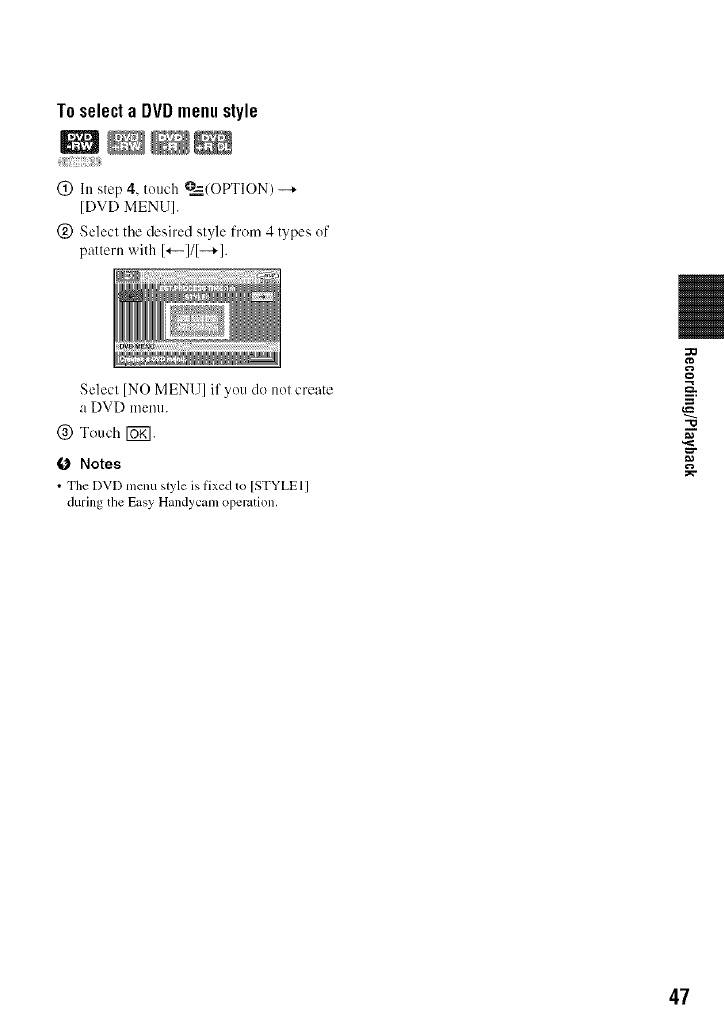
(_) In step 4, touch @=_,/OPTION) --+
[DVD MENU].
(_) Select the desired style from 4 types of
pattern with I'--I/I-+1.
Select [NO MENU] if you do not create
a DVD menu.
@ Touch [UK].
O Notes
• The DVD mcnu style is l]xed to [STYLEl]
during the Easy Handycam operation.
--=h.
"O
47
(OTHERS)category
This category enables you to edit or print
images oil a disc or "Memory Stick Duo,"
or copy them onto your computer for
viewing, editing or creating an original
DVD.
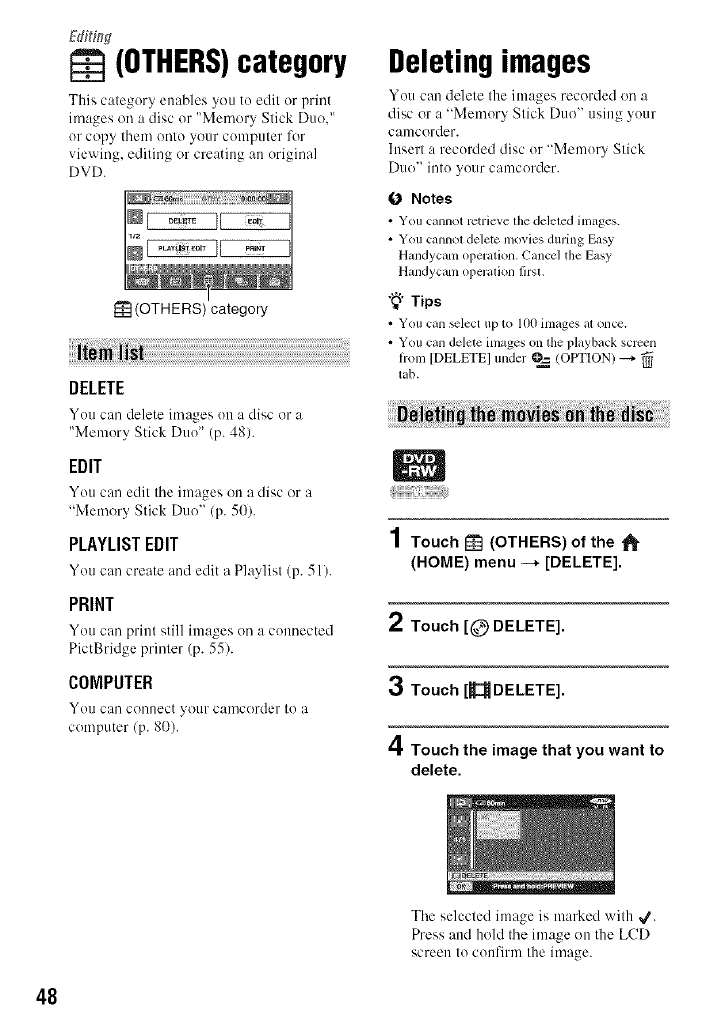
(OTHERS) category
DELETE
You can delete images on a disc or a
"Memory Stick Duo" (p. 48).
EDIT
You can edit the images on a disc or a
"Memory Stick Duo" (p. 50).
PLAYLIST EDIT
You can create and edit a Playlist (p. 5 l).
PRINT
You can print still images on a connected
PictBridge printer (p. 55).
COMPUTER
YOll C:H] conlleCt _O/lr camcorder to a
computer (p. 80).
Deletingimages
You can delete the images recorded on a
disc or a "Memory Stick Duo" using your
canlcorder.
Insert a recorded disc or "Memory Stick
Dtlo" into yotlr camcorder.
0 Notes
• You cannot retrieve lhe deleled inl_ges.
• You cannol delete ino_ ies during Easy
Hmldycam operation. Cancel the Easy
Hmldycam operalion lirsl.
"_° Tips
• You can _lect up to I(IOimages al oncc.
• You c_uldelete images on the playb_tck screen
honl [DELETE] under @=_(OPTION) _.
tab.
1Touch _ (OTHERS) of the _-
(HOME) menu --* [DELETE].
2Touch [@ DELETE].
3Touch[_DELETE].
4Touch the image that you want to
delete.
The selecled image is marked with _.
Press and hold the image on tile LCD
screen Io confirnl tile image.
48
Touch _ to relurn Io the prexious
ScFeeI].
5 Touch _-+ [YES] -+ Ib_l.
Todelete all moviesonthe discat one
time
ht step 3, touch [_DELETE ALLI --',-
[YES]--.,-[YES]--.,- tug].
To deletethe mostrecently recorded
movie
NtNI
ht step 3, touch [_ LAST SCENE DELl
-+ rug] -+ [YES] -+ rug].
O Notes
•Do not rcnlove tile battery pack or the AC
Adaptor ti'om your camcorder while ediHng
images. It may damage the disc.
• If the deleted movie is included in the Playlist
(p. 51 ), the movie is deleted also from the
PhJylisl.
• Even if you delete unnecessary images Irom lhe
disc, lhe remaining disc capacity may not
incrc_se as much as you can nmke additional
recording.
• To delete all images recorded in the disc and
restore the original capacity of tile disc, t_ll-nlal
the disc !page 591.
"_° Tips
• The images recorded by this camcorder and
stored onto a disc are called "original."
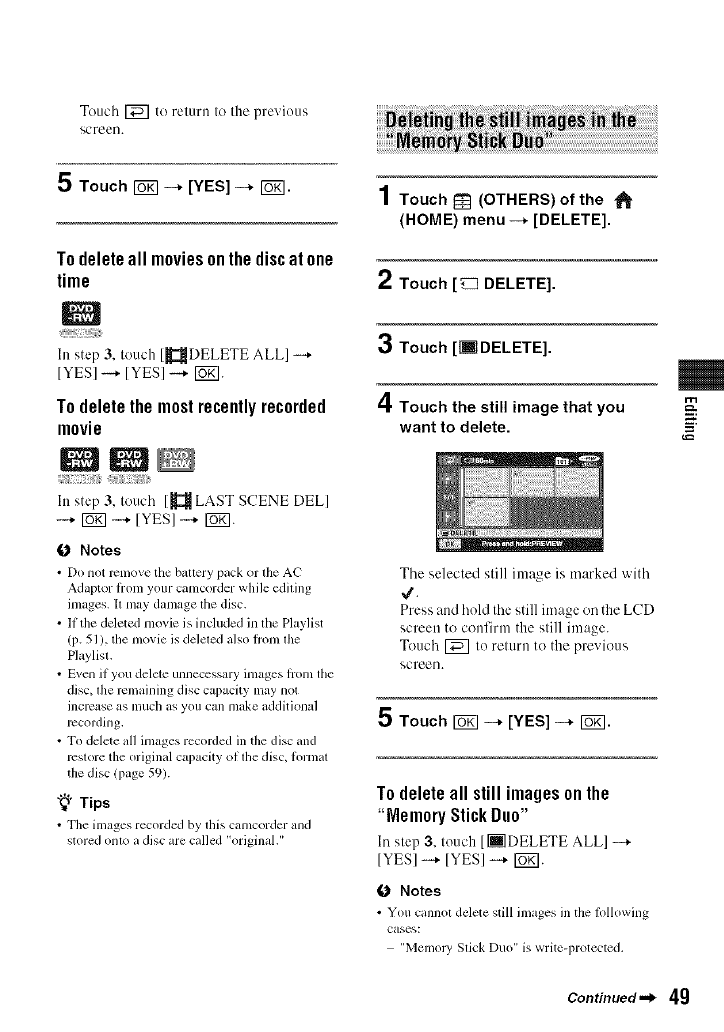
1Touch _] (OTHERS) of the "_
(HOME) menu --+ [DELETE].
2Touch [_ DELETE].
3Touch [liTDELETE].
4Touch the still image that you
want to delete.
The selected still image is marked with
4.
Press attd hold the still image on the LCD
screen to confirm the still image.
Touch [_] to retttrn to the previous
screen.
5 Touch _-+ [YES] -+ r_l.
Todeleteall stillimagesonthe
"MemoryStickDuo"
In step 3, touch [ [] DELETE ALLI ---+
[YESI-+ [YESI-+ [B_I.
ONotes
• You cannot delete still images in the following
cases:
"Memoly Slick Duo" is write-protected.
m
£.
Continued._ 49
ge_eti_ images(Coati,u@}
write-protection is set to the still images by
the other device.
"_" Tips
• To delete all images recorded on the 'Memory
Stick Duo," l_wmal tile 'Memoly Slick Duo"
(p, 60).
Dividingthe image
O Notes
• You cannot dixidc movies during Easy
Handycam operation. Cancel the Easy
Handycam operalion lirsl.
1Touch _ (OTHERS) of the
(HOME) menu -* [EDIT].
2Touch [DIVIDE].
3Touch the movie that you want to
divide.
Tile selected moxie starts playing.
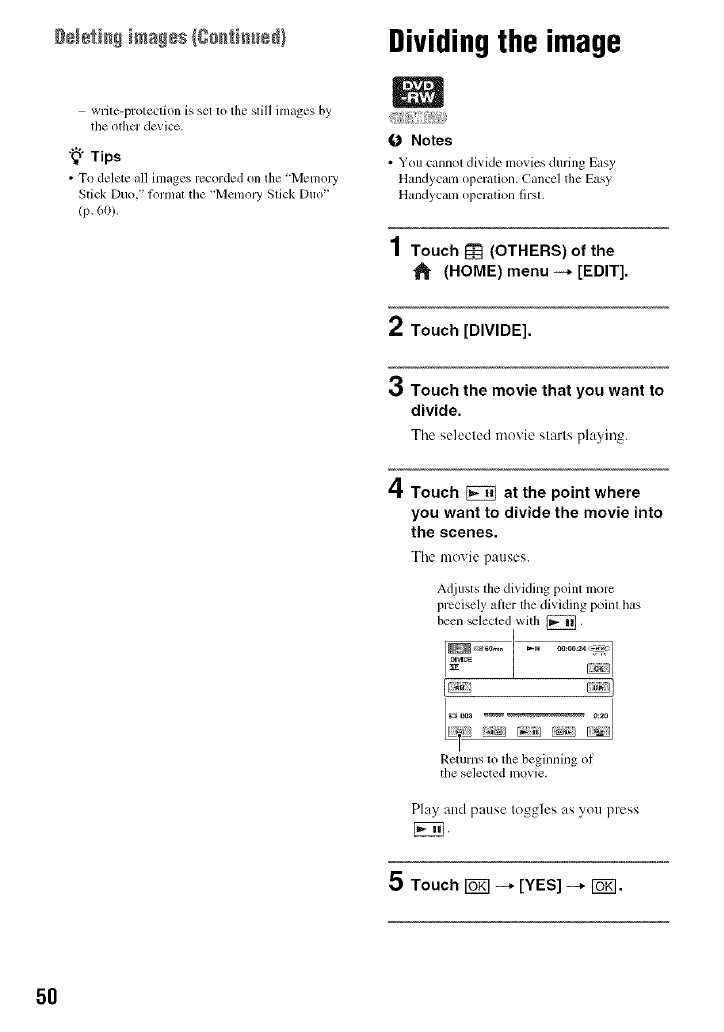
4Touch _ at the point where
you want to divide the movie into
the scenes.
Tile movie pauses.
Adjusts thedividing point lnOle
precisely al]er thedividing point has
been _lected with [_],
Returns lo the beginning ol
the selected movie.
Play and pause toggles as you press
[KN.
5 Touch _ -* [YES] --* Io_1.
5O
O Notes
• Mo_ies cannot be reslorcd once flley _uc
divided.
• Do not remove tlae battery pack or ll_e AC
A&apmr ti'om your c_m_corder while editing
images. II may damage ll/e disc,
• Even if the divided movie is included in ll_e
Playlist, the movie is not divided in the Playlist.
• A slight dil]crence m_ty occur irom tile point
where you touch [_ and the actual dividing
point, as your camcorder selects the dividing
point based on about hall;-second incremcnts.
Creatingthe Playlist
|
_iii{iiiiiii/!ii;!_Siiiiiiiii_,i)iiii/_¸
A Playlist is a list showing thumbnails of
the movies that you have selected. The
uriginal scenes are not changed even
though you edit or delete the scenes in the
Playlist.
Make sure to insert the recorded disc into
your canlcorder.
O Notes
• You cannot add or edit movies during Ea',y
Handyclun operation. Canccl the Easy
H_mdyclun oper_ttion first.
1Touch _(OTHERS) of the
(HOME) menu --* [PLAYLIST
EDIT].
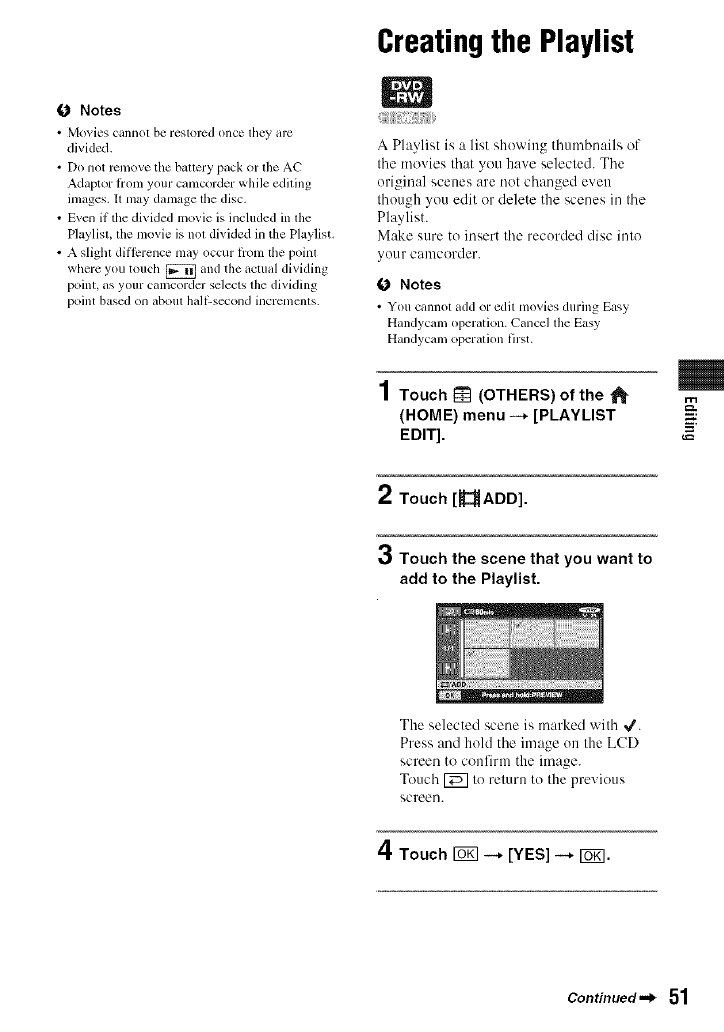
2 Touch[ ADD].
3Touch the scene that you want to
add to the Playlist.
m
=_.
The selected scene is marked with 4.
Press and hold the image un the LCD
screen to confirm the image.
Touch [_ to return to the previous
screeu.
4Touch ro_ -+ [YES] -+ ro_.
Continued._ 51

g_sati_ the ?_ayHst(go_ti_t_@}
To add all the movies on the disc in
the Playlist
In step 2, touch [_{ADD ALLI -+ IYES]
--+ [YES] --+ [UKI.
O Notes
•Do not relno_ethe battery pack or the AC
Adaptor h'oln your camcorder while ediling lhe
P]aylisl,I1may damage the disc,
"_°Tips
• You clmadd a maximum of999 movies to the
Playlisl.
• You can add a movie when viewing it using
[[_IADD] on O__=(OPTION)_ [_ tab.
Make sure to insert the disc on which the
Playlist is added into your camcorder.
1Touch [_ (VIEW IMAGES) of the
(HOME) menu -+ [PLAYLIST].
The images added to the Playlist are
displayed on the screen.
@ Touch IERASEI.
To erase all images at a time. touch
[ERASE ALLI ---+ IYESI ---+ IYESI -+
giN.
(_) Touch the image that you want to erase
from the Playlist.
The selected image is marked with 4.
Press and hold the image on the LCD
screen to confirm the image.
Touch [_ to return to the previous
screen.
(_) Touch [Uff]---+ [YES] ---+ [_.
"_" Tips
• Tileoriginal images are not changed cven ifyou
era_ tile images hom lhe Playlisl.
Changing the order within the Playlist
(_) Touch [_ (OTHERS) of the _'
(HOME) menu ---+[PLAYLIST EDIT].
@ Touch [MOVEI.
@ Select the image that you want to move.
52
," Touch the scene from which you
want to play back.
The Playlist is played back from the
selected scene to the end. then the
screen returns to the Playlist screen.
To erase added images from the
Playlist at a time
@ Touch I_t (OTHERS) of the
(HOME) menu---_IPLAYLIST EDITI.
The selected scene is marked with 4.
Press and hold the image on the LCD
screen to confirm the image.
Touch [_ to return to the previous
screen.
(_) Touch [_.
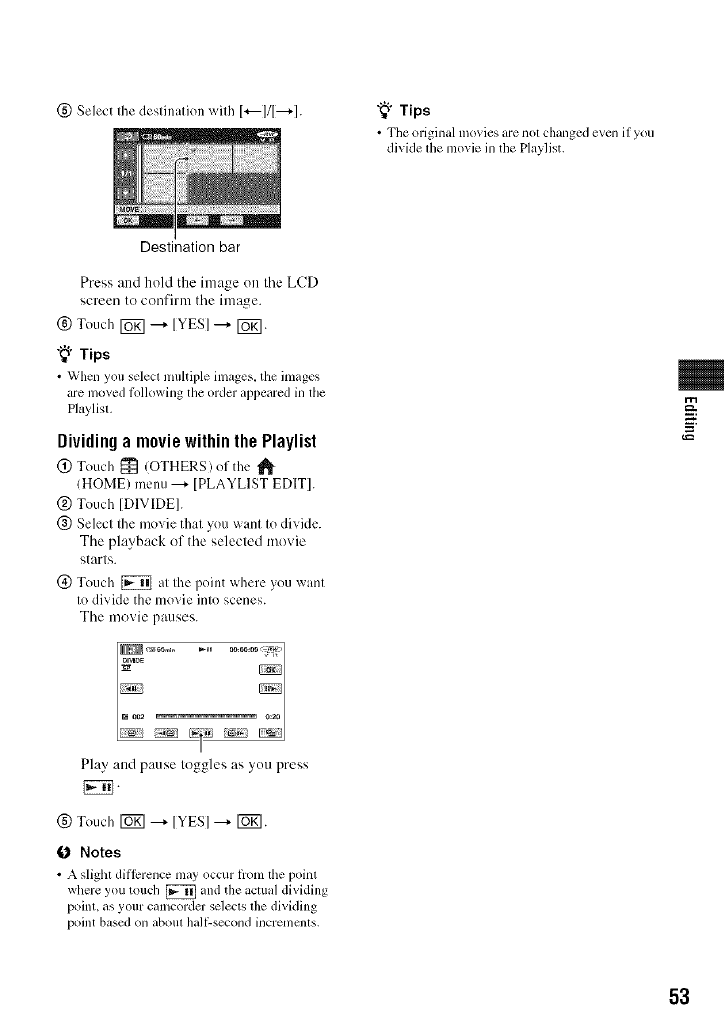
(_) Select the destination with 1+---111---+1.
Destination bar
"_° Tips
• Tim original ramies are not clmnged even if you
divide tile movie in the Playlist.
Press attd hold the image on tile LCD
screen to confirm tile image.
(_) Touch _ ---+ [YES] ---+ [_g].
"_° Tips
• When you select muhiple images, tile images
are moved Mlowing the order appeared in tile
P]uylist,
Dividing a movie within the Playlist
@ Touch _ (OTHERS)of the
(HOME) menu ---+ [PLAYLIST EDIT].
@ Touch ]DIVIDE].
@ Select the movie that you want to divide.
The playback of the selected movie
starts.
(_) Touch [_ at the point where you want
to divide the movie into scenes.
The movie pauses.
m
Play attd pause toggles as you press
IEN
(g) Touch _ ---+IYESI ---+ F6_].
0Notes
• A slight dil]crence may occur from the point
where you touch [_ and file ilCttlitl dividing
point, as your camcorder selects the divkling
point based on about hal/:-second incremcnts.
53
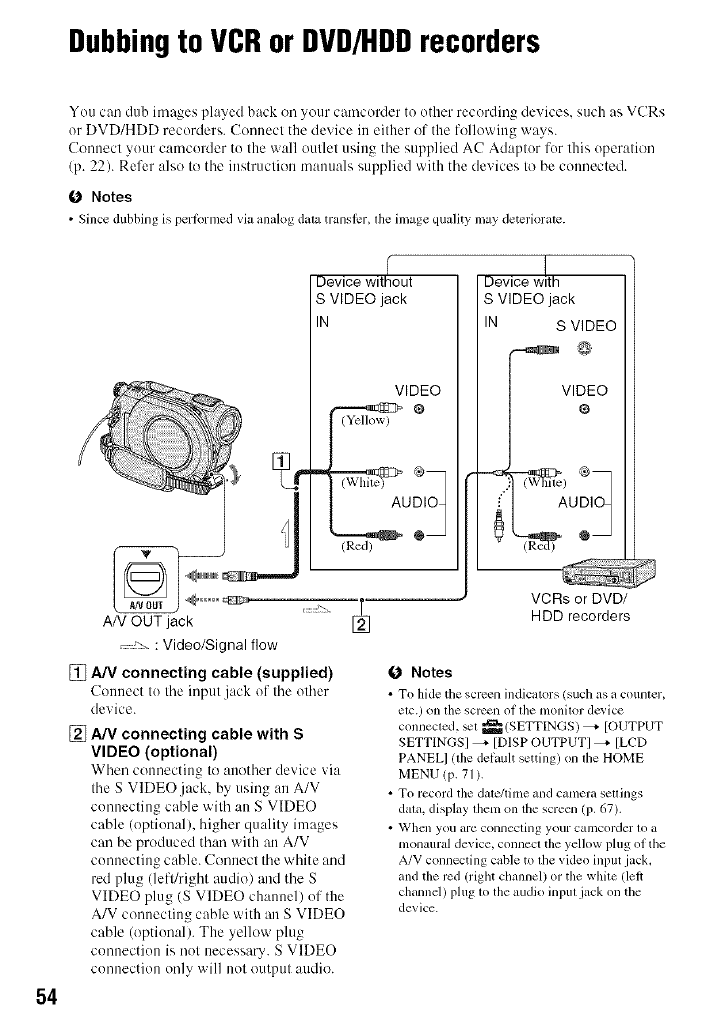
Dubbingto VCRorDVD/HDDrecorders
54
You can dub images played back oil your camcorder to other recording devices, such as VCRs
or DVD/HDD recorders. Connect the device in either of the following ways.
Conuect your camcorder to the wall outlet using tile supplied AC Adaptor for this operation
(p. 22). Refer also to the instruction manuals supplied with the devices to be connected.
O Notes
•Since dubbing is perlbrmed via amdog d_ua translcr, file image quality may deteriorate.
[]
AN OUT jack
: Video/Signal flow
[] A/V connecting cable (supplied)
Connect to tile input jack of tile other
device.
[] A/V connecting cable with S
VIDEO (optional)
When connecting to :mother device via
the SVIDEO.jack, by using an A/V
connecting cable with an S VIDEO
cable (optional), higher quality images
can be produced than with an A/V
connecting cable. Connect the white and
red plug (lefffright audio) and the S
VIDEO plug (S VIDEO chatmel) of the
A/V connecting cable with an S VIDEO
cable (optional). The yellow plug
connection is not necessa U. S VIDEO
connection only will not output attdio.
Device without
S VIDEO jack
IN
VIDEO
(Red) @
Device w!th
S VIDEO jack
IN S VIDEO
VI%EO
I AUDIOq
_ VCRs or DVD/
HDD recorders
(J Notes
• To hide tile screen indicators/such as a counter,
elc.) on tile screen of file monitor dc_ icc
connected, _t _ (SETTINGS) _ [OUTPUT
SETTINGSI _ [DISP OUTPUTI _ [LCD
PANELI lille delault setting) on tile HOME
MENU (p. 71 ).
• To record tile date/time and camera seuings
data. display fllem on the screen (p. 67).
• When you armconnecting your camcorder to a
monaural device, connect the yellow plug of tile
A/V connecting cable to the vide() input jack.
and the rcd (rigtu channel) or the white (let*
channel) plug to the audio input jack on the
device.
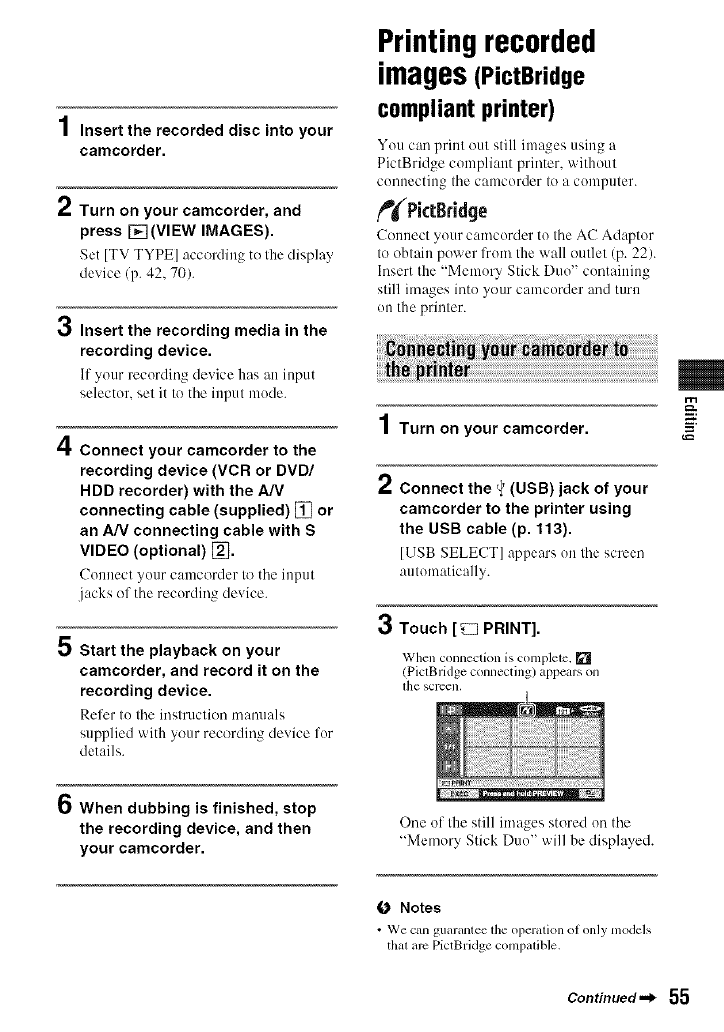
.4
/ Insert the recorded disc into your
camcorder.
Turn on your camcorder, and
press [] (VIEW IMAGES).
Set [TV TYPE] according to Ihe display
device/p. 42, 70).
3Insert the recording media in the
recording device.
If your recording device has :m input
selector, set it to the input mode.
4Connect your camcorder to the
recording device (VCR or DVD/
HDD recorder) with the A/V
connecting cable (supplied) [] or
an A/V connecting cable with S
VIDEO (optional) [_.
Connect your camcorder to tile input
jacks of the recording device.
5 Start the playback on your
camcorder, and record it on the
recording device.
Refer to the instruction nlnnl_lals
supplied with your recording device for
details.
Printingrecorded
images(PictBridge
compliant printer)
You can print out still images using a
PictBridge compliant printer, without
connecting the camcorder to a computer.
ftfPictBridge
Connect your camcorder to the AC Adaptor
to obtain power from the wall outlet (p. 22).
Insert the "Memory Stick Duo" containing
still images into your camcorder and turn
on the printer.
Turn on your camcorder.
2Connect the _(USB) jack of your
camcorder to the printer using
the USB cable (p. 113).
[USB SELECT] appears on the screen
automatically.
3Touch [_ PRINT].
When connection is complete. []
(PictBridge connecting) appears on
[h(3 SCl-een,
m
,wg
=_.
6When dubbing is finished, stop
the recording device, and then
your camcorder.
One of Ilae still images stored on the
"Memory Stick Duo" will be displayed.
O Notes
• We can guarantee lhe operation ot only models
thal are PictBridge conlpalible.
Continued._ 55
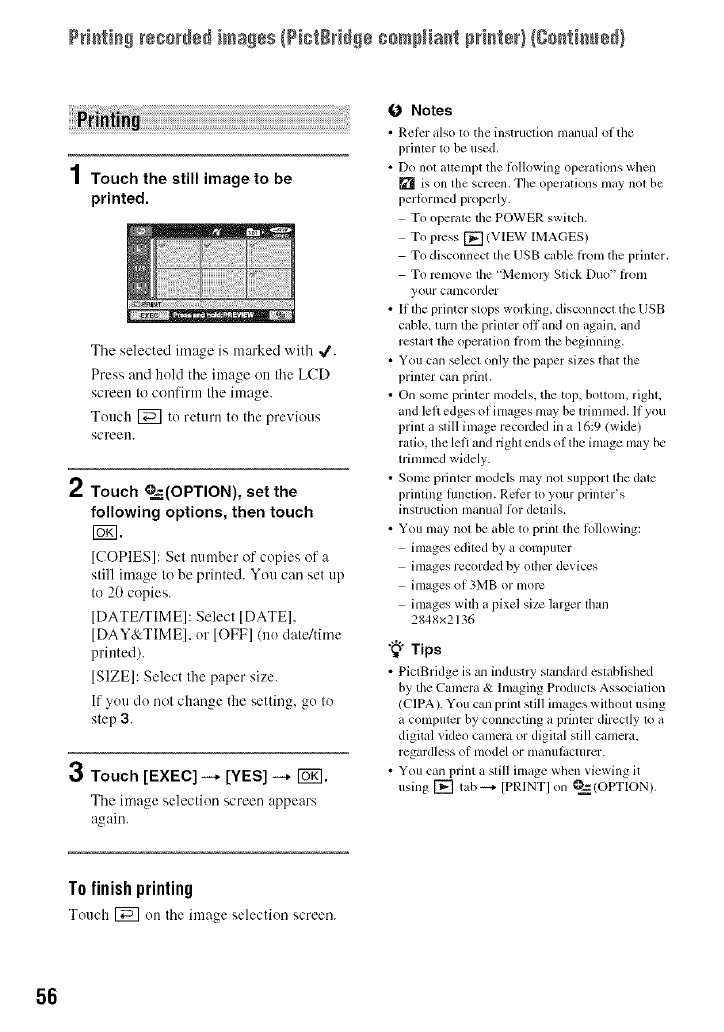
P++++t++g+++++_+d+d+mmg+s{P++t+++++++++mN+a+t p++r+t÷+}Ig++++t++m÷+}
1Touch the still image to be
printed.
3
The selected image is marked with 4.
Press and hold the image on the LCD
screen to confirm the image.
Touch [_] to return to the previous
screen.
Touch _=,_--(OPTION), set the
following options, then touch
r_.
[COPIES]: Set number of copies ol +a
still image to be printed. You can set up
to 20 copies.
[DATE_IME]: Select [DATE],
[DAY&TIME], or [OFF]/no date/time
printed).
[SIZE]: Select the paper size.
If you do not change the setting, go to
step 3.
Touch [EXEC] -* [YES] -* Io_1.
The image selection screen appears
_gain.
ONotes
• Relcr also to the instruction nlmlual oI tim
printer to be used.
• DO not attempt tile Ik)llowing operations Wllt:ll
is on the screen. The operations may not be
perlPrmed properly.
To operate tile POWER switch.
To press []/VIEW IMAGES)
To disconnect the USB cable Iiom the printcr.
To l+cnlove the 'Memoly Stick Duo" Ii'om
your camcorder
• If the printer stops working, disconnect the USB
cable, turn the printer offand on again, and
restart the operation Iiom the beginning.
• You can _lect only the paper sizes that the
printer can print.
• On some printcr models, tile top, bottonl, right,
and left edges of images may be trimmed. If you
print a still image recoMed in a 16:9 (wide)
ratio, tile left and right ends of the image may be
trimmed widely.
• Some printer models may not support the date
printing lunction. Relier to your printer's
instruction manual li>r details.
• You may not be able to print the Iollowing:
images edited by a computer
images recorded by otller devices
images of 3MB or more
images with a pixel size larger than
2848x2136
"_° Tips
• PictBridge is an industry standard established
by the Camcra & Imaging Products Association
/CIPA). You can print still images without using
a computer by connecting a printer directly to it
digital _ideo camera or digital still camera,
regardless ol model or lllanulilCtllrer.
• You can print a still image whcn viewing it
using [] tab +4 [PRINTI on _ (OPTION).
T0finish printing
Touch [_q on the image selection screen.
56
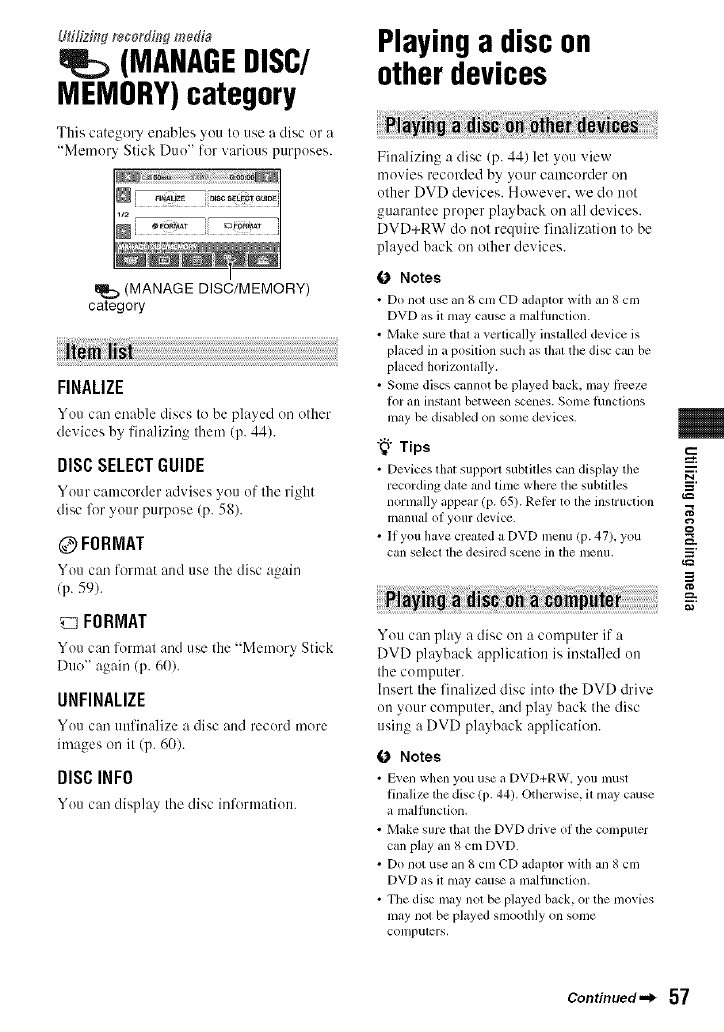
L#i/fzing recordh:_gme&'a
(MANABEBISC/
MEMORY)category
This calegory enables you Io use a disc or a
"Memory Slick Duo" for various purposes.
I
(MANAGE DISC/MEMORY)
category
FINALIZE
You c:m enable discs to be played on other
devices by finalizing them (p. 44).
DISCSELECTGUIDE
Your camcorder advises you of the right
disc lk_ryour purpose (p. 58).
@FORMAT
You can lormat and use the disc again
(p. 59).
FORMAT
You can format :rod use the "Memory Stick
Duo" again (p. 60).
UNFINALIZE
You can uufinalize a disc and record more
images on it (p. 60).
DISCINFO
You can display the disc iulk_rmation.
Playinga discon
otherdevices
Finalizing a disc (p. 44) let you view
movies recorded by your camcorder on
other DVD devices. However, we do not
guarantee proper playback on all devices.
DVD+RW do not require finalization to be
played back on other devices.
(J Notes
• Do not use an 8 cm CD adaptor witll ml 8 cm
DVD as il may cau_ a mallunction.
•Make sure that a_erficaHy installed device is
placed in a position sucll as that tile disc can be
placed horizontally.
• Some discs cannot be p]_Lyedback, may tiveze
l_)l" till illSlallt between SCClleS. SOllle l/incliolls
may be disabled on some devices.
"_° Tips
• Devices tllal support subtilles can display tile
recording date zuld lime wllere tile sublilles
normally appear (p. 65). Rel_r to lhe instruction
inanllal ol yollr device.
• II you have created a DVD menu (p. 47). you
can select tile desired scene in the menu.
!ii
You can play a disc on a computer if a
DVD playback application is installed on
the computer.
Insert the finalized disc into the DVD drive
on your computer, and play back the disc
using a DVD playback application.
(_ Notes
• E_en when you use iiDVD+RW. you must
linali/_: tile disc (p. 44). Otllerwise, it may cause
a malfimclion.
• Make sure tllal lhe DVD drive of the compuler
can play an 8 cm DVD.
• Do not use an 8 cm CD adaptor with an 8 cm
DVD as il may cau_ a malfimclion.
• The disc may not be played back, or the movies
may not be played smoothly on some
COlllpulers,
m
g
_=
_=h.
Continued._ 57

P+a++++a++sc ++ +{h++++v+c+s
• Movies stored on a disc cannot be copied
directly onto a colnputer to be played back or
edited,
"_° Tips
• For details on opermions mid procedures, s_ tile
+'First Step Guide" on the supplied <+'D-ROM
(i7. 80).
The volume label 0f the disc
The date when the disc was first used is
recorded/the default setting is I):OI)AM
Jammry 1, 2(X)7).
<e.g.>
When the disc was first used at 0:00 phi on
January 1st 2007:
2007_01 01 00HUOM AM
"_° Tips
• Images on discs are stored in the tbllowing
Ik_lders:
DVD-RW (VR lnode)
DVD RTAV Iolder
Other discs and n;odes
VIDEO TS lolder
Findingthe rightdisc
(DISCSELECTGUIDE)
Select the option that is right for you on the
screen, then you will be informed of the
appropriate disc for your purposes.
1 Touch _(MANAGE DISC/
MEMORY) of the _l_ (HOME).
2Touch [DISC SELECT GUIDE].
OTouch the option that is right for
you on the screen.
When you :mswer all the questions, you
will be informed of the right disc lk_r
you.
If you insert the same type of disc as
indicated in [DISC SELECT GUIDE],
you can format it with your selected
settings.
58
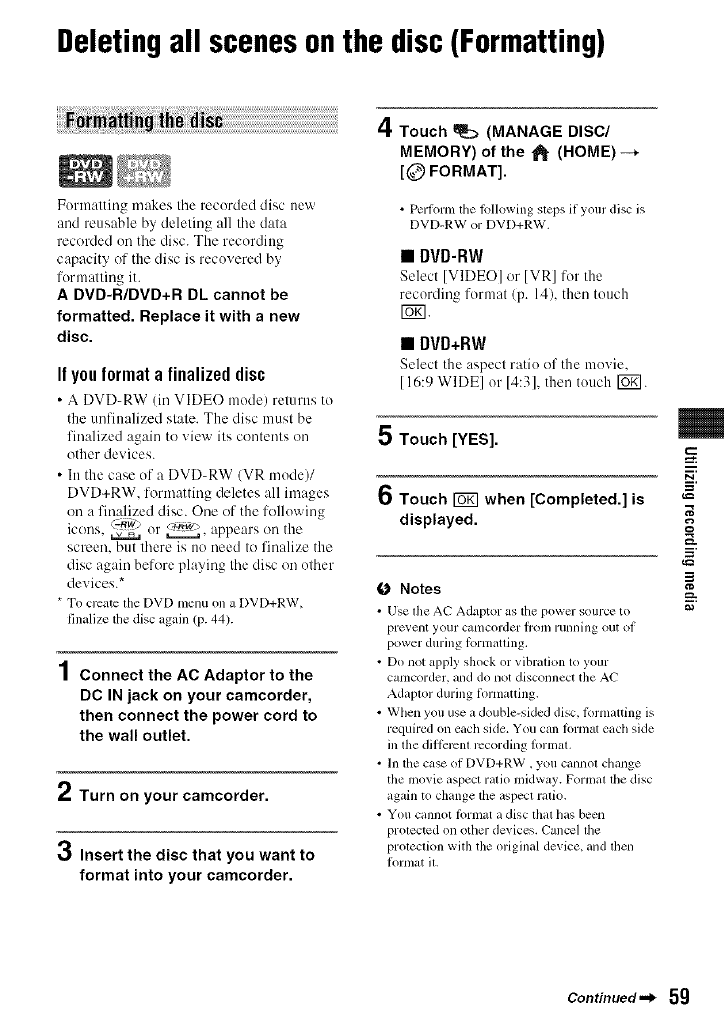
Deletingall scenesonthe disc(Formatting)
Formatting makes tile recorded disc new
and reusable by deleting all tile data
recorded on the disc. The recording
capacity of the disc is recovered by
formalting it.
A DVD-R/DVD+R DL cannot be
formatted. Replace it with a new
disc.
If you format a finalized disc
• A DVD-RW (in VIDEO mode) returns to
the unfinalized stale. The disc must be
finalized again to xiew ilk contenls on
other devices.
• In the case of a DVD-RW/VR mode)/
DVD+RW, formatting deletes all images
on a finalized disc. One of the following
icons. (z.Tiw) _. appears on the
or
screen, but lhere is no need Io finalize the
disc again before playing the disc on olher
' s*device.
* To create the DVDmenu on a DVD+RW,
finalize tiledisc again (p. 44).
4
l Connect the AC Adaptor to the
DC IN jack on your camcorder,
then connect the power cord to
the wall outlet.
Turn on your camcorder.
3Insert the disc that you want to
format into your camcorder.
4Touch _ (MANAGE DISC/
MEMORY) of the lJ_ (HOME) --*
[@ FORMAT].
•Pertonn the tkdlowing steps if your disc is
DVD-RW or DVD+RW.
•DVD-RW
Select [VIDEO] or IVR] for tile
recording format/p. 14), then touch
r_l.
•DVD+RW
Select the aspect ratio ill"the movie.
[16:9 WIDEI or 14:31, then touch roKI.
5 Touch [YES].
6Touch _when [Completed.] is
displayed.
ONotes
• Use the AC Adaptor as tile power source to
pl't=_, elll your catncorder lroln rUllllhlg out ot
power during torniaOing.
• Do not apply shock or vibration to your
camcorder, and do not disconnect the AC
Adaptor during iormatting.
•Wllen you use a double-sided disc, tl.)rmatting is
required on eactlside. You can tornlat eiicllside
ill filediil_zrcntrecording lormaL
• In tile case of DVD+RW, you cannot ctmnge
the movie aspect ratio midway. Formal the disc
again to change itleaspect ratio.
• You cannot lPrmat a disc lhat has been
protected on other devices. Cancel ltle
protection wflh the original device, and then
lk)rnlat it.
m
g
,_=
i
_=h.
Continued._ 59
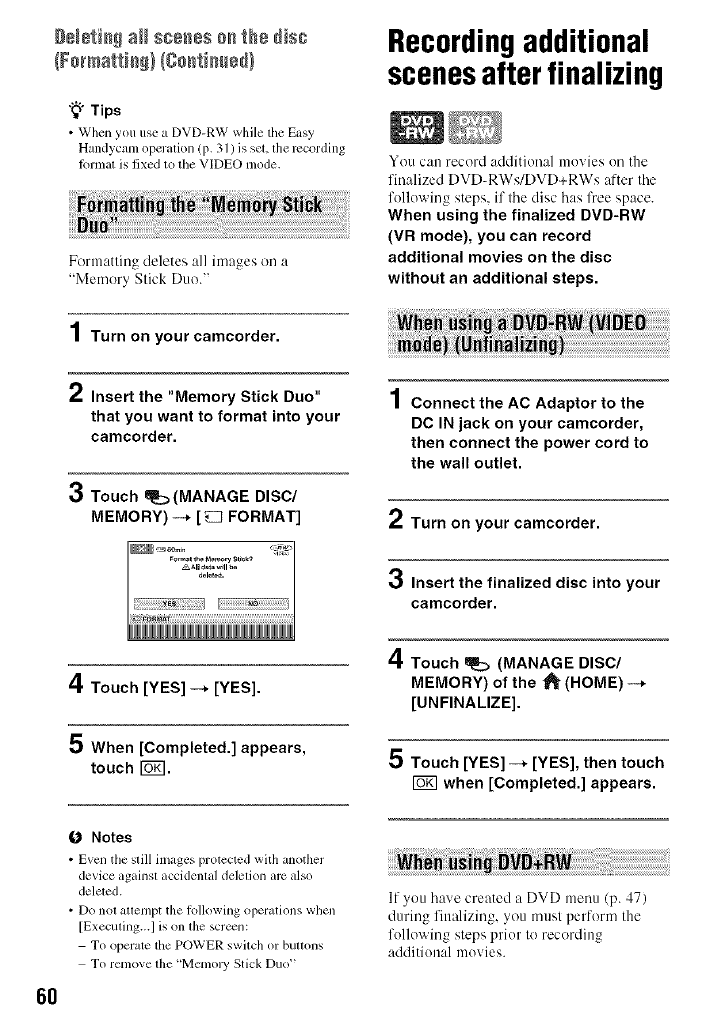
DN÷tie_ aH s;eees 0n the dis;
"_° Tips
• When you use a DVD-RW while the Easy
Handycam operation (p. 31 ) is set, the recording
lk:_llnatis fixed to the VIDEO lnode.
Formatting deletes all images on a
"Memory Slick Dtlo."
Turn on your camcorder.
2Insert the "Memory Stick Duo"
that you want to format into your
camcorder.
3Touch m_:_(MANAGE DISC/
MEMORY)--* [_ FORMAT]
4Touch [YES] --* [YES].
5 When [Completed.] appears,
touch I_K].
6O
ONotes
• Even tile slill images protccted with another
device againsl accidenlal deletion am also
deleted.
• Do nol atlempt the following operations when
[Executing...I is on ll_e screen:
To operate the POWER switch or buttons
To remove lhe "Mmnol3' Stick Duo"
Recordingadditional
scenesafterfinalizing
You can record additional movies on the
finalized DVD-RWs/DVD+RWs after the
following steps, if the disc has free space.
When using the finalized DVD-RW
(VR mode), you can record
additional movies on the disc
without an additional steps.
.4
| Connect the AC Adaptor to the
DC IN jack on your camcorder,
then connect the power cord to
the wall outlet.
Turn on your camcorder.
3Insert the finalized disc into your
camcorder.
4Touch _(MANAGE DISC/
MEMORY) of the _l_ [HOME) --*
[UNFINALIZE].
5 Touch [YES] -_ [YES], then touch
when [Completed.] appears.
If you have created a DVD menu (p. 47)
during fitmlizing, you must perform the
following steps prior to recording
additional movies.
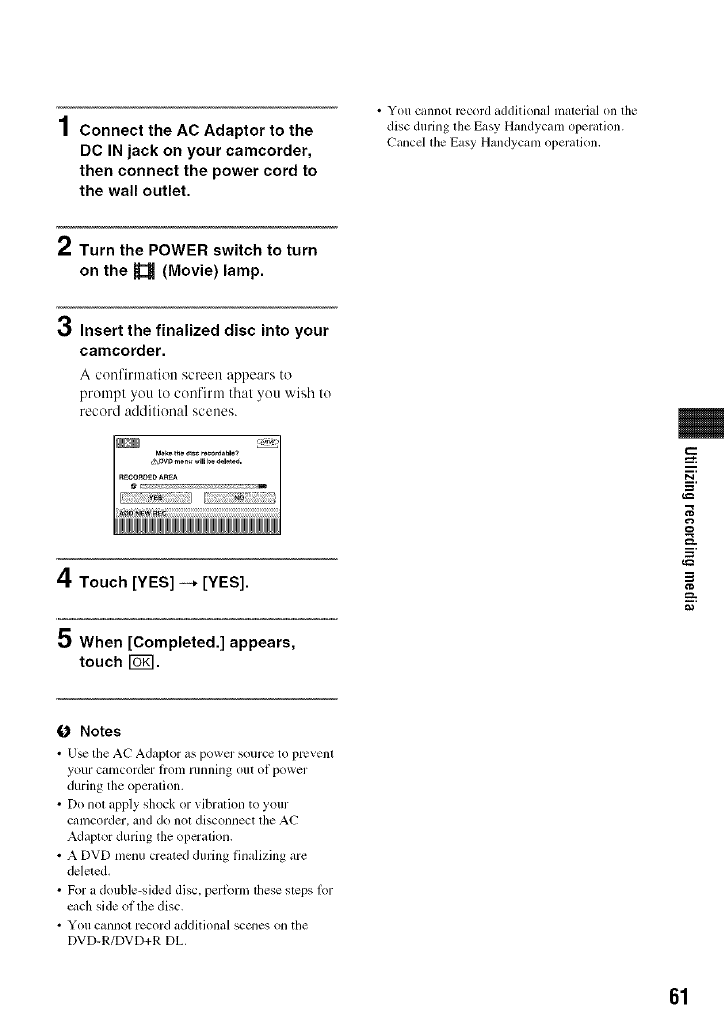
4
| Connect the AC Adaptor to the
DC IN jack on your camcorder,
then connect the power cord to
the wall outlet.
• You cannot record additional malerial on lhe
disc durfilg lhe Easy Handycam operation.
Cancel lhe Easy Handycam operalion.
2Turn the POWER switch to turn
on the U(Movie) lamp.
0Insert the finalized disc into your
camcorder.
A confirmation screen appears to
prompt you to confirm that you wish to
record additional scenes.
4Touch [YES] -+ [YES].
5 When [Completed.] appears,
touch [_.
i
=_
g
==
i
0 Notes
• U_ tile AC Adaptor as powcr source to prcvenl
youl C_ltllcorder lrotll lllllnillg ollt oi power
during the openllion.
• Do not _lpplyshock or _ibr_ltionto your
c_lnlcorder,anddo noldisconnect lhe AC
A&lplor during the opcl"_llion.
• A DVD menu created during Ihlalizing gll'¢
deleted.
• For a double-sided disc, perlorm lhesesleps lor
ct,ch side of filedisc.
• You ctmnotrecord additional scenes onthe
DVD-R/DVD+R DL.
61
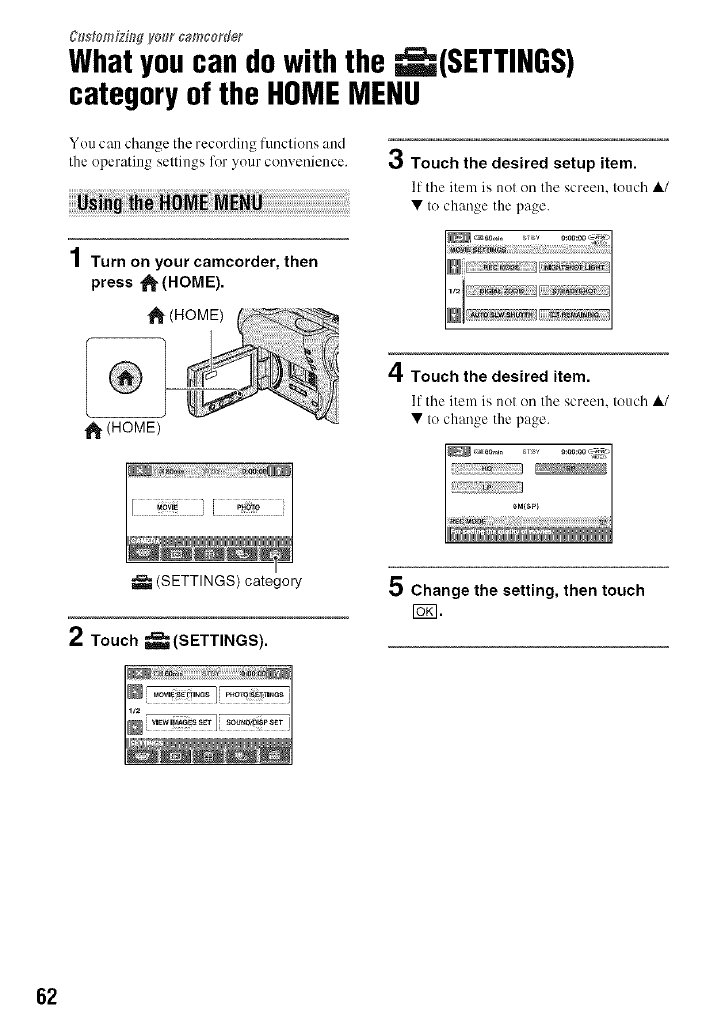
C#s#omiziWVo_r camcorder
Whatyoucan dowith the _(SETTINGS)
categoryof the HOMEMENU
You can change the recording funclions and
the operatillg seltillOS_ for _vour COII_,eIllelICC. €,j Touch the desired setup item.
11tile item is not on the screen, touch ,&/
• to change the page.
1Turn on your camcorder, then
press _ (HOME).
tt_ (HOM
11_(HOME)
,4
_1, Touch the desired item.
If the item is nol on the screen, touch ,&/
• Io change the page.
(SETTINGS) category
2Touch _(SETTINGS).
5 Change the setting, then touch
I_1.
62
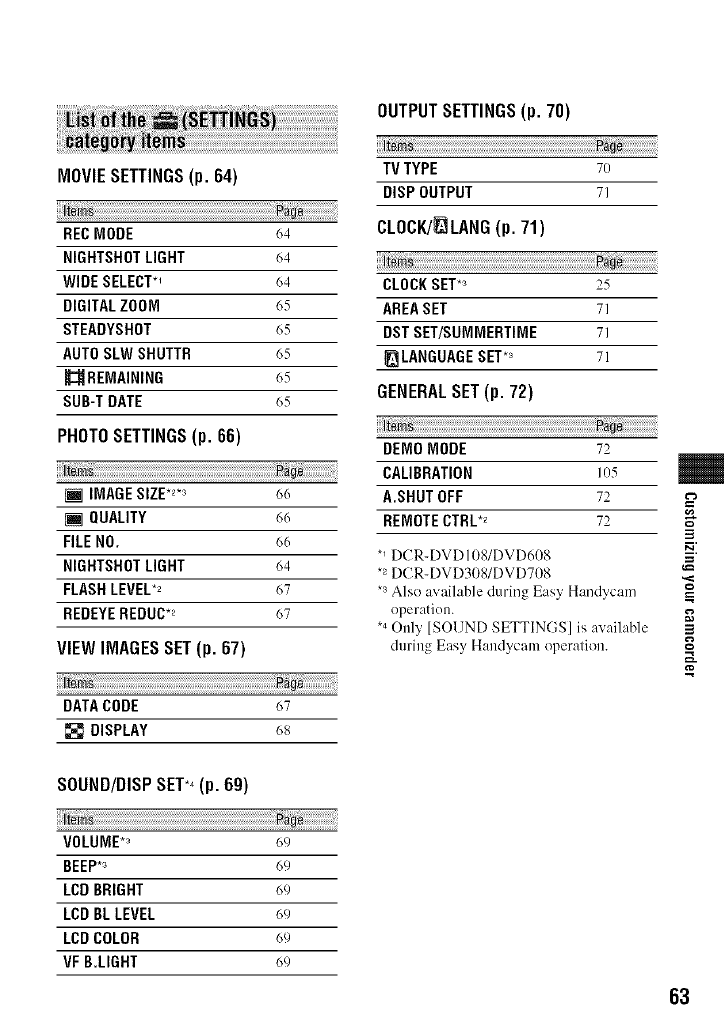
MOVIESETTINGS(p. 64)
te
REC MODE 64
NIGHTSHOTLIGHT 64
WIDE SELECT*_ 64
DIGITALZOOM 65
STEADYSHOT 65
AUTOSLW SHUTTR 65
REMAINING 65
SUB-T DATE 65
PHOTO SETTINGS (p. 66)
[] IMAGESIZE.2._ 66
[] QUALITY 6(_
FILE NO. 66
NIGHTSHOTLIGHT 64
FLASHLEVEL*2 67
REDEYEREDUC.2 67
VIEW IMAGES SET (p. 67)
DATACODE 67
DISPLAY 68
OUTPUT SETTINGS (p. 70)
TV TYPE 7O
DISPOUTPUT 71
CLOCK/_LANG (p. 71)
CLOCKSET*_ 25
AREASET 71
DSTSET/SUMMERTIME 71
LANGUAGESET*_ 71
GENERAL SET (p. 72)
DEMONODE 72
CALIBRATION 105
A.SHUT OFF 72
REMOTECTRL*_ 72
*_DCR-DVD 108/DVD608
*2DCR-DVD308/DVD708
.3 Also available during Easy Handycam
operation.
*4Only [SOUND SETTINGS] is available
during Easy Handycam operation.
3
=
3
g
a_
SOUND/DISPSET*_(p. 69)
VOLUME*_
BEEP*_
LCD BRIGHT
LCD BLLEVEL
LCDCOLOR
VF B.LIGHT
69
69
69
69
69
69
63
MOVIESETTINGS
(itemsforrecordingmovies)
Touch @, tllen @.
If the item is not oil tile screen, touch A/V
to change the page.
How to set
(HOME MENIJ) --+ page 62
@=_,/OPTIONMENIJ) -..+ page 73
The default settings are marked with P,'.
You can select att image quality of the
movie from three levels.
When using tile NightShot plus/p. 37) or
[S. NIGHTSHOT PLS]/p. 78) functiott to
record, you can record clearer images by
setting [NIGHTSHOT LIGHT], which
emits infrared light (invisible), to [ON]/the
default setting).
(J Notes
•Do nol cover the inti'ared port wilh your fingers
or other objects (p. 112).
• Rmnove lhe conversion lens (oplional).
• The maxinmm shooting dislance using
[NIGHTSHOT LIGHTI is about 3 in (10 tcet).
IIQ
Records in high quality mode.
(gM (HQ)/
_sP
Records in standard quality mode.
(6M (SP))
LP
Increases Ihe recording time (Long Play).
(3M (LP))
O Notes
• It you record in tile LP mode. the qualily of
scenes may be degraded, or sccnes with quick
movements may appear with a block noise when
you play back lhe disc,
"_° Tips
• See page 14 on the expected recording time of
each recording mode.
You can select the aspect ratio according to
the TV connected.Refer also to tile
instruction mammls supplied with your TV.
4:3
Records images to the lidl screen on a4:3
TV screen.
16:9 WIDE0_'_.'9)
Records images to the lidl screen on a 16:9
(wide) TV screen.
O Notes
• _Vh¢311 you COlllleCI your Cillncordt3r 10 a TV
compatible wilh the lD-l/ff)-2 syslem and play
back the disc. sel [TV TYPEI to [16:91. The TV
switches lo fldl mode automalically. Ret_sr also
lo lhe instruclion manuals supplied with your
TV.
• Set [TV TYPEI corrcctly according lo lhe TV
connecled tin playback (p. 70).
64
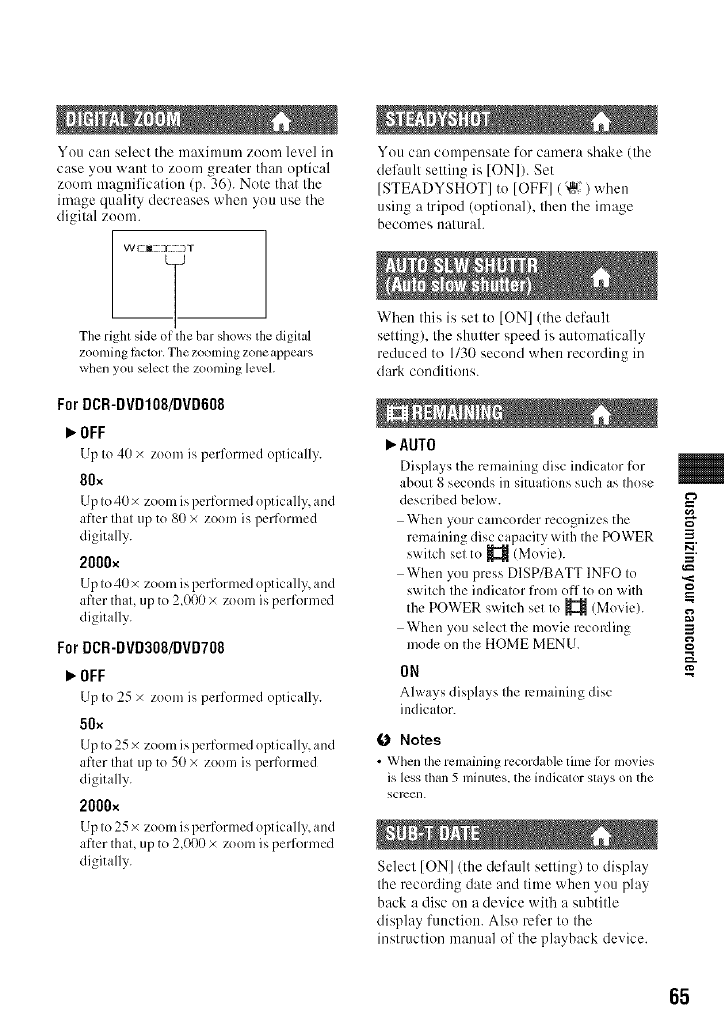
You can select the maxhnum zoom level in
case you want to zoom greater than optical
zoom magnification (p. 36). Note that the
image quality decreases when you use the
digital zoom.
W/M I .1
The riglu side of the bar shows the digital
zooming factor.Thezooming zoneappears
when you sdect the zooming level.
For DCR-DVD108/DVD608
_OFF
LIpto 40 x zoom is performed optically.
80,,
Up to 40 × zoom isperformed optically, and
after that up to 80 × zoom is performed
digitally.
2000x
Up to 40 × zoom is performed optically_and
after that, up to 2,000 x zoom ix performed
digitally.
For DCR-DVDa0g/DVD708
_OFF
Lipto 25 × zoom is performed optically.
50×
Up to 25 × zoom ixperformed optically, and
after that up to 50 × zoom is perfl)rmed
digitally.
2000×
Lipto 25 × zoom is performed optically, and
after that, up to 2,000 × zoom ix performed
digitally.
You can compensate for camera shake (the
default setting is [ON]). Set
[STEADYSHOT] to [OFF] ('0_' ) when
using a tripod (optional), then the image
becomes naturah
When this is set to ION] (the default
setting), the shutter speed is automatically
reduced to 1130 second when recording in
clark conditions.
AUTO
Displays the remaining disc indicalor for
about 8 seconds in situalions such as Ihose
described below.
When your camcorder recognizes the
remaining disc capacity with the POWER 3
E:
swilch set to _ (Movie).
When you press DISP/BATT INFO Io ,._
swilch Ihe indicalor from off Io on with ____
the POWER swilch sel Io _ (Movie).
When you select the movie recording 3
mode on the HOME MENU.
ON
Always disphlys Ihe remaining disc
indicalor.
0Notes
• When ll_eremaining recor&,ble time tbr movies
is less than 5 nlinutes, the indicalorslays on the
screell.
Select ION] (the default setting) to display
the recording date and time when you play
back a disc on a device with a subtitle
display function. Also refer to the
instruction manual of the playback device.
65
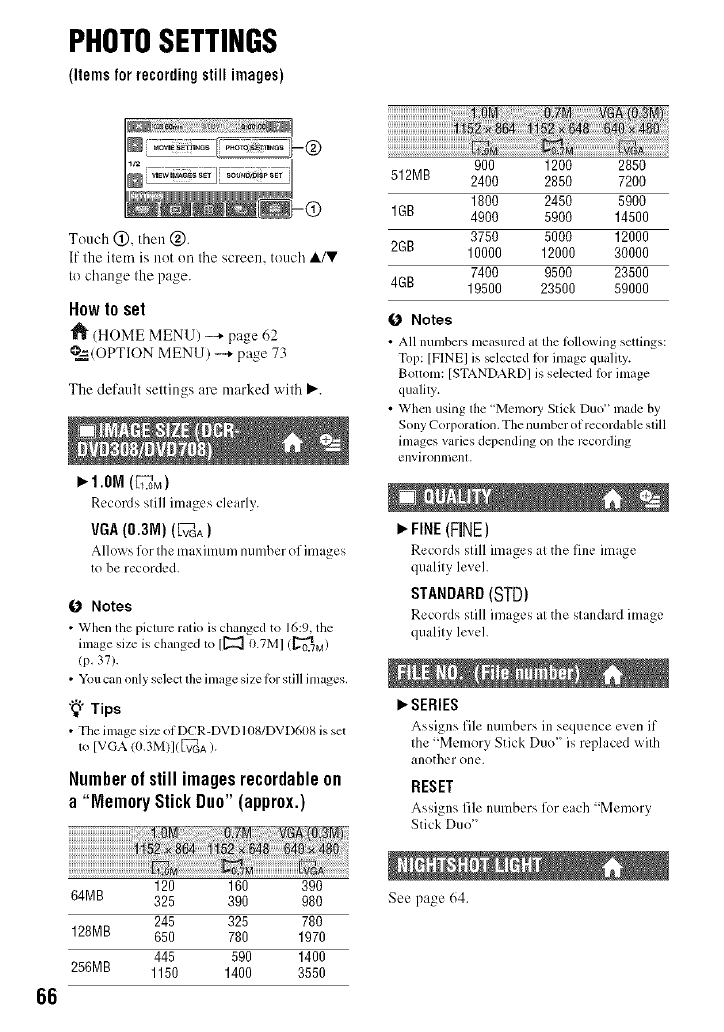
PHOTOSETTINGS
(itemsforrecordingstillimages)
66
Touch (_), then @.
If the ilem is not on the screen, touch A/V
It) change the page.
Howto set
(HOME MENU) -+ page 62
@=_.(OPTIONMENU) -...+page 73
The default settings are marked with P,'.
l_ 1.ON (_L_.oM)
Records still images clearly.
VGA(0.3M) (vrGA)
Allows for the maximull/number of images
to be recorded.
O Notes
•When tile picture ratio is changed to 16:9. the
image size is changed 1o [[_ 0.TMI (_0.7M)
(p. 37).
• You call only select the inmge size lbr slill images.
"_" Tips
• Tile image size oi DCR-DVD108/DVD608 is set
1o [VGA/(/.3M)]( V_VGA).
Numberofstill imagesrecordableon
a"MemoryStickDuo"(approx.)
120 160 390
64MR 325 390 980
245 325 780
128MB 650 780 1970
445 590 1400
256MB 1150 1400 3550
900 1200 2850
512MB 2400 2850 7200
1800 2450 5900
1GB 4900 5900 14500
3750 5000 12000
2GB 10000 12000 30000
7400 9500 23500
4GB 19500 23500 59000
O Notes
• All numbers measured at the lbllowing settings:
Top: [FINE] is _lected h)r image quality.
Bottom: [STANDARD] is selecled lor inmge
qualily.
• When using llle "Memol3' Stick Duo" made by
Sony Corporalion. The number ofrecordable slill
images varies depending on lhe recording
environmenl.
P, FINE(FINE)
Records still images at the fine image
quality level.
STANDARD(STD)
Records still images at the standard image
quality level.
l_SERIES
Assigns file numbers in seflucnce ew:n if
the "Memory Stick Duo" is replaced with
another one.
RESET
Assigns file numbers for each "Memory
Stick Duo"
See page 64.
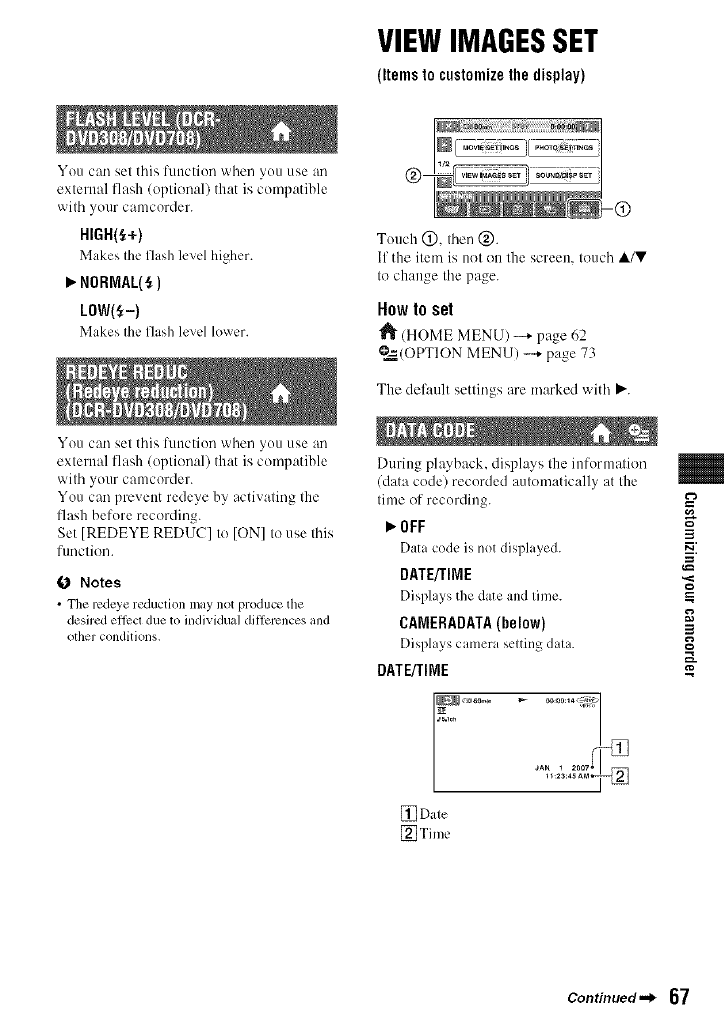
VIEWIMAGESSET
(Itemsto customizethedisplay)
You can set this lunction when you use an
external flash (optional) that is compatible
with your camcorder.
HIGH(S+)
Makes the flash level higher.
m,,NORMAL(_)
LOW(_-)
Makes lilt' flash level h)wcr.
You can set this lunctiou when you use an
external flash/optional) that is compatible
with your camcorder.
You can prevent redeye by activating the
flash before recording.
Set [REDEYE REDUC] to [ON] tu use this
fimctiun.
O Notes
• The rcdeye reduction may not produce the
desired ettcct due to individual diflcrcnces and
other conditions.
Touch @, fl'len@.
If the item is not un the screen, luuch A/V
lu change the page.
How to set
_" (HOME MENU) -+ page 62
@=_(OPTION MENU) --+ page 73
The default settings are marked witl'_ P,'.
During playback, displays the information
(data code) recorded automatically at Ihe
lime uf recording.
_'OFF
Data code is not disphLved.
DATE/TIME
Displays the date and time.
CAMERADATA(below)
Displays camera scqting dahL
DATE/TINE
[] Dale
[_Time
3
P_
3
g
Continued._ 67
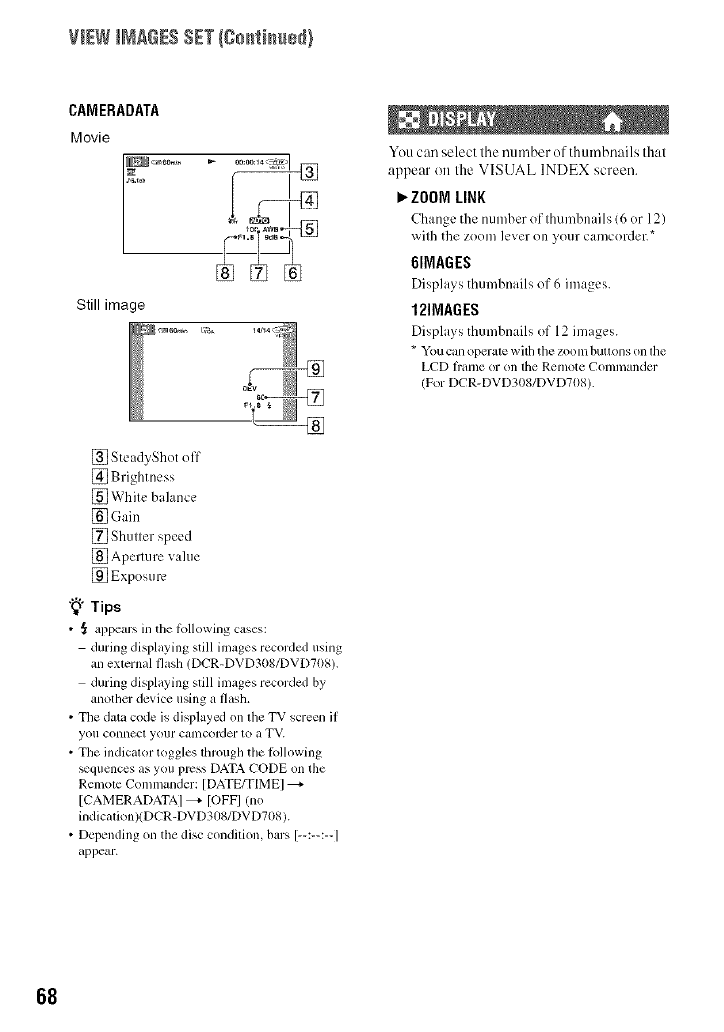
VIEWI_aGES SET(go_ti_us_}
CAMEBADATA
Movie
Still image
[] SteadyShot off
[] Brightness
[] White balance
[_ Gain
[] Shutter speed
[] Aperture value
[] Exposure
"_" Tips
• _ appears in the Ibllowing c_,ses:
during displaying still images recorded using
an exlernal flash (DCR-DVD308/DVD708).
during displaying still images recorded by
another device using a flash.
• The data code is displaycxl on the TV screen if
you connect your Calllcorder lo a TV.
• The indicalor toggles lhrough the lbllowing
_quences as you press DATA CODE on the
Remole Commander: [DATE/TIMEI
[CAMERADATAI _- [OFFI /no
indicalion)(DCR-DVD308/DVD708 ).
• Depending on the disc condition, bars [--:--:--I
appear.
You can select the number of thumbnails that
appear on the VISUAL INDEX screen.
P, ZOOM LINK
Change the numher of thumbnails 16 or 12)
with the ZOOl])lever on your camcordeE*
6IMAGES
Displays thumhnails of 6 images.
12IMAGES
Displays thumhn:,ils of 12 images.
* You can operate with the zoom buttons on lhe
LCD fl'ame or on the Remote Commander
(For DCR-DVD30g/DVD708).
68
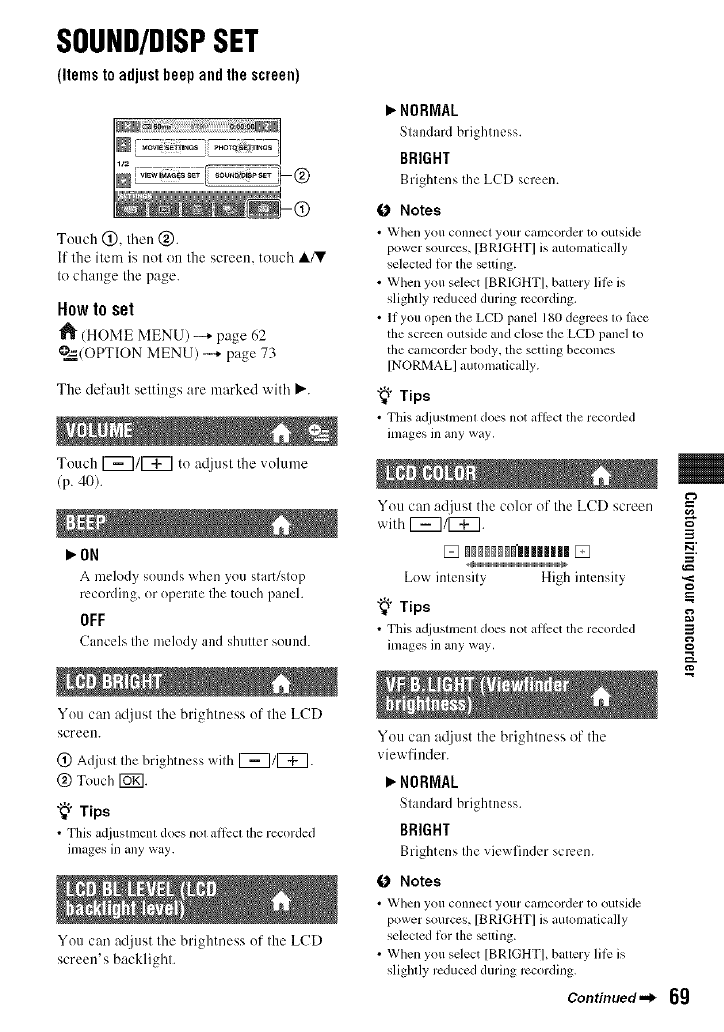
SOUND/DISPSET
(itemstoadjustheepandthescreen)
Touch @, lhen @.
If the item is not on the screen, touch ,&/V
It) change Ihe page.
Howto set
"J_ (HOME MENU) --* page 62
@=_(OPTION MENU) -+ page 73
Tile default seltings are marked with P,'.
Touch 1_7/_ to atljusl tile x olulne
(p. 40[.
_ON
A mek)dy sounds when you stari/slop
recording, or operate Ihe touch panel.
OFF
Cancels Ihe melody and shuller sound.
You can adjust 1he brightness of 1he LCD
screen.
(_) Adjusl Ihe brightness wilh [_1[_.
@ Touch [Ug].
"_° Tips
•Tills adjtlsllllenl does lIOl _ll]'ecl lhe lecorded
mlages in any way.
You can adjttst the brighmess ofthe LCD
screen's backlighl.
_" NORMAL
Standard brightness.
BRIGHT
Brightens the LCD screen.
0Notes
•_XJllell you connect your CillllCOrder to outside
power sources, [BRIGHT] is automatically
selecled li)r the _tting.
• When you select [BRIGHTI, ballery lili: is
slighlly rcduccd during recording.
• If you open tile LCD panel 180 degrces lo lace
the screen outside and close the LCD panel 1o
the canlcorder body, the setling becomes
[NORMALI automalically.
"_° Tips
• This acl.iustmenl does not all_ct tile recorded
inlages in any way.
You can adjust the color of the LCD screen
with [_7/[_7. 3
Low intensity High intensity '._
"_" Tips _=
• This a_/iustnlenl does not allcct tile recorded 3
inlages in any way.
You can atljust the blighlness of the
xiewlinder.
_" NORMAL
Standard brightness.
BRIGHT
Brightens the vie_ finder screen.
0 Notes
• _'tlell yOll COllnect your Citlncorder to outside
power sourccs, [BRlGHT] is automatically
selected lin the _tting.
• When you select [BRIGHT], battery lili: is
slightly rcduced during rccording.
Continued._ 69
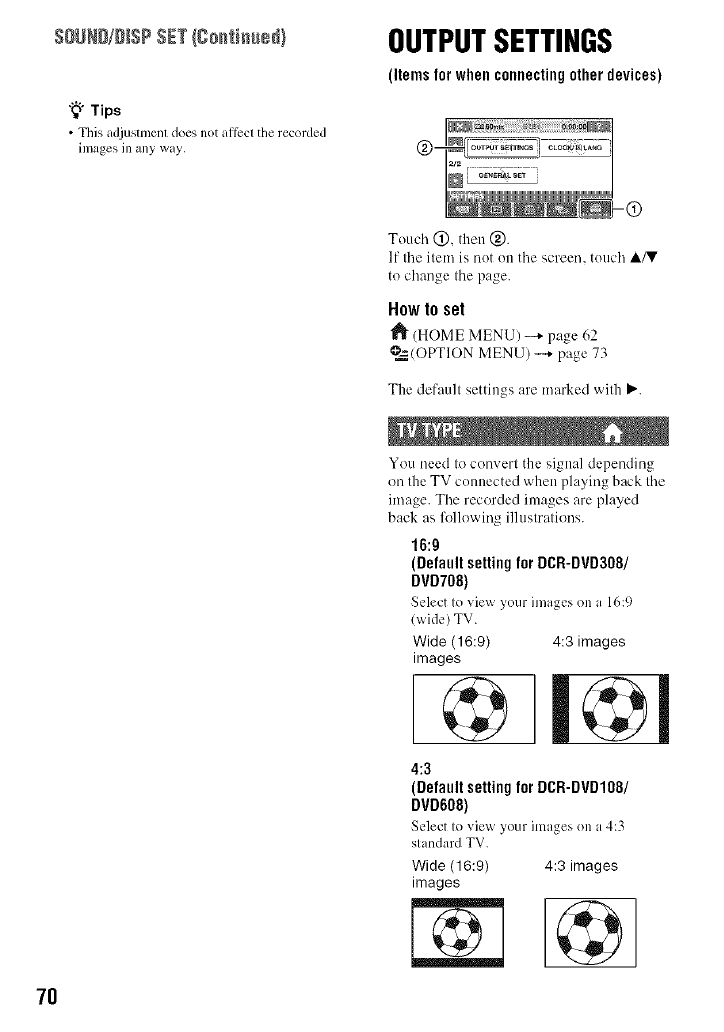
SOUND/D SPSET/Co. i. e / OUTPUTSETTINGS
"_° Tips
• This adjustment does not Mlbct tile recorded
images in any way.
(itemsforwhenconnectingotherdevices)
7O
Touch @, then @.
If tile item is not on tile screen, touch A/V
to change the page.
How to set
(HOME MENU) --+ page 62
@=_(OPTION MENU) -...+page 73
The default settings are marked with P,'.
You need to convert the signal depending
on the TV connected when playing back tile
image. Tile recorded images are played
back as lk_llewing illustrations.
16:{t
(Default settingfor DCR-DVD308/
DVD708)
Select to view your inmgcs on a 16:9
(wide) TV.
Wide (16:9) 4:3 images
images
4:3
(Defaultsetting for DCR-DVD108/
DVD608)
Select to view your images on a4:3
standard TV.
Wide (16:9) 4:3 images
images
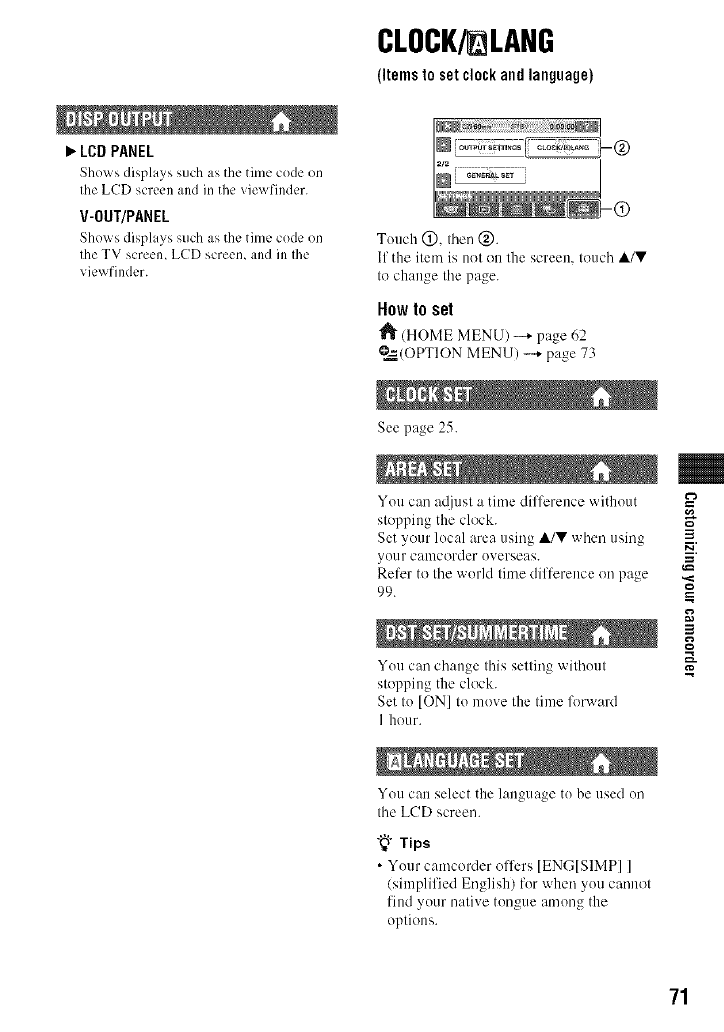
_,,LCDPANEL
Shows displays such as the time code on
the LCD screen and in the viewfinder.
V-OUT/PANEL
Shows displays such as the tilllC code on
the TV screen, LCD screen, and ill Ihe
viewfinder.
CLOCK/ LANG
(items to setclock and language)
Touch @, II;en @.
If the item is not on lhe screen, touch A/V
Io chau_e Ihe page.
How to set
_" (HOME MENU) -+ page 62
?_(OPTION MENU) -..+ page 73
See page 25.
You can atljust a time difference without
stopping the clock.
Set your local area using A/V when using
your camcorder overseas.
Refer to the world time difference on page
99.
You can change this setting without
stopping the clock.
Set to [ON] to move the time forward
I hour.
You can select the language to be used on
the LCD screen.
"_" Tips
• Your camcorder offers IENGISIMPII
(simplified English) for when you cannot
find your native tongue among the
options.
3
P_
3
g
71
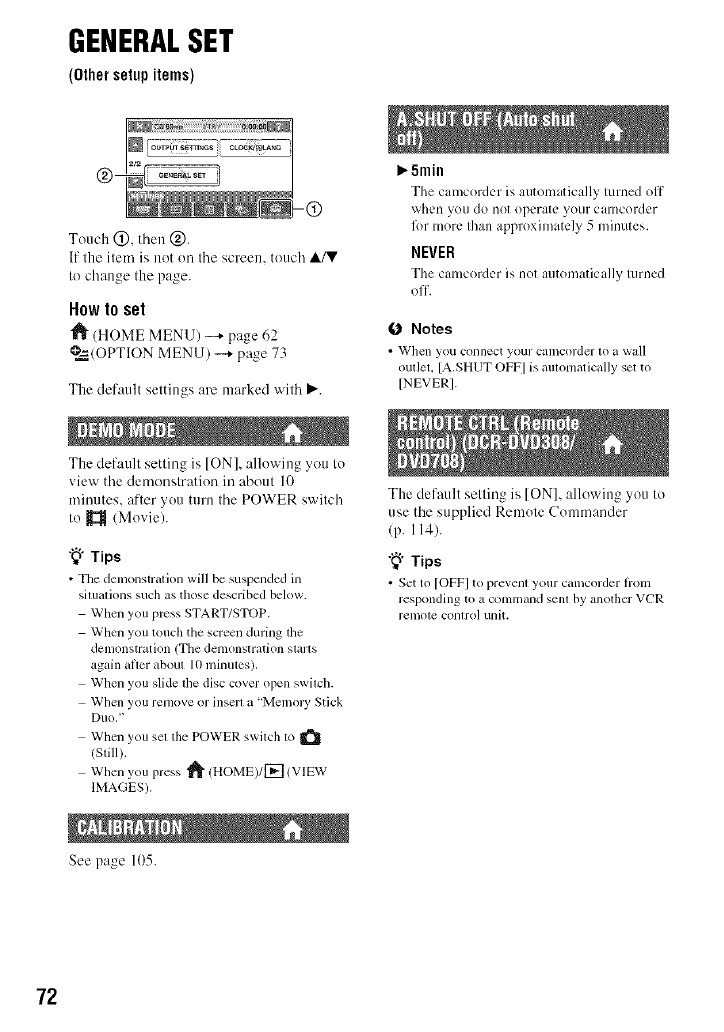
GENERALSET
(Othersetupitems)
Touch (_), then @.
If the ilem is not on the screen, touch A/V
It) change the page.
Howto set
_" (HOME MENU) -+ page 62
?._(OPTION MENU) -_ page 73
The default settings are marked with P,'.
The default setting is ION], allowing yott to
_iew the demonstration in about l0
minutes, after you Itlrn the POWER switch
to _ (Moxie).
"_" Tips
•The demonstration will be suspended in
siltlationssuch as those described below.
When you press START/STOP.
When you touch the screen during lhe
denlonstration (Tile delllOnstration SialIS
again alter about I(/nlillules),
When you slide the disc cover open swilch.
When yotl rel/lOVe or inserl a 'memory Stick
DIIO, '
When you sel lhe POWER swilch to _'_
(Still).
When you press _ (HOME)/I-_ (VIEW
IMAGES).
See page 1{)5.
_.5min
The camcordcr is automaticall.v turned off
whet) you do not operate yotlr camcorder
R)r more than approximately 5 minutes.
NEVER
The camcorder is not atltomatically turned
off.
0 Notes
• "_Vhcll you COllnect your calncorder lo il wall
outlet, [A.SHUTOFF] is aulonmtically set to
[NEVER].
The default selling is ION], allowing you to
use the supplied Remole Commander
(p. 114).
"_" Tips
• Set to [OFF] to prevent your camcorder hom
responding to a COllllnalldsenl by another VCR
remote COlllrol Ullit.
72
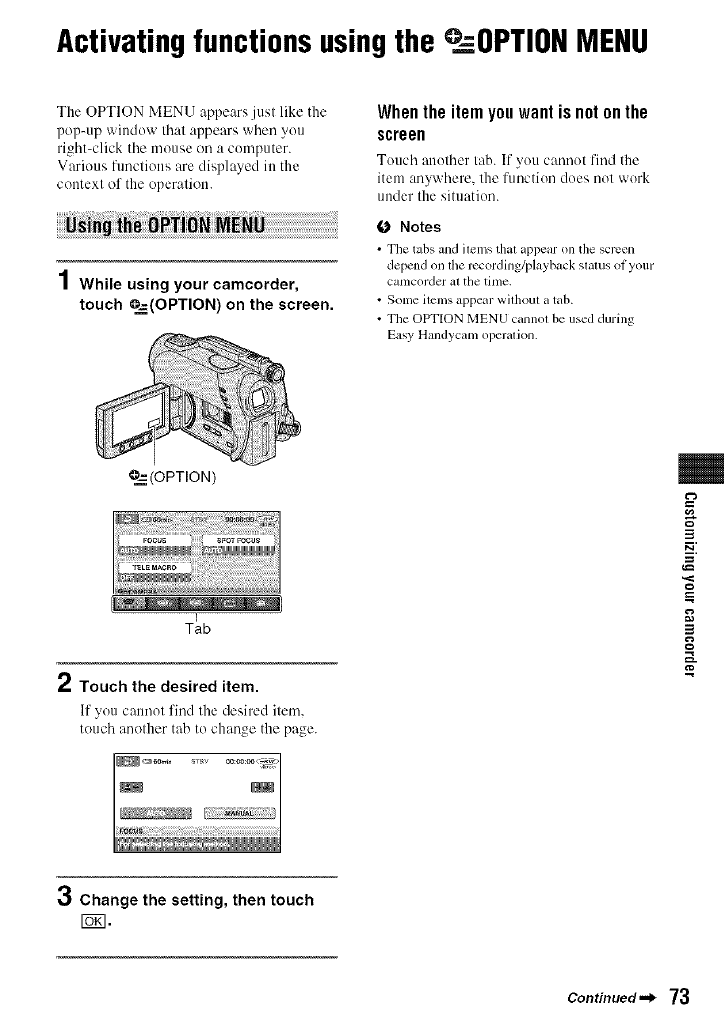
Activatingfunctionsusingthe .OPTION MENU
The OPTION MENU appears just like the
pop-up window that appears when you
right-click tile mouse oil a computer.
Various ftmctions are displayed in the
context of the operation.
1While using your camcorder,
touch O=_=(OPTION)on the screen.
Whenthe item youwant is not onthe
screen
Touch another lab. If you cannot find the
item anywhere, lhe fimction does nol work
under file situation.
O Notes
• Tile tabs and ilems that appear on the scrcen
depend on the rccording/playbackstatus ot your
caillCold¢21 al the liille.
• Some ilems appear wilhout atab.
• The OPTION MENU cannol be used during
Easy Handycam operalion.
@=-(OPTION)
I
Tab
2Touch the desired item.
If you cannot find the desired item.
touch anolher tab to change the page.
3
-g
8
3
g
3Change the setting, then touch
r5_1.
Continued._ 73
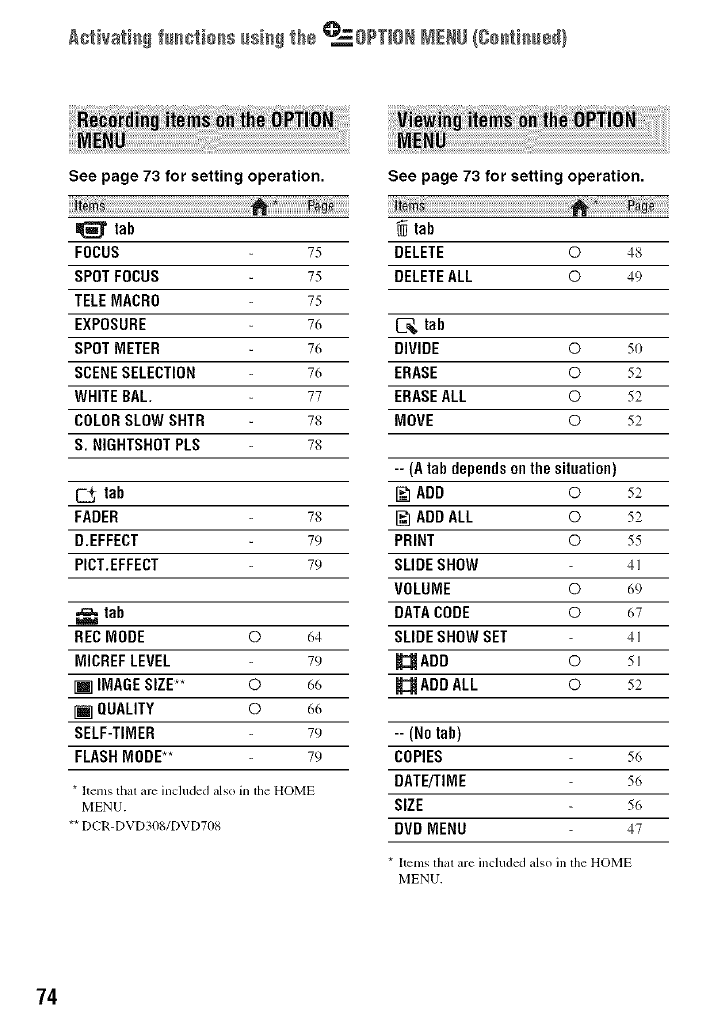
A¢_iva_i_ f_io_s usi_ _he _OPTION NENU {Continued)
See page 73 for setting operation.
tab
FOCUS
SPOTFOCUS
TELEMACRO
EXPOSURE
SPOTMETER
SCENESELECTION
WHITEBAL
COLORSLOWSHTR
S. NIGHTSHOTPLS
75
75
75
76
76
76
77
78
78
tab
FADER 78
D.EFFECT 7_)
PICT.EFFECT 7_)
=_= tab
RECNODE © (_4
MICREF LEVEL 7_)
[] IMAGESIZE** ©(_6
[] QUALITY ©(_(_
SELF-TIMER 7_)
FLASHMODE** 7_)
* Items that are included also in the HOME
MENU.
** DCR-DVD3OS/DVD708
See page 73 for setting operation.
tab
DELETE © 48
DELETEALL © 49
tab
DIVIDE O 5o
ERASE O 52
ERASEALL O 52
MOVE O 52
-- (A tab dependson the situation)
ADD ©52
ADD ALL © 52
PRINT O55
SLIDESHOW 4]
VOLUME O(_9
DATA CODE © 67
SLIDESHOW SET 41
_AOO O 5]
_ADD ALL ©52
-- (No tab)
COPIES 56
DATE/TIME 56
SIZE 56
DVD MENU 47
* [terns that are included also in the HOME
MENU.
74
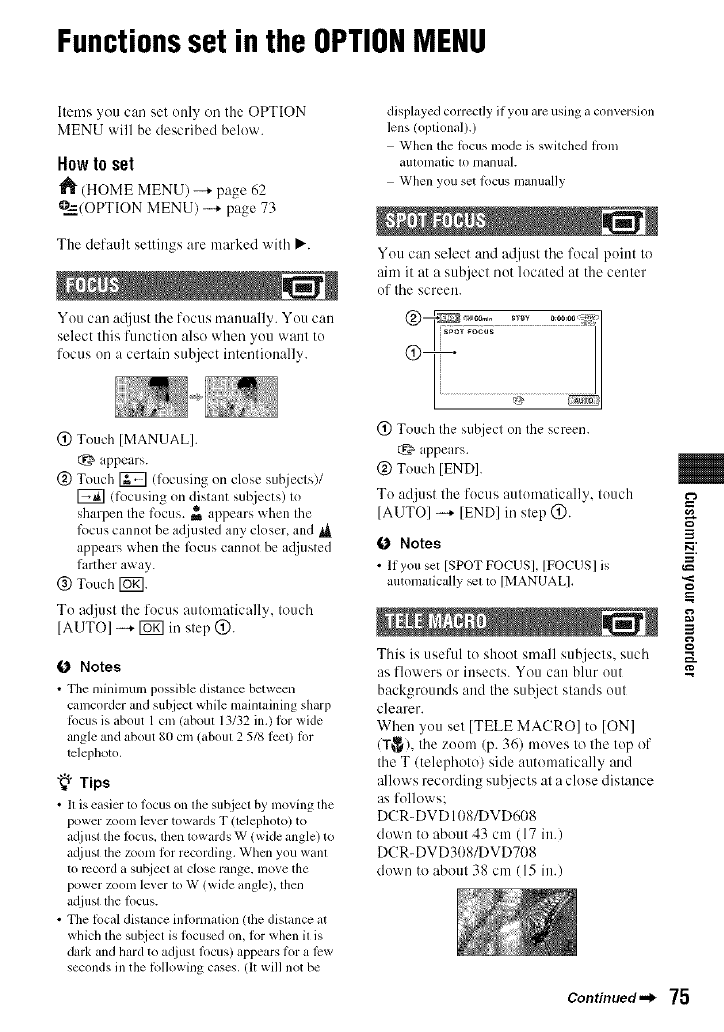
Functionsset in the OPTIONMENU
Items you can set only on the OPTION
MENU will be described below.
Howto set
(HOME MENU) --* page 62
O_4--/OPTION MENU) _ page 73
The default settings are marked with P,'.
You can a@lst 1he focus manually. You c,_/n
select this function also when you 'vv_t.ntto
focus on a certain subject intentionally.
@ Touch [MANUAL].
appears.
@ Touch _ (focusing on close subjects)/
[_] lfocusing on distant sul_jects) to
sharpen Ihe focus. _ appears when Ihe
lk)cus cannot be adjusted any closer_ and
appears when tile lbcus cannot be a({justed
farther away.
@Touch rbTI.
To adjust the focus automatically, touch
[AUTO] -* _ in step @.
0Notes
• The minimum possible distance between
camcorder and subject while mainlaining sharp
locus is about 1 cm (aboul 13/32 in.) lor wide
angle and about 80 cm/abom 2 5/8 tccl/for
telephoto,
"_° Tips
• It is easier to locus on the subject by moving tile
power zoom lever towards T (telephoto) to
at[lust the locus, then towards W (wide angle) to
ac[iusl the zoom tot recording. When you wahl
to record a sut_iecl at close range, nlove the
power zoom lever 1o W (wide angle), lhen
adjusl lhe locus.
• The local distance intormatkm (the distance at
which lhe sut!iect is focused on. tot when il is
dark and hard to adjust locus) appears for a t_w
seconds in the tollowing cases. Ill will not be
displayed correclly if you arc using a conversion
lens !oplional).)
When the locus mode is switched hom
autonlalic to nlanual.
When you set locus manually
You can select and atljust the focal point to
aim it at a subject not located at the center
of the screen.
(_) Touch the subject on the screen.
appears.
@ Touch [END].
To adjust the focus automatically, touch
[AUTO] -* lEND] ill step @.
0 Notes
• If you set [SPOT FOCUS], [FOCUS] is
automatically _l l_ [MANUAL],
This is useful to shoot small subjects, such
as l]owers or insects. You C;lIlblur out
backgrounds and the sut!ject stands out
clearer.
When you set [TELE MACRO] to IONI
/T_), the zoom (p. 36) moves to the top of
the T/telephoto) side automatically and
allows recording subjects at a close distance
as follows:
DCR-DVD 108/DVD608
down to about 43 cm (17 ill.)
DCR-DVD308/DVD708
down to about 38 cm (15 ill.)
Continued._ 75
3
==
3
g
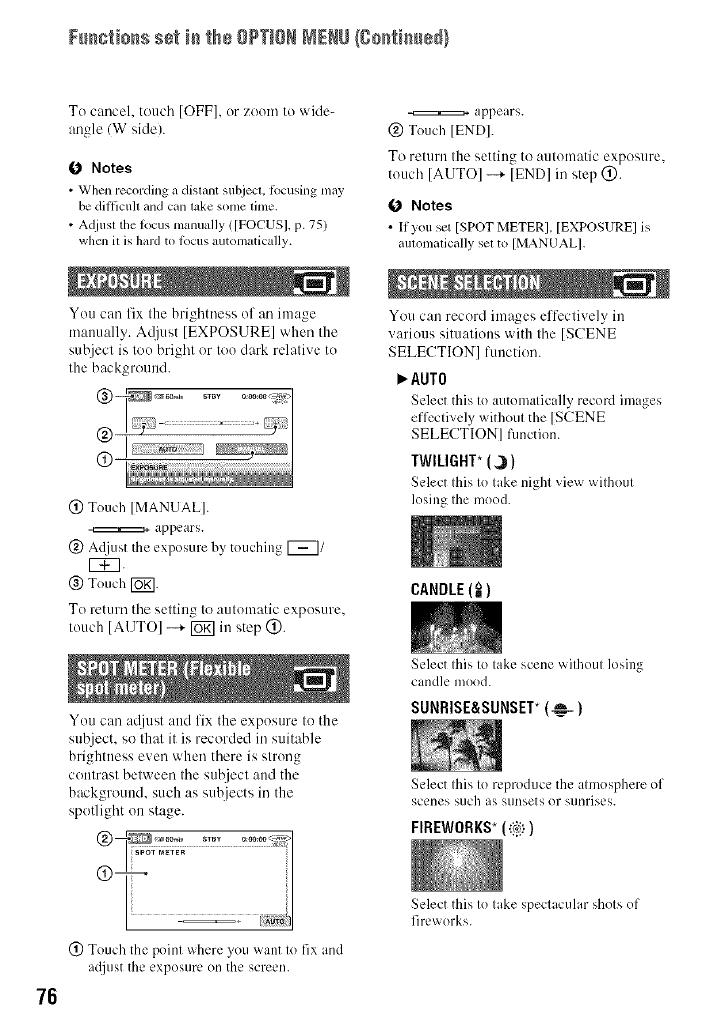
Fu_io_s se_ i_ the OPTIONMENU{go_i_e_}
To c:mcel, tottch [OFF], or zoom to wide-
angle/W side).
0 Notes
• When recoMing a distant subject, lbcusing may
be difl]cuh and can take some time.
• A([iust the Rlcus manually ![FOCUSI. p. 751
whml it is hard to locus automatically.
You can fix the brightness of an image
utanually. Atljust ]EXPOSURE] when the
subject is too bright or too clark relative to
the background.
@ Touch [MANUAL].
-=::::::::::=::::::=_appears.
(g) At!just the exposure by touching [_1
EE2
(_) Touch [_.
To return the setting to automatic exposure.
touch [AUTO] --+ [Uff] in step @.
You can mljust attd fix the exposure to the
su'c_ject,so that it is recorded in suitable
brightness even when there is strong
contrast between the sul2ject attd the
background, such as subjects in the
spotlight on stage.
appears.
@ Touch IEND].
To return the setting to automatic exposure.
touch [AUTO] --+ [END] in step @.
0 Notes
• [lyou set [SPOT METER]. [EXPOSURE] is
atltonlatically set to [MANUAL],
You can record images effeclively in
various situations with the [SCENE
SELECTION] function.
AUTO
Select this to automatically record images
effectively without the ]SCENE
SELECTION] function.
TWILIGHT* (_)
Select Ihis Io lake night view wilhotll
losing Ihe ntood.
CANDLE(_)
Select Ihis Io lake scene wiflloul losing
cand]e lltood.
SUNRISE&SUNSET*(@-)
Select Ihis 1(5 reproduce the am]osphere of
scenes such as stlnsets (51 sunrises.
FIREWORKS*(_i:_))
76
(_) Touch the poinl where you want 1(5fix and
at{justthe exposure on the screen.
Select this I(5lake spectacular shols of
fireworks.
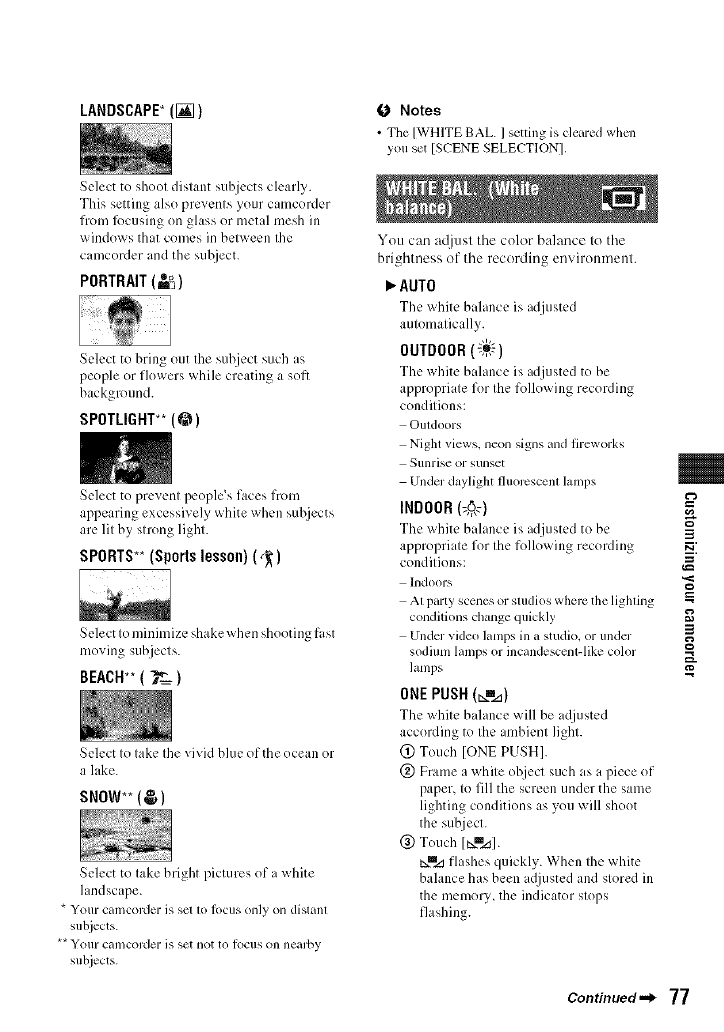
LANDSCAPE_(I_7) 0 Notes
• The [WHITE BAL. ] setling is cleared when
you set [SCENE SELECTION].
Select to shoot distant suhjects clearly.
This setting also prevents your camcorder
fiom lk)cusing on glass or metal mesh in
windows that comes in between the
camcorder and the subject.
PORTRAIT (_-_)
Select to bring out the suhject such as
people or flowers while creating a soft
background.
SPOTLIGHT** (@1
Select to prevent people's faces from
appearing excessively white when sul_.jects
are lit by strong light.
SPORTS**(Sportslesson)(,_)
Select Io minimize shakewhen shooting fast
moving subjecls.
BEACH**()_'= )
Select Io lake Ihe vivid blue of the ocean or
a lake.
SNOW** (_1
Select to take bright pictures of a white
landscape.
* Your cali/corder is sol 1o JOCtlS Oll]y OH dislanl
subjects.
** Your cali/corder is set not to lOCllS on nearby
subjects.
You can at]jusl the color balance to the
brightness of the recording environmenl.
P,AUTO
The white balance is adjusted
automatically.
OUTDOOR (_;q-'-)
The white balance is adjusted to be
appropriate for the following recording
conditions:
Ouldoors
Night views, neon signs and fireworks
Sunrise or sunset
Under daylight fhlorcscenl lamps
INDOOR(_,0,_)
The white bahmce is adjusted to be
appropri ite for the following recording
conditions:
Indoors
At party scenes or studios where the lighting
conditions change quickly
Undm video lamps in a studio, or under
sodium lamps or incandescent-like color
lamps
ONEPUSH(_=l.a)
The white bahmce will be a(ljusted
according to the ambient light.
(_) Touch [ONE PUSH].
(_ Frame a white object such as a piece of
paper, to fill the screen under the same
lighting conditions as you will shoot
the subject.
(_) Touch [t_m_].
t_m_ flashes quickly. When the white
balance has been a(ljusted and stored in
the memory, the indicator stops
flashing.
3
E_
P_
3
g
Continued-_ 77
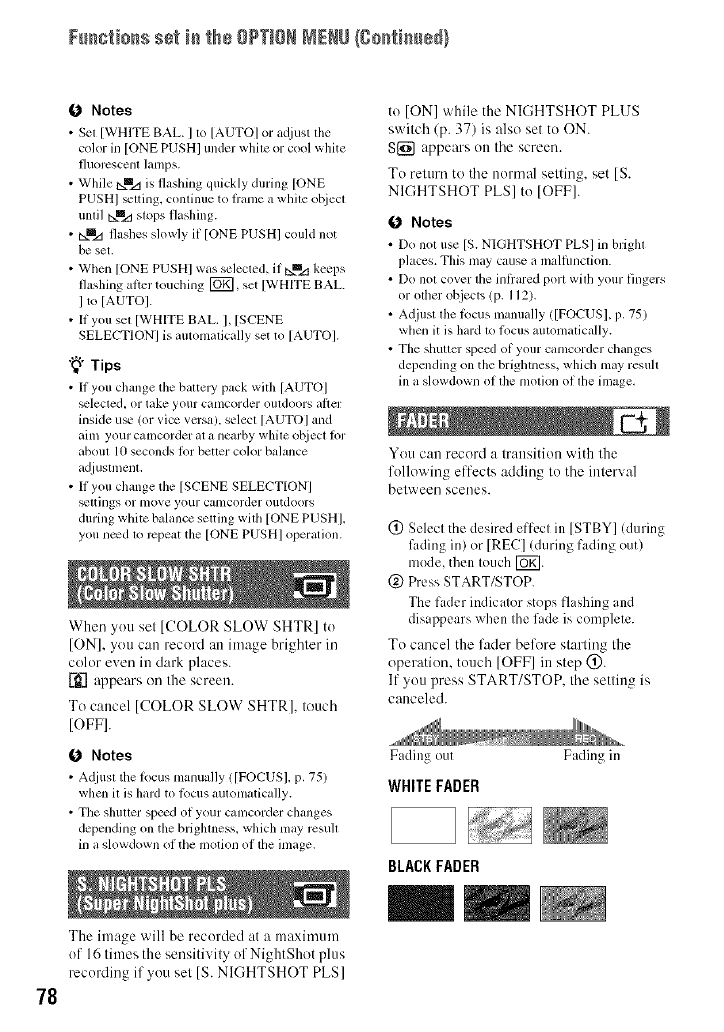
Fu_io_s se_ i_ the OPTIONMENU{go_fi_e_}
78
0Notes
• Set [WHITE BAL. ] to [AUTO] or a_[iust tile
cok)r in [ONE PUSH] under white or cool white
fluorcscent lamps.
• While i:xmz:lis flashing quickly during [ONE
PUSHI _tting, continue to ffanle a while ohject
until t::_l!le.dslops flashing.
• Nm_ flashes slowly if [ONE PUSH] could not
he set.
• When [ONE PUSHI was selected, if ixmztkeeps
flashing al}er touching [_, set [WHITE BAL
Ito [AUTOI.
• If you set [WHITE BAg. I, [SCENE
SELECTION] is automatically set to [AUTOf
"_° Tips
• It you change tile hattely pack with [AUTO]
_lected, or take yollr calllcorder Ollldoors af[er
inside tl_ (or vice versa h select [AUTOI and
aim your camcorder at a nearby white ohject fin.
abotll 10 seconds lor better color balance
adj ustlnent,
• ff you change the ]SCENE SELECTION]
_ttings or nlove your canlcorder otltdoors
during white balance setting with [ONE PUSHI,
you need to repeat the [ONE PUSHI operation.
When you set [COLOR SLOW SHTR] to
[ON], you can record an image brighter in
color even in dark places.
[-_'] appears on the screen.
To cancel [COLOR SLOW SHTR ], touch
[OFF].
Notes
• A@lst tile locus nlanually ([FOCUS], p. 75)
when it is hard to l_cus autonlatically.
• Tile shutter spe_d of your camcorder changes
depending on the brighmess, which nlay rcsu]l
in a slowdown of the motion of tile inlage.
The ilnage will be recorded at a nmximum
of 16 times the sensitivily of NightShot plus
recording if you sel IS. NIGHTSHOT PLS]
to [ON]while the NIGHTSHOT PLUS
switch (p. 37) is also setto ON.
S{_ appears on the screen.
To return to the nonnal setting, set IS.
NIGHTSHOT PLS] to [OFF].
0Notes
• Do not use IS. NIGHTSHOT PLS] in hright
places. This nlay ca,use a malfimction.
• Do not cover tile inliared port with your fingers
or other ohjects (p. I 12).
• Adjust the lbcus manually ([FOCUSI, p. 75)
when it is hard to locus automatically.
• The shuttcr speed of your canlcorder changes
depending on the brightness, which may resuh
ill a slowdown of tile nlotion of tile image,
You can record a transition with the
following effects addin_ to the interval
between scenes.
(_) Select the desired effect in [STBY] (during
fiJding in) or [REC] (during fading out)
mode, then touch [_].
@ Press START/STOP.
The fader indicator stops fl ishing and
disappears when the fade is complete.
To cancel the fader before starting the
operation, touch [OFF] in step @.
If you press START/STOP. the setting is
canceled.
Fading out
WHITE FADER
BLACK FADER
Fading in
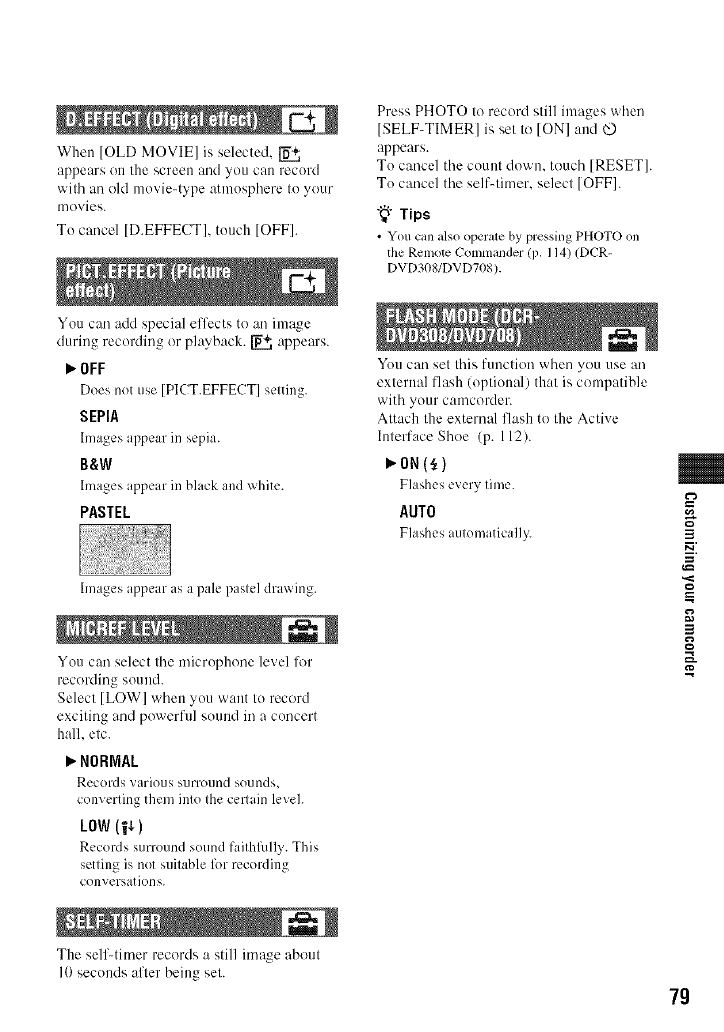
When[OLDMOVIE]isselected.
appearsOU the screeu and you call recurd
with an old movie-type atmusphere tu your
[novies.
To cancel [D.EFFECT], tuuch [OFF].
You can add special effects to an image
during recurdh/g or pl0.yb0.ck. _ 0.ppears.
Press PHOTO to record still images when
[SELF-TIMER] is set to [ON] and
appears.
To cancel the count down. touch [RESET].
Tu cancel the self-timer, select [OFF].
"_"Tips
• You can also operate by pressing PHOTO on
the Remote Commander (p. 114) (DCR-
DVD308/DVD708).
I,,.OFF
Does not use [PlCT.EFFECT] setting.
SEPIA
Images appear ill sepia.
B&W
hnages appear ill black and white.
PASTEL
huages appear as a pale paslel drawing.
You can select the microphone level lk_r
recording sound.
Select [LOW] when you want tu record
exciting and powerful suuud ill a concert
hall. etc.
I,,.NORMAL
Records _ ario/IS surro/ind so/inds,
converting them into the certain level.
LOW(1_1
Records surround sound faithfiflly. This
setting is not suitable l_/r recording
conversations.
The self-timer records a still image aboul
I0 seconds after being sel.
You can set this function when you use all
external flash (optional) that is compatible
with your camcorder.
Attach the external flash to the Active
hlterface Shoe (p. 112).
P,ON(_,)
Flashes everytime.
AUTO
Flashes automatical]5_ 3
3
g
79
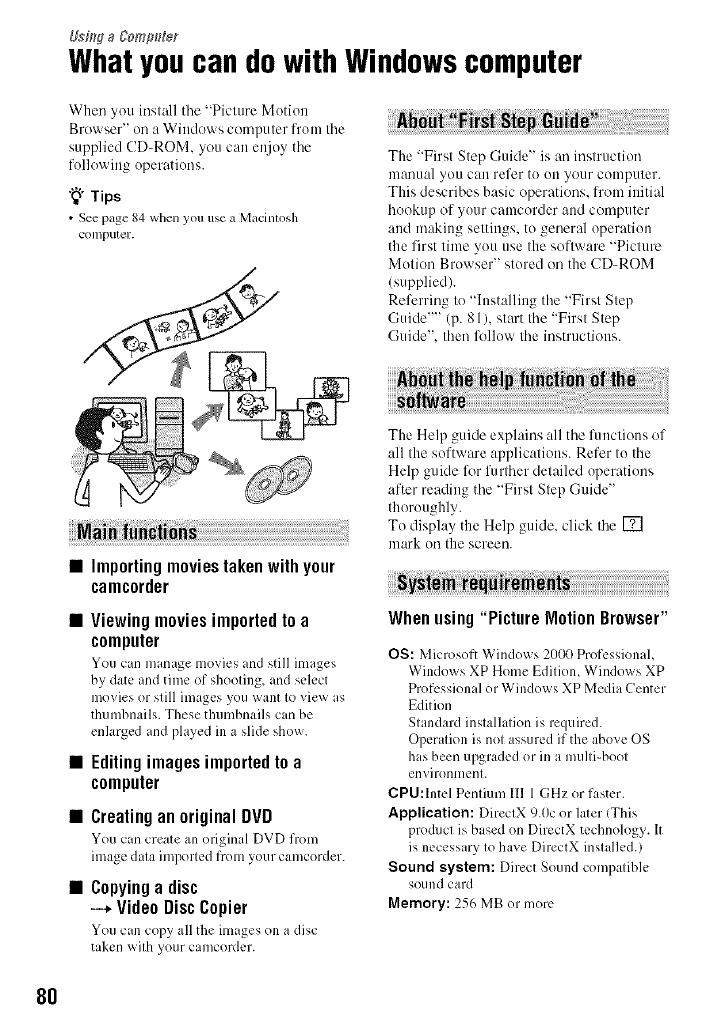
Whatyoucan dowith Windowscomputer
When you install tile "Picture Motion
Browser" oil a Windows computer from tile
supplied CD-ROM. you can enjoy tile
following operations.
"_"Tips
• Seepage 84when you use a Macintosh
COlllputer.
The "First Step Guide" is an instruction
manual you can refer to on your computer.
This describes basic operations, l?'om initial
hookup of your camcorder and computer
and making settings, to general operation
the first time you use the software "Picture
Motion Browser" stored on the CD-ROM
(supplied).
Referring to "Installing the "First Step
Guide'"' (p. 81), start the "First Step
Guide", then lidlow lhe instructions.
•Importingmoviestakenwith your
camcorder
•Viewing movies imported to a
computer
You can man ige movies and still images
by date and time of shooting, and select
movies or still images you want to view as
thumbnails. These thumbnails can be
enlarged and played ill a slide show.
•Editingimages importedto a
computer
•Creating an original DVD
You can create an original DVD from
image data imported from your camcorder.
•Copying a disc
--* Video Disc Copier
You can copy all the images on a disc
taken with your camcordcr.
The Help guide explains all tile fimctions of
all the software applications. Refer to tile
Help guide liar further detailed operations
after reading tile "First Step Guide"
thoroughly.
To display the Help guide, click Ihe []
mark on the screen.
Whenusing "Picture Motion Browser"
OS: Microsoft Windows 2000 Professional,
Windows XP Home Edition, Windows XP
Professional or WiMows XP Media Center
Edition
Standard installation is required.
Operation is not assured if the above OS
has been upgraded or in a multi-boot
environment.
CPU:lntel Pentium II1 1 GHz or faster.
Application: DirectX 9.0c or later (This
product is based on DirectX technology. It
is necessary to have DirectX installed.)
Sound system: Direct Sound compatible
sound card
Memory: 256 MB or more
8O
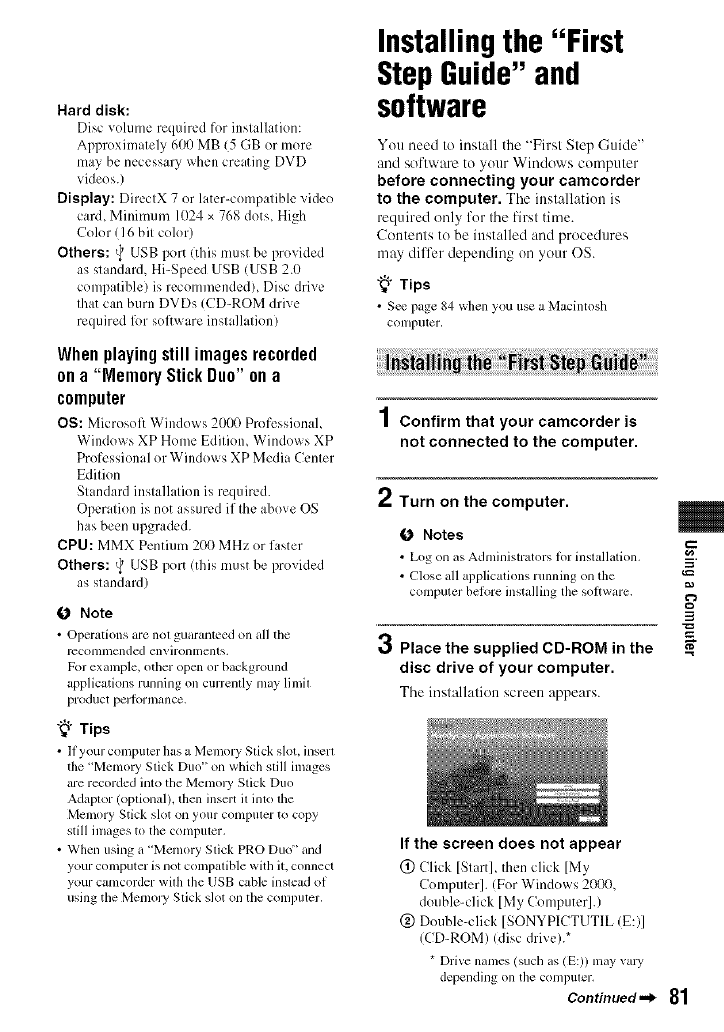
Hard disk:
Disc volume required fur installation:
Approximately 600 MB (5 GB or more
may be necessary when creating DVD
videos.)
Display: DirectX 7 or later-compatible vide()
card, Minimum 1024 x 768 dots, High
Color (16 bit color)
Others: v) USB port (this must be provided
as standard, Hi-Speed USB (USB 2.0
compatible) is recommended), Disc drive
that can burn DVDs (CD-ROM drive
required l_)r software installation)
Whenplayingstillimagesrecorded
ona "MemoryStickDuo"ona
computer
OS: Microsol_ Windows 2000 PrufessionaL
Windows XP Home Edition, Windows XP
Professional or Windows XP Media Center
Edition
Standard installation is required.
Operation is not assured if the above OS
has been upgraded.
CPU: MMX Pentium 200 MHz or faster
Others: _USB port (this must be provided
as standard)
O Note
•Operations are not guaranteed on all the
rt2c,Onlll lcllded ell_, irOllll/enl s.
For example, other open or background
applications running on currently may limil
product perlormance.
"_° Tips
• If your compuler has a Memory Stick slot. inserl
the 'Memoly Stick Duo" on which slill images
are recorded into the Memol3' Stick Duo
Adaplor (optional), then insert il into l13e
Memory Stick slot on your compuler to copy
still images to the compuler.
• When using a "Memory Stick PRO Duo" and
your computer is not compalible with it. connect
your camcorder with the USB calble instead of
using the Memol3' Stick slot on the computer.
Installingthe "First
StepGuide"and
software
You need to install the "First Step Guide"
and software to your Windows computer
before connecting your camcorder
to the computer. Tile installation is
required only fur tile first time.
Contents to be installed and procedures
may differ depending on your OS.
"_° Tips
• See page 84 when you use a Macintosh
coil IpMtt3F,
1Confirm that your camcorder is
not connected to the computer.
rt
," Turn on the computer.
O Notes
• Log on _,s Administrators lor installation.
• Close _dl applications running on tl_e
computer heR)re installing the soltware.
3Place the supplied CD-ROM in the
disc drive of your computer.
Tile inslall,'.tliouscreeu appears.
3
If the screen does not appear
@Click [StartL then click [My
Computer]. (For Windows 2000,
double-click [My Computer].)
@Double-click [SONYPICTUTIL (E:)I
(CD-ROM) (disc drive).*
*[)rive names (such as (E:)) may wu3,
depending on the computer.
Continued._ 81
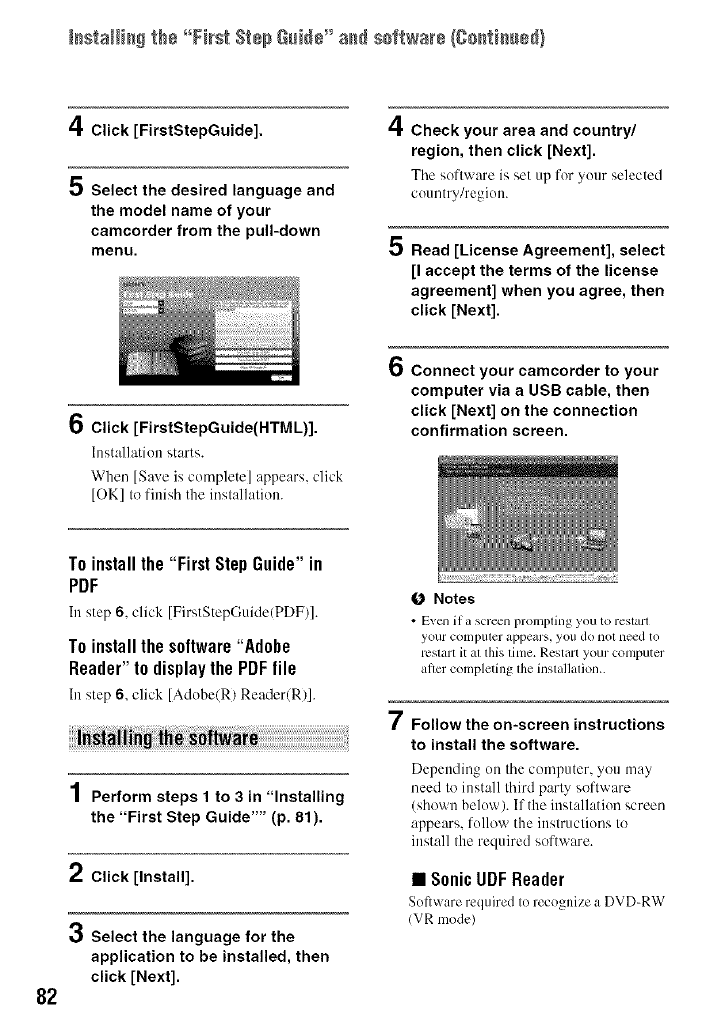
I_staH[_ the °°First S_÷pGNU÷" a_ sof_war÷/Co_ti_ued)
4Click [FirstStepGuide].
5 Select the desired language and
the model name of your
camcorder from the pull-down
menu.
4
5
Check your area and country/
region, then click [Next].
Tile software is set up for your selected
country/region.
Read [License Agreement], select
[I accept the terms of the license
agreement] when you agree, then
click [Next].
6Click [FirstStepGuide(HTML)].
Installation starts.
When [Save is complete] appears, click
[OK] to finish the installation.
6Connect your camcorder to your
computer via a USB cable, then
click [Next] on the connection
confirmation screen.
82
To installthe "First Step Guide" in
PDF
In step6, click [FirstStepGuide(PDF)].
To installthe software"Adobe
Reader" to display the PDFfile
In step6, click [Adobe(R) Reader(R)].
1Perform steps 1 to 3 in "Installing
the "First Step Guide'"' (p. 81).
2Click [Install],
3Select the language for the
application to be installed, then
click [Next].
O Notes
•E_cnif a screen prompting you to restart
your colnp/iter appears, you do llOt lleed to
l'CS[arl it _ll this lftll¢. Regtiu't NO/IF comp/iter
after completing the installation..
7Follow the on-screen instructions
to install the software.
Depending on the computer, you may
need to install third party software
(shown below). If the installation screen
appears, follow the instructions to
install the required software.
• SonicUDFReader
Software required Io recognize a DVD-RW
(VR mode)
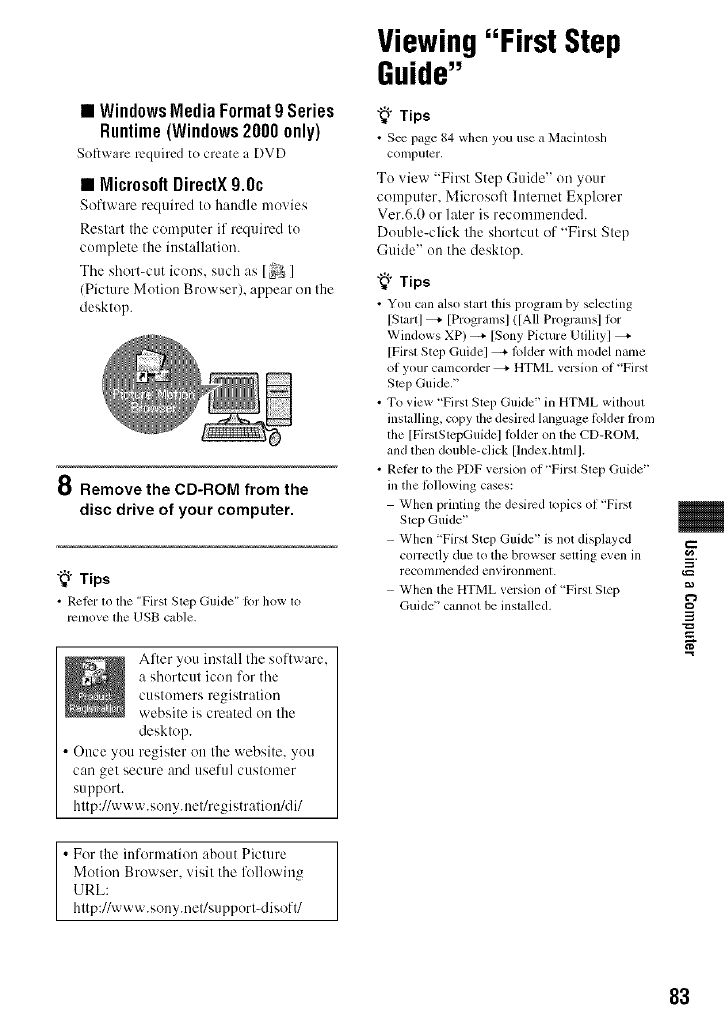
•WindowsMedia Format9 Series
Runtime(Windows2000only)
Softy, are required to create a DVD
•MicrosoftDirectX 9.0c
Software required to h:utdle movies
Restart the computer if required to
complete the iustallation.
Tile short-cut icons, such as [ _3 ]
(Picture Motion Browser), appear on the
desktop.
8 Remove the CD-ROM from the
disc drive of your computer.
"_° Tips
• Refer to the "First Step Guide" I_1"how to
remove lhe USB cable.
After you install the software,
a shortcut icon for tile
customers registration
website is created on the
desktop.
•Once you register on Ille website, you
can gel secure aud useful customer
support.
http://www.sony.neffregistration/di/
• For the information about Picture
Motion Browser. visil the followhl_
URL:
hltp://www.sony.nel/supporl<lisoft/
Viewing"First Step
Guide"
"_° Tips
• See page 84 when you use a Macintosh
COlllputer,
To view "First Step Guide" on your
computer. Microsoft lnteruet Explorer
Vet.6.0 or later is recommended.
Double-click the shortcut of "First Step
Guide" on the desktop.
"_° Tips
• You can also start this progranl by selecting
[Start] _=- [Programsl (tAll Programs] lor
Windows XP) _ [Sony Picture Utility]
[Firsl Step Guidel --+ l_)lder with model name
ol your camcorder _ HTML version oi "First
Step Guide."
• To view "First Step Guide" in HTML without
installing, copy the desired language lblder hom
the [FirslSlepGuideJ lolder on the CD-ROM,
and then double-click [lndex.lan_l].
•Relcr to the PDF version ol "Firsl Slep Guide"
in the lbllowing cases:
When printing the desired lopics ol "First
Slep Guide"
When "First Step Guide" is not displayed
correctly due to the browser selting even in
recollllnended ellvirolllllenl.
When the HTML version oi "Firsl Slep
Guide" CallllOlbe inslalled. 3
83
Usinga Macintosh
computer
Yuu can copy tile still images frum the
"Memory Stick Duo" to tile Macintosh.
Install "First Step Guide" in the supplied
CD-ROM.
0 Notes
•The supplied sotiwar_ _ "Picture Motion
Browser" does not operate on Mac OS.
• Ret)r 1o 'First Slep Guide" lot the delails on
connecting your calncorder to the computer and
copying the still images.
To copy still images from a"Memory
Stick Duo"
OS: Mac OS 9.119.2 or Muc OS X (v 10.11
v10.21vlO.3/v10.4).
Others: {_USB port (1hismtlsI be provided
as standard)
The "First Step Guide" is an instruction
mauual you cau refer to on your computer.
This describes basic operations, frum initial
hookup of your camcorder and computer
and making setting.
Referring tu "Installing the "First Step
Guide,'"' start the "First Step Guide," then
follow the iuslructious.
Copy "FirstStepGuide(PDF)," stored in tile
desired language in the [FirstStepGuide]
folder, tu your computer.
84
Duuble_click "FirstStepGuide(PDF)."
If no software for viewing PDF files is
installed on your computer, you can
duwuload Adobe Reader from the
following website:
http://www.adobe.com/

Troubfesflooh_g
Troubleshooting
If you run into any problems using your
camcorder, use tile following table to
troubleshoot tile problem. If the problenl
persists, disconnect the power sottrce and
contact your Sony dealer.
• Overall operation,/Easy Handycam opemlion/
Rctllole Commander. ..................................... 85
• Balterie,_/Power sources ................................ 86
• LCD scrcenkiewfinder ................................. 87
• Discs/"Memory Stick Duo" .......................... 87
• Recording ...................................................... 88
• Playing back on your camcorder .................. 90
• Playing back a disc on other devices ..............
• Editing movies on the disc ..............................
• Dubbing/Edifing/Connecling to other devices ..
....................................................................... 92
• Connecting to a computer ............................. 92
•Functions that cannot be used simuhaneously
....................................................................... 92
The power does not turn on.
• Attach a charged battery pack to the
camcorder (p. 22).
• Connect the plug of the AC Adaptor to Ihe
wall outlet (p. 22).
The camcorder does not operate
even when the power is set to on.
• It takes a f_.'_seconds for your camcorder to
be ready to shoot after the power is turned
on. This is not a mallhnction.
• Disconnect the AC Adaptor from the wall
outlet or remove the battery' pack, then
reconnect it after about 1 minute. If the
functkms still do not work, press the RESET
button (p. 113) using a sharp-pointed object.
(If you press the RESET button, all settings,
including the clock setting, are reset.)
• The temperature of your camcorder is
extremely high. Turn off your camcorder
and leave itR)r a while illa cool place.
Buttons do not work.
• During Easy Handycam operation, the
following buttons/fimctions are not
available.
BACK LIGHT button (p.37)
Playback zoom (p.41)
Turning the LCD backlight on and off
(pressing and holding the DISP BATT/
INFO button fi)r a l_.wseconds) (p.27)
The _ (OPTION) button is not
displayed.
• The OPTION MENU cannot he used during
Easy Handycam operation.
The menu settings have been
changed.
•Most menu items automatically return to
their default settings during Easy Handycan/
operation.
• The R)llowing menu items are fixed during
Easy Handycam operation:
Movie recording mode: [SPI
[ [] QUALITY] lbr still images: ]FINE]
]DATA CODE]: [DATE_IME]
Recording format lbr DVD-RW: ]VIDEO]
• The lbllowing menu items return to their
default settings if the POWER switch is set
to OFF (CHG) for more than 12hours:
[FOCUS]
[SPOT FOCUS]
]EXPOSURE]
]SPOT METER]
[SCENE SELECTION]
]WHITE BAL. ]
[MICREF LEVEL]
-4
Continued.._ 85
Trs@_÷shsstisS/Ssstisssd}
Even if you press EASY, menu
settings do not switch to their
defaults automatically.
• Follo_ing menu settings remain as they
were set even during Easy Handycam
operation.
]FILE NO. ]
]VOLUME]
[TV TYPE]
[ _ DISPLAY]
[BEEP]
[SUB-T DATE]
[CLOCK SET]
]AREA SET]
[DST SET]/[SUMMERTIME]
]WIDE SELECT] *
[DEMO MODE]
IFLASH MODE] **
[ _ LANGUAGE SET]
• DCR-DVD IOg/DVD608
•*DCR-DVD3Og/DVD70g
Your camcorder vibrates.
• Vibration occurs (h.,pending on tile condition
of the disc. This is not a malfimction.
A vibration is felt in your hand or a
faint sound is heard during
operation.
• This is not a mallhnction.
A motor sound is heard in the
camcorder when the disc cover is
closed without a disc.
• Your camcordcr is trying to recognize the
disc. This is not a malfunction.
Your camcorder gets warm.
• This is because the po_ er has been turned on
R)ra long time. This is not a malfunction.
Turn off your camcorder and leave it for a
while ill a cool place.
The supplied Remote Commander
does not function (DCR-DVD308/
DVD708).
• Set IREMOTE CTRLI to ION] (p. 72).
• Insert a battery, into the battery holder with
the +1 polarities correctly matching the +_
marks (p. 114).
• Remove any obstructions between the
Remote Commander and the remote sensor.
• Point the remote sensor away from strong
light sources such as direct sunlight or
overhead lighting. Otherwise, the Remote
Commander may not fimction properly.
Another DVD device malfunctions
when you use the supplied Remote
Commander (DC R-DVD308/DVD708).
• Seh:ct acommander mode other than DVD 2
for your DVD device, or cover tile sensor of
your DVD device with black paper.
The power abruptly turns off.
• When ap?roximatcly 5 minutes have elapsed
while you do not operate your camcorder,
the camcorder is auton/atically turned off
(A.SHUT OFF). Change the setting of
[A.SHUT OFF] (p. 72), or turn on the power
again, or use fl_eAC Adaptor.
•Charge the battery pack (p. 22).
The CHG (charge) lamp does not
light while the battery pack is being
charged.
• Turn the POWER switch to OFF (CHG)
(p. 22).
•Attach tile battery pack to the camcorder
correctly (p. 22).
•Connect the power cord to the wall outlet
properly.
•The battery charge is completed (p. 22).
86
The CHG (charge) lamp flashes while
the battery pack is being charged.
• Attach the battery Dack to the camcordcr
correctly (p. 22). If the problem persists,
disconnect the AC Adaptor from the wall
outlet and contact your Sony dealer. The
batteUpack may be damaged.
The remaining battery time indicator
does not indicate the correct time.
•The temperature of the environment is too
high or too low. This is not i malfunction.
• The battery pack has not been charged
enough. Fully charge the batte Uagain. If the
problem persists, replace the batte Upack
with a new one (p. 22).
• The indicated time may not be correct
depending on the environment of use.
The battery pack is quickly
discharged.
• The temperature of the environment is too
high or low. This is not a mallhnction.
• The batte U pack has not been charged
enough. Fully charge the battery again. If the
problem persists, replace the batte Upack
with a new one (p. 22).
The buttons do not appear on the
touch panel.
• Touch the LCD screen lightly.
• Press DISP/BATT INFO on your camcorder
(or DISPLAY on the Remote Commander
for DCR-DVD308/DVD7/)8) (p. 27).
The buttons on the touch panel do
not work correctly or do not work at
all.
• Adjust the touch panel ([CALIBRATION])
(p. 105).
Menu items are grayed out.
• You cannot select grayed items in the current
recording/playback status.
• Some functions cannot be used
simultaneously (p. 92).
The image in the viewfinder is not
clear.
• Move the viewfinder lens adjustment lever
until the image appears clearly (p. 27).
The image in the viewfinder has
disappeared.
• Close the LCD paneh No image is displayed
in the viewfinder when the LCD panel is
open (p. 27).
A dotted line appears on the LCD
screen.
• This is not malfunction and does not :,fl_:ct
recorded images.
The disc cannot be removed.
• Make sure the power source (battery pack or
AC Adaptor) is connected correctly (p. 22).
• The disc is damaged or is dilly with
fingerprints, etc. In this case, it may take up
to 10 minutes to remove the disc.
• The temper iture of your camcorder is
extremely high. Turn off your camcorder
and leave it for a while in acool place.
•Finalizing is interrupted by turning off your
camcorder. W/irn on your camcorder and
remove the disc after finalizing is completed
(p. 46).
Images cannot be deleted.
• The maximum number of images that you
can delete on the index screen at one time is
100.
•hnages cannot be deleted depending on the
type and recording lbrmat of a disc (p. 15,
48).
Continued,,_ 87
=-
TrssNsshsstisS/Ssstisssd)
Remaining disc space indicator is
not displayed.
• SolI_ REMAININ(;I to IONI to alw _ys
display the remaining disc spaceindicator
/p. 65).
The indicators of the disc type and
the recording format on the LCD
screen are grayed out.
• The disc may have been created other than
your camcorder. You can play back with
your camcorder, but you cannot record
additional scenes.
You cannot operate functions using
the "Memory Stick Duo."
• If you use a "Memory Stick Duo" formatted
on a computer, fornmt it again on your
camcorder (p. 60).
You cannot delete or format the
"Memory Stick Duo."
• Tile maximum number of images that you
can delete on the index screen at one time is
100.
• You cannot delete still images that have
write-protection set by another device.
Data file name is incorrect or
flashing
• Tile file may bc corrupted.
• The file format may not be supported by
your camcorder. Use the supported file
lk)rmat (p. 101 ).
Refer also to "Discs/"Memory Stick Duo ....
(p. 87).
Pressing START/STOP does not
record movies on the disc.
• The playback screen i,_ displayed. Set your
camcorder to recording standby (p. 35).
• Your camcorder is recording the scene you
have just shot on the disc.
• The disc has run out of space. Use a new disc
or format the disc IDVD-RW/DVD+RW
only, p. 59). Or delete the unnecessary
images (p. 48).
• When you are using one of the following
discs alter finalizing it, make the disc to be
able to record additional scenes (p.6t)). Or
use a new disc.
DVD-RW (VIDEO mode)
DVD+RW
• The temperature of your camcorder is
extremely high. Turn off your camcorder
and leave it for a while in a cool place.
• Moisture condensation has occurred with the
disc. Turn off your camcorder and leave it
for about 1 hour ill a cool place (p. 105).
You cannot record a still image.
• The playback screen is displayed. Set your
camcorder to recording standby (p. 35).
• The "Memory Stick Duo" has run out of
space. Use a new "Memory Stick Duo" or
format the "Memory Stick Duo" (p. 60). Or
delete the unnecessary images (p. 49).
• You cannot record a still image on a disc on
your camcorder.
The ACCESS lamp lights up even
when you stop recording.
• Your camcorder is recording the scene you
have just shot on tile disc.
88
The recording angle looks different
(DCR-DVD308/DVD708).
• The recording angle may look different
depending on the mode of your camcorder.
This is not a malfimction.
The actual recording time for movie
is less than the expected
approximate recording time of a
disc.
• Depending on an o/!iect, such as a fast
moving ol_iect,the time available for
recording may shorten (p. 14).
The recording stops.
• The tcmpcnmue of your camcorder is
extremely high. Turn off your camcorder
and leave itR)r a while in a cool place.
• Moisture condensation has occurred with the
disc. Turn off your camcorder and leave it
about I hour in acool place (p. 105).
There is a time difference between
the point where you press START/
STOP and the point that the
recorded movie starts/stops.
• On your camcordcr, there may bca slight
time difference between the point where you
press START/STOP and the actual point that
recording movie starts/stops. This is not a
malfunction.
The movie aspect ratio (16:9/4:3)
cannot be changed. (DCR-DVD308/
DVD708)
• You cannotchangethe movie aspectratio if
your disc is DVD+RW.
The auto focus does not function.
•Set [FOCUS] to [AUTO] (p. 75).
• The recording conditions ,re not suitable for
auto focus. A(!iu',l the focus mamlally
(p. 75).
[STEADYSHOT] does not function.
•Set [STEADYSHOT] to [ON] (p. 65).
• [STEADYSHOT] may not be able to
compensate for excessive vibrations.
The BACK LIGHT function does not
function.
• The BACK LIGHT function cannot bc used
during Easy Handycam operation.
Tiny spots in white, red, blue, or
green appear on the screen.
• The spots appear _qlcn you are recording
with [S. NIGHTSHOT PLS] or [COLOR
SLOW SHTR]. This is not a malfimction.
The color of the image is not
correctly displayed.
• Set the NIGHTSHOT PLUS s_ itch to OFF
/p. 37).
The screen image is bright, and the
subject does not appear on the
screen.
• Sel Ihe NIGHTSHOT PLUS swilch to OFF =o
=-
(p. 37). g
The screen image is dark, and the
subject does not appear on the
screen (DCR-DVD308/DVD708).
• Press md hokl DISP/BATT INFO for a fc_
seconds to turn on Ihe backlight (DCR-
DVD308/DVD708) (p. 27).
Undesirable flicker occurs.
• This occurs when recording images under a
fluorescent lamp, sodium lainD or mercury
lamp. This is not malfimction.
Continued._ 8g
Trssb_sshsstisS/Ssstisssd)
A vertical band appears when
recording candlelight or electric light
in the dark.
•This occurs when the contrast between the
subject and the background is too high.
This is not a malliu_ction.
A vertical white line may appear on
an image taken in bright light.
•This phenomenon is called the smear effect.
This is not a malfimction.
Black bands appear when you
record a TV screen or computer
screen.
• Set [STEADYSHOT] to IOFEI(p. 65).
[S. NIGHTSHOT PLS] cannot be
operated.
• Set the NIGHTSHOT PLUS s_itch to ON
/p. 37).
[COLOR SLOW SHTR] does not
operate correctly.
• [COLOR SLOW SHTR] may not operate
correctly in total darkness. Use NightShot
plus or [S. NIGHTSHOT PLS].
You cannot adjust [LCD BL LEVEL].
• You cannot adjust [LCD BL LEVEL] _xhcn:
The LCD panel is closed on your
camcorder with the LCD screen facing out.
The power is supplied from the AC
Adaptor.
You cannot use [WIDE SELECT]
(DCR-DVDt 08/DVD608).
• You cannot use [WIDE SELECT] if your
disc is DVD+RW.
You cannot play back a disc.
• Turn the POWER switch to turn on your
camcordcrand press[] (VIEW" IMAGES).
• On the HOME MENU, touch [_ (VIEW"
IMAGES), then ]VISUAL INDEX].
• Check out the disc compatibility (p. 14).
• Insert a disc with the recording side facing
your camcorder (p.28).
• The disc that was recorded, lkmnatted, of
finalized on other devices may not be played
back on your camcorder.
The playback image is distorted.
•Clean the disc using a sofl cloth (p. 10l).
Still images stored on a "Memory
Stick Duo" cannot be played back.
• Still images cannot he played back if you
have modified files or folders, or have edited
the data on a computer. (The file name
flashes in that case.) This is not a
malfunction (p. 102).
• Still images recorded on other devices may
not be played back. This is not a malfunction
(p. 102).
"[_" is indicated on an image in the
VISUAL INDEX screen.
• Loading of the data may haw' l_dlcd.It may
be indicated correctly when you turn off the
power and then turn it on again, or repeat
removing and inserting the "Memory Stick
Duo" a couple of times.
• This may ,ppear on still images recorded on
other devices, edited on a computer, etc.
gO

No sound or only a quiet sound is
heard when playing back a disc.
•Turn up the volume (p. 4t/).
• Sound is not output when the LCD screen is
closed. Open Ihe LCD screen.
• When you record sound with [MICREF
LEVEf=] (p. 79) sel Io [LOW], tile recorded
sound may be difficult to hear.
Playback does not move to the
previous scene when you press
141_1.
• llph@>ack crosses 2 titles made
automatically by you* camcorder when
is pressed, playback m,y not move to the
previous scene. Select the desired scene
front the inenu screen. Refer to the
instruction rl'mimaloI the playback de,,ice
for filrther information.
You cannot play back the disc, or the
disc is not recognized.
•Clean the db,c using a ",oft cloth (p. I[1/).
• Finalize the disc (p. 44).
• A disc recorded in VR mode cannot be
played back on a device Ihat does not
support VR mode. Check the compatibility
in the instruction manual of the playback
device.
The playback image is distorted.
• Clean the disc using a soil cloth (p. I0l ).
"[_" is indicated on an image in the
DVD menu.
•Lmding ol"the dau, ro.ay have failed when
the disc was finalized. For the following
discs, make the disc capable of additional
recording (p. 60), then remake the DVD
menu by finalizing the disc again (p. 47).
The DVD menu may be displayed correctly.
DVD-RW (VIDEO mode)
DVD+RW
Playback freezes for an instant
between the scenes.
•The image may freeze for an instant between
scenes depending on the device being used.
This is not a malfunction.
• In case of a DVD+R DL, the image may
freeze for an instant when the recording
layer changes. This is not a malhmction.
Unable to edit.
•Your disc may not bc configured for editing
data (p. 15).
•There ,re no images recorded on the disc.
• Unable to edit because of the condition of
the image.
• You cannot edit an image protected on
another device.
• You cannot copy or move the hnages
between a disc and a "Memory Stick Duo."
m
Scenes cannot be added in the
Playlist. "_
• The disc is full, or Ihe added scenes exceed _-
=-
999. Delete unnecessary scenes (p. 52).
• You cannot add still images in the Playlist.
A movie cannot be divided.
•A movie that is too short cannot bc divided.
•A movie protected on another device cannot
be divided.
A scene cannot be deleted.
•Your disc may not be configured for deleting
data (p. 15).
•You cannot delete too'vie during the Easy
Handycam operation.
• A scene protected on another device cannot
be deleted.
Continued"_ gl
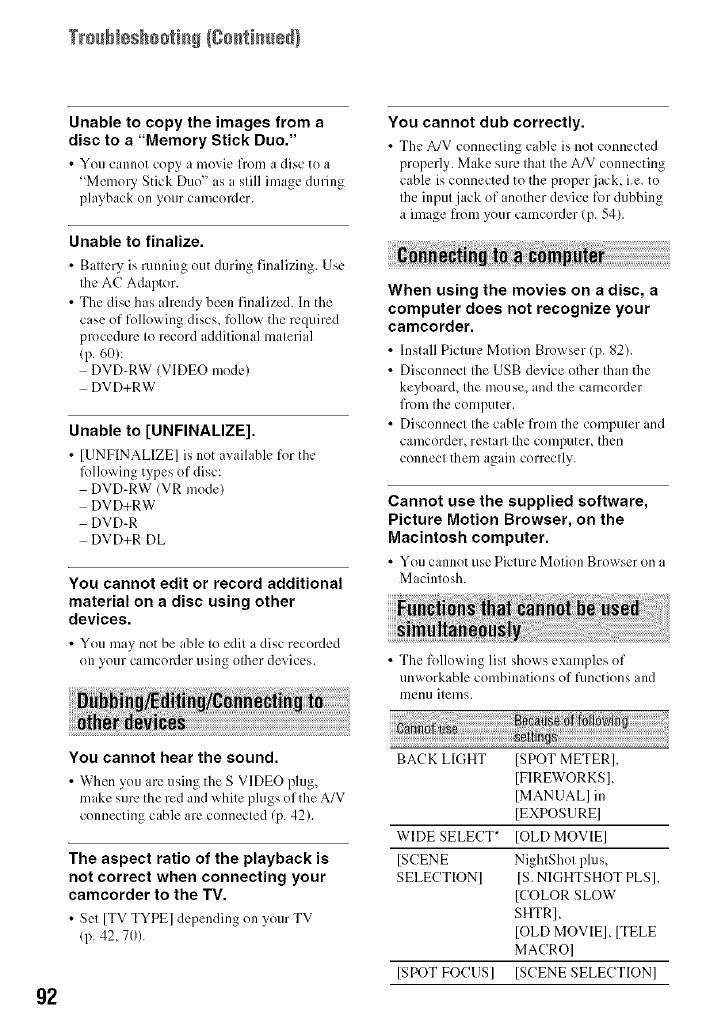
Trssb_sshsstisS/Ssstisssd)
Unable to copy the images from a
disc to a "Memory Stick Duo."
•You cannot copy a movie from a disc to a
"Memory Stick Duo" as a still image during
playback on your camcorder.
Unable to finalize.
• B ,ttcry is running out during finalizing. Use
the AC Adaptor.
• The disc has already been finalized. In the
case of following discs, follow the required
procedure to record additional material
(p. 60):
DVD-RW (VIDEO mode)
DVD+RW
Unable to [UNFINALIZE].
• [UNFINALIZE] is not awdh,blefor the
l_dlowing types of disc:
DVD-RW (VR mode)
DVD+RW
DVD-R
DVD+R DL
You cannot edit or record additional
material on a disc using other
devices.
•You may not be able to edit a disc recorded
on your camcorder using olher devices.
You cannot dub correctly.
• The A/V connecting cable is not connected
properly. Make sure that the A/V connecting
cable is connected to the properjack, i.e. to
the input jack of another device for dubbing
a image from your camcorder (p. 54).
When using the movies on a disc, a
computer does not recognize your
camcorder.
•Install Picture Motion Browser (p. 82).
• Disconnect the USB device other than the
keyboard, the mouse, and the camcorder
from the computer.
• Disconnect the cable from the computer and
camcorder, restart the computer, then
connect them again correctly.
Cannot use the supplied software,
Picture Motion Browser, on the
Macintosh computer.
• You cannot use Picture Motion Browser on a
Macintosh.
• The following list shows examples of
unworkable combinations of flmctions and
nlentl items.
g2
You cannot hear the sound.
• When you arc using the S VIDEO plug,
make sure the red and white plugs of the A/V
connecting cable are connected (p. 42).
The aspect ratio of the playback is
not correct when connecting your
camcorder to the TV.
•Set [TV TYPE] depending on your TV
(p. 42, 7//).
BACK LIGHT ]SPOT METER],
]FIREWORKS 1,
]MANUAL] in
[EXPOSURE]
WIDE SELECT* [OLD MOVIE]
[SCENE NightShot plus,
SELECTION] [S. NIGHTSHOT PLS],
[COLOR SLOW
SHTR],
[OLD MOVIE], [TELE
MACRO]
[SPOT FOCUSI ]SCENE SELECTION]

[SPOT METER] NightShot plus,
IS. NIGHTSHOT PLS]
[EXPOSURE] NightShot plus,
[S.NIGHTSHOT PLS]
[WHITE BAL. ] NightShot plus,
[S.NIGHTSHOT PLS]
[S.NIGHTSHOT [FADER], [D.EFFECT]
PLS]
[COLOR SLOW [FADER],
SHTR] [D.EFFECT], [SCENE
SELECTION]
[FADER] [S. NIGHTSHOT PLS],
[COLOR SLOW
SHTR], [D.EFFECT],
[CANDLE],
[FIREWORKS]
[D.EFFECT] [S. NIGHTSHOT PLS],
[COLOR SLOW
SHTR], [FADER]
[OLD MOVIE] [SCENE SELECTION],
[PICT.EFFECT]
[PICT.EFFECT] [OLD MOVIE]
[TELE MACRO] [SCENE SELECTION]
[AUTO SLW [S.NIGHTSHOT PLS],
SHUTTR] [SCENE SELECTION],
[COLOR SLOW
SHTR], [D.EFFECT]
[WIDE [OLD MOVIE]
SELECT]**
* DCR-DVD308/DVD708
** DCR-DVD 108/DVD608
--4
=-
g3
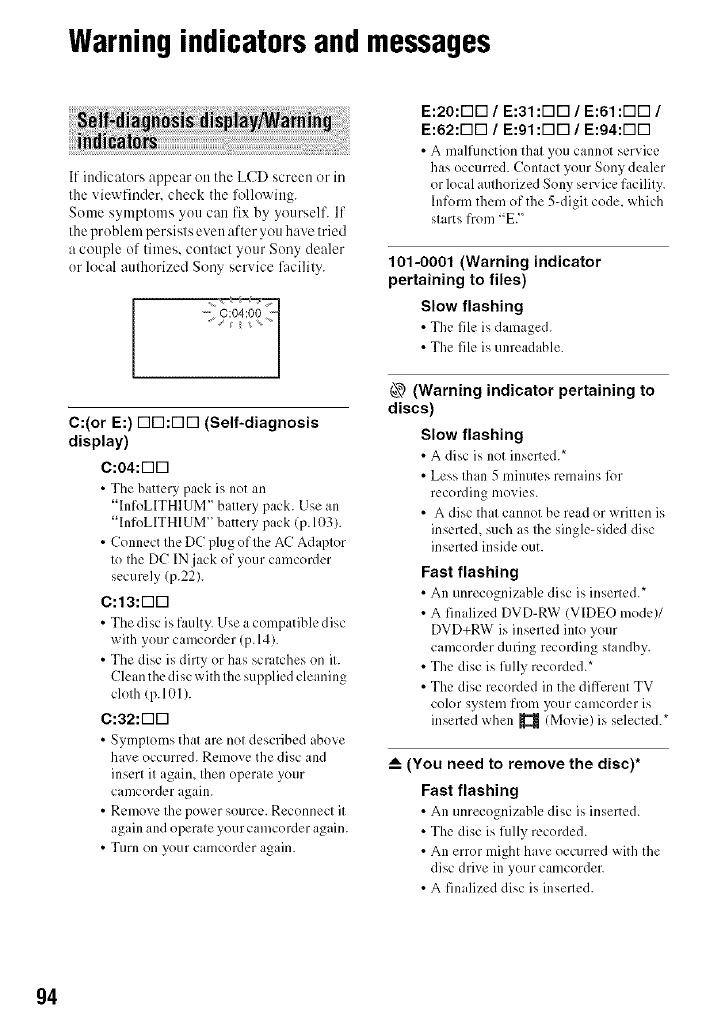
Warningindicatorsandmessages
If indicators appear on tile LCD screen or in
the viewfinder, check the %llowing.
Some symptoms you can fix by yourself. If
the problem persists even after you have tried
a couple of times. COlltact your Sony dealer
or local authorized Sony service 151cility.
-j: ¢04:0o:
C:(or E:) r-iK]:r-lr-i (Self-diagnosis
display)
C:04:r-113
•The battery pack is not an
"lnfoLITHIUM" battery pack. Use an
"InfoLITHIUM" battery pack (p.1(t3).
•Connect the DC plug of the AC Adaptor
to the DC IN jack of your camcorder
securely (p.22).
C:13:r-113
• The disc is faulty. Use a compatible disc
with your camcorder (p.14).
• The disc is dirty or has scratches on it.
Clean the disc with the supplied cleaning
cloth (p.lO]).
C:32:FqD
• Symptoms that are not described above
have occurred. Remove tile disc and
insert it again, then operate your
camcorder again.
•Remove the power source. Reconnect it
again and operate your camcorder again.
• Wtlrn on your camcorder again.
E:20:rqD /E:31 :r-if] /E:61 :FIE] /
E:62:rqD /E:91 :r-if] /E:94:rqD
• A malfunction that you cannot service
has occurred. Contact your Sony dealer
or local authorized Sony sep. icefacility.
hfform them of the 5-digit code, which
starts from "E."
101-0001 (Warning indicator
pertaining to files)
Slow flashing
• The fih.' is damaged.
• The file is unreadable.
(_ (Warning indicator pertaining to
discs)
Slow flashing
• A disc is not inserted.*
• Less than 5 minutes remains fi)r
recording movies.
• A disc that cannot be read or written is
inserted, such as the single-sided disc
inserted inside out.
Fast flashing
• An unrecognizable disc is inserted.*
• A finalized DVD-RW (VIDEO mode)/
DVD+RW is insmled into your
camcorder during recording standby.
• The disc is fully recorded.*
• The disc recorded in the different TV
color system from your camcorder is
inserled when _ (Movie) is selected.*
_--(You need to remove the disc)*
Fast flashing
• An unrecognizable disc is inserted.
• The disc is fully recorded.
• An error might have occurred with tile
disc drive in your camcorder.
• A finalized disc is inserted.
94
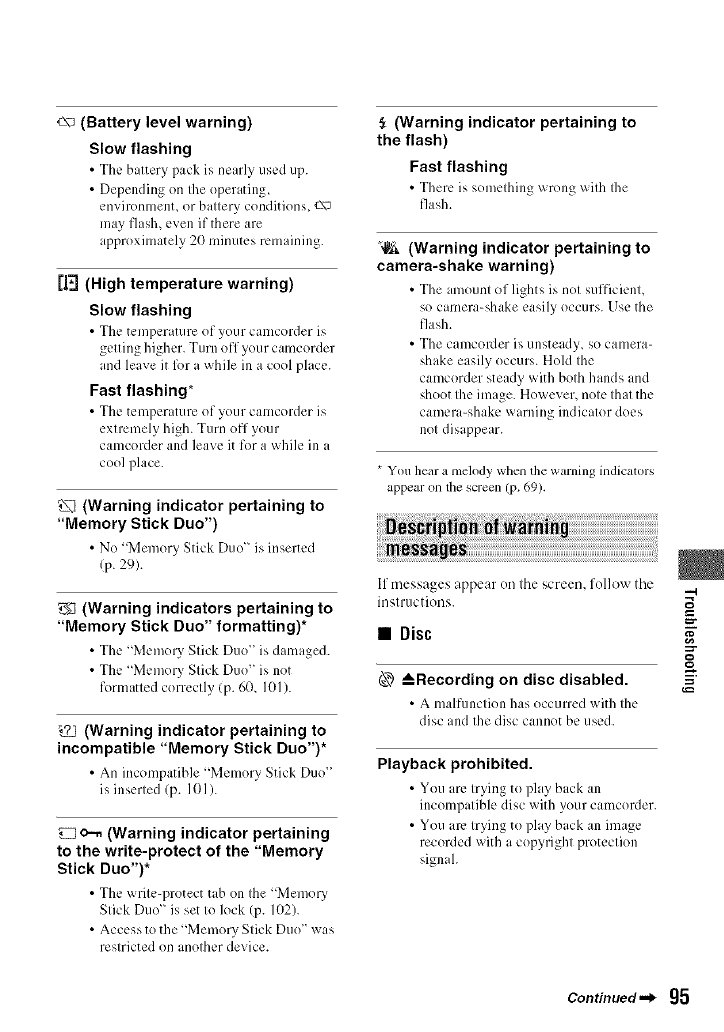
c\_ (Battery level warning)
Slow flashing
•The battery pack is nearly used up.
•Depending on the operating,
environment, or battery conditions, ¢_\_
may flash, even if there are
approximately 20 minutes remaining.
[|,-J(High temperature warning)
Slow flashing
• The temperature of your camcorder is
getting higher. Turn off your camcorder
and leave it R)r a while ill a cool place.
Fast flashing*
• The temperature of your camcorder is
extremely high. Turn off your
camcorder and leave it for a while ill a
cool place.
(Warning indicator pertaining to
"Memory Stick Duo")
• No "MemoryStick Duo" is inserted
(p. 29).
g_ (Warning indicators pertaining to
"Memory Stick Duo" formatting)*
• The "Memory Stick Duo" is damaged.
• The "Memory Stick Duo" is not
formatted correctly (p. 60, I01 ).
(Warning indicator pertaining to
incompatible "Memory Stick Duo")*
• An incompatible "Memory Stick Duo"
is inserted (p. 101).
o-, (Warning indicator pertaining
to the write-protect of the "Memory
Stick Duo")*
• The write-protect tab on the "Memory
Stick Duo" is set to lock (p. 102).
• Access to the "MemoUStick Duo" was
restricted on another device.
(Warning indicator pertaining to
the flash)
Fast flashing
•There is something wrong _ith the
flash.
'_& (Warning indicator pertaining to
camera-shake warning)
•The mlount of lights is not sufficient,
so camera-shake easily occurs. Use the
flash.
•The camcoKler is unsteady, SO canlera-
shake easily occurs. Hold the
camcorder steady with both hands and
shoot the image. However, note that the
camera-shake warning indicator does
not disappear.
* You hear a melody when the warning indicators
appear on the screen (p. 69).
If messages appear on the screen, follow the
instructions.
•Disc
_--Recording on disc disabled.
• A mallhmction has occ/irrcd with the
disc and the disc cannot be used.
Playback prohibited.
• You are trying to play back an
inc(mlpatible disc with VoLIrcamcorder.
•You am trying to play back an image
recorded with a copyright protection
signah
=-
Continued._ g5
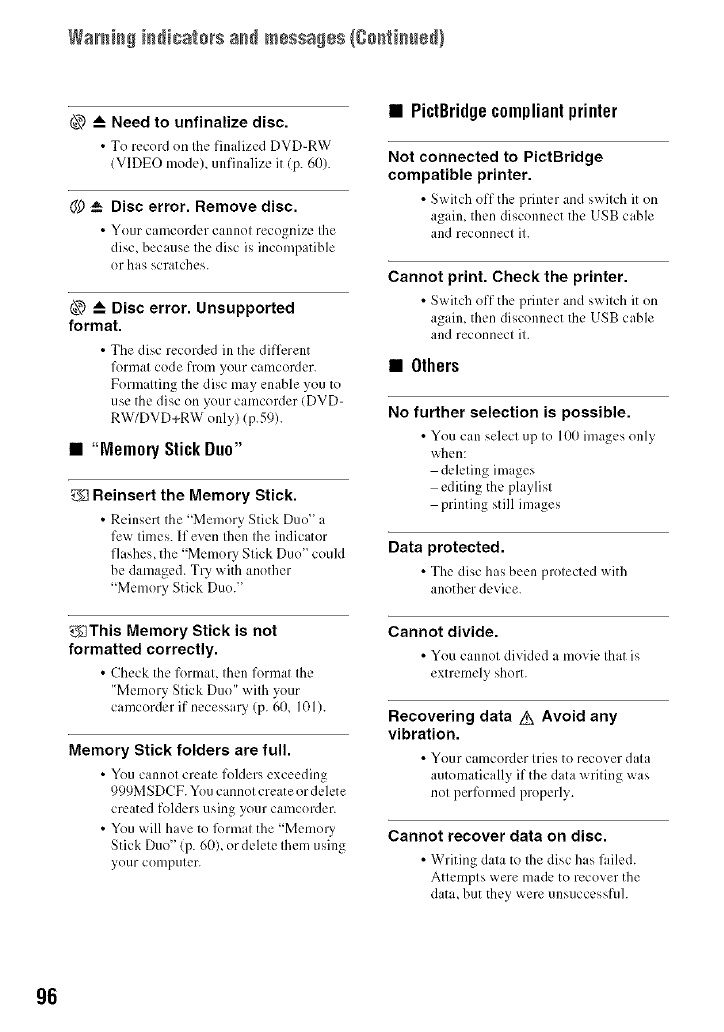
Waraia# iadicatars a_d messa#es {8a[_tia_ed}
@ _-- Need to unfinalize disc.
•To record on the finalized DVD-RW
IVIDEO model unfinalize it (p. 60).
@ _- Disc error. Remove disc.
• Your c;imcorder cannot recogniTe the
disc, because the disc is incon/patible
or has scratches.
@ _-- Disc error. Unsupported
format.
• The disc recorded in the different
format code from your camcorder.
Formatting the disc may enable you to
use tile disc on your camcorder IDVD-
RW/DVD+RW only) (p.59).
• "Memory StickDuo"
_1 Reinsert the Memory Stick.
• Reinsert the "Memory Stick Duo" a
few times. If even then the indicator
flashes, the "Memory Stick Duo" could
be damaged. Try with another
"Memory Stick Duo."
_]This Memory Stick is not
formatted correctly.
• Check the format, then format the
"Memory Stick Duo" with your
camcorder if necessary (p. 60, 101).
Memory Stick folders are full.
•You cannot create folders exceeding
999MSDCF. You cannot create or delete
created folders using your camcorder.
• You will have to lk)rmat the "Memory
Stick Duo" (p. 60)_ or delete them using
your cotilptlter.
• PictBridgecompliantprinter
Not connected to PictBridge
compatible printer.
• Switch off the printer and switch it on
agfim then disconnect the USB cable
and reconnect it.
Cannot print. Check the printer.
• Switch off the printer and switch it on
again, then disconnect tile USB cable
and reconnect it.
•Others
No further selection is possible.
•You can select up to 100 im:_gcs only
when:
deleting images
editing the playlist
printing still images
Data protected.
• The disc has been protected with
another device.
Cannot divide.
• You cannot divided a movie that is
extremely short.
Recovering data z_x Avoid any
vibration.
• YolJr caiilcordcr tries to recover data
automatically if the data writing was
not perlk)rmed properly.
Cannot recover data on disc.
• Writing data to the disc has failed.
Attempts were made to recover the
data, but they were unsuccessflfl.
96

Please wait.
•This is displayed it"the disc removal
process takes time. Turn on the
camcorder and leave it for about 10
minutes, preventing vibration.
--I
=-
g7
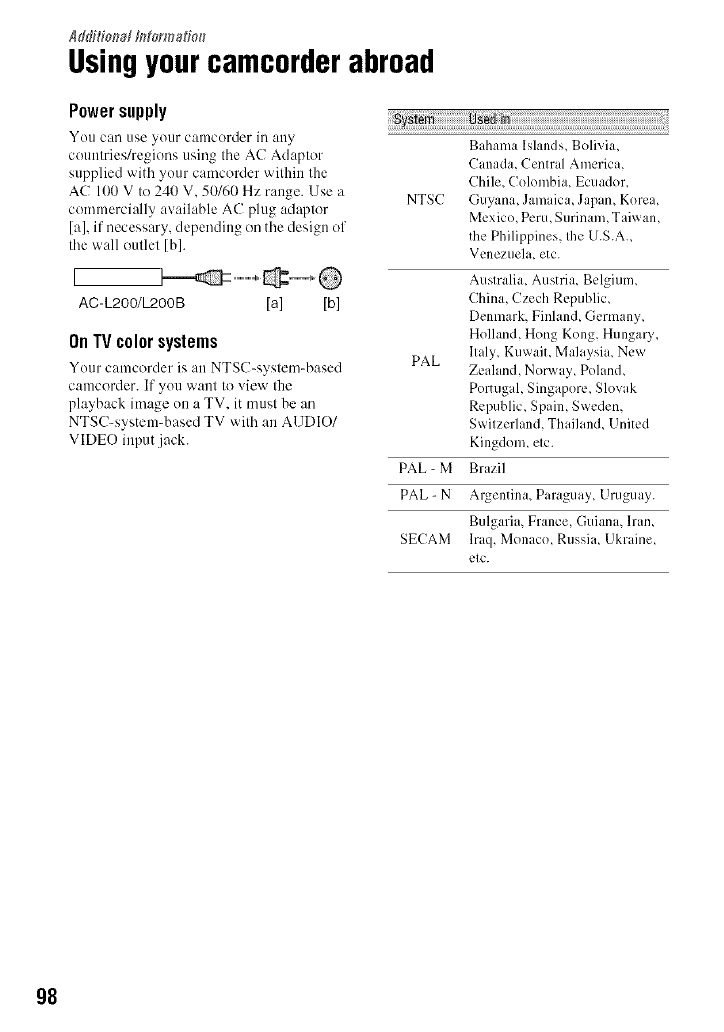
Md#irma, __torm_io_
Usingyourcamcorderabroad
Powersupply
You c_ln use your cauworder in auy
couutries/regions using the AC Adaptor
supplied with your camcorder within the
AC 100 V to 240 V, 50/hi) Hz range. Use a
commercially available AC plug adaptor
[a], if necessary, depending on the design of
the wall outlet [b].
L
AC-L2OO/L2OOB [a] [b]
On TV color systems
Your camcorder is an NTSC-system-based
camcorder. If yuu want to view the
playback image un a TV, it must be an
NTSC-system-based TV with an AUDIO/
VIDEO input .jack.
::::::::::::::::::::::::::::::::::::::::::::::::::
Bahama Islands, Bolivia,
Canada, Central America,
Chile, (k)lombia, Ecuador,
NTSC Guyana, Jamaica, Japam Korea,
Mexico, Peru, Surinam, Taiwan,
the Philippines, the U.S.A.,
Venezuela, etc.
Australia, Austria, Belgium,
China, Czech Republic,
Denmark, Finlan& Germany,
Holland, Hong Kong, Hungau_
PAL llaly, Kuwait Malaysia, New
Zealand, Norway, Poland,
Portugal, Singapore, Slowkk
Republic, Spain, Sweden,
Switzerland, Thailand, United
Kingdom, etc.
PAL- M Brazil
PAL- N Argentina, Paraguay, Uruguay.
Bulgaria, France, Guiana, Dan,
SECAM lraq, Monaco, Russia, Ukraine,
etc.
98
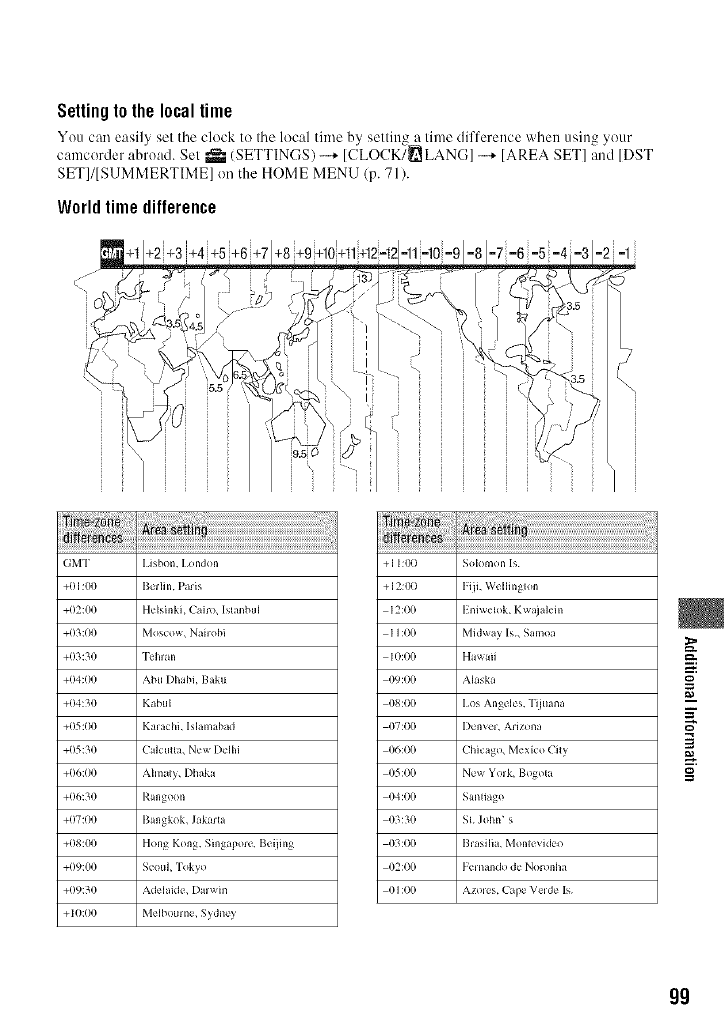
Settingto the localtime
You can easily settile clock to Iheloc:d time by selling a lime difference when using your
camcorder abroad. Sel _ (SETTINGS)-...+[(TLOCK/_LANG] -...+[AREA SET] and [DST
SET]/[SIJMMERTIME] on the HOME MENU (p. 71).
World time difference
GMT IAsbon. I.ond<>n
+01:00 Belfi n. PaJis
+02:00 Helsinki. Cairo. Is_anbtH
+03:00 Moscow. Nail obi
+03:30 I_hl_m
+04:00 Abu Dhabi. Baku
+04:30 KabtH
+05:00 Kalachi, Islamabad
+05:30 CaJculla. New Delhi
+06:00 Almaly. Dhaka
+06:30 Rangoon
+07:00 Bangkok. Jakarta
+08:00 Hong Kong, Singapore_ Beiimg
+09:00 SeouL Tokyo
+09:30 Adelaide, Dal_a in
+I0:00 Melbourne, Sydney
iiiiiii
+ I I:00 Solomon Is
+ ]2:00 Fiii, Wel[i ng{on
12:00 Emwelok, Kw_alem
II:00 Midway Is. Samoa
I0:00 Hawaii
09:00 Alaska
08:00 I,os An_les, Tijuana
07:00 Denver. Arizona
06:00 Chicago_ Mexico Cily
05:00 New Yolk, Bogola
04:00 Santiago
03:30 $1 John' s
03:00 Bmsilia. Monlevideo
02:00 Femando de Noronha
01:00 Azoles. Cape Velde Is
g
m
=Z
g
99
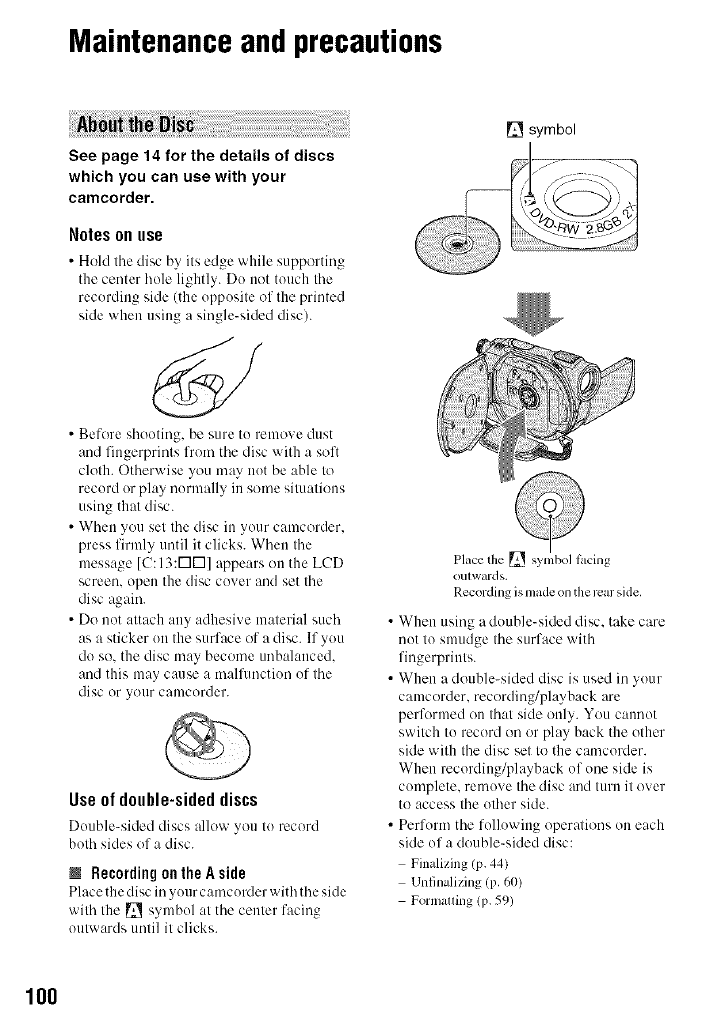
Maintenanceandprecautions
See page 14 for the details of discs
which you can use with your
camcorder.
Notes on use
• Hold tile disc by its edge while supporting
the center hole lightly. Do not touch tile
recording side (the opposite uf the primed
side when using a single-sided disc).
• Before shooting, be sure to remove dust
and fingerprints from tile disc with a soft
cloth. Otherwise you may not be able to
record or play normalb, in some situations
using that disc.
• When you set tile disc in your camcorder.
press firmly until it clicks. When tile
message [C:I3:r-IN] appears on the LCD
screen, open the disc cover and set tile
disc again.
• Do not attach any adhesive material such
as a sticker on the surface of a disc. If you
do so. the disc may become unbalanced.
and this may cause a malfunction of tile
disc or your camcorder.
Useof double-sideddiscs
Double-sided discs allow you to record
both sides of a disc.
NRecording on the Aside
Place the disc in your camcorder with tile side
with the _ symbol at tile center facing
outwards until it clicks.
__ symbol
Place the _ symbol lhcing
outwards.
Recording is made on the rcar side.
• When using a double-sided disc. take care
not to smudge tile surface with
fingerprints.
• When a double-sided disc is used in your
camcorder, recording/playback are
perlk_rmed on that side only. You cannot
switch to record on or play back the other
skle with the disc set to the camcorder.
When recording/playback of one side is
complete, remove tile disc and turn it uver
to access the other side.
• Perform tile following uper:diuns on each
side of a double-sided disc:
Finalizing (p. 44)
Unfinalizing (p. 60)
Formatting (p. 59)
100
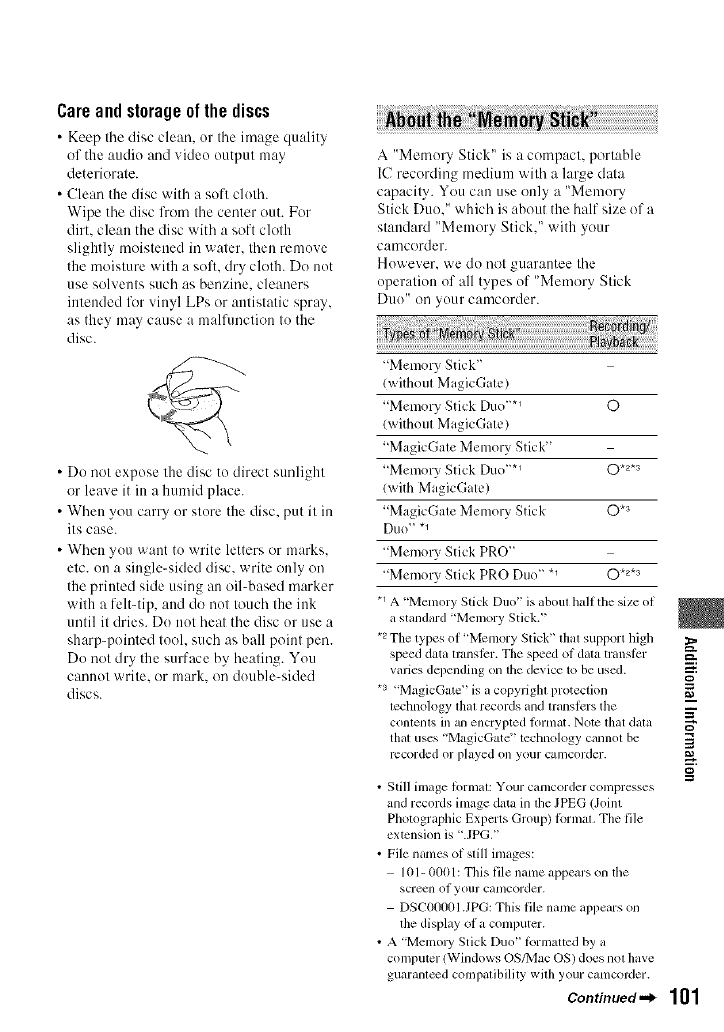
Care and storage of the discs
• Keep tile disc clean, or tile image quality
of the audio and vide() output may
deteriorate.
• Clean the disc with a soft cloth.
Wipe the disc lhom the center out. For
dirt. clean the disc with a soft cloth
slightly moistened in water, then remove
the moisture with a soft. dry cloth. Do not
use solvents such as benzine, cleaners
intended liar vinyl LPs or antistatic spray,
as they may cause a malfimction to the
disc.
• Do not expose the disc to direct sunlight
or leave it in a humid place.
• When you carry or store the disc, put it in
its case.
• When you want to write letters or marks.
etc. on a single-sided disc. write only on
the printed side using an oil-based marker
with a felt-tip, and do not touch the ink
until it dries. Do not heat the disc or use a
sharp-pointed tool. such as ball point pen.
Do not dry the surface by heating. You
cannot write, or mark. on double-sided
discs.
A "Memory Stick" is a compact, portable
IC recording medium with a large data
capacity. You can use only a "Memory
Stick Duo." which is about the half size of a
standard "Memory Stick." with your
camcorder.
However. we do not guarantee tile
operation of all types of "Memory Stick
Duo" oil your camcorder.
"Memory Stick"
(without MagicGate)
"Memory Stick Duo "*_ 0
(without MagicGate)
"MagicGate Memory Stick"
"Memory Stick Duo ''*_ O *2*s
(with MagicGate)
"MagicGate Memory Stick 0 *3
D/I()" "1
"Memory Stick PRO"
"Memory Stick PRO Duo" *_ O .2._
.1 A 'Memory Stick Duo" is aboul half the size of
a standard 'Memory Stick2'
.2 The types of "Memory Stick" that support high
speed data translcr. The speed of data transt_:r
varies depending on the device to be used.
*a .M_lgicGate _,is a copyright protection
technology that records and translcrs the
contents in ginencrypted tor[ilat. Nott_ that data
that uses "MagicGate" technology cannot he
recorded or played on your camcorder.
g
i
=Z
3
g
•Still image formal: Your camcorder compresses
and records image &ira in the JPEG (Joint
Photographic Experts Group) tbrmal. The file
extension is '.JPG."
• File names of still images:
101- 0001: This file name appears on the
screcn of yollr canlcorder.
DSC0t}001 .JPG: This file name appears on
the display of a computer.
• A "Memo W Stick Duo" tbrmattcd by a
computer (Windows OS/Mac OS) does not have
guaranteed compatibility with your camcorder.
Continued._ 101
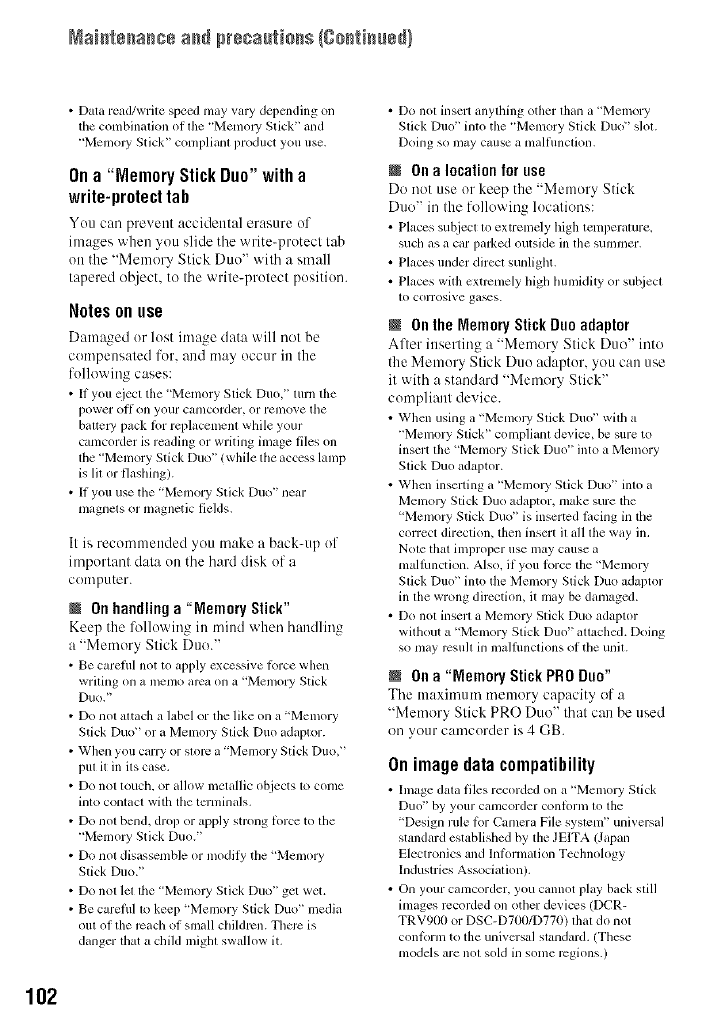
Naistssasss ass pr÷sa[tisss {gsstisss_}
• Data read/write speed may va13_ depending on
tile combination of the "MemolT Stick" and
"MemoJy Stick" compliant product you use.
On a"Memory Stick Duo" with a
write-protect tab
You can pre_ ent accidental erasure of
images when you slide the write-protect tab
on the "Memory Stick Duo" with a small
tapered object, to the write-protect position.
Notes on use
Damaged or lost image data will not be
compensated for. and may occur in the
following cases:
• If you eject tile "Memory Stick Duo," turn tile
power ol1 on your canlcorder, or remove tile
battc Wpack lPr rcplaccment willie your
camcorder is reading or writing image files on
tile "Memory Stick Duo _' (while file access lamp
is lit or flaslling).
• If you use tile "Memory Stick Du<F' near
magnets or magnetic fields.
It is recommended you make a back-up of
important data on the hard disk of a
computer.
N Onhandlinga "MemoryStick"
Keep the following in mind when handling
a "Memory Stick Duo."
• Be carefill not to apply excessive lbrce when
writing on a memo area on a 'Memory Stick
Duo]'
Do nol altach a label or the like on a 'Memory
Stick Duo '' or a Memory Stick Duo adaptor.
When you carry or store a "Memory Stick Duo, ''
pul it in its case.
Do nol touch, or allow metallic objects 1o come
into contact with tile tmminals.
Do not bend. dro I) or apply strong l_>rce to file
"Memo WStick Duo."
Do not dis_Jssemble or modily tile "Memory
Stick Duo2'
Do nol let lfie "Memol3' Stick Du<F' get wet.
• Be carefill to keep 'Memory Stick Duo" media
out of the reach of small cllildrcn. Tllmc is
danger that a child miglll swallow it.
• Do not insert anything other than a "Memory
Slick Duo" into the "Memory Stick Duo '' slot.
Doing so Inlay cruise a malflmclion.
N Ona locationfor use
Do not use or keep the "Memory Stick
Duo" in the following locations:
• Places subject lo extremdy high temperature,
such as a car parked outside in the summer.
• Places under direcl sunligllt.
• Places with extremely higll llun/idity or subject
1o corrosive ga_s.
NOntheMemoryStickDuoadaptor
After inserting a "Memory Stick Duo" into
the Memory Stick Duo adaptor, you can use
it with a standard "Memory Stick"
compliant device.
• When using a "Memol T Stick Duo" wilh a
"Memory Stick" compliant device, be sure to
insert the 'Memory Stick Duo" into a Memory
Slick Duo adaptor.
• When inserting a "Memo WStick Du<F' into a
Memol3' Stick Duo adaptor, make sure the
'Memory Stick Duo '' is inserted lacing in the
correct direction, then insert il all file way in.
Nole thal iml)roper use may cause a
malhmction. Also, if you k_rce the "Memory
Slick Duo" into the Memory Stick Duo adaptor
in the wrong dircction, it may be damaged.
• Do not inserl a Memo WSlick Duo adaptor
without a "Memory Stick Duo" altached. Doing
so may rcsu]l in malfimctions of the unil.
NOna "Memory Stick PR0 Duo"
The maximum memory capacity of a
"Memory Stick PRO Duo" that can be used
on your camcorder is 4 GB.
Onimagedatacompatibility
• Image data files recoMed on a "Memory Stick
Duo" by your canlcordcr conlorm to tile
'Design nile lbr C_mmra File system _' uni_ ersal
stmldard established by the JEITA (Japan
Electronics and lnlkmnadon Technology
Industries Association/.
• On your camcorder, you cannot play back still
images recorded on other devices (DCR-
TRV900 or DSC-D700/D770) that do not
conlbrm to the universal slandard. (These
models are not sold in some regions.)
102
• If you cannot u_ a "Memo13, Stick Duo" that
has been used wilh another device, ftlrmal il
with your camcorder (p. 60). Note thai
ti_rmatting erases all inlornlz_tion on the
"Memory Stick Duo."
• You may not be able to play back images with
your ctuncorder:
When playing back image data modified on
your compulcr.
- When playing back image data recorded with
other devices.
Your canlcorder operates (lilly with an
"InfoLITHIUM" battery pack (H series).
"Inf_LITHIUM" H series battery packs
have the U_,_,o_,rH,,,_Qmark.
What is an "InfoLITHIUM" battery
pack?
An "InfoLITHIUM" battery pack is :,
lithium-ion battery pack that has functions
for communicating information related to
operating conditions between your
camcorder and an optional AC Adaptor/
charger.
The "InfoLITHIIJM" battery pack
calculates the power consumption
according to the operating conditions of
your camcorder, and displays the remaining
battery time in minutes.
With an AC Adaptodcharger. the remaining
battery time and charging time appear.
To chargethe batterypack
• Be sure to charge tile battely pack beti_we you
Slilrl ilsing yo/ir cluncorder.
• We ivcommcnd charging the battery pack in an
alnbient temperature of between 10 °C tw 30 °C
(5(I °F tw 86 °F) until the CHG (cllarge) lamp
turns oil. If you charge tile battery pack outside
of this temperature range, you may not be able
to charge it efficiently.
• After charging is colnplete, disconnect the cuble
flom tile DC IN jack on your camcorder or
remove lhe baltery pack.
To use the batterypack effectively
• Battery p+_ckpertornl+mce decreases when the
surrounding temperature is lO °C (50 OF)or
below, and the length of time you can use the
battery pack becomes shorter. In that case, do
one of tile lollowing to rise tile ballery pack li)r a
longer time.
Put the battery pack in a pocket tw warln it up,
and insert it in your camcorder right before
you start tcking shots.
Use a large capacity battery pack: NP-FH70/
NP-FHI00 (optional).
• Frcquenl use of tile LCD screen or a ircqumlt
phJyback, t_st ii_rward or rewind operalion
wears out the battery pack tJster.
We recommend using a large capacity battery
pack: NP-FH70/NP-FHItX).
• Be sure to sel lhe POWER swilcll to OFF
(CHG) when not recording or playing back on
your camcorder. The baltcl2i pack is also
consllnled when yollr canlcorder is ill rccordillg
standby or playback pause.
• Have spare battery packs ready ti)r two or three
tilnes the expected recording tftne, and inake
trial recordings using a DVD-RW/DVD+RW
beli_rc making tile actual recording.
• Do not expose tile battely pack lo water. Tile
battery pack is not water resistanl,
Aboutthe remainingbatterytime
indicator
• When the power goes off even though tile
remaining battery tftne indicator indicates that
tile batlery pack has enougll powcr lo operale,
charge the battery pack hilly again. Remaining
battery time will be indicated correctly. Note,
llowever, that tile battery indication will not be
restwred if it is used in high temperatures tot a
long tinlc, or if left in a tully charged state, or
when the baltcry pack is ftcquently used. Use
the remaining battery time indication as a rough
guide only.
• The _-\J mark that indicates low battm'y flashes
even if there arc slill 5 to 10 minutes of battery
tinlc remaining, depending on the operating
conditions or ambient temperature.
_=:.
g
=Z
3
g
Continued._ 103
Naistssasss ass presa_[tisss {gsstisss_!
104
Aboutstorageof the battery pack
• It llle baltm3_ pack i not used l_n" a long lime.
lully charge file batlel3_ pack mM use it up on
your c_ltllcorder once _1ye_tr lo nlltilllaill proper
lunclion. To store the baltcry pack, remove it
h'om your camcoMer mid put it in a dry, cool
place.
• To discharge the battcly pack on your
camcorder completely, toucll _ (SETTINGS)
]GENERAL SET] _ [A.SHUT OFFI
]NEVER] on tile HOME MENU and leave your
camcorder in recording standby until tim power
goes off (p. 72).
Aboutbatterylife
• Baltcly capacity decreases over time and
lhrough repeated use. If decreased usage linle
between charges becomes significant, it is
probably time to replace it with a new one.
• Each baltery's liJi: is governed by storage,
operating and emironmental conditions.
Onuseandcare
•Do not u_ or store the canlcorder and
accessories in tile Ibllowing locations:
Anywllere extremely hot or cold. Never leave
them exposed to temperatures above 60 °C
(140 °F). such as under direct sunlight, near
beater', or in a car parked in the sun. They
may mallhnction or become delormed.
Near strong magnetic fields or mechanical
vibration. Tile camcorder may malthnction.
Near strong radio waves or radiation. The
camcoMer may not be able to record properly,
Near AM receivers and vide() equipment.
Noise may occur.
On a sandy beach or anywhere dusty, If sand
or dust gets in your camcorder, it may
malfimction. Sometimes tills malthnction
cannot be repaired.
Near windows or outdoors, whcre the LCD
screen, the viewfinder, or the lens may be
exposed to direct sunlight. This damages tile
inside of the viewfinder or the LCD screen.
Anywhere very lmmid.
• Operate your camcordcr on DC 6,8 V/7.2 V
/battely pack) or DC 8,4 V (AC Adaptor),
• For DC or AC operation, use tile accessories
recommended in tllese operating instructions.
• Do not let your camcorder get wet, Ior example,
hom rain or sea water. If your camcorder gels
wet, it may malthnction. Sometimes Ibis
malJunction cannot be repaired.
• If any solid object or liquid gets inside file
casing, unplug your camcorder and have it
checked by a Sony dealer beJorc operating it
any thither.
• Avoid rough handling, disassembling,
moddying, physical shock, or impact such as
hammering, dropping or stepping on tile
produo. Be particularly carclul of the lens.
• Keep lhe POWER swilch selling lo OFF (CHG)
when you arc not using your camcorder.
• Do not wrap your camcorder with a towel, ior
example, and operate it. Doing so might cause
heal to buikl up inside.
• When disconnecting lhe power cord. pull il by
the plug and not tile cord.
• Do not damage the powm- cord such as by
placing anything he*_vyon it.
• Keep metal contacts clean.
• Keep the Rcmole Commander and bulton-type
battery out of children's reacll. If the battely is
accidentally swallowed, consuh a doctor
immedialely,
• If the battery electrolytic liquid has leaked:
consult your local authorized Sony selvice
lacility.
wash oil any liquid that ii]ziyhave contacted
your skin.
if any liquid gets in your eyes, wash with
plenty of water and consuh a doctor.
@Whennotusingyourcamcorderfora
longtime
• Periodically turn it on and let it lun such as by
ph,ying back discs or recording lor about 3
nlinules,
• tenlove a disc lrolll your calncorder.
• Use up tile baltery pack completely belore
storing it,
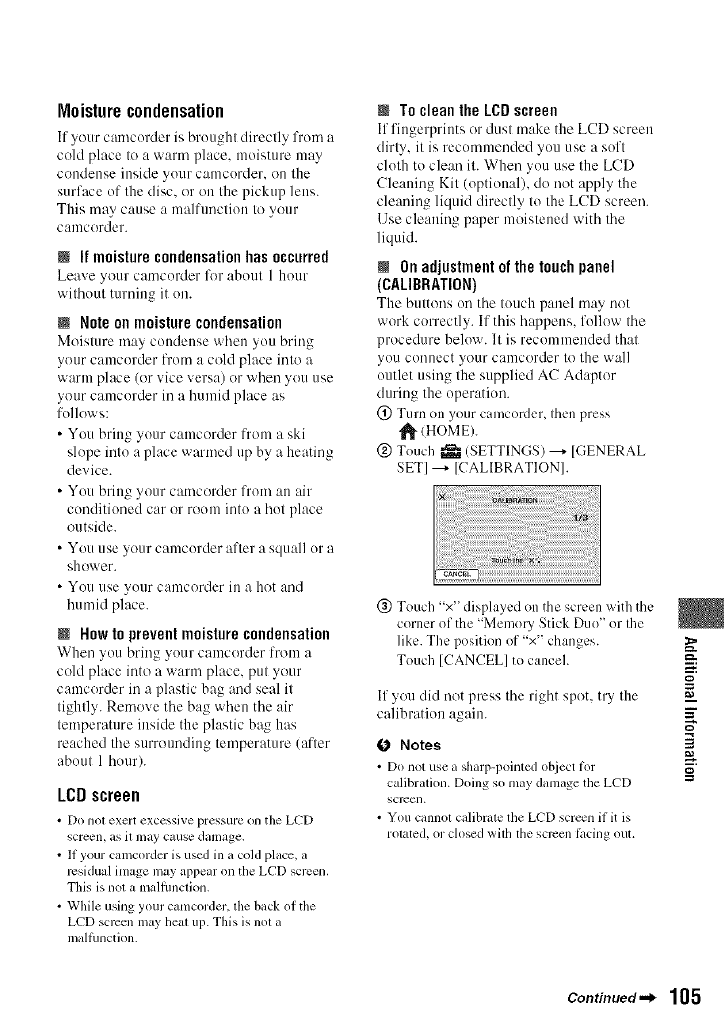
Moisturecondensation
If your camcorder is brought directly from a
cold place to a warm place, moisture may
condense inside your camcorder, on the
surface of the disc. or on the pickup lens.
This may cause a malfunction to your
canlcorder.
Nl! moisture condensationhas occurred
Leave your catncorder for about 1 hour
without tuming it on.
NNote on moisture condensation
Moisture may condense when you bring
your camcorder from a cold place into a
warm place (or vice versa) or when you use
your camcorder in a humid place as
follows:
• You bring your camcorder from a ski
slope into a place warmed up by a heating
device.
• You bring your camcorder from an air
conditioned car or room into a hot place
outside.
• You use your camcorder after a squall or a
shower.
• You use your camcorder ill a hot and
humid place.
NHow to prevent moisturecondensation
When you bring your camcorder from a
cold place into a warm place, put your
camcorder in a plastic bag and seal it
tightly. Remove tile bag when tile air
temperature inside the plastic bag has
reached tile surrounding temperature (after
about 1 hour).
LCDscreen
• Do not exert excessive pressure on the LCD
screen, as il may c_luse damage.
• If your camcorder is used in a cold place, a
residual image may appear on the LCD scrcen.
This is not a malflmction.
• While using your camcorder, the back of the
LCD SClX3enmay heal lip. Tiffs is not a
mallhnction.
NTo clean the LCD screen
If fingerprints or dust make the LCD screen
dirty, it is recommended you use a soft
cloth to clean it. When you use the LCD
Cleaning Kit (optional), do not apply the
cleaning liquid directly to the LCD screen.
Use cleaning paper moistened with tile
liquid.
@ On adjustmentof the touch panel
(CALIBRATION)
The buttons on tile touch p:ulel may not
work correctly. If this happens, follow tile
procedure below. It is recommended that
you connect your camcorder to the wall
outlet using the supplied AC Adaptor
during the operation.
(!) Turn on your camcorder, then press
_(HOME).
@ Touch _ (SETTINGS) ---+ [GENERAL
SET] ---+ [CALIBRATION].
@ Touch "x" displayed on the screen with the
corner of the "Memory Stick Duo" or the
like. The position of "x" changes.
Touch [CANCEL] to cancel.
If you did not press tile right sput, try the
calibration again.
0 Notes
• Do not use asharp-lx)inted object lor
calibration. Doing so may damage tile LCD
screen.
• You cannot calibrate llle LCD screen if it is
rolated, or closed wilh lhe sclvml li_cing out.
g
m
=Z
3
g
Continued._ 105
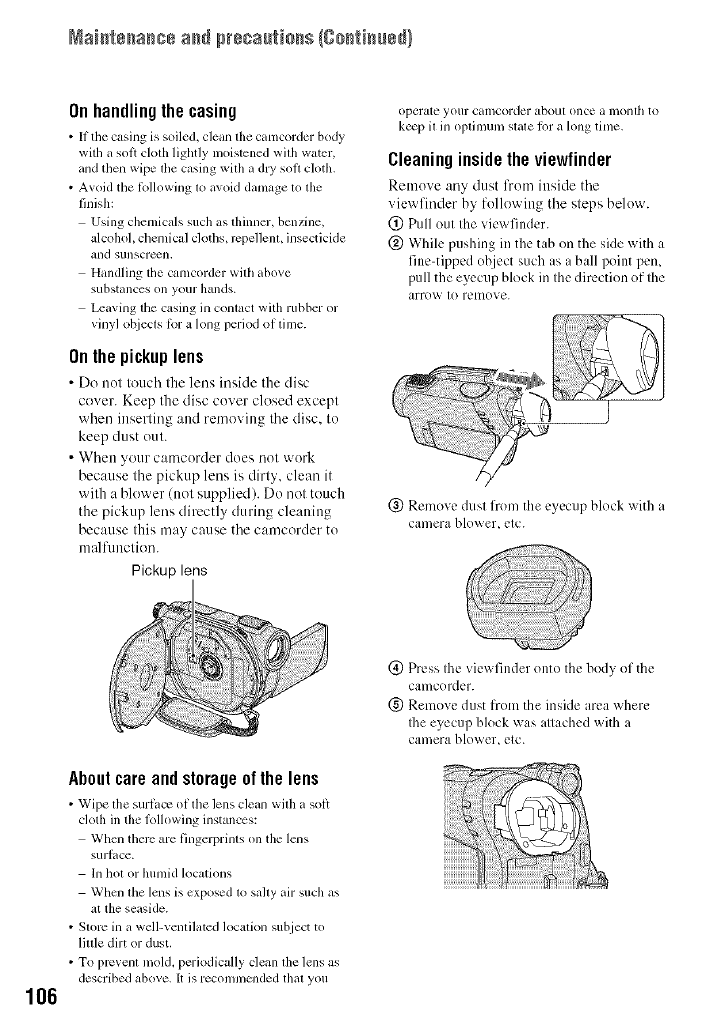
Naistssasss ass pr÷sa[tisss {gsstiss@}
Onhandlingthe casing
•It the casing is soiled, clean file camcoMer body
with a sol_ cloth lightly nloistened with water,
and then wipe tile casing with it dO, soil ch)th.
• A_oid the lblh)wing lo avok] damage lo fl_e
finish:
Using chemic_ds such as flfimmr, benzine,
alcohoh chemical cloths, rcpellem, insecticide
_lnd SUllSCrex_lL
Handling the camcorder willl above
s/ibstances oil yo/ir h_lllds.
Leaving the casing in comact with rubber or
vinyl ot_iects lot a long period of time.
On the pickuplens
• Do not touclt the lens inside the disc'
cover. Keep the disc cover closed except
when inserting and removing the disc. to
keep dust out.
• When your camcorder does not work
because the pickup lens is dirty, clean it
with a blower (not supplied). Do not touch
the pickup lens directly during cleaning
because this may cause the camcorder to
malfunction.
Pickup lens
operate your camcorder about ()lice a monlh to
ke_p il in oplimun/slale h)r a h)ng time,
Cleaning insidethe viewfinder
Reutove any dust from inside the
viewfinder by following the steps below.
(_) Pull out the viewfinder.
@ While pushing in the tab on the side with a
fine-tipped object such as a ball point pen,
pull the eyecup block in the direction of the
arro_A ' tO remove.
@ Remove dust from the eyecup block with a
camera blower, etc.
106
Aboutcare andstorageof the lens
• Wipe the surtacv otthe lens clean with a soi_
cloth in the lolh)wing instances:
When there are fingerprints on the lens
surlace.
In hot or hunlid locations
When file lens is exposed to sally air such as
at the seaside.
•Slorc in a well-venlilated location subject to
little dirt or dust.
• To prcvenl mold, periodically clean ll_e lens as
described above. It is recolnnlcnded thai you
(_) Press the view finder onto the body of the
camcorder.
(g) Remove dust K()m the inside area where
Ihe eyecup bh)ck was attached with a
cantera blower, etc.
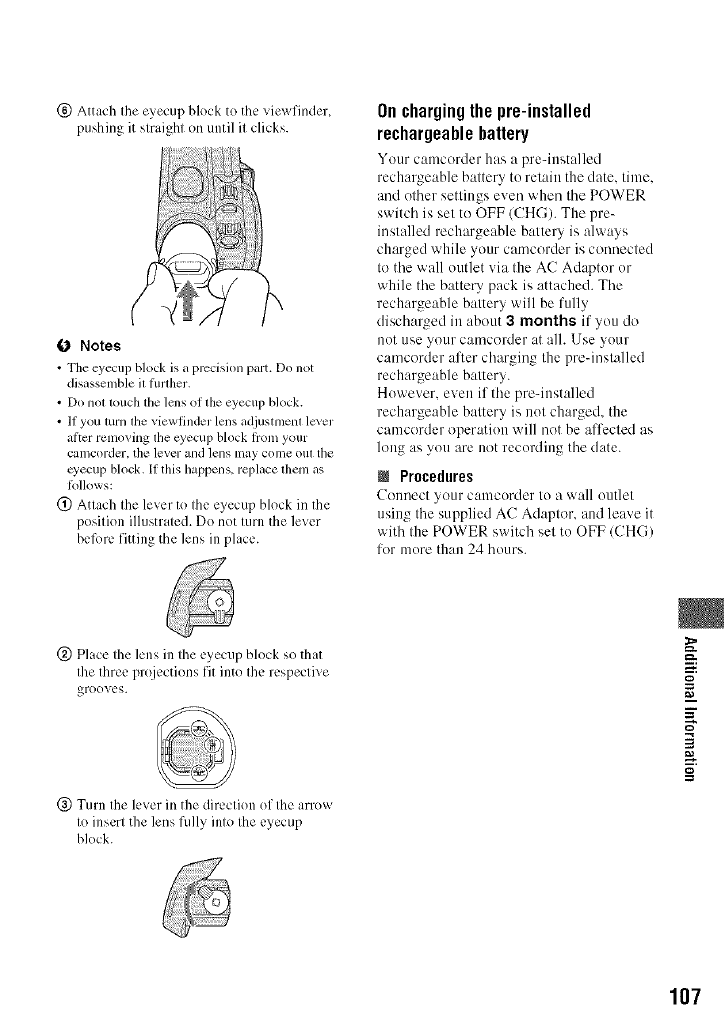
(_)Attachtheeyecupblocktotheviewfinder,
pushingitstraightonuntilitclicks.
0 Notes
• Tile eyecup block is _ precision pmt. Do not
disassemble it flnlher,
• Do not touch the lens of the eyecup block.
• If you turn file viewfinder lens adjustment lever
alicr relnoving tile cyecup block h'om your
calncorder, the lever and lens lllay colne oil[ the
eyecup block. If this happens, replace them as
lollows:
(_) Attach the lever to the eyecup block in the
position illustrated. Do not turn the lever
beR)re fitting the lens in place.
Onchargingthepre-installed
rechargeahlebattery
Your camcorder has a pre-iustalled
rechargeable battery to retain the date. time.
and other settings even when the POWER
switch is set to OFF/CHG). The pre-
installed rechargeable battery is always
charged while your camcorder is connected
to the wall outlet via the AC Adaptor or
while the batte Upack is attached. The
rechargeable battery will be fully
discharged in about 3 months if you do
not use your camcorder at all. Use your
camcorder alter charging the preqnstalled
rechargeable battery.
However. even if the pre-iustalled
rechargeable battery is not charged, the
camcorder operation will not be affected as
long as you are not recording the date.
Procedures
Connect your camcorder to a wall outlet
using the supplied AC Adaptor. and leave it
with the POWER switch set to OFF/CHG)
for more than 24 hours.
(_) Place the lens in the eyecup block so that
file three projections fit into the respective
grooves.
(_) Turn the lever in the direction of the arrow
to insert the lens fully into the eyecup
block.
g
m
==
3
g
107
Specifications
System
Video cmnpression fornlat
MPEG2/JPEG (Still images)
Audio compression lbrmat
DCR-DVD108/DVD608
Dolby Digital 2ch
Dolby Digital Stereo Creator
DCR-DVD308/DVD708
Dolby Digital 2/5.1 ch
Dolby Digital 5.1 Creator
Video signal
NTSC color, EIA standards
Usable discs
8 cm DVD-RW/DVD+RW/DVD-R/
DVD+R DL
Recording format
Movie
DVD-RW: DVD-V1DEO (VIDEO mode).
DVD-Video Recording
/VR mode)
DVD+RW: DVD+RW Video
DVD-R/DVD+R DL: DVD-VIDEO
Still image
Exil* Vcr.2.2
Recording time
DVD-RW/DVD+RW/DVD-R
HQ: Approx. 20 rain
SP: Approx. 30 rain
LP: Approx. 60 rain
DYD+R DL
HQ:Approx. 35 rain
SP: Approx. 55 rain
LP: Approx. 110 rain
Viewfinder
Electric viewfinder/color)
Image device
DCR-DVD108/DVD608
3 mm( 1/6 type) CCD (Chm'ge Coupled Device)
Gross:
Approx. 680 (X)0pixels
Elfective (Movie):
Approx. 340 000 pixels
Ellbctive (Still):
Approx. 340 000 pixels
DCR-DVDg08/DVD70P,
3toni (1/6 type) CCD (Charge Coupled Device)
Gross:
Approx. I 070 000 pixels
Eltk:ctive (Movie,l 6:9)
Approx. 670 (X)0pixels
Elli:ctive/Movie,4:3 )
Approx. 690 (X)0pixels
Ellk:ctive (Still, 4:3)
Approx. I 0(X)1,_}()pixels
Ellcctive (Still, 16:9)
Approx, 750 000 pixcls
Lens
Carl Zeiss Vario-Tcssar
DCR-DVD108/DVD608
Opfical:4Ox, Digital:80x, 2 000x
DCR-DVD308/DVD708
Optical:25x, Digital:50x, 2 000x
Filmr diamc_er: 30ram ( 1 3/16 in.)
Focal length
DCR-DVD108/DVD608
F= 1.8-4.1
f=1.9 -76.0toni (3/32 -3 in.)
Wheo converted to a 35111111still camera
For movies:
36 - 1 440nml (1 7/16 - 56 3/4 in.)
For sin images:
36 - 1 440nml (1 7/16 - 56 3/4 in.)
DCR-DVD308/DVD708
F= 1.8-3.2
1=2.5 -62.5mm (1/8 - 2 112 in.)
Whel_ converted to a 35111111still camera
For iI/ovies:
41 - I 189ram ( 1 5/8 - 46 7/8 in.) (16:9)**
43 - 1 075ram (1 3/4 - 42 3/8 in.) (4:3)
For still inlages:
36 - 900ram l1 7/16 - 35 1/2 in.) (4:3)
39 - 975mm 11 9/16 - 38 I/2 in.) (16:9)
Cohw temperature
[AUTO], [ONE PUSH], [INDOOR] (3 200 K),
[OUTDOORI (5 800 K)
Minimmu illunfination
DCR-DVD108/DVD608
3 lx (lux) (AUTO SLW SHUTTR ON, Shutter
spe_d 1/30 second)
0 Ix (lux) (during NightShot plus furlction)
DCR-DVD308/DVD708
4 Ix (lux) (AUTO SLW SHUTTR ON, Shutter
spe_d 1/30 second)
0Ix (lux) (during Nig/aShot plus function)
'+"ExiP' is afile ff)rnlat ff)r still inlages,established
by the JEITA (Japan Electronics and lnlormation
Tcchnology Industries Associmion). Files in this
Iormat can have additional in6.)rmation such as
your camcorder_s setting in forn/ation at tile time
of recording.
':*In 16:9 mode, the lk_callength ligurcs arc actual
figures resuhing honl wide angle pixel rcadout.
•Manufacu_rcd undm" license hom Dolby
Laboratories.
Input/Outputconnectors
Audio/Video output
10 pin connector
Vide() signal: 1 Vp-p, 75 L_(oh/lls)
Luminance signal: 1 Vp-p, 75 _2(ohlns/
Chrominance signal: 0.286 Vp-p. 75 _2(ohms)
Audio signal: 327 mV (at Load impedance
47 kg2/kilohlns/). Output impedance less tllan
2.2 k_/kilohms)
USB jack
mini-B
REMOTE jack (DCR-DVD308/DVD708)
Stereo mini-minijack (O 25 nnn)
LCDscreen
Picture
DCR-DVD108/DVD608
6.2 cm (2.5 type)
DCR-DVD308/DVD708
6.9 Cln (2.7 type, aspect ratio 16:9)
Tutal number of pixels
123 2/11115611× 220)
General
Puwer reqtlirelneuts
6.8 V/7.2 V (barrelT pack)
8.4 V/AC Adaptor)
Average puwer consumptiun
DCR-DVD] 08/DVD608
LCD:2.9W
Viewfinder:2.7W
DCR-DVDS08/DVD708
LCD:3.2W
/Whml the LCD backlight is on)
Viewfinder:2.9W
Operating temperature
0°C to +40°C 132°F to 104°F)
Storage temperature
-20°C to +60°C/-4°F to +140°F)
Dimensions (Approx.)
54.5 × 89 × 130.5 into 12 1/4 × 3 5/8 × 5 1/4
ill.) (w × h × d/ including the proiecting parts
54.5 × 89 × 130.5 mm 12 1/4 × 3 5/8 × 5 1/4
ill.) (w × h × d/ including the projecting parts
with supplied battely pack NP-FH4(t attacbed
Mass (Apprux.)
DCI:I-DVD ] 08/DVD608
39(t g (13 oz) main unit only
440 g (15 oz) including the NP-FH4(t
rcchalgeable battel T pack and disc
DCR-DVD308/DVD708
400 g (14 oz) main unit only
450 g ( 15 oz) ilMuding lhe NP-FH41)
rechargeable battery pack and disc
Supplied accessuries
See page 21.
AC AdaptorAC-LZ00/L200B
Puwer requirenlents
AC 100 - 240 V. 50/60 Hz
Current consumption
0.35 - 0.18 A
Puwer consumptiuu
18W
Output wdtage
DC 8.4V*
Operating temperature
O°C to +40°C 132°F to 104°F)
Storage temperature
-20°C to +60°C (-4°F to + 140°F)
Dimensiuns (Approx.)
48x29× 81/l 15/16× 1 3/16× 3 1/4 in.)
/wx h× d) excluding tile projecting parts
Mass (Apprux.)
171tg (6 oz) excluding file power cord
* See al the label of AC Adaptor lin" other
specificalions.
Rechargeablebattery packNP-FH40
MaxilnUln uutput voltage
DCS.4V
Output vultage
DC7.2V
Capacity
4.9 wh (680 mAh)
Dimensiuns (Approx.)
31.8 x 18.5 x 45.0 mm
l1 5/16 x 3/4 × 1 13/16 in.) (wxhxd)
Mass (Apprux.)
45 g (1.6 oz)
Operating temperature
0°C to +40°C 132°F to 1114°F)
Type
Li-ion
Design and specifications are subject to change
wittloul notice.
_=:.
g
=Z
3
g
109
110
Ontrademarks
• "Handycam" and
II-J'V____J"_r_ are
registered tradcqmuks of Sony Corporation.
• Memoly Stick," • _+_ _ ," Memory Stick
Duo." "MENORY511gK OUt]," "Memory Stick
PRO Duo," *NEMtlItYSTICKPR[I Dtl0."
'MagicGate," "MZ_G I ClG_TE ,"
"MagicGate Memol T Stick" and "MagicGate
Memo W Stick Duo" are trademarks of Sony
Corporation.
•"InIk>LITHIUM" is a trademark of Sony
Corporation.
• DVD-RW, DVD+RW, DVD-R, and DVD+R
DL logo are trademarks.
• Dolby and tile double-D symbol arc trademarks
of Dolby Laboratories.
• Dolby Digital 5,1 Creator is a trademark of
Dolby Laboratories.
• MicrosolL Windows, and Windows Media are
either registered trademarks or trademarks of
Microsoft Corporation ill the United States and/
or other countries,
• Macintosh and Mac OS arc registered
trademarks of Apple Computer, Inc ill the U.S.
and other countries.
• Pcntium is a trademark or registcred trademark
of Intel Corporation.
• Adobe. file Adobe logo, and Adobe Acrobat are
either registered trademarks or trademarks of
Adobe Systems Incorporated ill file United
States and/or (>filercountries.
All other product names mentioned llerein may be
the trademarks or registercd trademarks of their
respective companies. Furthermore, IM and '%3"
arc not menlioned ill eacll case in lhis manual.
Notes on the License
ANY USE OF THIS PRODUCT OTHER THAN
CONSUMER PERSONAL USE lN ANY
MANNER THAT COMPLIES WITH THE
MPEG-2 STANDARD FOR ENCODING
VIDEO INFORMATION FOR PACKAGED
MEDIA lS EXPRESSLY PROHIBITED
WITHOUT A LICENSE UNDER APPLICABLE
PATENTS lN THE MPEG-2 PATENT
PORTFOLIO+ WHICH LICENSE IS
AVAILABLE FROM MPEG LA. L.LC.. 250
STEELE STREET, SUITE 3(Xt,DENVER,
COLORADO 80206.
"C Library," "Expat," "zlib." and "lit_ipeg"
soilware are provided in your camcorder. We
provide this software ba_d on license agreements
with their owners of copyright. Based on requests
by file owners of copyright of these software
applicg_tions, we bve an obligation to inlorm you
of the Iollowing. Please rcad the Iollowing
sections.
Read 'licell_ 1.pdF' in the "License" lolder on the
CD-ROM. You will find licenses (in English) of
"C Library," "Expat," "zlib/and "lit_ipeg"
so]lwarc.
OnGNUGPL/LGPLappliedsoftware
Tile sol,ware that is eligible Ior tile lbllowing
GNU General Public License (hereinafter reli:rred
to as "GPL") or GNU Lesser Genmal Public
License (hereinalter rclcrrcd t(>as "LGPL") am
included in the camcorder.
This inlorms you tllat you have a right to have
access to, modit),, and redistribute source code lor
these software programs under the conditions of
the supplied GPL/LGPL.
Source code is provided on the w-eb. To
download, go to tile lollowing website and select
HDR- UX 1/HDR-SR I.
http://www.sony.neVProducts/Linux/
We would plvi_:r you do not contact us about tile
contents of source code.
Read "licen_2.pdff' in the "License" R_lder on tile
CD-ROM. You will find licenses (ill English) of
"GPL," and "LGPL" software.
To view tim PDF. Adobe Reader is needed. If it is
not installed (Ill your conlpuler_ you Call down]oad
it h'onl the Adobe Systems wcb page:
http://www.adobe.coml
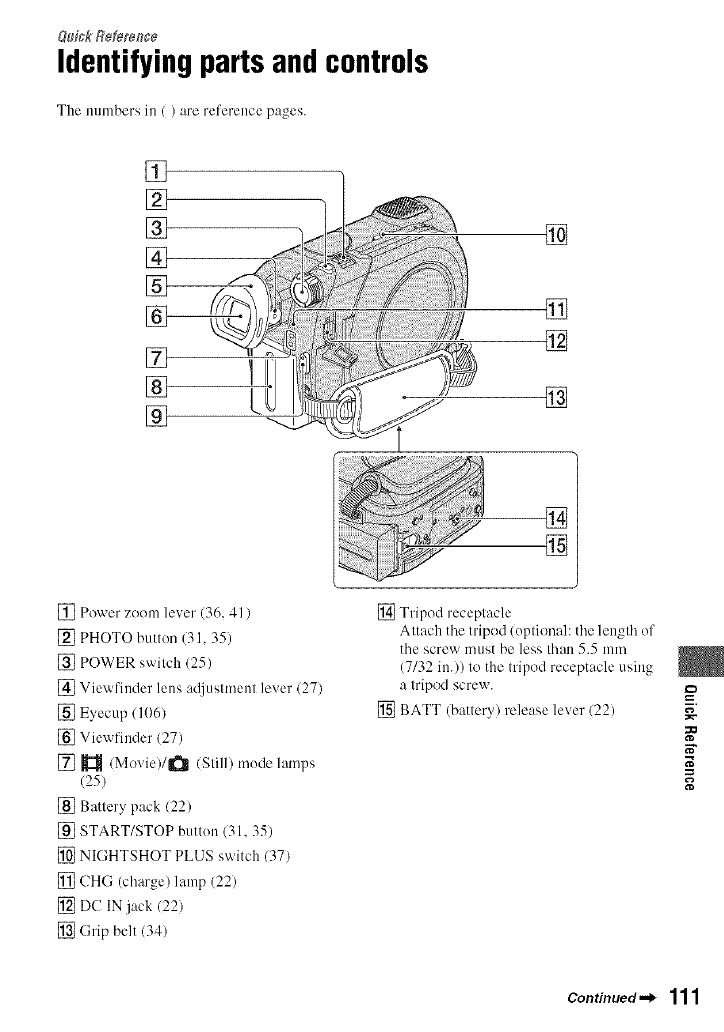
&_ickR_m_ce
Identifyingpartsandcontrols
The nunlbers in / ) are reference pages.
[]
[]
[]
[]
[]
[]
[] Power zoom lever (36, 41 )
[] PHOTO buttun (31, 35)
[] POWER switch 125)
[] View finder lens acliustment lever (27)
[] Eyecup / 1(161
[] Viewfiuder (27)
[] _ /Movie)/R_tl (Still) mude lamps
(25)
[] Battery pack (22)
[] START/STOP buttun (31, 35)
[] NIGHTSHOT PLUS switch (37)
[] CHG (charge) lamp (22)
[] DC IN jack 122)
[] (;rip belt (34)
[]
[]
[]
[]
[]
[] Tripod receptacle
Attach the tripod/uptional: the length of
the screw must be less than 5.5 mm
(7132 in.)) to the tripod receptacle using
a tripod screw.
[] BATT (battery) release lever (22) =_
N"
Continued._ 111
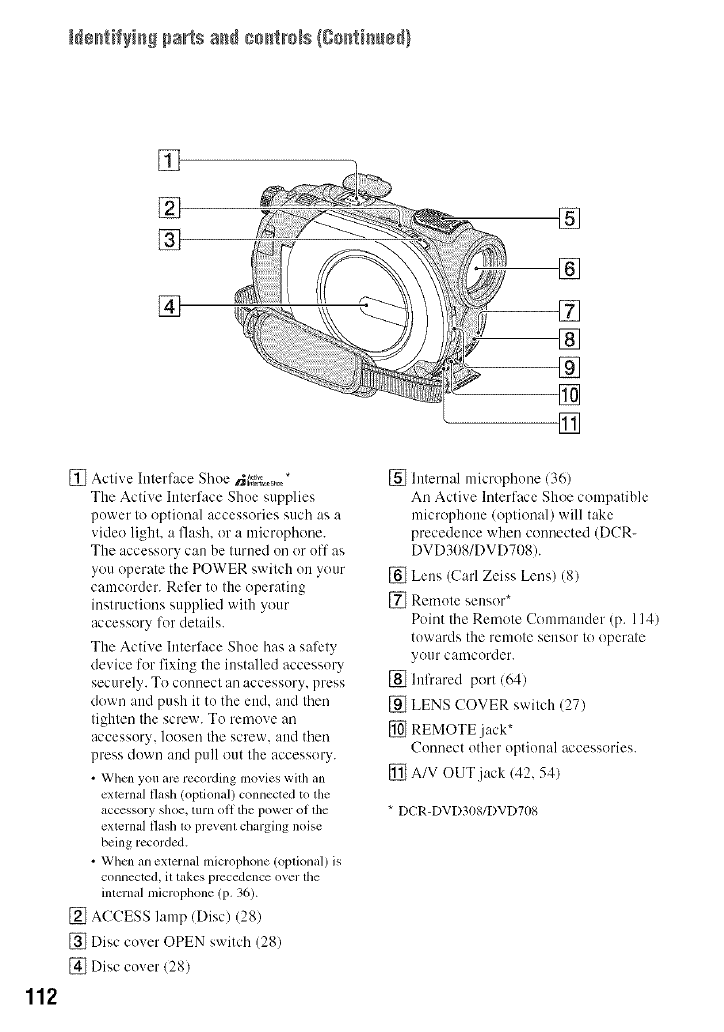
N÷_tifyiaS parts a_ co_tm_s {#o[_tia_ed)
112
[]
[]
[]
[]
[] Active Interface Shoe rJ_V_;,;_s,._*
The Active hlterface Shoe supplies
power to optional accessories such as a
video light, a flash, or a microphone.
The accessory Call be turned OU or ol'l' as
you operate the POWER switch on your
camcorder. Refer to the operating
instructions supplied with your
accessory for details.
The Active Interface Shoe has a safety
device for fixing the installed accessory
securely. To connect all accessory, press
down and push it to the end. and then
tighten the screw. To remove an
accessory, loosen tile screw, and then
press down and pull out the accessory.
• When you arc recording movies wilh an
external flash (optional) connected to the
accessory shoe. turn oH the power of lhe
external flash 1oprevcnl charging noise
being recorded.
• When an external microphone (opfional/is
conneclcd, il takes precedence over lhe
internal microphone (p. 36).
[] ACCESS lamp (Disc) (28)
[] Disc cover OPEN switch (28)
[] Disc cover 128)
[]
m[] []
[]
[]
[] Internal microphone 136)
All Active Interface Shoe compatible
microphone (optional) will take
precedence when connected (DCR-
DVD308/DVDT08).
[] Lens (Carl Zeiss Lens) (8)
[_ Remote sensor*
Point tile Remote Commander (p. 114)
towards the remote sensor to operate
your camcorder.
[] hlfrared port (64)
[] LENS COVER switch (27)
[] REMOTE jack*
Connect other optional accessories.
[] A/V OUT jack (42, 54)
*DCR-DVD30g/DVD708
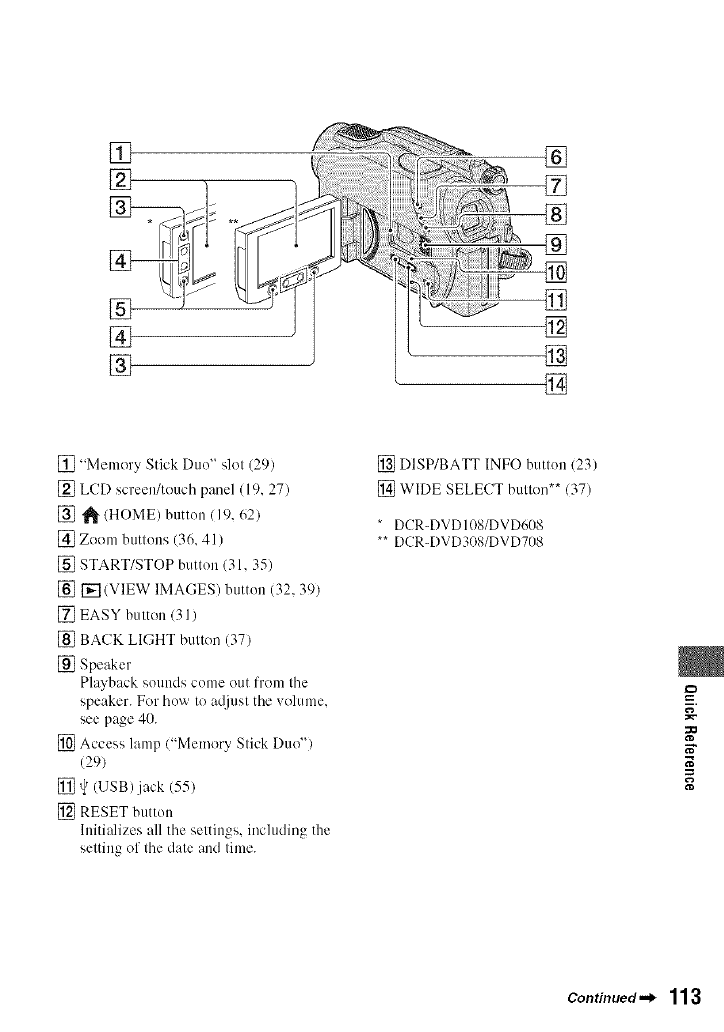
[]
[]
[]
[]
[]
[]
[]
[]
[]
[]
[]
[]
[] "Memory Stick Duo" slot (29)
[] LCD screen/touch panel (19, 27)
[] _ (HOME) button (19, 62)
[] Zoom buttons (36, 41)
[] START/STOP button (31, 35)
[] r_ (VIEW IMAGES) button (32, 39)
[] EASY button 131)
[] BACK LIGHT button (37)
[] Speaker
Playback sounds come out from tile
speaker. For how to a@lst the w)lume,
see page 40.
[] Access lamp/"Memory Stick Duo")
(29)
[] t) (USB).jack (55)
[] RESET button
lnitiNizes all the settings, including the
setting of the date and time.
[] DISP/BATT INFO butlon (23)
[] WIDE SELE(T bt IIo_ .7)
* DCR-DVD 108/DVD608
** DCR-DVD308/DVD708
=_
=
N"
V,,
Continued._ 113
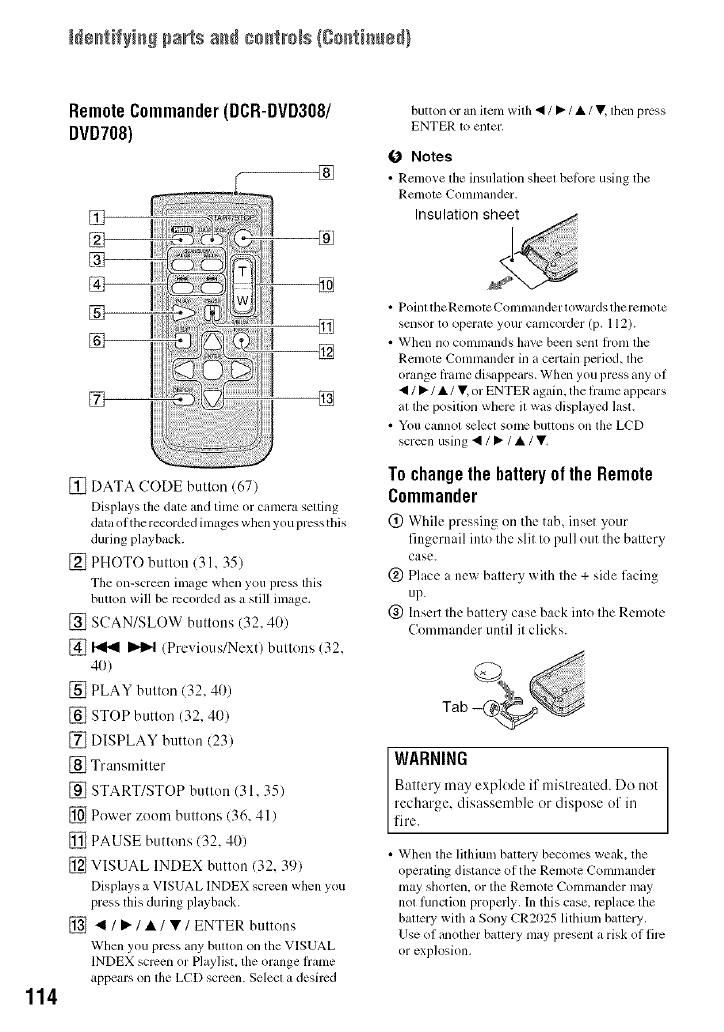
Ne_tifyiaS parts a_ c#_trNs {##r+tia_ed}
114
RemoteCommander(DCR-DVD3O8/
DVD708)
®
[]
[] DATA CODE button (67)
Displays the date and tinle or canlera setting
data of the recorded inlages whcn you prcss tiffs
during playback.
[] PHOTO button (31, 35)
Tile on-screen inlage when you press lhis
button will be recorded as a still image.
[] SCAN/SLOW buttons (32, 40)
[] _ _ (Previous/Next) buttons (32,
4O)
[] PLAY button (32, 40)
[] STOP button (32, 40)
[] DISPLAY button (23)
[] Transmitter
[] START/STOP button (31,35)
[] Power zoom buttons (36, 41)
[] PAUSE buttons (32, 40)
[] VISUAL INDEX button (32, 39)
Displays a VISUAL INDEX screen when you
press this during playback.
[] </P" /•/•/ENTER buttons
When you press any bullon on the VISUAL
INDEX screen or Playlist, file orange hame
appears on file LCD screen. Selecl a desired
button or an ilem wilh • /•/•/• lhen prcss
ENTER 1o enler.
O Notes
• Renlo_ e tim insulation sheel belbre using tile
RclllOtc {_'onlnlander.
Insulation shee
• Poilll lheRelnotc Conllnander lowards lhe ren/ole
sensor to operate your canlcorder (p. 112).
• Whcl111o colnll/ands have been sent lronl file
Renlotc Conlmander in a certain period, file
orange lianle disappears. Wllcn you press any of
•/•/•/Y, or ENTER again, tile hanle appears
at the positkm wllere it was displayed last.
• You cannol select some buttons on lhe LCD
screen using • /•/•/V,
Tochangethe batteryof the Remote
Commander
(_) While pressing on the tab, inset your
fingernail into the slit to pull ()tit the battery
case.
@ Place a new battery with the +side facing
up.
@ Insert the battery case back into the Remote
Commander until it clicks.
WARNING , _ ,)
Balle L a(ay expk de if mi Irealed. Dt it( l
_iec:l?arge, disassemble or dis2ose of it,
• When the lilhium battery becomes weak, lhe
operating distance of the Remote Conmlander
nlay sllorten, or tile Remote (-'Olnlllander may
not function properly. In this case, replace the
battery with a Sony CR2025 lithium battery.
Use of anofller battery nlay present a risk of firc
or explosion.
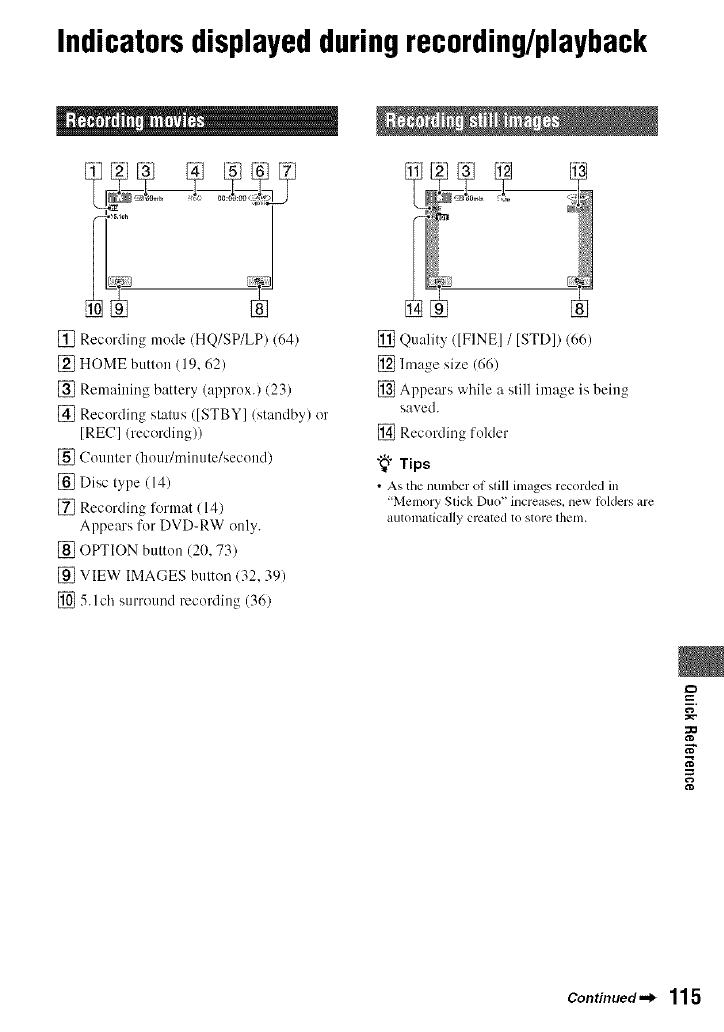
Indicatorsdisplayedduringrecording/playback
_" _ i ! He "" J
[] Recording mode (HQ/SP/LP) 164
[] HOME button (19, 62)
[] Remaining battery (approx.) (23)
[] Recording status ([STBY] (standby) or
[REC] (recording))
[] Counter (hour/minute/second)
[] Disc type (14)
[] Recording lkwmat ( 141
Appears for DVD-RW only.
[] OPTION button (20, 73)
[] VIEW IMAGES button 132, 39)
[] 5. l ch surround recording (36)
[] Quality ([FINE] /[STD]) (66)
[] hnage size (66)
[] Appears while a still image is being
saved.
[] Recording folder
"_° Tips
• As tile nunlber ol still images recorded in
"MemorySlick Duo" increases, new loldersare
automatically crcated to store lhet/l.
=_
N"
Continued._ 115
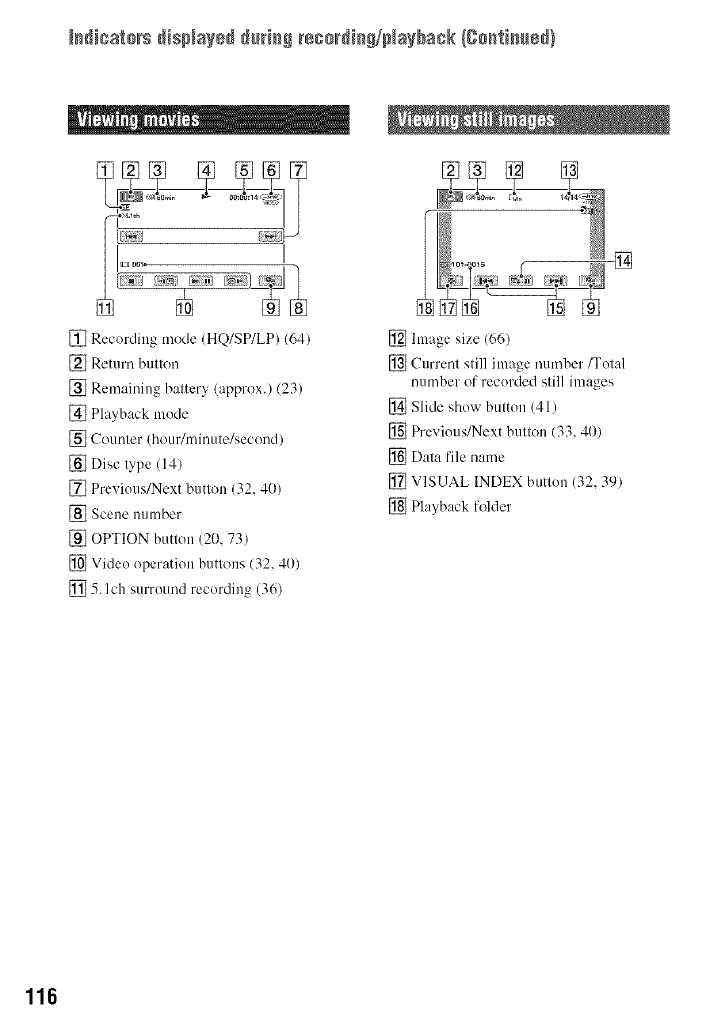
Is_icats_s disp_ays_ _t_i_S reso_di_S/pta_bask {go_fi_ed}
[] Recording mode (HQ/SP/LP) (641
[] Return button
[] Remaining battery (approx.) (23)
[] Playback mode
[] Counter (hour/minute/second)
[] Disc type (14)
[] Previous/Next button (32, 4(1)
[_ Scene nllmber
[] OPTION button (20, 73)
[] Video operation buttons (32, 40)
[] 5. Ich surround recording (36)
[] hnage size (66)
[] Current still image number/Total
number of recorded still images
[] Slide show button (41)
[] Previous/Next button (33, 40)
[] Data file name
[] VISUAL INDEX button (32, 391
[] Playback folder
116
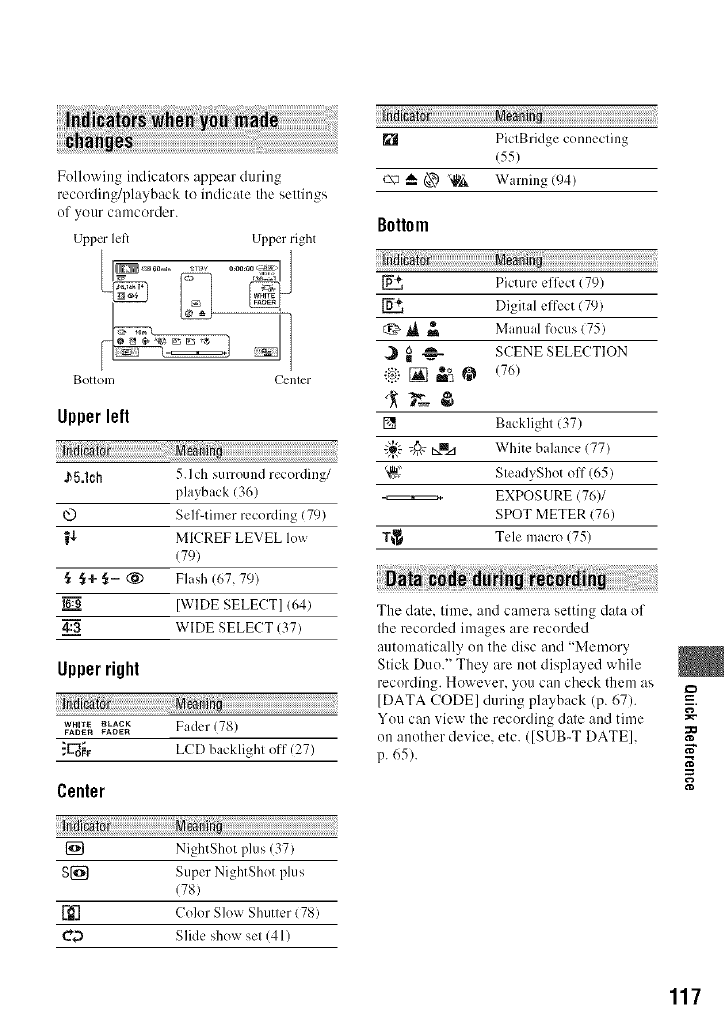
Following indicators appear during
recording/playback to indicate tile settings
of your camcorder.
Uppcr letY Upper right
BotlOlll Cenler
Upper left
in;_i ;;;;;;;;;;;;;;;;;;;;;;;;;;;:
J_5.1ch 5.Ich surround recording/
playback (36)
@ Self-timer recording (79)
W-!- M[CREF LEVEL low
(79)
_+ §- (_) Flash (67, 79)
16:d [WIDE SELECT] (64)
4:=.33 WIDE SELECT (37)
Upper right
wm,_Em.ACK Fader (78)
FADEFI FAOEFI
_1_o_1, LCD backlighi off (27)
Center
[] NightShot plus (37)
S{_ Super NightShot plus
178)
r_] Color Slow Shutter (78)
C_ Slide show set (41)
[] PictBridge connecting
(55)
c\_ _ (_3),,_ Warning (94)
Bottom
Picture eflk.ct (79)
Digital efli3ct (79)
,i_ _ Manual focus (75)
,_I _ _ SCENE SELECTION
ii_) [] m_e°_(76)
[] Backlight (37)
-}:" _ _Izd White balance (77)
_,£' SteadyShot off (65)
EXPOSURE (76)/
SPOT METER (76)
T_ Tele macro (75)
The date. time. and camera setting data of
the recorded images are recorded
automatically on the disc and "Memory
Stick Duo." They are not displayed while
recording. However. you can check them as
[DATA CODE] during playback (p. 67).
You can xiew the recording dale and time _"
on another dex ice. etc. ([SUB-T DATE].
p. 65). N"
u-,,
117
Glossary
•5.1chsurroundsound
A system that plays back sound on 6 speakers, 3 al
the lronl (lell, right and center) and 2 al the rear
(right and lell) will) an additional low-pass
subwoolcr counled as a 0, l channel Ior
liequencies of 120 Hz or lower.
•DVDmenu
A tllellU scr_n thai enables you to select a
particular sccne liom a disc being played back on
anothcr device.
•Dolhy Digital
An m/dio encoding (compression) system
developed by Dolby Laboratories Inc.
•Dolby Digital 5.1 Creator
Sound COlnplession technology developed by
Dolby Laboratories lnc. which compresses audio
efficiently while prcsel_'ing lligll sound quality. It
cnables recording of 5.1ch surround sound while
using disc space more efficiently. Discs created
by Dolby Digital 5.1 Creator can be played back
on a device compatible will) the disc created on
your calncorder,
•IVIPEG
MPEG stands lor Moving Picture Experts Group.
the group of standards lor the coding (image
compression) of video (lnovie) and audio. There
arc MPEGI and MPEG2 lormats. Your
camcorder records movies with SD (standaM
definition) image quality in MPEG2 lormat.
•Thumbnail
Reduced-size images which enable you to view
many images at the same tin)e. "VISUAL
INDEX" and "DVD MENU" use a tlmmbnail
display system.
•VIDEOmode
One of tim recording linmats you can select when
using a DVD-RW. VIDEO mode provides
excellent compatibility will) other DVD devices.
•VRmode
One of the recording lk)rmats you can select when
using a DVD-RW. VR mode enables editing
/deleting or _quence rcarrangement) will) your
calncorder Finalizing the disc lets you play it back
on a VR mode compatible DVD device.
•VISUALINDEX
This lhnction displays images of movies and still
images you llave recorded so that you can _lect
l]lose scenes you want to play back.
118
Index
Numeric
1(.:9 ................................. 37, 70
16:9 WIDE ............................ 64
4:3 ............................. 37, 64, 70
5.1 ch surround recording.....36
8cm DVD .............................. 12
A
AC Adaplor ........................... 22
Active Inlcrlacc Shoe ......... 112
Additional recording ............. 60
AREA SET ........................... 71
Aspect ralio ............... 37, 42, 64
AUTO SLW SHUTTR (Aulo
slow shulter) ................... 65, 93
A.SHUT OFF (Aulo shut off)
.............................................. 72
A/V connecting cable .....42, 54
B
BACK LIGHT ................ 37, 89
BatteJ T .......................... 22, 114
Battery inlo ........................... 23
BEACH ................................. 77
BEEP .................................... 69
BLACK FADER ................... 78
Bulton-type lithium battery
............................................ 114
B&W ..................................... 79
C
CALIBRATION ................. 105
CAMERA DATA ................. 67
CANDLE .............................. 76
CD-ROM .............................. 80
Charging time ....................... 23
CLOCK SET ......................... 25
CLOCK/LANG .................... 71
COLOR SLOW SHTR (Color
Slow Shutler) .................. 78, 93
Computer .............................. 80
Copyrighl ....................... 8. l l0
D
DATA CODE ............... 67. 117
DATE/TIME .......... 26, 67_ 117
DC IN jack ........................... 22
DC plug ................................ 22
DELETE
Disc ............................... 48
"Memory Stick Duo" .... 49
DEMO MODE ..................... 72
DIGITAL ZOOM ................. 65
Disc .............................. 28. 100
Disc cover OPEN swilch...... 28
DISC INFO .......................... 57
Disc remaining ..................... 65
DlSC SELECT GUIDE ....... 58
DISP OUTPUT .................... 71
DISPLAY ............................. 68
Display indicalors .............. 115
DIVIDE
Original ......................... 50
Playlist .......................... 53
Dolby Digital 5.1 Creator
...................................... 36. 118
Double-sided disc ............... 100
DST SET .............................. 71
Dubbing ................................ 54
DVD drive ............................ 57
DVD menu ........................... 47
DVD-R ................................. 15
DVD-RW ............................. 15
DVD+R DE .......................... 15
DVD+RW ............................ 15
D.EFFECT/Digital elI_:ct)
........................................ 79_ 93
E
Easy Handycam .................... 31
EDIT ..................................... 50
EXPOSURE ................... 76. 93
F
FADER ........................... 78, 93
FILE NO. (File number).......66
Finalize ................................. 44
FIREWORKS ....................... 76
Firsl Step Guide ........ 80, 83, 84
FLASH LEVEL .................... 67
FLASH MODE ..................... 79
FOCUS ........................... 75, 89
FORMAT
Disc ............................... 59
"Memory Stick Duo",.,.,60
6
GENERAL SET ................... 72
Glossary .............................. 118
Grip bell ................................ 34
R
HOME MENU ................ 18, 62
CLOC K/LANG ............. 71
GENERAL SET ............ 72
MOVIE SETTINGS......64
OUTPUT SETTINGS ...70
PHOTO SETTINGS......66
SOUND/DISP SET .......69
VIEW IMAGES SET ....67
HQ ........................................ 64
I
lcon .......See Display indicators
IMAGE SIZE ........................ 66
Indicators ............................ 117
INDOOR ............................... 77
InloLITHIDM ..................... 103
lnslall .................................... 81
Insulation sheet ................... 114
J
JPEG ................................... 101
=_
Continued._ 119
120
L
LANDSCAPE ...................... 77
LANGUAGE SET ................ 71
LCD backlighl ...................... 27
LCD BL LEVEL (LCD back
light level) ....................... 69. 90
LCD BRIGHT ...................... 69
LCD COLOR ....................... 69
Lcns cover ............................ 27
LP ......................................... 64
N
Macintosh ............................. 84
Mainlcnance ....................... 100
MANAGE DISC/MEMORY
calegory ................................ 57
"Memory Stick Duo'....29. 101
Memory Slick Duo adaptor
............................................ 102
MICREF LEVEL ................. 79
Mirror mode ......................... 37
Moisture condensation ....... 105
MOVIE SETTINGS ............. 64
MPEG ................................. 118
N
NIGHTSHOT LIGHT .......... 64
NightShot plus ...................... 37
NTSC .................................... 98
0
ONE PUSH ........................... 77
OPTION MEN U ................... 73
Original
DELETE ........................ 48
DIVIDE ......................... 50
OTHERS category ................ 48
OUTDOOR .......................... 77
OUTPUT SETTINGS .......... 70
P
PAL ...................................... 98
PASTEL ............................... 79
PHOTO SETTINGS ............ 66
Pickup lens ......................... 106
PictBridge ............................ 55
Picmrc Motion Browser ....... 80
PICT.EFFECT (Picture eBcct)
....................................... 79, 93
Playback ......................... 32, 39
Playback zoom ..................... 41
Playing time ......................... 24
Playlist
Creating ........................ 51
Playback ....................... 52
PORTRAIT .......................... 77
Power cord ........................... 22
Pre-installed rechargeable
battery ................................ 107
Preparalion ........................... 22
Print ...................................... 55
Q
QUALlTY ............................ 66
R
REC MODE (Recording mode)
............................................. 64
Recording ....................... 31, 34
Recording lormat ................. 14
Recording lime ............... 14, 23
REDEYE REDUC ............... 67
REMAINING ....................... 65
Remaining battely
............................. 23.115,116
Remote Commander. ......... 114
REMOTE CTRL .................. 72
RESET butlon .................... 113
S
SCENE SELECTION
....................................... 76,92
Sell-diagnosis display .......... 94
SELF-TIMER ....................... 79
SEPIA ................................... 79
SETTINGS calegoly ............ 62
Slide show ............................ 41
SNOW .................................. 77
SoBware ............................... 81
SOUND/DISP SET .............. 69
SP ......................................... 64
Specifications ..................... 108
SPORTS/Sports lesson) ...... 77
SPOT FOCUS ...................... 75
SPOT METER (Flexible spol
meter) ....................... 76, 92, 93
SPOTLIGHT ........................ 77
STEADYSHOT .................... 65
Still hnages ..................... 31.35
SUB-T [)ATE ....................... 65
SUMMERTIME ................... 71
SUNRISE&SUNSET ........... 76
Supplied items ...................... 21
Syslem requiremenls ............ 80
S.NIGHTSHOT PLS (Super
NightShol plus) .............. 78, 93
T
TELL MACRO .............. 75, 93
Tclcplloto .............................. 36
Thumbnail .......................... 118
Tripod ................................. 111
TV ................................... 42. 70
TV color system ................... 98
TV TYPE ........................ 42. 70
TWILIGHT .......................... 76
U
UNFINALIZE ................ 60. 92
Using abroad ........................ 98
V
VBR ...................................... 14
VCRorDVD/HDDrecorder
..............................................54
VFB.LIGHT(Viewfinder
brighmess)............................69
VIDEOmode................14,118
VIEWIMAGESSET...........67
Viewfinder............................27
Viewing................................32
VISUALINDEX....32,39,118
VOLUME.......................40,69
Volumelabel.........................58
VRmode.......................14,118
W
Warning indicalors ................ 94
Warning messages ................ 95
WHITE BAL. (White balance)
........................................ 77, 93
WHITE FADER ................... 78
Wide angle ............................ 36
WIDE SELECT .............. 64, 90
Windows ............................... 80
Workl time dilli_rence ........... 99
Write-protecl tab ................. 102
z
Zoom ..................................... 36
=_
N"
121
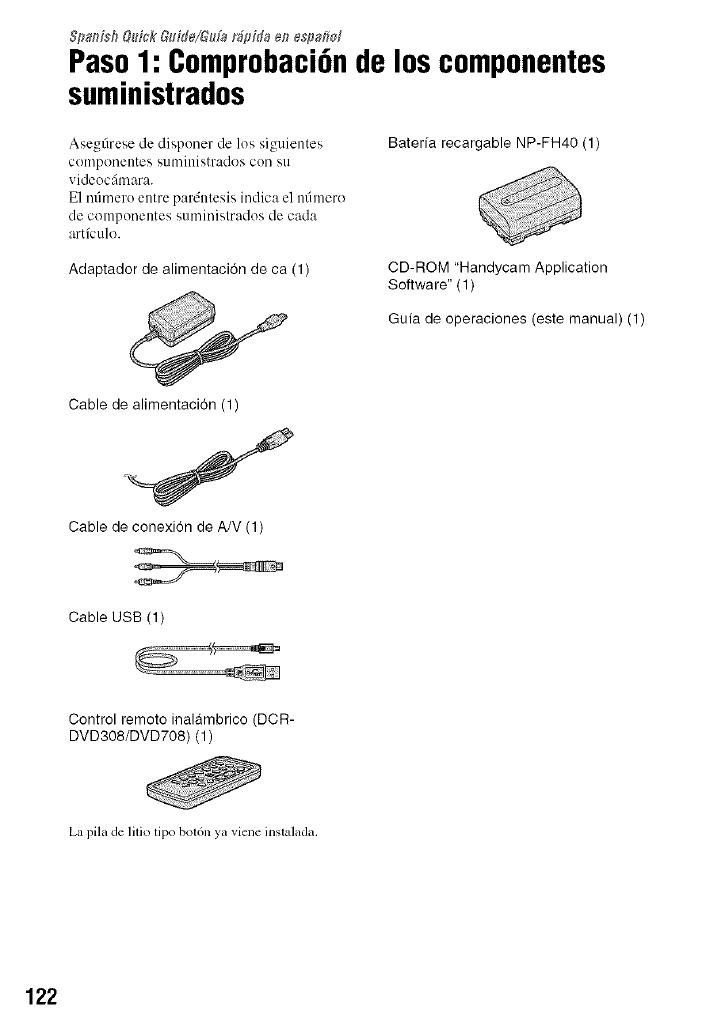
&_ai_isb&tick &dJe/&da r_dda en es#afid
Paso1: ComprobaciGnde loscomponentes
suministrados
Asegfirese de disponer de los siguientes
componentes Sllministrados coil Ell
vidcocfimara.
E1 nfimero entre pardntesis indica el ndmero
de componentes suministrados de cada
artfculo.
Adaptador de alimentaci6n de ca (1)
Baterfa recargable NP-FH40 (1)
CD-ROM "Handycam Application
Software" (1)
Gufa de operaciones (este manual) (1)
Cable de alimentaci6n (1)
Cable de conexi6n de A/V (1)
Cable USB (1)
Control remoto inalambrico (DCR-
DVD308/DVD708) (1)
La pila de litio tipo bot6n ya viene inslalada.
122
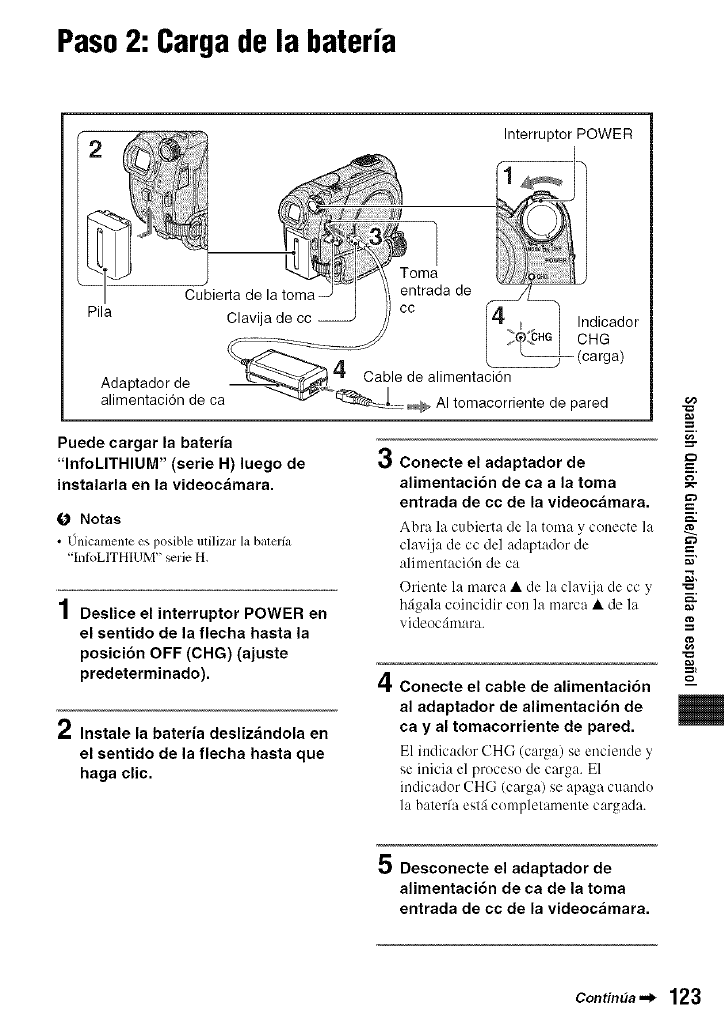
Paso2: Cargade la bateria
Pila Cubierta de
Clavija de cc
Adaptador de
alimentaci6n de ca
Puede cargar la bateria
"InfoLITHIUM" (serie H) luego de
instalarla en la videoc;imara.
O Notas
J
• Unicamenle es posible milizar la balerfa
'[nIbLITH[UM" _rie H.
4
| Deslice el interruptor POWER en
el sentido de la flecha hasta la
posici6n OFF (CHG) (ajuste
predeterminado).
2Instale la bateria desliz_indola en
el sentido de la flecha hasta que
haga clic.
Interrupter POWER
entrada de
co _ _ Indicador
I ,_°:"_t c.G
{_ (carga)
Cable de alimentacion
AI tomacorriente de pared
g
3Conecte el adaptador de =_
alimentaci6n de ca a la toma _-
entrada de cc de la videoc_imara.
Abra la cubierta tie la tema y cenecte la
clavija de cc del adaplader de
alimeetacidn de ca _"
Orieele la marca • de la cla,, ija de ccy "_'
bfi_ala ceincidir con la marca • de la
videocfimara.
4Conecte el cable de alimentaci6n
al adaptador de alimentaci6n de
ca y al tomacorriente de pared.
E1 indic:ldor CHG (c:u'g:O se enciende
se inicia el proceso de carga. E1
indicador CHG (carga) se apaga cuando
la bateffa estfi cempletamente cargada.
g
g
m
m
5 Desconecte el adaptador de
alimentaci6n de ca de la toma
entrada de cc de la videoc_imara.
Contin_a._ 123
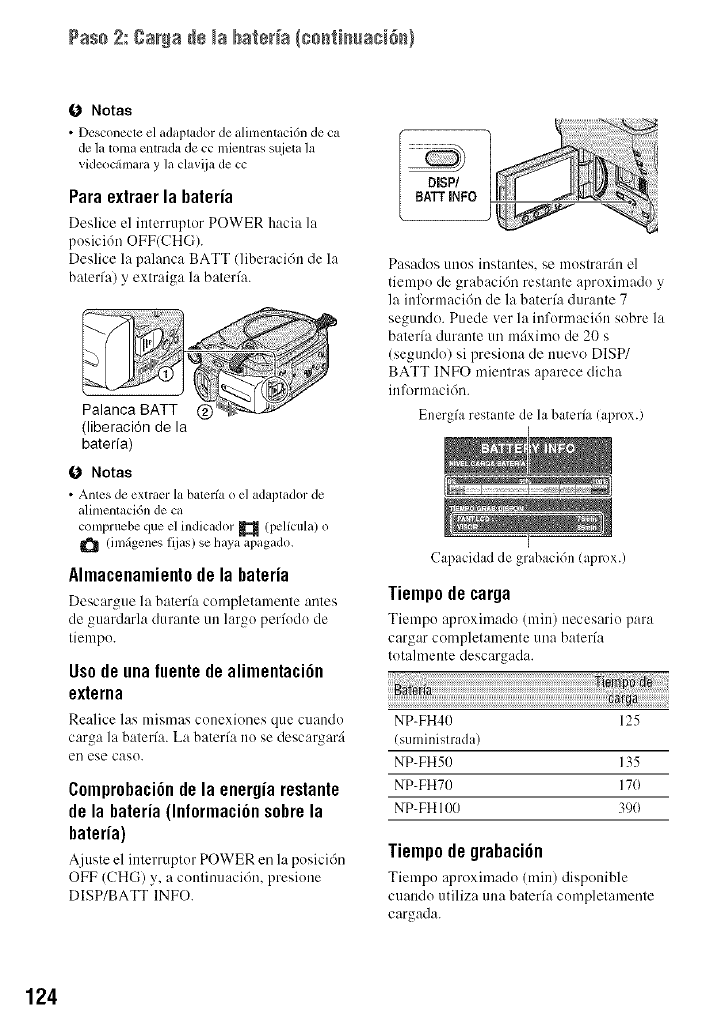
Pas+ 2:gar#a+÷ +aba_+++++Ic+++_+++ac+++++)
O Notas
• Dcsconecte el adaptador de +tlimcnt+tci(m de ca
de ]a tonm entrada de cc mJentras s/_ieta ]a
videoc&n+u+a y ]a claviia de cc
Paraextraerla bateria
Deslice el interruptor POWER hacia la
posici6n OFF(CHG)+
Deslice la palanca BATT (liberacidn de la
baterfa) y extraiga la bateri'a.
Palanca BATT @
(liberaci6n de la
baterfa)
DISP/
BATT INFO
Pasados unos instantes, se mostrarfin el
tiempo de grabaci6n restante aproximado y
la inl\wmacidn de la baterfa durante 7
segundo. Puede ver la infornmci6n sobre la
baterfa durante un mt_ximo de 20 s
(seg/mdo) si presiona de nuevo DISP/
BATT INFO mientras aparece dicha
in formacidn.
Energfa restante de la bateria (aprox.)
O Notas
• Antes de extraer la baterfa o el adaptador de
alimentacidn de c+t
compruebe que el indicador _ (pelfcula) o
(imfigenes fijas) se haya apagado.
Almacenamientode la bateria
Descargue la bater_a completamente antes
de guardarla durante un largo peri'odo de
tiempo.
Usode una luente de alimenta¢i6n
exterga
Re:,lice las mismas conexiones que cu:mdo
carga la baterfa.La bater_ano se descargarfi
el/ese caso.
Comprobaci6n de la energia restante
de la bateria (Informa¢i6n sobrela
bateria)
Ajuste el interruptor POWERell la posicidn
OFF (CHG) y, a continuaci6n, presione
DISP/BATT INFO.
Capacidadde grabacidn(aprox.)
Tiempo de carga
Tiempo aproxinl:,do (rain) necesario para
c_rgar completamente una baterfa
tomlmente descargada.
NP-FH40 125
(suministrada)
NP-FH50 135
NP-FH70 170
NP-FH 1O0 390
Tiempodegrabaci6n
Tiempo aproxinl:,do (rain) disponible
cuando utiliza una bateri'a completamente
cargada.
124
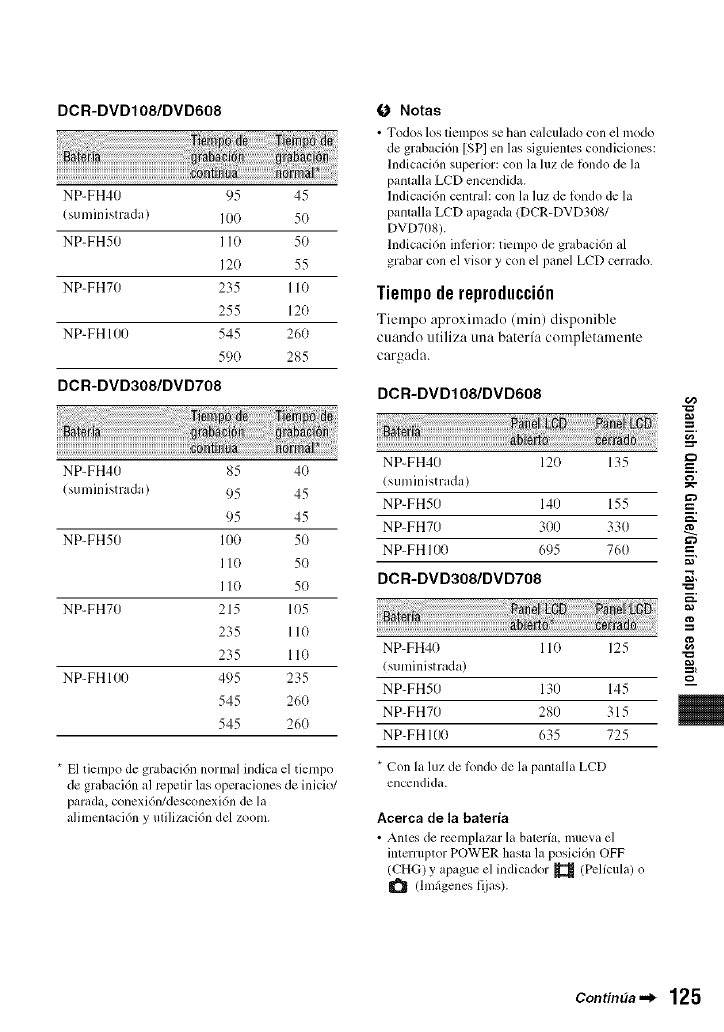
DCR-DVD108/DVD608
NP-FH40 95 45
(suministrada) 100 5(}
NP-FH50 I I0 50
12O 55
NP-FHT0 235 110
255 120
NP-FH 100 545 260
590 285
DCR-DVDa00/DVD708
NP-FH40 85 4(}
(suministrada) 95 45
95 45
NP-FH50 I00 50
II0 50
I I0 50
NP-FH70 215 105
235 110
235 110
NP-FH 100 495 235
545 260
545 260
* El tiempo de grabaci6n normal indica el tiempo
de grabaci6n al lvpetir las operaciones de inicio/
parada, conexi6n/desconexi6n de la
alimcntaci6n y utilizacidn del zoom.
O Notas
•Todos los tiempos se hml c+dculado con el modo
de grabaci6n [SPI en las siguientes condiciones:
lndicuci6n superior: con la luz de londo de la
pantalla LCD enccndida.
lndicaci6n ccntral: con la luz de londo de la
pantalla LCD apagada (DCR-DVD3OS/
DVD708).
lndicaci6n inlcrior: tiempo de grabacidn al
grabar con el visor y con el panel LCD cerrado.
Tiemp0derepr0ducci6n
Tiempo aproximado (rain) disponible
cuando utiliza una baterfa completamente
cargada.
DCR-DVD108/DVD608
+
NP-FH40 12(} 135 =_
(stmfinistrada) _--
NP-FH50 140 155 =
NP-FHT0 300 330
NP-FH 100 695 760 =
DOR-DVDa08/DVD708 .._,
g
NP-FH40 110 F?5
-- ,._
(suminismtda) _
NP-FH50 130 145 --
NP-FHT0 280 315
NP-FH 100 635 725
* Con la luz de Ibndo de la panlalla LCD
encendida.
Acerca de la bateria
•Antc', de reemplazar la baterfa, mueva el
intcn uptor POWER hasht la posici6n OFF
(CHG) y apague el indicador _ (Pclfcul+0 o
(hnfigenes fijas).
Contin_a._ 125
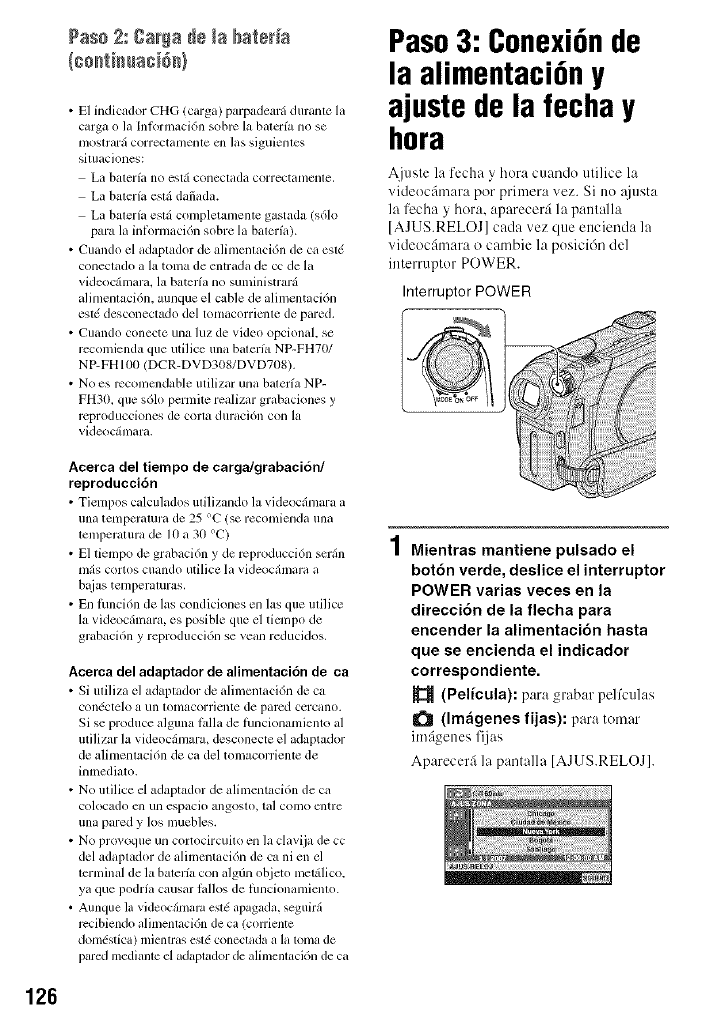
Paso 2:gar_a de ta bateda
• E1 indicudor CHG (carga) parpadearfi durante la
carga o la Inlormaci6n sobrc la balcrfa no se
[/loslrarfi correctamenle cn las siguienles
siluaciones:
La baterfa no estfi conectada correctamenle.
La baterfa eslfi dafiada.
La balerfa eslfi completamentc gastada (s61o
para la inlkmnaci6n sobre la balerfa).
• Cuando el adaptador de alimenlacidn de ca esl(
coneclado a la toma de entrada de cc de la
videocfimara, la baterfa no suministrarfi
alimenlaci6n, aunque el cable de alimentaci6n
est( desconectado del tomacorricnle de pared.
• Cuando conecte una luz de video opcional, se
rccomienda que utilice una balerfa NP-FH70/
NP-FH lb_l (DCR-DVD308/DVD708).
• No es rccomcndable utilizar una balerfa NP-
FH30. que s61o permite realizar grabaciones y
rcproducciones de corla duraci6n con la
videocfimara.
Paso3: Conexi6nde
la alimentaci6ny
ajuste de la fecha y
hora
Ajuste la fecha y hora cuando utilice la
videocfimara por primera vez. Si no :tiusta
la fecha y hora, aparecerfi la pantalla
[AJUS.RELOJ] cada vez que encienda la
videocfimara o cambie la posicidn del
interruptor POWER.
Interruptor POWER
Acerca del tiempo de cargaJgrabaci6n/
reproducci6n
• Tiempos c_dcul_Ldos ufilizando la _ ideocfimara a
una temperatura de 25 °C (se recomienda una
lemperalura de I0 a 30 °C)
• E1 tiempo de grabaci6n y de rcproducci6n serfin
mils cortos cuando utilice la videocfimara a
bltias tenlperamras.
• En lhnci6n de las condiciones en las que ulilice
la videocfimara, es posible que el ticmpo de
grabaci6n y reproduccidn se vean reducidos.
Acerca del adaptador de alimentacidn de ca
•Si ufiliza el adaplador de alimenlaci6n de ca
condctelo a un lonlacorrienle de parted cercano.
Si se produce alguna/_dla de fimcionamiento al
utilizar la videocfimara, desconecte el adaptador
de alimentaci6n de ca del tomacorriente de
inmediato.
• No ulilice el adaptador de alimentaci6n de ca
colocado cn un espacio angoslo, ta] COli]O entre
una pared y los mucbles.
• No provoque un cortocircuito en la clavija de cc
del adaplador de alimentacidn de ca ni en el
terminal de la baterfa con algdn objeto mct_ilico.
ya que podrfa causar lallos de fimcionamicnlo.
• Aunque la videocfimam esl( apagada, seguirfi
recibiendo alimenlaci6n de ca (corricntc
domdstica) mientras esl( conectada a la loma de
pared medianle el adaplador de alimenlacidn de ca
Mientras mantiene pulsado el
botdn verde, deslice el interruptor
POWER varias veces en la
direcci6n de la flecha para
encender la alimentacidn hasta
que se encienda el indicador
correspondiente.
(Pelicula): para grabar pelfculas
(Im_igenes fijas): para tomar
imfigenes fijas
Aparecer:i la pantalla [AJUS.RELOJ].
126
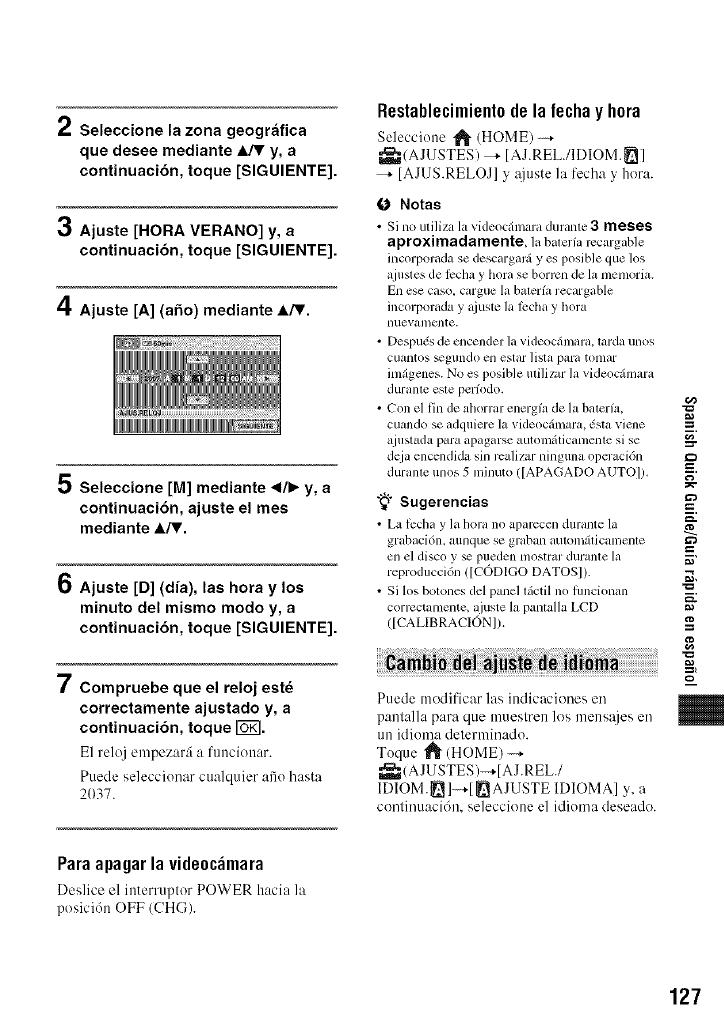
2Seleccione la zona geogr&tica
que desee mediante _y, a
continuaci6n, toque [SIGUIENTE].
3Ajuste [HORA VERANO] y, a
continuaci6n, toque [SIGUIENTE].
4Ajuste [A] (afio) mediante A/V.
5 Seleccione [M] mediante ,/_ y, a
continuaci6n, ajuste el mes
mediante A/V.
6Aiuste [D] (dia), las hora y los
minuto del mismo modo y, a
continuaci6n, toque [SIGUIENTE].
7Compruebe que el reloj estd
correctamente ajustado y, a
continuaci6n, toque _%.
E1reloj empezar:i a funcionar.
Puede seleccionar cualquier afio hasta
2037.
Restablecimient0dela fechay h0ra
Seleccione _ (HOME)
_,_(AJUSTES)--+ IAJ.REL./IDIOM._ I
_- [AJUS.RELOJ] y _iuste la fecha y hora.
Notas
• Si no utiliza h, videoc,_mara durante 3meses
aproximadamente, la bater_arccargabk"
incorporada se descargar_ yes posible que los
a.justes de _ccha y hora se borrcn de la memoria.
En ese caso. cargue la baterfa recargable
incorporada y +Ljustela lccha y hora
nuevanlcnte+
• Despu,Ss de encender la videocdmara+ tarda unos
cuantos _gundo en estar ]isla para tonlar
imdgenes. No es posible mili/ar la videoc&nara
durante este perfodo.
• Con el fin de ahorrar energfa de la baterfa,
cuando se adquiere la videocfimara, (sla viene
a.iustzlda p_wa apagarse autolllfilicamenle si se
dcja encendi&_ sin rcalizar ninguna operacidn
durame unos 5 minuto ([APAGADO AUTOI).
"_° Sugerencias
• La tccha y la hora no aparccen durante la
grabaci6n, aunque se graban mltomdtiCalnenle
ell el disco 3;_ pueden mostrar durante la
reproducci6n ([CODIGO DATOS]).
• Si los botoucs de[ pa0.cl t(tctil no flmcionan
corrcctamente, a.juste la pantalla LCD
([CALIBRACION]).
Puede modificar las indicaciones en
pantalla para que muestren los mens_ies en
un klioma determinado.
Toque I_" (HOME) -+
_,__,(AJUSTES/--+[ AJ.REL./
IDIOM._I-+[_AJUSTE IDIOMAI y, a
continuacidn, seleccione el idioma deseado.
g
g
=_.
g
g
m
Paraapagarlavide0c_mara
Dcslice el interruptor POWER hacia ]a
posici6n OFF (CH(;).
127
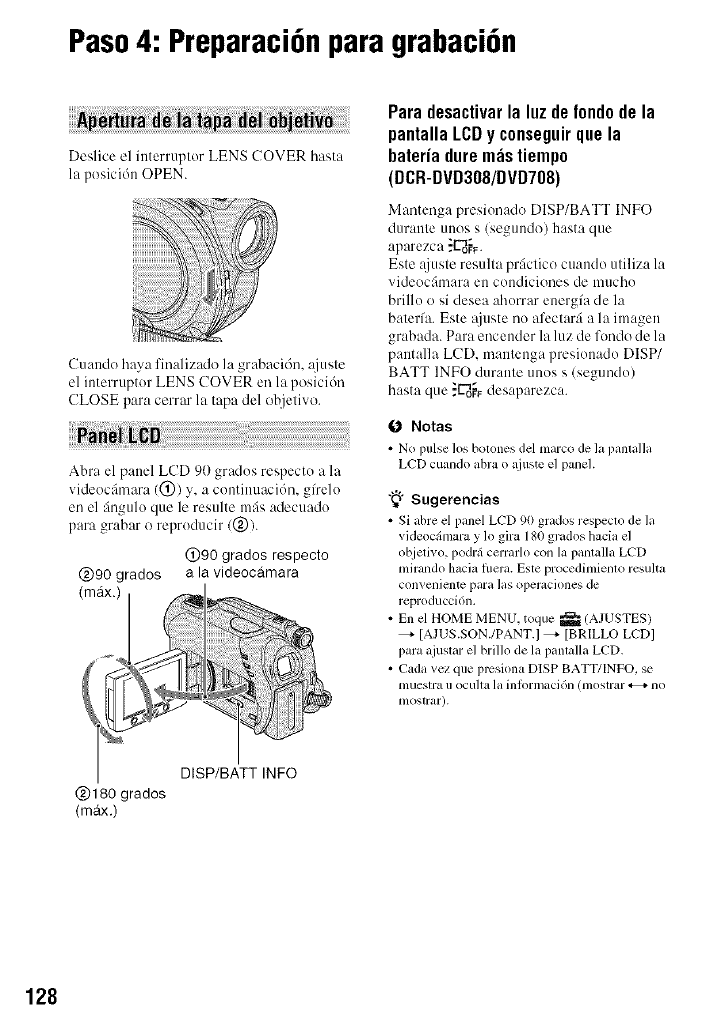
Paso4: Preparaci6npara grabaci6n
i
Deslice el interruptor LENS COVER hasta
la posici6n OPEN.
Cuando haya finalizado la grabaci6n, _(juste
el interruptor LENS COVER en la posici6n
CLOSE para cerrar la tapa del objetivo.
Abra el panel LCD 90 grados respecto a la
videocfimara(0) y, a continuacidn, gfrelo
en el finguloque le resulte mils adecuado
para grabar o reproducir (@).
@90 rados
(max.)
@180 grados
(max.)
@90 grados respecto
a la videocamara
DISP/BATT INFO
Para desactivar la luz de fondode la
pantalla LCDy conseguirque la
bateria dure re;istiempo
(DCR-DVD308/DVD708)
Mantenga presionado DISP/BATT INFO
durante unos s (segundo) hasta que
aparezca ."L-do_F•
Este :(juste resulta prfictico cuando utiliza la
videocfimara en condiciones de mucho
brillo o si desea ahorrar energ/a de la
bater/a. Este @lste no afcctarfi a la imagen
grabada. Para encender la luz de rondo de la
pantalla LCD, mantenga presionado DISP/
BATT INFO durante unos s (segundo)
hasta que .:L"_ desaparezca.
O Notas
•No pulse los bolones del marco de la pantalla
LCD cuando abra o ajuste el panel.
"_° Sugerencias
• Si abre el panel LCD 90 grados respeclo de la
videocfimara y 1o gira 180 grados hacia el
objetivo, podrfi cerrarlo con la pantalla LCD
mirando hacia flmra. Este procedimiento resulta
convcnient_ para las operaciones de
reproducci6n.
• En el HOME MENU. toque _ (AJUSTES)
_- [AJUS.SON./PANT.] _- [BRILLO LCDI
para ajuslar el brillo de la panlalla LCD.
• Cada vez que prcsiona DlSP BATT/INFO. se
mueslra i1 ocu][a la inlormacidll (mostrar _+ no
tnostrar).
128
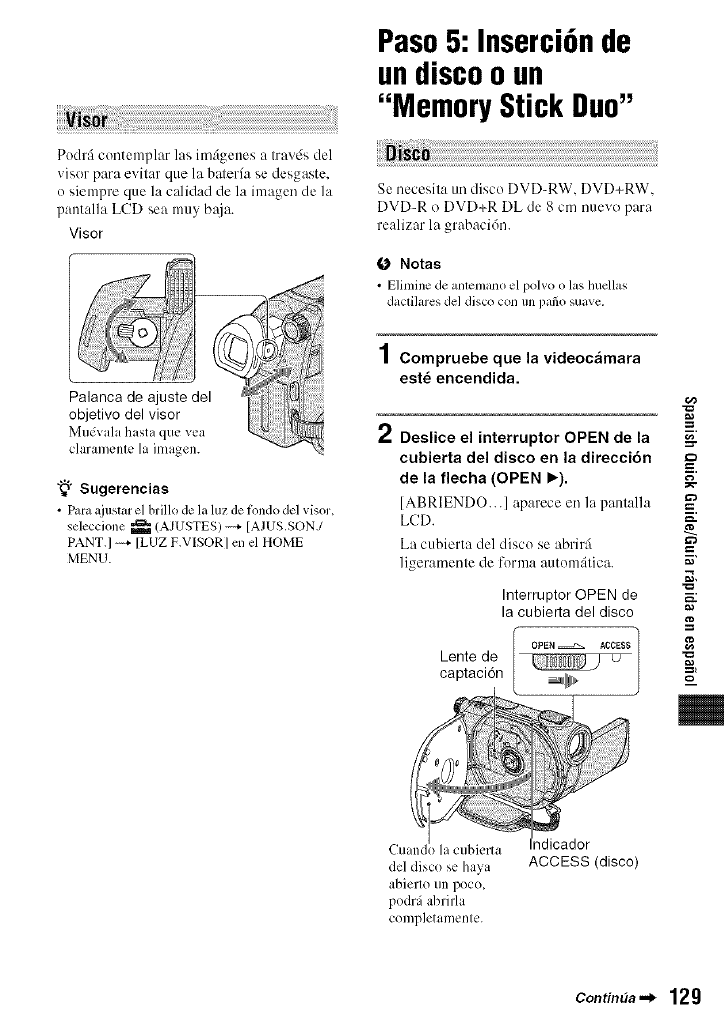
Podrfi contemplar las imfigenes a Iravds del
visor para evitar que la balerfa se desgaste.
o siempre que la calidad de la imagen de la
pantalla LCD sea muy b_{ia.
Visor
;,!ii_¸ili
Palanca de ajuste del
objetivo del visor
M[l_Vala h{ista q[IL' VL'a
claramcnlc la ima_en.
"_° Sugerencias
•Para aiustm"el brillo do la luz de tkmdode] visor,
seleccione _ (AJUSTES)_ [AJUS.SON./
PANT.] -'4 [LUZ F.VISORI en el HOME
MENU.
Paso5: Inserci6nde
undiscoo un
"Memory Stick Duo"
Se necesita un disco DVD_RW. DVD+RW.
DVD-R o DVD+R DL de 8 cm nuevo para
realizar la grabacidn.
ONotas
• Eliminede anlemanoel poBo o las hucllas
daclihu'es del disco con un patio suave,
1Compruebe que la videocamara
est_ encendida.
2Deslice el interruptor OPEN de la
cubierta del disco en la direcci6n E.
de la flecha (OPEN _). __
[ABRIENDO...] aparece en la panlalla
LCD. =-
La cubierta del disco se abrir:i
]igeramenle de forma automfilica. _'
._,
Interruptor OPEN de
la cubierta del disco
Lente de
captacion
del disco se haya
abierto un poco,
podrfi abrirla
completamente.
ndicador
ACCESS (disco)
=_
g
==,
m
ContimJa._ 129
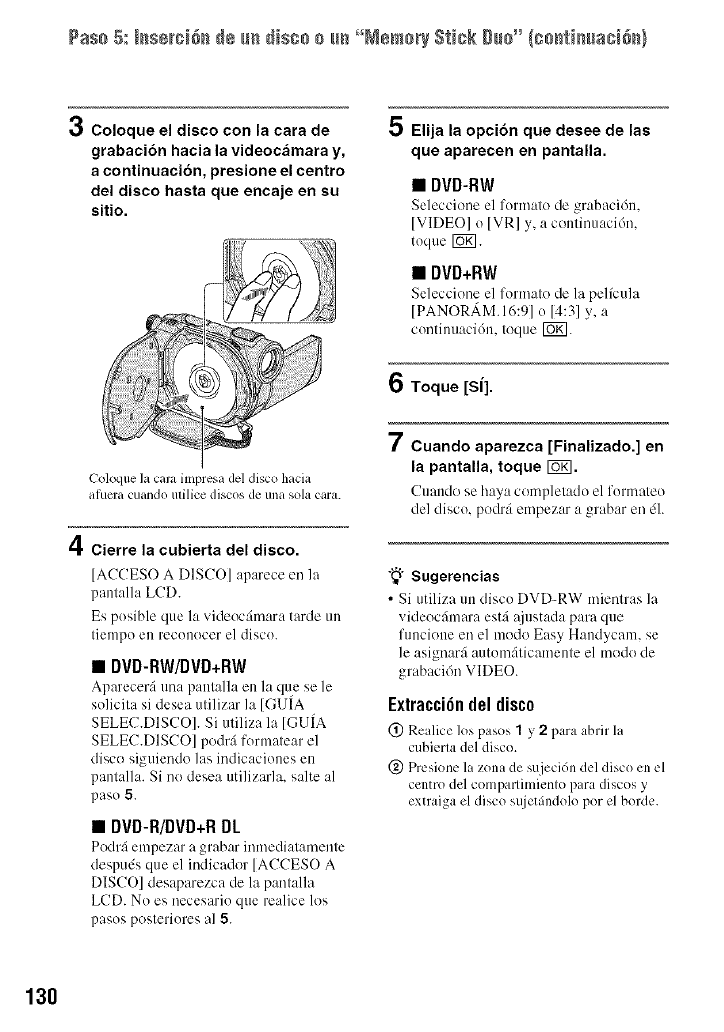
Pas+ 5: ++s÷+++++++++ +m+++s+++ +m°+N÷m+r+St++k g+++"{+++t++ma+++++}
Coloque el disco con la cara de
grabacibn hacia la videocfimara y,
a continuacibn, presione el centro
del disco hasta que encaje en su
sitio.
5Elija la opci6n que desee de las
que aparecen en pantalla.
•DVD-RW
Seleccione el formato de grabacidn.
IVIDEOI o IVRI y, a continuaci6n.
toque Ira.
•DVD+RW
Seleccione el formato de la pelicula
[PANOR,_M.16:gl o [4:31 y, a
contilmacidn, toque rug].
6Toque [Sl].
4
Coloque la cala impresa del disco hacia
afucra cuando utilice discos de una sola cara.
Cierre la cubierta del disco.
[ACCESO A DISCO] aparece en la
pantalla LCD.
Es posible que la videoc:imara tarde un
tiempo en reconocer el disco.
•DVD-RW/DVD+RW
Aparecer:i una p:mt:dla en la que se le
solicita si desea utilizar llt [GUfA
SELEC.DISCO]. Si utiliza la [GUIA
SELEC.DISCO] podr:i formatear el
disco siguiendo las indicaciones en
pantalla. Si no desea utilizarla, salte al
paso 5.
•DVD-R/DVD+R DL
Podr:i enlpezar a grabar in[lnedi:ltamente
despuds que el indicador [ACCESO A
DISCO] desaparezca de llt pantalla
LCD. No es necesario que realice los
pasos posteriores Ill 5.
7Cuando aparezca [Finalizado.] en
la pantalla, toque rOK].
Cuando se h:_ya completado el formateo
del disco, podr:i empezar a grabar en dl.
"_i° Sugerencias
• Si utiliza un disco DVD-RW mientras la
videocfimm'a est:i :tjustada pare que
funcione en el modo Easy Handycam, se
le asignarfi autom6ticamente el modo de
grabacidn VIDEO.
Extracci6n del disco
@ Realice los pasos 1y2para abrir la
cubierla del disco.
@ Prcsione la zona de sujecidn del disco en el
centro del compallimiento para discos y
extraiga el disco sujetfindolo por el borde.
130
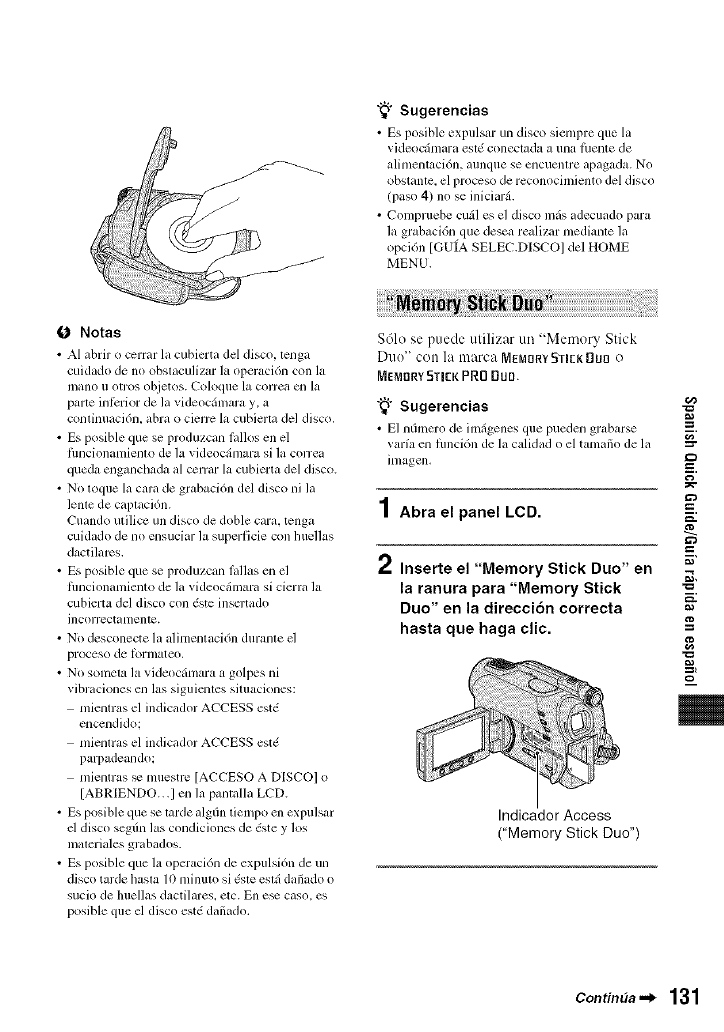
"_° Sugerencias
•Es posible expulsm un disco siempre que la
videocfimara esl_ conectada a una lhente de
alimentaci6n, aunque se encumllre apagada. NO
obstantc, el proceso de reconocimiento del disco
(paso 4) no se iniciarfi.
• Compruebe cufil es el disco mils adecuado para
la grabaci6n que desea realizur mediante la
opci6n [GUIA SELEC.DISCO] del HOME
MENU.
0 Notas
• AI a,brir o cerrar l_tcubierta del disco, lenD*
cuidado de nit obslaculizar la operacidn con la
mano i1 O[l*OS objetos. Coloque la correa ell la
parte inlcrior de la videocfimara y, a
continuaci6n, abra o cierrc la cubierla del disco.
• Es posible que se produzcan lallos en el
flmcionamienlo de la videocfimara si la correa
queda enganchada al cerrar la cubierta del disco.
• Nit toque la cara de grabaci6n del disco ni la
lenle de caplaci6n.
Cuando utilice un disco de doble car& tenga
cuidado de nit ensuciar la superficie con huellas
dactilarcs.
• Es posible que se produzcan lallas en el
flmcionamiento de la videocfimara si cierra la
cubierta del disco con ,Sste inscrtado
incorrcctatllente.
• Nit desconecte la alimentaci6n durante d
proceso de [_)rnlateo.
• Nit sonlcta la videocfimara a golpes ni
vibraciones en las siguicntes simaciones:
mientras el indicador ACCESS estd
enccndido:
mientras el indicador ACCESS estd
parpadeando:
mientras _ muestrc [ACCESO A DISCO] o
[ABRIENDO...I en la pantalla LCD.
• Es posible que se lame algdn tiempo en expulsar
d disco segdn las condiciones de 6ste y los
materiales grabados.
• Es posible que lz_opcracidn de expulsi6n de un
disco taMe hasla 10 [llinulo si (sle eglfi dafiado o
sucio de huellas dactilares, etc. En e_ caso. es
posible que el disco estd dafiado.
$61o se puede utilizar un "Memory Stick
Duo" con la marca [t,J]EMOR¥STEK _U{] o
MEMORYSTICKPRD Duo.
"_° Sugerencias
• E1nfimero de imfigenes que pueden gr_,barse
varia en fimcidn de la calidad o el tamafio de la
imagen.
1Abra el panel LCD.
rt Inserte el "Memory Stick Duo" en
la ranura para "Memory Stick
Duo" en la direcci6n correcta
hasta que haga clic.
Indicador Access
("Memory Stick Duo")
g
m.
g
g
m
m
Contin_a.._ 131
Pa++ 5: +++÷r+++++++e +m+++++++ +m°+M÷m+r+$_++k++++°+I+++_++ma+++++}
Para expulsarun "Memory StickDuo"
Empuje ligemmente el "Menlory Stick
Duo" hacia el interior de la ranura una vez
y, a continuaci6n, deslfcelo fuera de 6sta.
0 Notas
• No intente extract el '[Vlcmory Stick Duo" a ]a
luerza. Si Iohace, podrfa provocar l_,llas de
hmcionamiento.
• Cuando el indicador de acceso se enciende o
pallmdea, significa que la videocfimara estfi
leyendo o grabando datos. No sacuda ni golpee
la videocfimara, desconecte la alimentaci6n,
expulse el "Memory Stick Duo" ni retire la
bateria. Si 1o hace, los datos de imfigenes
podr/an dafiar_.
• Si ingresa el "Memo W Stick Duo" en la ranura
en la direcci6n incorrccta, es posible que se
darien el "Mmnory Stick Duo", la ranura para
+'MemolT Stick Duo" o los datos de imfigenes.
132

Grabaci6n
DCR-DVD108/DVD608 Interruptor POWER []
(HOME) [] PHOTO [] Abra la tapa
del objetivo
[]
DCR-DVD308/DVD708
START/STOP _ (HOME []
[]
START/STOP[_]
A.iusle la correa de sujeci6n como mueslra
la iluslraci(m y su.jete la videoc_hnara
correclamen/e.
O Notas
Si los indicadorcs de acccso permanecen
encendidos una vez finalizada la grabaci6n.
significa que todavfa se estgin grabando dalos en
el disco o en el 'Mmno USlick Duo". No
somela la videocilmara a golpes o vibraciones.
ni desconecte la balerfa o el adaplador de
alimenlaci6n de ca
g
Pc
m.
=,,
g
g
=%
m
m
ContinlJa ._ 133
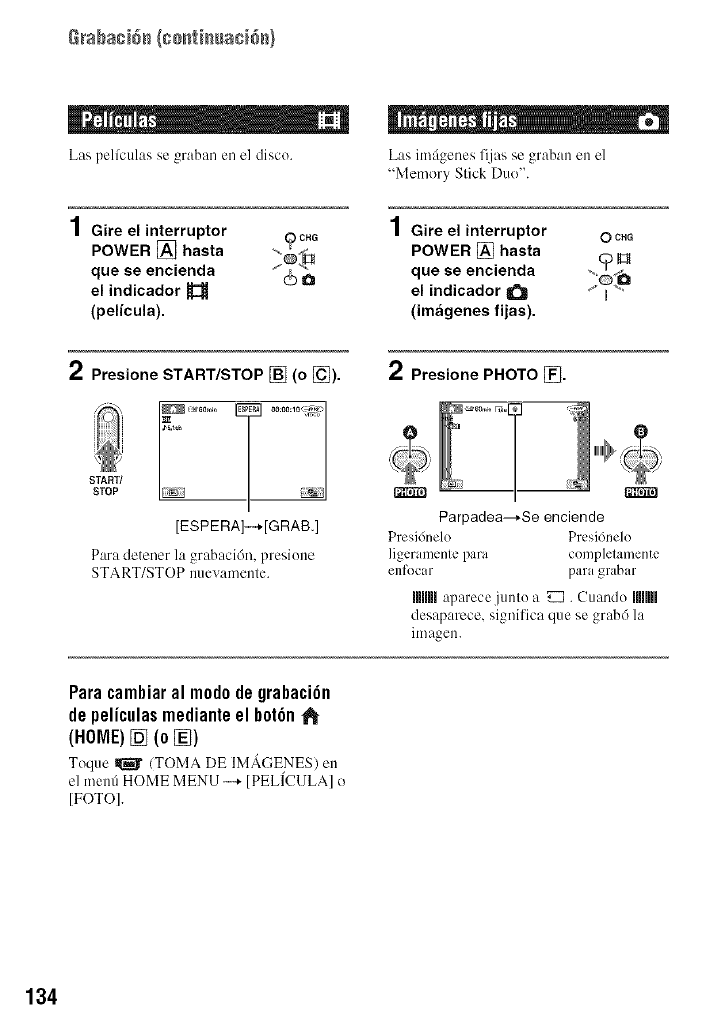
Rraba¢i6_ (ge_t}_uac}6_}
m . , EmE
Las pel(culas se graban en el disco.
1Gire el interruptor
POWER [] hasta
que se encienda
el indicador
(pegcula).
Las imfigenes fijas se graban en el
"Memory Slick Duo".
1Gire el interruptor
POWER [] hasta
que se encienda
el indicador
(imageries fijas).
0CHG
H
2Presione START/STOP [] (o []).
START/
STOP
[ESPERA]-+[GRAB.]
Para detener la grabaci6n, presione
START/STOP nuevamenle.
2Presione PHOTO _.
Parpadea--_Se enciende
Presi6nelo Prcsi6nelo
ligeramente para completamente
enfocar para grabar
Illlllllaparece junto a _ . Cuando Ilfllfll
desaparece, significa que se grabd la
imagen.
Paracambiaral m0d0degrabaci6n
depeliculasmedianteel b0t6n
(HOME) [] (0 [])
Toque _ (TOMA DE IMACENES) en
el menfi HOME MENU --+ [PELICULA] o
[FOTO].
134
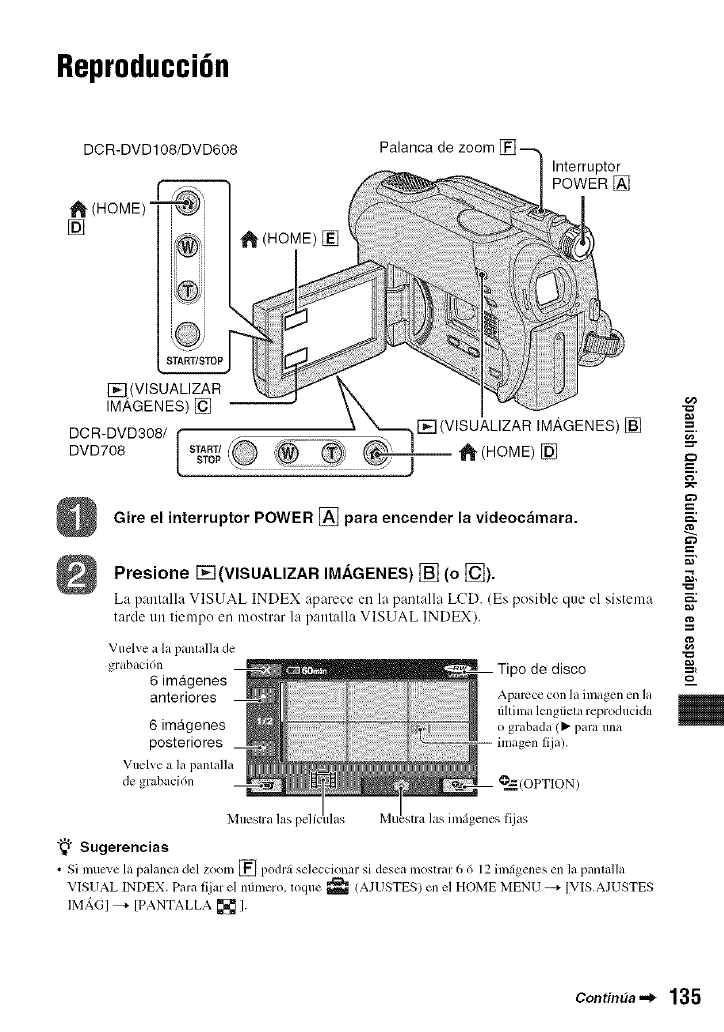
Reproducci6n
DCR-DVD108/DVD608
i_-(HOME) =
[] ,_ (HOME) []
Palanca de zoom
Interruptor
POWER []
[_ (VISUALIZAR
IMAGENES) []
F'_'] (VISUALIZAR IMAGENES) []
DCR-DVD308/ r _ ,_::::¢'+_ _ I
DVD708 [ START/sTOP '_ (HOME) []
Gire el interruptor POWER [] para encender la videoc;imara.
Presione I-_(VISUALIZAR IM.&GENES) [] (o []).
La pant:alia VISUAL INDEX aparece en la pantalla LCD. (Es posiMe que el sistema
tarde un fiempo en mostrar la panlalla VISUAL INDEX).
Vuelve a la panlalla de
grabaci6n
6 imagenes
anteriores
6 imagenes
posteriores
Vuelve a la panlalla
de grabaci6n
Tipo de disco
Aparccc con la inlagen en la
tihima lcngiiela reproducida
o grabada (_ para una
imagen Ilia).
@=_--'(OPTION)
Muestra las
"_° Sugerencias
•Si mucve la palanca del zoom [] podrfi seleccionar si desea mostrar 6 d 12 imfigenes en la pmlmlla
VISUAL INDEX. Para fijar el nfimero, loque _ (AJUSTES) en el HOME MENU ----+ [V[S.AJUSTES
IM_.G] _- IPANTALLA _ ].
g
E.
i.
g
g
i
m
Continaa "_ 135

Rep_o_ucci6_ (co_ti_uaci&_}
Inicie la reproduccion.
Toque la lengtieta _ yla pelicula que desee reproducir.
ka pantalla VISUAl_ INDEX volvergt a aparecer cuando se haya completado la
reproducci6n de la secuencia entre la pelicula seleccionada y la 01tima pelicula.
Volver (a la palltalla @_ _60mm I_- 00:00:14<_ I
VIsuAL INDEX) i_.,_h :_1_] ' Ahernareproduccidnyel nlOdOdelde........
............ cada vez que se loca.
Detener (Jr a ]a pantalla g_i1001VISUAL lNDEX) O,=- OPT ON
} Ue*_obinado/avance rfipido
Toque la lengtieta I1_ Y la imagen fija que desee reproducir.
Volver (a la l)antalla _60m=n _u 14114 _
VISUAL INDEX)
101-0015
h a la pantalla
VISUAL INDEX
Bot6n de presenlaci6n de
diaposilivas
Anlerior/Siguienle
Cambio al modo de reproduccidn
mediante el bot6n _(HOME) [] (o
Toque [_EI(VISUALIZAR IMAGENES)
--* [VISUAL INDEX]
Ajustedelv01umendela pelicula
Toque O_--(OPTION) _ lengtieta [_
VOL. y, acontinuaci6n, ajfistelocon [_7/
r_].
"_° Sugerencias
•Toque _/[]_ durante la pausa para
reproducir la pelfcula en cfimara lenla.
• Si Ioca dichos botones Ul3a vez. el rebobinado o
el avance rfipido irfin unas 5 veces ]ntis rfipido y,
si los loca 2 veces, aumentarfi la velocidad
aproxi madal/lenle 10 veces*.
* UllaS 8 veces mils r@ido si uliliza un DVD+RW
136
