Sony DGA-4001 Bluetooth Display User Manual Sony Ericsson Mobile Communications AB
Sony Mobile Communications Inc Bluetooth Display Sony Ericsson Mobile Communications AB
Sony >
08 user manual

LiveView™
User guide
Guide de l’utilisateur
用户指南
使用手冊
September 13, 2010 15:07:12

Prior to use, please read the Important information leaflet separately
provided.
This User guide is published by Sony Ericsson Mobile Communications
AB or its local affiliated company, without any warranty. Improvements
and changes to this User guide necessitated by typographical errors,
inaccuracies of current information, or improvements to programs and/
or equipment, may be made by Sony Ericsson Mobile Communications
AB at any time and without notice. Such changes will, however, be
incorporated into new editions of this User guide.
All rights reserved.
©Sony Ericsson Mobile Communications AB, 2010
Publication number: 1243-2255.1
Bluetooth is a trademark or a registered trademark of Bluetooth SIG Inc.
and any use of such mark by Sony Ericsson is under license.
Interoperability and compatibility among Bluetooth™ devices varies.
Device generally supports products utilizing Bluetooth spec. 1.2 or
higher, and Headset or Handsfree profile.
The Liquid Identity logo, LiveWare and LiveView are trademarks or
registered trademarks of Sony Ericsson Mobile Communications AB.
Sony and "make.believe" are trademarks or registered trademarks of
Sony Corporation.
Android and Android Market are trademarks or registered trademarks of
Google, Inc.
Facebook is a trademark or registered trademark of Facebook, Inc.
Twitter is a trademark or a registered trademark of Twitter, Inc.
Ericsson is a trademark or registered trademark of Telefonaktiebolaget
LM Ericsson.
NeoReader is a trademark or registered trademark of NeoMedia
Technologies Inc.
All illustrations are for illustration only and may not accurately depict the
actual accessory.
September 13, 2010 15:07:12
Sony Ericsson MN800
2

English
Introduction
LiveView™ is a mini display that mirrors and displays the
events that happen in your phone, so you never miss what
is going on. On your LiveView™ screen, you can view
notifications such as text messages, multimedia messages,
incoming calls, calendar event reminders, updates from
friends on Facebook™, and tweets.
You decide what you want to keep track of by selecting the
notification categories in the LiveView™ application.
LiveView™ uses a Bluetooth™ connection to communicate
with your phone.
The LiveView™ device lets you open notifications on both
the mini display and on your phone so that you can first read
the notification on the mini display before, for example,
replying to it using your phone.
LiveView™ only displays events that happen in your
phone after LiveView™ is connected.
This User guide focuses on using LiveView™ with a
Sony Ericsson Android™ mobile phone.
LiveWare™ manager
Before using your LiveView™ device, make sure
LiveWare™ manager is installed on your phone.
LiveWare™ manager detects smart Sony Ericsson
accessories and identifies what software should be used
with them. It then takes you to Android Market™ to
download the appropriate software. LiveWare™
manager requires Android™ version 2.0 or later. If you are
3
September 13, 2010 15:07:12

using an older version than Android™ 2.0 (typically 1.6), you
need to update it to the latest official software version. See
To check the phone software version on page 4.
If LiveWare™ manager is not installed in your phone,
you should download it by searching for
pname:com.sonyericsson.extras.liveware in Android
Market™ or by scanning the barcode provided in this
User guide. See Barcode on page 5.
To check the phone software version
•From your phone's main menu, find and tap Settings >
About phone > Firmware version.
To update your phone software
•Go to the Sony Ericsson support website at
www.sonyericsson.com/support
and follow the
instructions.
The updating process erases all user data, including
downloaded applications. Make sure to back up
important data you have on the phone before you
update your phone software.
Before you download applications from
Android Market™
Before downloading applications from Android Market™,
make sure you have an Internet connection and a Google™
September 13, 2010 15:07:12
4
account. You may also need to have a memory card
inserted in your phone.
Android Market™ may not be available in all countries
or regions.
When you download content to your phone, you may
be charged for the amount of data transferred to your
phone. Contact your operator for information about
data transfer rates in your country.
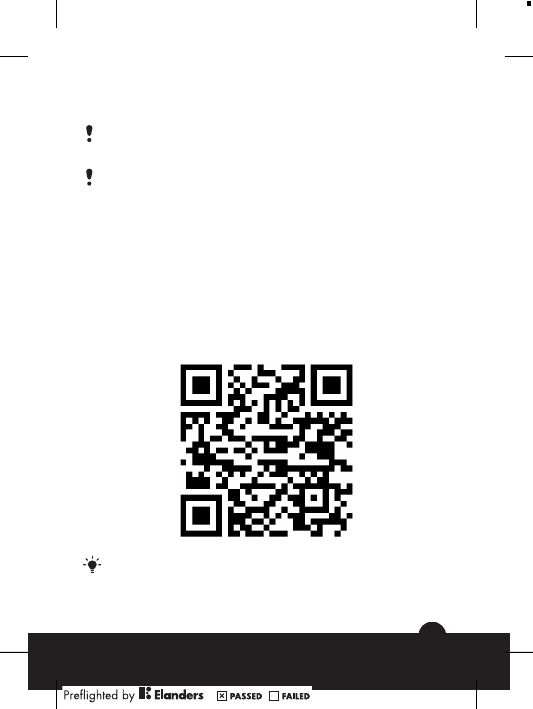
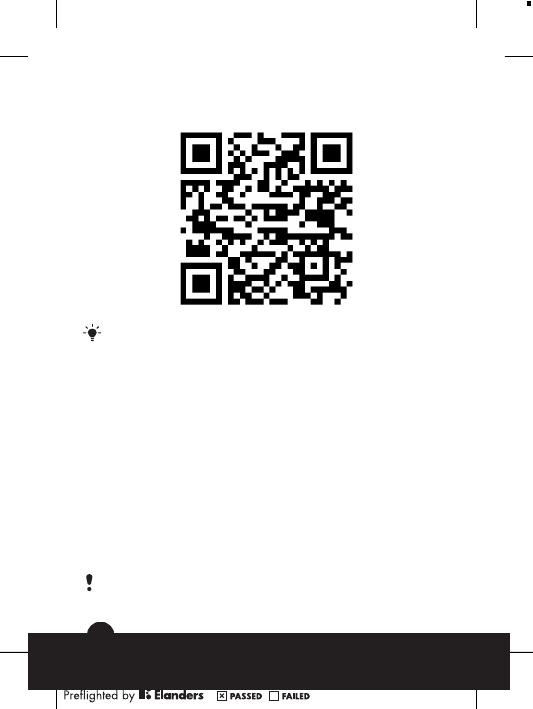
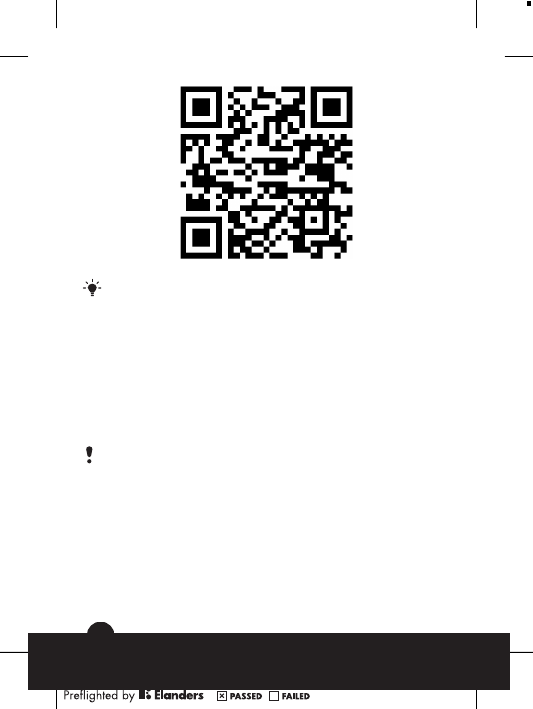
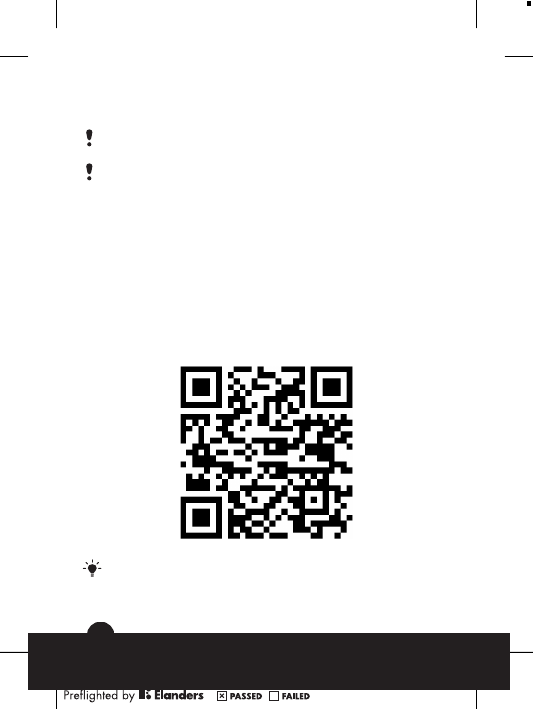
Barcode
The 2D barcode shown below helps you download the
LiveWare™ manager application from Android Market™.
This barcode can be read by optical scanners such as
Barcode Scanner or NeoReader™. Before using the
scanner, make sure you have an Internet connection.
A barcode scanner is either pre-installed in your
phone or available for free from Android Market™.
5
September 13, 2010 15:07:12

To download LiveWare™ manager using a barcode
scanner
1From your phone's main menu, find and tap your scanner
application, for example, NeoReader™.
2To scan the barcode, position the complete barcode
inside the viewfinder.
3When the scanner recognises the barcode, tap
Continue. You are directed to the LiveWare™
manager application in Android Market™. Follow the
instructions that appear on your phone screen.
If you use a different barcode scanner, the instructions
might vary.
LiveView™ application
The LiveView™ application in your phone helps you
connect or disconnect the LiveView™ device and select
which notification categories you want to show on the
device. The LiveView™ application also lets you apply
Facebook™ and Twitter™ settings, turn on or off the
LiveView™ vibration function, and set all notifications in
LiveView™ as read. LiveView™ needs to be paired with
your phone, and you need to install the LiveView™
application in your phone.
The LiveWare™ manager in your phone helps you identify,
download and install the LiveView™ application. See To
install the LiveView™ application on page 12.
You can also download the LiveView™ application
by searching for
pname:com.sonyericsson.extras.liveview in
Android Market™.
September 13, 2010 15:07:12
6
To access the LiveView™ application
•From your phone's main menu, find and tap the
LiveView™ application.
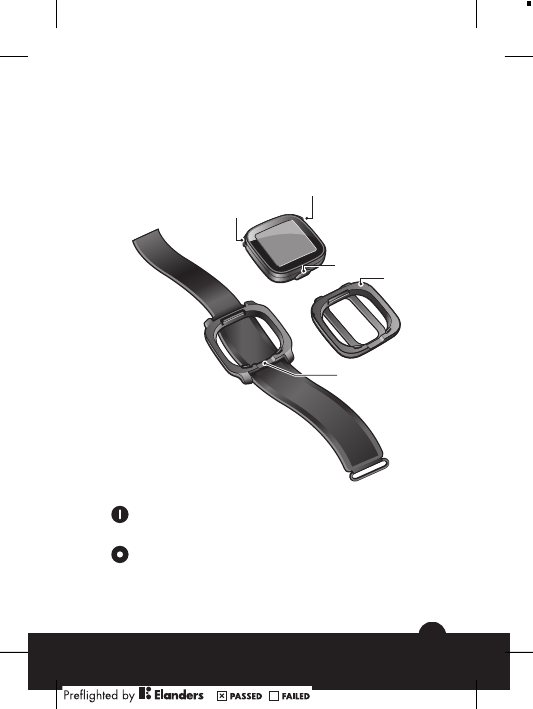
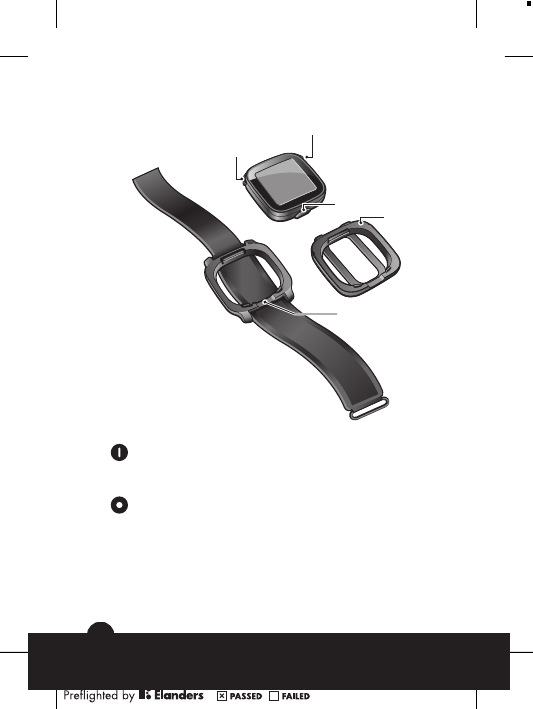
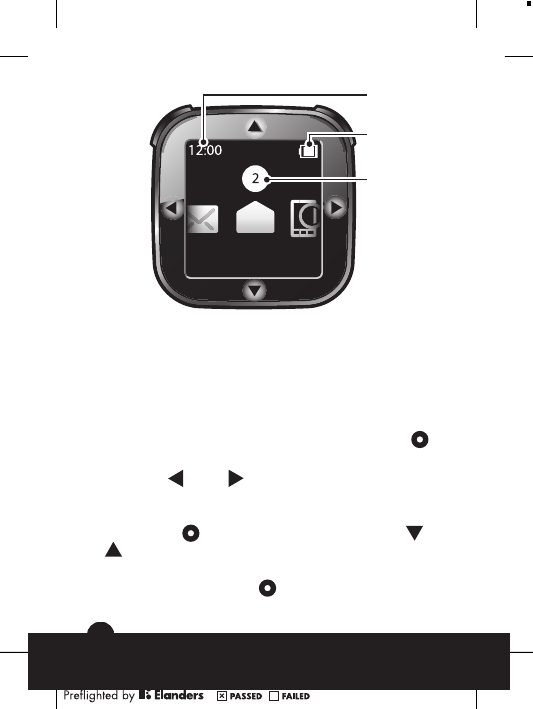
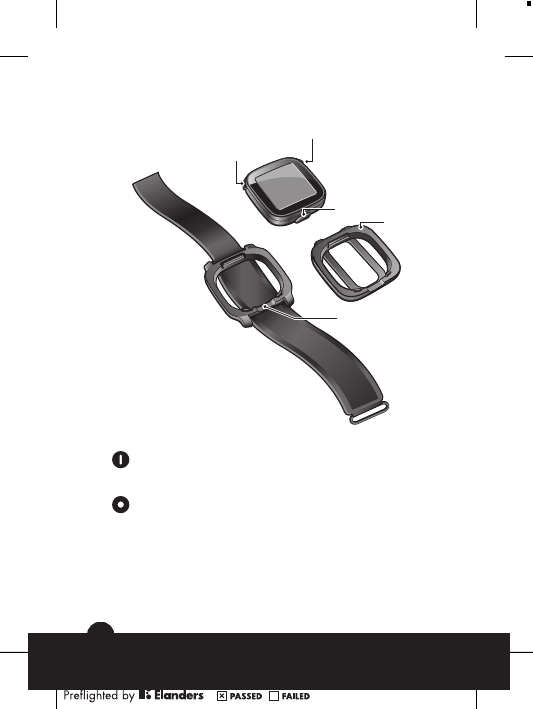
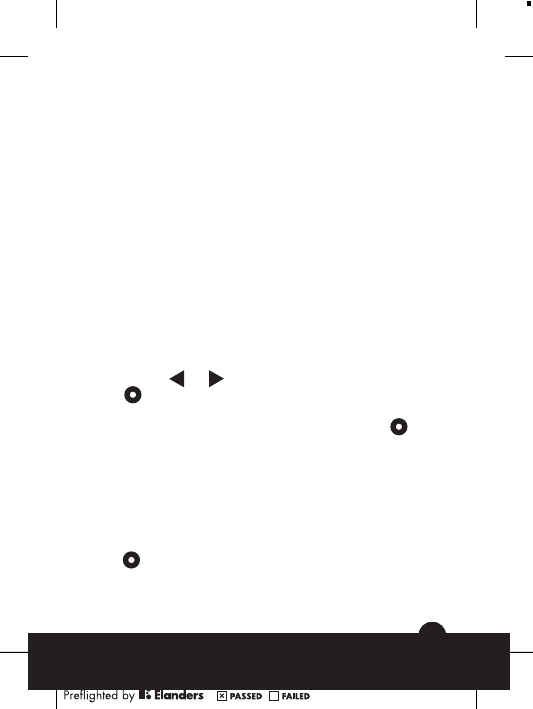
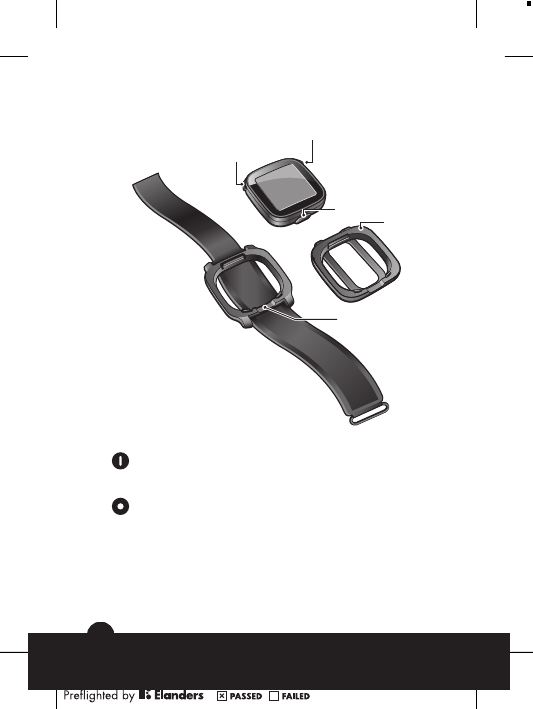
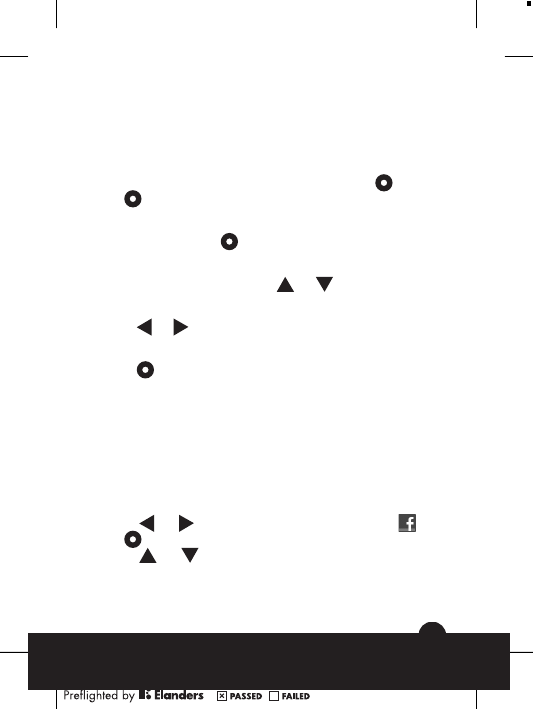
LiveView™ overview
2
1
3
4
5
1Power on or off / pairing mode / display on or off /
notification LED (Light-emitting diode)
2 Back / select / media player / display on
3 Connector for charger
7
September 13, 2010 15:07:12

4 Clip - attach the LiveView™ device anywhere you
want, for example, to your clothing
5 Wrist strap - wear the LiveView™ device on your
wrist
Changing wearing solutions
You can use either a clip or a wrist strap to wear the
LiveView™ device. You can change wearing solutions to
suit different purposes.
To change wearing solutions
1To detach, for example, the clip from the LiveView™
device, insert a finger nail in the seam between the
LiveView™ device and the clip frame on one side of the
device and pull the clip firmly.
2Attach the wrist strap instead.
Notification LED
The Notification LED provides information on the status and
notifications of LiveView™.
•Flashing blue - incoming call
•Flashing red - low battery
•Flashing green - a new notification is available
•Flashing red and green alternately - pairing is
underway
•Red - the battery is charging, and the battery level is
between low and full
•Green - the battery is fully charged
September 13, 2010 15:07:12
8

Vibrating alerts
Important notifications received on the LiveView™ device
are indicated by a vibration. You can turn off the vibrating
alert function in the LiveView™ application.
To turn off vibrating alerts
1Connect LiveView™ with your phone.
2From your phone menu, find and tap LiveView™
application > Vibrate.
3To turn on the vibrating alert function, tap Vibrate again.
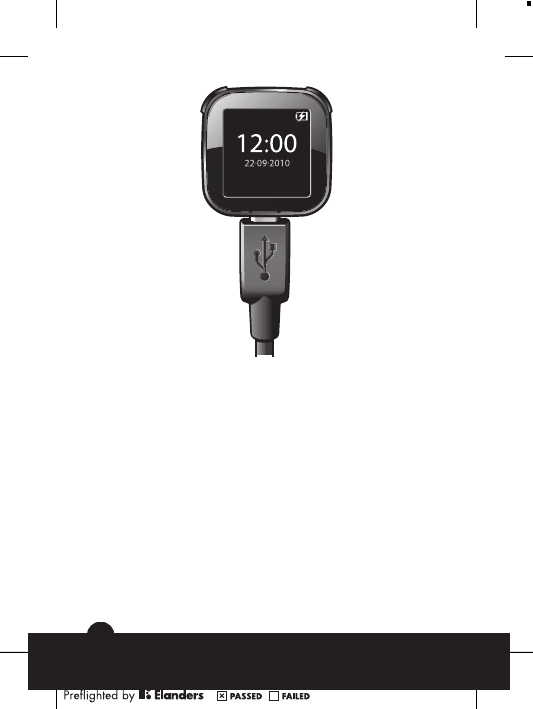
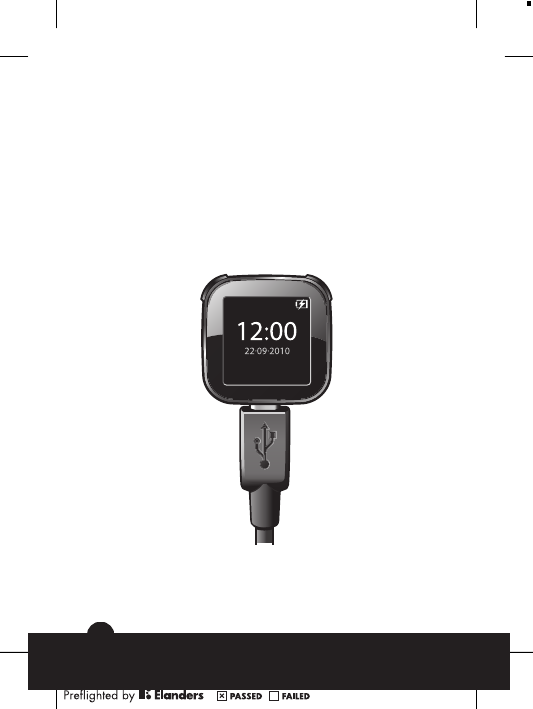
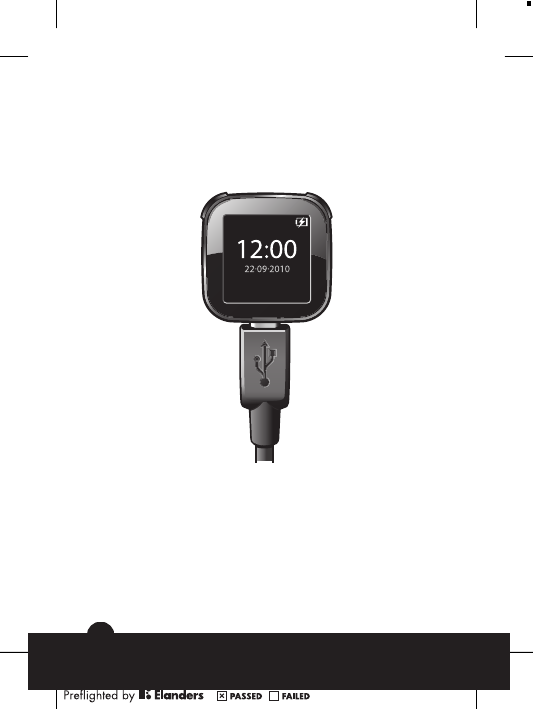
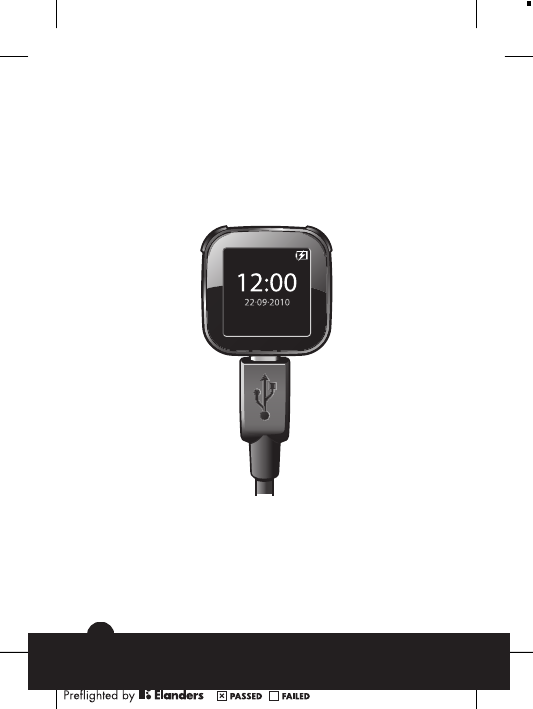
Charging
Before using the LiveView™ device for the first time, you
need to charge it for approximately 2 hours until the
notification LED turns green.
9
September 13, 2010 15:07:12
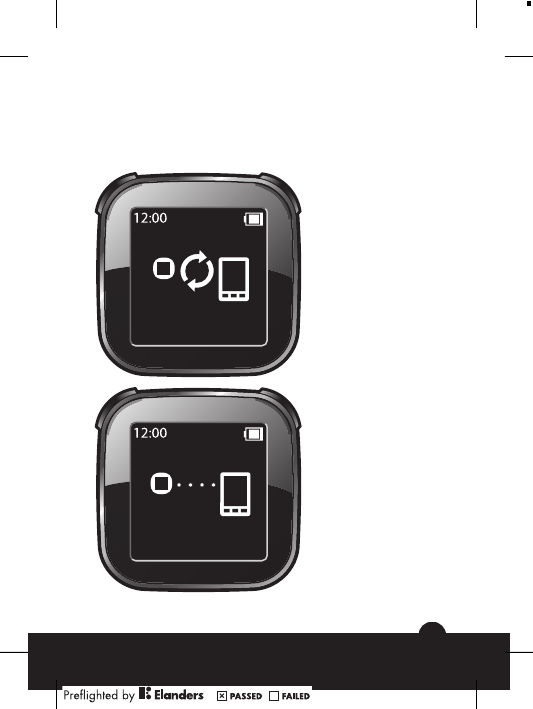
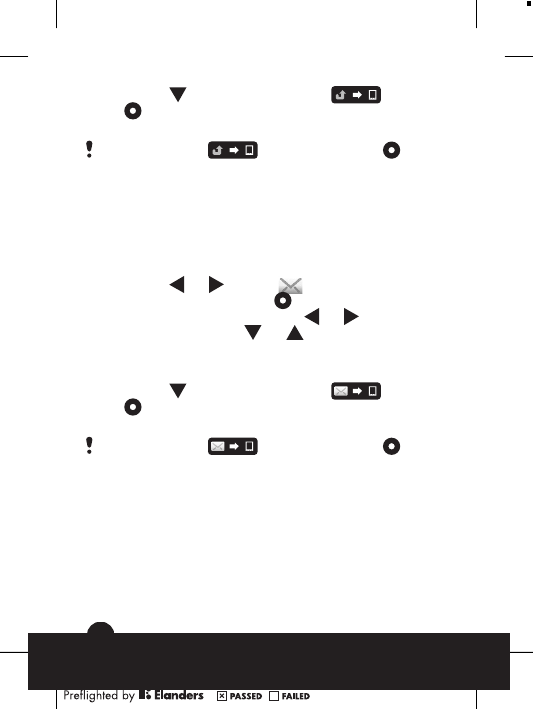
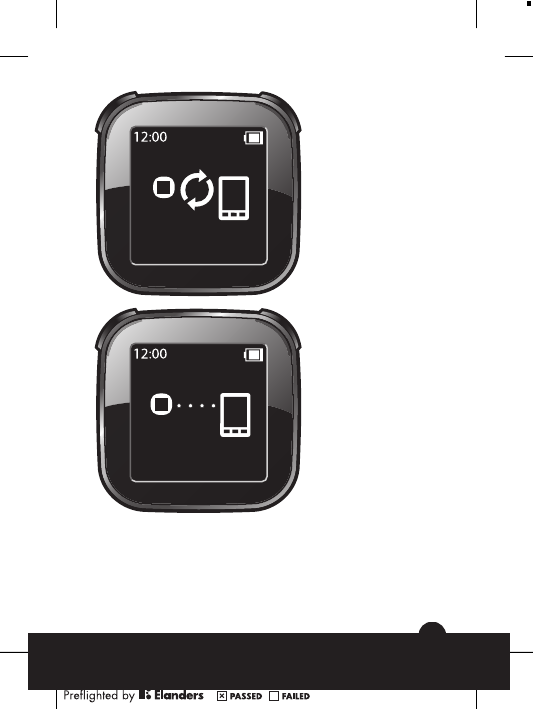
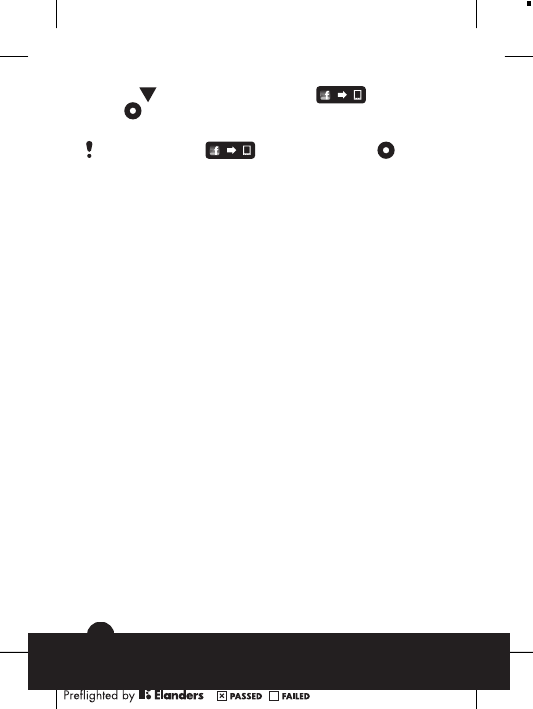
Pairing LiveView™ with a phone
You need to pair LiveView™ with your phone. LiveView™
can only be paired with one phone at a time.
September 13, 2010 15:07:12
10
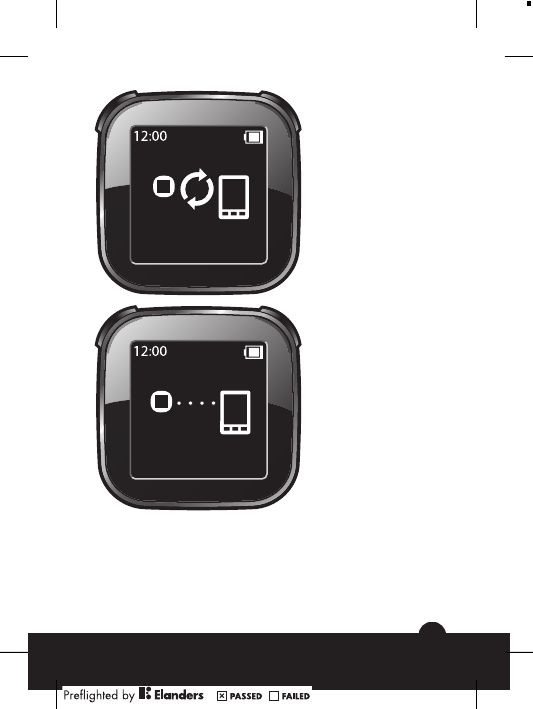
LiveView™ is in
pairing mode
LiveView™ is
connecting – you
might need to enter a
pairing passcode
0000
To pair LiveView™ with your phone
1Turn on the Bluetooth™ function in your phone.
2Place your phone close to the LiveView™ device.
11
September 13, 2010 15:07:13

3Make sure the LiveView™ device is turned off. Press and
hold down until the LiveView™ device enters pairing
mode.
4All Bluetooth™ devices within range of your phone will be
listed. Tap LiveView™ in the list that appears.
5When asked to add LiveView™, follow the instructions
that appear.
6If you are asked to enter a passcode, enter 0000.
Once you have paired your phone with the LiveView™
device, your phone will remember this pairing. You do
not need to re-enter the passcode the next time you
connect to a paired LiveView™ device.
If pairing fails, the LiveView™ device switches off and
you need to restart and enter pairing mode again.
To install the LiveView™ application
1Once your phone and the LiveView™ device are paired,
a popup window on your phone asks if you want to install
the preferred application for the accessory. Tap Yes. You
are taken to the Android Market™ application in the
phone.
2When details of the LiveView™ application appear, tap
Install.
3After the LiveView™ application has been installed in
your phone, press any key on the LiveView™ device to
start the application.
4To connect LiveView™ with your phone, go to your
phone's main menu, then find and tap LiveView™
application > Manage LiveView™.
5Find and tap LiveView™ .
6To disconnect, tap LiveView™ again.
September 13, 2010 15:07:13
12
Turning LiveView™ on and off
To turn on your LiveView™ device
•Press .
To turn off your LiveView™ device
•Press and hold down .
Before turning the LiveView™ device off, make sure
the display is turned on. See To turn on the display on
page 14.
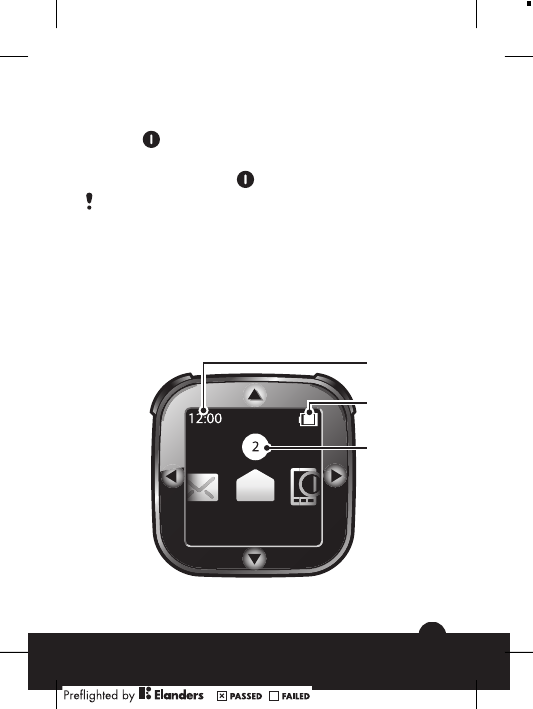
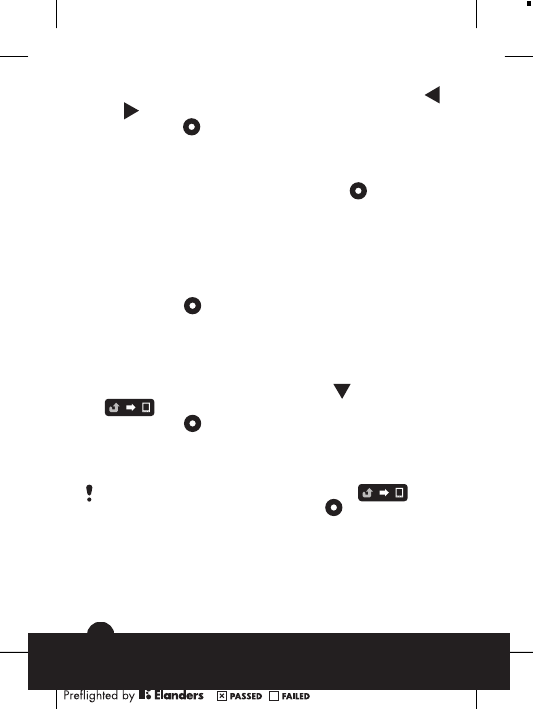
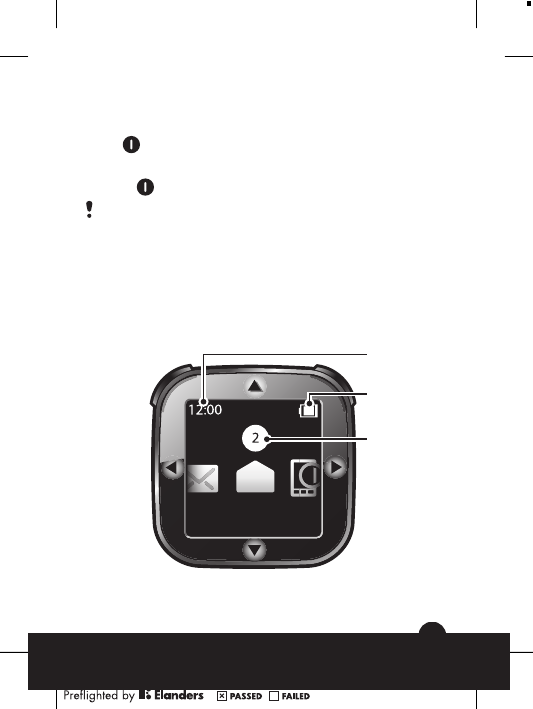
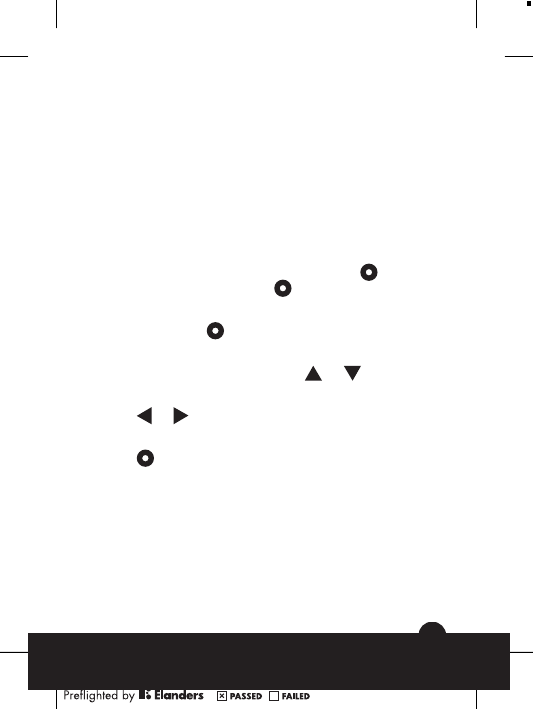
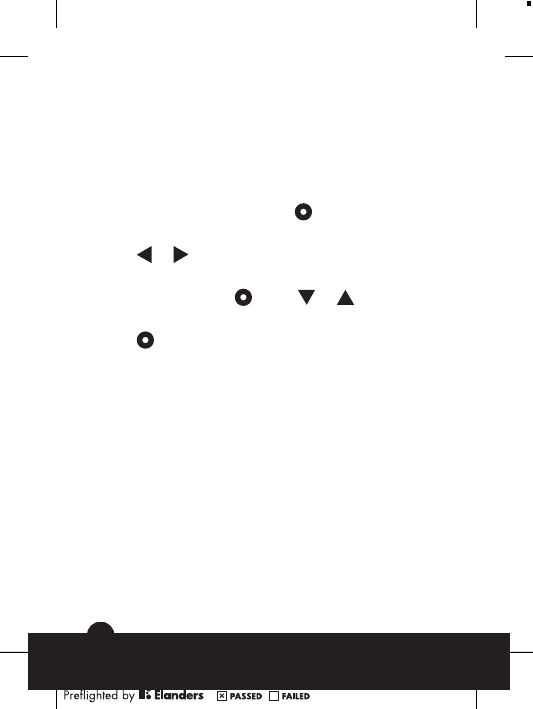
Home screen
You can navigate through notification categories, such as
messaging, social networking services, feeds, calls, and
calendar items from the LiveView™ Home screen,
depending on your phone settings.
2
1
3
13
September 13, 2010 15:07:13

1Time - time information is synchronised with your phone
2 Battery status
3 The number of unread notifications
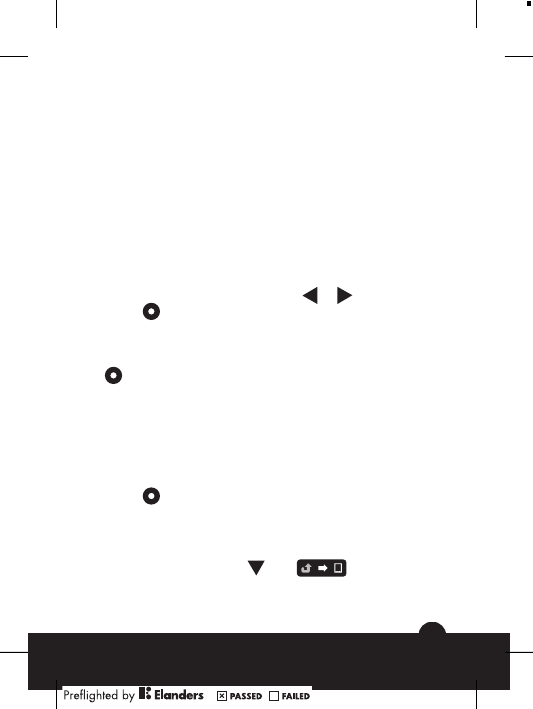
To go to the Home screen
•Turn on the LiveView™ device and press .
To navigate through notification categories
•Tap or .
To open a notification category
•Scroll to a notification category and press . To read the
notification, tap or .
To go back to the Home screen
•Press and hold down .
Turning on the display
The display on your LiveView™ device turns off after a short
period of time if it is not used. This saves power and protects
your personal information. You will be notified by the LED
and a vibration when there is a new notification, if the
vibrating alert function is on. If the display is off, you need to
turn it on again in order to view notifications.
To turn on the display
1Make sure your LiveView™ device is turned on.
2Press any key on your LiveView™ device.
Displaying categories in LiveView™
You can decide which notification categories you want to
display on your LiveView™ device.
September 13, 2010 15:07:13
14
To select categories displayed in LiveView™
1Connect your LiveView™ device with your phone.
2From your phone's main menu, find and tap LiveView™
application > Customise tiles.
3Select your favourite categories.
Find phone
If you know your phone is within range but forgot where you
put it, you can find it using LiveView™. Your phone beeps
or vibrates, allowing you to find it.
To use the Find phone function
1Go to the LiveView™ Home screen.
2Scroll to Find phone by tapping or .
3Press . Your LiveView™ device starts to search for
your phone. Your phone beeps or vibrates, allowing you
to find it.
4To stop your LiveView™ device from searching, press
again.
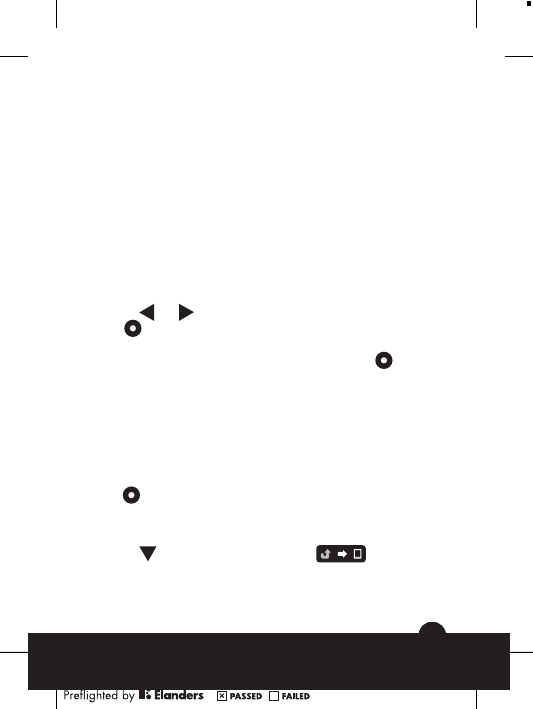
Calls
When your phone rings, LiveView™ displays the name or
number of the caller. You can mute the call, or open the call
history list in the phone remotely.
To mute an incoming call using LiveView™
•Press .
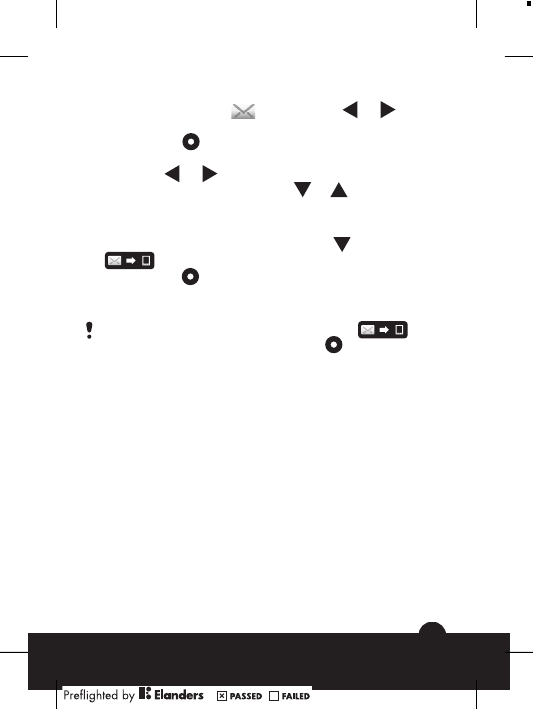
To remotely open the call history list in your phone
1Open a missed call notification on your LiveView™
device.
2Scroll down by tapping until is selected.
15
September 13, 2010 15:07:13
3Press . If your phone is locked, you need to unlock it
so that the display is active. The call history list appears
at the top of your phone screen.
If you want to go back when is selected, press
and hold down .
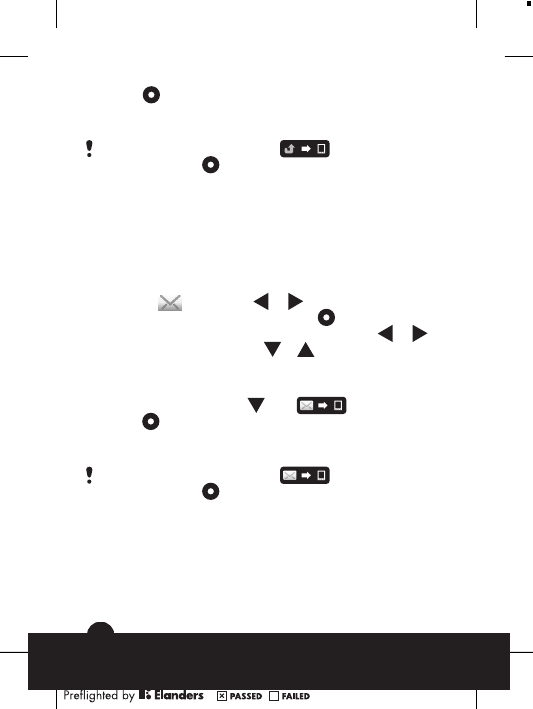
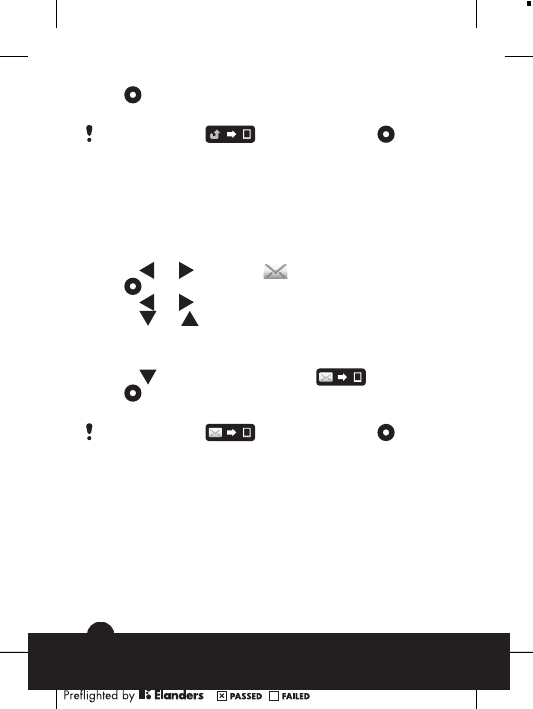
Text messages
When a text message comes to your phone, you can check
the sender's information and the content of the message on
your LiveView™ device. You can also remotely open the
message in your phone.
To read text messages on the LiveView™ device
1Scroll to by tapping or .
2To enter the message inbox, press .
3To select the message you want to read, tap or .
4To read the message, tap or .
To remotely open a text message in your phone
1Open a text message in LiveView™.
2Scroll down by tapping until is selected.
3Press . If the phone is locked, you need to unlock it so
that the display is activated. The desired message
appears at the top of your phone screen.
If you want to go back when is selected, press
and hold down .
All events
The All events feature collects notifications for all event
categories shown in LiveView™.
September 13, 2010 15:07:13
16
Multimedia messages
Your LiveView™ device displays the text part of multimedia
messages. If you want to access images, sounds or videos
sent in multimedia messages, go to the messaging
application in your phone.
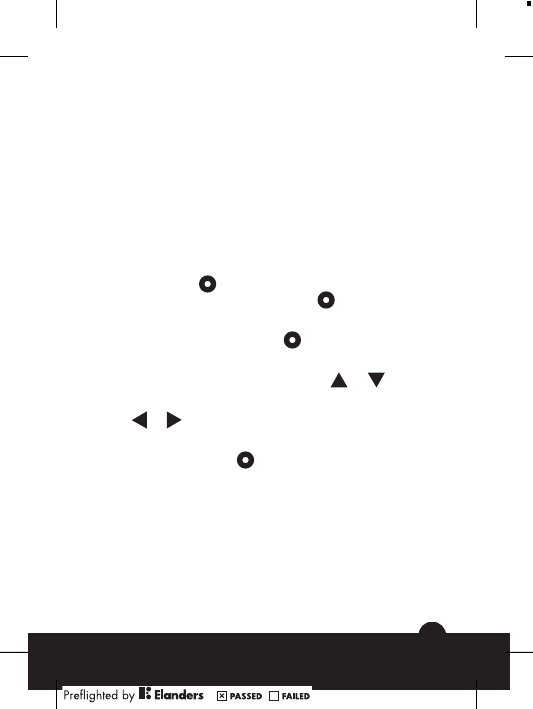
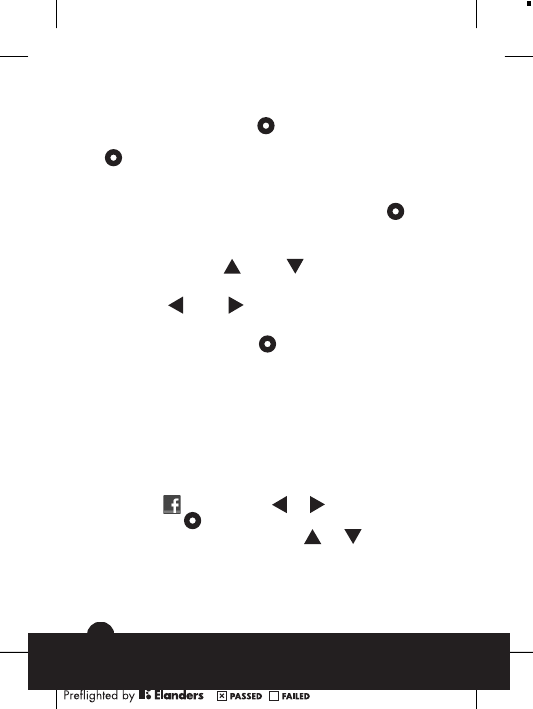
Music player
You can use LiveView™ to control the music player in your
phone.
To remotely open the music player in your phone
1From the Home screen of your LiveView™ device, press
and hold down .
2To play a track in the phone, press .
To remotely pause the music player in your phone
•When music is playing, press .
To change the music player volume
•While the music player is playing, tap or .
To move between tracks
•Tap or .
To exit the music player
•Press and hold down .
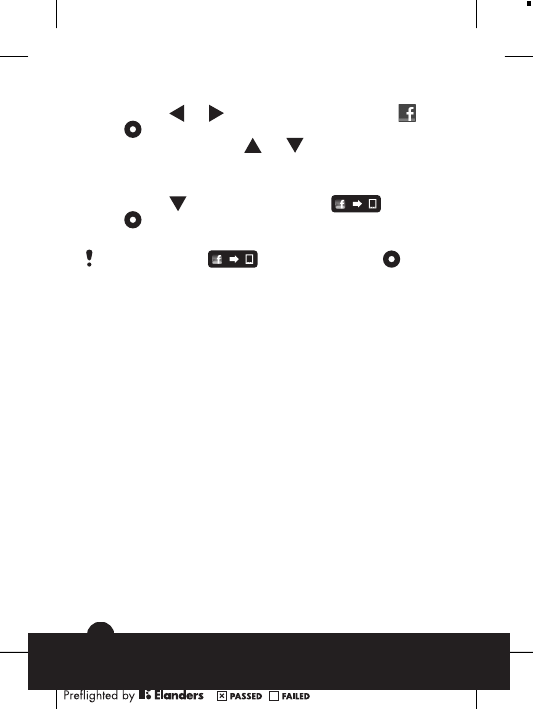
Social networking services
LiveView™ gives you live notifications from Facebook™ as
well as Twitter™ updates. You can access your social
networking service settings from the LiveView™
application in your phone to, for example, filter notifications
about a specific friend.
17
September 13, 2010 15:07:13
To view social networking service notifications
1Scroll to a social networking service, for example, , by
tapping or .
2Press .
3To read the notification, tap or .
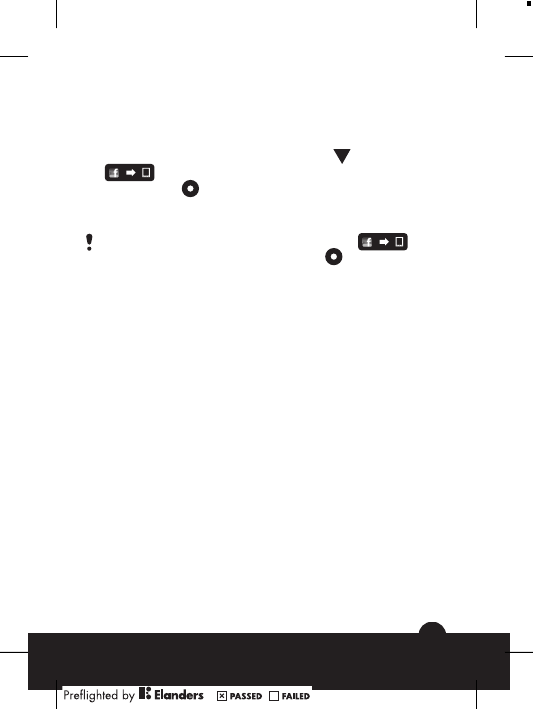
To remotely open a social networking event in the phone
1Open a social networking notification on your LiveView™
device.
2Scroll down by tapping until is selected.
3Press . If the phone is locked, you need to unlock it so
that the display becomes active. The desired event
appears at the top of the phone screen.
If you want to go back when is selected, press
and hold down .
To access your Facebook™ settings
1From your phone's main menu, find and tap LiveView™
application > Customise tiles > Facebook. Log in to
your account.
2Select an option.
To download a plug-in from Android Market™
1From your phone, find and tap LiveWare™ manager.
2From the list that appears, tap LiveView™ .
3Tap LiveView™ application. When a window pops up,
tap Search for plug-ins. Available plug-ins are shown in
the Android Market™ application.
4Select the plug-ins you want to install and follow the
instructions that appear.
September 13, 2010 15:07:13
18
Troubleshooting
No plug-ins are found
For some phone types and/or countries there might not be
any plug-ins available for the LiveView™ application.
•The battery level is too low. Charge your LiveView™
device.
•Pairing has failed. You need to re-enter pairing mode.
Unexpected behaviour
Reset your LiveView™ device.
To reset LiveView™
•Press and hold down for 15 seconds.
Français
Introduction
LiveView™ est un mini-écran qui répercute et affiche les
événements qui se déroulent sur votre téléphone, afin que vous
n'en manquiez aucun. Sur votre écran LiveView™, vous pouvez
visionner les notifications, qu'il s'agisse de SMS, de MMS,
d'appels entrants, de rappels d'événements du calendrier, de
mises à jour d'amis sur Facebook™ ou de tweets.
Vous déterminez les notifications qui vous intéressent en
sélectionnant leurs catégories dans l'Application LiveView™.
LiveView™ communique avec votre téléphone par
l'intermédiaire d'une connexion Bluetooth™.
19
September 13, 2010 15:07:13
turns off automatically
LiveView™

Le périphérique LiveView™ vous permet d'ouvrir les notifications
à la fois sur le mini-écran et sur votre téléphone afin que vous
puissiez, par exemple, les lire sur le mini-écran avant d'y
répondre à l'aide du téléphone.
LiveView™ affiche uniquement les événements qui se
déroulent sur votre téléphone une fois LiveView™
connecté.
Ce Guide de l'utilisateur s'attache plus particulièrement à
décrire l'utilisation de LiveView™ avec un téléphone
Android™ Sony Ericsson.
Gestionnaire LiveWare™
Avant d'utiliser votre périphérique LiveView™, vérifiez si le
Gestionnaire LiveWare™ est installé sur votre téléphone. Le
Gestionnaire LiveWare™ détecte les accessoires
Sony Ericsson intelligents et détermine les logiciels à utiliser avec
ceux-ci. Il accède ensuite à Android Market™ pour vous
permettre de télécharger le logiciel approprié. Le Gestionnaire
LiveWare™ nécessite Android™ version 2.0 ou ultérieure. Si
vous utilisez une version antérieure à Android™ 2.0
(généralement 1.6), vous devez procéder à la mise à jour vers la
version la plus récente du logiciel. Voir Pour vérifier la version
du logiciel du téléphone à la page 21.
Si le Gestionnaire LiveWare™ n'est pas installé sur votre
téléphone , vous devez le télécharger en recherchant
pname:com.sonyericsson.extras.liveware dans Android
Market™ ou en numérisant le code à barres que vous
trouverez dans le présent Guide de l'utilisateur. Voir Code
à barres à la page 21.
September 13, 2010 15:07:13
20

Pour vérifier la version du logiciel du téléphone
•Dans le menu principal du téléphone, recherchez et tapez
sur Paramètres > À propos du téléphone > Version du
micrologiciel.
Pour mettre à jour le logiciel du téléphone
•Visitez le site Web d'assistance Sony Ericsson à l'adresse
www.sonyericsson.com/support
et suivez les instructions.
Le processus de mise à jour efface toutes les données
utilisateur, y compris les applications téléchargées. Avant
de mettre à jour le logiciel du téléphone, veillez à en
sauvegarder les données importantes.
Avant de télécharger des applications à partir
d'Android Market™
Avant de télécharger des applications à partir d'Android
Market™, assurez-vous que vous disposez d'une connexion
Internet et d'un compte Google™. Il est également possible
qu'une carte mémoire doive être insérée dans votre téléphone.
Android Market™ n'est pas nécessairement disponible
dans tous les pays ou dans toutes les régions.
Quand vous téléchargez du contenu sur votre téléphone,
le volume de données transféré sur votre téléphone peut
vous être facturé. Pour obtenir des informations sur les
tarifs de transfert de données dans votre pays, contactez
votre opérateur.
Code à barres
Le codes à barres 2D illustré ci-dessous vous aide à télécharger
l'application Gestionnaire LiveWare™ à partir d'Android
Market™. Ce code à barres peut être lu par des scanners
optiques tel qu'un scanner de codes à barres ou NeoReader™.
21
September 13, 2010 15:07:13
Avant d'utiliser le scanner, veillez à disposer d'une connexion
Internet.
Un scanner de codes à barres est préinstallé dans votre
téléphone ou est disponible gratuitement sur Android
Market™.
Pour télécharger le Gestionnaire LiveWare™ à l'aide d'un
scanner de code à barres
1Dans le menu principal du téléphone, recherchez et tapez
sur votre application de numérisation, par exemple
NeoReader™.
2Pour scanner le code à barres, placez-la totalité du code
à l'intérieur du viseur.
3Lorsque le scanner reconnaît le code à barres, tapez sur
Continuer. Vous être dirigé vers l'application
Gestionnaire LiveWare™ dans Android Market™.
Suivez les instructions qui s'affichent sur l'écran du
téléphone.
Les instructions peuvent varier si vous utilisez un autre
scanner de code à barres.
September 13, 2010 15:07:13
22

Application LiveView™
Sur votre téléphone, l'Application LiveView™ vous permet de
connecter et de déconnecter le périphérique LiveView™ ainsi
que de sélectionner les catégories de notifications à afficher sur
celui-ci. L'Application LiveView™ vous permet aussi
d'appliquer vos paramètres Facebook™ et Twitter™, d'activer
ou de désactiver la fonction vibreur LiveView™ et de définir
toutes les notifications dans LiveView™ comme lues.
LiveView™ doit être jumelé à votre téléphone et vous devez
installer l'Application LiveView™ sur celui-ci.
Sur votre téléphone, le Gestionnaire LiveWare™ vous aide à
identifier, télécharger et installer l'Application LiveView™. Voir
Pour installer l'Application LiveView™ à la page 28.
Vous pouvez aussi télécharger l'Application LiveView™
en recherchant
pname:com.sonyericsson.extras.liveview dans Android
Market™.
Pour accéder à l'Application LiveView™
•Dans le menu principal du téléphone, recherchez et tapez
sur l'Application LiveView™.
23
September 13, 2010 15:07:13
Présentation de LiveView™
2
1
3
4
5
1 Mise sous or hors tension / mode de jumelage /
activation ou désactivation de l'affichage / LED (diode
électroluminescente) de notification
2 Retour / sélection / lecteur multimédia / allumage de
l'affichage
3 Connecteur pour chargeur
4 Clip : accrochez le périphérique LiveView™ où vous le
souhaitez, par exemple, à vos vêtements
September 13, 2010 15:07:13
24

5 Dragonne : portez le périphérique LiveView™ au
poignet
Différents types de port
Pour porter le périphérique LiveView™, vous avez le choix entre
un clip et une dragonne. Vous pouvez ainsi le porter
différemment selon les circonstances.
Pour modifier les options de port
1Pour détacher, par exemple, le clip du périphérique
LiveView™, insérez un ongle dans la fente située entre le
périphérique LiveView™ et le cadre du clip, sur un côté
du périphérique, et tirez fermement sur le clip.
2Fixez ensuite la dragonne.
LED de notification
La LED de notification fournit des informations sur l'état et les
notifications de LiveView™.
•Bleu clignotant - appel entrant
•Rouge clignotant - batterie faible
•Vert clignotant - nouvelle notification disponible.
•Vert et rouge clignotant alternativement - jumelage en
cours
•Rouge - la batterie est en cours de charge ou son niveau
se situe entre faible et plein
•Vert - la batterie est chargée au maximum
Vibreur
Les notifications importantes reçues sur le périphérique
LiveView™ sont signalées par le vibreur. Vous pouvez désactiver
le vibreur dans l'Application LiveView™.
25
September 13, 2010 15:07:13
Pour désactiver le vibreur
1Connectez votre périphérique LiveView™ à votre
téléphone.
2Dans le menu principal du téléphone, recherchez et tapez
sur l'Application LiveView™ > Vibreur.
3Pour activer le vibreur, tapez de nouveau sur Vibreur.
Charge
Avant d'utiliser le périphérique LiveView™ pour la première fois,
vous devez le charger pendant 2 heures environ jusqu'à ce que
la LED de notification vire au vert.
September 13, 2010 15:07:13
26
Jumelage de LiveView™ avec un téléphone
Vous devez jumeler LiveView™ avec votre téléphone.
LiveView™ ne peut être jumelé qu'avec un seul téléphone à la
fois.
LiveView™ est en
mode de jumelage
LiveView™ se
connecte – vous devez
peut-être saisir le code
de passe de jumelage
0000
27
September 13, 2010 15:07:13

Pour jumeler LiveView™ avec votre téléphone
1Activez la fonction Bluetooth™ sur votre téléphone.
2Placez votre téléphone à proximité du périphérique
LiveView™.
3Assurez-vous que le périphérique LiveView™ est éteint.
Appuyez longuement sur jusqu'à ce que le
périphérique LiveView™ passe en mode de jumelage.
4Tous les périphériques Bluetooth™ qui se trouvent à
portée de votre téléphone sont répertoriés. Tapez sur
LiveView™ dans la liste affichée.
5Quand vous êtes invité à ajouter LiveView™, suivez les
instructions qui s'affichent.
6Si vous êtes invité à saisir un code de passe, saisissez
0000.
Lorsque le téléphone a été jumelé à un périphérique
LiveView™, il conserve ce jumelage en mémoire. Lors de
la prochaine connexion à un périphérique LiveView™
jumelé, vous n'aurez pas besoin de saisir de nouveau le
code de passe.
Si le jumelage échoue, le périphérique LiveView™ s'éteint
et vous devez recommencer et passer de nouveau en
mode de jumelage.
Pour installer l'Application LiveView™
1Quand votre téléphone est jumelé avec le périphérique
LiveView™, une fenêtre contextuelle s'affiche sur le
téléphone pour vous demander si vous souhaitez installer
l'application préférée pour l'accessoire. Appuyez sur
Oui. Vous accédez à l'application Android Market™ sur
le téléphone.
2Quand des informations détaillées sur l'Application
LiveView™ apparaissent, tapez sur Installer.
September 13, 2010 15:07:13
28

3Quand l'Application LiveView™ a été installée sur votre
téléphone, appuyez sur une touche quelconque du
périphérique LiveView™ pour démarrer l'application.
4Pour connecter LiveView™ à votre téléphone, accédez
au menu principal du téléphone, recherchez et tapez sur
Application LiveView™ > Gérer LiveView™.
5Recherchez et tapez sur LiveView™ .
6Pour vous déconnecter, tapez de nouveau sur
LiveView™ .
Activation et désactivation de LiveView™
Pour allumer votre périphérique LiveView™
•Appuyez sur .
Pour éteindre votre périphérique LiveView™
•Appuyez longuement sur .
Avant d'éteindre le périphérique LiveView™, assurez-vous
que l'écran est allumé. Voir Pour allumer l'écran à la
page 31.
écran Accueil
Selon les paramètres définis sur votre téléphone, vous pouvez
parcourir les catégories de notifications, notamment la
messagerie, les services de réseaux sociaux, les flux, les appels
et les éléments du calendrier à partir de l'écran d'accueil
LiveView™.
29
September 13, 2010 15:07:13
2
1
3
1 Heure : l'heure est synchronisée avec votre téléphone.
2 État de la batterie
3 Nombre de notifications non lues
Pour accéder à l'écran d'accueil
•Allumez le périphérique LiveView™ et appuyez sur .
Pour parcourir les catégories de notifications
•Tapez sur ou sur .
Pour ouvrir une catégorie de notifications
•Faites défiler jusqu'à une catégorie de notifications et
appuyez sur . Pour lire la notification, tapez sur ou
.
Pour revenir à l'écran d'accueil
•Appuyez longuement sur 1.
September 13, 2010 15:07:13
30

Allumage de l'écran
L'écran de votre périphérique LiveView™ s'éteint après
quelques instants s'il n'est pas utilisé. Cela économise l'énergie
et protège vos données personnelles. Vous êtes averti par la
LED et le vibreur en cas de nouvelle notification, pour autant que
le vibreur soit activé. Si l'écran est éteint, vous devez le rallumer
pour afficher les notifications.
Pour allumer l'écran
1Assurez-vous que votre périphérique LiveView™ est
allumé.
2Appuyez sur une touche quelconque de votre
périphérique LiveView™.
Affichage des catégories dans LiveView™
Vous pouvez déterminer les catégories de notifications que vous
souhaitez afficher sur votre appareil LiveView™.
Pour sélectionner les catégories affichées dans LiveView™
1Connectez votre périphérique LiveView™ à votre
téléphone.
2Dans le menu principal du téléphone, recherchez et tapez
sur Application LiveView™ > Personnaliser
mosaïque.
3Sélectionnez vos catégories favorites.
Trouver télépho.
Si vous savez que votre téléphone n'est pas loin, mais avez
oublié où vous l'avez déposé, vous pouvez le retrouver à l'aide
de LiveView™. Votre téléphone émet un bip ou vibre afin que
vous puissiez le localiser.
Pour utiliser la fonction Trouver télépho.
1Accédez à l'écran d'accueil LiveView™.
31
September 13, 2010 15:07:13
2Faites défiler jusqu'à Trouver télépho. en tapant sur
ou .
3Appuyez sur . Votre périphérique LiveView™ se met à
la recherche de votre téléphone. Votre téléphone émet un
bip ou vibre afin que vous puissiez le localiser.
4Pour que votre périphérique LiveView™ mette un terme
à la recherche, appuyez de nouveau sur .
Appels
Quand le téléphone sonne, LiveView™ affiche le nom ou le
numéro de l'appelant. Vous pouvez couper le son ou ouvrir à
distance la liste de l'historique des appels sur le téléphone.
Pour couper le son d'un appel entrant à l'aide de LiveView™
•Appuyez sur .
Pour ouvrir à distance la liste de l'historique des appels sur votre
téléphone
1Ouvrez une notification d'appel en absence sur votre
périphérique LiveView™.
2Faites défiler vers le bas en tapant sur jusqu'à ce que
soit sélectionné.
3Appuyez sur . Si votre téléphone est verrouillé, vous
devez le déverrouiller pour activer l'écran. La liste de
l'historique des appels apparaît en haut de l'écran du
téléphone.
Si vous souhaitez revenir en arrière lorsque est
sélectionné, appuyez longuement sur .
SMS
Lorsqu'un SMS parvient à votre téléphone, vous pouvez vérifier
l'expéditeur et consulter le contenu du message sur votre
périphérique LiveView™. Vous pouvez aussi ouvrir à distance le
message sur votre téléphone.
September 13, 2010 15:07:13
32
Pour lire les SMS sur le périphérique LiveView™
1Faites défiler jusqu'à en tapant sur ou .
2Pour accéder à la boîte de réception des messages,
appuyez sur .
3Pour sélectionner le message que vous souhaitez lire,
tapez sur ou .
4Pour lire le message, tapez sur ou .
Pour ouvrir à distance un SMS sur votre téléphone
1Ouvrez un SMS dans LiveView™.
2Faites défiler vers le bas en tapant sur jusqu'à ce que
soit sélectionné.
3Appuyez sur . Si le téléphone est verrouillé, vous devez
le déverrouiller pour activer l'écran. Le message souhaité
apparaît en haut de l'écran du téléphone.
Si vous souhaitez revenir en arrière lorsque est
sélectionné, appuyez longuement sur .
Tous les événements
La fonction Tous les événements collecte les notifications pour
toutes les catégories d'événements affichés dans LiveView™.
MMS
Votre périphérique LiveView™ affiche la partie texte des MMS.
Si vous souhaitez accéder aux images, sons ou vidéos envoyés
dans les MMS, basculez vers l'application de messagerie de
votre téléphone.
Lecteur de musique
Vous pouvez commander le lecteur de musique de votre
téléphone à l'aide de LiveView™.
33
September 13, 2010 15:07:14
Pour ouvrir à distance le lecteur de musique sur votre téléphone
1Dans l'écran d'accueil de votre périphérique LiveView™,
appuyez longuement sur .
2Pour écouter une plage sur le téléphone, appuyez sur
.
Pour interrompre à distance le lecteur de musique sur votre
téléphone
•Pendant la lecture de la musique, appuyez sur .
Pour modifier le volume du lecteur de musique
•Pendant qu'une lecture est en cours sur le lecteur de
musique, tapez sur ou sur .
Pour vous déplacer entre les plages
•Tapez sur ou sur .
Pour quitter le lecteur de musique
•Appuyez longuement sur 1.
Services de réseaux sociaux
LiveView™ fournit les notifications en direct de Facebook™ ainsi
que les mises à jour Twitter™. Vous pouvez accéder aux
paramètres des services de réseaux sociaux à partir de
l'Application LiveView™ de votre téléphone pour filtrer les
notifications relatives à un ami déterminé, par exemple.
Pour afficher les notifications des services de réseaux sociaux
1Faites défiler jusqu'à un service de réseau social, par
exemple, , en tapant sur ou .
2Appuyez sur .
3Pour lire la notification, tapez sur ou .
September 13, 2010 15:07:14
34
Pour ouvrir à distance un évènement de réseau social sur le
téléphone
1Ouvrez une notification de réseau social sur votre
périphérique LiveView™.
2Faites défiler vers le bas en tapant sur jusqu'à ce que
soit sélectionné.
3Appuyez sur . Si le téléphone est verrouillé, vous devez
le déverrouiller pour activer l'écran. L'événement souhaité
apparaît en haut de l'écran du téléphone.
Si vous souhaitez revenir en arrière lorsque est
sélectionné, appuyez longuement sur .
Pour accéder à vos paramètres Facebook™
1Dans le menu principal du téléphone, recherchez et tapez
sur Application LiveView™ > Personnaliser
mosaïque > Facebook. Connectez-vous à votre
compte.
2Sélectionnez une option.
Pour télécharger un plug-in à partir d'Android Market™
1Sur le téléphone, recherchez et tapez sur Gestionnaire
LiveWare™.
2Dans la liste qui s'affiche, tapez sur LiveView™ .
3Tapez sur Application LiveView™. Quand une fenêtre
apparaît, tapez sur Recherche de plug-ins. Les plug-ins
disponibles s'affichent dans l'application Android
Market™.
4Sélectionnez les plug-ins à installer et suivez les
instructions qui s'affichent.
35
September 13, 2010 15:07:14

Dépannage
Aucun plug-in n'a été trouvé
Il est possible qu'aucun plug-in ne soit disponible pour
l'Application LiveView™ pour certains types de téléphone et/
ou dans certains pays.
s'éteint automatiquement
•Le niveau de la batterie est insuffisant. Chargez votre
périphérique LiveView™.
•Le jumelage a échoué. Vous devez revenir en mode de
jumelage.
Comportement inattendu
Réinitialisez votre périphérique LiveView™.
Pour réinitialiser LiveView™
•Appuyez sur pendant 15 secondes.
September 13, 2010 15:07:14
LiveView™
36

简体中文
简介
LiveView™ 是一个微型显示屏,可以反映和显示
手机中发生的事件,因此,您绝不会错过任何信
息。在 LiveView™ 屏幕上,您可以查看通知,
比如短信、彩信、来电、日历事件提示、朋友在
Facebook™ 上的更新以及 Twitter 消息。
您可通过在 LiveView™ 应用程序中选择通知类
别来决定要跟踪的内容。
LiveView™ 使用蓝牙连接与手机进行通信。
使用 LiveView™ 设备,您可以同时在微型显示
屏和手机上打开通知,这样,您就可以先在微型
显示屏上阅读通知,然后使用手机进行回复或者
执行其他操作。
LiveView™ 只显示连接 LiveView™ 后手机中
发生的事件。
本用户指南主要介绍将 LiveView™ 与
索尼爱立信 Android™ 手机一起使用。
LiveWare™ 管理器
使用 LiveView™ 设备前,请确保在手机上安装
了 LiveWare™ 管理器。LiveWare™ 管理器将
检测智能索尼爱立信配件并确定哪些软件应与它
们一起使用。然后,它将转到 Android Market™
September 13, 2010 15:07:14
37

以下载相应的软件。LiveWare™ 管理器要求使
用 Android™ 2.0 或更高版本。如果您使用的是
Android™ 2.0 以前的版本(一般是 1.6),则需
要将它更新到最新的正式软件版本。请参阅
第 41 页的
查看手机软件版本
。
如果手机中未安装 LiveWare™ 管理器,则应
通过在 Android Market™ 中搜索
pname:com.sonyericsson.extras.liveware
或扫描本用户指南中提供的条码来下载它。请
参阅第 42 页的
条码
。
查看手机软件版本
•在手机的主菜单上,查找并点按设置 > 关于手机 > 固件
版本。
更新手机软件
•转到索尼爱立信支持网站
www.sonyericsson.com/support
并按照说明操作。
更新过程将擦除所有用户数据,包括下载的应
用程序。更新手机软件之前,确保备份手机上
的重要数据。
September 13, 2010 15:07:14
38

从 Android Market™ 下载应用程序之
前
在从 Android Market™ 下载应用程序之前,请
确保已连接到互联网且具有 Google™ 帐户。您
可能还需要在手机中插入记忆卡。
并非所有国家或地区都能够使用 Android Market
™。
当您将内容下载到手机时,可能需要对传送到手机
的数据量付费。有关所在国家/地区的数据传送费
率的信息,请与您的运营商联系。
条码
下面显示的二维条码可帮助您从 Android
Market™ 下载 LiveWare™ 管理器应用程序。此
条码可由诸如条码扫描器或 NeoReader™ 等光
学扫描器读取。使用扫描器之前,请确保已连接
到互联网。
September 13, 2010 15:07:14
39
条码扫描器可能已预装在手机中,您还可从
Android Market™ 免费获取。
使用条码扫描器下载 LiveWare™ 管理器
1在手机的主菜单上,查找并点按扫描器应用程序,
如 NeoReader™ 。
2要扫描条码,请将整个条码放置在取景器内。
3当扫描器识别条码时,请点按继续。您将转至
Android Market™ 中的 LiveWare™ 管理器应用程
序。按照手机屏幕上显示的说明操作。
如果使用其他条码扫描器,则操作说明可能有
所不同。
LiveView™ 应用程序
手机中的 LiveView™ 应用程序可帮助您连接或
断开 LiveView™ 设备,还可帮助选择要在该设
备上显示的通知类别。通过 LiveView™ 应用程
序,您还可以应用 Facebook™ 和 Twitter™ 设
置,打开或关闭 LiveView™ 振动功能,将
September 13, 2010 15:07:14
40

LiveView™ 中的所有通知设置为已读。
LiveView™ 需要与手机进行配对,您需要在手机
中安装 LiveView™ 应用程序。
手机中的 LiveWare™ 管理器可帮助您确定、下
载和安装 LiveView™ 应用程序。请参阅第 49
页的
安装
LiveView™
应用程序
。
您还可通过在 Android Market™ 中搜索
pname:com.sonyericsson.extras.liveview
来下载 LiveView™ 应用程序。
访问 LiveView™ 应用程序
•在手机的主菜单上,查找并点按 LiveView™ 应用程序。
September 13, 2010 15:07:14
41
LiveView™ 概述
2
1
3
4
5
1电源开关/配对模式/显示屏开关/通知 LED
(发光二极管)
2后退/选择/媒体播放器/显示屏打开
3 充电器接口
4 夹子 - 将 LiveView™ 设备连接到衣服等
任何所需位置
September 13, 2010 15:07:14
42

5 腕带 - 在手腕上佩戴 LiveView™ 设备
更改携带方法
您可使用夹子或腕带来携带 LiveView™ 设备。
您可根据不同需要变换携带方法。
更改携带方法
1例如,要将夹子与 LiveView™ 设备分离,可将指甲
插入 LiveView™ 设备和设备一侧的夹子框架之间的
缝隙,然后用力拉出夹子。
2随后连接腕带。
通知 LED
通知 LED 提供有关 LiveView™ 的状态和通知的
信息。
•闪烁蓝光 - 来电
•闪烁红光 - 电池电量低
•闪烁绿光 - 存在新通知
•交替闪烁红光和绿光 - 正在配对
•红色 - 电池正在充电,电池电量介于不足和已满之间
•绿色 - 电池充电完成
振动提示
在 LiveView™ 设备上收到的重要通知由振动指
示。您可在 LiveView™ 应用程序中关闭振动提
示功能。
关闭振动提示
1将 LiveView™ 与手机连接。
2在手机菜单上,查找并点按 LiveView™ 应用程序
> 振动。
September 13, 2010 15:07:14
43
3要打开振动提示功能,再次点按振动。
充电
首次使用 LiveView™ 设备之前,您需要为它充
电约 2 小时,直到通知 LED 变绿。
将 LiveView™ 与手机配对
您需要将 LiveView™ 与手机进行配对。
LiveView™ 一次只能与一部手机进行配对。
September 13, 2010 15:07:14
44

LiveView™ 处于配
对模式
LiveView™ 正在连
接 – 您可能需要输
入配对数字密码
0000
将 LiveView™ 与手机配对
1打开手机中的蓝牙功能。
2将手机放在 LiveView™ 附近。
September 13, 2010 15:07:14
45

3确保关闭了 LiveView™ 设备。按住 直到
LiveView™ 设备进入配对模式。
4位于手机有效范围内的所有蓝牙设备都将被列出。
在出现的列表中,点按 LiveView™ 。
5当要求添加 LiveView™ 时,按照显示出的说明操
作。
6如果要求输入数字密码,请输入 0000。
将手机与 LiveView™ 设备配对之后,手机将
记住此配对。下次连接已配对的 LiveView™
设备时,将不需要再次输入该数字密码。
如果配对失败,LiveView™ 设备将关闭,您需
要重新启动并再次进入配对模式。
安装 LiveView™ 应用程序
1当手机和 LiveView™ 设备配对后,手机上将弹出一
个窗口,询问您是否要为该配件安装首选应用程
序。点按是。您将转至手机中的 Android Market™
应用程序。
2当出现 LiveView™ 应用程序的详细信息时,点按
安装。
3在手机中安装 LiveView™ 应用程序后,在
LiveView™ 设备上按任意键可启动该应用程序。
4要将 LiveView™ 与手机相连,请转到手机的主菜
单,然后查找并点按 LiveView™ 应用程序 > 管理
LiveView™。
5查找并点按 LiveView™ 。
6要断开连接,请再次点按 LiveView™ 。
September 13, 2010 15:07:14
46
打开和关闭 LiveView™
打开 LiveView™ 设备
•按 。
关闭 LiveView™ 设备
•按住 。
关闭 LiveView™ 设备前,确保打开显示屏。
请参阅第 51 页的
打开显示屏
。
主屏幕
您可从 LiveView™ 主屏幕浏览通知类别,比如
信息、社交网络服务、因子、呼叫和日历项目,
具体取决于手机设置。
2
1
3
September 13, 2010 15:07:14
47
1时间 - 时间信息已与手机同步
2电池状态
3未读通知的数目
转到主屏幕
•打开 LiveView™ 设备,然后按 。
浏览通知类别
•点按 或 。
打开通知类别
•滚动到某一通知类别然后按 。要阅读通知,请点按
或 。
返回主屏幕
•按住 。
打开显示屏
LiveView™ 设备上的显示屏将在保持空闲一小段
时间后关闭。这将节省电能并保护您的个人信
息。当出现新通知时,如果打开了振动提示功
能,您将会收到 LED 和振动提示。如果显示屏关
闭,则需要再次打开它以查看通知。
打开显示屏
1确保打开了 LiveView™ 设备。
2按 LiveView™ 设备上的任意键。
September 13, 2010 15:07:14
48
在 LiveView™ 中显示类别
您可决定要在 LiveView™ 设备上显示的通知类
别。
选择在 LiveView™ 中显示的类别
1将 LiveView™ 设备与手机连接。
2在手机的主菜单上,查找并点按 LiveView™ 应用
程序 > 自定义图块。
3选择收藏的类别。
查找手机
如果您知道手机就在某一位置范围内但忘记将它
放在哪儿了,则可使用 LiveView™ 找到它。手
机将会发出响声或振动,这样您就能找到它。
使用查找手机功能
1转到 LiveView™ 主屏幕。
2通过点按 或 滚动到查找手机。
3按 。LiveView™ 设备将开始搜索手机。手机将
会发出响声或振动,这样您就能找到它。
4要让 LiveView™ 设备停止搜索,请再次按 。
通话
当手机响铃时,LiveView™ 将显示出呼叫方的姓
名或电话号码。您可关闭呼叫声音,也可以远程
打开手机中的通话历史清单。
使用 LiveView™ 将来电铃声设置为静音
•按 。
远程打开手机中的通话历史清单
1在 LiveView™ 设备上打开未接来电通知。
September 13, 2010 15:07:14
49
2通过点按 向下滚动,直到选中 。
3按 。如果手机锁定,则需要进行解锁以便打开显
示屏。通话历史清单将显示在手机屏幕的顶部。
如果要在选中 时返回,则按住 。
短信
当手机中收到短信时,您可在 LiveView™ 设备
上查看发件人的信息和该信息的内容。您还可以
远程打开手机中的信息。
在 LiveView™ 设备上阅读短信
1通过点按 或 滚动到 。
2要进入信息收件箱,请按 。
3要选择要阅读的信息,请点按 或 。
4要阅读信息,请点按 或 。
远程打开手机中的短信
1在 LiveView™ 中打开一条短信。
2通过点按 向下滚动,直到选中 。
3按 。如果手机锁定,则需要进行解锁以便激活显
示屏。所需信息将显示在手机屏幕的顶部。
如果要在选中 时返回,则按住 。
所有事件
所有事件功能收集有关 LiveView™ 中显示的所
有事件类别的通知。
September 13, 2010 15:07:14
50
彩信
LiveView™ 设备显示彩信的文本部分。如果您要
访问通过彩信发送的图像、声音或视频,则转到
手机中的信息应用程序。
音乐播放器
您可使用 LiveView™ 来控制手机中的音乐播放
器。
远程打开手机中的音乐播放器
1在 LiveView™ 设备的主屏幕上,按住 。
2要播放手机中的曲目,按 。
远程暂停手机中的音乐播放器
•播放音乐时,按 。
调整音乐播放器音量
•在音乐播放器正在播放时,点按 或 。
在曲目之间切换
•点按 或 。
退出音乐播放器
•按住 。
社交网络服务
LiveView™ 为您提供有关 Facebook™ 和
Twitter™ 更新的实时通知。您可使用手机中的
LiveView™ 应用程序访问您的社交网络服务设
置,比如,筛选有关某一朋友的通知。
September 13, 2010 15:07:14
51
查看社交网络服务通知
1通过点按 或 滚动到社交网络服务,如 。
2按 。
3要阅读通知,请点按 或 。
在手机中远程打开社交网络事件
1在 LiveView™ 设备上打开社交网络通知。
2通过点按 向下滚动,直到选中 。
3按 。如果手机锁定,则需要进行解锁以便打开显
示屏。所需事件将显示在手机屏幕的顶部。
如果要在选中 时返回,则按住 。
访问 Facebook™ 设置
1在手机的主菜单上,查找并点按 LiveView™ 应用
程序 > 自定义图块 > Facebook。登录到您的帐
户。
2选择某个选项。
从 Android Market™ 下载插件
1在手机上,查找并点按 LiveWare™ 管理器。
2从出现的列表中,点按 LiveView™ 。
3点按 LiveView™ 应用程序。弹出一个窗口时,点
按搜索插件。可用插件将显示在 Android Market™
应用程序中。
4选择要安装的插件,然后按照显示的说明操作。
故障排除
未找到插件
对于一些手机类型和/或国家(地区),可能不存
在 LiveView™ 应用程序可用的任何插件。
September 13, 2010 15:07:15
52
LiveView 自动关闭
•电池电量太低。请给 LiveView™ 设备充电。
•配对失败。您需要重新进入配对模式。
意外行为
重设 LiveView™ 设备。
重设 LiveView™
•按住 并保持 15 秒。
September 13, 2010 15:07:15
™
53
April 1, 2010 16:06:29
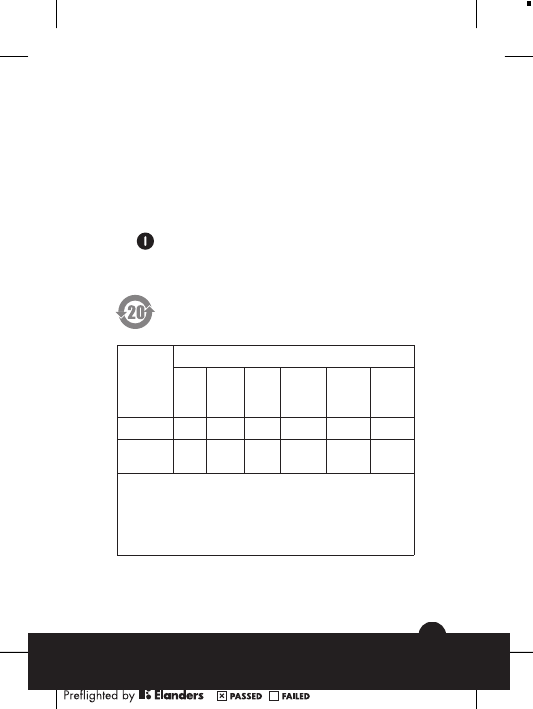
ᆶ۾ᆶ࡞ዊຫ
ℷᐌՓ⫼ᴵӊϟˈ៥Ӏⱘ⦃ֱՓ⫼ᳳ䰤ᰃ
20 ᑈDŽ
ᆶ۾ᆶ࡞ዊईᇮ໎
䚼ӊ
ৡ⿄
䪙
(Pb)
∲
(Hg)
䬝
(Cd)
݁Ӌ䫀
(Cr6+)
⒈
㘨㣃
(PBB)
⒈
Ѡ㣃䝮
(PBDE)
䜡ӊ X O O O O O
ܙ⬉఼
˄བ䳔㽕˅ XOO O O O
O: 㸼⼎䆹᳝↦᳝ᆇ⠽䋼䚼ӊ᠔᳝ഛ䋼ᴤ᭭Ёⱘ䞣ഛ
SJ/T 11363-2006 㾘ᅮⱘ䰤䞣㽕∖ҹϟDŽ
X: 㸼⼎䆹᳝↦᳝ᆇ⠽䋼㟇ᇥ䆹䚼ӊⱘᶤϔഛ䋼ᴤ᭭Ё
ⱘ䞣䍙ߎ SJ/T 11363-2006 㾘ᅮⱘ䰤䞣㽕∖DŽ˄ᠧ
ĀXāⱘᡔᴃॳᰃЎⳂࠡЎℶ≵᳝ৃ᳓ᤶᡔᴃDŽ˅

LiveView™ 裝置可讓您同時在迷你顯示幕和手機
中開啟通知,舉例來說,您可以先在迷你顯示幕中
閱讀通知,然後再使用手機回覆通知。
LiveView™ 只顯示 LiveView™ 連線後發生在
手機中的事件。
此使用手冊重點在說明如何使用 LiveView™ 搭
配索尼愛立信 Android™ 行動電話一同運作。
September 13, 2010 15:07:15
54
LiveWare™ 管理員
在使用 LiveView™ 裝置之前,請先確定手機已安
裝 LiveWare™ 管理員。LiveWare™ 管理員會偵
繁體中文 (台灣)
簡介
LiveView™ 是一個迷你顯示幕,可以反映並顯示
手機中發生的事件,讓您絕對不會錯過任何發生的
事件。您可以在 LiveView™ 畫面中檢視各類通
知,例如文字訊息、多媒體訊息、來電、行事曆事
件提醒、Facebook™ 朋友更新以及 tweet。
您可以在 LiveView™ 應用程式中選擇通知類別,
以決定要追蹤哪些項目。
LiveView™ 使用藍牙連線與手機進行通訊。

更新手機軟體
•請移至索尼愛立信支援網站
www.sonyericsson.com/support
,並依照指示操作。
更新程序會清除所有使用者資料,包括已下載的
應用程式。更新手機軟體之前,請先確定已備份
手機中的重要資料。
September 13, 2010 15:07:15
55
從 Android™ Market 下載應用程式前
的注意事項
從 Android™ Market 下載應用程式之前,請先確
測索尼愛立信智慧型配件,並識別應該搭配哪個軟
體以使用該配件。接著,它會引導您到 Android
Market™ 下載適當的軟體。LiveWare™ 管理員
需要 Android™ 2.0 或更新版本。如果您使用的是
比 Android™ 2.0 舊的版本 (通常是 1.6),則必須
更新到最新版的正式軟體。請參閱第 57 頁的
檢
查手機軟體版本
。
如果手機未安裝 LiveWare™ 管理員,則應該
在 Android Market™ 中搜尋
pname:com.sonyericsson.extras.liveware
或掃描此使用手冊提供的條碼,以下載此軟體。
請參閱第 58 頁的
條碼
。
檢查手機軟體版本
•從手機的主目錄,尋找並輕觸設定 > 關於手機 > 韌體版
本。
條碼掃描器已預先安裝在您的手機,如果沒
有,也可從 Android Market™ 免費取得。
September 13, 2010 15:07:15
56
定網際網路已連線並擁有 Google™ 帳號。此外,
手機必須插入記憶卡。
並非所有國家或地區都提供 Android Market™。
下載內容至手機時,您可能必須支付手機數據傳輸
費用。請連絡您的電信業者以取得貴國數據傳輸費
率的詳細資訊。
條碼
下方顯示的 2D 條碼可協助您從 Android Market™
下載 LiveWare™ 管理員。此條碼可由光學掃描
器 (例如條碼掃描器或 NeoReader™) 讀取。使用
掃描器之前,請先確定網際網路已連線。

關閉 LiveView™ 振動功能,以及將 LiveView™
中的所有通知設定為已閱讀。LiveView™ 必須與
您的手機配對,您的手機必須安裝 LiveView™ 應
用程式。
手機中的 LiveWare™ 管理員可協助您識別、下
載和安裝 LiveView™ 應用程式。請參閱第 65
頁的
安裝
LiveView™
應用程式
。
您也可以在 Android Market™ 中搜尋
pname:com.sonyericsson.extras.liveview
以下載 LiveView™ 應用程式。
存取 LiveView™ 應用程式
•從手機的主目錄,尋找並輕觸 LiveView™ 應用程式。
September 13, 2010 15:07:15
57
使用條碼掃描器下載 LiveWare™ 管理員
1從手機的主目錄,尋找並輕觸您的掃描器應用程
式,例如 NeoReader™。
2若要掃描條碼,請將完整條碼放入觀景窗中。
3當掃描器辨識此條碼後,請輕觸繼續。手機畫面會
移至 Android Market™ 中的 LiveWare™ 管理員
應用程式。依照手機畫面出現的指示操作。
如果您使用不同的條碼掃描器,指示可能會有所
不同。
LiveView™ 應用程式
手機中的 LiveView™ 應用程式可協助您連線或中
斷與 LiveView™ 裝置的連線,以及選擇要顯示在
此裝置上的通知類別。LiveView™ 應用程式也可
讓您套用 Facebook™ 和 Twitter™ 設定、開啟或
LiveView™ 概覽
2
1
3
4
5
1電源開啟或關閉/配對模式/顯示幕開啟或關
閉/通知 LED (發光二極體)
2返回/選擇/媒體播放器/顯示幕開啟
3 充電器接頭
4 固定夾 - 可將 LiveView™ 裝置夾在任何想
要的地方,例如衣服
September 13, 2010 15:07:15
58

5 手腕帶 - 可將 LiveView™ 裝置戴在手腕上
變更攜戴方式
您可以使用固定夾或手腕帶來攜戴 LiveView™ 裝
置。您可依不同用途來變更攜戴方式。
變更攜戴方式
1舉例來說,若要將固定夾從 LiveView™ 裝置拔下,
請將手指甲插入 LiveView™ 裝置與裝置側邊之固定
夾框之間的縫隙,然後穩穩地拔下固定夾。
2改裝在手腕帶上。
通知 LED
通知 LED 提供關於 LiveView™ 狀態和通知的相關
資訊。
•閃藍燈 - 來電
•閃紅燈 - 電池電量低
•閃綠燈 - 有新通知
•紅燈和綠燈交替閃爍 - 正在進行配對
•紅燈 - 電池正在充電,目前電量介於低與完全充飽之間
•綠燈 - 電池已完全充飽
振動警示
LiveView™ 裝置會以振動來表示收到重要的通
知。您可以在 LiveView™ 應用程式中關閉振動警
示功能。
關閉振動警示
1將 LiveView™ 連線至手機。
September 13, 2010 15:07:15
59
2從手機的主目錄,尋找並輕觸 LiveView™ 應用程
式 > 振動。
3若要開啟振動警示功能,請再次輕觸振動。
充電
第一次使用 LiveView™ 裝置之前,您必須先充電
約 2 個小時,直到通知 LED 變綠燈為止。
將 LiveView™ 與手機配對
您必須將 LiveView™ 與手機配對。LiveView™ 一
次只能與一個手機配對。
September 13, 2010 15:07:15
60
LiveView™ 正處於
配對模式
LiveView™ 連線中 -
您可能需要輸入配
對數字密碼 0000
將 LiveView™ 與手機配對
1開啟手機的藍牙功能。
2將手機靠近 LiveView™ 裝置。
September 13, 2010 15:07:15
61

3確定 LiveView™ 裝置已關閉。按住 直到
LiveView™ 裝置進入配對模式。
4將會列出手機範圍內的所有藍牙裝置。在出現的清
單中,輕觸 LiveView™ 。
5當系統要求您新增 LiveView™ 時,請依照出現的指
示操作。
6如果系統要求您輸入數字密碼,請輸入 0000。
將手機與 LiveView™ 裝置配對後,手機便會
記住這個配對。下次連線至已配對的
LiveView™ 裝置時,就不需重新輸入數字密
碼。
如果配對失敗,LiveView™ 裝置會關閉,您必
須重新啟動,然後再次進入配對模式。
安裝 LiveView™ 應用程式
1手機和 LiveView™ 裝置一旦完成配對,手機會出現
快顯視窗詢問是否要安裝用於配件的偏好應用程
式。輕觸是。手機畫面會移至 Android Market™ 應
用程式。
2出現 LiveView™ 應用程式的詳細資料後,輕觸安
裝。
3手機安裝好 LiveView™ 應用程式後,按
LiveView™ 裝置的任一按鍵,啟動此應用程式。
4若要將 LiveView™ 連線至手機,請移至手機的主目
錄,然後尋找並輕觸 LiveView™ 應用程式 > 管理
LiveView™。
5尋找並輕觸 LiveView™ 。
6若要中斷連線,請再次輕觸 LiveView™ 。
September 13, 2010 15:07:15
62

開啟和關閉 LiveView™
開啟 LiveView™ 裝置
•按 。
關閉 LiveView™ 裝置
•按住 。
關閉 LiveView™ 裝置之前,請先確定顯示幕已
開啟。請參閱第 67 頁的
開啟顯示幕
。
首頁畫面
視您的手機設定而定,您可以從 LiveView™ 首頁
畫面瀏覽各通知類別,例如訊息功能、社群網路服
務、feed、通話和行事曆項目。
2
1
3
September 13, 2010 15:07:15
63
1時間 - 時間資訊已與手機同步化
2電池狀態
3未閱讀的通知數目
移至首頁畫面
•開啟 LiveView™ 裝置,然後按 。
瀏覽通知類別
•輕觸 或 。
開啟通知類別
•捲動至通知類別並按 。輕觸 或 閱讀通知。
返回首頁畫面
•按住 。
開啟顯示幕
LiveView™ 裝置的顯示幕在一小段時間未使用後
會自行關閉。這是為了省電並保護您的個人資訊。
當有新的通知時,裝置會振動 (若振動警示功能為
開啟) 且 LED 會閃爍來通知您。如果顯示幕已關
閉,則必須再次開啟才能檢視通知。
開啟顯示幕
1確定 LiveView™ 裝置已開啟。
2按 LiveView™ 裝置的任一按鍵。
在 LiveView™ 中顯示類別
您可以決定要在 LiveView™ 裝置中顯示哪些通知
類別。
September 13, 2010 15:07:15
64
選擇 LiveView™ 所顯示的類別
1將 LiveView™ 裝置連線至手機。
2從手機的主目錄,尋找並輕觸 LiveView™ 應用程
式 > 自訂功能格。
3選擇您喜愛的類別。
尋找手機
如果您知道手機在連線範圍內但忘記放在哪裡,可
以使用 LiveView™ 找到它。手機會發出嗶聲或振
動,以便您找到它。
使用尋找手機功能
1移至 LiveView™ 首頁畫面。
2輕觸 或 以捲動至尋找手機。
3按 。LiveView™ 裝置會開始搜尋手機。手機會
發出嗶聲或振動,以便您找到它。
4若要 LiveView™ 裝置停止搜尋,請再按 一次。
通話
手機響鈴時,LiveView™ 會顯示來電者的名稱和
電話號碼。您可以將來電轉成靜音,或遠端開啟手
機中的通話記錄清單。
使用 LiveView™ 將來電轉成靜音
•按 。
遠端開啟手機中的通話記錄清單
1在 LiveView™ 裝置上開啟未接來電通知。
2輕觸 以向下捲動,直到選擇 為止。
September 13, 2010 15:07:15
65
3按 。如果手機已鎖定,則必須解鎖以啟用顯示
幕。通話記錄清單會出現在手機畫面頂端。
如果要在選擇 後返回,請按住 。
文字訊息
手機收到文字訊息時,您可以在 LiveView™ 裝置
上查看寄件者資訊和訊息內容。您也可以遠端開啟
手機中的訊息。
閱讀 LiveView™ 裝置中的文字訊息
1輕觸 或 以捲動至 。
2按 進入訊息收件匣。
3輕觸 或 選擇要閱讀的訊息。
4輕觸 或 閱讀訊息。
遠端開啟手機中的文字訊息
1在 LiveView™ 中開啟文字訊息。
2輕觸 以向下捲動,直到選擇 為止。
3按 。如果手機已鎖定,則必須解鎖以啟用顯示
幕。所需的訊息會出現在手機畫面頂端。
如果要在選擇 後返回,請按住 。
所有事件
所有事件功能可收集 LiveView™ 顯示之所有事件
類別的通知。
多媒體訊息
LiveView™ 裝置可顯示多媒體訊息的文字部分。
如果想要存取多媒體訊息中的影像、聲音或視訊,
請使用手機中的訊息應用程式。
September 13, 2010 15:07:15
66
音樂播放器
您可以使用 LiveView™ 控制手機中的音樂播放
器。
遠端開啟手機中的音樂播放器
1在 LiveView™ 裝置的首頁畫面中,按住 。
2按 以播放手機中的樂曲。
遠端暫停手機中的音樂播放器
•在音樂播放時,按 。
變更音樂播放器音量
•在音樂播放器播放時,輕觸 或 。
在樂曲間移動
•輕觸 或 。
結束音樂播放器
•按住 。
社群網路服務
LiveView™ 可即時通知您 Facebook™ 和
Twitter™ 的更新。您可以使用手機中的
LiveView™ 應用程式存取社群網路服務設定,例
如,篩選特定朋友的通知。
檢視社群網路服務通知
1輕觸 或 以捲動至社群網路服務,例如 。
2按 。
3輕觸 或 閱讀通知。
遠端開啟手機中的社群網路事件
1在 LiveView™ 裝置上開啟社群網路通知。
September 13, 2010 15:07:15
67
2輕觸 以向下捲動,直到選擇 為止。
3按 。如果手機已鎖定,則必須解鎖才能啟用顯示
幕。所需的事件會出現在手機畫面頂端。
如果要在選擇 後返回,請按住 。
存取 Facebook™ 設定
1從手機的主目錄,尋找並輕觸 LiveView™ 應用程
式 > 自訂功能格 > Facebook。登入您的帳號。
2選擇選項。
從 Android Market™ 下載外掛程式
1在手機中尋找並輕觸 LiveWare™ 管理員。
2在出現的清單中,輕觸 LiveView™ 。
3輕觸 LiveView™ 應用程式。在畫面彈出視窗後,
輕觸搜尋外掛程式。所有可用的外掛程式會顯示在
Android Market™ 應用程式中。
4選擇要安裝的外掛程式並依照出現的指示操作。
疑難排解
找不到外掛程式
某些手機類型和/或國家可能沒有任何 LiveView™
應用程式的外掛程式。
LiveView 自動關閉
•電池電量過低。請為 LiveView™ 裝置充電。
•配對失敗。您必須重新進入配對模式。
未預期的行為
重設 LiveView™ 裝置。
September 13, 2010 15:07:15
™
68

重設 LiveView™
•按住 15 秒。
September 13, 2010 15:07:15
69

FCC Statement
This device complies with Part 15 of the FCC rules. Operation
is subject to the following two conditions: (1) This device may
not cause harmful interference, and (2) This device must accept
any interference received, including interference that may cause
undesired operation.
Any change or modification not expressly approved by Sony Ericsson
may void the user's authority to operate the equipment.
This equipment has been tested and found to comply with the limits for
a Class B digital device, pursuant to Part 15 of the FCC Rules. These
limits are designed to provide reasonable protection against harmful
interference in a residential installation. This equipment generates, uses
and can radiate radio frequency energy and, if not installed and used in
accordance with the instructions, may cause harmful interference to
radio communications. However, there is no guarantee that interference
will not occur in a particular installation.
If this equipment does cause harmful interference to radio or television
reception, which can be determined by turning the equipment off and on,
the user is encouraged to try to correct the interference by one or more
of the following measures:
•Reorient or relocate the receiving antenna.
•Increase the separation between the equipment and receiver.
•Connect the equipment into an outlet on a circuit different from
that to which the receiver is connected.
•Consult the dealer or an experienced radio/TV technician for
help.
Industry Canada Statement
This device complies with RSS-210 of Industry Canada.
Operation is subject to the following two conditions: (1) this device may
not cause interference, and (2) this device must accept any interference,
including interference that may cause undesired operation of the device.
This Class B digital apparatus complies with Canadian ICES-003.
Cet appareil numérique de la classe B est conforme à la norme NMB-003
du Canada.
September 13, 2010 15:07:14
70
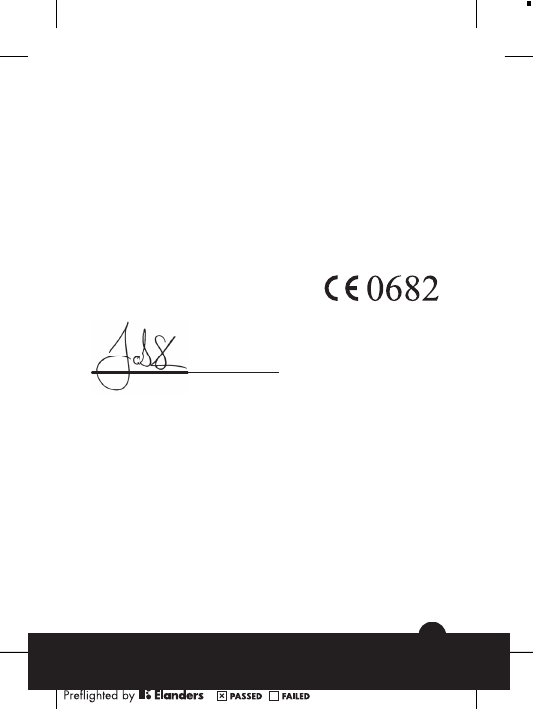
We, Sony Ericsson Mobile Communications AB of
Nya Vattentornet
SE-221 88 Lund, Sweden
declare under our sole responsibility that our product
Sony Ericsson type DGA-0004001
and in combination with our accessories, to which this declaration relates
is in conformity with the appropriate standards EN 300 328:V1.7.1, EN
301 489-17:V2.1.1 and EN 60 950-1:2006 following the provisions of,
Radio Equipment and Telecommunication Terminal Equipment directive
1999/5/EC.
Lund, August 2010
Jacob Sten,
Head of Product Business Unit Accessories
We fulfil the requirements of the R&TTE Directive (1999/5/EC).
Ce produit est conforme à la directive R&TTE (1999/5/EC).
我们符合 R&TTE 指令 (1999/5/EC) 的要求。
本公司符合 R&TTE Directive (1999/5/EC) 中的規定。
September 13, 2010 15:07:14
Declaration of Conformity for MN800
71
www.sonyericsson.com
Sony Ericsson Mobile Communications AB
SE-221 88 Lund, Sweden
September 13, 2010 15:07:16