Sony PM-0610 GSM/WCDMA/LTE mobile phone User Manual
Sony Mobile Communications Inc GSM/WCDMA/LTE mobile phone
UserManual.wiki
>
Sony
>
PM-0610 User Manual
>
User Manual
Contents
1.
Legal Leaflet
2.
SAR Leaflet
3.
User Manual
User Manual
Navigation menu
Upload a User Manual
Namespaces
Wiki Guide
HTML
PDF
Info
Views
User Manual
Discussion / Help
Navigation
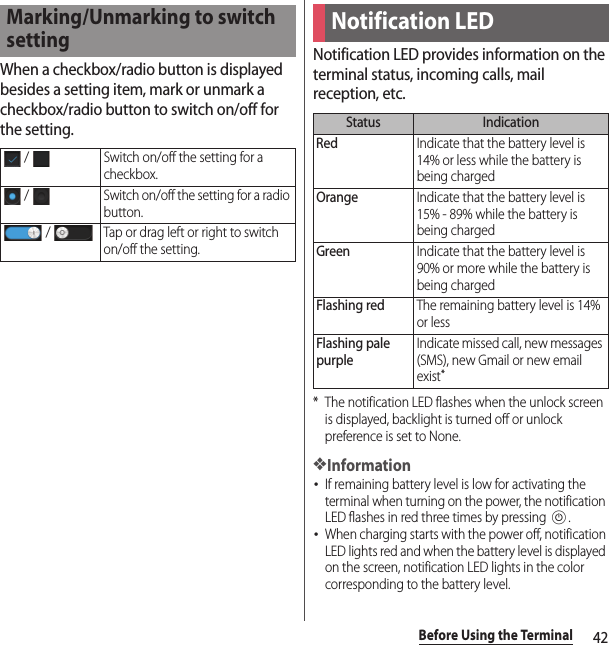
![IntroductionThank you for your purchase of "SO-02F".For proper use of the SO-02F, read this manual carefully before and while you use the SO-02F.About manuals of SO-02FIn addition to this manual, the operations of SO-02F are described in "クイックスタートガイド (Quick Start Guide)" (in Japanese only) and "Instruction Manual" application of the terminal (in Japanese only).●"クイックスタートガイド (Quick Start Guide)" (Supplied accessories)The initial operations and settings after purchasing the terminal, screen view contents and operations of main function are explained.●"Instruction Manual" (Application of the terminal)Similarly to this manual, operations and settings of each function are explained. To use "Instruction Manual" application, from the Home screen, tap and [Instruction Manual]. When using for the first time, download and install the application according to the onscreen instructions. You can use the application as an electronic book. You can also shift to actual operations by tapping the description in the contents or view reference contents.❖Note・For downloading or updating the application, a high packet communication charge will be applied because of a large amount data communication. For this reason, subscription of packet flat-rate service is highly recommended.●"Instruction Manual" (PDF file)Operations and settings of each function are explained. It can be downloaded from NTT DOCOMO website.http://www.nttdocomo.co.jp/english/support/trouble/manual/download/index.html* You can download the latest information of "クイックスタートガイド (Quick Start Guide)". The URL and contents are subject to change without prior notice.❖Note・Reproduction or reprint of all or part of this manual without prior permission is prohibited.・Important information for SO-02F is posted in the following website. Be sure to check before using.http://www.sonymobile.co.jp/support/use_support/product/so-02f/ (In Japanese only)●スマホなるほどツアーズ (Tips of smartphone) (widget of the terminal) (in Japanese only)An widget with which you can easily learn useful functions and basic operations you should know with Docomodake.To use スマホなるほどツアーズ (Tips of smartphone), from the Home screen, tap .](https://usermanual.wiki/Sony/PM-0610.User-Manual/User-Guide-2121930-Page-2.png)
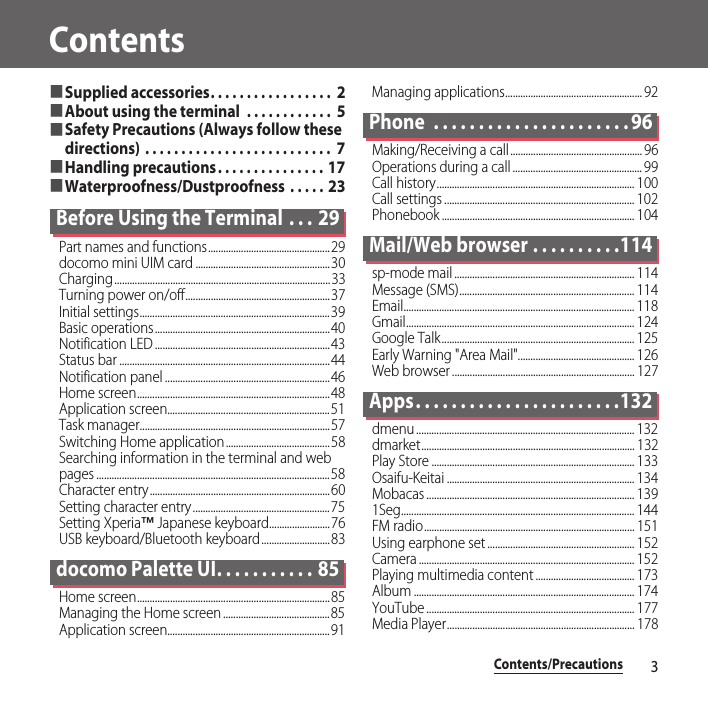
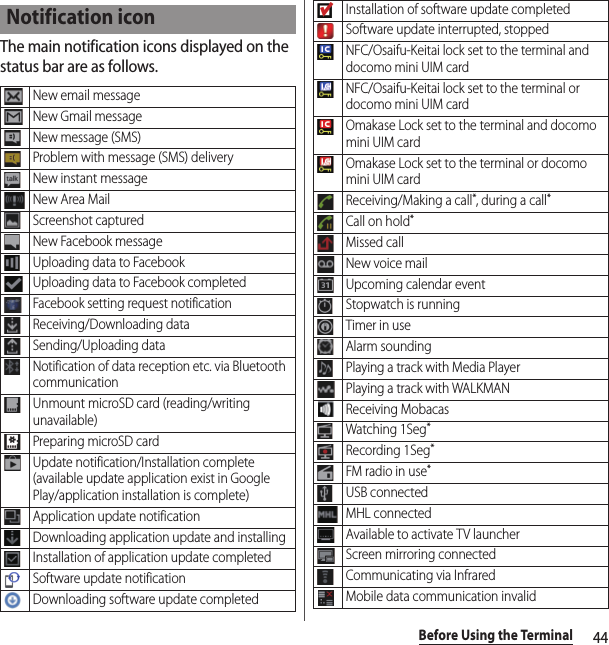
![1Operation descriptionsIn this manual, each key operation is described with P, x, y, r, m, k. And selection operations of the icons or function items on the touch screen are described as follows.❖Information・In this manual, the instructions are described with the default Home screen. If you set the other application to the home screen, the operations may differ from the descriptions.・Display examples and illustrations used in this manual are just images for explanations and may be different from actual ones.・In this manual, the easier procedure is described for the functions and settings which have multiple operating procedures.・Please note that "SO-02F" is called "the terminal" in this manual.・In this manual, explanations for "docomo" as Home application are provided. To switch the Home applications, see "Switching Home application" (P.57).Description OperationFrom the Home screen, tap and tap [Settings]u[About phone].From the Home screen, tap (Applications button), and then tap "Settings" on the next screen and "About phone" on the following screen in order.Touch and hold an icon.Keep touching an icon longer (1-2 seconds).](https://usermanual.wiki/Sony/PM-0610.User-Manual/User-Guide-2121930-Page-3.png)

![6Contents/Precautions・The terminal automatically performs communication for synchronizing data, checking the latest software version, maintain connection with the server, etc. If you transmit a large amount of data such as downloading applications or watching video, a packet communication charge becomes high. Subscription of packet flat-rate service is highly recommended.・Depending on the applications or service you use, packet communication charge may be applied even in Wi-Fi communication.・Since Mobacas is a service linking communication, using the service requires packet communication charge. Subscription of packet flat-rate service is recommended.・Public mode (Driving mode) is not supported.・Setting the terminal to the silent mode does not mute sounds for shutter, playback of video or music, alarm, dial pad touch tones during a call, sound emitted when tapping [End call], etc.・The name of the operator is displayed on unlock screen (P.37).・To check your phone number (own number), from the Home screen, tap and tap [Settings]u[About phone]u[Status] to see "My phone number".・To check the software version, from the Home screen, tap and tap [Settings]u[About phone].・You can perform software update by downloading an update file with a PC via Internet and connecting the PC to the terminal. For details, see "Connecting to a PC and updating" (P.272).・By some software updates, the operating system (OS) may be version-upgraded for improving the terminal quality. For this reason, you always need to use the latest OS version. And some applications that used in the previous OS version may not be available or some unintended bugs may occur.・You can use the terminal only with docomo mini UIM card. If you have a UIM or FOMA card, bring it to a docomo Shop to replace.・Set the screen lock to ensure the security of your terminal for its loss. For details, see "Screen lock" (P.218).・If your terminal is lost, change your each account password to invalidate authentication using a PC to prevent other persons from using Google services such as Google Talk, Gmail, Google Play, etc., Facebook, Twitter and mixi.・For services provided by Google, refer to Google Terms of Service. For other web services, refer to each terms of service.・Google application and service contents are subject to change without prior notice.](https://usermanual.wiki/Sony/PM-0610.User-Manual/User-Guide-2121930-Page-8.png)
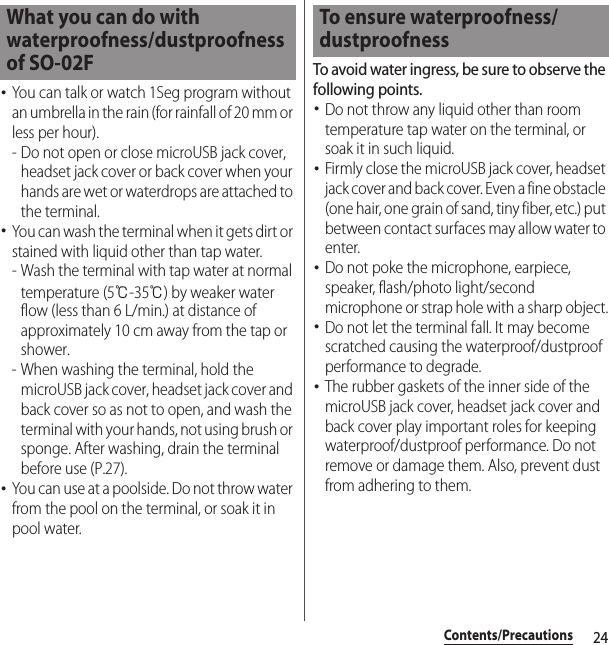
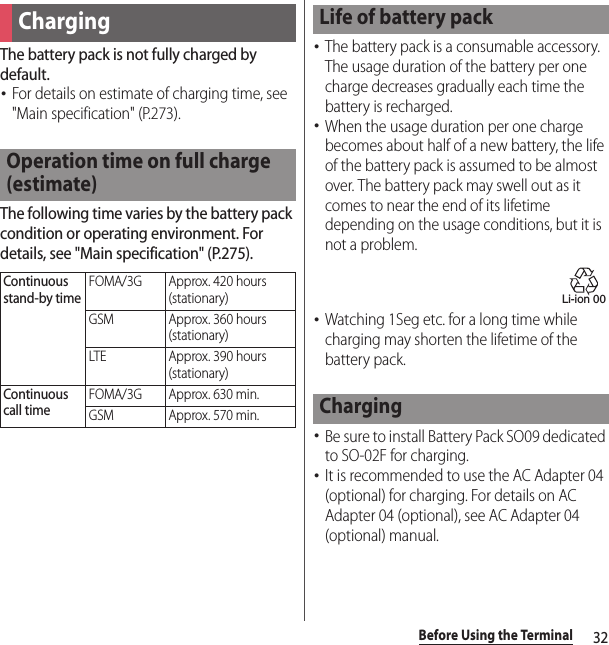
![23Contents/Precautions■ Note・Do not use a remodeled terminal. Using a remodeled terminal violates the Radio Law/Telecommunications Business Act.A "Technical Conformity Mark " shown on the terminal certifies that the terminal meets technical regulations for specified radio equipment that are based on the Radio Law and also certifies a technical standards conformity for terminal equipment that are based on the Telecommunications Business Act. To check the certificate, from the Home screen, tap and tap [Settings]u[About phone]u[Legal information]u[Certificates].If you remove the screws and alter the inside of the terminal, the technical regulations conformity certification becomes invalid.Do not use the terminal with the certification invalid, as it is a violation of the Radio Law and Telecommunications Business Act.・Be careful when using the terminal while driving.Using a handheld mobile phone while driving will result in a penalty.However, absolutely necessary cases such as rescue of a sick person or maintaining public's safety are exempted.・Use the FeliCa reader/writer function only in Japan.FeliCa reader/writer function of the terminal conforms to Japanese radio standards. If you use this function overseas, you may be punished.・Do not alter the basic software illegally.It is regarded as the software modification and Repairs may be refused.SO-02F provides waterproofness property of IPX5*1, IPX8*2 and dustproofness property of IP5X*3 with microUSB jack cover, headset jack cover and back cover firmly attached.*1 IPX5 means that a phone keeps functioning after applying a jet flow of 12.5 L/min. from every direction from a distance of approximately 3 m for at least 3 minutes using water nozzle in 6.3 mm inner diameter.*2 IPX8 means that a phone keeps functioning after SO-02F is slowly submerged to depth of 1.5m in static tap water at room temperature, left there for approximately 30 minutes and then taken out.*3 IP5X means a degree of protection that a communication device will securely maintain its operability even after it has been placed in an apparatus with grit and dust of diameters of 75 μm or less and shaken for 8 hours.Waterproofness/Dustproofness](https://usermanual.wiki/Sony/PM-0610.User-Manual/User-Guide-2121930-Page-25.png)
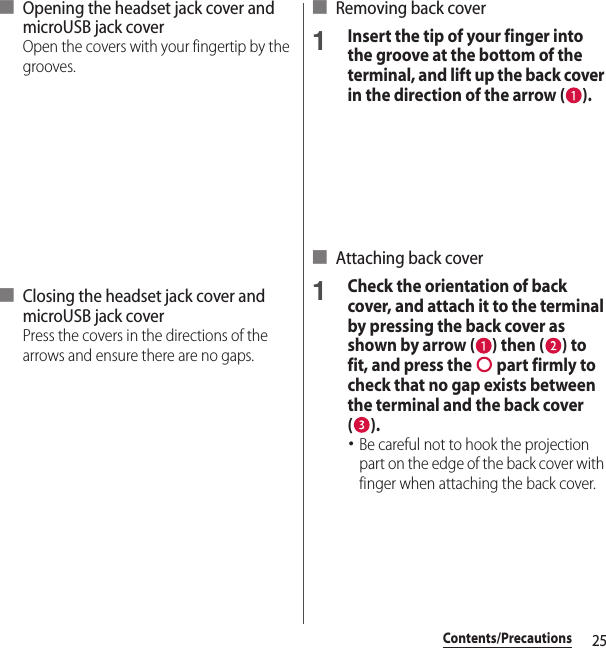
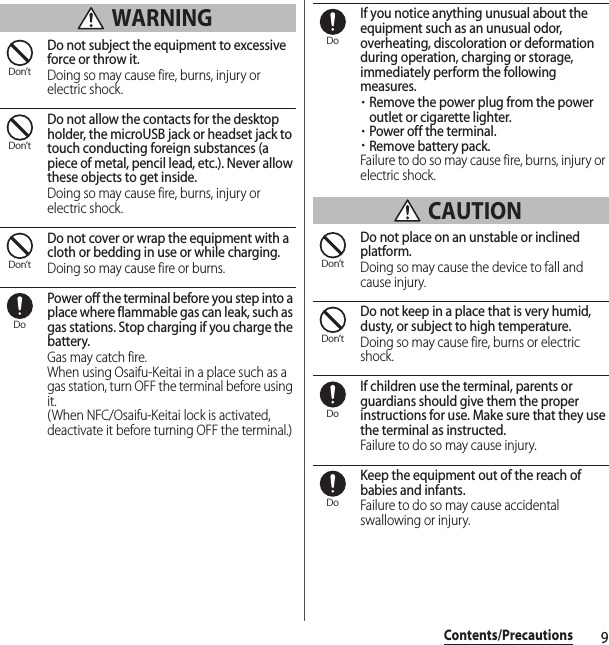
![33Before Using the Terminal・The AC Adapter 04 (optional) is compatible with AC 100 V to 240 V. For using the terminal overseas, a plug adapter that fits the electrical outlets in the country you stay is needed. Do not use an electrical transformer for overseas use to charge the terminal.・Use a compatible AC adapter or microUSB cable for charging (P.257). If you use a charger other than the compatible one, charging may not be available or operations may not be performed correctly.・Insert and remove the AC adapter cable or microUSB cable slowly and evenly so that excessive force is not applied.・If remaining battery level is low for activating the terminal when turning on the power, the notification LED flashes in red three times by pressing P.・When you start charging, notification LED on the terminal turns red/orange/green, and green light indicates that the battery level has reached 90 % or more. To check the battery level, see the status bar at the top of the screen or from the Home screen, tap and tap [Settings]u[About phone]u[Status] to see "Battery level". When the battery level has reached 100 %, battery level is displayed as "100%" on the status bar or in "Battery level", and "Charged." appears on the unlock screen (P.37).・When the battery level is 19% or less, "Connect your charger" appears on the unlock screen. When the battery level is 14% or less, "Connect charger" appears in a pop-up window. Tap [Battery info] in the pop-up window to set Power Saver or check battery information (P.210).・When you start charging with the terminal powered off, the power turns on. However, you cannot operate the terminal. Power off the terminal in a place where the use is prohibited such as in airplane or hospital for this reason.When using supplied Desktop Holder SO17 and AC Adapter 04 (optional) for charging, do the following procedures.1Insert a microUSB plug of the AC adapter into the charging jack on the back side of the desktop holder with the USB symbol (B) side facing up ( ).2Unfold the power plug of the AC adapter and insert it into an outlet.Charging with Desktop Holder](https://usermanual.wiki/Sony/PM-0610.User-Manual/User-Guide-2121930-Page-35.png)
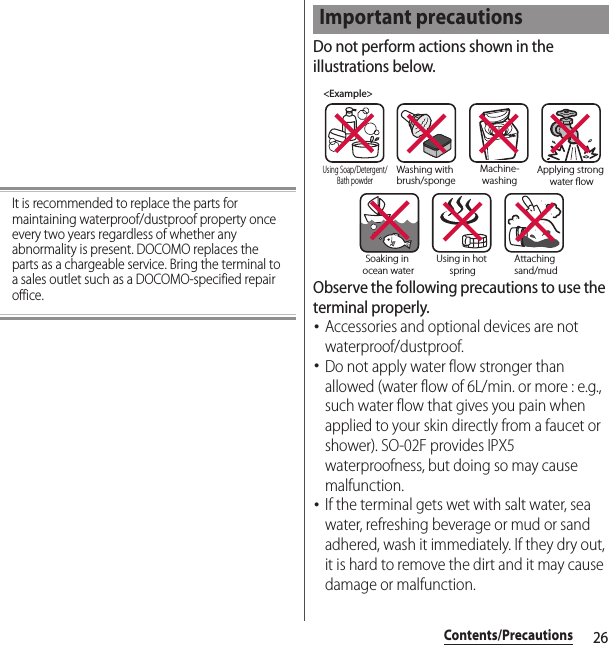
![35Before Using the Terminal❖Note・Check the connecting direction to connect correctly. Wrong connection may cause damage.DC Adapter 03 (optional) supplies power from a car cigarette lighter socket (12 V/24 V). For details, refer to the DC Adapter 03 (optional) manual.When using Micro USB Cable 01 (optional) for charging, do the following procedures.・For opening/closing microUSB jack cover, see "To ensure waterproofness/dustproofness" (P.24, P.25).1Hook the groove on the microUSB jack cover of the terminal to open the cover and insert the microUSB plug of the microUSB cable straight into the microUSB jack of the terminal, with the symbol side ( ) facing up.2Insert the USB plug of the microUSB cable into a USB port of a PC.・Notification LED lights on the terminal. For the notification LED for charging, see "Notification LED" (P.42).・When "PC Companion software" screen appears on the terminal, tap [Skip].・When a screen for new hardware detection etc. appears on the PC, select "キャンセル (Cancel)".3When the charging is complete, remove the USB plug of the microUSB cable from the USB port of the PC.Charging with DC adapterCharging with a PC](https://usermanual.wiki/Sony/PM-0610.User-Manual/User-Guide-2121930-Page-37.png)
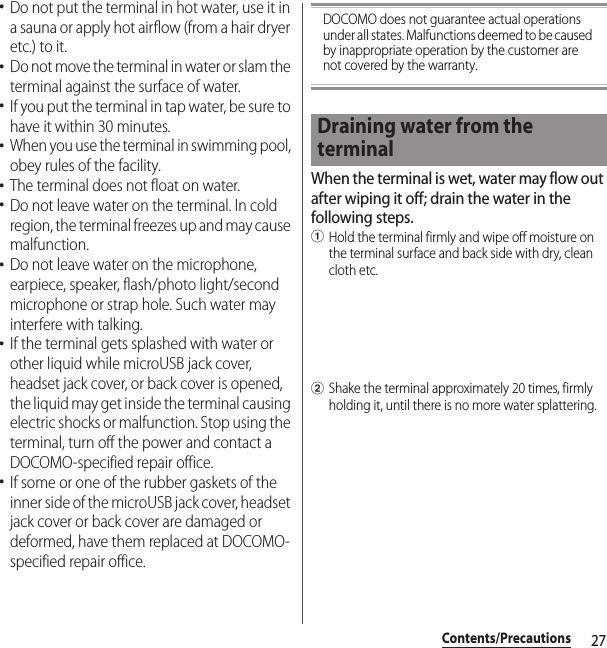
![37Before Using the Terminal・If you have activated the screen lock (P.218) or SIM card lock (P.217), unlock screen/PIN code entry screen appears when turning power on. For unlocking the screen lock, see "Unlocking the screen lock" (P.219), and for PIN code entry, see "Entering the PIN code when powered on" (P.217).1Press and hold P for over a second.2Tap [Power off].3Tap [OK].❖Information・Press P for over a second and then touch and hold [Power off] and tap [OK] to restart the terminal in safe mode. For safe mode, see "The terminal operation is unstable." (P.259).When the screen lock is set, the screen backlight turns off. You can avoid the touch screen or key from false operations.・The screen is locked with turning the screen backlight off after the specified time duration.1Press P.❖Information・For setting time after the backlight turns off until the screen lock activates, see "Adjusting the idle time before the screen turns off" (P.208).Unlock screen appears when turning the power on or the backlight on by pressing P.1On the unlock screen, tap .❖Information・On the unlock screen, tap to activate the camera. Tap to activate "しゃべってコンシェル (Shabette concier)" or "Google" application.・For setting a method to cancel the screen lock, see "Setting screen unlock method" (P.218), and for changing the method, see "Changing screen unlock method" (P.219).・The screen lock can be disabled. For details, see "Canceling screen lock" (P.220).・When "Preferred applications" is set to "Xperia™ applications", or "Set all to" or "Lock screen" is set to "Xperia™" in Preferred apps settings, flick the screen up or down (swipe) to cancel the screen lock. For the initial settings, see "Initial settings" (P.38) and for Preferred apps settings, see "Setting preferred apps" (P.214).Turning power offSetting screen lockUnlocking the screen](https://usermanual.wiki/Sony/PM-0610.User-Manual/User-Guide-2121930-Page-39.png)
![38Before Using the TerminalFor the first time you turn on the terminal, flick (swipe) up/down the screen to unlock the screen and follow the onscreen instructions to make initial settings.1Select [English (United States)]u Tap [Done], and tap .・After this step, follow the onscreen instructions to make the following settings, and tap or [Finish].- Connect to a Wi-Fi network- Connecting to Sony Entertainment Network- Set accounts and auto-sync- Select preferred applications2Tap [OK].3Tap when initial setting screen for docomo service appears.・After this step, follow the onscreen instructions to set up below, and tap .- Select whether to install all apps now or later- Select whether to set Osaifu-Keitai settings- Set docomo apps password settings- Set whether to respond when receive a request of location search4Tap [OK].・Instruction guide for the Home screen appears. Tap [Do not show this again]/[OK] to display the Home screen.❖Information・To change the language later, from the Home screen, tap , then tap [Settings]u[Language & input]u[Language]. To set functions, from the Home screen, tap , then tap [Settings]u[Setup guide]/[docomo service].・Make sure that the data connection is available (LTE/3G/GPRS) or Wi-Fi network is connected before setting up online services. For checking the connection status, see "Status icon" (P.43).・You can use the terminal without creating your Google account, however the services such as Google Talk, Gmail, Google Play, etc. are not available.Initial settings](https://usermanual.wiki/Sony/PM-0610.User-Manual/User-Guide-2121930-Page-40.png)
![40Before Using the Terminal■ DragTouch the screen, drag to the desired position and release the finger.■ ScrollWhen whole content cannot be displayed, flick up/down/left/right displayed content to scroll (move) the display position.■ PinchTouch the screen with two fingers and widen (pinch-out) or narrow (pinch-in) the fingers' distance. On some screens, pinch-out to zoom in and pinch-in to zoom out.You can set the screen orientation to switch between landscape and portrait view automatically according to the terminal orientation.1Drag the status bar downwards.2Tap [Auto rotate].・When the setting is enabled, appears.❖Information・To switch the screen automatically between landscape and portrait screen, from the Home screen, tap , then tap [Settings]u[Display] and mark "Auto-rotate screen", or from the Home screen, tap , then tap [Settings]u[Accessibility] and mark "Auto-rotate screen".・Even when you change the orientation of the terminal, the screen may not change to landscape view depending on the screen such as Home screen, etc.・Changing orientation of the terminal in nearly horizontal state against the ground does not switch to portrait view/landscape view automatically.Switching portrait or landscape view automatically](https://usermanual.wiki/Sony/PM-0610.User-Manual/User-Guide-2121930-Page-42.png)
![41Before Using the Terminal1Drag the status bar downwards.2Tap [Sound].・Tap to activate silent mode (vibration) and tap to activate silent mode (mute). Tap to cancel silent mode.❖Information・Press and hold P for over a second and then tap / / in the pop-up screen to switch Mute (Ringtone 0)/Vibrate/Off (disabling silent mode).・From the Home screen etc., press and hold lower part of m to set vibrator. While vibration is on, press m to set to Mute (Ringtone 0). On the unlock screen, during a call, or while the camera, WALKMAN, Media Player, etc. is activated, pressing and holding lower part of m does not set silent mode.・Setting the terminal to silent mode does not mute sounds for shutter, playback of video or music, alarm, dialpad operation sound during a call or when [End call] is tapped, etc. Note that adjusting volume in Volumes ("Ringtone & notifications" (P.205)) or turning the volume up by pressing upper part of m cancels silent mode.You can save the current displayed screen as an image (screenshot).1On the screen you want to capture, press and hold P and lower part of m for over a second at the same time.・Screenshot is captured and appears in the status bar.❖Information・You can also capture a screenshot by pressing and holding P for over a second and then tapping [Take screenshot].・Drag the status bar downwards and tap [Screenshot captured.] on the Notification panel to check captured images in the "Album" application. Tap [Share] to attach captured images to an application to send or to share them. "Share" may not appear depending on notification status on the Notification panel, but it appears when pinching out on the Notification panel.Setting silent mode Capturing screenshot](https://usermanual.wiki/Sony/PM-0610.User-Manual/User-Guide-2121930-Page-43.png)

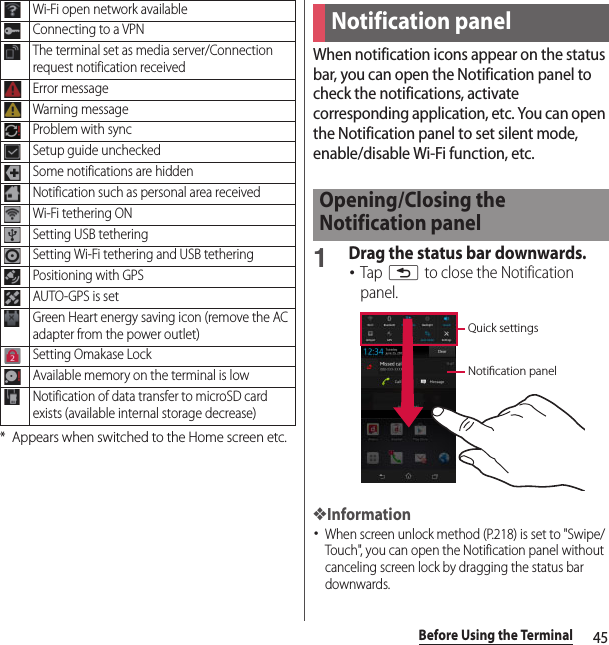
![46Before Using the Terminal・On the Notification panel, number of unread mails, missed calls, and name of callers can be checked. Depending on the notification status and application on the Notification panel, sender, subject, part of message of unread mail can be checked.・You can zoom in/out the Notification panel for some notifications by pinching (P.40) on the Notification panel.・Touch and hold a notification on the Notification panel, then tap [App info] to check the application information.・You can open the Notification panel to set ON/OFF etc. of function with the quick setting tool. For changing order or number of the quick setting tool displayed in the Notification panel, see "Editing quick settings on the Notification panel" (P.208).1Open the Notification panel and tap [Clear].❖Information・Flick left or right a notification on the Notification panel to delete from the list.・Some notifications may not be cleared. / Wi-FiEnable/disable Wi-Fi function. / BluetoothEnable/disable Bluetooth function. / Mobile dataEnable/disable mobile data communication. / BacklightSwitch screen brightness. / / SoundEnable/disable silent mode (Vibration/mute). / HotspotEnable/disable Wi-Fi tethering function. / GPSEnable/disable GPS function. / AirplaneEnable/disable Airplane mode. / Auto-rotateSet whether to switch portrait/landscape view automatically according to the terminal orientation.SettingsDisplay Settings menu (P.193).Clearing contents on the Notification panel](https://usermanual.wiki/Sony/PM-0610.User-Manual/User-Guide-2121930-Page-48.png)
![47Before Using the TerminalYou can switch the Home screen of the terminal to "docomo" or "Xperia™".・For "docomo" home screen, see "Home screen" (P.84).・For changing home application, see "Switching Home application" (P.57).It appears when the home application is set to "Xperia™".aCurrent home screen position・Flick the home screen left or right to switch.bWidget : Google SearchcWidget : ClockdWallpapereShortcuts (applications)fMedia folder (Camera, 1Seg, FM radio, Osaifu-Keitai)gApplication button❖Information・To change the initial home screen for operations, switch the home screen you want to change to, touch and hold the area of the screen where no icons are displayed, then tap .Adding a home screenUp to 7 home screens can be displayed.1Touch and hold an area of the Home screen where no icons are displayed.・Alternatively, pinch-in on the Home screen.2Flick the Home screen left or right and tap .❖Information・To return to the Home screen, tap y or x, or tap any home screen.・To delete a home screen, touch and hold an area of the Home screen where no icons are displayed and tap . When you added shortcuts, widgets, etc. to the home screen, tap and tap [Delete].Home screenXperia™ home screenabcefeg ed](https://usermanual.wiki/Sony/PM-0610.User-Manual/User-Guide-2121930-Page-49.png)
![48Before Using the TerminalAdding a widget to the Home screenWidget is an application which can be added to the Home screen to use. Use a widget and start an application easily.1Touch and hold an area of the Home screen where no icons are displayed.・Alternatively, pinch-in on the Home screen.2Tap [WIDGETS] and select a widget to add.・When a settings screen appears, follow the onscreen instructions.❖Information・To return to the Home screen, tap y or x, or tap any home screen.・For some widgets, displaying size can be changed. To change displaying size, touch and hold a widget, then drag the blue frame.・To delete a widget, from the Home screen, touch and hold a widget to delete and drag it to displayed at the bottom of the screen.Adding a shortcut to the Home screenYou can add shortcuts of application, bookmark, etc.1Touch and hold an area of the Home screen where no icons are displayed.・Alternatively, pinch-in on the Home screen.2Tap [APPS].3[Shortcuts] or select an application you want to add.・When you select "Shortcuts", select from the stored shortcuts.・When a data selection screen or setting screen appears, follow the onscreen instructions.❖Information・To return to the Home screen, tap y or x, or tap any home screen.・To delete a shortcut, touch and hold a shortcut to delete on the Home screen, drag it to displayed at the bottom of the screen.Adding a folder to the Home screenYou can put applications, shortcuts, etc. added to the Home screen into a folder to manage them.1From the Home screen, touch and hold an icon, then drag it over the other icon.・A new folder creation screen appears.2Enter a folder name, then tap [Done].](https://usermanual.wiki/Sony/PM-0610.User-Manual/User-Guide-2121930-Page-50.png)
![49Before Using the Terminal❖Information・To move an icon to a folder, on the Home screen, touch and hold an icon you want to move, drag it over a folder.・To change a folder name, tap a folder, tap the folder name and enter a folder name, then tap [Done].・To delete a folder, on the Home screen, touch and hold an icon to delete and drag it to displayed at the bottom of the screen, then tap [Delete]. Applications, shortcuts, etc. in the folder are also deleted.Changing wallpaperYou can change wallpaper of the Home screen.1Touch and hold an area of the Home screen where no icons are displayed.・Alternatively, pinch-in on the Home screen.2Tap [WALLPAPERS].3Tap [Album]/[Live Wallpapers].・When you tap [Album], select an image and set range of the image by dragging or pinching to adjust the cropping frame, and then tap [Crop] to set wallpaper.・When you tap [Live Wallpapers], select a content and tap [Set wallpaper].・Images displayed at the right of "Album" or "Live Wallpapers" are wallpapers of Xperia™. Select an image to set.❖Information・To return to the Home screen, tap y or x, or tap any home screen.Changing themeYou can change image theme for the Home screen, unlock screen, etc.1Touch and hold an area of the Home screen where no icons are displayed.・Alternatively, pinch-in on the Home screen.2Tap [THEMES].3Flick it left or right to select any image.❖Information・To return to the Home screen, tap y or x, or tap any home screen.](https://usermanual.wiki/Sony/PM-0610.User-Manual/User-Guide-2121930-Page-51.png)
![50Before Using the TerminalApplication screen when the Home screen (P.47) is set to "Xperia™" is explained here.1From the Home screen, tap (Application button).・The Application screen appears.a (Sort)・To sort application icons displayed in the Application screen, set "Own order" and touch and hold an application icon, then drag it to any position.b (Search)・Search for an application in the terminal.cOptional menu icon・"Uninstall" (P.54), "Share" (P.55) or "Customize" can be operated. To customize the Home screen such as changing the wallpaper, tap [Customize].dCurrent displayed position of the application screen・Flick the Application screen left or right to switch.eApplication icon・Some application icons are displayed with a number of missed calls, unread mails, etc.❖Information・To add an application screen, while sorting application icons, drag to the right-end of the application screen.Applications displayed on the Application screen are as follows.・For usage of some applications, separate subscription (Charged) is required. ContactsActivate Xperia™ phonebook application to manage contacts of your friends or colleagues. DialActivate Xperia™ phone application to make/receive calls, and switch between calls. MessagingSend and receive messages (SMS).→P. 1 1 3 BrowserBrowse website and WAP sites (except for WML) and download files.→P. 1 2 6 WALKMANPlayback music data stored on the internal storage or microSD card. AlbumView photos and videos you took, and images posted on Picasa or Facebook.→P.173Application screendeabcApplication list](https://usermanual.wiki/Sony/PM-0610.User-Manual/User-Guide-2121930-Page-52.png)
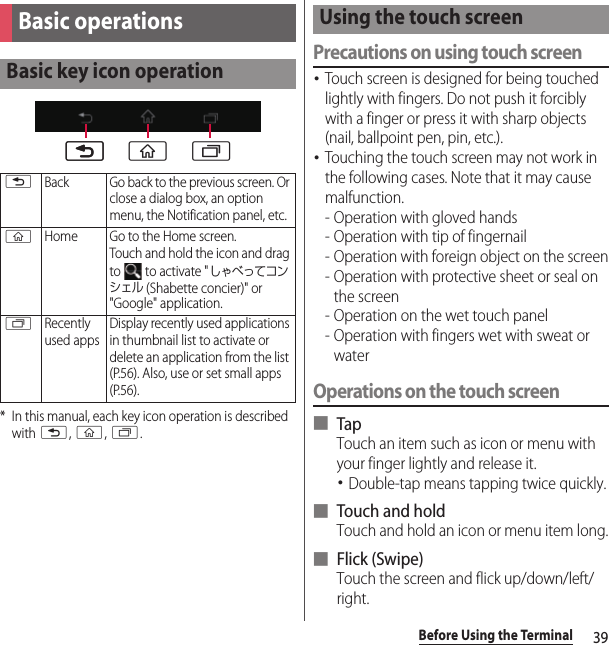
![54Before Using the Terminal 遠隔サポート (Remote support)An application for using "スマートフォンあんしん遠隔サポート (Smartphone Anshin Remote Support)". With "スマートフォンあんしん遠隔サポート (Smartphone Anshin Remote Support)", call center staff can provide operational support while checking your terminal screen remotely. OfficeSuiteView and read Office documents.→P. 1 9 2❖Information・The applications displayed on this application screen are pre-installed by default. Some pre-installed applications can be uninstalled. Even if uninstalled, some applications can be downloaded from "Play Store" (P.132) etc. again.・Some application names may not be displayed fully.・Some applications require downloading and installation. If you cannot download application, from the Home screen, tap and tap [Settings]u[Security]u[Unknown sources]u[OK], mark the checkbox and then tap the application.・Activating two or more applications may increase battery consumption and the operation time may become short. For this reason, it is recommended to end applications when not used. To end an application, on the application screen you are using, tap x to display the Home screen, or tap r and then [Close all].・If you selected Japanese as a language in Initial settings (P.38), some group names are displayed in Japanese even after the language setting is changed. These group names can be changed to English (P.92).Adding an application to the Home screen1From the Application screen, touch and hold an icon you want to add to the Home screen.2Drag it to "Add to Home screen" displayed at the top of the screen.・A Home screen appears.3Drag it to a position to locate the shortcut.❖Information・To delete a shortcut, touch and hold a shortcut to delete on the Home screen, drag it to displayed at the bottom of the screen.Uninstalling an application・Before uninstalling an application, see "Uninstalling an application" (P.91).1From the Home screen, tap .2Tap and tap [Uninstall].3Tap an icon with .・A confirmation screen appears for uninstall.・Icons with can be deleted.4Tap [Uninstall].](https://usermanual.wiki/Sony/PM-0610.User-Manual/User-Guide-2121930-Page-56.png)
![55Before Using the TerminalSharing applicationIntroduce an application with simple operation. Send/post an application downloading information (URL) without entering manually.・Some applications cannot be shared.1From the Home screen, tap .2Tap and [Share].3Tap an application icon with .・A selection screen for sharing method appears.・An icon with can be shared.4Selecting sharing method.・Follow the onscreen instructions.Adding a folder to the Application screenYou can enter application icons displayed on the Application screen to a folder to manage them.1On the Application screen, touch and hold an application icon, then drag it over the other icon.・A new folder creating screen appears.2Enter a folder name, then tap [Done].❖Information・To move an application icon to a folder, on the Application screen, touch and hold an icon you want to move, then drag it over a folder.・To take out an application icon in a folder from the folder, tap the folder, touch and hold the application icon, then drag it to a place somewhere you want to locate.・To change a folder name, tap a folder, tap the folder name, enter a folder name, then tap [Done].](https://usermanual.wiki/Sony/PM-0610.User-Manual/User-Guide-2121930-Page-57.png)
![56Before Using the TerminalYou can check the recently-used application and end it.Display recently used applications in thumbnail list and activate.1Tap r.・Thumbnails of recently used applications are listed.❖Information・Tap a thumbnail of application to activate.・Flick left or right a thumbnail of application displayed to delete from the list.Alternatively, touch and hold a thumbnail of application and tap [Delete from list] to delete from the thumbnail list.・To end all applications and delete all thumbnail lists, tap [Close all] displayed at the upper left of the screen.・To check application information, touch and hold a thumbnail of application and tap [App info].You can use a small app while using another application.1Tap r.・The set small apps appear.2Select a small app to use.・The small app activates.❖Information・By default, (Calculator), (Timer), (Note), (Recorder) are set.・Tap and [Play Store] to install a new small app from Play Store and set it. When is not displayed in the list, flick the small app displayed area left or right.・To delete a set small app, touch and hold a small app you want to delete and then drag it out of the small app display area, then tap [Delete] when a deletion confirmation screen appears. To set deleted small app again, tap and [Installed small apps], then select a small app you want to set.・To close a running small app, tap .Task managerOpening recently-used application windowSmall apps](https://usermanual.wiki/Sony/PM-0610.User-Manual/User-Guide-2121930-Page-58.png)
![57Before Using the TerminalIn the terminal, you can switch the Home screen between "docomo" or "Xperia™"."docomo" is set to the home application by default.1From the Home screen, tap and tap [Settings]u[Setup guide].・Tap 4 times.2On the Preferred applications screen, tap [Change now].3Tap [Home screen]/[Set all to].・When "ALL" is selected, you can set home application, unlock screen, phonebook application and application for playing videos or music as preferred applications all at once.4Tap [docomo]/[Xperia™].5Tap [OK].❖Information・Alternatively, from the Home screen, tap and [Settings]u[Xperia™]uTap [Preferred apps settings], then tap [Set all to]/[Home screen] (P.214).・When the home application is switched, widgets or shortcuts on the screen may not be displayed correctly depending on home screen layout etc.Enter a word in the search box to browse the information in the terminal or on the Internet.1From the Home screen, tap , then tap [Google].・The software keyboard appears.2Enter a search word.・Search suggestions appear as you enter a character. For character entry, see "Character entry" (P.59).・To enter a new search word, tap .3Tap a search item or of software keyboard.・When you select an application from the search result, the application is activated.❖Information・If a Google account is set, the Google Now screen appears in Step 1 in portrait view. Follow the onscreen instructions.・Tap on the software keyboard to input a search word by voice typing with "docomo voice input" or "Google voice typing".Switching Home applicationSearching information in the terminal and web pages](https://usermanual.wiki/Sony/PM-0610.User-Manual/User-Guide-2121930-Page-59.png)
![58Before Using the TerminalUsing Google voice typingEnter a search word by voice.1From the Home screen, tap on the Google search widget.2Speak a search word to the microphone.・Search results appear.Search settingsYou can set to use for search box or set search objectives in the terminal.1From the Home screen, tap , then tap [Google].・The software keyboard appears. Tap .2Tap and [Settings].・Google search setting screen appears. You can set the following items.* Appears when a Google account is set.Google Now*Set location information service to on to check weather information for the current location, traffic information, directions.VoiceYou can change language and settings for voice search.Phone searchChange the search range by marking/unmarking data categories (Apps, Browser, Chrome, Contacts, docomo phonebook, Email, File Commander, Messaging, OfficeSuite, Play Books, Play Movies & TV, WALKMAN) in the terminal.Privacy and accountsSet whether to display search options from Web history when a search word is entered, or delete a search history for contents or applications in the terminal.・You need to create your Google account.](https://usermanual.wiki/Sony/PM-0610.User-Manual/User-Guide-2121930-Page-60.png)
![59Before Using the TerminalEnter characters using the software keyboard which appears when you tap the character input box in a mail, phonebook, etc.❖Information・When the software keyboard is displayed, appears on the status bar.・To hide software keyboard, tap displayed at the lower left of the screen.・Touch and hold a text in the character entry screen to display the enlarged text to check with dragging on the text.In the terminal, you can select Input method (keyboard type) from "Google voice typing", "Moji-Henshu", "Xperia™ Chinese keyboard", "Xperia™ Japanese keyboard" or "Xperia™ keyboard".1From the Home screen, tap , then tap [Settings].2Tap [Language & input]u[Default].3Tap [Xperia™ Japanese keyboard]/[International keyboard].❖Information・When the language is set to English, the default input method is set to "International keyboard". To use the Japanese keyboard, tap [Xperia™ Japanese keyboard] in Step 3. In this manual, explanations are given only for "Xperia™ Japanese keyboard".・While entering characters, drag the status bar downwards and tap [Choose input method] to select from "Google voice typing"/"Japanese Moji-Henshu"/"Xperia™ Japanese keyboard"/"International keyboard".・"Xperia™ Chinese keyboard" is not available by default. To use Chinese keyboard, from the Home screen, tap , then tap [Settings]u[Language & input] and mark "Xperia™ Chinese keyboard".Character entrySelecting entry methodGoogle voice typingSelect to enter characters by voice input with Google voice typing.Moji-HenshuSelect to enter characters by voice input with docomo voice input.Xperia™ Chinese keyboardSelect to enter Chinese.Xperia™ Japanese keyboardSelect to enter Japanese.Xperia™ keyboardYou can select a language for text entry.](https://usermanual.wiki/Sony/PM-0610.User-Manual/User-Guide-2121930-Page-61.png)
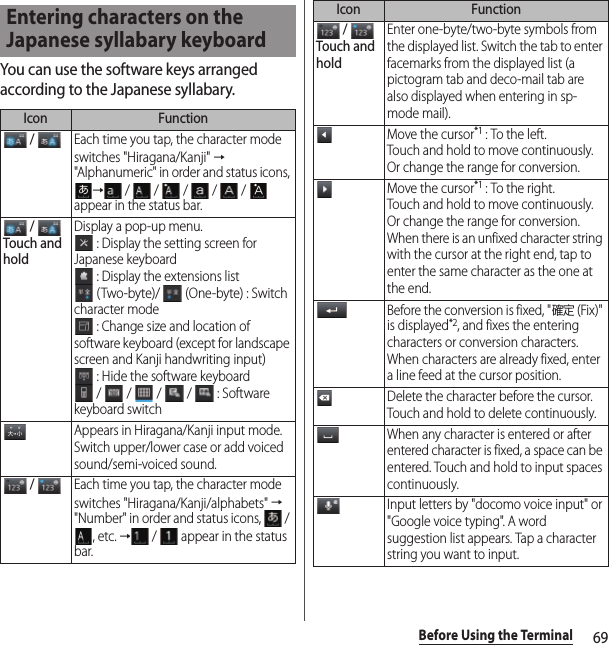
![62Before Using the Terminal❖Information・By default, the phonepad keyboard for portrait screen is set and QWERTY keyboard for landscape screen is set. Also, "Word suggestions", "Auto capitalization", and "Spell check" are set to ON for input support.・Tap in Step 2 to change size and location of software keyboard. Drag blue frame to change size. Drag the software keyboard to move to. To restore the software keyboard to the default, tap [Reset].Enter characters using the keyboard with multiple-character-assigned keys. Flick input or toggle input is used for character entry.Entering characters on the phonepad keyboardIcon Function / Each time you tap, the character mode switches "Hiragana/Kanji" → "Alphanumeric" in order and status icons, → / / appear in the status bar. / Touch and holdDisplay a pop-up menu. : Display the setting screen for Japanese keyboard : Display the extensions list (Two-byte)/ (One-byte) : Switch character mode : Change size and location of software keyboard (except for landscape screen and Kanji handwriting input). : Hide the software keyboard / / / / : Software keyboard switch / Each time you tap, the character mode switches "Hiragana/Kanji/alphabets" → "Number" in order and status icons, / , etc. → / appear in the status bar. / Touch and holdEnter one-byte/two-byte symbols from the displayed list. Switch the tab to enter facemarks from the displayed list (a pictogram tab and deco-mail tab are also displayed when entering in sp-mode mail).Appears before fixing character in Hiragana/Kanji input mode. It displays alphanumeric or katakana conversion candidates assigned to tapped key.Appears after conversion is fixed to return to text before conversion.Move the cursor*1 : To the left.Touch and hold to move continuously. Or change the range for conversion.Icon Function](https://usermanual.wiki/Sony/PM-0610.User-Manual/User-Guide-2121930-Page-64.png)
![63Before Using the Terminal*1 When any characters are entered, just tap the desired position on the entered character string to move the cursor.*2 In some screens such as the mail account registration screen or search screen, "次へ (Next)", "完了 (Done)", "実行 (Go)", , etc. appear.*3 To set online dictionary, in Hiragana/Kanji input mode, touch and hold , tap [OK] then mark "Online dictionary", or mark "Online dictionary" in the Japanese keyboard setting screen (P.80).Move the cursor*1 : To the right.Touch and hold to move continuously. Or change the range for conversion.When there is an unfixed character string with the cursor at the right end, tap to enter the same character as the one at the end.Before the conversion is fixed, "確定 (Fix)" is displayed*2, and fixes the entering characters or conversion characters. When characters are already fixed, enter a line feed at the cursor position.Delete the character before the cursor. Touch and hold to delete continuously.When any character is entered or after entered character is fixed, a space can be entered. Touch and hold to input spaces continuously.Input letters by "docomo voice input" or "Google voice typing". A word suggestion list appears. Tap a character string you want to input.Touch and holdDisplay the available extensions list.Display the previous character (opposite order).In Hiragana/Kanji input mode, highlight and select word in conversion candidates. Tap continuously to change a word highlighted in conversion candidates and select a word to enter.Icon FunctionTouch and holdIn Hiragana/Kanji input mode, activate online dictionary to display in conversion candidates.*3 / Appears when entering numbers, tap to switch one-byte/two-byte character.Icon Function](https://usermanual.wiki/Sony/PM-0610.User-Manual/User-Guide-2121930-Page-65.png)
![64Before Using the TerminalSettings of entry■ Flick inputFlick up/down/left/right to enter characters in each column of kana syllabary.・Ex: Entering characters in "な" columnYou can enter "な" only by tapping. Flick left for "に", up for "ぬ", right for "ね" and down for "の".・To switch upper/lower case or change to voiced/semi-voiced sound, tap or flick / .・Flick input is available by default. When not using it, you can cancel by the following operations.aOn a character entry screen, touch and hold .bTap .c[On-screen keyboard settings]uUnmark "Flick input" checkbox.・To change sensitivity of the flick input, on a character entry screen, touch and hold , tap and [On-screen keyboard settings]u[Sensitivity of flick input], then select "High"/"Medium (default)"/"Low".■ Toggle entryTap the same key continuously to enter the assigned character.To enter characters assigned to the same key continuously, operate the followings.・Ex: To enter "あお"aTap "あ" once.bTap , and tap "あ" 5 times.・Ex: To enter "ca"aTap "abc" 3 times.bTap *.cTap "abc" once.* In some applications, tap in Step b.・To switch upper/lower case or change to voiced/semi-voiced sound, tap / .ぬねにのなFlick leftFlick up TapFlick rightFlick down](https://usermanual.wiki/Sony/PM-0610.User-Manual/User-Guide-2121930-Page-66.png)
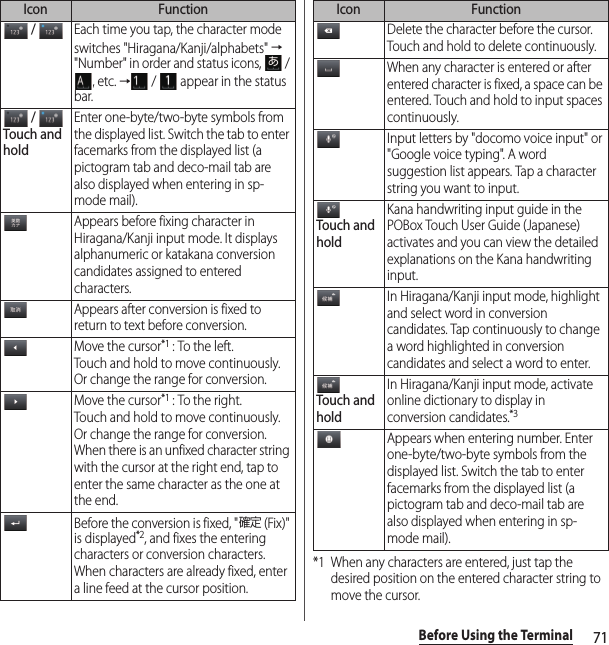
![65Before Using the Terminal・Multitap text input is available by default. When not using it, you can cancel by the following operations.aOn a character entry screen, touch and hold .bTap .c[On-screen keyboard settings]uUnmark "Multitap text input" checkbox.❖Information・In case of Multitap text input, when the tapped key's highlighter goes off and you can enter a character assigned to the same key consecutively without tapping .Enter characters using a keyboard with characters allocated in the same arrangement as general PCs. Enter Japanese in Roman character.Entering characters on the QWERTY keyboardIcon Function / Each time you tap, the character mode switches "Hiragana/Kanji" → "Alphanumeric" in order and status icons, → / / / / / appear in the status bar. / Touch and holdDisplay a pop-up menu. : Display the setting screen for Japanese keyboard : Display the extensions list (Two-byte)/ (One-byte) : Switch character mode : Change size and location of software keyboard (except for landscape screen and Kanji handwriting input) : Hide the software keyboard / / / / : Software keyboard switch / Each time you tap, the character mode switches "Hiragana/Kanji/alphabets" → "Number" in order and status icons, / , etc. → / appear in the status bar.](https://usermanual.wiki/Sony/PM-0610.User-Manual/User-Guide-2121930-Page-67.png)
![66Before Using the Terminal*1 When any characters are entered, just tap the desired position on the entered character string to move the cursor.*2 In some screens such as the mail account registration screen or search screen, "次へ (Next)", "完了 (Done)", "実行 (Go)", , etc. appear.*3 To set online dictionary, in Hiragana/Kanji input mode, touch and hold , tap [OK] then mark "Online dictionary", or mark "Online dictionary" in the Japanese keyboard setting screen (P.80). / Touch and holdEnter one-byte/two-byte symbols from the displayed list. Switch the tab to enter facemarks from the displayed list (a pictogram tab and deco-mail tab are also displayed when entering in sp-mode mail).Move the cursor*1 : To the left.Touch and hold to move continuously. Or change the range for conversion.Move the cursor*1 : To the right.Touch and hold to move continuously. Or change the range for conversion.When there is an unfixed character string with the cursor at the right end, tap to enter the same character as the one at the end.Before the conversion is fixed, "確定 (Fix)" is displayed*2, and fixes the entering characters or conversion characters. When characters are already fixed, enter a line feed at the cursor position.Delete the character before the cursor. Touch and hold to delete continuously.When any character is entered or after entered character is fixed, a space can be entered. Touch and hold to input spaces continuously.Input letters by "docomo voice input" or "Google voice typing". A word suggestion list appears. Tap a character string you want to input.Icon FunctionTouch and holdDisplay the available extensions list.Appears before fixing character in Hiragana/Kanji input mode. It displays alphabet or katakana conversion candidates assigned to tapped key. / / In alphanumerics input mode, tap to switch capitalization/upper case/lower case.In Hiragana/Kanji input mode, highlight and select word in conversion candidates. Tap continuously to change a word highlighted in conversion candidates and select a word to enter.Touch and holdIn Hiragana/Kanji input mode, activate online dictionary to display in conversion candidates.*3 / Appears in number input mode. Tap to switch numbers or symbols to one-byte/two-byte characters.Icon Function](https://usermanual.wiki/Sony/PM-0610.User-Manual/User-Guide-2121930-Page-68.png)
![67Before Using the TerminalSelecting an assistant keyboardWhen you enter in Hiragana/Kanji input mode using the QWERTY keyboard, you can change the assistant keyboard to make the frequent using keys to be displayed widely for easy tapping.1On a character entry screen, touch and hold .2Tap .3Tap [On-screen keyboard settings]u[Choose key type].4Tap any of [Wide]/[Highlight]/[Dynamic]/[Standard].5Tap [OK].■ WideWiden frequent using key for easy tapping.■ HighlightWiden frequent using key and highlight the key that is predicted for the next entry.■ DynamicWiden the key that is predicted for the next entry much further and highlight it.■ StandardDisplay equally the width of each key. Settings of "Hide keys" (P.68) are not valid and all keys are shown.](https://usermanual.wiki/Sony/PM-0610.User-Manual/User-Guide-2121930-Page-69.png)
![68Before Using the TerminalChanging display keysYou can set not to display less-frequent-used keys (Q, X, C, etc.) on the QWERTY keyboard.1On a character entry screen, touch and hold .2Tap .3Tap [On-screen keyboard settings]u[Hide keys].・When the Choose key type (P.67) is set to "Standard", "Hide keys" cannot be selected.4Unmark the checkbox of the key you want to hide.5Tap [OK].Customizing keyboardYou can change symbols which are displayed in QWERTY keyboard when entering number to desired characters/symbols.1On a character entry screen, touch and hold .2Tap .3Tap [On-screen keyboard settings]u[Keyboard customization].4Tap a symbol you want to change and delete character previously set, then enter a character to display and tap [OK].・Only one character (two-byte or one-byte character) can be set.5Tap [OK].❖Information・To return to the default status, on the keyboard customize screen, tap , then tap [Reset]u[OK].](https://usermanual.wiki/Sony/PM-0610.User-Manual/User-Guide-2121930-Page-70.png)
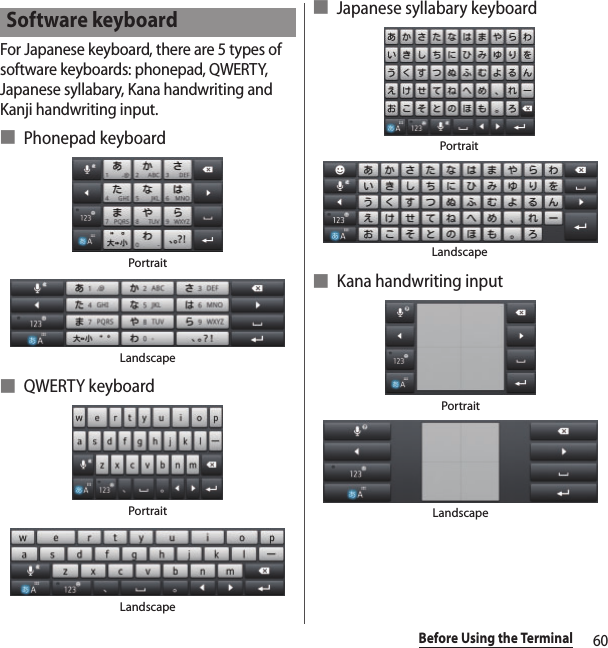
![70Before Using the Terminal*1 When any characters are entered, just tap the desired position on the entered character string to move the cursor.*2 In some screens such as the mail account registration screen or search screen, "次へ (Next)", "完了 (Done)", "実行 (Go)", , etc. appear.*3 To set online dictionary, in Hiragana/Kanji input mode, touch and hold , tap [OK] then mark "Online dictionary", or mark "Online dictionary" in the Japanese keyboard setting screen (P.80).Trace characters on the Kana handwriting area to enter Hiragana, Alphabet, Number, a part of symbols by handwriting.Touch and holdDisplay the available extensions list. / / In alphanumerics input mode, tap to switch capitalization/upper case/lower case or switch allocated symbol type.In Hiragana/Kanji input mode, highlight and select word in conversion candidates. Tap continuously to change a word highlighted in conversion candidates and select a word to enter.Touch and holdIn Hiragana/Kanji input mode, activate online dictionary to display in conversion candidates.*3Appears in landscape mode, and you can enter one-byte/two-byte symbols from the displayed list. Switch the tab to enter facemarks from the displayed list (a pictogram tab and deco-mail tab are also displayed when entering in sp-mode mail).Icon FunctionEntering characters on the Kana handwriting inputIcon Function / Each time you tap, the character mode switches "Hiragana/Kanji" → "Alphanumeric" in order and status icons, → / / appear in the status bar. / Touch and holdDisplay a pop-up menu. : Display the setting screen for Japanese keyboard : Display the extensions list (Two-byte)/ (One-byte) : Switch character mode : Change size and location of software keyboard (except for landscape screen and Kanji handwriting input) : Hide the software keyboard / / / / : Software keyboard switchAppears in Hiragana/Kanji input mode. Switch upper/lower case or add voiced sound/semi-voiced sound.Appears in alphanumerics input mode, tap to switch upper case and lower case.](https://usermanual.wiki/Sony/PM-0610.User-Manual/User-Guide-2121930-Page-72.png)
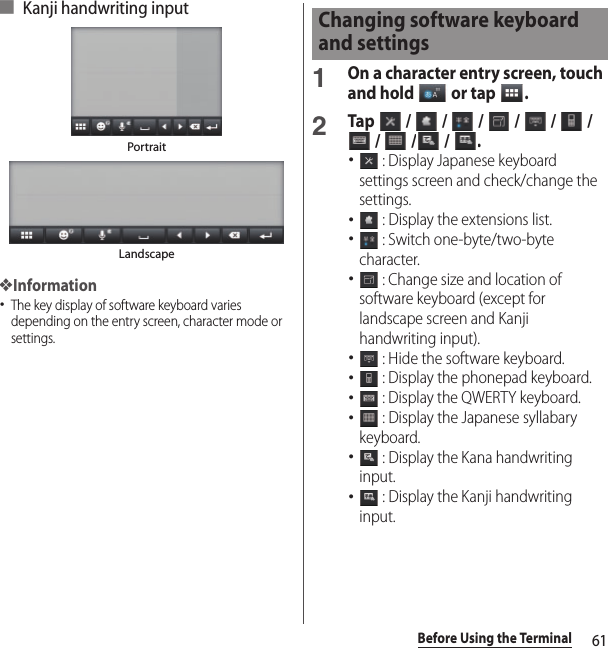
![72Before Using the Terminal*2 In some screens such as the mail account registration screen or search screen, "次へ (Next)", "完了 (Done)", "実行 (Go)", , etc. appear.*3 To set online dictionary, in Hiragana/Kanji input mode, touch and hold , tap [OK] then mark "Online dictionary", or mark "Online dictionary" in the Japanese keyboard setting screen (P.80).❖Information・When you enter character by Kana handwriting for the first time, read a guidance and tap [OK].・You can enter a character continuously without deleting entered character.・For voiced sound and semi voiced sound mark, enter in the right upper part of the Kana handwriting input screen.・For punctuation mark and lower case, enter in the lower part from the center of the Kana handwriting input.・For entering alphabet, enter it with reference to lower horizontal line of the Kana handwriting input screen.You can input Hiragana, Kanji, Katakana, Alphabet, Number, a part of symbols by tracing characters on Kanji handwriting area without switching input mode.Entering characters on the Kanji handwriting inputIcon FunctionDisplay a pop-up menu. : Display the setting screen for Japanese keyboard : Display the extensions list (Two-byte)/ (One-byte) : Switch character mode : Hide the software keyboard / / / / : Software keyboard switch / *1Enter one-byte/two-byte symbols from the displayed list. Switch the tab to enter facemarks from the displayed list (a pictogram tab and deco-mail tab are also displayed when entering in sp-mode mail).Touch and holdThe Kana handwriting input guide in the POBox Touch User Guide (Japanese) activates. You can view the detailed explanations for the handwriting input.*1Touch and holdWhen inputting character, activate online dictionary to display in conversion candidates.*2](https://usermanual.wiki/Sony/PM-0610.User-Manual/User-Guide-2121930-Page-74.png)
![73Before Using the Terminal*1 Appears when entering characters.*2 To set online dictionary, when inputting character, touch and hold , tap [OK] then mark "Online dictionary", or mark "Online dictionary" in the Japanese keyboard setting screen (P.80).*3 When any characters are entered, just tap the desired position on the entered character string to move the cursor.*4 In some screens such as the mail account registration screen or search screen, "次へ (Next)", "完了 (Done)", "実行 (Go)", , etc. appear.❖Information・When you enter character by Kanji handwriting for the first time, read a guidance and tap [OK].・On the character entry screen, tap and , then [On-screen keyboard settings]uMark "Auto scrolling" to display a gray area on the right of Kanji handwriting input. Input characters to the area to scroll the input area to the left automatically. When you unmark "Auto scrolling", tap on the Kanji handwriting input screen to scroll the input area.・For voiced/semi-voiced sound mark, enter in the upper part from the Kanji handwriting input screen.・For punctuation mark and lower case, enter in the lower part from the center of the Kanji handwriting input screen.・Tap an icon at the upper left of entered character to display candidates for the entered character. Character displayed in blue is the recognized. Color displayed below conversion candidate indicates a character type: Green means Hiragana, yellow means Kanji, orange means Katakana, dark blue means Alphabet, purple means number and light blue means symbol.・When entering 2 or more characters and tapping an icon at the upper left, appears. Tap to combine entered 2 characters to 1 character.Enter characters by "docomo voice input" or "Google voice typing". Input candidates list appears. Tap a character string to enter.Touch and holdDisplay the available extensions list.When any character is entered or after entered character is fixed, a space can be entered. Touch and hold to input spaces continuously.Display direct conversion candidates when entering characters.When entering characters, highlight and select word in conversion candidates. Tap continuously to change a word highlighted in conversion candidates and select a word to enter.Move the cursor*3 : To the left.Touch and hold to move continuously. Or change the range for conversion.Move the cursor*3 : To the right.Touch and hold to move continuously. Or change the range for conversion.Delete the character before the cursor. Touch and hold to delete continuously.Before the conversion is fixed, "確定 (Fix)" is displayed*4 and pressing it fixes characters to enter or convert. When characters are already fixed, enter a line feed at the cursor position.Icon Function](https://usermanual.wiki/Sony/PM-0610.User-Manual/User-Guide-2121930-Page-75.png)
![74Before Using the Terminal・When entering characters, tap to delete entered characters.In the character entry screen such as mail, phonebook, etc., double-tap text you want to edit so that text edit menu appears at the top of the screen. Drag or to change the character string to select.❖Information・To paste a copied or cut character string, touch and hold a position where you want to insert, then tap [PASTE]. Alternatively, when texts are entered, tap a position where you want to insert, then tap and [PASTE].・Edit menu icons vary by applications.・In the landscape screen, editing menu may not be displayed.For each input method, you can make settings related to character entry.1From the Home screen, tap , then tap [Settings]u[Language & input].2Tap on "Google voice typing"/"Moji-Henshu"/"Xperia™ Chinese keyboard"/"Xperia™ Japanese keyboard"/"Xperia™ keyboard".・Settings screen for respective input method appears. Tap an item displayed on the screen to set.❖Information・The items vary depending on the input method.・Alternatively, while entering characters, drag the status bar downwards and tap [Choose input method] u [Set up input methods], then tap for each input method to display.・ on the "Xperia™ Chinese keyboard" is not available by default. To set Chinese keyboard, mark "Xperia™ Chinese keyboard" in Step 2, then tap .Editing text (Select all)Select all entered text. (Cut)Cut a selected character string. (Copy)Copy a selected character string. (Paste)Paste a copied/cut character string. (Complete)Close the edit menu.Setting character entry](https://usermanual.wiki/Sony/PM-0610.User-Manual/User-Guide-2121930-Page-76.png)
![75Before Using the Terminal1From the Home screen, tap , then tap [Settings]u[Language & input].2Tap on "Xperia™ Japanese keyboard".・The setting screen for Xperia™ Japanese keyboard appears.❖Information・Alternatively, on a character entry screen, touch and hold or tap and then tap to display the setting screen for Xperia™ Japanese keyboard. Alternatively, while entering characters, drag the status bar downwards and tap [Choose input method] u [Set up input methods], then tap for "Xperia™ Japanese keyboard" to display.Common settings of software keyboardMake keyboard settings such as Key sound, Vibrate, etc.1On the setting screen for Xperia™ Japanese keyboard, tap [On-screen keyboard settings].・Set items for "COMMON ON-SCREEN KEYBOARD SETTINGS".❖Information・"Sound on keypress" volume is linked to "Ringtone & notifications" (P.205) of volume in Volumes.・By default, conversion candidates are set to be displayed in 2 lines in portrait/landscape screen.Setting Xperia™ Japanese keyboardDisplaying the setting screen for Xperia™ Japanese keyboardSound on keypressSet whether to sound at the time of key tapping.Vibration on keypressSet whether to vibrate at the time of key tapping.Vibration intensityWhen "Vibration on keypress" is set, you can set vibration intensity by dragging the slider left or right.Pop-up on keypressSet whether to magnify tapped key or display flick guide.No. of lines (portrait)Set number of lines for conversion candidates displayed in portrait mode.No. of lines (landscape)Set number of lines for conversion candidates displayed in landscape mode.](https://usermanual.wiki/Sony/PM-0610.User-Manual/User-Guide-2121930-Page-77.png)
![76Before Using the TerminalKeeping keyboard typeSet to stabilize the last status of keyboard (phonepad/QWERTY/Japanese syllabary keyboard/Kana handwriting input/Kanji handwriting input) in the each portrait/landscape screen in kana/alphabet/number input mode.1On the setting screen for Xperia™ Japanese keyboard, tap [On-screen keyboard settings].2Mark [Keep keyboard type].❖Information・You can set to stabilize the last status of keyboard in the each portrait/landscape screen without marking "Keep keyboard type".You can set support functions for character input such as Word suggestion function, Setting voice input.Setting Word suggestionThe Word suggestion function shows predicted conversion candidates when you enter Japanese/English characters. Mark the checkbox of Word suggestion checkbox to set "Spell check" and "Auto space". That helps you entering characters with ease.1On the setting screen for Xperia™ Japanese keyboard, tap [Input support].2Mark "Word suggestions".❖Information・Flick or drag downwards in the word suggestion field to enlarge the word suggestion field and to hide the keyboard. Tap [前候補 (Previous suggestion)]/[次候補 (Next suggestion)]/[確定 (Fix)] shown below the word suggestions to select/fix characters to be entered. To show the software keyboard, tap [戻る (Back)] or .・In Hiragana/Kanji input mode (in inputting character when using Kanji handwriting input), tap [直変 (Direct conversion)]/[予測 (Prediction)] in the word suggestion field to display direct conversion candidates/predicted conversion candidates.Input support](https://usermanual.wiki/Sony/PM-0610.User-Manual/User-Guide-2121930-Page-78.png)
![77Before Using the TerminalSetting voice inputSet voice input to "docomo voice input" or "Google voice typing".1On the setting screen for Xperia™ Japanese keyboard, tap [Input support]u[Voice typing].2Tap [docomo voice input]/[Google voice typing].❖Information・"docomo voice input" is set by default.・When you tap on the software keyboard for the first time, you can select whether to activate docomo voice input or change to Google voice typing.Auto capitalizationSet to capitalize automatically the top letter you enter in one-byte alphabet entry mode (except for Kana handwriting input and Kanji handwriting input).1On the setting screen for Xperia™ Japanese keyboard, tap [Input support].2Mark "Auto capitalization".❖Information・The top letter may not always be capitalized automatically in one-byte alphabet entry mode when "Auto capitalization" is marked.Setting Spell checkSpell check corrects mistyped characters and shows conversion candidates before conversion in one-byte alphabet input mode when entering characters with QWERTY keyboard or Japanese syllabary keyboard.1On the setting screen for Xperia™ Japanese keyboard, tap [Input support].2Mark "Spell check".❖Information・If Word suggestion function (P.76) is not set, Spell check is not available.Setting Auto spaceWhen selecting English word suggestion, Auto space enters next to the entered character (Except for Kanji handwriting input). However, space is not entered automatically in the mail address or URL input fields.1On the setting screen for Xperia™ Japanese keyboard, tap [Input support].2Mark "Auto space".❖Information・If Word suggestion function (P.76) is not set, Auto space is not available.](https://usermanual.wiki/Sony/PM-0610.User-Manual/User-Guide-2121930-Page-79.png)
![78Before Using the TerminalYou can change software keyboard skin.1On the setting screen for Xperia™ Japanese keyboard, tap [Keyboard skin].2Select from keyboards displayed by flicking left or right and tap [Set skin].❖Information・To download and add keyboard skins from a website, tap [Search for skin] in Step 2. Some keyboard skins downloaded from website may not support the terminal.・To delete the downloaded keyboard skin, from the Home screen, tap , and tap [Settings]u[Apps]u"Downloaded" tab, and tap the keyboard skin you want to delete, and then tap [Uninstall]u[OK]u[OK]. Also, tap [Uninstall] in Step 2 so that you can delete the keyboard skin that is not compatible with the terminal.You can use or add extensions when entering characters.Using Contact Picker 2.3If contacts are registered to the Contacts, you can use "Contact Picker 2.3" to enter contact information when entering characters.1On a character entry screen, touch and hold or tap .2Tap .3Tap [Contact Picker 2.3]u"Contacts" tab.4Tap the contact to pick up.・When you enter a name or reading in the search box at the top of the screen, a list of contacts appears accordingly.5Mark items you want to quote and tap [OK].・If you want to select/deselect all items, tap [Mark all]/[Unmark all].❖Information・Alternatively, on a character entry screen, touch and hold to display the available extensions list (except for Kana handwriting input).・"History" tab displays contacts that are picked up when entering characters.Setting keyboard skin Using extensions](https://usermanual.wiki/Sony/PM-0610.User-Manual/User-Guide-2121930-Page-80.png)
![79Before Using the TerminalAdding an extensionYou can install extensions to use when entering characters.1On the setting screen for Xperia™ Japanese keyboard, tap [Manage extensions].2On the how to start extensions screen, tap [OK].・Extensions settings screen appears.3Tap [Download new extensions].・Extensions list screen appears.4Select an application you want to add.・After this step, follow the onscreen instructions.❖Information・Marked extensions in the extensions settings screen can be activated in the character entry screen. The preinstalled extension "Contact Picker 2.3" is marked by default.To display the word as the preferred candidate when entering characters, set the user dictionary beforehand.Registering words in user dictionariesThere are 2 types of user dictionaries: "My words Japanese" and "My words English".1On the setting screen for Xperia™ Japanese keyboard, tap [Dictionaries].2Tap [My words Japanese]/[My words English].3Tap and [Add].4Tap the character input box for "Reading" and fill it out.5Enter a word in the input box for "Word" and tap [完了 (Done)] on the software keyboard.6Tap [Save].❖Information・Words registered to My words Japanese are displayed as conversion candidates when entering Kanji in phonepad/QWERTY/Japanese syllabary/Kana handwriting and Kanji handwriting input.Setting dictionary](https://usermanual.wiki/Sony/PM-0610.User-Manual/User-Guide-2121930-Page-81.png)
![80Before Using the Terminal・Words registered to My words English are displayed as conversion candidates when entering alphabet in phonepad/QWERTY/Japanese syllabary/Kana handwriting. During Kanji handwriting input, they are not displayed in the conversion candidates.・Up to 50 characters (regardless of one-byte or two-byte characters) can be stored for a "Reading" and "Word", and up to 500 items can be stored in the user dictionary.・Added user dictionary can be edited or deleted. To edit, select an added user dictionary and tap , then tap [Edit] for editing and tap [Save]. To delete, select an added user dictionary and tap , then tap [Delete]u[Delete]. To delete all user dictionary, tap , then tap [Delete all]u[Delete].Setting Words by learningLearn words selected from the conversion candidates to display as the preferred candidate when entering characters.1On the setting screen for Xperia™ Japanese keyboard, tap [Dictionaries] then [Learn words].2Mark "Save words while typing".・To reset already learned words, tap [Delete saved words]u[Delete].❖Information・To delete history for learned words individually, touch and hold a word you want to delete and tap [Delete].Setting online dictionaryIn Hiragana/Kanji input mode (in inputting character when using Kanji handwriting input), activate online dictionary to display in conversion candidates.1On the setting screen for Xperia™ Japanese keyboard, tap [Dictionaries] then [Online dictionary].2Tap [Online dictionary], then read the note and tap [Agree].・"Online dictionary" is marked.❖Information・In Hiragana/Kanji input mode, touch and hold (touch and hold in inputting character when using Kanji handwriting input) to activate online dictionary.](https://usermanual.wiki/Sony/PM-0610.User-Manual/User-Guide-2121930-Page-82.png)
![81Before Using the TerminalBacking up and restoring dictionaryUser dictionary and Words by learning can be backed up onto an internal storage and restored when needed.1On the setting screen for Xperia™ Japanese keyboard, tap [Dictionaries] then [Backup & restore].2Tap [Backup]/[Restore].3Mark a dictionary to back up/restore.・Select "My words Japanese"/"My words English"/"Learn words".4Tap [Go].・When backing up, a screen asking whether to overwrite the user dictionary on the internal storage appears. When restoring, a screen asking whether to overwrite the user dictionary in the terminal appears.5Tap [OK]u[OK].・The data is backed up or restored.❖Information・If restoring data is failed, user dictionary in the terminal restores to the default. Restore by operating again.・User dictionary and Words by learning are not backed up onto microSD card.You can view the detailed explanations on the high performance Xperia™ Japanese keyboard from the basic to application. The latest information can be obtained from the websites for extensions or keyboard skins.1On the setting screen for Xperia™ Japanese keyboard, tap [POBox Touch User Guide].・POBox Touch User Guide appears.❖Information・Touch and hold in the Kana handwriting input screen to activate the Kana handwriting input guide in the POBox Touch User Guide (Japanese), or touch and hold in the Kanji handwriting input screen to activate Kanji handwriting input guide with which you can view the detailed explanations for the handwriting input.POBox Touch User Guide](https://usermanual.wiki/Sony/PM-0610.User-Manual/User-Guide-2121930-Page-83.png)
![82Before Using the TerminalConnect USB keyboard or Bluetooth keyboard that supports HID (Human Interface Device) profile with the terminal to enter characters.■ Using JIS keyboard1Connect a USB keyboard or Bluetooth keyboard and drag the status bar downwards, then tap [Select keyboard layout].・If a notification does not appear on the status bar, from the Home screen, tap and [Settings]u[Language & input].2Tap a name of USB keyboard or Bluetooth keyboard connected to the terminal.3Tap [Set up keyboard layouts]u[Japanese].・JIS keyboard is set. Tap y etc. to end setting.❖Information・Some Bluetooth keyboards compatible with HID profiles cannot be used or may not operate properly.・After is shown on the status bar of the terminal, enter characters with USB keyboard or Bluetooth keyboard. If the status icon does not appear, tap character input field.・Press "半角/全角 (one-byte/two-byte)" key on a USB JIS keyboard or Bluetooth JIS keyboard to switch the Roman alphabet kana input/Alphabet input on the terminal. For English keyboards, pressing "`" key (grave key) switches the input mode.・While displaying word suggestions, press "Tab" key/"↓" key on the USB keyboard or the Bluetooth keyboard to select a word in word suggestions.・While not selecting a word in word suggestions, press "Space" key on the USB keyboard or the Bluetooth keyboard to switch to direct conversion.・You can edit texts with connected USB keyboard or the Bluetooth keyboard. For instructions on editing texts on the terminal, see "Editing text" (P.74).- Press "Ctrl" key and "A" key to select all entered text.- Press "Shift" key and "←" key or "Shift" key and "→" key to partly select entered text from cursor.- Press "Ctrl" key and "X" key to cut a selected character string.- Press "Ctrl" key and "C" key to copy a selected character string.- Press "Ctrl" key and "V" key to paste a copied or cut character string.・While displaying word suggestions, press "無変換 (No conversion)" key on the USB keyboard or the Bluetooth keyboard to switch word suggestions to alphanumeric conversion.USB keyboard/Bluetooth keyboard](https://usermanual.wiki/Sony/PM-0610.User-Manual/User-Guide-2121930-Page-84.png)

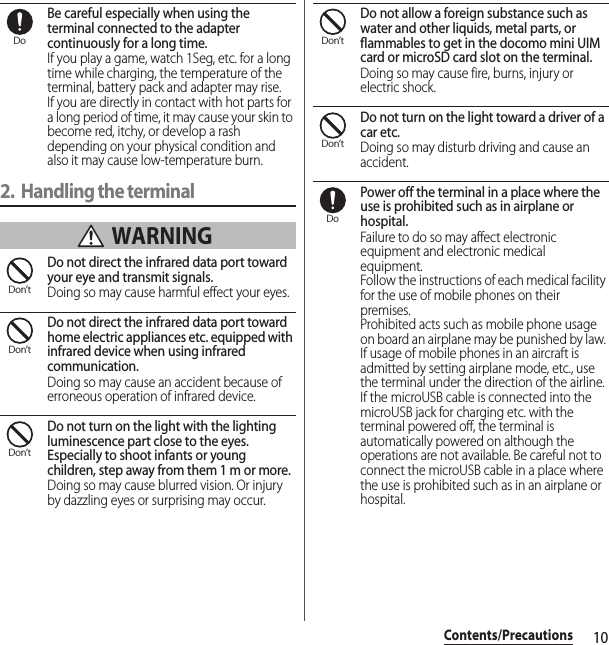
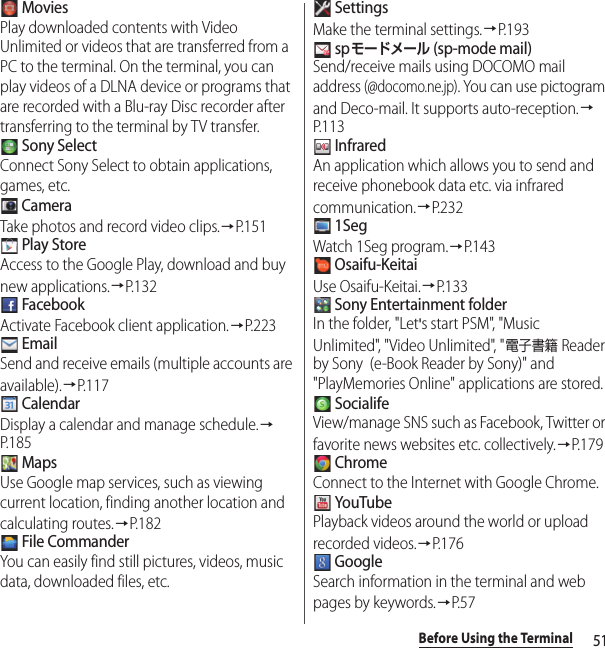
![84docomo Palette UIdocomo Palette UITapping y displays Home screen which consists of up to 12 screens you can use flicking left and right.aCurrent home screen position・Flick the Home screen left or right to switch.bWidget : Google SearchcWidget : i-channeldWidget : Machi-charaeShortcuts (applications)fApplications buttongWallpaper❖Information・You can switch the home application between "docomo" and "Xperia™" in the terminal. For changing home application, see "Switching Home application" (P.57).・When the instruction guide for the Home screen appears, tap [Do not show this again]/[OK] to display the Home screen.Displaying a list of home screens1From the Home screen, pinch-in.・A home screen list appears.❖Information・Touch an hold an area of the Home screen where no icons are displayed and tap [Home screens] to display list of home screens.・When the instruction guide for the home screen list appears, tap [Do not show this again]/[OK].・To return to the home screen, pinch-out, or tap y or x.1Touch and hold an area of the Home screen where no icons are displayed.・"Select an action" menu appears to change the Home screen.■ Select an actionHome screenabcefegd©NTT DOCOMO"ひつじのしつじくん®(Butler Sheep)"Managing the Home screenAdding to the Home screenShortcutAdd shortcuts of applications or favorites (P.85).WidgetAdd widgets (P.85).FolderCreate a new folder (P.87).](https://usermanual.wiki/Sony/PM-0610.User-Manual/User-Guide-2121930-Page-86.png)
![85docomo Palette UIAdding a shortcut to the Home screen1On "Select an action" menu screen (P.84), tap [Shortcut].2Select an item you want to add.・The shortcut appears on the Home screen.❖Information・Alternatively, on the Application screen (P.90), touch and hold a group name and then tap [Add].Adding a widget to the Home screen1On "Select an action" menu screen (P.84), tap [Widget].・A list of widgets appears.KisekaeChange the background of the Home screen or Application screen, or download from website to add (P.89).WallpaperSelect from "Album", "Live Wallpapers", or "Xperia™ wallpapers" to set wallpaper (P.89).GroupAdd group shortcut of Application screen (P.87).Home screensDisplay a list of home screens and then add, delete, or sort home screens (P.84).Wallpaper loop settingsSet whether to loop wallpaper on the Home screen.BookmarksDisplay bookmarks of Browser.BookmarksDisplay bookmarks of Chrome.CalendarDisplay events in calendar.ContactDisplay contacts using Contacts application of Xperia™.Contents HeadlineDisplay recommended music, videos, e-books and applications information at the dmarket.docomo location informationActivate docomo location information application.docomo Wi-Fi Easy ConnectionConnect/disconnect to Wi-Fi with a one-touch operation in a Wi-Fi area.EmailSelect Email account or folder to display.Facebook ButtonsPost your comments or select and upload images to Facebook.Facebook StatusShow or post Facebook comments.GmailSelect Gmail account or folder to display.Google SearchDisplay the Google search box.Google+ postsDisplay posted contents in Google+.](https://usermanual.wiki/Sony/PM-0610.User-Manual/User-Guide-2121930-Page-87.png)

![87docomo Palette UIAdding a folder to the Home screen1On "Select an action" menu screen (P.84), tap [Folder].・A folder is added on the Home screen.❖Information・To rename a folder, tap a folder you want to rename and tap the name entry field to enter a folder name, then [完了 (Done)] on the software keyboard and then tap on the screen. Alternatively, touch and hold a folder you want to rename and tap [Edit name], then enter a folder name and then tap [OK].・To move a shortcut into a folder, touch and hold a shortcut, then drag it onto any folder.Adding a group to the Home screen1On "Select an action" menu screen (P.84), tap [Group].2Select an item you want to add.❖Information・Alternatively, on the Application screen (P.90), touch and hold a group name and then tap [Add].You can add, delete, sort home screens while the home screen list is displayed.・For details on the home screen list, see "Displaying a list of home screens" (P.84).Adding a home screen1From the Home screen, pinch-in.・A home screen list appears.2Tap .❖Information・There are 3 home screens by default. The terminal can display up to 12 home screens.Deleting a home screen1From the Home screen, pinch-in.・A home screen list appears.2Tap of thumbnail you want to delete on the Home screen.❖Information・Alternatively, on the home screen list, touch and hold a thumbnail of home screen you want to delete and tap [Delete].Changing the Home screen](https://usermanual.wiki/Sony/PM-0610.User-Manual/User-Guide-2121930-Page-89.png)
![88docomo Palette UISorting home screens1From the Home screen, pinch-in.・A home screen list appears.2Touch and hold a home screen you want to sort.3Drag it anywhere.Moving an icon on the Home screen1From the Home screen, touch an icon you want to move.2Drag it anywhere.・To move to another Home screen, keep touching the icon and drag it to left or right.Deleting an icon from the Home screen1From the Home screen, touch and hold an icon you want to delete.2Tap [Delete].❖Information・Alternatively, touch and hold an icon you want to delete from the Home screen and drag it to displayed at the bottom of the screen.Uninstalling a shortcut or widget on the Home screen・Before uninstalling application, back up contents related to the application or widget that you want to save including data saved in the application or widget.・Some applications or widgets may not be uninstalled.1From the Home screen, touch and hold a shortcut or widget you want to uninstall.2Tap [Uninstall].・A confirmation screen appears for uninstall.3Tap [OK]u[OK].❖Information・You can also uninstall application from the Settings menu (P.193). For details, see "Deleting installed application" (P.212).](https://usermanual.wiki/Sony/PM-0610.User-Manual/User-Guide-2121930-Page-90.png)
![89docomo Palette UIChanging Kisekae1On "Select an action" menu screen (P.84), tap [Kisekae].2Flick left or right and tap a Kisekae you want to change to.❖Information・Alternatively, in Step 2, select Kisekae you want to change to and tap [Set] to change Kisekae.・Alternatively, from the Home screen, tap and then tap [Kisekae] to change.・You can add Kisekae contents by tapping [Search] to download from website. To delete added Kisekae contents, select the image and tap [Delete]u[Delete].Changing wallpaper1On "Select an action" menu screen (P.84), tap [Wallpaper].2Tap any of [Album]/[Live Wallpapers]/[Xperia™ wallpapers].・When you tap [Album], select an image and set range of the image by dragging or pinching to adjust the cropping frame, and then tap [Crop] to set wallpaper.・When you tap [Live Wallpapers], select a content and tap [Set wallpaper].For some contents, you can change type or contents displayed on the wallpaper by tapping [Settings...].・When you tap [Xperia™ wallpapers], select an image and tap [Set wallpaper].❖Information・You can also download wallpapers from websites and add it.・Alternatively, you can change from the Home screen, tap and tap [Settings]u[Display]u[Wallpaper].](https://usermanual.wiki/Sony/PM-0610.User-Manual/User-Guide-2121930-Page-91.png)
![90docomo Palette UI1From the Home screen, tap (Applications button).・The Application screen appears.aApplication tab・View Application screen.bRecommends tab・Install applications recommended by DOCOMO (P.93).cOptional menu icon・View optional menu such as Settings.dGroup name・You can manage applications by groups.・Tap a group name to show/hide applications in the group.eApplication icon・When you download an application from website or a downloaded application is updated, appears on the upper left of the application icon.・Some application icons are displayed with a number of missed calls, unread mails, etc.fNumber of applications in the groupgApplications in the group・To display/hide applications in all groups, pinch-out/in the Application screen.❖Information・When the instruction guide for the Application screen appears, tap [Do not show this again]/[OK].・To close the Application screen, tap x or y.・Touch and hold an application icon, then tap [About] to check the application information.・If you selected Japanese as a language in Initial settings (P.38), some group names are displayed in Japanese even after the language setting is changed. These group names can be changed to English (P.92).Application screendfgeabc](https://usermanual.wiki/Sony/PM-0610.User-Manual/User-Guide-2121930-Page-92.png)
![91docomo Palette UIFrom the Application screen, you can add or move application icons, or uninstall applications.Adding an application shortcut to the Home screen1From the Application screen, touch and hold an icon you want to add to the Home screen.2Tap [Add].・The application icon is added onto the Home screen.❖Information・Touch and hold an area of the Home screen where no icons are displayed and tap [Shortcut] u[Application] and select an application to add an icon.Moving application1On the Application screen, touch and hold an icon to move.2Drag it anywhere.・The application icon is moved.❖Information・Touch and hold an application icon on the Application screen, tap [Move] and select group, the group of application icons is changed.Uninstalling an applicationSome application icons can be deleted from the Application screen.・Before uninstalling application, back up contents related to the application that you want to save including data saved in the application.・Some applications may not be uninstalled.1From the Application screen, touch and hold an icon of application you want to uninstall.2Tap [Uninstall].・A confirmation screen appears for uninstall.3Tap [OK]u[OK].❖Information・You can also uninstall them from the Settings menu (P.193). For details, see "Deleting installed application" (P.212).Managing applicationsChanging the Application screen](https://usermanual.wiki/Sony/PM-0610.User-Manual/User-Guide-2121930-Page-93.png)
![92docomo Palette UIAdding group to the Home screen1From the Application screen, touch and hold an icon you want to add to the Home screen.2Tap [Add].・Shortcuts to the group is added to the Home screen.❖Information・Touch and hold an area of the Home screen where no icons are displayed and tap [Group] and select a group to add a shortcut.Changing the color of group name1From the Application screen, touch and hold a group you want to change the color.2Tap [Edit label] and select label color to change.・The color for group name is changed.Deleting group1From the Application screen, touch and hold a group you want to delete.2Tap [Delete]u[OK].・Application icons belonged to the deleted group move to the "Download Application" group.❖Information・"Recently", "DOCOMO Services", and "Download Application" groups cannot be deleted.Changing group name1From the Application screen, touch and hold a group you want to rename.2Tap [Edit name].3Enter a group name and tap [OK].・The group is renamed.❖Information・"Recently", "DOCOMO Services", and "Download Application" groups cannot be renamed.Changing group](https://usermanual.wiki/Sony/PM-0610.User-Manual/User-Guide-2121930-Page-94.png)
![93docomo Palette UIAdding group1From the Application screen, tap and tap [Add group].2Enter a group name and tap [OK].・A new group is added.Sorting groups1From the Application screen, touch and hold a group name you want to sort.2Drag it anywhere.・The group is moved.Search application installed into the terminal to activate.1From the Application screen, tap and then tap [Search].・The software keyboard appears.2Enter application name to search.・Search suggestions appear as you enter a character.3Tap an application name.・The application activates.❖Information・If a Google account is set, the Google Now screen appears in Step 1 in portrait view. Follow the onscreen instructions.・Alternatively, from the Home screen, tap , then tap [Google] to search application. For details, see "Searching information in the terminal and web pages" (P.57).Icons on the Application screen can be displayed in a list or tiles.1From the Application screen, tap and then tap [List format]/[Tile format].The "Recommends" tab (P.90) in the Application screen shows applications recommended by DOCOMO.1From the Application screen, tap "Recommends" tab.2Tap [おすすめアプリを見る (See recommended applications)].3Select an application to use.・Download screen appears. Follow the onscreen instructions.Searching for an applicationSwitching application screensInstalling "Recommends" applications](https://usermanual.wiki/Sony/PM-0610.User-Manual/User-Guide-2121930-Page-95.png)
![94docomo Palette UI❖Information・If you tap [おすすめアプリをすべて見る (See all recommended apps)] in Step 3, Browser activates and applications recommended by DOCOMO are displayed in a list.・Downloaded applications are displayed in "Download Application" group in the Application screen.1From the Application screen, tap and then tap [Application info].・The home application information appears.Checking Home application information](https://usermanual.wiki/Sony/PM-0610.User-Manual/User-Guide-2121930-Page-96.png)
![95PhonePhone1From the Home screen, tap , then tap "Dial" tab.2Enter the number of the recipient and tap .・If a wrong number is entered, tap to delete the number.3When the call is finished, tap [End call].❖Information・In Step 2, tap without entering a phone number to enter the phone number registered as the latest call in Recent calls.・To activate Xperia™ phone application, from the Home screen, tap , then tap [Dial].Entering pause (,), (;) to sendFor using services requiring entry of number during a call such as check of the balance of a bank account, reservation of tickets, etc., enter an additional number to a phone number beforehand and make a call.■ Using 2-second pause (,)1From the Home screen, tap , then tap "Dial" tab.2Enter the phone number, then tap and tap [Add 2–sec pause].・Pause (,) is entered.3Enter an additional number, then tap .・Added number will automatically be sent approximately 2 seconds after the call is made.4When the call is finished, tap [End call].■ Using a wait (;)1From the Home screen, tap , then tap "Dial" tab.2Enter a phone number, tap and tap [Add wait].・Pause (;) is entered.3Enter an additional number, then tap .・When a call is received, a confirmation screen asking if you send the added number appears. Select "Yes" or "No".4When the call is finished, tap [End call].Making/Receiving a callMaking a call](https://usermanual.wiki/Sony/PM-0610.User-Manual/User-Guide-2121930-Page-97.png)
![96PhoneEmergency callWhen the terminal is within range of the service area, you can make an emergency call of 110 (Police), 119 (Fire and ambulance), or 118 (Japan Coast Guard).1From the Home screen, tap , then tap "Dial" tab.2Enter the number of the emergency call and tap .・If a wrong number is entered, tap to delete the number.3When the call is finished, tap [End call].❖Note・If docomo mini UIM card is not inserted to the terminal, emergency calls (110, 119, 118) cannot be made in Japan.・You can make an emergency call by tapping [Emergency call] on the unlock screen. In Japan, however, on the PIN code entry screen, while PIN code locked or while PUK locked, emergency calls (110, 119, 118) cannot be made.・This terminal supports "Emergency call location information". If you use the terminal to place a call to emergency numbers such as 110, 119, or 118, the information of a location where you are calling from (location information) is automatically notified to the Emergency call acceptance organization such as the Police Station.The Emergency call acceptance organization may not be able to figure out your exact location depending on the location where you place a call or radio wave condition.If you make a call hiding your caller ID, such as by entering a phone number with "184" for each call, the location information and phone number are not notified. However, the Emergency call acceptance organization may decide to obtain the location information and phone number regardless of your settings when they consider it is necessary for lifesaving, etc. Note that the areas/time for which the "Emergency call location information" is ready to be used vary depending on the preparatory state of each Emergency call acceptance organization.・When calling 110, 119 or 118 for emergency from the terminal, tell that you are calling from a mobile phone, and give your phone number and your current location precisely for checking callback from the police/fire department. Also, make a point to call in a stationary position to prevent the call from being dropped. Do not power off the terminal for at least 10 minutes after the emergency call just in case the Police or Fire/Ambulance may have to get in contact with you.・Note that you may not connect to the local Fire Department or Police Station depending on where you are calling from. In this case, try to call from a public phone or a land-line phone in the neighborhood.](https://usermanual.wiki/Sony/PM-0610.User-Manual/User-Guide-2121930-Page-98.png)
![97PhoneMaking an international call (WORLD CALL)For details on WORLD CALL, refer to DOCOMO International Services website.1From the Home screen, tap , then tap "Dial" tab.2Touch and hold [0] key until "+" sign appears.・When making an international call, "+" is replaced by an international access code.3Enter Country codeuArea code (City code)uThe number of the recipient and tap .・If the area code begins with "0", omit "0". However, "0" may be required to dial to some countries or areas such as Italy.4When the call is finished, tap [End call].1While receiving a call, touch and hold (left) and drag it to (right).2When the call is finished, tap [End call].❖Information・Even if the screen lock is set, you can answer a call by the same operation.Muting the ringtone for an incoming call1When receiving a call, press m / P.❖Information・You can stop vibration by pressing m / P when silent mode (vibration) is set.・On the Home screen etc., press upper or lower of m to adjust the ringtone volume. For silent mode setting, see "Setting silent mode" (P.41).Declining a call1While receiving a call, touch and hold (right) and drag it to (left).❖Information・Even if the screen lock is set you can reject a call by the same operation.・If you reject an incoming call during use of Voice Mail Service, the call is connected to the Voice Mail service center.Receiving a call](https://usermanual.wiki/Sony/PM-0610.User-Manual/User-Guide-2121930-Page-99.png)
![98PhoneDeclining an incoming call and sending a message (SMS)When you cannot answer a call, you can reject the call and send a message (SMS). Message to send is registered in advance, and you can edit it if necessary.1Drag upwards when receiving a call.2Tap a message to send.・The message (SMS) is sent to the caller.❖Information・While Voice Mail service is in use, a call is rejected and a message (SMS) is sent then the caller is connected to the Voice Mail service center.・To create a new message to send, when receiving a call, drag up and tap [Write new message] to create a message and send. To edit a message, from the Home screen, tap and , then tap [Call settings]u[Reject call with message] to select and edit an existing message, then tap [OK].Calling screenOn the Calling screen, you can set speakerphone or mute, or enter a phone number to make a call to another party.aName of the other partybNumber of the other partycA photo saved in PhonebookdCall duration timeeSpeaker : Set speakerphone on/off.・Other party's voice can be heard from the speaker and handsfree call can be made.・When you switch to the other screen such as the Home screen with the speakerphone on, appears in the status bar.fPhonebook : View phonebook entry list screen (P.103).gOption menu : Set Hold during a call.・To cancel Hold, tap [Retrieve call] during Hold.・To set a call on hold, "Call waiting" subscription is required (P.101).Operations during a callajicdhbgef](https://usermanual.wiki/Sony/PM-0610.User-Manual/User-Guide-2121930-Page-100.png)
![99PhonehMute : Turn the microphone on/off during a call.・When you switch to the other screen such as the Home screen with Mute on, appears in the status bar.iDial key : Enter the phone number you want to add to make a call.・The ongoing call is automatically on hold.・To add a call, "Call waiting" subscription is required (P.101).jEnding a call❖Note・Do not bring the terminal close to your ear with the speakerphone on to avoid from hearing damage.❖Information・When you switch to the other screen such as the Home screen during a call, appears in the status bar. Drag the status bar and tap [Ongoing call] to display the calling screen. Tap [Mute] to set Mute to on/off for the microphone, or tap [Hang up] to end the call.Adjusting the earpiece volume1During a call, press m to adjust.❖Information・You can adjust the earpiece volume only during a call.1From the Home screen, tap , then tap "Recent calls" tab.・Recent calls screen appears.Recent calls screenIncoming call and outgoing call are displayed by chronological order in the Recent calls screen.aAll tabbPhone number/namecHistory icons : Missed call : Incoming call : Outgoing calldIncoming tabeOutgoing tabCall historyShowing call historyabcegidhf](https://usermanual.wiki/Sony/PM-0610.User-Manual/User-Guide-2121930-Page-101.png)
![100PhonefCall status icons : Koe-no-Takuhaibin・For details on Koe-no-Takuhaibin, refer to "Koe-no-Takuhaibin" (P.101) or NTT DOCOMO website. : Caller ID notified : Caller ID hidden・It appears when prefix "186" (Notify)/"184" (Not notify) is entered to a phone number to make a call, or when you enter a phone number and tap , then tap [Caller ID notification]uTap [Notify]/[Not notify] to make a call. : Incoming/outgoing international callgDatehOutgoingiPhonebook❖Information・On the Recent calls screen, tap and tap [Call settings] to set/edit "Network service" or "Reject call with message" (P.101).Making a call from Recent calls1On the Recent calls screen (P.99), tap .Adding a number from the Recent calls to Phonebook1On the Recent calls screen (P.99), tap a phone number and tap [Add Phonebook].・Alternatively, touch and hold a phone number, tap [Edit number before call]u[Add Phonebook].2Tap [Register new] or a phonebook to add.・When you set a Google account etc., tap [Register new] so that you can select that account as a registration account.3On the Edit profile screen, enter required items.・You can set a name, mail address, group, etc. Tap in "Others", tap [Add] of an item you want to register, and then enter.4Tap [Save].Deleting a call history1On the Recent calls screen (P.99), touch and hold an item you want to delete in outgoing call log/incoming call log.2Tap [Delete from call log]u[OK].❖Information・To delete all items from Incoming log or Outgoing log, on the Recent calls screen, tap "Incoming" tab/"Outgoing" tab and tap , then [Delete all]u[OK].・To delete all items from Incoming log and Outgoing log, on the Recent calls screen, tap "All" tab and tap , then [Delete all]u[OK].](https://usermanual.wiki/Sony/PM-0610.User-Manual/User-Guide-2121930-Page-102.png)
![101PhoneWhen you have missed calls, appears in the status bar.1Drag the status bar downwards.2Tap [Missed call].・Recent calls screen appears.❖Information・For 1 missed call, drag the status bar, "Call back" and "Message" are displayed below "Missed call". Tap [Call back] to make a call to the party of the missed call, or tap [Message] to compose message (SMS) to send to the party. "Call back" and "Message" may not appear depending on notifications in the Notification panel.For multiple missed calls, number of calls appears below "Missed call".・When you have missed calls, an icon appears on the unlock screen to show that you have missed calls and a number of those.You can set the network services, register call rejection or edit Reject call with message.1From the Home screen, tap , then tap .2Tap [Call settings].・You can set the following options.Displaying missed callsCall settingsNetwork serviceKoe-no-TakuhaibinKoe-no-Takuhaibin is a service of taking voice messages for you.Voice mail serviceIt is a service of taking caller's message when you cannot answer an incoming call.Call forwarding serviceIt is a service of transferring call when you cannot answer an incoming call.Call WaitingIt is a service of putting the current call on hold and answering an incoming call or making a call to another party.Caller ID notificationNotify the display of the recipient phone of your phone number.Nuisance call blocking serviceRegister phone numbers of nuisance call to reject.](https://usermanual.wiki/Sony/PM-0610.User-Manual/User-Guide-2121930-Page-103.png)
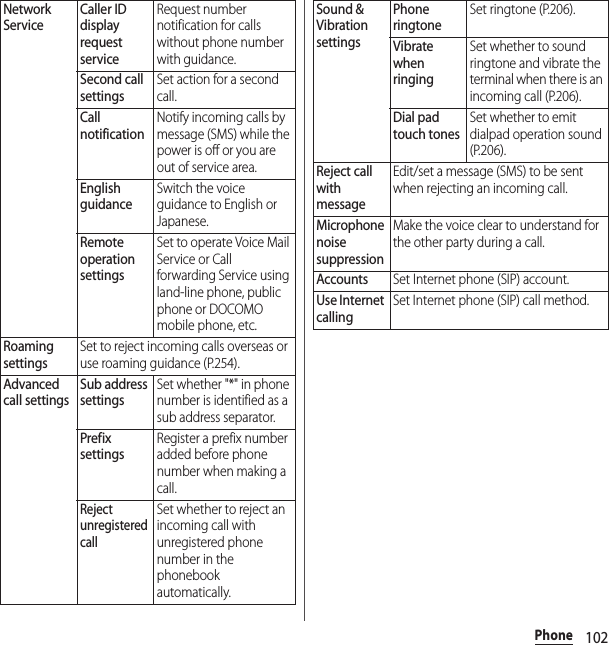
![103PhoneOn the phonebook, you can enter various information for contacts, for example, phone numbers, mail addresses and various service accounts.1From the Home screen, tap , then tap [docomo phonebook]u"Contacts" tab.・The phonebook list screen appears.❖Information・When you use for the first time, "Use of Cloud" screen appears. Tap [Start] to start using Cloud. Cloud service in phonebook require DOCOMO's phonebook application.・Alternatively, from the Home screen, tap and tap [Phonebook] to display phonebook list screen.・Phonebook data can be backed up in a microSD card using "ドコモバックアップ (docomo backup)" application. For information on backing up, see "ドコモバックアップ (docomo backup)" (P.190).・To activate Xperia™ phone application, from the Home screen, tap , then tap [Contacts].Phonebook list screenOn the phonebook list screen, you can view details of your contacts. You can add a picture to a phonebook entry, and display phonebook entries by group.aContacts tabbName registered in the phonebook entrycEntry items・Icons indicate entry items.dPhoto set in the phonebook entryeRegisterfGroups・Select a group to be displayed.gCommunication tab・Call history or history of message (SMS), sp-mode mail and SNS messages are displayed. SNS messages are displayed only when using "My SNS" function after using Cloud is started.hTimeline tab・Timeline of SNS/blog by "Friend NEWS" function and "My SNS" function is displayed. To display, start using Cloud.iOption menuPhonebookDisplaying phonebooklag hcdbfejikm](https://usermanual.wiki/Sony/PM-0610.User-Manual/User-Guide-2121930-Page-105.png)
![104PhonejMy profile tab・Check your own phone number.kIndex character area・Tap index character to display phonebook entries allocated to the index character.lIndex・Display the index character to search entries in the order of Japanese syllabary, alphabet, etc.mSearchAdding a new phonebook entry1On the phonebook list screen (P.103), tap [Register].・When you set a Google account etc., you can select that account as a registration account.2On the Edit profile screen, enter required items.・You can set a name, phone number, mail address, etc. Tap in "Others", tap [Add] of an item you want to register, and then enter.3Tap [Save].❖Information・To check the number of registered data in the phonebook, from the phonebook list screen, tap , then tap [Others]u[About].・When you save "Phonetic name (first/last)", phonebook list is displayed according to Japanese syllabary order or alphabets order of "Phonetic name". If you enter "First name/Last name" in Kanji without entering "Phonetic name" to add phonebook entry, the name appear in "ABC" field on the phonebook list screen.・If "docomo" account is selected as saving location when registering phonebook entries, SNS/Blog accounts can be set.・To set default phone number or mail address from multiple phone numbers or mail addresses, on the Profile screen, touch and hold a phone number or mail address, then tap [Make default number]/[Make default address]. The phone number or mail address is marked on the right. To cancel the setting, on the Profile screen, touch and hold phone number or mail address, then tap [Clear default number]/[Clear default address].Managing phonebook](https://usermanual.wiki/Sony/PM-0610.User-Manual/User-Guide-2121930-Page-106.png)
![105PhoneUsing phonebook shortcutsWhen you tap the photo (image) part on the phonebook list screen (P.103), shortcuts for phone, mail, etc. appear. Tap the shortcut to make a call, or create and send a mail.❖Information・You can use other functions such as displaying a map from the registered addresses with shortcut.・When multiple phone numbers or mail addresses are saved, a selection screen appears by tapping a shortcut. If you mark "Save this selection" and then select a phone number, mail address, etc. the selection screen does not appear next time you use the shortcut.・When multiple phone numbers or mail addresses are saved, if default phone number or mail address is set, the selection screen does not appear by tapping a shortcut.・When you tap a part other than photo (image) on the phonebook list screen, profile screen of the phonebook appears instead of shortcuts.・For a phonebook entry with only name, tapping photo (image) does not display shortcuts.Making a call using the phonebook1On the phonebook list screen (P.103), tap a phonebook entry to call.2On the Profile screen, tap a phone number.3Tap [Call].Searching for a phonebook entry1On the phonebook list screen (P.103), tap [Search].2Enter name or reading to search.・All phonebook entries beginning with those letters (First name/Last name) appear.Changing contacts display order1On the phonebook list screen (P.103), tap , then tap [Others]u[Contacts display order].2Tap any of [Japanese order]/[Alphabetical order]/[Number order].Call to registered phone number.Create and send message (SMS).Select Email application to create and send an email.・When you set an Email account, is displayed as .・On the application selection screen, select "Always" or "Just once" after selecting Email application.・If you do not set Gmail account, tap to display a setting wizard. After an account is set, you can create and send mails.](https://usermanual.wiki/Sony/PM-0610.User-Manual/User-Guide-2121930-Page-107.png)
![106PhoneChanging accounts to displayYou can set registered phonebook entries to be displayed in the phonebook list.1On the phonebook list screen (P.103), tap , then tap [Others]u[Accounts to display].2Tap [Display all accounts]/[Customize…].・When you set a Google account etc., you can select docomo account, Google account, etc. as an account to display.・Tap [Customize...], select a checkbox for each account, and then customize display of the phonebook list screen.Displaying phonebook entries by group1On the phonebook list screen (P.103), tap [Groups].2Select a group.・Phonebook entries are displayed by the group set when the entry is registered.・To hide the group, tap [Close].Setting group for phonebook entrySet a group from phonebook list screen.1On the phonebook list screen (P.103), tap [Groups].2Touch and hold a phonebook entry to set a group, and then drag it to any group.❖Information・To cancel group setting, touch and hold a phonebook entry you want to cancel and then drag it to the set group, or tap a phonebook entry you want to cancel and from the profile screen, tap [Edit]u[Setting] in GroupuUnmark group and tap [OK]u[Save].・When you set Google account etc., display groups by account. You can set/cancel group in the same account.Creating a new group in Phonebook1On the phonebook list screen (P.103), tap [Groups]u[Add].・When "Add" is not displayed, flick up groups to display.・When you set a Google account etc., you can select that account for adding.2On the group addition screen, enter color, icon, group name, and tap [OK].・The items vary depending on the account type.](https://usermanual.wiki/Sony/PM-0610.User-Manual/User-Guide-2121930-Page-108.png)
![107Phone❖Information・You can edit/delete newly created groups and "Family"/"Friends"/"Company", which are saved by default. To edit a group, touch and hold a group and tap [Edit group], then enter editing content and tap [OK]. To delete a group, touch and hold a group and tap [Delete group]u[OK]. Phonebook entries belonged to the deleted group move to the "No group" tab.・For one account, you cannot add a group that has the same name as existing groups.Editing a phonebook entry1On the phonebook list screen (P.103), tap a phonebook entry to edit.2On the profile screen, tap [Edit].3Select a required item and edit.・Tap [Add] to set phone number or mail address, or tap [Del] to delete the set information.4Tap [Save].❖Information・You cannot edit contacts for the Facebook account.Registering a phonebook entry to FavoritesYou can mark a phonebook entry as a favorite. The favorite list provides quick access to the phonebook entry you have marked.1On the phonebook list screen (P.103), tap a phonebook entry to combine.2On the profile screen, tap .・The icon turns to and the entry is registered to Favorites.❖Information・Phonebook entries saved to the docomo account/Google account can be added to Favorites.・To display phonebook entries added to Favorites, on the phonebook list screen, tap [Groups]u[Favorites], or from the Home screen, tap and then tap "Favorites" tab.Setting photo in a phonebook entry1On the phonebook list screen (P.103), tap a phonebook entry you want to add a photo.2On the profile screen, tap [Edit].3Tap [Setting] for image.](https://usermanual.wiki/Sony/PM-0610.User-Manual/User-Guide-2121930-Page-109.png)
![108Phone4Tap [Take photo]/[Select picture].・When you tap [Take photo], select "Camera" or "Picture effect" and then select "Always" or "Just once" to take a photo. For information on how to shoot by "Picture effect", see "Picture effect" (P.170).・When you tap [Select picture], select "Album" or "File Commander" and then to select "Always" or "Just once" to select a picture.5Set image range to be displayed, and then tap [Crop].・Drag or pinch to adjust cropping area to set image range.6Tap [Save].❖Information・You can also set photo to a phonebook entry by the following operation.From the Home screen, tap , then tap [Album]. Select an image you want to set and tap the screen and , then tap [Use as]u[Photo of phonebook]. Select a phonebook entry you want to register, set image range to be displayed, and then tap [Crop].Setting ringtone1On the phonebook list screen (P.103), tap a phonebook entry to set ringtone.2On the profile screen, tap and [Set ringtone].3Select a ringtone and tap [Done].❖Information・For docomo account, you can set ringtone by tapping [Setting] for Ringtone on the Edit profile screen. For Google account, on Preferred apps settings (P.214), you can also set "Set all to" or "Contacts" to "Xperia™", then edit phonebook entry using "Contacts" app to set ring tone.・To set a ringtone other than the ones stored by default, tap .・Depending on the saving account, ringtone can be set when saving a phonebook entry.Combining phonebook entriesYou can bind multiple phonebook entries together into one.1On the phonebook list screen (P.103), tap a phonebook entry to combine.2On the profile screen, tap and [Join/Separate].・Phonebook entries to be combined are displayed.](https://usermanual.wiki/Sony/PM-0610.User-Manual/User-Guide-2121930-Page-110.png)
![109Phone3Tap the phonebook entry to combine.❖Information・To cancel binding, on the profile screen of a phonebook entry you want to separate, tap , then tap [Join/Separate]u[Separate].Deleting a phonebook entry1On the phonebook list screen (P.103), tap , then tap [Delete].2Mark the phonebook entry you want to delete.・If you want to delete all phonebook entries, tap "Select all".・Tap [Index] to search phonebook to delete.3Tap [Delete]u[OK].❖Information・To delete only a phonebook entry, in the phonebook list screen, tap a phonebook entry you want to delete and tap , then tap [Delete]u[OK].Checking My profile and editing information1On the phonebook list screen (P.103), tap "My profile" tab.2Tap [Edit].3On the My profile screen, enter necessary information such as name.・Tap [Add] to set phone number or mail address, and tap [Set] to add SNS or Blog account. Tap in "Others", tap [Add] of an item you want to register, and then enter.4Tap [Save].❖Information・You can register multiple phone numbers, mail addresses, SNS/Blog accounts, etc. in My profile.・Name card data created with name card creator application can be saved to My profile and be exchanged via network. When you use for the first time, in the phonebook list screen, tap the "My profile" tab, [Create new] and follow the onscreen instructions.](https://usermanual.wiki/Sony/PM-0610.User-Manual/User-Guide-2121930-Page-111.png)
![110PhoneSending phonebook entries via infrared communication1On the phonebook list screen (P.103), tap , then tap [Others]u[Send via Infrared].・To send an entry, tap [Send one], select entry to send then tap [OK]u[OK].・To send all phonebook entries, tap [Send all] u Tap [Start], enter docomo apps password, tap [OK], then enter the same authentication password as that of the recipient and tap [OK] u [OK] u [OK].❖Information・When sending all phonebook entries via infrared communication, you need to enter authentication password an docomo apps password. Authentication password is a 4-digit number fixed up between you and other party in advance. For the docomo apps password, see "docomo apps password" (P.214).・To activate infrared communication in a selected phonebook entry, tap in the profile screen, [Infrared]u[OK]u[OK]. To send My profile, tap "My profile" tab in the phonebook entry list screen, tap , [Send via infrared]u[OK]u[OK]. If a name card is stored in My profile, tapping [Send via infrared] opens a screen to select "send my profile" or "Exchange name card (via infrared)".・Phonebook entries can be sent using "Infrared" app. For details, refer to "Sending data via infrared communication" (P.233).Sending phonebook via Bluetooth/Email/GmailRegistered phonebook and My profile information can be sent using Bluetooth function (P.235), or email attachment function.■ Sending phonebook1On the phonebook list screen (P.103), tap a phonebook entry you want to send.2On the profile screen, tap and [Share].3Select a sending method.・After this step, follow the onscreen instructions.■ Sending phonebook entry currently displayedSend all entries displayed in the phonebook list screen. For conditions for displaying phonebook entries, see "Changing accounts to display" (P.106).1On the phonebook list screen (P.103), tap , then tap [Others]u[Import/Export].2Tap [Share phonebook data].](https://usermanual.wiki/Sony/PM-0610.User-Manual/User-Guide-2121930-Page-112.png)
![111Phone3Select a sending method and tap [Always]/[Just once].・After this step, follow the onscreen instructions.■ Sending My profile1On the phonebook list screen (P.103), tap "My profile" tab.2Tap and [Share].3Select a sending method.・After this step, follow the onscreen instructions.❖Information・To use Bluetooth function, turn on Bluetooth function (P.235) in advance, or select [Bluetooth]u[Turn on] in Step 3.・To use email, you need to make settings of your email account (P.117).・If you want to send it as an Email/Gmail attachment, send from a mail composing screen in an account you have set up. If you do not set a Gmail account, a setting wizard appears. After an account is set, you can create and send mails.・You cannot send some information such as name card data set in the phonebook.You can export/import phonebook entries from/to a microSD card or docomo mini UIM card. This is useful, for example, when you want to move the contact information to another phone.❖Information・You can also use a synchronization service for synchronizing your phonebook. For details, refer to "Setting Auto-sync" (P.225).Exporting phonebook to microSD card・Insert a microSD card in advance (P.229).1On the phonebook list screen (P.103), tap , then tap [Others]u[Import/Export].2Tap [Export to SD card].3Tap any of [Export one contact data]/[Export some contact data]/[Export all contact data], then tap [OK].・When you tap [Export one contact data]/[Export some contact data], mark a contact to export and tap [OK].4Select [No]/[Yes] for attaching name card.Exporting/Importing phonebook entries](https://usermanual.wiki/Sony/PM-0610.User-Manual/User-Guide-2121930-Page-113.png)
![112Phone5Tap [OK].Importing phonebook from microSD card・Insert a microSD card in advance (P.229).1On the phonebook list screen (P.103), tap , then tap [Others]u[Import/Export].2Tap [Import from SD card].・When you set a Google account etc., you can select that account as an import account.・If there is only one vCard file, the file is imported immediately.3Tap any of [Import one phonebook data]/[Import multiple phonebook data]/[Import all phonebook data], then tap [OK].・If you tap [Import one phonebook data]/[Import multiple phonebook data], mark vCard files to import, then tap [OK].・If a vCard file has multiple phonebook entries, they are imported all at once.❖Information・For some phonebook entries, a part of data may not be imported or exported.Importing phonebook entries from docomo mini UIM card・Insert a docomo mini UIM card in advance (P.30).1On the phonebook list screen (P.103), tap , then tap [Others]u[Import/Export].2Tap [Import from SIM card].・When you set a Google account etc., you can select that account as an import account.3Tap a phonebook entry to import.・Phonebook entries are imported.・Alternatively, touch and hold a contact to be imported, tap [Import].・To import all phonebook entries, tap and [Import all].❖Information・Names and phone numbers can be imported.・If there is a phonebook entry whose name is matched with the imported entry, the entry is imported as a separated one.・To export phonebook entries to docomo mini UIM card, use "Contacts" app of Xperia™. Note that only name and the first phone number can be saved because of memory space of docomo mini UIM card. For some phonebook entries, a part of data may not be exported.](https://usermanual.wiki/Sony/PM-0610.User-Manual/User-Guide-2121930-Page-114.png)
![113Mail/Web browserMail/Web browse rSend/receive mails using DOCOMO mail address (@docomo.ne.jp).You can use pictogram and Deco-mail. Mails can be received automatically. For details on sp-mode mail, refer to "Mobile Phone User’s Guide [sp-mode]".1From the Home screen, tap .・After this step, follow the instructions on the screen.❖Information・sp-mode mail data can be backed up in a microSD card using "ドコモバックアップ (docomo backup)" app. For information on backing up, see "ドコモバックアップ (docomo backup)" (P.190).You can send and receive text messages up to 70 two-byte characters (up to 160 one-byte characters) with a mobile phone number as the destination.1From the Home screen, tap , then tap [Messaging].2Tap (New mail).3Enter the recipient's phone number.・Tap to display the contacts list screen to select from registered contacts. When you enter a name or phone number in the box at the top of the screen, a list of contacts matching the entered numbers or letters appears.4Tap [Write message] and enter a message.・Tap and [Select message template] to enter by selecting message template registered in "Message template settings" (P.115).sp-mode mail Message (SMS)Sending message (SMS)](https://usermanual.wiki/Sony/PM-0610.User-Manual/User-Guide-2121930-Page-115.png)
![114Mail/Web browser・When the number of entered characters comes close to a limit, a number of enterable characters appears on the upper left of the text box.5Tap [Send].❖Information・For the character entry, see "Character entry" (P.59).・You can also send/receive text messages to/from customers of overseas network operators. For details, see "Mobile Phone User’s Guide [International Services]" or the DOCOMO International Services website.・To send SMS to users of overseas network operators, enter "+", "Country code" and then "the recipient mobile phone number". Enter the phone number without a leading "0", if any. Alternatively, enter "010", "Country code" then "the recipient mobile phone number" in order.To reply to the received a message (SMS) overseas, you need to create a new message (SMS). To send a message, in Step 3, enter "010", "Country code" then "the recipient mobile phone number" in order.1From the Home screen, tap , then tap [Messaging].・Messages (SMS) appear per sender. Senders with unread messages (SMS) left are displayed in bold font, and is displayed to the left.2Select a sender whose messages (SMS) you want to read.・A message (SMS) appears.❖Information・When you receive a message (SMS), appears on the status bar. To read the message (SMS), drag the status bar downward and tap a notification of message (SMS).・Tap / in a message (SMS) to add star. To check starred messages (SMS) in a list, tap from the Home screen, tap [Messaging], then tap and tap [Starred messages].Receiving and reading message (SMS)](https://usermanual.wiki/Sony/PM-0610.User-Manual/User-Guide-2121930-Page-116.png)
![115Mail/Web browser1From the Home screen, tap , then tap [Messaging].2Tap of phone number to save and tap [Save].3Tap [Register new] or a phonebook to add.・When you set Google account etc., tap [Register new] to select the account as a saving location.4Enter required items and tap [Save].❖Information・For a sender registered to the phonebook, tap or photo (image) in Step 2 to make a call or display the phonebook entry.1From the Home screen, tap , then tap [Messaging].2Tap and [Settings].* While the silent mode (mute) is set, the terminal does not vibrate when receiving a message (SMS).Saving phone number of message (SMS) to phonebookChanging settings for Messaging (SMS)Notification toneSet ringtone when receiving a message (SMS).NotificationsSet whether to show message (SMS) arrival notification in the status bar.Notification vibration*Set whether to vibrate when receiving a message (SMS).Notification lightSet whether to notify message (SMS) reception by notification LED.Delivery reportSet whether to mark a message (SMS) you sent each time a recipient receives the message (SMS).Message template settingsRegister phrase that can be inserted when writing a text.SIM messagesManage messages (SMS) saved to docomo mini UIM card.Push settingsSet a message (SMS) sent from the provider.SMS center numberCheck SMS center number.](https://usermanual.wiki/Sony/PM-0610.User-Manual/User-Guide-2121930-Page-117.png)
![116Mail/Web browser1From the Home screen, tap , then tap [Messaging].2Tap a sender/recipient whose messages (SMS) you want to delete.3Touch and hold a message (SMS) you want to delete.4Tap [Delete message]u[Delete].❖Information・To delete several messages (SMS), in Step 3, tap , tap [Delete messages], and mark messages (SMS) you want to delete, then tap and tap [Delete].・To delete all messages (SMS), in Step 3, tap and [Delete messages]u[X selected]u[Mark all], then tap and [Delete].1From the Home screen, tap , then tap [Messaging].2Touch and hold a sender/recipient you want to delete.・The sender/recipient to be deleted is marked. To mark all senders/recipients, tap [X selected]u[Select all].3Tap and [Delete].❖Information・In Step 2, tap and tap [Delete conversations] to select senders/recipients and delete their messages (SMS) or to delete all senders'/recipients' messages (SMS).Deleting a message (SMS) Deleting messages (SMS) by sender/recipient](https://usermanual.wiki/Sony/PM-0610.User-Manual/User-Guide-2121930-Page-118.png)
![117Mail/Web browserYou can create an email account provided by mopera U mail, a POP3 or IMAP compatible email account provided by general ISP (provider), or an Exchange ActiveSync account to send or receive email.You can set multiple Email accounts.Set an Email account following the onscreen instructions.For mopera U mail setting procedure, see "Using mopera U Mail" (P.122).1From the Home screen, tap , then tap [Email].2Enter your email address and password.3Tap [Next].・To set up an email account manually, tap [Manual setup] and follow the onscreen instructions.4Set Inbox check frequency, mark required items and tap [Next].・If a screen for selecting type of account appears, tap an email account type and follow the onscreen instructions to set.5Enter account name and name displayed on emails you send, and tap [Next].・Inbox for set email account appears.・If you set an Exchange ActiveSync account, a name displayed for email cannot be set. Set up from "Your name" (P.120) on email account settings after email initial settings is complete.❖Information・If you need to make the settings manually, contact your email service provider or system administrator for the correct email account settings.・If you set an Exchange ActiveSync account as an email account, and if server manager sets Remote wipe, the data saved in the terminal may be deleted.1From the Home screen, tap , then tap [Email].2Tap (Compose).3Enter the email address of recipient.・Tap to display the contacts list screen to select from registered contacts. When you enter a name or email address in the search box at the top of the screen, a list of contacts matching the entered numbers or letters appears.EmailMaking initial setting for EmailCreating and sending email](https://usermanual.wiki/Sony/PM-0610.User-Manual/User-Guide-2121930-Page-119.png)
![118Mail/Web browser・To enter multiple email addresses directly, separate with a comma (,) and then enter the next email address.・To add Cc or Bcc recipients, tap and tap [Show Cc/Bcc].4Enter a subject and message.5Tap (Send).❖Information・To attach a file, while creating an email, tap and attach a file in the following step.・While creating a mail, tap and tap [Save draft] to save a mail as a draft. Also, if you view another screen while creating an email, the email is automatically saved as a draft (for saving an email without recipient or subject, or without message text or attachment as a draft, tap x).・In sent/received emails, a communication data is also included other than text and image displayed on the screen and charges will apply to the data.・Email is handled as an email from a PC. Your email cannot be received if rejecting emails from PCs is set on a recipient terminal.1From the Home screen, tap , then tap [Email].・If you have already set an email account, tap [Inbox] to select an email account to receive.2In the Inbox, tap .3Tap an email you want to read.・Email message appears.❖Information・The sender name of a received email is the name set on sender's terminal.・If you set "Email notifications" in Account settings (P.120) and set "Inbox check frequency" to an item other than "Manual", appears in the status bar when you receive a new email. Drag the status bar downwards to read the received email.・Tap an address of received email to register the address to the phonebook. For addresses already registered to the phonebook or Google Talk, displaying the phonebook entries, selecting an application to create mail, etc. are available.Add pictureSelect a file from the saved image file list to attach it.Take photoStart the camera to take a photo and attach it.Add videoSelect a file from the saved video file list to attach it.Record videoStart the camera to shoot a video and attach it.Add sound WALKMAN : Select a file from the saved music file list to attach it.Sound Recorder : Record a voice message and attach it.Add filesSelect files from a saved file list to attach.Receiving and reading email](https://usermanual.wiki/Sony/PM-0610.User-Manual/User-Guide-2121930-Page-120.png)
![119Mail/Web browser・In the Inbox or the email message screen, tap to add star and the email is added to "Starred" folder. To check starred emails in a list, in the Inbox, [Inbox]u[Show all folders]uTap [Starred].・To add star to multiple emails, in the Inbox, mark emails you want to add stars, then tap at the bottom right of the screen.Changing Inbox viewTurn Preview pane on and turn the terminal sideways to show preview of email message. To switch to the landscape view, turn Auto-rotate screen on beforehand (P.40).1From the Home screen, tap , then tap [Email].2Tap and [Settings]u[General]u[Preview pane].3Tap [Landscape].❖Information・If you have two or more accounts, change made in any of the accounts applies to all accounts.1From the Home screen, tap , then tap [Email].2Tap email with attached files and tap .・The attached file list is displayed. When attached file is not loaded, tap [Load].3Tap [Save] of file you want to save.・Tap [View] or [Play] to view or play the attached file.❖Information・The attached file is saved on the internal storage.1From the Home screen, tap , then tap [Email].2Tap email to reply or forward and tap .3Tap any of [Reply]/[Reply all]/[Forward].・When you tap [Forward], enter an email address to forward.4Enter a message.5Tap (Send).Saving attachment file of emailReplying/forwarding email](https://usermanual.wiki/Sony/PM-0610.User-Manual/User-Guide-2121930-Page-121.png)
![120Mail/Web browser❖Information・When you reply or forward an email, the original message contents for replying or forwarding is quoted. To delete the quoted message text, unmark "Include original text".・When you forward an email, the attachment file of the original message is quoted. To cancel quoting attached file, tap .1From the Home screen, tap , then tap [Email].2Tap an email to delete.3Tap and [Delete].❖Information・To select and delete several emails, in Inbox, mark emails you want to delete, tap and [Delete]. Mark at least 1 email and tap [X selected]u[Mark all] to mark all emails.1From the Home screen, tap , then tap [Email].2Tap and [Settings].3Tap an Email account you want to change the settings for.Deleting emailChanging Email account settingsAccount nameChange account name.Your nameChange your name (sender name).SignatureChange your signature.Quick replyRegister phrase that can be inserted when creating an email.Default accountSet whether to send email by default, if you set two or more email accounts.Inbox check frequencySet whether to check new messages automatically and intervals of automatic check.Auto download attachments*1Set whether to download attached file automatically when connecting via Wi-Fi.Email notificationsSet whether to show email arrival notification in the status bar.Select ringtoneSet ringtone when receiving an email.Vibrate*2Set whether to vibrate when receiving an email.Notification lightSet whether to notify email reception by notification LED.](https://usermanual.wiki/Sony/PM-0610.User-Manual/User-Guide-2121930-Page-122.png)
![121Mail/Web browser*1 Appears when Gmail account (@gmail.com) is set.*2 While the silent mode (mute) is set, the terminal does not vibrate when receiving an email.❖Information・The items vary depending on the account type.・You can also set "Out of office", "Days to sync", "Sync contacts", "Sync calendar", etc. for an Exchange ActiveSync account. Setting for "Outgoing settings" is not required.・If you set "Inbox check frequency" to an item other than "Manual", and if you are using the pay-as-you-go data communication, you may be charged every time you check email.・If you tap [General] in Step 3, you can change whole "Email" app settings.1From the Home screen, tap , then tap [Email].2Tap [Inbox]u[Add account].3Enter your email address and password.・If required, mark "Send email from this account by default.".4Tap [Next].・To set up an email account manually, tap [Manual setup] and follow the onscreen instructions.5Set Inbox check frequency, mark required items and tap [Next].・If a screen for selecting type of account appears, tap an email account type and follow the onscreen instructions to set.6Enter account name and name displayed on emails you send, and tap [Next].・Inbox for set email account appears.・If you set an Exchange ActiveSync account, a name displayed for email cannot be set. Set up from "Your name" (P.120) on email account settings after email initial settings is complete.Incoming settingsSet mail server for receiving.Outgoing settingsSet mail server for sending.Delete accountDelete Email account.Setting another Email account](https://usermanual.wiki/Sony/PM-0610.User-Manual/User-Guide-2121930-Page-123.png)
![122Mail/Web browser❖Information・If you need to make the settings manually, contact your email service provider or system administrator for the correct email account settings.・If you set an Exchange ActiveSync account as an email account, and if server manager sets Remote wipe, the data saved in the terminal may be deleted.・Tap [Inbox] to display a list of set accounts. Tap [Combined view] to display combined Inbox for all accounts.1From the Home screen, tap , then tap [Email].2Tap and [Settings].3Tap an account to delete.4Tap [Delete account]u[OK].mopera U users can use mopera U Mail.For mopera U setting procedure, see "Setting mopera U" (P.204).Mail box capacity of mopera U mail is 50 MB. It supports both POP mail and IMAP mail. Also, the Web mail system is available.■ POP mail1From the Home screen, tap , then tap [Email].・If you already set an Email account, tap [Inbox]u[Add account].2Enter mopera U mail address and mopera U password, then tap [Manual setup]/[Next].・If you tap [Next], it changes automatically to POP3 account. Go to Step 4.3Tap [POP3] from the type of the mail account.4Check that you have entered "User name" and "Password" for mopera U correctly, and "mail.mopera.net" for the POP3 server.・If you tap [Next] in Step 2, "mail.mopera.net" is entered in the POP3 server field.5Select the security type.・When you do not set security, select "None".6Confirm the entry, then tap [Next].Deleting Email accountUsing mopera U Mail](https://usermanual.wiki/Sony/PM-0610.User-Manual/User-Guide-2121930-Page-124.png)
![123Mail/Web browser7Enter "mail.mopera.net" for the SMTP server and confirm the entry of "User name" and "Password" for mopera U.・If you tap [Next] in Step 2, you need to mark "Require sign–in" to check entered "User name", "Password" for mopera U.・If you tap [Next] in Step 2, "mail.mopera.net" is entered in the SMTP server field. Set "587" in the Port field.8Tap [Next].9On the account setting screen, set Inbox check frequency, etc. and tap [Next].10On the account setting screen, enter a display name for sending mail and tap [Next].・The mailer is displayed and the set mail account is available.❖Information・When "Require sign-in." is unmarked on the SMTP server setting screen, sending mails is not available. Mark "Require sign-in.".Set a Google account. You can use Gmail to send and receive emails.・If you do not set a Google account, follow the onscreen instructions to set one on the initial setting screen. For details, refer to "Setting Google account" (P.222).・If you do not synchronize Gmail after Google account is set, "Account not synced" screen appears. Follow the onscreen instructions.❖Information・For details on Gmail, tap , then tap [Help] to view the Google help.1From the Home screen, tap , then tap [Gmail].2Tap (Compose).3Enter the email address of recipient.・When you enter a name or email address in the email address field, contacts matched to the entered numbers or letters are listed.・To add Cc or Bcc recipients, tap and tap [Add Cc/Bcc].4Enter a subject and message.GmailSending Gmail](https://usermanual.wiki/Sony/PM-0610.User-Manual/User-Guide-2121930-Page-125.png)
![124Mail/Web browser5Tap (Send).❖Information・To attach a picture or a video, tap and then tap [Attach picture]/[Attach video] and select a video to attach.1From the Home screen, tap , then tap [Gmail].2On the Inbox tray, tap .・Synchronizing "Gmail" app in the terminal with your Gmail account starts, and the Inbox is refreshed.You can use Google Talk instant messaging to chat with friends. To use Google Talk, you need to make settings of your Google account. For details, refer to "Setting Google account" (P.222).Signing in is unnecessary if you have already set a Google account.1From the Home screen, tap , then tap [Talk].2Tap [Existing] and enter user name and password.3Tap .・After this step, follow the onscreen instructions.❖Information・For details on Google Talk, from the Google Talk screen, tap and then tap [Help] to refer to.Refreshing GmailGoogle TalkSigning in Google Talk](https://usermanual.wiki/Sony/PM-0610.User-Manual/User-Guide-2121930-Page-126.png)
![125Mail/Web browserIt is a service with which you can receive earthquake early warning, etc. delivered by the Meteorological Agency.・Area Mail is a free service for which subscription is not required.・Area Mail cannot be received in the following case.- During a voice call- Out of service area- While power is off- During International roaming- During Airplane mode- While updating software - When a SIM other than by DOCOMO is inserted - While sending/receiving a message (SMS)・Area Mail may not be received when tethering is set or during packet communications.・Area Mail that could not be received cannot be received later.A notification content screen appears and you are notified by buzzer sound or dedicated ringtone and vibration.1Receive Area Mails automatically.2A dedicated ring tone sounds and notification LED flashes when an Area Mail is received.・Ringtone and ringtone volume cannot be changed.・The notification LED blinks only when backlight is off.3A message body of Area Mail appears automatically.View received Area Mail later1From the Home screen, tap , then tap [Disaster kit].・When you activate for the first time, "ご利用にあたって (Terms of use)" appears. Tap [Agree] to start using.2Tap [Early Warning "Area Mail"].3Select an Area Mail from the Area Mail list.・You can view message of Area Mail.Early Warning "Area Mail"Receiving Early Warning "Area Mail"](https://usermanual.wiki/Sony/PM-0610.User-Manual/User-Guide-2121930-Page-127.png)
![126Mail/Web browser❖Information・If savable amount of Area Mail exceeds the limit of maximum, the oldest one is deleted in order.1From the Home screen, tap , then tap [Disaster kit].2Tap [Early Warning "Area Mail"].3Tap and then [Settings].❖Information・Area Mail cannot be set when docomo mini UIM card is not inserted.You can view web pages using web browser like on a PC.Web browser can be used via packet communication or Wi-Fi network.1From the Home screen, tap .・A browser screen appears.❖Information・Alternatively, from the Home screen, tap , then tap [Chrome] to access the Internet to view web pages.Moving to a web page1Tap the address entry field on the top of the web page in the Browser screen.・If web page address entry field is not displayed, flick down the screen to display.2Enter a web page address or keyword to search.・As you enter an address or characters, retrieved web pages list appears.Setting Early Warning "Area Mail"Receive settingSet whether to receive Area Mail.Beep toneSet sounding time for Area Mail reception and whether to sound a dedicated ringtone even in silent mode.Check screen image and beep toneCheck the ringtone and screen for reception of earthquake early warning, tsunami warning or disaster/evacuation information.Other settingsSet receiving/deleting Area Mail other than earthquake early warning, tsunami warning and disaster/evacuation information.Web browserOpening BrowserDisplaying web pages](https://usermanual.wiki/Sony/PM-0610.User-Manual/User-Guide-2121930-Page-128.png)
![127Mail/Web browser3Tap the displayed candidates list or [Go] on the software keyboard.・You can move the web page.❖Information・In Step 2, you can tap in the address entry field to enter search words by voice and search a web page.Going back to the previous page1Tap x.Adding a new tabOpen multiple tabs and view web pages.1On the Browser screen, tap and .・A new tab opens in the default home page.Opening new incognito tabYou can view web pages without browser history or search history.1On the Browser screen, tap and .2Tap [New incognito tab].・A new tab opens and descriptions for the incognito mode appear.3Display a web page.・For information on displaying web page, see "Moving to a web page" (P.126).❖Information・ is displayed on the side of web page address entry while viewing in the incognito tab.・Web pages you view in the incognito tab does not appear in the history. When the tab is closed, the record of Cookies etc. is erased. Downloaded files or bookmarked web pages are saved even for the incognito tab.Switching tabs1On the Browser screen, tap and then tap a tab you want to display.Closing a tab1On the Browser screen, tap and then tap of a tab to close.・Alternatively, flick a tab left or right to close it.](https://usermanual.wiki/Sony/PM-0610.User-Manual/User-Guide-2121930-Page-129.png)
![128Mail/Web browserZooming in/out a web page1Pinch-in/-out on the Browser screen.❖Information・Alternatively, double-tap the browser screen to zoom in.・Web pages created to fit to the screen cannot be zoomed in/out.Searching text in a web page1On the Browser screen, tap and tap [Find on page].・The search bar appears in the upper part of the screen.2Enter a search word.・When you enter characters, matching characters are emphasized.・Tap / to move to next/previous matched item.❖Information・Tap to close the search bar.Copying text in a web page1On the Browser screen, touch and hold text you want to copy.2Drag or to select a range of text to copy.・Selected text is highlighted in blue.3Tap (Copy).・A message "Text copied to clipboard." appears.4Touch and hold the entry field on the pasting location, and tap [PASTE].❖Information・On some web pages, selecting characters may not be available.You can make settings for homepage, privacy and security, page display, etc.1On the Browser screen, tap and [Settings].2Select an item to change.Changing Browser settings](https://usermanual.wiki/Sony/PM-0610.User-Manual/User-Guide-2121930-Page-130.png)
![129Mail/Web browserSetting a home pageSet home page for opening new tab.1On the Browser screen, tap , then tap [Settings]u[General].2Tap [Set homepage] to select an item you want to set as home page.1Open the web page you want to operate the links.2Tap a link.・Link is highlighted and move to linked web page.❖Information・When you touch and hold a link including a link or image, or image, "Open", "Open in new tab", "Save link", "Copy link URL", "Select text", "Save image", "View image", "Set as wallpaper" and "Share link" appear.・When you download a file by "Save link" from websites which require Basic authentication or SSL session, the downloading may be failed.・Browser recognizes some phone numbers that allow you to call the phone number. Tap the phone number to call.You can check history, save bookmarks, etc.Bookmarking a web page1On the Browser screen, display the web page you want to bookmark.2Tap and [Save to bookmarks].3Set label etc. and tap [OK].・You can set the following options.Operating linksManaging bookmarks and historyLabelSet a name displayed to the bookmark.AddressSet URL saved to the bookmark.AccountWhen you set a Google account etc. and sync with the browser, you can select the account as a bookmark saving location.Add toAdd a shortcut of the bookmark on the Home screen or create a folder.](https://usermanual.wiki/Sony/PM-0610.User-Manual/User-Guide-2121930-Page-131.png)
![130Mail/Web browserOpening a bookmark1On the Browser screen, tap and [Bookmarks].2Tap the bookmark you want to open.❖Information・Touch and hold a bookmark to edit or delete it.Checking history1On the Browser screen, tap and tap [Bookmarks]u"History" tab.2Tap the time you browsed the web page, such as [Today] or [Yesterday].・To check your most visited web pages, tap [Most visited].・Tap a history to open a web page.❖Information・On the Browser screen, touch and hold x to check the history.Clearing history1On the Browser screen, tap and tap [Bookmarks]u"History" tab.2Tap a time when you viewed, touch and hold a history you want to delete, then tap [Remove from history].❖Information・To delete history, tap on the browser screen and [Settings]u[Privacy & security]u[Clear history]u[OK].・To delete temporary Internet files such as cache, on the Browser screen, tap and tap [Settings]u[Privacy & security] and set each item.](https://usermanual.wiki/Sony/PM-0610.User-Manual/User-Guide-2121930-Page-132.png)
![131AppsAppsIn dmenu, you can easily access sites recommended by DOCOMO or convenient applications.1From the Home screen, tap [dmenu].・Browser activates to display "dmenu".❖Information・To use dmenu, Internet connection by packet communication (LTE/3G/GPRS) or Wi-Fi is required.・For connecting dmenu and downloading applications introduced in dmenu, packet communication charge is applied separately. Some applications automatically perform packet communications.・Applications introduced by dmenu may include charged ones.You can obtain useful and interesting contents which meet your needs at dmarket.1From the Home screen, tap [dmarket].・When you activate for the first time, "dマーケットソフトウェア使用許諾契約書 (License Agreement)" appears. Mark "Agree" and tap [Start use].❖Information・For details on dmarket, refer to NTT DOCOMO website.dmenuOpening dmenudmarketOpening dmarket](https://usermanual.wiki/Sony/PM-0610.User-Manual/User-Guide-2121930-Page-133.png)
![132AppsWith Google Play, you can directly access useful applications or fun games which you can download and install on the terminal. And you can send feedback and comments about an application, or report objectionable application or incompatible application with the terminal as an inappropriate content.・To use Google Play, you need to set a Google account (P.222).・Some applications and games are free of charge, and the others are paid. On the applications list of Google Play, distinction between free and paid is clearly specified. For details on purchasing, returning and refunding of paid applications, see "Help" (P.133).1From the Home screen, tap [Play Store].・When License agreement screen appears, follow the onscreen instructions.2Search applications and tap an application you want to install.・Check the displayed contents carefully and follow the onscreen instructions.・Be careful especially about applications which access many functions or large amount of data. Downloading an application means that you are responsible for the consequences of using the application on the terminal.❖Information・Make sure the security of application, then install it at your own risk. The terminal may be infected with a virus and the data may be damaged.・NTT DOCOMO is not liable for malfunctions, if any, caused by the application you installed. In such case, the repair is charged even during the warranty period.・NTT DOCOMO is not liable for any disadvantage brought to you or any third party due to an application you installed.・Some applications automatically perform packet communications. Packet communication is kept active unless you disconnect it or the time-out is occurred. To disconnect packet communications manually, drag the status bar downwards and tap [Mobile data]. When packet communication is disconnected, appears.・Some applications may be updated automatically.Play StoreInstalling applications](https://usermanual.wiki/Sony/PM-0610.User-Manual/User-Guide-2121930-Page-134.png)
![133Apps1From the Home screen, tap [Play Store].2Tap and [My apps].3Tap the applications you want to delete, then tap [Uninstall]u[OK].・When you uninstall charged applications, a screen for refund may appear. For details, refer to "Help" (P.133).When you need help or have any questions about Google Play, display the Google Play screen, then tap and tap [Help] to open Google Play help page.This function allows you to use "おサイフケータイ対応サービス (Osaifu-Keitai compatible service)" by which you can pay money or use coupon, etc. or "かざしてリンク対応サービス (Kazashite-Link compatible service)" by which you can access information by holding the terminal over a home electric appliances or smart poster.Electronic money or point values can be saved in the IC card or the docomo mini UIM card.You can check credit, payment or points of electronic money by using the network. In addition, you can lock your Osaifu-Keitai to provide against loss or theft, and you can use Osaifu-Keitai with safe.For details on Osaifu-Keitai, refer to "Mobile Phone User’s Guide [sp-mode]".Deleting applicationHelpOsaifu-Keitai](https://usermanual.wiki/Sony/PM-0610.User-Manual/User-Guide-2121930-Page-135.png)
![134AppsiC transfer serviceThe iC transfer service is a service which helps you transfer all data in the IC card for Osaifu-Keitai to your new Osaifu-Keitai when you change Osaifu-Keitai for changing of the model or repair. Data in the docomo mini UIM card remains the same after using the iC transfer service.Visit a sales outlet such as docomo Shop to use the iC transfer service.For details on iC transfer service, refer to "Mobile Phone User’s Guide [sp-mode]".Precautions on using the Osaifu-Keitai compatible terminal・The data in the IC card*1 or the docomo mini UIM card*2 may be lost or modified because of the malfunction of the terminal (When we take your terminal for repair etc., as we cannot take it with data remained, you are required to erase the data by yourself ). For support such as reissuance, restoration, temporary preservation or transfer of data, contact Osaifu-Keitai compatible service providers. For important data, be sure to use a service with backup service.・If the data in the IC card or the docomo mini UIM card is lost, modified or damaged by any means related to Osaifu-Keitai compatible service such as malfunction or model change, DOCOMO assumes no responsibility for the loss of data.・If the terminal is stolen or misplaced, immediately contact Osaifu-Keitai compatible service provider for an advice.*1 Data saved in the IC card built in the Osaifu-Keitai compatible terminal (including electronic money or point values)*2 Data saved in the docomo mini UIM card (including electronic money or point values, and excluding phonebook data and SMS data)](https://usermanual.wiki/Sony/PM-0610.User-Manual/User-Guide-2121930-Page-136.png)
![135Apps1From the Home screen, tap then tap [Osaifu-Keitai].2Select a service you want to use from a service list.・Download an application compatible with service site or service.・You can exchange data with an IC card reader only by holding mark over the card reader.❖Information・If you do not make the initial setting for Osaifu-Keitai in the initial setting for DOCOMO services (P.38), the initial setting screen appears in Step 2. Follow the onscreen instructions.・You can scan and write data to or from an IC card reader without activating Osaifu-Keitai compatible application.・The function is available even if the terminal is off, but it is not available when the battery is not attached. Even if the battery is attached, it may not be available if the terminal is off for a long while or battery is low.・You can use Osaifu-Keitai compatible service even when the PIN code cannot be unlocked or PIN locked.・Note that when you do not subscribe sp-mode, some functions of Osaifu-Keitai compatible service may not be available.1From the Home screen, tap , then tap [Settings]u[More...].2[NFC/Osaifu-Keitai settings]u[Reader/Writer, P2P]u[OK].・"Reader/Writer, P2P" and "Android Beam" are marked.・NFC Reader/Writer, P2P function is enabled, and appears in the status bar.3Hold the mark over a device with the NFC module or a smart poster.Using "おサイフケータイ対応サービス (Osaifu-Keitai compatible service)"Using "かざしてリンク対応サービス (Kazashite-Link compatible service)"](https://usermanual.wiki/Sony/PM-0610.User-Manual/User-Guide-2121930-Page-137.png)
![136Apps・When holding mark over the other device, make sure not to hit the terminal strongly.・Hold the mark over parallel to the center of the other device.・Slowly put the terminal close to the other device when holding mark.・If mark is not recognized even when holding over the device, try lifting the terminal slightly, or moving the terminal back, forth and around.・If there are metal objects between mark and the other device, scanning may be failed. And note that putting the terminal in a case or cover may affect communication performance.Use "NFC/Osaifu-Keitai lock" settings to restrict the use of Osaifu-Keitai function and related services.・NFC/Osaifu-Keitai lock is different from screen lock for the terminal, SIM card lock.1From the Home screen, tap , then tap [Settings]u[More...].2Tap [NFC/Osaifu-Keitai settings]u[NFC/Osaifu-Keitai lock].3Enter a password, then tap [Next].・When using "NFC/Osaifu-Keitai lock" for the first time, enter a password to set. Set security question and answer in case you forget the pattern following the onscreen instructions.・Osaifu-Keitai function is locked, and or is displayed in the status bar.❖Information・Note that you cannot cancel "NFC/Osaifu-Keitai lock", if the battery runs out while "NFC/Osaifu-Keitai lock" is set. Be careful about remaining battery level. If you cancel "NFC/Osaifu-Keitai lock", charge the terminal before canceling.・You need to unlock to use Osaifu-Keitai menu while "NFC/Osaifu-Keitai lock" is set.・"NFC/Osaifu-Keitai lock" password is not be deleted even if you reset the terminal.Notes on holding the mark over the other device such as a reader or device with the NFC moduleLocking Osaifu-Keitai function](https://usermanual.wiki/Sony/PM-0610.User-Manual/User-Guide-2121930-Page-138.png)
![137Apps・If you forget the password for "NFC/Osaifu-Keitai lock", tap in the "NFC/Osaifu-Keitai settings" screen and tap [Forget password?], then answer the secret question that you set when setting the password.・When unlocking "NFC/Osaifu-Keitai lock", insert the same docomo mini UIM card as the one inserted when "NFC/Osaifu-Keitai lock" was set, then unlock.■NFCNFC is an abbreviation for Near Field Communication and a short range wireless communication method of international standard defined by ISO (International Organization for Standardization). You can use a contactless IC card function, Reader/Writer function (R/W), Peer-to-Peer communications function (P2P), etc."iD" is a convenient electronic money by credit clearance scheme. You can enjoy shopping simply and conveniently only by holding Osaifu-Keitai with credit information set or the iD-compatible card over the IC card reader in stores. Because up to 2 types of credit information can be registered in Osaifu-Keitai, you can use them according to the benefits, etc. It also supports cashing, depending on the card issuer.・To use iD with Osaifu-Keitai, subscribing to a card issuer that supports iD, settings for iD application are required.・The charges required for iD service (including the annual charge) vary by card issuer.・For using the application, a packet communication charge is applied.・A packet communication charge for oversea use differs from the one in Japan.・For details on iD, refer to iD website.http://id-credit.com/ (In Japanese only)ToruCa is an electronic card that can be obtained to mobile phones. It can be obtained from the IC card reader or site as store information, coupon ticket, etc. Obtained ToruCa is saved to the "ToruCa" app. Use the "ToruCa" app to display, search or update.For details on ToruCa, refer to "Mobile Phone User’s Guide [sp-mode]".❖Information・For obtaining, displaying or updating ToruCa, a packet communication charge may be applied.・Some ToruCa provided to i-mode terminal may not be obtained/displayed/updated.・Depending on the settings of IP (Information Provider), the following functions may not be available.- Obtaining/Updating from the IC card reader, sharing ToruCa, moving to microSD card, copying/displaying mapiDアプリ (iD application)ToruCa](https://usermanual.wiki/Sony/PM-0610.User-Manual/User-Guide-2121930-Page-139.png)
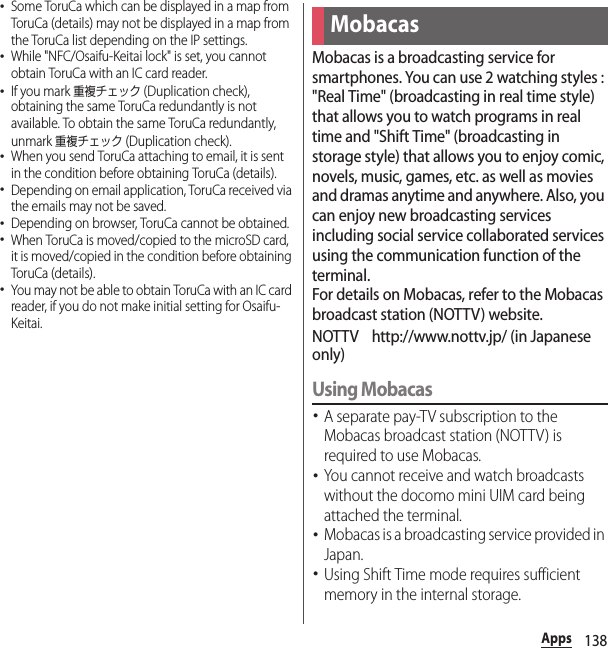
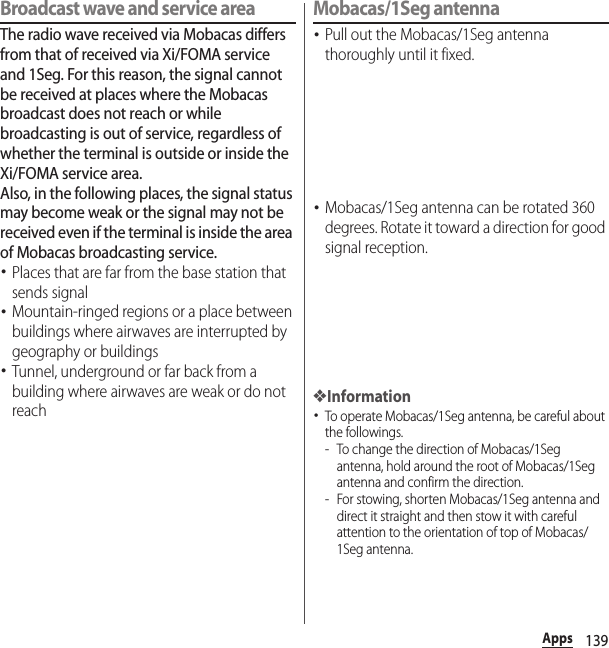
![140AppsImproving reception status・Fully extending the Mobacas/1Seg antenna and changing the antenna direction or moving to other location may improve signal reception.Watching programs/contents1From the Home screen, tap and [NOTTV].・A home screen of NOTTV appears.・When you activate for the first time, a terms for use appears. Tap [同意する (Agree)] to perform initial settings automatically. Perform the initial settings in a place with good communication environment.・When a guidance etc. appears, follow the onscreen instructions.2Tap a thumbnail of program/content.❖Information・When watching Real Time program, you can select channels by flicking the screen left or right.・To view in full-screen, turn the terminal sideways or on the portrait screen, tap an image of program/content and tap .* Viewing structure of content differs depending on program/content.・Tap [データ (Data)] to display a data broadcasting window (only in portrait view).・Tap [ソーシャル (Social)] to display timeline related to program/content (only in portrait screen).・Tap [インフォ (Info)] to display program details (only in portrait view).・While watching, press m to adjust sound volume.・To set subtitle or audio, tap and [設定 (Settings)]u[表示・音声 (Display/audio)].・Some Mobacas programs/contents can be output to TV by MHL connection. For connecting, see "Connecting to other devices" (P.246).There are various methods for searching for programs/contents in the application. Searching from program table (Real Time)1From the Home screen, tap and [NOTTV].2Tap [Program guide].・Real Time program guide appears. To display Shift Time program guide, tap [シフトタイム (Shift Time)].・Tap a current broadcasting program to switch to a watching screen of selected program.Watching MobacasSearching for a program/content](https://usermanual.wiki/Sony/PM-0610.User-Manual/User-Guide-2121930-Page-142.png)
![141AppsSearching by conditions1From the Home screen, tap and [NOTTV].2Tap and tap [検索・ジャンル別 (Search/by genre)].3Enter a keyword to search or tap a genre you want to search for.1From the Home screen, tap and [NOTTV].2Tap [番組表 (Program guide)]u[シフトタイム (Shift Time)].・A list of programs/contents to be broadcasted appears.3Tap a program/content you want to reserve.・A detail screen of program/content appears.4Tap [予約する (Reserve)].❖Information・Programs/contents may not be received in the following cases : when the power is off while a program/content is broadcasted, when the battery is low, when the terminal is in a poor reception area such as out of the Mobacas service area etc., available memory space in the internal storage is low.・Programs/contents temporarily saved in the internal storage can be watched/used only on the terminal.・When expiration date has passed for programs/contents, they are automatically deleted from the internal storage. You can also delete programs/contents manually before the expiration date.・Programs/contents may be automatically reserved even when you have not reserved (自動受信 (Automatic reservation)).・You can disable the automatic reservation function.・Depending on the signal reception, content data may not be received. In that case, packet communication is automatically used to compliment data (自動コンテンツ補完 (Auto contents complement)).・You can disable the auto contents complement function.Reserving receiving a program/content (Shift Time)](https://usermanual.wiki/Sony/PM-0610.User-Manual/User-Guide-2121930-Page-143.png)
![142AppsYou can set for view, audio, content reception, etc.1From the Home screen, tap and [NOTTV].2Tap and [Settings].Settings Mobacas表示・音声 (Display/audio)字幕表示 (Display subtitles)Set display subtitles.文字スーパー表示 (Telop display)Set the telop display to on/off.音声 (Audio)Switch main/sub audio sound.自動処理 (Auto process)自動受信 (Auto reception)Set the automatic reception of content or program guide to on/off.おすすめのリセット (Reset recommendation)Reset recommendation.番組・コンテンツ情報取得 (Acquire program/content information)Set a time zone for acquiring programs/contents list information.自動コンテンツ補完 (Auto contents complement)Set whether to automatically complement data using packet communication when contents are not completely received because of the reception status of broadcast wave etc.利用ログ送信 (Send log)Set log sending to on/off.自動ライセンス取得 (Auto license acquisition)Set whether to automatically acquire licenses of contents.ペアレンタルコントロール (Parental control)Restrict usage of programs/contents according to age.](https://usermanual.wiki/Sony/PM-0610.User-Manual/User-Guide-2121930-Page-144.png)
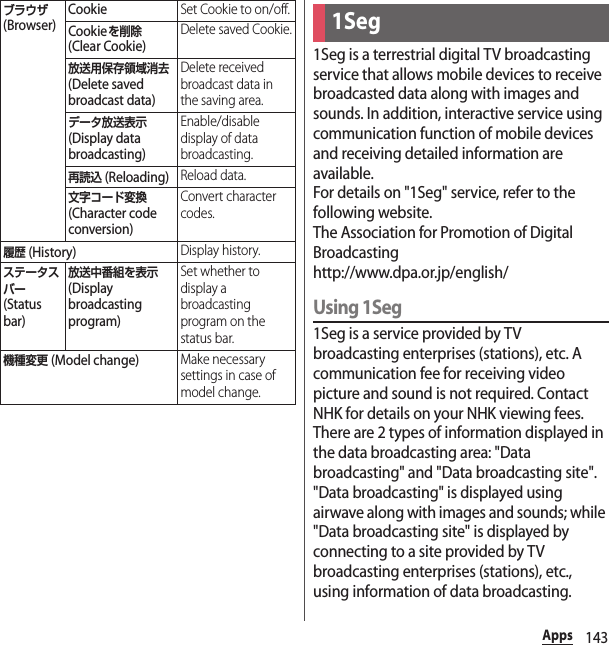
![144AppsFor viewing "Data broadcasting site", etc., packet communication fees are charged.・Some sites require information fees.・ToruCa may be automatically saved while watching 1Seg program. For acquiring detailed information of saved ToruCa, packet communication charge is applied.Airwaves1Seg is one of the broadcast services and a different type of radio waves (airwaves) from that of FOMA service is received. Therefore, regardless of whether you are in or out of Xi service or FOMA service area, it cannot be received where airwaves do not reach or during broadcasting interruptions.Also, even in a terrestrial digital TV broadcasting service area, reception condition may be poor or reception may be unavailable in the following places:・A place far from the tower that the airwaves are sent from・Mountain-ringed regions or a place between buildings where airwaves are interrupted by geography or buildings・Tunnel, underground or far back from a building where airwaves are weak or do not reachFully extending the Mobacas/1Seg antenna and moving to other location may improve signal reception.When you use 1Seg for the first time, select an area to make channel setting. After channel setting is done, 1Seg programs can be received.1From the Home screen, tap and tap [1Seg].2Tap [Area Select] to select region, prefecture and locality.・The terminal searches for available channels. When the searching is complete, a channel list appears.3Tap a channel you want to watch.・1Seg watching screen appears.❖Information・Alternatively, tap [Auto] in Step 2 to set channels.Initial settings for 1Seg](https://usermanual.wiki/Sony/PM-0610.User-Manual/User-Guide-2121930-Page-146.png)
![145Apps1From the Home screen, tap and tap [1Seg].・1Seg watching screen appears. Tap an image or subtitle to temporarily view information such as program name.■ 1Seg watching screenaRemote control number, broadcasting station and program informationbImagecSubtitledChannel selection key : Select channel, display operation key to display channel list etc.eReception signal levelfView optional menugData broadcasting : Display data broadcasting content.hRemote control for data broadcasting : Display operation keys for data broadcasting such as Back, Move focus, Select focus, etc.iRecord iconjSwitch of screen view (full-screen/with data broadcasting)❖Information・While watching 1Seg, press m to adjust volume.・You can watch 1Seg program in the portrait view or landscape view. To set the screen orientation to switch between landscape and portrait view automatically according to the terminal orientation, drag the status bar downwards and tap [Auto rotate].・To switch channels for watching, operate any of the followings.- Tap the channel selection key- On the 1Seg watching screen, flick an image or subtitle left or right.- On the 1Seg watching screen, touch and hold an image or subtitle to display the channel list and then select a channel・On the portrait view screen, tap a data broadcasting to display the remote control for data broadcasting. To display the channel selection key or recording icon again, tap an image or subtitle.・You cannot exit 1Seg even if you tap y to return to the Home screen. If 1Seg remains activated, the battery may be consumed quickly. To exit 1Seg, tap x while watching 1Seg.Watching 1Seg programgdabcefhi j1Seg watching screen(with data broadcasting)dabceijf1Seg watching screen (full screen)](https://usermanual.wiki/Sony/PM-0610.User-Manual/User-Guide-2121930-Page-147.png)
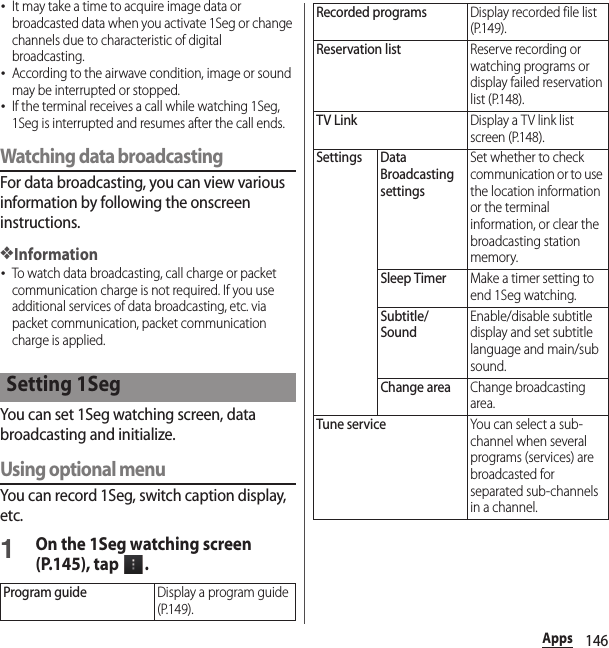
![147AppsSaving channels in the current locationAvailable channels vary depending on the area (broadcasting service area) you are using in.1On the 1Seg watching screen (P.145), tap .2Tap [Settings]u[Change area]u[Empty].3Tap [Auto].・The terminal searches for available channels. When the searching is complete, a channel list appears.4Tap a channel you want to watch.・1Seg watching screen appears.❖Information・Alternatively, tap [Area Select] in Step 3 then select your area to save channels.Changing a broadcasting area1On the 1Seg watching screen (P.145), tap .2Tap [Settings]u[Change area].3Select a registered area.・Channels are switched to the ones for the selected area.❖Information・By touching and holding the area registered in Step 3, you can display details, set area information, refresh channels, rename area or clear settings.Changing numbers for TV remoteChange TV remote number assigned to each broadcasting station. Each broadcasting station can be called up via the corresponding TV remote number.1On the 1Seg watching screen (P.145), touch and hold an image.・A channel list appears.2Tap a broadcasting station to change the remote control number.3Touch and hold a number of remote control you want to set to.4Tap [Register channel].・If you select a number of remote control which is already assigned to another broadcasting station, tap [YES].❖Information・To delete set broadcasting stations, touch and hold a broadcasting station to delete in Step 2, then [Delete channel]uTap [YES].](https://usermanual.wiki/Sony/PM-0610.User-Manual/User-Guide-2121930-Page-149.png)
![148AppsFor some data broadcasting programs, link information to related websites (TV link) is displayed. Save TV links to connect to related websites later.Saving TV links1On the 1Seg watching screen (with data broadcasting) (P.145), select TV link to store.・After this step, follow the onscreen instructions.Displaying TV links1On the 1Seg watching screen (P.145), tap .2Tap [TV Link].・A TV link list screen appears.3Select a TV link.・When selecting a link content or HTML content, tap [Yes].❖Information・Some TV links have period of validity. Out of date TV links are no longer available.Viewing/Deleting details of TV link1On the 1Seg watching screen (P.145), tap .2Tap [TV Link] and touch and hold a TV link.❖Information・Alternatively, on the TV link list screen, tap to delete all.Reserve recording/viewing TV program.1On the 1Seg watching screen (P.145), tap .2Tap [Reservation list] and tap .3Tap [Manual].4Tap [Viewing reservation]/[Recording reservation].5Set a program name, channel, start time, end time, etc. and tap , then tap [YES].Using TV linkPropertyDisplay details for registered information such as title, description, expiration date, etc.Delete Delete oneDelete a stored TV link.Delete allDelete all stored TV links.Reservation of recording/viewing TV program](https://usermanual.wiki/Sony/PM-0610.User-Manual/User-Guide-2121930-Page-150.png)
![149Apps❖Information・Alternatively, tap [From Program guide] in Step 3, you can reserve recording/watching.Record images, sound, captions or data broadcasting while displaying.1On the 1Seg watching screen (P.145), tap to start recording.2On the 1Seg watching screen (P.145), tap to end recording.❖Information・Maximum savable recorded data file size is 2GB, and maximum recordable time is approximately 640 minutes in a row.Items can be saved up to 99.・Recorded data is saved on a microSD card. Recording is not available if a microSD card is not attached.・When you use the microSD card from another application while recording, recording may fail.Playing a recorded program.1On the 1Seg watching screen (P.145), tap .2Tap [Recorded programs].3Tap a program you want to play.❖Information・Touch and hold a program to change or delete title etc.・Tap on the recorded file list screen to set play mode, select/delete all, display remaining memory space, etc.1On the 1Seg watching screen (P.145), tap .2Tap [Program guide].・After this step, follow the onscreen instructions.Recording 1SegUsing program guide](https://usermanual.wiki/Sony/PM-0610.User-Manual/User-Guide-2121930-Page-151.png)
![150AppsYou can listen to the FM radio with the terminal. Tuning can be made automatically or manually, and you can register your favorite channels to Favorites. To use FM radio, use a commercially available earphone set or headphone. They work as antenna.1Connect an earphone set or headphone to the terminal.2From the Home screen, tap , then tap [FM radio].・FM radio screen appears and selecting channel starts automatically. The search ends when radio waves are received.3Tap / to select channel.・You can select channel by flicking the screen left and right.4Tap .5Enter a name, select a color, then tap [Save].・The frequency bands of selected channels are registered to Favorites.6To stop the FM radio, tap .❖Information・Alternatively, on the FM radio screen, tap and [Search for channels] to search.・Up to 8 one-byte or two-byte characters can be entered as a favorite name.・You can return to the Home screen to perform another operation while listening to FM radio in the background. To return to the FM radio screen, from the Home screen, tap then tap [FM radio], or drag the status bar downward and tap [FM radio].・If you cannot receive Japanese FM radio programs because the docomo mini UIM card is not inserted etc., tap on the FM radio screen, then tap [Set radio region]u[Japan]. For using FM radio, check your area.■ FM radio screenaPlay in speaker/Play in handsfreebSave/edit FavoritescChannel point displayed in a good radio wave conditiondSearch channels to the lefteShow FavoritesfOn/Off of FM radiogView optional menuFM radioSearching and registering channelscihjkadbfge](https://usermanual.wiki/Sony/PM-0610.User-Manual/User-Guide-2121930-Page-152.png)
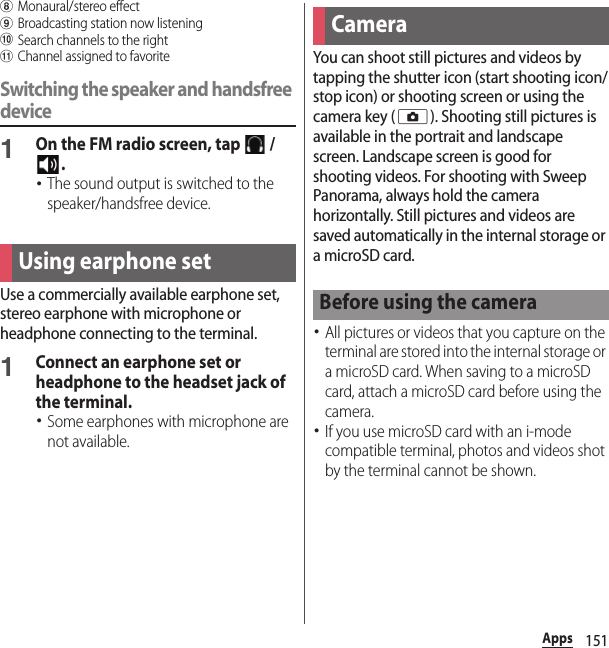
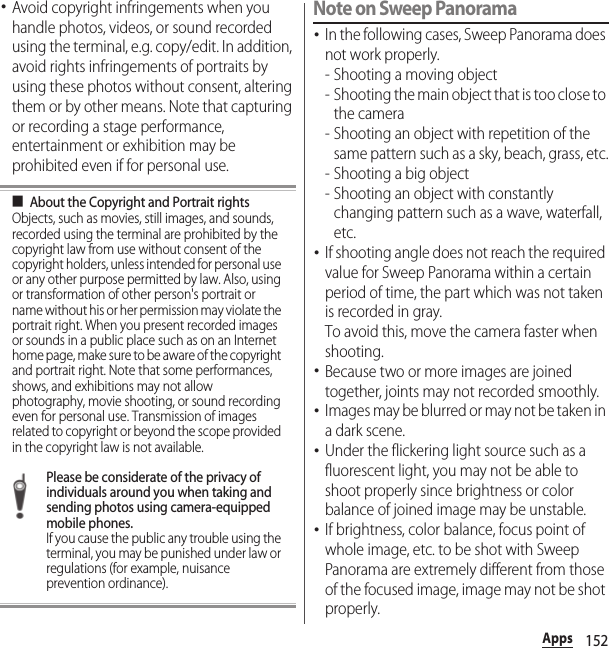
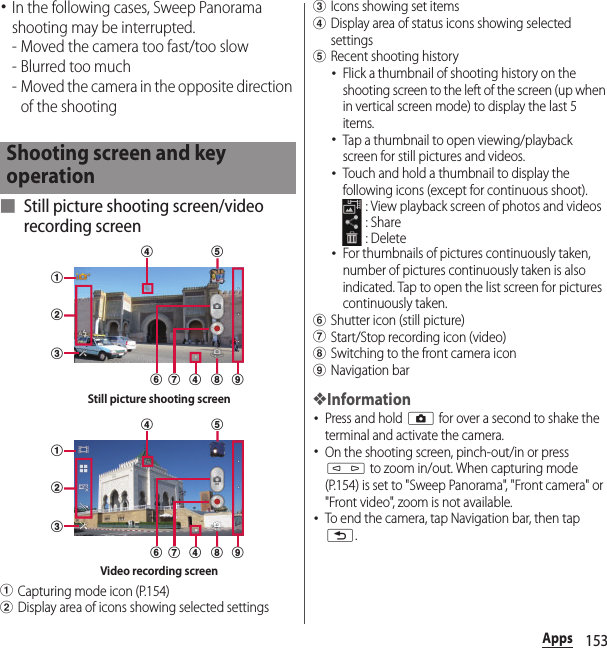
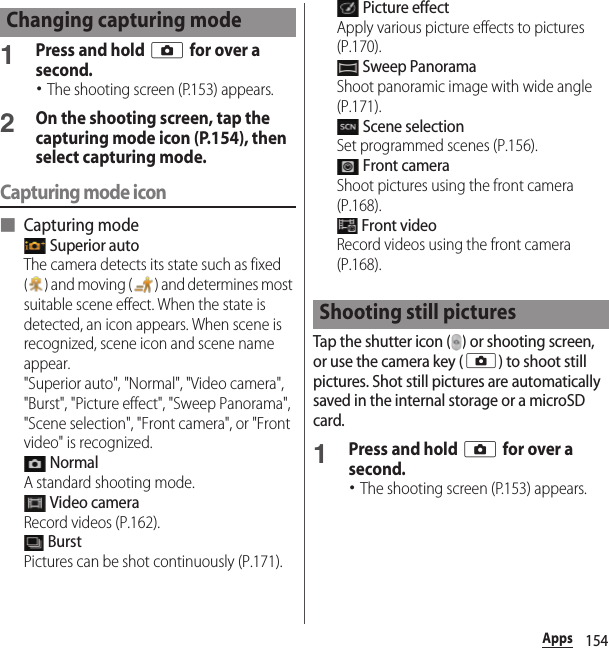
![155Apps■Shooting with the shutter iconTap on the shooting/recording screen.・To shoot still pictures using auto-focus function, touch and hold and release your finger when the focus frame turns blue and sound beeps. A picture is shot as soon as you release the finger. If the focus frame does not appear, auto-focus does not operate correctly.■Shooting with "Touch capture"Set "Touch capture", then tap around a displayed frame on the shooting screen.・To set "Touch capture", on the recording screen, tap , then tap [Touch capture]u[On].・To shoot still pictures using auto-focus function, tap the screen and release your finger, and then the focus frame turns blue and a picture is shot. If the focus frame does not appear, auto-focus does not operate correctly.■Using the camera key (k)Press k on the shooting screen・Even when "Touch capture" (P.161) is set to "On", pressing k shoots a picture.・To shoot still pictures using auto-focus function, press k halfway and when the focus frame turns blue and sound beeps, press k all the way until it stops. If the focus frame does not appear, auto-focus does not operate correctly.❖Information・When you connect a commercially available earphone set or other Bluetooth device, shutter sound may be softer.1Press and hold k for over a second.・The shooting screen (P.153) appears.2On the shooting screen, tap , then tap item to set.・Several setting icons are displayed on the shooting screen in advance. The displayed setting icons change depending on the setting conditions.・When capturing mode (P.154) is set to "Burst", "Picture effect" or "Sweep Panorama", tap the setting item icon displayed on the shooting screen to change the setting.・For setting items and icons, see "Still camera setting" (P.156).Changing the shooting settings](https://usermanual.wiki/Sony/PM-0610.User-Manual/User-Guide-2121930-Page-157.png)

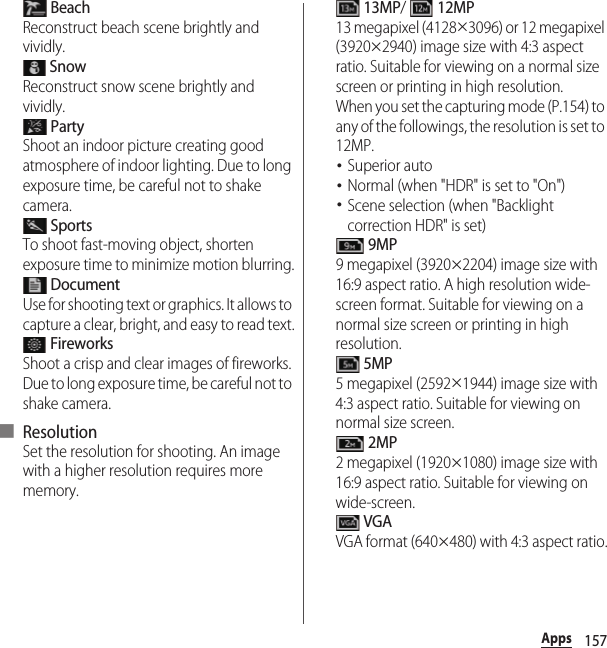
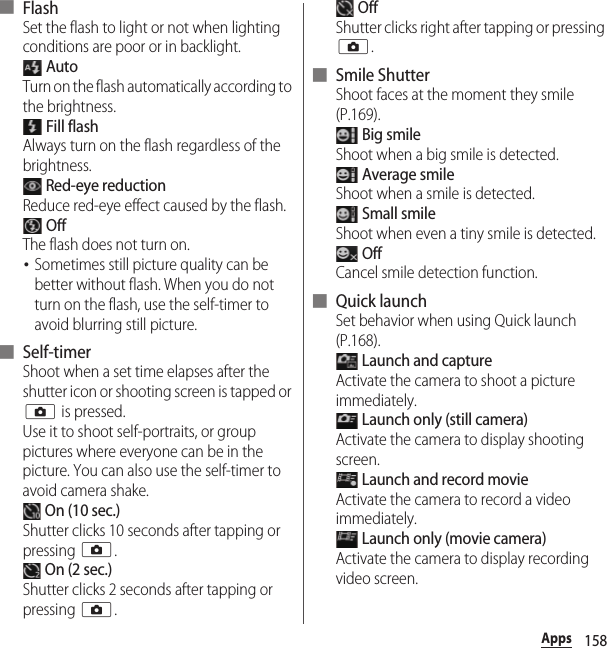
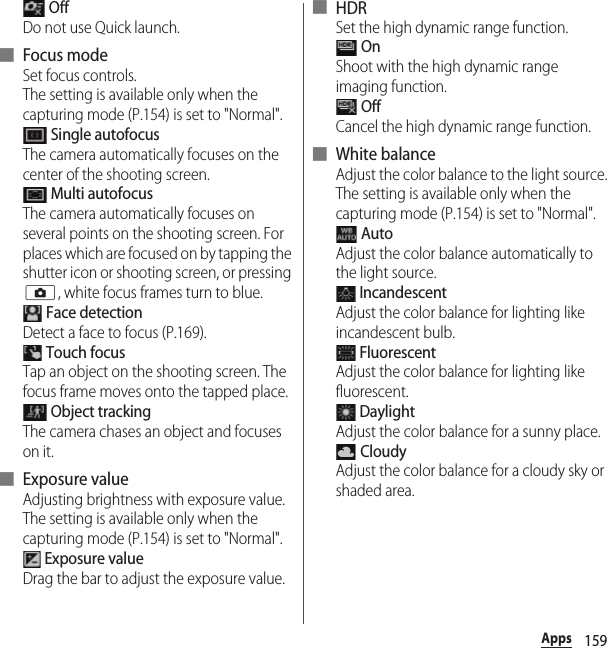

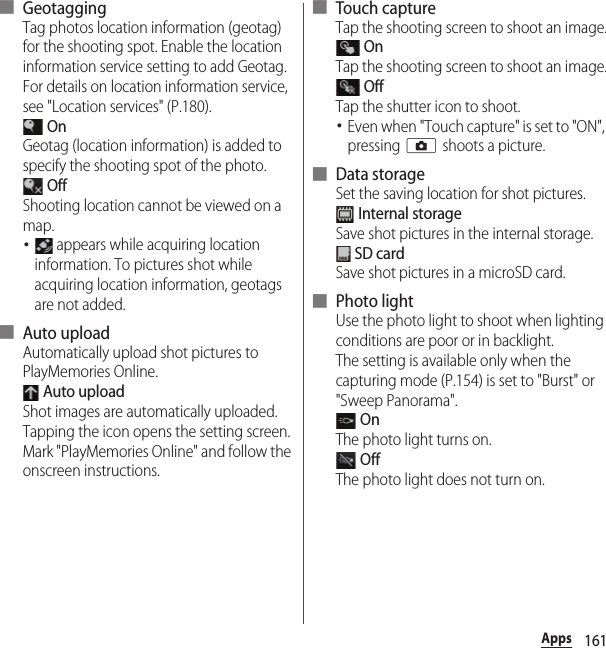
![162Apps■ Shooting directionSet shooting direction for Sweep Panorama.The setting is available only when the capturing mode (P.154) is set to "Sweep Panorama". RightShoot moving the camera from left to right. LeftShoot moving the camera from right to left. DownShoot moving the camera downward. UpShoot moving the camera upward.■ Burst speedSet continuous shooting speed.The setting is available only when the capturing mode (P.154) is set to "Burst". HighShoot at high speed and 1280×720 image size with 16:9 aspect ratio. MiddleShoot at medium speed and 3920×2204 image size with 16:9 aspect ratio. LowShoot at low speed and 1920×1080 image size with 16:9 aspect ratio.❖Information・For available setting items when the capturing mode (P.154) is set to "Front camera", see "Front camera" (P.168).・Some settings cannot be used in combination with one another.・If you shoot pictures continuously with "Data storage" set to "SD card", dropping frames may occur depending on the writing speed of microSD card. For fully using the performance of continuous shooting with "High" or "Middle", set "Data storage" to "Internal storage".Tap the start recording icon ( )/stop recording icon ( ), tap the recording screen, or press k to start/stop recording a video. Recorded videos are automatically saved in the internal storage or a microSD card.1Press and hold k for over a second.2On the shooting screen, tap the capturing mode icon (P.154), then tap [Video camera].・The video recording screen (P.153) appears.■Recording with the start recording icon/stop recording iconOn the recording screen, tap to start recording, and tap to stop recording.Recording videos](https://usermanual.wiki/Sony/PM-0610.User-Manual/User-Guide-2121930-Page-164.png)
![163Apps■Shooting with "Touch capture"Set "Touch capture", then tap around a displayed frame on the recording screen to start recording, and tap the recording screen to stop recording.・To set "Touch capture", on the recording screen, tap , then tap [Touch capture]u[On].■Using the camera key (k)On the recording screen, tap k to start recording, and tap k to stop recording.・Even when "Touch capture" (P.167) is set to "On", pressing k starts/stops recording a video.❖Information・Alternatively, tap in Step 2 to start recording.・Do not cover the microphone with fingers etc. when recording videos.・When you connect a commercially available earphone set or other Bluetooth device, shutter sound may be softer.・On the video recording screen (P.153) or while recording video, tap shutter icon to shoot still pictures.Shot image size varies by video resolution setting.Full HD/HD : 1 megapixel (1280×720) with 16:9 aspect ratioVGA : VGA (640×480) with 4:3 aspect ratioQVGA : QVGA (320×240) with 4:3 aspect ratio1Press and hold k for over a second.2On the shooting screen, tap the capturing mode icon (P.154), then tap [Video camera].・The video recording screen (P.153) appears.3On the shooting screen, tap , then tap item to set.・Several setting icons are displayed on the shooting screen in advance. The displayed setting icons change depending on the setting conditions.・For setting items and icons, see "Video camera setting" (P.164).4Tap an option in the selected setting.・If you change setting options, icons displayed on the shooting screen change to the set items.❖Information・To replace setting item icons displayed on the recording screen, tap on the recording screen and touch and hold a setting item and drag it to a dotted frame.Changing the recording settings](https://usermanual.wiki/Sony/PM-0610.User-Manual/User-Guide-2121930-Page-165.png)
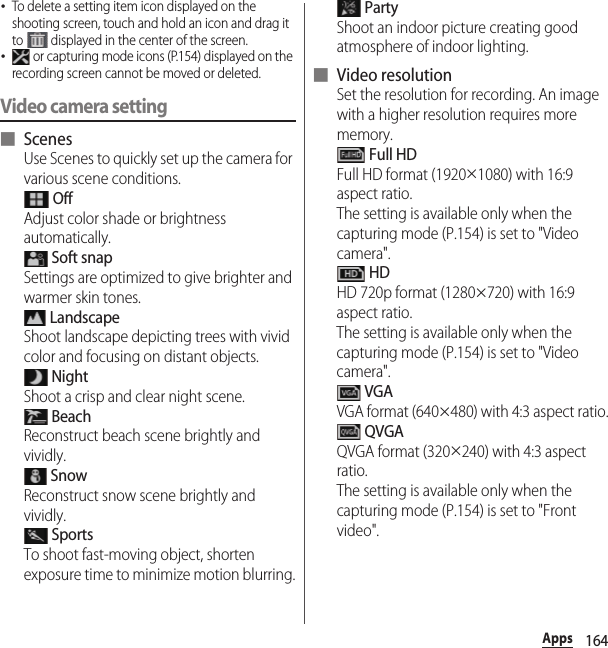
![168AppsFront camera allows you to shoot your own picture or video while watching the shooting screen.1Press and hold k for over a second.・The shooting screen (P.153) appears.2Tap on the shooting/recording screen.3Shoot photo/video.・For information on how to shoot, see "Shooting still pictures" (P.154) or "Recording videos" (P.162).❖Information・Alternatively, on the shooting screen, tap the capturing mode icon (P.154), then tap [Front camera]/[Front video] to switch to the Front camera/Front video camera.・For using Front camera, "Self-timer", "Smile Shutter", "Geotagging", "Auto upload", "Touch capture", "Data storage" can be set. Other "Still camera setting" (P.156) are not supported by Front camera.- Resolution for Front camera is "VGA". The resolution cannot be changed.- Some settings take over the camera settings set at the time when switching.・For using Front video camera, "Video resolution", "Self-timer", "Geotagging", "Microphone", "Touch capture", "Data storage" can be set. Other "Video camera setting" (P.164) are not supported by Front video camera.- Some settings take over the camera settings set at the time when switching.Quick launch allows you to activate camera to shoot when using other application, or from the the unlock screen, the Home screen, etc.❖Information・By default, on the unlock screen, tap to activate camera.・Only when "Set all to" or "Lock screen" in Preferred apps settings (P.214) to "Xperia™", and set the screen unlock method (P.218) to "Swipe/Touch", you can also activate the camera by dragging / left on the unlock screen.1Press and hold k for over a second.・"Launch only (still camera)" to activate the camera is set by default.・For behavior when using Quick launch, make setting from the shooting screen. For details, see "Quick launch" (P.158).Front cameraQuick launch](https://usermanual.wiki/Sony/PM-0610.User-Manual/User-Guide-2121930-Page-170.png)
![169AppsUse Face detection to focus on a face located away from the center. The camera detects up to 5 faces and selects 1 face for auto focus. The camera determines the most suitable face according to the balance of distance from the camera and from the center. A selected face is surrounded with a yellow frame and automatically focused on. You can select a face to focus on by tapping a frame.Setting face detection1Press and hold k for over a second.・The shooting screen (P.153) appears.2On the shooting screen, tap the capturing mode icon (P.154), then tap [Normal]/[Video camera].3On the shooting screen, tap and [Focus mode]u[Face detection].Shooting using face detection1With Face detection set, point the camera at the object.・Each detected face is framed (up to 5 faces).2Tap the frame you want to focus on or let the camera select which face to focus on without tapping.・A yellow frame shows the face in focus.3Shoot photo/video.・For information on how to shoot, see "Shooting still pictures" (P.154) or "Recording videos" (P.162).Smile shutter allows you to capture a face just as it smiles. The camera detects up to 5 faces and selects 1 face for smile shutter and auto focus. A selected face is surrounded with a yellow frame and when the selected face smiles, the frame turns to blue and the camera automatically takes a photo.Face detectionSmile Shutter](https://usermanual.wiki/Sony/PM-0610.User-Manual/User-Guide-2121930-Page-171.png)
![170AppsSetting smile shutter1Press and hold k for over a second.・The shooting screen (P.153) appears.2On the shooting screen, tap , then tap [Smile Shutter].3Select smile level for the smile shutter.Taking a photo using smile shutter1Set smile shutter, and point the camera at the object.・Each detected face is framed (up to 5 faces).・The camera selects which face to focus on. A yellow frame shows the face in focus.2The camera automatically takes the photo when a face in focus smiles.・Shot pictures are automatically saved in the internal storage or a microSD card.・If no smile is detected, operate the steps in "Shooting still pictures" (P.154) to shoot a picture.Picture effect allows you to shoot pictures with various picture effects.Setting picture effects1Press and hold k for over a second.・The shooting screen (P.153) appears.2On the shooting screen, tap the capturing mode icon (P.154), then tap [Picture effect].3Select a picture effect.・Select from "Nostalgic", "Miniature", "Vivid", "Filter", "Fisheye", "Sketch", "Partial color", "Harris shutter" or "Kaleidoscope".❖Information・On the screen for selecting a picture effect, press m to capture a screenshot.・Resolution for the picture effect is "2MP". The resolution cannot be changed.Taking a picture using picture effect1Set picture effect, and point the camera at the object.・Tap or pinch to change the picture effect setting.Picture effect](https://usermanual.wiki/Sony/PM-0610.User-Manual/User-Guide-2121930-Page-172.png)
![171Apps2Press k.・Alternatively, tap the shutter icon to shoot.・Shot pictures are automatically saved in the internal storage or a microSD card.❖Information・When you shoot a picture using picture effect, "Touch capture" (P.155) is not available.Use Sweep Panorama to shoot panoramic image with wide angle.Aligning the white frame on the screen with the black frame, move the camera slowly toward the set shooting direction to shoot.Setting Sweep Panorama1Press and hold k for over a second.・The shooting screen (P.153) appears.2On the shooting screen, tap the capturing mode icon (P.154), then tap [Sweep Panorama].・Tap / to set "Shooting direction" (P.162) or "Photo light" (P.161).Shooting Sweep Panorama1Set Sweep Panorama, point the camera at the object.2Shoot a still picture.・For information on how to shoot pictures, see "Shooting still pictures" (P.154).・A white frame and big black frame appear on the shooting screen.3Aligning the white frame with the black frame, slowly move the camera from left to right.・If you change shooting direction, slowly move the camera in the set direction.・Shot pictures are saved automatically in the internal storage or a microSD card.❖Information・For shooting with Sweep Panorama, always hold the camera horizontally.Use Burst to shoot a series of images.Setting continuous shoot1Press and hold k for over a second.・The shooting screen (P.153) appears.Sweep PanoramaContinuous shooting](https://usermanual.wiki/Sony/PM-0610.User-Manual/User-Guide-2121930-Page-173.png)
![172Apps2On the shooting screen, tap the capturing mode icon (P.154), then tap [Burst].・Tap / to set "Burst speed" (P.162) or "Photo light" (P.161).Shooting continuously1Set Burst and point the camera to an object.2Press and hold k for over a second.・Pictures are continuously shot while k is pressed.・Alternatively, touch and hold the shutter icon to operate. Pictures are continuously shot while the shutter icon is touched and held.・Shot pictures are automatically saved in the internal storage or a microSD card.❖Information・"Touch capture" (P.155) is not available while Burst is set.Photos or videos that you took with the terminal or multimedia contents (music, photos, videos, etc.) saved in the internal storage or microSD card are viewed/played in applications such as "Media Player", "WALKMAN", "Album".The terminal can play the following multimedia contents:Playing multimedia contentType File formatSoundWAV (PCM, G.711) (.wav), AAC (.3gp, .m4a, .mp4), AAC+ (.3gp, .m4a, .mp4), eAAC+ (.3gp, .m4a, .mp4), MP3 (.mp3), AMR-NB (.3gp), AMR-WB (.3gp), MIDI (SP-MIDI/GM/GML (.mid), XMF (.xmf), Mobile XMF 1.0 (.mxmf ), RTTTL/RTX (.rtttl, .rtx), OTA (.ota), iMelody (.imy)), Ogg Vorbis (.ogg), FLAC (.flac), PIFF (.isma)Still imageJPEG (.jpeg, .jpg), GIF (.gif ), PNG (.png), BMP (.bmp), WEBP (.webp)VideoH263 (.3gp, .3gpp, .mp4, .m4v), H264 (.3gp, .3gpp, .mp4, .m4v), MPEG4 (.3gp, .3gpp, .mp4, .m4v), VP8 (.webm, .mkv), Xvid (.avi, .xvid, .mkv, .3gp, .3gpp, .mp4, .m4v), WebM (.webm), AVI (.avi), PIFF (.ismv)](https://usermanual.wiki/Sony/PM-0610.User-Manual/User-Guide-2121930-Page-174.png)
![173AppsAvoid copyright infringements when you handle photos, videos, or sound recorded using the terminal, e.g. copy/edit. In addition, avoid rights infringements of portraits by using these photos without consent, altering them or by other means. Note that capturing or recording a stage performance, entertainment or exhibition may be prohibited even if for personal use.Please be considerate of the privacy of individuals around you when taking and sending photos using camera-equipped mobile phones.Images, photos and videos you took can be viewed and played. Also, use Media Go to transfer content to the terminal and to take content from an external device. For details, refer to "Connecting to a PC with microUSB cable" (P.241).1From the Home screen, tap , then tap [Album].・Album screen appears.・ is displayed for files of pictures continuously shot.・ is displayed for video files.❖Information・Depending on the number of saved images, it may take some times to load images.Copyright protected contentAlbumViewing picture/video](https://usermanual.wiki/Sony/PM-0610.User-Manual/User-Guide-2121930-Page-175.png)
![175AppsSharing image filesYou can share image files by attaching to Gmail or Email, uploading to Picasa or Google+, or sending to other devices via Bluetooth or infrared communication.1On the picture viewing screen/video playing screen, tap the screen and tap .・Menu for sharing image file appears.・Tap [See all] to display all share menus.2Select sharing method for image file.・After this step, follow the onscreen instructions.❖Information・Different options may be shown or some items cannot be operated in some image files.・To operate several files, on the album screen, tap and [Select items] to select image files.・When you select "Infrared" in Step 2, the Send via infrared message appears. Tap [OK] to start sending. For details on infrared communication, see "Using infrared communication" (P.232).・For shared files, file sizes and file types are not particularly limited, but may be limited by the application to transfer. DRM content cannot be shared.Deleting image files1On the picture viewing screen/video playing screen, tap and tap [Delete].・Image file is deleted.❖Information・To delete several files, on the album screen, tap and [Select items], then select image files to delete, tap and tap [Delete]. When a file contains pictures continuously taken, tap [Delete cover]/[Delete burst]u[Delete].Using optional menuView slideshow, edit image, set image to phonebook entry or as wallpaper, check shooting date and time, etc.1On the picture viewing screen/video playing screen, tap the screen and tap .2From the displayed menu, select item you want to use.・After this step, follow the onscreen instructions.Operating image files](https://usermanual.wiki/Sony/PM-0610.User-Manual/User-Guide-2121930-Page-177.png)
![176Apps❖Information・Different options may be shown or some items cannot be operated in some image files.・In Step 2, tap "Throw" to display the connection device selection screen (if no devices are found, tap [Add new device] to make the setting). Select a device on the connection device selection screen to share files between a DLNA device, Bluetooth device, or screen mirroring device and the terminal.YouTube is a free online video streaming service. You can play, search for and upload videos.・A packet communication charge is applied when downloading or uploading video content using mobile networks.1From the Home screen, tap , then tap [YouTube].・If you do not set Google account, the Google account setting screen appears. Follow the onscreen instructions.・When a message appears, follow the onscreen instructions.・A list of videos appears. You can select from categories.2Tap a video to play it.・Tap the screen to display play/pause icon or progress bar. Drag the marker left or right on the progress to change playing point.・Turn the terminal sideways to switch to the landscape view.・Tap x to stop playing and return to the video list screen.・To quit YouTube, tap y.❖Information・For movies with caption function which can display subtitles, "CC" appears by tapping the screen while playing in the landscape screen. Tap [CC] to set the caption function.・When "HD" or "HQ" appears by tapping the screen while playing in the landscape screen mode, tap [HD]/[HQ] to play in high quality. A video plays in high quality when Wi-Fi is connected. To always play video in high quality even when mobile network is connected, tap , then tap [Settings]u[General] then mark "High quality on mobile" checkbox.・Tap to search videos. To delete search history, tap and [Settings]u[Search]u[Clear search history]u[OK].YouTubePlaying YouTube video](https://usermanual.wiki/Sony/PM-0610.User-Manual/User-Guide-2121930-Page-178.png)
![177AppsPlay back music and videos stored on the internal storage or a microSD card using Media Player.・For information on how to copy music and video data from a PC, see "Connecting to a PC with microUSB cable" (P.241).・For information on file formats of playable data, see "Playing multimedia content" (P.172).1From the Home screen, tap , then tap [Media Player].・Media Player screen appears.■ Media Player screenaTab・Change displayed information.・Flick left or right.bView optional menu❖Information・To change the order of tab icons, tap and tap [Settings]u[Arrange icons], drag up and down on the item to change then tap [Apply].1From the Home screen, tap , then tap [Media Player].・Tap [Movie] tab at the bottom of the screen to display video list.2Tap a song/video.・Song/video is played.■ Music playback screenaBack to song listbGo back to the beginning of the track or to the previous track/Play or pause/Skip to the next trackcPlayback pointdView optional menueAlbum artfSong informationgRepeat OFF/Repeat ON/1 track repeatMedia PlayerActivating Media PlayerabPlaying music/videoaacgefdibh](https://usermanual.wiki/Sony/PM-0610.User-Manual/User-Guide-2121930-Page-179.png)
![178AppshShuffle OFF/Shuffle ONiVolume control・Alternatively, press m during playback to adjust volume.❖Information・You can return to the Home screen to perform another operation while listening to music in the background. To return to the music playback screen, from the Home screen, tap then tap [Media Player], or drag the status bar downward to tap the name of song that is being played.■ Video playback screenaBack to video listbGo back to the beginning of the video or to the previous video/Play or pause/Skip to the next videocPlayback pointdView optional menueVideo informationfAuto-rotate screen ON/OFF・Tap to turn red and disable Auto-rotate screen.gVolume control・Alternatively, press m during playback to adjust volume.❖Information・While in landscape view, tap the screen to display option menu icons etc.You can play back songs in the order you decided using playlist.Creating a playlist1From the Home screen, tap , then tap [Media Player].2Flick left and right on tabs at the bottom of the screen and tap [Play list].・Play list screen appears.3Tap [Create new] and enter the access point name and tap [OK].4Tap [Add songs to playlist] and select songs you want to add.・You can also select songs from "Artists" and "Albums".・ on the selected song turns red and the song is added to Play list by each tap.5Tap [Apply]u[Save]u[OK].cbaafdegPlaylist](https://usermanual.wiki/Sony/PM-0610.User-Manual/User-Guide-2121930-Page-180.png)
![179AppsEditing songs in playlist1On the play list screen, select a playlist to edit and tap [Edit].■Changing order of the songsDrag up and down in song to change order and tap [Save]u[OK].■Deleting songs from playlistSelect a song to delete and tap [Save]u[OK].・Tapping [Delete all songs] toggles select all/deselect all.Deleting playlist1On the play list screen, tap [Edit].2Select a playlist you want to delete.3Tap [Save]u[OK].・Tapping [Delete all playlists] toggles select all/deselect all.❖Information・"Recently added songs", "Recently played songs", and "Most played songs" playlists cannot be deleted.Socialife is an application with which you can view or manage SNS such as Facebook, Twitter, etc. or news websites etc. collectively.・To use Socialife, an account for Facebook or Sony Entertainment Network is needed.1From the Home screen, tap , then tap [Socialife].・After this step, follow the onscreen instructions.MenuVarious operations can be done from the following menu.SocialifeActivating SocialifeMy StreamDisplay timelines of registered network services and news sites as one. Also, displaying them by category such as Facebook, Twitter, news, etc. is available.FavoritesDisplay SNS messages, news articles, etc. registered to Favorites in My stream.DiscoveryDisplay popular news sites among Socialife users, recommended news sites, etc.SettingsRegister news site, manage sign-in IDs, or display help or information, etc.](https://usermanual.wiki/Sony/PM-0610.User-Manual/User-Guide-2121930-Page-181.png)
![181Apps・Some wireless communications products (mobile phone, data detectors and some others) block satellite signals and also causes instability of signal reception.・Some map displays based on location information (latitude/longitude information) may be not accurate due to some countries' or regions' regulations.■ Where radio waves are difficult to receiveNote that radio waves may not be received or it may be difficult to receive radio waves in the following conditions, since GPS uses radio waves from a satellite.・Inside or immediately under a building・Inside a bag or box・Inside or under a thick covering of trees・In a car, inside a train compartment・When there are obstructions (people or objects) near the terminal・Inside a basement or tunnel, and below the ground or water・In buildings-clustered or residential area・Near a high-voltage cable・Bad weather such as heavy rain or snow❖Note・If some of the GPS functions are not available, or if none of them are, check that your contract includes the use of the Internet, and see "Wireless & networks" (P.193).・NTT DOCOMO is not liable for navigation services or for the accuracy of location services.Activating GPS/Location servicesYou can position current location using GPS, Wi-Fi or information sent from base stations of mobile network.1From the Home screen, tap , then tap [Settings].2Tap [Location services].3Tap or drag right for Access to my location.4Read note on GPS location services and tap [Agree], then read Location consent and tap [Agree].・"GPS satellites" and "Google's location service" are marked.❖Information・The note for location information may appear in Step 4.・Alternatively, drag the status bar downwards and tap [GPS] to turn on/off GPS. To activate, read the note on GPS location services and tap [Agree].](https://usermanual.wiki/Sony/PM-0610.User-Manual/User-Guide-2121930-Page-183.png)
![182Apps・Your location information is sent to Google without specifying who you are. Your location information may be sent even when the application is not running.・"GPS satellites" and "Google's location service" can be set individually.■ Using My location info in Google applicationTo identify your location with a Google application such as Google Maps, you need to allow the Google application to access location information.When you set a Google account, set the location information settings from Privacy in the account. For details on Google account, see "Setting Google account" (P.222).・Turn on the location information service setting beforehand (P.181).1From the Home screen, tap , then tap [Settings].2Tap [Google]u[Location settings].3Tap or drag right of Access to my location.The Google Maps application allows you to view your current location, find other locations and search routes.❖Information・To use Google Maps, enable data traffic (LTE/3G/GPRS) or connect to Wi-Fi.・Google Maps does not cover the whole world.・Only using LTE/3G/Wi-Fi connection may not detect some locations.・Google may provide updated service or function.1From the Home screen, tap and [Maps].・When a message appears, follow the onscreen instructions.・A map screen appears.Finding the current location on the mapYou can detect your current location using location information service.❖Information・To detect current location, enable the location information service (P.181) beforehand, then allow Google application to access the location information (P.182). If you do not set a Google account, on the map screen, tap and [Settings]u[Location settings].Using Google Maps](https://usermanual.wiki/Sony/PM-0610.User-Manual/User-Guide-2121930-Page-184.png)
![183Apps1On the map screen, tap .・The blinking blue mark shows the current location.・If you tap , the terminal's geomagnetic compass links the direction displayed on the map.Zooming in/out on a map1Pinch-in/-out on the Maps screen.❖Information・Alternatively, double-tap the screen to zoom in.・Tapping the screen with 2 fingers also zooms out.Viewing Street ViewStreet View does not cover some areas. For uncovered area, Street View icon appears in light gray.1Touch and hold a spot on the map that you are going to look at in Street View.2Tap the displayed call-out.3Tap [Street view]u[OK].・On the Street View display, tap and tap [Compass mode]. The compass in Street View shows the same direction as the terminal's geomagnetic compass.Searching for a location you want to look at1On the map screen, tap .2Fill out the search bar.・You can enter addresses, city names, business types and institution names (for example, London and art museum).・When a list of places matched to the entered letters appears on the screen, tap a place in the list to check the location on the map.3Tap on the software keyboard.・Search result appears on the map.・When "Did you mean:" appears at the top of the map or "RESULT LIST" appears at the bottom of the map, tap to select the place to view.4Tap a destination.・A detailed information screen appears.❖Information・On the detailed information screen, you can check the route or phone number for the searched location. The items displayed vary depending on the location.・On the map screen, tap to select a category such as "Restaurants", "Cafes" and show it on the map.](https://usermanual.wiki/Sony/PM-0610.User-Manual/User-Guide-2121930-Page-185.png)
![184AppsChanging the layersYou can select information to overlay on the map.1On the map screen, tap .2Tap information to display.・Traffic information and routes are not available in all locations.Getting directionYou can receive detailed guides for your destination.1On the map screen, tap .2Enter a start point in the upper entry field, and an end point in the lower entry field.・Alternatively, tap at the right of the input field to select a Start point and End point from "My current location"/"Contacts"/"Point on map"/"My Places".3Select a transportation from (Driving)/ (Transit)/ (Walking).・When you select transit, you can select preferred transit or conditions.4Tap [GET DIRECTIONS].■Going by car/on footDirection is shown on a map.■Going by public transportTrip list appears. Select a route to check details.❖Information・After Step 4, tap to use easy route search with My Location as Start point.Clearing the MapsClear displayed layers, route search results and some others.1On the map screen, tap and tap [Clear Map].TrafficShow traffic condition.SatelliteDisplay satellite photo.TerrainDisplay geological formation.Transit LinesShow route information.LatitudeJoin Latitude.My MapsView My Maps that you create on a PC. Only viewing : You cannot create My Maps on the terminal.WikipediaDisplay .Tap to display a Wikipedia article related to the location.](https://usermanual.wiki/Sony/PM-0610.User-Manual/User-Guide-2121930-Page-186.png)
![185AppsGoogle Latitude enables you to share location information with your friends on the map.You need to set up a Google account (P.222) and join Latitude and invite a friend who gives his or her location information, or to receive an invitation from him or her.Joining LatitudeYou need to turn on the location information service setting beforehand. For details, see "Activating GPS/Location services" (P.181).1On the map screen, tap [Maps] u[Latitude].・If you do not set Google account, tap [Join Latitude] to display the Google account setting screen. Follow the onscreen instructions.2Tap [MAP VIEW].❖Information・To set Latitude, cancel sharing location data, etc., tap on the map screen, then tap [Settings]u[Location settings] to display a screen for the operation.・For details of Latitude, tap on the map screen, then tap [Help]u[How to]u[Additional Maps features]u[Latitude] to view the help.The terminal has a built-in calendar for the schedule. If you have a Google account etc., you can synchronize the terminal's calendar and web calendar. For details, see "Setting an account" (P.222).・When a Google account is set, tap [Sync Calendar] in the Sync items of Google account (P.223).1From the Home screen, tap , then tap [Calendar].・A calendar screen appears.2Tap any of [Month]/[Week]/[Day].・Tap to move the cursor to date and time set on the terminal. Number displayed on the icon shows the current date.・Flick the calendar left or right to display the next or previous month/week/day according to the view mode.・Pinch out/in on the weekly or daily schedule screen to zoom in/out calendar.Checking where a friend is by Google LatitudeCalendarDisplaying calendar](https://usermanual.wiki/Sony/PM-0610.User-Manual/User-Guide-2121930-Page-187.png)
![186Apps1Tap on the calendar screen.2Enter a name, date and time, location, and description for event.3Tap [Done].❖Information・When you set a Google account, you can select an account to create schedule to in Step 2.・Tap beside "Add reminder" to add a new notification.・Tap in "More" and flick up the screen to set "Repetition", "Attendees", "Time zone", "Show me as:", and "Privacy".Displaying events in Calendar1On the calendar screen, display date or time when event is scheduled.・On the month display screen, tap a date in which event is scheduled.・On the calendar screen, tap and [Agenda] to display a list of events.2Tap an event to view description.❖Information・On the calendar screen, tap and [My calendars] to synchronize with the docomo account. You can view the events created in "Schedule" app in the Calendar.・If you log in to Facebook, tap [Sync Calendar] in "Xperia™ with Facebook" (P.224) to display events in Facebook in the Calendar.Searching events in Calendar1On the calendar screen, tap , then tap [Search].2Enter a keyword and tap on the software keyboard.・Search results appear. Tap an event to view details.Deleting events from Calendar1On the calendar screen, display date or time when event is scheduled.・On the month display screen, tap a date in which event is scheduled.・On the calendar screen, tap and [Agenda] to display a list of events.2Touch and hold an event you want to delete.3Tap [Delete event]u[Delete].❖Information・To delete all events, tap on the Calendar screen, then tap [Settings]u[Delete all events]u[Delete].Creating a schedule in Calendar](https://usermanual.wiki/Sony/PM-0610.User-Manual/User-Guide-2121930-Page-188.png)
![187AppsWhen scheduled time arrives, appears on the status bar.1Drag the status bar downwards.2Tap [Snooze]/[Dismiss].・Tap [Snooze] to show pop-up menu and select snooze interval. After set time elapses, notification appears again.❖Information・Snooze means a function with which reminder once dismissed reactivates after a while.・For an event set attendee by selecting Google account, tap [Respond] displayed on the Notification panel to create and send a mail to the participant.Set Calendar view, way to notify, Default reminder time, phrases for quick responses, etc.1On the calendar screen, tap , then tap [Settings].2Select an item to change.With "Alarm & clock" app, you can set an alarm and use world clock, stopwatch and timer.1From the Home screen, tap , then [Alarm & clock].・Alarm screen appears.■ Alarm screenaClock display・Tap to view date and time (P.225) setting screen.bAdd alarm (P.188)cAlarm listdDisplay clock in full screeneView alarm screenfView world clock (P.189)gView stop watch (P.189)hView timer (P.190)iDeleting alarms (P.188)Canceling reminder or setting snoozeChanging calendar settingsAlarm & clockadbceif g h](https://usermanual.wiki/Sony/PM-0610.User-Manual/User-Guide-2121930-Page-189.png)
![188Apps1On the alarm screen, tap [Add alarm].2Set time etc. and tap [Done].・Tap [Advanced alarm settings] to view all setting items.* If "Style settings" is marked, this setting is disabled. To set "Alarm sound", unmark "Style settings".❖Information・To switch on/off alarm, on the alarm screen, tap or touch and hold an alarmuTap [Turn alarm on]/[Turn alarm off ].・When an alarm is turned on, the line under lights blue.Deleting the alarm1On the alarm screen, tap and mark alarm to delete.2Tap [Delete]u[ Yes ].・The number of marked alarms appears on the right of "Delete".❖Information・Alternatively, on the alarm screen, touch and hold an alarm you want to delete, then tap [Delete alarm]u[Yes] to delete the alarm.Stopping an alarm while the alarm is sounding1While alarm is sounding, drag to the right.❖Information・If you tap [Snooze], the alarm sounds again when the time set in "Snooze duration" (P.188) has passed.Setting alarmTimeFlick up and down on numbers to set time.RepeatSet a day of the week for the alarm.Alarm sound*Set alarm sound.Snooze durationSet time interval to sound the ringtone again after stopping the ringtone.Alarm textEnter texts that appear while alarm is sounding.Style settingsMark the checkbox and tap to set displayed image and sounded alarm while sounding alarm.VibrateSet whether to vibrate at the alarm time.Alarm volumeDrag the slider left or right to adjust the volume level.Alarm in silent modeSet whether to sound alarm even in silent mode.Side keys behaviorSet behavior when pressing m / k while alarm is sounding.Auto silent timeSet time interval until alarm automatically stops.](https://usermanual.wiki/Sony/PM-0610.User-Manual/User-Guide-2121930-Page-190.png)
![189AppsDisplay the date and time in cities around the world.1On the alarm screen, tap "World clock" tab.・World clock screen appears.2Tap [Add city].3Select a city.❖Information・Tap , then flick the city list left or right to check date and time corresponding to the cities.・Time display in cities during day-light saving time may differ from time difference to standard time (GMT) displayed on the screen when adding a city in Step 2.Changing World clockYou can switch, sort or delete Celsius/Fahrenheit displayed on World clock.1On the world clock screen, tap .■Setting home cityTap [Set home city] and select a city.・ is displayed on the city set to home city.■Switching Celsius/FahrenheitTap [Celsius]/[Fahrenheit].■SortingTap [Rearrange] and drag up and down beside added cities, then tap [Done].■DeletingTap [Delete] and mark cities you want to delete, then tap [Delete]u[Yes].・The number of the marked cities appears on the right of "Delete".・Alternatively, on the world clock screen, touch and hold a city you want to delete, then tap [Delete city]u[Yes] to delete.1On the alarm screen, tap "Stopwatch" tab.2Tap [Start].・Timer starts, and appears in the status bar.・Tap [Lap] to measure elapsed time.3Tap [Stop].・Tap [Start] to resume measuring.・Tap [Reset] to delete measured time and lap time.Using World clockUsing Stopwatch](https://usermanual.wiki/Sony/PM-0610.User-Manual/User-Guide-2121930-Page-191.png)
![190Apps1On the alarm screen, tap "Timer" tab.2Tap [Set time].3Flick up and down on numbers to adjust the time and then tap [Done].4Tap [Start].・Timer starts, and appears in the status bar.5Tap [Stop].・Stop sounding alarm after a set time has elapsed.・Tap [Stop] within a set time duration to pause timer. Tap [Start] to resume timer.❖Information・Tap to set time from Timer history.・Tap and select an alarm sound, then tap [Done] to change the alarm sound.・While using a desired application, tap r and to use the timer of "Small apps" (P.56).Move or back up data such as phonebook entries, sp-mode mails, bookmarks, etc. using external memory such as microSD card.・Do not remove the battery or microSD card during backup or restoring. Doing so may damage the terminal data.・If the battery is low, backup or restore may not be done. In that case, charge the terminal and retry to back up or restore.・docomo apps password is required to back up or restore. For details on docomo apps password, see "docomo apps password" (P.214).❖Information・For details on docomo backup, tap , then tap [Help] to view the help.Using Timerドコモバックアップ (docomo backup)](https://usermanual.wiki/Sony/PM-0610.User-Manual/User-Guide-2121930-Page-192.png)
![191AppsIf microSD card is not installed, data such as images and movies are saved to the internal storage. You can back up only data such as images and movies stored in the internal storage. Data stored in microSD card cannot be backed up.1From the Home screen, tap , then tap [ドコモバックアップ (docomo backup)].2Tap [microSDカードへ保存 (save to microSD card)].・When you use for the first time, agree to "License agreement".3Tap [Backup].4Mark the data to back up.・Tap [Select all] to mark all data. Tap [Deselect] to unmark all marked data.5Tap [Start backup]u[OK].6Enter docomo apps password and tap [OK].・Data is backed up in a microSD card.1From the Home screen, tap , then tap [ドコモバックアップ (docomo backup)].2Tap [microSDカードへ保存 (save to microSD card)].・When you use for the first time, agree to "License agreement".3Tap [Restore].4Tap [Select] on data type to restore and mark data to restore, and tap [Select].・Tap [Select latest data] to select the latest data for each data type.5Tap [Add]/[Overwrite] to select restore method and tap [Start restore]u[OK].6Enter docomo apps password and tap [OK].・Backed up data is restored.Backing up Restoring](https://usermanual.wiki/Sony/PM-0610.User-Manual/User-Guide-2121930-Page-193.png)
![192AppsYou can copy contacts data registered in Google account and in the terminal to docomo account.1From the Home screen, tap , then tap [ドコモバックアップ (docomo backup)].2Tap [microSDカードへ保存 (save to microSD card)].・When you use for the first time, agree to "License agreement".3Tap [Phonebook account copy], tap [Select] on Google account contacts you want to copy.4Tap [Overwrite]/[Add].・Phonebook data is copied to docomo account.❖Information・If phonebook item names (e.g. Phone number, etc.) of the other terminal are different from ones of your terminal, the item names may be changed or deleted. Also, some text may be deleted in copied destination, because savable characters in a phonebook entry vary by terminal.・When backing up phonebook entries to microSD card, data without Name cannot be copied.・If microSD card is low on memory, backup may not be done. In that case, delete unnecessary files to make available space.With OfficeSuite, you can view files of Word, Excel, etc. from the terminal or a microSD card.❖Information・Some files may not be viewed properly due to corrupted layouts.1From the Home screen, tap , then tap [OfficeSuite].・When a registration screen appears, follow the onscreen instructions.・OfficeSuite starts.Copying phonebook entries registered in Google account to docomo accountOfficeSuiteStarting OfficeSuite](https://usermanual.wiki/Sony/PM-0610.User-Manual/User-Guide-2121930-Page-194.png)
![193SettingsSettings1From the Home screen, tap , then tap [Settings].■ Setting menu❖Information・Alternatively, from the Home screen, tap and then tap [Settings], or drag the status bar downwards and tap [Settings] to display the Settings screen.You can make settings related to networks such as Wi-Fi, Bluetooth function.Using the Wi-Fi function, you can connect to an access point for your home, company network or public wireless LAN services to use mail and Internet.・Even when Wi-Fi is on, packet communication is available. However, while you connect Wi-Fi network, Wi-Fi comes first.・When a Wi-Fi network is disconnected, connection is automatically switched to a LTE/WCDMA/GSM network mode. Note that packet communication charge may be applied if network connection stays switched.Viewing the setting menuWIRELESS & NETWORKSP. 1 9 3DEVICEP. 2 0 5PERSONALP. 2 1 4ACCOUNTSP. 2 2 2SYSTEMP. 2 2 5Wireless & networksWi-FiP. 1 9 3BluetoothP.198, P.235Data usageP. 1 9 8More... Airplane modeP. 1 9 9VPNP. 2 0 0Tethering & portable hotspotP. 2 0 1Media server settingsP. 2 4 5Mobile networksP.203, P.251NFC/Osaifu-Keitai settingsP. 1 3 3Wi-Fi](https://usermanual.wiki/Sony/PM-0610.User-Manual/User-Guide-2121930-Page-195.png)
![194Settings・Turn the Wi-Fi function to off when you do not use Wi-Fi to cut battery power consumption.・If you start Wi-Fi connection while using Wi-Fi Direct function (P.197) or during Screen mirroring (P.213), Wi-Fi Direct function/Screen mirroring is terminated.Before using Wi-FiTo use Wi-Fi function, turn on Wi-Fi and search available Wi-Fi network, then connect it.・To access the Internet using Wi-Fi function, connect to Wi-Fi network in advance.❖Information・Make sure to receive signal strong enough for using Wi-Fi function. The signal strength of the Wi-Fi network varies by the location of the terminal. Moving closer to the Wi-Fi router might improve the signal reception.■ Reception interference caused by Bluetooth devicesBluetooth devices and wireless LAN (IEEE802.11b/g/n) devices use the same frequency band (2.4GHz). If you use Bluetooth devices near a wireless LAN device, reception interference may occur or the communications speed may lower. Also, you may hear noise or have a connection problem. Communication may be interrupted or sound may be lost while streaming data, etc. In these cases, do the following:・Keep the terminal and Bluetooth device to be connected wirelessly 10 or more meters away from a wireless LAN device.・Within 10 meters, turn off the Bluetooth device to be connected.Turning on Wi-Fi1From the Settings screen (P.193), tap of Wi-Fi or drag it to the right.❖Information・It may take a few seconds before the Wi-Fi connection is on.・Alternatively, drag the status bar downwards and tap [Wi-Fi] to turn on/off Wi-Fi function.Connecting to a Wi-Fi network1From the Settings screen (P.193), tap [Wi-Fi].・Available Wi-Fi networks or secured Wi-Fi networks are displayed.2Select a Wi-Fi network to connect.・To connect to a protected Wi-Fi network, enter the password and tap [Connect].](https://usermanual.wiki/Sony/PM-0610.User-Manual/User-Guide-2121930-Page-196.png)
![195Settings・To connect Wi-Fi network with WPS compatible device, tap , or tap , then tap [WPS Pin Entry]. Follow the onscreen instructions.❖Information・The next time you connect to a Wi-Fi network, the password is saved in the terminal.・If you enter a wrong password (security key) when selecting an access point to connect, any of the following appears.- Saved, Secured with WEP- Saved, Secured with WPA/WPA2- Saved, Secured with 802.1x- Avoided poor Internet connection*- Authentication problem- Limited connectivity* It may take 5 minutes or more to display the message after [Connect] is tapped.Check a password (security key).When any of above messages appears even if you enter a correct password (security key), the correct IP address may not have been acquired. Check the signal status and reconnect.・To use docomo service via Wi-Fi, setting "Wi-Fi option password" is required. To set, from the Settings screen (P.193), tap [docomo service]u[Wi-Fi settings for docomo apps]u[Wi-Fi option password].■ Wi-Fi network status icons on status barThe following icons appear according to the Wi-Fi network connection status.* Without connected to Wi-Fi network, you need to set Wi-Fi Network notification to on beforehand (P.196).Disconnecting a Wi-Fi network1From the Settings screen (P.193), tap [Wi-Fi].2Tap the Wi-Fi network that is currently connected.3Tap [Forget].Wi-Fi network statusWhen you are connected to a Wi-Fi network or when there are Wi-Fi networks available in your vicinity, you can see the status of these Wi-Fi networks. You can also set the terminal to notify you when an unsecured Wi-Fi network is detected.Appears when connected to Wi-Fi network.Appears when communicating via Wi-Fi network.Appears when connected to Wi-Fi network using Auto IP function.Appears when any open network within the service area is detected.*](https://usermanual.wiki/Sony/PM-0610.User-Manual/User-Guide-2121930-Page-197.png)
![196SettingsSetting the Wi-Fi open network notification to ON・You need to turn on the Wi-Fi setting beforehand (P.194).1From the Settings screen (P.193), tap [Wi-Fi].2Tap and [Advanced].3Mark "Network notification".Scanning for Wi-Fi networks manually・You need to turn on the Wi-Fi setting beforehand (P.194).1From the Settings screen (P.193), tap [Wi-Fi].2Tap and [Scan].・Scanning Wi-Fi networks starts.3Tap a Wi-Fi network in the list to connect.Adding a Wi-Fi network manually・You need to turn on the Wi-Fi setting beforehand (P.194).1From the Settings screen (P.193), tap [Wi-Fi].2Tap and enter a network SSID of the Wi-Fi network you want to add.3Tap "Security" setting item and tap a security type of the Wi-Fi network you want to add.・4 options, "None", "WEP", "WPA/WPA2 PSK", or "802.1x EAP", appear.4If required, enter security information for the Wi-Fi network you want to add.5Tap [Save].Viewing detailed information on a connected Wi-Fi network1From the Settings screen (P.193), tap [Wi-Fi].2Tap the Wi-Fi network that is currently connected.・The detailed network information is displayed.](https://usermanual.wiki/Sony/PM-0610.User-Manual/User-Guide-2121930-Page-198.png)
![197Settings❖Information・In Step 1, tap , then tap [Advanced] to enable/disable Auto IP support or check "MAC address" and "IP address".Mark "Avoid poor connections" to use LTE/WCDMA/GSM network mode when Wi-Fi radio waves are weak.Changing Wi-Fi sleep policyYou can choose to disable the Wi-Fi function in the terminal when the screen backlight turns off. You can also set the terminal to always turn on the Wi-Fi function or to always turn it on when the terminal is charged.1From the Settings screen (P.193), tap [Wi-Fi].2Tap and [Advanced].3Tap [Keep Wi-Fi on during sleep].4Tap any of [Always]/[Only when plugged in]/[Never (increases data usage)].❖Information・When a Wi-Fi network is disconnected, connection is automatically switched to a LTE/WCDMA/GSM network mode.Using Wi-Fi Direct compatible deviceYou can connect among the devices compatible with Wi-Fi Direct via Wi-Fi even without configuring access point.・You need to turn on the Wi-Fi setting beforehand (P.194).1From the Settings screen (P.193), tap [Wi-Fi].2Tap and [Wi-Fi Direct].・A list of detected Wi-Fi Direct devices appears.3Select a Wi-Fi Direct compatible device name to connect.・If a note appears, tap [OK].・Tap [Search for devices] to refresh the detection list.・To change the terminal name displayed on the detected Wi-Fi Direct compatible device, tap [Rename device].❖Information・To use the Wi-Fi Direct function, you need an application compatible with Wi-Fi Direct function. The function becomes available when you install a compatible application.・If you start Wi-Fi Direct connection during Wi-Fi connection, Wi-Fi connection is disconnected and switched to packet communication (LTE/WCDMA/GSM).](https://usermanual.wiki/Sony/PM-0610.User-Manual/User-Guide-2121930-Page-199.png)
![198SettingsConnect Bluetooth device wirelessly using Bluetooth function. For details on Bluetooth communication, see "Using Bluetooth function" (P.235).Enable/Disable mobile data communication or set data usage limit.❖Information・You can check communication volume for each application. For some applications, the settings can be displayed.Enabling mobile data communication1From the Settings screen (P.193), tap [Data usage].2Tap of Mobile data communication or drag it to the right.3Read the note and tap [Yes].❖Information・Alternatively, drag the status bar downwards and tap [Mobile data] to turn on/off mobile data communication.Setting data usage limit1From the Settings screen (P.193), tap [Data usage].2Tap [Set mobile data limit] and read the notes, and then tap [OK].・"Set mobile data limit" is marked.❖Information・Note that mobile data communication will be disabled when data usage volume reaches to the limit.・Change the setting value for data usage limit and the value for alert by dragging the right end of each bar in the graph. Alternatively, tap each bar, drag value and tap [Set] to change it.Setting Data usage cycle1From the Settings screen (P.193), tap [Data usage].2Tap "Data usage cycle" setting item and tap the set period/[Change cycle...].・When you tap [Change cycle...], select reset date and tap [Set].BluetoothData usage](https://usermanual.wiki/Sony/PM-0610.User-Manual/User-Guide-2121930-Page-200.png)
![199SettingsPermitting data roaming1From the Settings screen (P.193), tap [Data usage].2Tap and [Data roaming], then read the notes and then tap [OK].・"Data roaming" is marked.Restricting background data1From the Settings screen (P.193), tap [Data usage].2Tap and [Restrict background data], then read the notes and then tap [OK].・"Restrict background data" is marked.❖Information・To restrict use of specified Wi-Fi network, in Step 2, tap and tap [Mobile hotspots], then mark a Wi-Fi network you want to restrict.Displaying Wi-Fi usage status1From the Settings screen (P.193), tap [Data usage].2Tap and mark "Show Wi-Fi usage".・"Wi-Fi" tab is displayed and tap it to check Wi-Fi usage condition.In this mode, the functions of using radio wave transmissions such as calling, accessing to the Internet (including sending/receiving mails), etc. are disabled. It is useful when you want to operate the terminal with no interruption of incoming calls or mails.Turning on Airplane mode1From the Settings screen (P.193), tap [More...].2Mark [Airplane mode].・When Airplane mode is set, appears on the status bar.・When you unmark "Airplane mode", the Airplane mode turns off.❖Information・Alternatively, press and hold P for over a second and then tap [Airplane mode] in the pop-up screen, or drag the status bar downward and tap [Airplane] to set Airplane mode to on/off.・Even if Airplane mode is on, Wi-Fi, Bluetooth function and NFC Reader/Writer, P2P function can be turned on. Be careful not to use Wi-Fi, Bluetooth, NFC Reader/Writer, P2P functions in a place where the use is prohibited such as in a airplane or hospital.Airplane mode](https://usermanual.wiki/Sony/PM-0610.User-Manual/User-Guide-2121930-Page-201.png)
![200SettingsVirtual Private Network (VPN) is a technology to connect to the information in a protected local network from another network. Generally, VPNs are provided to companies, schools and other facilities. A user can access to the information in the local network from outside of the premises.To set up a VPN access from the terminal, you need to retrieve the information related to security from your network administrator. For details, see the following website.http://www.sonymobile.co.jp/support/ (In Japanese only) ❖Information・If you set sp-mode as an ISP, you cannot use PPTP.Adding a VPN1From the Settings screen (P.193), tap [More...]u[VPN].・When the note appears, follow the onscreen instructions to set unlocking method of screen lock. For details, see "Setting screen unlock method" (P.218).2Tap [Add VPN profile].3When an editing screen is displayed, follow the instruction of the network administrator to enter/set required items of VPN settings.4Tap [Save].❖Information・Added VPNs can be edited/deleted.To edit VPNs, touch and hold a VPN you want to change, then tap [Edit profile]. Change the VPN settings as required and tap [Save]. To delete, touch and hold a VPN you want to delete, then tap [Delete profile].Connecting to a VPN1From the Settings screen (P.193), tap [More...]u[VPN].2Tap a VPN to connect to.3Enter required authentication information and tap [Connect].・When you are connected to a VPN, appears in the status bar.Disconnecting a VPN1Drag the status bar downwards.2Tap a notification that indicates VPN connected.3Tap [Disconnect].Connecting to a VPN (Virtual Private Network)](https://usermanual.wiki/Sony/PM-0610.User-Manual/User-Guide-2121930-Page-202.png)
![201Settings❖Information・Alternatively, from the Settings screen (P.193), tap [More...]u[VPN], tap a indication of a connected VPNu[Disconnect] to disconnect VPN.Tethering stands for using mobile devices such as smartphone as modem to allow USB compatible devices or wireless LAN devices to access the Internet.❖Information・Packet communication charge when using tethering varies depending on the charging plan you use. Subscription of packet flat-rate service is highly recommended.・For details on usage charge, see the following website.http://www.nttdocomo.co.jp/english/ ・When the docomo mini UIM card is not inserted, mobile data communication is disabled, or out of service area, USB tethering or Wi-Fi tethering is not available.Setting USB tetheringConnecting the terminal to a USB compatible PC with Micro USB Cable 01 (optional), and using the terminal as a modem, you can connect the PC to the Internet.1From the Settings screen (P.193), tap [More...]u[Tethering & portable hotspot].2Connect the terminal to a PC using a microUSB cable (P.35).・When you connect microUSB cable for the first time, the driver software for the terminal is installed to a PC. Wait for a while until installation is completed.・When "PC Companion software" screen appears on the terminal, tap [Skip].3Tap [USB tethering].4Confirm "Details", then tap [OK].・"USB tethering" is marked.❖Information・System requirements (OS) for USB tethering are as follows.- Microsoft Windows 8- Microsoft Windows 7- Microsoft Windows Vista- Microsoft Windows XP*- Linux* For Microsoft Windows XP, installation of PC Companion is required.・During USB tethering, the terminal storage cannot be mounted with a PC.・For details such as method of USB tethering for other OS, see the following website.http://www.android.com/tether#usb (In Japanese only)Using tethering function](https://usermanual.wiki/Sony/PM-0610.User-Manual/User-Guide-2121930-Page-203.png)
![202SettingsSetting Wi-Fi tethering1From the Settings screen (P.193), tap [More...]u[Tethering & portable hotspot].2Tap [Portable Wi-Fi hotspot].3Confirm "Details", then tap [OK].・"Portable Wi-Fi hotspot" is marked.❖Information・If Wi-Fi tethering starts while connecting to Wi-Fi network, Wi-Fi network is disconnected and automatically connected when Wi-Fi tethering ends. Alternatively, when the terminal and DLNA device are connected via Wi-Fi network, starting/ending Wi-Fi tethering affects Wi-Fi connection.・USB tethering and Wi-Fi tethering can be used at the same time.・Alternatively, drag the status bar downwards to open the Notification panel and tap [Hotspot] to set Wi-Fi tethering function to on/off. When Wi-Fi tethering is ended on the Notification panel, Wi-Fi connection is not automatically connected.・For details on Wi-Fi tethering, see the following website.http://www.android.com/tether#wifiSetting up a portable Wi-Fi hotspotYou can use the terminal as a Wi-Fi access point to connect up to 10 wireless LAN devices to the Internet simultaneously.1From the Settings screen (P.193), tap [More...]u[Tethering & portable hotspot].2Tap [Portable Wi-Fi hotspot settings]u[Configure Wi-Fi hotspot].3Enter a network SSID of the Wi-Fi access point to set.・"Xperia ●_XXXX" is set by default.4Tap "Security" setting item and tap a security type of the Wi-Fi network to set.・"None" and "WPA2 PSK" appear.5Enter security information of the Wi-Fi access point to set as required.6Tap [Save].❖Information・By default, the password is set at random. You can change the password as desired.](https://usermanual.wiki/Sony/PM-0610.User-Manual/User-Guide-2121930-Page-204.png)
![203SettingsAn access point for connecting to the Internet (sp-mode, mopera U) is already registered. You can add or change it if necessary.By default, sp-mode (P.204) is set for the usual access point.Checking the access point in use1From the Settings screen (P.193), tap [More...]u[Mobile networks]u[Access Point Names].・Available access points (APN) appear.・It is recommended that you use the displayed access point without editing.❖Information・If you have several available connections, a marked radio button to the right indicates the active network connection.Setting an access point additionally1From the Settings screen (P.193), tap [More...]u[Mobile networks]u[Access Point Names].2Tap and [New APN].3Tap [Name], enter a name and tap [OK].4Tap [APN] and enter the access point name and tap [OK].5Tap and enter all other information required by your network operator.6Tap and [Save].❖Information・Do not change the MCC/MNC. If you change MCC/MNC to other than the default value (440/10), the set new APN does not appear on the APNs screen. When the set new APN does not appear on the APNs screen, tap to make APN settings with "Reset to default" or "New APN" again.・Note that, when using the prediction conversion by one-byte alphabet entry mode (English mode) with mark in "Auto space" (P.77) on Japanese keyboard settings screen, spaces may be entered automatically when the prediction option is confirmed. In this case, delete spaces.Setting an access point](https://usermanual.wiki/Sony/PM-0610.User-Manual/User-Guide-2121930-Page-205.png)
![204SettingsBy initializing an access point, the default state is restored.1From the Settings screen (P.193), tap [More...]u[Mobile networks]u[Access Point Names].2Tap and tap [Reset to default].sp-mode is ISP for NTT DOCOMO smartphone. In addition to accessing Internet, you can use the mail service using the same address as imode mail (@docomo.ne.jp), etc. sp-mode is a service requiring subscription. For details on sp-mode, refer to NTT DOCOMO website.mopera U is ISP of NTT DOCOMO's Internet connection. If you have subscribed to mopera U, you can use Internet after making the simple settings. mopera U is a service requiring subscription.Setting mopera U1From the Settings screen (P.193), tap [More...]u[Mobile networks]u[Access Point Names].2Mark "mopera U" or "mopera U設定 (mopera U settings)" radio button.・Return to the Home screen and open the Browser. You can enjoy the nice Internet access.❖Information・"mopera U設定 (mopera U settings)" is an access point for setting mopera U. When you use the access point for setting mopera U, packet communication charges for setting do not apply. Note that you can set only the initial setting screen or the change setting screen. For details on mopera U settings, refer to mopera U website.Initializing an access pointsp-modemopera U](https://usermanual.wiki/Sony/PM-0610.User-Manual/User-Guide-2121930-Page-206.png)
![205SettingsYou can use the network services and search for available networks. For Call settings, see "Call settings" (P.101).Set ringtones, operation sound, vibrator, etc.・For silent mode, see "Setting silent mode" (P.41).Adjusting each sound volume1From the Settings screen (P.193), tap [Sound]u[Volumes].・Adjust the volume of following items.- Music, video, games & other media- Ringtone & notifications- Alarms2Drag the slider to the right or left.・Drag the slider to the left for volume down, or to the right for volume up.3Tap [OK].❖Information・Even if alarm volume is set in Volumes, "Alarm volume" (P.188) set in "Alarm & clock" app is given priority.DeviceCall settingsSoundClear Phase™Set sound quality optimized for the built-in speaker.xLOUD™Set audio playback level enhancement technology ("xLOUD") to enjoy powerful sounds with the built-in speaker when playing WALKMAN, YouTube, Album, etc.VolumesP. 2 0 5Phone ringtoneP. 2 0 6Vibrate when ringingP. 2 0 6Notification soundP. 2 0 6Dial pad touch tonesP. 2 0 6Touch soundsP. 2 0 6Screen lock soundSet whether to emit sound for unlocking the screen lock.Vibrate on touchSet whether to vibrate the terminal for some operations such as specified software key operation.](https://usermanual.wiki/Sony/PM-0610.User-Manual/User-Guide-2121930-Page-207.png)
![206SettingsAdjusting the ringtone volume with the volume key1From the Home screen, press up or down of m.・The volume adjustment bar appears, you can adjust the volume up or down.❖Information・You can also press m or P to mute the ringtone for an incoming call.Setting a ringtone/notification sound1From the Settings screen (P.193), tap [Sound]u[Phone ringtone]/[Notification sound].2Select a ringtone or notification sound and tap [Done].❖Information・You can set voice file in ".wav"/".m4a" or in other format which is transferred from Media Go (P.243) or downloaded from the Internet as a ringtone or notification sound.・To set a ringtone or notification sound other than the ones stored by default, tap .・When volume of "Music, video, games & other media" is muted (Volume 0), ringtone or notification sound cannot be heard.Setting vibration when receiving a call1From the Settings screen (P.193), tap [Sound] and mark "Vibrate when ringing".・Ringtone sounds and the terminal vibrates when there is an incoming call.Setting touch tones to ON1From the Settings screen (P.193), tap [Sound].2Mark "Dial pad touch tones"/"Touch sounds".・If you unmark them, any operation tones do not sound when you tap.❖Information・"Dial pad touch tones" is a sound for operations on the dial pad. "Touch sounds" is a sound for selecting menu.・To set the key sound of software keyboard, set from "Setting character entry" (P.74).](https://usermanual.wiki/Sony/PM-0610.User-Manual/User-Guide-2121930-Page-208.png)
![207SettingsSet brightness, orientation of the screen, etc.* Image quality improving procedure for still pictures is effective only for viewing in the album application.Adjusting the screen brightness1From the Settings screen (P.193), tap [Display]u[Brightness].2Drag the slider to the right or left.・Drag the slider to the left for dimmer screen, or to the right for brighter screen.3Tap [OK].❖Information・Mark "Adapt to lighting conditions" to adjust brightness automatically according to the ambient brightness with reference to the manually set brightness.・Drag the status bar downwards and tap [Backlight] to switch the screen brightness to the maximum/dim (approx. 30 % of the maximum brightness).Adjusting white balance1From the Settings screen (P.193), tap [Display]u[White balance].2Drag the slider of "Saturation" or "Hue" to the right or left.・Touch and hold the area displays "Press and hold here to see previous setting" to check the previous setting.3Tap [Done].❖Information・Tap in Step 2 and tap [Default values] to initialize setting.DisplayMobile BRAVIA Engine 2To view photos or movies colorfully and beautifully, set image quality improving procedure (Mobile BRAVIA Engine 2). It adjusts contrast, color shade, etc.*BrightnessP. 2 0 7White balanceP. 2 0 7WallpaperP. 8 9Auto-rotate screenP. 4 0SleepP. 2 0 8Font sizeSet font size.ThemesSet an image for the Home screen, unlock screen, etc.Quick settingsP. 2 0 8Lock screenP. 2 0 8](https://usermanual.wiki/Sony/PM-0610.User-Manual/User-Guide-2121930-Page-209.png)
![208SettingsAdjusting the idle time before the screen turns off1From the Settings screen (P.193), tap [Display]u[Sleep].2Select a time option before the screen back light turns off.❖Information・To turn the screen back light off immediately, press P.Editing quick settings on the Notification panelYou can edit number of quick settings (P.46) or sort the order.1From the Settings screen (P.193), tap [Display]u[Quick settings].■ To select quick settings to be displayed1Mark tools you want to display.・Up to 10 items can be displayed.■ To change order of quick settings1Drag off the quick setting you want to change the order up or down.Changing wallpaper of the unlock screen・Only when "Set all to" or "Lock screen" in Preferred apps settings (P.214) to "Xperia™", and set the screen unlock method (P.218) to "Swipe/Touch", you can change the wallpaper.1From the Settings screen (P.193), tap [Display]u[Lock screen].2Tap [Wallpaper]u[Album]/[Xperia™ wallpapers].・For details on setting procedure, see Step 2 in "Changing wallpaper" (P.89).](https://usermanual.wiki/Sony/PM-0610.User-Manual/User-Guide-2121930-Page-210.png)
![209SettingsCheck memory volume of internal storage, microSD card, and USB storage. And you can delete data in the microSD card and USB storage and format. USB storage is an external memory such as a microSD card connected to the terminal using commercially available reader/writer cable.* Displayed items vary depending on condition of microSD card or USB storage recognition.Formatting microSD card1From the Settings screen (P.193), tap [Storage].2Tap [Erase SD card]u[Erase SD card].・Enter your screen unlock method as required.3Tap [Erase everything].❖Information・Formatting microSD card deletes all the data in it.StorageINTERNAL STORAGETotal spaceCheck memory space for Apps, Pictures, videos, Audio (music, ringtones, etc.), Downloads, Misc. and available space in the internal storage.SD CARD Total spaceCheck available memory space etc. of microSD card.Unmount SD card*Cancel connection of microSD card to remove it safely.Mount SD card*Have microSD card recognized.Erase SD card*P. 2 0 9EXTERNAL USB STORAGETotal spaceCheck available memory space of USB storage.Unmount USB storage*Cancel connection of USB storage to remove it safely.Mount USB storage*Have USB storage recognized.Clear USB storage*P. 2 1 0MISCELLANEOUS Transfer data to SD cardTransfer images, videos, music data in the internal storage to the microSD card.](https://usermanual.wiki/Sony/PM-0610.User-Manual/User-Guide-2121930-Page-211.png)
![210SettingsFormatting USB storage・Insert external memory such as a microSD card into commercially available reader/writer cable and connect the cable to the terminal in advance.1From the Settings screen (P.193), tap [Storage].2Tap [Clear USB storage]u[Erase].・Enter your screen unlock method as required.3Tap [Erase everything].❖Information・Formatting USB storage (external memory such as microSD card) deletes all the data in it.Increasing the available memory of the terminalIf the terminal has a small memory, you can perform the following operations to increase available memory.・In the browser, you can clear all temporary Internet files and browser history information. For details, see "Clearing history" (P.130).・Uninstall programs that you no longer use. For details, see "Deleting installed application" (P.212).You can check battery consumption and set Power Saver or Location-based Wi-Fi.Using Location-based Wi-FiWhen entering to the registered Wi-Fi network area, the terminal connects the Wi-Fi network automatically to reduce the battery power consumption.1From the Settings screen (P.193), tap [Power management].2Tap of Location-based Wi-Fi or drag it to the right.・When Wi-Fi network is not registered, tap [Location-based Wi-Fi]u[Set up Wi-Fi] to connect to Wi-Fi (P.194).Power managementPower SaverSet Power Saver to reduce battery power consumption.Location-based Wi-FiP. 2 1 0BatteryDisplay battery consumption, remaining battery level, etc.](https://usermanual.wiki/Sony/PM-0610.User-Manual/User-Guide-2121930-Page-212.png)
![211SettingsManage and delete installed applications, display memory usage condition, etc. or change the settings.Viewing permitted operation of the applications in the terminalYou can check functions which are permitted to access to each application in the progress of performing, such as network communication function or location information function of the terminal.1From the Settings screen (P.193), tap [Apps].2Tap an application to view.3Flick the screen up to view permitted operations.・If all permitted operations do not appear, tap [Show all].Force-quitting an applicationIf a pop-up window appears to indicate the application does not reply, you can force-quit the application.1From the Settings screen (P.193), tap [Apps].2Tap an application to force-quit.3Tap [Force stop].4Read the notes and then tap [OK].❖Information・When you do not want to force-quite the application, tap [Cancel] and wait for a reply of the application.Deleting all data of the application・Before deleting all installed application data, back up contents related to the application that you want to save including data saved in the application.1From the Settings screen (P.193), tap [Apps].2Tap an application to delete the data.3Tap [Clear data].4Read the notes and then tap [OK].Apps](https://usermanual.wiki/Sony/PM-0610.User-Manual/User-Guide-2121930-Page-213.png)
![212SettingsDeleting installed application・Before deleting installed application, back up contents related to the application that you want to save including data saved in the application.・Some applications cannot be deleted.1From the Settings screen (P.193), tap [Apps].2Tap an application to be deleted.3Tap [Uninstall].4Tap [OK].5When uninstallation is completed, tap [OK].❖Information・Some applications pre-installed in the terminal cannot be uninstalled. For some applications which cannot be uninstalled, disabling is possible (P.212).・Applications downloaded from Play Store are recommended to be deleted from the Google Play screen (P.133).・Applications can be deleted from the Application screen. For details, see "Uninstalling an application" (P.91).Disabling applicationYou can disable some applications which cannot be uninstalled or services. Disabled applications are not displayed on the Application screen and you cannot execute them, but they are not uninstalled.1From the Settings screen (P.193), tap [Apps].2Flick the screen to the left to display "All" tab.3Tap an application to be disabled.4Tap [Disable].5Read the notes and then tap [OK].・To enable again, tap [Enable].❖Information・When you disabled an application, some other applications linked to the disabled application may not be operated correctly. Enable the disabled application again to operate them correctly.](https://usermanual.wiki/Sony/PM-0610.User-Manual/User-Guide-2121930-Page-214.png)
![213SettingsDeleting cache of the application1From the Settings screen (P.193), tap [Apps].2Tap an application to delete cache.3Tap [Clear cache].Deleting settings for activating the applicationYou can delete settings for activating the application and restore to the default.1From the Settings screen (P.193), tap [Apps].2Tap an application to delete its settings.3Tap [Clear defaults].Resetting applicationYou can reset disabling applications (P.212), settings for activating application (P.213), or restricting background data.1From the Settings screen (P.193), tap [Apps].2Tap and tap [Reset app preferences].3Tap [Reset apps].Set preferred application in the terminal. You can also make settings for USB connection or Wi-Fi connection to a PC or other devices.Xperia™About PlayStation CertifiedCheck trademarks of PlayStation.Preferred apps settingsP. 2 1 4Screen mirroring*1Connect to a TV that supports Screen mirroring*2 to display the screen of the terminal.Smart ConnectSet to activate applications automatically when you connect a commercially available earphone, the AC adapter for charging, etc. Also, set how applications operate when activating or deactivating.Start MirrorLink™Set to allow a device compatible with MirrorLink™ to operate the terminal using microUSB cable.Throw settingsPlay various contents in the terminal with other device.USB ConnectivityP. 2 4 2](https://usermanual.wiki/Sony/PM-0610.User-Manual/User-Guide-2121930-Page-215.png)
![214Settings*1 Data with copyright protection cannot displayed.Depending on usage environment, image or sound may be interrupted or stopped.Covering around the Wi-Fi antenna with your hand may affect the quality of communications.If you start Screen mirroring during Wi-Fi connection, Wi-Fi connection is disconnected and switched to packet communication (LTE/WCDMA/GSM).*2 Connection is available only with a device that supports HDCP.Setting preferred appsYou can set for applications (Home app, unlock screen, phonebook app, application for play back videos or music) used in the terminal all at once or individually.1From the Settings screen (P.193), tap [Xperia™].2[Preferred apps settings]uTap any of [Set all to]/[Home screen]/[Lock screen]/[Contacts]/[Player(music and video)].3Tap [docomo]/[Xperia™].・"docomo" or "Xperia™" is set as a using application.❖Information・To set preferred apps all at once, from the Home screen, tap [Preferred apps settings]u[OK].You can set passwords for applications provided by docomo or to use the services supporting AUTO-GPS.PERSONALdocomo serviceApplication managerSet to check update for applications regularly.Wi-Fi settings for docomo appsSet to use docomo service when connecting Wi-Fi.docomo apps passwordSet a password for applications provided by docomo. docomo apps password is set "0000" by default.AUTO-GPSSet to use the services supporting AUTO-GPS.docomo location informationSet location information function for imadoco search, imadocokantan search and Keitai-Osagashi Service.docomo Wi-Fi Easy ConnectionSet the terminal for using docomo Wi-Fi or home Wi-Fi.データ量確認アプリ (Check data volume application)Set totaling cycle or starting/stopping measuring for データ量確認アプリ (Check data volume application).Open source licensesView open source licenses.](https://usermanual.wiki/Sony/PM-0610.User-Manual/User-Guide-2121930-Page-216.png)
![216SettingsProtecting docomo mini UIM card Some functions provided for convenient use of the terminal require the security code to use them. Besides the security code for locking the terminal, the network security code necessary for the network services etc. are available. Make use of the terminal using an appropriate security code according to the purpose.■ Notes on the security codes・Avoid using a number that is easy to guess, such as "birth date", "part of your phone number", "street address number or room number", "1111", and "1234". Make sure to make a note of the security code you set lest you should forget it.・Be very careful not to let others know your security code. If your security code is known by anyone else, DOCOMO shall have no liability for any loss due to any unauthorized use of it.・If you forget your security codes, you must bring your official identification (such as drivers license), the terminal, and docomo mini UIM card with you to the nearest docomo Shop. For details, contact the "General Inquiries" on the last page.・The PUK code is written on the subscription form (copy for customer) handed at the subscription in the docomo Shop. If you subscribed other than docomo Shop, you must bring your official identification (such as drivers license), the docomo mini UIM card with you to the nearest docomo Shop or contact the "General Inquiries" on the last page.Network security codeThe network security code is a 4-digit number necessary for identification or using the docomo Network Services at reception of your request in docomo Shop or at docomo Information Center. It can be set any number at the subscription and also changed later by yourself.You can change your network security code to new one using a PC if you have "docomo ID"/"Password" for "My docomo", the General support site for PC.Alternatively, from the Home screen, tap [dmenu] and [お客様サポート (Customer support)]u[各種お申込・お手続き (Various applications/procedures)] to change the security code yourself.* For information on "My docomo" and "お客様サポート (Customer support)", see the previous page of the last page.](https://usermanual.wiki/Sony/PM-0610.User-Manual/User-Guide-2121930-Page-218.png)
![217SettingsPIN codeYou can set security code which named PIN code to docomo mini UIM card. It is set "0000" at the subscription. They can be changed by yourself.PIN code is a 4- to 8-digit security number (code) that must be entered for user confirmation to prevent unauthorized use by a third party every time you insert the docomo mini UIM card into the terminal or when the terminal is powered on. Entering the PIN code enables making/receiving calls and terminal operation.・If you use a newly purchased terminal with docomo mini UIM card you have been using, use the PIN code set on the former terminal. If you did not change the setting, the code is "0000".・If you enter a wrong PIN code 3 times consecutively, the PIN code is locked and cannot be used anymore. In this case, unlock with "Personal Unblocking Key (PUK code)" (P.217).Personal Unblocking Key (PUK code)The PUK code is an 8-digit number for canceling the locked PIN code. The PUK code cannot be changed by yourself.・If you failed to enter PUK code 10 times consecutively, the docomo mini UIM card is locked. Please contact a docomo Shop.Enabling SIM card lockBy setting PIN (security code) and entering PIN code when powered on, you can protect the docomo mini UIM card from improper use.1From the Settings screen (P.193), tap [Security]u[Set up SIM card lock]u[Lock SIM card].2Enter PIN code and tap [OK].・"Lock SIM card" is marked.❖Information・You can unlock SIM card lock by the same operation.Entering the PIN code when powered on1On the PIN code entry screen, enter the PIN code.2Tap [OK].](https://usermanual.wiki/Sony/PM-0610.User-Manual/User-Guide-2121930-Page-219.png)
![218SettingsChanging the PIN code・You can change only when you activate the SIM card lock.1From the Settings screen (P.193), tap [Security]u[Set up SIM card lock]u[Change SIM PIN].2Enter the current PIN code and tap [OK].3Enter a new PIN code and tap [OK].4Enter a new PIN code again and tap [OK].Unlocking PIN lock1Tap [PUK code] field and enter PUK code.2Tap the [New PIN Code] field and enter a new PIN code and tap [OK].3Enter a new PIN code again and tap [OK].Screen lockYou can secure your data by requiring a screen unlock pattern every time the terminal is turned on or every time it is activated from sleep mode.There are 5 types of screen lock settings: "Swipe/Touch", "Face Unlock", "Pattern", "PIN" and "Password" (P.218).Setting screen unlock method1From the Settings screen (P.193), tap [Security]u[Screen lock].2Tap any of [Swipe/Touch]/[Face Unlock]/[Pattern]/[PIN]/[Password].・When you tap [Face Unlock], follow the onscreen instructions to set face authentication. For unlocking when the Face Unlock cannot be unlocked, "Pattern" or "PIN" is required to select to set.・When you tap [Pattern], follow the onscreen instructions to enter unlock pattern.Set security question and answer in case you forget the pattern.](https://usermanual.wiki/Sony/PM-0610.User-Manual/User-Guide-2121930-Page-220.png)
![219Settings・When you tap [PIN], follow the onscreen instructions to enter 4 - 16 digit numbers. This "PIN" code is different from a PIN code to be set to docomo mini UIM card (P.217).・When you tap [Password], follow the onscreen instructions to enter 4 - 16 digit characters including alphabets.Changing screen unlock method1From the Settings screen (P.193), tap [Security]u[Screen lock].2Enter the current unlock pattern/PIN/password.3Select a new unlock method.・For details, see Step 2 in "Setting screen unlock method" (P.218).Locking the screenOnce screen unlock method (P.218) is set, the screen is locked when the sleep mode is set or P is pressed.Unlocking the screen lock1Press P to turn the backlight on.2Enter unlock screen method.・Enter the set unlock method (Flick or Tap/Face Unlock/Pattern/PIN/Password).If you forget how to unlock■ If you set "Pattern""Incorrect pattern" appears when you enter incorrect unlock pattern 5 times consecutively.・Tap [Next] and "Security question" screen appears. Answer the security question that you set for the unlock pattern setting, and tap [Unlock] to unlock the screen lock.・If you set Google account, on the "Incorrect pattern" screen, tap [Next] to display "Unlock screen" screen.- Mark "Answer question" and tap [Next], and answer the security question, then tap [Unlock] to unlock the screen lock.- Mark "Enter Google account details", tap [Next], and enter Google account and password, then tap [Sign in] to unlock the screen lock.・When setting new unlock pattern after unlocking screen lock, "Screen unlocked" appears. Tap [Yes] to reset unlock pattern.](https://usermanual.wiki/Sony/PM-0610.User-Manual/User-Guide-2121930-Page-221.png)
![220Settings❖Information・Tap [Try again] to retry entering pattern in 30 seconds.・When you tap [Try again]u[Forgot pattern?], "Security question" screen or "Unlock screen" screen appears.・If you set multiple Google accounts, enter one of those accounts and password to unlock the screen.■ If you set "PIN" or "Password"Please contact a docomo Shop.Canceling screen lockYou can cancel screen lock pattern after you set.1From the Settings screen (P.193), tap [Security]u[Screen lock].2Enter the current unlock pattern/PIN/password.3Tap [None].Permitting downloading unknown sources application・Before you can download unknown source's applications, set the terminal to enable downloading.Applications you download may be of unknown origin. To protect your terminal and personal data, only download applications from trusted sources such as the Google Play etc.1From the Settings screen (P.193), tap [Security].2Tap [Unknown sources].3Read the notes and then tap [OK].・"Unknown sources" is marked.You can select language and input method.Language & inputLanguageP. 2 2 1Spell checkerSet spell checker.Personal dictionaryRegister words.DefaultSet input method.Google voice typingP. 7 4Moji-HenshuXperia™ Chinese keyboardXperia™ Japanese keyboardXperia™ keyboardVoice SearchP. 2 2 1Text-to-speech outputP. 2 2 1Pointer speedSet pointer speed of mouse etc.](https://usermanual.wiki/Sony/PM-0610.User-Manual/User-Guide-2121930-Page-222.png)
![221SettingsChanging phone language1From the Settings screen (P.193), tap [Language & input]u[Language].2Select a language and tap [OK].・When you select Japanese, "OK" is displayed, but its display varies by the language you selected.❖Information・If you choose the wrong language and cannot read the menu texts, see the FAQ of the following website.http://www.sonymobile.co.jp/so-02f/faq.html (In Japanese only) Setting Voice Search* If the phone language is set to "English (United States)", "Hotword detection" appears in the list.Text-to-speech settings* Japanese is not supported.Set backup of application etc. or restore the terminal to default by using Google account.LanguageSelect language used for Google voice search.Speech outputSet voice input as always used or for handsfree use only.Block offensive wordsSet whether to display recognized offensive voice results.Download offline speech recognitionDownload voice recognition data for offline use.Google Text-to-speech Engine*Set language for text-to speech and audio synthesis engine to read out text.Pico TTS*Make settings for installed voice synthesis engine.Speech rateSet speed at reading out text.Listen to an examplePlayback sample of audio synthesis.Backup & resetBack up my dataSet to backup applications, settings, data, etc. to Google server.Backup accountSet an account for backup to Google server.Automatic restoreSet to restore backup settings or data when re-installing application.Data transfer modeSet to the mode to transfer the data in the terminal using the docomo shop terminal.Factory data resetP. 2 2 2](https://usermanual.wiki/Sony/PM-0610.User-Manual/User-Guide-2121930-Page-223.png)
![222SettingsResetting the terminalResetting the terminal deletes all data, including downloaded applications and accounts, and resets the terminal back to the initial (default) state. Make sure to back up important data you have on the terminal before you reset the terminal.For the initial settings, see "Initial settings" (P.38).1From the Settings screen (P.193), tap [Backup & reset]u[Factory data reset]u[Reset phone].・Mark "Erase internal storage" to delete all contents (music, photos, videos, etc.) on the internal storage.・Enter your screen unlock method as required.2Tap [Erase everything].・The terminal restarts automatically and the initial setting screen appears.❖Information・While the terminal is restarting or resetting, wait for a while. If the battery pack is removed while restarting or resetting, the terminal may malfunction.Display Setup guide and make the terminal settings.・For details, see "Initial settings" (P.38).You can manage (add or delete) online service accounts or synchronize contacts, messages, etc. saved in online services with the terminal.Setting Google accountYou can create a Google account on your terminal and use Google services such as Gmail, Google Talk, Google Calendar, Google Play, etc.You can set multiple Google accounts on the terminal.1From the Settings screen (P.193), tap [Add account]u[Google].2Follow the registration wizard, set a Google account.・If you have no Google account, create an account.・If you have already the Google account, sign in.Setup guideACCOUNTSSetting an account](https://usermanual.wiki/Sony/PM-0610.User-Manual/User-Guide-2121930-Page-224.png)
![223Settings❖Information・You can use the terminal without creating your Google account, however the services such as Google Talk, Gmail, Google Play, etc. are not available.・To log in, you need a Google account and a password.・When you sign in, "Backup and restore" screen may appear. To back up applications, bookmark settings, etc. using a Google account, mark "Keep this phone backed up with my Google Account" and then tap .・Tap set Google account and synchronize each data from the following items manually.* If a lot of photos are included to Picasa web album used in Google account or web album uploaded by Google+, it may consume a lot of battery power or increase data communication volume during the synchronization.・If you set a Google account and use Google+ in it, "Sync Google+" appears. Tap it to synchronize and display instant upload photos in the Album in the terminal.・Make sure to check if the data connection is available before sign in to the Google account. For checking the data connection status, see "Status icon" (P.43).Setting Facebook accountWhen you register or sign in Facebook, you can display profile information published by online "Friends" to the phonebook.❖Information・If you do not have a Facebook account, you can also create a new account in the following website.http://www.facebook.com 1From the Settings screen (P.193), tap [Add account]u[Facebook].・If you already have a Facebook account and set account from the phonebook etc. of the terminal, you need not add a new account.2Enter your sign in information.・If you have no Facebook account, register an account.・If you have Facebook account, sign in.Sync BrowserSynchronize browser settings saved in Google account such as bookmarks with web function of the terminal.Sync CalendarSynchronize calendar information such as schedule, etc., stored in Google account with Calendar in the terminal.Sync ContactsSynchronize contacts stored in Gmail with the phonebook stored in the terminal.Sync GmailSynchronize contacts stored in Gmail with the Email history stored in the terminal.Sync Google Photos*Synchronize web album Google Photos with album in the terminal.Sync Google Play BooksSynchronize with Google Play Books.Sync Google Play Movies & TVSynchronize with Google Play movies.](https://usermanual.wiki/Sony/PM-0610.User-Manual/User-Guide-2121930-Page-225.png)
![224Settings■ Setting Xperia™ with FacebookSet Facebook account to display in the status bar. Drag the status bar downwards and set "Xperia™ with Facebook" to synchronize functions of applications in the terminal.1Drag the status bar downwards and tap [Xperia™ with Facebook].2Tap [Done].❖Information・Alternatively, from the Settings screen (P.193), tap [Add account]u[Xperia™ with Facebook].・Tap the set account to set the following items.・Tap "Xperia™ with Facebook" account and [Application control settings], then mark each function to synchronize applications in the terminal and Facebook.Setting other accountYou can set docomo account, Email, Corporate (Exchange ActiveSync), etc. other than Google account (P.222) or Facebook account (P.223).1From the Settings screen (P.193), tap [Add account].2Tap an account type.・After this step, follow the onscreen instructions.❖Information・Use docomo account when you use "ドコモバックアップ (docomo backup)" app (P.190) provided by NTT DOCOMO. docomo account is set by default.Removing account1From the Settings screen (P.193), select an account type and then select an account you want to delete.2Tap , then tap [Remove account]u[Remove account].❖Information・A Google account registered by marking "Keep this phone backed up with my Google Account" on the "Backup and restore" screen is registered as a backup account. When a backup account is removed, caution appears on the status bar.・docomo account cannot be deleted.Sync CalendarSynchronize events such as Friends' birthdays, etc., stored in Facebook with Calendar in the terminal.Sync ContactsSynchronize profile of Friends stored in Facebook with the phonebook stored in the terminal.Sync Friends' musicSynchronize music that Friends specified "Like" in Facebook with WALKMAN in the terminal.](https://usermanual.wiki/Sony/PM-0610.User-Manual/User-Guide-2121930-Page-226.png)
![225SettingsSetting Auto-syncSynchronize information of online service with the terminal. You can display and edit information on the terminal or a PC.・You need to set your online service account (Google account, Facebook account, etc.) in the terminal to synchronize in advance.1From the Settings screen (P.193), tap [Data usage].2Tap and [Auto-sync data], then read the notes and then tap [OK].・"Auto-sync data" is marked.❖Information・To change online service items for synchronizing, from the Settings screen (P.193), select an account type. Select an account to change and mark items to be synchronized.❖Note・Setting Auto-sync permits to synchronize data of Gmail, calendar, contacts, etc. in the Google account and profile information published by "Friends" etc. set in the online service automatically. These communications may cause you to pay packet communications charges.・When Auto-sync is not set, synchronize manually. From the Settings screen (P.193), select an account type. Select an account and tap items to be synchronized.Canceling synchronization1Tap during a synchronization.2Tap [Cancel sync].You can change the date and time in the terminal.・To set date/time or time zone manually, unmark "Automatic date & time" or "Automatic time zone" to disable network-provided time/time zone in advance.SYSTEMDate & timeAutomatic date & timeAdjust date and time automatically by using network-provided information.Automatic time zoneAdjust time zone automatically by using network-provided information.Set dateP. 2 2 6Set timeP. 2 2 6Select time zoneP. 2 2 6Use 24-hour formatP. 2 2 6Choose date formatP. 2 2 6](https://usermanual.wiki/Sony/PM-0610.User-Manual/User-Guide-2121930-Page-227.png)
![226Settings❖Information・Correction of the time differences may not be performed correctly depending on the overseas network operator. In that case, set time zone manually (P.226).Setting the date1From the Settings screen (P.193), tap [Date & time]u[Set date].2Drag number to adjust date.3Tap [Done].Setting the time1From the Settings screen (P.193), tap [Date & time]u[Set time].2Drag number to adjust hour and minute.・When you unmark "Use 24-hour format", drag "am" or "pm" to switch AM/PM.3Tap [Done].Setting the time zone1From the Settings screen (P.193), tap [Date & time]u[Select time zone].2Select time zone you want to set.Setting the time format1From the Settings screen (P.193), tap [Date & time].2Mark/unmark "Use 24-hour format".・Mark the checkbox to shift to 24-hour format, and unmark to shift to 12-hour format.Setting the date format1From the Settings screen (P.193), tap [Date & time]u[Choose date format].2Select date format you want to set.You can set user support service which sounds or vibrates according to users operation and call end operation.AccessibilityTalkBackSet user support service (TalkBack).Large textEnlarge text size.Power button ends callSet to end a call by pressing P.Auto-rotate screenP. 4 0Speak passwordsOutput password by voice sound.Text-to-speech outputP. 2 2 1](https://usermanual.wiki/Sony/PM-0610.User-Manual/User-Guide-2121930-Page-228.png)
![227Settings❖Information・When TalkBack is turned on for the first time, a message asking if touch exploration function feature is enabled appears.Touch exploration is a function that reads or displays an explanation for the item you tapped.When touch exploration feature is enabled, you can operate the terminal in the different way from the usual one. To select an item, tap it once and then double-tap it. To drag, trace the screen to desired orientation with 2 fingers.To turn off only Touch exploration, from the Settings menu screen (P.193), tap [Accessibility]u[TalkBack]u[Settings], then unmark "Explore by touch".Make settings for developing applications or set whether to use debug function.1From the Settings screen (P.193), tap [Developer options].2Tap in Developer options or drag it right.3Read the notes and then tap [OK].You can check your own phone number, battery status, legal information, etc.Touch & hold delaySet response time for operation of touching and holding the screen.Enhance web accessibilitySet whether to install script from Google.Developer optionsAbout phoneSoftware UpdateP. 2 6 9Application updateDownload new applications or update applications.StatusCheck your own phone number, battery status, battery level, etc.Legal informationCheck open source license or Google terms of use, etc.Model numberCheck version and number.Android versionBaseband versionKernel versionBuild number](https://usermanual.wiki/Sony/PM-0610.User-Manual/User-Guide-2121930-Page-229.png)
![230File managementUse "File Commander" application to display or manage various data such as still images, videos, music, etc. saved to the terminal or the microSD card.❖Information・When you activate for the first time, a screen for registering name etc. appears. Select "Register later" or "Register now".When you select [Register later] and register to File Commander later, from the Home screen, tap , then [File Commander]u[Help]u[Register].Displaying/Playing file1From the Home screen, tap , then tap [File Commander].・Item list appears.・By default, "Downloads", "Pictures", "Music", "Videos", "Internal storage", "Remote files" are displayed.・When a microSD card is attached, "Sdcard1" appears.2Select an item, then tap a folder as required.3Tap a file you want to use.・The file is displayed/played.Creating new folder1From the Home screen, tap , then tap [File Commander].2Select an item, then tap a folder as required.3Tap [New]u[Folder].4Enter a folder name, then tap [OK].Renaming folder or file1From the Home screen, tap , then tap [File Commander].2Touch and hold a folder or file you want to rename.3Tap [Rename], then enter a folder name or file name.4Tap [OK].File operationsOperating files or folders](https://usermanual.wiki/Sony/PM-0610.User-Manual/User-Guide-2121930-Page-232.png)
![231File managementDeleting folder or file1From the Home screen, tap , then tap [File Commander].2Select an item, then tap a folder as required.3Mark a folder or file you want to delete.4Tap [Delete]u[OK].・Alternatively, touch and hold a folder or file, then tap [Delete]u[OK].Moving/Copying folder or file1From the Home screen, tap , then tap [File Commander].2Select an item, then tap a folder as required.3Mark a folder or file to move/copy, then tap [Cut]/[Copy].4Tap x until the File Commander screen appears.5Tap [Edit]u[Paste] anywhere.1From the Home screen, tap , then tap [File Commander].2Tap [Find] and enter a folder name or file name.・Search suggestions appear as you enter a character.Searching for data](https://usermanual.wiki/Sony/PM-0610.User-Manual/User-Guide-2121930-Page-233.png)
![233Data communication・You can send and receive Phonebook entries, My profile, name card, sp-mode mail, Schedule & memo, still images (.jpeg, .png, .gif, .bmp), videos (.mp4, .3gp) and ToruCa. It may take a time to exchange data depending on the data amount or device of other party.・Some data, such as data with copyright protection, etc., cannot be played back on other devices.・Received data cannot be played back or saved depending on the sender's device, data type or data amount.・The received data is saved on the internal storage.Use the "Infrared" application to send all data of "Phonebook", "sp-mode mail" or "Schedule&Memo". You can also send data one by one or send a still image or a video using the sharing menu of applications such as "docomo phonebook", "Album".■ Sending with "Infrared" application1From the Home screen, tap , then tap [Infrared].2Tap [Send all].3Tap [Phonebook]/[sp-mode mail]/[Schedule&Memo].・When you tap [sp-mode mail], select any of "Inbox"/"Sent"/"Unsent".4Tap [Start].5Enter docomo apps password and tap [OK].6Enter the same authentication password as that of the recipient and tap [OK]u[OK]u[OK].■ Sending with sharing menu of function1Select "Infrared" from the sharing menu of each application.❖Information・My profile (excluding name card) can be sent using infrared communication widget. From the Home screen, tap of (infrared communication widget) and follow the onscreen instructions.・For instructions on sending from the "docomo phonebook" application, see "Sending phonebook entries via infrared communication" (P.110).・For instructions on sending from "Album" application, see "Sharing image files" (P.175).・You cannot send two or more items of My profile, name card, still image, video or ToruCa at a time.Sending data via infrared communication](https://usermanual.wiki/Sony/PM-0610.User-Manual/User-Guide-2121930-Page-235.png)
![234Data communication■ Receiving 1 item1From the Home screen, tap , then tap [Infrared].2Tap [Receive]u[OK].3When receiving is complete, tap [OK]u[OK].■ Receiving all items1From the Home screen, tap , then tap [Infrared].2Tap [Receive all].3Enter docomo apps password and tap [OK].4Enter the same authentication password as that of the sender and tap [OK]u[OK]u[OK]u[OK].❖Information・1 item of data can be received using infrared communication widget. From the Home screen, tap of (infrared communication widget) and follow the onscreen instructions.・When phonebook entries, sp-mode mail and schedule & memo are received, data on the terminal is deleted before saved.・You cannot receive two or more videos at a time.・You may not save received data if the phone memory is full.・A file name may be changed when saving. A file named with 127 characters or more (Unicode) may not be saved properly.Receiving data via infrared communication](https://usermanual.wiki/Sony/PM-0610.User-Manual/User-Guide-2121930-Page-236.png)
![235Data communicationBluetooth function is a technology which enables to connect with Bluetooth device such as PC, handsfree headset wirelessly.To communicate with Bluetooth device, turn Bluetooth function on and pair or connect the terminal and the Bluetooth device.❖Information・By default, Bluetooth function is off. If you turn Bluetooth on and then turn off the terminal, Bluetooth function turns off. When you turn on the terminal again, Bluetooth function turns on automatically.・When you do not use Bluetooth function, turn it off to save the battery.■ Reception interference caused by wireless LAN devicesThe terminal's Bluetooth function and wireless LAN devices use the same frequency band (2.4GHz). If you use the terminal near a wireless LAN device, reception interference may occur or the communications speed may lower. Also, you may hear noise or have a connection problem. In these cases, do the following:・Keep the Bluetooth device 10 meters or more away from a wireless LAN device.・Within 10 meters, turn off either the Bluetooth device or the wireless LAN device.* The terminal does not communicate wirelessly with all types of Bluetooth devices. Bluetooth DUN is not supported.1From the Home screen, tap , then tap [Settings].2Tap in Bluetooth or drag it right.・ appears on the status bar and Bluetooth function turns on.3Tap [Bluetooth].4Tap [Xperia ●].・The terminal becomes detectable by other Bluetooth devices for 2 minutes.❖Information・Alternatively, drag the status bar downwards and tap [Bluetooth] to set Bluetooth function to on/off.Using Bluetooth functionMaking the terminal detectable with the Bluetooth function on](https://usermanual.wiki/Sony/PM-0610.User-Manual/User-Guide-2121930-Page-237.png)
![236Data communicationYou can name the terminal. The name appears on Bluetooth devices when you use the Bluetooth function.1Make sure that the Bluetooth function is on.2From the Home screen, tap and tap [Settings]u[Bluetooth].3Tap and tap [Rename phone].4Enter a name and tap [Rename].To connect the terminal and Bluetooth device, make pair setting for Bluetooth device. When paired and connected, you can make/receive a call with handsfree headset etc., or send/receive data such as image between the terminal and the Bluetooth device.・Once you have made pair setting for the terminal and a Bluetooth device, the setting is saved.・For make pair setting, entering passcode (PIN) may be required. Passcode (PIN) of the terminal is "0000". If you cannot make pair setting when you enter "0000", see the documentation of your Bluetooth device.・Once you made pair settings by entering passcode (PIN), you do not need to enter the passcode (PIN) when connecting with the paired Bluetooth device next time.・For Bluetooth profiles compatible with the terminal, see "Main specification" (P.275).1Make sure that the Bluetooth function is on.2From the Home screen, tap and tap [Settings]u[Bluetooth].3Tap [Search for devices].・A list of detected Bluetooth devices appears.4Tap a Bluetooth device name to pair with the terminal.Entering the terminal nameMaking pair setting for the terminal and Bluetooth device](https://usermanual.wiki/Sony/PM-0610.User-Manual/User-Guide-2121930-Page-238.png)
![237Data communication5Check a passkey on the "Bluetooth pairing request" screen, then tap [Pair].・You can use the Bluetooth device that has been paired.・Some Bluetooth devices make connections continuously after making pair setting.・Authentication passcode (PIN) may be required on the "Bluetooth pairing request" screen.❖Information・Make sure that the Bluetooth function and Bluetooth detection function of the target device are on.・When you make pair setting with the Bluetooth device supporting Secure Simple Pairing (SSP) function, a passkey appears on the screen. Check the passkey and make the pair setting.1Make sure that the Bluetooth function is on.2From the Home screen, tap and tap [Settings]u[Bluetooth].3Tap [Search for devices].・A list of detected Bluetooth devices appears.・Pair with Bluetooth device as required.4Tap the name of Bluetooth device you want to connect.・While connecting to a device, appears in the status bar and the connection status appears under the device name.❖Information・Tap on the name of connected Bluetooth device to check the status of that Bluetooth device or change the settings.1From the Home screen, tap and tap [Settings]u[Bluetooth].2Tap the connected Bluetooth device name.3Tap [OK].・To reconnect, tap the device name.Connecting the terminal with Bluetooth deviceDisconnecting a Bluetooth device](https://usermanual.wiki/Sony/PM-0610.User-Manual/User-Guide-2121930-Page-239.png)
![238Data communication1From the Home screen, tap and tap [Settings]u[Bluetooth].2Tap in a Bluetooth device name to unpair and tap [Unpair].・Connection disconnects and the pair setting is canceled.・Turn the Bluetooth function on before pairing with the other party's Bluetooth device.Receiving data via Bluetooth function1Send data from a Bluetooth device.・ appears on the status bar.2Drag the status bar downwards and tap [Bluetooth share: Incoming file]u[Accept].・When receiving is complete, a message indicating that the data is received appears.Sending data via Bluetooth function1Select "Bluetooth" from the sharing menu of each application.2Tap the other party's Bluetooth device.・When sending is complete, a message indicating that the data is sent appears.❖Information・For instructions on sending from the "docomo phonebook" application, see "Sending phonebook via Bluetooth/Email/Gmail" (P.110).・For instructions on sending from "Album" application, see "Sharing image files" (P.175).Canceling the pair setting of a Bluetooth deviceSending/receiving data using Bluetooth function](https://usermanual.wiki/Sony/PM-0610.User-Manual/User-Guide-2121930-Page-240.png)
![239Data communicationYou can send/receive data to/from a device with NFC such as a mobile phone. If you use the one-touch function with a Sony product with NFC, simple operations allow you to send or receive images, music, photos or videos taken with the terminal.・Enable NFC Reader/Writer, P2P function in advance (P.239).・Place 2 mobile phones in parallel position and point marks to each other. Do not move them until sending/receiving is complete.・Operations to send/receive and available data to send/receive depend on the compatible applications. Follow the onscreen instructions.・If the License agreement screen appears when sending/receiving data, read the content and follow the onscreen instructions.・Even if marks are pointed to each other, sending/receiving may fail. If failed, perform operations of sending/receiving again.・The terminal does not communicate with all NFC devices.・For notes when holding over the other device, see "Notes on holding the mark over the other device such as a reader or device with the NFC module" (P.136).Enabling NFC Reader/Writer, P2P function1From the Home screen, tap , then tap [Settings]u[More...].2[NFC / Osaifu-Keitai settings]u[Reader/Writer, P2P]u[OK].・"Reader/Writer, P2P" and "Android Beam" are marked.・NFC Reader/Writer, P2P function is enabled, and appears in the status bar.Using NFC communicationSending/receiving data by one-touch function](https://usermanual.wiki/Sony/PM-0610.User-Manual/User-Guide-2121930-Page-241.png)
![241External device connectionExternal device connectionBy connecting the terminal and a PC with the Micro USB Cable 01 (optional), the internal storage and a microSD card in the terminal are recognized by the PC and you can operate such as copying, moving, deleting the data.・You may not be able to copy, move, delete, etc. copyrighted data of images, music, etc.❖Information・The following operating systems (OS) are supported.- Microsoft Windows 8- Microsoft Windows 7- Microsoft Windows Vista- Microsoft Windows XP・The terminal is connected by "Media transfer mode (MTP)" which is set by default.Connecting the terminal and a PC using a microUSB cable・For using Mass storage mode (MSC) etc., attach a microSD card to the terminal (P.229).1Connect the terminal to a PC using a microUSB cable (P.35).・When you connect microUSB cable for the first time, the driver software for the terminal is installed to a PC. Wait for a while until installation is completed.・When "PC Companion software" screen appears on the terminal, tap [Skip].■Media transfer mode (MTP)"Internal storage & SD card" appears in the status bar of the terminal. The terminal is displayed on the PC screen as a portable device.You can access the internal storage and a microSD card in the terminal.■Mass storage mode (MSC)"SD card connected" appears in the status bar of the terminal. The terminal is displayed on the PC screen as a removable disc.You can access the microSD card.Connecting to PCConnecting to a PC with microUSB cable](https://usermanual.wiki/Sony/PM-0610.User-Manual/User-Guide-2121930-Page-243.png)
![242External device connection❖Information・Screen that appears when connecting to a PC may vary depending on the operating system (OS) of a PC.・From the Home screen, tap and tap [Settings]u[Xperia™]u [USB Connectivity] to check connection mode and change the settings as follows.・When you connect the terminal to a PC switching USB connection mode to "Mass storage mode (MSC)", you cannot access the microSD card on the terminal. Some functions using microSD card for the applications such as "Camera" or "Album" may not be available.・When the terminal is connected to a PC, charging starts automatically. For details, see "Charging with a PC" (P.35).・Install PC Companion by tapping [Install] on the "PC Companion software" screen to perform software update of the terminal on the connected PC (P.272). Also, you can use the following applications for managing media files, making backup files, etc. by connecting to a PC. For details, check PC Companion screen after installation.Disconnecting the microUSB cable safely・Do not disconnect the microUSB cable during data transferring. Data may be damaged.■ Media transfer mode (MTP)1Confirm that it is not transferring data, disconnect the microUSB cable.■ Mass storage mode (MSC)1Drag the status bar downwards.2Tap [SD card connected].・"SD card disconnected" appears in the status bar.3Disconnect the microUSB cable.Install PC CompanionDisplay PC Companion installation wizard when connected to a PC (P.272).USB connection modeSwitch USB connection mode to "Media transfer mode (MTP)"/"Mass storage mode (MSC)" when connecting to a PC.TRUSTED DEVICESConnect the terminal and a host device in a pair via Wi-Fi network (P.243).Support ZoneUpdate software of the terminal by connecting to a PC (P.272).Contacts SetupCopy the contacts data of the mobile phone previously used to the terminal.Media GoP.243Sync ZoneSynchronize phonebook or calendar between a PC or Google and the terminal.Back up & RestoreBack up the terminal data or move the data to another terminal.File ManagerCheck file type, update time, location, etc. on the terminal.](https://usermanual.wiki/Sony/PM-0610.User-Manual/User-Guide-2121930-Page-244.png)
![243External device connectionThe Media Go computer application helps you transfer and manage media content in the terminal and PC.With Media Go, you can load music from a CD to a PC and transfer to the terminal.・You can install Media Go from PC Companion. Activate PC Companion installed in a PC and install Media Go with "Sony PC Companion" screen. For information on how to install PC Companion, see "When PC Companion is not installed on your PC" (P.272).・To learn more about how to use the Media Go application, click "Help" on the Media Go window on a PC and then click "Media Go Help".❖Information・You can also download Media Go from the following website.http://mediago.sony.com/enu/features If the terminal and a PC* are connected in a pair on a Wi-Fi network, automatic connection/disconnection of internal storage of the terminal with a PC is enabled when the terminal user comes in and out of the Wi-Fi area. You can easily access to files in the internal storage of the terminal from a connected PC.* Use Microsoft Windows 7 or Microsoft Windows 8 to make a pair setting. Pair setting cannot be made under Microsoft Windows XP, Microsoft Windows Vista or other OS.1Connect a PC you want to set in a pair to a Wi-Fi network.2Connect the terminal to a Wi-Fi network (P.194).3Connect the terminal to a PC using a microUSB cable.・When "PC Companion software" screen appears on the terminal, tap [Skip].4Make sure that the terminal is displayed as a portable device on "コンピュータ (Computer of the PC screen)".Using Media Go Connecting the terminal to a PC on a Wi-Fi network](https://usermanual.wiki/Sony/PM-0610.User-Manual/User-Guide-2121930-Page-245.png)
![244External device connection5Right-click the portable device icon, then click "ネットワーク構成 (Network composition)".6Click "次へ (Next)".7On the pop-up screen of the terminal, tap [Pair].8On the "ポータブルデバイスのネットワーク構成 (Network composition of the portable device)" screen of the PC, click " 完了 (Done)".9Disconnect the microUSB cable.10From the Home screen, tap and tap [Settings]u[Xperia™]u[USB Connectivity]u"Host name" (PC name) in the "TRUSTED DEVICES" field.11Tap [Connect].・The terminal and the PC are connected in "Media transfer mode (MTP)" on a Wi-Fi network, and you can exchange data files.❖Information・From the Home screen, tap and tap [Settings]u[Xperia™]u[USB Connectivity] to display "Host name" (PC name) in the "TRUSTED DEVICES" field. To cancel connection setting, tap the host name and [Forget]. Until "Forget" is tapped, the connection setting retains even if you connect/disconnect repeatedly by coming in and out of a Wi-Fi area.・If the privacy separator function for Wi-Fi network (access point) is enabled, pair setting cannot be made.Using Wi-Fi function, you can share media files with other client (DLNA : Digital Living Network Alliance) devices.Set Wi-Fi connection (P.194) with another client device in advance.Connecting to DLNA deviceSharing a file with DLNA device](https://usermanual.wiki/Sony/PM-0610.User-Manual/User-Guide-2121930-Page-246.png)
![245External device connectionSetting Media server1From the Home screen, tap , then tap [Settings]u[More...].2Tap [Media server settings].・Media server settings screen appears. You can set the following items.❖Information・On the Media server settings screen, tap and [Wi-Fi settings] to set Wi-Fi connection.Playing media files in the DLNA device with the terminalYou can share media files on the terminal and DLNA device using Media server function.・Connect a DLNA device and the terminal via the same Wi-Fi network, and set the permission of access from the terminal for the device in advance.1From the Home screen, tap , then tap [Album]/[Movies]/[WALKMAN].2Tap [My albums]/[Devices]/[My music].3Select a device name to connect, and select a folder.4Tap a media file to play it.Playing a media file in the terminal with a DLNA deviceYou can play a media file in the terminal with a DLNA device using Throw function.・Connect a DLNA device and the terminal via the same Wi-Fi network in advance.・Setting a permission of access from the terminal in advance may be required on a DLNA device.1From the Home screen, tap , then tap [Album]/[Movies]/[WALKMAN].2Tap a file you want to play.3Tap and [Throw].・A device list appears.4Tap a device on the device list.・The file is played by a DLNA device.SO-02FChange server nameRename the terminal (server) displayed on a client device.Share contentSet to connect from a client device to the terminal via Wi-Fi.PENDING DEVICESManage client devices waiting access permissions.REGISTERED DEVICESManage client devices registered to the terminal.](https://usermanual.wiki/Sony/PM-0610.User-Manual/User-Guide-2121930-Page-247.png)
![246External device connectionThis terminal supports MHL connection. To connect to an MHL compatible TV, insert a commercially available MHL cable into the microUSB jack of the terminal and the MHL jack of the TV.To connect to an HDMI compatible TV, use a commercially available HDMI connector (MHL adapter) and an HDMI cable etc. to connect to the terminal.Connect to a TV to display photos and videos on the TV screen.1Connect the terminal with the Home screen or Application screen displayed to a TV using an MHL cable.■When the Home screen is displayed・Activate TV launcher automatically.■When Application screen is displayed・, appears on the status bar. Also, drag the status bar downwards and tap [TV launcher] to activate TV launcher.2Switch the TV to MHL input mode.・The screen of the terminal is shown on the TV screen.3Flick an icon left or right to select application you want to use.❖Information・While MHL is connected, drag the status bar downwards and tap [MHL connected] to make output settings or check using a TV remote control etc.・On the TV launcher screen, select an album art in WALKMAN at the upper left to display WALKMAN screen.・On the TV launcher screen, Tap [Home] to display the Home screen of the terminal.・On the TV launcher screen, tap [Add] or and tap [Add], then select the desired shortcut to add to the TV launcher screen.・On the TV launcher screen, tap and [Rearrange] to rearrange shortcuts on the TV launcher screen.・On the TV launcher screen, tap and [Delete] to delete shortcuts on the TV launcher screen.・Removing the MHL cable from the terminal severs connection, however, TV may remain to MHL input mode or HDMI input mode. Follow the instructions on the TV to switch to digital terrestrial television mode, etc.・When you do not use MHL connection, remove the MHL cable or HDMI adapter and cancel MHL connection. If the HDMI cable remains connected, the battery may be consumed quickly.・The terminal does not support resolution 720×576p (50Hz) for MHL output to TV.Connecting to other devicesConnecting TV and activating application from TV launcher](https://usermanual.wiki/Sony/PM-0610.User-Manual/User-Guide-2121930-Page-248.png)
![248International roamingInternational roamingWith the international roaming (WORLD WING), you can use the terminal without changing phone number or mail address in the service area of the overseas network operator affiliated with DOCOMO. You do not need to change the settings of call and SMS.■ Supporting networksThe terminal is Class 4. The terminal works in a 3G roaming area and GSM/GPRS service area. Services are also available in countries and areas supporting 3G 850MHz/GSM 850MHz. Check available areas. Use 3G network or GSM/GPRS network overseas because Xi is not available overseas.■ Before using the terminal overseas, refer to the followings.・"Mobile Phone User's Guide [International Services]"・DOCOMO International Services website❖Information・For Country codes, International call access codes, Universal number international prefix, supported countries/areas and network operators, refer to "Mobile Phone User's Guide [International Services]" or DOCOMO International Services Website.* To use data communication during roaming, mark "Data roaming" checkbox in Mobile network settings (P.251).❖Information・Some services are not available depending on the overseas network operator or network.Overview of International roaming (WORLD WING)Available servicesMain communication services 3G 3G 850 GSM (GPRS)Phone○○○Message (SMS)○○○Email*○○○Browser*○○○](https://usermanual.wiki/Sony/PM-0610.User-Manual/User-Guide-2121930-Page-250.png)
![250International roamingWhen you arrive overseas and turn on the terminal, an available network is automatically set.ConnectivityWhen you have set "Search mode" to "Automatic" in "Service providers" settings, optimized network is automatically selected (P.251).When you use a network operator of a country/region covered by the flat-rate service, you can use the service with flat-rate packet communication charges overseas up to the specified upper limit per day. To use this service, subscription of packet flat-rate service in Japan is required. For details, refer to "Mobile Phone User's Guide [International Services]" or DOCOMO International Services Website.DisplayDuring international roaming, appears on the status bar.・You can confirm the name of the connected network operator on the Notification panel.❖Note・While appears on the status bar, packet communication is available. Note that packet communication charge may become high.Date & time settingsWhen "Automatic date & time", "Automatic time zone" in "Date & time" are marked, the date, time and time differences of the terminal clock are corrected by receiving the information related to time and time differences from the network of overseas network operator you connect to. ・Correction of the time/time differences may not be performed correctly depending on the network of overseas network operator. In that case, set time zone manually.・Timing of correction varies by the overseas network operator.・Date & time (P.225)About inquiries・For loss or theft of the terminal or docomo mini UIM card, immediately contact DOCOMO from the spot to take the necessary steps for suspending the use. For inquiries, refer to the last page. Note that you are still liable for the call and communication charge incurred after the loss or theft occurred.・For using from land-line phone, entering "International call access code" or "Universal number international prefix" for the country is needed.After arriving overseas](https://usermanual.wiki/Sony/PM-0610.User-Manual/User-Guide-2121930-Page-252.png)
![251International roamingAfter returning to JapanWhen you return to Japan, the terminal is connected to DOCOMO network automatically. If connection is failed, perform the following operations.・Set "Network Mode" to "LTE (preferred)/WCDMA/GSM" (P.251).・Set "Search mode" to "Automatic" in "Service providers" settings (P.251).By default, the terminal automatically searches available network and connect to it. To switch network manually, set as follows.Setting network mode1From the Home screen, tap , then tap [Settings].2Tap [More...]u[Mobile networks]u[Network Mode].3Select a network mode you use.・You can select from "LTE/WCDMA" "GSM only" and "LTE (preferred)/WCDMA/GSM". If you select "LTE (preferred)/WCDMA/GSM" to switch available network automatically.Setting a network operator1From the Home screen, tap , then tap [Settings].2Tap [More...]u[Mobile networks]u[Service providers].・If a note appears, tap [OK].3Tap [Search mode]u[Manual].・To display available networks, tap [Search networks].4From "AVAILABLE NETWORKS", mark a network to use.❖Information・If you cannot search networks, disable mobile data communication (P.198) and then search again.・If you set a network manually, the terminal is not reconnected to another network automatically even if you move out of the network area.・To return to "Automatic", tap [Automatic] in Step 3.Setting data roaming1From the Home screen, tap , then tap [Settings].2Tap [More...]u[Mobile networks].3Tap [Data roaming].4Read the note and tap [Yes].・"Data roaming" checkbox is marked.Settings for overseas use](https://usermanual.wiki/Sony/PM-0610.User-Manual/User-Guide-2121930-Page-253.png)
![252International roamingWhen you arrive overseas and turn on the terminal, an available network is automatically set.・Check that the battery and signal levels are high enough.・Depending on the network operator, even if the Caller ID notification is active, the caller ID may not be notified or appear properly.In this case, calls cannot be made from the call log.You can make a call from overseas using the international roaming service.・You can easily make international calls from the country you stay to Japan or to other countries by entering prefix "+" and then the country code and phone number.1From the Home screen, tap , then tap "Dial" tab.2Dial + (touch and hold [0])uCountry codeuArea code (City code)uEnter a phone number.・If the area code begins with "0", omit "0". However, "0" may be required to dial to some country or area such as Italy.・To call an overseas "WORLD WING" user, enter "81" (Japan) for the country code.3Tap .4When the call is finished, tap [End call].❖Information・During international roaming, if you make an international call to Japan using "Phone" application, the "International dialing assist" screen appears. You can make a call without entering country code from that screen.For details on International dialing assist, see "Setting international dial assistance" (P.255).Making/receiving calls in the country you stayMaking a call to outside country you stay (including Japan)](https://usermanual.wiki/Sony/PM-0610.User-Manual/User-Guide-2121930-Page-254.png)
![253International roamingYou can make a call by entering the phone number of the other party's land-line phone or mobile phone in the same way you do in Japan.1From the Home screen, tap , then tap "Dial" tab.2Enter a phone number.・To make a call to land-line phone, enter the area code (city code) + other party's phone number.3Tap .4When the call is finished, tap [End call].When the other party uses international roaming service, make a call as an international call to Japan even when you stay in the same country as the other party.You can receive a call using the international roaming service.1While receiving a call, touch and hold (left) and drag it to (right).2When the call is finished, tap [End call].❖Information・When you received a call during the international roaming, regardless of which country the call is from, it is forwarded internationally from Japan. A caller is charged for a call fee to Japan, and the receiver is charged for a reception fee.■ Having the other party call you・Having someone make a call from Japan to the country you stayTo have the other party make a call from a land-line phone or mobile phone in Japan to the terminal in the country you stay, the other party only needs to dial the phone number as in Japan.Making a call within the country you stayMaking a call to WORLD WING user overseasReceiving a call in the country you stay](https://usermanual.wiki/Sony/PM-0610.User-Manual/User-Guide-2121930-Page-255.png)
![254International roaming・Having someone make a call from other than Japan to the country you stay.You have to receive a call through Japan no matter where you are; therefore, the other party needs to enter the international call access code and "81" (Country code of Japan).International access code - 81 - 90 (or 80) - XXXX - XXXXMake settings for using international roaming or international calls.Set restricting incoming calls overseas or using roaming guidance.・For some overseas network operators, settings may not be made.Restricting incoming calls for roaming1From the Home screen, tap , then tap .2Tap [Call settings]u[Roaming settings].3Tap [Restricting incoming calls].・Select items you want to use.Setting incoming notification on roaming1From the Home screen, tap , then tap .2Tap [Call settings]u[Roaming settings].3Tap [Incoming notification on roaming].・Select items you want to use.International roaming settingsSettings for making/receiving calls overseasActivate restrictingTap "Restricting all incomings" or "Restricting incoming of video call/64K data", enter the network security code, and tap [OK].Deactivate restrictingEnter the network security code and tap [OK].Check settingsCheck the current service settings.Activate incoming call notificationTap [OK] to activate roaming incoming call notification.Deactiv. incoming call notificationTap [OK] to deactivate roaming incoming call notification.Check settingsCheck the current service settings.](https://usermanual.wiki/Sony/PM-0610.User-Manual/User-Guide-2121930-Page-256.png)
![255International roamingSetting roaming guidance1From the Home screen, tap , then tap .2Tap [Call settings]u[Roaming settings].3Tap [Roaming guidance].・Select items you want to use.Setting international dial assistance1From the Home screen, tap , then tap .2Tap [Call settings]u[Roaming settings].3Tap [International dial assist].・Select items you want to use.Settings Network service (overseas)Set network service such as voice mail from overseas.・If you make the settings overseas, you are charged a call fee to Japan from the country you stay.・For some overseas network operators, settings may not be made.1From the Home screen, tap , then tap .2Tap [Call settings]u[Roaming settings].3Tap [Network service].・Select items you want to use. You need to set "Remote operation" to activate (P.102).Activate roaming guidanceTap [OK] to activate roaming guidance.Deactivate roaming guidanceTap [OK] to deactivate roaming guidance.Check settingsCheck the current service settings.Auto conversionInternational prefix or country code is automatically added.Country codeTap [OK] to select a country code which will be used for auto conversion.International prefixTap [OK] to select an international prefix which will be used for auto conversion.](https://usermanual.wiki/Sony/PM-0610.User-Manual/User-Guide-2121930-Page-257.png)
![256International roaming* Follow the voice prompts to operate.Voicemail(charged)Activate serviceTap [OK].*Deactivate serviceTap [OK].*Play messagesTap [OK]. After this step, follow the voice prompts to play the message.SettingsTap [OK].*Ring time settingTap [OK].*Incoming call notific.(charged)Tap [OK].*Caller ID request (charged)Tap [OK].*Roaming guidance (charged)Tap [OK].*Remote operation (charged)Tap [OK].*Call forwarding (charged)Activate serviceTap [OK].*Deactivate serviceTap [OK].*Check settingsTap [OK].*](https://usermanual.wiki/Sony/PM-0610.User-Manual/User-Guide-2121930-Page-258.png)
![259Appendix/IndexPower discontinuity/rebooting occurs.・If terminals of battery pack is soiled, connection gets worse and it may cause power to be turned off. When it is soiled, clean the terminals of the battery pack with a dry cotton swab etc.Operations are not possible when tapping or pressing keys.・Check if the power is turned off.→P.36・Check if you activate the screen lock.→P.218・When you cannot cancel the screen lock by flicking up or down (swipe) on the unlock screen, Explore by touch of TalkBack may be set to On. If Explore by touch of TalkBack is enabled, flick (swipe) the screen up or down with 2 fingers.→P.227The screen reacts slowly when you tap or press keys.・When large amount of data is saved in the terminal or transferring large-size data between the terminal and microSD card, the reactions on the screen may be delayed.The docomo mini UIM card is not recognized.・Check if the docomo mini UIM card is attached in the right direction.→P.30The clock is not on time.・The clock time may become wrong while turning on the power for a long time. Check if "Automatic date & time" and "Automatic time zone" are set to on and turn the power off and on in a place with strong radio wave conditions.→P.225The terminal operation is unstable.・Instability may be caused by applications that you installed after purchasing the terminal. If the symptom is improved when you boot the terminal in safe mode (near default state), uninstalling the installed application may improve the symptom.To boot the terminal in safe mode, press and hold P for over a second with the terminal OFF until XPERIA logo appears, and then touch and hold m at the bottom. When safe mode is booted, "Safe mode" is displayed at the lower left of the screen.To exit the safe mode, turn power OFF and then ON.With the power on, press P for over a second, then touch and hold [Power off] and tap [OK] to restart the terminal in Safe mode.* Back up the necessary data before using safe mode.](https://usermanual.wiki/Sony/PM-0610.User-Manual/User-Guide-2121930-Page-261.png)
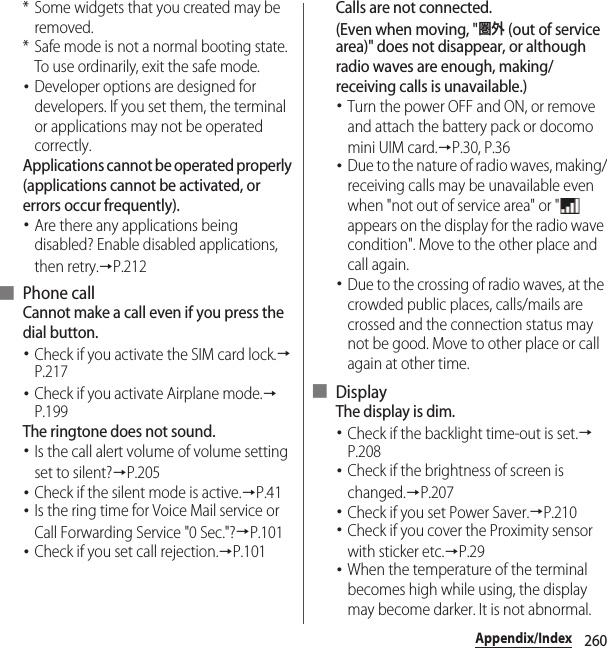
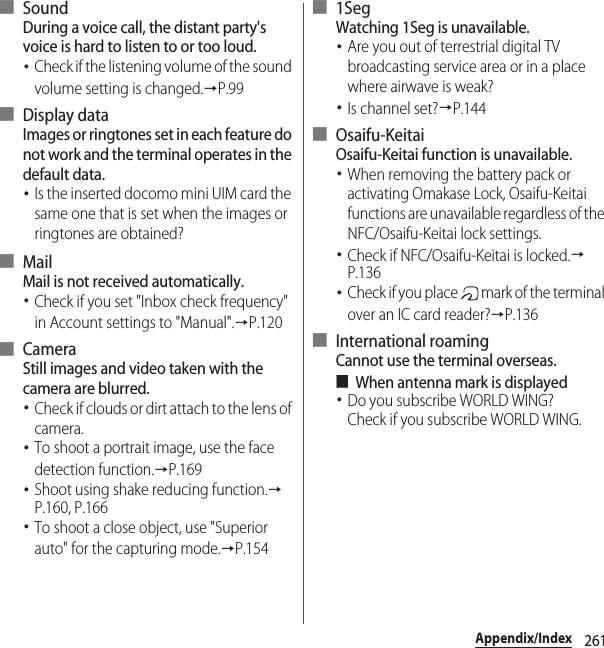
![262Appendix/Index■Out of service area indicator appears・Check if you are out of the international roaming service area or in an area with poor signal strength. Check if the service area and network operator are available, referring to "Mobile Phone User's Guide [International Services]" or DOCOMO International Services website.・Change the network settings or overseas network operator settings.Set "Search mode" to "Automatic" in "Service providers".Set "Network Mode" to "LTE (preferred)/WCDMA/GSM".→P.251・Turning off the terminal and then turning on again may work for the restoration.→P.36Cannot perform data communication overseas.・Mark "Data roaming".→P.251The terminal suddenly became unavailable while using overseas.・Check if usage amount exceeds the limit of maximum charges for use.For use of "International roaming (WORLD WING)", the limit of maximum charges for use is set in advance. If exceeding the limit of maximum charges for use, pay the charges.Cannot receive calls overseas.・Is "Restricting incoming calls" set to "Activate restricting"?→P.254No caller ID is notified/A notified caller ID is different from that of the caller/Functions for using contents saved in phonebook or those using Caller ID notification do not operate.・Even if a caller notifies its caller ID, it is not displayed on the terminal unless the network or network operator notifies it. And a different caller ID may be notified depending on the network or network operator you use.■ Data managementData transfer is not performed.・Check if USB hub is used. If you use USB hub, operations may not be performed correctly.Data saved in microSD card is not displayed.・Remove the microSD card and insert it again.→P.229When trying to display an image, "×" appears instead of it.Or "×" appears for the demo play or the preview function.・"×" may appear instead of destroyed image data.](https://usermanual.wiki/Sony/PM-0610.User-Manual/User-Guide-2121930-Page-264.png)
![265Appendix/IndexBy sharing screens of your terminal with NTT DOCOMO, you can receive technical support to make settings (in Japanese only).・This service is not available when your docomo mini UIM card is not inserted, during international roaming, or in Airplane mode.・Smartphone Anshin Remote Support is a service requiring subscription.・Some operations and settings are not supported.・For details on Smartphone Anshin Remote Support, refer to NTT DOCOMO website.1Call スマートフォン遠隔サポートセンター (Remote support center for smartphone).■スマートフォン遠隔サポートセンター (Remote support center for smartphone) 0120-783-360Business hours: 9:00 a.m. to 8:00 p.m., open all year round2From the Home screen, tap , then tap [遠隔サポート (Remote support)].・When you use for the first time, agree to "ソフトウェア使用許諾書 (License Agreement)".3Enter connection number notified by DOCOMO.4Remote support starts when you are connected.Smartphone Anshin Remote Support](https://usermanual.wiki/Sony/PM-0610.User-Manual/User-Guide-2121930-Page-267.png)

![270Appendix/Index・If software update is not needed, "No update is needed." appears.・During international roaming or when the terminal is out of service area, "When docomo network is not available, or during roaming, software update is not available even if Wi-Fi is connected." or "When docomo network is not available, or during roaming, install cannot be started even if Wi-Fi is connected." appears. The same messages appear even while connecting via Wi-Fi.・SMS sent during software update is stored in the SMS center.・When updating software, your private information concerning SO-02F (model, serial number, etc.) is automatically sent to the server for software update managed by DOCOMO. DOCOMO does not use the sent information for purposes except software update.・When software update has failed, the terminal may not activate or "Update failed." appears and all operations may become unavailable. In that case, please bring the terminal to DOCOMO-specified repair office.・While updating software, do not activate other applications.Update file is automatically downloaded and software is updated at the specified time.Automatic update setting・The settings of Software Update is set to "Automatic Update" by default.1From the Home screen, tap and tap [Settings]u[About phone]u[Software Update].2Tap [Configure the software update].3Tap [Automatic Update]/[Manual Update].When software update is necessaryIf the update file is downloaded automatically, appears on the status bar.・When the rewrite start time is reached with displayed, software is automatically rewritten. When the rewrite start time is not set, software is automatically rewritten between 2 a.m. and 5 a.m.1Drag the status bar to tap notification of Software update.・Rewriting time appears.Updating software automatically](https://usermanual.wiki/Sony/PM-0610.User-Manual/User-Guide-2121930-Page-272.png)
![271Appendix/Index2Perform a target operation.・[OK] : Go to the Home screen. Updating starts when the preset time is reached.・"Set Time" : Reserved update→"Reserving software update" (P.272)・"Start update" : Update immediately→"Updating software immediately" (P.271)❖Information・If the software is not updated when the update notification is received, appears on the status bar to notify.・If software update at the preset time could not be performed, the software update will be performed at the same time the following day.・Software cannot be updated automatically when the Auto-update setting is set to "Manual Update" or while updating software by Now update.Updating software immediatelySoftware update starts immediately.・There are 2 ways to activate software update: activating from Software update notice screen and activating from the menu.1From the Home screen, tap and tap [Settings]u[About phone]u[Software Update].2[Start the software update]uTap [ Yes ].・For activating from Software update notice screen, display the Software update notice screen and tap [Start update].・"Ready for update. Please refrain from starting other application." is displayed, then rewriting starts automatically. Tap [OK] to start rewriting automatically.・While updating the software, all key operations become disabled. Also, updating cannot be canceled.・When the software update is complete, the terminal restarts and the Home screen is displayed.❖Information・If software update is not needed, "No update is needed." is displayed.■ Post-update display appears on the status bar. Drag the status bar downwards and tap the notification, a message indicating that software update is complete appears.](https://usermanual.wiki/Sony/PM-0610.User-Manual/User-Guide-2121930-Page-273.png)
![272Appendix/IndexReserving software updateYou can preset time to update the software if you want to specify another time for installing the update file.1Display the Software update notice screenuTap [Set Time].2Set a timeuTap [Set].■ When the reserved time is reachedWhen the reserved time is reached, "Ready for update. Please refrain from starting other application." appears, then rewriting starts automatically.❖Information・While updating the software, all key operations become disabled and updating cannot be canceled.・If software update could not be started at the preset time, the software update will be performed at the same time the following day.・When an alarm etc. is set at the same time as the reserved time, priority will be given to the software update.・If SO-02F is turned OFF at the reserved time, the software update starts at the same time as the reserved time after the terminal is turned ON.・If (Software update was suspended Please check the remaining internal storage capacity and retry.) appears on the status bar during software update, make sure that sufficient memory remains on the phone memory and retry to update.・If (Software update was suspended Please check the status of the handset and retry.) appears on the status bar during software update, make sure that the terminal is not in the following states and retry to update.- No signal- The battery pack is removed- Interfered by some functionYou can update software by using PC Companion that can be installed into a PC from the terminal.❖Information・To install PC Companion on a PC, an Internet connection is required.When PC Companion is not installed on your PC1Connect the terminal to a PC using a microUSB cable.2When "PC Companion software" screen appears on the terminal, tap [Install].・Installer of PC Companion starts on the PC.Connecting to a PC and updating](https://usermanual.wiki/Sony/PM-0610.User-Manual/User-Guide-2121930-Page-274.png)
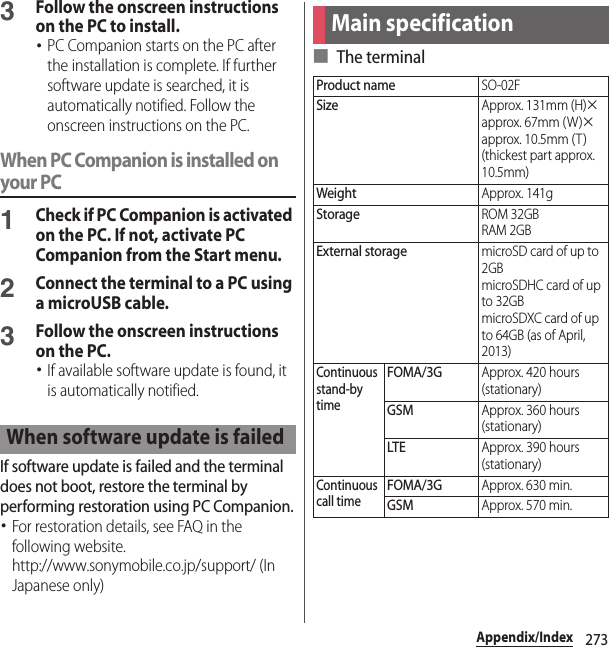
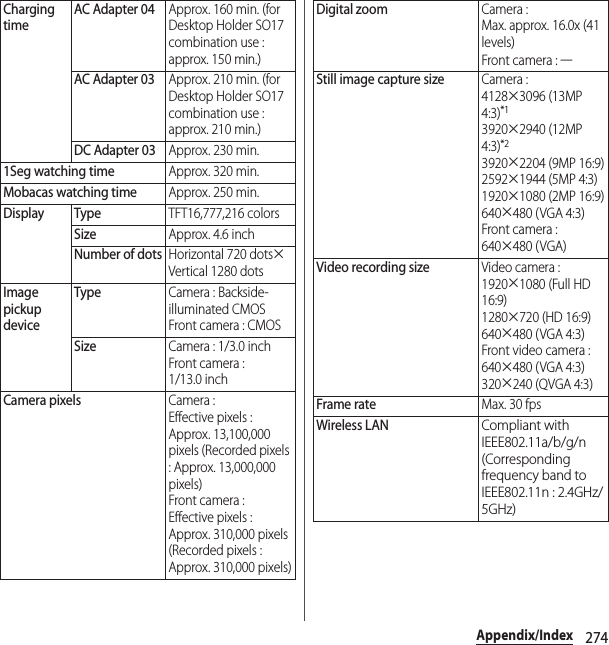
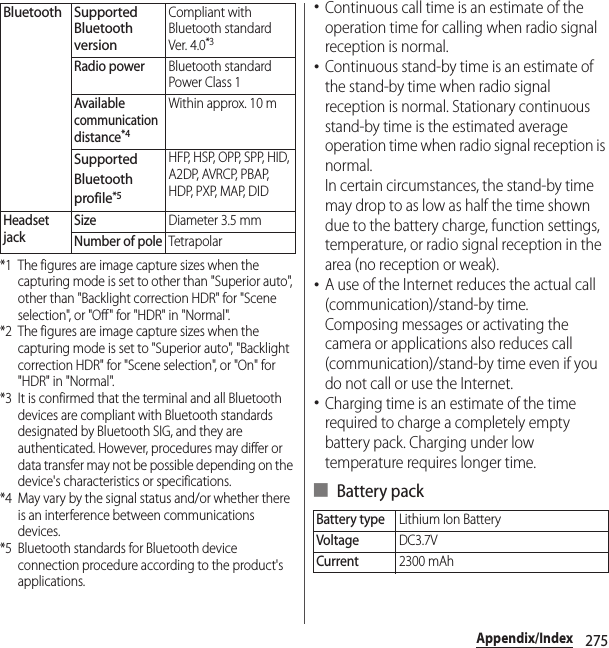
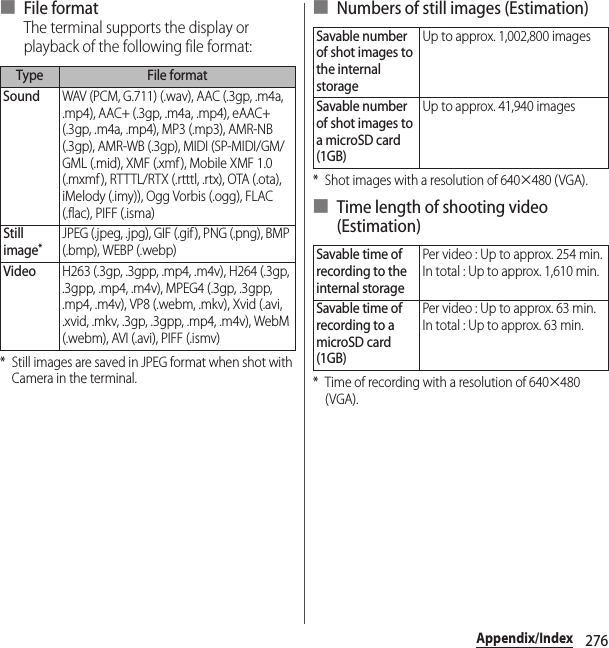
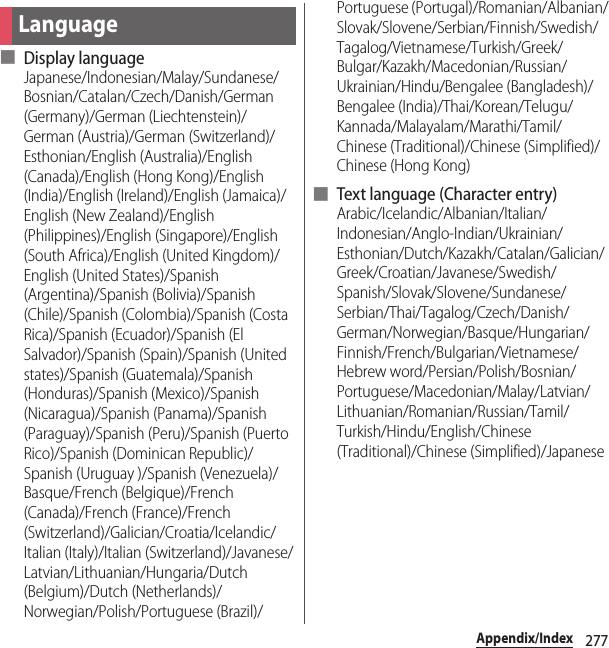
![278Appendix/Index■ Text language (Voice input)Japanese/Icelandic/Afrikaans/Arabic (United Arab Emirates)/Arabic (Israel)/Arabic (Egypt)/Arabic (Qatar)/Arabic (Kuwait)/Arabic (Saudi Arabia)/Arabic (Jordan)/Arabic (Lebanon)/Arabic (Bahrain)/Arabic (Oman)/Arabic (Palestine)/Italian/Greek/Indonesian/Dutch/Catalan/Galician/Swedish/isiZulu/Spanish (United States)/Spanish (Argentina)/Spanish (Uruguay)/Spanish (Ecuador)/Spanish (El Salvador)/Spanish (Guatemala)/Spanish (Costa Rica)/Spanish (Colombia)/Spanish (Spain)/Spanish (Chile)/Spanish (Dominican Republic)/Spanish (Nicaragua)/Spanish (Panama)/Spanish (Paraguay)/Spanish (Puerto Rico)/Spanish (Venezuela)/Spanish (Peru)/Spanish (Bolivia)/Spanish (Hondura)/Spanish (Mexico)/Slovak/Serbian/Czech/German/Turkish/Norwegian/Hungarian/Finnish/French/Bulgarian/Hebrew word (Israel)/Polish/Portuguese (Brazil)/Portuguese (Portugal)/Latin/Malay/Romanian/Russian/English (United States)/English (United Kingdom)/English (India)/English (Australia)/English (Canada)/English (New Zealand)/English (South Africa)/English (standard)/Chinese, standard (Taiwan, Traditional)/Chinese, standard (Hong Kong, Simplified)/Chinese, Cantonese (Hong Kong Traditional)/Chinese, standard (China, Simplified)/KoreanYou can check details of certificate and compliance mark specific to the terminal (including certificate number/compliance number).1From the Home screen, tap , then tap [Settings].2Tap [About phone]u[Legal information]u[Certificates].Certificate and compliance](https://usermanual.wiki/Sony/PM-0610.User-Manual/User-Guide-2121930-Page-280.png)