Sony PM0841 GSM/WCDMA/LTE + BLUETOOTH, DTS/UNII a/b/g/n/ac, ANT+ and NFC User Manual Manual 3
Sony Mobile Communications Inc GSM/WCDMA/LTE + BLUETOOTH, DTS/UNII a/b/g/n/ac, ANT+ and NFC Manual 3
Sony >
Contents
Manual 3

Get to Know
Your Phone
SONY ®
XPERIA® Z4V
Welcome to Verizon Wireless. You’re now
part of a growing movement that’s about
speed, signal and strength. This guide will
show you how to set up and use your phone,
access special features, and find help.
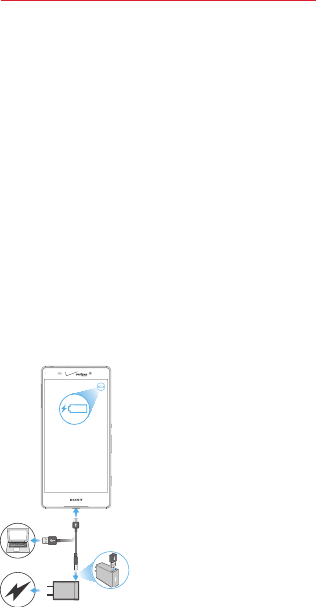
Charge the Phone
Before turning on your phone, charge it
fully.
1. Insert the small end of the USB cable
into the USB/Charger Port.
2. Insert the other end into the power
adapter, and then plug the power adapter
into an electrical outlet.
WARNING! Please use only an approved charging accessory
to charge your phone. Improper handling of the charging
port, as well as the use of an incompatible charger, may
cause damage to your device and void the warranty.
36%
36%
Setting Up Your Phone
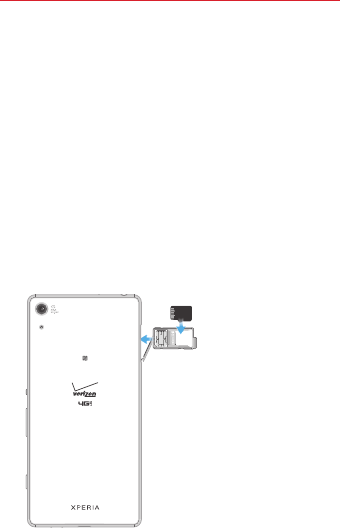
Optional: Insert the microSD Card
1. With the phone facing down, open
the Memory/SIM card slot cover. Using
a fingernail, pull out the SIM card and
memory card slot.
2. Carefully slide the micro SD card
into the memory card slot with the gold
contacts facing up.
3. Push the Memory/SIM card slot back
into place. Close the Memory/SIM card
slot cover.
NOTE: The microSD card is sold separately.
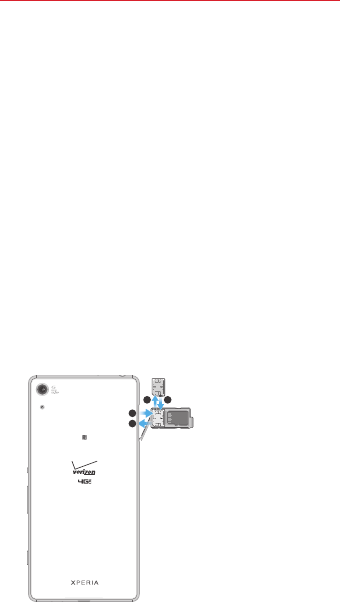
Optional: Replace the SIM Card
Your phone comes with the SIM card
already installed.
If you need to replace the SIM card:
1. With the phone facing down, open the
Memory/SIM card slot cover. Using a
fingernail, pull out the Memory/SIM card
slot.
2. Remove the SIM card.
3. Carefully insert the new 4G LTE SIM
card into the SIM card slot with the Verizon
logo facing down.
4. Push the Memory/SIM card slot back
into place. Close the Memory/SIM card slot
cover. Follow the onscreen instructions to
restart the device.
1
4
2 3
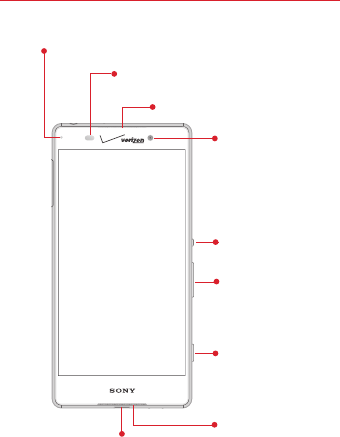
Front Camera
Lens
Volume/
Zoom Key
USB/Charger Port
Camera Key
Speaker
NOTE: Devices and software are constantly evolving—the
screen images and icons you see here are for reference only.
CAUTION: After using your device in water, it’s important
that the USB/Charger port is completely dry before a USB
cable is insterted into it. To remove moisture from the USB/
Charger port, shake your device several times with the USB/
Charger port facing downwards and then use a micro-fibre
cloth to wipe the device dry. If moisture is still visible in the
USB/Charger port, repeat the shaking and drying procedure.
Charging light/
Notification Light
Power/Lock
Key
Proximity/Light Sensor
Ear Speaker
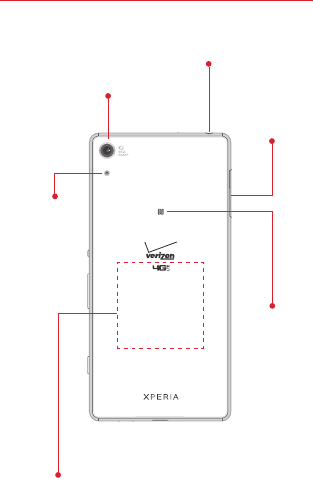
Memory/
SIM Card
Slot
NFC
Detection
Area
Headset Jack
Wireless Charge
Detection Area
Main Camera Lens
Camera
Light
Using Your Phone
Turning Your Phone On/Off
It’s important to fully charge the battery
before turning on your phone.
To turn on your phone
Press and hold the Power/Lock key on
the right side of your phone.
To turn off your phone
1. Press and hold the Power/Lock key
until the Device options screen appears.
2. Tap Power off.
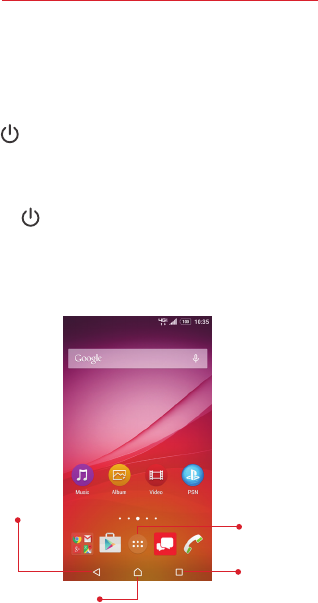
Home Screen
Recent
Apps
Button
Back
Button
Home Button
Apps
Icon

Setup Wizard
When you turn on your phone for the first
time, you have the option to quickly set
up email accounts, sync contacts that you
have backed up with Verizon Cloud, turn on
location services, and more. Simply follow
the onscreen instructions to complete the
initial setup of your phone.
Locking and Unlocking Your Phone
Prevent accidental key presses by locking
your phone.
To lock your phone
Press the Power/Lock key. Your phone
will also lock automatically if you haven’t
used it for a while.
To unlock your phone
Press the Power/Lock key to wake the
screen. Then swipe your finger upwards on
the screen.
For added security, you can set up a screen
lock such as a lock pattern or numeric PIN.
To set up a screen lock
1. From the Home screen,
tap Apps Settings Security
Screen lock .

2. Select the kind of screen lock
you want to use and follow the
instructions.
Using the Touch Screen
Use touch gestures to move around the
screen, open menus, select items, zoom in
or out on web pages, and more.
Tap—Tap to open or select an item, mark or
unmark a checkbox or option, or enter text
using the on-screen keyboard.
Swipe—Swipe by quickly sliding your finger
in any direction.
Flick—Flick to scroll quickly, for example,
in a list or on a web page. You can stop the
scrolling movement by tapping the screen.
Drag—Drag by touching an item and sliding
it to a new position, activate an item-
specific menu, or activate selection mode.
Double-Tap—Tap two times rapidly to
zoom in or out on a web page or picture.
Multi Touch—Pinch or spread your thumb
and index finger to zoom in or out.

©2015 Verizon Wireless. All Rights Reserved.

Making a Call
1. From the Home screen, tap the
Phone icon.
2. Tap the Dialpad icon to display the
dialpad.
3. Enter the number you want to call or
the first letters of the contact’s name and
select the contact.
4. Tap the Call icon to place the call.
Advanced Calling
You can make High-Definition Voice and
Video Calls, and surf the web while you
talk on the phone when you add Advanced
Calling to your line. Visit verizonwireless.
com/AdvancedCalling to learn how.
Receiving a Call
Tap the Answer icon to answer an
incoming call.
Setting Up Voice Mail
1. Tap the Phone icon on the Home
screen.
2. Tap the Dialpad icon to display the
dialpad.
3. Dial *86 and tap Call icon.
4. Follow the instructions to select
the language, set up your voice mail
password, and more.
Checking Voice Mail
1. From the Home screen, tap
Phone Dialpad.
2. Touch and hold 1.
3. When you hear a greeting, tap # to
interrupt.
4. Follow the instructions.
NOTE: Voice mailboxes not set up within 45 days will be
canceled. Your voice mailbox is not password protected
until you create a password by following the setup tutorial.
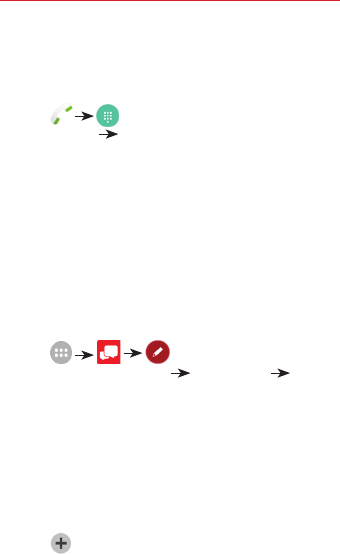
Sending a Text
1. From the Home
screen, tap Apps Message+
Compose.
2. Enter the name or number of the
person you want to send the message
to and you’ll see matching contacts. Or
just enter a phone number.
3. Tap the message area and enter your
message.
4. To add an attachment to your
message, tap the Add icon.
5. Review your message and tap Send.
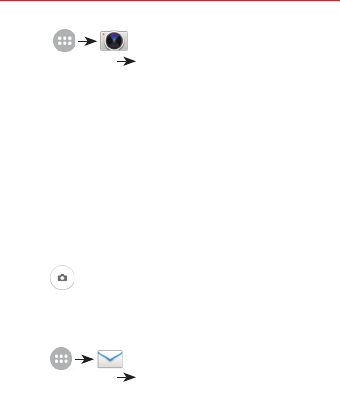
Taking Photos
1. From the Home screen,
tap Apps Camera. You can also
press and hold Camera Key to
activate the camera.
2. Use the phone’s screen as a
viewfinder to set up your shot.
3. Tap the onscreen icons to use various
camera options and settings.
4. You can also tap the screen to
move the focus to a desired area of
interest.
5. Tap the onscreen Camera button
or press the Camera Key fully down.
Setting Up Email
1. From the Home screen,
tap Apps Email.
2. Enter your email address in the Email
address field.
3. Enter your password in the Password
field and tap Next.
4. At the Account setup screen, name
the account and enter how you want
your name to appear on outgoing
messages.
5. Tap Next to save the new account.
Play Store
From the Home screen, tap the Play
Store icon. Sign in using your Google™
account. Then browse or search for apps.
Viewing Apps
From the Home screen, tap the Apps
icon.
Adding Apps
1. From the Home screen, tap the
Play Store icon.
2. Find and tap the app that you want.
3. Tap Install or the price button.
Review which settings the app will
have access to.
4. Tap Accept to download and install
the app.
Removing Apps
1. From the Home screen, tap the
Apps icon.
2. Swipe in from the left edge of the
screen and choose Uninstall.
3. Tap the red X next to the app you
want to uninstall.
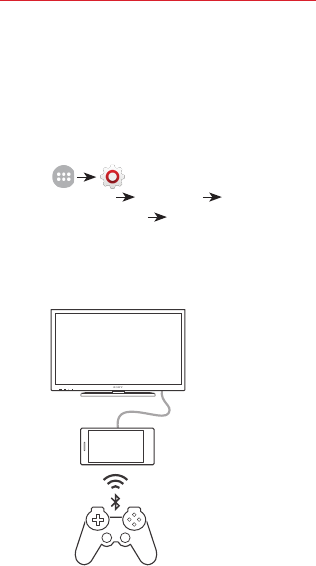
Using DUALSHOCK™4 wireless
controller
You can play games stored on your phone
on a TV and control the games using a
DUALSHOCK™4 wireless controller.
To connect a DUALSHOCK™4 wireless
controller to your phone:
1. From the Home screen,
tap Apps Settings Xperia™
Connectivity DUALSHOCK™
series.
2. Follow the onscreen instructions to
complete the connection.
BRAVIA
Improving Accessibility
Adjust accessibility settings to assist users
who have impaired vision or hearing, or
reduced dexterity.
1. From the Home
screen, tap Apps Settings
Accessibility.
2. Tap a category and set the desired
options to improve accessibility.
Using TalkBack
TalkBack provides screen reading to
assist people with impaired vision.
1. From the Home
screen, tap Apps Settings
Accessibility.
2. Tap TalkBack. Then tap the TalkBack
switch to turn it on.
3. Tap Settings at the top of the screen
to adjust the TalkBack settings.
NOTE: When TalkBack is on, double-tap when you hear the
item you want. (You can change to single-tap in Settings.)
My Verizon Mobile App
Manage your account, track your
usage, edit account information,
pay your bill and more.
Get Help Using Your Phone
Use your Help app to get
assistance at your fingertips, right
from your phone.
From your computer, visit
verizonwireless.com/support.
Customer Service
Call (800) 922-0204.
Follow us @VZWSupport.
More Information
To download a User Guide, go to
verizonwireless.com/support or
call (866) 766-9374 to order a
copy.
Support & More
User Guide

Your Wireless Device and Third Party Services
Verizon Wireless is the mobile carrier associated with this
wireless device, but many services and features offered
through this wireless device are provided by or in conjunction
with third parties. Verizon Wireless is not responsible for
your use of this wireless device or any non-Verizon Wireless
applications, services and products including any personal
information you choose to use, submit or share with others.
Specific third party terms and conditions, terms of use,
and privacy policies shall apply. Please review carefully all
applicable terms and conditions and policies prior to using
this wireless device and any associated application, product
or service.
Hearing Aid Compatibility Information
This phone has been tested and rated for use with hearing
aids for some of the wireless technologies that it uses.
However, there may be some newer wireless technologies
used in this phone that have not been tested yet for use with
hearing aids. It is important to try the different features of
this phone thoroughly and in different locations, using your
hearing aid or cochlear implant, to determine if you hear
any interfering noise. Consult your service provider or the
manufacturer of this phone for information on hearing aid
compatibility. If you have questions about return or exchange
policies, consult your service provider or phone retailer.
Using your device in wet and dusty conditions
Your smart device is waterproof and dust resistant in
compliance with the Ingress Protection (IP) ratings IP65 and
IP68. To view more specific IP information about your device,
go to www.sonymobile.com/us/legal/testresults/ and click
on the relevant device name.
These specific IP ratings mean that your device is dust
resistant and is protected against low pressure water stream
as well as against the effects of immersion for 30 minutes in
fresh (non-saline) water up to 1.5 meters deep.
Always firmly attach all covers to ensure the water and
dust resistance of the device. If liquid is detected inside
the device, for example, underneath one of the covers, your
warranty will be void.
Customer Information