Sony Flat Panel Television Dmx Nv1 Users Manual KDL 40WL140/KDL 46WL140/KDL 52WL140
Sony-Dmx-Nv1-Attachment-Guide-604456 sony-dmx-nv1-attachment-guide-604456
DMX-NV1 Attachment Guide (For DMX-NV1 bundled with KDLxxWL140 Televisions) DMXNV1_Bundled_attachment-guide
KDL-40WL140 Attachment Guide (For DMX-NV1 bundled with KDLxxWL140 Televisions) DMXNV1_Bundled_attachment-guide
KDL-46WL140 Attachment Guide (For DMX-NV1 bundled with KDLxxWL140 Televisions) DMXNV1_Bundled_attachment-guide
KDL-52WL140 Attachment Guide (For DMX-NV1 bundled with KDLxxWL140 Televisions) DMXNV1_Bundled_attachment-guide
2015-01-23
: Sony Sony-Sony-Flat-Panel-Television-Dmx-Nv1-Users-Manual-292878 sony-sony-flat-panel-television-dmx-nv1-users-manual-292878 sony pdf
Open the PDF directly: View PDF ![]() .
.
Page Count: 2
4-116-032-11(1)
DMX-NV1
Attachment Guide
© Sony Corporation 2008 Printed in U.S.A.
For TV Models: KDL-40WL140/KDL-46WL140/KDL-52WL140
Required Items for Assembly
Your Sony TV with XMB™ (1) / BRAVIA® Internet Video Link (DMX-NV1) (1)/ Cable Cover (1)/ Mounting
Bracket (1)/ Plastic Fastener (2)/ Mounting Knob (2)/ Phillips Screwdriver (for removal only; not supplied)
To Begin
On the back of the TV, locate the attachment holes situated on the right side, above the rear input panel.
These instructions are shown without cables attached. We recommend that you familiarize yourself with the attachment
process, then review the BRAVIA Internet Video Link’s Quick Setup Guide (supplied) for information on connecting
the cables.
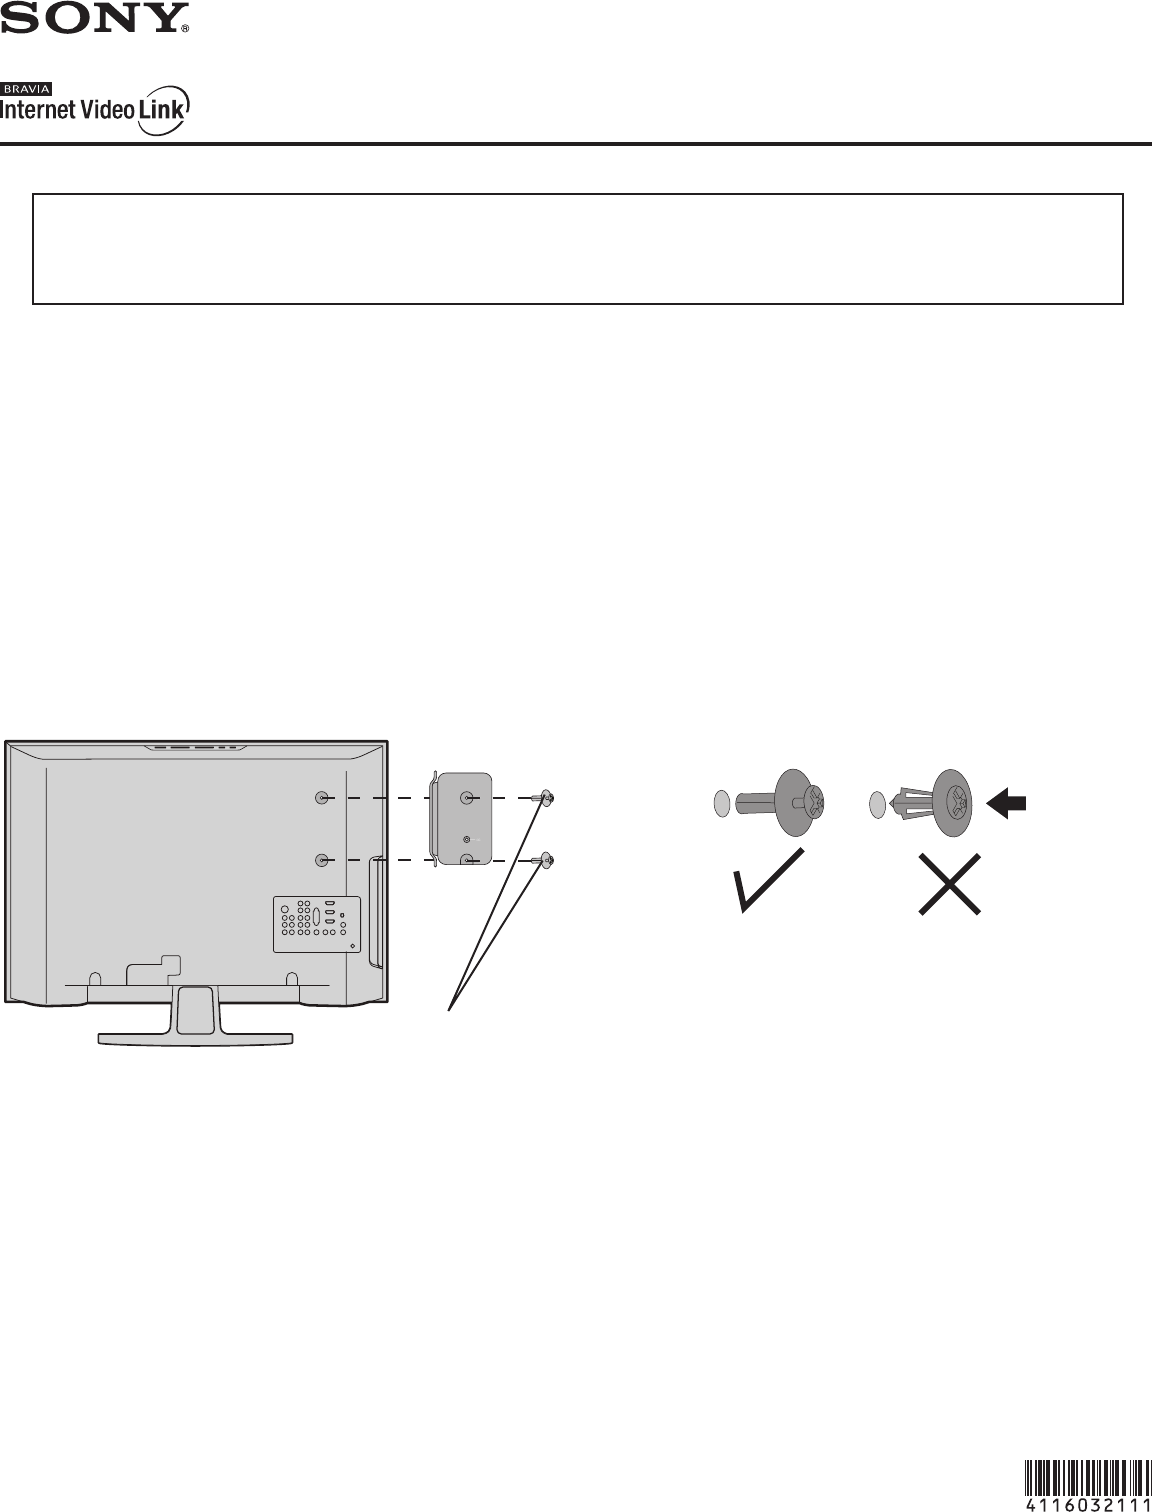
1 Align the holes on the bracket (supplied) to the holes
on the back of your TV.
2 Insert the 2 Plastic Fasteners (supplied) into the holes,
then press in the head of the fasteners using your
finger until they click.
~
Do not push in the head of the fastener until you have
inserted the fastener into the bracket and the hole on the
TV. Do not use a screwdriver to tighten the screws.
Plastic Fasteners

3 Insert the Mounting Knobs into the threaded holes
and lightly twist by hand. Do not fully tighten the
Mounting Knobs.
4 Place the bottom Mounting Knob into the hole on the
bracket, leaving the top Mounting Knob sitting above
the top hole.
5 Push down the receiver so both Mounting Knobs
are locked into the grooves, then fully tighten the
Mounting Knobs by hand.
1
NETWORK
INPUT
RESET
VIDEO
L
(MONO)
AUDIO
R
VIDEO IN
IN
2
2
~
Make sure that the cables are organized with the Cable
Cover so that the cables hang out on the same side as the
Mounting Knobs.
To Remove the Mounting Bracket
Follow the steps in reverse order. Use a Phillips
Screwdriver to remove the Plastic Fasteners.
LED Lights
Cables thread out on this side
