Sony TM-0050 GSM/WCDMA/LTE Tablet + Bluetooth, DTS/UNII a/b/g/n/ac, ANT+ & NFC User Manual Sony Mobile Communications AB
Sony Mobile Communications Inc GSM/WCDMA/LTE Tablet + Bluetooth, DTS/UNII a/b/g/n/ac, ANT+ & NFC Sony Mobile Communications AB
Sony >
Contents
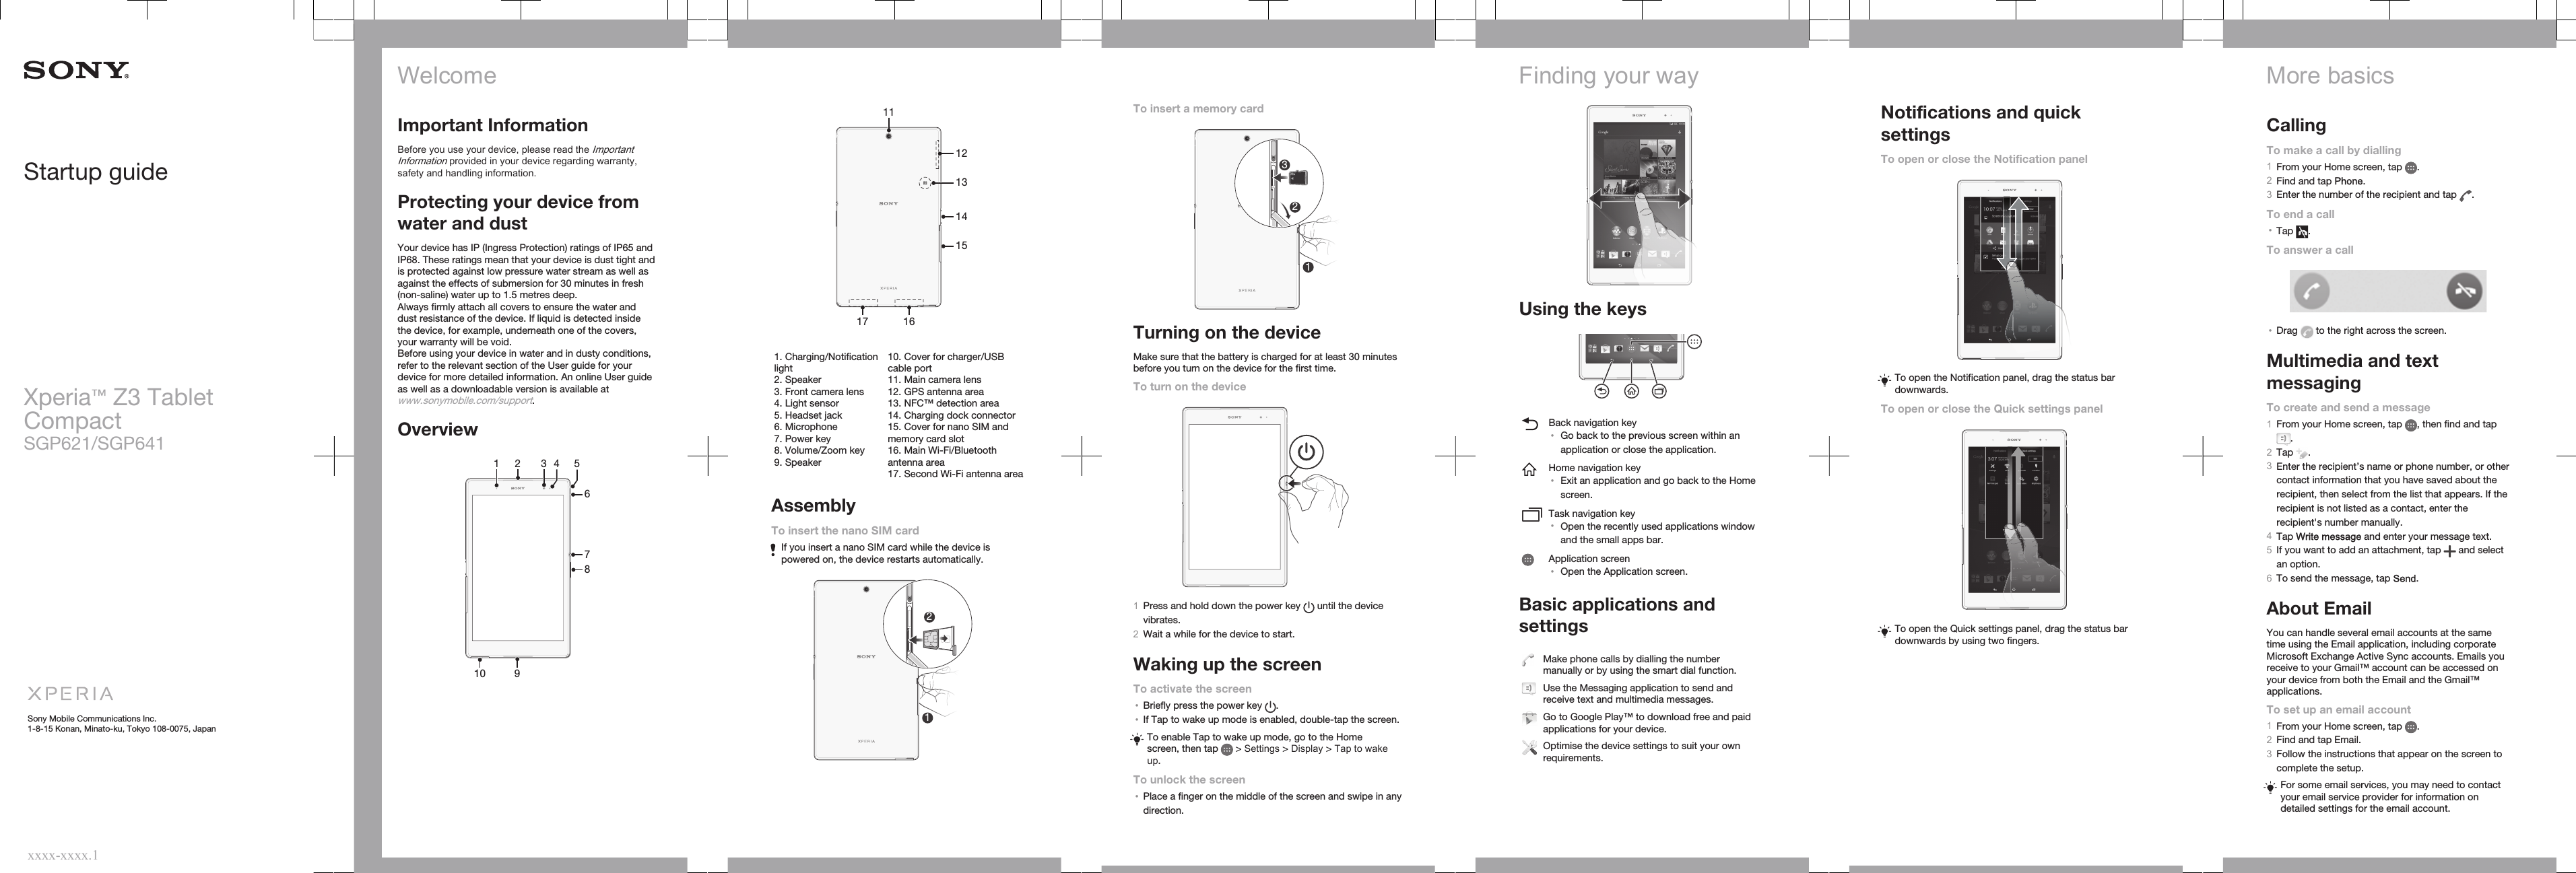
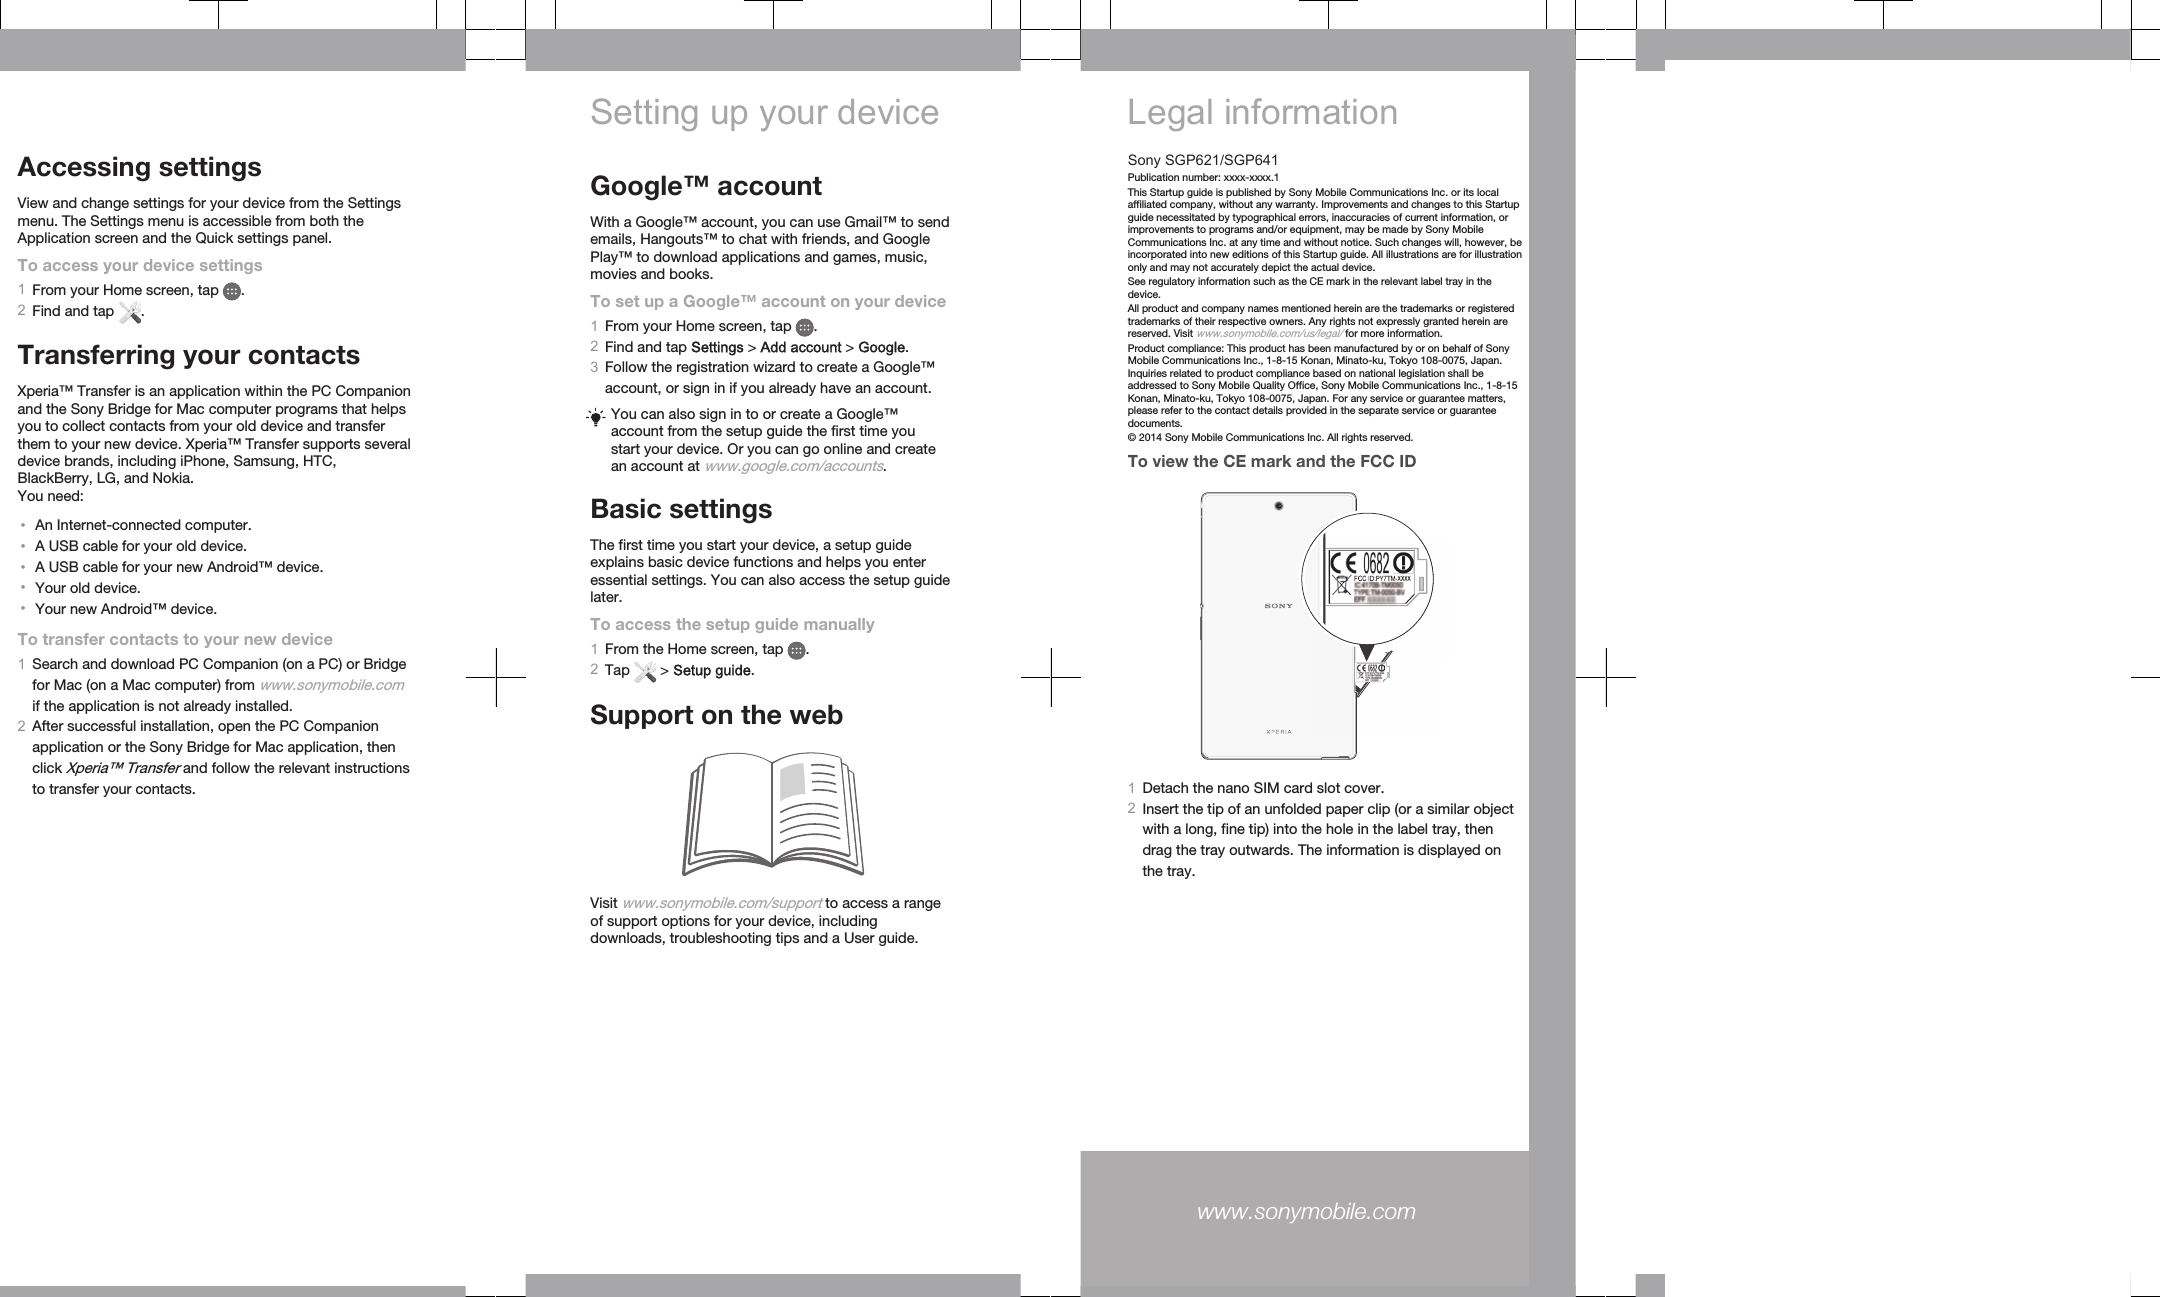
Start Up Guide