Sony VRD MC5 User Manual Quick Start Guide Vrdmc5 QSG
User Manual: Sony VRD-MC5 Quick Start Guide
Open the PDF directly: View PDF ![]() .
.
Page Count: 2
SONY VRD-MC5 P/N7819901876
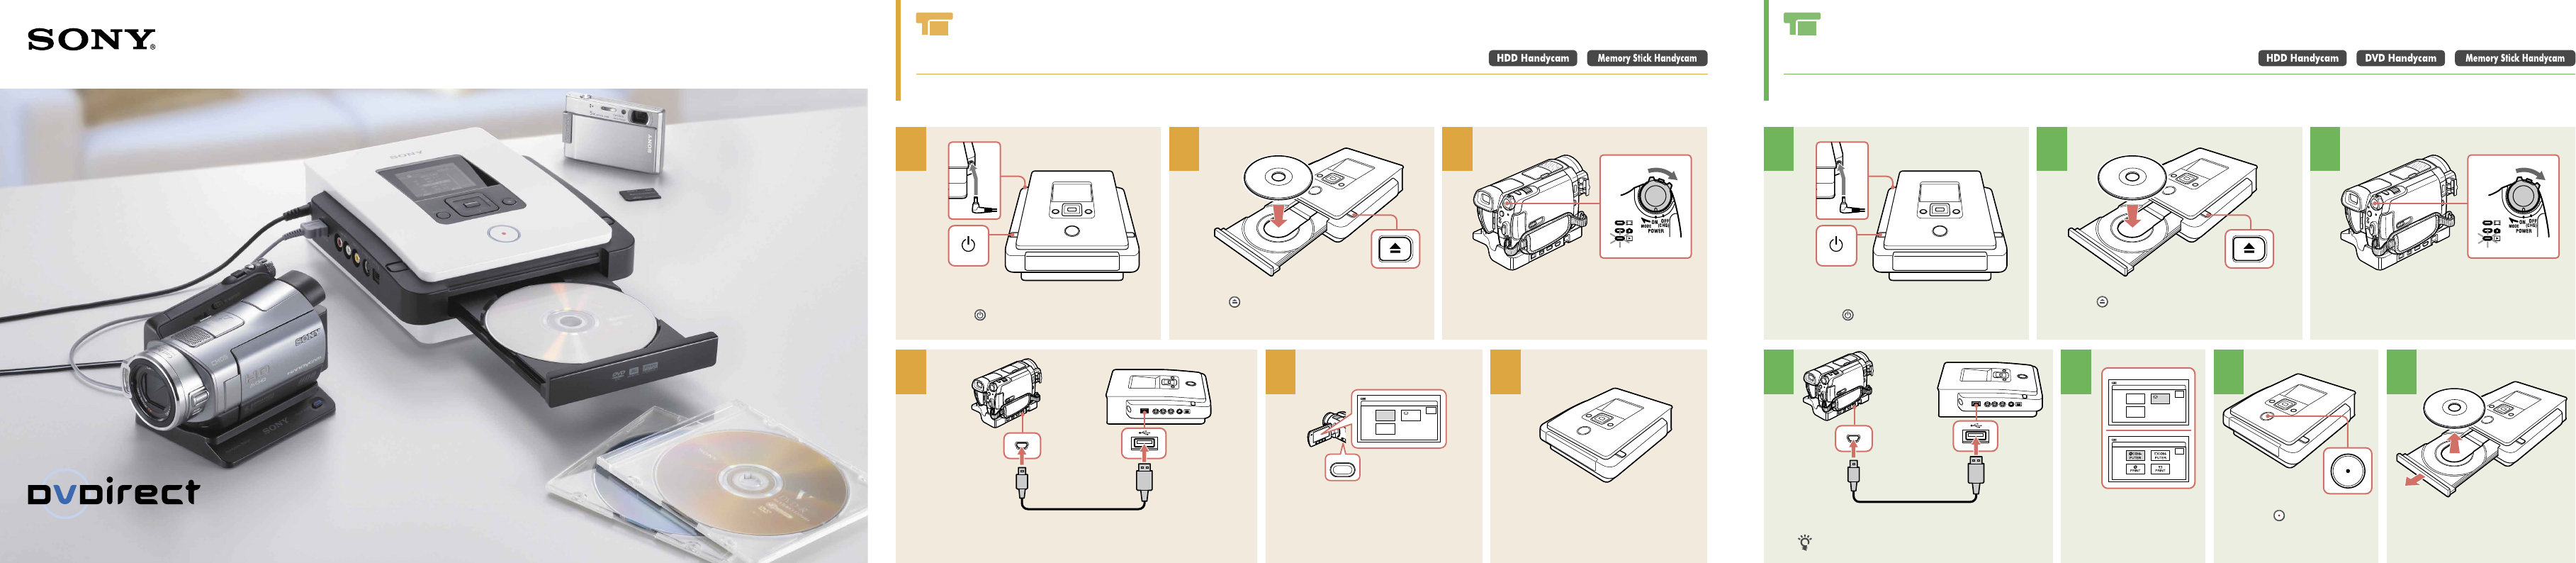
P/N 7819901876 Dubbing From Your Handycam®
With the DISC BURN Button
Simply press the DISC BURN button on your Handycam to start copying the videos recorded since the last
DISC BURN recording.
Connect the AC adapter and AC power cord,
and press to turn on the DVDirect.
1
Press and insert a disc.
2
Turn on the camcorder.
3
HANDCAM
Connect the camcorder and DVDirect with a USB cable (not supplied).
DISC BURN
USB SELECT
END
COM-
PUTER
PictBridge
PRINT
60min
DISC
BURN
Press the DISC BURN button to start
recording.
Wait for a while until dubbing is
complete.
4 5 6
Dubbing From Your Handycam®
Copy the entire video contents of your Handycam onto DVDs.
Connect the AC adapter and AC power cord,
and press to turn on the DVDirect.
1
Press and insert a disc.
2
Turn on the camcorder.
3
HANDCAM
Connect the camcorder and DVDirect with a USB cable
(not supplied).
Preparation for USB connection may differ depending on your
camcorder. Refer to the operating instructions for your camcorder.
USB SELECT
END
60min
USB SELECT
END
DISC
BURN
COM-
PUTER
PictBridge
PRINT
60min
On the camcorder’s
LCD screen, touch the
button of the media you
are dubbing from.
4 5
When complete, the disc is
ejected automatically.
7
VRD-MC5
Quick Start Guide
© 2007 Sony Corporation Printed in China
Press to start recording.
6
TM
SONY VRD-MC5 P/N7819901876
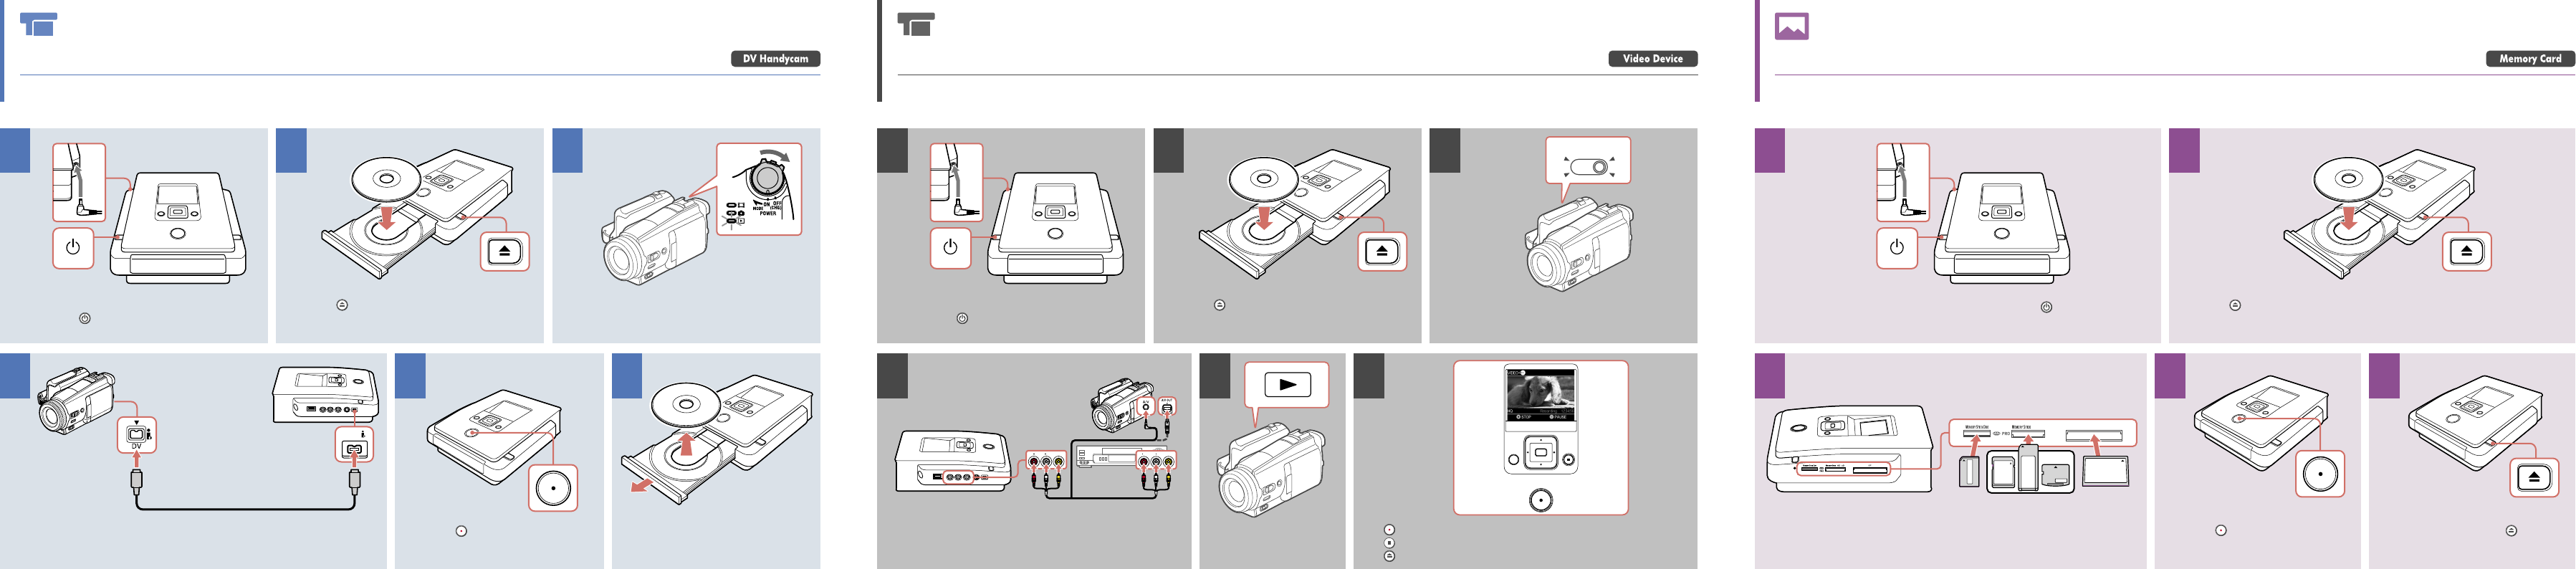
Dubbing From Your Handycam®
Copy the entire DV tape contents to a DVD.
Connect the AC adapter and AC power cord,
and press to turn on the DVDirect.
1
Press and insert a disc.
2
Turn on the camcorder, and switch to PLAY/EDIT
mode.
3
DV IN
Connect the camcorder and DVDirect with a DV cable
(not supplied).
Press to start recording.
4 5
When complete, the disc is ejected
automatically.
6
Dubbing From a Camcorder or
Other Video Device
Record selected portions of a video tape onto a DVD disc.
Connect the AC adapter and AC power cord,
and press to turn on the DVDirect.
1
Press and insert a disc.
2
Power ON !
Turn on and setup your video device for video
playback.
3
or
R AUDIO IN VIDEO INL R AUDIO OUT VIDEO OUTL
Connect the device and DVDirect with appropriate
cables (not supplied).
Operate the video
device to start playback.
4 5
RETURN
Start/pause/resume recording.
Stop recording.
Remove the disc.
6
Photo Recording
Copy all photos from a memory card to a DVD.
Connect the AC adapter and AC power cord, and press to turn on DVDirect. Press and insert a disc.
21
CFSD xD
Insert a memory card into the corresponding slot.
3
Press to start recording.
4
When complete, press and
remove the disc.
5
