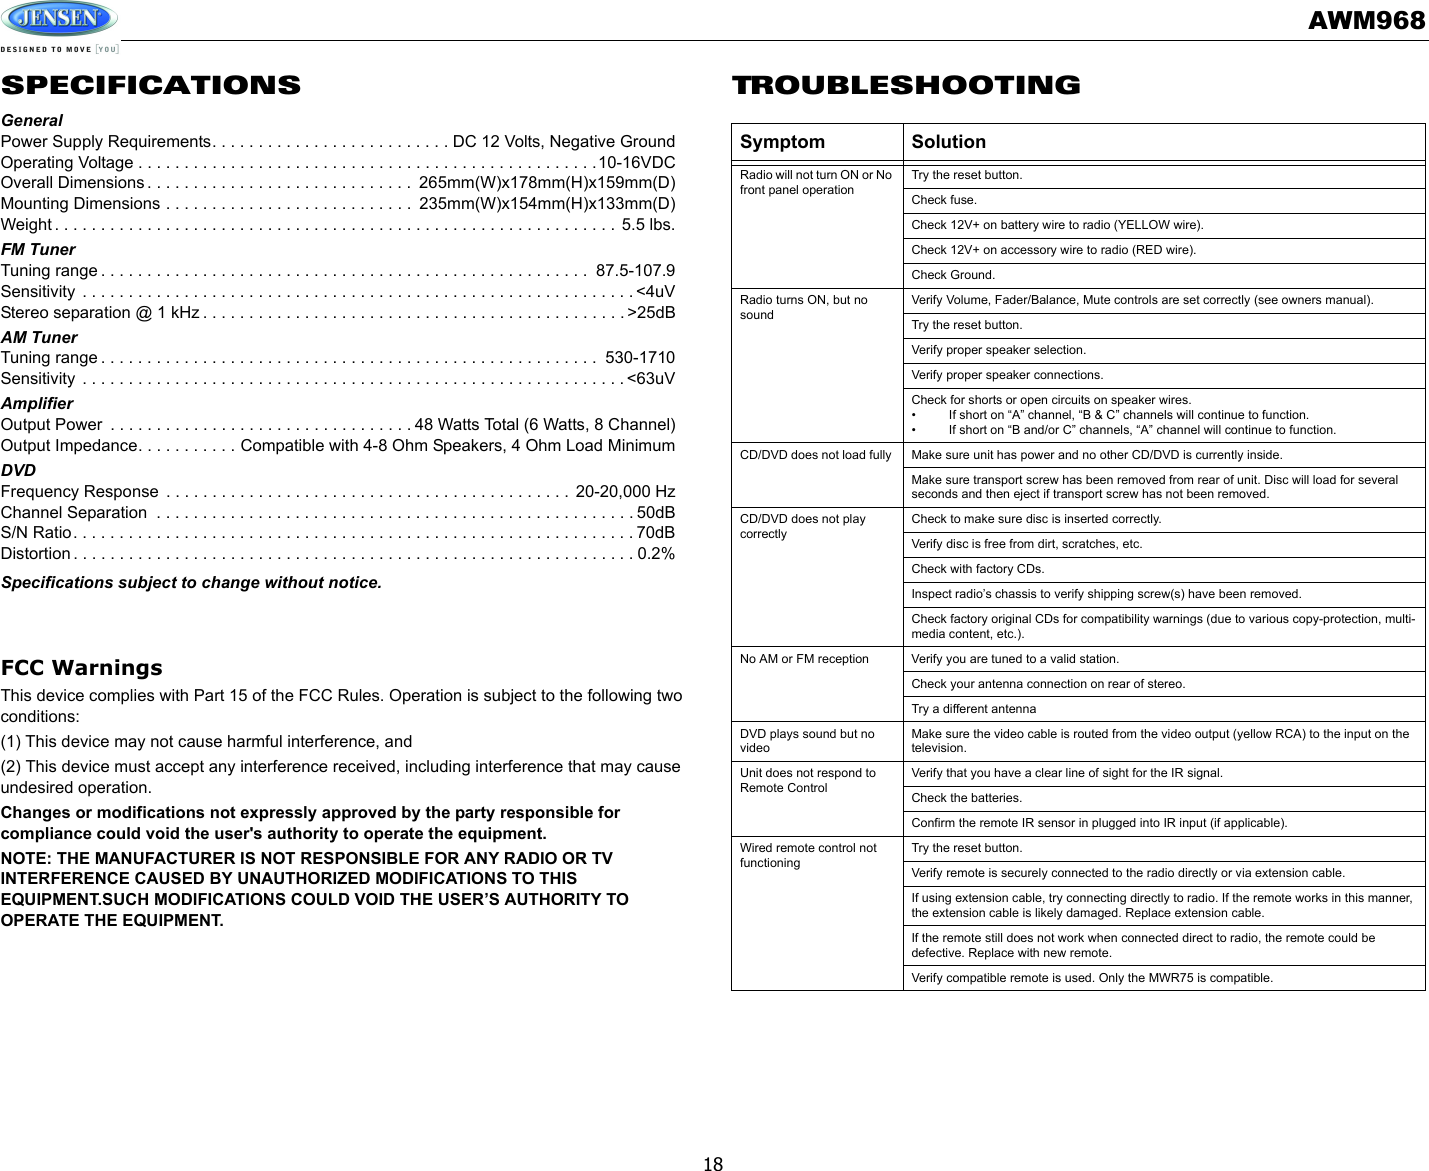
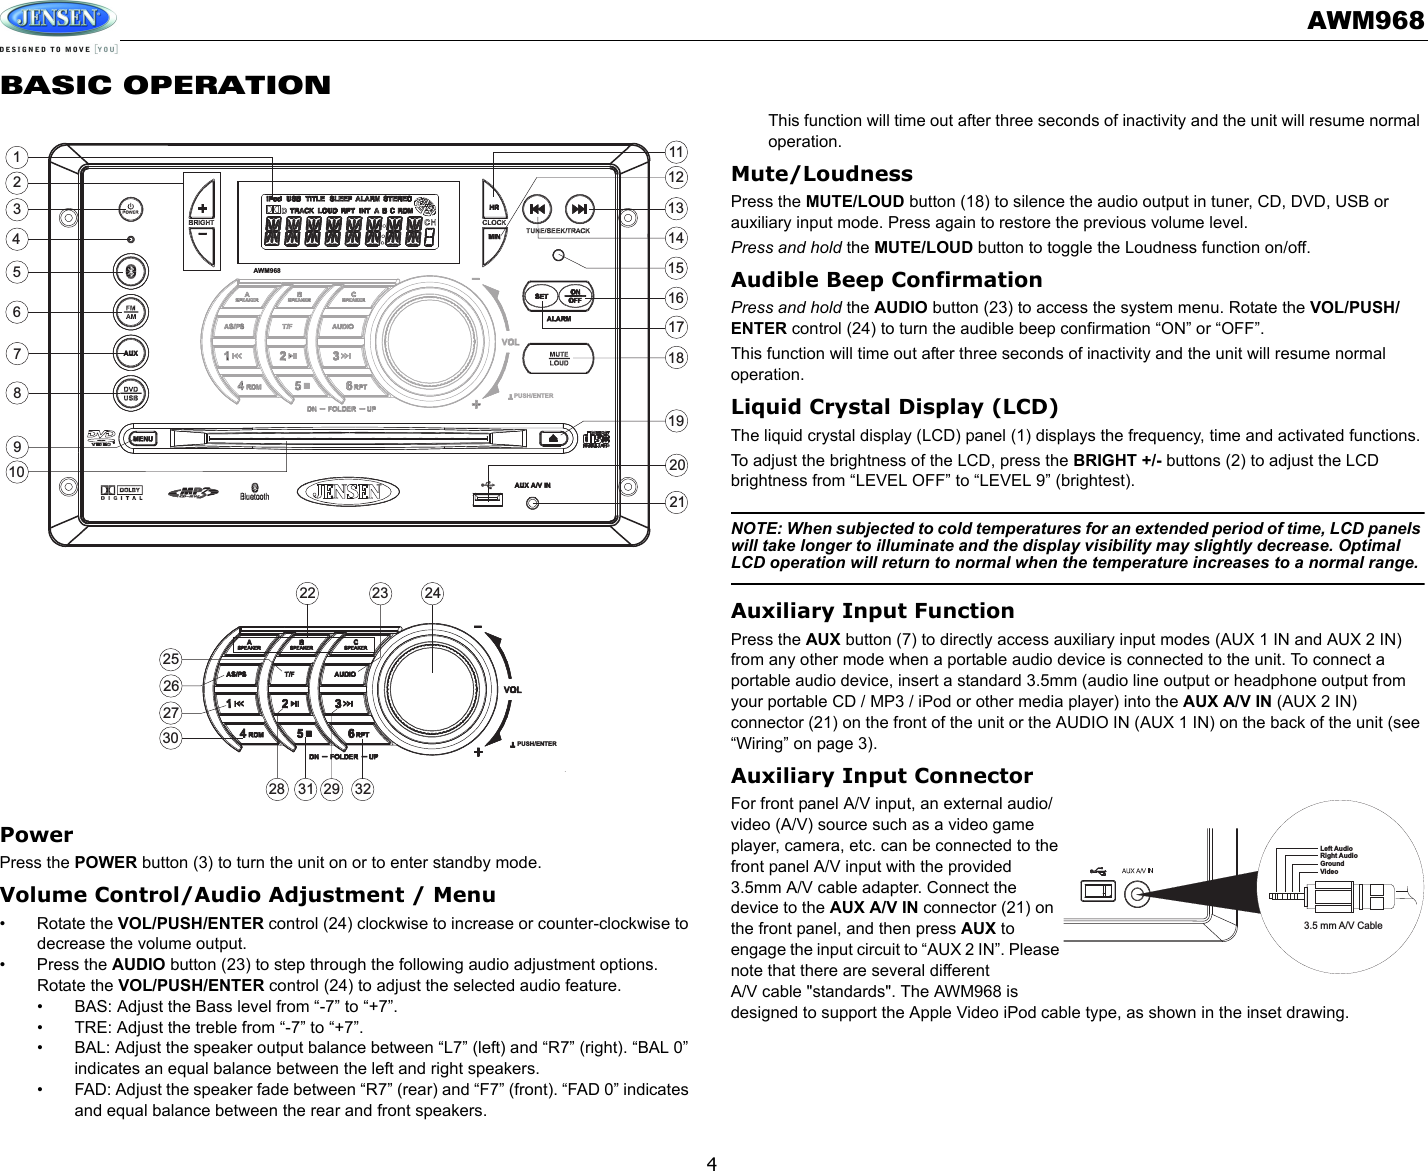
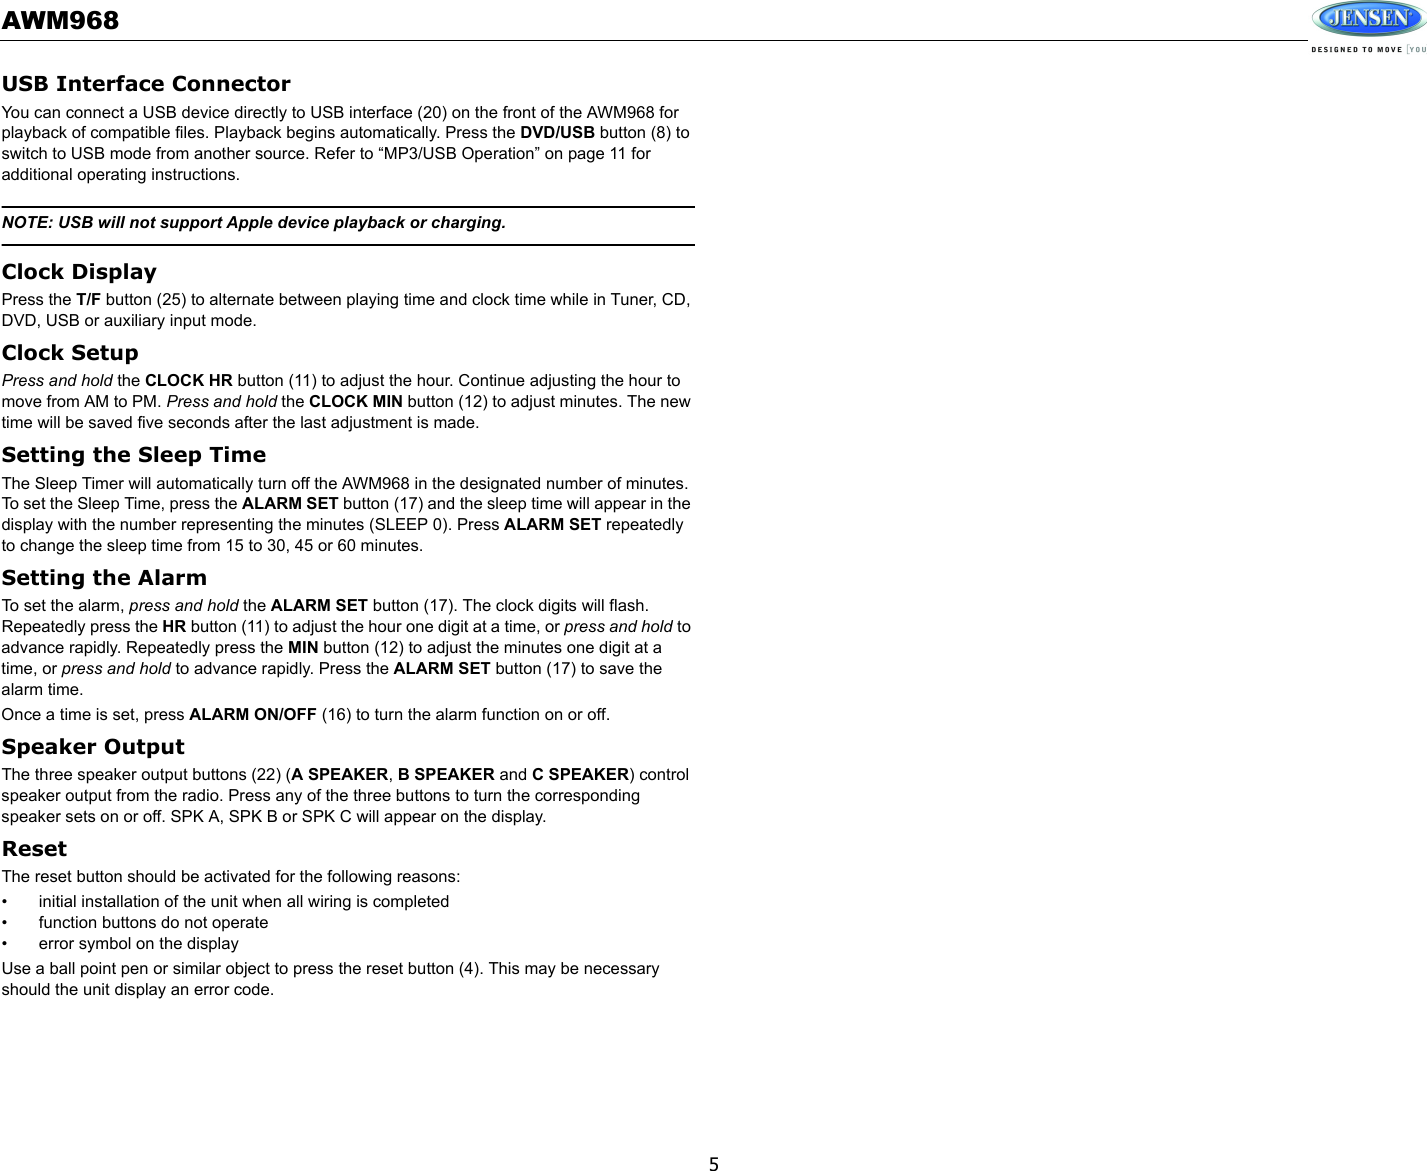
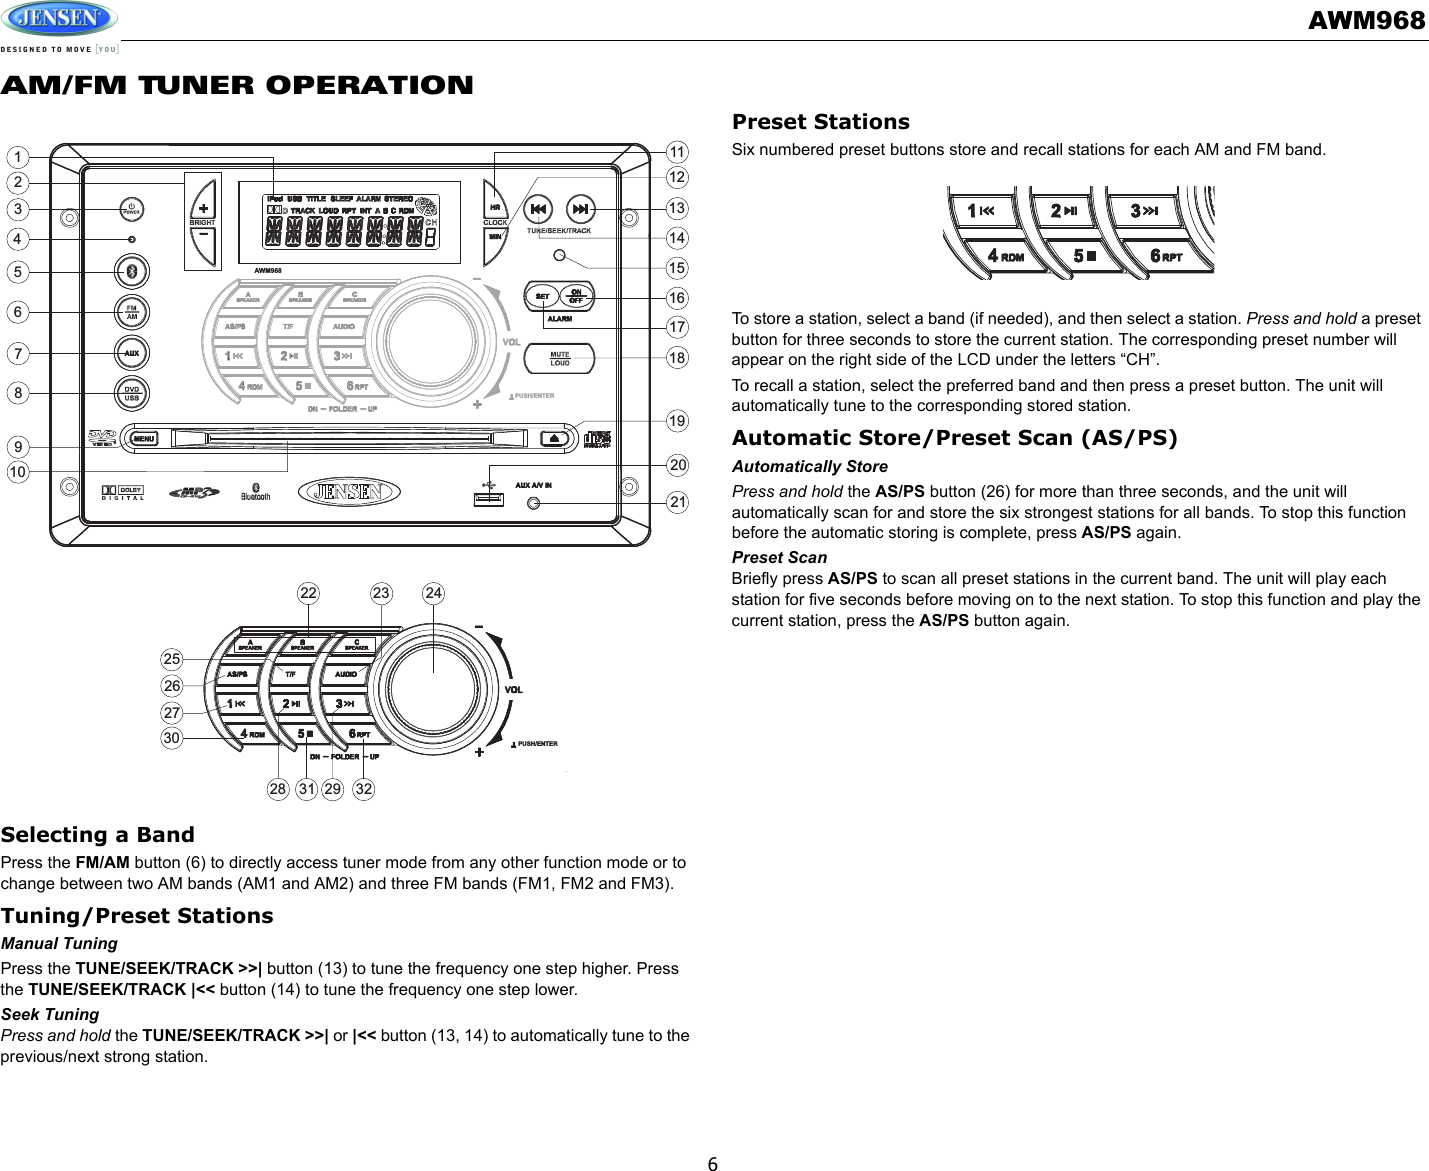
Sounding Audio AWM968 Wallmount DVD player with AM/FM/AUX/USB/BT User Manual AWM968
Sounding Audio Industrial Ltd. Wallmount DVD player with AM/FM/AUX/USB/BT AWM968
UserManual.wiki
>
Sounding Audio
>
AWM968 User Manual
User Manual
Navigation menu
Upload a User Manual
Namespaces
Wiki Guide
HTML
PDF
Info
Views
User Manual
Discussion / Help
Navigation
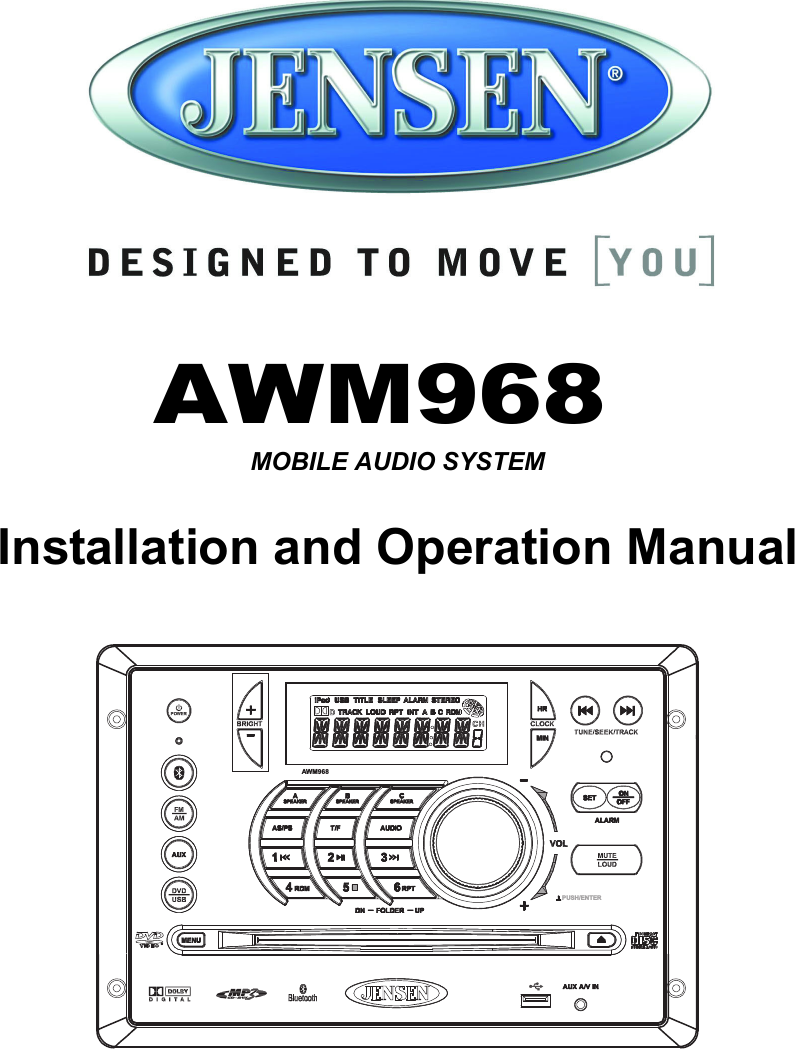
![AWM96811MP3/USB OPERATIONInsert/Eject DiscInsert a disc label-side up into the disc slot (10), and the disc will begin to play. Press the eject button (19) to stop playback and eject the disc.Insert/Remove USB DeviceTo connect a USB device, locate the USB interface connector (20) located near the bottom right corner on the front of the radio. Insert the USB device into the USB jack and the unit will read the files on the USB device automatically, displaying “USB LOAD” while files are initially loaded. To remove the USB device, press the FM/AM button (6), DVD/USB button (8) or AUX button (7) to change to another mode and then remove the USB device from the USB connector. Press the DVD/USB button (8) to access USB mode from any other mode.NOTE: MP4 streaming video format is not supported.MP3 Monitor DisplayAfter loading an MP3 disc or USB device, the following screen will appear on your output monitor.Select one of these icons to access the corresponding media on your disc or USB device. If the media type is not present, the icon will not be selectable.• : Audio• : Photos• : VideoPlay/PausePress the 2/ button (28) to suspend or resume playback. Track SelectWhen playback is stopped, press the TUNE/SEEK/TRACK >>| or |<< button (13, 14) to search in current folder. During playback, press the TUNE/SEEK/TRACK >>| or |<< button to access the previous/next file. The selected file number will appear on the display. Folder Up/DownPress the 6/RPT button (32) to access a higher folder level (FOLDER UP). Press the 5/ button (31) to access a lower folder level (FOLDER DN). Repeat (RPT)Press the 6/RPT button (32) on the control panel or the RPT button (21) on the remote control multiple times during playback to select from the following repeat play options: REP 1 (track), REP DIR (folder), REP ALL (disc), OFF.3186287262422 231415132930171632311920212798452111210125AWM968PUSH/ENTERPUSH/ENTER01. CHERRY POP02. CHRIS ISSA03. CRAZY TOWN04. PHISH BI05. PHISH BO06. PHISH FR07. PHISH GI08. PHISH... GU09. PHISH CH——————01. -02. 80'S03. ALLMAN BRO04. DISCO-FUNK05. OLDIES[ - ]PHISH GUMBO.MP3—](https://usermanual.wiki/Sounding-Audio/AWM968/User-Guide-1784411-Page-13.png)