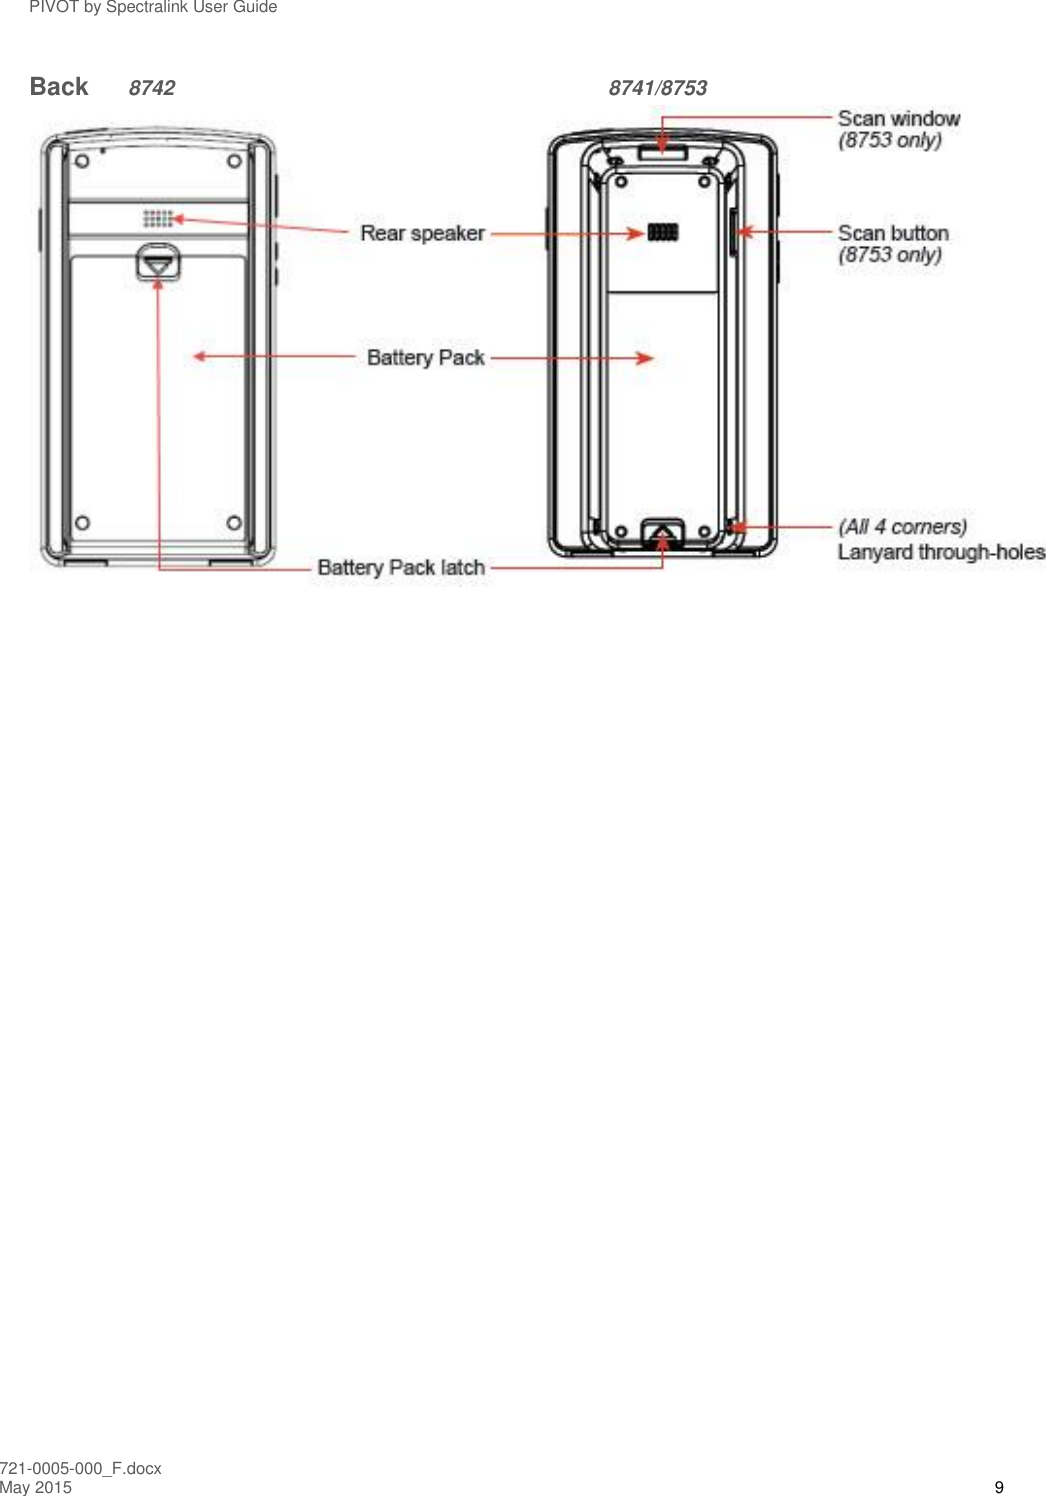
Spectralink 874X Wireless IP Telephone User Manual PIVOT by Spectralink User Guide
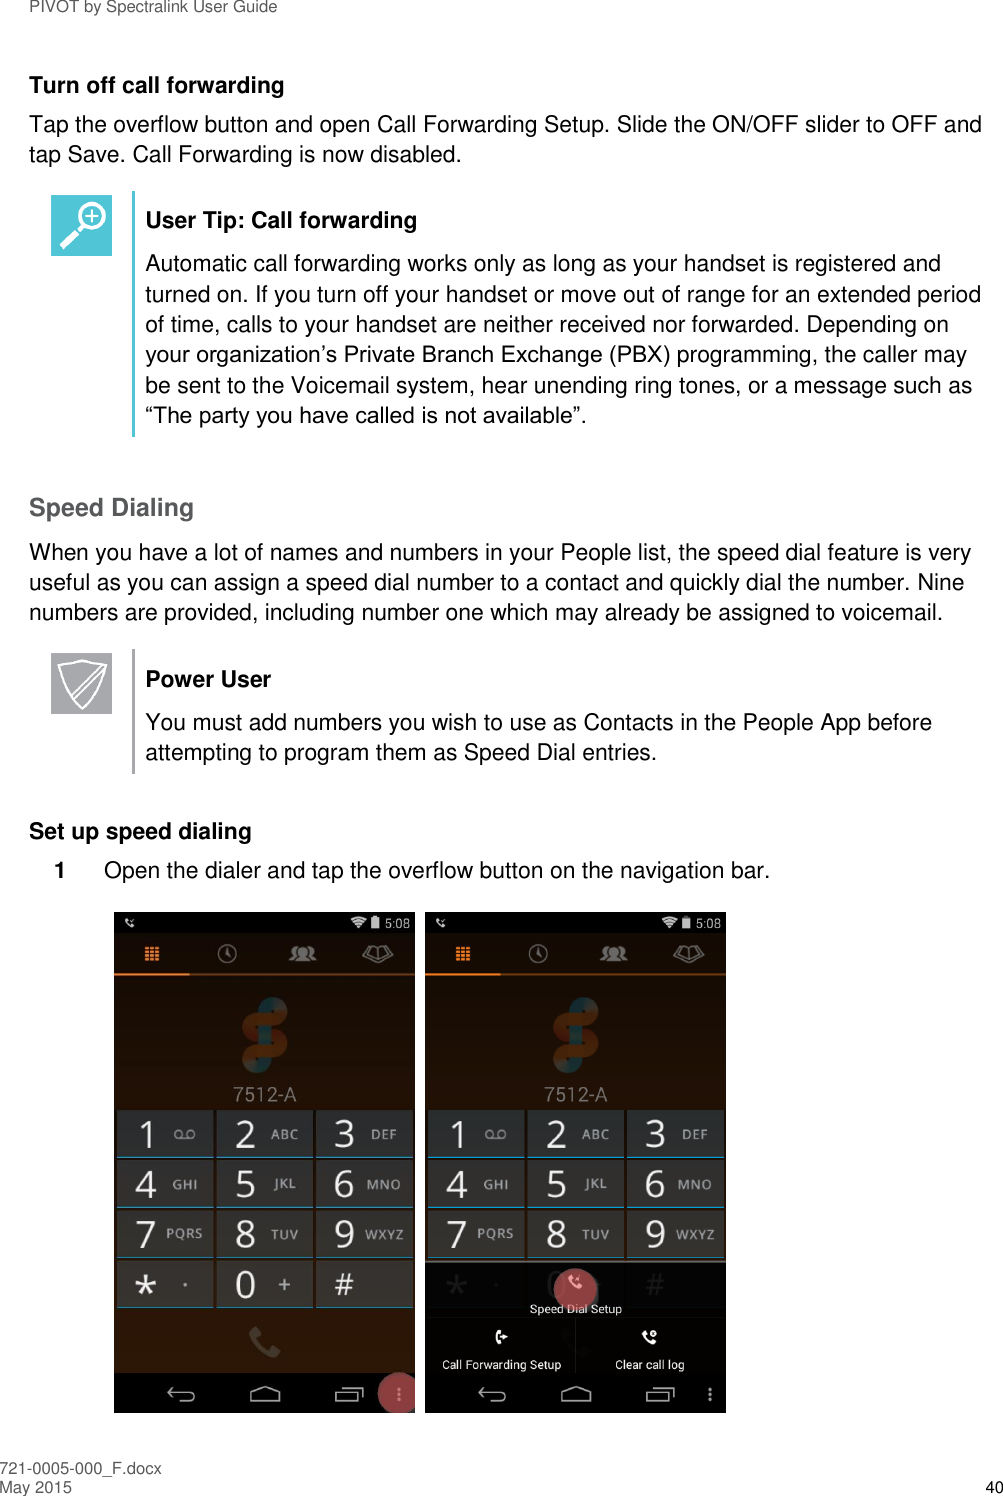
Spectralink Corporation Wireless IP Telephone PIVOT by Spectralink User Guide
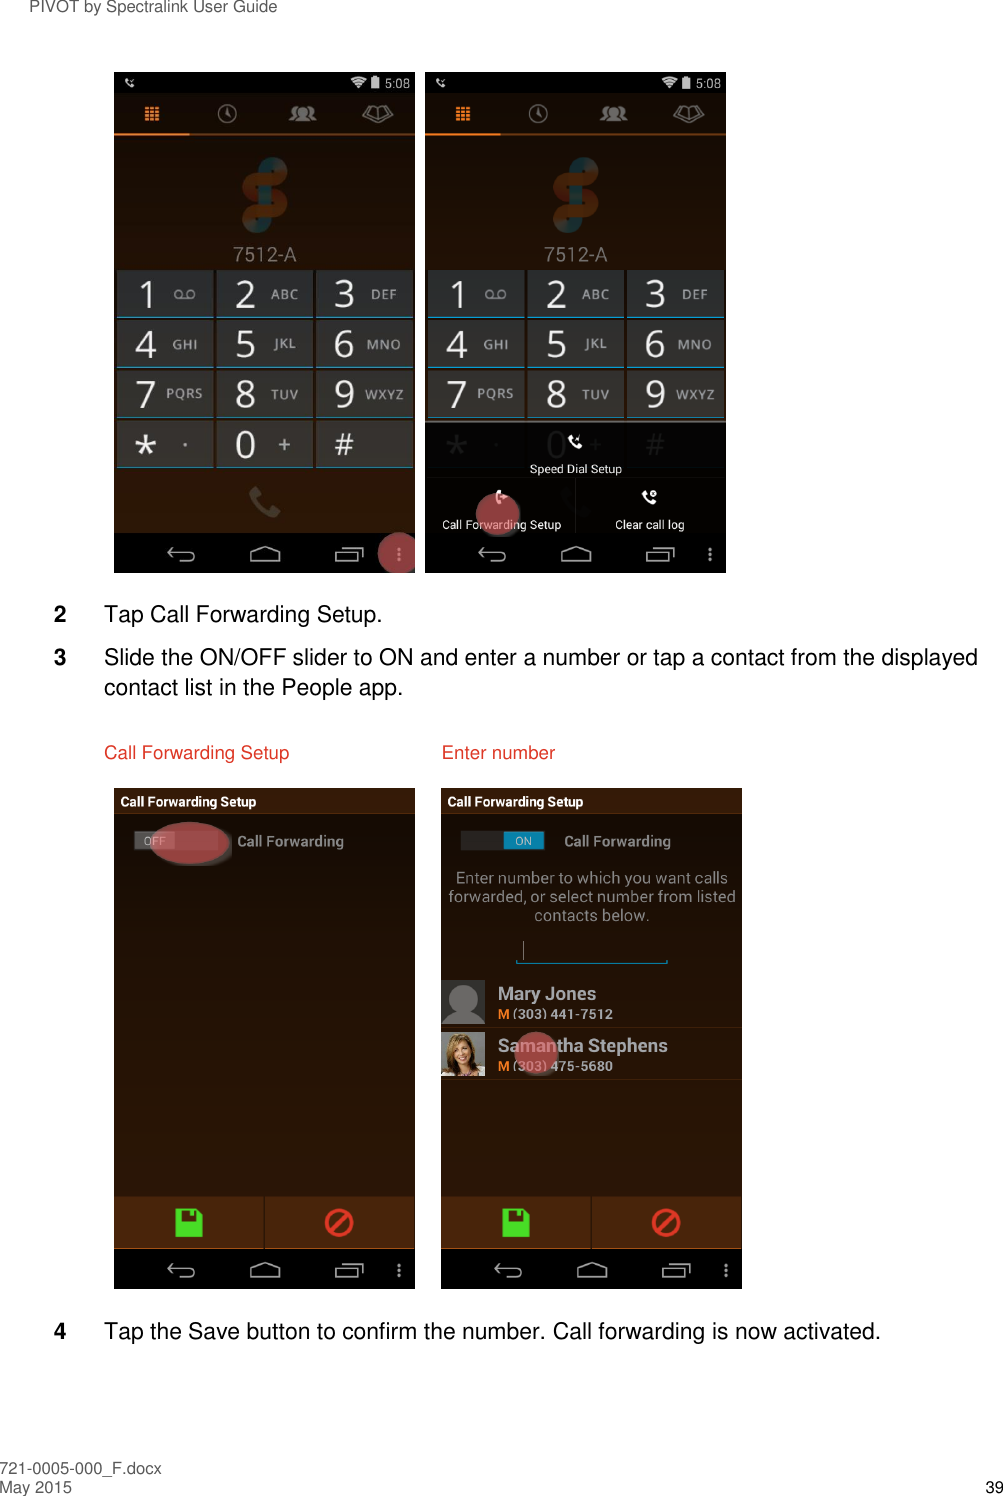
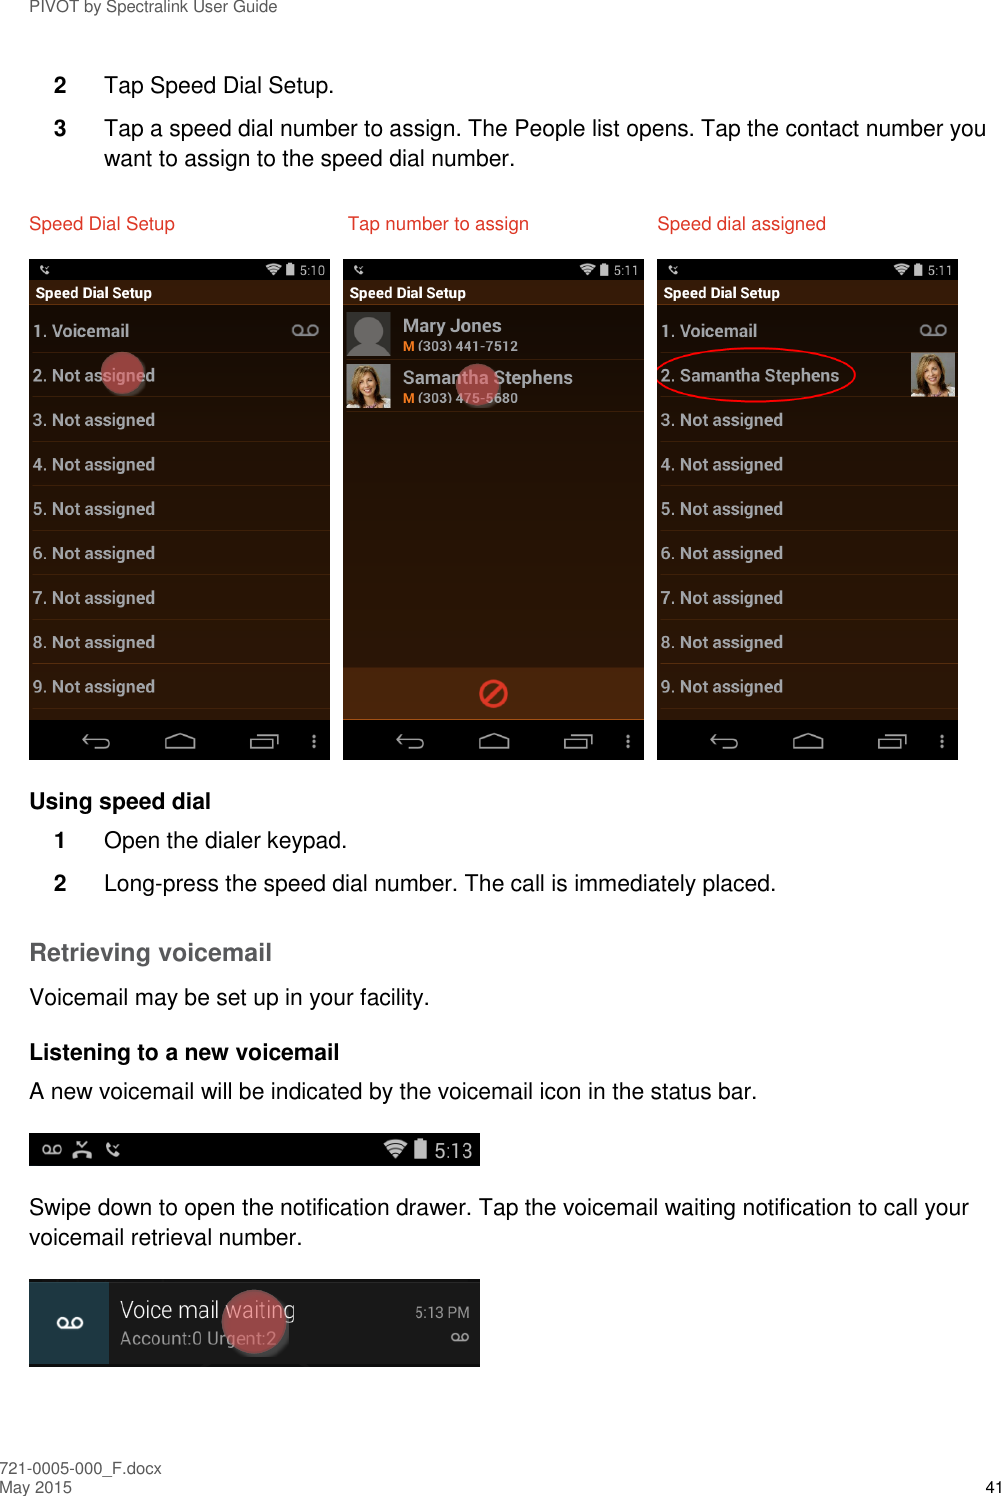
UserManual.wiki
>
Spectralink
>
874X User Manual
>
User Guide
Contents
1.
Manual
2.
User Guide
User Guide
Navigation menu
Upload a User Manual
Namespaces
Wiki Guide
HTML
PDF
Info
Views
User Manual
Discussion / Help
Navigation


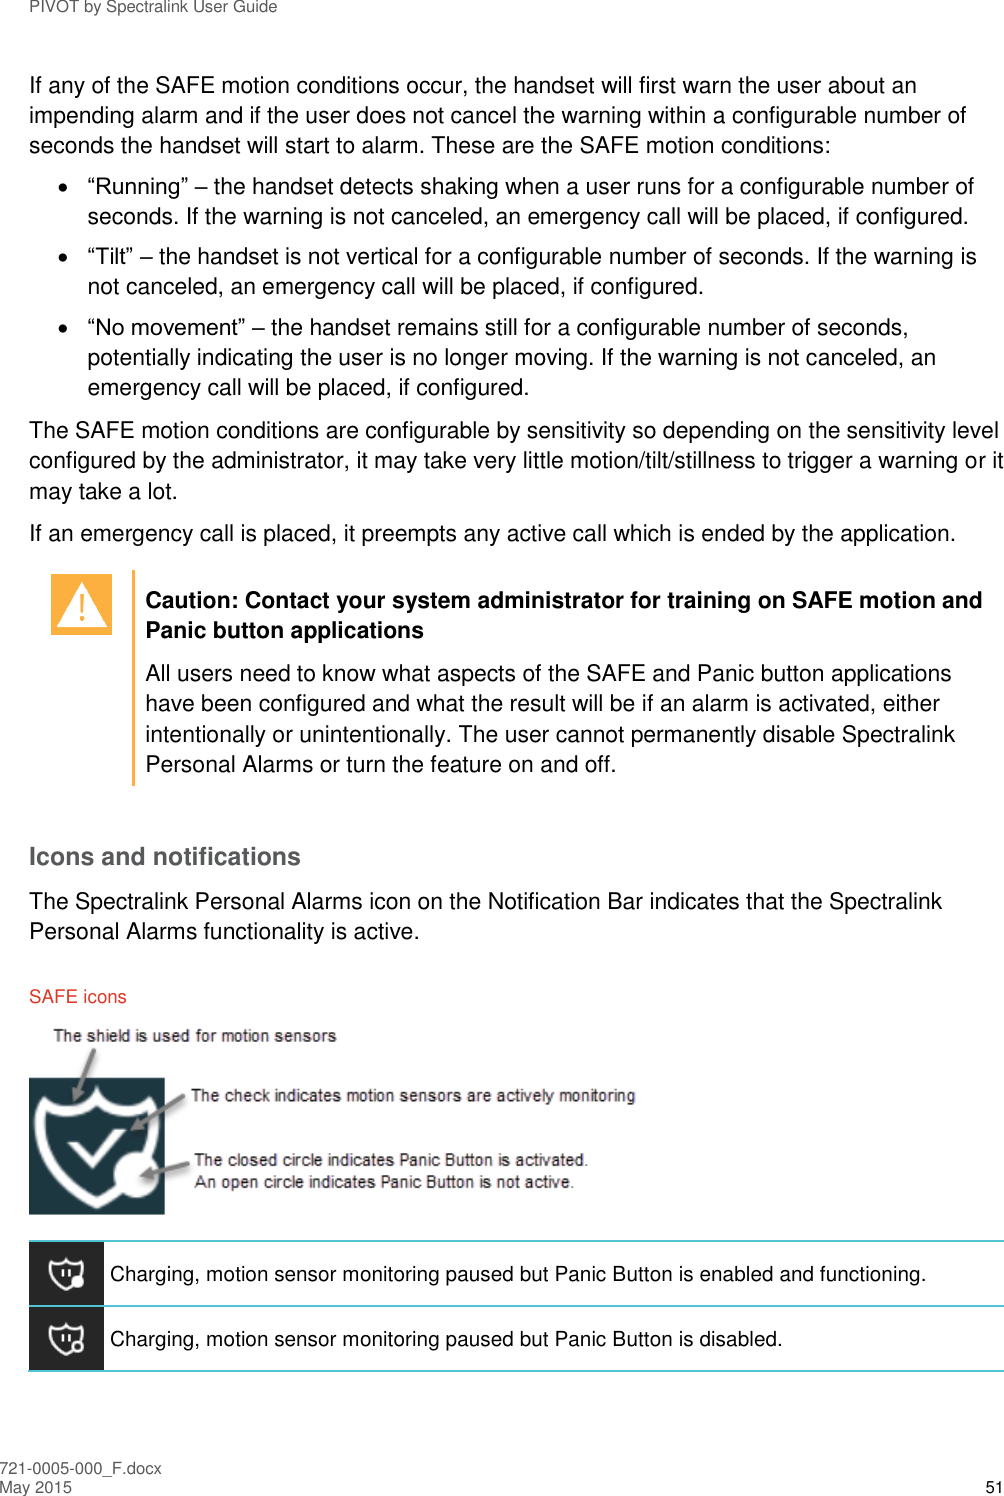
![PIVOT by Spectralink User Guide 721-0005-000_F.docx May 2015 52 Charging, motion sensor monitoring disabled but Panic Button is enabled and functioning. Motion sensors are monitoring, Panic Button is disabled. Motion sensors are monitoring, Panic Button is enabled. Motion sensor monitoring disabled but Panic Button is enabled and functioning. WARNING: Motion sensor monitoring threshold exceeded. (Panic Button is enabled but not alarming. Note that Panic Button never goes to the warning state.) WARNING (with Panic Button disabled) ALARMING due to motion sensor trigger. ALARMING due to Panic Button press. [No icon] Panic Button and motion sensors are not enabled. When you pull down the Notification Bar you will see more information about the status. For instance:](https://usermanual.wiki/Spectralink/874X.User-Guide/User-Guide-2608283-Page-52.png)