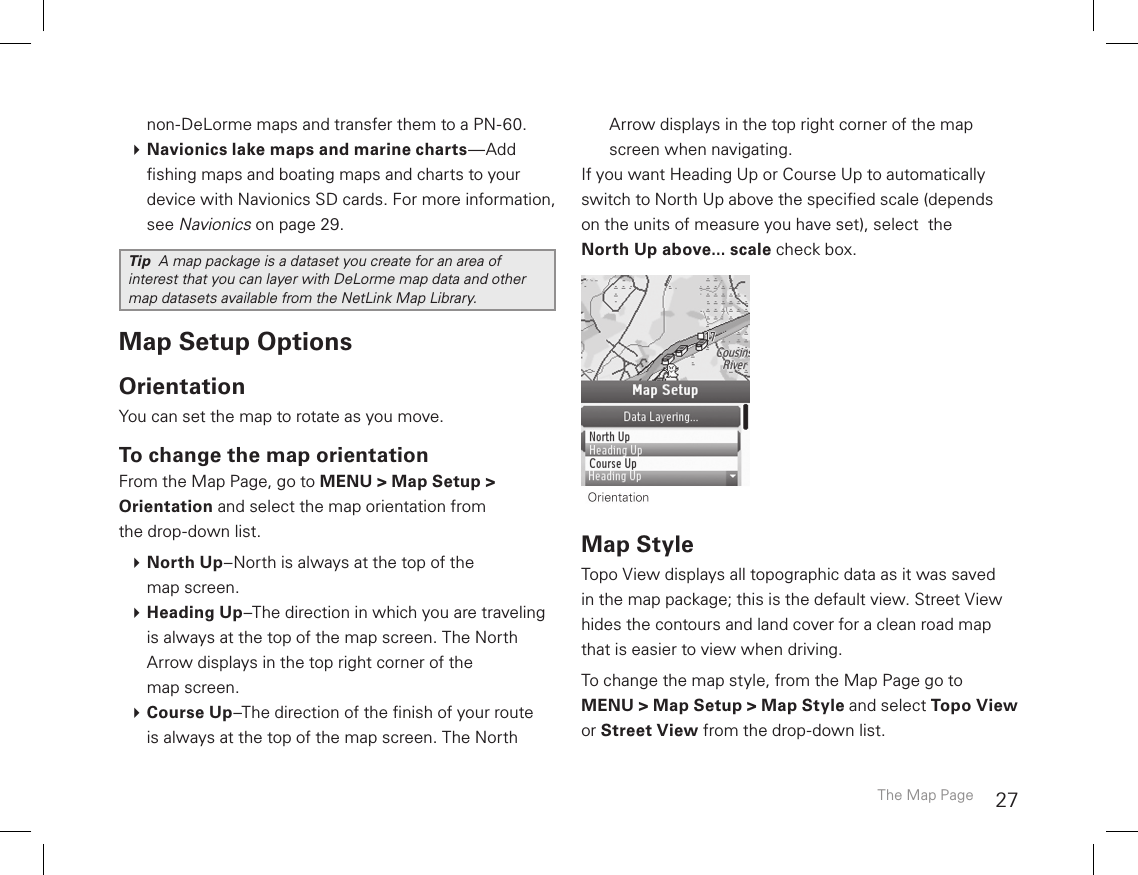
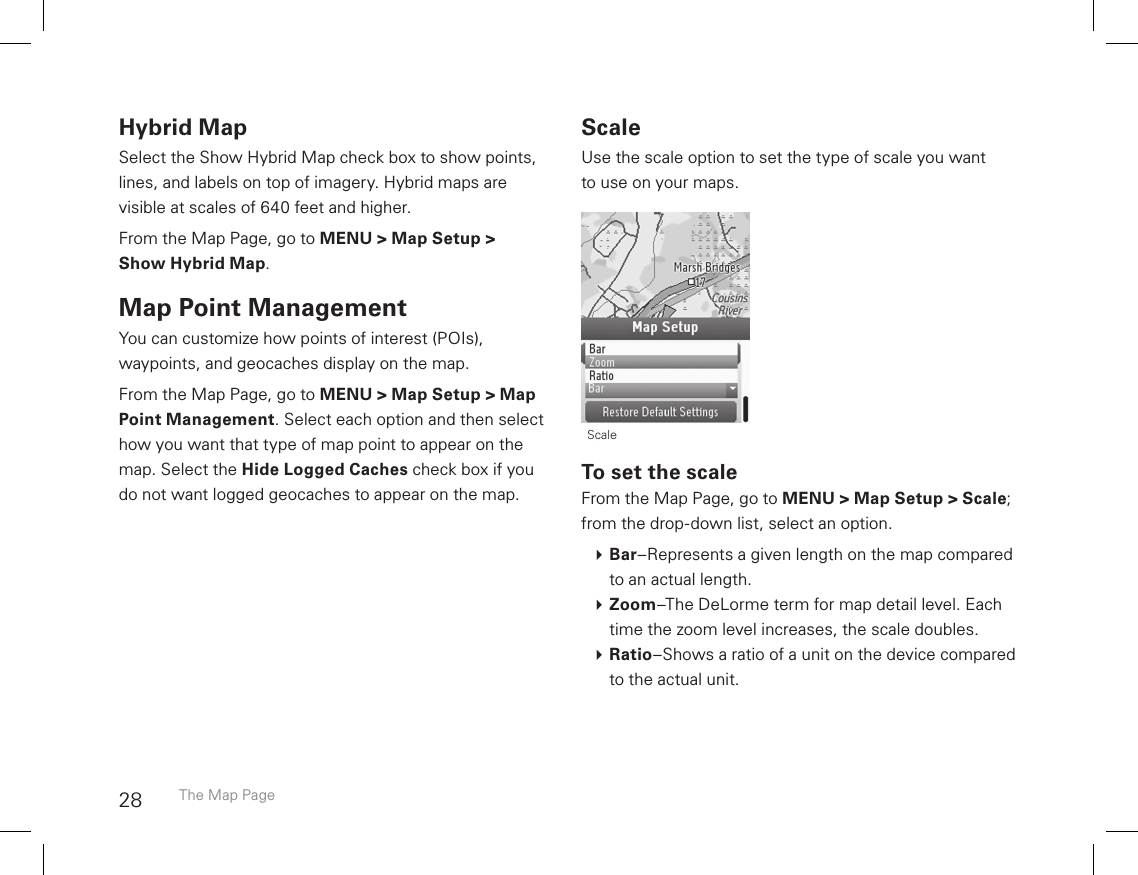
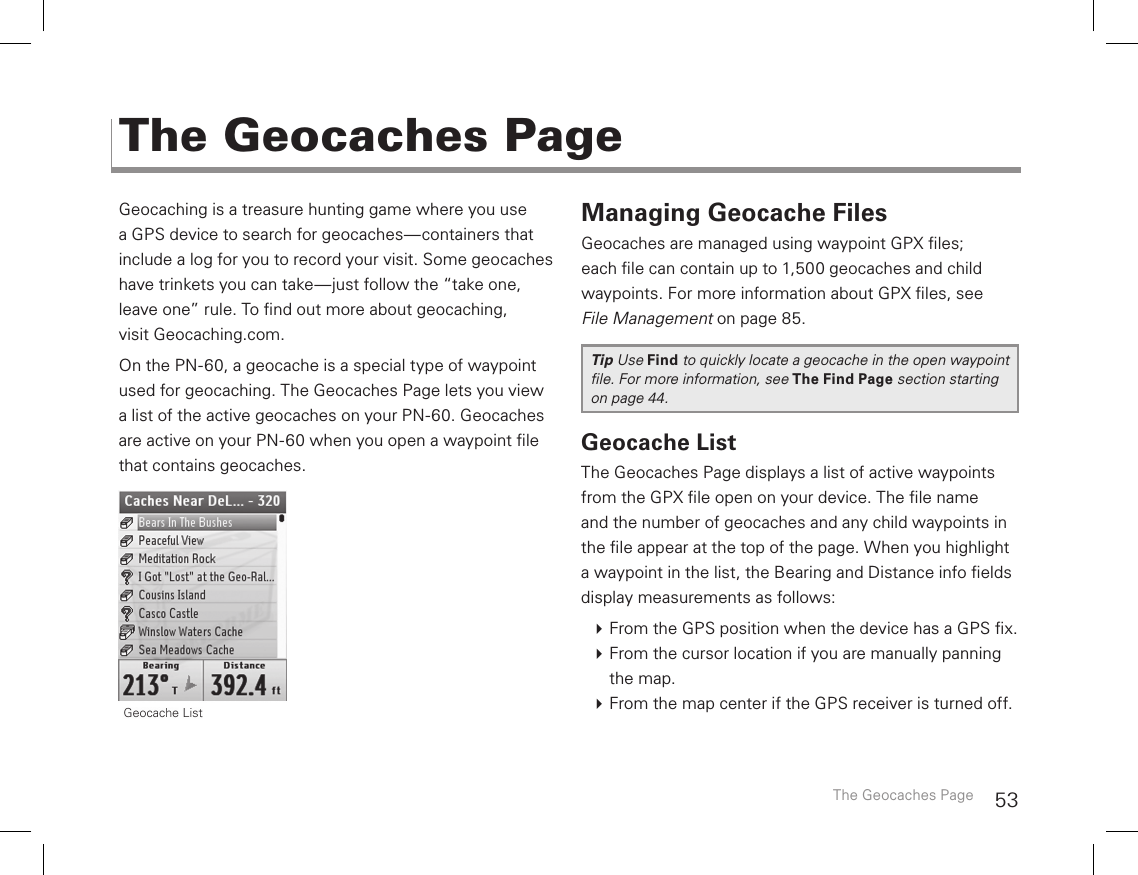
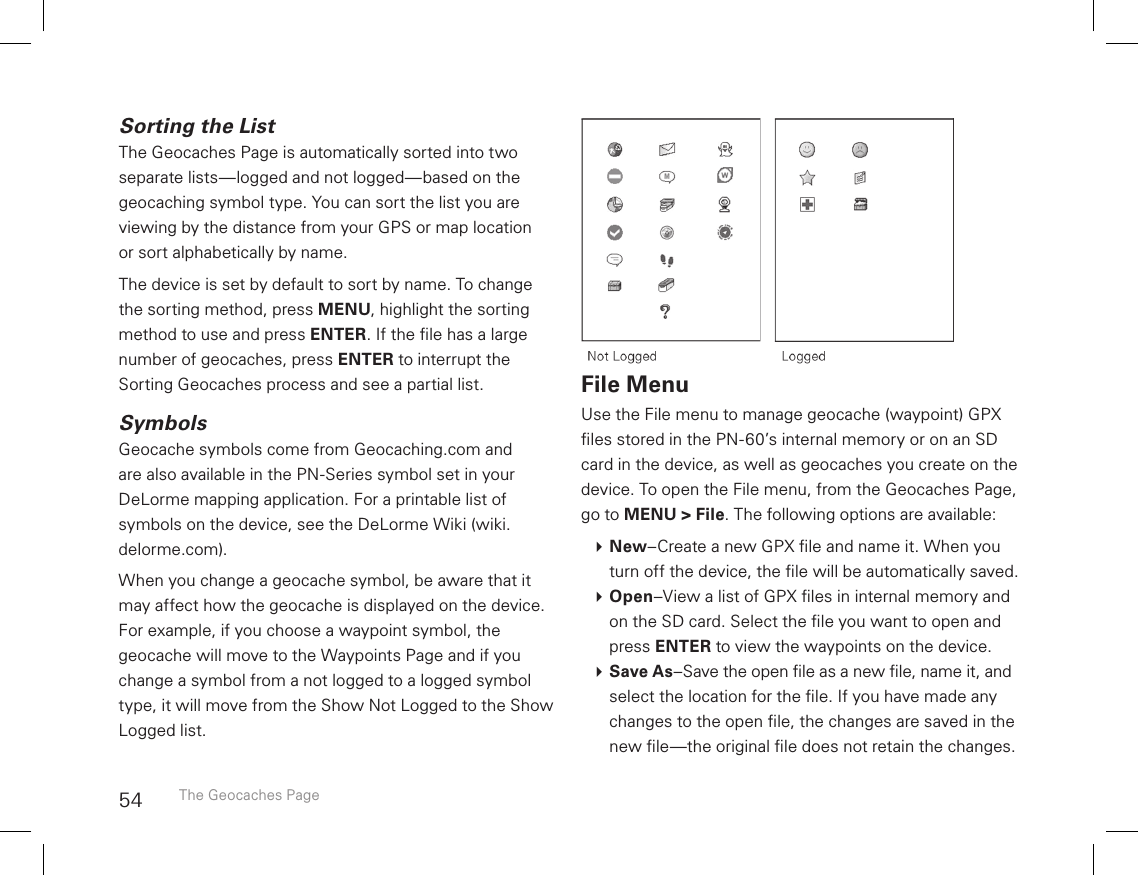
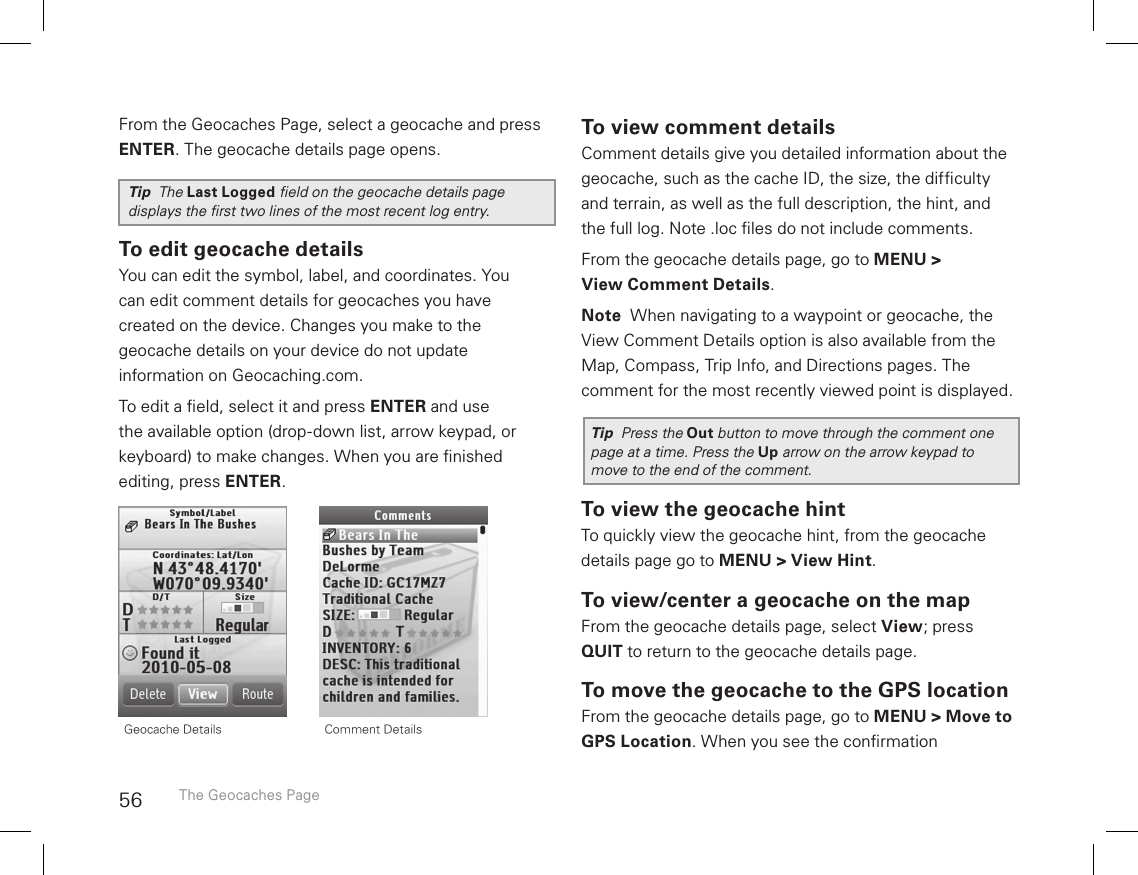
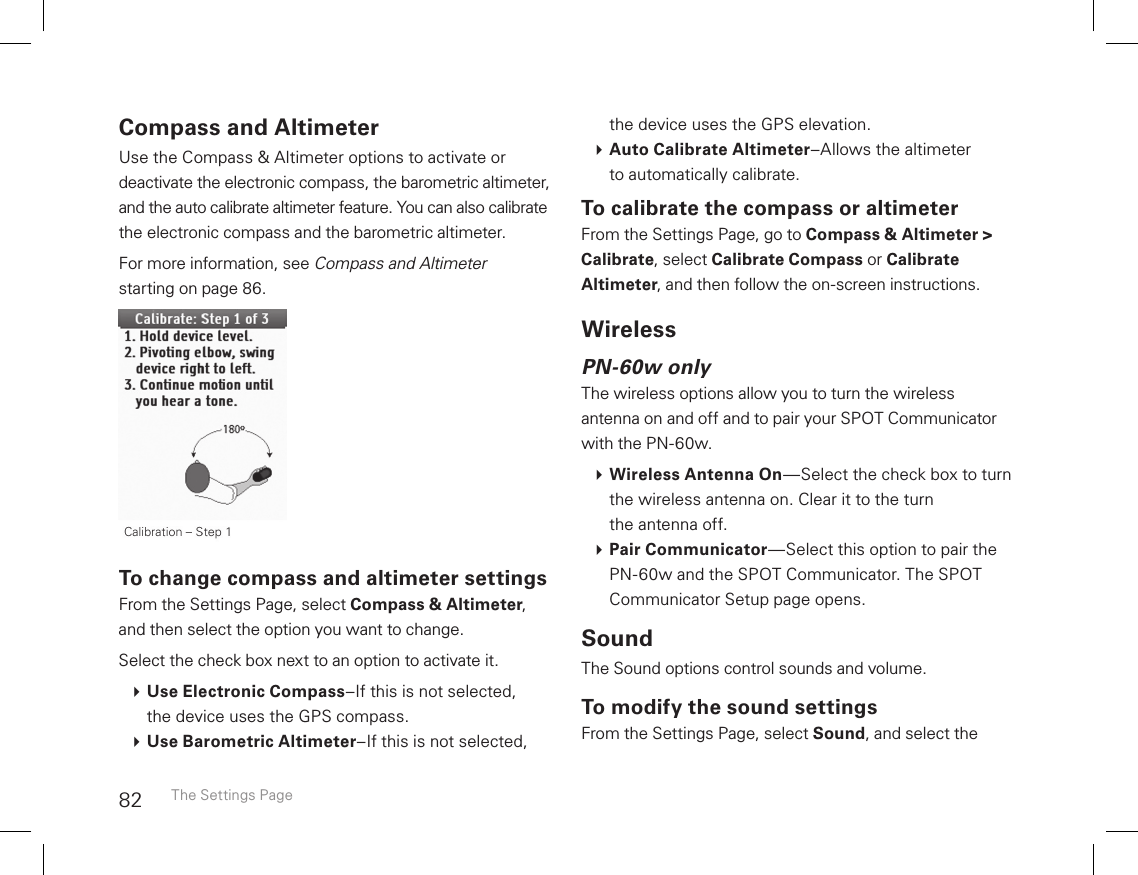
Spot COMM 1.6/2.4 Transmitter User Manual PN 60 rev 1 indb
Spot LLC 1.6/2.4 Transmitter PN 60 rev 1 indb
UserManual.wiki
>
Spot
>
COMM User Manual
Spot COMM User's Manual
Navigation menu
Upload a User Manual
Namespaces
Wiki Guide
HTML
PDF
Info
Views
User Manual
Discussion / Help
Navigation


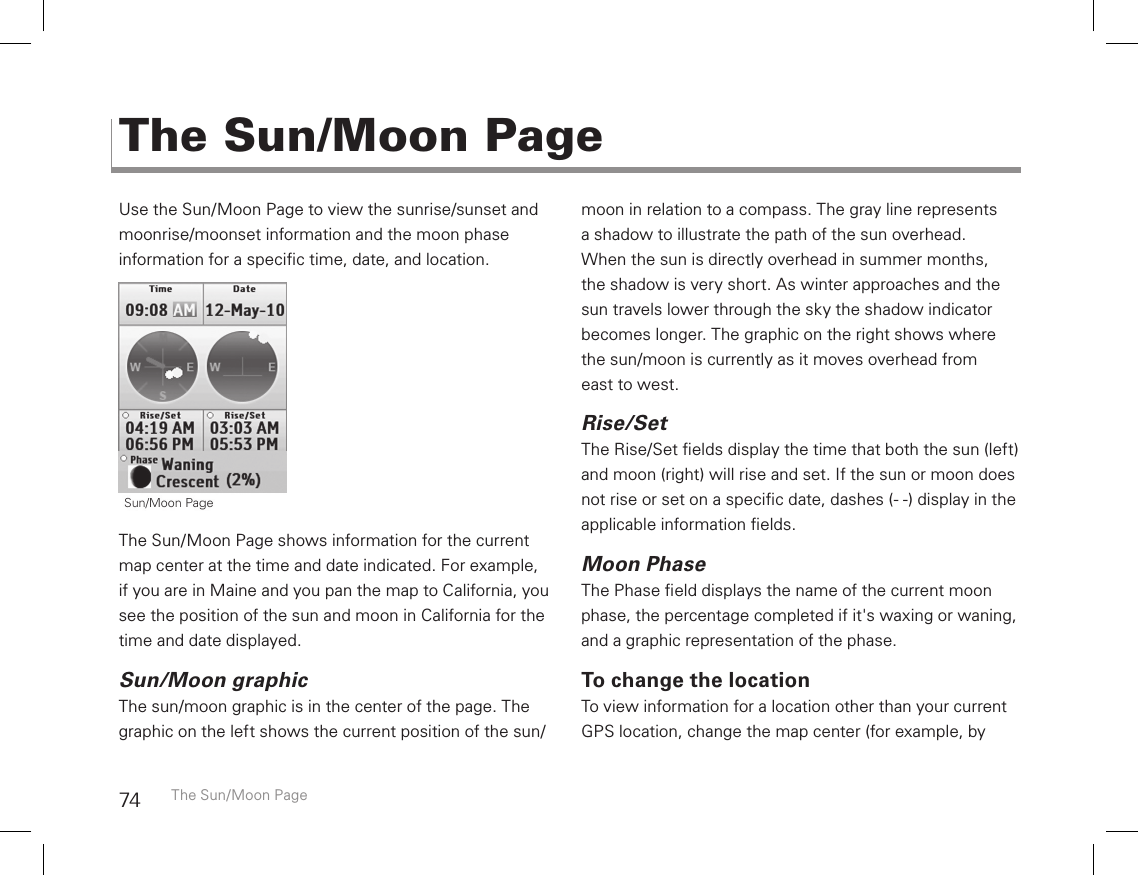
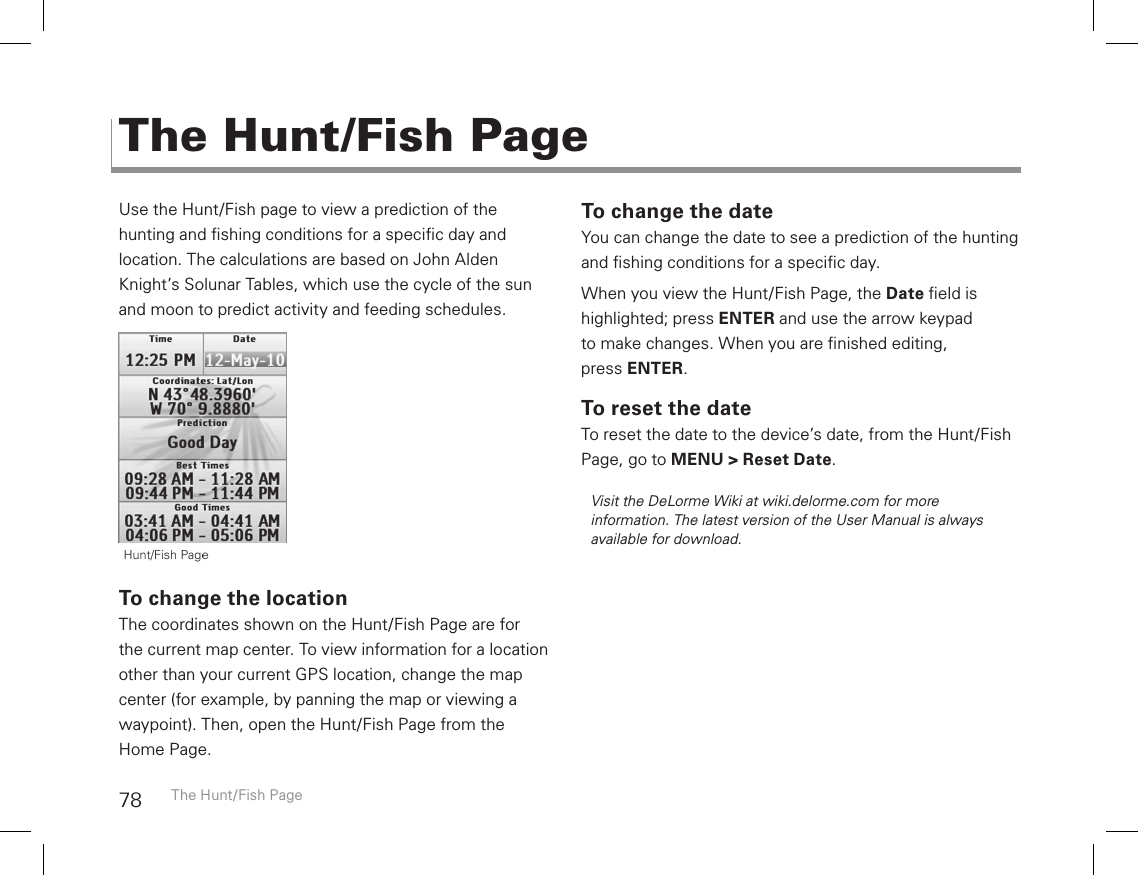
![90[450mW typical (600mW with full backlight)] » Power save: 30 hours with 2 AA alkaline batteries; 50 hours with 2 AA Lithium batteries [< 270mW] Fast USB 2.0 data transfer 3.5 GB available internal ash memory (SE model: 15.5 GB available internal ash memory) Supports SD and SDHC memory cards; up to 32 GB Uses 2 AA batteries or a DeLorme Li-on rechargeable battery.PN-60w Wireless Radio Radio Technology: IEEE 802.15.4 compliant Transmitter Bit Rate: 250kb/sec (maximum) Frequency Spectrum: 2.4GHz unlicensed band Transmitter Power (peak): 10mW Operating Temperature Range: -4ºF to +167ºF (-20 ºC to +75ºC) Storage Temperature Range: -49ºF to 212 ºF (-45ºC to +100ºC) Active memory holds 20,000 track points: 1,500 waypoints; 100 routesFCC CerticationThis equipment has been tested and found to comply with the limits for a class B digital device, pursuant to Part 15 of the FCC rules. These limits are designed to provide reasonable protection against harmful interference in a residential installation. This equipment generates, uses, and can radiate radio frequency energy and, if not installed and used in accordance with the instructions, may cause harmful interference to radio communications. However, there is no guarantee that interference will not occur in a particular installation. If this equipment does cause harmful interference to radio or television reception, which can be determined by turning the equipment off and on, the user is encouraged to try to correct the interference by one or more of the following measures: Reorient or relocate the receiving antenna. Increase the separation between the equipment and the receiver. Connect the equipment into an outlet on a circuit different from that to which the receiver is connected. Consult the dealer or an experienced radio/TV technician for help.Cautions and WarningsAny changes or modications not expressly approved by the grantee of this device could void the user’s authority to operate the equipment.FCC RF Radiation Exposure StatementThis equipment complies with FCC RF radiation Additional Information](https://usermanual.wiki/Spot/COMM/User-Guide-1311918-Page-90.png)