Star Computer Group E380 smart mobile phone User Manual
Star Computer Group smart mobile phone
UserManual.wiki
>
Star Computer Group
>
E380 User Manual
User Manual
Navigation menu
Upload a User Manual
Namespaces
Wiki Guide
HTML
PDF
Info
Views
User Manual
Discussion / Help
Navigation

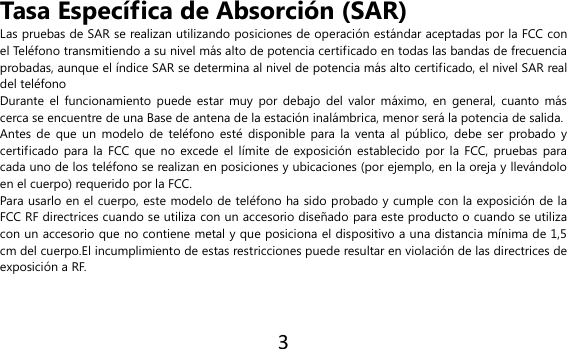
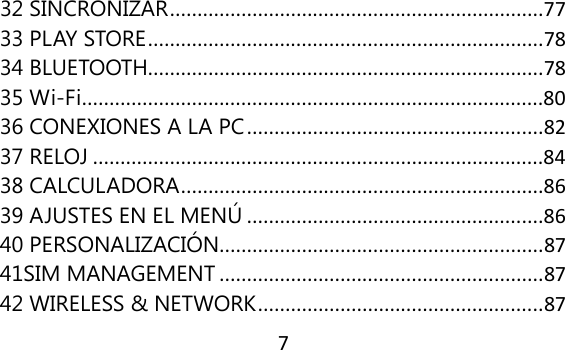
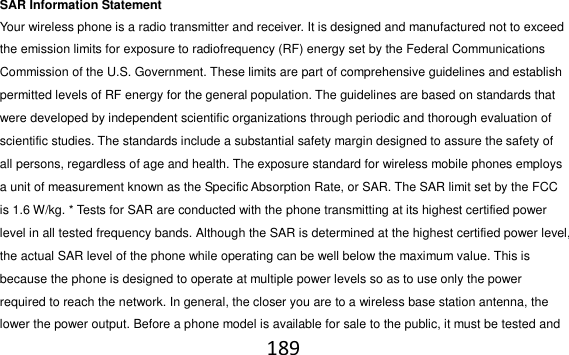
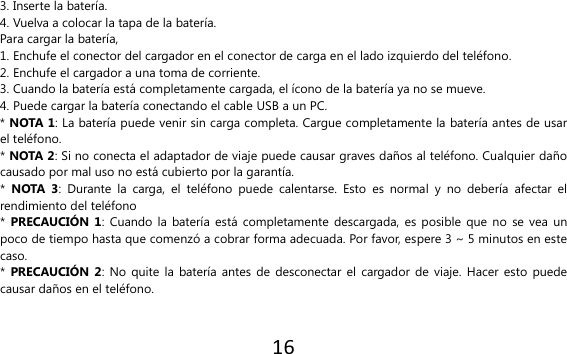
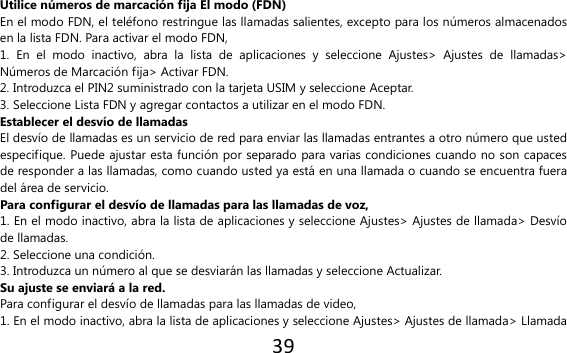
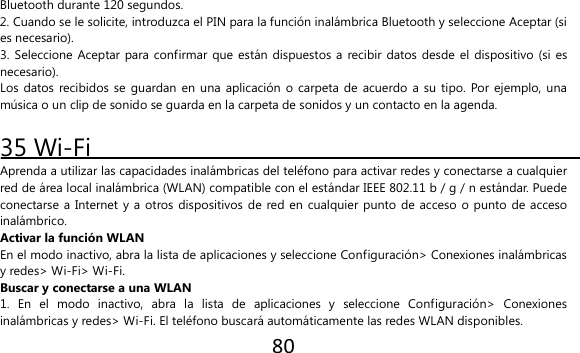
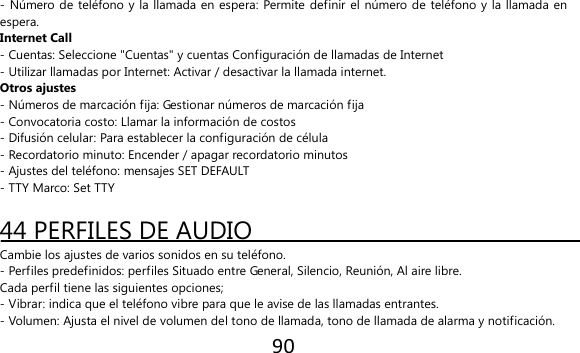
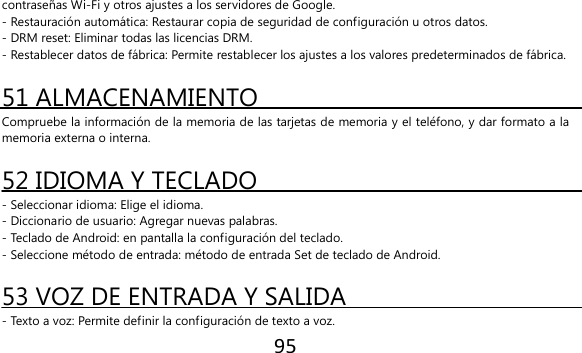
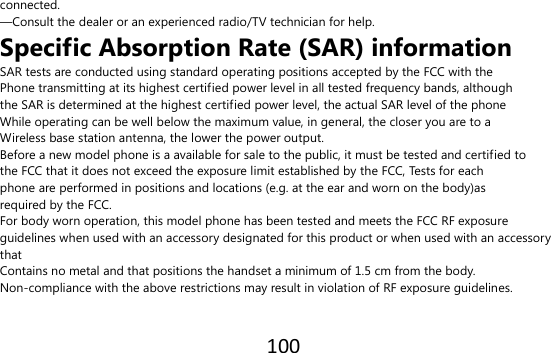
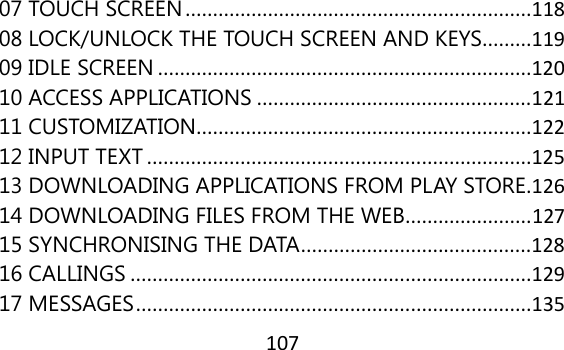
![15 Stereo Ear-Microphone * PRECAUCIÓN: Utilice únicamente accesorios aprobados por Argom. Otros accesorios pueden provocar daños o fallos de funcionamiento que no están cubiertos por la garantía del fabricante. 02 SIM CARD Para instalar la tarjeta SIM, 1. Apague el teléfono pulsando la tecla [POWER]. 2. Retire la tapa de la batería. 3. Inserte la tarjeta SIM en la dirección correcta. 4. Inserte la batería. 5. Vuelva a colocar la tapa de la batería. * ADVERTENCIA: Tenga cuidado de no dañarse las uñas al quitar la tapa de la batería. * PRECAUCIÓN: No inserte una tarjeta de memoria en la ranura de la tarjeta SIM. 03 BATERÍA Para instalar la batería, 1. Apague el teléfono inteligente, pulse [POWER]. 2. Retire la tapa de la batería.](https://usermanual.wiki/Star-Computer-Group/E380/User-Guide-1889082-Page-15.png)
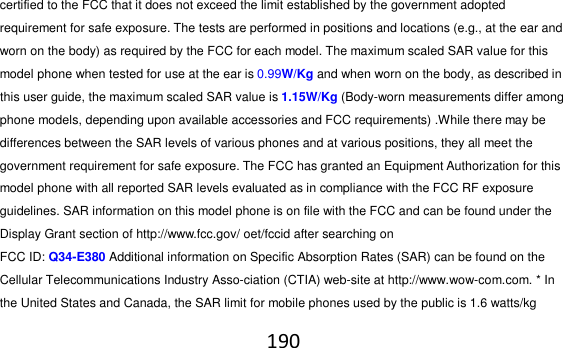
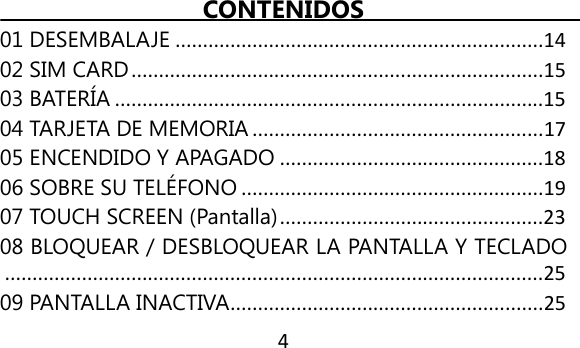
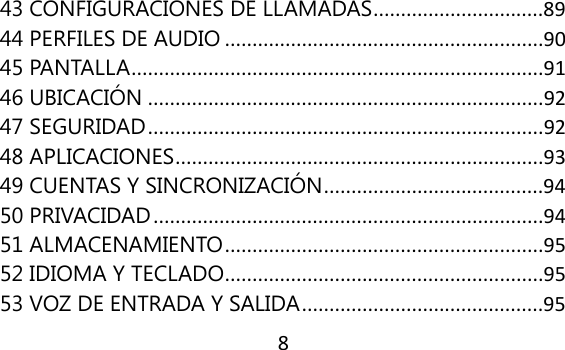
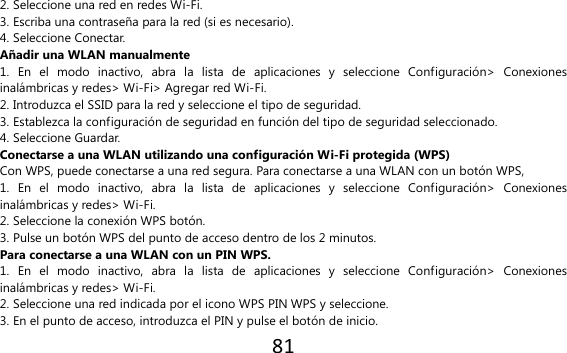
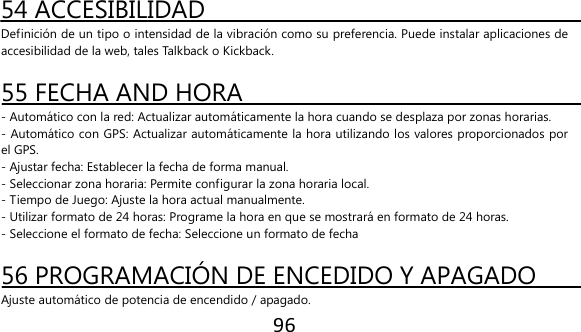
![18 una tarjeta formateada con una estructura de archivos diferente, el teléfono le pedirá volver a formatear la tarjeta de memoria. 05 ENCENDIDO Y APAGADO Para encender el teléfono, mantenga pulsada la tecla [POWER]. El teléfono se conectará automáticamente a la red celular. Si enciende el teléfono por primera vez, pulse en la imagen de Android en la pantalla y siga las instrucciones que aparecen en pantalla para configurar el teléfono para su primer uso. Para apagar el teléfono, mantenga pulsada la tecla [POWER] y luego seleccione Apagar. * NOTA: Para usar su teléfono fuera de la red de servicios solamente, cambie al modo Avión. Mantenga pulsado [POWER] y seleccione Modo avión.](https://usermanual.wiki/Star-Computer-Group/E380/User-Guide-1889082-Page-18.png)

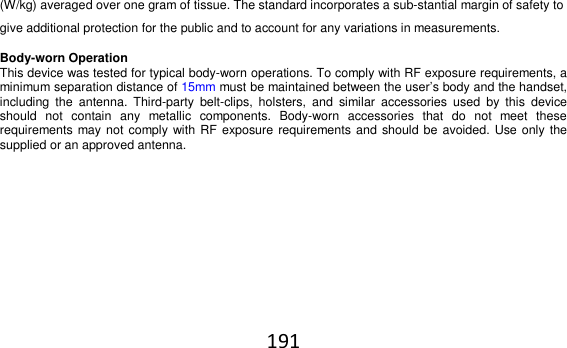
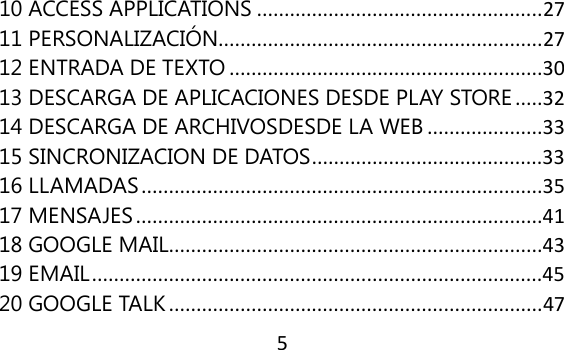
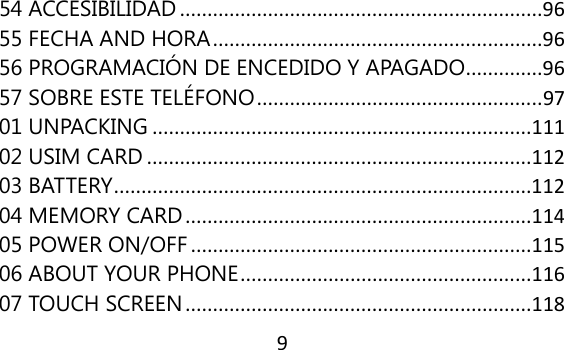
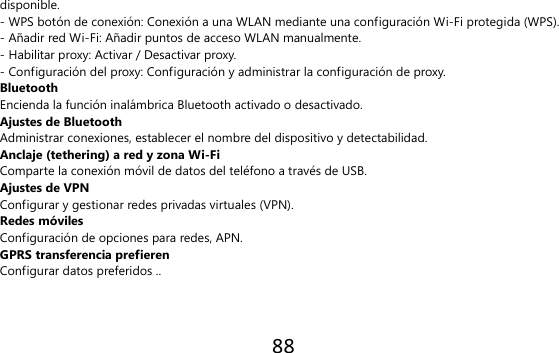
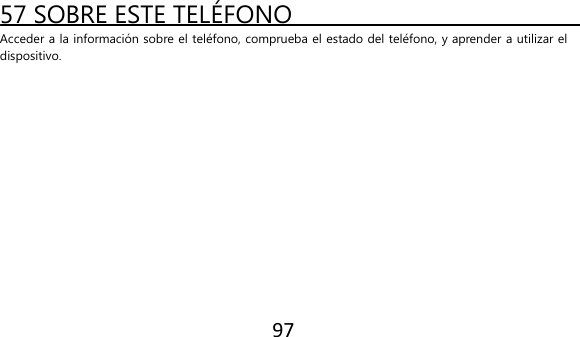
![24 de listas. 4. Arrastrar y soltar: Toque y mantenga el dedo en un elemento y, a continuación, arrastre el dedo para mover el elemento. 5. Doble pulsación: Pulse dos veces rápidamente con el dedo para acercar o alejar la ubicación de las fotos o páginas web. 6. El teléfono se apaga la pantalla táctil cuando no utiliza el teléfono durante un tiempo determinado o puede desactivar la pantalla táctil pulsando la tecla [POWER]. Para activar la pantalla, pulse [POWER] o [INICIO] * Precaución 1: La pantalla táctil cuenta con una función que detecta pequeñas cargas eléctricas que emite el cuerpo humano. Para obtener el mejor rendimiento, pulse la pantalla táctil con la yema del dedo. Para evitar rayar la pantalla táctil, no utilice herramientas cortantes, como un lápiz o un bolígrafo. * Precaución 2: No permitir que la pantalla táctil entre en contacto con el agua u otros dispositivos eléctricos. Puede causar un mal funcionamiento. * NOTA: Para un uso óptimo de la pantalla táctil, quite la película protectora de la pantalla antes de utilizar su teléfono.](https://usermanual.wiki/Star-Computer-Group/E380/User-Guide-1889082-Page-24.png)
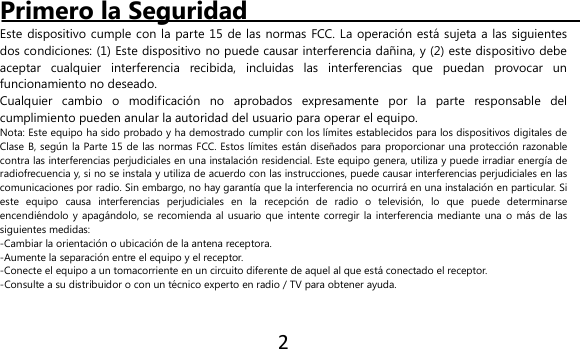
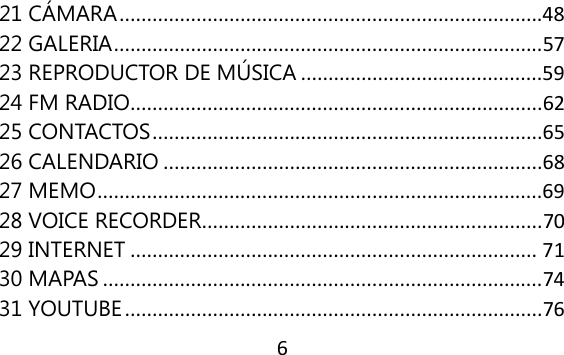
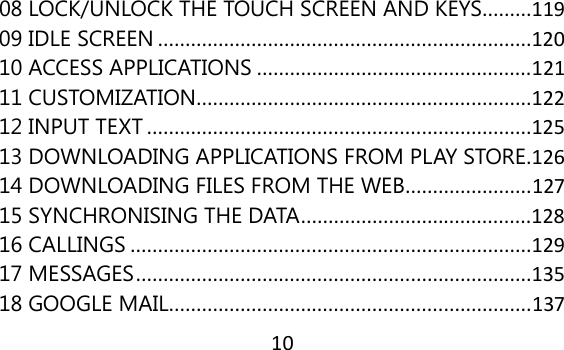
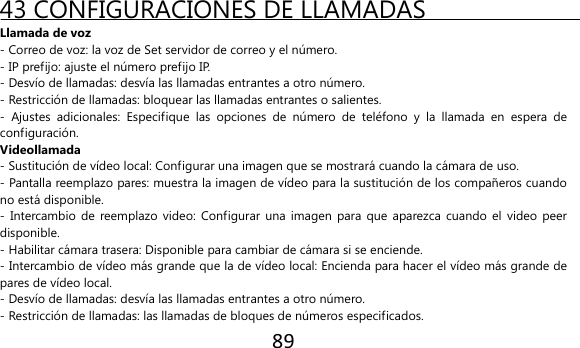
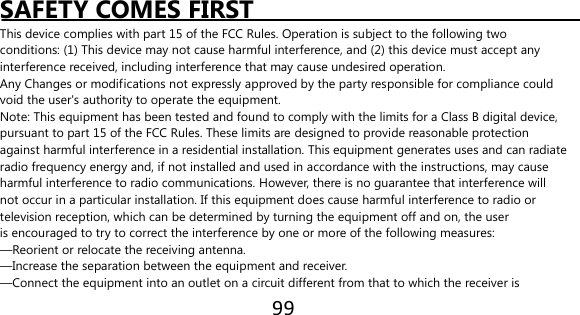
![25 08 BLOQUEAR / DESBLOQUEAR LA PANTALLA Y TECLADO Puede bloquear la pantalla táctil y las teclas para evitar las Operaciones de dispositivos no intencionales. Para bloquear, presione [POWER]. Para desbloquear, presione [POWER] o pulse [INICIO]. 09 PANTALLA INACTIVA Agregar elementos a la pantalla de espera Puede personalizar la pantalla de inicio añadiendo accesos directos a aplicaciones o elementos en aplicaciones, widgets o carpetas. Para agregar elementos a la pantalla de inicio, 1. Presione [MENU]> Añadir o mantenga pulsada el área vacía de la pantalla de inicio. 2. Seleccione la categoría del elemento y un elemento. 1) Widgets: Agregar widgets a la pantalla inactiva. 2) Accesos directos: Agregar accesos directos a los elementos, como aplicaciones, favoritos y contactos. 3) Carpetas: Crear una nueva carpeta o añadir carpetas para sus contactos. 4) Fondos de pantalla: Permite definir una imagen de fondo. Mover elementos en la pantalla de espera](https://usermanual.wiki/Star-Computer-Group/E380/User-Guide-1889082-Page-25.png)
![27 10 ACCESS APPLICATIONS Para acceder a las aplicaciones del teléfono, 1. En el modo inactivo, seleccione Aplicaciones para acceder a la lista de aplicaciones. 2. Desplácese hacia la izquierda o hacia la derecha a otra pantalla de aplicación. 3. Seleccione una aplicación. 4. Pulse [BACK] para volver a la pantalla anterior Pulse el botón [HOME] para volver a la pantalla inactiva. * NOTA: Al utilizar aplicaciones suministradas por Google, debe tener una cuenta de Google Acceso a Aplicaciones recientes 1. Pulse la tecla [INICIO] para abrir la lista de aplicaciones que ha accedido recientemente. 2. Seleccione una aplicación para acceder a él. 11 PERSONALIZACIÓN Ajuste de la fecha y hora actuales 1. En el modo inactivo, abra la lista de aplicaciones y seleccione Ajustes> Fecha y hora. 2. Ajuste la fecha y la hora y cambie otras opciones. Activar / desactivar la marcación por tonos En el modo inactivo, abra la lista de aplicaciones y seleccione Configuración> Perfiles> Perfiles de](https://usermanual.wiki/Star-Computer-Group/E380/User-Guide-1889082-Page-27.png)
![28 audio preferidos> Selección audible. Ajustar el volumen de los tonos de llamada Pulse el botón [VOL] hacia arriba o hacia abajo para ajustar el volumen del timbre. Cambie al modo silencioso Hay tres opciones para activar o desactivar el sonido del teléfono. 1. En el modo inactivo, abra la lista de aplicaciones y seleccione Teléfono> Teclado y pulse la tecla [#]. 2. En el modo inactivo, mantenga pulsada la tecla [POWER] y seleccione el modo silencioso. 3. En el modo inactivo, abra el panel de accesos directos de desplazamiento hacia abajo de la línea de icono en la parte superior de la pantalla y seleccionar el modo silencioso. Cambiar el tono 1. En el modo inactivo, abra la lista de aplicaciones y seleccione Configuración> Perfil de Audio> Perfil preferido> Voz / Video tono de llamada o Tono de notificación. 2. Seleccione una melodía de la lista y seleccione Aceptar. Animación Activo para cambiar de ventanas En el modo inactivo, abra la lista de aplicaciones y seleccione Ajustes> Pantalla> Animación> Algunas animaciones o Todas las animaciones. Seleccionar un fondo de pantalla para la pantalla de espera 1. En el modo inactivo, pulse [MENU]> Wallpaper y seleccione una opción. 2. Seleccione una imagen. 3. Seleccione Establecer fondo de pantalla.](https://usermanual.wiki/Star-Computer-Group/E380/User-Guide-1889082-Page-28.png)
![32 13 DESCARGA DE APLICACIONES DESDE PLAY STORE Basado en la plataforma Android, el teléfono se puede ampliar la funcionalidad mediante la instalación de aplicaciones adicionales. Play Store te ofrece una manera fácil y rápida de comprar juegos y aplicaciones móviles. * NOTA 1: Esta función puede no estar disponible dependiendo de su región. * NOTA 2: El dispositivo guardará los archivos de las aplicaciones descargadas a la interna NAND o tarjeta SD. Para guardar los archivos en la tarjeta de memoria, conecte el dispositivo a un PC y copiarlos de NAND o en la tarjeta SD. Instalar una aplicación 1. En el modo inactivo, abra la lista de aplicaciones y seleccione Play Store. 2. Seleccione Aceptar cuando los términos y condiciones que aparece. 3. Seleccione una categoría de elemento> un elemento. 4. Seleccione Instalar (para elementos gratuitos) o Comprar. Si selecciona Instalar, seleccione Aceptar para descargar el artículo inmediatamente. Si selecciona Comprar, deberá introducir su información de tarjeta de crédito. Siga las instrucciones que aparecen en pantalla. Desinstalar una aplicación 1. Desde la pantalla de casa Play Store, pulse [Menú]> Descargas. 2. Seleccione el elemento que desea eliminar. 3. Seleccione Desinstalar> Aceptar.](https://usermanual.wiki/Star-Computer-Group/E380/User-Guide-1889082-Page-32.png)
![35 3. Presione [MENU]> Sincronizar ahora. El teléfono comenzará a sincronizar los datos que figuran para la sincronización. 16 LLAMADAS Realizar una llamada 1. En el modo inactivo, abra la lista de aplicaciones y seleccione Teclado del teléfono>, e introduzca un código de área y el número telefónico. 2. Seleccione [TALK] para realizar una llamada de voz. 3. Para finalizar la llamada, seleccione Finalizar llamada. * NOTA: Cuando sostiene el teléfono cerca de su cara, el teléfono se apaga automáticamente la pantalla táctil para evitar pulsaciones accidentales. Contestar una llamada 1. Cuando entra una llamada, arrastre [TALK] hacia la derecha hasta que aparezca respuesta. 2. Para finalizar la llamada, seleccione Finalizar llamada. * NOTA: Cuando el teléfono esté sonando, pulse la tecla [VOL] para silenciar el tono de llamada. Rechazar una llamada Cuando entra una llamada, arrastre [TALK] hacia la izquierda hasta que aparezca decadencia. La persona que llama escuchará un tono de ocupado. Para enviar un mensaje cuando rechace llamadas entrantes, seleccione Rechazar con msg. Para utilizar](https://usermanual.wiki/Star-Computer-Group/E380/User-Guide-1889082-Page-35.png)
![36 esta función, primero debe configurar un mensaje de texto que se enviará a las personas que llaman. En el modo inactivo, abra la lista de aplicaciones y seleccione Ajustes> Ajustes de llamada> Rechazar llamada con mensaje. A continuación, seleccione Crear y crear un mensaje de texto. Llamar a un número internacional 1. En el modo inactivo, abra la lista de aplicaciones y seleccione Teléfono> Teclado y mantenga pulsada [0] para insertar el carácter +. 2. Introduzca el número completo que desea marcar (código de país, código de área y número de teléfono) y, a continuación, seleccione [TALK] para marcar el número. El uso de los auriculares Al conectar los auriculares suministrados en el dispositivo, podrá responder y controlar llamadas con manos libres: - Para responder a una llamada, pulse el botón del auricular. - Para rechazar una llamada, pulse y mantenga pulsado el botón del auricular. - Para poner una llamada en espera o recuperar una llamada en espera durante una llamada, pulse y mantenga pulsado el botón del auricular. - Para finalizar una llamada, pulse el botón del auricular. Utilizar las opciones durante una llamada de voz Puede utilizar las siguientes opciones durante una llamada de voz en curso: - Para ajustar el volumen de voz, pulse la tecla [VOL] hacia arriba o hacia abajo. - Para poner una llamada en espera, seleccione [ll]. Para recuperar una llamada en espera, seleccione](https://usermanual.wiki/Star-Computer-Group/E380/User-Guide-1889082-Page-36.png)
![37 [▶]. - Para marcar una segunda llamada, seleccione Agregar llamada y marque un número nuevo. - Para responder a una segunda llamada, seleccione Aceptar cuando una llamada en espera emite un tono. El teléfono le preguntará si desea finalizar o retener la primera llamada. Debe suscribirse al servicio de llamada en espera para usar esta función. - Para abrir la pantalla de marcación, seleccione Teclado. - Para activar la función de altavoz, seleccione Altavoz. - Para apagar el micrófono para que el interlocutor no pueda oírle, seleccione Silencio. - Para escuchar y hablar con la otra parte a través de los auriculares Headset bluetooth selección. - Para abrir la agenda, pulse [Menú]> Contactos. - Para añadir una nota, presione [MENU] Memo>. - Para cambiar entre las dos llamadas, seleccione Cambiar. - Para realizar una llamada múltiple (multiconferencia), realice o contestar una segunda llamada y seleccione Combinar cuando está conectado con la segunda persona. Repita el proceso para agregar más interlocutores. Debe suscribirse al servicio de llamada múltiple para utilizar esta función. - Para conectar a la parte actual a la otra parte pone en espera, presione [MENU]> Transferir. Se le desconecta de la llamada. Utilizar las opciones durante una videollamada Puede usar las siguientes opciones mientras una llamada de video está en curso: - Para activar la función de altavoz, seleccione Altavoz.](https://usermanual.wiki/Star-Computer-Group/E380/User-Guide-1889082-Page-37.png)
![38 - Para apagar el micrófono para que el interlocutor no pueda oírle, seleccione Silencio. - Para ocultar la imagen de la otra parte, pulse [MEMU]> Escóndeme. - Para seleccionar una imagen alternativa que se muestra a la otra parte, presione [MENU]> image saliente. - Para abrir la pantalla de marcación, presione [MENU]> Teclado. - Para escuchar y hablar con la otra parte a través de los auriculares Bluetooth, presione [MENU]> Cambiar al auricular. - Para cambiar entre la lente frontal y posterior de la cámara, presione [MENU]> Cambiar cámara. - Para personalizar los ajustes de videollamada, pulse [MENU]> Settings. - Para utilizar la imagen de la otra parte, toque y mantenga la imagen de la otra parte. Puede capturar una imagen de la pantalla o grabar la videollamada. - Utilizar mi imagen, toque y mantenga su imagen. Se puede ajustar el brillo, el zoom para acercar o alejar la imagen a través de la lente de la cámara trasera, o aplicar el efecto de desenfoque a la imagen a través de la lente de la cámara frontal. Ver y marcar llamadas perdidas El teléfono muestra las llamadas que ha perdido en la pantalla. Para marcar el número de una llamada perdida, abra el panel de accesos directos y seleccione la llamada perdida. Utilizar funciones adicionales Puede utilizar los demás relacionadas con las llamadas funciones, como el rechazo automático, el modo FDN (números de marcación fija), o el desvío de llamadas o restricción.](https://usermanual.wiki/Star-Computer-Group/E380/User-Guide-1889082-Page-38.png)
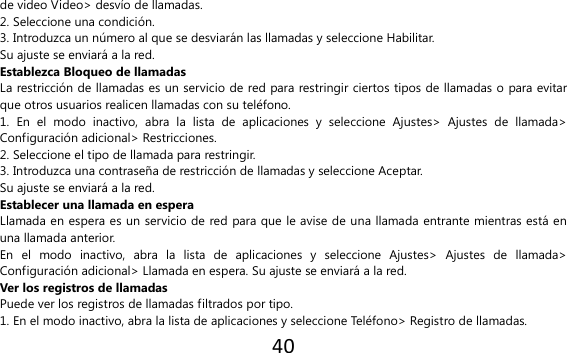
![41 2. Presione [MENU]> Ver por> una opción para ordenar los registros de llamadas. 3. Seleccione un registro para ver sus detalles. * NOTA 1: A partir de los registros de llamadas, puede realizar una llamada o enviar un mensaje directamente a un contacto rápidamente agitando el contacto a la derecha a la izquierda. * NOTA 2: En la vista de detalle, puede marcar el número, enviar un mensaje al número o agregar el número a la libreta de direcciones o lista de rechazados. 17 MENSAJES Enviar un mensaje de texto 1. En el modo inactivo, abra la lista de aplicaciones y seleccione Mensajería mensaje> Nuevo. 2. Seleccione Contactos. Puede introducir un número manualmente o seleccione uno de los destinatarios recientes o grupos de contacto, seleccionando otro botón. 3. Seleccione las casillas de verificación que aparecen junto a los contactos y seleccione Agregar. 4. Seleccione el tipo de componer e introduzca el texto del mensaje. Para insertar emoticonos, presione [MENU]> Insertar emoticono. 5. Seleccione Enviar para enviar el mensaje. Enviar un mensaje multimedia 1. En el modo inactivo, abra la lista de aplicaciones y seleccione Mensajería mensaje> Nuevo. 2. Seleccione Contactos. Puede introducir un número manualmente o seleccione uno de los](https://usermanual.wiki/Star-Computer-Group/E380/User-Guide-1889082-Page-41.png)
![42 destinatarios recientes o grupos de contacto, seleccionando otro botón. 3. Seleccione las casillas de verificación que aparecen junto a los contactos y seleccione Agregar. Cuando se introduce una dirección de correo electrónico, el teléfono convertir el mensaje como un mensaje multimedia. 4. Seleccione el tipo de componer e introduzca el texto del mensaje. Para insertar emoticonos, presione [MENU]> Insertar emoticono. 5. Presione [MENU]> Adjuntar> una opción y añada un elemento. Puede seleccionar un archivo de la lista de archivos o crear una nueva foto, vídeo o sonido. 6. Presione [MENU]> Añadir asunto y añada un asunto para el mensaje. 7. Seleccione Enviar para enviar el mensaje. Ver un mensaje de texto o multimedia 1. En el modo inactivo, abra la lista de aplicaciones y seleccione Mensajería. Los mensajes se agrupan en conversaciones por contacto, como un mensajero. 2. Seleccione un contacto. 3. Seleccione un mensaje de texto o multimedia de la cadena de mensajes. 4. Para un mensaje multimedia, seleccione [▶] para ver el archivo adjunto. Escuchar los mensajes de voz Si ha configurado las llamadas perdidas se desvíen al servidor de correo de voz, los llamantes podrán dejar mensajes de voz cuando no conteste las llamadas entrantes. Para acceder a su buzón de correo de voz y escuchar los mensajes de voz,](https://usermanual.wiki/Star-Computer-Group/E380/User-Guide-1889082-Page-42.png)
![43 1. En el modo inactivo, abra la lista de aplicaciones y seleccione Teléfono> Teclado y luego mantenga pulsado [1]. 2. Siga las instrucciones del servidor de correo de voz. * NOTA: Debe guardar el número del servidor de correo de voz antes de acceder al servidor. Su proveedor de servicios puede darle el número. 18 GOOGLE MAIL Puede recuperar los nuevos mensajes de correo electrónico de Google Mail en tu bandeja de entrada. Cuando acceda a esta aplicación, la pantalla Bandeja de entrada aparece. El número total de pantallas de mensajes sin leer en la barra de título y los mensajes no leídos aparecen en negrita. Si etiquetó un mensaje, su etiqueta aparece en un rectángulo de color en el mensaje. Enviar un mensaje de correo electrónico 1. En el modo inactivo, abra la lista de aplicaciones y seleccione Correo de Google. 2. Presione [MENU]> Redactar. 3. Introduzca un nombre o dirección en el campo de destinatario. 4. Introduzca un asunto y mensaje. 5. Para adjuntar un archivo de imagen, presione [MENU]> Adjuntar> un archivo. 6. Seleccione Enviar para enviar el mensaje. Ver mensajes de correo electrónico](https://usermanual.wiki/Star-Computer-Group/E380/User-Guide-1889082-Page-43.png)
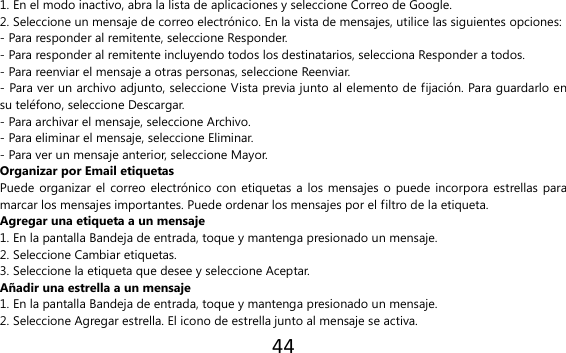
![45 Filtrar mensajes 1. En la pantalla Bandeja de entrada, pulse [Menú]> Ver etiquetas. 2. Seleccione la etiqueta de los mensajes que desea ver. 19 EMAIL Aprenda a enviar y ver mensajes de correo electrónico a través de su cuenta de correo electrónico personal o de empresa. Configurar una cuenta de correo electrónico 1. En el modo inactivo, abra la lista de aplicaciones y seleccione Correo electrónico. 2. Ingrese su dirección de correo electrónico y contraseña. 3. Seleccione Siguiente (para cuentas de correo electrónico generales, como Google Mail y Yahoo) o Configuración manual (para otras cuentas de la empresa de correo electrónico). 4. Siga las instrucciones que aparecen en pantalla. Cuando haya terminado de configurar la cuenta de correo electrónico, los mensajes de correo electrónico se descargan en el teléfono. Si ha creado más de 2 cuentas, puede cambiar entre cuentas de correo electrónico, pulse [Menú]> Cuentas y seleccione uno desea recuperar los mensajes. Enviar un mensaje de correo electrónico 1. En el modo inactivo, abra la lista de aplicaciones y seleccione Correo electrónico> una cuenta de correo electrónico.](https://usermanual.wiki/Star-Computer-Group/E380/User-Guide-1889082-Page-45.png)
![46 2. Presione [MENU]> Redactar. 3. Seleccione Contactos. Puede introducir una dirección de correo electrónico manualmente o seleccione uno de los destinatarios recientes o grupos seleccionando otro botón. 4. Seleccione la Cc / CCO para agregar más destinatarios. 5. Seleccione el campo del asunto que ingrese un tema. 6. Seleccione el campo de entrada de texto para escribir el texto de su correo electrónico. 7. Seleccione Adjuntar y adjunte un archivo. Puede seleccionar un clip de imagen, video o sonido. 8. Seleccione Enviar para enviar el mensaje. Ver un mensaje de correo electrónico Cuando usted abre una cuenta de correo electrónico, usted puede ver los correos electrónicos recuperados anteriormente sin conexión o conectarse al servidor de correo electrónico para ver mensajes nuevos. Después de recuperar los mensajes de correo electrónico, puede verlos sin conexión. 1. En el modo inactivo, abra la lista de aplicaciones y seleccione Correo electrónico> una cuenta de correo electrónico. 2. Presione [MENU]> Actualizar para actualizar la lista de mensajes. 3. Seleccione un mensaje de correo electrónico. En la vista de mensajes, utilice las siguientes opciones: - Para responder al remitente, seleccione Responder. - Para eliminar el mensaje, seleccione Eliminar. - Para responder al mensaje que incluye todos los destinatarios, selecciona Responder a todos. - Para ver un archivo adjunto, seleccione Abrir. Para guardarlo en su teléfono, seleccione Guardar.](https://usermanual.wiki/Star-Computer-Group/E380/User-Guide-1889082-Page-46.png)
![47 - Para reenviar el mensaje a otras personas, pulse [MENU]> Reenviar. 20 GOOGLE TALK Agregar amigos a tu lista de amigos 1. En el modo inactivo, abra la lista de aplicaciones y seleccione Google Talk. La lista de amigos muestra todos sus contactos de Google Talk de un vistazo. 2. Presione [MENU]> Añadir amigos. 3. Introduzca una dirección de correo electrónico del amigo y seleccione Enviar invitación. Cuando su amigo acepte la invitación, el amigo se agrega a su lista de amigos. Iniciar un chat 1. En el modo inactivo, abra la lista de aplicaciones y seleccione Google Talk. 2. Seleccione un amigo de la lista de amigos. La pantalla de chat se abre. 3. Escriba su mensaje y seleccione Enviar. Para insertar emoticonos, presione [MENU]> Más> Insertar emoticono. 4. Para alternar entre conversaciones activas, pulse [MENU]> Cambiar de chat. 5. Para finalizar la conversación, pulse [MENU]> Finalizar chat.](https://usermanual.wiki/Star-Computer-Group/E380/User-Guide-1889082-Page-47.png)
![49 Ver la foto o el vídeo que captura pasado. 4. Pulse el botón [VOL] para acercar o alejar. 5. Toque donde desee enfocar en la pantalla de vista previa. El marco de enfoque se desplaza al lugar en el que toca y cambia a verde cuando el sujeto está enfocado. 6. Seleccione [CAMERA] para tomar una fotografía. La foto se guardará automáticamente. Después de tomar fotografías, seleccione [▶] para ver las fotos tomadas. - Para ver más fotos, desplácese hacia la izquierda o la derecha. - Para acercar o alejar, seleccione [+] o [-]. También puede hacer doble toque en la pantalla. - Para enviar una fotografía a otras personas, seleccione Compartir. - Para definir una fotografía como fondo de pantalla o como ID de llamada de un contacto, seleccione Definir como. - Para eliminar una fotografía, seleccione Eliminar. Capturar una fotografía con las opciones predeterminadas para varias escenas Su cámara le ofrece ajustes predefinidos para varias escenas. Usted puede simplemente seleccionar el modo adecuado para las condiciones de disparo y sujetos. 1. En el modo inactivo, abra la lista de aplicaciones y seleccione Cámara. 2. Gire el teléfono hacia la izquierda para obtener la vista horizontal. 3. Seleccione SCN> a escena> [MEMORY]. 4. Realice los ajustes necesarios.](https://usermanual.wiki/Star-Computer-Group/E380/User-Guide-1889082-Page-49.png)
![50 5. Seleccione [CAMERA] para tomar una fotografía. Capturar una serie de fotografías Usted puede tomar una serie de fotos de sujetos en movimiento. Esto es útil cuando se está fotografiando a niños jugando. 1. En el modo inactivo, abra la lista de aplicaciones y seleccione Cámara. 2. Gire el teléfono hacia la izquierda para obtener la vista horizontal. 3. Seleccione > Continua. 4. Realice los ajustes necesarios. 5. Mantenga pulsado [CAMERA]. La cámara continuará tomando fotos hasta que suelte el disparador de la cámara. Capturar una foto panorámica Puede tomar fotografías panorámicas amplias con el modo de disparo panorámico. Este modo es conveniente para fotografiar paisajes. 1. En el modo inactivo, abra la lista de aplicaciones y seleccione Cámara. 2. Gire el teléfono hacia la izquierda para obtener la vista horizontal. 3. Seleccione > Panorama. 4. Haga cualquier ajuste necesario. 5. Seleccione [CAMERA] para tomar la primera fotografía. 6. Mueva lentamente el teléfono en cualquier dirección y alinee el marco verde con el visor. Cuando](https://usermanual.wiki/Star-Computer-Group/E380/User-Guide-1889082-Page-50.png)
![51 haya alineado el marco verde y el visor, la cámara tomará la foto siguiente. 7. Repita el paso 6 para completar la fotografía panorámica. Capturar fotografías en modo de sonrisa Shot La cámara puede reconocer las caras de las personas y ayudarlo a tomar fotografías con caras sonrientes. 1. En el modo inactivo, abra la lista de aplicaciones y seleccione Cámara. 2. Gire el teléfono hacia la izquierda para obtener la vista horizontal. 3. Seleccione > Disparo por sonrisa. 4. Haga cualquier ajuste necesario. 5. Seleccione [CAMERA]. 6. Dirija la lente de la cámara hacia el objetivo. El teléfono reconoce a las personas en una imagen y detecta sus sonrisas. Cuando el sujeto sonríe, el teléfono automáticamente toma una foto. Capturar fotografías en modo de disparo Auto Puede tomar fotografías de usted mismo cómodamente con la lente de la cámara frontal. 1. En el modo inactivo, abra la lista de aplicaciones y seleccione Cámara. 2. Gire el teléfono hacia la izquierda para obtener la vista horizontal. 3. Seleccione > Toma uno mismo. 4. Haga cualquier ajuste necesario. 5. Seleccione [CAMERA].](https://usermanual.wiki/Star-Computer-Group/E380/User-Guide-1889082-Page-51.png)
![52 Capturar una fotografía de acción Puede capturar fotos de sujetos en movimiento y luego combinarlas en una sola fotografía que muestre la acción. 1. En el modo inactivo, abra la lista de aplicaciones y seleccione Cámara. 2. Gire el teléfono hacia la izquierda para obtener la vista horizontal. 3. Seleccione > Toma Acción. 4. Haga cualquier ajuste necesario. 5. Seleccione [CAMERA] para capturar la primera fotografía. 6. Mueva el dispositivo para seguir al sujeto en movimiento. El dispositivo automáticamente captura las fotos siguientes. 7. Continúa hacia el tema hasta que el teléfono se haya capturado todas las tomas necesarias para la fotografía de acción. Personalizar la configuración de la cámara Antes de tomar una fotografía, seleccione [AJUSTES]> [CAMERA] para acceder a las siguientes opciones: Visibilidad al aire libre Visibilidad activo al aire libre para seleccionar las condiciones de iluminación adecuada. Modo de enfoque Tomar fotografías en primer plano o configurar la cámara para enfocar el sujeto o centrarse en los rostros humanos de forma](https://usermanual.wiki/Star-Computer-Group/E380/User-Guide-1889082-Page-52.png)
![53 automática. Timer Seleccione el tiempo de espera antes de que la cámara tome una fotografía. Resolución Cambiar la opción de resolución. White balance Ajusta el balance de color según las condiciones de luz. Efectos Permite aplicar un efecto especial, como tonos en blanco y negro. ISO Ajuste la sensibilidad del sensor de imagen de la cámara. Medida Seleccione un tipo de medidor de exposición. Anti-Shake Reducir el efecto borroso provocado por la vibración del dispositivo o en movimiento. Auto contraste Automáticamente ajustar el contraste entre el sujeto y el fondo. Detección de parpadeo Ajuste la cámara para que le avise cuando la gente cierra los ojos. Calidad de Imagen Ajuste el nivel de calidad de sus fotos. Adjustes Ajuste el contraste, la saturación y la nitidez. Antes de tomar una fotografía, seleccione [Ajustes]> [TOOLS] para acceder a las siguientes opciones: Guias Muestra instrucciones en la pantalla de vista previa.. Revisar Ajuste la cámara para visualizar la imagen tomada.](https://usermanual.wiki/Star-Computer-Group/E380/User-Guide-1889082-Page-53.png)
![54 GPS Ajuste la cámara incluyen información sobre la ubicación de las fotografías. Sonida de la Cámara Ajuste el obturador de la cámara para hacer un sonido al capturar una foto. Almacenaje Seleccione una ubicación de memoria para guardar fotos capturadas. Restablecer Permite restablecer los menús y las opciones de disparo. Captura de un vídeo 1. En el modo inactivo, abra la lista de aplicaciones y seleccione Cámara. 2. Gire el teléfono hacia la izquierda para obtener la vista horizontal. 3. Seleccione [CAMERA] para cambiar a la videocámara. 4. Apunte el lente hacia el objetivo y realice los ajustes necesarios. Compruebe el estado y la configuración de la videocámara. Cambie el modo de grabación (para adjuntar un mensaje multimedia o guardar normalmente) Ajuste el valor de exposición, seleccione + para aumentar o - para disminuirlo.](https://usermanual.wiki/Star-Computer-Group/E380/User-Guide-1889082-Page-54.png)
![55 Cambie los ajustes de la videocámara. Cambie a la cámara. Captura de un vídeo. Ver la foto o el vídeo que captura pasado. 5. Presione [VOLUME] para acercar o alejar. 6. Seleccione [GRABAR] para iniciar la recodificación. 7. Seleccione [STOP] para detener la grabación. El vídeo se guarda automáticamente. Después de capturar vídeos, seleccione [▶] para ver los vídeos capturados. - Para ver más vídeos, desplácese hacia la izquierda o la derecha. - Para reproducir un vídeo, seleccione Reproducir. - Para eliminar un vídeo, seleccione Eliminar. - Para enviar un vídeo a otras personas, seleccione Compartir. Personalizar la configuración de la videocámara Antes de capturar un vídeo, seleccione [AJUSTES]> [VIDEO] para acceder a las siguientes opciones: Visibilidad al aire Visibilidad activo al aire libre para seleccionar las condiciones de](https://usermanual.wiki/Star-Computer-Group/E380/User-Guide-1889082-Page-55.png)
![56 libre iluminación adecuada. Timer Seleccione el tiempo de espera antes de que la cámara tome una fotografía. Resolución Cambiar la opción de resolución. White balance Ajusta el balance de color según las condiciones de luz. Efectos Permite aplicar un efecto especial, como sepia o tonos en blanco y negro. Calidad de Video Ajuste el nivel de calidad para sus vídeos. Adjustes Ajuste el contraste, la saturación y la nitidez. Antes de tomar una fotografía, seleccione [Ajustes]> [TOOLS] para acceder a las siguientes opciones: Guias Muestra instrucciones en la pantalla de vista previa. La grabación de audio Girar el audio encendido o apagado. Revisar Ajuste la cámara para visualizar el vídeo grabado. Almacenaje Seleccione una ubicación de memoria para almacenar los vídeos capturados Restablecer Restablecer los menús y las opciones de disparo Video Player Aprenda a usar el reproductor de vídeo para reproducir diferentes tipos de vídeo. El reproductor de](https://usermanual.wiki/Star-Computer-Group/E380/User-Guide-1889082-Page-56.png)
![57 vídeo es compatible con los siguientes formatos de archivo: 3gp, mp4, avi, wmv, flv, mkv (Códec: MPEG4, H.263, Sorenson H.263, H.264, VC-1, DivX / XviD). 1. En el modo inactivo, abra la lista de aplicaciones y seleccione Reproductor de Video. 2. Seleccione un vídeo para reproducir. 3. Gire el dispositivo hacia la izquierda para obtener la vista horizontal. 4. Controle la reproducción con los siguientes iconos: Pausa en la reproducción[ ll ], seleccione [▶] para reanudar la reproducción. 22 GALERIA Aprenda a ver fotografías y reproducir vídeos guardados en la memoria del teléfono y la tarjeta de memoria. Formatos de archivo admitidos Imagen Extension: bmp, gif, jpg, png. Video - Extension: 3gp, mp4, avi, wmv, flv, mkv - Codec: MPEG4, H.263, Sorenson H.263, H.264, VC-1, DivX/XviD Ver una fotografía 1. En el modo inactivo, abra la lista de aplicaciones y seleccione Galería. 2. Seleccione una carpeta.](https://usermanual.wiki/Star-Computer-Group/E380/User-Guide-1889082-Page-57.png)
![58 3. Para cambiar el modo de vista, seleccione en la parte superior derecha de la pantalla. 4. Seleccione una foto (sin icono) para ver. Mientras ve una foto, utilice las siguientes opciones: - Para ver más fotos, desplácese hacia la izquierda o la derecha. - Para acercar o alejar, seleccione [+] o [-]. También puede tocar la pantalla con dos dedos y separarlos (mueva los dedos más cerca juntos para disminuir el zoom). - Para iniciar una presentación de diapositivas imágenes de la carpeta seleccionada, seleccione Presentación de diapositivas. Toque la pantalla para detener la presentación. Reproducir un vídeo 1. En el modo inactivo, abra la lista de aplicaciones y seleccione Galería. 2. Seleccione un vídeo (con el icono [▶] ) para reproducirlo. 3. Gire el teléfono hacia la izquierda para obtener la vista horizontal. 4. Controle la reproducción con las teclas virtuales. Compartir imágenes o vídeos 1. En el modo inactivo, abra la lista de aplicaciones y seleccione Galería. 2. Seleccione una carpeta. 3. Seleccione los archivos de imagen o de vídeo. 4. Seleccione Menú> Compartir> una opción para compartir.](https://usermanual.wiki/Star-Computer-Group/E380/User-Guide-1889082-Page-58.png)
![59 23 REPRODUCTOR DE MÚSICA Aprenda a escuchar su música favorita mientras se desplaza con el reproductor de música. El reproductor de música es compatible con los siguientes formatos: mp3, m4a, 3gp, 3ga, wma, ogg, oga, aac, Flac. Añadir archivos de música al teléfono Comience por transferir archivos al teléfono o a la tarjeta de memoria: - Descargar desde la Web inalámbrica. - Descarga de un PC. - Recibir mediante Bluetooth. - Copiar a la tarjeta de memoria. - Sincronizar con el Reproductor de Windows Media. Reproducir música Después de transferir los archivos de música al teléfono o a la tarjeta de memoria, 1. En el modo inactivo, abra la lista de aplicaciones y seleccione Reproductor de música. 2. Desplácese hacia la izquierda o la derecha para una categoría de música. 3. Seleccione un archivo de música. 4. Controle la reproducción con los siguientes iconos: [VOLUMEN] Adjuste del volumen. [5.1CH] Activar el canal de sonido envolvente 5.1 sistema de sonido cuando](https://usermanual.wiki/Star-Computer-Group/E380/User-Guide-1889082-Page-59.png)
![60 el auricular está conectado. [SHUFFLE] Activar Shuffle mode. [REPETIR] Cambiar el modo de repetición (desactivado, repetir un archivo o repetir todos los archivos). [SKIP.BACKWARD] Saltar hacia atrás, retroceder dentro del mismo archivo (manteniéndola pulsada) [PAUSA] Pausa en la reproducción, seleccione ▶ para reanudar la reproducción. [SKIP.FORWARD] Avanzar dentro del mismo archivo (manteniéndola pulsada). Acceda a la lista de álbumes 1. En el modo inactivo, abra la lista de aplicaciones y seleccione Reproductor de música. 2. Gire el teléfono hacia la izquierda para obtener la vista horizontal o presione [MENU]> Ir a la vista del disco según la región o el proveedor de servicios. 3. Desplácese hacia la izquierda o hacia la derecha para un álbum. 4. Seleccione la imagen del álbum para empezar la reproducción. 5. Seleccione [PAUSE] o [PLAY] para pausar o reanudar la reproducción actual. 6. Seleccione para cambiar a la vista círculo. 7. Arrastre alrededor del círculo para seleccionar una pista. Para cambiar a otra categoría, seleccione Todos> una categoría.](https://usermanual.wiki/Star-Computer-Group/E380/User-Guide-1889082-Page-60.png)
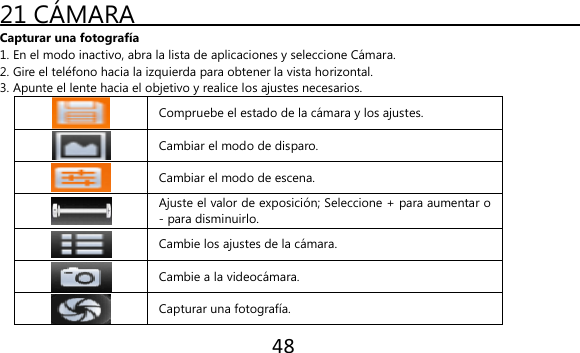
![61 8. Seleccione para volver a la vista del álbum. Crea una lista 1. En el modo inactivo, abra la lista de aplicaciones y seleccione Reproductor de música. 2. Seleccione Listas de reproducción. 3. Presione [MENU]> Crear. 4. Introduzca un título para la nueva lista de reproducción y seleccione Guardar. 5. Seleccione Añadir música. 6. Seleccione los archivos que desea incluir y seleccione Agregar. Durante la reproducción, puede agregar archivos a una lista de reproducción pulsando la tecla [MENU]> Añadir a la lista de reproducción. Agregar canciones a la lista rápida Puede añadir canciones a la lista rápida y guardarlas como lista de reproducción. Durante la reproducción, presione [MENU]> Añadir a la lista rápida para agregar la canción actual a la lista rápida. Para ir a la lista rápida, desde la pantalla principal reproductor de música, seleccione Listas de reproducción> Lista rápida. Para guardar la lista rápida como una lista de reproducción, presione [MENU]> Guardar como lista de reproducción. Personalizar la configuración del reproductor de música 1. En el modo inactivo, abra la lista de aplicaciones y seleccione Reproductor de música. 2. Presione [MENU]> Más> Configuración o pulse [MENU]> Settings. 3. Realice los siguientes ajustes para personalizar el reproductor de música.](https://usermanual.wiki/Star-Computer-Group/E380/User-Guide-1889082-Page-61.png)
![63 Búsqueda de una emisora de radio disponible. Cambie la frecuencia 0.1MHz. Añadir la emisora de radio actual a la lista de favoritos. Cambie la salida de sonido (auriculares o el altavoz del teléfono). Guardar una estación de radio automáticamente 1. Conecte los auriculares suministrados al teléfono. 2. En el modo inactivo, abra la lista de aplicaciones y seleccione Radio FM. 3. Seleccione Scan> una opción de escaneo. La radio FM busca y guarda automáticamente las estaciones disponibles. 4. Seleccione la emisora de radio que desee de la lista de emisoras all y pulse [RETURN] para volver a la pantalla de la radio FM. Añadir una emisora de radio a la lista de favoritos 1. Conecte los auriculares suministrados al teléfono. 2. En el modo inactivo, abra la lista de aplicaciones y seleccione Radio FM. 3. Seleccione ▶ para encender la radio FM. 4. Desplácese hasta la emisora de radio que desee. 5. Seleccione + para agregar a la lista de favoritos.](https://usermanual.wiki/Star-Computer-Group/E380/User-Guide-1889082-Page-63.png)
![64 Personalizar la configuración de radio FM 1. En el modo inactivo, abra la lista de aplicaciones y seleccione Radio FM. 2. Presione [MENU]> Settings. 3. Realice los siguientes ajustes para personalizar la radio FM: Región Seleccione su Región Música de Fondo Permite definir si se ejecutará la radio FM en segundo plano mientras se utilizan otras aplicaciones. Si esta función está activada, se puede controlar la radio FM en el panel de accesos directos. Mostrar ID de estación Permite definir si se mostrará el ID de estación en la pantalla de la radio FM; IDs Station sólo están disponibles a partir de las estaciones de radio que proporcionan esta información. Frecuencia alternativa Permite definir si la radio FM intentará volver a sintonizar una emisora de radio cuando la señal es débil. FM auto off Establecer que la radio FM se apague automáticamente después de un período especificado de tiempo.](https://usermanual.wiki/Star-Computer-Group/E380/User-Guide-1889082-Page-64.png)
![66 2. Presione [MENU]> Más> Importar / Exportar. 3. Seleccione una opción para importar o exportar. 4. Para importar contactos, seleccione una opción de la importación. Búsqueda de un contacto 1. En el modo inactivo, abra la lista de aplicaciones y seleccione Contactos. 2. Desplácese hacia arriba o hacia abajo en la lista de contactos. 3. Seleccione el nombre de un contacto. Establecer número de marcación rápida 1. En el modo inactivo, abra la lista de aplicaciones y seleccione Contactos. 2. Presione [MENU]> Marcación rápida. 3. Seleccione un número de ubicación> un contacto. Cree su tarjeta de nombre 1. En el modo inactivo, abra la lista de aplicaciones y seleccione Contactos. 2. Presione [MENU]> Mi perfil. 3. Introduzca sus datos personales. 4. Seleccione Guardar. Recuperar contactos de cuentas de su Comunidad Puede ver la lista de cuentas de redes sociales y seleccionar una cuenta para añadir un contacto de la página web de contactos del teléfono. 1. En el modo inactivo, abra la lista de aplicaciones y seleccione Contactos.](https://usermanual.wiki/Star-Computer-Group/E380/User-Guide-1889082-Page-66.png)
![67 2. Presione [MENU]> Obtenga amigos. 3. Seleccione una cuenta. Crear un grupo de contactos Al crear grupos de contactos, puede administrar varios contactos y enviar mensajes o correos electrónicos a un grupo entero. Comience por crear un grupo. 1. En el modo inactivo, abra la lista de aplicaciones y seleccione Contactos> Grupos. 2. Presione [MENU]> Crear. 3. Escriba un nombre y seleccione un tono de timbre para el grupo. 4. Seleccione Guardar. Copiar contactos 1. En el modo inactivo, abra la lista de aplicaciones y seleccione Contactos. 2. Seleccione un contacto. 3. Pulse [MENU] y seleccionar una opción de copia (desde el teléfono a la tarjeta SIM o viceversa). Ver el registro de Comunicación Puede ver el registro de comunicación de llamadas, mensajes, correo electrónico o hilos del SNS. 1. En el modo inactivo, abra la lista de aplicaciones y seleccione Contactos> Historial. 2. Seleccione la opción que desee ver. Ver las Actividades de las redes sociales Puede ver las actividades recientes de los contactos en las redes sociales, como Facebook, MySpace y Twitter.](https://usermanual.wiki/Star-Computer-Group/E380/User-Guide-1889082-Page-67.png)
![68 1. En el modo inactivo, abra la lista de aplicaciones y seleccione Contactos> Actividades. 2. Seleccione la opción que desee ver 26 CALENDARIO Aprenda a crear y administrar eventos diarios, semanales o mensuales y defina alarmas para recordar eventos importantes. Crear un evento 1. En el modo inactivo, abra la lista de aplicaciones y seleccione Calendario. 2. Presione [MENU]> Crear. 3. Introduzca los detalles del evento según sea necesario. 4. Seleccione Guardar. Ver Eventos Para cambiar la vista del calendario, 1. En el modo inactivo, abra la lista de aplicaciones y seleccione Calendario. 2. Seleccionar un modo de visualización en la parte superior del calendario. Para ver eventos con una fecha específica, 1. En el modo inactivo, abra la lista de aplicaciones y seleccione Calendario. 2. Seleccione una fecha en el calendario. En la vista mensual, los días con eventos programados se indican con un triángulo pequeño. Para desplazarse a un día específico introduciendo una fecha](https://usermanual.wiki/Star-Computer-Group/E380/User-Guide-1889082-Page-68.png)
![69 manualmente, presione [MENU]> Ir a, introduzca la fecha seleccionando + o -, y seleccione Definir. Para seleccionar la fecha actual, pulse [MENU]> Hoy. 3. Seleccione un evento para ver sus detalles. Detener la alarma de evento Si define una alarma para un evento del calendario, el icono de alarma del evento en el tiempo especificado. 1. Abra el panel de accesos directos desde la parte superior de la pantalla. 2. Seleccione un recordatorio para ver más detalles sobre el evento. 3. Para posponer o descartar el recordatorio, seleccione Posponer o Descartar todo todo. 27 MEMO Aprenda a grabar información importante para almacenarla y verla más adelante. Crear una nota 1. En el modo inactivo, abra la lista de aplicaciones y seleccione Notas. 2. Seleccione Crear nota o pulse [MENU]> Crear. 3. Introduzca el texto de la nota. 4. Seleccione un color para cambiar el color de fondo. 5. Seleccione Guardar. Ver Memos](https://usermanual.wiki/Star-Computer-Group/E380/User-Guide-1889082-Page-69.png)
![71 29 INTERNET Servicios de Internet requieren una conexión de datos. Póngase en contacto con su operador para elegir el mejor plan de datos o se podría conectar por wifi. Aprenda a acceder y marcar tus páginas web favoritas. Navegar las páginas Web 1. En el modo inactivo, abra la lista de aplicaciones y seleccione Internet para poner en marcha una página web especificada. Para acceder a una página web específica, seleccione el campo de entrada de URL, introduzca la dirección web de la página web y seleccione Go. 2. Navegar por las páginas web con las siguientes claves: Escriba una dirección web de la página web para acceder a él. Abra una lista de favoritos guardados, páginas visitadas y el historial de Internet reciente. Mientras navega por la página web, utilice las siguientes opciones: - Para acercar o alejar, toque dos veces la pantalla. También puede utilizar el zoom con dos dedos; Coloque el dedo en la pantalla de dos y poco a poco pellizcar o separadas. - Para abrir una nueva ventana, presione [MENU]> Nueva ventana. - Para añadir el feed RSS, pulse [MENU]> Añadir fuentes RSS. Usted puede leer feeds RSS con Google Reader.](https://usermanual.wiki/Star-Computer-Group/E380/User-Guide-1889082-Page-71.png)
![72 - Para ver las ventanas activas, pulse [MENU]> Windows. Puede abrir varias páginas y pasar de uno a otro. - Para volver a cargar la página web actual, pulse [MENU]> Actualizar. - Para ir a la siguiente página del historial, pulse [MENU]> Reenviar. - Para marcar la página web actual, pulse [MENU]> Más> Añadir favorito. - Para buscar texto en la página web, presione [MENU]> Más> Buscar en la página. - Para seleccionar texto en la página web, presione [MENU]> Mas texto> Seleccionar. Resalta el texto que quieras con tu dedo. El texto resaltado se copia en el portapapeles y se puede pegar en cualquier lugar. - Para ver los detalles de la página web, presione [MENU]> Más> Información de la página. - Para enviar la dirección web de la página web a otras personas, pulse [MENU]> Más> Compartir página. - Para ver el historial de descarga, presione [Menú]> Más> Descargas. - Para personalizar la configuración del navegador, presione [MENU]> Más> Configuración. - Para ajustar el brillo de la pantalla, pulse [MENU]> Más> Configuración de Brillo. Esta función puede no estar disponible dependiendo de su región. Marcar sus páginas web favoritas. Si conoce la dirección web de la página web, puede agregar manualmente un marcador. Para agregar un favorito, 1. En el modo inactivo, abra la lista de aplicaciones y seleccione Internet.](https://usermanual.wiki/Star-Computer-Group/E380/User-Guide-1889082-Page-72.png)
![73 2. Seleccione > Añadir a favoritos. 3. Seleccione Agregar. Para marcar la página web que está viendo, presione [MENU]> Bookmark última página vista. 4. Introduzca un título de la página y una dirección web. 5. Seleccione Aceptar. Desde la lista de favoritos, mantenga pulsado un favorito y utilice las siguientes opciones: - Para abrir la página web en una nueva ventana, seleccione Abrir en una ventana nueva. - Para editar los detalles del favorito, seleccione Editar favorito. - Para añadir el acceso directo del favorito a la pantalla de inicio, seleccione Añadir acceso directo a inicio. - Para enviar la dirección web de la página web a otras personas, seleccione Compartir vínculo. - Para copiar la dirección web de la página web, seleccione Copiar URL de enlace. - Para eliminar el favorito, seleccione Eliminar marcador. - Para utilizar la página web como página de inicio del navegador, seleccione Establecer como página de inicio. Añadir una dirección de fuente RSS 1. En el modo inactivo, abra la lista de aplicaciones y seleccione Internet. 2. Ir a una página web que tiene un feed RSS.](https://usermanual.wiki/Star-Computer-Group/E380/User-Guide-1889082-Page-73.png)
![74 3. Presione [MENU]> Añadir fuentes RSS. 4. Seleccione una fuente RSS. 5. Lea el feed RSS con Google Reader. Acceder a las páginas visitadas con frecuencia o la historia reciente 1. En el modo inactivo, abra la lista de aplicaciones y seleccione Internet. 2. Seleccione > Más visitados o Historial. 3. Selección de una página web para acceder a él. 30 MAPAS Aprenda a utilizar Google Maps para encontrar su ubicación, buscar los mapas en línea de calles, ciudades o países y obtener indicaciones. Buscar en el mapa 1. En el modo inactivo, abra la lista de aplicaciones y seleccione Maps. 2. Desplácese por el mapa. 3. Para acercar o alejar, toque la pantalla y seleccione + o -. Encuentre su ubicación 1. En el modo inactivo, abra la lista de aplicaciones y seleccione Maps. 2. Presione [MENU]> Mi ubicación.](https://usermanual.wiki/Star-Computer-Group/E380/User-Guide-1889082-Page-74.png)
![75 Buscar una ubicación específica 1. En el modo inactivo, abra la lista de aplicaciones y seleccione Maps. 2. Presione [MENU]> Buscar. 3. Utilice uno de los métodos siguientes: - Introduzca la dirección. - Introduzca la categoría de la empresa. - Seleccione una dirección que ha visitado o una categoría de la lista. 4. Seleccione Cómo llegar a un destino específico 1. En el modo inactivo, abra la lista de aplicaciones y seleccione Maps. 2. Presione [MENU]> Direcciones. 3. Escriba las direcciones de la ubicación inicial y la posición final. Para introducir una dirección de su lista de contactos o señalar la ubicación en el mapa, seleccione > Contactos o Punto en el mapa. 4. Seleccione un medio de transporte (coche, autobús o andando) y seleccione Go. 5. Seleccione un camino para ver los detalles de su viaje (si es necesario). 6. Seleccione Mostrar en mapa. 7. Cuando haya terminado, presione [MENU]> Más> Borrar mapa. Comparte tu ubicación a través de Google Latitude](https://usermanual.wiki/Star-Computer-Group/E380/User-Guide-1889082-Page-75.png)
![76 Aprenda a compartir su ubicación con sus amigos y localizaciones Ver los amigos con Google Latitude. 1. En el modo inactivo, abra la lista de aplicaciones y seleccione Maps. 2. Presione [MENU]> Unirme a Latitude. 3. Pulse [Menú]> Añadir amigos> una opción. 4. Seleccione los amigos que desea añadir o introduzca una dirección de correo electrónico y seleccione Añadir amigos> Sí. Cuando su amigo acepte la invitación, podrán compartir las ubicaciones. Usted puede ver las marcas que indican la ubicación de tus amigos pulsando [MENU]> Ver mapa. 31 YOUTUBE YouTube es un servicio gratuito de streaming de vídeo en línea. Aprender a ver y compartir vídeos a través de YouTube. Ver Videos 1. En el modo inactivo, abra la lista de aplicaciones y seleccione YouTube. 2. Seleccione un vídeo de la lista. 3. Gire el dispositivo hacia la izquierda para obtener la vista horizontal. Compartir Videos 1. En el modo inactivo, abra la lista de aplicaciones y seleccione YouTube. 2. Toque y mantenga presionado un video. 3. Selecciona> Compartir una opción.](https://usermanual.wiki/Star-Computer-Group/E380/User-Guide-1889082-Page-76.png)
![77 Subir Videos 1. En el modo inactivo, abra la lista de aplicaciones y seleccione YouTube. 2. Presione [MENU]> Cargar y seleccione un vídeo. Saltar a 8. Si quieres subir vídeos nuevos, seleccione para encender la cámara. 3. Gire el dispositivo hacia la izquierda para obtener la vista horizontal. 4. Apunte el lente hacia el objetivo y realice los ajustes necesarios. 5. Seleccione [GRABAR] para iniciar la grabación. 6. Seleccione [GRABAR] para detener la grabación. 7. Seleccione Guardar para cargar el vídeo que ha grabado. 8. Introduce tu nombre y contraseña y seleccione Iniciar sesión 32 SINCRONIZAR Aprenda a sincronizar contactos, eventos de calendario y notas con el servidor web que se especifique. Crear un perfil de sincronización 1. En el modo inactivo lista de aplicaciones abiertas y seleccione Configuración> Conexiones inalámbricas> Sincronizar. 2. Seleccione Crear nuevo perfil y especifique las opciones de perfil siguientes: Nombre del Perfil Escriba un nombre para el perfil.](https://usermanual.wiki/Star-Computer-Group/E380/User-Guide-1889082-Page-77.png)
![79 1. En el modo inactivo, abra la lista de aplicaciones y seleccione Configuración> Conexiones inalámbricas y redes> Configuración de Bluetooth. 2. Seleccione Bluetooth para activar la función inalámbrica Bluetooth. Buscar y vincular con otro dispositivo Bluetooth 1. En el modo inactivo, abra la lista de aplicaciones y seleccione Configuración> Conexiones inalámbricas y redes> Ajustes de Bluetooth> Dispositivos de escaneo. 2. Seleccione un dispositivo. 3. Introduzca un PIN para la función inalámbrica Bluetooth o el PIN de Bluetooth del otro dispositivo, si tiene uno, y seleccione Aceptar. Alternativamente, seleccione Aceptar para que coincida con el número de identificación personal entre su dispositivo y el dispositivo. Cuando el dueño del otro dispositivo introduzca el mismo PIN o acepte la conexión, se completa. Si la vinculación se realiza correctamente, el dispositivo buscará automáticamente los servicios disponibles. Enviar datos mediante la función inalámbrica Bluetooth 1. Seleccione un archivo o un elemento, como un contacto, un evento del calendario, memo o un archivo multimedia, desde una aplicación o desde Mis archivos. 2. Presione [MENU]> Compartir, Enviar vía o Enviar tarjeta de contacto mediante Bluetooth>. 3. Busque y conectado con un dispositivo compatible con Bluetooth. Recibir datos mediante la función inalámbrica Bluetooth 1. En el modo inactivo, abra la lista de aplicaciones y seleccione Configuración> Conexiones inalámbricas y redes> Ajustes de Bluetooth> Visible. El teléfono está visible para otros dispositivos](https://usermanual.wiki/Star-Computer-Group/E380/User-Guide-1889082-Page-79.png)
![82 36 CONEXIONES A LA PC Aprenda a conectar el dispositivo a un PC con un cable de datos opcional para PC en varios modos de conexión USB. Al conectar el dispositivo a un PC, puede sincronizar archivos con el Reproductor de Windows Media, transferir los datos hacia y desde su teléfono directamente, y utilizar el teléfono como un módem inalámbrico para un PC. Sincronizar con Windows Media Player 1. En el modo inactivo, abra la lista de aplicaciones y seleccione Ajustes> Acerca del teléfono> Configuración USB> Reprod. 2. Pulse [INICIO] para volver al modo inactivo. 3. El uso de un cable de datos opcional para PC, conecte la toma multifunción de su teléfono a un PC con Windows Media Player instalado. Cuando esté conectado, aparecerá una ventana pop-up aparecerá en la PC. 4. Abra Windows Media Player para sincronizar archivos de música. 5. Edite o escriba el nombre de su teléfono en la ventana emergente (si es necesario). 6. Seleccione y arrastre los archivos de música que desee a la lista de sincronización. 7. Iniciar la sincronización. Conectar como dispositivo de almacenamiento masivo](https://usermanual.wiki/Star-Computer-Group/E380/User-Guide-1889082-Page-82.png)
![83 Puede conectar el teléfono a un PC como un disco extraíble y acceder al directorio de archivos. Si inserta una tarjeta de memoria en el teléfono, también puede acceder al directorio de archivos de la tarjeta de memoria utilizando el dispositivo como un lector de tarjetas de memoria. 1. Si desea transferir archivos desde o hacia una tarjeta de memoria, inserte la tarjeta de memoria en el teléfono. 2. En el modo inactivo, abra la lista de aplicaciones y seleccione Ajustes> Acerca del teléfono> Configuración USB> Almacenamiento masivo. 3. Pulse [INICIO] para volver al modo inactivo. 4. El uso de un cable de datos opcional para PC, conecte la toma multifunción de su teléfono a un PC. Cuando esté conectado, aparecerá una ventana pop-up aparecerá en la PC. 5. Abra la carpeta para ver archivos. 6. Copie los archivos del PC a la tarjeta de memoria. Uso del teléfono como un módem inalámbrico Puede utilizar el teléfono como módem para un ordenador para acceder a Internet a través de su servicio de telefonía móvil. 1. En el modo inactivo, abra la lista de aplicaciones y seleccione Ajustes> Acerca del teléfono> Configuración USB> Internet PC. 2. Pulse [INICIO] para volver al modo inactivo. 3. El uso de un cable de datos opcional para PC, conecte la toma multifunción del dispositivo a un PC. 4. Cuando el gestor de instalación, siga las instrucciones que aparecen en pantalla para completar la](https://usermanual.wiki/Star-Computer-Group/E380/User-Guide-1889082-Page-83.png)
![84 instalación del software. Una vez completada la instalación, aparecerá la ventana para activar una conexión a Internet. 5. Crear una conexión de módem en su PC. Cómo crear una conexión de módem puede variar dependiendo del sistema operativo del PC. 6. Seleccione la conexión de módem creado e introduzca el ID y la contraseña proporcionada por su proveedor de servicios. 37 RELOJ Configurar una nueva alarma 1. En el modo inactivo, abra la lista de aplicaciones y seleccione Reloj> Alarma. 2. Seleccione Crear alarma o pulse [MENU]> Crear. 3. Establecer detalles de la alarma. Seleccione Establecer como rueda de prensa diaria para activar la rueda de prensa diaria inmediatamente después de detener una alarma. 4. Cuando haya terminado, seleccione Guardar. Detener una alarma Cuando la alarma suena, - Mantenga pulsado Parar para detener la alarma. - Toque y mantenga Snooze para repetir la alarma luego de un período de tiempo específico. Borrar una alarma](https://usermanual.wiki/Star-Computer-Group/E380/User-Guide-1889082-Page-84.png)
![85 1. En el modo inactivo, abra la lista de aplicaciones y seleccione Reloj> Alarma. 2. Presione [MENU]> Eliminar. 3. Seleccione las alarmas que desea eliminar. 4. Seleccione Eliminar. Crear un reloj mundial 1. En el modo inactivo, abra la lista de aplicaciones y seleccione Reloj> Reloj mundial. 2. Seleccione Añadir ciudad o presione [MENU]> Añadir. 3. Ingresa la ciudad o seleccione uno de la lista de ciudades. Para seleccionar una ciudad en la vista de mapa del mundo, seleccionar. 4. Para añadir más relojes mundiales, repita los pasos 2-3. Usar el cronómetro 1. En el modo inactivo, abra la lista de aplicaciones y seleccione Reloj> Cronómetro. 2. Seleccione Iniciar para iniciar el cronómetro. 3. Seleccione Vuelta para grabar tiempos de vueltas. 4. Cuando haya terminado, seleccione Parar. 5. Seleccione Restablecer para borrar los tiempos grabados. Utilice el cronómetro de cuenta atrás 1. En el modo inactivo, abra la lista de aplicaciones y seleccione Reloj> Cuenta Atras. 2. Ajuste la longitud de tiempo para la cuenta atrás. 3. Seleccione Iniciar para comenzar la cuenta atrás. Ahora puede usar otras funciones con el](https://usermanual.wiki/Star-Computer-Group/E380/User-Guide-1889082-Page-85.png)
![86 temporizador de cuenta regresiva en el fondo. Pulse la tecla [INICIO] o [BACK] y acceder a otra aplicación. 4. Cuando el tiempo se agota, mantenga pulsado Parar para detener la alerta. 38 CALCULADORA Realizar el cálculo 1. En el modo inactivo, abra la lista de aplicaciones y seleccione Calculadora. 2. Utilice las teclas que correspondan a la pantalla de la calculadora para realizar operaciones matemáticas básicas. Ver el historial de cálculo 1. En el modo inactivo, abra la lista de aplicaciones y seleccione Calculadora. 2. Realizar el cálculo. 3. Seleccione [▼] para cerrar el teclado de una calculadora. El historial de cálculo aparece. 4. Para borrar el historial, pulse [MENU]> Borrar historial. 39 AJUSTES EN EL MENÚ 1. En el modo inactivo, abra la lista de aplicaciones y seleccione Configuración.](https://usermanual.wiki/Star-Computer-Group/E380/User-Guide-1889082-Page-86.png)

![93 el teléfono para mostrar el número de la entrada. - Seleccionar administradores de dispositivos: Agregar o quitar administradores de dispositivos. - Utilizar credenciales seguras: Los certificados de uso y las credenciales para garantizar el uso seguro de diversas aplicaciones. - Instalación de la tarjeta SD: Instalar tarjeta SD certificado por el teléfono - Establecer contraseña: Crea y confirme una contraseña para acceder a las credenciales. - Borrar almacenamiento: Permite borrar el contenido de las credenciales del dispositivo y restablecer la contraseña. 48 APLICACIONES - Orígenes desconocidos: seleccione esta opción para descargar aplicaciones desde cualquier fuente. Si no se selecciona esta opción, puede descargar aplicaciones sólo desde la Play Store. - Ubicación de instalación preferido: Cambiar la ubicación de instalación preferido para las nuevas aplicaciones. - Administrar aplicaciones: Acceda a la lista de las aplicaciones instaladas en el teléfono y compruebe la información de la aplicación. Para ver las aplicaciones que se estén ejecutando o aplicación de terceros instalado adicionalmente, presione [MENU]> Filtro. - APK de instalación: Instalar el APK desde la tarjeta SD. - Servicios de servicio: Vea los servicios que está utilizando y acceder a ellos de manejar. - Desarrollo](https://usermanual.wiki/Star-Computer-Group/E380/User-Guide-1889082-Page-93.png)


![112 USB Cable(USB Cable with the core) User Manual Stereo Ear-Microphone * CAUTION: Use only ARGOM-approved accessories. Other accessories may cause damage or malfunctions that are not covered by manufacturer’s warranty. 02 USIM CARD To install the USIM card, 1. Power off the phone by pressing [POWER]. 2. Remove the battery cover. 3. Insert the USIM card in right direction. 4. Insert the battery. 5. Replace the battery cover. * WARNING: Be careful not to damage your fingernails when you remove the battery cover. * CAUTION: Do not insert a memory card into USIM card slot. 03 BATTERY To install the battery,](https://usermanual.wiki/Star-Computer-Group/E380/User-Guide-1889082-Page-112.png)
![113 1. Power off the smart phone by pressing [POWER]. 2. Remove the battery cover. 3. Insert the battery. 4. Replace the battery cover. To charge the battery, 1. Plug the charging connector into the charging jack on left side of the phone. 2. Plug the charger into a power outlet. 3. When the battery is fully charged, the battery icon is no longer moving. 4. You can charge the battery by connecting the USB cable to a PC. * NOTE 1: The battery may come without fully charged. Fully charge your battery before using your phone. * NOTE 2: Improperly connecting the travel adaptor can cause seriously damage to the phone. Any damage caused by misuse is not covered by the warranty. * NOTE 3: While charging, the phone may heat up. This is normal and should not affect your phone’s performance. * CAUTION 1: When the battery is fully discharged, there may be no display a little while even you started charging properly. Please wait 3~5 minutes in this case. * CAUTION 2: Do not remove the battery before removing the travel charger. Doing this may cause damage to the phone.](https://usermanual.wiki/Star-Computer-Group/E380/User-Guide-1889082-Page-113.png)
![115 05 POWER ON/OFF To power on your phone, press and hold [POWER]. Your phone will automatically connect to the cellular network. If you power on your phone for the first time, tap the Android image on the screen and follow the on-screen instructions to set up your phone for its first use. To power off your phone, press and hold [POWER] and then select Power off. * NOTE: To use your phone’s non-network services only, switch to Airplane mode. Press and hold [POWER] and select Airplane mode.](https://usermanual.wiki/Star-Computer-Group/E380/User-Guide-1889082-Page-115.png)
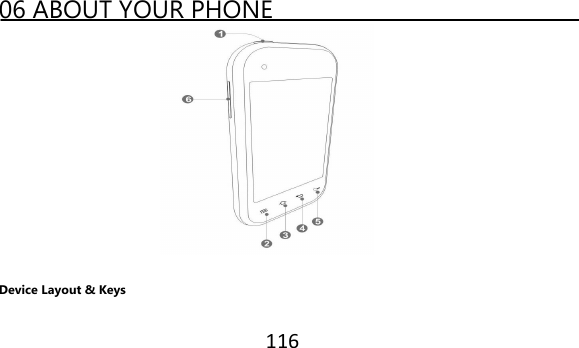
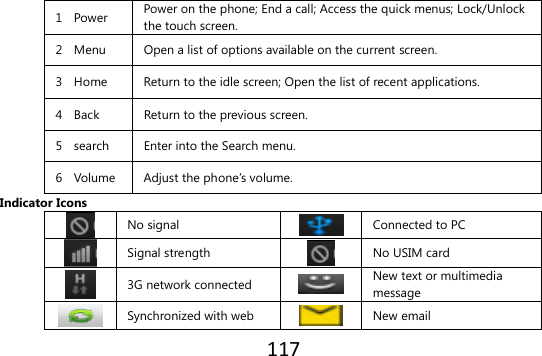
![119 the touch screen. Control your touch screen with the following actions: 1. Tap: Tap once with your finger to select or launch a menu, option or application. 2. Tap and hold: Tan an item and hold it for more than 2 seconds to open a pop-up option list. 3. Scroll: Tap and drag your finger up, down, left or right to move to items on lists. 4. Drag and drop: Tap and hold your finger on an item, and then drag your finger to move the item. 5. Double-tap: Tap twice quickly with your finger to zoom in or out while photos or web pages. 6. Your phone turns off the touch screen when you do not use the phone for a specified time or you can turn off the touch screen by pressing [POWER]. To turn on the screen, press [POWER] or [HOME]. * CAUTION 1: Your touch screen has a layer that detects small electrical charges emitted by the human body. For the best performance, tap the touch screen with your fingertip. To avoid scratching the touch screen, do not use sharp tools, such as a stylus or pen. * CAUTION 2: Do not allow the touch screen to come into contact with water or other electrical devices. It may cause a malfunction . * NOTE: For optimal use of the touch screen, remove the screen protection film before using your phone. 08 LOCK/UNLOCK THE TOUCH SCREEN AND KEYS You can lock the touch screen and keys to prevent any unintentional device operations.](https://usermanual.wiki/Star-Computer-Group/E380/User-Guide-1889082-Page-119.png)
![120 To lock, press [POWER]. To unlock, press [POWER] again or press [HOME]. 09 IDLE SCREEN Add Items to the Idle Screen You can customize the idle screen by adding shortcuts to applications or items in applications, widgets or folders. To add items to the idle screen, 1. Press [MENU]>Add or tap and hold the empty area on the idle screen. 2. Select the item category and an item. 1) Widgets: Add widgets to the idle screen. 2) Shortcuts: Add shortcuts to items, such as applications, bookmarks and contacts. 3) Folders: Create a new folder or add folders for your contacts. 4) Wallpapers: Set a background image. Move Items on the Idle Screen 1. Tap and hold an item to move. 2. Drag the item to the location you want when the item is magnified. Remove Items from the Idle Screen 1. Tap and hold an item to remove. The item is magnified and the trash icon appears on the application area, meaning that the application area at the bottom of the idle screen changes to the trash.](https://usermanual.wiki/Star-Computer-Group/E380/User-Guide-1889082-Page-120.png)
![122 4. Press [BACK] to return to the previous screen; Press the [HOME] to return to the idle screen. * NOTE: When you use applications provided by Google, you must have a Google account. Access Recent Applications 1. Press and hold the [HOME] to open the list of applications you have accessed recently. 2. Select an application to access. 11 CUSTOMIZATION Set the Current Date and Time 1. In idle mode, open the application list and select Settings>Date & time. 2. Set the time and date and change other options. Turn on/off the Touch Tone In idle mode, open the application list and select Settings>Audio profiles>Preferred profiles>Audible selection. Adjust the Volume of the Ringtones Press the [VOLUME] up or down to adjust the ringtone volume. Switch to the Silent Mode There are three options to mute or unmute your phone. 1. On idle mode, open the application list and select Phone>Keypad and tap and hold the [#]. 2. In idle mode, press and hold [POWER] and select Silent mode.](https://usermanual.wiki/Star-Computer-Group/E380/User-Guide-1889082-Page-122.png)
![123 3. In idle mode, open the Shortcuts panel by scroll down the icon line on top of the screen and select Silent mode. Change Your Ringtone 1. In idle mode, open the application list and select Settings>Audio profile>Preferred profile>Voice/Video call ringtone or Notification ringtone. 2. Select a ringtone from the list and select OK. Active Animation for Switching Windows In idle mode, open the application list and select Settings>Display>Animation>Some animations or All animations. Select a Wallpaper for the Idle Screen 1. In idle mode, press [MENU]>Wallpaper and select an option. 2. Select an image. 3. Select Set wallpaper. Adjust the Brightness of the Display You can quickly adjust the display brightness by scrolling left or right on the indicator line of the screen. To adjust the brightness in the setting menu, 1. In idle mode, open the application list and select Settings>Display>Brightness. 2. Clear the check box of Automatic brightness. 3. Drag the slider to adjust the level of brightness. 4. Select OK.](https://usermanual.wiki/Star-Computer-Group/E380/User-Guide-1889082-Page-123.png)
![127 3. Select an item category>an item. 4. Select Install (for free items) or Buy. If you select Install, select OK to download the item immediately. If you select Buy, you need to enter your credit card information. Follow the on-screen instructions. Uninstall an Application 1. From the Play Store home screen, press [MENU]>Downloads. 2. Select the item you want to delete. 3. Select Uninstall>OK. 14 DOWNLOADING FILES FROM THE WEB When you download files or web applications from the web, your phone saves them in a memory card. * CAUTION: Files you download from the web may include viruses that will damage your phone. To lessen your risk, only download files from sources you can trust. * NOTE: Some media files include Digital Rights Management to protect copyrights. This protection may prevent you from downloading, copying, modifying, or transferring some files. To download files from the web, 1. In idle mode, open the application list and select Internet. 2. Search for a file or application and download it. To install applications downloaded from websites other than Play Store, you must select](https://usermanual.wiki/Star-Computer-Group/E380/User-Guide-1889082-Page-127.png)
![129 you want. Synchronize Data Manually 1. In idle mode, open the application list and select Settings>Accounts and sync. 2. Select an account. 3. Press [MENU]>Sync now. Your phone will start synchronizing the data you set for synchronization. 16 CALLINGS Make a Call 1. In idle mode, open the application list and select Phone>Keypad, and enter an area code and a phone number. 2. Select [TALK] to make a voice call. For a video call. 3. To end the call, select End call. * NOTE: When you hold the phone near your face, your phone automatically turns off the touch screen to prevent accidental inputs. Answer a Call 1. When a call comes in, drag [TALK] right until Answer appears. 2. To end the call, select End call. * NOTE: When the phone is ringing, press the [VOLUME] to mute the ringtone. Reject a Call](https://usermanual.wiki/Star-Computer-Group/E380/User-Guide-1889082-Page-129.png)
![130 When a call comes in, drag [TALK] left until Decline appears. The caller will hear a busy tone. To send a message when you reject incoming calls, select Reject with msg. To utilize this function, first you need to set a text message to be sent to callers. In idle mode, open the application list and select Settings>Call settings>Reject call with message. Then select Create and create a text message. Call an International Number 1. In idle mode, open the application list and select Phone>Keypad, and tap and hold [0] to insert the + character. 2. Enter the complete number you want to dial (country code, area code and phone number), and then select [TALK] to dial the number. Use the Headset By plugging the supplied headset into the device, you can answer and control calls hands-free: - To answer a call, press the headset button. - To reject a call, press and hold the headset button. - To place a call on hold or retrieve a held call during a call, press and hold the headset button. - To end a call, press the headset button. Use Options During a Voice Call You can use the following options while a voice call is in progress: - To adjust the voice volume, press the [VOLUME] up or down. - To place a call on hold, select [ ll ]. To retrieve a held call, select [▶].](https://usermanual.wiki/Star-Computer-Group/E380/User-Guide-1889082-Page-130.png)
![131 - To dial a second call, select Add call and then dial a new number. - To answer a second call, select Accept when a call waiting tone sounds. The phone asks whether to end or hold the first call. You must subscribe to the call waiting service to use this feature. - To open the dialing screen, select Dialpad. - To activate the speakerphone feature, select Speaker. - To turn off the microphone so that the other party cannot hear you, select Mute. - To listen and talk to the other party via the bluetooth headset select Headset. - To open the phonebook, press [MENU]>Contacts. - To add a memo, press [MENU]>Memo. - To switch between the two calls, select Swap. - To make a multiparty call (conference call), make or answer a second call and select Merge when connected to the second party. Repeat to add more parties. You must subscribe to the multiparty call service to use this feature. - To connect the current party to the other party placed on hold, press [MENU]>Transfer. You will be disconnected from the call. Use Options During a Video Call You can use the following options while a video call is in progress: - To activate the speakerphone feature, select Speaker. - To turn off the microphone so that the other party cannot hear you, select Mute. - To hide your image from the other party, press [MEMU]>Hide me.](https://usermanual.wiki/Star-Computer-Group/E380/User-Guide-1889082-Page-131.png)
![132 - To select an alternative image to be shown to the other party, press [MENU]>Outgoing image. - To open the dialing screen, press [MENU]>Dialpad. - To listen and talk to the other party via the Bluetooth headset, press [MENU]>Switch to headset. - To switch between the front and rear camera lens, press [MENU]>Switch camera. - To customize the video call settings, press [MENU]>Settings. - To use the other party’s image, tap and hold the other party’s image. You can capture an image of the screen or record the video call. - To use my image, tap and hold your image. You can adjust the brightness, zoom in or out on the image via the rear camera lens, or apply the blur effect to your image via the front camera lens. View and Dial Missed Calls Your phone will display calls you have missed on the display. To dial the number of a missed call, open the shortcuts panel and select the missed call. Use Additional Features You can use various other call-related features, such as auto rejection, FDN (Fixed Dialing Number) mode, or call forwarding or barring. Use Fixed Dialing Number (FDN) mode In FDN mode, your phone will restrict outgoing calls, except for the numbers stored in the FDN list. To activate FDN mode, 1. In idle mode, open the application list and select Settings>Call settings>Fixed Dialing Numbers>Enable FDN.](https://usermanual.wiki/Star-Computer-Group/E380/User-Guide-1889082-Page-132.png)
![134 1. In idle mode, open the application list and select Settings>Call settings>Additional settings>Call barring. 2. Select call type to restrict. 3. Enter a call barring password and select OK. Your setting will be sent to the network. Set call waiting Call waiting is a network feature to alert you of an incoming call while you are on a previous call. In idle mode, open the application list and select Settings>Call settings>Additional settings>Call waiting. Your setting will be sent to the network. View Call Logs You can view logs of your calls filtered by their types. 1. In idle mode, open the application list and select Phone>Call logs. 2. Press [MENU]>View by>an option to sort the call logs. 3. Select a log to view its details. * NOTE 1: From the call logs, you can make a call or send a message directly to a contact by quickly flicking the contact to the left right. * NOTE 2: From the detail view, you can dial the number, send a message to the number or add the number to the phonebook or reject list.](https://usermanual.wiki/Star-Computer-Group/E380/User-Guide-1889082-Page-134.png)
![135 17 MESSAGES Send a Text Message 1. In idle mode, open the application list and select Messaging>New message. 2. Select Contacts. You can enter a number manually or select one from the recent recipients or contact groups by selecting another button. 3. Select the check boxes next to contacts and select Add. 4. Select Type to compose and enter your message text. To insert emoticons, press [MENU]>Insert smiley. 5. Select Send to send the message. Send a Multimedia Message 1. In idle mode, open the application list and select Messaging>New message. 2. Select Contacts. You can enter a number manually or select one from the recent recipients or contact groups by selecting another button. 3. Select the check boxes next to contacts and select Add. When you enter an email address, the phone will convert the message as a multimedia message. 4. Select Type to compose and enter your message text. To insert emoticons, press [MENU]>Insert smiley. 5. Press [MENU]>Attach>an option and add an item. You can select a file from the file list or create a](https://usermanual.wiki/Star-Computer-Group/E380/User-Guide-1889082-Page-135.png)
![136 new photo, video, or sound. 6. Press [MENU]>Add subject and add a subject for the message. 7. Select Send to send the message. View a Text or Multimedia Message 1. In idle mode, open the application list and select Messaging. Your messages are grouped into message threads by contact, like a messenger. 2. Select a contact. 3. Select a text or multimedia message from the message thread. 4. For a multimedia message, select [▶] to view the attachment. Listen to Voice Mail Messages If you have set missed calls to be diverted to the voice mail server, callers may leave voice messages when you do not answer incoming calls. To access your voice mail inbox and listen to voice mail messages, 1. In idle mode, open the application list and select Phone>Keypad and then tap and hold [1]. 2. Follow the instructions from the voice mail server. * NOTE: You must save the voice mail server number before accessing the server. Your service provider can give you the number.](https://usermanual.wiki/Star-Computer-Group/E380/User-Guide-1889082-Page-136.png)
![137 18 GOOGLE MAIL You can retrieve new email messages from Google Mail to your Inbox. When you access this application, the Inbox screen appears. The total number of unread message displays in the title bar and unread messages display in bold. If you have labeled a message, its label appears in a colored rectangle on the message. Send an email message 1. In idle mode, open the application list and select Google Mail. 2. Press [MENU]>Compose. 3. Enter a name or address in the recipient field. 4. Enter a subject and meaage. 5. To attach an image file, press [MENU]>Attach>a file. 6. Select Send to send the message. View Email Messages 1. In idle mode, open the application list and select Google Mail. 2. Select an email message. From the message view, use the following options: - To reply to the sender, select Reply. - To reply to the sender including all recipients, select Reply to all. - To forward the message to other people, select Forward. - To view an attachment, select Preview next to the attachment item. To save it to your phone, select](https://usermanual.wiki/Star-Computer-Group/E380/User-Guide-1889082-Page-137.png)
![138 Download. - To archive the message, select Archive. - To delete the message, select Delete. - To view an older message, select Older. Organize Email by Labels You can organize your email by labeling your messages or adding stars to mark important messages. You can sort messages by label filter. Add a Label to a Message 1. From the Inbox screen, tap and hold a message. 2. Select Change labels. 3. Select a label to add and select OK. Add a Star to a Message 1. From the Inbox screen, tap and hold a message. 2. Select Add star. The star icon next to the message is activated. Filter Messages 1. From the Inbox screen, press [MENU]>View labels. 2. Select the label of the messages you want to view.](https://usermanual.wiki/Star-Computer-Group/E380/User-Guide-1889082-Page-138.png)
![139 19 EMAIL Learn to send or view email messages via your personal or company email account. Setup an Email Account 1. In idle mode, open the application list and select Email. 2. Enter your email address and password. 3. Select Next (for general email accounts, such as Google Mail and Yahoo) or Manual setup (for other company email accounts). 4. Follow the on-screen instructions. When you finish setting up the email account, the email messages are downloaded to your phone. If you have created more than 2 accounts, you can switch between email accounts; press [MENU]>Accounts and select one you want to retrieve messages from. Send an Email Message 1. In idle mode, open the application list and select Email>an email account. 2. Press [MENU]>Compose. 3. Select Contacts. You can enter an email address manually or select one from the recent recipients or groups by selecting another button. 4. Select the Cc/Bcc field to add more recipients. 5. Select the subject field to enter a subject. 6. Select the text input field to enter your email text.](https://usermanual.wiki/Star-Computer-Group/E380/User-Guide-1889082-Page-139.png)
![140 7. Select Attach and attach a file. You can select an image, video or sound clip. 8. Select Send to send the message. View an Email Message When you open an email account, you can view previously retrieved emails offline or connect to the email server to view new messages. After retrieving email messages, you can view them offline. 1. In idle mode, open the application list and select Email>an email account. 2. Press [MENU]>Refresh to update the message list. 3. Select an email message. From the message view, use the following options: - To reply to the sender, select Reply. - To delete the message, select Delete. - To reply to the message including all recipients, select Reply all. - To view an attachment, select Open. To save it to your phone, select Save. - To forward the message to other people, press [MENU]>Forward. 20 GOOGLE TALK Add Friends to Your Friend List 1. In idle mode, open the application list and select Talk. The friends list shows all of your Google Talk contacts at a glance. 2. Press [MENU]>Add friends.](https://usermanual.wiki/Star-Computer-Group/E380/User-Guide-1889082-Page-140.png)
![141 3. Enter an email address of the friend and select Send invitation. When your friend accepts the invitation, the friend is added to your friend list. Start a Chat 1. In idle mode, open the application list and select Talk. 2. Select a friend from the friend list. The chat screen opens. 3. Enter your message and select Send. To insert emoticons, press [MENU]>More>Insert smiley. 4. To switch between active chats, press [MENU]>Switch chats. 5. To end the chat, press [MENU]>End chat. 21 CAMERA Capture a Photo 1. In idle mode, open the application list and select Camera. 2. Rotate the phone anti-clockwise to landscape view. 3. Aim the lens at the subject and make any necessary adjustments. Check the camera status and settings. Change the shooting mode.](https://usermanual.wiki/Star-Computer-Group/E380/User-Guide-1889082-Page-141.png)
![142 Change the scene mode. Adjust the exposure value; Select + to increase or – to decrease. Change the camera settings. Switch to the camcorder. Capture a photo. View the photo or video you capture last. 4. Press the [VOLUME] to zoom in or out. 5. Tap where you want to focus on the preview screen. The focus frame moves to the place you tap and changes to green when the subject is in focus. 6. Select [CAMERA] to take a photo. The photo is saved automatically. After taking photos, select [▶] to view the taken photos. - To view more photos, scroll left or right. - To zoom in or out, select [+] or [-]. You can also double tap the screen. - To send a photo to others, select Share.](https://usermanual.wiki/Star-Computer-Group/E380/User-Guide-1889082-Page-142.png)
![143 - To set a photo as wallpaper or a caller ID image for a contact, select Set as. - To delete a photo, select Delete. Capture a Photo by Using Preset Options for Various Scenes Your camera provides you with predefined settings for various scenes. You can simply select the proper mode for your shooting condition and subjects. 1. In idle mode, open the application list and select Camera. 2. Rotate the phone anti-clockwise to landscape view. 3. Select SCN>a scene>[MEMORY]. 4. Make any necessary adjustments. 5. Select [CAMERA] to take a photo. Capture a Series of Photos You can easily take a series of photos of moving subjects. This is useful when you are photographing children at playing. 1. In idle mode, open the application list and select Camera. 2. Rotate the phone anti-clockwise to landscape view. 3. Select >Continuous. 4. Make any necessary adjustments. 5. Tap and hold [CAMERA]. The camera will continue to take photos until you release the camera shutter.](https://usermanual.wiki/Star-Computer-Group/E380/User-Guide-1889082-Page-143.png)
![144 Capture a Panoramic Photo You can take wide panoramic photos using Panorama shooting mode. This mode is convenient for photographing landscapes. 1. In idle mode, open the application list and select Camera. 2. Rotate the phone anti-clockwise to landscape view. 3. Select >Panorama. 4. Make any necessary adjustment. 5. Select [CAMERA] to take the first photo. 6. Slowly move the phone in any direction and align the green frame with the viewfinder. When you have aligned the green frame and viewfinder, the camera will automatically take the next photo. 7. Repeat step 6 to complete the panoramic photo. Capture a Photo in Smile Shot Mode Your camera can recognize people’s faces and help you take photos of their smiling faces. 1. In idle mode, open the application list and select Camera. 2. Rotate the phone anti-clockwise to landscape view. 3. Select >Smile shot. 4. Make any necessary adjustment. 5. Select [CAMERA]. 6. Aim the camera lens at your subject. Your phone recognizes people in an image and detects their](https://usermanual.wiki/Star-Computer-Group/E380/User-Guide-1889082-Page-144.png)
![145 smiles. When the subject smiles, the phone automatically takes a photo. Capture a Photo in Self Shot Mode You can take photos of yourself conveniently using the front camera lens. 1. In idle mode, open the application list and select Camera. 2. Rotate the phone anti-clockwise to landscape view. 3. Select >Self shot. 4. Make any necessary adjustment. 5. Select [CAMERA]. Capture a Photo of Action You can capture shots of a moving subject and then combine them into a single photo that shows the action. 1. In idle mode, open the application list and select Camera. 2. Rotate the phone anti-clockwise to landscape view. 3. Select >Action shot. 4. Make any necessary adjustment. 5. Select [CAMERA] to capture the first photo. 6. Move the device to follow the moving subject. The device automatically captures the next photos. 7. Continue to follow the subject until the phone has captured all the shots necessary for the action photo.](https://usermanual.wiki/Star-Computer-Group/E380/User-Guide-1889082-Page-145.png)
![146 Customize Camera Settings Before taking a photo, select [SETTINGS]>[CAMERA] to access the following options: Outdoor visibility Active Outdoor visibility to select an appropriate lighting condition. Focus mode Take close-up photos or set the camera to focus on the subject or focus on human faces automatically. Timer Select the length of the delay before the camera takes a photo. Resolution Change the resolution option. White balance Adjust the color balance according to light conditions. Effects Apply a special effect, such as sepia or black and white tones. ISO Adjust the sensitivity of the camera imaging sensor. Metering Select a type of exposure meter. Anti-Shake Reduce blur caused by the device’s vibration or movement. Auto contrast Automatically adjust contrast between your subject and background. Blink detection Set the camera to alert you when people close their eyes.](https://usermanual.wiki/Star-Computer-Group/E380/User-Guide-1889082-Page-146.png)
![147 Image quality Set the quality level for your photos. Adjust Adjust contrast, saturation, and sharpness. Before taking a photo, select [SETTINGS]>[TOOLS] to access the following settings: Guidelines Display guidelines on the preview screen. Review Set the camera to display the taken image. GPS Set the camera to include location information for your photos. Shutter sound Set the camera shutter to make a sound when capturing a photo. Storage Select a memory location for storing captured photos. Reset Reset menus and shooting options. Capture a Video 1. In idle mode, open the application list and select Camera. 2. Rotate the phone anti-clockwise to landscape view. 3. Select [CAMERA] to switch to the camcorder. 4. Aim the lens at the subject and make any necessary adjustments. Check the camcorder status and settings.](https://usermanual.wiki/Star-Computer-Group/E380/User-Guide-1889082-Page-147.png)
![148 Change the recording mode (for attaching to a multimedia message or for saving normally). Adjust the expose value; select + to increase or – to decrease. Change the camcorder settings. Switch to the camera. Capture a video. View the photo or video you capture last. 5. Press [VOLUME] to zoom in or out. 6. Select [RECORD] to start recoding. 7. Select [STOP] to stop recording. The video is saved automatically. After capturing videos, select [▶] to view the captured videos. - To view more videos, scroll left or right. - To play a video, select Play. - To delete a video, select Delete.](https://usermanual.wiki/Star-Computer-Group/E380/User-Guide-1889082-Page-148.png)
![149 - To send a video to others, select Share. Customize Camcorder Settings Before capturing a video, select [SETTINGS]>[VIDEO] to access the following options: Outdoor visibility Active Outdoor visibility to select an appropriate lighting condition. Timer Select the length of the delay before the camera takes a photo. Resolution Change the resolution option. White balance Adjust the color balance according to light conditions. Effects Apply a special effect, such as sepia or black and white tones. Video quality Set the quality level for your videos. Adjust Adjust contrast, saturation, and sharpness. Before taking a photo, select [SETTINGS]>[TOOLS] to access the following settings: Guidelines Display guidelines on the preview screen. Audio recording Turn the audio on or off. Review Set the camera to display the recorded video. Storage Select a memory location for storing captured videos. Reset Reset menus and shooting options.](https://usermanual.wiki/Star-Computer-Group/E380/User-Guide-1889082-Page-149.png)
![150 Video Player Learn to use the video player to play various kinds of videos. The video player supports the following file formats: 3gp, mp4, avi, wmv, flv, mkv (Codec: MPEG4, H.263, Sorenson H.263, H.264, VC-1, DivX/XviD). 1. In idle mode, open the application list and select Video Player. 2. Select a video to play. 3. Rotate the device anti-clockwise to landscape view. 4. Control playback with the following icons: Pause playback [ ll ] ; Select [▶] to resume playback 22 GALLERY Learn to view photos and play videos saved in your phone’s memory and memory card. Supported File Formats Image Extension: bmp, gif, jpg, png. Video - Extension: 3gp, mp4, avi, wmv, flv, mkv - Codec: MPEG4, H.263, Sorenson H.263, H.264, VC-1, DivX/XviD](https://usermanual.wiki/Star-Computer-Group/E380/User-Guide-1889082-Page-150.png)
![151 View a Photo 1. In idle mode, open the application list and select Gallery. 2. Select a folder. 3. To change the view mode, select at the top right of the screen. 4. Select a photo (with no icon) to view. While viewing a photo, use the following options: - To view more photos, scroll left or right. - To zoom in or out, select [+] or [-]. You can also tap the screen with two fingers and spread them apart (move your fingers closer together to zoom out). - To start a slideshow images in the selected folder, select Slideshow. Tap the screen to stop the slideshow. Play a Video 1. In idle mode, open the application list and select Gallery. 2. Select a video (with the [▶] ) to play. 3. Rotate the phone anti-clockwise to landscape view. 4. Control playback with the virtual keys. Share Image or Videos 1. In idle mode, open the application list and select Gallery. 2. Select a folder.](https://usermanual.wiki/Star-Computer-Group/E380/User-Guide-1889082-Page-151.png)
![153 [VOLUME] Adjust the volume. [5.1CH] Activate the 5.1 channel surround sound system when a headset is connected. [SHUFFLE] Active Shuffle mode. [REPEAT] Change the repeat mode (off, repeating a file or repeating all files). [SKIP.BACKWARD] Skip backward; scan backward in a file (tap and hold) [PAUSE] Pause playback; select ▶ to resume playback. [SKIP.FORWARD] Skip forward; scan forward in a file (tap and hold). Access the Album List 1. In idle mode, open the application list and select Music player. 2. Rotate the phone anti-clockwise to landscape view or press [MENU]>Go to Disc view depending on your region or service provider. 3. Scroll left or right to an album. 4. Select the album image to begin playback. 5. Select [PAUSE] or [PLAY] to pause or resume the current playback. 6. Select to switch to circle view. 7. Drag around the circle to select a track. To switch to another category, select All>a category. 8. Select to switch back to album view.](https://usermanual.wiki/Star-Computer-Group/E380/User-Guide-1889082-Page-153.png)
![154 Create a Playlist 1. In idle mode, open the application list and select Music player. 2. Select Playlists. 3. Press [MENU]>Create. 4. Enter a title for your new playlist and select Save. 5. Select Add music. 6. Select the files you want to include and select Add. During playback, you can add files to a playlist by pressing [MENU]>Add to playlist. Add Songs to the Quick List You can add songs to the quick list and save them as a playlist. During playback, press [MENU]>Add to quick list to add the current song to the quick list. To go to the quick list, from the music player main screen, select Playlist>Quick list. To save the quick list as a playlist, press [MENU]>Save as playlist. Customize Music Player Settings 1. In idle mode, open the application list and select Music player. 2. Press [MENU]>More>Settings, or press [MENU]>Settings. 3. Adjust the following settings to customize your music player. Equalizer Select a default equalizer type. Effect Select a sound effect.](https://usermanual.wiki/Star-Computer-Group/E380/User-Guide-1889082-Page-154.png)
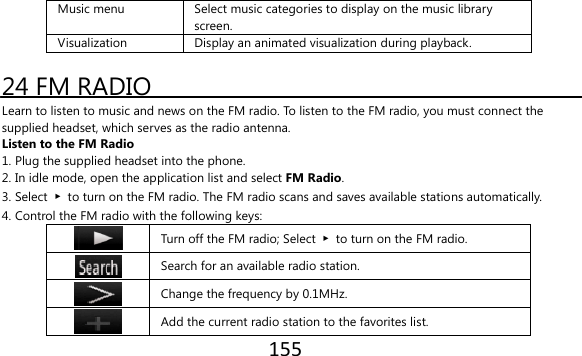
![156 Change the sound output (headset or phone’s speaker). Save a Radio Station Automatically 1. Plug the supplied headset into the phone. 2. In idle mode, open the application list and select FM Radio. 3. Select Scan>a scanning option. The FM radio scans and saves available stations automatically. 4. Select the radio station you want from the all station list and press [RETURN] to return to the FM radio screen. Add a Radio Station to the Favorites List 1. Plug the supplied headset into the phone. 2. In idle mode, open the application list and select FM Radio. 3. Select ▶ to turn on the FM radio. 4. Scroll to the radio station you want. 5. Select + to add to the favorites list. Customize FM Radio Settings 1. In idle mode, open the application list and select FM Radio. 2. Press [MENU]>Settings. 3. Adjust the following settings to customize your FM radio: Region Select your region. Background playing Set whether or not to run the FM radio in the background](https://usermanual.wiki/Star-Computer-Group/E380/User-Guide-1889082-Page-156.png)
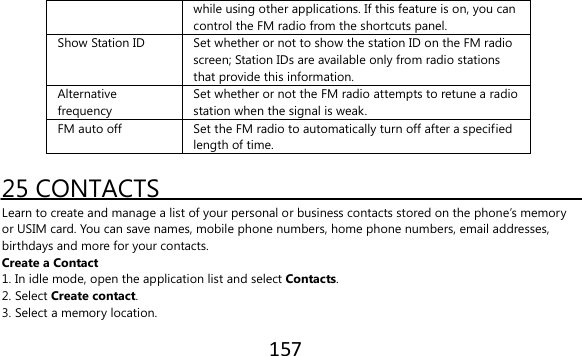
![158 4. Enter contact information. 5. Select Save to add the contact to memory. You can also create a contact from the dialing screen. 1. In idle mode, open the application list and select Phone>Keypad. 2. Enter a phone number. 3. Select Add to contacts>Create contact. 4. Select a memory location. 5. Enter contact information. 6. Select Save to add the contact to memory. Import or Export Contacts 1. In idle mode, open the application list and select Contacts. 2. Press [MENU]>More>Import/Export. 3. Select an option to import or export. 4. For importing contacts, select an importing option. Find a Contact 1. In idle mode, open the application list and select Contacts. 2. Scroll up or down on the contact list. 3. Select a contact’s name. Set Speed Dial Number 1. In idle mode, open the application list and select Contacts.](https://usermanual.wiki/Star-Computer-Group/E380/User-Guide-1889082-Page-158.png)
![159 2. Press [MENU]>Speed dial. 3. Select a location number>a contact. Create Your Name card 1. In idle mode, open the application list and select Contacts. 2. Press [MENU]>My profile. 3. Enter your own personal details. 4. Select Save. Retrieve Contacts from Your Community Accounts You can view the list of community website accounts and select an account to add a contact from the website to your phone contacts. 1. In idle mode, open the application list and select Contacts. 2. Press [MENU]>Get friends. 3. Select an account. Create a Group of Contacts By creating groups of contacts, you can manage multiple contacts and send messages or email to an entire group. Start by creating a group. 1. In idle mode, open the application list and select Contacts>Groups. 2. Press [MENU]>Create. 3. Enter a name and select a ringtone for the group. 4. Select Save.](https://usermanual.wiki/Star-Computer-Group/E380/User-Guide-1889082-Page-159.png)
![160 Copy Contacts 1. In idle mode, open the application list and select Contacts. 2. Select a contact. 3. Press [MENU] and select a copy option (from the phone to USIM card or vice versa). View the Communication Log You can view the communication log of calls, messages, email or SNS threads. 1. In idle mode, open the application list and select Contacts>History. 2. Select an item you want to view. View the Social Network Activities You can view the recent activities of contacts in social network services, such as Facebook, MySpace, and Twitter. 1. In idle mode, open the application list and select Contacts>Activities. 2. Select an item you want to view. 26 CALENDAR Learn to create and manage daily, weekly or monthly events, and set alarms to remind yourself of important events. Create an Event 1. In idle mode, open the application list and select Calendar.](https://usermanual.wiki/Star-Computer-Group/E380/User-Guide-1889082-Page-160.png)
![161 2. Press [MENU]>Create. 3. Enter the details of the event as required. 4. Select Save. View Events To change the calendar view, 1. In idle mode, open the application list and select Calendar. 2. Select a view mode from the top of the calendar. To view events of a specific date, 1. In idle mode, open the application list and select Calendar. 2. Select a date on the calendar. In month view, days with scheduled events are indicated by a small triangle. To move to a specific day by entering a date manually, press [MENU]>Go to, enter the date by selecting + or -, and select Set. To select today’s date, press [MENU]>Today. 3. Select an event to view its details. Stop an Event Alarm If you set an alarm for a calendar event, the event alarm icon will appear at the specified time. 1. Open the shortcuts panel from the top of the screen. 2. Select a reminder to view more details about the event. 3. To snooze or dismiss the reminder, select Snooze all or Dismiss all.](https://usermanual.wiki/Star-Computer-Group/E380/User-Guide-1889082-Page-161.png)
![162 27 MEMO Learn to record important information to save and view at a later date. Create a Memo 1. In idle mode, open the application list and select Memo. 2. Select Create memo or press [MENU]>Create. 3. Enter your memo text. 4. Select a color to change a background color. 5. Select Save. View Memos 1. In idle mode, open the application list and select Memo. 2. Select a memo to view its details. 28 VOICE RECORDER Learn to operate your phone’s voice recorder. You can set voice memos as call or alarm ringtones. Record a Voice Memo 1. In idle mode, open the application list and select Voice Recorder. 2. Select ● to start recording.](https://usermanual.wiki/Star-Computer-Group/E380/User-Guide-1889082-Page-162.png)
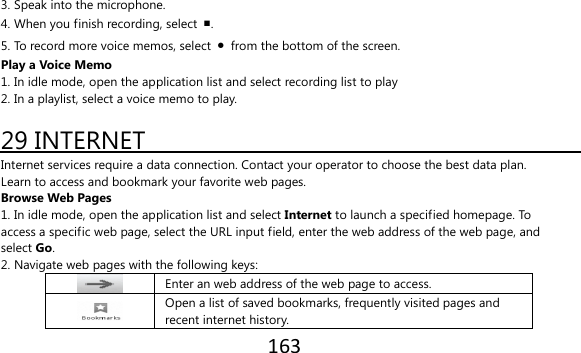
![164 While browsing the web page, use the following options: - To zoom in or out, double-tap the screen. You can also use the two finger zoom; Place your two finger on the screen and slowly pinch or spread apart. - To open a new window, press [MENU]>New window. - To add the RSS feed, press [MENU]>Add RSS feeds. You can read RSS feeds using Google Reader. - To view the current active windows, press [MENU]>Windows. You can open multiple pages and switch back and forth between them. - To reload the current web page, press [MENU]>Refresh. - To go to a next page in history, press [MENU]>Forward. - To bookmark the current web page, press [MENU]>More>Add bookmark. - To search for text on the web page, press [MENU]>More>Find on page. - To select text on the web page, press [MENU]>More>Select text. Highlight the text you want with your finger. The highlighted text is copied to the clipboard and you can paste it anywhere. - To view the web page details, press [MENU]>More>Page info. - To send the web address of the web page to others, press [MENU]>More>Share page. - To view the downloaded history, press [MENU]>More>Downloads. - To customize the browser settings, press [MENU]>More>Settings. - To adjust the brightness of the screen, press [MENU]>More>Brightness Setting. This feature may be unavailable depending on your region. Bookmark your favorite web pages.](https://usermanual.wiki/Star-Computer-Group/E380/User-Guide-1889082-Page-164.png)
![165 If you know the web address of the web page, you can manually add a bookmark. To add a bookmark, 1. In idle mode, open the application list and select Internet. 2. Select >Bookmark. 3. Select Add. To bookmark the web page you were viewing, press [MENU]>Bookmark last-viewed page. 4. Enter a page title and a web address. 5. Select OK. From the bookmark list, tap and hold a bookmark and use the following options: - To open the web page in a new window, select Open in new window. - To edit the bookmark details, select Edit bookmark. - To add the bookmark shortcut to the idle screen, select Add shortcut to Home. - To send the web address of the web page to others, select Share link. - To copy the web address of the web page, select Copy link URL. - To delete the bookmark, select Delete bookmark. - To use the web page as your homepage of the browser, select Set as homepage. Add an RSS Feed Address 1. In idle mode, open the application list and select Internet. 2. Move to a web page that has an RSS feed.](https://usermanual.wiki/Star-Computer-Group/E380/User-Guide-1889082-Page-165.png)
![166 3. Press [MENU]>Add RSS feeds. 4. Select an RSS feed. 5. Read the RSS feed with Google Reader. Access the Frequently Visited Pages or the Recent History 1. In idle mode, open the application list and select Internet. 2. Select >Most visited or History. 3. Select a web page to access. 30 MAPS Learn to use Google Maps to find your location, search the online map for street, cities, or countries, and get directions. Search the Map 1. In idle mode, open the application list and select Maps. 2. Scroll through the map. 3. To zoom in or out, tap the screen and select + or -. Find Your Location 1. In idle mode, open the application list and select Maps. 2. Press [MENU]>My Location.](https://usermanual.wiki/Star-Computer-Group/E380/User-Guide-1889082-Page-166.png)
![167 Search for a Specific Location 1. In idle mode, open the application list and select Maps. 2. Press [MENU]>Search. 3. Use one of the following methods: - Enter the address. - Enter the category of the business. - Select an address you have visited or a category from the list. 4. Select Get Directions to a Specific Destination 1. In idle mode, open the application list and select Maps. 2. Press [MENU]>Directions. 3. Enter the addresses of the starting location and the ending location. To enter an address from your contact list or point the location on the map, select >Contacts or Point on map. 4. Select a travel method (car, bus, or walk) and select Go. 5. Select a travel route to view details of your trip (if necessary). 6. Select Show on map. 7. When you are finished, press [MENU]>More>Clear Map. Share Your Location Via Google Latitude](https://usermanual.wiki/Star-Computer-Group/E380/User-Guide-1889082-Page-167.png)
![168 Learn to share your location with your friends and view friends’ locations via Google Latitude. 1. In idle mode, open the application list and select Maps. 2. Press [MENU]>Join Latitude. 3. Press [MENU]>Add friends>an option. 4. Select friends you want to add or enter an email address and select Add friends>Yes. When your friend accepts your invitation, you can share locations. You can view the marks that indicate the locations of your friends by pressing [MENU]>See map. 31 YOUTUBE YouTube is a free online video streaming service. Learn to view and share videos via YouTube. Watch Videos 1. In idle mode, open the application list and select YouTube. 2. Select a video from the list. 3. Rotate the device anti-clockwise to landscape view. Share Videos 1. In idle mode, open the application list and select YouTube. 2. Tap and hold a video. 3. Select Share>an option. Upload Videos](https://usermanual.wiki/Star-Computer-Group/E380/User-Guide-1889082-Page-168.png)
![169 1. In idle mode, open the application list and select YouTube. 2. Press [MENU]>Upload and select a video. Skip to 8. If you want to upload new videos, select to turn on the camera. 3. Rotate the device anti-clockwise to landscape view. 4. Aim the lens at the subject and make any adjustments. 5. Select [RECORD] to start recording. 6. Select [RECORD] to stop recording. 7. Select Save to upload the video that you have recorded. 8. Enter your name and password and select Sign in. 32 SYNCHRONIZE Learn to synchronize contacts, calendar events, and memos with the web server you have specified. Set up a Synchronization Profile 1. In idle mode, open application list and select Settings>Wireless and network>Synchronize. 2. Select Create new profile and specify the following profile options: Profile name Enter a name for the profile. Sync category Select types of data to be synchronized. Sync type Set how to synchronize the phone and the server.](https://usermanual.wiki/Star-Computer-Group/E380/User-Guide-1889082-Page-169.png)

![171 1. In idle mode, open the application list and select Settings>Wireless and network>Bluetooth settings>Scan devices. 2. Select a device. 3. Enter a PIN for the Bluetooth wireless feature or the other device’s Bluetooth PIN, if it has one, and select OK. Alternatively, select Accept to match the PIN between your device and the device. When the owner of the other device enters the same PIN or accepts the connection, pairing is completed. If the pairing is successful, the device will automatically search for available services. Send Data Using the Bluetooth Wireless Feature 1. Select a file or item, such as a contact, calendar event, memo, or media file, from an appropriate application or My Files. 2. Press [MENU]>Share, Send via or Send name card via>Bluetooth. 3. Search for and paired with a Bluetooth-enabled device. Receive Data Using the Bluetooth Wireless Feature 1. In idle mode, open the application list and select Settings>Wireless and network>Bluetooth settings>Visible. Your phone is visible to other Bluetooth devices for 120 seconds. 2. When prompted, enter the PIN for the Bluetooth wireless feature and select OK (if necessary). 3. Select Accept to confirm that you are willing to receive data from the device (if necessary). Received data is saved to an appropriate application or folder according to its type. For example, a music or sound clip is saved to the sound folder and a contact to the phonebook.](https://usermanual.wiki/Star-Computer-Group/E380/User-Guide-1889082-Page-171.png)
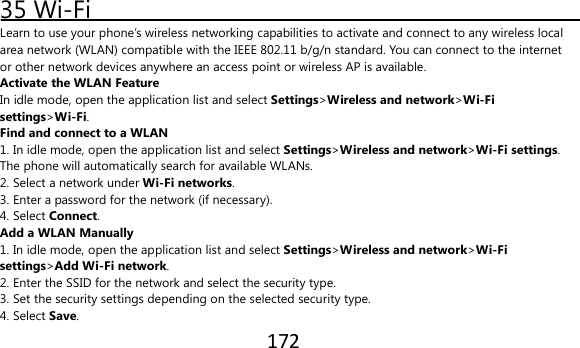
![173 Connect to a WLAN Using a Wi-Fi Protected Setup (WPS) Using WPS, you can connect to a secured network. To connect to a WLAN with a WPS button, 1. In idle mode, open the application list and select Settings>Wireless and network>Wi-Fi settings. 2. Select WPS button connection. 3. Press a WPS button on the access point within 2 minutes. To connect to a WLAN with a WPS PIN. 1. In idle mode, open the application list and select Settings>Wireless and network>Wi-Fi settings. 2. Select a network indicated by the WPS icon and select WPS PIN. 3. On the access point, enter the PIN and press the start button. 36 PC CONNECTIONS Learn to connect your device to a PC with an optional PC data cable in various USB connection modes. By connecting the device to a PC, you can synchronize files with Windows Media Player, transfer the data to and from your phone directly, and use your phone as a wireless modem for a PC. Synchronize with Windows Media Player 1. In idle mode, open the application list and select Settings>About phone>USB settings>Media player. 2. Press [HOME] to return to idle mode.](https://usermanual.wiki/Star-Computer-Group/E380/User-Guide-1889082-Page-173.png)
![174 3. Using an optional PC data cable, connect the multifunction jack on your phone to a PC with Windows Media Player installed. When connected, a pop-up window will appear on the PC. 4. Open Windows Media Player to synchronize music files. 5. Edit or enter your phone’s name in the pop-up window (if necessary). 6. Select and drag the music files you want to the sync list. 7. Start synchronization. Connect as a Mass Storage Device You can connect your phone to a PC as a removable disk and access the file directory. If you insert a memory card in the phone, you can also access the file directory of the memory card by using the device as a memory card reader. 1. If you want to transfer files from or to a memory card, insert a memory card into the phone. 2. In idle mode, open the application list and select Settings>About phone>USB settings>Mass storage. 3. Press [HOME] to return to idle mode. 4. Using an optional PC data cable, connect the multifunction jack on your phone to a PC. When connected, a pop-up window will appear on the PC. 5. Open the folder to view files. 6. Copy files from the PC to the memory card. Use Your Phone as a Wireless Modem You can use your phone as a modem for a PC to access the internet via your mobile network service.](https://usermanual.wiki/Star-Computer-Group/E380/User-Guide-1889082-Page-174.png)
![175 1. In idle mode, open the application list and select Settings>About phone>USB settings>PC internet. 2. Press [HOME] to return to idle mode. 3. Using an optional PC data cable, connect the multifunction jack on your device to a PC. 4. When the installation manager appears, follow the on-screen instructions to complete the installation of the software. Once the installation is completed, the window to activate an internet connection will appear. 5. Create a modem connection on your PC. How you create a modem connection may differ depending on the operating system of the PC. 6. Select the created modem connection and enter an ID and password provided by your service provider. 37 CLOCK Set a New Alarm 1. In idle mode, open the application list and select Clock>Alarm. 2. Select Create alarm or press [MENU]>Create. 3. Set alarm details. Select Set as daily briefing to activate the Daily briefing immediately after you stop an alarm. 4. When you finish, select Save.](https://usermanual.wiki/Star-Computer-Group/E380/User-Guide-1889082-Page-175.png)
![176 Stop an Alarm When the alarm sounds, - Tap and hold Stop to stop the alarm. - Tap and hold Snooze to repeat the alarm after a specified length of time. Delete an Alarm 1. In idle mode, open the application list and select Clock>Alarm. 2. Press [MENU]>Delete. 3. Select alarms to delete. 4. Select Delete. Create a World Clock 1. In idle mode, open the application list and select Clock>World clock. 2. Select Add city or press [MENU]>Add. 3. Enter a city name or select one from the city list. Press city in the world map list to select it. 4. To add more world clocks, repeat steps 2-3. Use the Stopwatch 1. In idle mode, open the application list and select Clock>Stopwatch. 2. Select Start to begin the stopwatch. 3. Select Lap to record lap times. 4. When you are finished, select Stop. 5. Select Reset to clear recorded times.](https://usermanual.wiki/Star-Computer-Group/E380/User-Guide-1889082-Page-176.png)
![177 Use the Count-down Timer 1. In idle mode, open the application list and select Clock>Timer. 2. Set the length of time to count-down. 3. Select Start to begin the count-down. You can now use other functions with the timer counting down in the background. Press the [HOME] or [BACK] and access another application. 4. When the timer expires, tap and hold Stop to stop the alert. 38 CALCULATOR Perform the Calculation 1. In idle mode, open the application list and select Calculator. 2. Use the keys that correspond to the calculator display to perform basic mathematical operations. View the Calculation History 1. In idle mode, open the application list and select Calculator. 2. Perform the calculation. 3. Select [▼] to close the calculator keypad. The calculation history appears. 4. To clear the history, press [MENU]>Clear history.](https://usermanual.wiki/Star-Computer-Group/E380/User-Guide-1889082-Page-177.png)
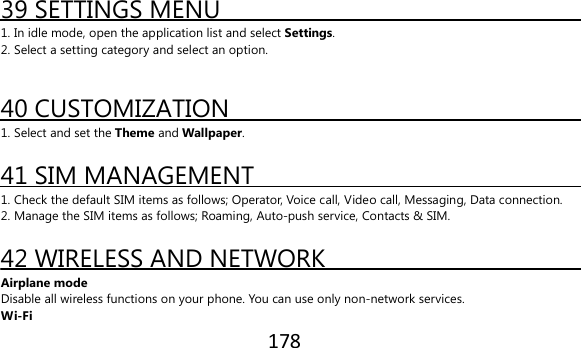
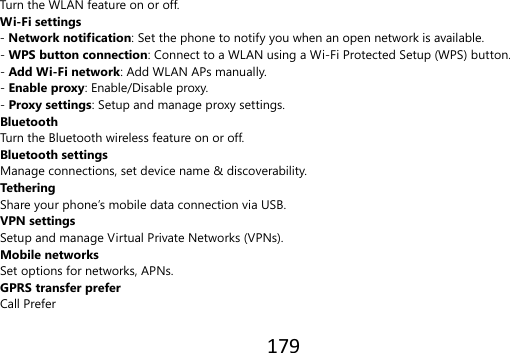
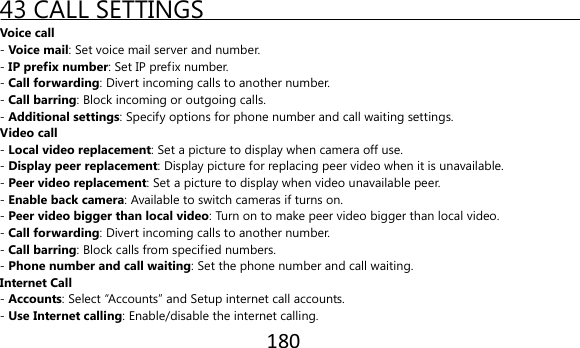
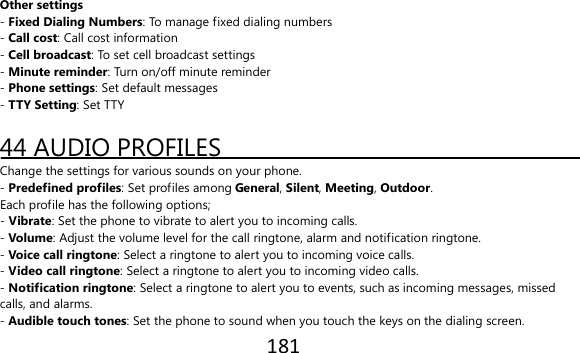
![184 - Set password: Create and confirm a password for accessing credentials. - Clear storage: Erase the credential contents from the device and reset the password. 48 APPLICATIONS - Unknown sources: Select to download applications from any source. If you do not select this option, you can download applications only from Play Store. - Preferred install location: Change the preferred installation location for new applications. - Manage applications: Access the list of the applications installed on the phone and check the application information. To view the applications that are currently running or third-party application installed additionally, press [MENU]>Filter. - APK installer: Install your APK from SD card. - Running services: View the services you are using and access them to manage. - Development . USB debugging: Select to connect your phone to a PC by using a PC data cable. This is for application development. . Stay awake: Set the phone’s screen to stay on while charging the battery. . Allow mock locations: Allow mock locations and service information to be sent to a Location Manager service for testing. This is for application development. - Storage use: View storage used by applications.](https://usermanual.wiki/Star-Computer-Group/E380/User-Guide-1889082-Page-184.png)