Steinberg Cubase Elements/Cubase AI/Cubase LE 8 – Operation Manual AI 8.0 OM EN
LE - 8.0 - Operation Manual OM_EN Free User Guide for Cubase Software, Manual - page2
Elements - 8.0 - Operation Manual OM_EN User Guide for Cubase Software, Free Instruction Manual - 1
User Manual: Steinberg AI - 8.0 - Operation Manual Free User Guide for Cubase Software, Manual - page1
Open the PDF directly: View PDF ![]() .
.
Page Count: 686 [warning: Documents this large are best viewed by clicking the View PDF Link!]
- Table of Contents
- Introduction
- Setting Up Your System
- VST Connections
- Project Window
- Project Handling
- Tracks
- Track Handling
- Adding Tracks
- Removing Tracks
- Moving Tracks in the Track List
- Renaming Tracks
- Coloring Tracks
- Showing Track Pictures
- Setting the Track Height
- Selecting Tracks
- Duplicating Tracks
- Disabling Audio Tracks (Cubase Elements only)
- Organizing Tracks in Folder Tracks
- Handling Overlapping Audio
- How Events are Displayed on Folder Tracks
- Modifying Event Display on Folder Tracks
- Track Presets
- Parts and Events
- Range Editing
- Playback and Transport
- Virtual Keyboard
- Recording
- Quantizing MIDI and Audio
- Fades and crossfades
- Arranger Track (Cubase Elements only)
- Markers
- MixConsole
- Audio Effects
- Audio processing and functions
- Sample Editor
- Audio Part Editor
- Pool
- MediaBay
- Working With the MediaBay
- Setting Up the MediaBay
- Define Locations Section
- Scanning Your Content
- Updating the MediaBay
- Locations Section
- Results Section
- Previewer Section
- Filters Section
- Sound Browser and Mini Browser
- MediaBay Preferences
- MediaBay Key Commands
- Working with MediaBay-Related Windows
- Working With Volume Databases
- Automation
- VST Instruments
- Installing and Managing Plug-ins
- Remote controlling Cubase
- MIDI realtime parameters
- Using MIDI devices
- MIDI Processing
- MIDI Editors
- Chord Functions
- Chord Pads
- Editing tempo and signature
- Export Audio Mixdown
- Synchronization
- Video
- ReWire (not in Cubase LE)
- Key Commands
- File handling
- Customizing
- Optimizing
- Preferences
- Index
Operation Manual
Cristina Bachmann, Heiko Bischoff, Christina Kaboth, Insa Mingers, Matthias Obrecht,
Sabine Pfeifer, Kevin Quarshie, Benjamin Schütte
This PDF provides improved access for vision-impaired users. Please note that due to the
complexity and number of images in this document, it is not possible to include text
descriptions of images.
The information in this document is subject to change without notice and does not represent
a commitment on the part of Steinberg Media Technologies GmbH. The software described
by this document is subject to a License Agreement and may not be copied to other media
except as specifically allowed in the License Agreement. No part of this publication may be
copied, reproduced, or otherwise transmitted or recorded, for any purpose, without prior
written permission by Steinberg Media Technologies GmbH. Registered licensees of the
product described herein may print one copy of this document for their personal use.
All product and company names are ™ or ® trademarks of their respective holders. For more
information, please visit www.steinberg.net/trademarks.
© Steinberg Media Technologies GmbH, 2015.
All rights reserved.

3
Table of Contents
7Introduction
7About the Program Versions
7Typographical Conventions
8Setting Up Your System
8Setting Up Audio
14 Setting Up MIDI
15 Connecting a Synchronizer
16 Setting Up Video
17 VST Connections
17 VST Connections Window
18 Renaming the Hardware Inputs and
Outputs
20 Adding Input and Output Busses
21 Presets for Input and Output Busses
22 About Monitoring
22 Editing the Bus Configurations
24 Project Window
25 Toolbar
27 Status Line
28 Info Line
28 Overview Line
29 Ruler
30 Inspector
32 Global Track Controls
33 Track List
34 Event Display
34 Racks
35 Zooming in the Project Window
39 Snap Function
41 Cross-Hair Cursor
42 Edit History Dialog
44 Project Handling
44 Creating New Projects
45 Steinberg Hub
46 Project Assistant
47 About Project Files
47 About Template Files
49 Project Setup Dialog
52 Opening Project Files
54 Saving Project Files
55 Reverting to the Last Saved Version
55 Choosing a Project Location
56 Removing Unused Audio Files
56 Creating Self-Contained Projects
59 Tracks
59 Audio Tracks
64 Instrument Tracks
68 MIDI Tracks
72 Arranger Track
73 Chord Track
75 FX Channel Tracks
79 Folder Tracks
81 Group Channel Tracks
85 Marker Track
86 Ruler Track
87 Video Track
88 Customizing Track Controls

4
91 Track Handling
91 Adding Tracks
92 Removing Tracks
92 Moving Tracks in the Track List
93 Renaming Tracks
93 Coloring Tracks
94 Showing Track Pictures
96 Setting the Track Height
97 Selecting Tracks
98 Duplicating Tracks
98 Disabling Audio Tracks (Cubase Elements
only)
99 Organizing Tracks in Folder Tracks
100 Handling Overlapping Audio
100 How Events are Displayed on Folder Tracks
100 Modifying Event Display on Folder Tracks
101 Track Presets
106 Parts and Events
107 Audio Handling
108 Parts
109 Auditioning Audio Parts and Events
109 Adding Events to a Track
110 Scrubbing
111 Folder Parts
112 Editing Parts and Events
124 Range Editing
124 Creating a Selection Range
126 Editing Selection Ranges
129 Playback and Transport
129 Transport Panel
133 Transport Menu
135 Setting the Project Cursor Position
136 Left and Right Locators
137 Auto-Scroll
138 Time Formats
139 Locating to Specific Time Positions
140 Metronome
142 Chase
143 Virtual Keyboard
143 Recording MIDI With the Virtual Keyboard
144 Virtual Keyboard Options
145 Recording
145 Basic Recording Methods
149 Monitoring
152 Audio Recording Specifics
157 MIDI Recording Specifics
164 Remaining Record Time
165 Lock Record
166 Quantizing MIDI and Audio
166 Quantizing Audio Event Starts
167 Quantizing MIDI Event Starts
167 Quantizing MIDI Event Lengths
167 Quantizing MIDI Event Ends
167 Quantize Panel
172 Additional Quantizing Functions
174 Fades and crossfades
174 Creating fades
177 The Fade dialogs
179 Creating crossfades
180 The Crossfade dialog
182 Auto fades and crossfades
184 Arranger Track (Cubase Elements only)
184 Introduction
184 Setting up the arranger track
185 Working with arranger events
189 Flattening the arranger chain
192 Live mode
194 Arranging your music to video
196 Markers
196 Position Markers
196 Cycle Markers
198 Markers Window
202 Marker Track
204 Importing and Exporting Markers
206 MixConsole
208 Setting Up the MixConsole
208 MixConsole Toolbar
209 Configuring the MixConsole
214 Linking Channels
215 Input Levels
216 Copying and Moving Rack and Channel
Settings
217 Fader Section
220 Working with Channel Racks
236 Using Channel Settings
238 Adding Notes to a MixConsole Channel
239 Keyboard Navigation
240 Audio Effects
240 Overview
242 Insert Effects
247 Send Effects
252 Effect Control Panel
252 Comparing Effect Settings
253 Effect Presets
259 Plug-In Information Window

5
262 Audio processing and functions
262 Background
262 Audio processing
272 Freeze Edits
273 Detect Silence
276 The Spectrum Analyzer
278 Statistics
279 Time stretch algorithm
281 Sample Editor
281 Window overview
286 General Functions
297 Warping audio
297 Working with hitpoints and slices
306 Audio Part Editor
306 Window Overview
308 Opening the Audio Part Editor
309 Operations
312 Options and Settings
313 Pool
314 Pool Window
318 Working with the Pool
334 MediaBay
335 Working With the MediaBay
335 Setting Up the MediaBay
336 Define Locations Section
337 Scanning Your Content
337 Updating the MediaBay
338 Locations Section
340 Results Section
345 Previewer Section
350 Filters Section
352 Sound Browser and Mini Browser
352 MediaBay Preferences
353 MediaBay Key Commands
354 Working with MediaBay-Related Windows
356 Working With Volume Databases
359 Automation
359 Recording your Actions
360 Automation Curves
360 Static Value Line
360 Write/Read Automation
361 MIDI Part Data vs. Track Automation
361 Writing Automation Data
364 Editing Automation Data
366 Automation Tracks
368 VST Instruments
368 VST Instruments Window
371 Adding VST Instruments
372 Presets for Instruments
374 VST Quick Controls
376 Playing Back VST Instruments
378 About Latency
379 Import and Export Options
382 Installing and Managing Plug-ins
382 Installing VST plug-ins
383 Plug-in Manager
386 Compiling a New Effects Collection
388 Remote controlling Cubase
388 Setting Up
390 Operations
392 The Generic Remote device
396 The Remote Control Editor (Cubase
Elements only)
403 Apple Remote (Macintosh only)
404 MIDI realtime parameters
404 The Inspector – general handling
405 The Inspector sections
413 Using MIDI devices
413 MIDI devices – general settings and patch
handling
421 MIDI Processing
421 MIDI functions vs. MIDI modifiers
422 What is affected by the MIDI functions?
422 Transpose
423 Making your settings permanent
425 Dissolve Part
427 Repeat Loop
427 Other MIDI functions
433 MIDI Editors
433 Opening MIDI editors
434 Changing the Default MIDI Editor
434 Common MIDI Editor Functions
443 Key Editor
451 Key Editor Operations
470 Score Editor
474 Score Editor Operations
483 Drum Editor
493 Drum Editor Operations
500 SysEx Messages

6
505 Chord Functions
505 Chord Track
506 Chord Events
511 Scale Events
512 Voicings
515 Converting Chord Events to MIDI
515 Controlling MIDI Playback using the Chord
Track
519 Assigning Voices to Notes
520 Extracting Chord Events from MIDI
521 Recording Chord Events with a MIDI
Keyboard
522 Chord Pads
522 Chord Pads Zone
525 Functions Menu
526 Preparations
527 Chord Assistant
528 Assigning Chords to Chord Pads
531 Moving and Copying Chord Pads
531 Playing Back and Recording Chords
533 Chord Pad Settings – Remote Control
536 Chord Pad Settings – Players
539 Chord Pad Settings – Pad Layout
540 Chord Pads Presets
541 Creating Events from Chord Pads
542 Editing tempo and signature
542 Background
543 Tempo and signature display
545 Editing tempo and signature
548 The Beat Calculator
550 Adjusting the audio to the project tempo
551 Export Audio Mixdown
551 Introduction
551 Mixing down to audio files
553 The Export Audio Mixdown dialog
556 The available file formats
564 Synchronization
564 Background
565 Timecode (positional references)
567 Clock sources (speed references)
568 The Project Synchronization Setup dialog
571 Synchronized operation
572 Working with VST System Link
577 Activating VST System Link
585 Video
585 Before You Start
588 Preparing a Video Project
591 Playing Back Video
595 Editing Video
595 Extracting Audio From a Video File
596 Replacing the Audio in a Video File
597 ReWire (not in Cubase LE)
597 Introduction
598 Launching and quitting
599 Activating ReWire channels
599 Using the transport and tempo controls
600 How the ReWire channels are handled
601 Routing MIDI via ReWire
601 Considerations and limitations
602 Key Commands
602 Introduction
603 Setting up key commands
607 Setting up tool modifier keys
607 The default key commands
616 File handling
616 Importing audio
622 Exporting and importing standard MIDI files
626 Exporting and importing MIDI loops
627 Customizing
627 Using the Setup options
629 Appearance
632 Applying colors in the Project window
637 Where are the settings stored?
639 Optimizing
639 Optimizing Audio Performance
645 Preferences
645 Preferences Dialog
647 Appearance
648 Editing
656 Event Display
659 General
661 MIDI
665 MediaBay
666 Metering
667 Record
669 Transport
671 VST
674 Video
675 Index

7
Introduction
About the Program Versions
The documentation covers two different operating systems, Windows and Mac OS
X. Some features and settings are specific to one of the platforms.
This is clearly stated in the applicable cases. If nothing else is said, all descriptions
and procedures in the documentation are valid for both Windows and Mac OS X.
The screenshots are taken from the Windows version of Cubase.
Typographical Conventions
Many of the default key commands in Cubase use modifier keys, some of which are
different depending on the operating system. For example, the default key command
for Undo is [Ctrl]-[Z] on Windows and [Command]-[Z] on Mac OS X.
When key commands with modifier keys are described in this manual, they are
shown with the Windows modifier key first, in the following way:
• [Win modifier key]/[Mac modifier key]-[key]
For example, [Ctrl]/[Command]-[Z] means “press [Ctrl] on Windows or [Command]
on Mac OS X, then press [Z]”.
Similarly, [Alt]/[Option]-[X] means “press [Alt] on Windows or [Option] on Mac OS
X, then press [X]”.
NOTE
This manual often refers to right-clicking, for example, to open context menus. If you
are using a Mac with a single-button mouse, hold down [Ctrl] and click.
8
Setting Up Your System
Setting Up Audio
IMPORTANTIMPORTANTIMPORTANTIMPORTANT
Make sure that all equipment is turned off before making any connections.
Simple Stereo Input and Output Setup
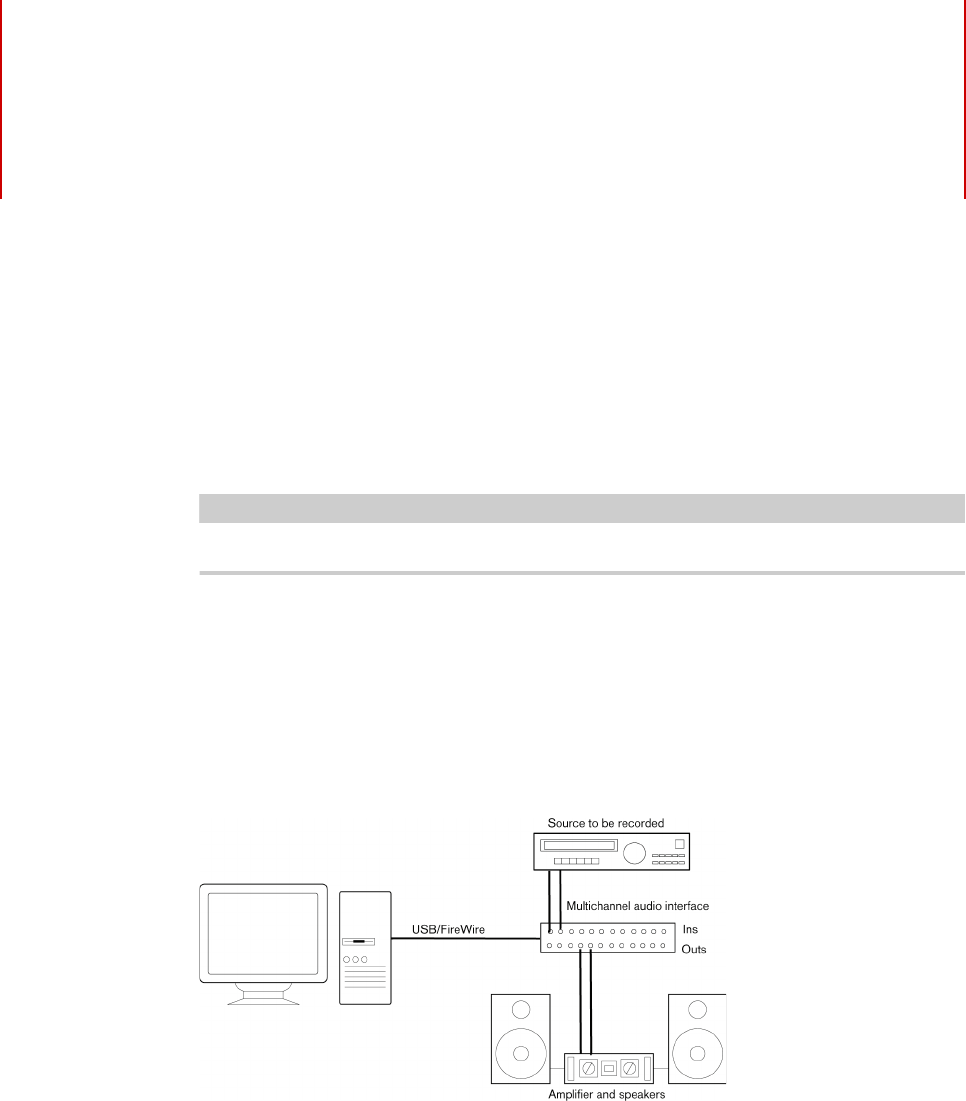
If you only use a stereo input and output from Cubase, you can connect your audio
hardware, for example, the inputs of your audio card or your audio interface, directly
to the input source and the outputs to a power amplifier and speaker.
Once you have set up the internal input and output busses, you can connect your
audio source, for example a microphone, to your audio interface and start recording.
Connecting Audio
Your system setup depends on many different factors, for example, on the kind of
project that you want to create, on the external equipment that you want to use, or
on the computer hardware that is available to you. Therefore, the following sections
can only serve as examples.
How to connect your equipment, that is, whether to use digital or analog
connections also depends on your setup.

Setting Up Your System
Setting Up Audio
9
About Recording Levels and Inputs
When you connect your equipment, make sure that the impedance and levels of the
audio sources and inputs are matched. Using the correct type of input is important
to avoid distortion or noisy recordings. For microphones, for example, different
inputs can be used, such as consumer line level (-10 dBV) or professional line level
(+4 dBV).
Sometimes, you can adjust input characteristics on the audio interface or on its
control panel. For details, refer to the documentation that came with the audio
hardware.
IMPORTANTIMPORTANTIMPORTANT
IMPORTANT
Cubase does not provide any input level adjustments for the signals that are coming
into your audio hardware, since these are handled differently for each card.
Adjusting input levels is either done in a special application that is included with the
hardware or its control panel.
Word Clock Connections
If you are using a digital audio connection, you may also need a word clock
connection between the audio hardware and external devices. For details, refer to
the documentation that came with the audio hardware.
IMPORTANTIMPORTANTIMPORTANTIMPORTANT
Set up word clock synchronization correctly, or you may experience clicks and
crackles in your recordings.
Selecting a Driver
You must select the correct driver in Cubase to make sure that the program can
communicate with the audio hardware.
NOTE
On Windows operating systems, we recommend that you access your hardware via
an ASIO driver developed specifically for the hardware. If no ASIO driver is installed,
refer to your audio hardware manufacturer about available ASIO driver. You can use
the Generic Low Latency ASIO driver if no specific ASIO driver is available.
When you start Cubase, a dialog opens that prompts you to select a driver. You can
also select your audio hardware driver in the following way.
PROCEDURE
1. Launch Cubase and select Devices > Devices Setup.
2. In the devices list, select VST Audio System.
Setting Up Your System
Setting Up Audio
10
3. On the ASIO Driver menu, select your audio hardware driver.
The selected driver is added to the devices list.
4. In the devices list, select the driver to open the driver settings for your audio
hardware.
5. Open the control panel for the audio hardware in the following way:
• On Windows operating systems, click the Control Panel button.
• On Mac OS X operating systems, click the Open Config App button.
This button is available only for some hardware products. If it is not available in
your setup, refer to the documentation of your audio hardware for information
on where to make hardware settings.
NOTE
The control panel is provided by the audio hardware manufacturer and is different for
each audio card brand and model. However, control panels for the ASIO DirectX
driver and the Generic Low Latency ASIO Driver (Windows only) are provided by
Steinberg.
6. Make the settings as recommended by the audio hardware manufacturer.
7. Click Apply.
8. Click OK.
RELATED LINKS
Using Audio Hardware with a DirectX Driver (Windows only) on page 10
Using Audio Hardware with a DirectX Driver (Windows only)
A DirectX driver is an alternative to a specific ASIO driver and the Generic Low
Latency ASIO driver.
Cubase comes with the ASIO DirectX Full Duplex driver.
• To select the driver, select Devices > Device Setup > VST Audio System
and open the ASIO Driver menu.
When the ASIO DirectX Full Duplex driver is selected, you can open ASIO DirectX
Full Duplex Driver from the Devices List, and click Control Panel button. On the
Control Panel for the driver, the following settings are available:
Direct Sound Output and Input Ports
Lists all available Direct Sound output and input ports. To activate/deactivate
a port in the list, click the checkbox in the left column.
Buffer Size
Allows you to edit the buffer size. Audio buffers are used when audio data is
transferred between Cubase and the audio card. Larger buffers ensure that
playback occurs without glitches, but larger buffers also increase the latency.
Offset
Allows you to adjust the output or input latency time, if a constant offset is
audible during playback of audio and MIDI recordings.

Setting Up Your System
Setting Up Audio
11
Audio Channels
Lists the available audio channels.
Bits Per Sample
Shows the number of bits per sample.
Sync Reference
Shows if the driver is used as sync reference.
NOTE
To take advantage of DirectX Full Duplex driver, the audio hardware must support
Windows Driver Model (WDM).
Using Hardware that is Based on an External Clock Source
For proper audio playback and recording, you must set the sample rate of the
project to the sample rate of the incoming clock signals. If you are using an external
clock source, Cubase must be notified that it receives external clock signals and
derives its speed from that source.
PROCEDURE
1. Select Devices > Devices Setup.
2. In the devices list, select the page of your audio hardware driver.
3. Activate Externally clocked.
RESULT
Cubase accepts the sample rate mismatch, and playback is therefore faster or
slower.
When a sample rate mismatch occurs, the Record Format field on the status line
is highlighted in a different color.
Using Several Audio Applications Simultaneously
If you want to use several audio applications simultaneously, you must allow other
applications to play back via your audio hardware even though Cubase is running.
PROCEDURE
1. Select Devices > Devices Setup.
2. In the devices list, select the VST Audio System page.
3. Activate Release Driver when Application is in Background.
RESULT
The application that is currently active gets access to the audio hardware.

Setting Up Your System
Setting Up Audio
12
NOTE
Make sure that any other audio application accessing the audio hardware is also set
to release the ASIO or Mac OS X driver.
Setting Up Busses
Cubase uses a system of input and output busses to transfer audio between the
program and the audio hardware.
• Input busses let you route audio from the inputs of your audio hardware into
Cubase. This means that audio is always recorded through one or several
input busses.
• Output busses let you route audio from Cubase to the outputs of your audio
hardware. This means that audio is always played back through one or several
output busses.
Once you understand the bus system and know how to set up the busses properly,
you can continue with recording, playing back, and mixing.
RELATED LINKS
VST Connections on page 17
Configuring the Audio Hardware
Most audio cards provide one or more small applications that allow you to
customize your hardware.
This includes:
• Selecting which inputs/outputs are active.
• Setting up word clock synchronization (if available).
• Turning on/off monitoring via the hardware.
• Setting levels for each input.
• Setting levels for the outputs so that they match the equipment that you use
for monitoring.
• Selecting digital input and output formats.
• Making settings for the audio buffers.
In most cases, the settings for the audio hardware are gathered on a control panel
that can be opened from within Cubase or separately, when Cubase is not running.
For details, refer to the audio hardware documentation.

Setting Up Your System
Setting Up Audio
13
Plug and Play Support for ASIO Devices
The Steinberg UR824 hardware series supports plug and play in Cubase. These
devices can be plugged in and switched on while the application is running. Cubase
automatically uses the driver of the UR824 series and re-maps the VST
connections accordingly.
Steinberg cannot guarantee that this works with other hardware. If you are unsure
of whether your device supports plug and play, refer to the documentation of your
device.
IMPORTANTIMPORTANTIMPORTANTIMPORTANT
If a device that does not support plug and play is connected or disconnected while
the computer is running, it can get damaged.
Setting Up the Input and Output Ports
Once you have selected the driver for your audio hardware and have set it up, you
must specify which inputs and outputs to use.
PROCEDURE
1. Select Devices > Device Setup.
2. In the Device Setup dialog, select your driver from the Devices list on the left.
3. Make your settings.
4. Optional: To hide a port, click its Visible column.
IMPORTANT
Hiding a port disconnects it.
Ports that are not visible cannot be selected in the VST Connections window where
you set up your input and output busses.
5. Optional: To rename a port, click its name in the Show as column and type in
a new name.
6. Click OK.
About Monitoring
In Cubase, monitoring means listening to the input signal while preparing to record
or while recording.
The following ways of monitoring are available.
• Externally by listening to the signal before it reaches Cubase.
•Via Cubase.

Setting Up Your System
Setting Up MIDI
14
• By using ASIO Direct Monitoring.
This is a combination of the other methods.
RELATED LINKS
External Monitoring on page 150
Monitoring via Cubase on page 149
ASIO Direct Monitoring on page 150
Setting Up MIDI
IMPORTANTIMPORTANTIMPORTANTIMPORTANT
Turn off all equipment before making any connections.
PROCEDURE
1. Connect your MIDI equipment (keyboard, MIDI interface, etc.) to your
computer.
2. Install the drivers for your MIDI equipment.
RESULT
You can use your MIDI equipment in Cubase.
About MIDI Ports
To play back and record MIDI data from your MIDI device, for example, a MIDI
keyboard, you need to set up the MIDI ports in Cubase.
Connect the MIDI output port of your MIDI device to the MIDI input port of your
computer. This way, the MIDI device sends MIDI data to be played back or recorded
inside your computer.
Connect the MIDI input port of your MIDI device to the MIDI output port of your
computer. This way, you can send MIDI data from Cubase to the MIDI device. For
example, you can record your own playing, edit the MIDI data in Cubase, and then
play it back on the keyboard and record the audio that is coming out of the keyboard
for a better edited performance.
Showing or Hiding MIDI Ports
You can specify if a MIDI port is listed on the MIDI pop-up menus in the program.
PROCEDURE
1. Select Devices > Device Setup.
2. In the Device Setup dialog, select MIDI Port Setup from the Devices list on
the left.

Setting Up Your System
Connecting a Synchronizer
15
3. To hide a MIDI port, deactivate its Visible column.
4. Click OK.
Setting Up All MIDI Inputs
When you record MIDI, you can specify which MIDI input each recording MIDI track
should use. However, you can also record any MIDI data from any MIDI input. You
can specify which inputs are included when you select All MIDI Inputs for a MIDI
track.
PROCEDURE
1. Select Devices > Device Setup.
2. In the Device Setup dialog, select MIDI Port Setup from the Devices list on
the left.
3. Activate In ‘All MIDI Inputs’ for a port.
NOTE
If you have a MIDI remote control unit connected, make sure to deactivate the In ‘All
MIDI Inputs’ option for that MIDI input. This avoids accidental recording of data from
the remote control when All MIDI Inputs is selected as input for a MIDI track.
4. Click OK.
RESULT
When you select All MIDI Inputs on the Input Routing menu of a MIDI track in the
Inspector, the MIDI track uses all MIDI inputs that you specified in the Device Setup
dialog.
Connecting a Synchronizer
When using Cubase with external tape transports, you most likely must add a
synchronizer to your system.
IMPORTANTIMPORTANTIMPORTANTIMPORTANT
Make sure that all equipment is turned off before making any connections.
For information on how to connect and set up your synchronizer, refer to the
documentation of your synchronizer.
RELATED LINKS
Synchronization on page 564

Setting Up Your System
Setting Up Video
16
Setting Up Video
Cubase plays back video files in a number of formats, such as AVI, QuickTime, or
MPEG. QuickTime is used as the playback engine. Which formats can be played
back depends on the video codecs that are installed on your system.
There are several ways to play back video, for example, without any special
hardware, using a FireWire port, or using dedicated video cards.
If you plan to use special video hardware, install it and set it up as recommended by
the manufacturer.
NOTE
Before you use the video hardware with Cubase, we recommend that you test the
hardware installation with the utility applications that were provided with the
hardware and/or the QuickTime Player application.
RELATED LINKS
Video on page 585
Video Output Devices on page 587
17
VST Connections
To play back and record in Cubase, you must set up input and output busses in the
VST Connections window.
The bus types that you need depend on your audio hardware, on your general audio
setup, and on the projects that you use.
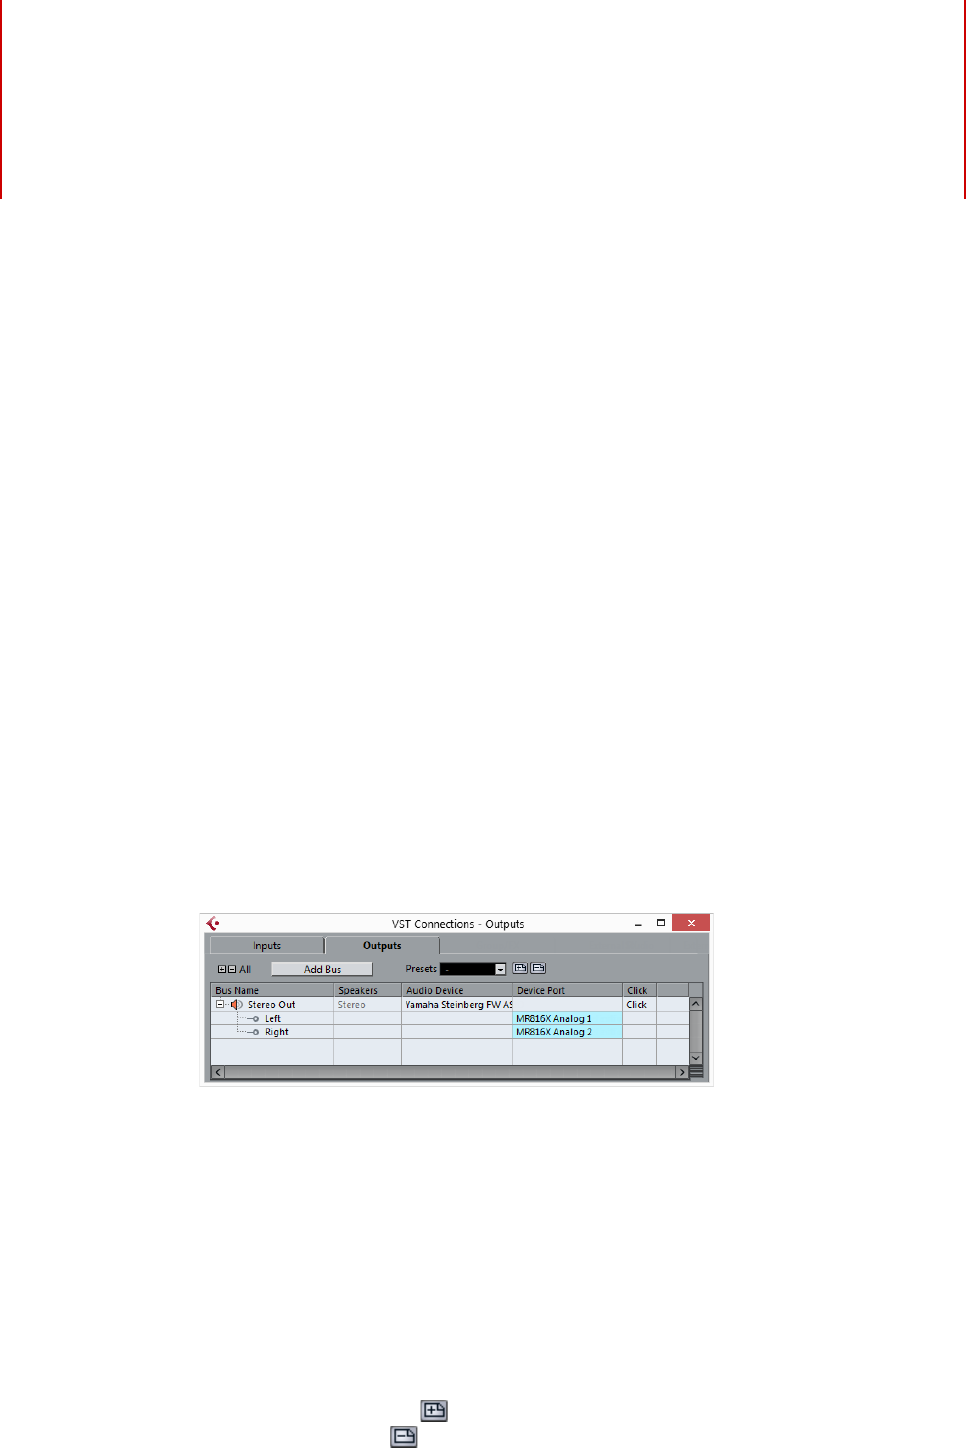
VST Connections Window
The VST Connections window allows you to set up input and output busses.
• To open the VST Connections window, select Devices > VST Connections.
Inputs/Outputs Tab
The Input and Output tabs allow you to set up and configure input and output
busses.
The following options are available above the bus list:
+- All
Expands/Collapses all busses in the bus list.
Add Bus
Opens the Add Input Bus dialog, where you can create a new bus
configuration.
Presets
Opens the Presets menu, where you can select bus configuration presets.
The Store button allows you to save a bus configuration as preset. The
Delete button deletes the selected preset.

VST Connections
Renaming the Hardware Inputs and Outputs
18
The following columns are available for the bus list:
Bus Name
Lists the busses. Click the name of a bus to select or rename it.
Speakers
Indicates the speaker configuration (mono, stereo) of each bus.
Audio Device
Shows the currently selected ASIO driver.
Device Port
Shows which physical inputs/outputs on your audio hardware are used by the
bus. Expand the bus entry to show all speaker channels. If the bus entry is
collapsed, only the first port that is used by this bus is visible.
The Device Port pop-up menu displays how many busses are connected to
a given port. The busses are shown in square brackets next to the port name.
Up to three bus assignments can be displayed in this way. If more
connections have been made, this is indicated by a number at the end of the
port name.
For example, “Adat 1 [Stereo1] [Stereo2] [Stereo3] (+2)” means that the
Adat 1 port is already assigned to three stereo busses plus two additional
busses.
Click (Outputs tab only)
You can route the metronome click to a specific output bus.
Renaming the Hardware Inputs and Outputs
Before you set up busses, you should rename the default inputs and outputs of your
audio hardware. This allows transferring projects between different computers and
setups.
For example, if you move your project to another studio, the audio hardware may be
of a different model. But if you and the other studio owner have agreed on identical
names for your inputs and outputs, Cubase corrects inputs and outputs for your
busses.
NOTE
If you open a project that was created on another computer and the port names do
not match or the port configuration is not the same, the Missing Ports dialog
appears. This allows you to manually re-route ports that are used in the project to
ports that are available on your computer.

VST Connections
Renaming the Hardware Inputs and Outputs
19
PROCEDURE
1. Select Devices > Device Setup.
2. On the VST Audio System page, make sure that the correct driver for your
audio hardware is selected.
If this is the case, your audio card is listed in the Devices list on the left of the Device
Setup window.
3. In the devices list, select your audio card.
The available input and output ports on your audio hardware are listed on the right.
4. In the Show As column, click on a port name and enter a new name.
5. Repeat the previous step until you have renamed all required ports.
6. Click OK.
RELATED LINKS
Re-Routing Missing Ports on page 53
Hiding Ports
You can hide ports that you are not using. Hidden ports are not displayed in the VST
Connections window.
PROCEDURE
1. Select Devices > Device Setup.
2. In the devices list, select your audio card.
3. In the Visible column, deactivate the ports that you want to hide.
4. Click OK.
Activating and Deactivating Ports (Mac only)
On Mac operating systems, you can specify which input and output ports are active.
This allows you to use the microphone input instead of the line input or to deactivate
the audio card input or output.
NOTE
This function is only available for built-in audio, standard USB audio devices, and a
certain number of other audio cards.
PROCEDURE
1. Select Devices > Device Setup.
2. In the devices list, select your audio card.
3. Click the Control Panel button.

VST Connections
Adding Input and Output Busses
20
4. Activate/Deactivate ports.
5. Click OK.
Adding Input and Output Busses
PROCEDURE
1. In the VST Connections dialog, click the Inputs or Outputs tab.
2. Click Add Bus.
The Add Input Bus dialog opens.
3. Configure the bus.
4. Optional: Enter a name for the bus.
If you do not specify a name, the bus is named according to the channel configuration.
5. Click Add Bus.
The new bus is added to the bus list.
6. For each of the speaker channels in the bus, click in the Device Port column
and select a port of your audio hardware.
Setting the Default Output Bus (Main Mix)
The Main Mix is the default output bus to which each new audio, group, or FX
channel is automatically routed. If only one bus is available, this bus is automatically
used as the default output bus.
PREREQUISITE
Add an output bus.
PROCEDURE
1. In the VST Connections dialog, right-click the output bus that you want to
use as default output bus.
2. Select Set as Main Mix.
RESULT
The selected bus is used as default bus. The Main Mix is indicated by a speaker
icon next to its name.

VST Connections
Presets for Input and Output Busses
21
Presets for Input and Output Busses
For input and output bus configurations, you can use different kinds of presets.
• A number of standard bus configurations.
• Automatically created presets tailored to your specific hardware
configuration.
On startup, Cubase analyzes the physical inputs and outputs that are
provided by your audio hardware and creates a number of
hardware-dependent presets.
• Your own presets.
Saving a Bus Configuration Preset
You can save your own input and output bus configuration as presets.
PROCEDURE
1. Select Devices > VST Connections.
2. Set up your bus configuration.
3. Click Store .
The Type in Preset Name dialog opens.
4. Enter a name.
5. Click OK.
RESULT
The preset is available in the Presets menu.
Deleting a Bus Configuration Preset
PROCEDURE
1. Select Devices > VST Connections.
2. From the Presets menu, select the preset that you want to delete.
3. Click Delete .
RESULT
The preset is deleted.

VST Connections
About Monitoring
22
About Monitoring
The default output bus (Main Mix) is used for monitoring. You can adjust the
monitoring level in the MixConsole.
RELATED LINKS
Setting the Default Output Bus (Main Mix) on page 20
Editing the Bus Configurations
After you have set up all the required busses for a project you can edit the names
and change port assignments. The bus configuration is saved with the project.
Removing Busses
PROCEDURE
• In the VST Connections window, right-click a bus in the list and select
Remove Bus.
You can also select the bus and press [Backspace].
Changing Port Assignments
You can change the port assignment of busses in the VST Connection window.
• To change a port assignment, click in the Device Port column of a bus and
select a new port.
• To assign different ports to the selected busses, open the Device Port
pop-up menu for the first selected entry, press [Shift], and select a device
port.
All subsequent busses are automatically connected to the next available port.
• To assign the same port to all selected busses, open the Device Port pop-up
menu for the first selected entry, press [Shift]-[Alt]/[Option], and select a
device port.

VST Connections
Editing the Bus Configurations
23
Renaming Multiple Busses
You can rename all the selected busses at once using incrementing numbers or
letters.
• To use incrementing numbers, select the busses that you want to rename and
enter a new name for one of the busses, followed by a number.
For example, if you have eight inputs that you want to be named “In 1, In 2, …,
In 8”, you select all the busses and enter the name In 1 for the first bus. All
other busses are then renamed automatically.
• To use letters from the alphabet, select the busses that you want to rename
and enter a new name for one of the busses, followed by a space and a capital
letter.
For example, if you have three FX channels that you want to be named “FX A,
FX B, and FX C”, you select all the channels and enter the name FX A for the
first. All other channels are renamed automatically. The last letter that can be
used is Z. If you have more selected entries than there are letters available, the
remaining entries are skipped.
NOTE
You can begin renaming from any position in the list. The renaming starts from the
bus where you edit the name, goes down the list to the bottom, and then continues
from the top until all selected busses have been renamed.
Identifying Exclusive Port Assignments
For certain channel types, the port assignment is exclusive.
Once a port has been assigned to such a bus or channel, it must not be assigned
to another bus, otherwise the connection to the first bus will be broken.
The corresponding ports are marked in red in the VST Connections window on the
Device Port pop-up menu.
24
Project Window
The Project window provides an overview of the project, and allows you to navigate
and perform large scale editing.
Each project has one Project window. The Project window is displayed whenever
you open or create a new project.
• To open a project, select File > Open.
• To create a new project, select File > New Project.
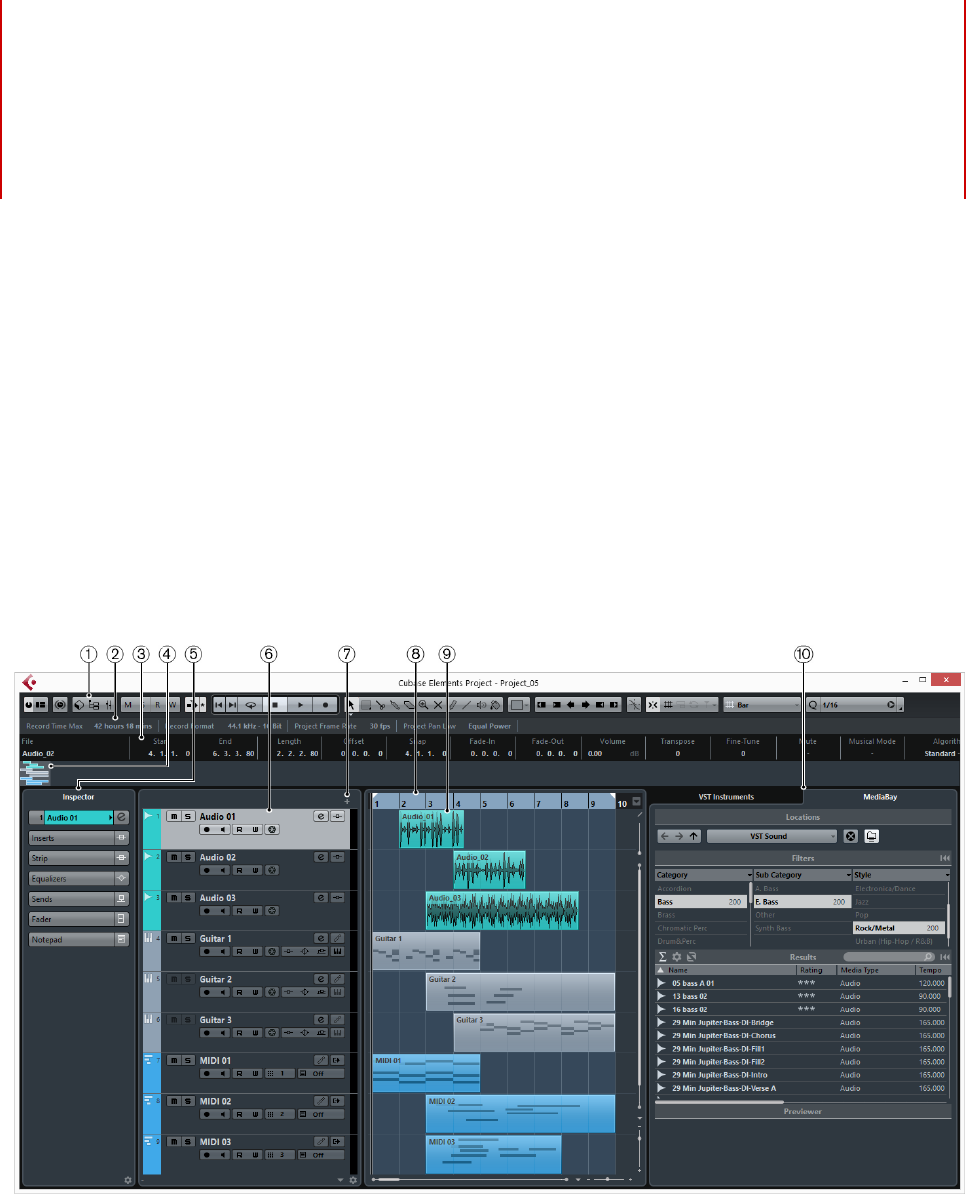
The Project window is divided into several sections:
1) Toolbar
Holds tools and shortcuts for opening other windows and various project
settings and functions.
2) Status Line
Shows the most important project settings.
3) Info Line
Shows information about the currently selected event or part in the Project window.
Project Window
Toolbar
25
4) Overview Line
Shows events and parts as boxes and allows you to zoom and navigate in the
project.
5) Inspector
Shows controls and parameters for the first selected track.
6) Track List
Shows the track types and their controls.
7) Add Track
Allows you to add a new track.
8) Ruler
Shows the timeline and the display format of the project.
9) Event Display
Shows the parts and events of the project.
10) Racks
Shows the MediaBay.
Toolbar
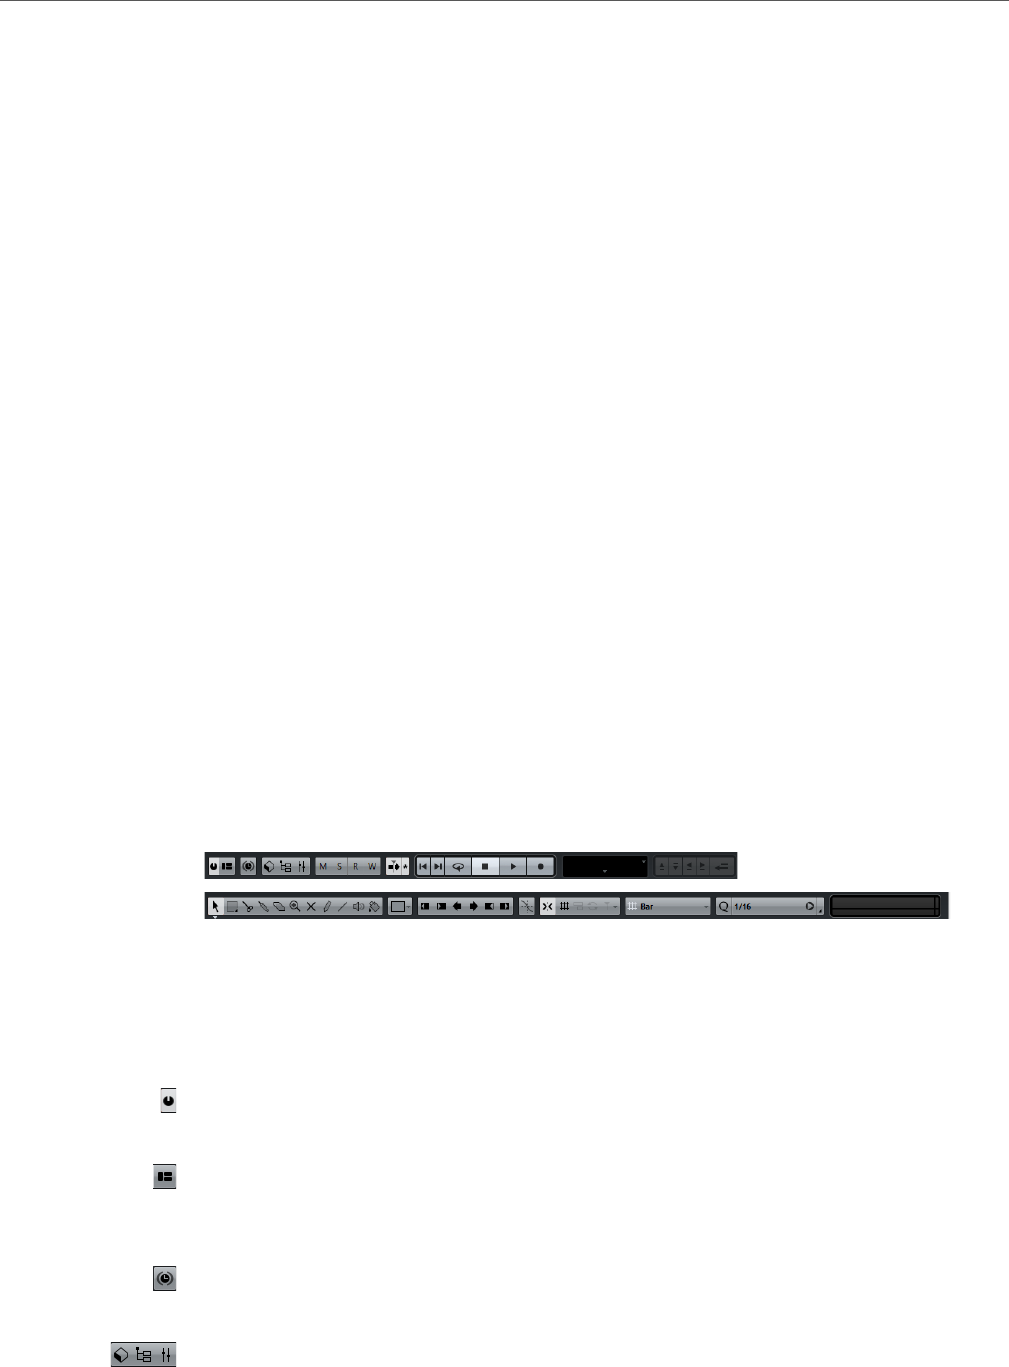
The toolbar holds tools and shortcuts for opening other windows and various
project settings and functions.
• To display all toolbar elements, right-click in an empty area of the toolbar and
select Show All.
The following options are available:
Activate Project
Allows you to activate a project.
Set up Window Layout
Allows you to show or hide the sections Inspector, status line, info line, and
overview line.
Constrain Delay Compensation
Allows you to minimize the latency effects of the delay compensation.
Media & MixConsole Windows
These buttons allow you to open or close the MediaBay, the Pool, and the
MixConsole.
Project Window
Toolbar
26
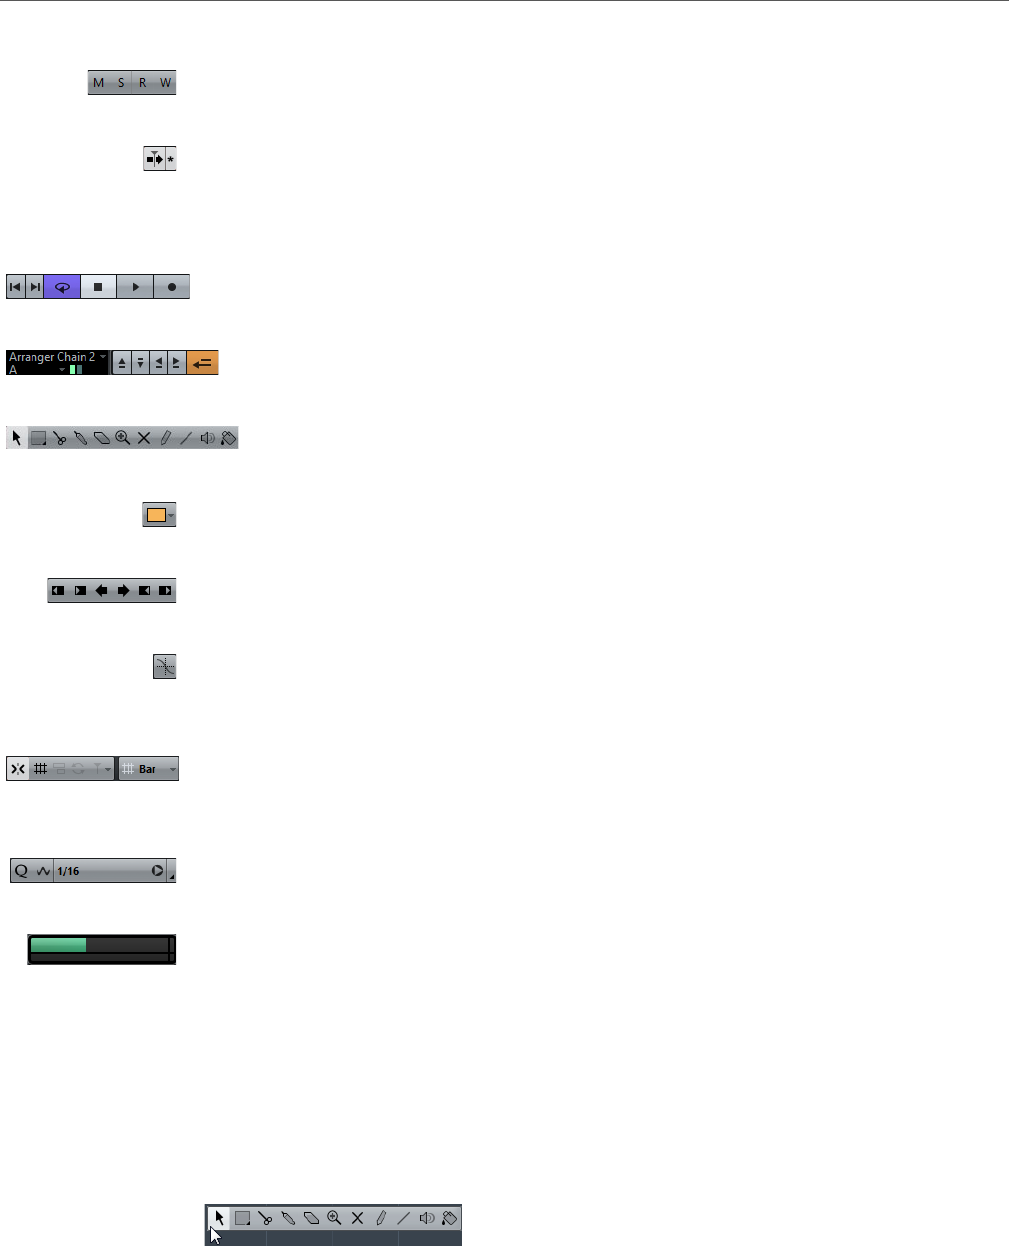
State buttons
These buttons show the mute, solo, listen, and automation states.
Auto-Scroll
Allows you to activate the Auto-Scroll and Suspend Auto-Scroll when
Editing options. These determine if the waveform display is scrolled during
playback.
Transport Buttons
Shows the transport controls.
Arranger Controls (Cubase Elements only)
Shows the controls for the arranger track.
Tool Buttons
Shows the buttons for editing in the Project window.
Color Menu
Allows you to define the Project window colors.
Nudge Palette
Allows you to nudge or trim events or parts.
Snap to Zero Crossings
If this option is activated, it finds zero crossings when you split and size audio
events.
Snap
Allows you to restrict horizontal movement and positioning to certain
positions.
Quantize
Allows you to move recorded audio or MIDI to musical relevant positions.
Performance Meter
Shows the meters for ASIO time usage and hard disk transfer load.
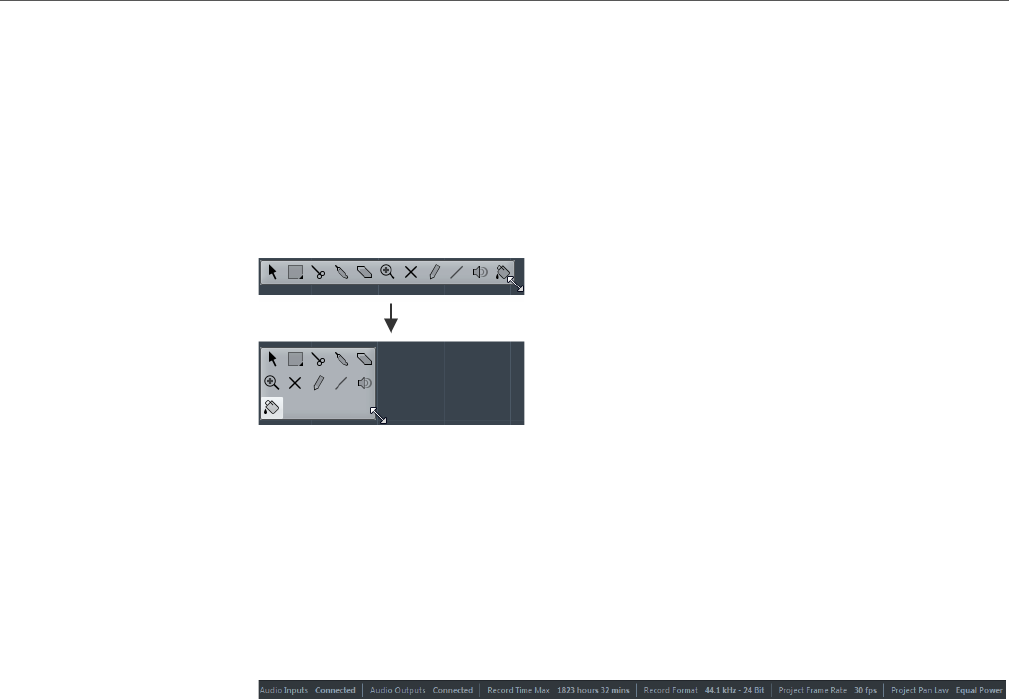
Toolbox
The toolbox makes the editing tools from the toolbar available at the mouse pointer
position. It can be opened instead of the standard context menus in the event
display and editors.
• To activate the toolbox function, select File > Preferences > Editing >
Tools and activate Pop-up Toolbox on Right-Click.
• To open the toolbox, right-click in the event display or editor.
If Pop-up Toolbox on Right-Click it is deactivated, the context menu opens.
Project Window
Status Line
27
• To open the context menu instead of the toolbox, press any modifier key and
right-click in the event display or editor.
If Pop-up Toolbox on Right-Click is deactivated, press any modifier key to
open the toolbox instead of the context menu.
• To change the number of rows in which the tools are arranged on the toolbox,
keep the right mouse button pressed on the toolbox until the mouse pointer
changes to a double arrow, and drag to the bottom or right.
Status Line
The status line shows the most important project settings.
• To show or hide the status line, click Set up Window Layout on the toolbar
and activate or deactivate Status Line.
The following information is shown in the status line:
Audio Inputs
Displays the connection state of your audio inputs. Click in this field to open
the VST Connections dialog.
Audio Outputs
Displays the connection state of your audio outputs. Click in this field to open
the VST Connections dialog.
Record Time Max
Displays the remaining time for recording, depending on your project settings
and the available hard disk space. Click in this field to display the remaining
record time in a separate window.
Record Format
Displays the sample rate and the bit resolution used for recording. Click in this
field to open the Project Setup dialog.
Project Frame Rate
Displays the frame rate used in the project. Click in this field to open the
Project Setup dialog.
Project Pan Law
Displays the current pan law setting. Click in this field to open the Project
Setup dialog.
Project Window
Info Line
28
Info Line
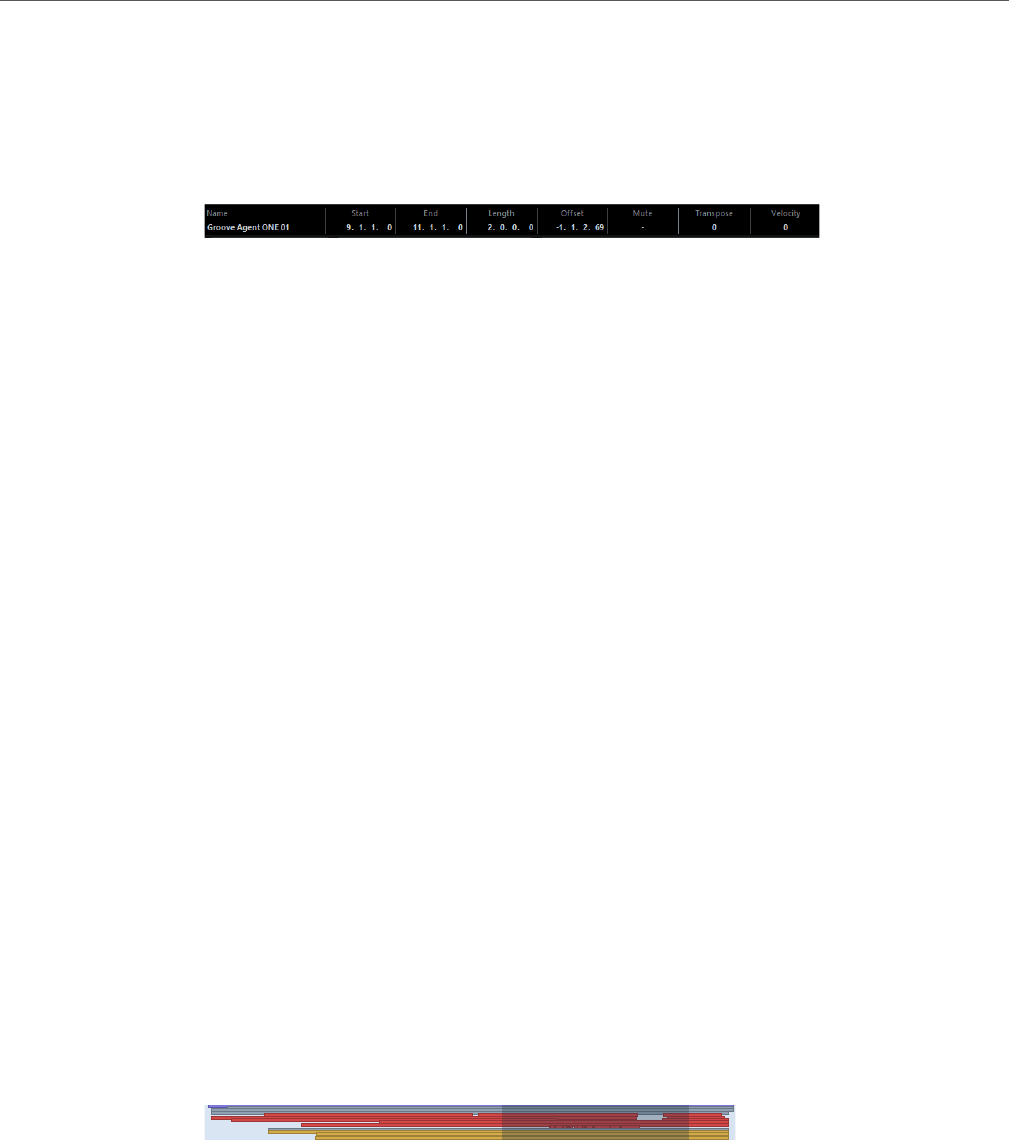
The info line shows information about the currently selected event or part in the
Project window.
• To show or hide the info line, click the Set up Window Layout button on the
toolbar and activate or deactivate the Info Line option.
Editing in the Info Line
You can edit almost all event or part data on the info line using regular value editing.
If you select several events or parts, the info line is shown in another color and only
the information about the first item in the selection is displayed. The following rules
apply:
• Value changes are applied to all selected elements, relatively to the current
values.
For example, you have selected two audio events. The first event has a length
of 1 bar, the second of 2 bars. If you change the info line value to 3, the first
event is resized to 3 bars and the second event to 4 bars.
• Value changes are applied absolutely to the current values, if you press
[Ctrl]/[Command] while modifying the value on the info line.
In the example above, both events are resized to 3 bars.
• To change the modifier, select File > Preferences > Editing > Tool
Modifiers and select a new modifier in the Info Line category.
Overview Line
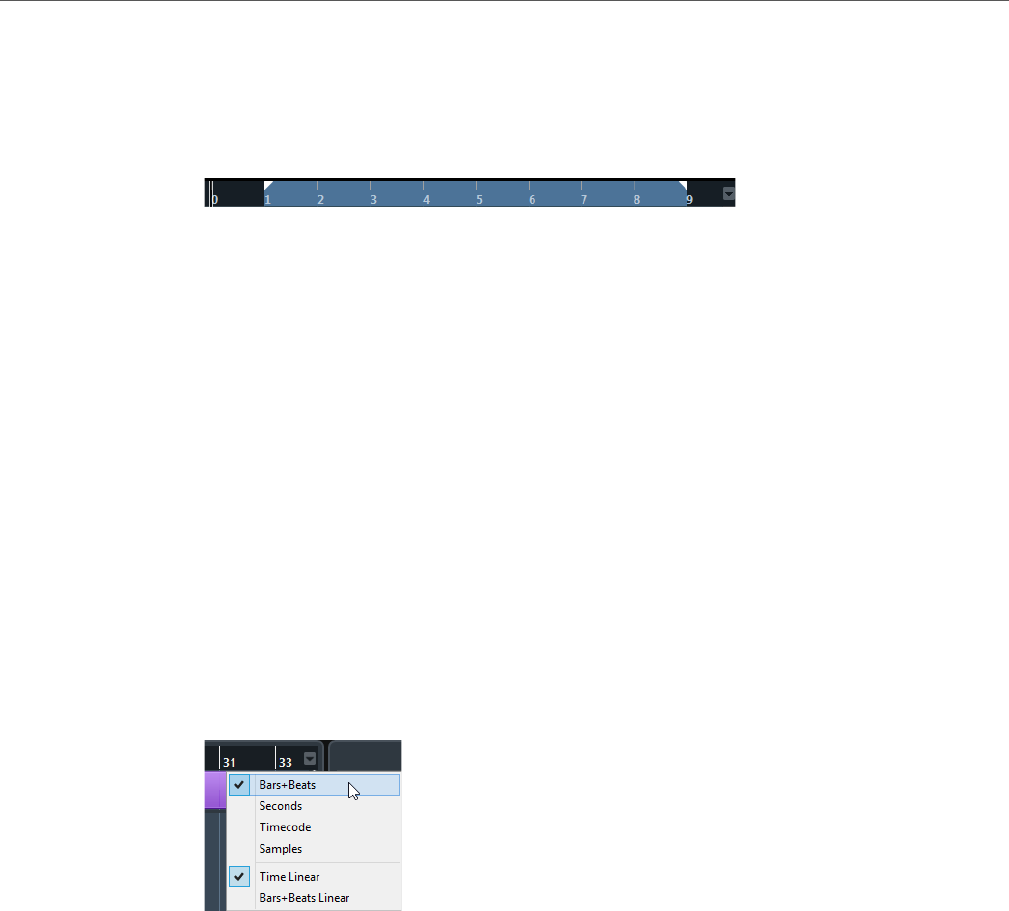
The overview line allows you to zoom and navigate to other sections in the Project
window.
• To show or hide the overview line, click the Set up Window Layout button on
the toolbar and activate or deactivate Overview Line.
In the overview line, events and parts are displayed as boxes. A rectangle indicates
the section of the project that is currently displayed in the event display.
• To zoom the event display in or out horizontally, resize the rectangle by
dragging the edges.
• To navigate to another section of the event display, drag the rectangle to the
left or right, or click in the upper part of the overview.
Project Window
Ruler
29
Ruler
The ruler shows the timeline and the display format of the project.
Initially, the Project window ruler uses the display format that is specified in the
Project Setup dialog.
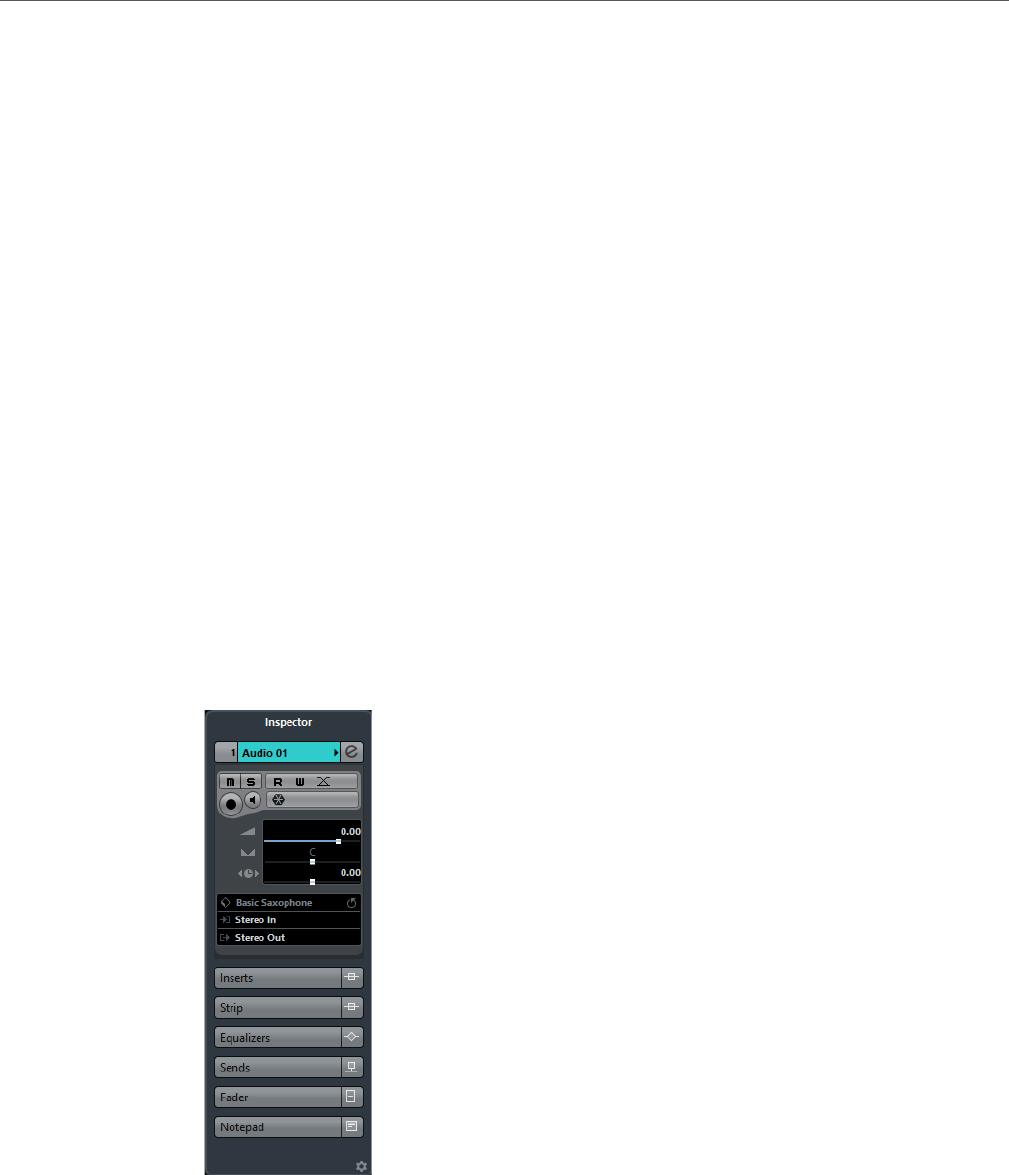
• To select an independent display format for the ruler, click the arrow button to
the right of the ruler and select an option from the pop-up menu.
• To set the display format globally for all windows, use the primary display
format pop-up on the Transport panel, or hold down [Ctrl]/[Command] and
select a display format in any ruler.
RELATED LINKS
Project Setup Dialog on page 49
Ruler Display Formats
You can select a display format for the ruler.
• To select a new display format for the ruler, click the arrow button to the right
of the ruler and select an option from the pop-up menu.
The selection that you make affects the time display formats in the following areas:
•Ruler
• Info line
• Tooltip position values
The following options are available:
Bars+Beats
Bars, beats, sixteenth notes, and ticks. By default, there are 120 ticks per
sixteenth note, but you can adjust this with the MIDI Display Resolution
setting (File > Preferences > MIDI).
Second
Hours, minutes, seconds, and milliseconds.
Project Window
Inspector
30
Timecode
Hours, minutes, seconds, and frames. The number of frames per second (fps)
is set in the Project Setup dialog with the Frame Rate pop-up menu. You
can also display subframes by activating Show Timecode Subframes (File
> Preferences > Transport).
Samples
Samples
Time Linear
Sets the ruler linear to time.
Bars+Beats Linear
Sets the ruler linear to bars and beats.
Inspector
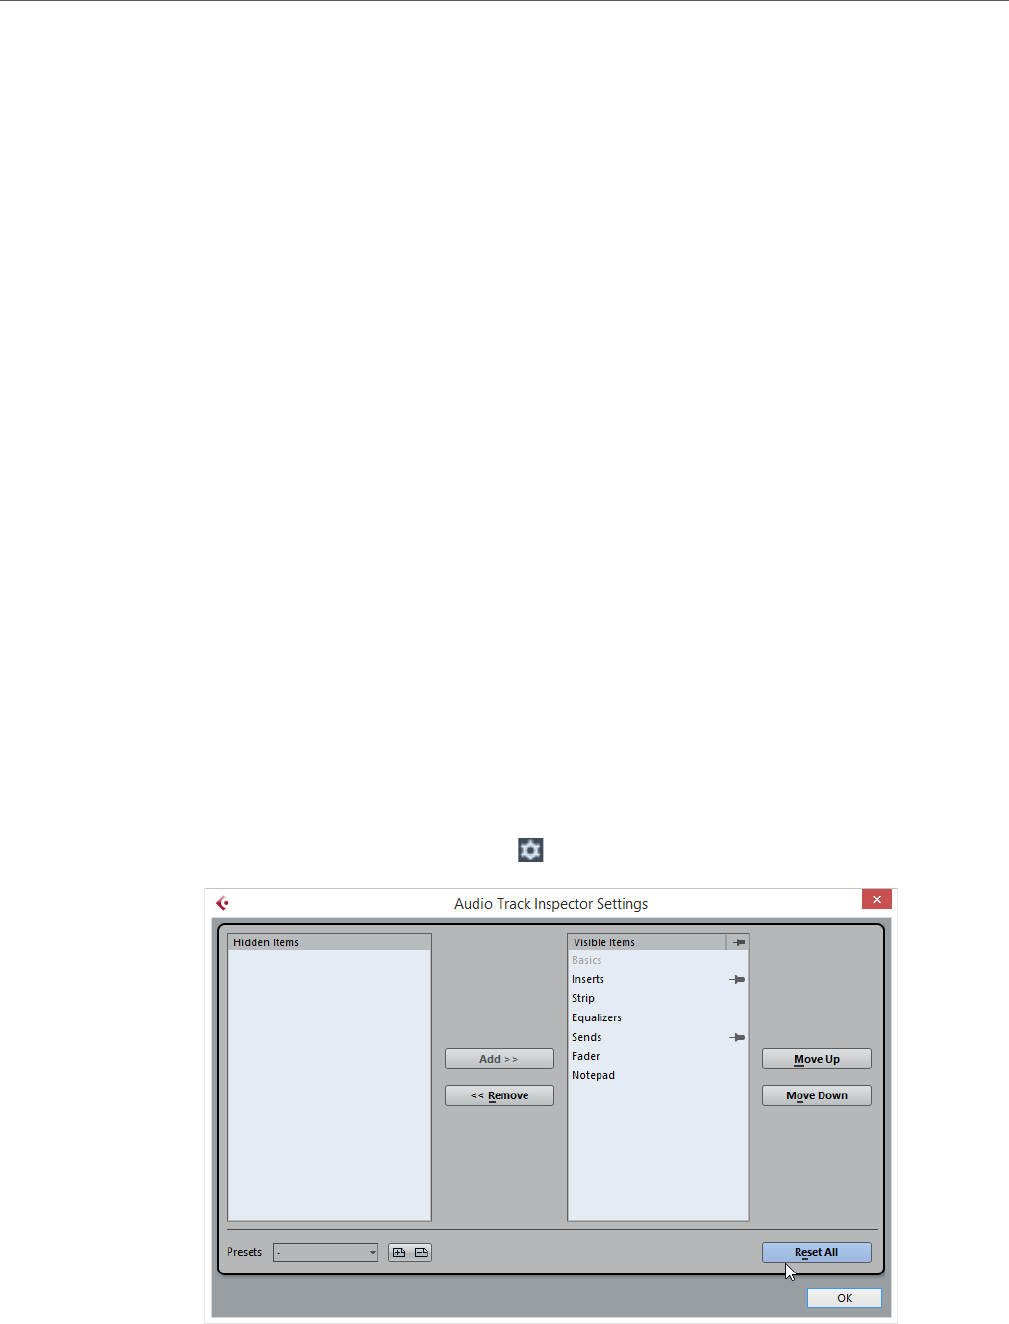
The Inspector shows controls and parameters for the first (topmost) selected track
type in the track list.
• To show or hide the Inspector, click the Set up Window Layout button on the
toolbar and activate or deactivate Inspector.
Project Window
Inspector
31
Inspector Sections
The Inspector is divided into a number of sections that each contain different
controls for the track.
Not all Inspector sections are shown by default. The available sections depend on
the selected track type.
• To hide or show sections, click on their names.
Clicking the name for a hidden section brings it into view and hides the other
sections.
• To hide or show a section without closing the other sections,
[Ctrl]/[Command]-click the section name.
RELATED LINKS
Audio Track Inspector on page 60
Instrument Track Inspector on page 64
MIDI Track Inspector on page 68
Arranger Track Inspector on page 72
Chord Track Inspector on page 74
Marker Track Inspector on page 85
Video Track Inspector on page 87
Setting Up Inspector Sections
You can set up the visible Inspector sections for all tracks of the selected track
type.
• To open the Audio Track Inspector Settings dialog, click the Open
Inspector Settings Dialog button at the bottom right of the Inspector.
Hidden Items
This section displays sections currently hidden in the Inspector.
Project Window
Global Track Controls
32
Visible Items
This section displays sections currently visible in the Inspector.
Pin
Allows you to pin the open/close status of the selected Inspector section.
Add
Allows you to move an item selected in the hidden sections list to the list of
visible sections.
Remove
Allows you to move an item selected in the visible sections list to the list of
hidden sections.
Move Up/Move Down
Allows you to change the order of an item in the list of visible sections.
Presets
Allows you to save Inspector section settings as presets.
Reset All
Allows you to restore all default Inspector section settings.
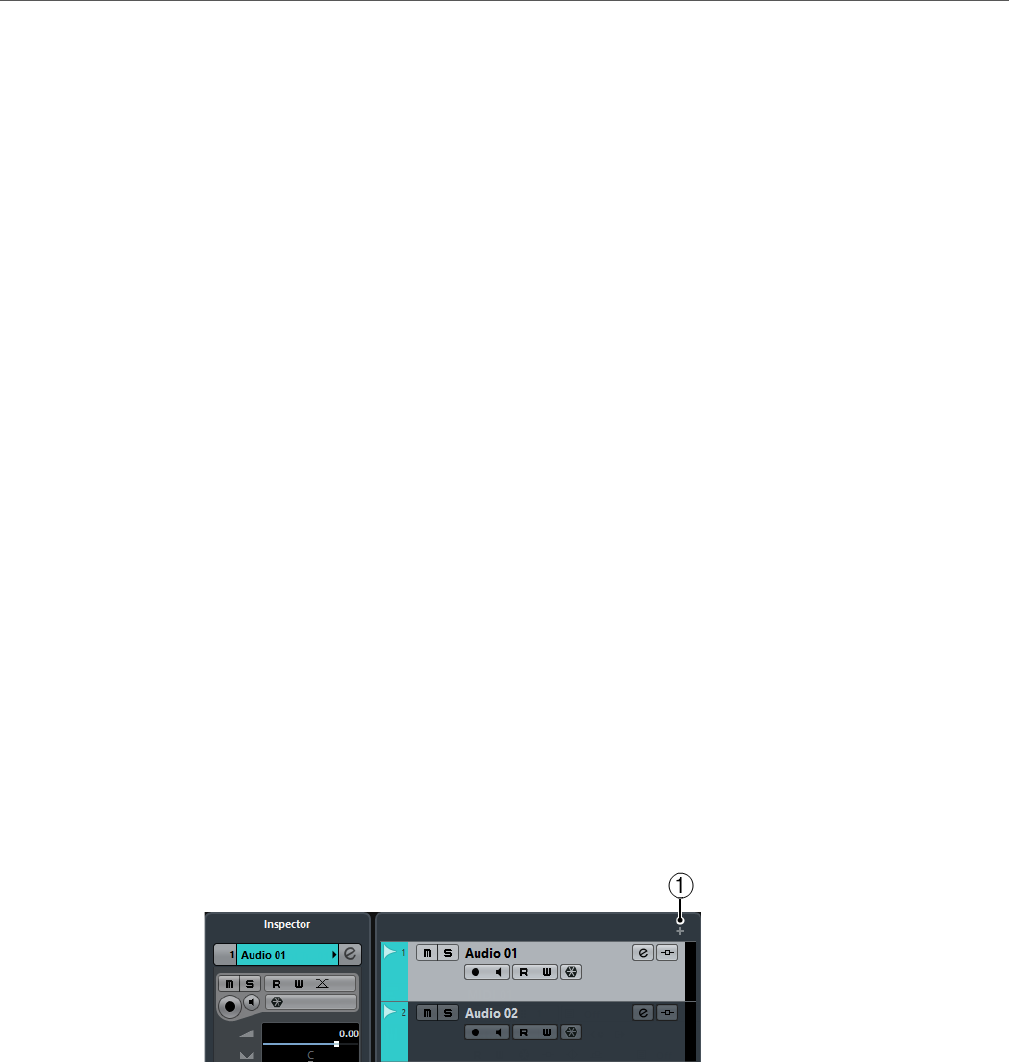
Global Track Controls
The global track controls area above the track list allows you to add tracks to the
track list.
1) Add Track
Allows you to add tracks to the track list.
RELATED LINKS
Channel Selector on page 209
Project Window
Track List
33
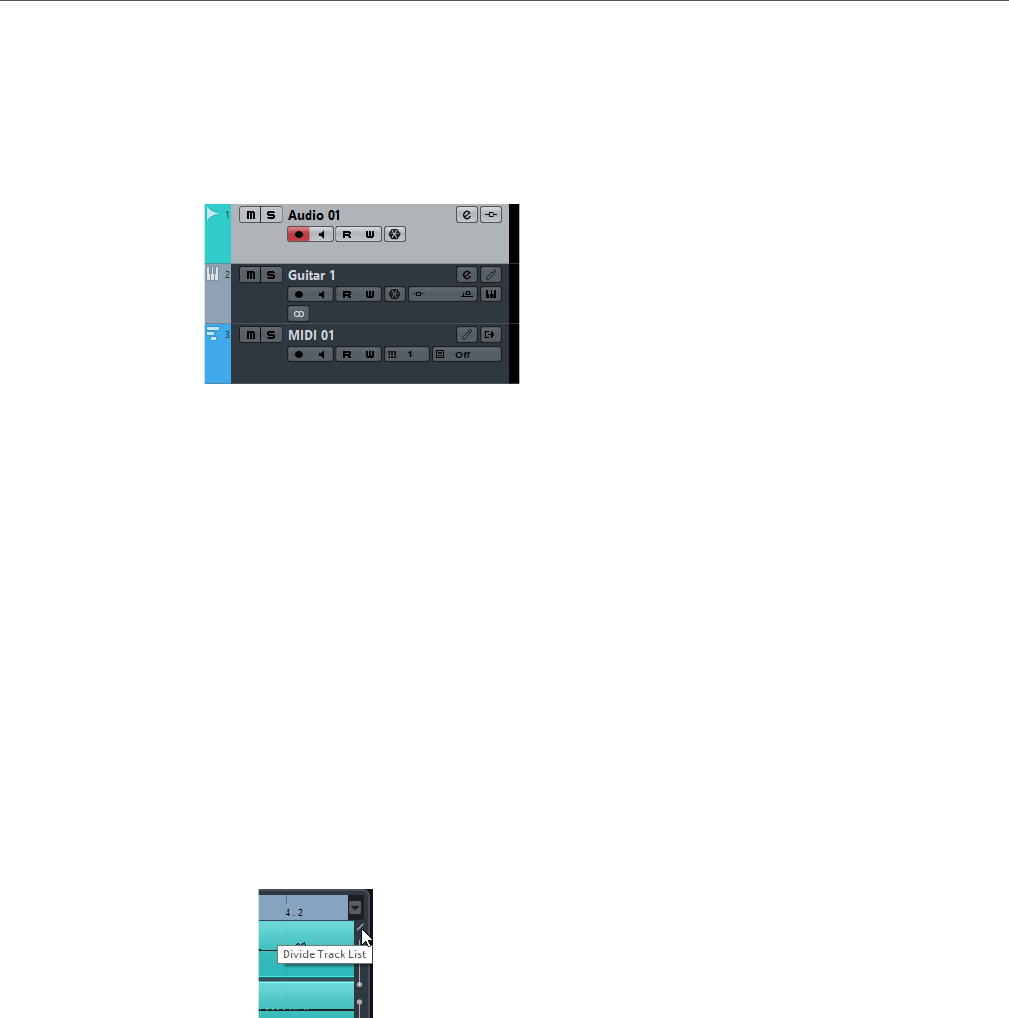
Track List
The track list shows the tracks that are used in the project. When a track is added
and selected, it contains name fields and settings for this track.
• To decide which controls are visible for each track type, right-click the track
list and open the Track Controls Settings dialog.
RELATED LINKS
Customizing Track Controls on page 88
Dividing the Track List
You can divide the track list into an upper track list and a lower track list. These track
lists can have independent zoom and scroll controls.
Dividing the track list is useful if you are working with a video track and multi-track
audio, for example. It allows you to place the video track in the upper track list and
to scroll the audio tracks separately in the lower track list, so that they can be
arranged with the video.
• To divide the track list, click the Divide Track List button in the top right
corner of the Project window below the ruler.
Video, marker, or arranger tracks are automatically moved to the upper track
list. All other track types are moved to the lower track list.
• To move any type of track from the lower track list to the upper and vice versa,
right-click it in the track list and select Toggle Track List from the context
menu.
• To resize the upper part of the track list, click and drag the divider between
the track list sections.
• To revert to a single track list, click Divide Track List again.
Project Window
Event Display
34
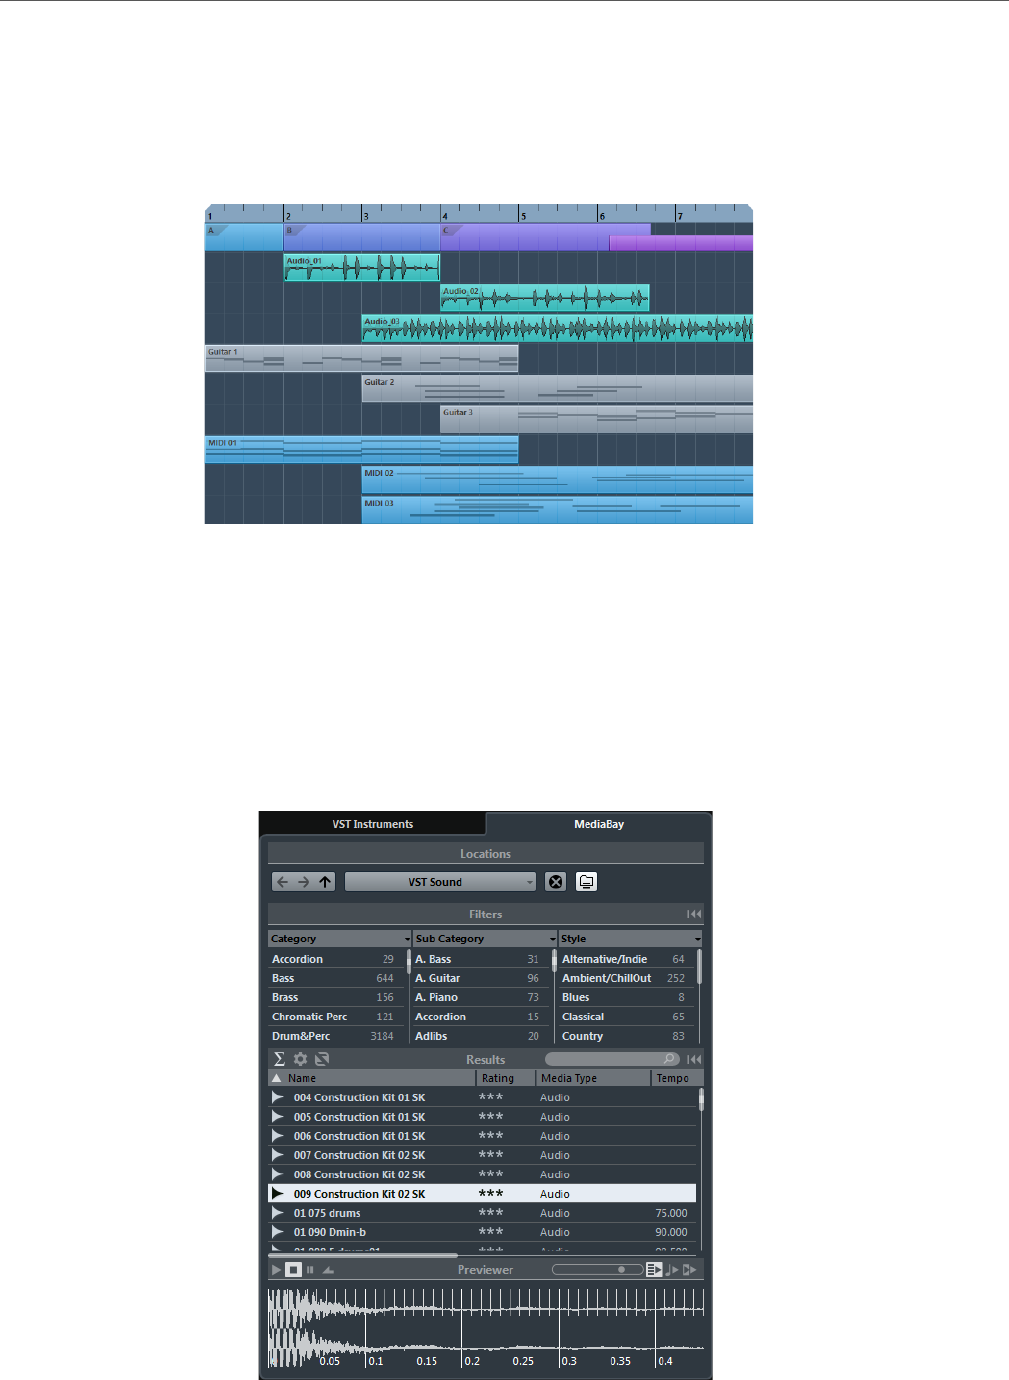
Event Display
The event display shows the parts and events that are used in the project. They are
positioned along the timeline.
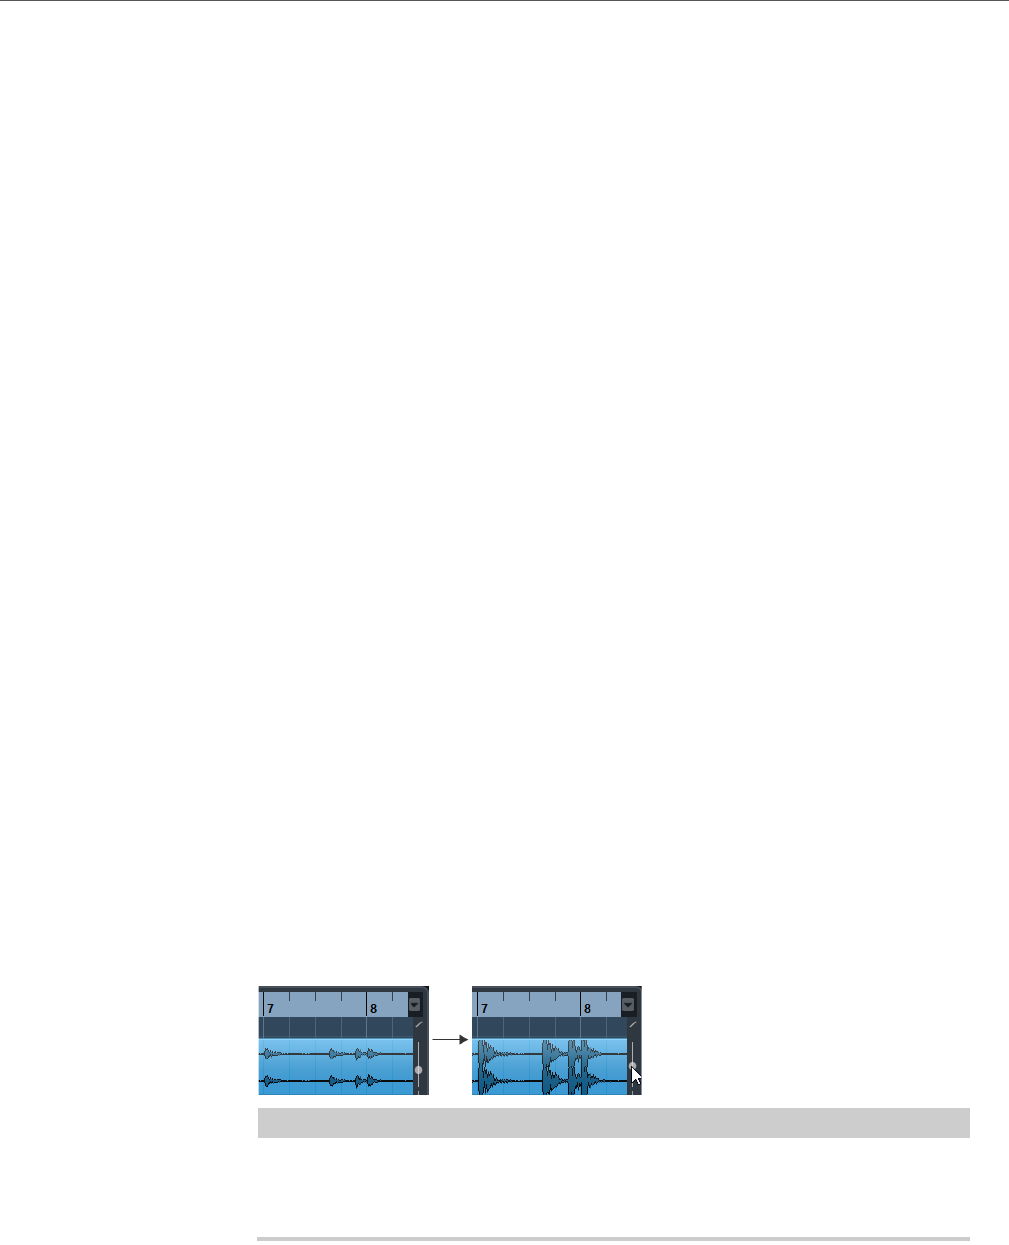
Racks
The racks zone of the project window allows you to display the VST Instruments
and the MediaBay.
• To show or hide the rack zone, click the Set up Window Layout button on the
toolbar and activate or deactivate Racks.
Project Window
Zooming in the Project Window
35
•Click the VST Instruments tab to add and edit VST instruments from within
the rack zone of the project window.
• Click the MediaBay tab to drag audio events and MIDI parts into project
window or to drag audio events and MIDI parts from the project window into
the MediaBay and store them as audio or MIDI loops.
Zooming in the Project Window
You can zoom in the Project window according to the standard zoom techniques.
Note the following:
• When you are using the Zoom tool (magnifying glass), the zooming result
depends on the Zoom Tool Standard Mode: Horizontal Zooming Only
option (File > Preferences > Editing > Tools).
If this option is activated and you drag a selection rectangle with the Zoom
tool, the window is only zoomed horizontally, the track height does not
change. If the option is deactivated, the window is zoomed both horizontally
and vertically.
• When you are using the vertical zoom sliders, the tracks are scaled relatively.
If you have made any individual track height adjustments, the relative height
differences are maintained.
•If the Zoom while Locating in Time Scale option (File > Preferences >
Transport) is activated, you can also zoom by clicking in the ruler and
dragging up or down with the left mouse button pressed.
Drag up to zoom out; drag down to zoom in.
• To zoom in on the contents of parts and events vertically, use the waveform
zoom slider in the top right corner of the event display.
This is useful when viewing quiet audio passages.
IMPORTANT
To get an approximate reading on the level of the audio events by viewing the
waveforms, make sure this slider is all the way down. Otherwise, zoomed
waveforms may be mistaken for clipped audio.
•If the Quick Zoom option (File > Preferences > Editing) is activated, the
contents of parts and events are not continuously redrawn when you zoom
manually. Instead, the contents are redrawn once you have stopped changing
the zoom. Activate the Quick Zoom option if screen redraws are slow on your
system.

Project Window
Zooming in the Project Window
36
Zoom Submenu
The Zoom submenu contains options for zooming in the Project window.
• To open the Zoom submenu, select Edit > Zoom.
The following options are available:
Zoom In
Zooms in one step, centering on the project cursor.
Zoom Out
Zooms out one step, centering on the project cursor.
Zoom Full
Zooms out so that the whole project is visible. The whole project means the
timeline from the project start to the length set in the Project Setup dialog.
Zoom to Selection
Zooms in horizontally and vertically so that the current selection fills the
screen.
Zoom to Selection (Horiz.)
Zooms in horizontally so that the current selection fills the screen.
Zoom to Event
This option is available only in the Sample Editor.
Zoom In Vertically
Zooms in one step vertically.
Zoom Out Vertically
Zooms out one step vertically.
Zoom In Tracks
Zooms in on the selected tracks one step vertically.
Zoom Out Tracks
Zooms out the selected tracks one step vertically.
Zoom Selected Tracks
This zooms in vertically on the selected tracks and minimizes the height of all
other tracks.
Undo/Redo Zoom
These options allow you to undo/redo the last zoom operation.
RELATED LINKS
Zooming on page 286
Project Window
Zooming in the Project Window
37
Zoom Presets
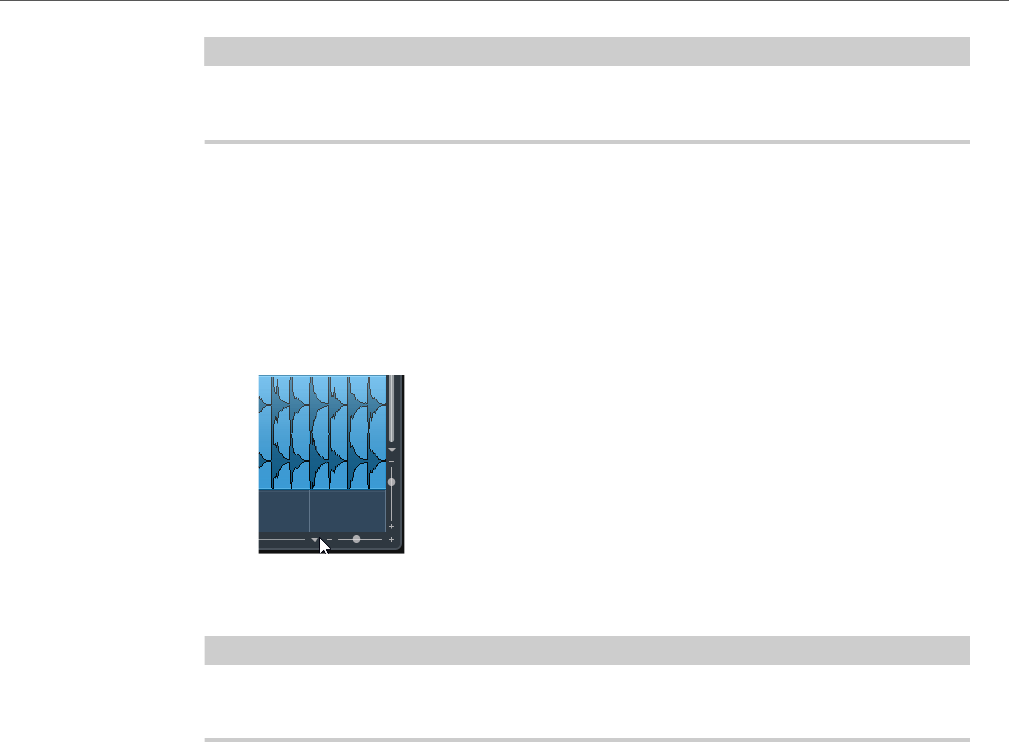
You can create zoom presets that allow you to set up different zoom settings. For
example, one where the whole project is displayed in the Project window and
another with a high zoom factor for detailed editing. The Zoom Presets pop-up
menu allows you to select, create, and organize zoom presets.
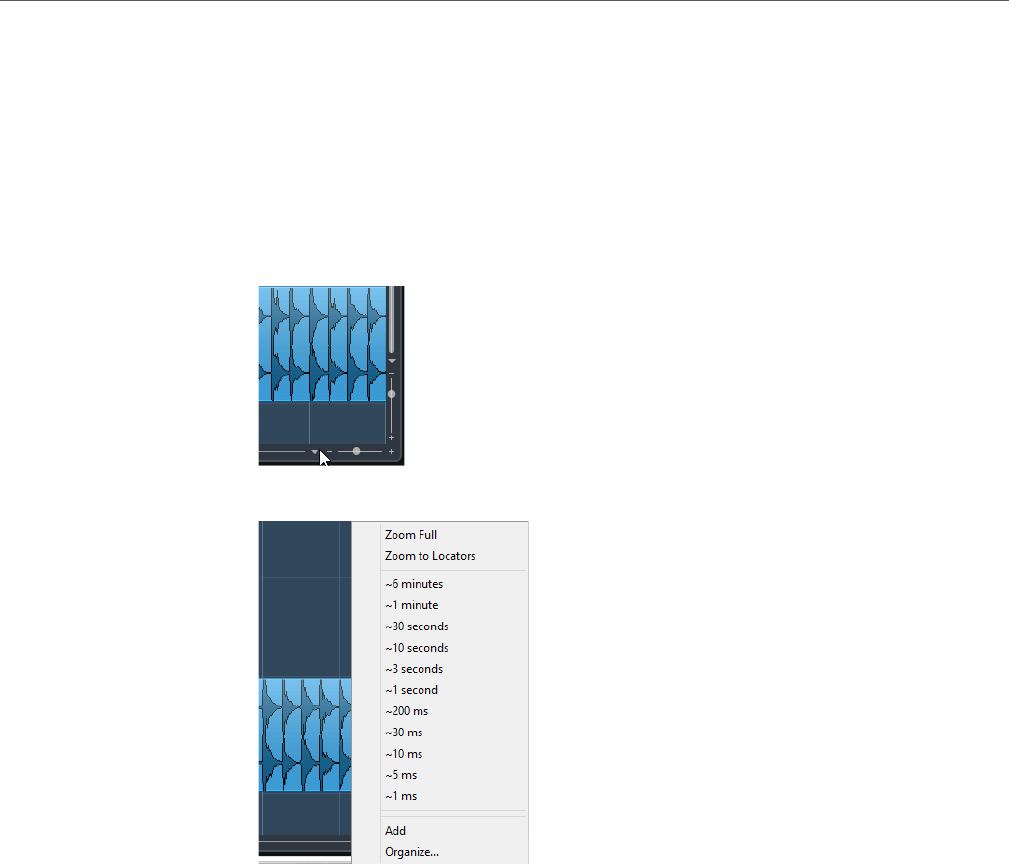
• To open the Zoom Presets pop-up menu, click the button to the left of the
horizontal zoom control.
The upper part of the menu lists the zoom presets.
• To save the current zoom setting as a preset, open the Zoom Presets pop-up
menu and select Add. In the Type In Preset Name dialog that opens, type in
a name for the preset and click OK.
• To select and apply a preset, select it from the Zoom Presets pop-up menu.
• To zoom out so that the whole project is visible, open the Zoom Presets
pop-up menu and select Zoom Full.
This displays the project from the project start to the length that is set in the
Project Setup dialog.
• To delete a preset, open the Zoom Presets pop-up menu and select
Organize. In the dialog that opens, select the preset in the list and click the
Delete button.
• To rename a preset, open the Zoom Presets pop-up menu and select
Organize. In the dialog that opens, select a preset in the list and click the
Rename button. In the dialog that opens, type in a new name for the preset.
Click OK to close the dialogs.
Project Window
Zooming in the Project Window
38
IMPORTANTIMPORTANTIMPORTANTIMPORTANT
Zoom presets are global for all projects. They are available in all projects that you
open or create.
Zooming In On Cycle Markers
You can zoom in on the area between cycle markers in the project.
• To zoom in on a cycle marker, click the button to the left of the horizontal zoom
control to open a pop-up menu and select a cycle marker.
The middle part of the pop-up menu lists any cycle markers that you have added to
the project.
NOTE
Only the cycle markers that you create in the current project are available on the
menu.
If you select a cycle marker from this menu, the event display is zoomed in to
encompass the marker area.
You cannot edit the cycle markers in this pop-up menu.
RELATED LINKS
Markers Window on page 198
Zoom History
You can undo and redo zoom operations. This way you can zoom in several steps
and then easily go back to the zoom stage at which you started.
You can undo and redo zoom operations in the following ways:
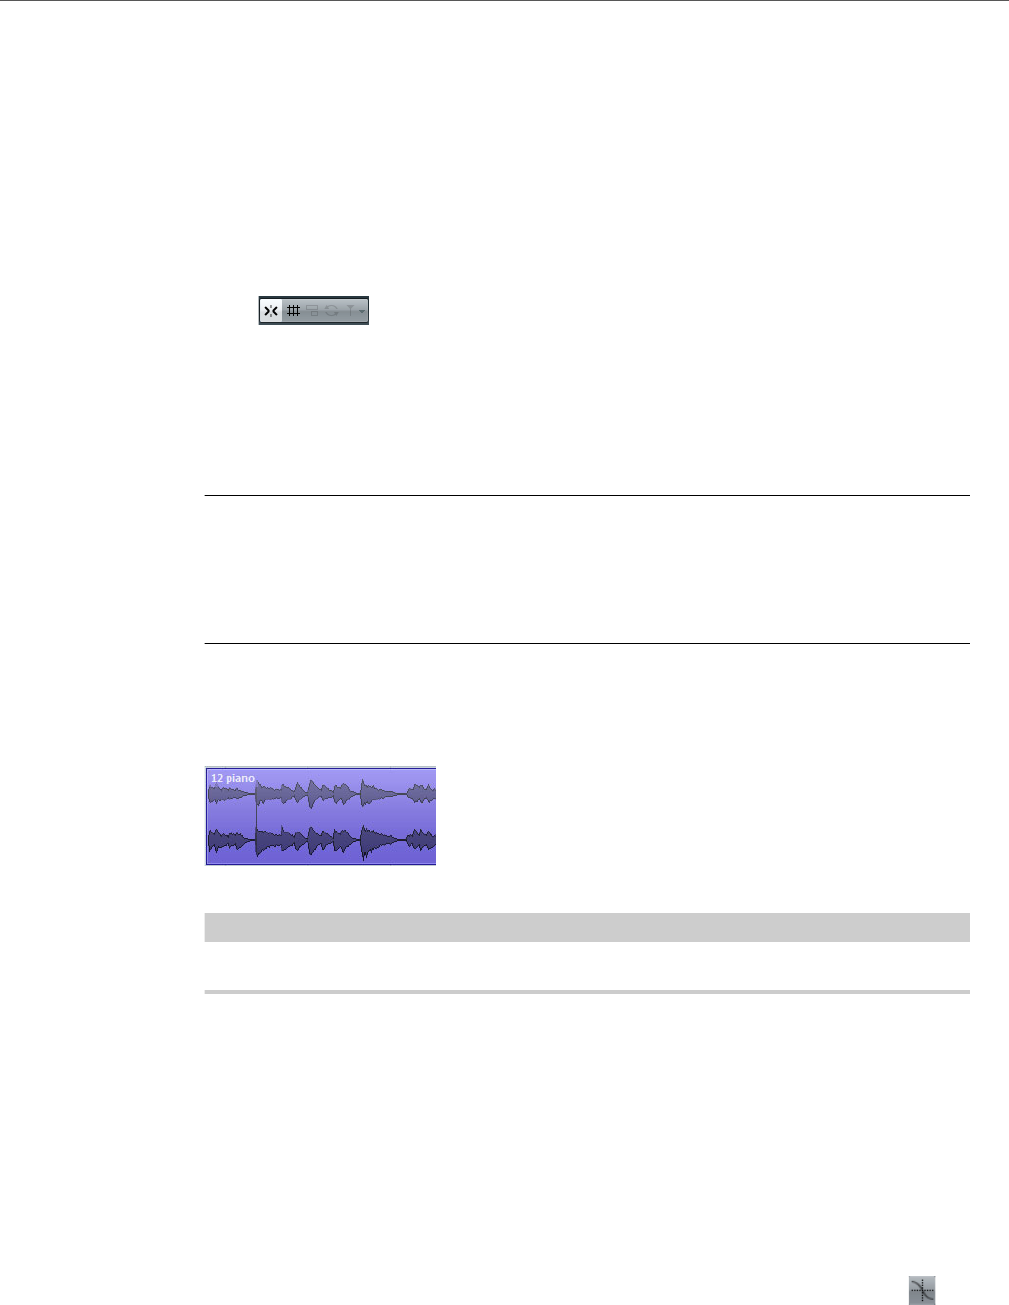
• To undo zoom, select Edit > Zoom > Undo Zoom or double-click with the
zoom tool (magnifying glass).
• To redo zoom, select Edit > Zoom > Redo Zoom or press [Alt]/[Option] and
double-click with the zoom tool (magnifying glass).
Project Window
Snap Function
39
Snap Function
The Snap function helps you to find exact positions when editing in the Project
window. It does this by restricting horizontal movement and positioning to certain
positions. Operations affected by Snap include moving, copying, drawing, sizing,
splitting, range selection, etc.
• To activate/deactivate Snap, activate/deactivate the Snap icon on the
toolbar.
Setting the Snap Point (Cubase Elements only)
You can set the snap point at any position of the audio event.
PROCEDURE
1. Select an event.
2. Place the project cursor at a position within the selected audio event.
3. Select Audio > Snap Point To Cursor.
RESULT
The snap point is set at the cursor position.
The snap point for an event is displayed as a vertical line in the Project window.
NOTE
You can also set the snap point in the Sample Editor.
RELATED LINKS
Adjusting the snap point on page 289
Snap to Zero Crossing
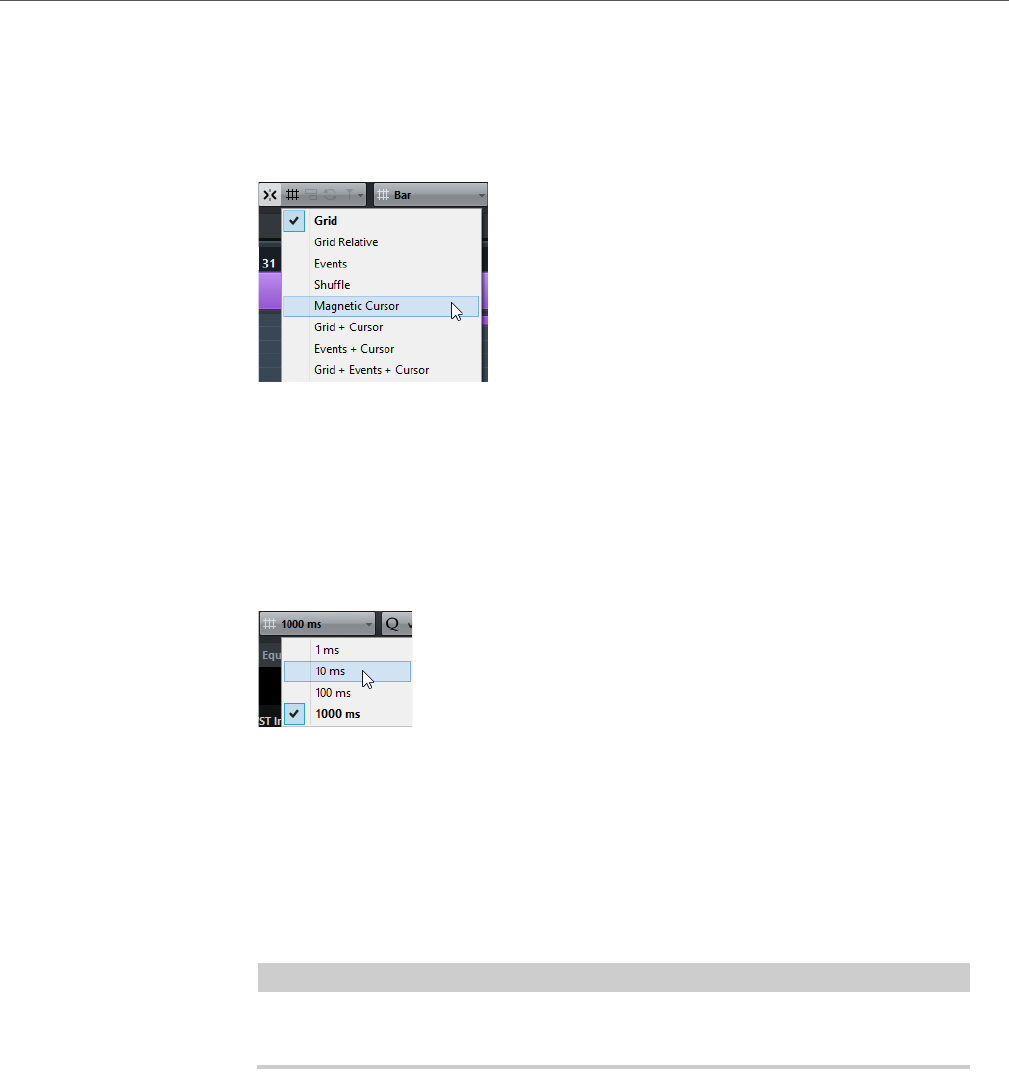
When splitting and sizing audio events, sudden amplitude changes can cause pops
and clicks. To avoid this, you can activate Snap to Zero Crossing to snap to points
where the amplitude is zero.
• To activate Snap to Zero Crossing, activate Snap to Zero Crossing on
the toolbar.
Project Window
Snap Function
40
Snap Types
You can select between different snap types to determine the snap point.
• To select a snap type, open the Snap Type pop-up menu.
The following snap types are available:
Grid
If this option is activated, the snap points are set with the Grid Type pop-up
menu. The options depend on the display format that are selected for the ruler.
When you select Seconds as ruler format, the Grid Type contains
time-based grid options.
Grid Relative
If this option is activated, events and parts are not magnetic to the grid.
Rather, the grid determines the step size for moving the events. This means
that a moved event keeps its original position relative to the grid.
For example, if an event starts at the position 3.04.01, snap is set to Grid
Relative and the Grid Type pop-up menu is set to Bar, you can move the
event in steps of one bar to the positions 4.04.01, 5.04.01, and so on.
NOTE
This only applies when dragging existing events or parts. When you create
new events or parts this snap type works like Grid.
Events
If this option is activated, the start and end positions of other events and parts
become magnetic. This means that if you drag an event to a position near the
start or end of another event, it is automatically aligned with the start or end
of the other event.
For audio events, the position of the snap point is also magnetic. This includes
marker events on the marker track.
Project Window
Cross-Hair Cursor
41
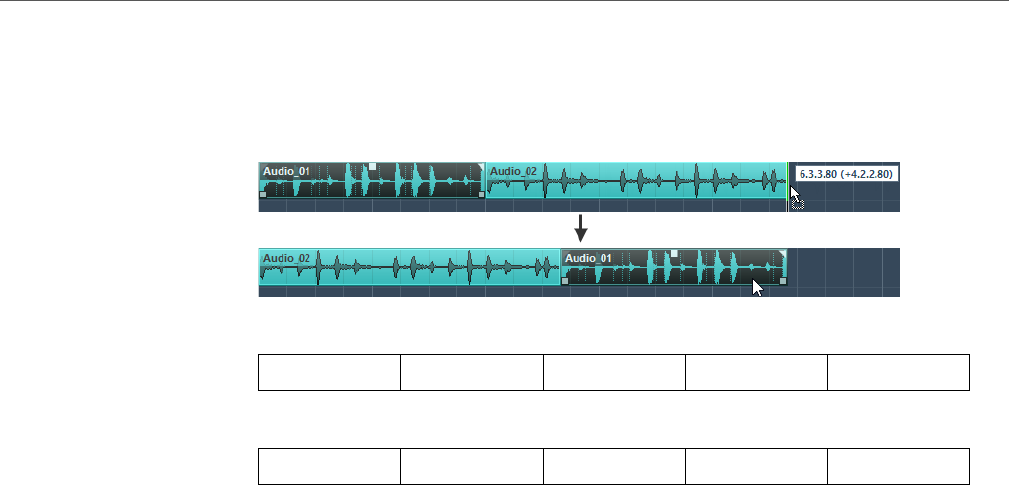
Shuffle
Shuffle is useful when you want to change the order of adjacent events. If you
have two adjacent events and drag the first one to the right, past the second
event, the two events will change places.
The same principle works when changing the order of more than two events:
Dragging event 2 past event 4…
…changes the order of events 2, 3, and 4.
Magnetic Cursor
This grid type lets the project cursor become magnetic. Dragging an event
near the cursor causes the event to be aligned with the cursor position.
Grid + Cursor
This is a combination of Grid and Magnetic Cursor.
Events + Cursor
This is a combination of Events and Magnetic Cursor.
Events + Grid + Cursor
This is a combination of Events, Grid, and Magnetic Cursor.
Cross-Hair Cursor
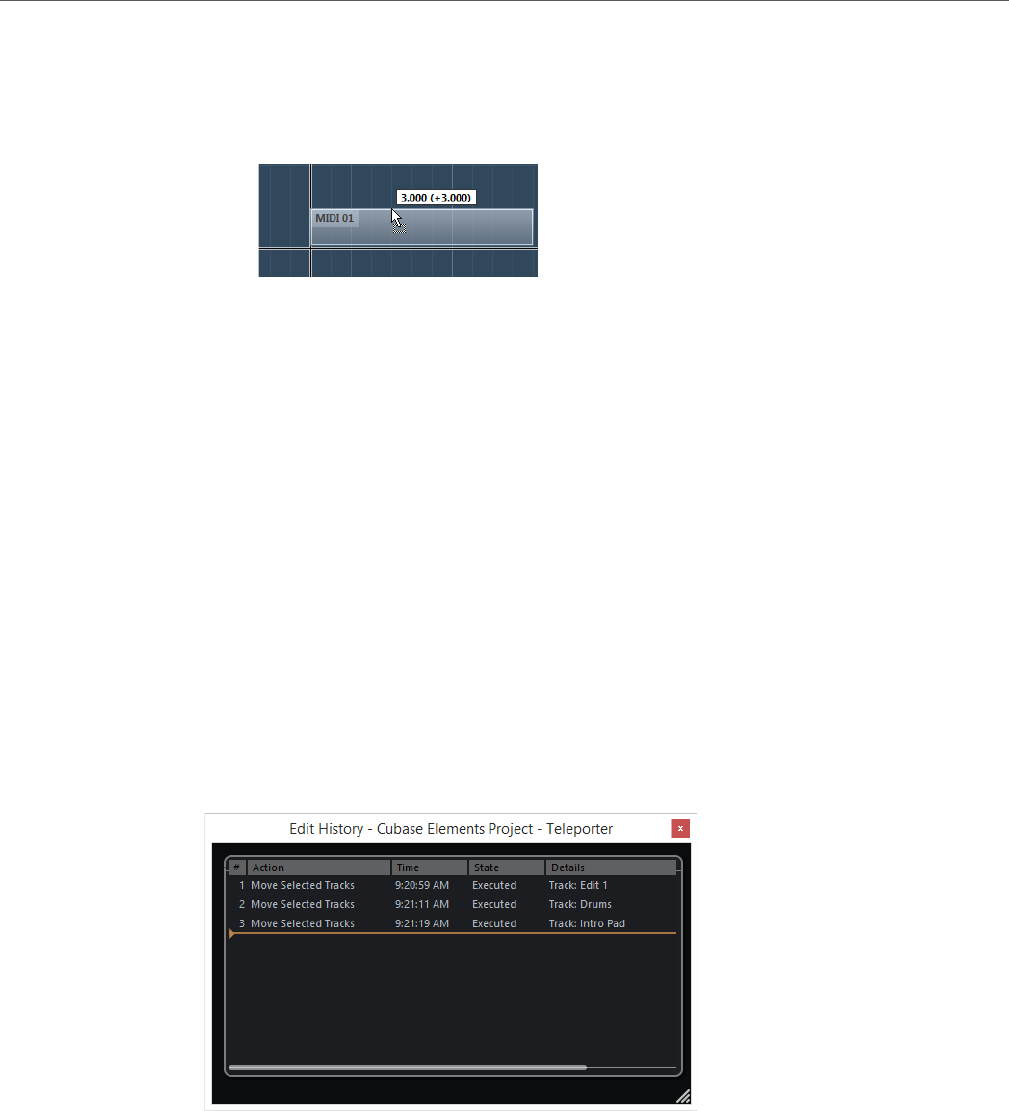
The cross-hair cursor is displayed when working in the Project window and in the
editors, facilitating navigation and editing, especially when arranging large projects.
• To set up the cross-hair cursor, select File > Preferences > Editing >
Tools.
You can set up the colors for the line and the mask of the cross-hair cursor,
and define its width.
12345
13425
Project Window
Edit History Dialog
42
The cross-hair cursor works as follows:
• When the Object Selection tool or one of its subtools is selected, the
cross-hair cursor appears when you start moving/copying a part/event, or
when using the event trim handles.
Cross-hair cursor when moving an event.
• When the Object Selection tool, the Cut tool, or any other tool that makes
use of this function is selected, the cross-hair cursor appears as soon as you
move the mouse over the event display.
• The cross-hair cursor is only available for tools where such a function is of any
use. The Mute tool, for example, does not use a cross-hair cursor, as you have
to click directly on an event to mute it.
Edit History Dialog
In the Edit History dialog, you can undo all actions in the Project window as well
as in the editors. You can also undo audio processes or applied plug-in effects. The
dialog contains a list of all your edits, with the most recent action at the bottom of
the list.
• To open the Edit History dialog, select Edit > History.
The Action column displays the name of the action while the Time column tells you
when this action was performed. In the Details column further details are shown.
Here you can enter new text by double-clicking in the column.
• To undo your actions, move the horizontal, colored line upwards to the desired
position.
You can only undo your actions in reverse order, for example, the last
performed action is the first action to be undone.
• To redo an action that was undone previously, move the line down the list
again.

Project Window
Edit History Dialog
43
Setting the Number of Maximum Undo Steps
You can limit the number of maximum undo steps. This is useful if you run out of hard
disk space, for example.
PROCEDURE
1. Select File > Preferences > General.
2. Set the number in the Maximum Undo Steps field.

44
Project Handling
Creating New Projects
You can create empty projects or projects that are based on a template.
PROCEDURE
1. Select File > New Project.
Depending on your settings, either the Steinberg Hub or the Project Assistant
dialog opens.
2. In the location options section, select where to store the new project.
• To use the default location, select Use default location.
• To choose another location, select Prompt for project location, click Create,
and set the location in the dialog that opens.
3. Do one of the following:
• To create an empty new project, click Create Empty.
• To create a new project from a template, select a template and click Create.
RESULT
A new, untitled project is created. If you selected a template, the new project is
based on this template and includes the corresponding tracks, events, and settings.
Project Handling
Steinberg Hub
45
Steinberg Hub
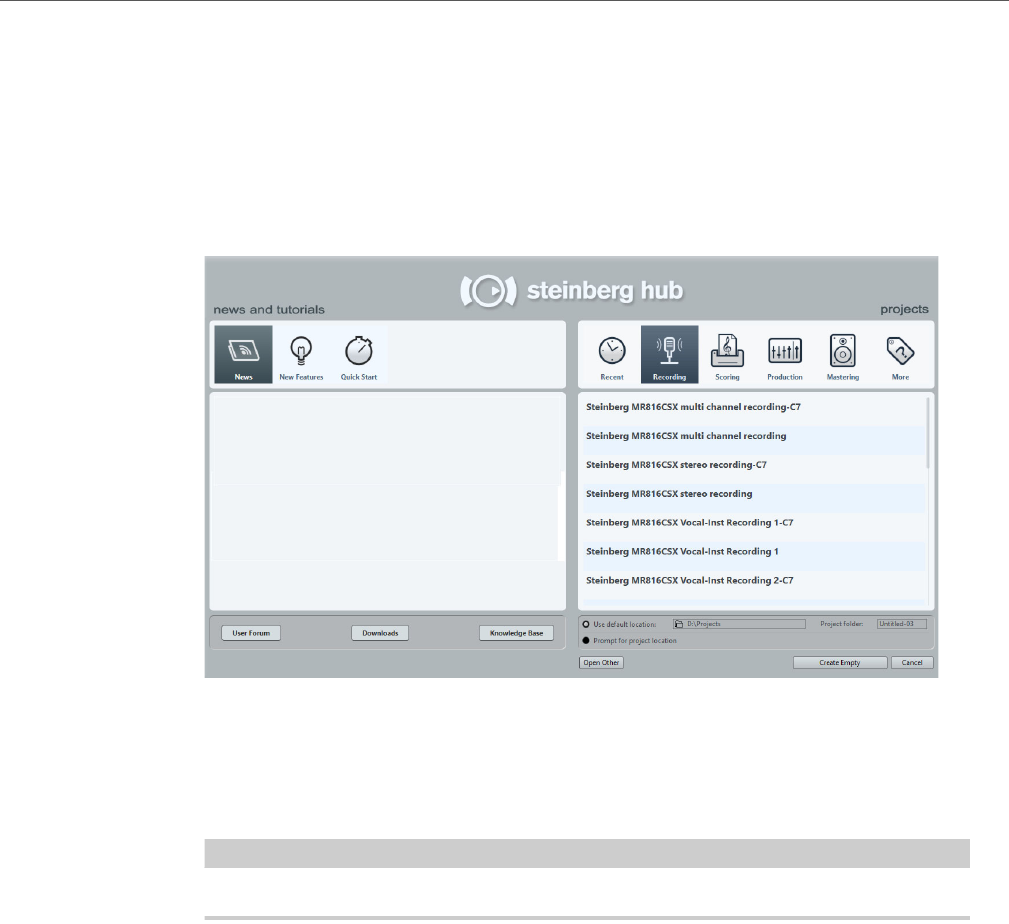
When you start Cubase or create new projects using the File menu, Steinberg
Hub opens. Steinberg Hub keeps you up to date with the latest information and
assists you with organizing your projects. It consists of the News and Tutorials
section and the Projects section.
News and Tutorials section
The News and Tutorials section displays Steinberg news, tutorial videos as well
as links to the user forum, downloads, and Knowledge Base.
NOTE
Ensure that you have an active internet connection to access this material.
Projects section
The Projects section lets you create new projects, which can either be empty or
based on a template. It lets you specify where to save the projects. It also allows
you to access recently opened projects or projects that are stored in other
locations. This section offers the same functionality as the Project Assistant dialog.
Category bar
In this section, the available factory templates are sorted into the predefined
categories Recording, Scoring, Production, and Mastering.
The Recent category contains a list of the recently opened projects.
The More category contains the default project template and all templates
that are not assigned to any of the other categories.

Project Handling
Project Assistant
46
Template list
When you click on one of the category items, the list below the category bar
shows the available templates for this category. Any new templates that you
create are added at the top of the corresponding list.
Location options
This section allows you to specify where the project is stored.
Open other
This button allows you to open any project file on your system. This is identical
to using the Open command on the File menu.
RELATED LINKS
Project Assistant on page 46
Deactivating Steinberg Hub
To start Cubase or to create new projects without Steinberg Hub, you can
deactivate it.
PROCEDURE
•Select File > Preferences > General and deactivate Use Steinberg Hub.
RESULT
Cubase starts without opening a project and opens the Project Assistant dialog
when you create a new project using the File menu. However, you can still open
Steinberg Hub through the Steinberg Hub menu.
Project Assistant
When you deactivate Steinberg Hub and create new projects, the Project
Assistant dialog opens. This dialog offers the same functions as the Projects
section in Steinberg Hub.
Category bar
In this section, the available factory templates are sorted into the predefined
categories Recording, Production, Scoring, and Mastering.
The Recent category contains a list of the recently opened projects.
The More category contains the default project template and all templates
that are not assigned to any of the other categories.

Project Handling
About Project Files
47
Template list
When you click on one of the category items, the list below the category bar
shows the available factory templates for this category. Any new templates
that you create are added at the top of the corresponding list.
Location options
This section allows you to specify where the project is stored.
Open other
This button allows you to open any project file on your system. This is identical
to using the Open command from the File menu.
About Project Files
A project file (extension *.cpr) is the central document in Cubase. A project file
contains references to media data that can be saved in the project folder.
NOTE
We recommend to save files only in the project folder, even though you can save
them in any other location to which you have access.
The project folder contains the project file and the following folders that Cubase
automatically creates when necessary:
•Audio
•Edits
•Images
• Track Pictures
About Template Files
Templates can be a good starting point for new projects. Templates are projects
where you can save all settings that you regularly use, such as bus configurations,
sample rates, record formats, basic track layouts, VSTi setups, drum map setups,
etc.
The following template types are available from within Steinberg Hub:
• Factory templates for specific scenarios. These are listed in the Recording,
Scoring, Production, or Mastering categories.
• The default template. This is listed in the More category.
• Any new user templates that you create and save. These are listed in the More
category.
Project Handling
About Template Files
48
Template projects are not saved in project folders and therefore contain no
subfolders and no media files.
• To open the location of a specific template, right-click a template in the
template list and select Show in Explorer (Win) or Reveal in Finder (Mac).
Saving a Project Template File
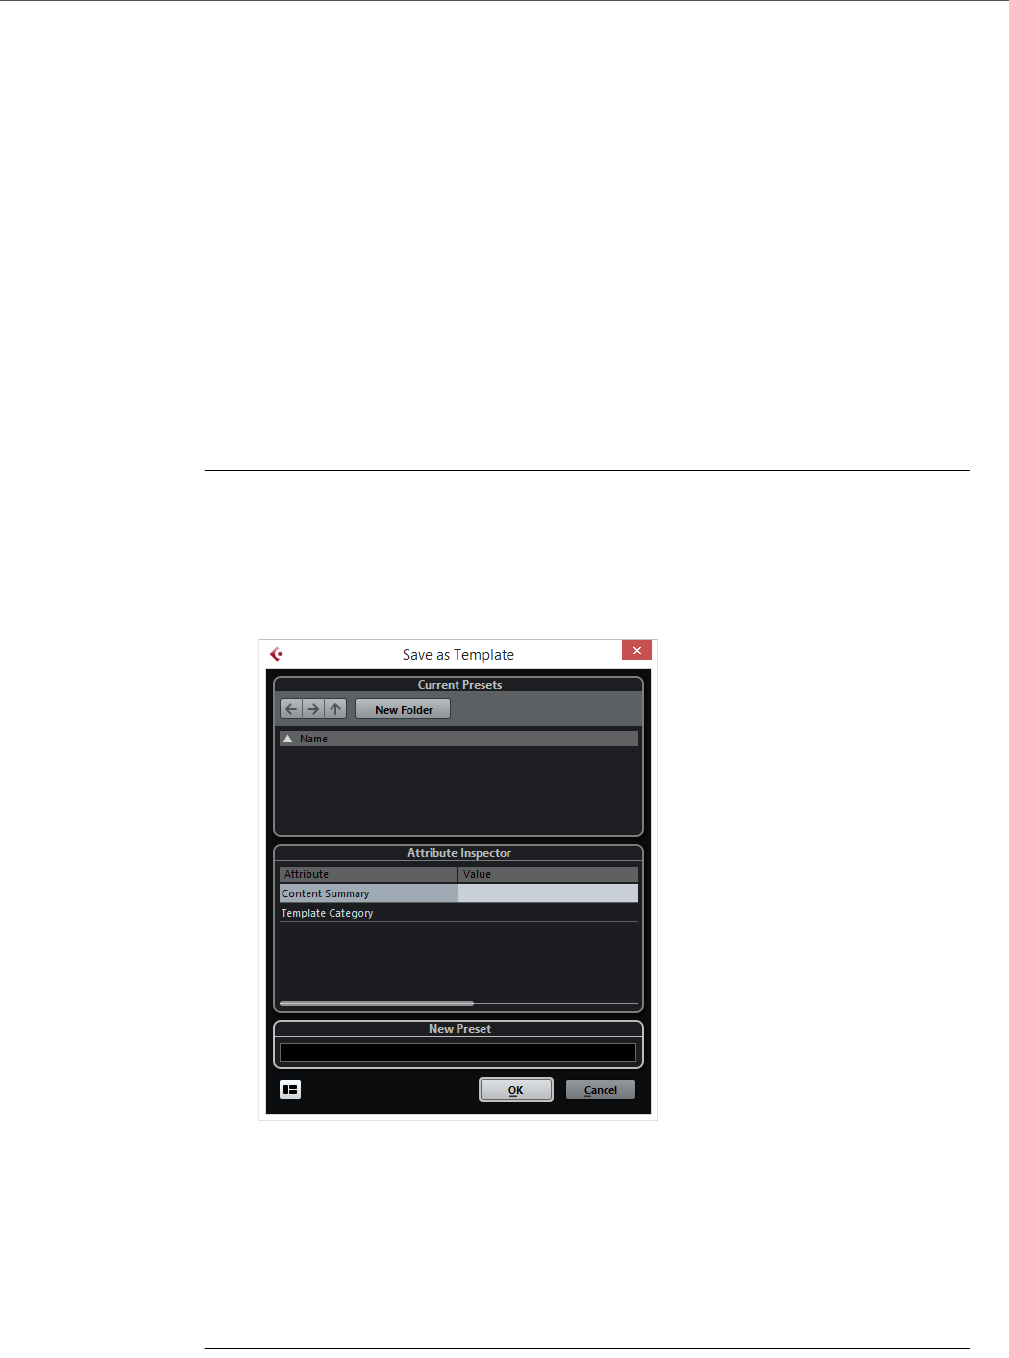
You can save the current project as a template. When you create a new project, you
can select this template as a starting point for your new project.
PREREQUISITE
Remove all clips from the Pool before you save the project as a template. This
ensures that references to media data from the original project folder are deleted.
PROCEDURE
1. Set up a project.
2. Select File > Save As Template.
3. In the New Preset section of the Save As Template dialog, enter a name for
the new project template.
4. In the Attribute Inspector section, double-click the Value field of the
Content Summary attribute to enter a description for the template.
5. Click the Value field of the Template Summary attribute and select a
template category from the pop-up menu.
If you do not select a category, the new template will be listed in Steinberg Hub in
the More category.
6. Click OK to save the template.
Project Handling
Project Setup Dialog
49
Renaming Templates
PROCEDURE
1. In Steinberg Hub or the Project Assistant, right-click a template and select
Rename.
2. In the Rename dialog, enter a new name and click OK.
Project Setup Dialog
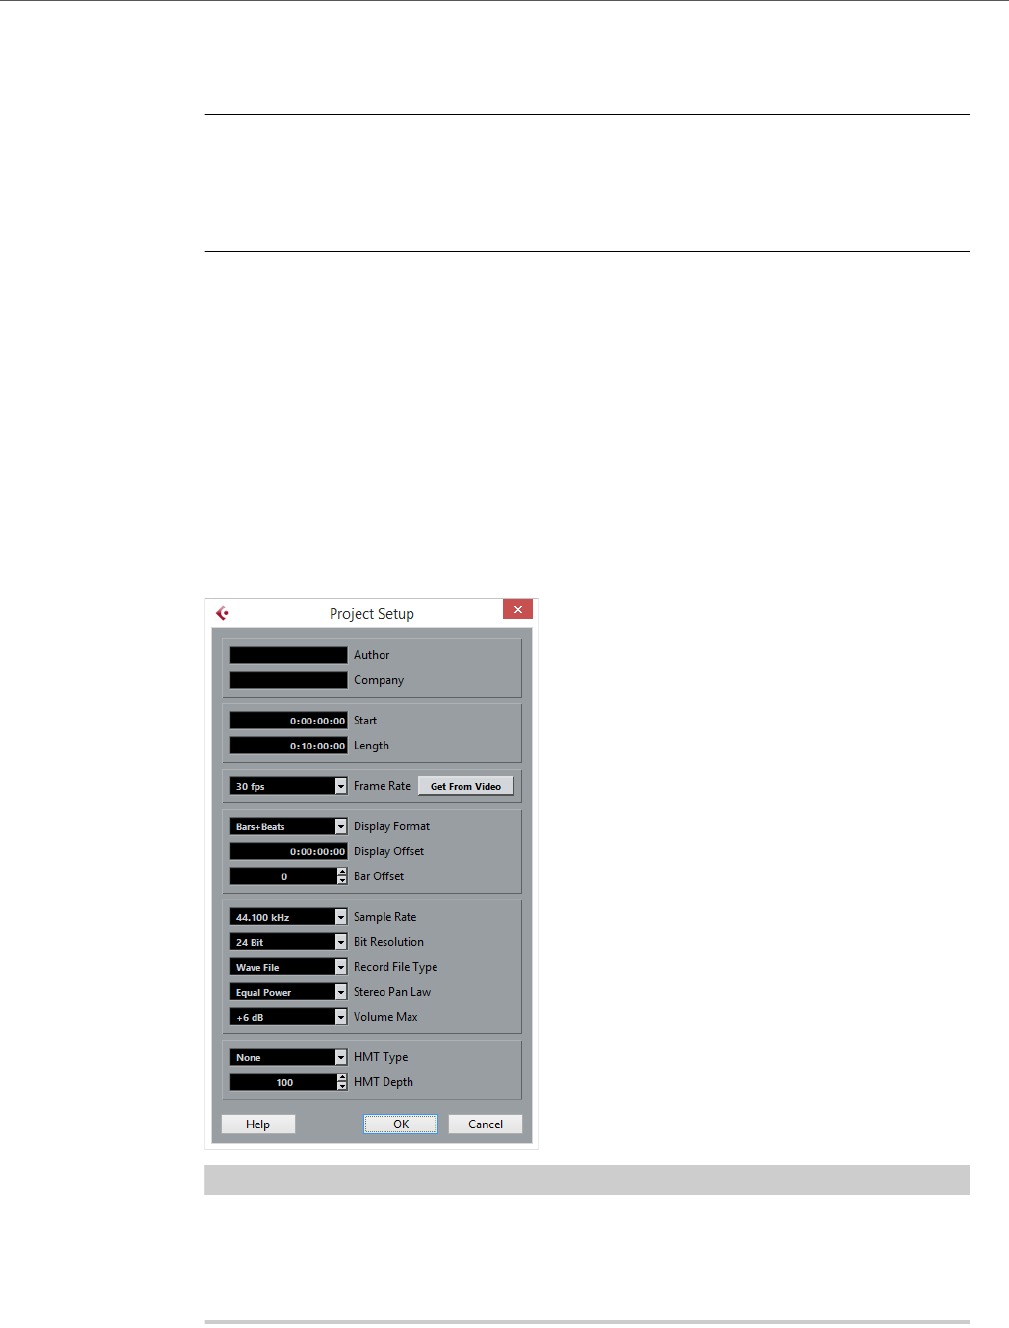
You can perform general settings for your project in the Project Setup dialog.
• To open the Project Setup dialog, select Project > Project Setup.
• To open the Project Setup dialog automatically when you create a new
project, activate the Run Setup on Create New Project option (File >
Preferences > General).
IMPORTANTIMPORTANTIMPORTANTIMPORTANT
While most Project Setup settings can be changed at any time, you must set the
sample rate directly after creating a new project. If you change the sample rate at a
later stage, you must convert all audio files in the project to the new sample rate to
make them play back properly.

Project Handling
Project Setup Dialog
50
The following options are available:
Author
Allows you to specify a project author that is written into the file, when you
export audio files and activate the Insert iXML chunk option. You can specify
a default author in the Default Author Name field (File > Preferences >
General > Personalization).
Company
Allows you to specify a company name that is written into the file, when you
export audio files and activate the Insert iXML chunk option. You can specify
a default company in the Default Company Name field (File > Preferences
> General > Personalization).
Start
Allows you to specify the start time of the project in timecode format. This also
determines the sync start position when synchronizing to external devices.
Length
Allows you to specify the length of the project.
Frame Rate
Allows you to specify the timecode standard and frame rate for the project.
When synchronizing to an external device, this setting must correspond to the
frame rate of any incoming timecode.
Get From Video
Allows you to set the project frame rate to the frame rate of an imported video
file.
Display Format
Allows you to specify the global display format that is used for all rulers and
position displays in the program, except the ruler tracks. However, you can
make independent display format selections for the individual rulers and
displays.
Display Offset
Allows you to specify an offset for the time positions that are displayed in the
rulers and position displays to compensate for the Start position setting.
Bar Offset
This setting is only used, when you select the Bars+Beats display format.
Allows you to specify an offset for the time positions that are displayed in the
rulers and position displays to compensate for the Start position setting.
Sample Rate
Allows you to specify the sample rate at which records and plays back audio.
• If your audio hardware generates the sample rate internally and you
select a non-supported sample rate, this is indicated by a different color.
In this case, you must set a different sample rate to make your audio files
play back properly.

Project Handling
Project Setup Dialog
51
• If you select a sample rate that your audio hardware supports, but that
differs from its current sample rate setting, it is automatically changed
to the project sample rate.
• If your audio hardware is externally clocked and receives external clock
signals, sample rate mismatches are accepted.
Bit Resolution
Allows you to specify the resolution of the audio files that you record in
Cubase. Select the record format according to the bit resolution that is
delivered by your audio hardware. The available options are 16 Bit, 24 Bit, and
32 Bit float.
NOTE
• When you record with effects, consider setting the bit resolution to 32 Bit
Float. This prevents from clipping (digital distortion) in the recorded files
and keeps the audio quality absolutely pristine. Effect processing and
level or EQ changes in the input channel are done in 32 Bit Float format.
If you record at 16 or 24 Bit, the audio will be converted to this lower
resolution when it is written to a file. As a result, the signal may degrade.
This is independent of the actual resolution of your audio hardware. Even
if the signal from the audio hardware has a resolution of 16 Bit, the signal
will be 32 Bit Float after the effects are added to the input channel.
• The higher the bit resolution, the larger the files and the more strain is put
on the disk system. If this is an issue, you can lower the record format
setting.
Record File Type
Allows you to specify the file type of the audio files that you record in Cubase.
The following file types are available:
•Wave files are a common file format on the PC platform. For recordings
larger than 4 GB, the EBU RIFF standard is used. If a FAT 32 disk is
used (not recommended), audio files are split automatically.
•Wave 64 is a proprietary format developed by Sonic Foundry Inc.
Audio-wise it is identical to the Wave format, but the internal file
structure allows for much larger file sizes as required by long live
recordings.
•Broadcast Wave Files are, in terms of audio content, identical with
regular Wave files, but with embedded text strings for supplying
additional information about the file. These can be set up in the
Preferences dialog (Record–Audio–Broadcast Wave).
•AIFF Files, Audio Interchange File Format, is a defined standard by
Apple Inc. and can be used on most computer platforms. AIFF files can
contain embedded text strings. These can be set up in the Preferences
dialog (Record–Audio–Broadcast Wave).

Project Handling
Opening Project Files
52
•FLAC Files, Free Lossless Audio Codec, is an open source format.
Audio files recorded in this format are typically 50 % to 60 % smaller
than regular Wave files.
NOTE
If your recorded Wave file is larger than 4 GB and Use RF64 Format is
activated on the When Recording Wave Files larger than 4 GB pop-up
menu (File > Preferences > Record > Audio), your recording is saved as
an RF64 file. This way, you do not have to worry about the file size during
recording. However, keep in mind that this format is not supported by all
applications.
Stereo Pan Law
If you pan a channel left or right, the sum of the left and right side is higher
(louder), than if this channel is panned center. These modes allow you to
attenuate signals panned center. 0 dB turns off constant-power panning.
Equal Power means that the power of the signal remains the same regardless
of the pan setting.
Volume Max
Allows you to specify the maximum fader level. By default, this is set to
+12 dB. If you load projects that were created with Cubase versions older
than 5.5, this value is set to the old default value of +6 dB.
HMT Type (MIDI only (Cubase Elements only))
Allows you to specify a mode for Hermode tuning of MIDI notes.
HMT Depth (MIDI only (Cubase Elements only))
Allows you to specify the overall degree of retuning.
Opening Project Files
You can open one or several saved project files at the same time.
IMPORTANTIMPORTANTIMPORTANTIMPORTANT
If you open a project saved with a different program version that contains data for
functions that are not available in your version, this data may be lost when you save
the project with your version.
PROCEDURE
1. Select File > Open.
2. In the file dialog that opens, select the project that you want to open and click
Open.
3. If there already is an open project, you are asked if you want to activate the
new project. Do one of the following:
• To activate the project, click Activate.
Project Handling
Opening Project Files
53
• To open the project inactive, click No.
This reduces load times for projects.
Activating Projects
If you have several projects opened at the same time in Cubase, only one project
can be active. The active project is indicated by the lit Activate Project button in
the upper left corner of the Project window. If you want to work on another project,
you have to activate the other project.
PROCEDURE
• To activate a project, click its Activate Project button.
Opening Recent Projects
To open a recently opened project, do one of the following:
• In the category bar of Steinberg Hub or the Project Assistant dialog, click
Recent, select a project from the projects list, and click Open.
•Select File > Recent Projects and select a recently opened project.
Re-Routing Missing Ports
If you open a Cubase project that was created on a different system with other
audio hardware, Cubase tries to find matching audio inputs and outputs for the
input/output busses. If Cubase cannot resolve all audio/MIDI inputs and outputs
that are used in the project, the Missing Ports dialog opens.
This allows you to manually re-route any ports specified in the project to ports that
are available in your system.
NOTE
To improve the search for matching audio inputs and outputs for the input/output
busses, you should use descriptive, generic names for your input and output ports.
RELATED LINKS
Renaming the Hardware Inputs and Outputs on page 18

Project Handling
Saving Project Files
54
Saving Project Files
You can save the active project as a project file. To keep your projects as
manageable as possible, make sure that you save project files and all related files
in the respective project folders.
• To save the project and specify a file name and location, open the File menu
and select Save As.
• To save the project with its current name and location, open the File menu and
select Save.
NOTE
Make sure that the Use File Extension in File Dialog option (File > Preferences
> General) is activated. This automatically adds the file name extension when you
save a file and keeps your projects compatible with both Windows and Mac OS X
systems.
About the Auto Save Option
Cubase can automatically save backup copies of all open project files with unsaved
changes.
NOTE
Only the project files are backed up. If you want to include the files from the Pool
and save your project in a different location, you must use the Back up Project
function.
If you activate the Auto Save option (File > Preferences > General), Cubase
automatically saves backup copies of all open projects with unsaved changes.
These backup copies are named “<project name>-xx.bak” where xx is an
incremental number. Unsaved projects are backed up in a similar way as
“UntitledX-xx.bak”, with X being the incremental number for unsaved projects. All
backup files are saved in the project folder.
• To specify the time intervals in which a backup copy is created, use the Auto
Save Interval setting.
• To specify how many backup files are created with the Auto Save function,
use the Maximum Backup Files option. When the maximum number of
backup files is reached, the existing files are overwritten, starting with the
oldest file.
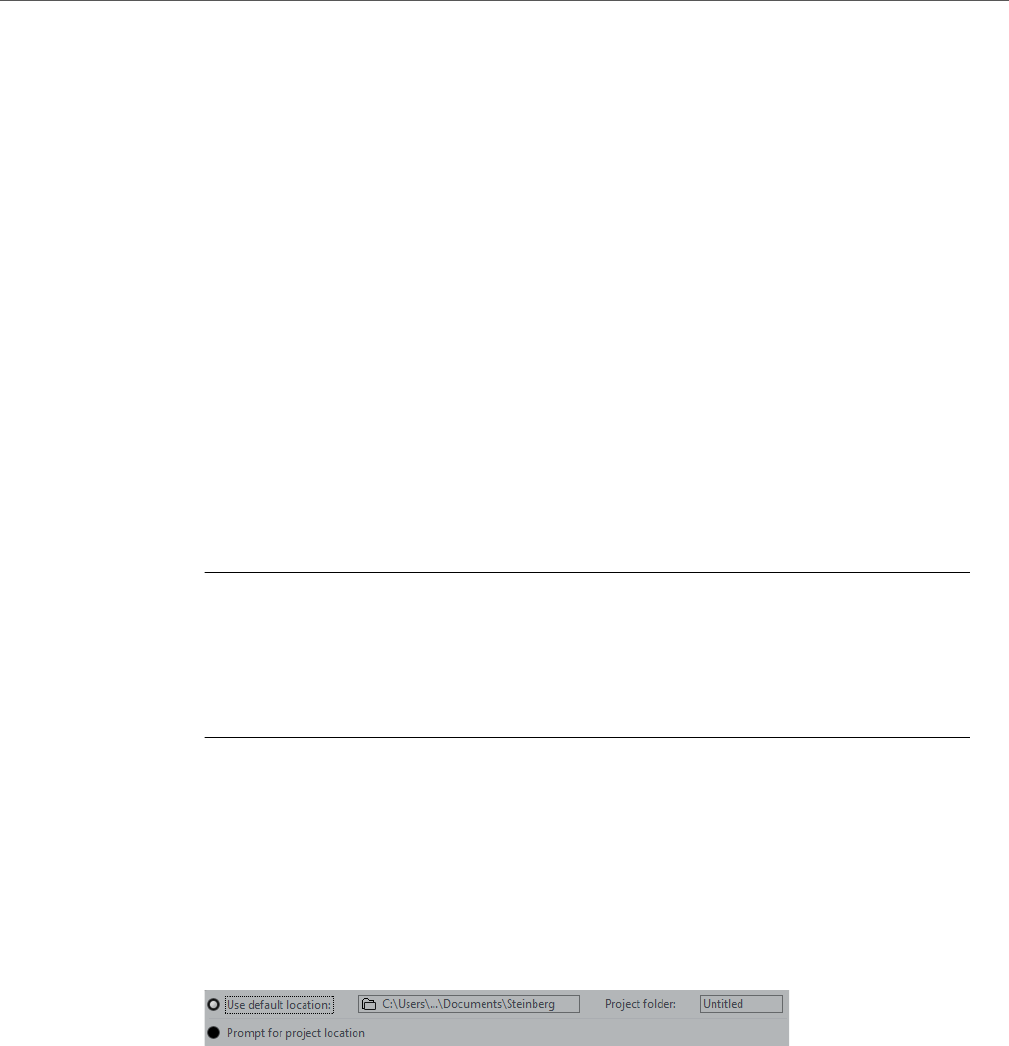
Project Handling
Reverting to the Last Saved Version
55
Saving Project Files As a New Version
You can create and activate a new version of an active project file. This is useful if
you are experimenting with edits and arrangements and want to be able to go back
to a previous version at any time.
• To save a new version of the active project, press
[Ctrl]/[Command]-[Alt]/[Option]-[S].
The new file is saved with the same name as the original project and an attached
incremental number. For example, if your project is called “My Project,” new
versions are called “My Project-01”, “My Project-02”, and so on.
Reverting to the Last Saved Version
You can return to the last saved version and discard all changes that have been
introduced.
PROCEDURE
1. Select File > Revert.
2. In the warning message, click Revert.
If you have recorded or created new audio files since the last version was saved, you
are prompted to delete or keep the files.
Choosing a Project Location
In Steinberg Hub and in the Project Assistant, you can specify where to save a
project.
• To create a project in the default project location, select Use default
location.
In the Project folder field, you can specify a name for the project folder. If you
do not specify a project folder here, the project is saved in a folder named
Untitled.
• To change the default project location, click in the path field.
A file dialog opens that allows you to specify a new default location.
• To create the project in a different location, select Prompt for project
location.
In the dialog that opens, specify a location and a project folder.
Project Handling
Removing Unused Audio Files
56
Removing Unused Audio Files
You can use the Cleanup function to locate and delete unused audio files in the
project folders on your disk.
PREREQUISITE
Make sure that you have not moved or renamed files or folders without updating the
project files to use the new paths. Also make sure that the project folder does not
contain audio files that belong to projects that are not saved in the project folder.
PROCEDURE
1. Close all projects.
2. Select File > Cleanup.
3. Click the Start button.
Cubase scans the hard disks for project folders and lists all audio and image files that
are not used by any project.
NOTE
You can also click the Search Folder button to select a specific folder for the
Cleanup function. This is only recommended if you are sure that the folder contains
no audio files that are used in other projects.
4. Select the files that you want to delete and click Delete.
Creating Self-Contained Projects
If you want to share your work or transfer it to another computer, your project must
be self-contained.
The following functions facilitate this task:
•Select Media > Prepare Archive to verify that every clip that is referenced in
the project is located in the project folder, and to take actions if that is not the
case.
•Select File > Back up Project to create a new project folder where you can
save the project file and the necessary work data. The original project remains
unchanged.

Project Handling
Creating Self-Contained Projects
57
Preparing Archives
The Prepare Archive function allows you to gather all files that are referenced by
your project to ensure that these are in the project folder. This is useful if you want
to move or archive your project.
PROCEDURE
1. Select Media > Prepare Archive.
If your project references external files, you are prompted if you want to copy them to
your working directory. If any processing has been applied, you must decide if you
want to freeze edits.
2. Click Proceed.
RESULT
Your project is ready to be archived. You can move or copy the project folder to
another location.
AFTER COMPLETING THIS TASK
You must copy audio files that reside within the project folder to the Audio folder or
save them separately. You must also move your video clips manually, as videos are
only referenced and not saved in the project folder.
Backing Up Projects
You can create a backup copy of your project. Backups only contain the necessary
work data. All media files except the files from VST Sound archives are included as
a copy.
PROCEDURE
1. Select File > Back up Project.
2. Select an empty folder or create a new one.
3. Make your settings in the Back up Project Options dialog and click OK.
RESULT
A copy of the project is saved in the new folder. The original project remains
unaffected.
NOTE
VST Sound content provided by Steinberg is copy-protected and will not be
included in the backup project. If you want to use a backup copy that uses VST
Sound content on a different computer, make sure that the corresponding content
is also available on that computer.
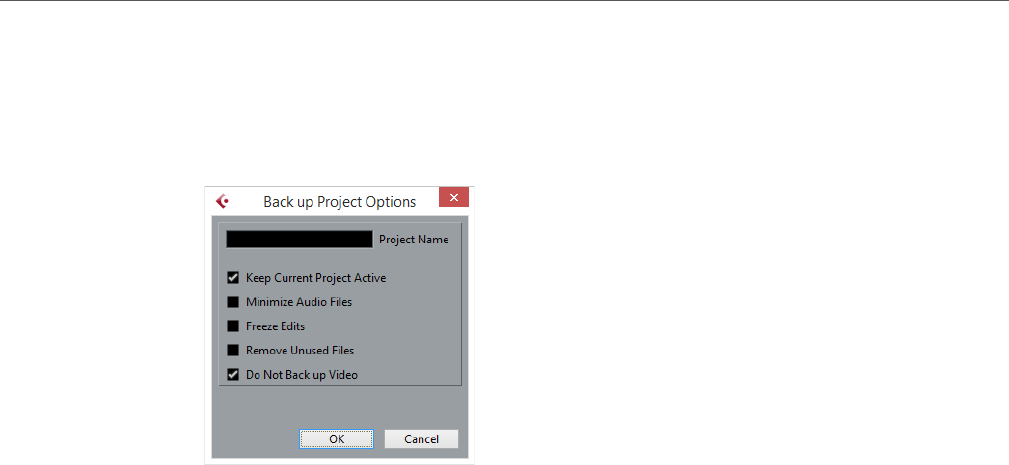
Project Handling
Creating Self-Contained Projects
58
Back up Project Options Dialog
This dialog allows you to create a backup copy of your project.
• To open the Back up Project Options dialog, select File > Back up Project.
Project Name
Allows you to change the name of the backed up project.
Keep Current Project Active
Allows you to keep the current project active after clicking OK.
Minimize Audio Files
Allows you to include only the audio file portions that are actually used in the
project. This can significantly reduce the size of the project folder if you are
using small sections of large files. It also means that you cannot use other
parts of the audio files if you continue working with the project in its new
folder.
Freeze Edits
Allows you to freeze all edits and make all processing and applied effects
permanent to each clip in the Pool.
Remove Unused Files
Allows you to remove unused files and to back up only the files that are
actually used.
Do Not Back up Video
Allows you to exclude video clips on the video track or in the Pool of the
current project.
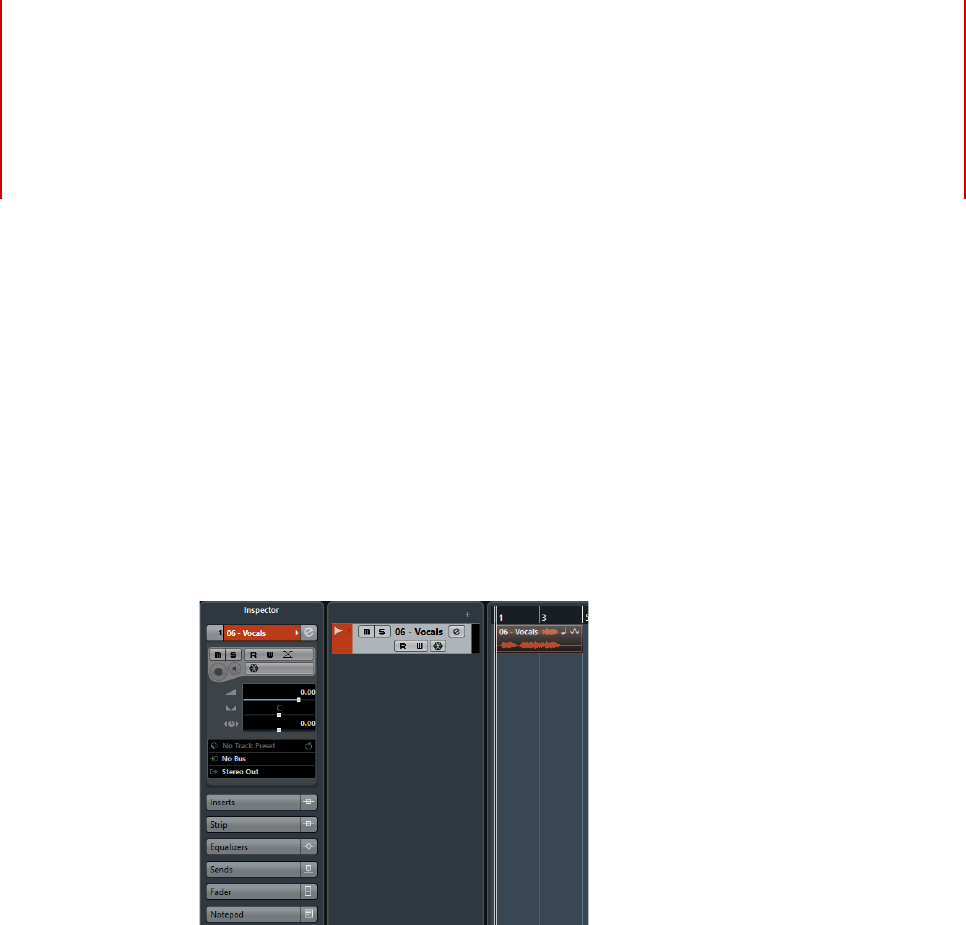
59
Tracks
Tracks are the building blocks of your project. They allow you to import, add, record,
and edit data (parts and events). Tracks are listed from top to bottom in the Track
list and extend horizontally across the Project window. Each track is assigned to a
particular channel strip in the MixConsole.
If you select a track in the Project window, the controls, settings, and parameters
displayed in the Inspector and the track list allow you to control the track.
Audio Tracks
You can use audio tracks for recording and playing back audio events and audio
parts. Each audio track has a corresponding audio channel in the MixConsole. An
audio track can have any number of automation tracks for automating channel
parameters, effect settings, etc.
• To add an audio track to your project, select Project > Add Track > Audio.
RELATED LINKS
Adding Tracks on page 91
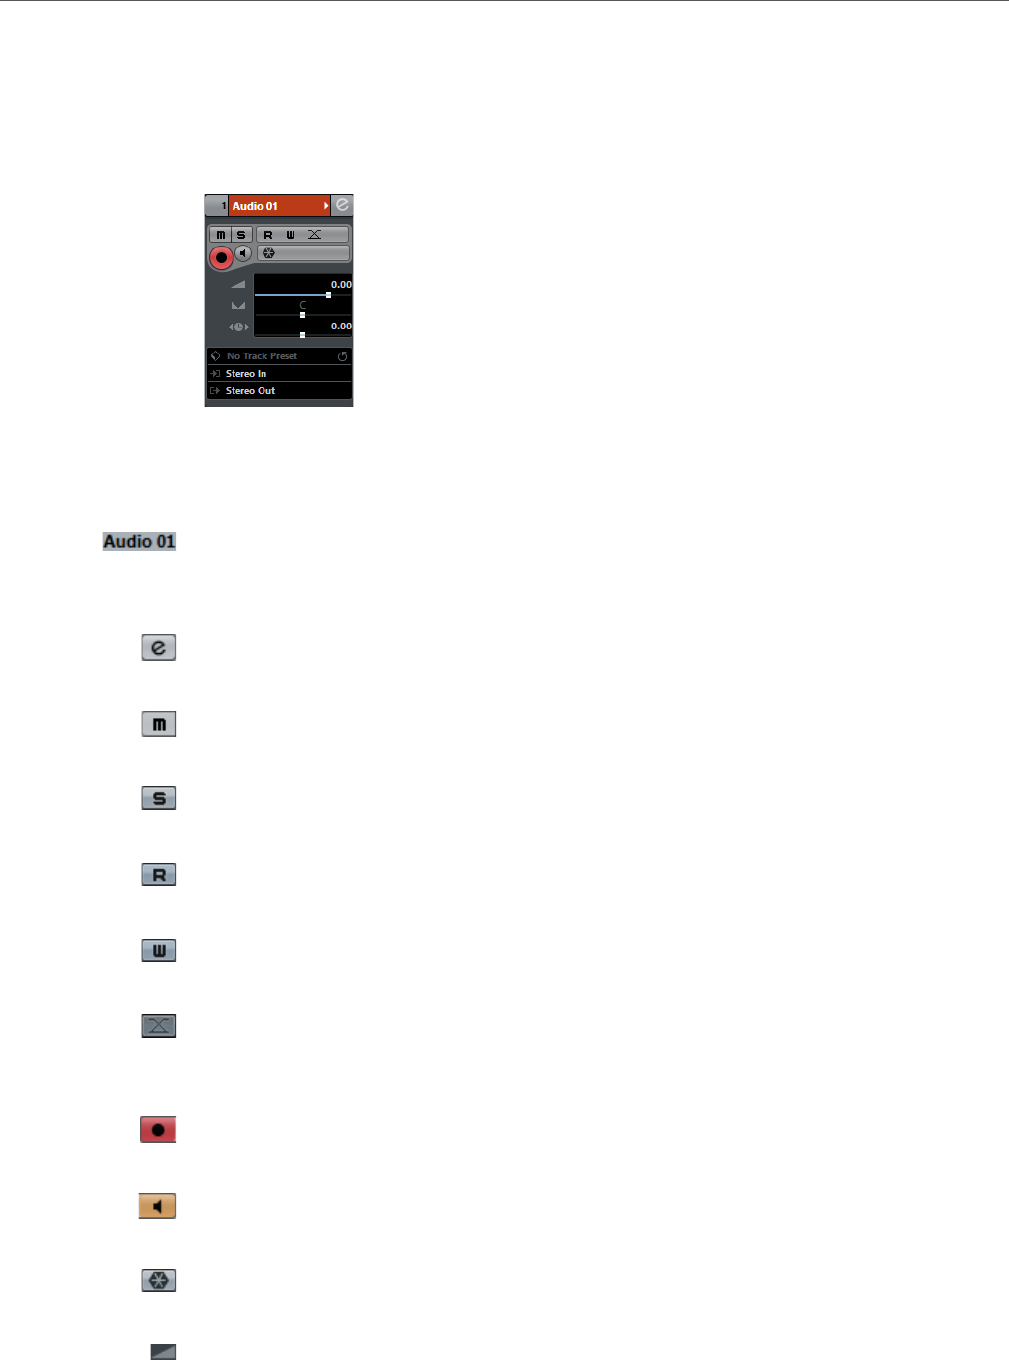
Tracks
Audio Tracks
60
Audio Track Inspector
The Inspector for audio tracks contains controls and parameters that allow you to
edit your audio track.
The top section of the audio track Inspector contains the following basic track
settings:
Track name
Click once to show/hide the basic track settings section. Double-click to
rename the track.
Edit
Opens the Channel Settings window for the track.
Mute
Mutes the track.
Solo
Solos the track.
Read Automation
Allows you to read track automation.
Write Automation
Allows you to write track automation.
Auto Fades Settings
Opens a dialog where you can make separate audio fade settings for the
track.
Record enable
Activates the track for recording.
Monitor
Routes incoming signals to the selected output.
Freeze Audio Channel
Allows you to freeze the audio channel.
Volume
Allows you to adjust the level for the track.
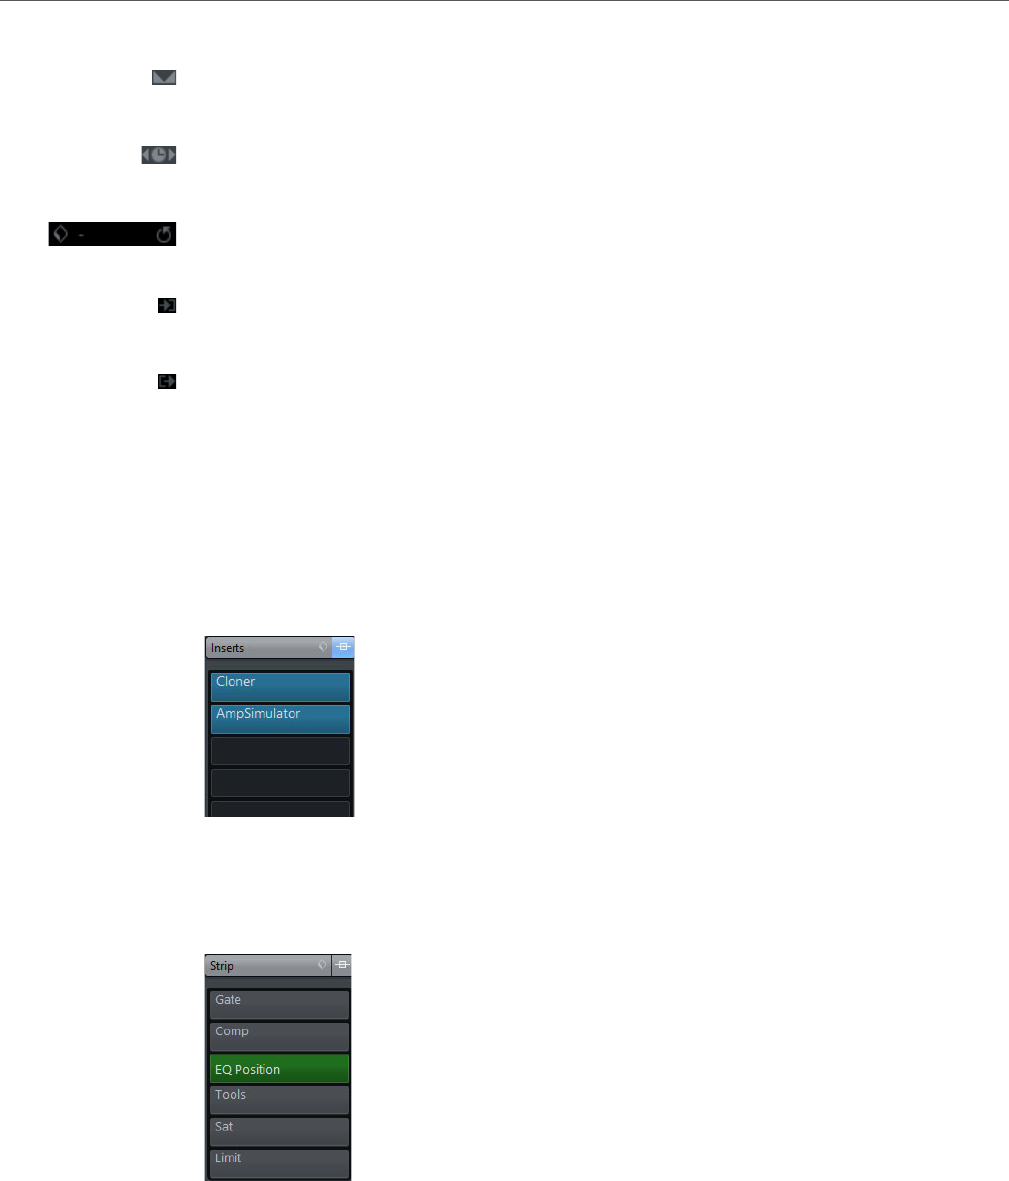
Tracks
Audio Tracks
61
Pan
Allows you to adjust the panning of the track.
Delay
Allows you to adjust the playback timing of the track.
Load/Save/Reload Track Preset
Loads or saves a track preset or reverts the default presets.
Input Routing
Allows you to specify the input bus for the track.
Output Routing
Allows you to specify the output bus for the track.
Audio Track Inspector sections
Apart from the basic track settings that are always shown, audio tracks provide
other Inspector sections. These are described in the following sections.
Inserts Section
Allows you to add insert effects to the track.
Strip Section
Allows you to set up the channel strip modules.
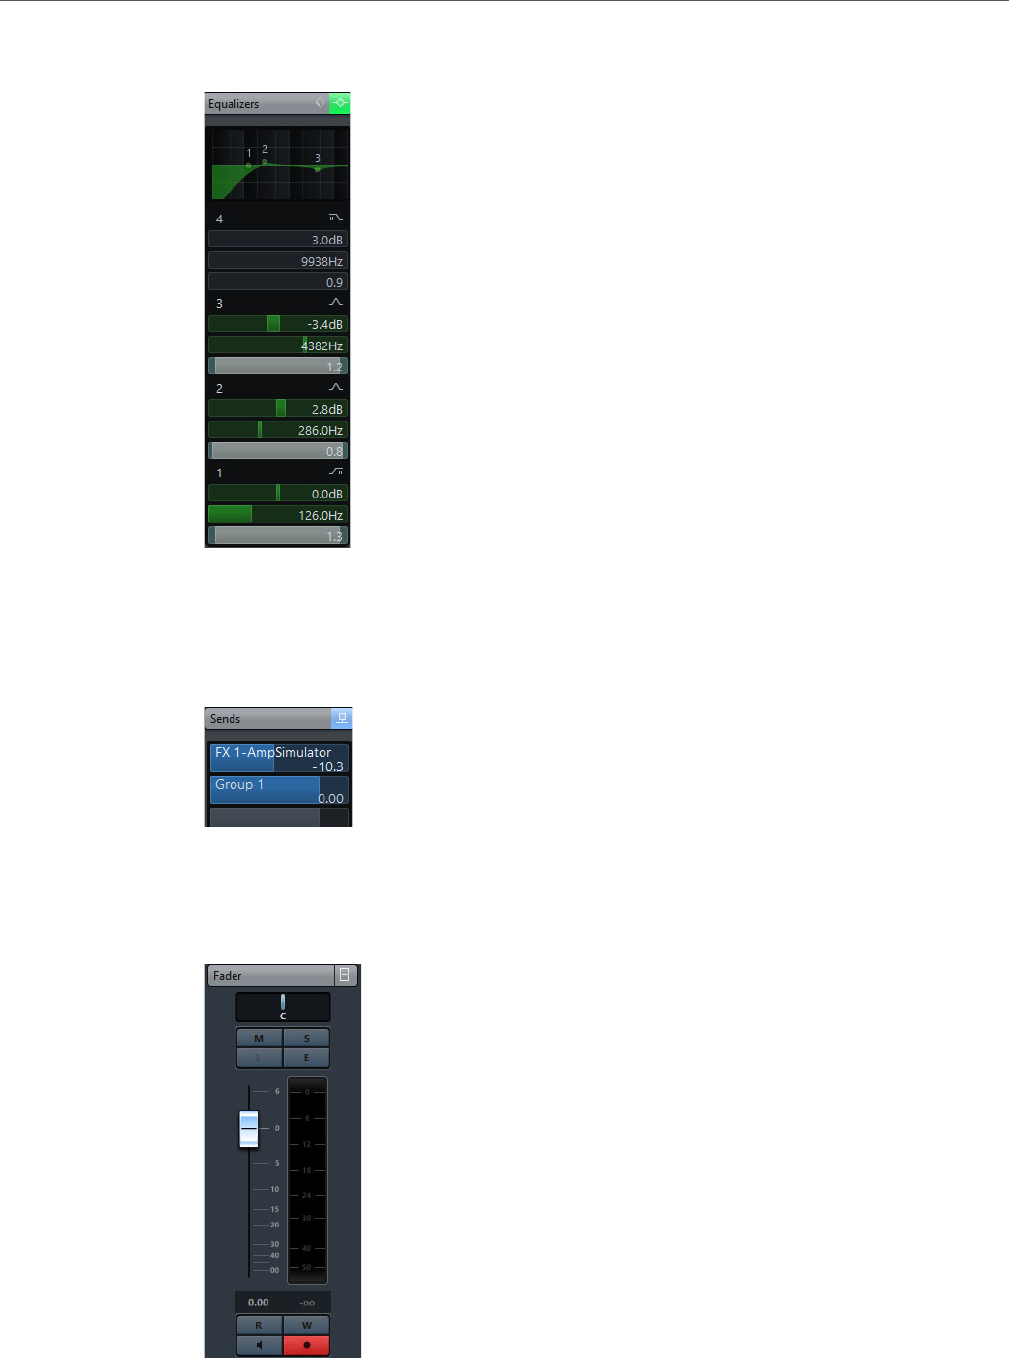
Tracks
Audio Tracks
62
Equalizers Section
Allows you to adjust the EQs for the track. You can have up to four bands of EQ for
each track.
Sends Section
Allows you to route the track to one or several FX channels.
Fader Section
Shows a duplicate of the corresponding MixConsole channel.
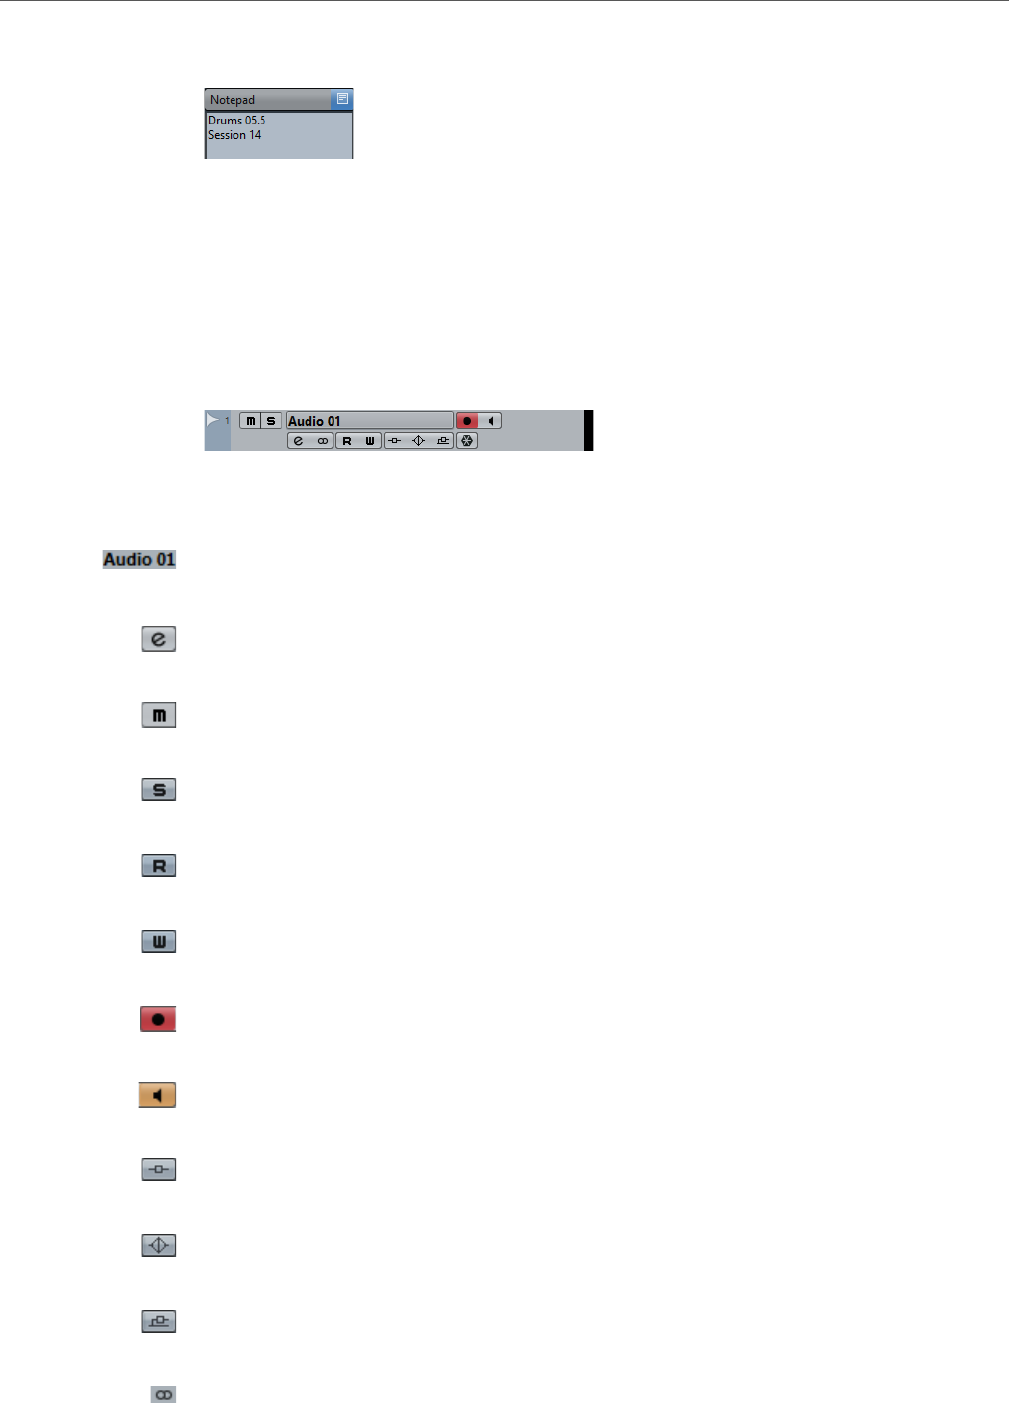
Tracks
Audio Tracks
63
Notepad Section
Allows you to enter notes about the track.
Audio Track Controls
The Track List for audio tracks contains controls and parameters that allow you to
edit your audio track.
The track list for audio tracks contains the following controls:
Track name
Double-click to rename the track.
Edit
Opens the Channel Settings window for the track.
Mute
Mutes the track.
Solo
Solos the track.
Read Automation
Allows you to read track automation.
Write Automation
Allows you to write track automation.
Record enable
Activates the track for recording.
Monitor
Routes incoming signals to the selected output.
Bypass Inserts
Bypasses the inserts for the track.
Bypass EQs
Bypasses the equalizers for the track.
Bypass Sends
Bypasses the sends for the track.
Channel Configuration
Shows the channel configuration of the track.
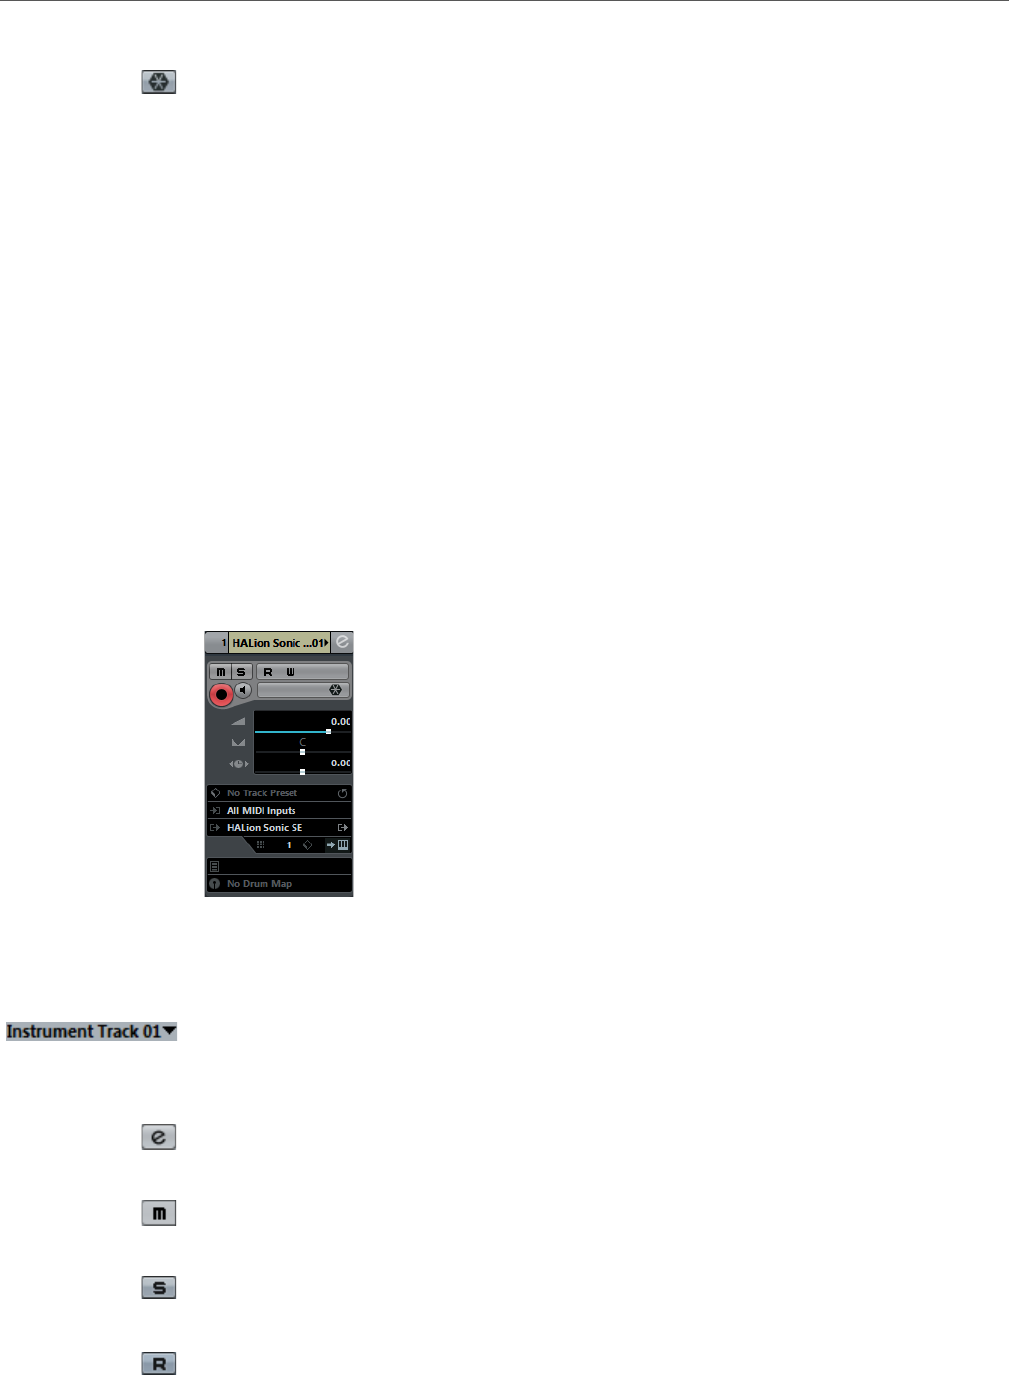
Tracks
Instrument Tracks
64
Freeze Audio Channel
Allows you to freeze the audio channel.
Instrument Tracks
You can use instrument tracks for dedicated VST instruments. Each instrument
track has a corresponding instrument channel in the MixConsole. An instrument
track can have any number of automation tracks.
• To add an instrument track to your project, select Project > Add Track >
Instrument.
Instrument Track Inspector
The Inspector for instrument tracks contains controls and parameters that allow you
to control your instrument track. It shows some of the sections from VST instrument
channels and MIDI tracks.
The top section of the instrument track Inspector contains the following basic track
settings:
Track name
Click once to show/hide the basic track settings section. Double-click to
rename the track.
Edit
Opens the Channel Settings window for the track.
Mute
Mutes the track.
Solo
Solos the track.
Read Automation
Allows you to read track automation.
Tracks
Instrument Tracks
65
Write Automation
Allows you to write track automation.
Record enable
Activates the track for recording.
Monitor
Routes incoming MIDI to the selected MIDI output. For this to work, activate
MIDI Thru Active in the Preferences dialog (MIDI page).
Freeze Instrument Channel
Allows you to freeze the instrument.
Volume
Allows you to adjust the level for the track.
Pan
Allows you to adjust the panning of the track.
Delay
Allows you to adjust the playback timing of the track.
Load/Save/Reload Track Preset
Loads or saves a track preset or reverts the default presets.
Input Routing
Allows you to specify the input bus for the track.
Output Routing
Allows you to specify the output bus for the track.
Edit Instrument
Allows you to open the instrument panel.
Programs
Allows you to select a program.
Drum Map
Allows you to select a drum map for the track.
Instrument Track Inspector Sections
Apart from the basic track settings that are always shown, instrument tracks provide
other Inspector sections. These are described in the following sections.
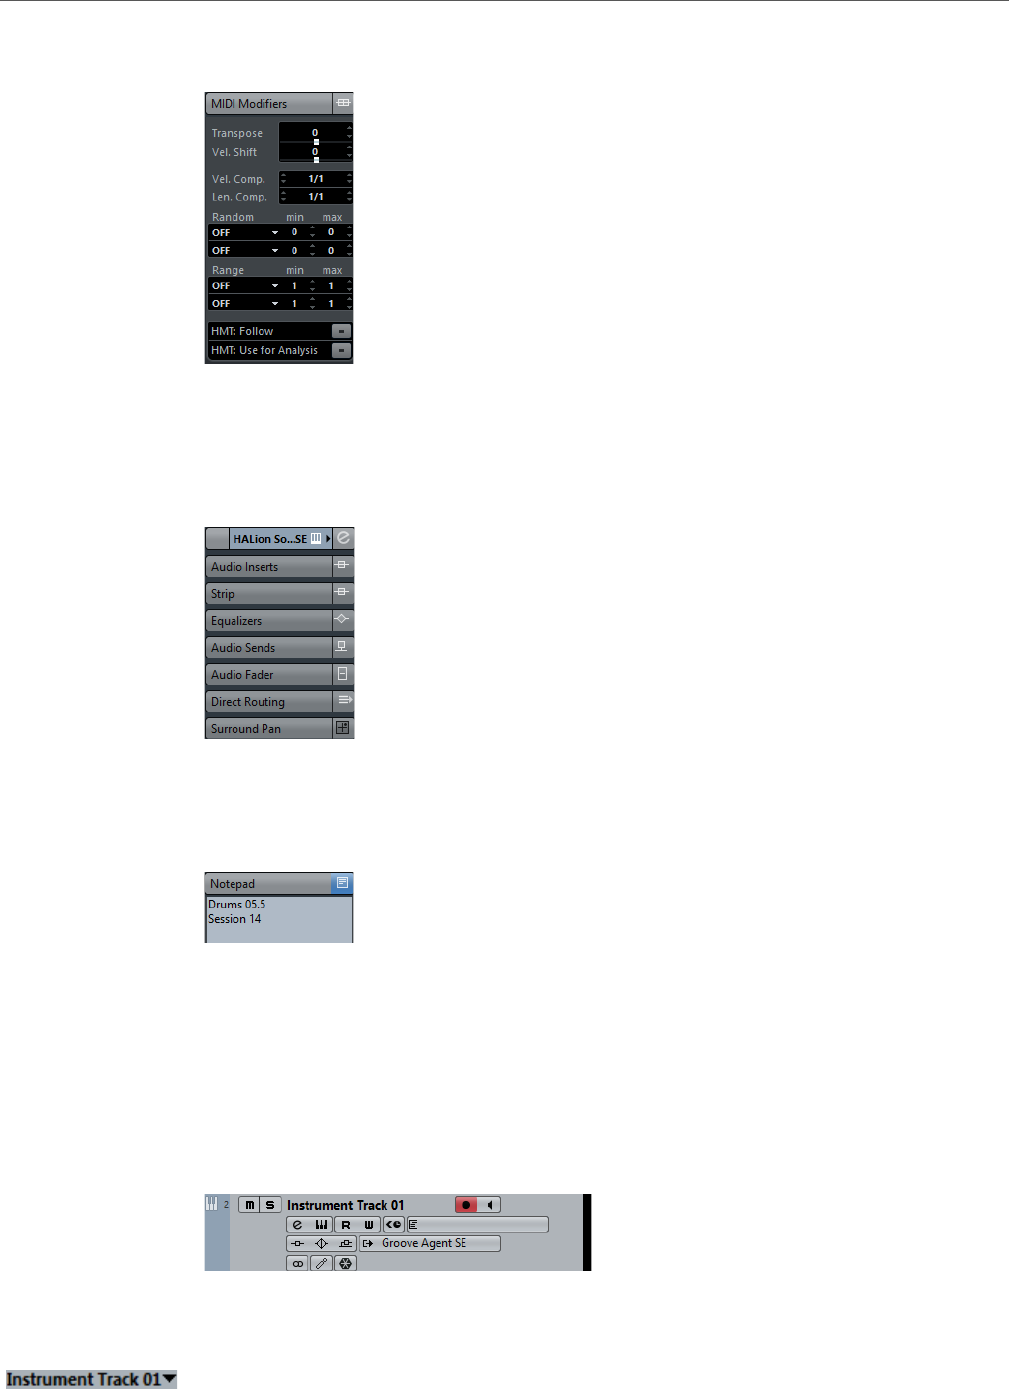
Tracks
Instrument Tracks
66
MIDI Modifiers Section
Allows you to transpose or adjust the velocity of the MIDI track events in realtime
during playback.
Instrument Section
Shows the audio-related controls for the instrument.
Notepad Section
Allows you to enter notes about the track.
Instrument Track Controls
The Track List for instrument tracks contains controls and parameters that allow you
to edit your instrument track.
The track list for instrument tracks contains the following controls:
Track name
Double-click to rename the track.
Tracks
Instrument Tracks
67
Edit
Opens the Channel Settings window for the track.
Mute
Mutes the track.
Solo
Solos the track.
Read Automation
Allows you to read track automation.
Write Automation
Allows you to write track automation.
Record enable
Activates the track for recording.
Monitor
Allows you to route incoming MIDI signals to the selected MIDI output. For
this to work, activate MIDI Thru Active in the Preferences dialog (MIDI
page).
Bypass Inserts
Bypasses the inserts for the track.
Bypass EQs
Bypasses the equalizers for the track.
Bypass Sends
Bypasses the sends for the track.
ASIO Latency Compensation
Moves all recorded events on the track by the current latency.
Drum Map
Allows you to select a drum map for the track.
Programs
Allows you to select a program.
Instrument
Allows you to select an instrument.
Edit Instrument
Allows you to open the instrument panel.
Freeze Channel
Allows you to freeze the instrument.
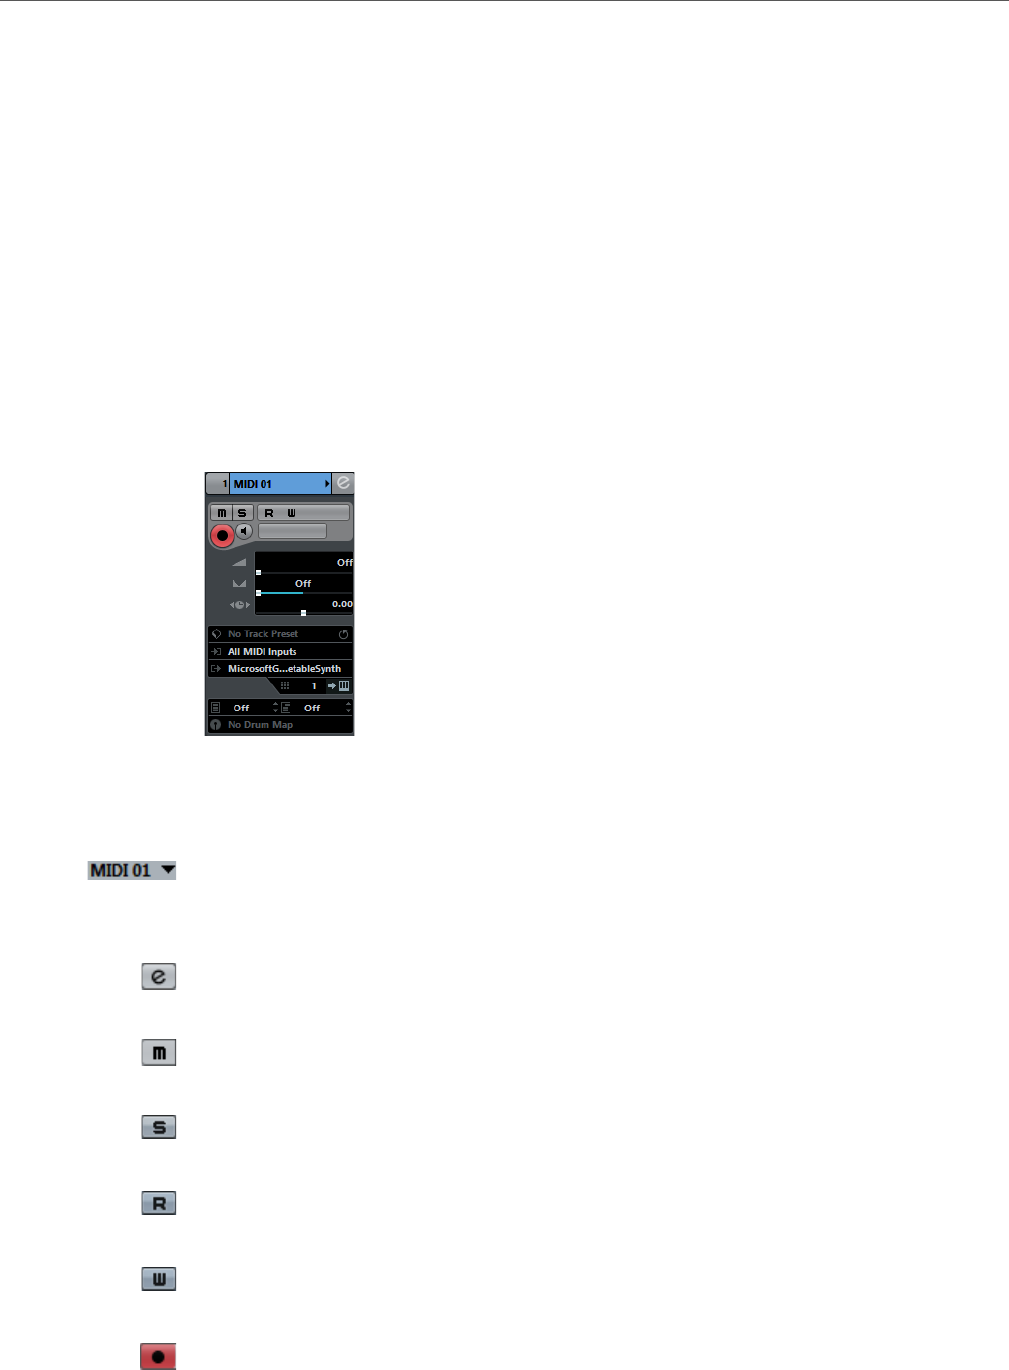
Tracks
MIDI Tracks
68
MIDI Tracks
You can use MIDI tracks for recording and playing back MIDI parts. Each MIDI track
has a corresponding MIDI channel in the MixConsole. A MIDI track can have any
number of automation tracks.
• To add a MIDI track to your project, select Project > Add Track > MIDI.
MIDI Track Inspector
The Inspector for MIDI tracks contains controls and parameters that allow you to
control your MIDI track. These affect MIDI events in realtime, on playback, for
example.
The top section of the MIDI track Inspector contains the following basic track
settings:
Track name
Click once to show/hide the basic track settings section. Double-click to
rename the track.
Edit
Opens the Channel Settings window for the track.
Mute
Mutes the track.
Solo
Solos the track.
Read Automation
Allows you to read track automation.
Write Automation
Allows you to write track automation.
Record enable
Activates the track for recording.
Tracks
MIDI Tracks
69
Monitor
Routes incoming MIDI to the selected MIDI output. For this to work, activate
MIDI Thru Active in the Preferences dialog (MIDI page).
MIDI Volume
Allows you to adjust the MIDI volume for the track.
MIDI Pan
Allows you to adjust the MIDI pan for the track.
Delay
Allows you to adjust the playback timing of the track.
Load/Save/Reload Track Preset
Loads or saves a track preset or reverts the default presets.
Input Routing
Allows you to specify the input bus for the track.
Output Routing
Allows you to specify the output bus for the track.
Channel
Allows you to specify the MIDI channel.
Edit Instrument
Allows you to open the instrument panel.
Bank Selector
Allows you to set a bank select message that is sent to your MIDI device.
Program Selector
Allows you to set a program change message that is sent to your MIDI device.
Drum Map
Allows you to select a drum map for the track.
MIDI Track Inspector Sections
Apart from the basic track settings that are always shown, MIDI tracks provide other
Inspector sections. These are described in the following sections.
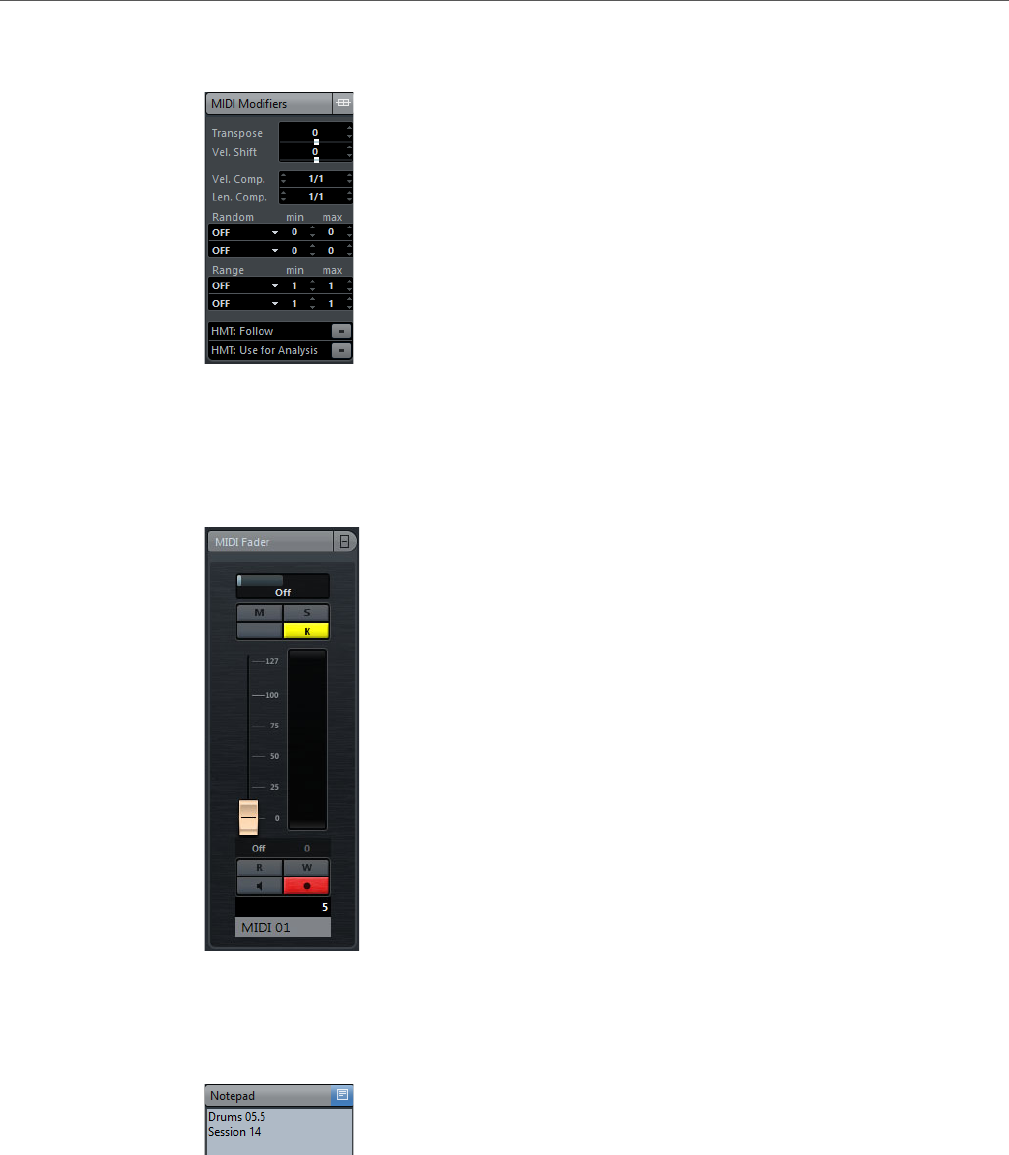
Tracks
MIDI Tracks
70
MIDI Modifiers Section
Allows you to transpose or adjust the velocity of the MIDI track events in realtime
during playback.
MIDI Fader Section
Shows a duplicate of the corresponding MixConsole channel.
Notepad Section
Allows you to enter notes about the track.
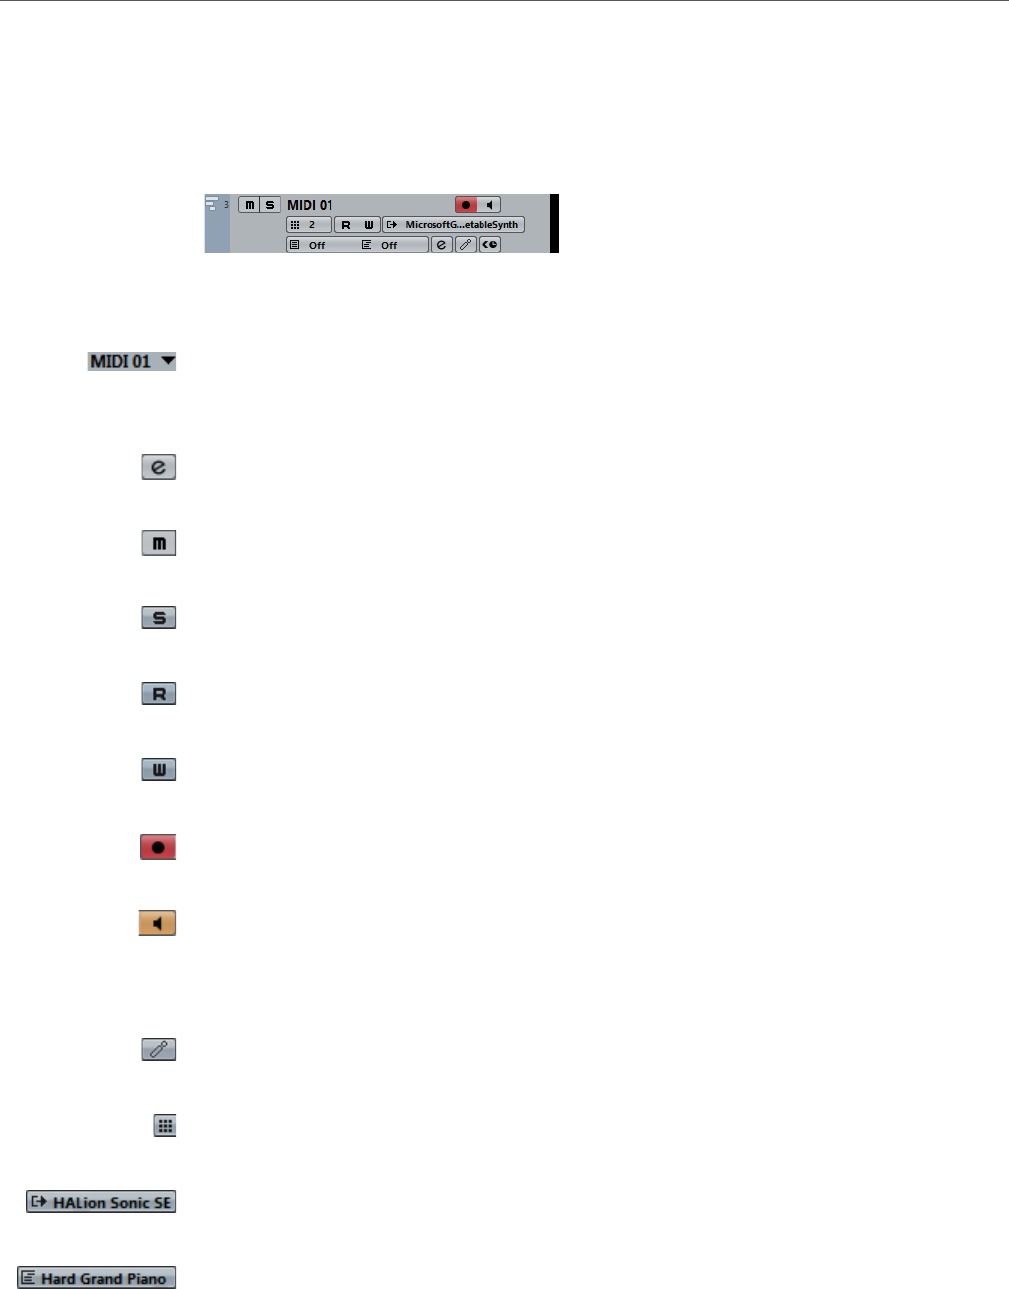
Tracks
MIDI Tracks
71
MIDI Track Controls
The Track List for MIDI tracks contains controls and parameters that allow you to
edit your MIDI track.
The track list for MIDI tracks contains the following controls:
Track name
Click once to show/hide the basic track settings section. Double-click to
rename the track.
Edit
Opens the Channel Settings window for the track.
Mute
Mutes the track.
Solo
Solos the track.
Read Automation
Allows you to read track automation.
Write Automation
Allows you to write track automation.
Record enable
Activates the track for recording.
Monitor
Allows you to route incoming MIDI signals to the selected MIDI output. For
this to work, activate MIDI Thru Active in the Preferences dialog (MIDI
page).
Drum Map
Allows you to select a drum map for the track.
Channel
Allows you to specify the MIDI channel.
Output
Allows you to specify the output for the track.
Programs
Allows you to select a program.
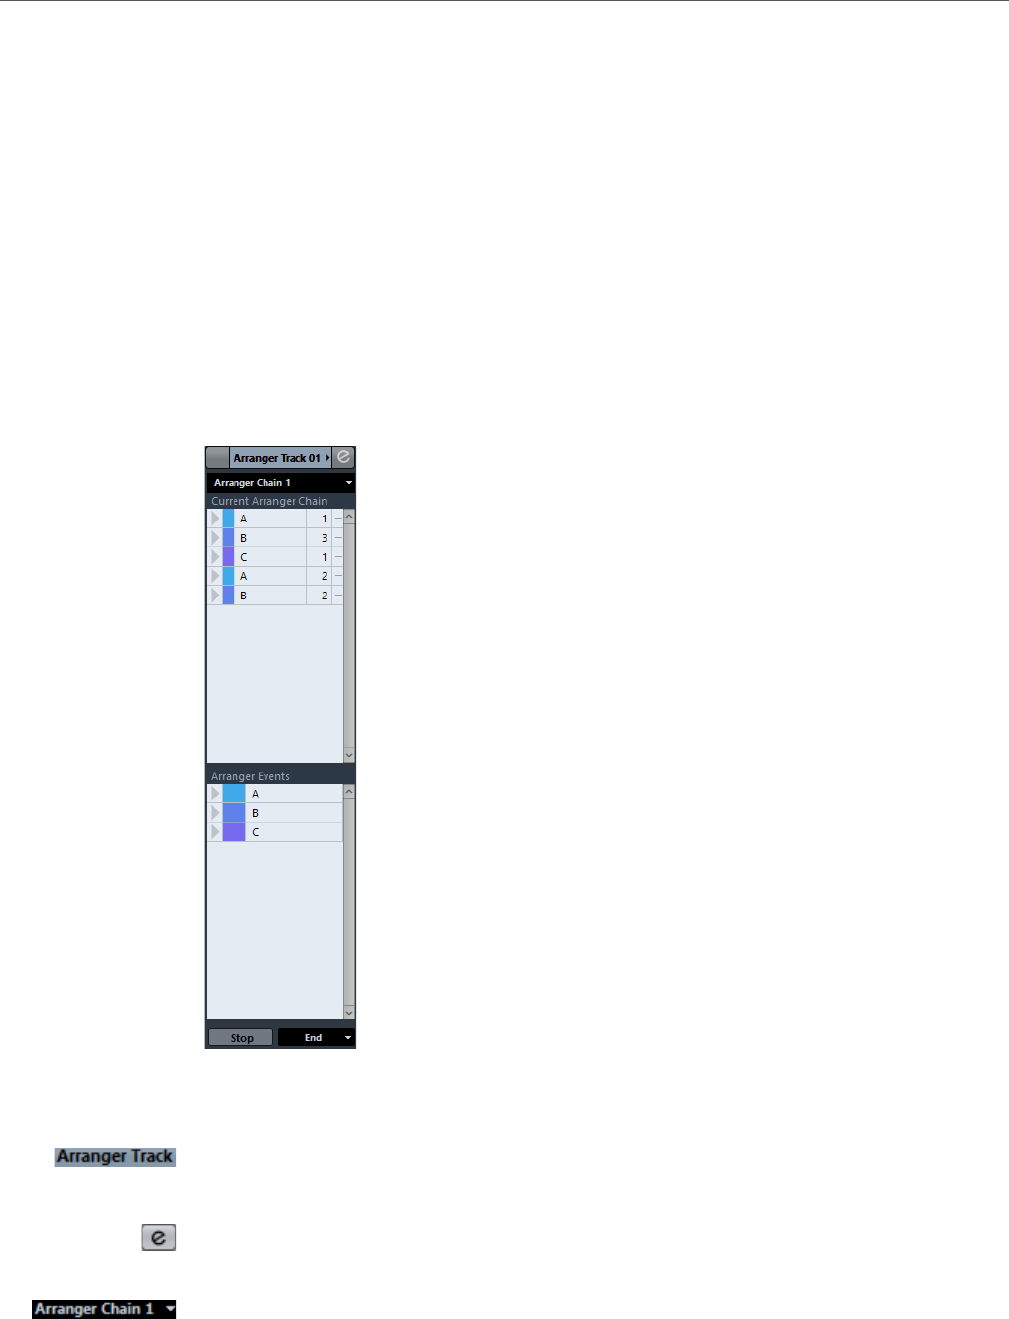
Tracks
Arranger Track
72
Arranger Track
You can use the arranger track for arranging your project by marking out sections
and determining in which order they are to be played back.
• To add the arranger track to your project, select Project > Add Track >
Arranger.
Arranger Track Inspector
The arranger track Inspector displays the lists of available arranger chains and
arranger events.
The arranger track Inspector contains the following settings:
Track Name
Double-click to rename the track.
Edit
Opens the Arranger Editor.
Select Active Arranger Chain + Function
Allows you to select the active arranger chain, to rename it, to create a new
one, to duplicate or to flatten it.
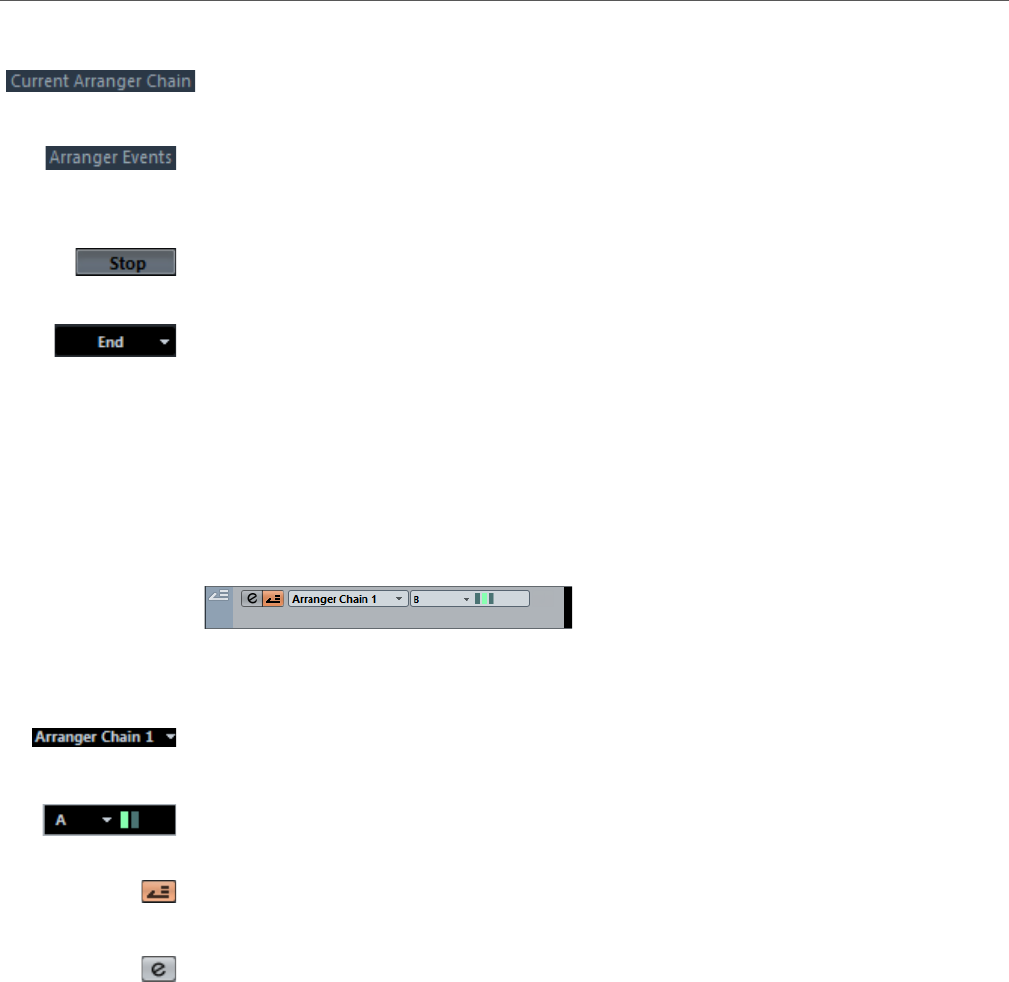
Tracks
Chord Track
73
Current Arranger Chain
Shows the active arranger chain.
Arranger Events
Lists all arranger events in your project. Click the arrow for an arranger event
to play it back and start the live mode.
Stop
Allows you to stop the live mode.
Jump mode
In this pop-up menu you can define how long the active arranger event is
played before jumping to the next one.
Arranger Track Controls
The Track List for the arranger track contains controls and parameters that allow you
to edit the arranger track.
The track list for the arranger track contains the following controls:
Select Active Arranger Chain
Allows you to select the active arranger chain.
Current Item/Current Repeat
Displays which arranger event and which repeat is active.
Activate Arranger Mode
Allows you to activate and deactivate the arranger mode.
Edit
Opens the Arranger Editor for the track.
Chord Track
You can use the chord track for adding chord and scale events to your project.
These can transform the pitches of other events.
• To add the chord track to your project, select Project > Add Track > Chord.
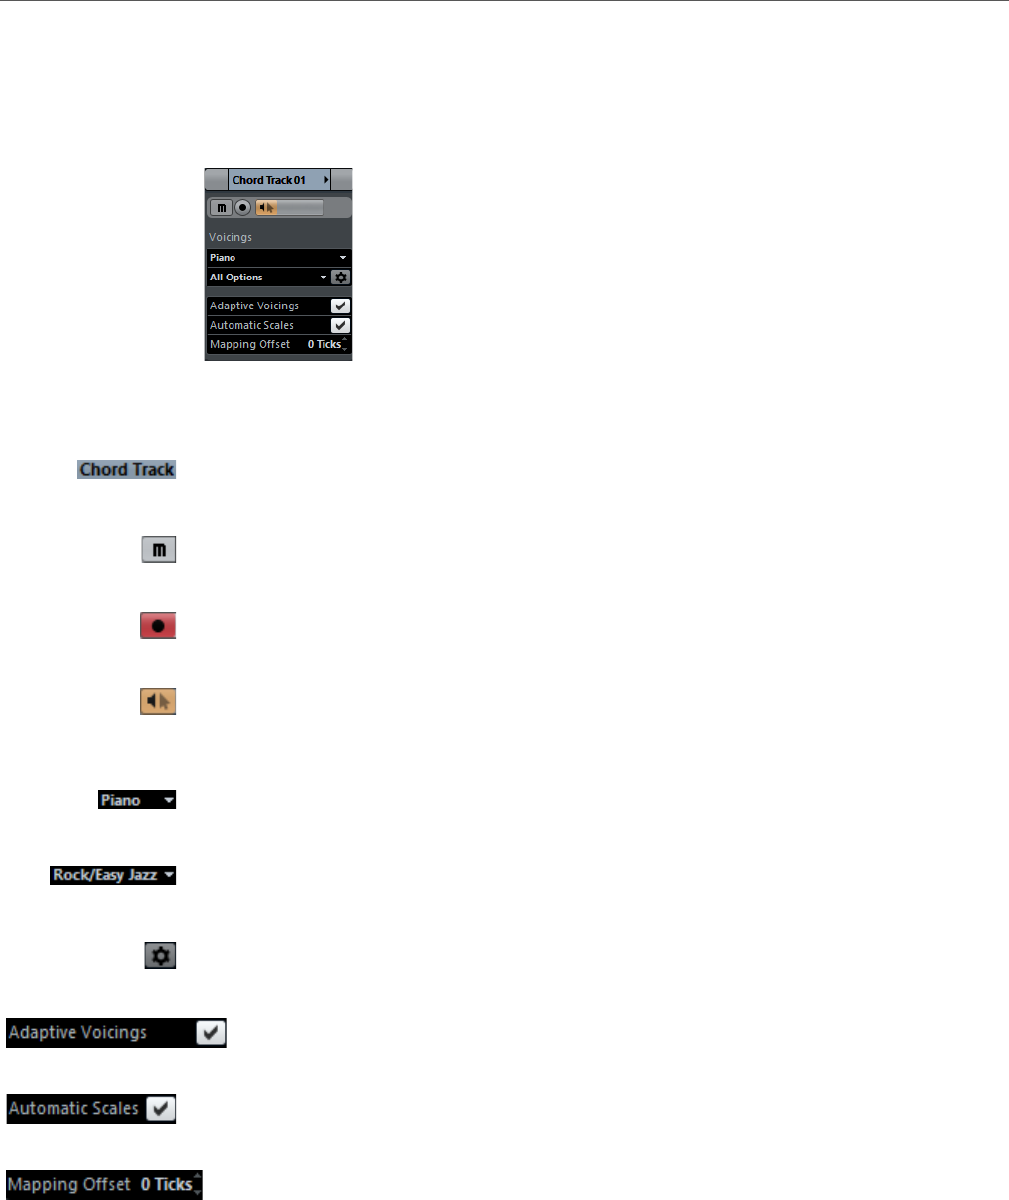
Tracks
Chord Track
74
Chord Track Inspector
The chord track Inspector contains a number of settings for the chord events.
The top section of the chord track Inspector contains the following settings:
Track name
Click to show/hide the basic track settings section.
Mute
Mutes the track.
Record enable
Activates the track for recording.
Acoustic Feedback
Allows you to audition the events on the chord track. For this to work, you
need to select a track for auditioning in the track list.
Voicing library
Allows you to set up a voicing library for the track.
Voicing library subset
Allows you to select a library subset.
Configure voicing parameters
Allows you to configure your own voicing parameters for a specific voicing scheme.
Automatic Voicings
Activate this to set the voicings automatically.
Automatic Scales
Activate this to let the program create scale events automatically.
Mapping Offset
Allows you to specify an offset value to make sure that chord events also
affect the MIDI notes that have been triggered too early (enter a negative
value) or too late (enter a positive value).
Chord Track Inspector Sections
Apart from the basic track settings that are always shown, the chord track provides
other Inspector sections. These are described in the following sections.
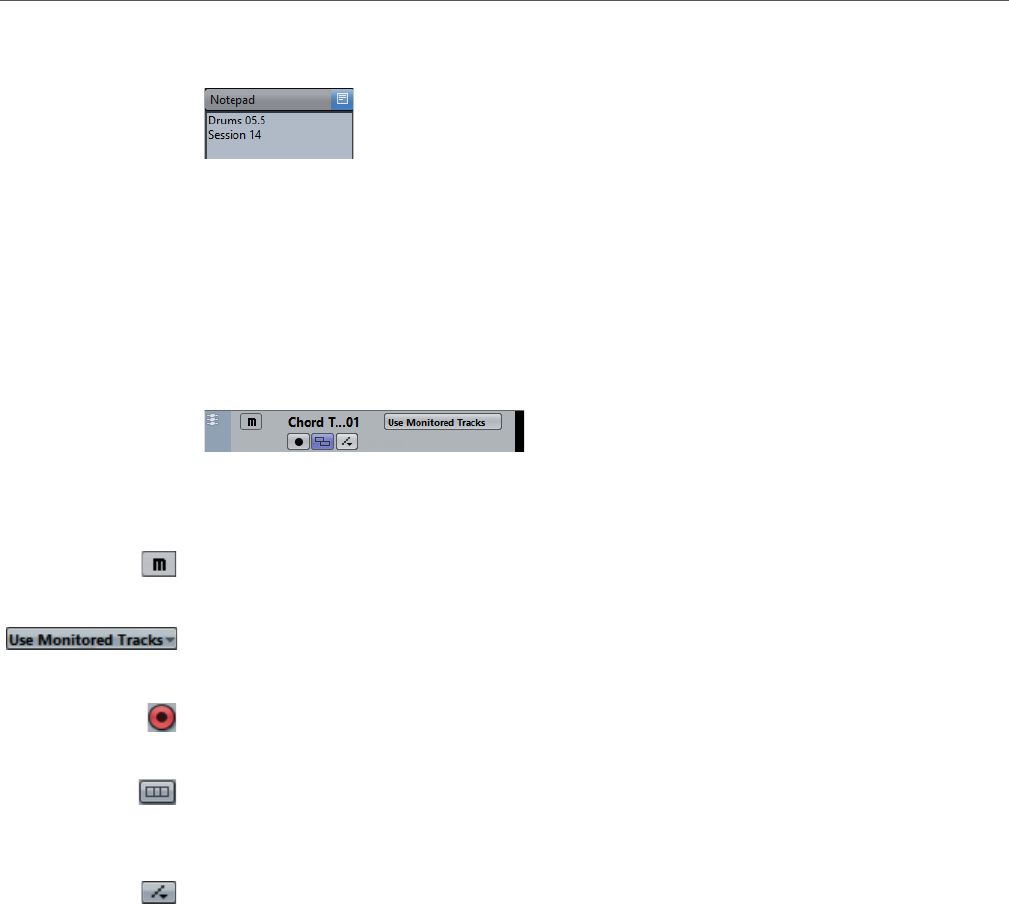
Tracks
FX Channel Tracks
75
Notepad Section
Allows you to enter notes about the track.
Chord Track Controls
The Track List for the chord track contains controls and parameters that allow you
to edit the chord track.
The track list for chord tracks contains the following controls:
Mute
Mutes the track.
Select Track for Auditioning
Allows you to select a track for auditioning the chord events.
Record Enable
Allows you to record chord events.
Resolve Display Conflicts
Allows you to show all chord events on the track properly, even at low
horizontal zoom levels.
Show Scales
Allows you to show the scale lane in the lower part of the chord track.
FX Channel Tracks
You can use FX channel tracks for adding send effects. Each FX channel can
contain up to eight effect processors. By routing sends from an audio channel to an
FX channel, you send audio from the audio channel to the effects on the FX channel.
All FX channel tracks are automatically placed in a special FX channel folder in the
track list, for easy management. Each FX channel has a corresponding channel in
the MixConsole. An FX channel track can have any number of automation tracks.
• To add an FX channel track to your project, select Project > Add Track > FX
Channel.
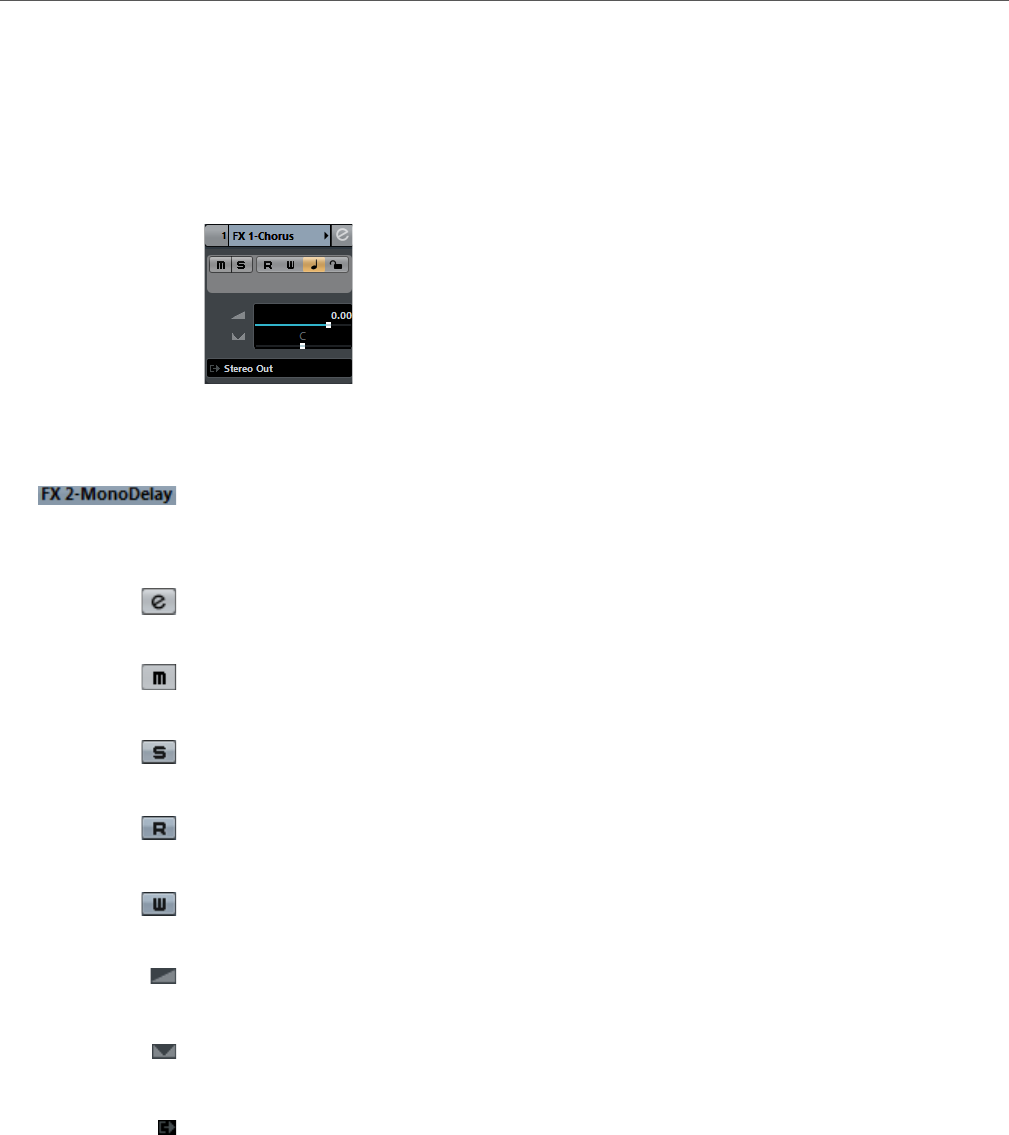
Tracks
FX Channel Tracks
76
FX Channel Track Inspector
The Inspector for FX channel tracks shows the settings for the FX channel. When
you select the folder track instead, the Inspector shows the folder and the FX
channels it contains. You can click one of the FX channels shown in the folder to
have the Inspector show the settings for that FX channel.
The FX channel track Inspector contains the following basic track settings:
Track name
Click once to show/hide the basic track settings section. Double-click to
rename the track.
Edit
Opens the Channel Settings window for the track.
Mute
Mutes the track.
Solo
Solos the track.
Read Automation
Allows you to read track automation.
Write Automation
Allows you to write track automation.
Volume
Allows you to adjust the level for the track.
Pan
Allows you to adjust the panning of the track.
Output Routing
Allows you to specify the output bus for the track.
FX Channel Track Inspector Sections
Apart from the basic track settings that are always shown, FX channel tracks
provide other Inspector sections. These are described in the following sections.
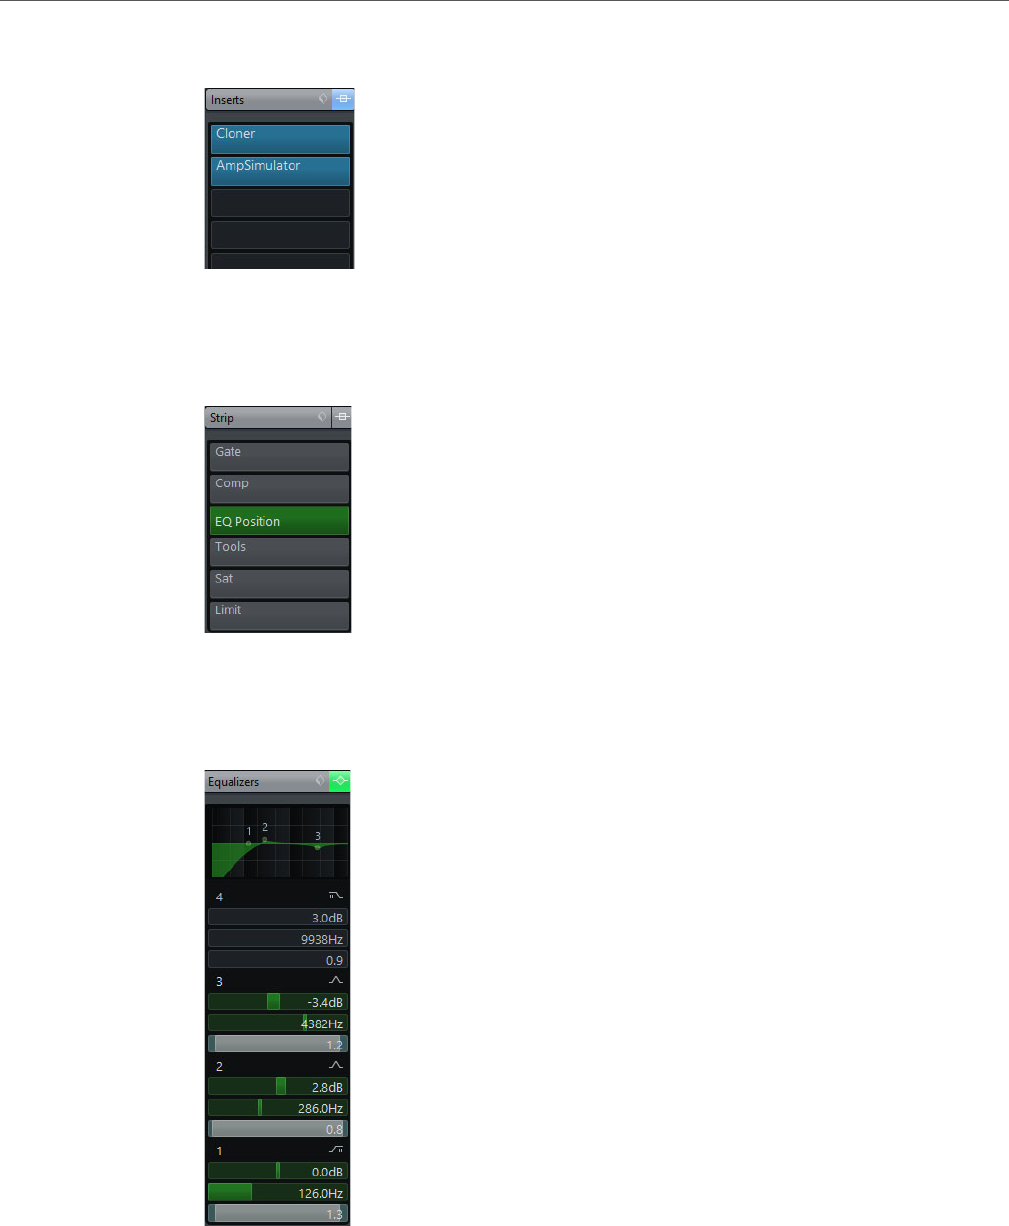
Tracks
FX Channel Tracks
77
Inserts Section
Allows you to add insert effects to the track.
Strip Section
Allows you to set up the channel strip modules.
Equalizers Section
Allows you to adjust the EQs for the track. You can have up to four bands of EQ for
each track.
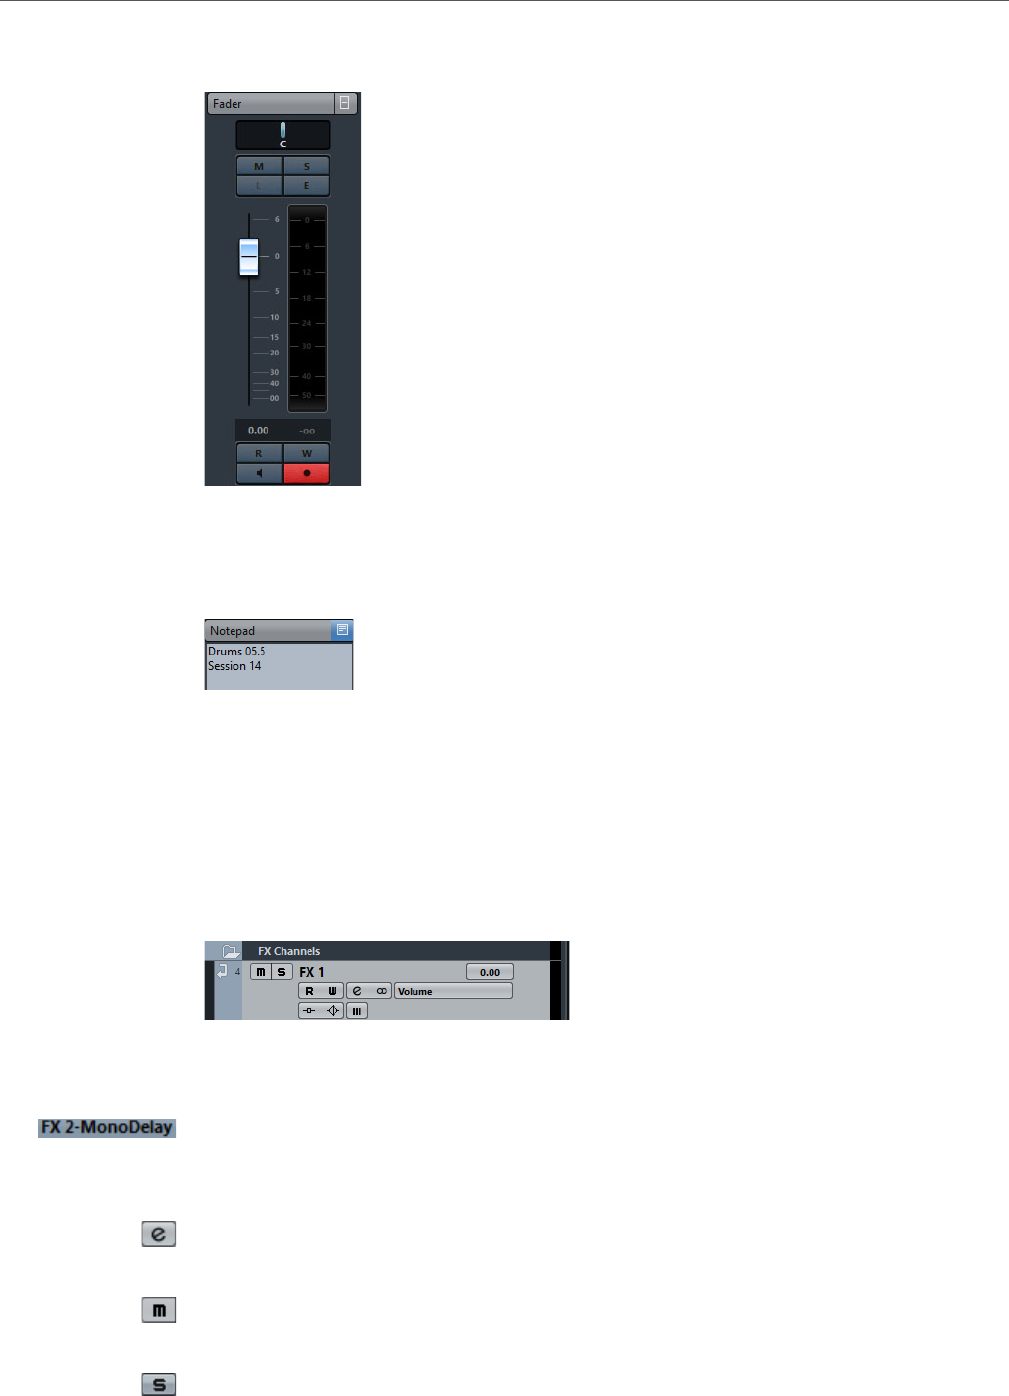
Tracks
FX Channel Tracks
78
Fader Section
Shows a duplicate of the corresponding MixConsole channel.
Notepad Section
Allows you to enter notes about the track.
FX Channel Track Controls
The Track List for FX channel tracks contains controls and parameters that allow
you to edit the settings for the effect.
The track list for FX channel tracks contains the following controls:
Track name
Click once to show/hide the basic track settings section. Double-click to
rename the track.
Edit
Opens the Channel Settings window for the track.
Mute
Mutes the track.
Solo
Solos the track.
Tracks
Folder Tracks
79
Read Automation
Allows you to read track automation.
Write Automation
Allows you to write track automation.
Mute Automation
Deactivates the automation read function for the selected parameter.
Automation parameter
Allows you to select a parameter for automation.
Bypass Inserts
Bypasses the inserts for the track.
Bypass EQs
Bypasses the equalizers for the track.
Bypass Sends
Bypasses the sends for the track.
Channel Configuration
Shows the channel configuration of the track.
Folder Tracks
Folder tracks function as containers for other tracks, making it easier to organize
and manage the track structure. They also allow you to edit several tracks at the
same time.
• To add a folder track to your project, select Project > Add Track > Folder.
Folder Track Inspector
The Inspector for folder tracks shows the folder and its underlying track, much like
a folder structure in the Windows Explorer or the Mac OS X Finder. When you
select the one of the tracks shown under the folder, the Inspector shows the
settings for that track.
Tracks
Folder Tracks
80
The folder track Inspector contains the following basic track settings:
Track name
Double-click to rename the track.
Mute
Mutes the track.
Solo
Solos the track.
Record enable
Activates the track for recording.
Monitor
Routes incoming signals to the selected output.
Folder Track Controls
The Track List for folder tracks contains controls and parameters that allow you to
edit all tracks in the folder.
The track list for folder tracks contains the following controls:
Expand/Collapse
Shows/hides the tracks in the folder. Hidden tracks are played back as usual.
Track name
Double-click to rename the track.
Mute
Mutes the track.
Solo
Solos the track.
Record enable
Activates the track for recording.
Monitor
Routes incoming signals to the selected output.
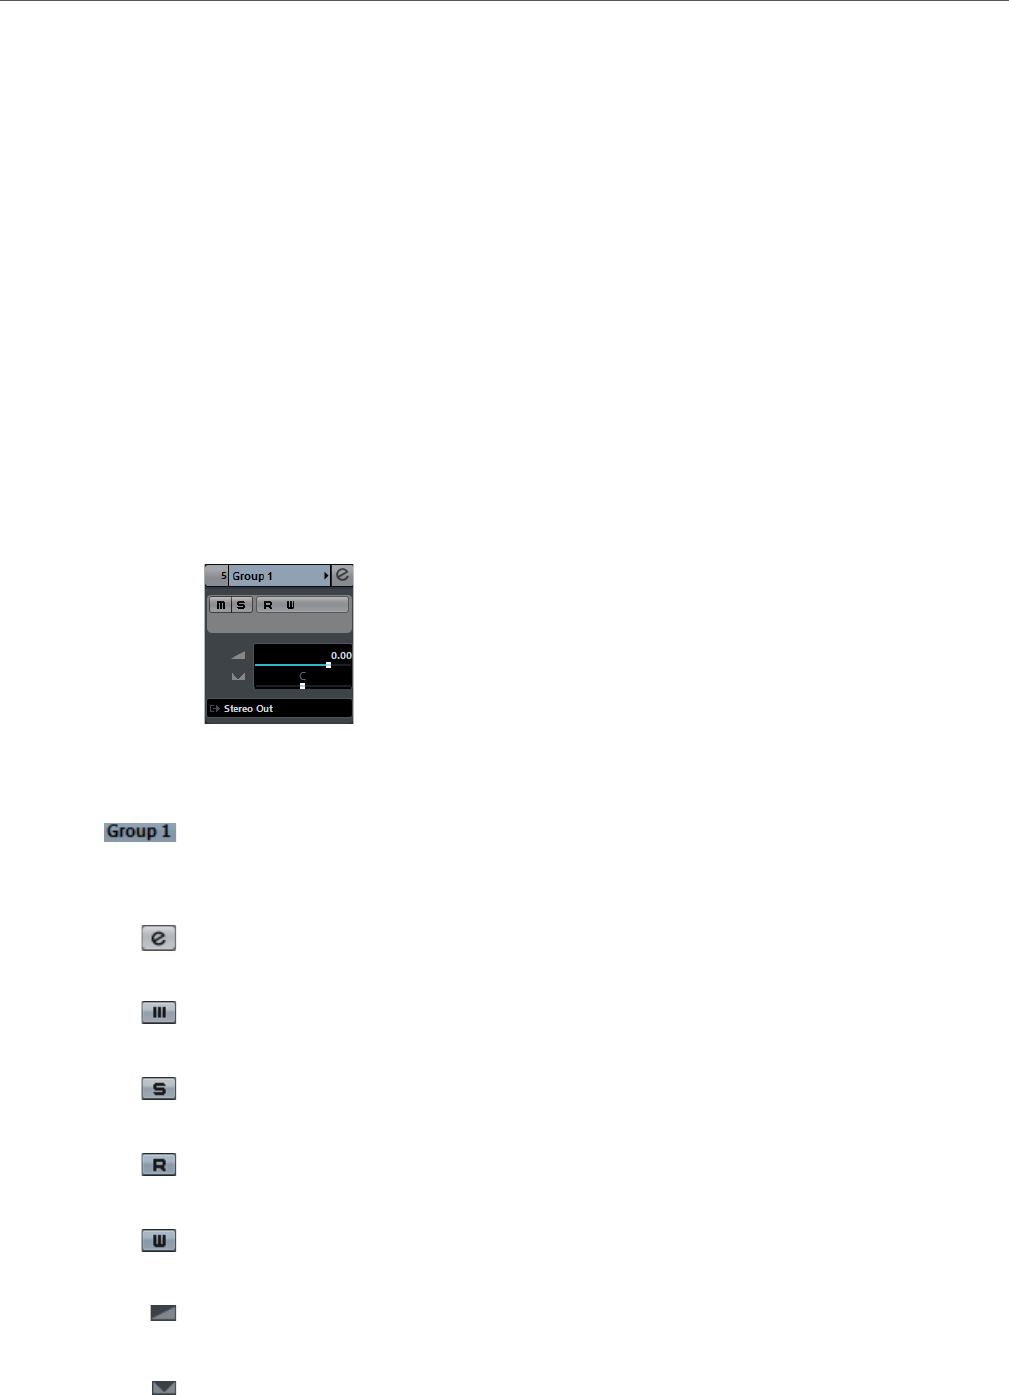
Tracks
Group Channel Tracks
81
Group Channel Tracks
You can use group channel tracks to create a submix of several audio channels and
apply the same effects to them. A group channel track contains no events as such,
but displays settings and automation for the corresponding group channel.
All group channel tracks are automatically placed in a special group track folder in
the track list, for easy management. Each group channel track has a corresponding
channel in the MixConsole. A group channel track can have any number of
automation tracks.
• To add a group channel track to your project, select Project > Add Track >
Group Channel.
Group Channel Track Inspector
The Inspector for group channel tracks shows the settings for the group channel.
The group channel track Inspector contains the following basic track settings:
Track name
Click once to show/hide the basic track settings section. Double-click to
rename the track.
Edit
Opens the Channel Settings window for the track.
Mute Automation
Deactivates the automation read function for the selected parameter.
Solo
Solos the track.
Read Automation
Allows you to read track automation.
Write Automation
Allows you to write track automation.
Volume
Allows you to adjust the level for the track.
Pan
Allows you to adjust the panning of the track.
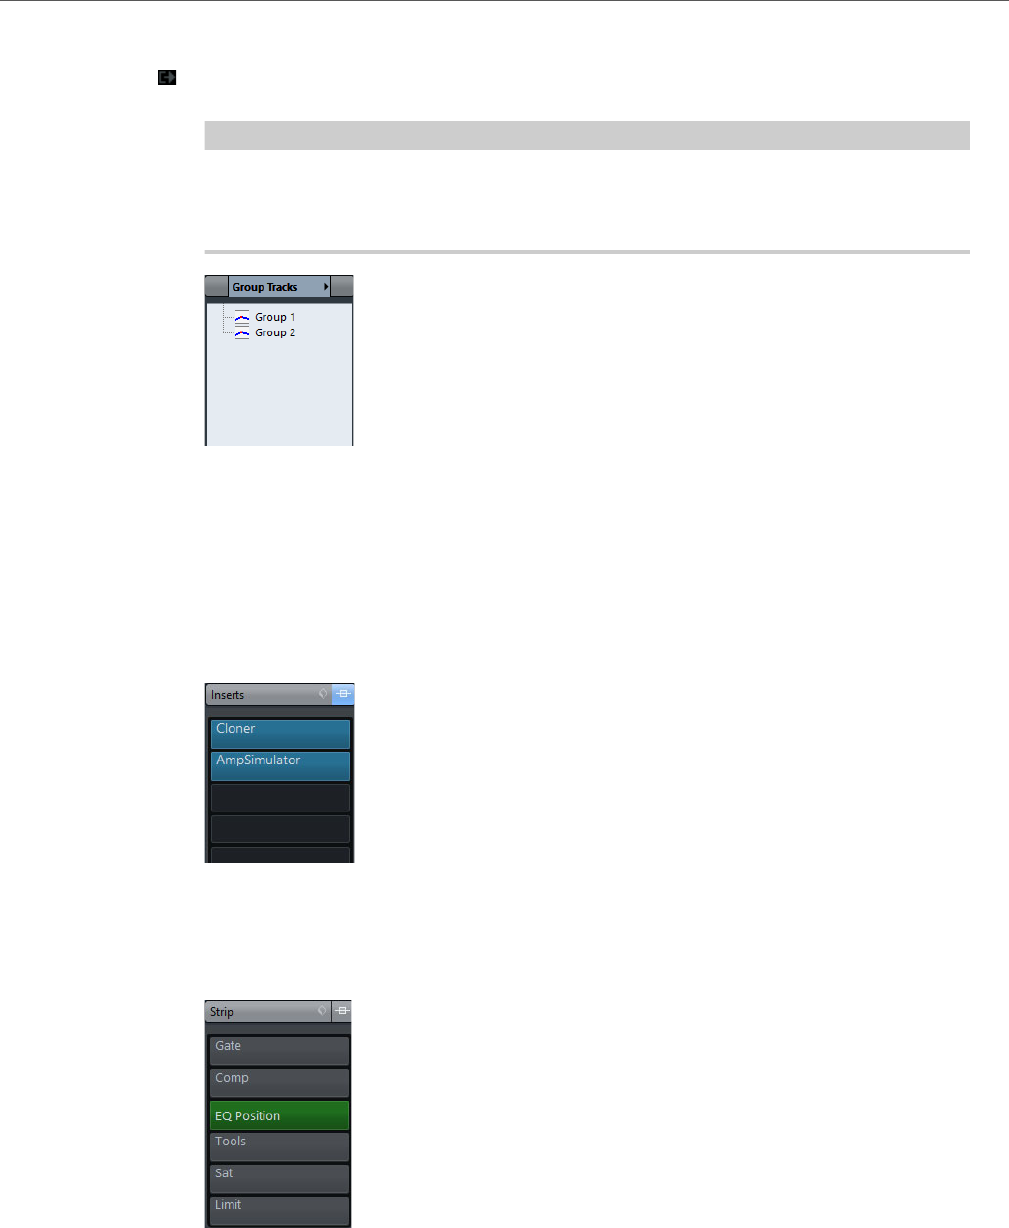
Tracks
Group Channel Tracks
82
Output Routing
Allows you to specify the output bus for the track.
NOTE
When you select the group folder track instead, the Inspector shows the folder and
the group channels it contains. You can click one of the group channels shown in
the folder, to have the Inspector show the settings for that group channel.
Group Channel Track Inspector sections
Apart from the basic track settings that are always shown, group channel tracks
provide other Inspector sections. These are described in the following sections.
Inserts Section
Allows you to add insert effects to the track.
Strip Section
Allows you to set up the channel strip modules.

Tracks
Group Channel Tracks
83
Equalizers Section
Allows you to adjust the EQs for the track. You can have up to four bands of EQ for
each track.
Sends Section
Allows you to route the track to one or several FX channels.
Fader Section
Shows a duplicate of the corresponding MixConsole channel.
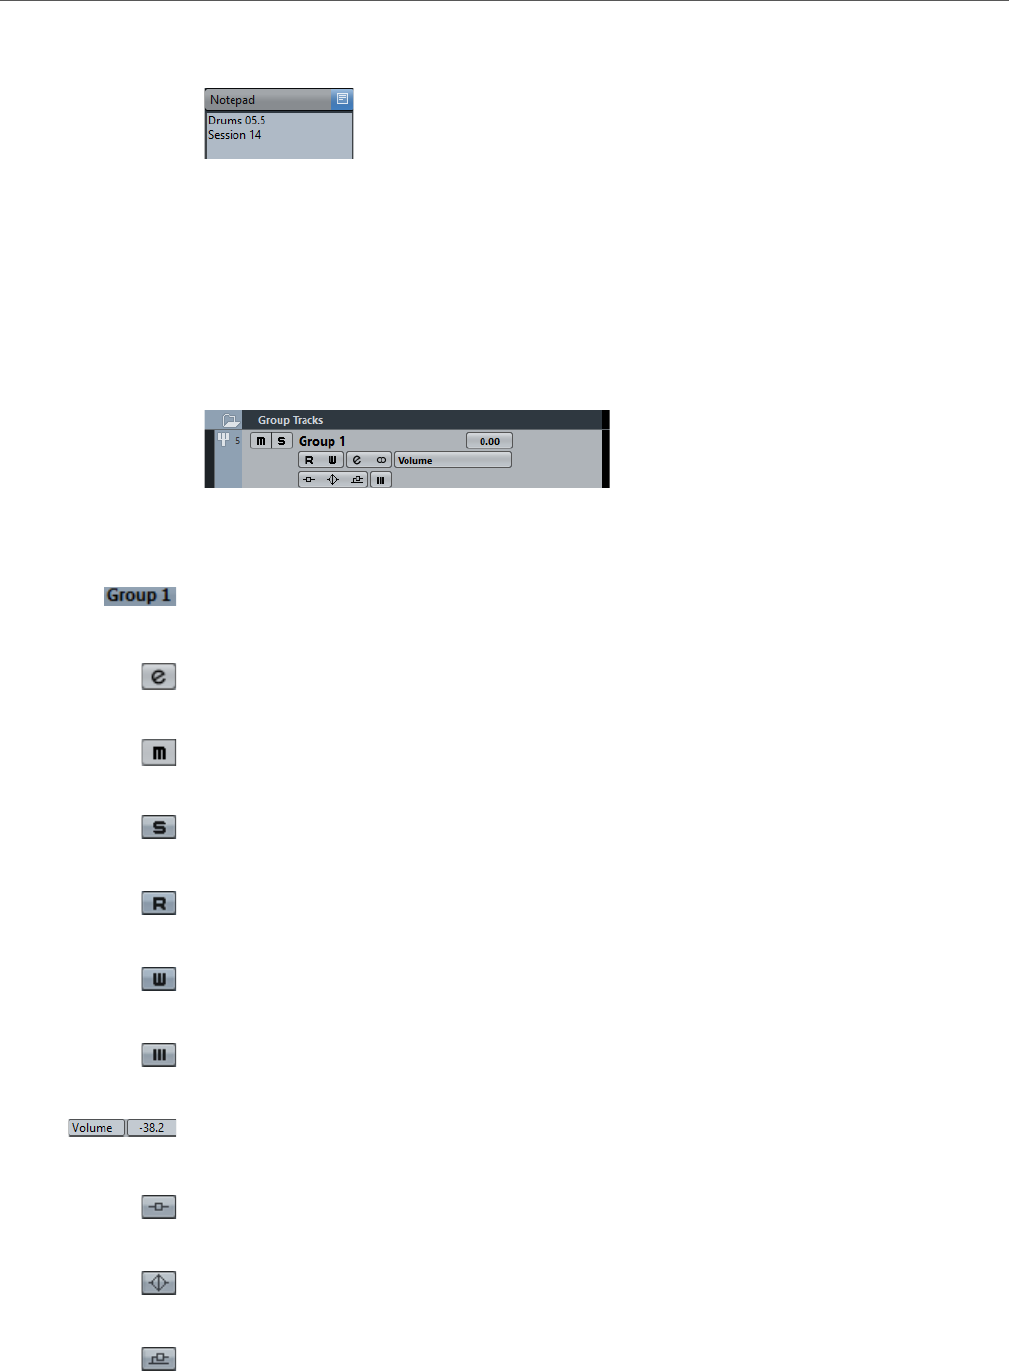
Tracks
Group Channel Tracks
84
Notepad Section
Allows you to enter notes about the track.
Group Channel Track Controls
The Track List for group channel tracks contains controls and parameters that allow
you to edit the settings for the group.
The track list for group channel tracks contains the following controls:
Track name
Double-click to rename the track.
Edit
Opens the Channel Settings window for the track.
Mute
Mutes the track.
Solo
Solos the track.
Read Automation
Allows you to read track automation.
Write Automation
Allows you to write track automation.
Mute Automation
Deactivates the automation read function for the selected parameter.
Automation parameter
Allows you to select a parameter for automation.
Bypass Inserts
Bypasses the inserts for the track.
Bypass EQs
Bypasses the equalizers for the track.
Bypass Sends
Bypasses the sends for the track.
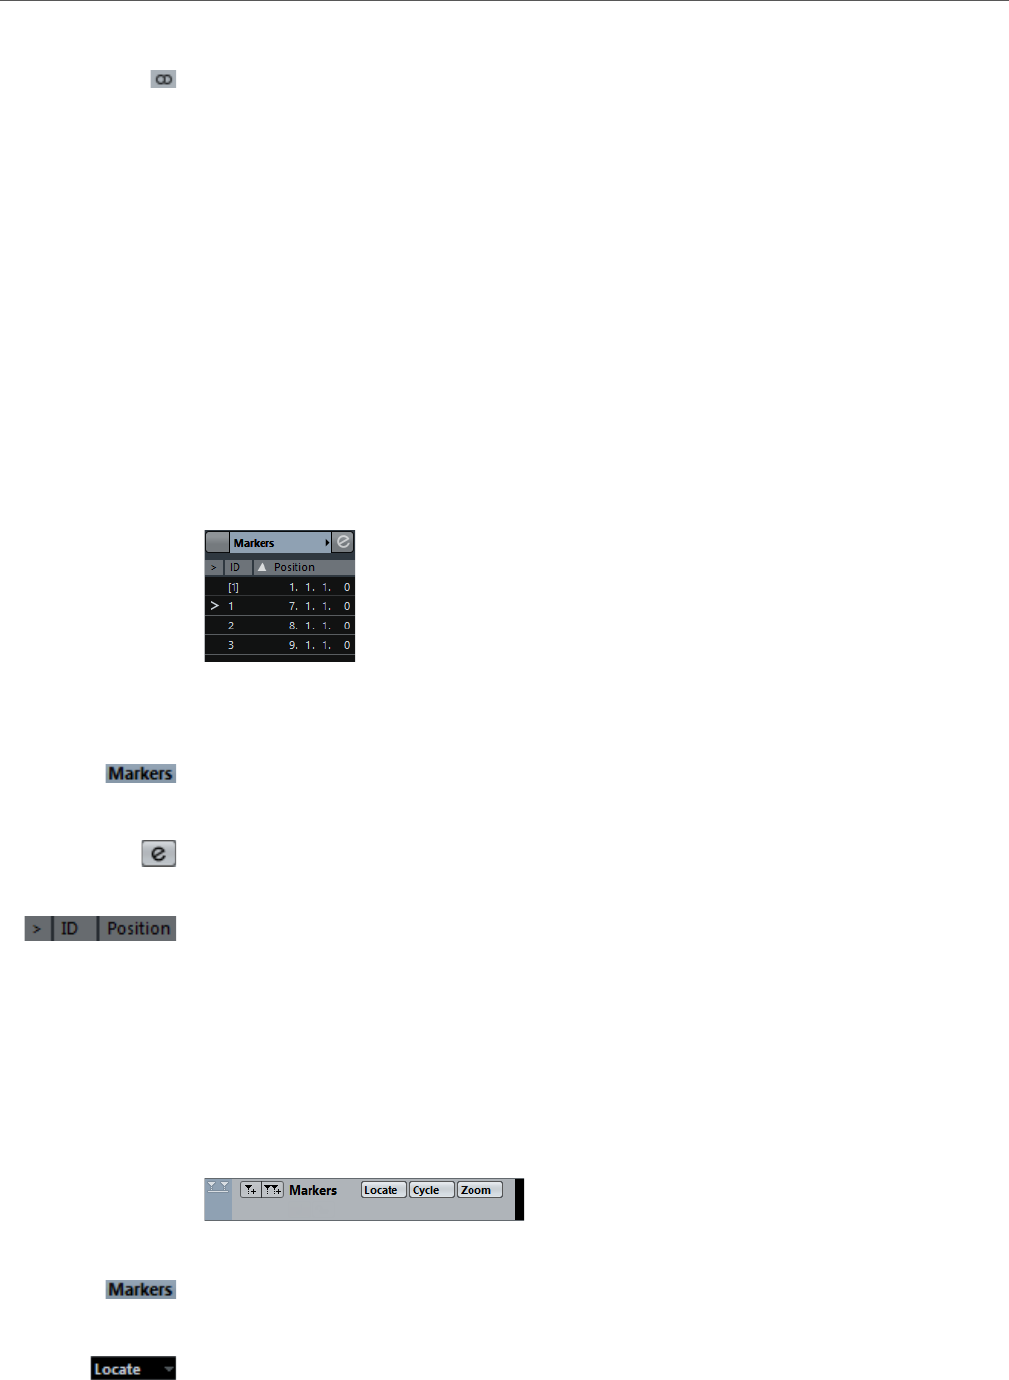
Tracks
Marker Track
85
Channel Configuration
Shows the channel configuration of the track.
Marker Track
You can use the marker track to add and edit markers that help you to locate certain
positions quickly.
• To add the marker track to your project, select Project > Add Track >
Marker.
Marker Track Inspector
The marker track Inspector displays the marker list.
The marker track Inspector contains the following settings:
Track name
Double-click to rename the track.
Edit
Opens the Channel Settings window for the track.
Marker attributes
Shows the markers, their IDs, and time positions. Click in the leftmost column
for a marker to move the project cursor to the marker position.
Marker Track Controls
The track list for the marker track contains controls and parameters that allow you
to edit the marker track.
Track name
Double-click to rename the track.
Locate
Allows you to move the project cursor to the selected marker position.
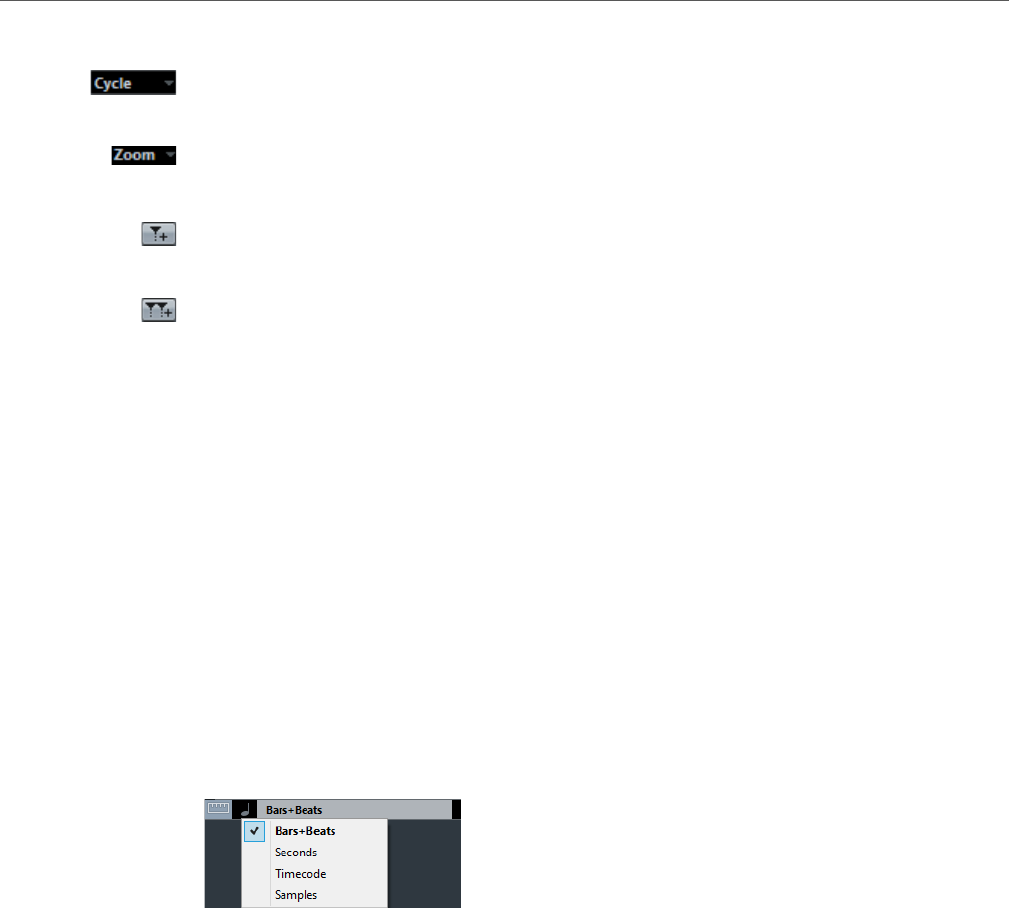
Tracks
Ruler Track
86
Cycle
Allows you to select a cycle marker.
Zoom
Allows you to zoom in a cycle marker.
Add Marker
Allows you to add a position marker at the project cursor position.
Add Cycle Marker
Allows you to add a cycle marker at the project cursor position.
Ruler Track
You can use ruler tracks to show several rulers with different display formats for the
timeline. This is completely independent from the main ruler, as well as rulers and
position displays in other windows.
• To add a ruler track to your project, select Project > Add Track > Ruler.
Ruler Track Controls
In the track list for ruler tracks you can change the display format for the ruler.
Right-click the ruler to open the display format pop-up menu.
The following display formats are available:
Bars+Beats
Activates a display format of bars, beats, sixteenth notes, and ticks. By default
there are 120 ticks per sixteenth note, but you can adjust this with the MIDI
Display Resolution setting in the Preferences dialog (MIDI page).
Seconds
Activates a display format of hours, minutes, seconds, and milliseconds.
Timecode
Activates a display format of hours, minutes, seconds, and frames. The
number of frames per second (fps) is set in the Project Setup dialog with the
Frame Rate pop-up menu. You can also display subframes by activating
Show Timecode Subframes in the Preferences dialog (Transport page).
Samples
Activates a display format of samples.
Tracks
Video Track
87
NOTE
Ruler tracks are not affected by the display format setting in the Project Setup
dialog.
Video Track
You can use the video track to play back video events. Video files are displayed as
events/clips on the video track, with thumbnails representing the frames in the film.
• To add a video track to your project, select Project > Add Track > Video.
Video Track Inspector
The video track Inspector contains a number of parameters to control the video
track.
The video track Inspector contains the following settings:
Reveal Video Window
Opens the Video Player window.
Mute Video Track
Mutes the track.
Video Track Inspector Section
Apart from the basic track settings that are always shown, the video track provides
an other Inspector section. This is described in the following section.
Notepad Section
Allows you to enter notes about the track.
Video Track Controls
The track list for the video track contains a number of parameters to control the
video track.
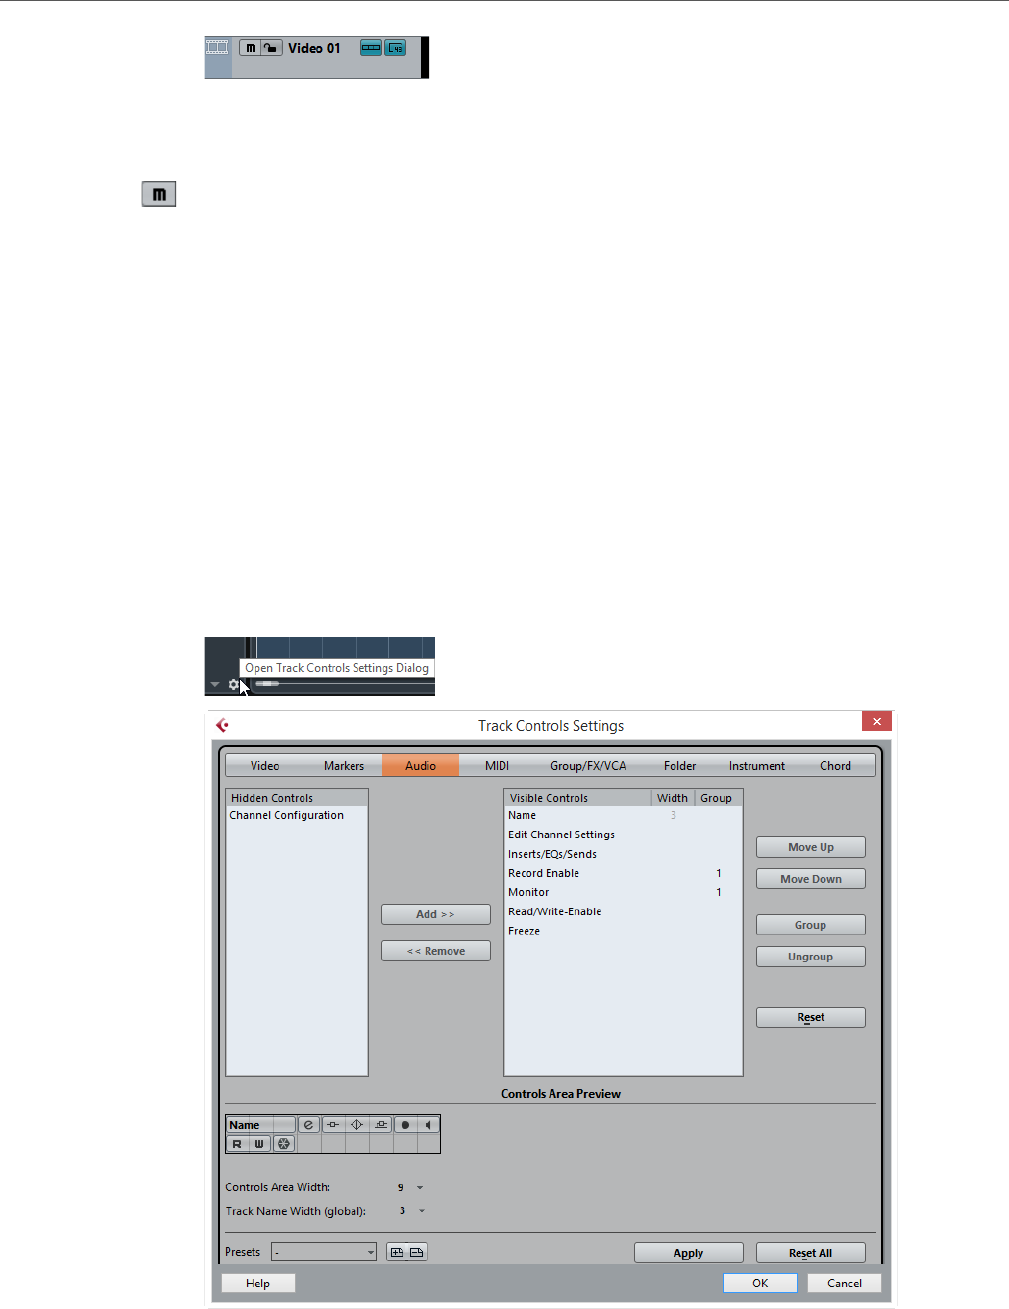
Tracks
Customizing Track Controls
88
The track list for the video track contains the following settings:
Mute Video Track
Mutes the track.
Customizing Track Controls
For each track type you can configure which track controls are shown in the track
list. You can also specify the order of controls and group controls so that they are
always shown adjacent to each other.
• To open the Track Controls Settings dialog, right-click a track in the track
list and select Track Controls Settings from the context menu, or click Open
Track Controls Settings Dialog in the bottom right corner of the track list.
Track Type
Allows you to select the track type to which your settings are applied.

Tracks
Customizing Track Controls
89
Hidden Controls
This section displays controls currently hidden in the track list.
Visible Controls
This section displays controls currently visible in the track list.
Width
If you click in this column, you can set the maximum length for the track name.
Group
Displays the group number.
Add
Allows you to move an item selected in the hidden controls list to the list of
visible controls.
Remove
Allows you to move an item selected in the visible controls list to the list of
hidden controls. All controls can be removed except the Mute and Solo
buttons.
Move Up/Move Down
Allows you to change the order of an item in the list of visible controls.
Group
Allows you to group two or more controls selected in the visible controls list
that are adjacent to each other. This ensures that they are always positioned
side by side in the track list.
Ungroup
Allows you to ungroup grouped controls in the visible controls list. To remove
an entire group, select the first (topmost) element belonging to this group and
click the Ungroup button.
Reset
Allows you to restore all default track controls settings for the selected track
type.
Controls Area Preview
Shows a preview of the customized track controls.
Controls Area Width
Allows you to determine the width of the track control area for the selected
track type. In the Controls Area Preview, this area is shown with a black
frame.
Presets
Allows you to save track controls settings as presets. To recall a preset, click
the Switch Presets button in the bottom right corner of the track list. The
name of the selected preset is shown in the left corner.

Tracks
Customizing Track Controls
90
Track Name Width (global)
Allows you to determine the global name width for all track types.
Apply
Applies your settings.
Reset All
Allows you to restore all default track controls settings for all track types.
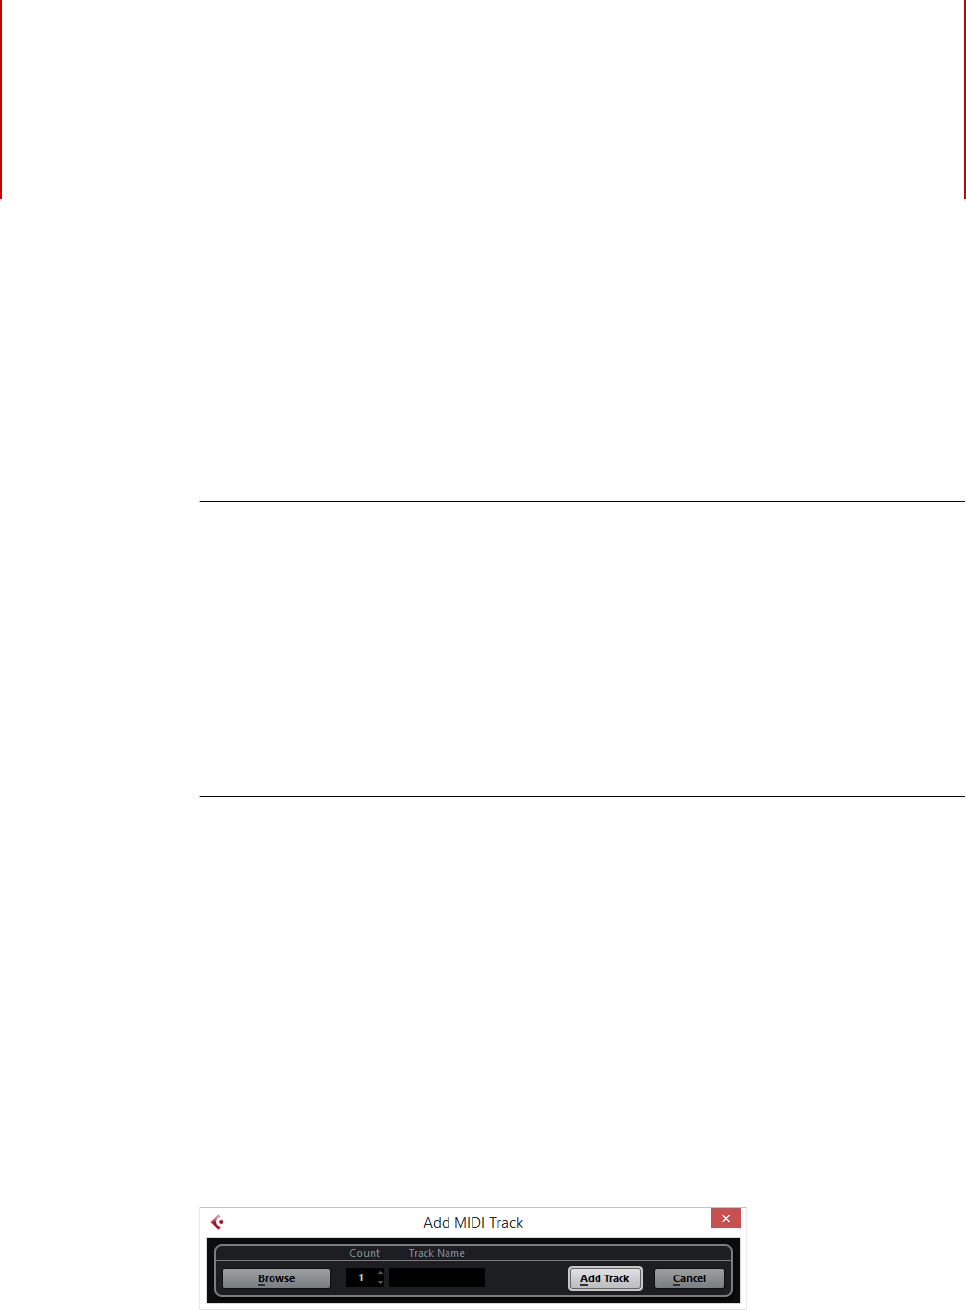
91
Track Handling
Adding Tracks
PROCEDURE
1. Select Project > Add Track, or right-click the track list.
2. Do one of the following:
• Add a track of a specific type.
For some track types a dialog opens that allows you to insert several tracks at
once.
• To add a track based on a track preset, select Add Track Using Track Preset.
The Choose Track Preset dialog opens that allows you to select a track
preset. The number and type of added tracks depends on the selected track
preset.
RESULT
The track is added to the project.
RELATED LINKS
Add Track Dialog on page 91
Track Presets on page 101
Add Track Dialog
The Add Track dialog opens when you add audio, MIDI, group/FX channel, or
instrument tracks.
Browse
Expands the dialog and allows you to select a track preset for the track.
Count
Allows you to enter the number of tracks that you want to add.

Track Handling
Removing Tracks
92
Configuration
Allows you to set the channel configuration. Audio-related tracks can be
configured as mono or stereo tracks.
Speakers
Shows the speaker names according to the track configuration.
Track Name
Allows you to specify a track name.
Add Track
Adds the track and closes the dialog.
RELATED LINKS
Track Presets on page 101
Removing Tracks
You can remove selected or empty tracks from the track list.
• To remove selected tracks, select Project > Remove Selected Tracks or
right-click the track that you want to remove, and from the context menu select
Remove Selected Tracks.
• To remove empty tracks, select Project > Remove Empty Tracks.
Moving Tracks in the Track List
You can move tracks up or down in the track list.
PROCEDURE
• Select a track and drag it up or down in the track list.
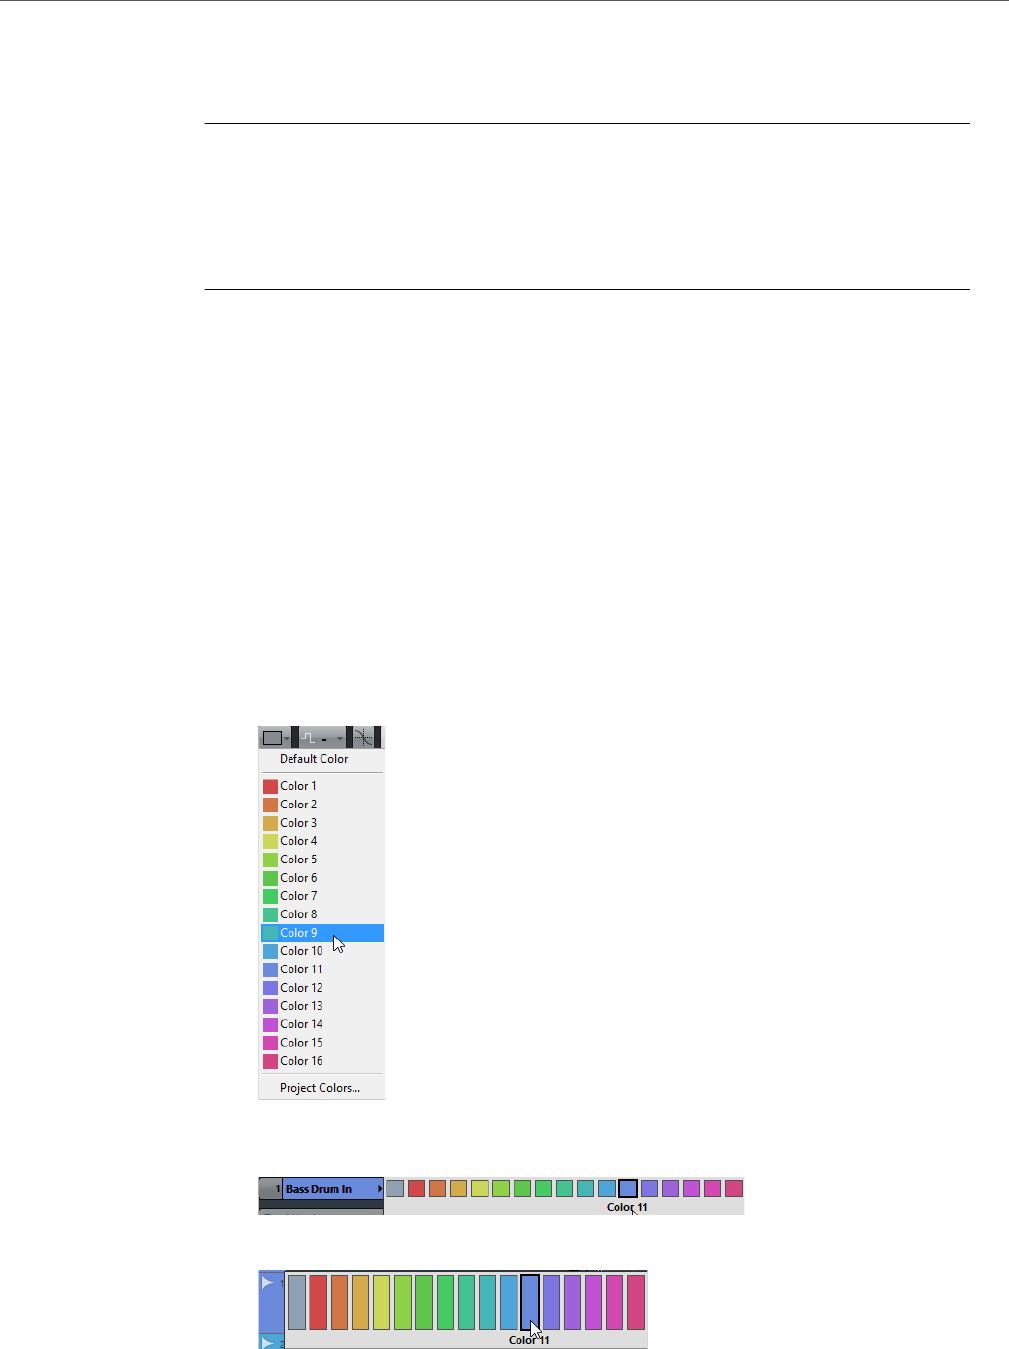
Track Handling
Renaming Tracks
93
Renaming Tracks
PROCEDURE
1. Double-click the track name and type in a new name for the track.
2. Press [Return].
If you want all events on the track to get the same name, hold down any modifier key
and press [Return].
AFTER COMPLETING THIS TASK
If the Parts Get Track Names option (File > Preferences > Editing) is activated,
and you move an event from one track to another, the moved event will automatically
be named according to its new track.
Coloring Tracks
All new tracks are automatically assigned a color according to the Auto Track
Color Mode settings. However, you can change the track color manually.
• To change the color for the selected track, use the Select Colors pop-up
menu on the toolbar.
• You can also use the Track Color Selector. In the Inspector, click the arrow
to the right of the track name and select a color.
In the track list, [Ctrl]/[Command]-click in the left area and select a color.
• To control which colors are used for new tracks, select File > Preferences
> Event Display > Tracks and edit the Auto Track Color Mode settings.
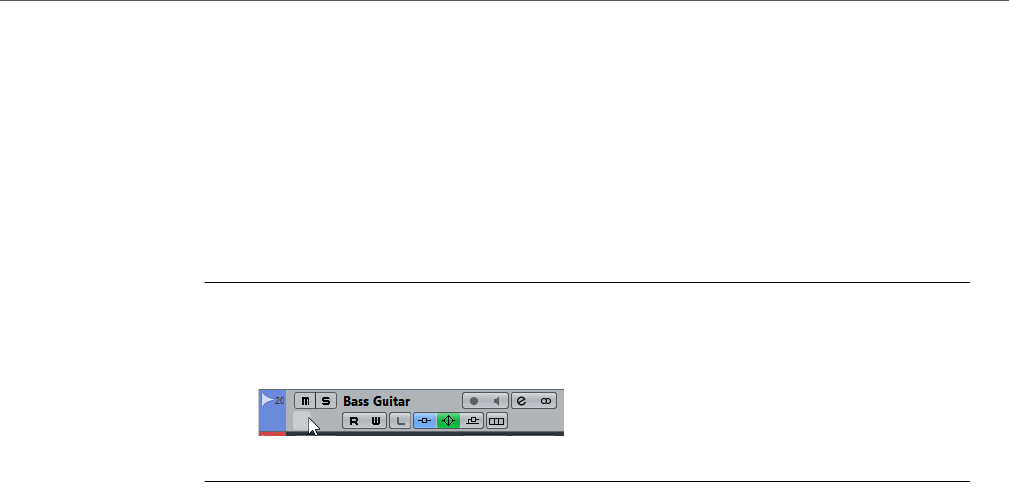
Track Handling
Showing Track Pictures
94
Showing Track Pictures
You can add pictures to tracks to recognize your tracks easily. Track pictures are
available for audio, instrument, MIDI, FX channel and group channel tracks.
PREREQUISITE
Adjust the track height to at least 2 rows.
PROCEDURE
1. Right-click any track in the track list.
2. From the track list context menu, select Show Track Pictures.
If you move the mouse to the left on a track, a highlighted rectangle appears.
AFTER COMPLETING THIS TASK
Double-click the rectangle to open the Track Pictures Browser and set up a track
picture.
RELATED LINKS
Track Pictures Browser on page 94
Track Pictures Browser
The Track Pictures Browser allows you to set up and select pictures that can be
shown in the track list and in the MixConsole. Track pictures are useful to recognize
tracks and channels easily. You can select pictures from the factory content or add
new ones to the user library.
• To open the Track Pictures Browser for a track, double-click in the lower left
side of the track list.
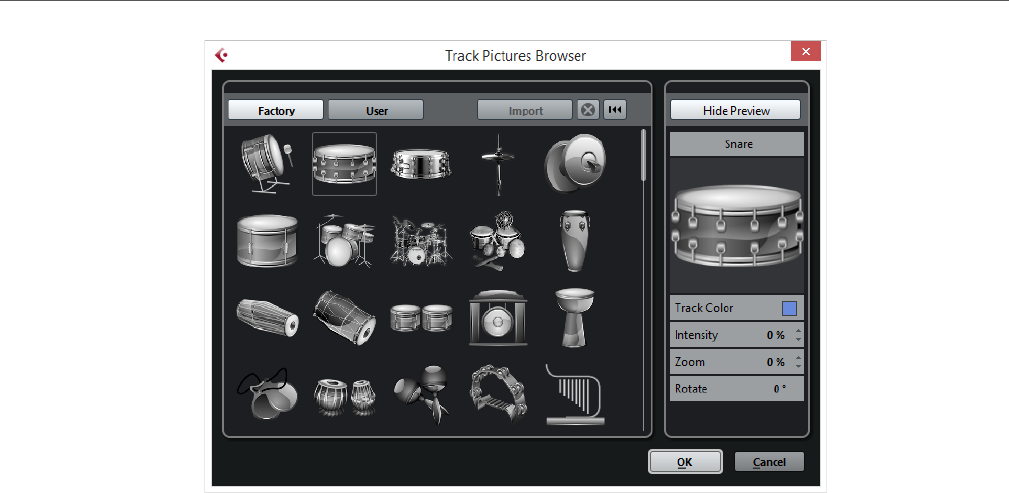
Track Handling
Showing Track Pictures
95
Factory
Shows the factory content in the pictures browser.
Pictures Browser
Shows the pictures that you can assign to the selected track/channel.
User
Shows your user content in the pictures browser.
Import
Opens a file dialog that allows you to select pictures in bmp, jpeg, or png
format and add them to the user library.
Remove Selected Pictures from User Library
Removes the selected picture from the user library.
Reset Current Picture
Removes the picture from the selected track/channel.
Show/Hide Preview
Opens/Closes a section with further color and zoom settings.
Track Picture Preview
Shows the current track picture. When you zoom in the picture, you can drag
it with the mouse to change its visible part.
Track Color
Opens the Track Color Selector. Click the rectangle to change the track
color.
Intensity
Allows you to apply the track color to the track picture and set the color
intensity.
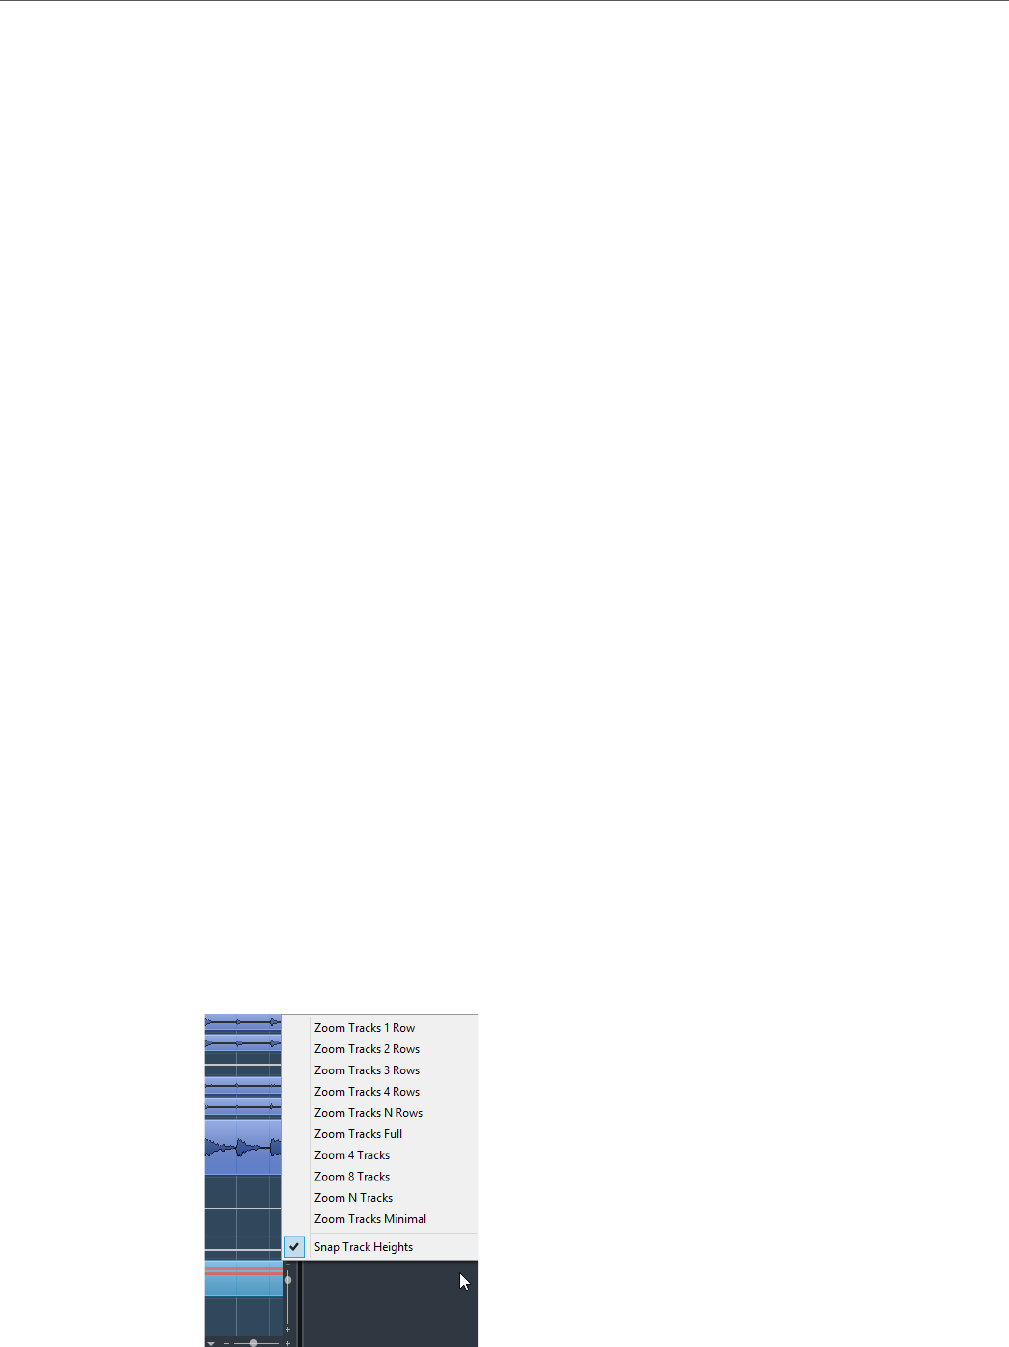
Track Handling
Setting the Track Height
96
Zoom
Allows you to change the size of the track picture.
Rotate
Allows you to rotate the track picture.
Setting the Track Height
You can enlarge the track height to show the events on the track in detail, or you
can decrease the height of several tracks to get a better overview of your project.
• To change the height of an individual track, click its lower border in the track
list and drag up or down.
• To change the height of all tracks simultaneously, hold down
[Ctrl]/[Command], click the lower border of one track, and drag up or down.
• To set the number of tracks to view in the Project window, use the track zoom
menu.
• To set the track height automatically when you select a track, click Edit >
Enlarge Selected Track.
RELATED LINKS
Track Zoom Menu on page 96
Customizing Track Controls on page 88
Track Zoom Menu
The track zoom menu allows you to set the number of tracks and the track height in
the Project window.
• To open the track zoom menu in the lower right of the Project window, click
the arrow button above the vertical zoom control.

Track Handling
Selecting Tracks
97
The following options are available:
Zoom Tracks x Rows
Zooms all track heights to show the specified number of rows.
Zoom Tracks Full
Zooms all tracks to fit in the active Project window.
Zoom x Tracks
Zooms the specified number of tracks to fit in the active Project window.
Zoom N Tracks
Allows you to set the number of tracks to fit in the active Project window.
Zoom Tracks Minimal
Zooms all track heights to the minimum size.
Snap Track Heights
Changes the track height in fixed increments when you resize it.
Selecting Tracks
• To select a track, click on it in the track list.
• To select several tracks, [Ctrl]/[Command]-click several tracks.
• To select a continuous range of tracks, [Shift]-click the first and last track in a
continuous range of tracks.
Selected tracks are indicated by a light gray color in the track list.
RELATED LINKS
Track Selection follows Event Selection on page 649
Scroll To selected Track on page 654
Select Channel/Track on Solo on page 654
Select Channel/Track on Edit Settings on page 654
Selecting Tracks with Arrow Keys
You can select tracks and events with the up/down arrow keys on the computer
keyboard. However, you can make the up/down arrow keys exclusively available for
selecting tracks.
• To make the up/down arrow keys exclusively available for selecting tracks,
select File > Preferences > Editing and activate Use Up/Down Navigation
Commands for selecting Tracks only.

Track Handling
Duplicating Tracks
98
The following applies:
• When this option is deactivated and no event/part is selected in the Project
window, the up/down arrow keys on the computer keyboard are used to step
through the tracks in the track list.
• When this option is deactivated and an event/part is selected in the Project
window, the up/down arrow keys still step through the tracks in the track list
– but on the currently selected track, the first event/part will automatically be
selected as well.
• When this option is activated, the up/down arrow keys are only used to
change the track selection – the current event/part selection in the Project
window will not be altered.
Duplicating Tracks
You can duplicate a track with all contents and channel settings.
PROCEDURE
•Select Project > Duplicate Tracks.
RESULT
The duplicated track appears below the original track.
Disabling Audio Tracks (Cubase Elements only)
You can disable audio tracks that you do not want to play back or process at the
moment. Disabling a track zeroes its output volume and shuts down all disk activity
and processing for the track.
PROCEDURE
• Right-click in the track list and select Disable Track from the context menu.
RESULT
The track color changes and the corresponding channel in the MixConsole is
hidden.
To enable a disabled track and restore all channel settings, right-click in the track
list and select Enable Track.

Track Handling
Organizing Tracks in Folder Tracks
99
Organizing Tracks in Folder Tracks
You can organize your tracks in folders by moving tracks into folder tracks. This
allows you to perform editing on several tracks as one entity. Folder tracks can
contain any type of track including other folder tracks.
• To create a folder track, open the Project menu and in the Add Track
submenu select Folder.
• To move tracks into a folder, select them and drag them into the folder track.
• To remove tracks from a folder, select them and drag them out of the folder.
• To hide/show tracks in a folder, click the Expand/Collapse Folder button of
the folder track.
• To hide/show data on a folder track, open the context menu for the folder track
and select an option from the Show Data on Folder Tracks submenu.
• To mute/solo all tracks in a folder track, click the Mute or Solo button for the
folder track.
NOTE
Hidden tracks are played back as usual.
Moving Tracks to Folder Tracks
You can move your tracks to folder tracks to organize them and to perform editing
on several tracks as one entity. You can move any type of track including other folder
tracks to folder tracks.
PROCEDURE
•Select Project > Track Folding > Move Selected Tracks to New Folder.
RESULT
This creates a new folder and moves all selected tracks into it.
NOTE
You can also drag and drop tracks into or out of a folder track.
RELATED LINKS
Folder Tracks on page 79
Folder Track Controls on page 80

Track Handling
Handling Overlapping Audio
100
Handling Overlapping Audio
The basic rule for audio tracks is that each track can only play back a single audio
event at a time. If two or more events overlap, you will only hear one of them: the one
that is actually visible (e. g. the last lap of a cycle recording).
If you have a track with overlapping (stacked) events/regions, use one of the
following methods to select the event/region that is played back:
• Open the context menu for the audio event in the event display and select the
desired event or region from the To Front or Set to Region submenu.
The available options depend on whether you performed a linear or a cycle
recording and the record mode you used. When recording audio in cycle
mode, the recorded event is divided in regions, one for each take.
• Use the handle in the middle of a stacked event and select an entry from the
pop-up menu that appears.
How Events are Displayed on Folder Tracks
Closed folder tracks can display data of the contained audio, MIDI, and instrument
tracks as data blocks or as events.
When you close folder tracks, the contents of the contained tracks are displayed as
data blocks or events. Depending on the folder track height, the display of the
events can be more or less detailed.
Modifying Event Display on Folder Tracks
You can modify the event display on folder tracks.
PROCEDURE
1. Right-click the folder track.
2. On the context menu, select Show Data on Folder Tracks.
You have the following options:
•Always Show Data
If this option is activated, data blocks or event details are always displayed.
•Never Show Data
If this option is activated, nothing is displayed.
•Hide Data When Expanded
If this option is activated, the display of events is hidden when you open folder tracks.
•Show Event Details
If this option is activated, event details are displayed. If deactivated, data blocks
are displayed.
NOTE
To change these settings, select File > Preferences > Event Display > Folders.

Track Handling
Track Presets
101
Track Presets
Track presets are templates that can be applied to newly created or existing tracks
of the same type.
You can create them from virtually all track types (audio, MIDI, instrument, group,
FX, VST instument return, input, and output channels). They contain sound and
channel settings, and allow you to quickly browse, preview, select, and change
sounds, or reuse channel settings across projects.
Track presets are organized in the MediaBay.
Audio Track Presets
Track presets for audio tracks, group tracks, FX tracks, VST instrument channels,
input channels, and output channels include all settings that define the sound.
You can use the factory presets as a starting point for your own editing and save
the audio settings that you optimized for an artist that you often work with as a
preset for future recordings.
The following data is saved in audio track presets:
• Insert effects settings (including VST effect presets)
•EQ settings
• Volume and pan
NOTE
To access the track presets functions for input and output channels, activate the
Write buttons for input and output channels in the MixConsole. This creates input
and output channel tracks in the track list.
Instrument Track Presets
Instrument track presets offer both MIDI and audio features and are the best choice
when handling sounds of simple, mono-timbral VST instruments.
Use instrument track presets for auditioning your tracks or saving your preferred
sound settings, for example. You can also extract sounds from instrument track
presets for use in instrument tracks.
The following data is saved in instrument track presets:
• Audio insert effects
•Audio EQ
• Audio volume and pan
• MIDI insert effects

Track Handling
Track Presets
102
• MIDI track parameters
• The VST instrument used for the track
• Staff settings
• Color settings
• Drum map settings
MIDI Track Presets
You can use MIDI track presets for multi-timbral VST instruments (not in Cubase
LE).
When creating MIDI track presets you can either include the currently set channel
or the currently set patch.
The following data is saved in MIDI track presets:
• MIDI modifiers (Transpose, etc.)
• Output and Channel or Program Change
• Volume and pan
• Staff settings
• Color settings
• Drum map settings
Multi-Track Presets
You can use multi-track presets, for example, when recording setups that require
several microphones (a drum set or a choir, where you always record under the
same conditions) and you have to edit the resulting tracks in a similar way.
Furthermore, they can be used when working with layered tracks, where you use
several tracks to generate a certain sound instead of manipulating only one track.
If you select more than one track when creating a track preset, the settings of all
selected tracks are saved as one multi-track preset. Multi-track presets can only be
applied if the target tracks are of the same type, number, and sequence as the
tracks in the track preset, therefore, they should be used in recurring situations with
similar tracks and settings.
VST Presets
VST instrument presets behave like instrument track presets. You can extract
sounds from VST presets for use in instrument tracks.
The following data is saved in VST instrument presets:
•VST instrument

Track Handling
Track Presets
103
• VST instrument settings
NOTE
Modifiers, inserts, and EQ settings are not saved.
VST effect plug-ins are available in VST 3 and VST 2 format.
NOTE
In this manual, VST presets stands for VST 3 instrument presets, unless stated
otherwise.
Applying Track Presets
When you apply a track preset, all the settings that are saved in the preset are applied.
Track presets can be applied to tracks of their own type only. The only exception are
instrument tracks: for these, VST presets are also available.
NOTE
• Once a track preset is applied, you cannot undo the changes. It is not
possible to remove an applied preset from a track and return to the previous
state. If you are not satisfied with the track settings, you have to either edit the
settings manually or apply another preset.
• Applying VST presets to instrument tracks leads to removal of modifiers, MIDI
inserts, inserts, or EQs. These settings are not stored in VST presets.
Loading Track or VST Presets
PROCEDURE
1. In the Project window, select a track.
2. Do one of the following:
• In the Inspector, click Load Track Preset.
• In the track list, right-click the track and select Load Track Preset.
3. In the Presets browser, select a track or VST preset.
4. Double-click the preset to load it.
RESULT
The preset is applied.
NOTE
You can also drag and drop track presets from the MediaBay, the Windows
Explorer, or the Mac OS Finder onto a track of the same type.

Track Handling
Track Presets
104
RELATED LINKS
Filters Section on page 350
Loading Multi-Track Presets
PROCEDURE
1. In the Project window, select several tracks.
NOTE
Multi-track presets can only be applied if track type, number, and sequence are
identical for the selected tracks and the track preset.
2. In the track list, right-click the track and select Load Track Preset.
3. In the Presets browser, select a multi-track preset.
4. Double-click the preset to load it.
RESULT
The preset is applied.
Extracting the Sound from an Instrument Track or VST Preset
For instrument tracks, you can extract the sound of an instrument track preset or
VST preset.
PROCEDURE
1. Select the instrument track to which you want to apply a sound.
2. In the Inspector, click VST Sound.
3. In the Presets browser, select an instrument track preset or VST preset.
4. Double-click the preset to load the settings.
RESULT
The VST instrument and its settings (but no inserts, EQs, or modifiers) on the
existing track are overwritten with the data of the track preset. The previous VST
instrument for this instrument track is removed and the new VST instrument with its
settings is set up for the instrument track.
Track Handling
Track Presets
105
Creating a Track Preset
You can create a track preset from a single track or from a combination of tracks.
PROCEDURE
1. In the Project window, select one or more tracks.
2. In the track list, right-click one of the selected tracks and select Save Track
Preset.
3. In the New Preset section, enter a name for the new preset.
NOTE
You can also define attributes for the preset.
4. Click OK to save the preset and exit the dialog.
RESULT
Track presets are saved within the application folder in the Track Presets folder.
They are saved in default subfolders named according to their track type: audio,
MIDI, instrument, and multi.

106
Parts and Events
Parts and events are the basic building blocks in Cubase.
The tracks in the Project window contain parts and/or events. Different event types
are handled differently in the Project window:
• Video events and automation events (curve points) are always viewed and
rearranged directly in the Project window.
• MIDI events can always be found in MIDI parts, which are containers for one
or more MIDI events. MIDI parts are rearranged and manipulated in the Project
window. To edit the individual MIDI events in a part, you have to open the part
in a MIDI editor.
• Audio events can be displayed and edited directly in the Project window, but
you can also work with audio parts containing several events. This is useful if
you have a number of events which you want to treat as one unit in the project.
Audio parts also contain information about the time position in the project.
NOTE
If the “Object Selection tool: Show Extra Info” option is activated in the Preferences
dialog (Editing–Tools page), a tooltip will be shown for the Object Selection tool,
displaying information depending on where you point it. For example, in the Project
window event display, the tool will show the current pointer position and the name
of the track and event you are pointing at.
The Preferences dialog contains several settings for customizing the display in the
Project window.
RELATED LINKS
Event Display on page 656
Event Display - MIDI on page 658
Event Display - Chords on page 658
Event Display - Tracks on page 659

Parts and Events
Audio Handling
107
Audio Handling
When you work with audio files, it is crucial to understand how audio is handled in
Cubase.
When you edit or process audio in the Project window, you always work with an
audio clip that is automatically created on import or during recording. This audio clip
refers to an audio file on the hard disk that itself remains untouched. This means,
that audio editing and processing is “non-destructive”, in the sense that you can
always undo changes or revert to the original versions.
Audio Clips
An audio clip does not necessarily refer to just one original audio file!
If you apply some processing to a specific section of an audio clip, for example, this
will create a new audio file containing only this section. The processing will then be
applied to the new audio file only, leaving the original audio file unchanged. Finally,
the audio clip is automatically adjusted, so that it refers both to the original file and
to the new, processed file. During playback, the program will switch between the
original file and the processed file at the correct positions. You will hear this as a
single recording, with processing applied to one section only. This feature makes it
possible to undo processing at a later stage, and to apply different processing to
different audio clips that refer to the same original file.
Audio Events
An audio event is the object that you place on a time position in Cubase.
If you make copies of an audio event and move them to different positions in the
project, they will still all refer to the same audio clip. Furthermore, each audio event
has an Offset value and a Length value. These determine at which positions in the clip
the event will start and end, i. e. which section of the audio clip will be played back by
the audio event. For example, if you resize the audio event, you will just change its start
and/or end position in the audio clip – the clip itself will not be affected.
Audio Regions
An audio region is a section within a clip with a length value, a start time, and a snap point.
Audio regions are shown in the Pool and are best created and edited in the Sample Editor.
NOTE
If you want to use one audio file in different contexts, or if you want to create several
loops from one audio file, convert the corresponding regions of the audio clip to
events and bounce them into separate audio files. This is necessary since different
events that refer to the same clip access the same clip information.

Parts and Events
Parts
108
Parts
Parts are containers for MIDI or audio events, and for tracks.
RELATED LINKS
Folder Parts on page 111
Creating MIDI Parts
A MIDI part is automatically created when you record. It contains the recorded
events. However, you can also create empty MIDI parts and later add events to
them.
You can create MIDI parts in the following ways:
• Draw a part on a MIDI track with the Draw tool.
You can also draw parts by pressing [Alt]/[Option] and using the Object
Selection tool.
• Double-click with the Object Selection tool on a MIDI track, between the left
and right locator.
Adding Events to a MIDI Part
• To add events to a MIDI part, use the tools and functions in a MIDI editor.
RELATED LINKS
MIDI Editors on page 433
Creating Audio Parts
There is no way of automatically creating audio parts on recording. On recording
audio events are created always.
You can create audio parts in the following ways:
• To gather existing audio events into a part, select Audio > Events to Part.
This creates an audio part containing all selected audio events on the same track.
To remove the part and make the events appear as independent objects on
the track again, select the part and select Audio > Dissolve Part.
• Draw a part on an audio track with the Draw tool.
You can also draw parts by pressing [Alt]/[Option] and using the Object
Selection tool.

Parts and Events
Auditioning Audio Parts and Events
109
• Double-click with the Object Selection tool on an audio track, between the
left and right locator.
NOTE
You can use copy and paste or drag and drop in the Audio Part Editor to add events
to existing audio parts.
RELATED LINKS
Audio Part Editor on page 306
Auditioning Audio Parts and Events
Audio parts and events can be auditioned in the Project window with the Play tool.
PROCEDURE
1. Select the Play tool.
2. Click where you want playback to start, and keep the mouse button pressed.
Only the track on which you click is played back, starting at the click position.
NOTE
When auditioning, the Main Mix bus is used.
3. Release the mouse button to stop playback.
Adding Events to a Track
To add events to a track, do one of the following:
•Record.
• Drag and drop files on the track.
You can drag from the following locations: the desktop, the MediaBay and its
related windows, the Pool, the Find media dialog, another open Project
window, the Audio Part Editor, the Sample Editor (press [Ctrl]/[Command]
and drag to create an event of the current selection).
• Grab audio CD tracks and convert them to audio files.
•Use Copy and Paste on the Edit menu.
This allows you to copy all kinds of events between projects. You can also
copy events within the project, for example, from the Sample Editor.
• Draw marker or automation tracks.
For audio, MIDI, and instrument tracks, you can only draw parts.

Parts and Events
Scrubbing
110
• Import audio or video files via the File > Import menu.
When you import a file this way, a clip is created for the file and an event that
plays the whole clip is inserted on the selected track, at the position of the
project cursor.
• Import audio or video files via the File > Import menu.
RELATED LINKS
Basic Recording Methods on page 145
MediaBay on page 334
Exporting and importing standard MIDI files on page 622
Importing audio CD tracks on page 617
Creating MIDI Parts on page 108
Creating Audio Parts on page 108
Scrubbing
Scrubbing can be quite a burden on your system. If playback problems occur, try
deactivating the “Use High Quality Scrub Mode” option in the Preferences dialog
(Transport–Scrub page). The resampling quality will then be lower, but scrubbing will be
less demanding on the processor. This can be useful when scrubbing in large projects.
You can adjust the volume of the Scrub function in the Preferences dialog
(Transport–Scrub page).
When scrubbing with the mouse, insert effects are always bypassed.
Using the Scrub Tool
The Scrub tool allows you to locate positions in MIDI or audio parts and in audio
events by playing back, forwards or backwards, at any speed.
PROCEDURE
1. Select the Play tool and click a second time on the icon.
A pop-up menu opens.
2. Select “Scrub”.
3. Click your event or part and keep the mouse button pressed.
The project cursor moves to the position where you click. The mouse pointer is not
visible anymore.
4. Drag to the left or right.
The project cursor moves correspondingly and the event or part is played back. The
speed and thus the pitch of the playback depend on how fast you move the mouse.
NOTE
You can also scrub all audio and video tracks of your project with the Jog wheel and
Shuttle Speed control on the Transport panel. In this case, MIDI events are ignored.

Parts and Events
Folder Parts
111
Folder Parts
A folder part is a graphic representation of events and parts on the tracks in the
folder. Folder parts indicate the position and length of the events and parts, as well
as on which track they are (their vertical position). If part colors are used, these are
also shown in the folder part.
Editing Folder Parts
Any editing that you perform in the Project window to a folder part affects all the
events and parts it contains.
You can select several folder parts and edit them at the same time. The editing you
can perform includes:
• Moving a folder part.
This moves its contained events and parts, possibly resulting in other folder
parts, depending on how the parts overlap.
• Using cut, copy, and paste.
• Deleting a folder part. This will delete its contained events and parts.
• Splitting a folder part with the Cut tool.
• Gluing folder parts together with the Glue tool. This will only work if the
adjacent folder parts contain events or parts on the same track.
• Resizing a folder part resizes the contained events and parts according to the
selected resizing method.
• Muting a folder part. This will mute its contained events and parts.
Tracks inside a folder can be edited as one entity by performing the editing directly
on the folder part containing the tracks. You can also edit individual tracks within
the folder by showing the contained tracks, selecting parts and opening editors as
usual.
• To open the editor for the track classes that are present in a folder part,
double-click the folder part.
All MIDI parts that are located on the tracks within the folder are displayed as
if they were on the same track, just like when opening the Key Editor with
several MIDI parts selected.
To be able to discern the different tracks in the editor, give each track a different
color in the Project window and use the Part Colors option in the editor.
If the folder contains tracks with audio events and/or audio parts, the Sample
and/or Audio Part Editors are opened with each audio event and audio part in
a separate window.
RELATED LINKS
Coloring Notes and Events on page 436

Parts and Events
Editing Parts and Events
112
Editing Parts and Events
This section describes techniques for editing in the Project window. If not explicitly
stated, all descriptions apply to both events and parts, even though we use the term
“event” for convenience.
When you are using the tools for editing, you can in many cases get additional
functions by pressing modifier keys (e. g. pressing [Alt]/[Option] and dragging with
the Object Selection tool creates a copy of the dragged event).
NOTE
You can customize the default modifier keys in the Preferences dialog.
RELATED LINKS
Editing - Tool Modifiers on page 655
Selecting Events
You can select events using any of the following methods:
•Use the Object Selection tool.
•Use the Select submenu on the Edit menu.
• Right-click on a track and select Select All Events from the context menu.
• To select ranges, regardless of the event and track boundaries, use the
Range Selection tool.
• Use the arrow keys on the computer keyboard.
•If the Auto Select Events under Cursor option (File > Preferences >
Editing) is activated, all events on the selected tracks that are touched by the
project cursor are automatically selected.
This is helpful when rearranging your project, because it allows you to select
whole sections on all tracks by selecting all tracks and moving the project
cursor.
RELATED LINKS
Selecting with the Object Selection Tool on page 112
Select Submenu on page 113
Range Editing on page 124
Selecting with the Object Selection Tool
PROCEDURE
1. On the Project window toolbar, click Object Selection.
2. In the event display, click the events or parts that you want to select.
The standard techniques apply.

Parts and Events
Editing Parts and Events
113
Select Submenu
• To open the Select submenu, select Edit > Select.
The following options are available, when the Object Selection tool is selected:
All
Selects all events in the Project window.
None
Deselects all events.
Invert
Inverts the selection – all selected events are deselected and all events that
were not selected are selected instead.
In Loop
Selects all events that are partly or wholly between the left and right locator.
From Start to Cursor
Selects all events that begin to the left of the project cursor.
From Cursor to End
Selects all events that end to the right of the project cursor.
Equal Pitch
These are available in the MIDI editors and the Sample Editor.
Select Controllers in Note Range
This is available in the MIDI editors.
All on Selected Tracks
Selects all events on the selected track.
Events under Cursor
Automatically selects all events on the selected track(s) that are touched by
the project cursor.
Select Event
This is available in the Sample Editor.
Left/Right Selection Side to Cursor
These two functions are only used for range selection editing.
NOTE
When Range Selection tool is selected, the Select submenu features other
functions.
RELATED LINKS
Selection Range Options on page 124

Parts and Events
Editing Parts and Events
114
Removing Events
To remove an event from the Project window, do one of the following:
• Click on the event with the Erase tool.
• To delete all following events, but not the event that you clicked and all events
before it, press [Alt]/[Option] and click on an event.
• Select the events and press [Backspace], or select Edit > Delete.
Moving Events
You can move events using any of the following methods:
•Use the Object Selection tool.
•Use the Move to submenu on the Edit menu.
• Select the event and edit the start position in the info line.
•Use the Nudge buttons on the toolbar.
RELATED LINKS
Moving with the Object Selection Tool on page 114
“Move to” Submenu on page 115
Moving via the Info Line on page 115
Moving with the Nudge Buttons on page 115
Moving with the Object Selection Tool
PROCEDURE
1. In the Project window toolbar, click Object Selection.
2. In the event display, click the events or parts you want to move, and drag to a
new position.
NOTE
You can only drag events to tracks of the same type.
3. Optional: Hold down [Ctrl]/[Command] while dragging to restrict movement
either horizontally or vertically.
RESULT
All selected events are moved, maintaining their relative positions. If Snap is
activated, this determines to which positions you can move the events.

Parts and Events
Editing Parts and Events
115
NOTE
To avoid accidentally moving events when you click on them in the Project window
the response when you move an event by dragging is slightly delayed. You can
adjust this delay with the Drag Delay setting (File > Preferences > Editing).
“Move to” Submenu
• To open the Move to submenu, select Edit > Move to.
The following options are available:
Cursor
Moves the selected event to the project cursor position. If there are several
selected events on the same track, the first event will start at the cursor, and
the following will be lined up end-to-start after the first one.
Origin
Moves the selected events to their original positions, i. e. the positions at
which they were originally recorded.
Front/Back
This function does not actually change the position of the events, but moves
the selected events to the front or back, respectively. This is useful if you have
overlapping events and want to see one that is partially obscured. For audio
events, this is an extra important feature, because only the visible sections of
events will be played back. Moving an obscured audio event to front (or
moving the obscuring event to back) will allow you to hear the whole event on
playback.
Moving via the Info Line
PROCEDURE
1. In the event display, select the event or part that you want to move.
2. In the info line, double-click the Start field and enter a new value for the event
start.
The event is moved accordingly.
Moving with the Nudge Buttons
PROCEDURE
1. Right-click the Project window toolbar and activate Nudge Palette.
The nudge buttons become available in the toolbar.
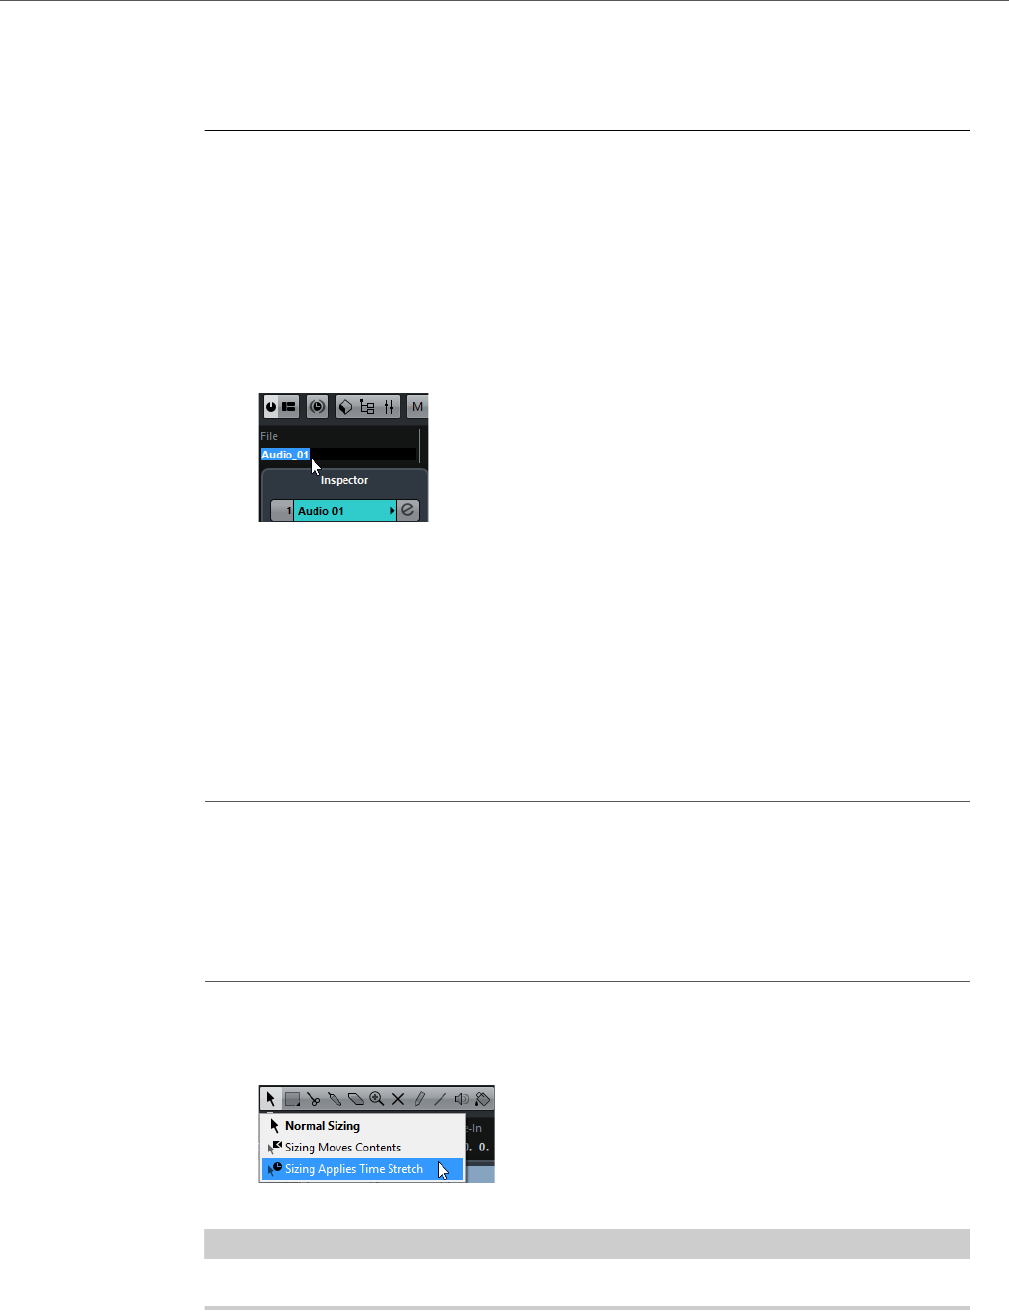
Parts and Events
Editing Parts and Events
116
2. In the event display, select the events or parts that you want to move, and use
the Move Left/Move Right nudge buttons.
The selected events or parts are moved to the left or right.
Renaming Events
By default, audio events show the name of their clip, but you can enter a separate
descriptive name for events.
• To rename an event, select the event and type in a new name in the Name
field on the info line.
• To give all events on a track the same name as the track, change the track
name, hold down a modifier key, and press [Return].
Resizing Events
Resizing events means to move their start or end positions individually.
The following resizing modes are available:
• To select one of the resizing modes, select the Object Selection tool and
then click again on the Object Selection tool icon on the toolbar. This opens
a pop-up menu from which you can select one of the options.
The toolbar icon indicates the resizing mode
IMPORTANTIMPORTANTIMPORTANT
IMPORTANT
When resizing events, any automation data not taken into account.
Normal Sizing The contents of the event stay fixed, and the start or end point
of the event is moved to “reveal” more or less of the contents.
Sizing Moves Contents The contents follow the moved start or end of the event (see
the figure below).
Sizing Applies Time
Stretch
The contents will be time stretched to fit the new event length.
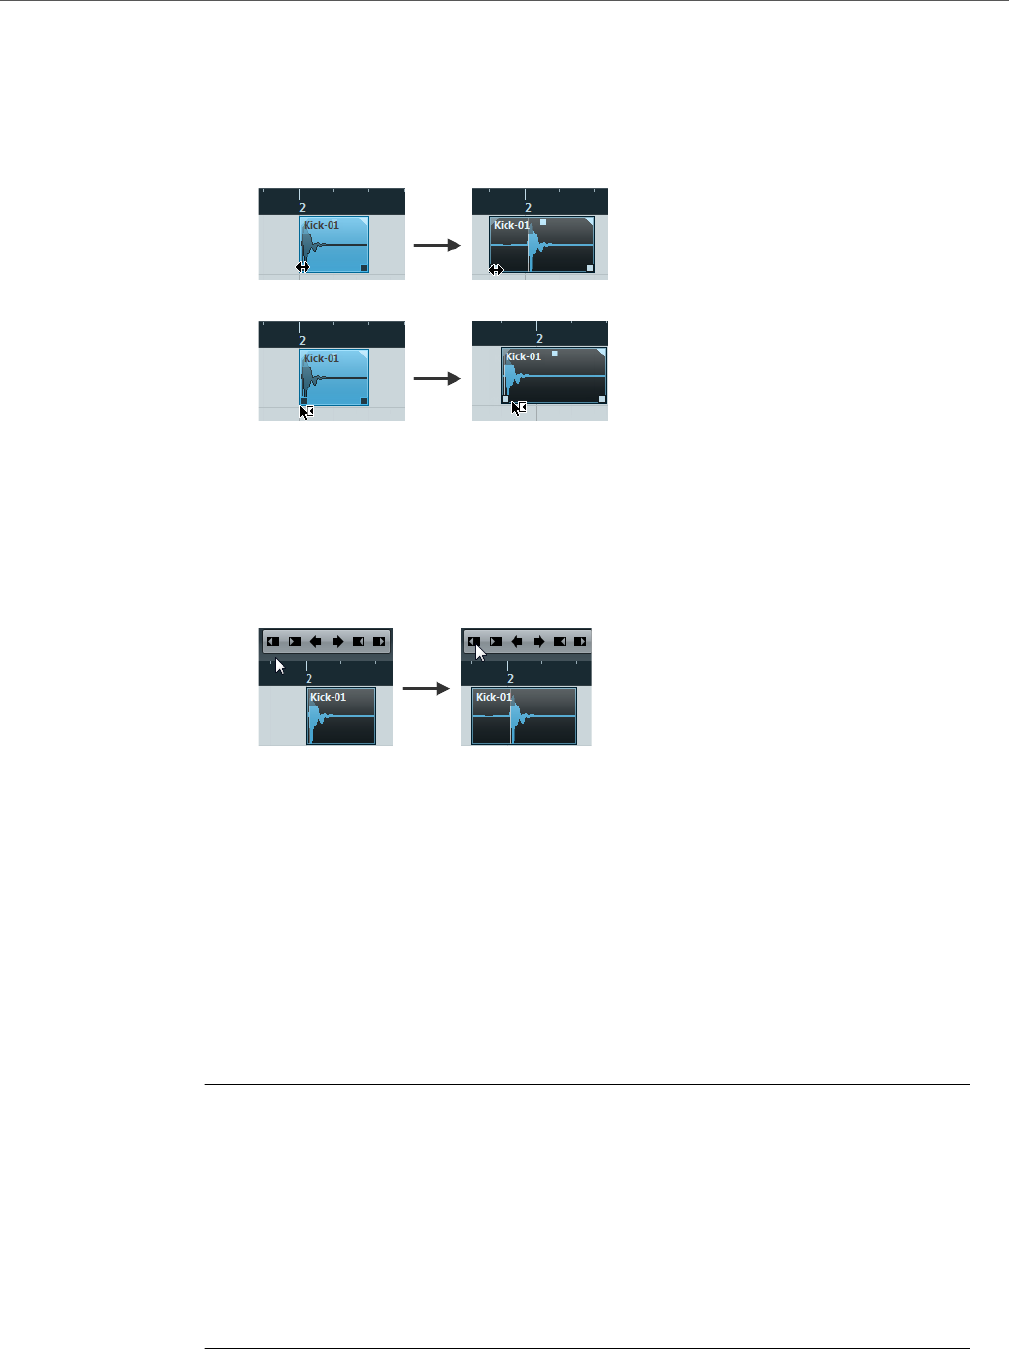
Parts and Events
Editing Parts and Events
117
To resize events, do one of the following:
• Click and drag the lower left or right corner of the event.
If Snap is activated, the Snap value determines the resulting length. If several
events are selected, all will be resized in the same way.
Normal sizing
Sizing moves contents
•Use the Trim buttons (Nudge palette) on the toolbar.
This will move the start or end position of the selected events by the amount
set on the Grid Type pop-up menu. The sizing type currently selected applies
to this method too, with the exception of Sizing Applies Time Stretch which
is not possible with this method.
•Use the Scrub tool.
•Apply time stretch.
RELATED LINKS
Snap Function on page 39
Resizing Events Using Time Stretch on page 117
Resizing Events Using Time Stretch
Time stretching allows you to resize a part and make its contents fit the new size.
PROCEDURE
1. Click the Object Selection tool on the toolbar and click again to select the
Sizing Applies Time Stretch option from the pop-up menu.
2. Point close to the end point of the part you want to stretch.
3. Click and drag left or right.
When you move the mouse, a tooltip shows the current mouse position and length of
the part. Snap is taken into account.
4. Release the mouse button.

Parts and Events
Editing Parts and Events
118
RESULT
The part is stretched or compressed to fit the new length.
• For MIDI parts, this means that the note events are stretched (moved and
resized).
Controller data will be stretched, too.
• For audio parts, this means that the events are moved, and that the referenced
audio files are time stretched to fit the new length.
A dialog shows the progress of the time stretch operation.
Splitting Events
You can split events in the Project window in the following ways:
• Click with the Cut tool on the event you want to split.
If Snap is activated, this determines the exact split position. You can also split
events by pressing [Alt]/[Option] and clicking with the Object Selection tool.
•Select Edit > Functions > Split at Cursor.
This splits the selected events at the position of the project cursor. If no
events are selected, all events (on all tracks) that are intersected by the
project cursor will be split.
•Select Edit > Functions > Split Loop.
This splits events on all tracks at the left and right locator positions.
NOTE
If you split a MIDI part so that the split position intersects one or several MIDI notes,
the result depends on the Split MIDI Events option (File > Preferences > Editing
> MIDI). If the option is activated, the intersected notes will be split (creating new
notes at the beginning of the second part). If it is deactivated, the notes will remain
in the first part, but stick out after the end of the part.
RELATED LINKS
Snap Function on page 39
Gluing Events Together
No data will be kept in the clipboard.
The following options are available:
• To glue an event together with the next event on the track, click on an event
with the Glue tool. The events do not have to touch one another.
The result is a part containing the two events, with one exception: If you first
split an event and then glue the two sections together again (without moving
or editing them first), they become a single event again.

Parts and Events
Editing Parts and Events
119
• You can select several events on the same track and click on one of them with
the Glue tool.
A single part is created.
• To glue an event together with all following events on this track, hold down
[Alt]/[Option] and click on an event with the Glue tool.
Duplicating
Events can be duplicated in the following ways:
• Hold down [Alt]/[Option] and drag the event to a new position.
If Snap is activated, this determines to which positions you can copy the
events.
NOTE
If you hold down [Ctrl]/[Command] as well, movement direction is restricted
to either horizontal or vertical. That means if you drag an event vertically it
cannot be moved horizontally at the same time.
•Select Edit > Functions > Duplicate to create a copy of the selected event
and place it directly after the original.
If several events are selected, all of these are copied “as one unit”, maintaining
the relative distance between the events.
NOTE
When you duplicate audio events, the copies always refer to the same audio clip.
Cutting, Copying, and Pasting Events
You can cut or copy selected events, and paste them in again, using the functions
on the Edit menu.
• When you paste an audio event, it is inserted on the selected track, positioned
so that its snap point is aligned with the cursor position.
If the selected track is of the wrong type, the event will be inserted on its
original track.
• If you use the Paste at Origin function (Edit > Function), the event is pasted
at the position from which you cut or copied it.
• If you use the Paste Relative to Cursor function (Edit > Function), the event
is pasted while keeping its relative position to the project cursor.
RELATED LINKS
Snap Function on page 39

Parts and Events
Editing Parts and Events
120
Repeating
Events can be repeated in the following ways:
• Hold down [Alt]/[Option] and click the handle in the lower right corner of the
last selected event and drag to the right.
•Select Edit > Functions > Repeat to open a dialog, allowing you to create a
number of copies (regular or shared) of the selected events.
Fill Loop
You can create a number of copies between the right and left locators.
•Select Edit > Functions > Fill Loop to create a number of copies starting at
the left locator and ending at the right locator.
The last copy is automatically shortened to end at the right locator position.
Creating Shared Copies
You can create shared copies of audio and MIDI parts. If you edit the contents of a
shared copy, all other shared copies of the same part are automatically edited in the
same way.
• Hold down [Alt]/[Option]-[Shift] and drag to the right.
NOTE
You can convert a shared copy to a real copy by selecting Edit > Functions >
Convert to Real Copy. This creates a new version of the clip (that can be edited
independently) and adds this to the Pool.
Sliding the Contents of an Event or Part
You can move the contents of an event or part without changing its position in the
Project window.
• To slide an event or part, press [Alt]/[Option]-[Shift], click in the event or part
and drag to the left or right.
IMPORTANTIMPORTANTIMPORTANTIMPORTANT
When sliding the contents of an audio event, you cannot slide past the start or end
of the actual audio clip. If the event plays the whole clip, you cannot slide the audio
at all.
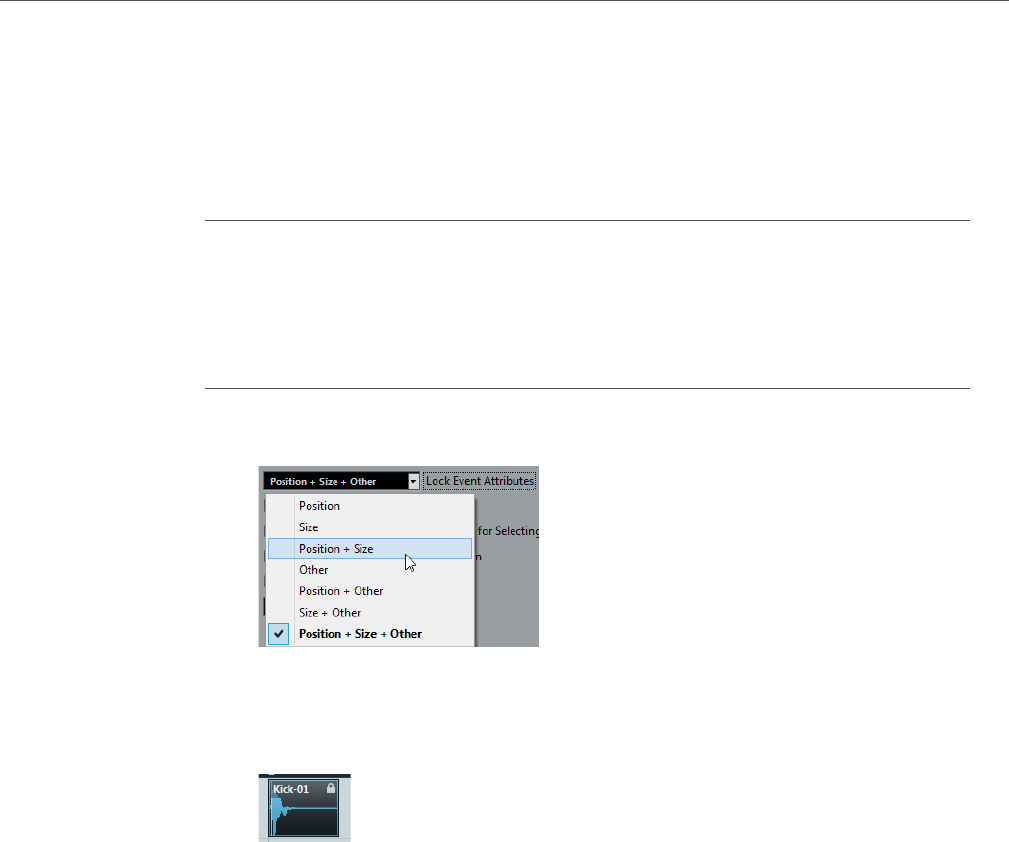
Parts and Events
Editing Parts and Events
121
Locking Events
If you want to make sure that you do not edit or move an event by accident, you can
lock it.
Locking can affect one or any combination of the following properties:
• To specify which of these properties are affected by the Lock function, use
the Lock Event Attributes pop-up menu (File > Preferences > Editing).
• To lock events, select them and select Edit > Lock.
The events will be locked according to the options specified in the
Preferences dialog.
The padlock symbol indicates that one or more of the lock options are activated for
the event.
• To adjust the lock options for a locked event, select the locked event and
select Edit > Lock.
This opens a dialog in which you can activate or deactivate the desired lock
options.
• To unlock an event (turn off all lock options), select the event and select Edit
> Unlock.
• To lock a whole track, click the padlock symbol in the track list or in the
Inspector.
This disables all editing of all events on the track.
Lock Option Description
Position If this is locked, the event cannot be moved.
Size If this is locked, the event cannot be resized.
Other If this is locked, all other editing of the event is disabled. This includes
adjusting the fades and event volume, processing, etc.
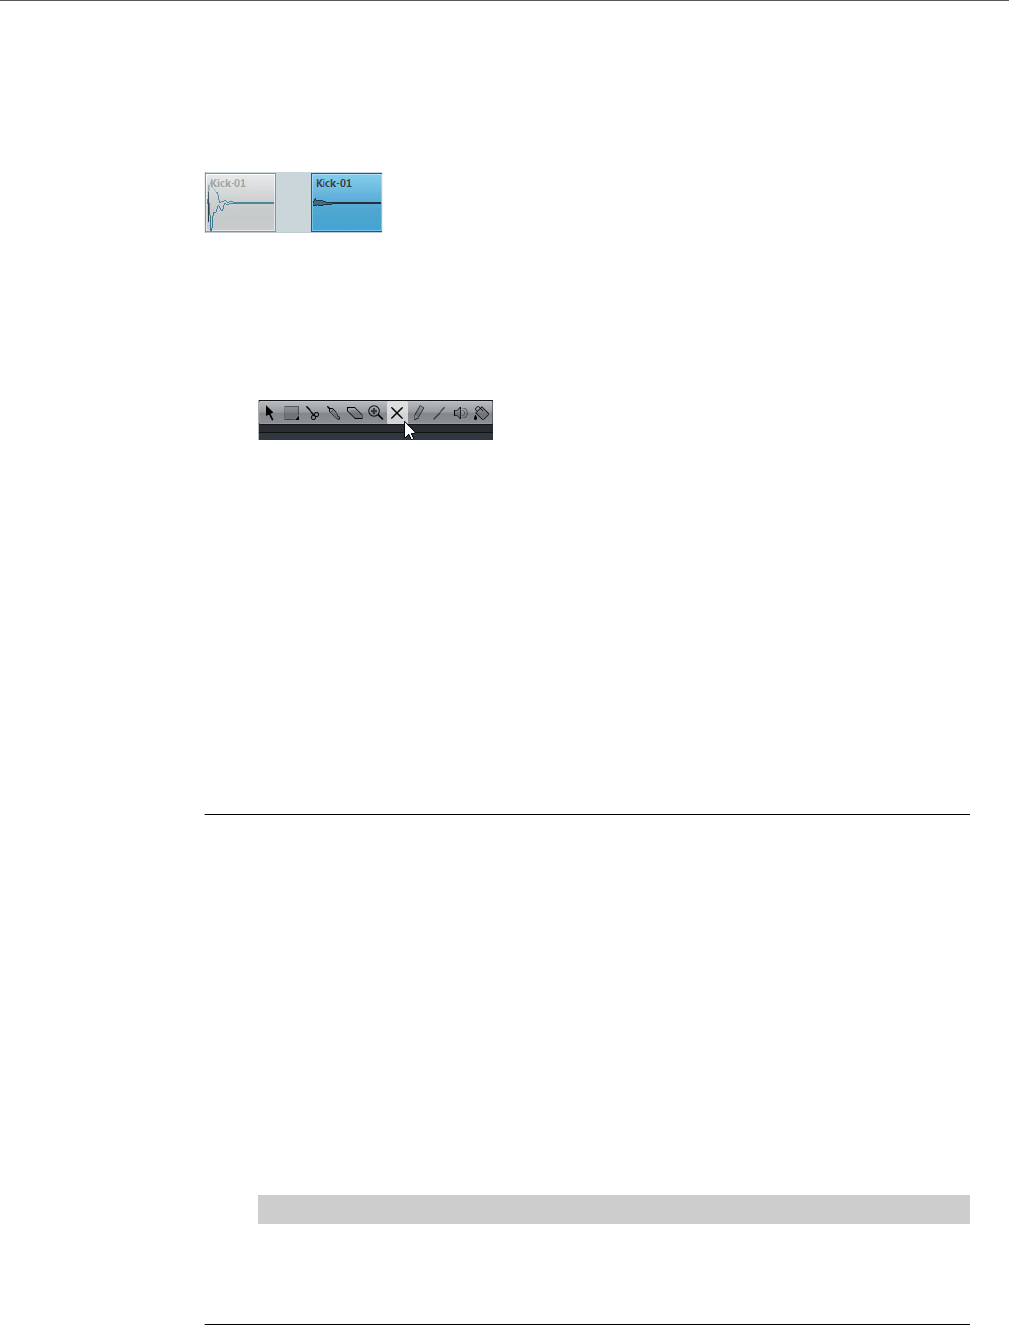
Parts and Events
Editing Parts and Events
122
Muting Events
You can mute events in the Project window. Muted events can be edited as usual
(with the exception of adjusting fades), but are not played back.
Muted events are grayed out.
• To mute events, select them and select Edit > Mute.
• To unmute events, select them and select Edit > Unmute.
• To mute or unmute a single event, click on it with the Mute tool.
• To mute or unmute several events, click in an empty area with the Mute tool
and drag a selection rectangle around several events.
All selected events are muted.
• To change the mute status of selected events, [Shift]-click them.
Creating New Files From Events
An audio event plays a section of an audio clip, which in turn refers to one or more
audio files on the hard disk. However, you can create a new file that consists only
of the section that is played by the event.
PROCEDURE
1. Select one or several audio events.
2. Set up fade in, fade out, and event volume.
These settings will be applied to the new file.
3. Select Audio > Bounce Selection.
You are asked whether you want to replace the selected event or not.
4. Do one of the following:
• To create a new file that only contains the audio in the original event, click Replace.
A clip for the new file is added to the Pool, and the original event is replaced
by a new event playing the new clip.
• To create a new file and add a clip for the new file to the Pool, click No.
The original event is not replaced.
NOTE
You can also apply the Bounce Selection function to an audio part. In that case, the audio
from all events in the part will be combined into a single audio file. If you select Replace
when asked, the part will be replaced with a single audio event playing a clip of the new file.
RELATED LINKS
Creating fades on page 174

Parts and Events
Editing Parts and Events
123
Region Operations
Regions are sections within a clip.
Regions are best created and edited in the Sample Editor. However, to access the
following options, select Audio > Advanced.
Event or Range as Region
This function is available when one or several audio events or selection ranges
are selected. It creates a region in the corresponding clip, with the start and
end position of the region determined by the start and end position of the
event or selection range within the clip.
Events from Regions
This function is available if you have selected an audio event whose clip
contains regions within the boundaries of the event. The function will remove
the original event and replace it with events positioned and sized according
to the regions.
RELATED LINKS
Working with regions on page 293
124
Range Editing
Editing in the Project window is not restricted to handling whole events and parts.
You can also work with selection ranges, which are independent from the event/part
and track boundaries.
Creating a Selection Range
• To make a selection range, drag with the Range Selection tool.
When the Range Selection tool is selected, you can select selection ranges
options via Edit > Select.
• To create a selection range that encompasses an event, double-click on an
event with the Range Selection tool.
• To create a selection range that encompasses several events, hold down
[Shift] and double-click several events in a row.
• To open an encompassed event for editing in the Sample Editor,
double-click it.
RELATED LINKS
Selection Range Options on page 124
Selection Range Options
• To open the range selection options menu, select the Range Selection tool
and select Edit > Select.
All
Makes a selection that covers all tracks, from the start of the project to the
end. You can define the track length with the Length setting in the Project
Setup dialog.
None
Removes the current selection range.

Range Editing
Creating a Selection Range
125
Invert
Inverts the selection. All selected events are deselected, and all events that
were not selected are selected. Only used for event selection.
In Loop
Makes a selection between the left and right locator on all tracks.
From Start to Cursor
Makes a selection on all tracks, from the start of the project to the project
cursor.
From Cursor to End
Makes a selection on all tracks, from the project cursor to the end of the
project.
All on Selected Tracks
Selects all events on the selected track. Only used for event selection.
Select Event
This is available in the Sample Editor.
Left Selection Side to Cursor
Moves the left side of the current selection range to the project cursor
position.
Right Selection Side to Cursor
Moves the right side of the current selection range to the project cursor
position.
RELATED LINKS
Project Setup Dialog on page 49
Selecting Events on page 112
Select Submenu on page 113
Selecting Ranges for Several Tracks
You can create selection ranges that cover several tracks. It is also possible to
exclude tracks from a selection range.
PROCEDURE
1. Create a selection range from the first to the last track.
2. Press [Ctrl]/[Command] and click in the selection range on the tracks that you
want to exclude from the selection.

Range Editing
Editing Selection Ranges
126
Editing Selection Ranges
Adjusting the Size of Selection Ranges
You can adjust the size of a selection range in the following ways:
• By dragging its edges.
The pointer takes the shape of a double arrow when you move it over an edge
of the selection range.
• By holding down [Shift] and clicking.
The closest selection range edge will be moved to the position at which you
clicked.
• By adjusting the selection range start or end position on the info line.
• By using the trim buttons on the toolbar.
The left trim buttons move the start of the selection range and the right
buttons move the end. The edges are moved by the amount specified on the
Grid pop-up menu.
NOTE
The trim buttons are located on the Nudge Palette, which is not visible on the
toolbar by default.
• By using the Move Left and Move Right buttons on the toolbar.
These move the whole selection range to the left or the right. The amount of
movement depends on the selected display format and the value specified on
the Grid pop-up menu.
IMPORTANT
The contents of the selection are not moved. Using the Move Left/Move
Right buttons is the same as adjusting the start and end of the selection range
at the same time by the same amount.
NOTE
The move buttons are located on the Nudge Palette, which is not visible on
the toolbar by default.
• To crop all events or parts that are partially within the selection range, select
Edit > Range > Crop.
Events that are fully inside or outside the selection range are not affected.
RELATED LINKS
The setup context menus on page 627

Range Editing
Editing Selection Ranges
127
Moving and Duplicating Selection Ranges
• To move a selection range, click and drag it to a new position.
This will move the contents of the selection range to the new position. If the
range intersected events or parts, these are split before moving, so that only
the sections within the selection range are affected.
• To duplicate a selection range, hold down [Alt]/[Option] and drag.
You can also use the duplicate, repeat, and fill loop functions that are available
for duplicating events.
RELATED LINKS
Duplicating on page 119
Cutting, Copying, and Pasting Selection Ranges
You can cut or copy and paste selection ranges, using the functions on the Edit
menu. You can also use the Cut Time and Paste Time options.
Cut
Cuts out the data in the selection range and moves it to the clipboard. The
selection range is replaced by empty track space in the Project window,
meaning that events to the right of the range keep their positions.
Copy
Copies the data in the selection range to the clipboard.
Paste
Pastes the clipboard data to the start position and track of the current
selection. Existing events on the tracks remain at their original position.
Paste at Origin
Pastes the clipboard data back at its original position. Existing events on the
tracks remain at their original position.
This option is available in Edit > Functions.
Cut Time
Cuts out the selection range and moves it to the clipboard. Events to the right
of the removed range are moved to the left to fill the gap.
This option is available in Edit > Range.
Paste Time
Pastes the selection range from the clipboard to the start position and track
of the current selection. Existing events are moved to make room for the
pasted data.
This option is available in Edit > Range.

Range Editing
Editing Selection Ranges
128
Paste Time at Origin
Pastes the selection range from the clipboard to its original position. Existing
events are moved to make room for the pasted data.
This option is available in Edit > Range.
Global Copy
This copies everything in the selection range.
This option is available in Edit > Range.
Deleting Data in Selection Ranges
You can delete selection ranges as follows:
• To replace data within the deleted selection range with empty track space,
select Edit > Delete or press [Backspace].
Events to the right of the range keep their position.
• To remove the selection range and make the events to the right move to the
left to fill the gap, select Edit > Range > Delete Time.
Splitting Selection Ranges
• To split any events or parts that are intersected by the selection range, at the
positions of the selection range edges, select Edit > Range > Split.
Inserting Silence
You can insert empty track space from the start of the selection range. The length
of the silence equals the length of the selection range.
• To insert silence, select Edit > Range > Insert Silence.
Events to the right of the selection range start are moved to the right to make
room. Events that are intersected by the selection range start are split, and the
right section is moved to the right.
129
Playback and Transport
This chapter describes the methods for controlling playback and transport
functions.
RELATED LINKS
Transport on page 669
Transport Panel
The Transport panel contains the main transport functions as well as many other
options related to playback and recording.
• To show the transport panel, select Transport > Transport Panel or press
[F2].
Transport Panel Sections
The Transport panel has different sections that you can show or hide by activating
the corresponding options on the transport panel context menu.
• To show all Transport panel sections, right-click anywhere in the Transport
panel and select Show All.
The following sections are available:
Virtual Keyboard
Allows you to play and record MIDI notes by using your computer keyboard
or mouse.
Performance
Shows the audio processing load and the hard disk transfer rate.
Playback and Transport
Transport Panel
130
Record Mode
Determines what happens to your recordings and to any existing events on
the track when you are recording. This section also contains the automatic
MIDI record quantize function.
Locators
Allows you to go to the left or right locator position, and to activate Auto
Punch In and Auto Punch Out.
Furthermore, you can set the left and right locator position numerically and
specify a pre-roll and a post-roll value.
Jog/Scrub
The outer wheel is the Shuttle Speed control.
The middle wheel is the Jog Wheel.
The Nudge buttons + and - allow you to move the project cursor position to
the right or left in steps of 1 frame.
Main Transport
Shows the basic transport controls as well as the time display options.
Arranger
Shows the arranger functions.
Master + Sync
Shows the basic metronome, tempo, and synchronization options.
Marker
Shows the basic marker functions.
Playback and Transport
Transport Panel
131
MIDI Activity
Allows you to monitor the MIDI input and the MIDI output signals.
Audio Activity
Allows you to monitor the audio input and output signals.
Audio Level Control
Shows clipping indicators and an output level control.
RELATED LINKS
Transport on page 669
Transport - Scrub on page 671
Pre-Roll and Post-Roll
You can activate pre-roll and post-roll with the corresponding buttons in the
Locators section on the Transport panel or by selecting Transport > Use
Pre-roll/Use Post-roll.
• By setting a pre-roll value you instruct Cubase to roll back a short section
whenever playback is activated.
• By setting a post-roll value you instruct Cubase to play back a short section
after automatic punch out before stopping.
NOTE
This is only relevant if Auto Punch Out is activated on the Transport panel
and Stop after Automatic Punch Out is activated (File > Preferences >
Transport).
Using Pre-Roll and Post-Roll
PROCEDURE
1. Set the locators to where you want to start and end recording.
2. On the Transport panel, activate Auto Punch In and Auto Punch Out.
3. Select File > Preferences > Transport and activate Stop after Automatic
Punch Out.
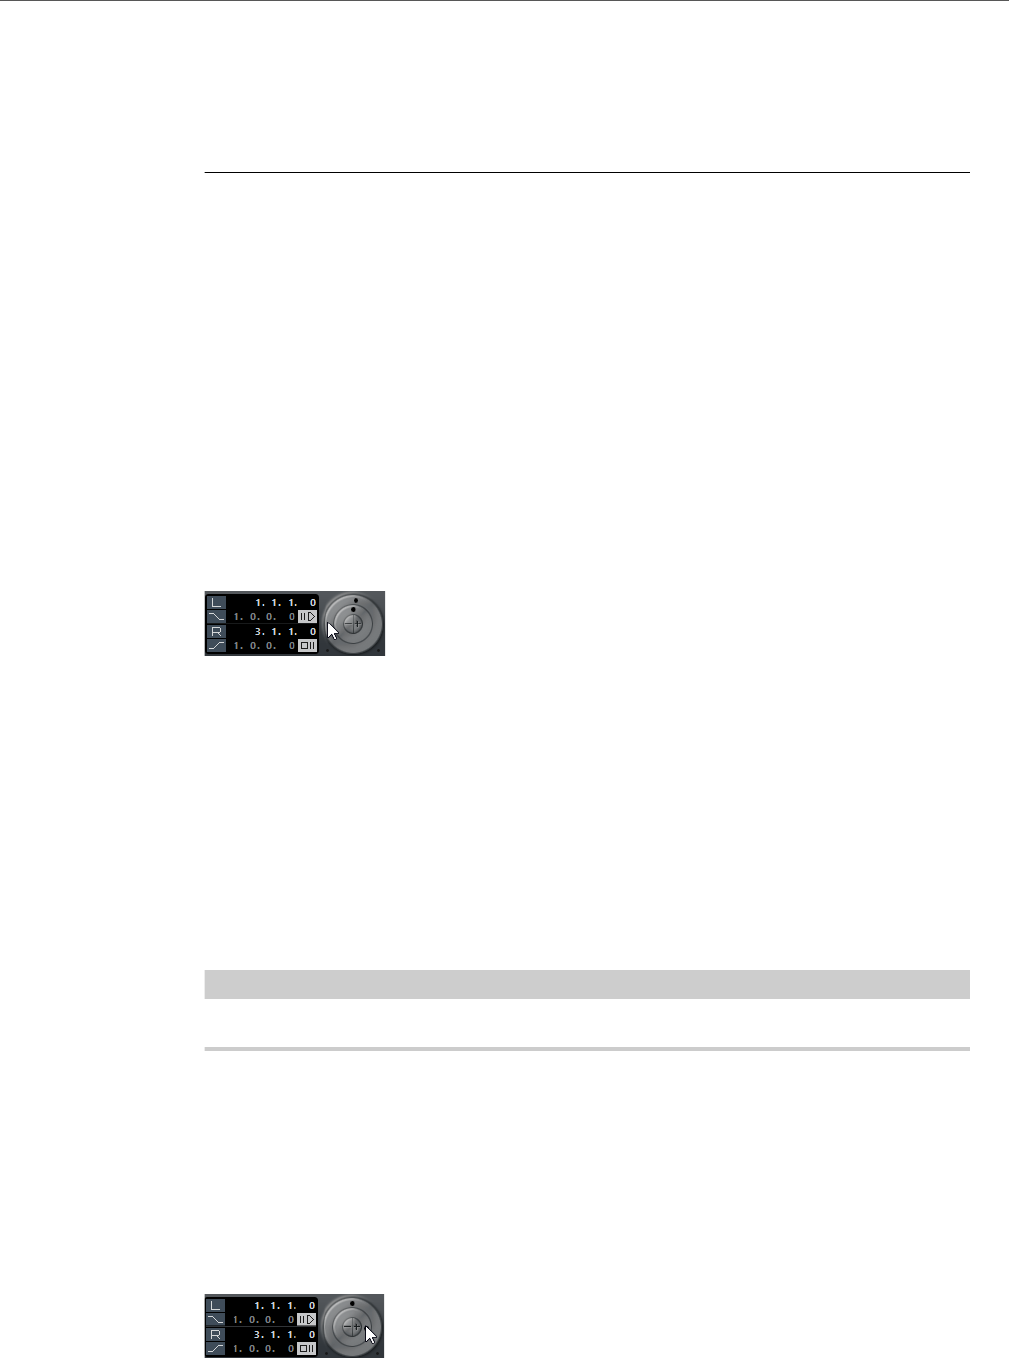
Playback and Transport
Transport Panel
132
4. On the transport panel, click the Pre-roll Amount and the Post-roll Amount
fields and enter the pre-roll and post-roll values.
5. Activate Use pre-roll and Use post-roll.
6. Activate Record.
RESULT
The project cursor rolls back by the time specified in the Pre-roll Amount field and
playback starts. When the cursor reaches the left locator, recording is automatically
activated. When the cursor reaches the right locator, recording is deactivated, but
playback continues for the time set in the Post-roll Amount field before stopping.
Playing Back with the Shuttle Speed Wheel
The shuttle speed wheel allows you to play back the project at up to four times the
playback speed, forwards or backwards. This is a quick way to locate or cue to any
position in the project.
• To start playback, turn the shuttle speed wheel to the right.
The further you turn the wheel, the faster the playback speed.
• To play the project backwards, turn the wheel to the left.
The further you turn the wheel, the faster the playback speed.
• To activate insert effects for scrubbing with the shuttle speed wheel, select
File > Preferences > Transport > Scrub and activate Use Inserts While
Scrubbing.
By default, insert effects are bypassed.
NOTE
You can also access the shuttle speed wheel via a remote control device.
Project Scrubbing - The Jog Wheel
The jog wheel allows you to move the playback position forwards or backwards,
much like scrubbing on a tape deck. This helps you pinpoint exact locations in the
project.

Playback and Transport
Transport Menu
133
• To move to another playback position, turn the jog wheel to the left or right.
The further you turn the jog wheel, the faster the playback speed. The original
playback speed is the fastest speed possible. You can turn the jog wheel as
many times as needed to move to a location.
If you click the jog wheel during playback, playback automatically stops and
scrubbing starts.
• To activate insert effects for scrubbing with the jog wheel, select File >
Preferences > Transport > Scrub and activate Use Inserts While Scrubbing.
By default, insert effects are bypassed.
NOTE
You can also access the jog wheel via a remote control device.
Transport Menu
The Transport menu contains several transport functions as well as many other
options related to playback and recording.
Open Function
Transport Panel
Opens the Transport panel.
Locate Functions
Locators to Selection
Sets the locators to encompass the selection.
Locate Selection
Moves the project cursor to the beginning of the selection.
Locate Selection End
Moves the project cursor to the end of the selection.
Locate Next/Previous Marker
Moves the project cursor to the closest marker to the right or left.
Locate Next/Previous Hitpoint
Moves the project cursor to the next or to the previous hitpoint on the selected
track.
Locate Next/Previous Event
Moves the project cursor to the next or to the previous event on the selected
track.

Playback and Transport
Transport Menu
134
Playback Functions
Post-roll from Selection Start/End
Starts playback from the beginning or end of the currently selected range and
stops after the time set in the post-roll field on the transport panel.
Pre-roll to Selection Start/End
Starts playback from a position before the start or end of the currently
selected range and stops at the selection start or end, respectively. The
playback start position is set in the pre-roll field on the transport panel.
Play from Selection Start/End
Activates playback from the beginning or end of the current selection.
Play until Selection Start/End
Activates playback two seconds before the start or end of the current
selection and stops at the selection start or end, respectively.
Play until Next Marker
Activates playback from the project cursor and stops at the next marker.
Play Selection Range
Activates playback from the start of the current selection and stops at the
selection end.
Loop Selection
Activates playback from the start of the current selection and keeps starting
over again when reaching the selection end.
Record Functions
Re-Record Mode
Activates/Deactivates the re-record mode that allows you to reinitiate a
recording with a single click.
Start Recording at Left Locator
If this is activated, the project cursor locates to the left locator when you click
the record button.
Use Pre-/Post-roll
Activates the pre-roll/post-roll.
Retrospective Record
Allows you to capture MIDI notes that you play in stop mode or during
playback. Therefore, you need to enable the Retrospective Record option
(File > Preferences > Record > MIDI).

Playback and Transport
Setting the Project Cursor Position
135
Metronome Functions
Metronome Setup
Opens the Metronome Setup dialog.
Metronome On/Off
Activates/Deactivates the metronome click.
Precount On/Off
Activates/Deactivates the precount.
Synchronization Functions
Project Synchronization Setup
Opens the Project Synchronization Setup dialog.
Use External Sync
Sets Cubase to be synchronized externally.
Setting the Project Cursor Position
To move the project cursor, do one of the following:
• Use fast forward and rewind.
• Use the jog/shuttle/nudge control on the Transport panel.
• Drag the project cursor in the lower part of the ruler.
• Click in the ruler.
Double-clicking in the ruler moves the cursor and starts/stops playback.
•If Locate when Clicked in Empty Space is activated (File > Preferences >
Transport), you can click anywhere in an empty section of the Project
window to move the cursor position.
• Change the value in any of the position displays.
• Use the position slider above the transport buttons in the Transport panel.
The range of the slider relates to the length setting in the Project Setup
dialog. Hence, moving the slider all the way to the right takes you to the end
of the project.
•Use markers.
• Use the playback options.
• Cubase Elements only: Use the arranger function.
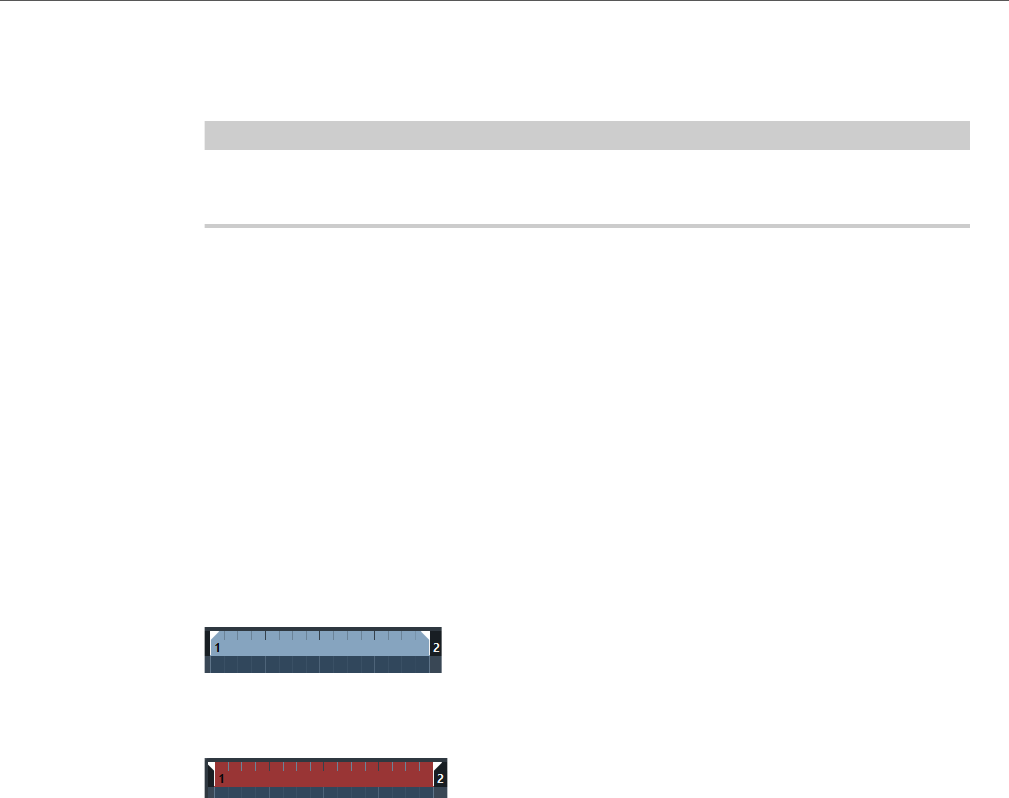
Playback and Transport
Left and Right Locators
136
• Use the functions on the Transport menu.
• Use key commands.
NOTE
If Snap is activated when dragging the project cursor, the snap value is taken into
account. This is helpful for finding exact positions quickly.
RELATED LINKS
Markers on page 196
Transport Menu on page 133
Arranger Track (Cubase Elements only) on page 184
Playing Back with the Shuttle Speed Wheel on page 132
Left and Right Locators
The left and right locators are a pair of markers that you can use for specifying
punch-in and punch-out positions, and cycle boundaries.
Locators are indicated by the flags in the ruler. The area between the locators is
highlighted in the ruler and the event display.
If the right locator is positioned before the left locator, the area between the locators
is shown in a different color.
Setting the Locators
There are several ways to set the locator positions.
To set the left locator, do one of the following:
• Drag the left handle in the ruler.
• Press [Ctrl]/[Command] and click at the position in the ruler.
• Adjust the Left Locator Position value on the Transport panel.
To set the left locator to the project cursor position, do one of the following:
• Press [Ctrl]/[Command], and on the numeric keypad press [1].
• Press [Alt]/[Option] and click L on the Transport panel.
To set the right locator, do one of the following:
• Drag the right handle in the ruler.

Playback and Transport
Auto-Scroll
137
• Press [Alt]/[Option] and click at the position in the ruler.
• Adjust the Right Locator Position value on the Transport panel.
To set the right locator to the project cursor position, do one of the following:
• Press [Ctrl]/[Command] and on the numeric keypad press [2].
• Press [Alt]/[Option] and click R on the Transport panel.
To set both locators, do one of the following:
• Click and drag left or right in the upper half of the ruler.
• Select a range or an event and select Transport > Locators to Selection.
• Double-click a cycle marker.
Auto-Scroll
Auto-Scroll allows the waveform display to scroll during playback, keeping the
project cursor visible in the window.
•To activate Auto-Scroll, click the Auto-Scroll button on the toolbar.
• To keep the project cursor in the middle of the screen, select File >
Preferences > Transport and activate Stationary Cursors.
NOTE
Auto-Scroll is available in the toolbar of the Project window and in all editors.
Suspend Auto-Scroll when Editing
If you do not want the Project window display to change when editing during
playback, you can activate Suspend Auto-Scroll when Editing.
The Suspend Auto-Scroll when Editing button is located to the right of the
Auto-Scroll button.
When this option is activated, auto-scrolling is suspended as soon as you click
anywhere in the event display during playback. As a visual feedback for that, the
Auto-Scroll button turns orange.
As soon as playback stops or when you click the Auto-Scroll button again, Cubase
will return to the normal Auto-Scroll behavior.
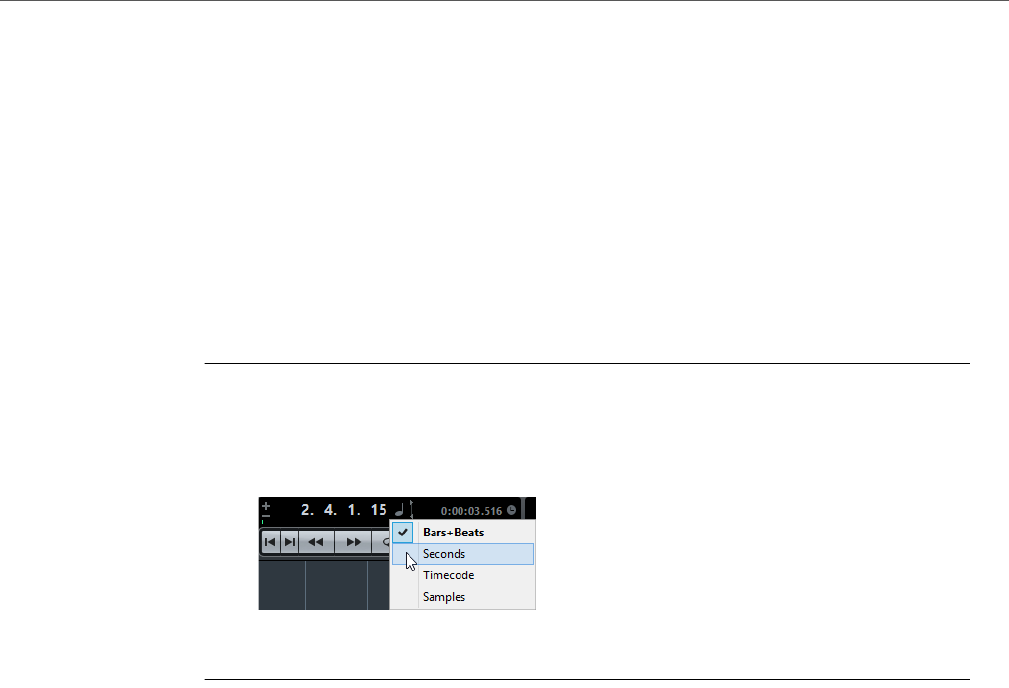
Playback and Transport
Time Formats
138
Time Formats
You can set up different time formats.
Selecting the Primary Time Format
In the Transport panel, you can select the primary time format. This is the global
display format that is used for all rulers and position displays in the program, except
the ruler tracks.
PROCEDURE
1. In the main transport section of the Transport panel, click Select Primary
Time Format.
2. Select a time format from the pop-up menu.
You can also select Project > Project Setup > Display Format to select the primary
time format.
RESULT
The time format in the Transport panel and all rulers and position displays are
updated.
Independent Time Displays (Cubase Elements only)
You can show time displays that are independent from the global display format.
To select an independent time display, do one of the following:
• In the ruler of the Project window or any editor, click the arrow button to the
right of the ruler.
•Select Project > Add Track > Ruler to add a ruler track, and right-click the
ruler.
• In the Main Transport section of the Transport panel, click Select
Secondary Time Format.
RELATED LINKS
Ruler on page 29
Ruler Track on page 86
Playback and Transport
Locating to Specific Time Positions
139
Switching the Primary and Secondary Time Format (Cubase
Elements only)
PROCEDURE
• In the Main Transport section of the Transport panel, click Exchange Time
Format.
RESULT
The primary and secondary time formats are switched and all rulers and position
displays are updated.
Locating to Specific Time Positions
You have several possibilities to locate to specific time positions in the Project
window.
• In the Transport panel, use the functions in the Main Transport section or in
the Jog/Scrub section.
• In the Transport panel, use the position slider above the transport buttons.
• In the ruler, click the time position that you want to locate to.
Double-click to start/stop playback.
• In the lower part of the ruler, drag the project cursor.
• Use the following Transport menu functions: Locate Selection/Locate
Selection End, Locate Next/Previous Marker, Locate Next/Previous
Hitpoint, Locate Next/Previous Event.
•Use markers.
• Use the arranger functions.
•Use locators.
On the numeric keypad, press [1] to go to the left locator position, and press
[2] to go to the right locator position.
On the Transport panel, click L to go to the left locator, and click R to go to
the right locator.
NOTE
If Snap is activated, the snap value is taken into account. This is helpful for finding
exact positions quickly.
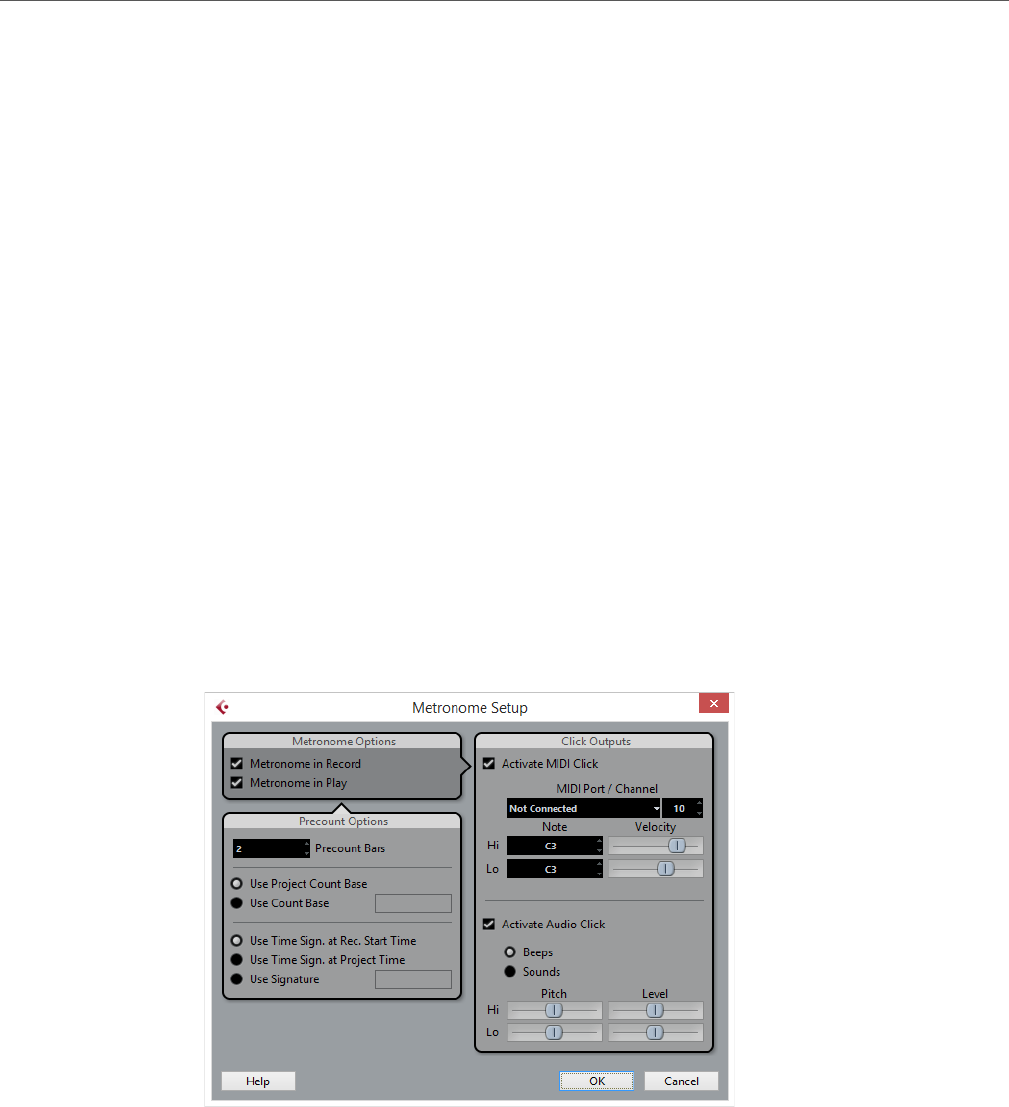
Playback and Transport
Metronome
140
Metronome
You can use the metronome click as a timing reference. The two parameters that
govern the timing of the metronome are tempo and time signature.
• To activate the metronome click, activate the Click button on the Transport
panel.
You can also select Transport > Metronome On or use the corresponding
key command.
• To activate the precount, click the Precount button on the Transport panel.
You can also select Transport > Precount On or set up a key command for
this.
• To set up the metronome, select Transport > Metronome Setup.
Metronome Setup
You can make settings for the metronome in the Metronome Setup dialog.
• To open the Metronome Setup dialog, select Transport > Metronome
Setup.
Metronome Options Section
In the Metronome Options section, the following options are available:
Metronome in Record
Allows you to activate the metronome click during recording.
Metronome in Play
Allows you to activate the metronome click during playback.

Playback and Transport
Metronome
141
Precount Options Section
In the Precount Options section, the following options are available:
Precount Bars
Allows you to set the number of bars that the metronome counts in before
recording starts.
Use Project Count Base
Activate this to let the metronome play one click per beat according to the
project count base.
Use Count Base
Activate this to set the rhythm of the metronome. For example, setting this to
1/8, gives you eighth notes (two clicks per beat).
Use Time Sign. at Rec. Start Time
Activate this to let the precount automatically use the time signature and
tempo set at the position where recording starts.
Use Time Sign. at Project Time
Activate this to let the precount use the time signature set on the tempo track
and apply any tempo changes on the tempo track during the precount.
Use Signature
Allows you to set a time signature for the precount. In this mode, tempo
changes on the tempo track do not affect the precount.
Click Outputs Section
In the Click Outputs section, the following options are available:
Activate MIDI Click
Allows you to activate the MIDI click.
MIDI Port/Channel
Allows you to select a MIDI output and channel for the MIDI click. You can
also select a VST instrument previously set up in the VST Instruments
window.
Hi Note/Velocity
Allows you to set the MIDI note number and velocity value for the first beat in
a bar, the high note.
Lo Note/Velocity
Allows you to set the MIDI note number and velocity for the other beats, the
low notes.
Activate Audio Click
Allows you to activate the audio click that sounds via the audio hardware.
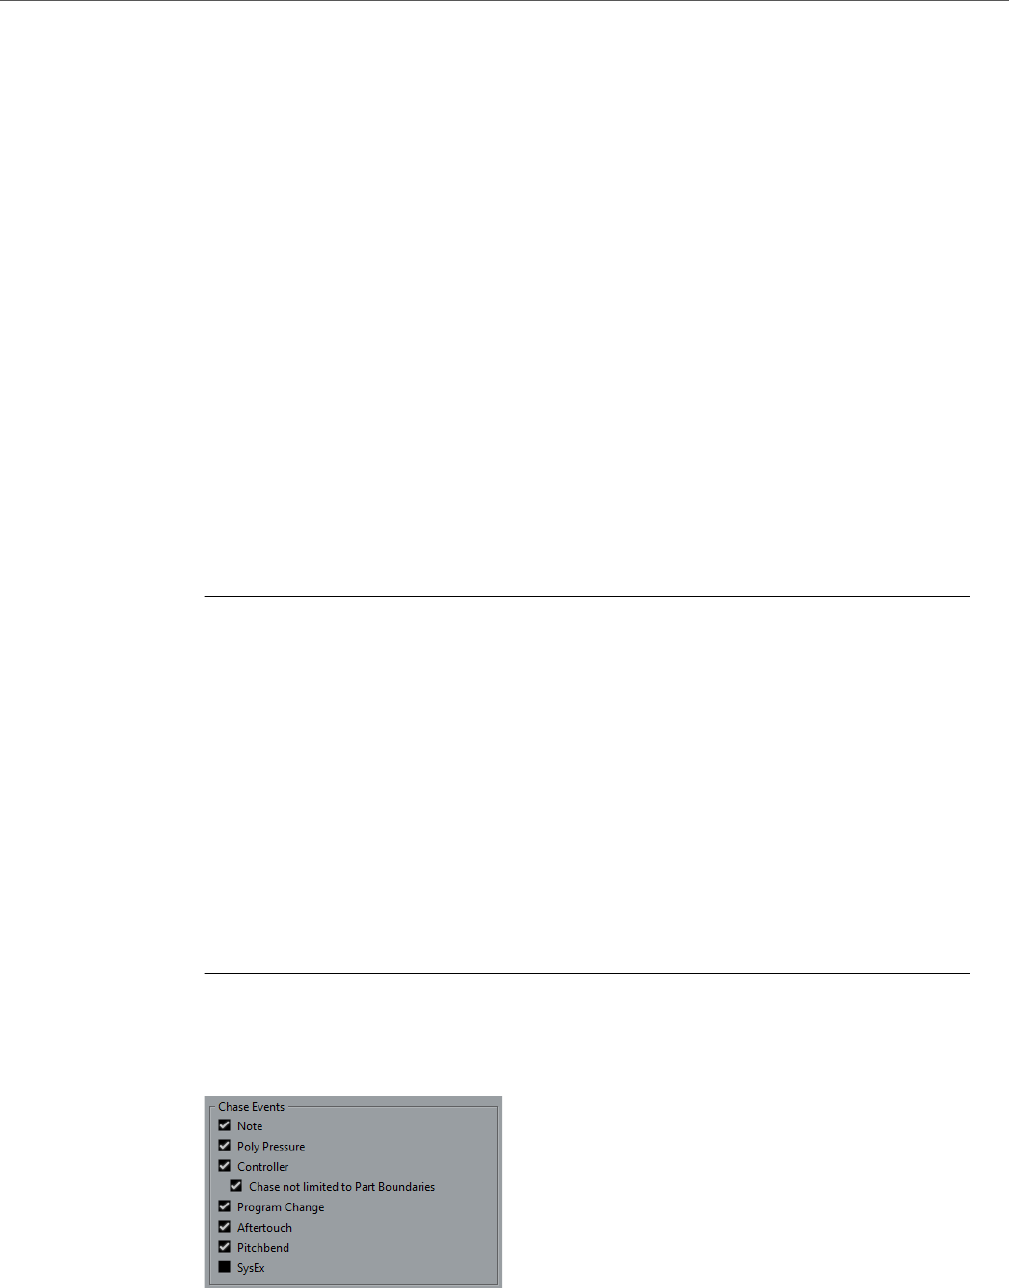
Playback and Transport
Chase
142
Beeps
Allows you to activate beeps generated by the program. Adjust the pitch and
level of the beeps for the Hi (first) beat and Lo (other) beats using the sliders
below.
Sounds
Allows you to load audio files for the Hi and Lo metronome sounds in the
Sound fields below. The sliders set the level of the click.
Chase
Chase is a function that makes sure your MIDI instruments sound as they should
when you locate to a new position and start playback. This is accomplished by the
program transmitting a number of MIDI messages to your instruments each time that
you move to a new position in the project, making sure all MIDI devices are set up
correctly with regard to program change, controller messages (such as MIDI
Volume), etc.
EXAMPLE
You have a MIDI track with a program change event inserted at the beginning. This
event makes a synth switch to a piano sound.
At the beginning of the first chorus you have another program change event which
makes the same synth switch to a string sound.
You now play back the song. It begins with the piano sound and then switches to
the string sound. In the middle of the chorus you stop and rewind to some point
between the beginning and the second program change. The synth now still plays
the string sound although in this section it really should be a piano.
The Chase function takes care of that. If program change events are set to be
chased, Cubase tracks the music back to the beginning, finds the first program
change, and transmits it to your synth, setting it to the correct sound.
The same thing can apply to other event types as well. The Chase Events settings
(File > Preferences > MIDI) determine which event types are chased when you
locate to a new position and start playback.
Activated event types are chased.
RELATED LINKS
Chase Events on page 661

143
Virtual Keyboard
The Virtual Keyboard allows you to play and record MIDI notes by using your
computer keyboard or mouse. This is useful if you have no external MIDI instrument
at hand and you do not want to draw in notes with the Draw tool.
When the Virtual Keyboard is displayed, the usual key commands are blocked
because they are reserved for the Virtual Keyboard. The only exceptions are:
• Save: [Ctrl]/[Command]-[S]
• Start/Stop Record: Num [*]
• Start/Stop Playback: [Space]
• Jump to left locator: Num [1]
• Delete: [Delete] or [Backspace]
• Cycle on/off: Num [/]
• Show/Hide Transport panel: [F2]
• Show/Hide Virtual Keyboard: [Alt]/[Option]-[K]
Recording MIDI With the Virtual Keyboard
PREREQUISITE
You have selected a MIDI or instrument track and activated Record Enable.
PROCEDURE
1. Select Devices > Virtual Keyboard.
The Virtual Keyboard is displayed in the Transport panel.
2. On the Transport panel, activate Record.
3. Perform one of the following actions to enter some notes:
• Click with the mouse on the keys of the virtual keyboard.
• Press the corresponding key on your computer keyboard.
NOTE
Press several keys simultaneously to enter polyphonic parts. The maximum number of
notes that can be played at one time varies between the different operating systems
and hardware configurations.
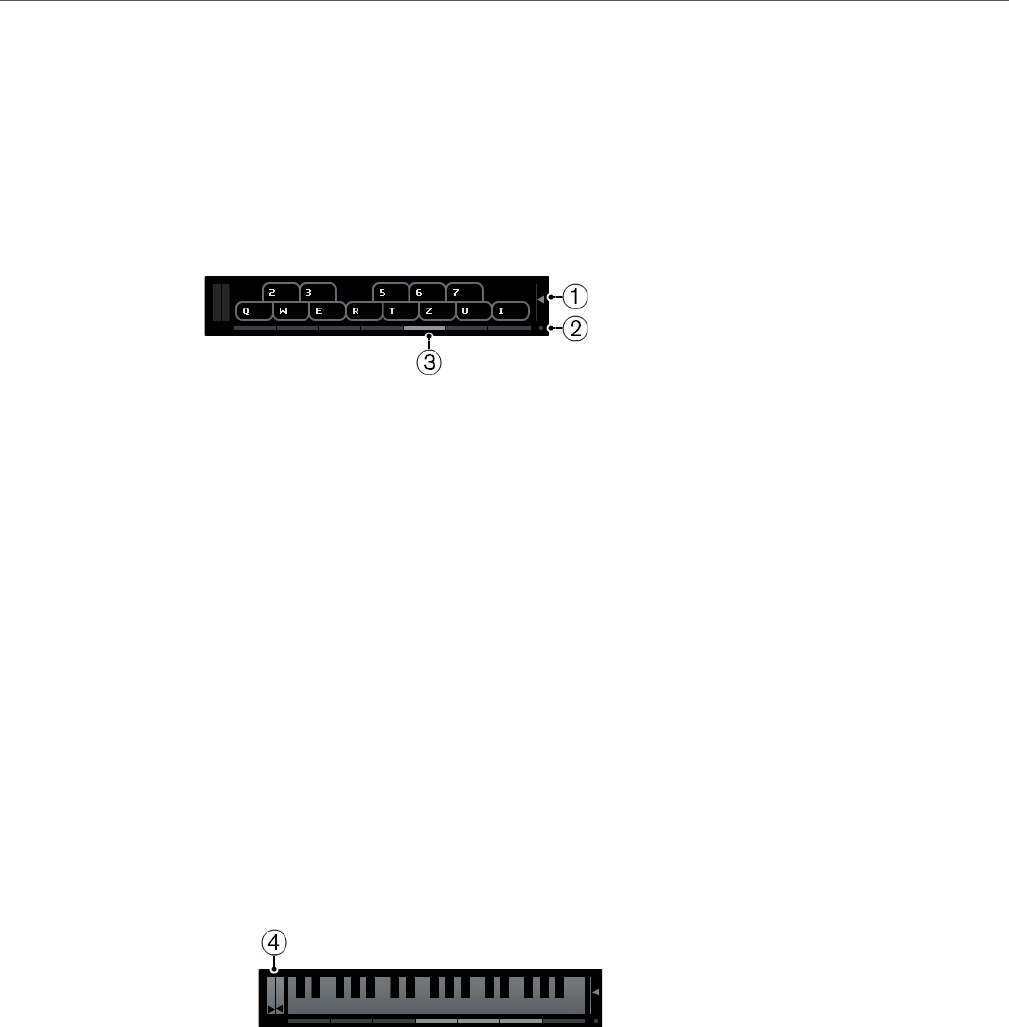
Virtual Keyboard
Virtual Keyboard Options
144
AFTER COMPLETING THIS TASK
Close the virtual keyboard to make all key commands available again.
Virtual Keyboard Options
1) Note Velocity Level
This slider allows you to adjust the volume of the virtual keyboard. You can
also use the up and down arrow keys for this.
2) Change Virtual Keyboard Display Type
This button allows you to switch between computer keyboard and piano
keyboard display mode.
The computer keyboard mode, you can use the two rows of keys that are
displayed on the Virtual Keyboard to enter notes.
The piano keyboard has a wider range of keys. It allows you to enter more than
one voice simultaneously. You can also use the [Tab] key for this.
3) Octave Offset
These buttons allow you to switch the keyboard range to a lower or higher
octave. You have seven full octaves at your disposal. You can also use the left
and right arrow keys for this.
4) Pitchbend/Modulation Sliders
These sliders are only available in piano keyboard mode. They allow you to
introduce pitchbend and modulation. You can also click on a key, hold the
mouse button pressed until the mouse pointer becomes a cross-hair cursor
and drag upwards/downward to introduce modulation or drag left/right to
create pitchbend.

145
Recording
In Cubase, you can record audio and MIDI.
This chapter assumes that you are familiar with certain basic recording concepts
and that some initial preparations have been made.
• Set up, connect, and calibrate your audio hardware.
• Open a project and set up the project setup parameters according to your
specifications.
Project setup parameters determine the record format, sample rate, project
length, etc. that affect the audio recordings that you make during the course
of the project.
• If you plan to record MIDI, set up and connect your MIDI equipment.
RELATED LINKS
Setting Up Audio on page 8
Setting Up MIDI on page 14
Basic Recording Methods
This section describes the general recording methods.
Record Enabling Tracks
To be able to record, you must record-enable the tracks on which you want to
record.
• To record-enable a track, activate the Record Enable button in the track list,
in the Inspector, or in the MixConsole.
• To record-enable all audio tracks simultaneously, set up a key command for
Activate Record Enable for all Audio Tracks in the Mixer category of the
Key Commands dialog and use it.
• To record-enable audio or MIDI tracks on selection, activate the Enable
Record on Selected Audio Track or the Enable Record on Selected MIDI
Track option (File > Preferences > Editing > Project & MixConsole).

Recording
Basic Recording Methods
146
NOTE
The exact number of audio tracks that you can record simultaneously depends on
your computer CPU and hard disk performance. Activate the Warn on Processing
Overloads option (File > Preferences > VST) to show a warning message as
soon as the CPU overload indicator lights up during recording.
RELATED LINKS
Editing - Project & MixConsole on page 654
VST on page 671
Activating Recording
You can activate recording manually or automatically.
Activating Recording Manually
• To activate recording, click the Record button on the Transport panel or on
the toolbar. You can also use the corresponding key command, by default [*]
on the numeric keypad.
Recording starts from the current cursor position.
NOTE
When you start recording in Stop mode, you can start recording from the left locator
by activating Start Record at Left Locator on the Transport menu. The pre-roll
setting or the metronome count-in will be applied.
Activating Recording Automatically
Cubase can automatically switch from playback to recording at a given position.
This is useful if you must replace a section of a recording and want to listen to what
is already recorded up to the recording start position.
PROCEDURE
1. Set the left locator to the position where you want to start recording.
2. Activate the Punch In button on the Transport panel.
3. Activate playback from any position before the left locator.
When the project cursor reaches the left locator, recording is automatically activated.
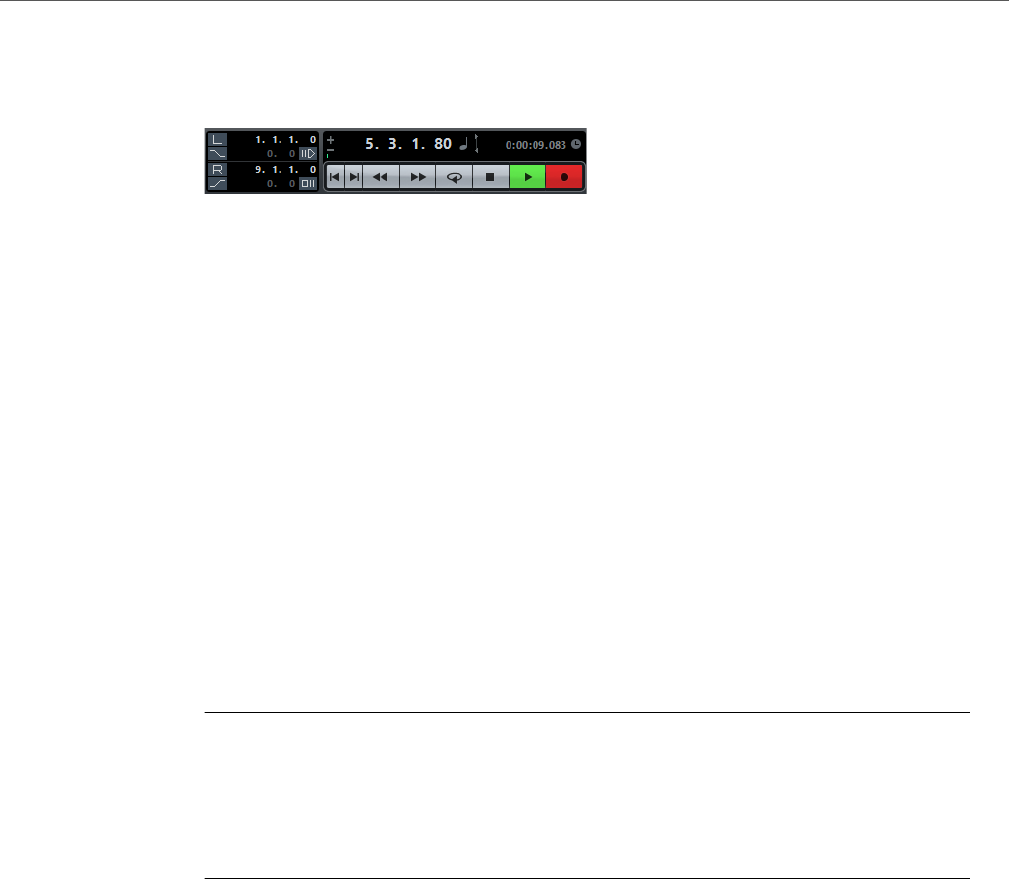
Recording
Basic Recording Methods
147
Stopping Recording
• To stop recording and playback, click the Stop button on the Transport panel
or use the corresponding key command, by default [0] on the numeric keypad.
• To stop recording and continue playback, click the Record button or use the
corresponding key command, by default [*] on the numeric keypad.
• To stop recording automatically when the project cursor reaches the right
locator and continue playback, activate the Punch Out button on the
Transport panel.
Cycle Recording
You can record in a cycle, that is you can record a selected section repeatedly and
seamlessly.
PREREQUISITE
A cycle is set up with the left and right locators.
PROCEDURE
1. Click the cycle button on the Transport panel to activate cycle mode.
2. Activate recording from the left locator, before or within the cycle.
As soon as the project cursor reaches the right locator, it jumps back to the left
locator and continues recording a new lap.
RESULT
The results of cycle recording depend on the selected record mode. They also differ
for audio and MIDI.
RELATED LINKS
Recording MIDI on page 160
Recording Audio on page 154
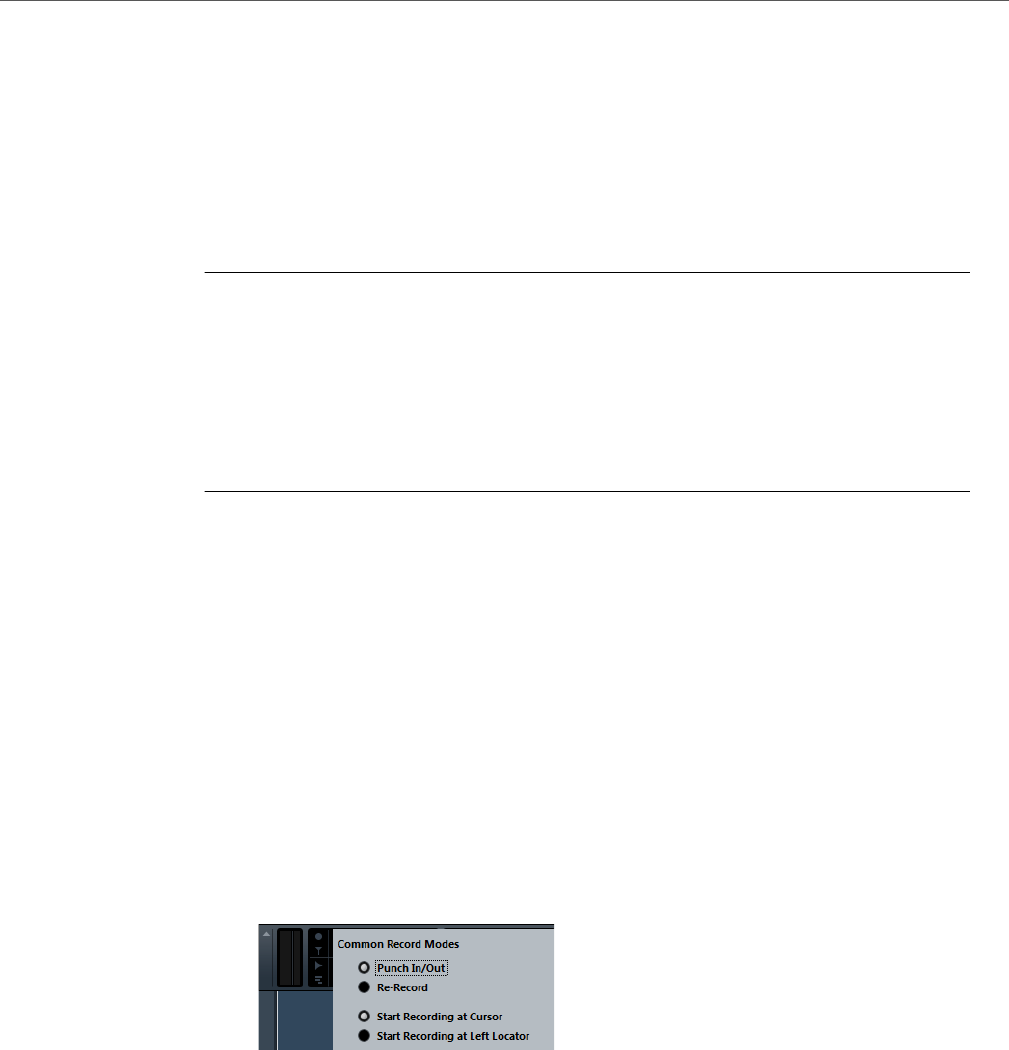
Recording
Basic Recording Methods
148
Using Pre-Roll and Post-Roll
You can set up a pre-roll and a post-roll for recording.
PREREQUISITE
Select File > Preferences > Transport and activate the Stop after Automatic
Punch Out option.
PROCEDURE
1. Set the locators to where you want to start and end recording.
2. On the Transport panel, activate Auto Punch In and Auto Punch Out.
3. Activate Use Pre-roll and Use Post-roll.
4. Specify a Pre-roll Amount and a Post-roll Amount.
5. Click Record.
RESULT
The project cursor rolls back and starts playback at the time that has been set as
pre-roll amount. When the cursor reaches the left locator, recording is automatically
activated. When the cursor reaches the right locator, recording is deactivated, and
the playback continues as long as the time that has been set as post-roll amount.
Common Record Modes
The Common Record Modes determine what happens if you click the Record
button during an audio or MIDI recording.
• In the Transport panel, click the upper part of the Record Modes section to
open the Common Record Modes pop-up menu.
Punch In/Out
In this mode, the recording is stopped.
Re-Record
In this mode, the recording is reinitiated, the events are removed and
recording is restarted from the exact same position.
Start Recording at Cursor
In this mode, recording starts from the cursor position.
Start Recording at Left Locator
In this mode, recording starts from the left locator.
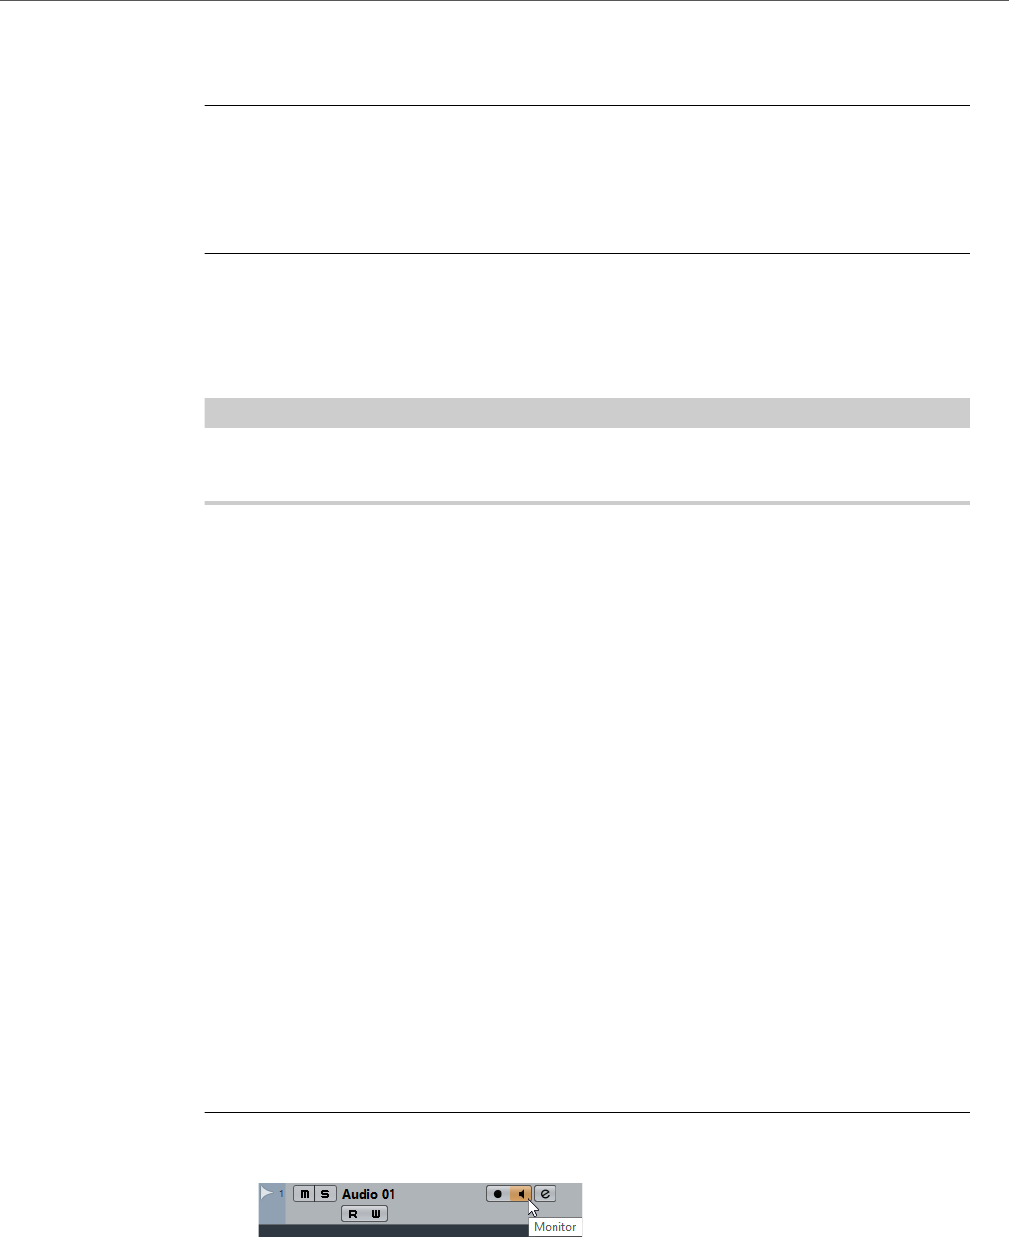
Recording
Monitoring
149
Re-Recording
PROCEDURE
1. Activate Transport > Re-Record.
2. Activate recording.
3. Hit the Record button again to restart recording.
RESULT
The project cursor jumps back to the record start position and recording is
reinitiated. Pre-roll and pre-count settings are taken into account.
NOTE
The previous recordings are removed from the project and cannot be retrieved
using Undo. However, they remain in the Pool.
Monitoring
In Cubase, monitoring means listening to the input signal while preparing to record
or while recording.
The following ways of monitoring are available.
•Via Cubase.
• Externally by listening to the signal before it reaches Cubase.
• By using ASIO Direct Monitoring.
This is a combination of both other methods.
Monitoring via Cubase
If you use monitoring via Cubase, the input signal is mixed with the audio playback.
This requires an audio hardware configuration with a low latency value.
PROCEDURE
1. In the track list, activate the Monitor button.
2. In the MixConsole, adjust the monitoring level and the panning.
You can add effects and EQ to the monitor signal using the track’s channel. If you are
using plug-in effects with large inherent delays, the automatic delay compensation
function in Cubase will increase the latency. If this is a problem, you can use the
Constrain Delay Compensation function while recording.

Recording
Monitoring
150
3. Select File > Preferences > VST.
4. Open the Auto Monitoring pop-up menu and select a monitoring mode.
RESULT
The monitored signal will be delayed according to the latency value which depends
on your audio hardware and drivers. You can check the latency of your hardware in
the Device Setup dialog (Device > Device Setup > VST Audio System).
RELATED LINKS
VST on page 671
External Monitoring
External monitoring means listening to the input signal before it is sent into Cubase.
It requires an external mixer for mixing the audio playback with the input signal. The
latency value of the audio hardware configuration does not affect the monitor signal.
When using external monitoring, you cannot control the level of the monitor signal
from within Cubase or add VST effects or EQ to the monitor signal.
PROCEDURE
1. Select File > Preferences > VST.
2. Open the Auto Monitoring pop-up menu and select Manual.
3. Deactivate the Monitor buttons in Cubase.
4. On your mixing desk or mixer application for your audio hardware, activate the
Thru or Direct Thru mode to send the input audio back out again.
ASIO Direct Monitoring
If your audio hardware is ASIO 2.0 compatible, it may support ASIO Direct
Monitoring. This feature may also be available for audio hardware with Mac OS X
drivers. In ASIO Direct Monitoring mode, the monitoring is done in the audio
hardware, and monitoring is controlled from Cubase. The latency value of the audio
hardware configuration does not affect the monitor signal when using ASIO Direct
Monitoring.
PROCEDURE
1. In the track list, activate the Monitor button.
2. Select Devices > Device Setup.
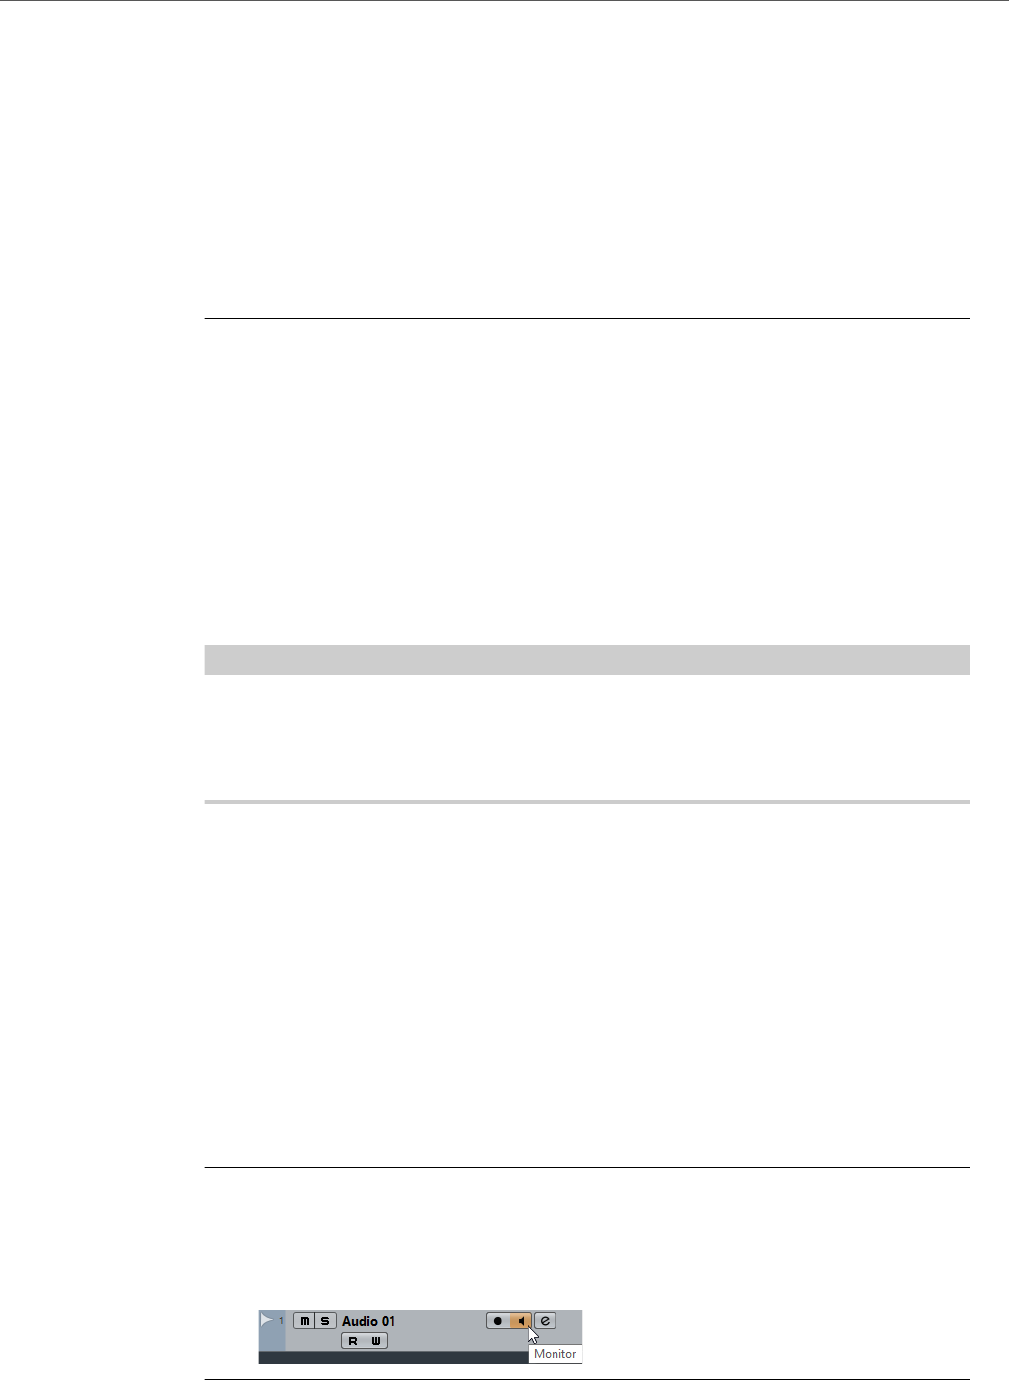
Recording
Monitoring
151
3. In the Device Setup dialog, select your driver in the Devices list on the left to
display the driver settings for your audio hardware, and activate the Direct
Monitoring checkbox.
If the checkbox is grayed out, your audio hardware (or its driver) does not support
ASIO Direct Monitoring. Consult the audio hardware manufacturer for details.
4. Select File > Preferences > VST.
5. Open the Auto Monitoring pop-up menu and select a monitoring mode.
6. In the MixConsole, adjust the monitoring level and panning.
Depending on the audio hardware, this might not be possible.
AFTER COMPLETING THIS TASK
You can monitor the input levels of audio tracks, that is, you can map the input bus
metering to monitor-enabled audio tracks and watch the input levels of your audio
tracks when working in the Project window.
•Select File > Preferences > Metering and activate Map Input Bus
Metering to Audio Track (in Direct Monitoring).
As the tracks are mirroring the input bus signal you will see the same signal in
both places. When using mapped metering, any functions that you apply to
the audio track are not reflected in its meters.
NOTE
When using Steinberg hardware (MR816 series) in combination with ASIO Direct
Monitoring, monitoring will be virtually latency-free. If you are using RME Audio
Hammerfall DSP audio hardware, make sure that the pan law is set to -3 dB in the
card’s preferences.
RELATED LINKS
VST on page 671
Monitoring MIDI Tracks
You can monitor everything you play and record though the MIDI output and
channel that are selected for the MIDI track.
PREREQUISITE
Local Off is activated on your MIDI instrument.
PROCEDURE
1. Select File > Preferences > MIDI.
2. Make sure MIDI Thru Active is activated.
3. In the track list, activate the Monitor button.

Recording
Audio Recording Specifics
152
RESULT
Incoming MIDI is echoed back out again.
RELATED LINKS
MIDI on page 661
Audio Recording Specifics
Preparations
Selecting a Record File Format
You can set up the record file format, that is the sample rate, bit resolution, and
record file type for new audio files.
PROCEDURE
1. Select Project > Project Setup.
2. Set up the settings for Sample Rate, Bit Resolution, and Record File Type.
IMPORTANT
The bit resolution and file type can be changed at any time while the sample rate of a
project cannot be changed at a later stage.
RELATED LINKS
Creating New Projects on page 44
Setting the Audio Record Folder
Each Cubase project has a project folder containing an Audio folder. By default,
this is where recorded audio files are stored. However, you can select record
folders independently for each audio track if needed.
PROCEDURE
1. In the track list, select all tracks that you want to assign the same record folder.
2. Right-click one of the tracks to open the context menu.
3. Select Set Record Folder.
A file dialog opens.

Recording
Audio Recording Specifics
153
4. Navigate to the folder that you want to use as record folder or create a new
folder with the New Folder button.
If you want to have separate folders for different types of material (speech, ambient
sounds, music, etc.), you can create subfolders within the project Audio folder and
assign different tracks to different subfolders. This way, all audio files will still reside
within the project folder, which will make managing the project easier.
Getting the Track Ready for Recording
Creating a Track and Setting the Channel Configuration
PROCEDURE
1. Select Project > Add Track > Audio.
2. In the Count field, enter the number of tracks that you want to add.
3. Open the Configuration pop-up menu and select a channel configuration.
4. Optional: Enter a track name.
5. Click Add Track.
RELATED LINKS
Add Track Dialog on page 91
RAM Requirements for Recording
Each track on which you record requires a certain amount of RAM, and the memory
usage increases the longer the recording lasts. For each audio channel, 2.4 MB of
RAM are required for MixConsole settings, etc. The memory usage increases with
the length of the recording, the sample rate, and the number of tracks you record.
Consider the RAM limitation of your operating system when setting up your project
for recording.
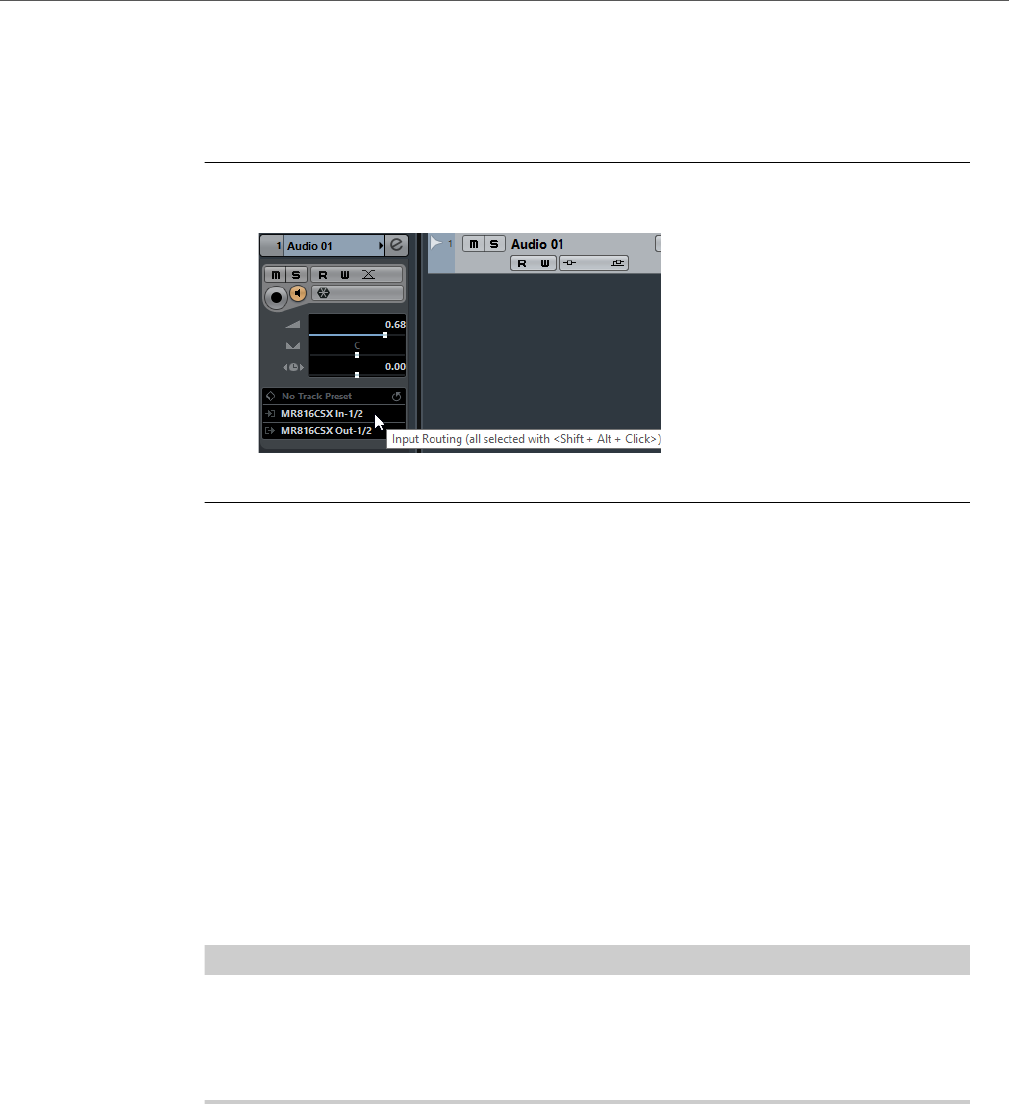
Recording
Audio Recording Specifics
154
Selecting an Input Bus for the Track
Before you can record on your track, you must add and set up the required input
busses and specify from which input bus the track will record.
PROCEDURE
1. In the Inspector for the audio track, open the Input Routing pop-up menu.
2. Select an input bus.
RELATED LINKS
Setting Up the Input and Output Ports on page 13
Setting Up Busses on page 12
Audio Track Inspector on page 60
Recording Audio
You can record audio using any of the basic recording methods.
When you finish recording, an audio file is created in the Audio folder within the
project folder. In the Pool, an audio clip is created for the audio file, and an audio
event that plays the whole clip appears on the recording track. Finally, a waveform
image is calculated for the audio event. If the recording was very long, this may take
a while.
NOTE
The waveform image will be calculated and displayed during the actual recording
process. This realtime calculation uses some processing power. If your processor
is slow or if you are working on a CPU-intensive project, select File > Preferences
> Record > Audio and deactivate Create Audio Images During Record.
RELATED LINKS
Activating Recording on page 146
Cycle Recording on page 147
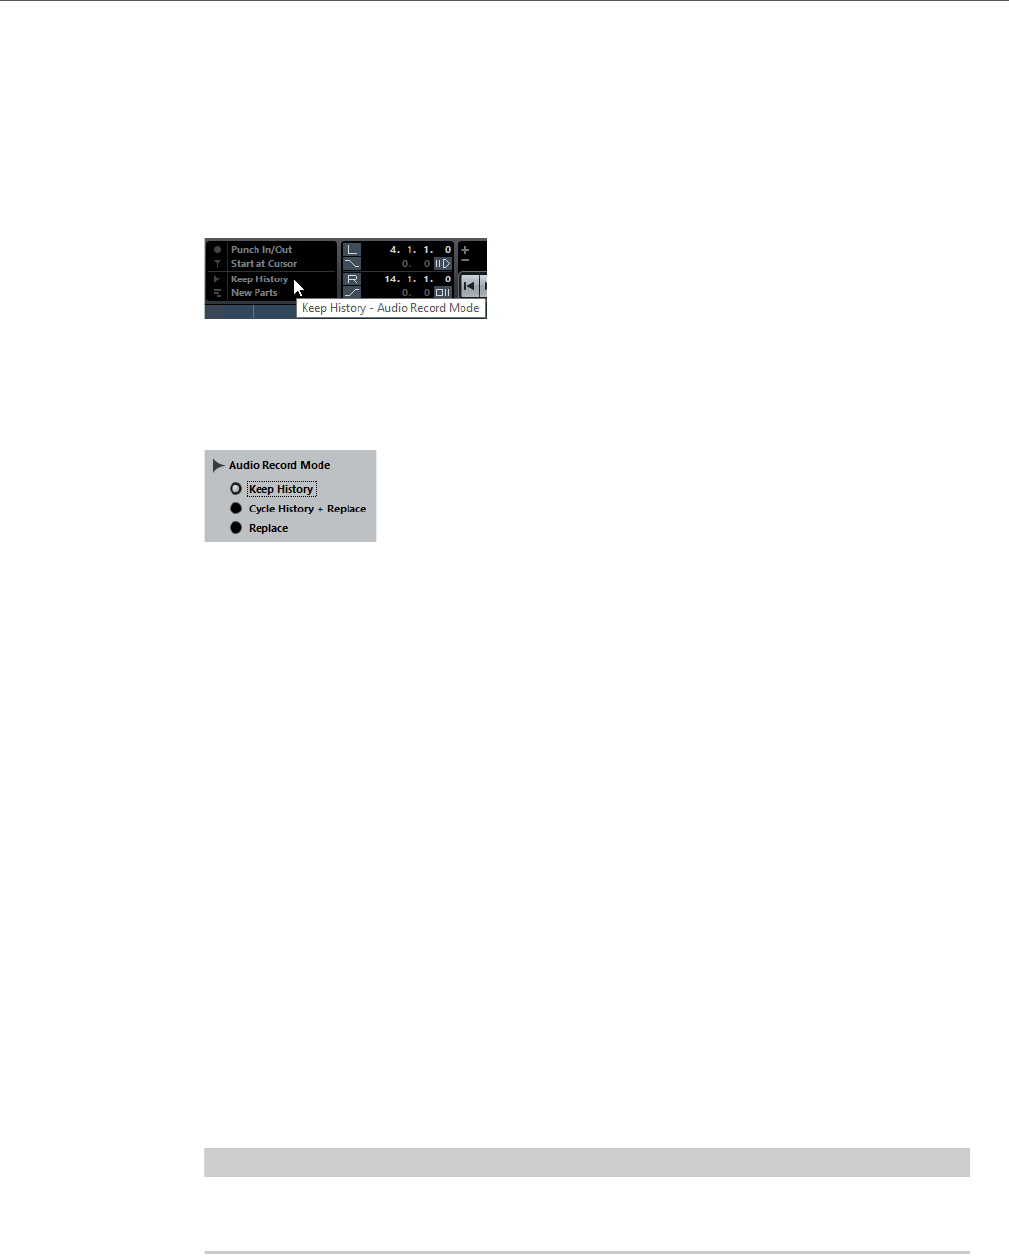
Recording
Audio Recording Specifics
155
Audio Record Modes
By selecting an Audio Record Mode you decide what happens to your recording
and to any existing events on the track where you are recording. This is necessary
because you will not always record on an empty track. There may be situations
where you record over existing events, especially in cycle mode.
• To select an Audio Record Mode, click the audio symbol in Record Mode
section of the Transport panel and select a record mode.
• To close the Audio Record Mode panel, click anywhere outside the panel.
Keep History
Existing events or portions of events that are overlapped by a new recording
are kept.
Cycle History + Replace
Existing events or portions of events that are overlapped by a new recording
are replaced by the new recording. However, if you record in cycle mode, all
takes from the current cycle recording are kept.
Replace
Existing events or portions of events that are overlapped by a new recording
are replaced by the last recorded take.
Recording with Effects
Cubase allows you to add effects and/or EQ directly while recording. This is done
by adding insert effects and/or making EQ settings for the input channel in the
MixConsole.
IMPORTANTIMPORTANTIMPORTANTIMPORTANT
If you record with effects, the effects become part of the audio file itself. You cannot
change the effect settings after recording.
When you are recording with effects consider using 32-bit float format. This way,
the bit resolution will not be reduced, which means there is no risk of clipping at this
stage. Also, this preserves the signal quality perfectly. If you record in 16-bit or
24-bit format, the available headroom is lower, which means clipping can occur if
the signal is too loud.

Recording
Audio Recording Specifics
156
Undoing Recording
If you decide that you do not like what you just recorded, you can delete it.
•Select Edit > Undo.
This removes the events that you just recorded from the Project window and moves
the audio clips in the Pool to the trash folder. To remove the recorded audio files from
the hard disk, open the Pool, right-click the Trash icon and select Empty Trash.
RELATED LINKS
Pool Window on page 314
Recovering Audio Recordings
Cubase allows you to recover audio recordings in two situations: if you specified an
audio pre-record time when you hit the record button too late and after a system
failure during recording.
Specifying an Audio Pre-Record Time
You can capture up to 1 minute of any incoming audio that you play in Stop mode
or during playback. This is possible because Cubase can capture audio input in
buffer memory, even when not recording.
PROCEDURE
1. Select File > Preferences > Record > Audio.
2. Specify a time (up to 60 seconds) in the Audio Pre-Record Seconds field.
This activates the buffering of audio input, making pre-record possible.
3. Make sure that an audio track is record-enabled and receives audio from the
signal source.
4. When you have played some audio material that you want to capture (either
in Stop mode or during playback), click the Record button.
5. Stop the recording after a few seconds.
This creates an audio event that starts where the cursor position was when you
activated recording. If you were in stop mode, and the cursor was at the beginning of
the project, you may have to move the event to the right in the next step. If you were
playing along to a project, you leave the event where it is.
6. Select the Object Selection tool and place the cursor on the bottom left edge
of the event so that a double arrow appears. Then click and drag to the left.
RESULT
The event is now extended, and the audio that you played before activating the
recording is inserted. This means that if you played along during playback, the
captured notes end up exactly where you played them in relation to the project.
RELATED LINKS
Record - Audio on page 667

Recording
MIDI Recording Specifics
157
Recovering Audio Recordings after System Failure
Cubase allows you to recover audio recordings after a system failure, because of a
power cut or other mishap, for example.
When you experience a computer crash during a recording, relaunch the system
and check the project record folder. By default, this is the Audio subfolder inside
the project folder. It should contain the audio file that you recorded, from the
moment when you started recording to the time when your computer crashed.
NOTE
• This feature does not constitute an overall guarantee by Steinberg. While the
program itself was improved in such a way that audio recordings can be
recovered after a system failure, it is always possible that a computer crash,
power cut, etc. might have damaged another component of the computer,
making it impossible to save or recover any of the data.
• Do not try to actively bring about this kind of situation to test this feature.
Although the internal program processes have been improved to cope with
such situations, Steinberg cannot guarantee that other parts of the computer
are not damaged as a consequence.
MIDI Recording Specifics
Preparations
The preparations described in the following sections mainly focus on external MIDI
devices.
MIDI Instruments and Channels
Most MIDI synthesizers can play several sounds at the same time, each on a
different MIDI channel. This allows you to play back several sounds (bass, piano,
etc.) from the same instrument.
Some devices, such as General MIDI compatible sound modules, always receive on
all 16 MIDI channels. If you have such an instrument, there is no specific setting to
make in the instrument.
On other instruments, you must use the front panel controls to set up a number of
parts, timbres, or similar so that they all receive on one MIDI channel.
For more information, see the manual that came with your instrument.

Recording
MIDI Recording Specifics
158
Naming MIDI Ports
MIDI inputs and outputs are often displayed with long and complicated names. In
Cubase, you can rename your MIDI ports to more descriptive names.
PROCEDURE
1. Select Devices > Device Setup.
2. In the Devices list, select MIDI Port Setup.
The available MIDI inputs and outputs are listed. On Windows systems, the device to
choose depends on your system.
3. Click in the Show As column and type in a new name.
4. Click OK.
RESULT
The new port names appear on the MIDI Input and Output Routing pop-up menus.
Setting the MIDI Input
In the Inspector, you set the MIDI input for the track.
PROCEDURE
1. In the track list, select the track to which you want to assign a MIDI input.
2. In the topmost Inspector section, open the Input Routing pop-up menu and
select an input.
The available inputs on the menu depend on the type of MIDI interface that you are
using. If you hold down [Shift]-[Alt]/[Option], the selected MIDI input is used for all
selected MIDI tracks.
NOTE
If you select All MIDI Inputs, the track will receive MIDI data from all available MIDI
inputs.

Recording
MIDI Recording Specifics
159
Setting the MIDI Channel and Output
The MIDI channel and output settings determine where the recorded MIDI is routed
during playback. They are also relevant for monitoring MIDI in Cubase. You can
select the channel and output in the track list or in the Inspector.
PROCEDURE
1. In the track list, select the track to which you want to assign a MIDI channel
and output.
2. In the topmost Inspector section, open the Output Routing pop-up menu
and select an output.
The available outputs on the menu depend on the type of MIDI interface that you are
using. If you hold down [Shift]-[Alt]/[Option], the selected MIDI output is used for all
selected MIDI tracks.
3. Open the Channel pop-up menu and select a MIDI channel.
NOTE
If you select the Any MIDI channel, the MIDI material is routed to the channels that are
used by your MIDI instrument.
Selecting a Sound
You can select sounds from within Cubase by instructing the program to send
Program Change and Bank Select messages to your MIDI device.
PROCEDURE
1. In the track list, select the track to which you want to assign a sound.
2. In the track list or the Inspector, open the Program Selector pop-up menu
and select a program.
Program Change messages give access to 128 different program locations.
3. If your MIDI instruments have more than 128 programs, you can open the
Bank Selector pop-up menu and select different banks, each containing 128
programs.
NOTE
Bank Select messages are recognized differently by different MIDI instruments. The
structure and numbering of banks and programs may also vary. Refer to the
documentation of your MIDI instruments for details.
RELATED LINKS
MIDI Track Inspector on page 68

Recording
MIDI Recording Specifics
160
Recording MIDI
You can record MIDI using any of the basic recording methods.
When you finish recording, a part that contains MIDI events is created in the Project
window.
NOTE
If you perform a live recording on a VST instrument, you usually compensate the
latency of the audio card by playing earlier. In consequence, the timestamps are
recorded too early. If you activate the ASIO Latency Compensation button on the
track list, all recorded events are moved by the current latency setting.
The following preferences affect MIDI recording:
• Length Adjustment
• Snap MIDI Parts to Bars
• Solo Record in MIDI Editors
• MIDI Record Catch Range in ms
• ASIO Latency Compensation Active by Default
You can find them on the MIDI and Record–MIDI page of the Preferences dialog.
RELATED LINKS
MIDI on page 661
Record - MIDI on page 668
Recording Different Types of MIDI Messages
You can record different types of MIDI messages.
• To specify which event types are recorded, select File > Preferences > MIDI
> MIDI Filter and deactivate the options for the type of MIDI message that
you want to record.
RELATED LINKS
MIDI - MIDI Filter on page 665
Recording MIDI Notes
If you press and release a key on your synthesizer or on another MIDI keyboard, the
following messages are recorded:
• Note On (key down)
• Note Off (key up)
•MIDI channel

Recording
MIDI Recording Specifics
161
NOTE
Normally, the MIDI channel information is overridden by the MIDI channel setting for
the track. However, if you set the track to the Any MIDI channel, the notes will be
played back on their original channels.
Recording Continuous Messages
Pitchbend, aftertouch, and controllers, such as modulation wheel, sustain pedal,
volume, etc. are considered as MIDI continuous events, as opposed to the
momentary key down and key up messages.
You can record continuous messages together or independently from the notes,
that is, afterwards or before.
You can record continuous messages on their own tracks, separately from the
notes to which they belong. As long as you set the two tracks to the same output
and MIDI channel, it will appear to the MIDI instrument as if you made the two
recordings at the same time.
Recording Program Change Messages
When you switch from one program to another on your synthesizer or on another
MIDI keyboard, a number corresponding to that program is sent out via MIDI as a
Program Change message.
You can record Program Change Messages together or independently from the
notes, that is, afterwards or before.
You can record Program Change Messages on their own tracks, separately from
the notes to which they belong. As long as you set the two tracks to the same output
and MIDI channel, it will appear to the MIDI instrument as if you made the two
recordings at the same time.
Recording System Exclusive Messages
System Exclusive (SysEx) messages are special types of MIDI messages that are
used to send data that only makes sense to a unit of a certain make and type.
SysEx can be used to transmit a list of the numbers that make up the settings of one
or more sounds in a synth.
Reset Function
The Reset function sends out note-off messages and resets controllers on all MIDI
channels. This is sometimes necessary if you experience hanging notes, constant
vibrato, etc. when punching in and out on MIDI recordings with pitchbend or
controller data.
• To perform a MIDI reset manually, select MIDI > Reset.
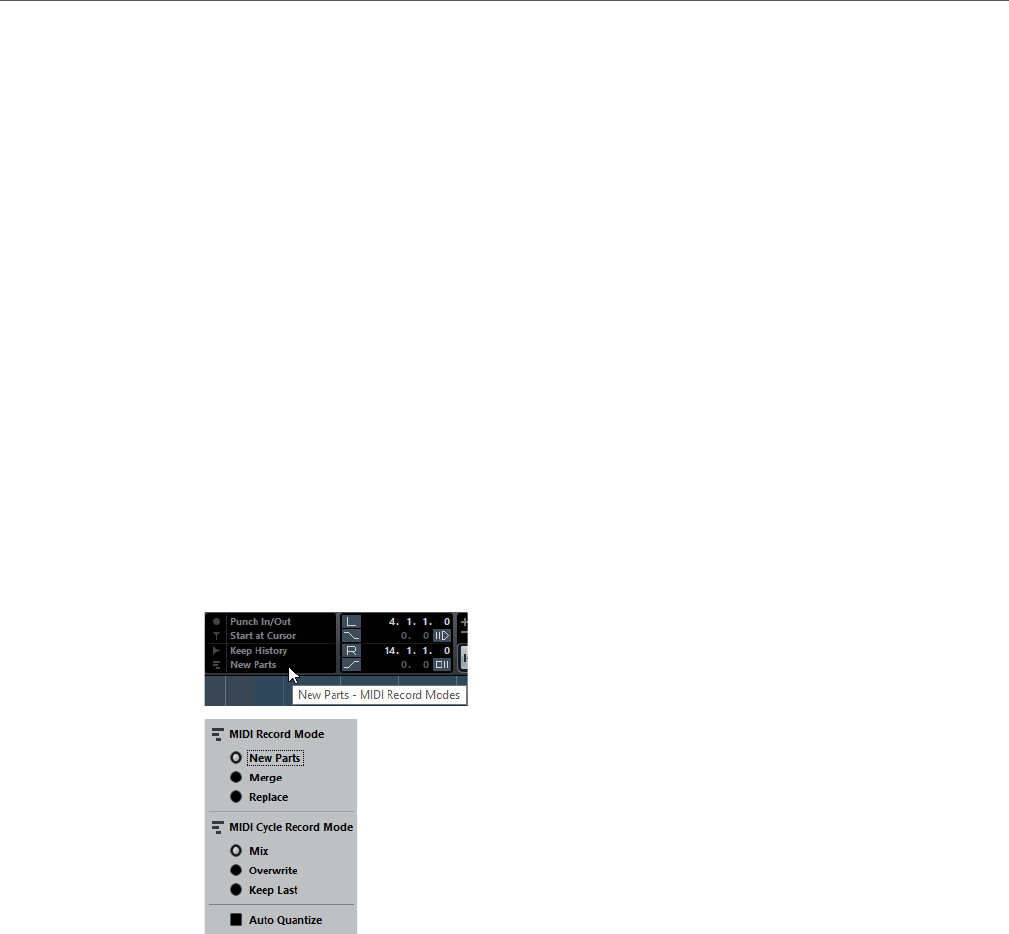
Recording
MIDI Recording Specifics
162
• If you want Cubase to perform a MIDI reset on stop, select File >
Preferences > MIDI and activate Reset on Stop.
• If you want Cubase to insert a reset event at the end of a recorded part, select
File > Preferences > MIDI and activate Insert Reset Events after Record.
This resets controller data such as sustain, aftertouch, pitchbend, modulation,
and breath control. This is useful if a MIDI part is recorded and the sustain
pedal is still held after stopping recording. Usually, this would cause all
following parts to be played with sustain, as the pedal off command was not
recorded.
RELATED LINKS
MIDI on page 661
MIDI Record Modes
By selecting a MIDI Record Mode you decide what happens to any existing parts
on the track where you are recording. MIDI tracks can play back all events in
overlapping parts. If you record several parts in the same locations or move parts so
that they overlap, you will hear the events in all parts.
• To select a MIDI Record Mode, click the MIDI symbol in the left section of the
Transport panel.
• To close the MIDI Record Mode panel again, click anywhere outside the panel.
MIDI Record Mode
New Parts
Existing parts that are overlapped by a new recording are kept. The new
recording is saved as a new part.
Merge
Existing events in parts that are overlapped by a new recording are kept. The
newly recorded events are added to the existing part.
Replace
Existing events in parts that are overlapped by a new recording are replaced.
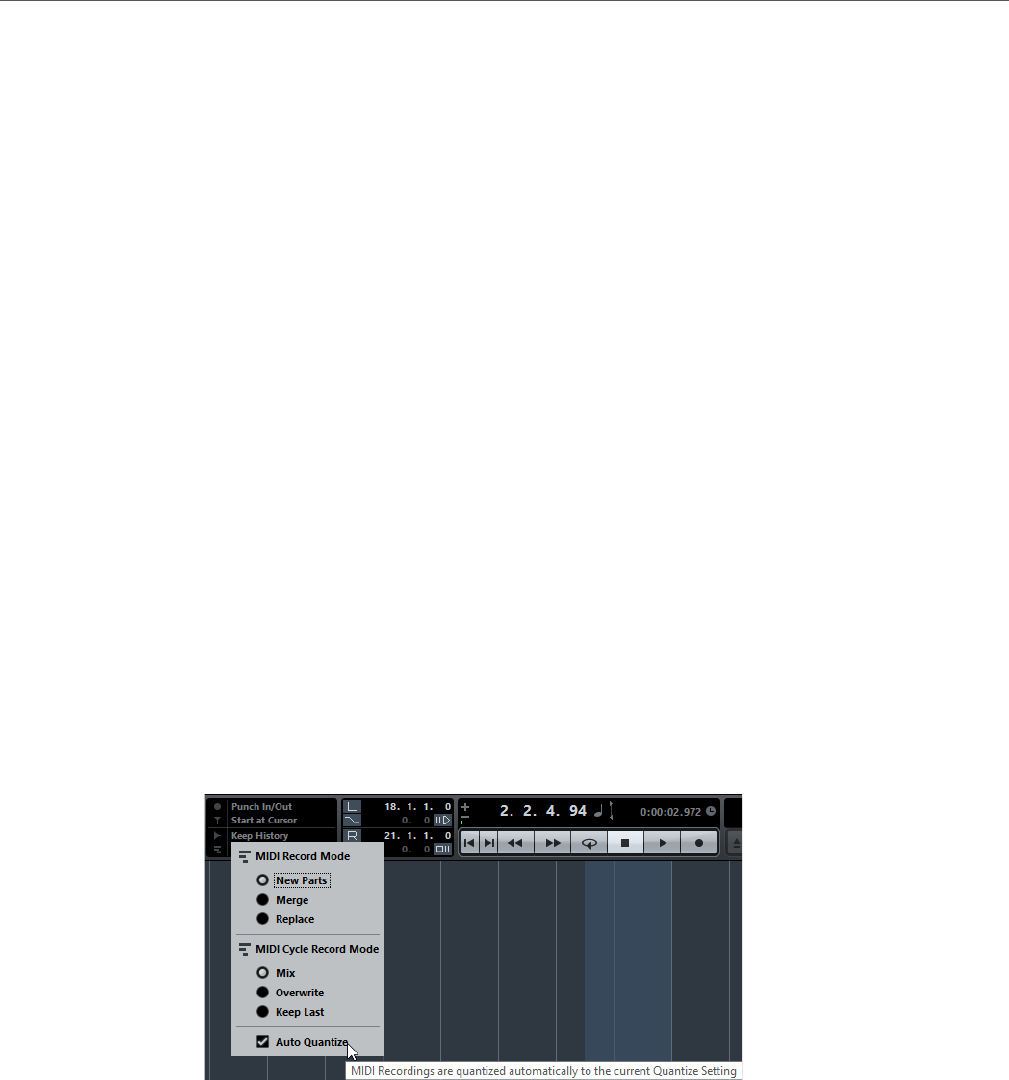
Recording
MIDI Recording Specifics
163
MIDI Cycle Record Mode
When you record MIDI in cycle mode, the result not only depends on the MIDI
Record Mode, but also on the Cycle Record Mode that is selected in the MIDI
Cycle Record Mode section.
Mix
For each completed lap, everything you record is added to what was
previously recorded. This is useful for building up rhythm patterns. Record a
hi-hat part on the first lap, the bass drum part on the second lap, etc.
Overwrite
As soon as you play a MIDI note or send any MIDI message, all MIDI that you
have recorded on previous laps is overwritten from that point. Make sure that
you stop playing before the next lap begins. Otherwise, you will overwrite the
entire take.
Keep Last
Each completed lap replaces the previously recorded lap. If you deactivate
recording or press Stop before the cursor reaches the right locator, the
previous take will be kept. If you do not play or input any MIDI during a lap,
nothing happens, and the previous take will be kept.
Quantizing MIDI Recordings
Cubase can automatically quantize MIDI notes on recording.
• To enable automatic quantizing, open the Transport panel and in the Record
Mode section, activate Auto Quantize.
The notes that you record are automatically quantized according to the
Quantize settings.
RELATED LINKS
Quantizing MIDI and Audio on page 166
Common Settings on page 168

Recording
Remaining Record Time
164
Recovering MIDI Recordings
Cubase allows you to recover MIDI recordings.
Enabling Retrospective Record
The Retrospective Record setting allows you to capture any MIDI notes that you
play in Stop mode or during playback and turn them into a MIDI part after the fact.
This is possible because Cubase can capture MIDI input in buffer memory, even
when not recording.
PROCEDURE
1. Select File > Preferences > Record–MIDI.
2. Enable Retrospective Record and specify a Retrospective Record Buffer
Size.
This activates the buffering of MIDI input.
3. In the MIDI track list, activate the Record Enable button.
4. Play some MIDI material either in Stop mode or during playback.
5. Select Transport > Retrospective Record.
RESULT
The content of the MIDI buffer is turned into a MIDI part on the record-enabled track,
and the captured notes end up exactly where you played them in relation to the
project.
RELATED LINKS
Record - MIDI on page 668
Remaining Record Time
The Record Time Max display lets you see how much time you have left for
recording.
The available time depends on the current setup, for example, on the amount of
tracks that are record-enabled, the sample rate for your project, and the available
hard disk space.
• To open the display, select Devices > Record Time Max.

Recording
Lock Record
165
NOTE
The remaining record time is also shown in the status line above the track list.
If you use individual record folders to store your tracks on different drives, the time
display refers to the medium with the least storage space available.
Lock Record
The Lock Record function prevents you from accidentally deactivating the record
mode.
•Select File > Key Commands and in the Transport category, assign key
commands to the Lock Record and Unlock Record commands.
If Lock Record is activated and you want to enter Stop mode, a dialog opens in
which you need to confirm that you want to stop recording. You can also use the
Unlock Record key command first and then enter Stop mode as usual.
NOTE
An automatic punch-out at the right locator position will be ignored in Lock Record
mode.

166
Quantizing MIDI and Audio
Quantizing means moving recorded audio or MIDI and positioning it on the nearest
grid position that is musically relevant. Quantizing is designed to correct errors, but
you can also use it in a creative way.
You can quantize audio and MIDI to a grid or to a groove.
Audio and MIDI can be quantized at the same time. However, what exactly happens
during quantizing differs for audio and MIDI:
• Audio quantizing affects the audio event starts.
• MIDI quantizing can affect the starts of MIDI events in a part, the MIDI event
lengths, or the MIDI event ends.
NOTE
Quantizing is based on the original position of the events. Therefore, you can freely
try out different quantize settings without the risk of destroying anything.
The Quantize function is found on the Edit menu. You can also use the key
command [Q] or the “Quantize” button on the Quantize Panel.
RELATED LINKS
Quantizing Audio Event Starts on page 166
Quantizing MIDI Event Starts on page 167
Quantizing MIDI Event Lengths on page 167
Quantizing MIDI Event Ends on page 167
Quantizing Audio Event Starts
If you select audio events or a sliced loop and use the Quantize function, the audio
events are quantized based on their snap points or event starts.
The snap points that do not match exact note positions on the selected grid are
moved to the closest grid positions. The grid is set up on the Quantize pop-up
menu. If no snap points are available, the event start is moved.
NOTE
If you use the Quantize function on an audio part, the event starts inside the part are
quantized.

Quantizing MIDI and Audio
Quantizing MIDI Event Starts
167
Quantizing MIDI Event Starts
If you select MIDI notes in a part and use the Quantize function on the Edit menu,
the MIDI note starts are quantized, that is, the starts of MIDI notes that do not match
exact note positions are moved to the closest grid positions. The grid is set up on
the Quantize pop-up menu. The note lengths are maintained.
NOTE
If you quantize MIDI parts, all events are quantized, even if none is selected.
Quantizing MIDI Event Lengths
The “Quantize MIDI Event Lengths” function on the Edit menu, Advanced Quantize
submenu, quantizes the lengths of MIDI notes without changing their start positions.
At its most basic level, this function sets the lengths of the notes to the Length
Quantize value on the MIDI editor toolbar by cutting off the note ends.
However, if you have selected the “Quantize Link” option on the “Length Quantize”
pop-up menu, the function resizes the notes according to the quantize grid, taking
the Swing, Tuplet, and Catch Range settings into account.
Quantizing MIDI Event Ends
The “Quantize MIDI Event Ends” function on the Edit menu, Advanced Quantize
submenu, moves the ends of your MIDI notes to the nearest grid positions, taking
the Quantize pop-up menu setting into account.
Quantize Panel
The Quantize Panel provides further parameters for defining how to quantize audio
or MIDI. These parameters allow you to set up a more sophisticated quantization.
Using the Quantize Panel, you can quantize audio or MIDI to the grid or to a groove.
Depending on what method you choose, different parameters are shown on the
Quantize Panel. There is also a set of common settings.
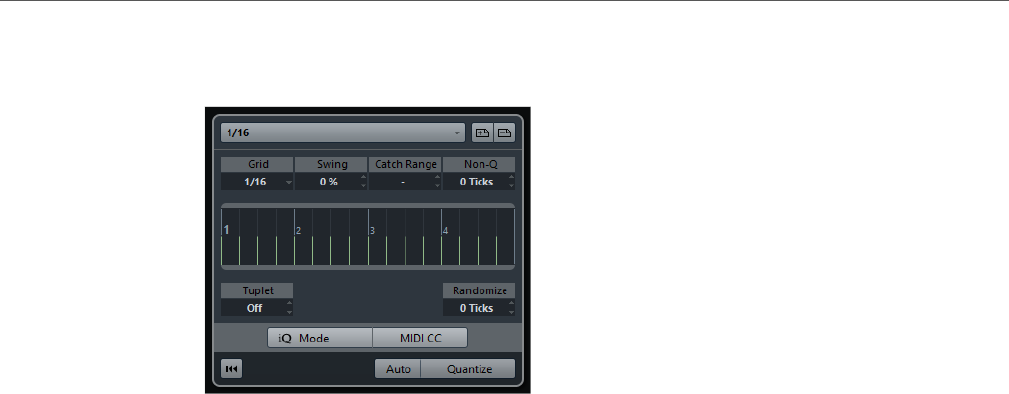
Quantizing MIDI and Audio
Quantize Panel
168
You can open the Quantize Panel by clicking the corresponding button on the
toolbar or by opening the Edit menu and selecting “Quantize Panel”.
Common Settings
Quantize Presets Pop-Up Menu
On this pop-up menu, you can select a quantize or a groove preset.
Save/Remove Preset
The preset controls allow you to save the current settings as a preset, making
them available on all “Quantize Presets” pop-up menus. This includes Swing,
“Catch Range”, etc.
• To save a preset, click the “Save Preset” button (the plus sign) to the
right of the Quantize Presets pop-up menu.
A preset name is generated automatically, according to your settings.
• To rename a preset, open the “Quantize Presets” pop-up menu, select
“Rename Preset” and enter the new name in the dialog that appears.
• To remove a user preset, select it and click the “Remove Preset” button.
Non-Quantize
This setting allows you to create a safe zone before and after the quantize
positions, by specifying a “distance” in ticks (120 ticks = one 16th note).
Events that lie within this zone are not quantized. This allows you to keep slight
variations when you quantize, but correct notes that are too far away from the
grid positions.
Grid Display
In the middle of the Quantize Panel the grid display is shown. The green lines
indicate the quantize grid, that is, the positions that audio or MIDI is moved to.
Randomize
This setting allows you to set a distance in ticks, so that your audio or MIDI is
quantized to random positions within the specified distance from the quantize
grid. This allows for slight variations and, at the same time, prevents your audio
or MIDI from ending up too far away from the grid.

Quantizing MIDI and Audio
Quantize Panel
169
MIDI CC
If you activate this button, controllers related to MIDI notes (pitchbend, etc.)
are automatically moved with the notes when these are quantized.
Auto Apply
If you activate this button, any changes you make are immediately applied to
the selected parts or events. A way of using this feature is to set up a playback
loop and adjust the settings until you are satisfied with the result.
iQ Mode and Iterative Strength Setting
If you quantize your audio or MIDI with the “iQ Mode” (iterative quantize)
option activated, a “loose” quantization is applied. This means that your audio
or MIDI moves only part of the way to the closest quantize grid position. You
can specify an “Iterative Strength” value to the right of the “iQ Mode” option.
This value determines how close your audio or MIDI moves towards the grid.
NOTE
Iterative quantizing is based on the current, quantized positions and not on the
original event positions. This makes it possible to repeatedly use iterative
Quantize, gradually moving your audio or MIDI closer to the quantize grid until
you have found the right timing.
Reset Quantize
This button is identical with the “Reset Quantize” function on the Edit menu.
IMPORTANT
If you move an audio event manually, the actual event start changes.
Therefore, the “Reset Quantize” function has no effect on an event that was
moved manually.
Quantize
Clicking this button applies your settings.
RELATED LINKS
Reset Quantize on page 172
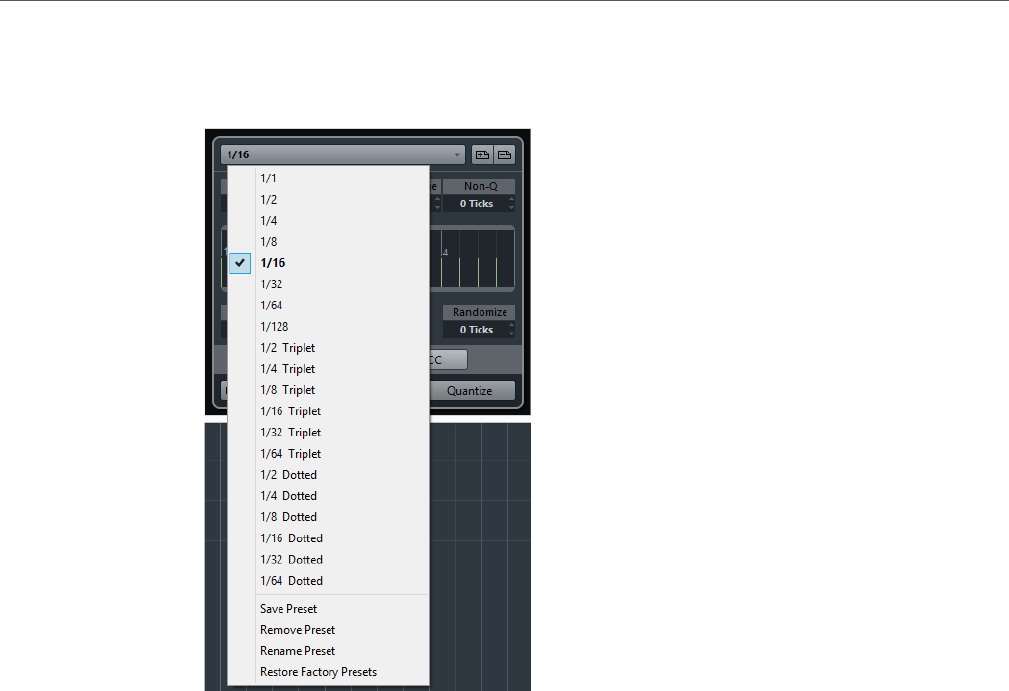
Quantizing MIDI and Audio
Quantize Panel
170
Options For Quantizing to a Musical Grid
Grid
On this pop-up menu you can determine the basic value for the quantize grid.
Swing
This parameter lets you offset every second position in the grid, creating a
swing or shuffle feel.
This setting is only available when a straight value is selected for the grid and
Tuplet is off (see below).
Catch Range
This parameter allows you to specify that quantizing affects only audio or MIDI
within a certain distance from the grid lines, the so-called catch range. This
allows for complex quantization tasks, for example, if you want to quantize only
the heavy beats near each beat, and not the events in-between.
With a value of 0 %, all audio or MIDI is affected by quantizing. With higher
percentages, wider catch ranges are shown around the green lines in the grid
display.
Tuplet
This parameter allows you to create rhythmically more complex grids by
dividing the grid into smaller steps, and thereby creating n-tuplets.
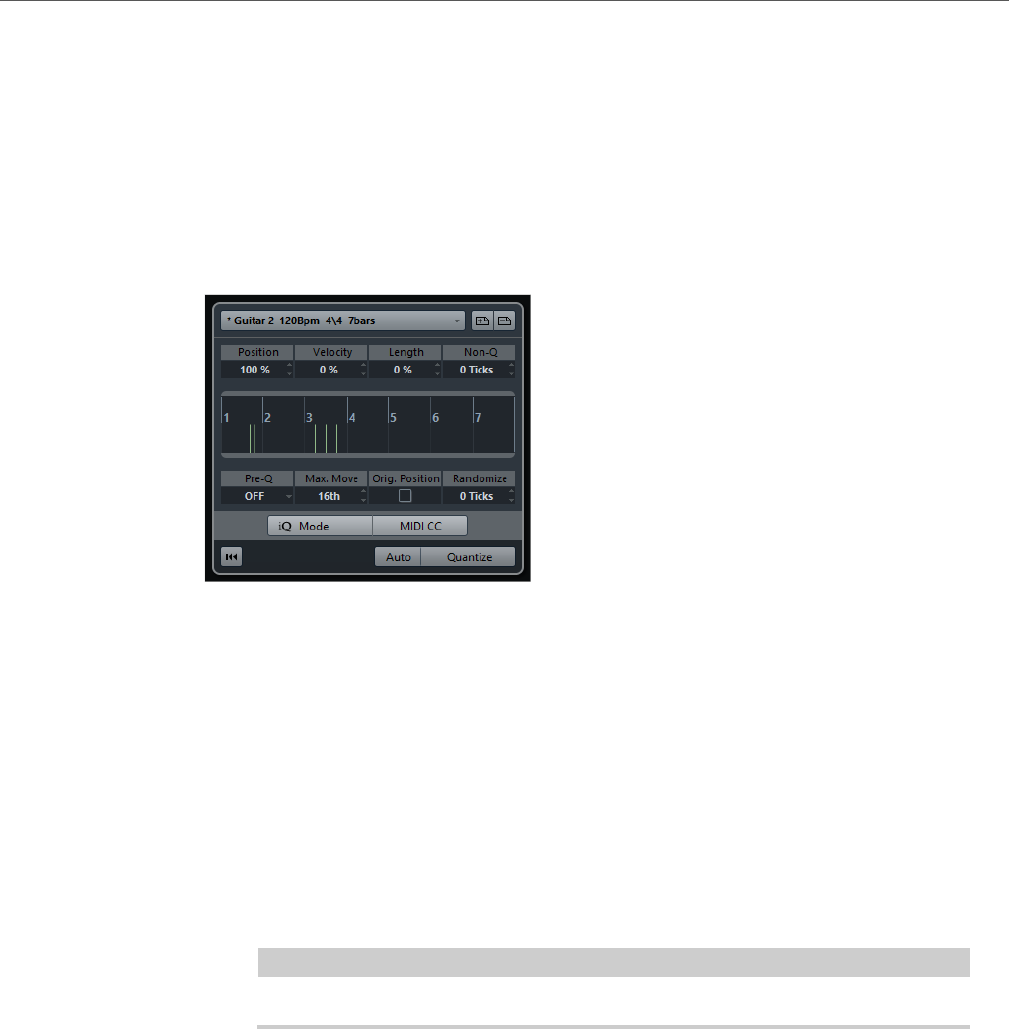
Quantizing MIDI and Audio
Quantize Panel
171
Options for Quantizing to a Groove
Groove quantizing is intended for recreating existing rhythmic feels by matching
your recorded music to a timing grid generated from a MIDI part or an audio loop.
To extract the groove from a MIDI part, from an audio loop, an audio event with
hitpoints, or sliced audio, select the material and drag it onto the grid display in the
middle of the Quantize Panel. Alternatively, you can use the “Create Groove
Quantize Preset” function.
Position
This parameter lets you determine how much the timing of the groove affects
the music. 0 % means that the timing of the music remains unaffected, while
100 % means that the timing is adjusted to match the groove completely.
Velocity (MIDI Only)
This parameter lets you determine how much the velocity values within the
groove affect the music. Note that not all grooves contain velocity information.
Length (MIDI Only)
This parameter lets you specify how much the length of the notes is affected
by the groove. This is done by modifying the note-off value.
NOTE
For drums, the Length setting is ignored as drum sounds cannot be sustained.
Pre-Quantize
This pop-up menu lets you quantize your audio or MIDI to a musical grid
before groove quantizing. This helps you to get the notes closer to their
groove destination.
For example, if you apply a shuffle groove to a 16th-note pattern, you can set
up a Pre-Quantize value of 16 to straighten up the timing before applying the
groove quantizing.
Max. Move
Here, you can select a note value to specify a maximum distance that the
audio or MIDI is moved.

Quantizing MIDI and Audio
Additional Quantizing Functions
172
Orig. Position
If you activate this option, the starting point of the quantizing operation is not
the first bar of the project, but the original starting position of the audio or MIDI
material used to find the groove. This allows you to synchronize material that
does not start from bar 1 of the project.
RELATED LINKS
Creating Groove Quantize Presets on page 172
Additional Quantizing Functions
Freezing MIDI Quantizing
The Freeze MIDI Quantize function on the Edit menu, Advanced Quantize submenu,
makes the start and end positions of MIDI events permanent. This is useful in
situations where you want to quantize a second time, based on the current
quantized positions rather than the original positions.
Reset Quantize
This command on the Edit menu reverts your audio or MIDI to its original,
unquantized state. This function is independent from the regular Undo History.
NOTE
The Reset function also resets any length changes that you performed using the
“Scale Length/Legato” slider.
RELATED LINKS
Length on page 449
Creating Groove Quantize Presets
You can generate a groove quantize map based on hitpoints that you have created
in the Sample Editor.
PROCEDURE
1. Open the Sample Editor for the audio event from which you want to extract
the timing.
2. Create and edit hitpoints.
3. On the Hitpoints tab, click the “Create Groove” button.
The groove is extracted.

Quantizing MIDI and Audio
Additional Quantizing Functions
173
RESULT
If you open the Quantize pop-up menu on the Project window toolbar, you will find
an additional item at the bottom of the list, with the same name as the file from which
you have extracted the groove. You can select it as a base for quantizing, just like
any other quantize value.
AFTER COMPLETING THIS TASK
To save the groove, open the Quantize Panel and save it as a preset.
RELATED LINKS
Working with hitpoints and slices on page 297
Save/Remove Preset on page 168

174
Fades and crossfades
Creating fades
There are two types of fade ins and fade outs in audio events in Cubase:
event-based fades that you create by using the fade handles and clip-based fades
created by processing.
RELATED LINKS
Event-based fades on page 174
Clip-based fades on page 176
Event-based fades
Selected audio events have triangular handles in the upper left and right corners.
These can be dragged to create a fade in or fade out, respectively.
The fade handles are visible when you point the mouse at the event.
The fade is automatically reflected in the shape of the event’s waveform, giving you
a visual feedback of the result when dragging the fade handle.
Fades created with the handles are not applied to the audio clip as such but
calculated in realtime during playback. This means that several events referring to
the same audio clip can have different fade curves. It also means that having a large
number of fades may require more processing power.
• If you select multiple events and drag the fade handles of one of them, the
same fade is applied to all selected events.
• A fade can be edited in the Fade dialog, as described on the following pages.
You open the dialog by double-clicking in the area above the fade curve, or by
selecting the event and selecting “Open Fade Editor(s)” from the Audio menu (note
that this will open two dialogs if the event has both fade in and fade out curves).
If you adjust the shape of the fade curve in the Fade dialog, this shape will be
maintained when you later adjust the length of the fade.
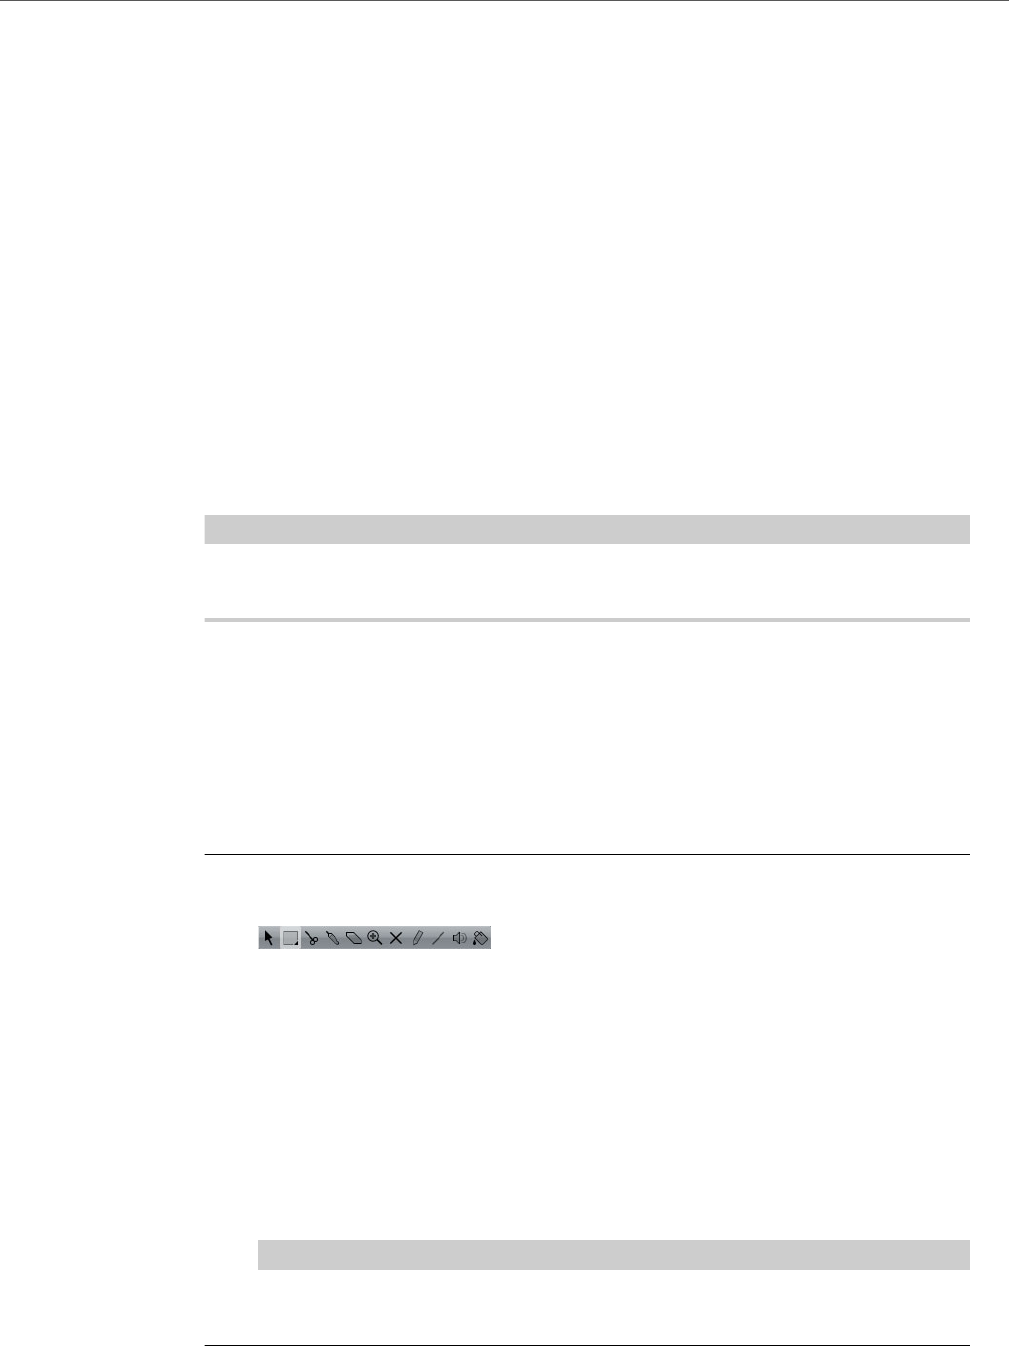
Fades and crossfades
Creating fades
175
• You can make the fade longer or shorter at any time, by dragging the handle.
You can do this without selecting the event first, i. e. without visible handles.
Just move the mouse pointer along the fade curve until the cursor turns into a
bidirectional arrow, then click and drag.
• If the “Show Event Volume Curves Always” option is activated in the
Preferences dialog (Event Display–Audio page), fade curves are shown in all
events, regardless of whether they are selected or not.
If the option is deactivated, the fade curves are shown in selected events only.
• If the “Use Mouse Wheel for Event volume and Fades” option is activated in
the Preferences dialog (Editing–Audio page), moving the mouse wheel
moves the volume curve up or down.
When you press [Shift] while moving the mouse wheel, and position the
mouse pointer somewhere in the left half of the event, the fade in end point is
moved. When the mouse pointer is in the right half of the event, the fade out
start point is moved.
NOTE
In the Key Commands dialog (Audio category) you can set up key commands for
changing the event volume curve and any fade curves.
RELATED LINKS
Key Commands on page 602
Creating and adjusting fades with the Range Selection tool
Event-based fades can also be created and adjusted with the Range Selection tool.
PROCEDURE
1. Select a section of the audio event with the Range Selection tool.
2. Open the Audio menu and select “Adjust Fades to Range”.
The result depends on your selection:
• If you select a range from the beginning of the event, a fade in is created within
the range.
• If you select a range that reaches the end of an event, a fade out is created in
the range.
• If you select a range encompassing a middle section of the event, but not
reaching neither the start nor the end, a fade in is created from the beginning
of the event to the beginning of the selected range, and a fade out is created
from the end of the selected range to the end of the event.
IMPORTANT
You can select multiple audio events on separate tracks with the Range Selection
tool, and apply the fade to all of them simultaneously.
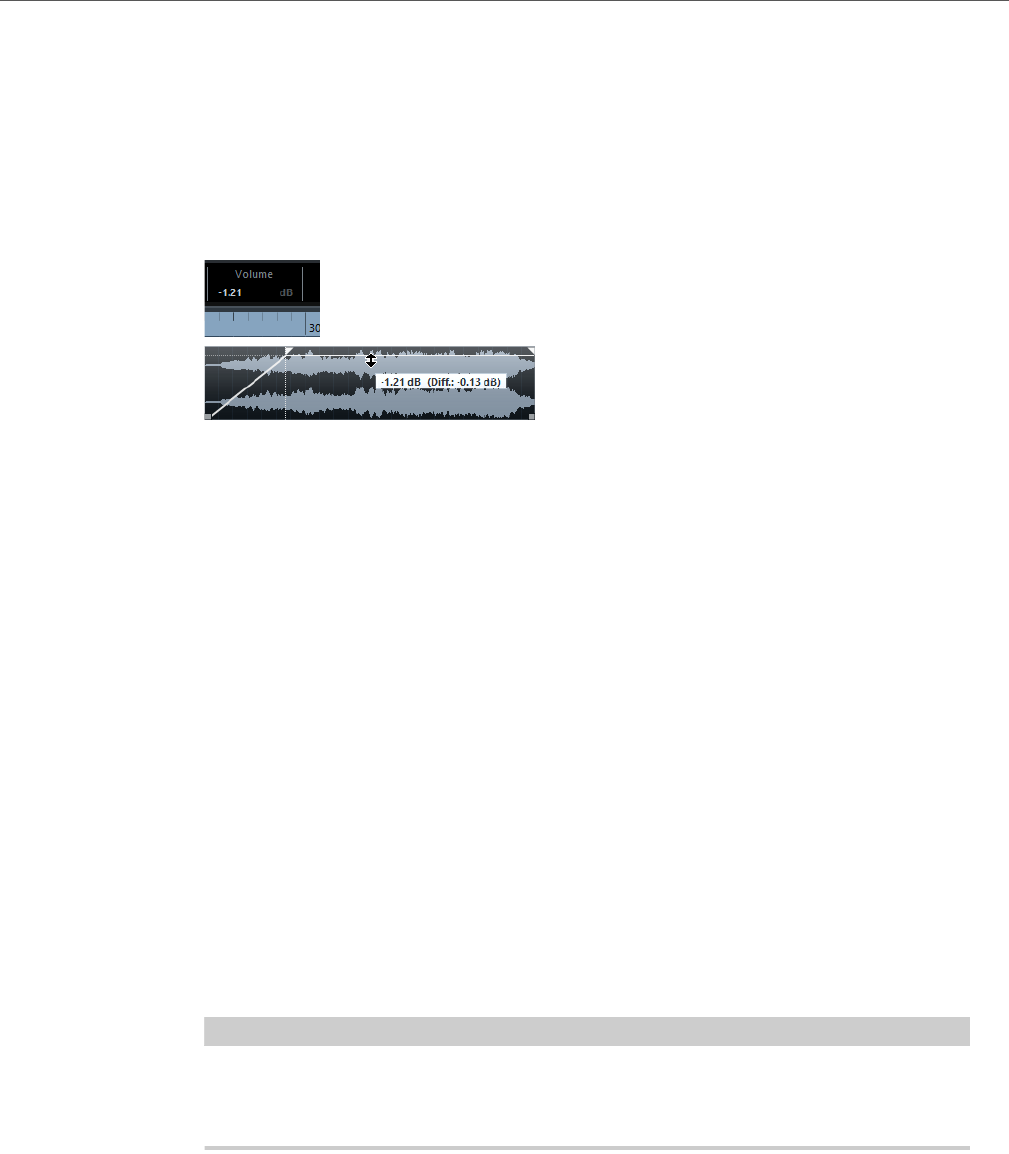
Fades and crossfades
Creating fades
176
About the volume handle
A selected audio event also has a square handle in the top middle: the volume
handle. It provides a quick way of changing the volume of an event in the Project
window. Note that dragging the volume handle also changes the value on the info
line.
The volume change is displayed numerically on the info line.
The event waveform reflects the volume change.
• Drag the Volume handle up or down to change the volume of the event.
Removing fades
• To remove the fades for an event, select the event and select “Remove Fades”
from the Audio menu.
• If you want to remove the fades in a specific range only, select the fade area
with the Range Selection tool and select “Remove Fades” from the Audio
menu.
Clip-based fades
If you have selected an audio event or a section of an audio event (using the Range
Selection tool), you can apply a fade in or fade out to the selection by using the
“Fade In” or “Fade Out” function on the Process submenu of the Audio menu. These
functions open the corresponding Fade dialog, allowing you to specify a fade curve.
Fades created this way are applied to the audio clip rather than to the event.
IMPORTANTIMPORTANTIMPORTANT
IMPORTANT
The length of the fade area is determined by your selection. In other words, you
specify the length of the fade before you open the Fade dialog. You can select
multiple events and apply the same processing to all of them simultaneously.
• If you later create new events that refer to the same clip, these will have the
same fades.
If other events refer to the same audio clip, you will be asked whether you want the
processing to be applied to these events or not.
• Continue will apply the processing to all events that refer to the audio clip.
• New Version will create a separate, new version of the audio clip for the
selected event.
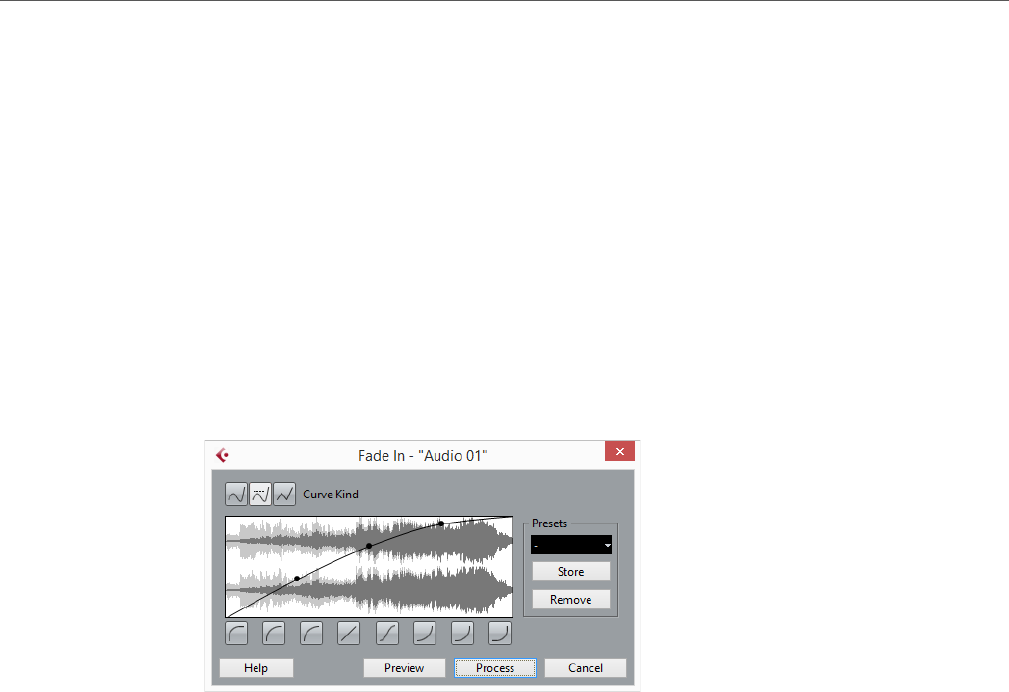
Fades and crossfades
The Fade dialogs
177
• You can also activate the “Please, don’t ask again” option. Regardless of
whether you then choose “Continue” or “New Version”, any further
processing will conform to the option you select.
You can change this setting at any time in the Preferences dialog
(Editing–Audio page), under “On Processing Shared Clips”.
The Fade dialogs
The Fade dialogs appear when you edit an existing fade or use the Fade In/Fade
Out functions on the Process submenu of the Audio menu. The picture below
shows the Fade In dialog; the Fade Out dialog has identical settings and features.
If you open the Fade dialog(s) with several events selected, you can adjust the fade
curves for all these events at the same time. This is useful if you want to apply the
same type of fade in to more than one event, etc.
The available options are:
Curve Kind
These buttons determine whether the fade curve consists of spline curve
segments (left button), damped spline segments (middle button), or linear
segments (right button).
Fade display
This shows the shape of the fade curve. The resulting waveform shape is
shown in dark gray, with the current waveform shape in light gray.
Click on the curve to add points, and click and drag existing points to change
the shape. To remove a point from the curve, drag it outside the display.
Curve shape buttons
These buttons give you quick access to some common curve shapes.
Restore button
This button is only available when editing fades made by dragging the fade
handles. Click this to cancel any changes you have made since opening the
dialog.

Fades and crossfades
The Fade dialogs
178
Fade Length Value
This parameter is only available when editing fades made by dragging the fade
handles. It can be used to enter fade lengths numerically. The format of values
displayed here is determined by the Time Display in the Transport panel.
• When you activate the Apply Length option, the value entered in the
Fade Length value field is used when clicking Apply or OK.
• When you set the current fade as the default fade, the length value is
included as part of the default settings.
Presets
In this section you can set up presets for fade in or fade out curves that you
want to apply to other events or clips.
• To apply a stored preset, select it from the pop-up menu.
• To rename the selected preset, double-click on the name and type in a
new one.
• To remove a stored preset, select it from the pop-up menu and click
Remove.
As Default button
This button is only available when editing fades made by dragging the fade
handles. Click this to save the current settings as the default fade, to be used
whenever you create new fades by dragging event handles.
Applying a fade
Depending on whether you are editing a fade made with the fade handles or
applying a fade using processing, different buttons are shown in the bottom row of
the Fade dialog.
The Edit Fade dialogs have the following buttons:
OK
Applies the set fade curve to the event, and closes the dialog.
Cancel
Closes the dialog without applying any fade.
Apply
Applies the set fade curve to the event, without closing the dialog.
The Process Fade dialogs have the following buttons:
Preview
Plays back the fade area. Playback will repeat until you click the button again
(the button is labeled “Stop” during playback).
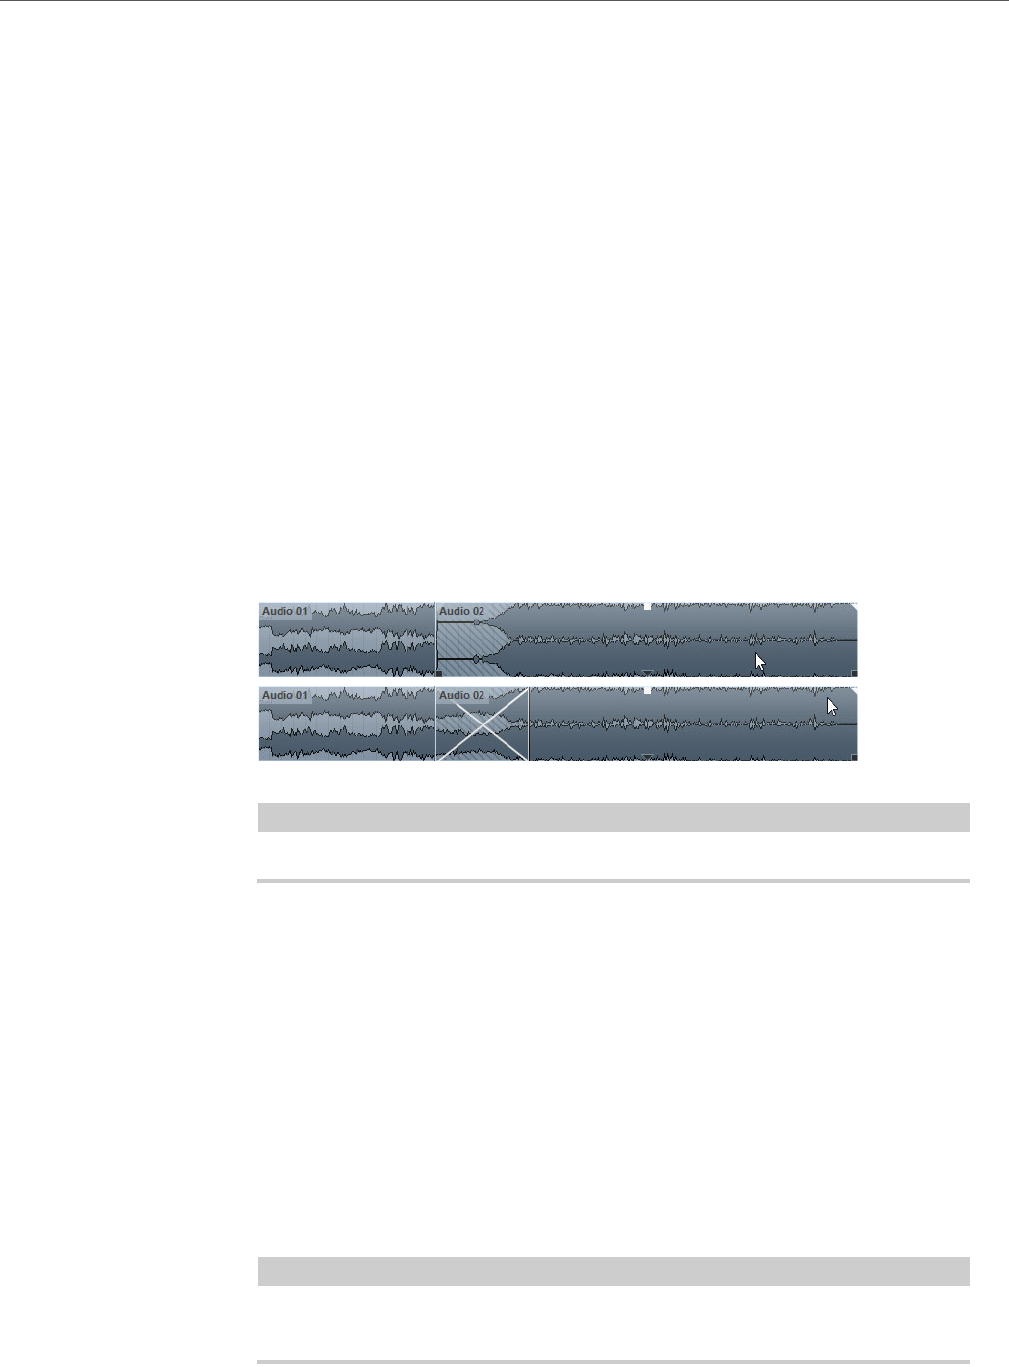
Fades and crossfades
Creating crossfades
179
Process
Applies the set fade curve to the clip, and closes the dialog.
Cancel
Closes the dialog without applying any fade.
Creating crossfades
Overlapping audio material on the same track can be crossfaded, for smooth
transitions or special effects. You create a crossfade by selecting two consecutive
audio events and selecting the Crossfade command on the Audio menu (or by using
the corresponding key command, by default [X]).
The result depends on whether the two events overlap or not:
• If the events overlap, a crossfade is created in the overlapping area.
The crossfade will be of the default shape (linear, symmetric), but you can
change this as described below.
Crossfade area
NOTE
The default crossfade length and shape are set in the Crossfade dialog.
• If the events do not overlap but are directly consecutive (lined up end-to-start,
with no gap) it is still possible to crossfade them – provided that their
respective audio clips overlap! In this case, the two events are resized so that
they overlap, and a crossfade of the default length and shape is applied.
• If the events do not overlap and cannot be resized enough to overlap, a
crossfade cannot be created.
• You can specify the length of the crossfade using the Range Selection tool:
make a selection range covering the desired crossfade area and use the
Crossfade command on the Audio menu.
The crossfade is applied to the selected range (provided that the events or
their clips overlap, as described above).
NOTE
You can also make a selection range after creating the crossfade and use the
function “Adjust fades to Range” on the Audio menu.
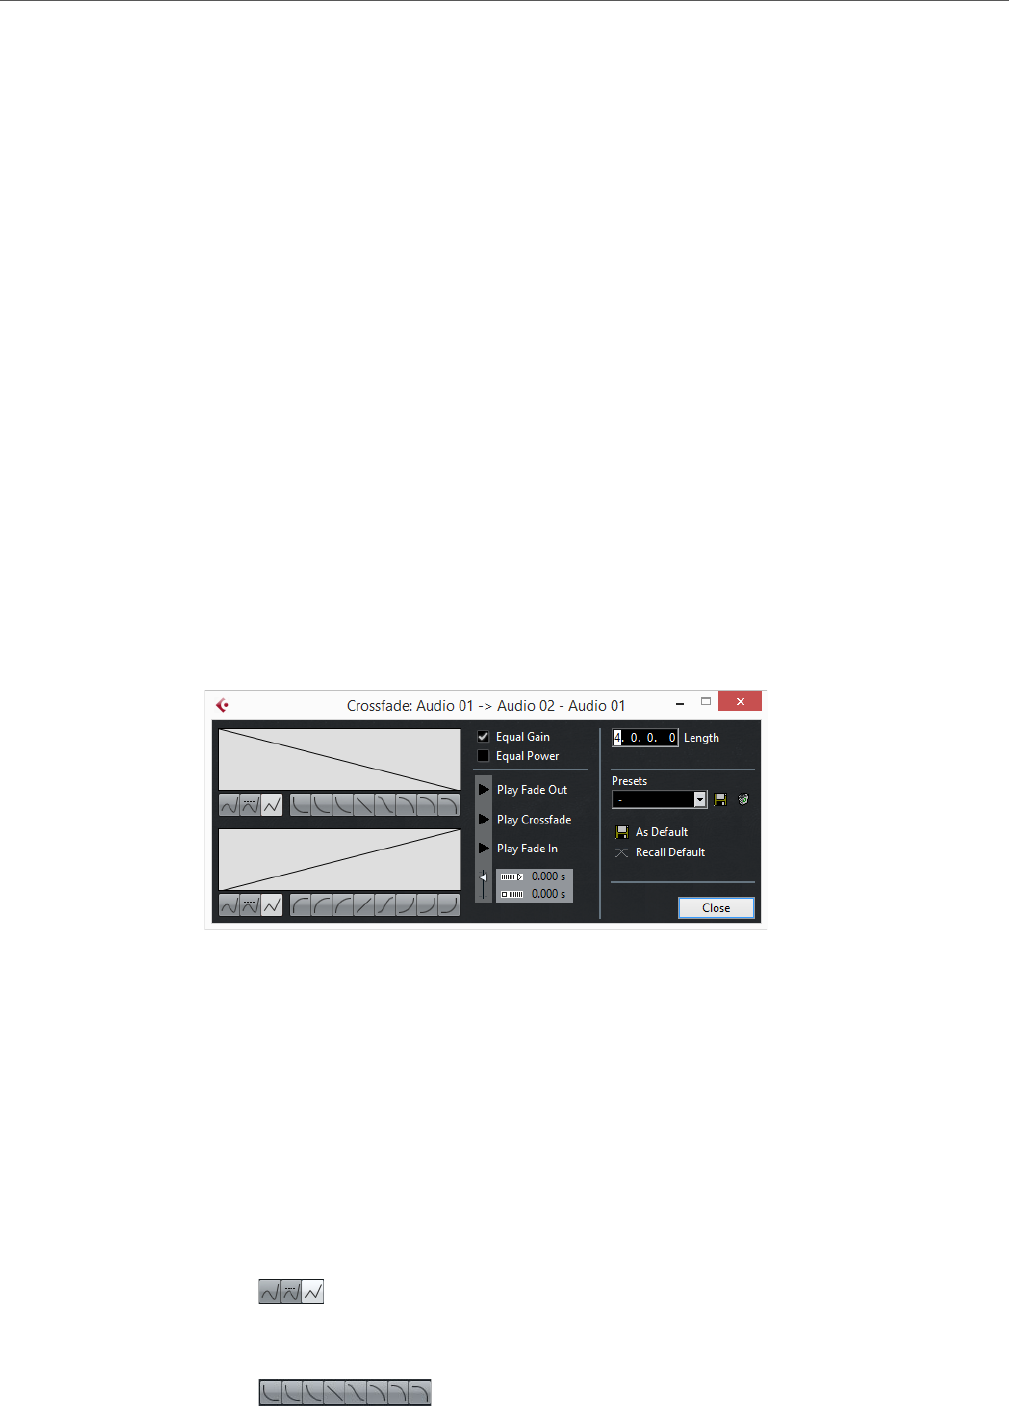
Fades and crossfades
The Crossfade dialog
180
• Once you have created a crossfade, you can edit it by selecting one or both
crossfaded events, and selecting “Crossfade” from the Audio menu again (or
by double-clicking in the crossfade zone).
This opens the Crossfade dialog.
RELATED LINKS
The Crossfade dialog on page 180
Removing crossfades
To remove a crossfade, proceed as follows:
• Select the corresponding events and select “Remove Fades” from the Audio menu.
• Use the Range Selection tool to select all fades and crossfades you wish to
remove, and select “Remove Fades” from the Audio menu.
• Select a crossfade by clicking, and drag it outside the track.
The Crossfade dialog
The Crossfade dialog contains separate, but identical, sections for the fade-in and
fade-out curve settings in the crossfade on the left, and common settings on the right:
Fade curve displays
These displays show the shape of the fade out and fade in curve, respectively.
Click on a curve to add points, click and drag existing points to change their
shape, or drag a point outside the display to remove it.
Curve buttons
The curve kind buttons determine whether the corresponding fade curve
consists of spline curve segments (left button), damped spline segments
(middle button) or linear segments (right button).
The curve shape buttons give you quick access to some common curve
shapes.

Fades and crossfades
The Crossfade dialog
181
Equal Gain
Activate this parameter to adjust the fade curves so that the summed fade in
and fade out amplitudes will be the same all along the crossfade region. This
is often suitable for short crossfades.
Equal Power
Activate this parameter to adjust the fade curves so that the energy (power)
of the crossfade will be constant all along the crossfade region.
Equal Power curves have only one editable curve point. You cannot use the
Curve kind buttons or the presets when this mode is selected.
Play buttons
These buttons allow you to audition the whole crossfade, or the fade out part,
or the fade in part. You can set up key commands for this in the following
categories of the Key Commands dialog:
• Media category – Preview Start (triggers crossfade playback), Preview
Stop (stops crossfade playback).
• Transport category – StartStop (triggers global playback), Stop (stops
global playback) and StartStop Preview (triggers crossfade playback).
Pre-roll and Post-roll
Activate pre-roll to start playback before the fade area. Activate post-roll to
stop playback after the fade area.
In the time fields you can enter the desired time (in seconds and milliseconds)
for the pre-roll and post-roll length.
Length
This specifies the length of the crossfade area. Cubase tries to center the
crossfade, i. e. the length change will be applied equally to both sides. To be
able to resize a crossfade, it must be possible to resize the corresponding
event. For example, if the fade out event already plays its audio clip to the end,
its end point cannot be moved any further to the right.
Presets section
Click the Store button to the right of the Presets pop-up menu to store the
settings of your crossfade so that you can apply them to other events later.
• To rename a preset, double-click on the name and type in a new one.
• To remove a preset, select it on the pop-up menu and click the Delete
button.
Default buttons
Click the As Default button to store the current settings as default. These
settings will then be used whenever you create new crossfades.
Click the Recall Default button to apply the curves and settings of the default
crossfade to the Crossfade dialog.
RELATED LINKS
Key Commands on page 602
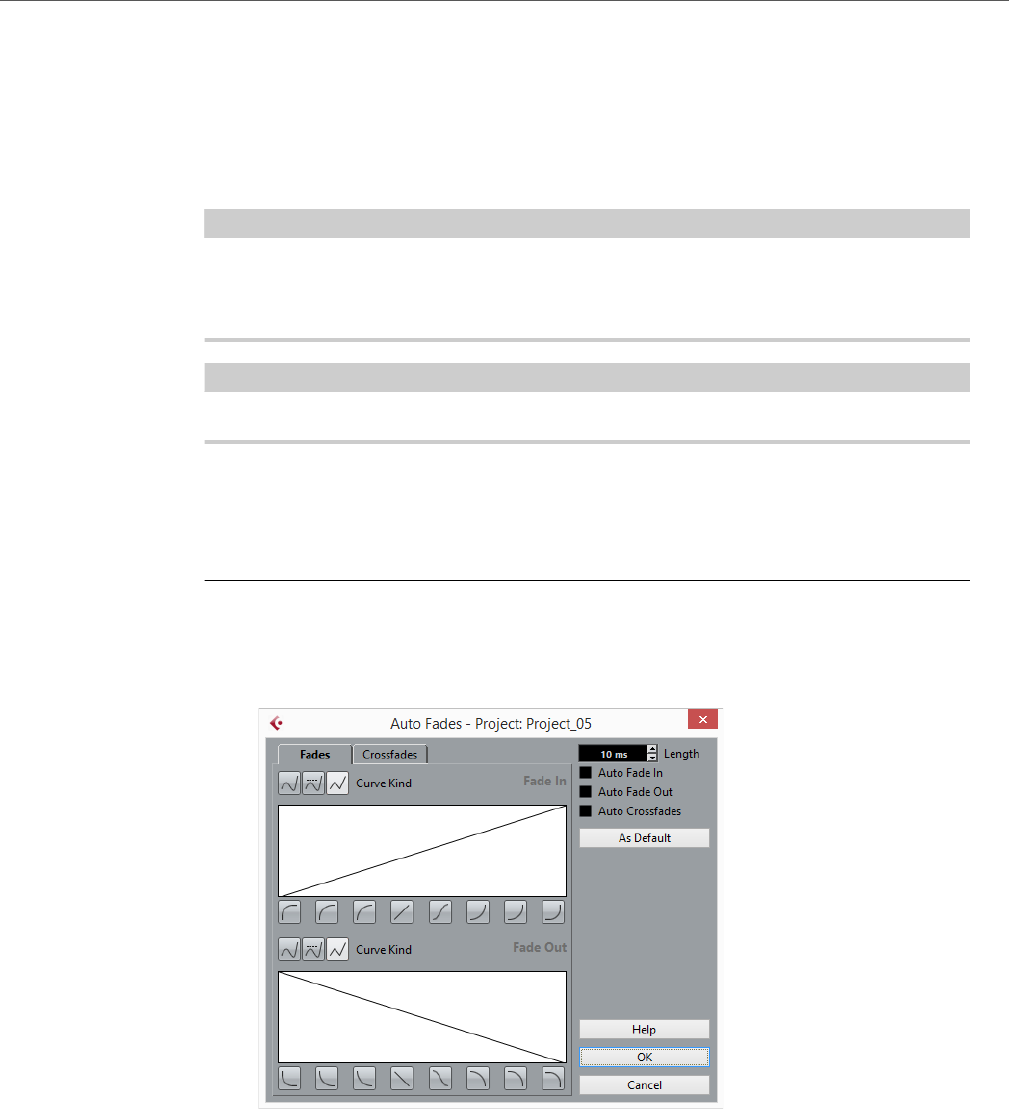
Fades and crossfades
Auto fades and crossfades
182
Auto fades and crossfades
Cubase features an Auto Fade function that can be set both globally, and separately
for each audio track. The idea behind the Auto Fade function is to create smoother
transitions between events by applying short (1 to 500 ms) fade ins and fade outs.
IMPORTANTIMPORTANTIMPORTANT
IMPORTANT
As event-based fades are calculated in realtime during playback, a higher number
of audio events provokes to a higher the demand on the processor when Auto
Fades is activated.
NOTE
Auto fades are not indicated by fade lines!
Making global Auto Fade settings
PROCEDURE
1. To make Auto Fades settings globally for a project, select “Auto Fades
Settings…” from the Project menu.
This opens the Auto Fades dialog for the project.
2. Use the Length value field to specify the length of the Auto Fades or
Crossfades (1 to 500 ms).
3. Use the checkboxes in the upper right corner to activate or deactivate Auto
Fade In, Auto Fade Out, and Auto Crossfades.
4. To adjust the shapes of Auto Fade In and Auto Fade Out, select the Fades
tab and make settings as in the regular Fade dialogs.
5. To adjust the shape of the Auto Crossfade, select the “Crossfades” tab and
make settings as in the regular Crossfade dialog.

Fades and crossfades
Auto fades and crossfades
183
6. If you want to use your settings in future projects, click the “As Default” button.
7. Click OK to close the dialog.
RELATED LINKS
The Fade dialogs on page 177
The Crossfade dialog on page 180
Making Auto Fade settings for individual tracks
By default, all audio tracks will use the settings you have made in the project’s Auto
Fades dialog.
However, since Auto Fades use computing power, a better approach may be to turn
Auto Fades off globally and activate them for individual tracks, as needed:
PROCEDURE
1. Right-click the track in the track list and select “Auto Fades Settings…” from
the context menu (or select the track and click the “Auto Fades Settings”
button in the Inspector).
The Auto Fades dialog for the track opens. This is identical to the project’s Auto
Fades dialog, with the addition of a “Use Project Settings” option.
2. Deactivate the “Use Project Settings” option.
Any settings you now make are applied to the track only.
3. Set up the Auto Fades as desired and close the dialog.
Reverting to project settings
If you want a track with individual Auto Fade settings to use the global Auto Fade
settings, open the Auto Fades dialog for the track and activate the “Use Project
Settings” checkbox.

184
Arranger Track (Cubase
Elements only)
Introduction
The arranger track allows you to work with sections of your project in a non-linear
fashion, to simplify arranging to the maximum extent. Instead of moving, copying and
pasting events in the Project window to create a linear project, you can define how
different sections are to be played back, like a playlist.
For this, you can define arranger events, order them in a list, and add repeats as
desired. This offers a different and more pattern-oriented way of working, which
complements the usual linear editing methods in the Project window.
You can create several arranger chains, making it possible to save different versions
of a song within the project without sacrificing the original version. When you have
created an arranger chain that you like, you have the option of “flattening” the list,
which creates a normal linear project based on the arranger chain.
You can also use the arranger track for live performances on the stage, in clubs or
at parties.
Setting up the arranger track
Let’s say you have prepared a number of audio files that form the base of a typical
pop song, with introduction, verse, chorus and bridge. Now you want to arrange
these files.
The first step is to create an arranger track. On the arranger track, you define
specific sections of the project by creating arranger events. These can be of any
length, may overlap and are not bound to the start or end of existing events and
parts. Proceed as follows:
PROCEDURE
1. Open the project for which you want to create arranger events.
2. Open the Project menu and select Arranger from the Add Track submenu (or
right-click the track list and select the corresponding option from the context
menu).
An arranger track is added. There can be only one arranger track in a project, but you
can set up more than one arranger chain for this track.
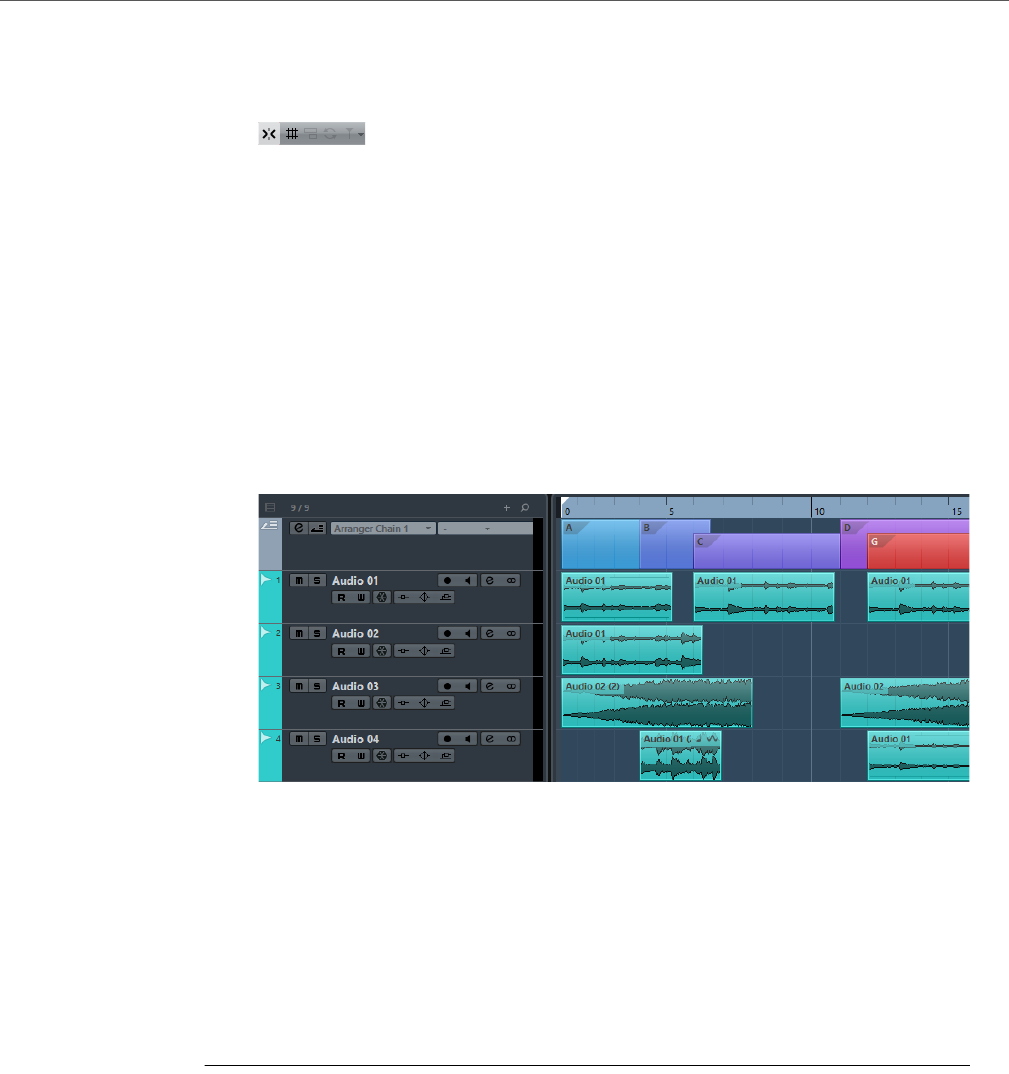
Arranger Track (Cubase Elements only)
Working with arranger events
185
3. On the Project window toolbar, make sure that Snap is activated and that the
Snap Type is set to a mode that allows your arranger events to snap to
appropriate positions in the project.
Snap to events is activated, i. e. when drawing in the Project window, new events will
snap to existing events.
4. On the arranger track, use the Draw tool to draw an event of the desired
length.
An arranger event is added, called “A” by default. Any following events will be named
in alphabetical order.
You can rename an arranger event by selecting it and changing its name in the Project
window info line or by holding down [Alt]/[Option], double-clicking on the name in the
arranger chain (see below) and entering a new name.
You may want to name your arranger events according to the structure of your project,
e. g. Verse, Chorus, etc.
5. Create as many events as you need for your project.
When arranger events have been created, the music sequence is determined by the
arranger events.
Events can be moved, resized and deleted using the standard techniques. Please
note:
• If you want to change the length of an event, select the Object Selection tool
and click and drag the lower corners of the event in the desired direction.
• If you copy an arranger event (by [Alt]/[Option]-dragging or by using
copy/paste), a new event will be created with the same name as the original.
However, this new event will be totally independent from the original event.
• Double-clicking on an arranger event adds it to the current arranger chain.
RELATED LINKS
Managing arranger chains on page 189
Working with arranger events
You now have a number of arranger events that form the basic building blocks for
your arrangement. The next step is to arrange these events using the functions of
the Arranger Editor.
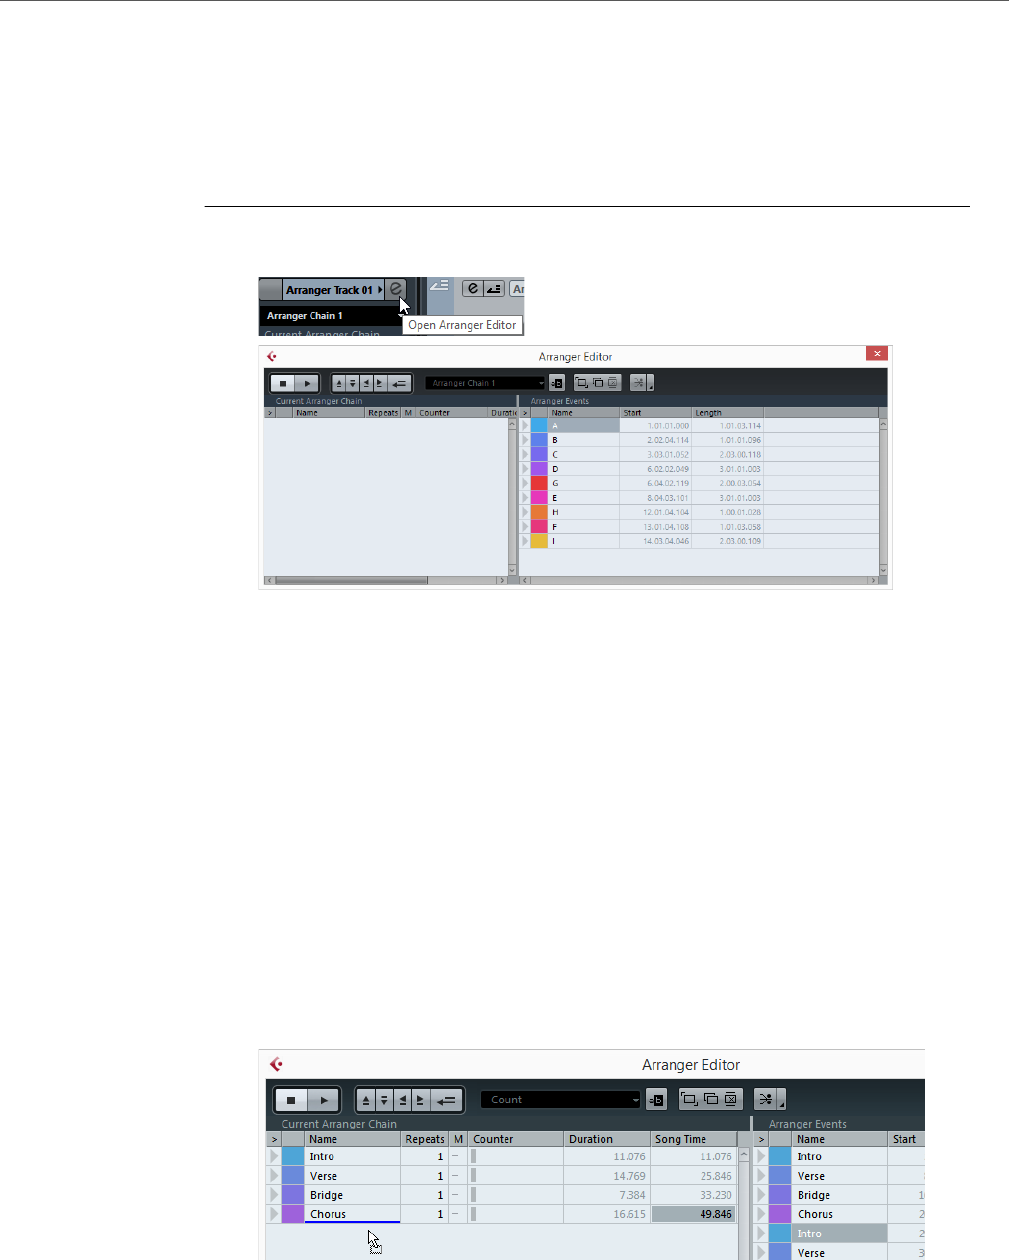
Arranger Track (Cubase Elements only)
Working with arranger events
186
Creating an arranger chain
You can set up an arranger chain in the Arranger Editor or in the Inspector for the
arranger track. The Arranger Editor is opened by clicking the “e” button in the
Inspector or in the track list.
PROCEDURE
1. Click the “e” button to open the Arranger Editor.
On the right in the Arranger Editor, the available arranger events are listed, in the order
they appear on the timeline. To the left you find the actual arranger chain, which
shows in which order the events will be played back, from top to bottom, and how
many times they are repeated.
Initially the arranger chain is empty – you set it up by adding events from the list to the
chain. There are several ways to add events to the arranger chain:
• By double-clicking on the name of an event in the window section on the right
(or in the Project window).
When an event is selected in the arranger chain on the left, this will add the
event above the selected event. When no events are selected in the arranger
chain, the event will be added at the end of the list.
• By selecting one or more events in the list, right-clicking and selecting “Append
Selected In Arranger Chain”.
This will add the selected events at the end of the list.
• By dragging and dropping arranger events from the list on the right to the
arranger chain on the left.
A blue insertion line shows you where the dragged event will end up.
An event is dragged into the arranger chain.
• By dragging arranger events from the Project window into the arranger chain.
If you followed our example, you should now have arranger events arranged in a very
basic pop song pattern. However, we have used audio files that are only a few bars
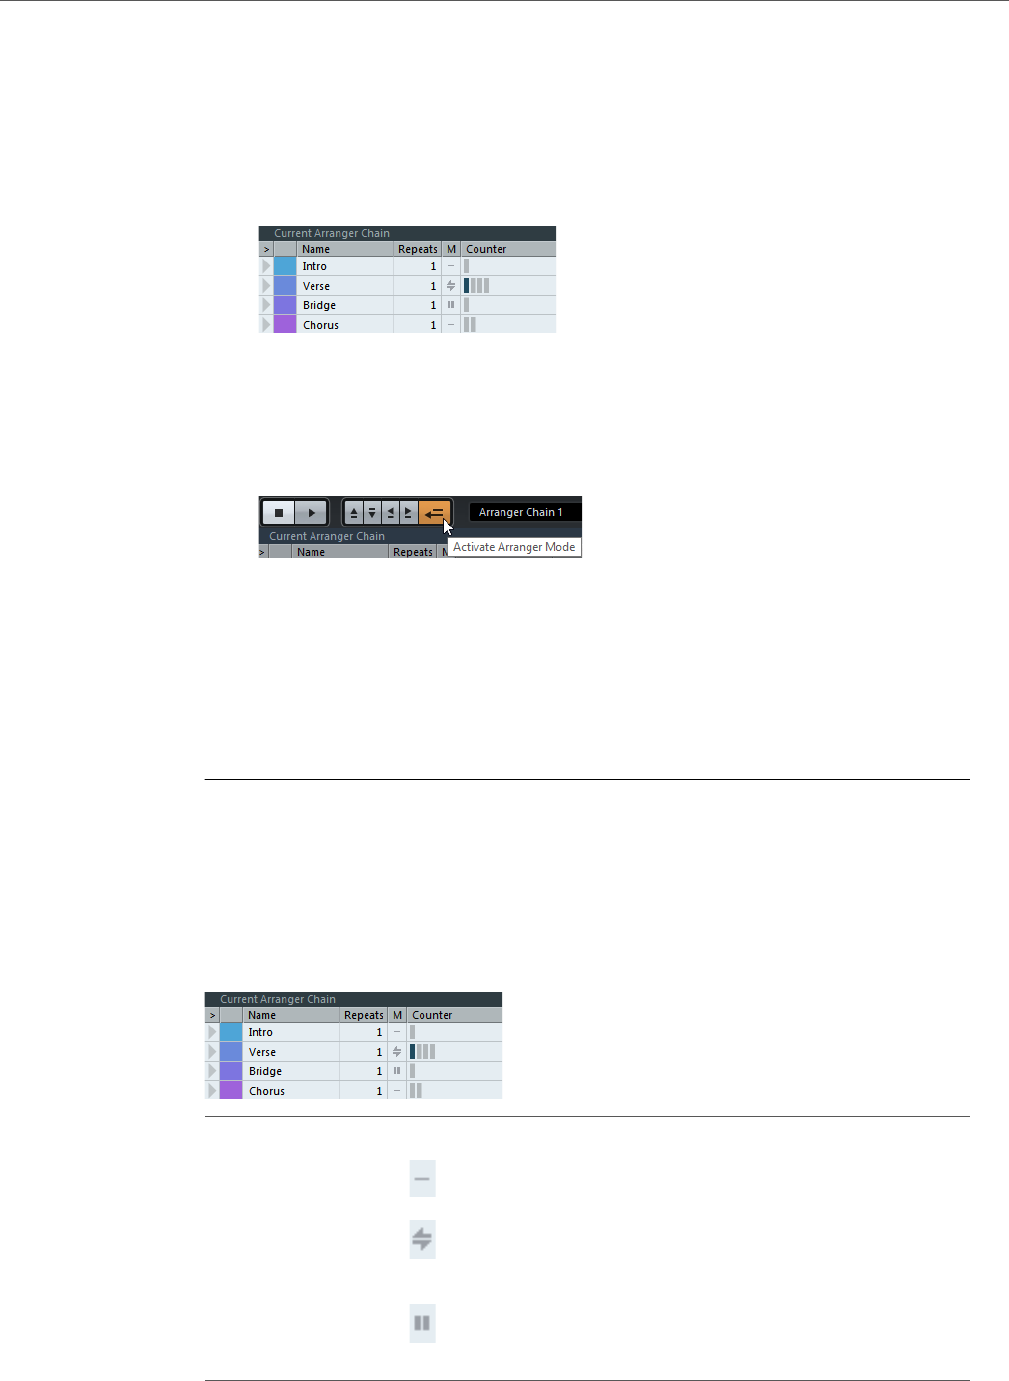
Arranger Track (Cubase Elements only)
Working with arranger events
187
long – to turn our pattern into a “song” (or at least into a basic sketch of the song
structure), these files must be looped. This is where the Repeats function comes in.
If you want an event to repeat several times, proceed as follows:
• Click in the Repeats field for an event, type in the desired number of repeats
and press [Enter].
When playing back the arranger chain, the Counter column indicates which
repeat of this event is currently playing.
• Click in the Mode field for an event and select the desired repeat mode.
When you now play back the arranger chain, you will hear the complete
arrangement.
2. Make sure that Arranger mode is activated.
In Arranger mode the project will be played back using the arranger settings.
3. Position the Arranger Editor window so that you can see the arranger track in
the Project window, and click in the arrow column for the event at the top of
the list.
You will see the project cursor jump to the beginning of the first event specified in the
arranger chain.
4. Activate playback, either from the Arranger Editor or on the Transport panel.
The events are played back in the specified order.
RELATED LINKS
Arranger Chain Repeat Modes on page 187
Arranger Chain Repeat Modes
Option Button Description
Normal In this mode, the arranger chain will be played back as
you set it up.
Repeat forever In this mode, the current arranger event will be
repeated in a loop until you either click on another
event in the Arranger Editor or press play once again.
Pause after
Repeats
In this mode, the playback of the arranger chain will be
stopped after having played back all repeats of the
current arranger event.
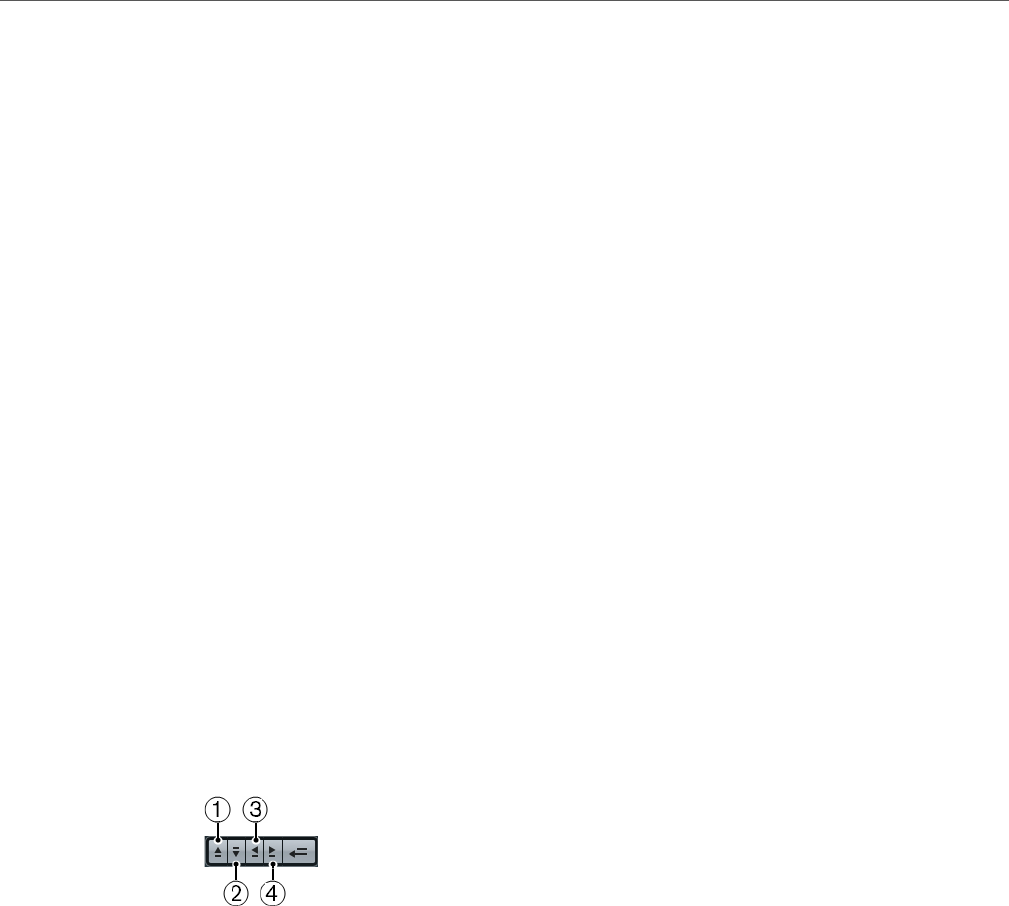
Arranger Track (Cubase Elements only)
Working with arranger events
188
Editing the arranger chain
In the arranger chain on the left, you can do the following:
• Select multiple events by [Ctrl]/[Command]-clicking or [Shift]-clicking as
usual.
• Drag events to move them in the list.
• Drag events holding [Alt]/[Option] to create copies of the selected items.
The insert location for both move and copy operations is indicated by a
colored insertion line. A blue line indicates that the move or copy is possible;
a red line indicates that moving or copying events to the current position is not
allowed.
• Use the Repeats column to specify how many times each event is to be
repeated.
• Click the arrow to the left of an event in the arranger chain to move the
playback position to the start of that event.
• To remove an event from the list, right-click on it and select “Remove
Touched” from the context menu. To remove several events, select them,
right-click and select “Remove Selected”.
Navigating
To navigate between arranger events, you use the arranger transport buttons.
1) Previous chain step
2) Next chain step
3) First repeat of current chain step
4) Last repeat of current chain step
These controls are available in the Arranger Editor, on the Project window toolbar,
and on the Transport panel.
In the Arranger Editor, the event that is currently played back is indicated by an
arrow in the leftmost column, and the indicators in the Counter column.

Arranger Track (Cubase Elements only)
Flattening the arranger chain
189
Managing arranger chains
You can create several arranger chains. This way, you can create alternative
versions for playback.
In the Arranger Editor, the toolbar buttons on the right are used for this:
Click this to rename the current arranger chain.
Creates a new, empty arranger chain.
Creates a duplicate of the current arranger chain, containing the same events.
Removes the currently selected arranger chain. Only available if you have
created more than one arranger chain.
In the Inspector, these functions are accessed from the Arranger pop-up menu
(opened by clicking on the Arranger name field).
The arranger chains you create will be listed on the Name pop-up menu, found in
the Arranger Editor to the left of the buttons, at the top of the arranger track
Inspector, and in the track list. Please note that to be able to select another arranger
chain from the pop-up menu, the Arranger mode must be activated.
Flattening the arranger chain
When you have found an arranger chain that suits your purposes, you can “flatten”
it, i. e. convert the list into a linear project.
PROCEDURE
1. Click the Flatten button (or select Flatten Chain from the pop-up menu in the
Inspector for the arranger track).
The events and parts in the project are reordered, repeated, resized, moved and/or
deleted (if these are not within the boundaries of any used arranger event), so that
they correspond exactly to the arranger chain.
The Flatten button
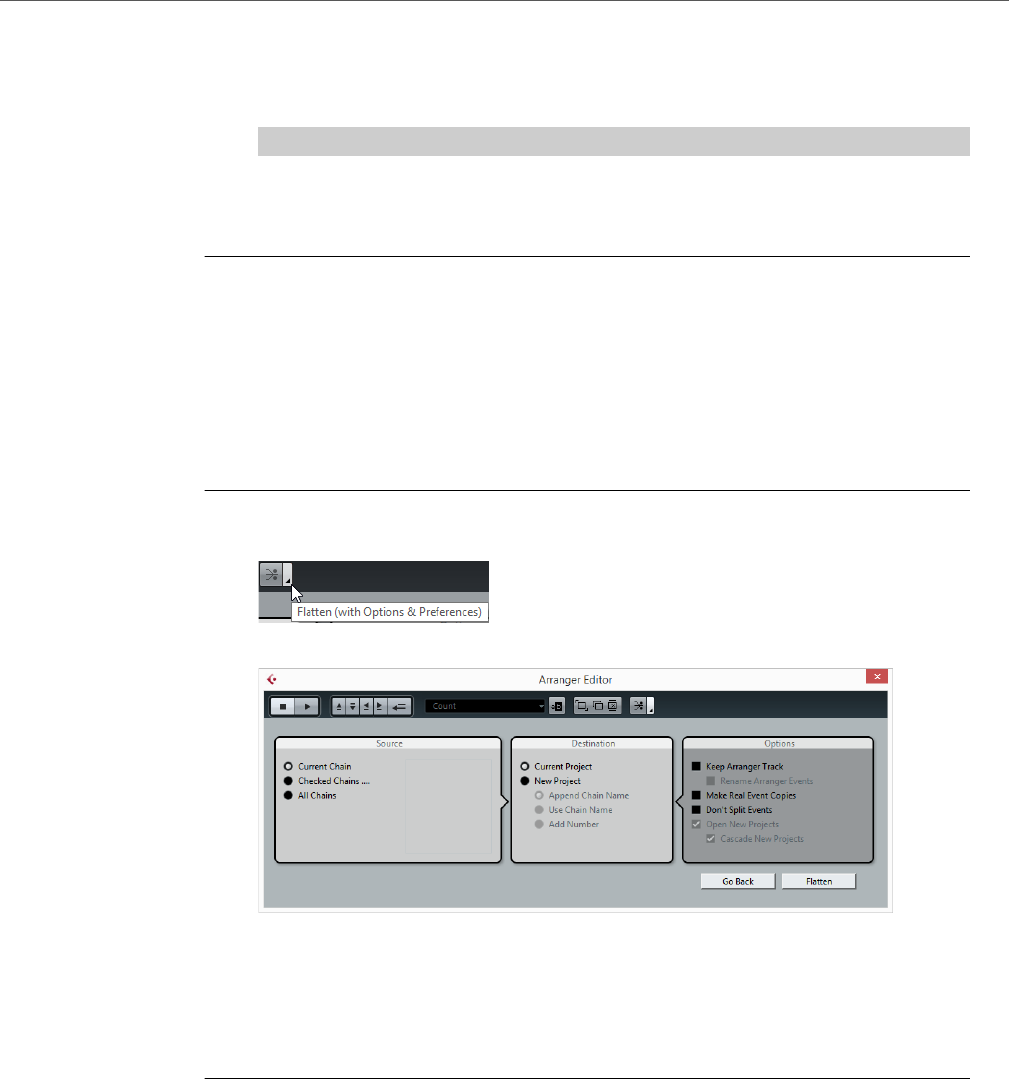
Arranger Track (Cubase Elements only)
Flattening the arranger chain
190
2. Activate Playback.
The project will now play back exactly as in Arranger mode, but you can view it and
work with it as usual.
IMPORTANT
Flattening the arranger chain may remove events and parts from the project. Only use
the Flatten function when you know you do not want to edit the arranger track/chain
any more. If in doubt, save a copy of the project before flattening the arranger chain.
Flattening options
Sometimes it might be useful to keep the original arranger events even after
flattening the arranger track. By using flattening options you can define which chain
is flattened, where it is stored and how it is named together with other options.
PROCEDURE
1. Click the Flattening options button.
2. In the window that opens, select the desired options.
3. You can now flatten the arranger track by clicking the Flatten button.
If you realize that you want to do further arrangements, you can click the “Go Back”
button and make your adjustments. Your Flattening settings will be kept.
4. Click the “Go Back” button to go back to the Arranger Editor or close the
window by clicking its Close button.
Flattening options in the Arranger Editor dialog
In the Source section you can specify which arranger chains are flattened.
Current Chain
If you activate this option, only the current chain will be flattened.

Arranger Track (Cubase Elements only)
Flattening the arranger chain
191
Checked Chains…
If you activate this option, you can select the arranger chains you want to
flatten in the list to the left.
All Chains
If you activate this option, all arranger chains of the current project will be
flattened.
The Destination section allows you to choose where the result of the flattening is
saved. The available options are:
Current Project
This is only available if you have selected “Current Chain” as Source. If you
activate this option, the result of the flattening of the current chain will be
saved in the current project.
New Project
If you activate this option, you can flatten one or several chains in a new
project. In this case it might be useful to use naming options. If you activate
“Append Chain Name”, the Chain Names will be appended in brackets to the
project name. If you activate “Use Chain Name”, the new projects will have
the name of the current arranger chains. If you activate “Add Number”, the
new projects will be named like the old ones and a number will be appended
in brackets.
In the Options section you can make further settings. The available options are:
Keep Arranger Track
If you activate this option, the arranger track will be kept when flattening the
arranger chain. Activate “Rename Arranger Events” to append a number to
the events, according to their use. For example, if you use arranger event “A”
two times, the first occurrence will be renamed “A 1” and the second “A 2”.
Make Real Event Copies
Normally, you will get shared copies when flattening the arranger track. If you
activate this option, real copies will be created instead.
Don’t Split Events
If this option is activated, MIDI notes that start before or are longer than the
arranger event will not be included. Only MIDI notes that begin and end inside
the arranger event boundaries will be taken into account.
Open New Projects
If you activate this option, a new project will be created for every flattened
arranger chain. If you activate the “Cascade New Projects” option the opened
projects will be cascaded.

Arranger Track (Cubase Elements only)
Live mode
192
Live mode
If you have set up an arranger track and play it back, you have also the possibility to
influence the playback order “live”. Note that the Arranger mode has to be activated
to be able to use the Live mode.
PROCEDURE
1. Set up an arranger chain in the Inspector or in the Arranger Editor for an
arranger track, activate the Arranger mode and play back your project.
Now you can use your arranger events listed in the lower section of the Inspector to
play back your project in Live mode.
2. Switch into Live mode by clicking on the little arrow in the lower list of the
Inspector to the left of the arranger event you want to trigger.
The arranger event will be looped endlessly, until you click on another arranger event.
This might be useful, for example, if you want to loop a guitar solo with a flexible
length.
In the Jump Mode pop-up menu, you can define how long the active arranger event
will be played, before jumping to the next one.
• You can stop Live mode by clicking the Stop button or go back to “normal”
playback in Arranger mode by clicking on any arranger event in the upper list.
In the latter case, playback will be continued from the arranger event where you
clicked.
RELATED LINKS
Jump Mode options on page 193
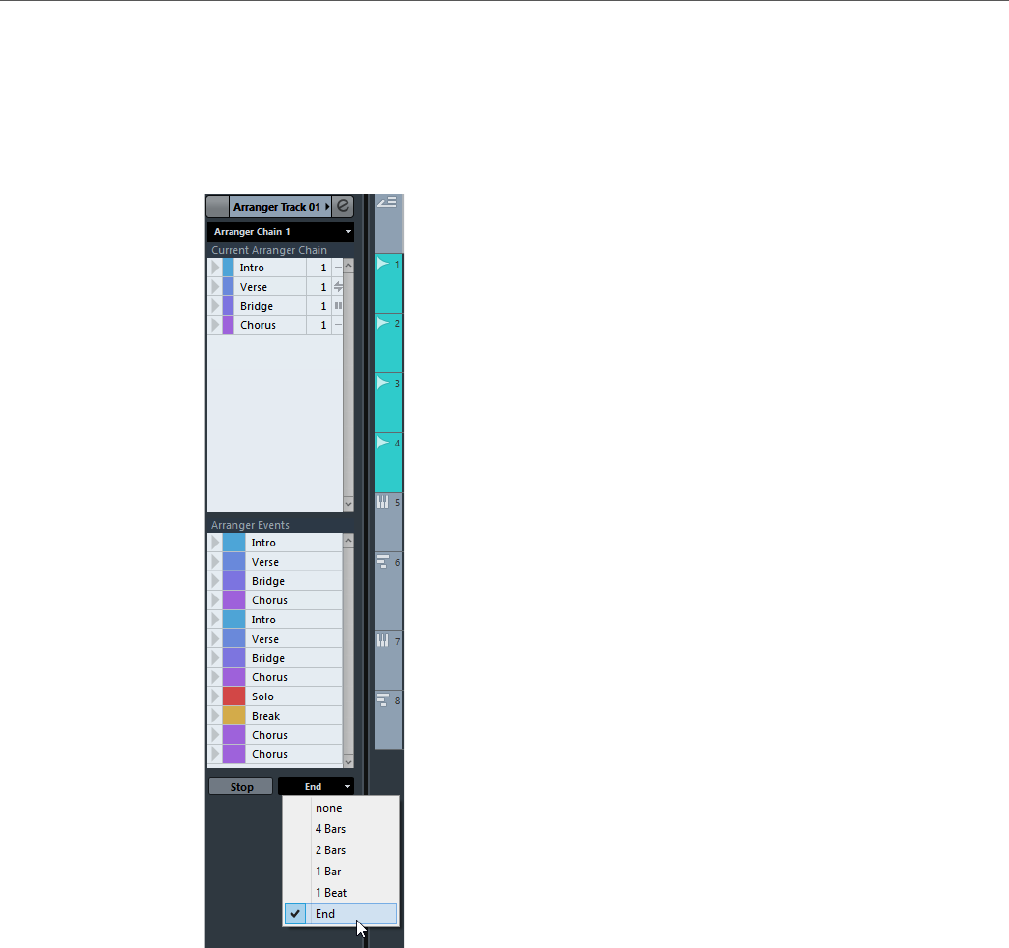
Arranger Track (Cubase Elements only)
Live mode
193
Jump Mode options
In the Jump Mode pop-up menu, you can define how long the active arranger event
will be played, before jumping to the next one.
The following options are available:
None
Jumps to the next section immediately.
4 bars, 2 bars
When one of these modes is selected, a grid of 4 or 2 bars (depending on the
setting) will be placed on the active arranger event. Whenever the respective
grid line is reached, playback will jump to the next arranger event. An example:
Let’s say you have an arranger event which is 8 bars long and the grid is set
to 4 bars. When the cursor is anywhere within the first 4 bars of the arranger
event when you hit the next arranger event, playback will jump to the next
event when the end of the fourth bar of the arranger event is reached. When
the cursor is anywhere within the last 4 bars of the arranger event, playback
will jump to the next event at the end of the event.

Arranger Track (Cubase Elements only)
Arranging your music to video
194
When an event is shorter than 4 (or 2) bars and this mode is selected,
playback will jump to the next section at the event end.
1 bar
Jumps to the next section at the next bar line.
1 beat
Jumps to the next section at the next beat.
End
Plays the current section to the end, then jumps to the next section.
You can stop Live mode by clicking the Stop button or go back to “normal” playback
in Arranger mode by clicking on any arranger event in the upper list.
In the latter case, playback will be continued from the arranger event where you
clicked.
Arranging your music to video
The relative time of your arranger track can be taken as a reference instead of the
project time. This is useful, if you want to use the arranger track to compose music
for video and fill a specific video section with music, by repeating the corresponding
number of arranger events.
If you position your external sync master device to a position that does not match
the Project Start time, Cubase will jump automatically to the right position in the
arranger track and will start playback from there, i. e. the correct relative position and
not the absolute project time will be found. The reference for the external timecode
can be MIDI or any other timecode that can be interpreted/read by Cubase.
An example:
PROCEDURE
1. Set up a project with a MIDI track and three MIDI parts. The first part should
start at position 00:00:00:00 and end at position 00:01:00:00, the second
should start at position 00:01:00:00 and end at position 00:02:00:00 and the
third should start at position 00:02:00:00 and end at position 00:03:00:00.
2. Activate the Sync button on the Transport panel.
3. Add an arranger track and create arranger events that match the MIDI parts.
4. Set up the arranger chain “A-A-B-B-C-C”, activate the Arranger mode and
play back your project.
5. Start external timecode at position 00:00:10:00 (within the range of “A”).
In your project, the position 00:00:10:00 will be located and you will hear “A” playing.
Nothing special!
Now, let’s see what happens if your external sync master device starts at a position
that does not match the Project Start time:
Arranger Track (Cubase Elements only)
Arranging your music to video
195
6. Start at 00:01:10:00 (within the range of what originally was “B”).
In your project, the position 00:01:10:00 will be located and you will hear “A” playing,
because it plays twice in the arranger track.
7. Start external timecode at position 00:02:10:00 (within the range of what
originally was “C”).
In your project, the position 00:02:10:00 will be located and you will hear “B” playing,
because it plays “later” in the arranger track.
NOTE
If the Arranger mode is not activated or no arranger track exists, Cubase will work as
usual.

196
Markers
Markers are used to locate certain positions quickly. There are two types of markers:
position markers and cycle markers.
If you often find yourself jumping to a specific position within a project, you should
insert a marker at this position. You can also use markers to make range selections
or for zooming.
Markers are located on the marker track.
Position Markers
Position markers allow you to save a specific position.
Position markers on the marker track are shown as marker events: vertical lines with
the marker description (if assigned) and number beside it. If you select a marker
track, all its markers are shown in the Inspector.
Cycle Markers
By creating cycle markers you can save any number of left and right locator
positions as start and end positions of a range and recall them by double-clicking
on the corresponding marker.
Cycle markers are shown on marker tracks as two markers bridged by a horizontal
line. Cycle markers are ideal for storing sections of a project.
By defining cycle markers for sections of a song, e. g. “Intro”, “Verse”, and “Chorus”,
you can quickly navigate to the song sections and repeat the section by activating
the Cycle button on the Transport panel.

Markers
Cycle Markers
197
Setting the Locators Using Cycle Markers
Cycle markers represent ranges in your project. You can use them for moving the
left and right locators.
PROCEDURE
• To set the left locator to the cycle marker start and the right locator to the
cycle marker end, perform one of the following actions:
• Double-click on a cycle marker.
• From the Cycle pop-up menu in the track list, select a cycle marker.
RESULT
The left and right locators are moved to encompass the cycle marker.
AFTER COMPLETING THIS TASK
Now you can move the project cursor position to the start or the end of the cycle
marker by moving it to the corresponding locator or use cycle markers to export
specific ranges of your project with the Export Audio Mixdown dialog.
Editing Cycle Markers
When editing cycle markers on the marker track, snap is taken into account.
• To add a cycle marker, press [Ctrl]/[Command] click and drag on the marker
track.
• To change the start/end position of a cycle marker, drag the start/end handle.
• To move a cycle marker to another position, drag the upper border.
• To delete a cycle marker, click with the Erase tool.
If you hold down [Alt]/[Option] when you click, all consecutive markers are
deleted.
• To trim a cycle marker, select a range in the cycle marker and press
[Ctrl]/[Command]-[X].
• To set the marker start/end of the selected cycle marker to the cursor position,
select Project > Markers to open the Markers window, and select
Functions > Set marker start/end to cursor.
• To create a selection range spanning all tracks in the project, double-click a
cycle marker.
• To set the left and right locators, double-click a cycle marker.
• To zoom in on a cycle marker, press [Alt]/[Option] and double-click the cycle
marker.
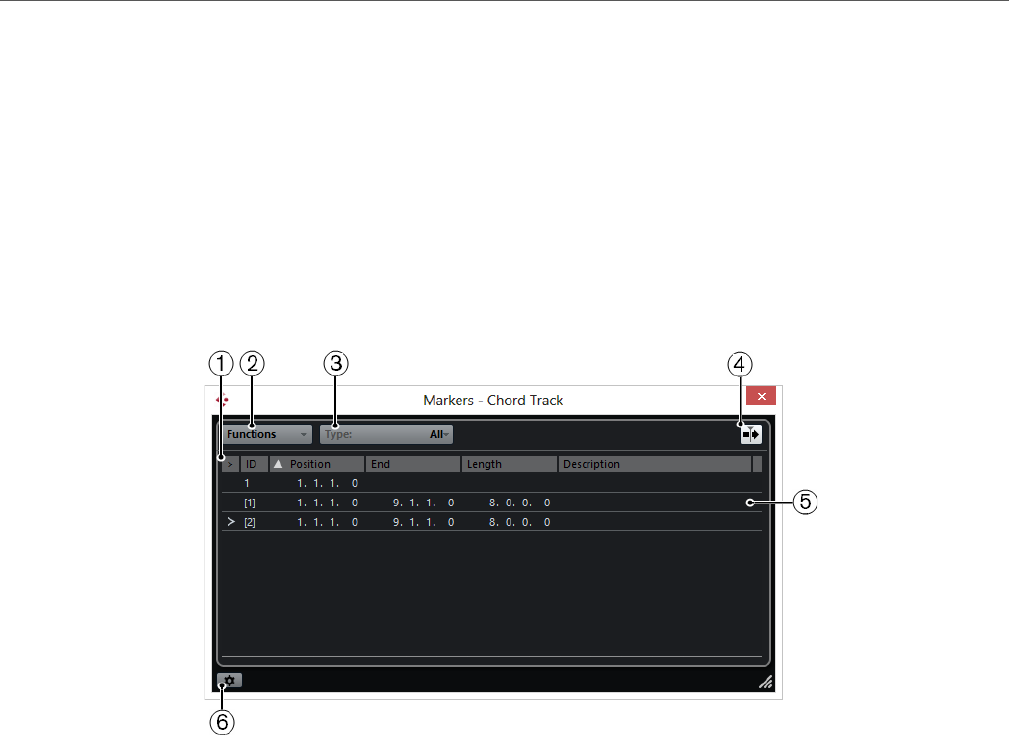
Markers
Markers Window
198
Markers Window
In the Markers window you can view and edit markers. The markers on the marker
track are displayed in the marker list in the order in which they occur in the project.
To open the Markers window, you have the following possibilities:
•Select Project > Markers.
• On the Transport panel in the marker section, click Show.
• Use a key command (by default [Ctrl]/[Command]-[M]).
1) Locate arrow
Indicates which marker is at the project cursor position.
2) Functions menu
Lists all functions available in the Marker window.
3) Marker type
Allows you to specify which marker type is shown in the marker list.
4) Auto-Scroll with Project Cursor
Allows you to keep track of the locate arrow, even if your project contains a
large number of markers. When this option is activated, the Marker window
is automatically scrolled to keep the locate arrow visible.
5) Markers list
Shows the markers in the order in which they occur in the project.
6) Marker Preferences
Shows the marker preferences.

Markers
Markers Window
199
Editing in the Markers Window
In the Markers window you can select, edit, add, move, and remove markers.
• To select a marker, click on it.
• To edit a selected marker, click on it.
Select multiple markers by [Shift] or [Ctrl]/[Command]-clicking them.
• To add a position marker at the cursor position, select Functions > Insert
Marker.
A position marker is added at the current project cursor position on the marker
track.
• To add a cycle marker at the cursor position, select Functions > Insert Cycle
Marker.
This adds a cycle marker between the left and right locators on the marker
track.
• To move a marker to the cursor position, select the marker and select
Functions > Move Markers to Cursor.
You can also enter the new position numerically in the Position column. If a
cycle marker is selected, the move operation affects the cycle marker start
position.
• To remove a marker, select it and select Functions > Remove Marker.
Navigating in the Marker List
You can navigate in the marker list using your computer keyboard and select entries
by pressing [Enter]. This is a quick and easy way to jump to markers during playback
or recording.
• To move to the previous/next marker in the list, press [Up Arrow]/[Down
Arrow].
• To jump to the first/last marker, press [Page Up]/[Page Down].
Sorting and Reordering the Marker List
You can customize the display of the marker attributes in the marker list by sorting
or reordering the columns.
• To sort the marker list by a specific attribute, click on the corresponding
column header.
• To reorder the marker attributes, drag and drop the corresponding column
headers.
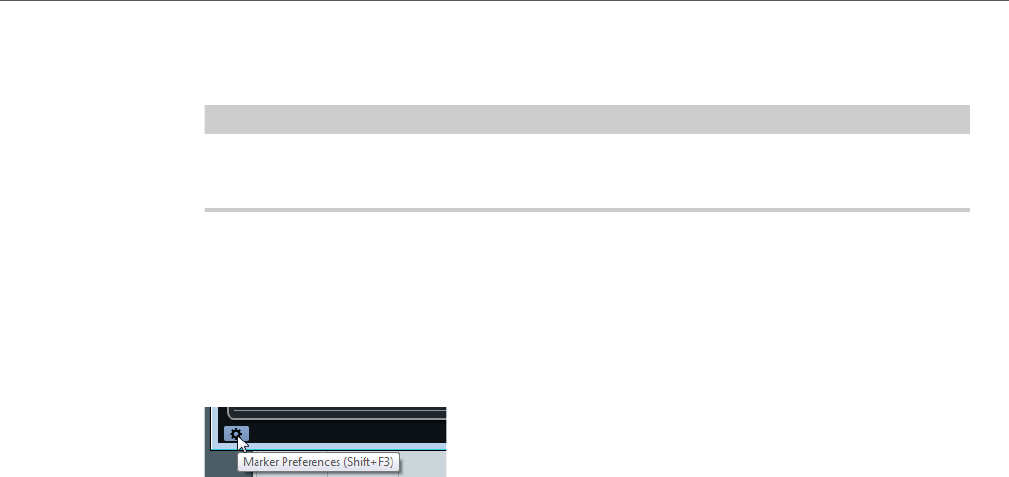
Markers
Markers Window
200
• To adjust the width of a column, place the mouse pointer between two column
headers and drag left or right.
NOTE
No matter by which attribute you sort, the second sort criterion will always be the
position attribute.
Marker Preferences
You can access the marker preferences by clicking the corresponding button in the
bottom left corner of the Markers window.
Cycle follows when locating to Markers
This sets the left and right locators automatically to a position or cycle marker,
when locating to this marker. This is useful if you need to set the locators on
the fly, e. g. during recording for Punch In/Punch Out.
Show marker IDs on marker track
When this option is activated, the marker IDs are shown on the marker track.
Sync Selection
When this option is activated, the Markers window selection is linked to the
selection in the Project window.
Marker Attributes
The following marker attributes are shown in the marker list of the Marker window:
Locate
An arrow indicates which marker is at the project cursor position (or closest
to the project cursor). If you click in this column, the project cursor is moved
to the corresponding marker position. This column cannot be hidden.
ID
This column shows the marker ID numbers.
Position
In this column you can view and edit the markers’ time positions (or start
positions for cycle markers). This column cannot be hidden.
End
In this column you can view and edit the end positions of cycle markers.

Markers
Markers Window
201
Length
In this column you can view and edit the length of cycle markers.
Description
Here you can enter names or descriptions for markers.
RELATED LINKS
Marker IDs on page 202
Cycle Markers on page 196
Editing Attributes
• To edit a marker attribute, select the corresponding marker, click in the
desired attribute column, and make your settings.
• To change the attributes of several markers, select the markers and click the
checkbox for the desired attribute.
All selected markers will change their attributes accordingly. Note that this
does not work when clicking on a timecode value or a text field.
NOTE
To navigate in the list of marker attributes, you can also use the [Tab] key and the
arrow keys.
Sorting and Reordering Columns
You can customize the display of the marker attributes in the marker list by sorting
or reordering the columns.
• To sort the marker list by a specific attribute, click on the corresponding
column header.
NOTE
No matter by which attribute you sort, the second sort criterion will always be
the position attribute.
• To reorder the marker attributes, drag and drop the corresponding column
headers.
• To adjust the width of a column, place the mouse pointer between two column
headers and drag left or right.
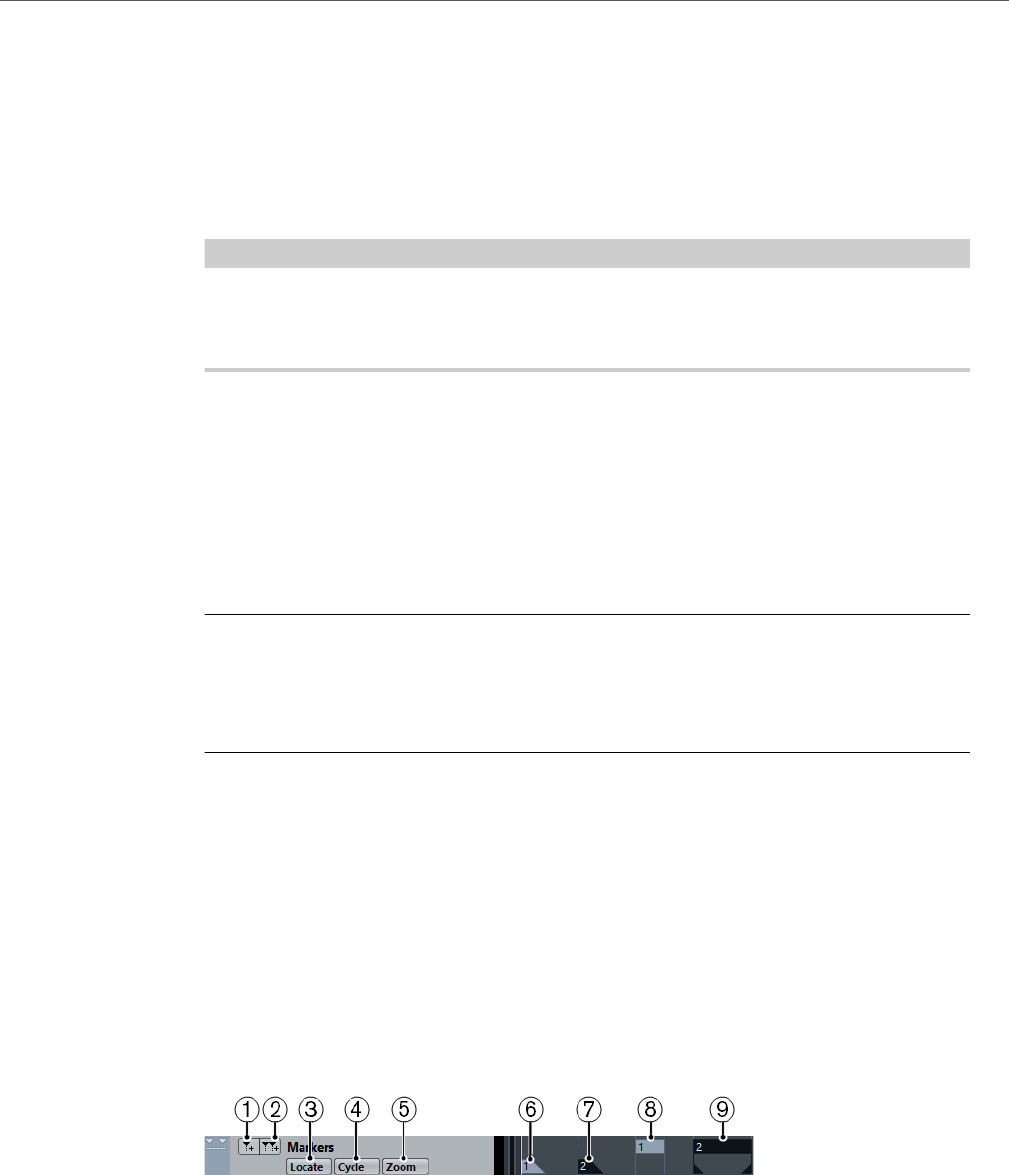
Markers
Marker Track
202
Marker IDs
Each time you add a marker, it is automatically and sequentially assigned an ID
number, starting from 1.
IDs for cycle markers are shown in brackets and start from [1]. ID numbers can be
changed at any time – this allows you to assign specific markers to key commands.
NOTE
If you move a marker from one marker track to another by drag & drop in the Project
window and the marker ID is already used on this track, the inserted marker
automatically gets a new ID.
Reassigning Marker IDs
Sometimes, especially when setting markers on the fly, you may forget or miss to
set a marker. When added later, this marker’s ID will not correspond to its position
on the marker track. Therefore, it is possible to reassign the IDs for all markers on a
track.
PROCEDURE
1. Open the Markers window.
2. Open the Functions pop-up menu and select either Reassign Position
Marker IDs or Reassign Cycle Marker IDs.
RESULT
The marker IDs of the selected type are reassigned to match the order of markers
on the marker track.
Marker Track
The marker track is used for adding and editing markers.
1) Add Marker
Adds a position marker at the cursor position.
2) Add Cycle Marker
Adds a cycle marker at the cursor position.

Markers
Marker Track
203
3) Locate pop-up menu
If you select a position or a cycle marker in this pop-up menu, the
corresponding marker in the event display or in the Markers window is
selected.
4) Cycle pop-up menu
If you select a cycle marker in this pop-up menu, the left and right locators are
set to the corresponding cycle marker.
5) Zoom pop-up menu
If you select a cycle marker in this pop-up menu, the view zooms to the
corresponding cycle marker.
6) Marker event (inactive)
Shows an inactive marker event.
7) Marker event (active)
Shows an active marker event.
8) Cycle marker event (inactive)
Shows an inactive cycle marker event.
9) Cycle marker event (active)
Shows an active cycle marker event.
Adding, Moving, and Removing the Marker Track
• To add the marker track to the project, select Project > Add Track > Marker.
• To move the marker track to another position in the track list, click and drag it
up or down.
• To remove the marker track, right-click it in the track list and select Remove
Selected Tracks.
• To remove an empty marker track, select Project > Remove Empty Tracks.
This also removes any other tracks that are empty.
Editing Markers on the Marker Track
• To add a position marker, click Add Marker or use the Draw tool.
• To add a cycle marker, click Add Cycle Marker or use the Draw tool.
• To select a marker, use the standard techniques.
• To resize a cycle marker, select it and drag the handles. You can also do this
numerically on the info line.

Markers
Importing and Exporting Markers
204
• To move a marker, select it and drag it. You can also edit marker positions on
the info line.
• To remove a marker, select it and press [Delete] or use the Erase tool.
Using Markers to Select Ranges
Markers can be used in conjunction with the Range Selection tool to make range
selections in the Project window. This is useful if you quickly want to make a
selection that spans all tracks in the project.
PROCEDURE
1. Set markers at the start and end of the section that you want to move or copy.
2. Select the Range Selection tool and double-click on the marker track
between the markers.
Everything in the project within the marker boundaries is selected. Any functions or
processing you perform now affect the selection only.
3. Click on the marker track in the selected range and drag the range to a new
position.
If you hold down [Alt]/[Option] while you drag the range, the selection in the Project
window is copied instead.
Importing and Exporting Markers
Markers and marker tracks can be imported and exported.
The following files can contain markers:
• MIDI files
Importing Markers via MIDI
You can import position markers by importing MIDI files containing markers. This is
useful if you want to use your marker tracks in other projects or if you want to share
them with other Cubase users. Any markers you have added are included in the
MIDI file as standard MIDI file marker events.
•Select File > Preferences > MIDI > MIDI File and make sure Import
Markers is activated.
The following settings are imported:
• The start position of position markers and cycle markers
RELATED LINKS
Importing MIDI files on page 624

Markers
Importing and Exporting Markers
205
Exporting Markers via MIDI
You can export your markers as part of a MIDI file.
• To include any markers in the MIDI file, activate Export Markers in the Export
Options dialog.
The following settings are exported:
• The start position of position markers and cycle markers.
NOTE
To be able to export markers via MIDI export, your project must contain a marker
track.
RELATED LINKS
Exporting MIDI files on page 622

206
MixConsole
The MixConsole provides a common environment for producing mixes in stereo or
surround. It allows you to control level, pan, solo/mute status, etc. for audio and MIDI
channels. Furthermore, it is a convenient environment for setting up the input and
output routing for multiple tracks or channels at the same time.
To open the MixConsole, you have the following options:
• Press [F3].
•Select Devices > MixConsole.
• On the Project window toolbar, click Open MixConsole .
This is only visible on the toolbar if the section Media & MixConsole
Windows is activated.
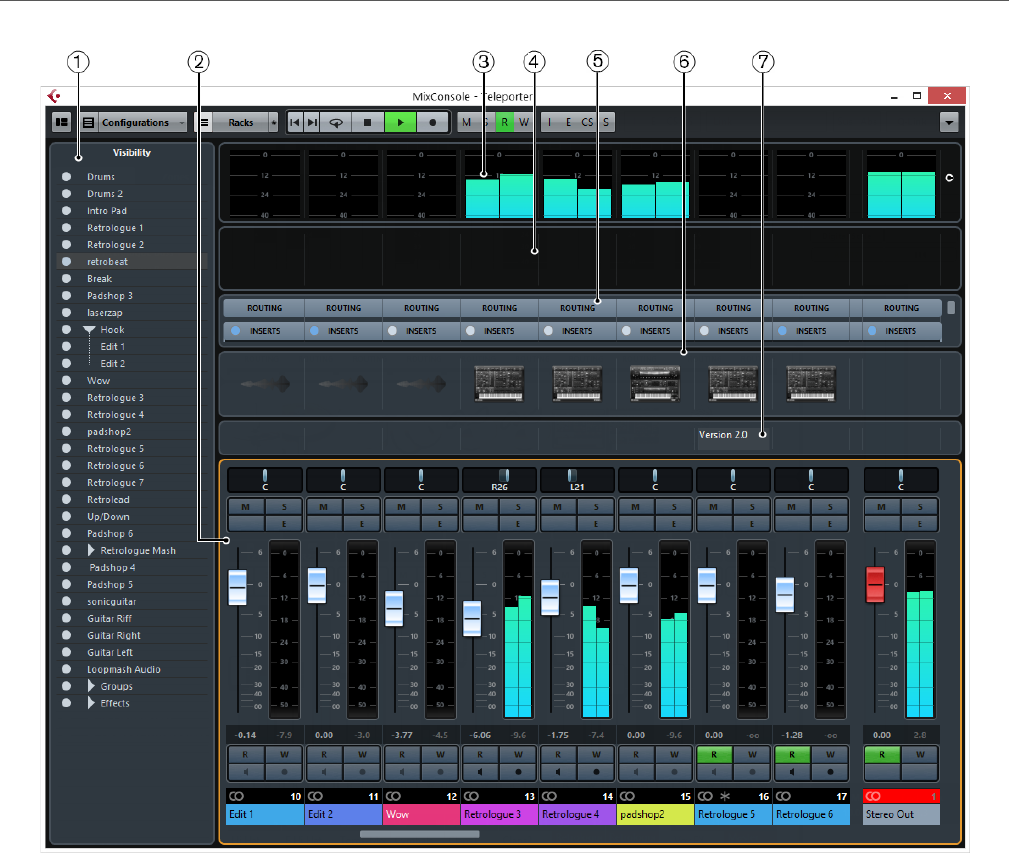
MixConsole
207
The MixConsole is divided into several sections:
1) Channel Selector
Allows you to set up the visibility of channels in the fader section.
2) Fader Section
The fader section is the heart of the MixConsole. It is always visible and
shows all channels in the same order as in the track list.
3) Meter Bridge
Allows you to monitor the levels of your channels.
4) Equalizer Curve
Allows you to draw an EQ curve. Click in the curve display to open a larger
view where you can edit the curve points.
5) Channel Racks
Allows you to show additional channel controls as needed.
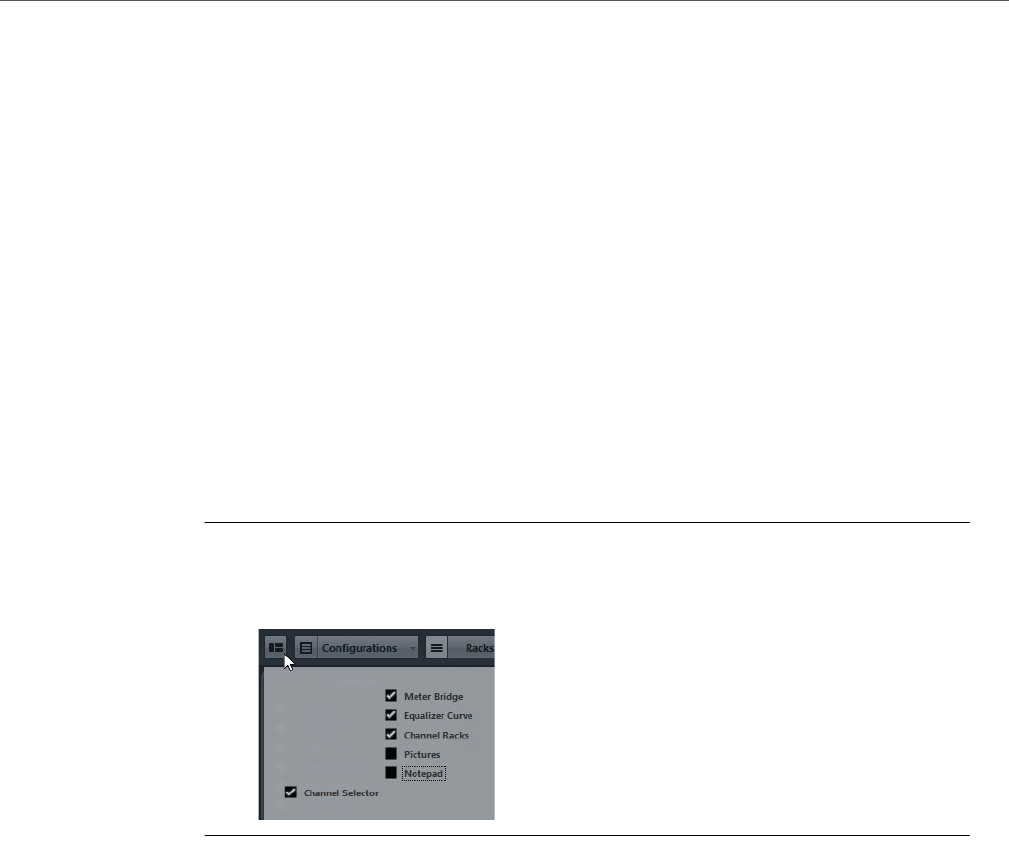
MixConsole
Setting Up the MixConsole
208
6) Pictures
Opens the Pictures section that allows you to add a picture to the selected
channel. Pictures can help you identify your MixConsole channels quickly.
7) Notepad
In the Notepad section, you can enter notes and comments about a channel.
Each channel has its own notepad.
RELATED LINKS
Track Pictures Browser on page 94
Setting Up the MixConsole
You can show and hide the different sections of the MixConsole. This saves screen
space and enables you to display only the information that you need.
PROCEDURE
1. Click the Set up Window Layout button on the MixConsole toolbar.
2. Activate the checkboxes for the sections that you want to show.
MixConsole Toolbar
The toolbar holds tools and shortcuts for settings and functions in the MixConsole.
Set up Window Layout
Allows you to activate/deactivate the different sections of the MixConsole.
Filter Channel Types
Opens the channel filter that allows you to show/hide all channels of a certain
channel type.
Channel Visibility Configurations
Allows you to create configurations that are useful for switching quickly
between different visibility setups.
Show Channel Racks
Activates/Deactivates the rack selector.

MixConsole
Configuring the MixConsole
209
Select Racks
Opens the rack selector that allows you to show/hide specific racks.
Rack Settings
Opens a pop-up menu with settings for the racks.
Locators
Shows the left and right locator positions.
Transport Buttons
Shows the transport controls.
Time Display
Shows the time display.
Markers
Shows the marker buttons.
State Buttons
Shows the mute, solo, listen, and automation states. Here you can also
bypass inserts, EQs, channel strips, and sends.
Link Group
Allows you to link channels.
Zoom Palette
Allows you to increase/reduce the channel width and the rack height. You can
change the width for all channels from viewable (narrow) to editable (wide),
by using the default key commands [G] and [H].
Performance Meter
Shows the meters for ASIO time usage and hard disk transfer load.
Functions Menu
Opens the Functions Menu, that allows you to make settings in the
MixConsole.
Configuring the MixConsole
You can configure the MixConsole exactly to your needs and to your individual
workflow.
Channel Selector
The channel selector contains the Visibility tab that lists all channels contained in
your project.
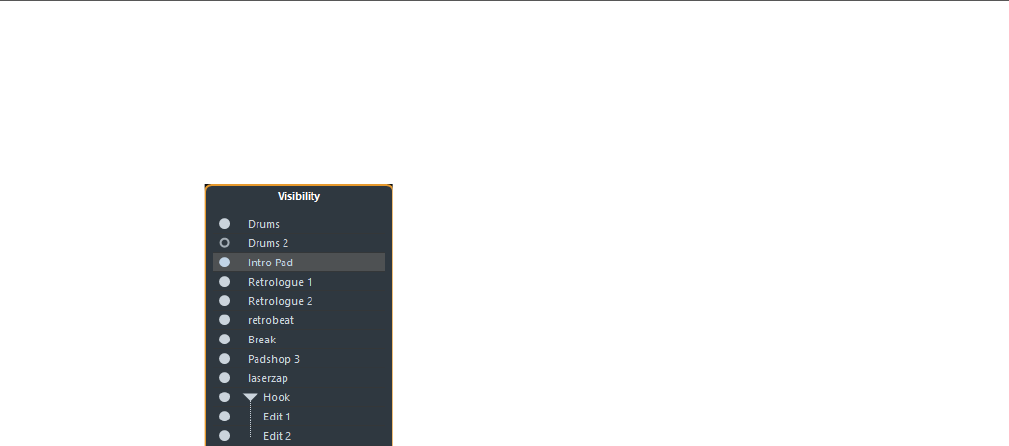
MixConsole
Configuring the MixConsole
210
Visibility Tab
The Visibility tab allows you to determine which channels are shown in the
MixConsole. This is particularly helpful if you organize your tracks in folder or group
tracks.
• To show/hide channels, activate/deactivate the dots.
• To collapse/expand groups and folders, click the group or folder name.
Input Routing Configurations for Mono Channels
• Mono input busses.
• Mono output busses, or mono group output busses.
These should not lead to feedback.
RELATED LINKS
Routing on page 221
Input Routing Configurations for Stereo Channels
• Mono or stereo input busses.
• Mono or stereo output busses, and mono or stereo group output busses.
These should not lead to feedback.
RELATED LINKS
Routing on page 221
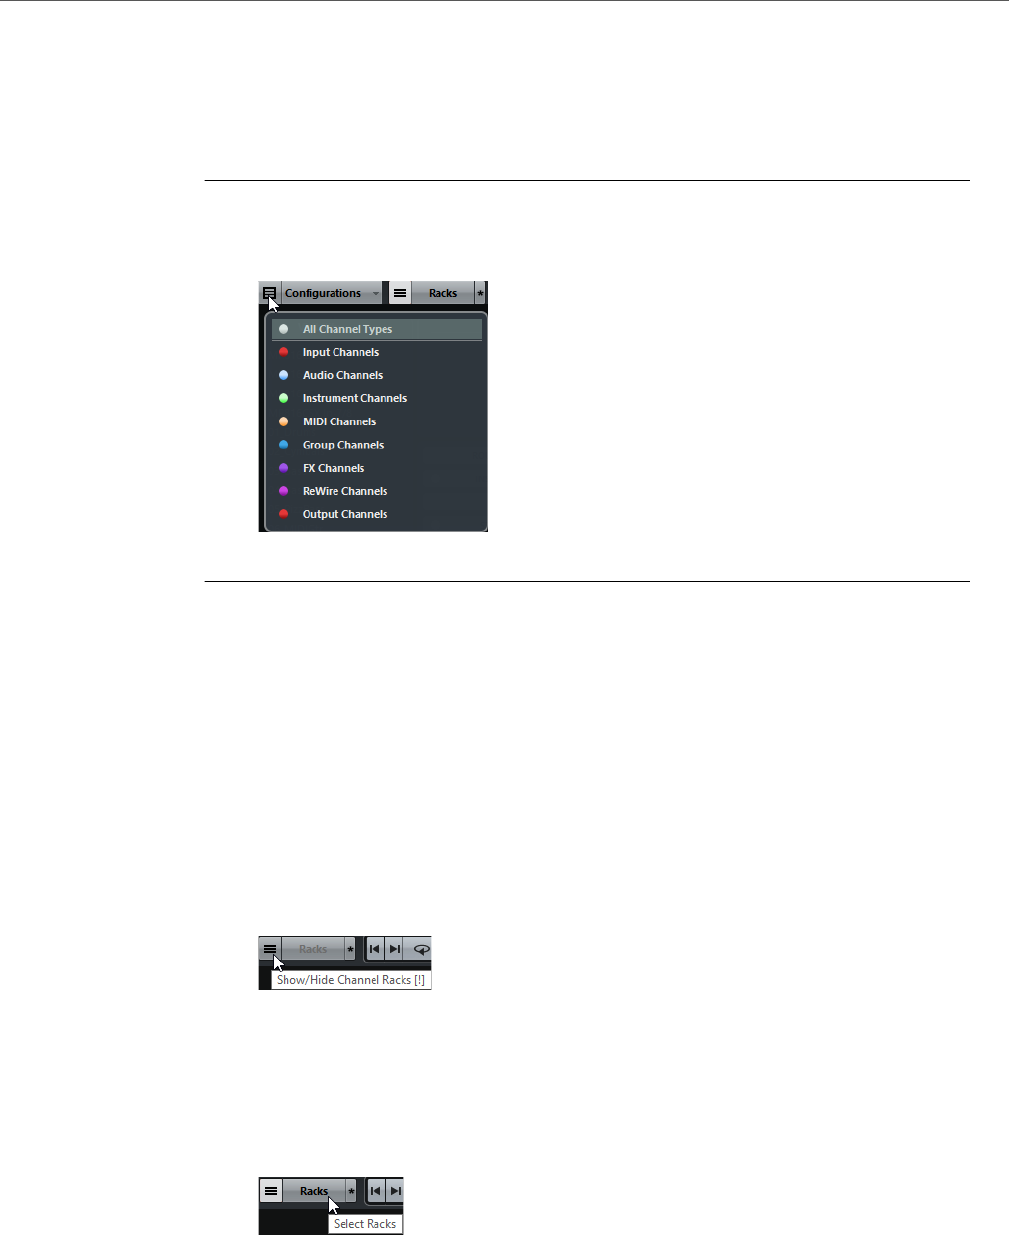
MixConsole
Configuring the MixConsole
211
Filtering Channel Types
The channel types filter on the MixConsole toolbar allows you to determine which
channel types are shown.
PROCEDURE
1. Click Filter Channel Types.
This opens the channel types filter.
2. Click a dot to the left of a channel type to hide it.
RESULT
Channels of the filtered type are removed from the fader section and the color of the
Filter Channel Types button changes to indicate that a channel type is hidden.
Rack Selector
The rack selector allows you to activate specific MixConsole functions, such as
routing, insert, or send handling, that are organized in racks.
• To activate the rack selector, activate Show Channel Racks.
Channel Racks
You can activate and deactivate the different channel racks in the MixConsole.
• To open the Select Racks pop-up menu, click Select Racks.
Depending on the channel type, you can activate/deactivate the following racks:
Routing
Allows you to set up the input and output routing. For MIDI, you can also
select the MIDI channel.

MixConsole
Configuring the MixConsole
212
Pre (Filters/Gain) (Cubase Elements only)
Contains input filter and gain controls along with Phase and Gain controls for
audio-related channels or an Input Transformer control for MIDI channels.
Inserts
Allows you to select insert effects for your channel.
Equalizers (audio-related channels only)
Allows you to set the channel EQ.
Channel Strip (audio-related channels only)
Allows you to integrate channel strip modules, such as Gate, Compressor,
EQ, Transformer, Saturator, and Limiter that allow you to enhance your sound.
Sends
Allows you to select send effects for your channel.
Rack Settings
The Rack Settings pop-up menu allows you to make settings for the racks.
• To open the Rack Settings pop-up menu, click *.
Exclusive Expanded Rack
Shows the selected rack exclusively and collapses the other racks.
Fixed Number of Slots
Shows all available slots for the Inserts, Sends, Cues, and Quick Controls
racks.
Link Racks to Configurations
If activated, the rack status is taken into account when you save and load a
configuration.
Show Pre/Filters as <Combined Label & Setting> (Cubase Elements only)
Select Combined Label & Setting, if you want to show the label and the
setting in one line.
Select Separate Label & Setting, if you want to show the label and the
setting in separate lines.
Show Inserts as <Plug-in & Preset Names>
Select Plug-in Names, if you want to show the plug-in names only.
Select Plug-in & Preset Names, if you want to show the plug-in and the
preset names.
Show All Channel Strip Controls
Shows all available controls on the Channel Strip rack.

MixConsole
Configuring the MixConsole
213
Show One Channel Strip Type
Shows only one channel strip type at a time.
Show Sends as <Combined Destination & Gain>
Select Combined Destination & Gain, if you want to show the destination
and the gain in one line.
Select Separate Destination & Gain, if you want to show the destination and
the gain in separate lines.
Channel Visibility Configurations
The Channel Visibility Configurations button on the MixConsole toolbar allows
you to create configurations that are useful for switching quickly between different
visibility setups.
The button displays the name of the active configuration. A list of configurations is
shown as soon as you create at least one configuration. To load a configuration,
select it from this list. Channel visibility configurations are saved with the project.
Add Configuration
Opens the Add Configuration dialog that allows you to save the
configuration and enter a name for it.
Update Configuration
If you change the active configuration, this is indicated by an asterisk after the
configuration name. Use this function to save changes to the active
configuration.
Rename Configuration
Opens the Rename Configuration dialog that allows you to rename the
active configuration.
Delete Configuration
Allows you to delete the active configuration.
Move Configuration to Position
This function becomes available if 2 or more configurations exist. It allows you
to change the position of the active configuration on the menu. This is useful
as you can assign key commands to the first 8 configurations in the Channel
& Track Visibility category of the Key Commands dialog.

MixConsole
Linking Channels
214
Saving Configurations
To quickly switch between different channel setups, you can save configurations.
The configurations contain visibility settings as well as the show/hide status of
channel types and racks.
PROCEDURE
1. Set up the configuration that you want to save.
2. On the toolbar, click Configurations.
3. From the pop-up menu, select Add Configuration.
4. In the Add Configuration dialog, enter a name for the configuration.
5. Click OK.
RESULT
The configuration is saved and you can return to it at any time.
Linking Channels
You can link selected channels temporarily. Any change that is applied to one
channel is mirrored by all linked channels.
Using Quick Link
You can activate the Temporary Link Mode to synchronize all touched parameters
of selected channels.
PROCEDURE
1. Select the channels that you want to link.
2. On the MixConsole toolbar, activate Q-Link.
NOTE
You can also press [Shift]-[Alt]/[Option] to temporarily link channels. In that case, the
link is only active as long as you press the keys.
3. Change the parameters for one of the selected channels.
RESULT
The changes are applied to all selected channels until you deactivate Q-Link.

MixConsole
Input Levels
215
Input Levels
When recording digital sound, it is important to set the input levels high enough to
ensure low noise and high audio quality. At the same time, you must avoid clipping
(digital distortion).
Setting Input Levels
PROCEDURE
1. Click Filter Channel Types and activate Input Channels.
In this mode, the input channel level meters show the level of the signal at the input
of the bus, before any adjustments, such as input gain, EQ, effects, level, or pan are
made. This allows you to check the level of the unprocessed signal coming into the
audio hardware.
2. Select Functions > Global Meter Settings > Meter Position and activate
Input.
3. Play back the audio and check the level meter for the input channel.
The signal should be as loud as possible without exceeding 0 dB that is the clipping
indicator for the input bus should not light up.
4. If necessary, adjust the input level in one of the following ways:
• Adjust the output level of the sound source or the external mixer.
• If possible, use the audio hardware’s own application program to set the input
levels. See the documentation for the audio hardware.
• If your audio hardware supports the ASIO control panel function, it may be
possible to make input level settings. To open the ASIO control panel, select
Devices > Device Setup and in the list to the left (below VST Audio System),
select your audio card. When this is selected, you can open the control panel
by clicking the Control Panel button in the settings section to the right.
5. Optional: Select Functions > Global Meter Settings > Meter Position and
activate Post-Fader.
NOTE
This allows you to check the level of the audio being written to a file on your hard disk
which is only necessary if you make any adjustments to the input channel.
6. In the Channel Racks section, in the Inserts rack, click a slot and select an
effect, or in the Equalizers rack, make your EQ settings.
For some effects you may want to adjust the level of the signal going into the effect.
Use the input gain function for this. Press [Shift] or [Alt]/[Option] to adjust the input
gain.
7. Play back the audio and check the level meter of the input channel.
The signal should be reasonably loud without exceeding 0 dB that is the clipping
indicator for the input bus should not light up.
8. If necessary, use the input channel fader to adjust the signal level.

MixConsole
Copying and Moving Rack and Channel Settings
216
Clipping
Clipping typically occurs in the audio hardware when an analog signal is too loud
and therefore converted to digital in the hardware’s A/D converters.
Copying and Moving Rack and Channel Settings
You can use drag and drop to copy or move rack and channel settings.
Drag and drop works between different channels or different rack slots on the same
channel. When you drag, a blue frame indicates the sections where you can drop
your settings.
The following applies:
• To copy the rack settings from one rack to another, drag the rack and drop it
on the rack to which you want to copy the settings.
• To move the rack settings from one rack to another, press [Alt]/[Option], drag
the rack, and drop it on the rack to which you want to move the settings.
• To copy the channel settings from one channel to another, drag the channel
and drop it on the channel to which you want to copy the settings.
You can copy rack and channel settings between different types of channels,
provided that the target channels have corresponding settings.
• For example, copying from input/output channels leaves the sends settings in
the target channel unaffected.
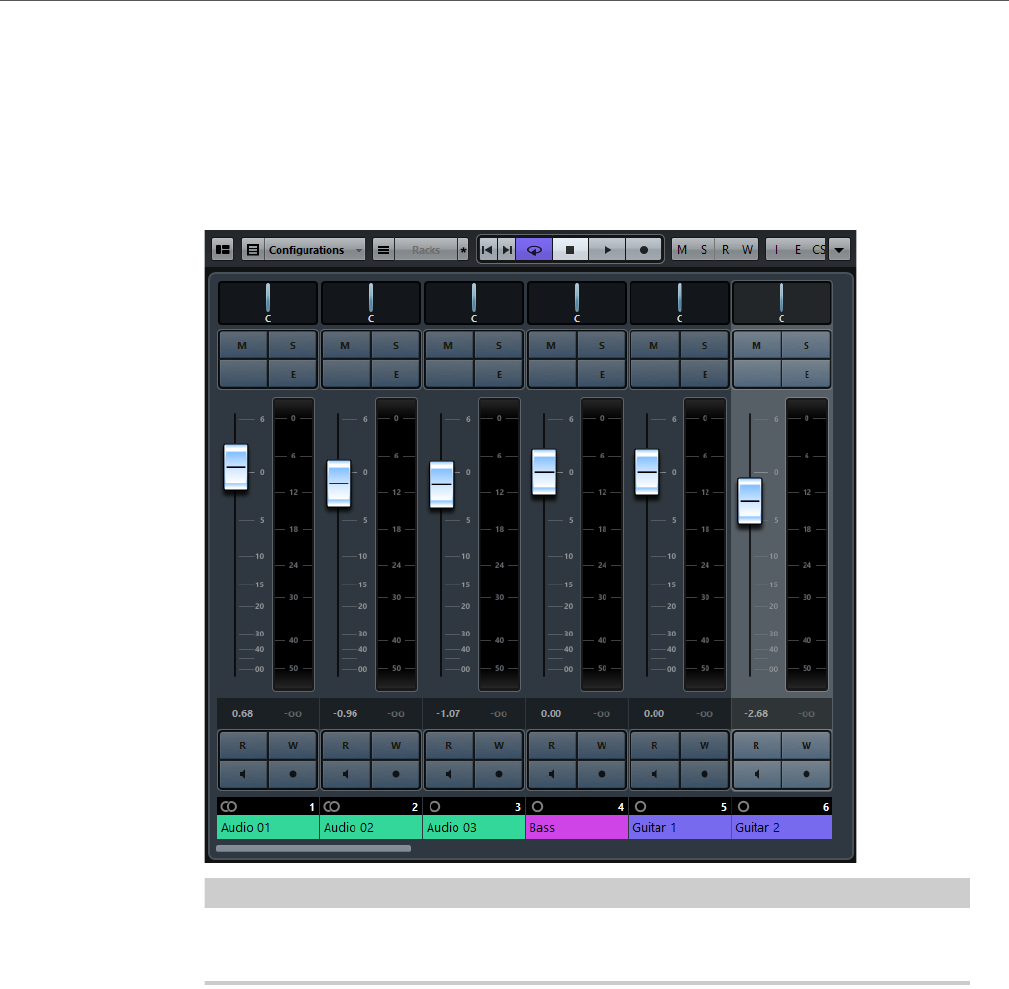
MixConsole
Fader Section
217
Fader Section
The fader section is the heart of the MixConsole. It shows input and output
channels together with audio, instrument, MIDI, group, FX, and ReWire (not in
Cubase LE) channels that appear in the same order as in the track list.
NOTE
If a channel is deactivated in the channel selector or if its channel type is
deactivated, it is not shown in the fader section.
The fader section allows you to do the following:
• Set the panorama
• Activate mute and solo
• Open the channel settings
•Set the volume
• Enable automation
RELATED LINKS
Using Channel Settings on page 236
Write/Read Automation on page 360

MixConsole
Fader Section
218
Setting Pan
For each audio-related channel with at least a stereo output configuration, you can
find a pan control at the top of the fader section. For MIDI channels, the pan control
sends out MIDI pan messages. The result depends on how your MIDI instrument is
set to respond to pan.
The pan control allows you to position a channel in the stereo spectrum.
• To make fine adjustments, hold down [Shift] when you move the pan control.
• To select the default center pan position, hold down [Ctrl]/[Command], and
click the pan control.
• To edit the value numerically, double-click the pan control.
RELATED LINKS
Creating New Projects on page 44
Stereo Balance Panner
The stereo balance panner allows you to control the balance between the left and
right channels. It is activated by default.
Panning Bypass
You can bypass the panning for all audio-related channels.
• To activate panning bypass, click the button to the left or press
[Ctrl]/[Command]-[Alt]/[Option]-[Shift] and click the pan control.
• To deactivate panning bypass, press [Ctrl]/[Command]-[Alt]/[Option]-[Shift]
and click again.
When panning is bypassed for a channel, the following happens:
• Mono channels are panned center.
• Stereo channels are panned hard left and right.
Using Solo and Mute
You can silence one or several channels using the Solo and Mute buttons.
• To silence a channel, click Mute.
Click again to deactivate the mute state for the channel.

MixConsole
Fader Section
219
• To mute all other channels, click Solo for a channel.
Click again to deactivate the solo state.
• To deactivate the mute or solo states for all channels simultaneously, click
Deactivate All Mute States or Deactivate All Solo States.
• To activate exclusive solo mode, hold down [Ctrl]/[Command] and click Solo
for the channel.
The Solo buttons of all other channels are deactivated.
• To activate solo defeat for a channel, [Alt]/[Option]-click Solo.
You can also click and hold Solo to activate solo defeat. In this mode the
channel is not muted when you solo another channel. [Alt]/[Option]-click
again to deactivate solo defeat.
Setting Volume
Each channel in the fader section of the MixConsole has a volume fader. The fader
levels are displayed below the fader, in dB for audio-related channels and as MIDI
volume (0 to 127) for MIDI channels.
• To change the volume, move the fader up or down.
• To make fine volume adjustments, press [Shift] while moving the faders.
• To reset the volume on its default value, press [Ctrl]/[Command] and click a
fader.
For audio channels, the volume fader controls the volume of the channel before it is
routed to an output bus, directly or via a group channel. For output channels the
volume fader controls the master output level of all audio channels that are routed
to an output bus. For MIDI channels the volume fader controls the volume changes
in the MixConsole by sending out MIDI volume messages to the connected
instruments that are set to respond to MIDI messages.
Level Meters
The channel meters show the level when you play back audio or MIDI. The Meter
Peak Level indicator shows the highest registered level.
• To reset the peak level, click the Meter Peak Level value.
NOTE
Input and output channels have clipping indicators. When they light up, lower the
gain or the levels until the indicator is no longer lit.
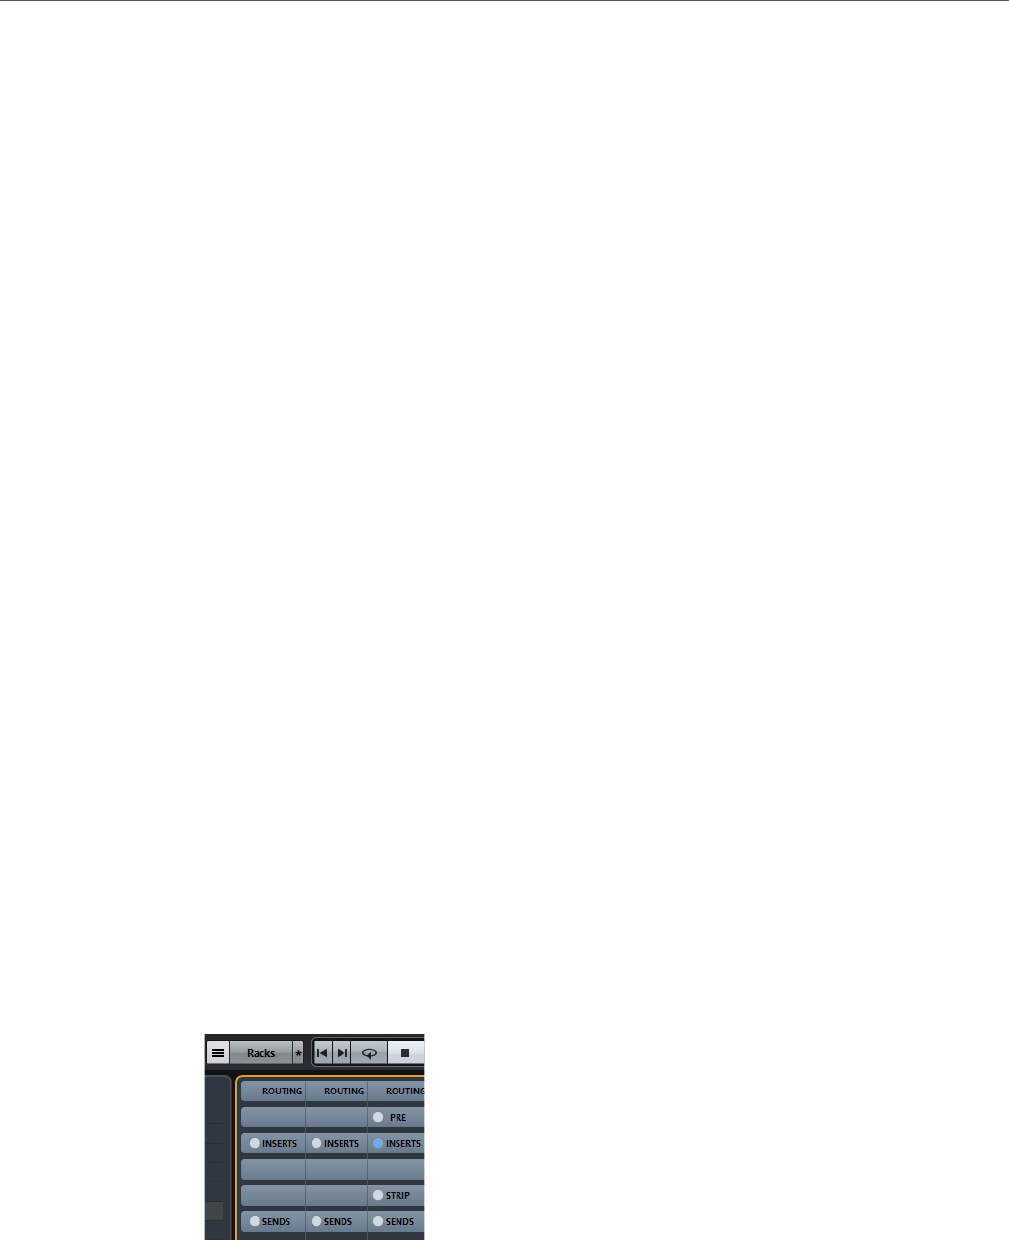
MixConsole
Working with Channel Racks
220
Channel Meter Options
You can change the meter characteristics for audio channels using the context
menu of the channel meter.
Meter Peak Options - Hold Peaks
The highest registered levels are held and shown as static horizontal lines in
the meter.
Meter Peak Options - Hold Forever
If this option is activated, the peak levels are shown until you reset the meters.
If this option is deactivated, you can use the Meters’ Peak Hold Time
parameter (File > Preferences > Metering) to specify for how long the peak
levels are held. The peak hold time can be between 500 and 30000 ms.
Meter Position - Input
If this option is activated, the meters show input levels for all audio channels
and input/output channels. The input meters are post input gain.
Meter Position - Post-Fader
If this option is activated, the meters show post-fader levels.
Meter Position - Post-Panner
If this option is activated, the meters show post-fader levels and also reflect
pan settings.
Reset Meters
Resets the meters.
Working with Channel Racks
The Channel Racks section holds specific MixConsole functions, such as routing,
insert, or send handling. These are organized in racks.

MixConsole
Working with Channel Racks
221
Routing
The Routing rack allows you to configure input and output routing, that is, setting
up input and output busses.
Input busses are used when you record on an audio track. In this case, you must
select from which input bus the audio is received.
NOTE
The settings that you make for the input channel will be a permanent part of the
recorded audio file.
Output busses are used when you play back an audio, group, or FX channel. In this
case, you must route the channel to an output bus.
You can route the outputs from multiple audio channels to a group. For example, to
control the channel levels using one fader, and to apply the same effects and
equalization to all the channels.
Setting up Routing
PREREQUISITE
Set up busses and group channels in the VST Connections window.
PROCEDURE
1. On the MixConsole toolbar, activate Show Channel Racks.
2. Click Racks and activate Routing to show the Routing rack above the fader
section.
3. Click one of the slots of the Routing rack to open the input or the output
routing pop-up menu for a channel.
4. In the routing selector, select an entry.
• To set up the routing for multiple selected channels simultaneously, press
[Shift]-[Alt]/[Option] and select a bus.
• To set several selected channels to incrementing busses (the second selected
channel to the second bus, the third to the third bus, etc.), press [Shift] and
select a bus.
• To disconnect input or output bus assignments, select No Bus.
Input Busses
The input routing selector only lists busses that correspond to the channel
configuration.
NOTE
If you select a group channel as input for an audio channel, you can record a
downmix.

MixConsole
Working with Channel Racks
222
Output Busses
For output busses any assignment is possible.
Using Group Channels
You can route the outputs from multiple audio channels to a group. This enables you
to control the channel levels using one fader, apply the same effects and EQ to all
channels, etc. You can also select a group channel as input for an audio track, to
record a downmix of separate tracks, for example.
PREREQUISITE
You have created and set up a group channel track in stereo.
PROCEDURE
1. Route the group channel track to an output bus.
2. Add effects to the group channel as insert effects.
3. Route the mono audio track to the group channel.
RESULT
The signal from the mono audio track is sent directly to the group, where it passes
through the insert effect, in stereo.
Pre (Filters/Gain/Phase) (Cubase Elements only)
The Pre rack for audio-related channels features a high-cut and a low-cut filter as
well as gain and phase settings.
For MIDI channels it allows you to open the Input Transformer.
NOTE
You cannot edit the Pre rack settings in the EQ curve display.
RELATED LINKS
Equalizer Settings on page 226

MixConsole
Working with Channel Racks
223
Making Filter Settings
Each audio-related channel has separate high-cut and low-cut filters that allow you
to attenuate signals with frequencies that are higher or lower than the cutoff
frequency.
PROCEDURE
1. On the MixConsole toolbar, activate Show Channel Racks.
2. Click Racks and activate Pre (Filters/Gain/Phase) to show the Pre rack
above the fader section.
3. Click to the left of the high-cut filter to activate the high-cut filter. You have the
following options:
• Drag the slider to adjust the cutoff frequency.
The available range spans from 20 kHz to 50 Hz.
•Click Select Filter Slope on the right of the high-cut filter to select a filter
slope.
You can choose between 6, 12, 24, 36, and 48 dB. The default value is 12 dB.
4. Click to the left of the low-cut filter to activate the low-cut filter. You have the
following options:
• Drag the slider to adjust the cutoff frequency.
The available range spans from 20 Hz to 20 kHz.
•Click Select Filter Slope on the right of the low-cut filter to select a filter slope.
You can choose between 6, 12, 24, 36, and 48 dB. The default value is 12 dB.
RESULT
The changed settings are visible in the curve display. If you deactivate the high-cut
and low-cut filters, the filter curves are removed from the display. Bypassed high-cut
and low-cut filters are displayed in a different color.
Making Input Gain Settings
The Pre-Gain slider allows you to change the level of a signal before it reaches the
EQ and the effects section. This is useful as the level going into certain effects can
change the way the signal is affected. A compressor, for example, can be driven
harder by raising the input gain. Gain can also be used to boost the level of poorly
recorded signals.
PROCEDURE
1. On the MixConsole toolbar, activate Show Channel Racks.
2. Click Racks and activate Pre (Filters/Gain/Phase) to show the Pre rack
above the fader section.
3. Drag the Gain slider to the left or to the right to cut or boost the gain.

MixConsole
Working with Channel Racks
224
Making Phase Settings
Each audio-related channel and input/output channel has a Phase button that
allows you to correct the phase for balanced lines and microphones that are wired
backwards or that are out of phase due to their positioning.
PROCEDURE
1. On the MixConsole toolbar, activate Show Channel Racks.
2. Click Racks and activate Pre (Filters/Gain/Phase) to show the Pre rack
above the fader section.
3. Activate Phase to invert the phase polarity for the signal.
Inserts
The Inserts rack for audio-related channels features insert effect slots that allow you
to load insert effects for a channel. For MIDI channels you can load MIDI inserts.
For further information, refer to the separate PDF document Plug-in Reference.
RELATED LINKS
Audio Effects on page 240
Adding Insert Effects
PROCEDURE
1. On the MixConsole toolbar, activate Show Channel Racks.
2. Click Racks and activate Inserts to show the Inserts rack above the fader
section.
3. Click one of the insert slots to open the insert selector.
4. Click an insert effect to select it.
RESULT
The selected insert effect is loaded and automatically activated. Its plug-in panel
opens.

MixConsole
Working with Channel Racks
225
Moving Inserts to Post-Fader or Pre-Fader Position (Cubase Elements
only)
For each audio-related channel, you can add 6 pre-fader and 2 post-fader inserts.
PROCEDURE
1. Right-click an insert effect in a pre-fader position.
2. From the context menu, select Move to Post-Fader Slot.
To move a post-fader insert to a pre-fader position, open its context menu and select
Move to Pre-Fader Slot.
Bypassing Insert Effects
• To bypass all inserts, click the bypass button at the top of the Inserts rack.
• To bypass a single insert, click the button on the left of the inserts slot.
• To deactivate bypass, click the button again.
Saving/Loading FX Chain Presets
You can save and load all insert rack settings using FX chain presets. FX chain
presets have the file name extension .fxchainpreset.
PROCEDURE
• In the top right corner of the Inserts rack, open the Presets pop-up menu and
perform one of the following actions:
• To save the current settings as a preset, select Save FX Chain Preset and
name your preset.
• To load a preset, select Load FX Chain Preset and select a preset.
NOTE
You can also apply inserts together with EQ and channel strip settings from track
presets. You can load, tag, and save FX chain presets in the MediaBay.
Equalizers (EQ)
The Equalizers (EQ) rack is only available for audio-related channels. It features a
built-in parametric equalizer with up to 4 bands for each audio channel.
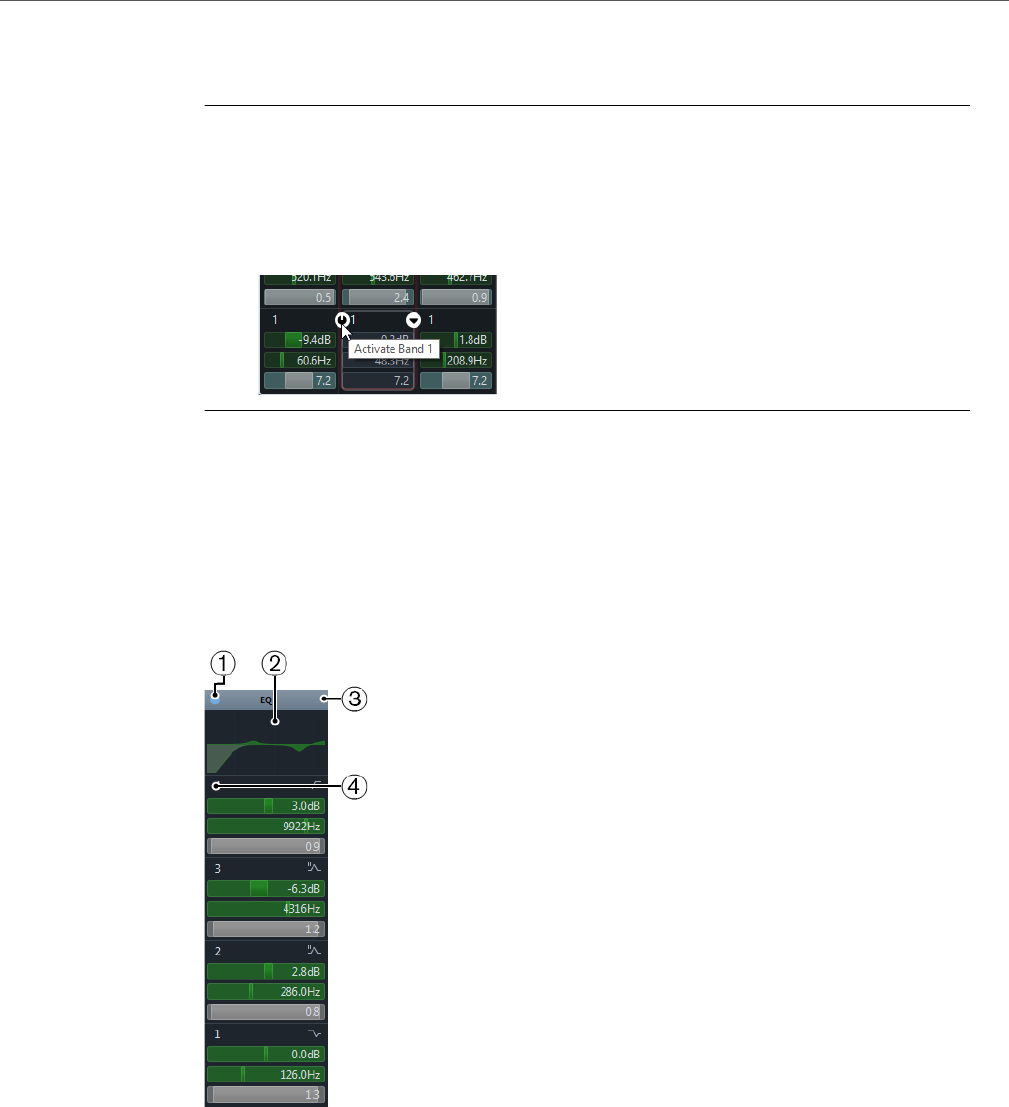
MixConsole
Working with Channel Racks
226
Activating Equalizer Bands
PROCEDURE
1. On the MixConsole toolbar, activate Show Channel Racks.
2. Click Racks and activate Equalizers to show the EQ rack above the fader
section.
3. Click Activate Band to activate an EQ band.
Equalizer Settings
You can make equalizer settings for the 4 bands. These have different default
frequency values and different Q names. However, they all have the same frequency
range (20 Hz to 20 kHz). You can specify different filter types for each individual
module.
1) Bypass EQ
Click to bypass all EQ bands.
2) Curve Display
Click on the display in a channel to show a larger version. The display is also
available in the Inspector and in the Channel Settings dialog. If you activate
Equalizer Curve in the Set up Window Layout pane, the curve is removed
from the EQ rack and is displayed above the racks.
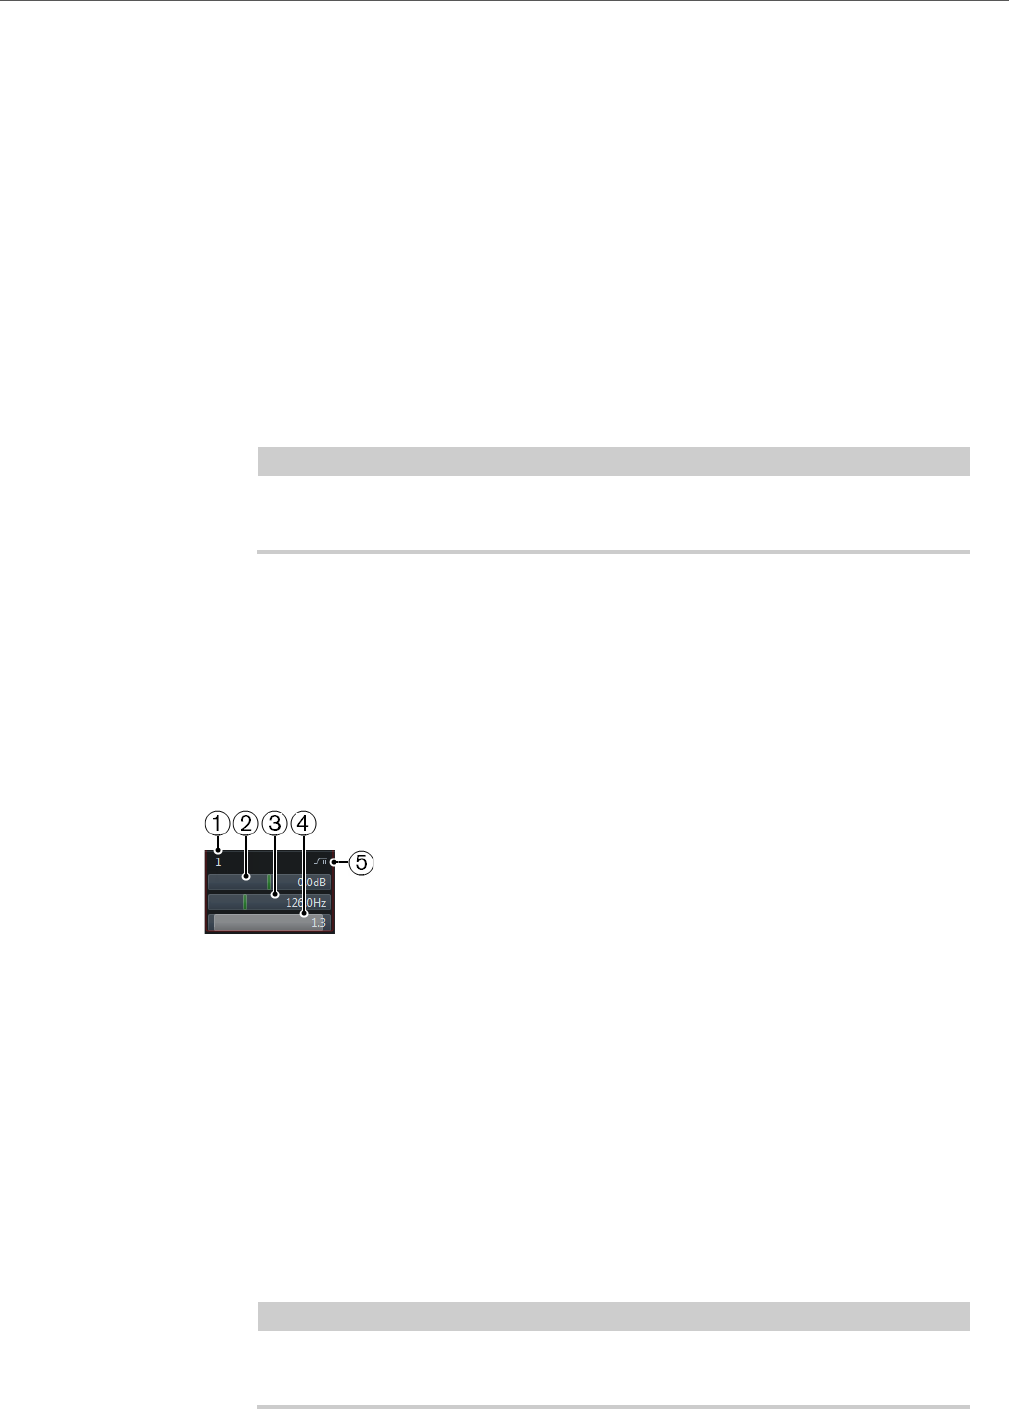
MixConsole
Working with Channel Racks
227
Hovering with the mouse over the display shows a cross-hair cursor. The
current mouse position shows the frequency, note value, offset, and level at
the top or bottom of the display.
Click and hold to add a curve point and activate the corresponding EQ band.
Double-click the curve point to deactivate it. Drag the curve point up or down
to adjust the gain. Press [Ctrl]/[Command] to edit only the gain. Drag left or
right to adjust the frequency. Press [Alt]/[Option] to edit only the frequency.
Press [Shift] while dragging to set the Q-factor. To invert the EQ curve, open
the context menu and select Invert EQ Settings.
The final curve shows the EQ settings as well as active high-cut and low-cut
filters of the Pre rack settings. Bypassed filter settings are shown in a different
color than the active settings. Disabled filter settings are hidden from the
display.
NOTE
You cannot edit the high-cut and low-cut filters in the curve display. To edit
the filters, open the Pre rack.
3) Select Preset
Opens a pop-up menu where you can load/save a preset.
4) Activate Band
Click to activate/deactivate an EQ band.
Band Settings
1) Activate Band
Activates the equalizer band.
2) Gain
Set the amount of cut or boost. The range is ±24 dB.
3) Frequency
Sets the center frequency of the frequency range to be cut or boosted. You
can set the frequency either in Hz or as a note value. If you enter a note value,
the frequency is automatically displayed in Hz. For example, a note value of A3
sets the frequency to 440 Hz. When you enter a note value, you can also enter
a cent offset. For example, enter A5 -23 or C4 +49.
NOTE
Ensure that you enter a space between the note and the cent offset. Only in
this case, the cent offsets are taken into account.

MixConsole
Working with Channel Racks
228
4) Q-Factor
Determines the width of the affected frequency range. Higher values give
narrower frequency ranges.
5) Type
Opens a pop-up menu where you can select an EQ type for the band. Bands
1 and 4 can act as parametric, shelving, or high/low-cut filters. EQ bands 2
and 3 are always parametric filters.
RELATED LINKS
Making Filter Settings on page 223
Saving/Loading EQ Presets
You can save and load EQ presets.
PROCEDURE
• In the top right corner of the EQ rack, open the presets pop-up menu and
perform one of the following actions:
• To save the current settings as a preset, select Save Preset and name your
preset.
• To load a preset, select Load Preset and select a preset.
NOTE
You can also apply EQ together with insert and channel strip settings from track
presets. You can load, tag, and save EQ presets in the MediaBay.
Channel Strips
The Channel Strip rack is only available for audio-related channels. It allows you to
load built-in processing modules for separate channels.
Channel Strip Modules
The channel strips allow you to apply modules directly to specific channels. You can
change the position of specific modules in the signal flow via drag and drop.
Gate (Cubase Elements only)
Allows you to silence audio signals below a set threshold level. As soon as the
signal level exceeds the set threshold, the gate opens to let the signal through.
Compressor
Allows you to create smooth compression effects. Drag the compressor up or
down to change its position in the signal flow.

MixConsole
Working with Channel Racks
229
EQ
Allows you to make EQ settings.
Tools (Cubase Elements only)
Provides various tools.
Sat (Cubase Elements only)
Allows you to add warmth to the sound.
Limit (Cubase Elements only)
Allows you to avoid clipping even at high levels.
Noise Gate (Cubase Elements only)
Noise gating silences audio signals below a set threshold. As soon as the signal
level exceeds the threshold, the gate opens to let the signal through.
Threshold (-60 to 0 dB)
Determines the level at which Gate is activated. Signal levels above the set
threshold trigger the gate to open, and signal levels below the set threshold
close the gate.
Release (10 to 1000 ms or Auto mode)
Sets the time after which the gate closes (after the set Hold time). If Auto
Release is activated, Gate automatically finds the best release setting for the
audio material.
State LED
Indicates whether the gate is open (LED lights up in green), closed (LED
lights up in red), or in an intermediate state (LED lights up in yellow).
Attack (0.1 to 1000 ms)
Sets the time after which the gate opens when it is triggered.
Range
Adjusts the attenuation of the gate when it is shut. If Range is set to , the
gate is completely shut. The higher the value, the higher the level of the signal
that passes through the shut gate.
Filter Frequency (50 to 20000 Hz)
If Side-Chain is activated, this sets the filter frequency.
Q-Factor (0.01 to 10000)
If Side-Chain is activated, this sets the resonance of the filter.
Listen Filter
Allows you to monitor the filtered signal.

MixConsole
Working with Channel Racks
230
Compressor
This channel strip module reduces the dynamic range of the audio, making softer
sounds louder or louder sounds softer, or both. Open the pop-up menu to select
between Standard Compressor, Tube Compressor (Cubase Elements only), and
Vintage Compressor (Cubase Elements only).
Standard Compressor
Allows you to create smooth compression effects. Drag the compressor up or down
to change its position in the signal flow.
Threshold (-60 to 0 dB)
Determines the level where the compressor kicks in. Only signal levels above
the set threshold are processed.
Ratio (1:1 to 8:1)
Sets the amount of gain reduction that is applied to signals above the set
threshold. A ratio of 3:1 means that for every 3 dB the input level increases,
the output level increases by 1 dB.
Gain Reduction LED
Indicates the amount of compression of the signal.
Attack (0.1 to 100 ms)
Determines how fast the compressor responds to signals above the set
threshold. If the attack time is long, more of the early part of the signal passes
through unprocessed.
Release (10 to 1000 ms or Auto mode)
Sets the time after which the gain returns to the original level when the signal
drops below the threshold. If Auto is activated, the compressor automatically
finds the best release setting for the audio material.
Make-up (0 to 24 dB or Auto mode)
Compensates for output gain loss that is caused by compression. If Auto is
activated, the knob becomes dark and the output is automatically adjusted for
gain loss.
Tube Compressor (Cubase Elements only)
This versatile compressor with integrated tube-simulation allows you to achieve
smooth and warm compression effects. The VU meter shows the amount of gain
reduction. Tube Compressor features an internal side-chain section that lets you
filter the trigger signal.
Input (-24.0 to 48.0 dB)
Determines the compression amount. The higher the input gain, the more
compression is applied.

MixConsole
Working with Channel Racks
231
Output (-12.0 to 12.0 dB)
Sets the output gain.
Gain Reduction LED
Indicates the amount of compression of the signal.
Attack (0.1 to 100.0 ms)
Determines how fast the compressor responds. If the attack time is long, more
of the initial part of the signal passes through unprocessed.
Release (10 to 1000 ms or Auto mode)
Sets the time after which the gain returns to the original level. If Auto is
activated, Tube Compressor automatically finds the best release setting for
the audio material.
Drive (1.0 to 6.0)
Controls the amount of tube saturation.
Mix (0 to 100)
Sets the level balance between the dry signal and the wet signal.
VintageCompressor (Cubase Elements only)
VintageCompressor is modeled after vintage type compressors.
Input (-24 to 48 dB)
In combination with the Output setting, this parameter determines the
compression amount. The higher the input gain setting and the lower the
output gain setting, the more compression is applied.
Output (-48 to 24 dB)
Sets the output gain.
Gain Reduction LED
Indicates the amount of compression of the signal.
Attack (0.1 to 100 ms)
Determines how fast the compressor responds. If the attack time is long, more
of the early part of the signal passes through unprocessed.
Punch (On/Off)
If this is activated, the early attack phase of the signal is preserved, retaining
the original punch in the audio material, even with short Attack settings.
Release (10 to 1000 ms or Auto mode)
Sets the time after which the gain returns to its original level. If Auto is
activated, Vintage Compressor automatically finds the best release setting
for the audio material.
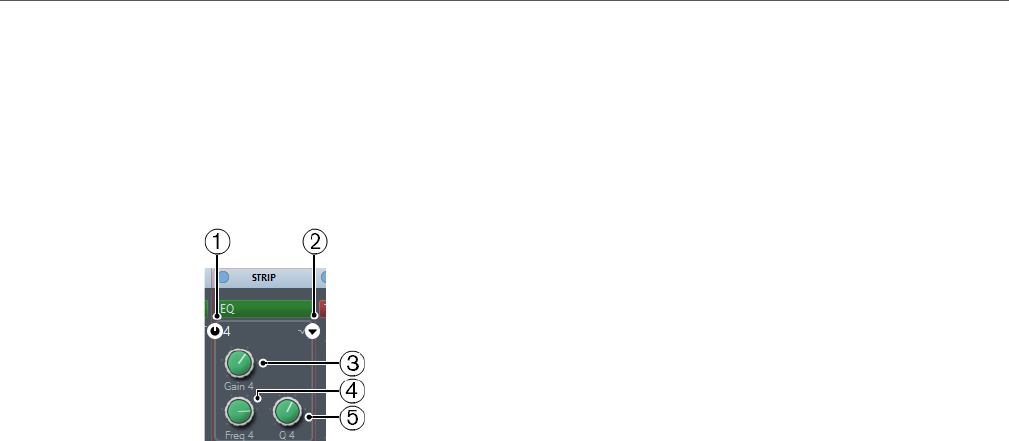
MixConsole
Working with Channel Racks
232
EQ
You can make equalizer settings for the 4 bands. These have different default
frequency values and different Q names. However, they all have the same frequency
range (20 Hz to 20 kHz). You can specify different filter types for each individual
module.
1) Activate Band x
Activates the equalizer band.
2) Select EQ Band x Type
Opens a pop-up menu where you can select an EQ type for the band. Bands
1 and 4 can act as parametric, shelving, or high/low-cut filters. EQ bands 2
and 3 are always parametric filters.
3) Gain
Sets the amount of cut or boost.
4) Freq
Sets the center frequency of the frequency range to be cut or boosted.
5) Q
Determines the width of the affected frequency range. Higher values give
narrower frequency ranges.
Tools (Cubase Elements only)
EnvelopeShaper
This channel strip module can be used to attenuate or boost the gain of the attack
and release phase of audio material. You can use the knobs to change parameter
values. Be careful with levels when boosting the gain and if needed reduce the
output level to avoid clipping.
Attack (-20 to 20 dB)
Changes the gain of the attack phase of the signal.
Release (-20 to 20 dB)
Changes the gain of the release phase of the signal.

MixConsole
Working with Channel Racks
233
Length (5 to 200 ms)
Determines the length of the attack phase.
Output (-24 to 12 dB)
Sets the output level.
Sat (Cubase Elements only)
Allows you to add warmth to the sound. Open the pop-up menu to select between
Tape Saturation, and Tube Saturation.
Tape Saturation
This channel strip module simulates the saturation and compression of recording on
analog tape machines.
Drive
Controls the amount of tape saturation.
Dual Mode
Simulates the use of two tape machines.
Auto Gain
Adjusts the gain automatically.
Output
Sets the output gain.
Drive Amount LED
Indicates the amount of drive of the signal.
Low-Frequency
This is a low shelving filter with fixed frequency.
High-Frequency
This is a Hi Cut filter. Use the frequency fader to reduce harshness of the
output signal.
Tube Saturation
This channel strip module simulates the saturation and compression of recording of
analogue tube compressors.
Drive
Controls the amount of tube saturation.
Output Gain
Sets the output gain.

MixConsole
Working with Channel Racks
234
Drive Amount LED
Indicates the amount of drive of the signal.
Low-Frequency
This is a low shelving filter with fixed frequency.
High-Frequency
This is a Hi Cut filter. Use the frequency fader to reduce harshness.
Limit (Cubase Elements only)
Allows you to avoid clipping even at high levels. Open the pop-up menu to select
between Brickwall Limiter, Maximizer, and Standard Limiter.
Brickwall Limiter
Brickwall Limiter ensures that the output level never exceeds a set limit.
Due to its fast attack time, Brickwall Limiter can reduce even short audio level
peaks without creating audible artifacts. However, this channel strip module creates
a latency of 1 ms. Brickwall Limiter features separate meters for input, output, and
the amount of limiting.
Threshold (-20 to 0 dB)
Determines the level where the limiter kicks in. Only signal levels above the
set threshold are processed.
Release (ms)
Sets the time after which the gain returns to the original level when the signal
drops below the threshold. If Auto is activated, Brickwall Limiter
automatically finds the best release setting for the audio material.
Gain Reduction LED
Displays the amount of gain reduction.
Maximizer
This channel strip module raises the loudness of audio material without the risk of
clipping.
Optimize
Determines the loudness of the signal.
Output (-24 to 6 dB)
Determines the maximum output level. Set this to 0 dB to avoid clipping.
Gain Reduction LED
Displays the amount of gain reduction.

MixConsole
Working with Channel Racks
235
Mix (0 to 100)
Sets the level balance between the dry signal and the wet signal.
Standard Limiter
This channel strip module is designed to ensure that the output level does not
exceed a set output level, to avoid clipping in following devices. Limiter can adjust
and optimize the Release parameter automatically according to the audio material,
or it can be set manually. Limiter also features separate meters for the input, output,
and the amount of limiting (middle meters).
Input (-24 to 24 dB)
Adjusts the input gain.
Output (-24 to 6 dB)
Determines the maximum output level.
Gain Reduction LED
Displays the amount of gain reduction.
Release (0.1 to 1000 ms or Auto mode)
Sets the amount of time it takes for the gain to return to its original level. If
Auto is activated, Limiter automatically finds the best release setting for the
audio material.
Saving/Loading Strip Presets
You can save and load strip presets. Strip presets have the file name extension
.strippreset.
PROCEDURE
• In the top right corner of the Channel Strip rack, open the Presets pop-up
menu and perform one of the following actions:
• To save the current settings as a preset, select Save Strip Preset and name
your preset.
• To load a preset, select Load Strip Preset and select a preset.
NOTE
You can also apply channel strip settings together with insert and EQ settings from
track presets. You can load, tag, and save strip presets in the MediaBay.
Sends
The Sends rack for audio-related channels features send effect slots that allow you
to load send effects and value sliders that allow you to determine the send level for
a channel. For MIDI channels the Sends rack features send effect slots that allow
you to load send effects.

MixConsole
Using Channel Settings
236
Adding Send Effects
PROCEDURE
1. On the MixConsole toolbar, activate Show Channel Racks.
2. Click Racks and activate Sends to show the rack above the fader section.
3. Click one of the send slots to open the send selector.
4. Click a send effect to select it.
The selected send effect is loaded.
5. Click on the left of the slot to activate the send.
Bypassing Send Effects
• To bypass all sends, click the bypass button at the top of the Sends rack.
• To deactivate bypass, click the button again.
Adding FX Channels to a Send
PROCEDURE
1. Right-click on the send slot to open the context menu.
2. Select Add FX Channel to Send.
3. In the Add FX Channel Track window, select the effect and configuration.
4. Click Add Track.
RESULT
The FX channel track is added in the Project window, and the send is automatically
routed to it.
Using Channel Settings
You can open each MixConsole channel in a separate Channel Settings window.
This allows for better overview and editing of the channel settings.
• To open the channel settings for a specific channel, click E in the fader
section.
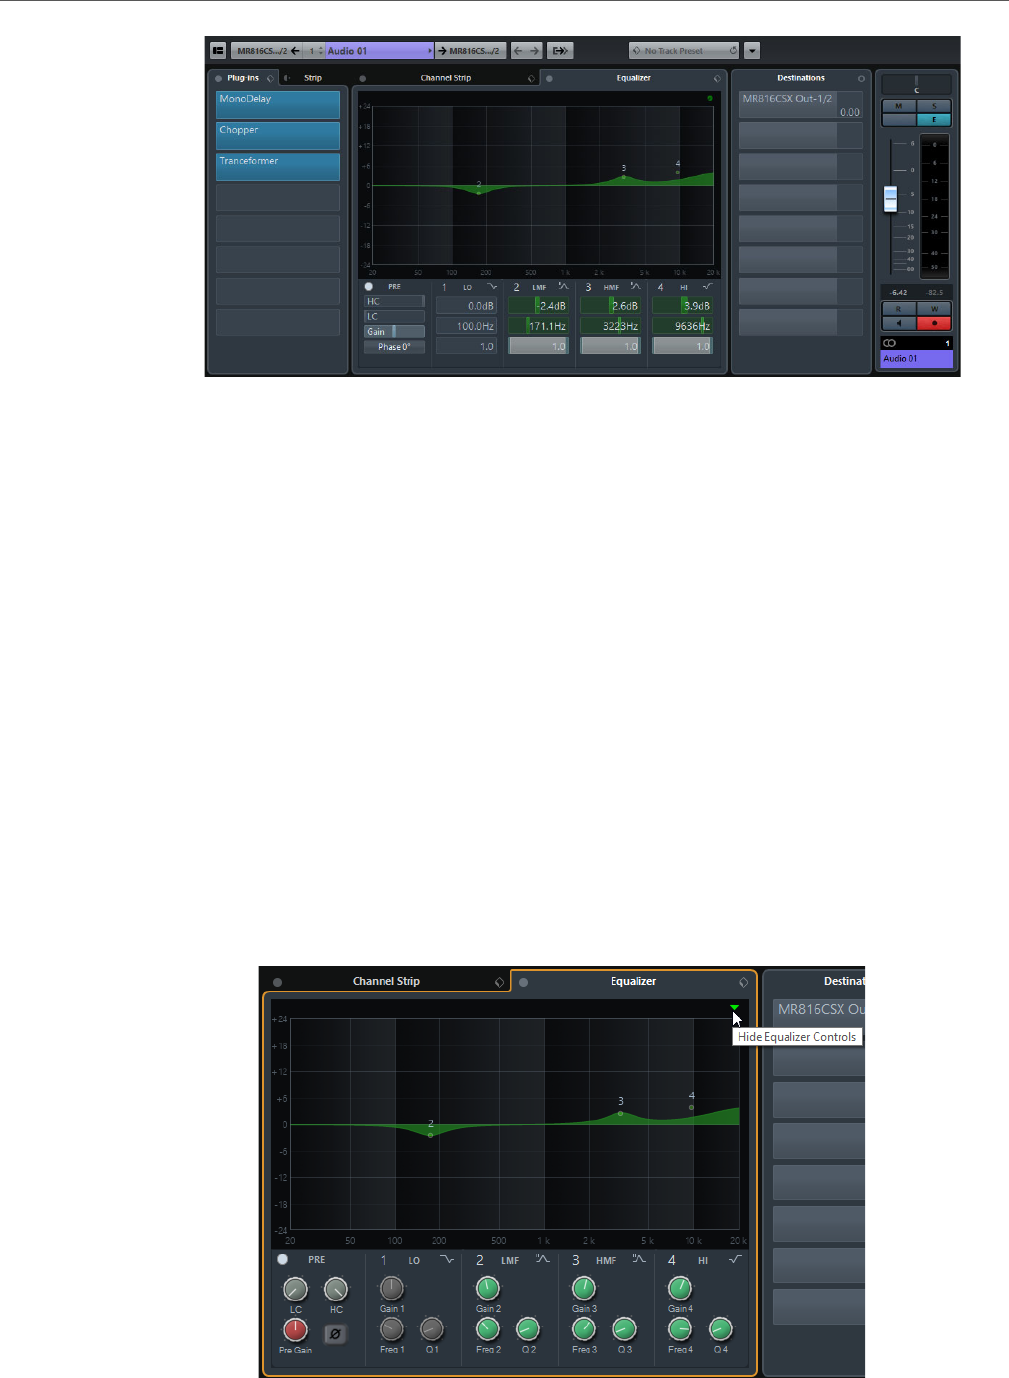
MixConsole
Using Channel Settings
237
For audio-related channels, the following sections can be shown/hidden by clicking
Set up Window Layout and activating/deactivating the corresponding options:
•Channel Inserts
•Channel Faders
•Channel Sends
The Channel Strip and Equalizer are always available.
The channel settings are especially suitable for the following actions:
• Moving the channel strip to Pre/Post-Inserts position
By default, the inserts are positioned before the channel strip in the signal
flow. In the Inserts section you can change this by clicking the arrow at the
top of the Strip tab. The tabs are swapped.
• Making EQ settings
The channel settings feature a large EQ curve display with several modes. By
default, the equalizer controls are hidden, but you can click the little green
button at the top right corner to show the equalizer controls or the equalizer
knob controls below the EQ curve.

MixConsole
Adding Notes to a MixConsole Channel
238
• Showing the output chain
If you click Show Output Chain on the toolbar, the output chain is shown
in the Channel Faders section. This allows you to keep track of more
complicated output routings.
• Browsing through channels
RELATED LINKS
Equalizer Settings on page 226
Browsing through Channels
Every channel has its own Channel Settings window, but you can view any
channel’s settings from a single window. This allows you to have a single Channel
Settings window open in a convenient position on the screen and use it for all your
EQ and channel effect settings.
To select a channel in the Channel Settings window, proceed as follows:
• To show the previous/next channel, click Go to Previous/Next Channel.
• To browse through the edited channels, click Go to Last/Next Edited
Channel.
The buttons are only available if at least two channels have been edited.
• Select a channel in the MixConsole to select the corresponding channel in
the Channel Settings window.
This is the default behavior. If this is not what you want, open the Functions
menu and deactivate Follow ‘e’ buttons or selection changes.
• Select a track in the Project window to select the corresponding channel in
the MixConsole and the Channel Settings window.
Adding Notes to a MixConsole Channel
PROCEDURE
1. On the MixConsole toolbar, click Set up Window Layout, and activate
Notepad.
The Notepad section is shown above the fader section.
2. Select the channel for which you want to add notes, click in the notepad
section and type in your notes.
3. To close the notepad, press [Esc], or click in another section of the
MixConsole.

MixConsole
Keyboard Navigation
239
Keyboard Navigation
The channel selector section, the channel rack section, and the fader section can
be controlled with the computer keyboard.
For this, you must activate a section. An activated section is indicated by a frame.
Activating a Section for Keyboard Navigation
PROCEDURE
1. Click with the mouse in an empty area of the section to activate it.
Activated sections are shown with a white frame.
2. Press [Tab] to activate the next section.
3. Press [Shift]-[Tab] to activate the previous section.
Navigating in a Section
Once you have activated a section, you can use the computer keyboard as
described below. In the channel racks section and in the fader section, controls that
are selected for keyboard control are indicated by a red frame.
• To navigate through the controls, use the arrow keys.
• To activate or deactivate a switch, press [Return].
• To expand or collapse an active rack, to open or close a value field in a slot,
or to open the plug-in panel for a loaded plug-in, press [Return].
• To access the controls in the left zone, press [Ctrl]/[Command]-[Return].
• To access the controls in the middle zone, press [Return].
• To access the controls in the right zone, press [Alt]/[Option]-[Return].
• To close a pop-up menu or a plug-in panel, press [Esc].
• To enable or disable the loaded plug-in, press
[Ctrl]/[Command]-[Alt]/[Option]-[Return].

240
Audio Effects
Cubase comes with a number of effect plug-ins included. This chapter contains
general details about how to assign, use and organize effect plug-ins. The effects
and their parameters are described in the separate PDF document “Plug-in
Reference”.
IMPORTANTIMPORTANTIMPORTANTIMPORTANT
This chapter describes audio effects, i. e. effects that are used to process audio,
group, VST instrument, and ReWire (not in Cubase LE) channels.
Overview
Audio effects can be used as follows:
•Insert effects
These effects are inserted into the signal chain of an audio channel, which
means that the whole channel signal passes through the effect. This makes
inserts suitable for effects for which you do not need to mix dry and wet sound,
e. g. distortion, filters or other effects that change the tonal or dynamic
characteristics of the sound.
In Cubase Elements you can have up to eight different insert effects per
channel (and the same is true for output busses – for recording with master
effects). In Cubase AI and Cubase LE, four insert effects per channel are
available.
•Send effects
Each audio channel has eight sends in Cubase Elements and four sends in
Cubase AI and Cubase LE, each of which can be freely routed to an effect (or
to a chain of effects).
Send effects are practical for two reasons: you can control the balance
between the dry (direct) and wet (processed) sound individually for each
channel using the sends, and several different audio channels can use the
same send effect. Send effects are handled by means of FX channel tracks.

Audio Effects
Overview
241
VST 3 Standard
The VST 3 plug-in standard offers many improvements over the previous VST 2
standard and yet retains full backwards compatibility.
Smart Plug-In Processing
The VST 3 standard features smart plug-in processing, i. e., processing by a plug-in
can be disengaged if there is no signal present. This can greatly reduce the CPU
load, thus allowing for more effects to be used.
This is achieved by activating the “Suspend VST3 plug-in processing when no
audio signals are received” option in the Preferences dialog (VST–Plug-ins page).
When this is activated, VST 3 plug-ins will not consume CPU power on silent
passages, i. e. when no audio data runs through them.
However, be aware that this can lead to a situation where you added more plug-ins
on “transport stop” than the system can handle on playback. Therefore, you should
always find the passage with the largest number of events playing simultaneously
to make sure that your system offers the required performance.
NOTE
Activating this option can increase your system performance a lot in certain
projects, but it also makes it more unpredictable whether the project can play back
fine on any timecode position of the project.
Plug-In Delay Compensation
A plug-in effect may have some inherent delay or latency. This means that it takes a
brief time for the plug-in to process the audio fed into it – as a result, the output
audio will be slightly delayed. This especially applies to dynamics processors
featuring look-ahead functionality.
Cubase provides full plug-in delay compensation throughout the entire audio path.
All plug-in delays are compensated for, maintaining the sync and timing of all audio
channels.
Normally, you do not have to make any settings for this. However, VST 3 dynamics
plug-ins with look-ahead functionality have a “Live” button, allowing you to
disengage the look-ahead to minimize latency, if they are to be used during realtime
recording (see the separate PDF document “Plug-in Reference”).
You can also constrain the delay compensation, which is useful to avoid latency
when recording audio or playing a VST instrument in real time.
RELATED LINKS
Constrain Delay Compensation on page 378
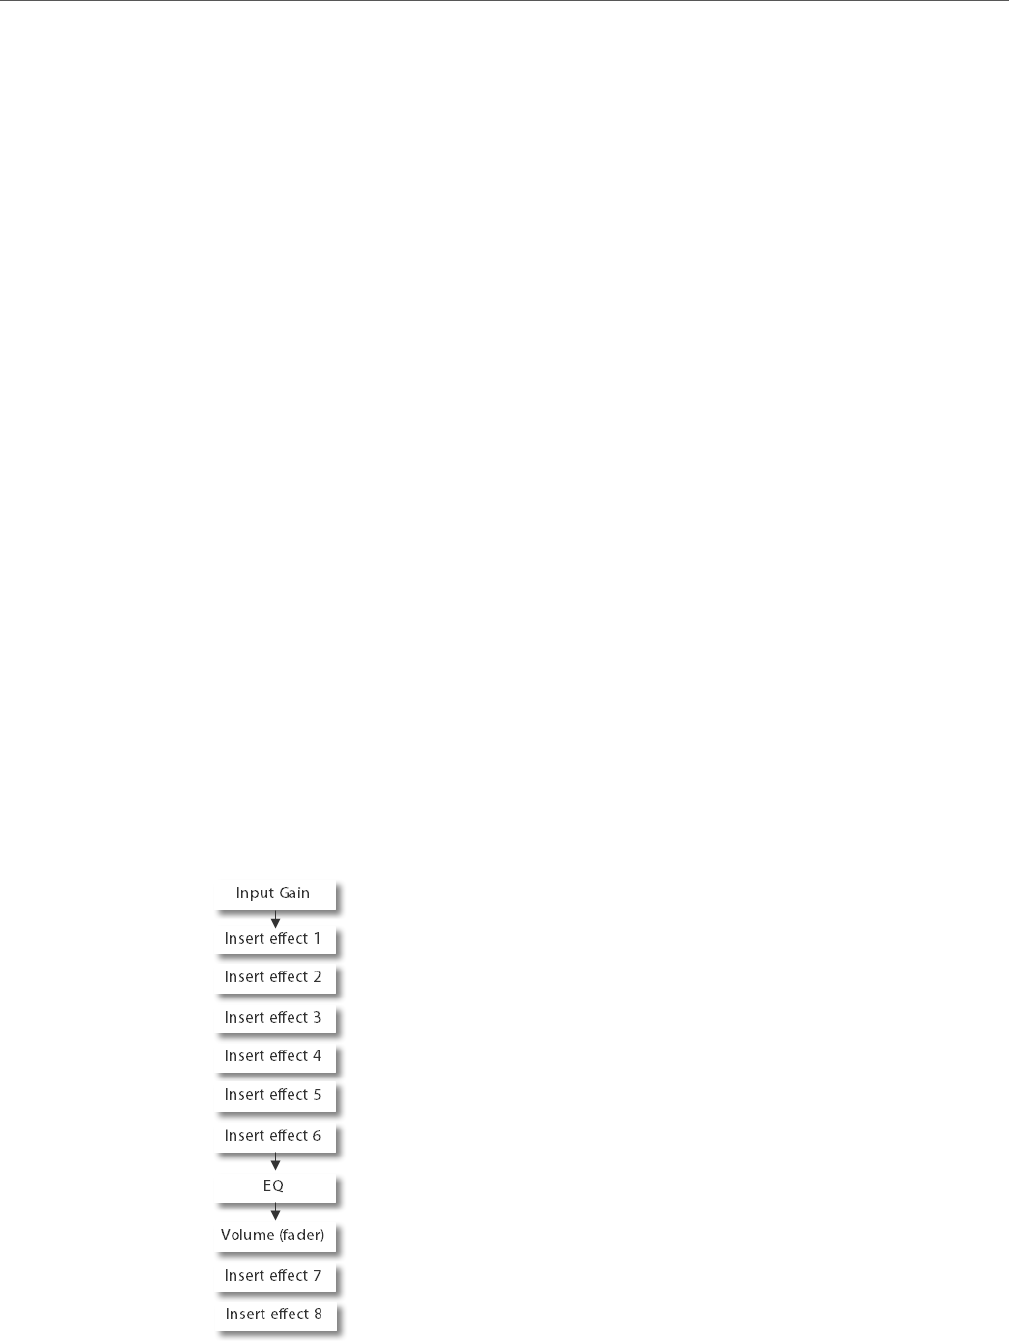
Audio Effects
Insert Effects
242
Tempo Sync
Plug-ins can receive timing and tempo information from the host application (in this
case, Cubase). Typically, this is used to synchronize certain plug-in parameters
(such as modulation rates or delay times) to the project tempo.
• This information is automatically provided to any VST plug-in (2.0 or later) that
requests it.
You do not have to make any special settings for this.
• You set up tempo sync by specifying a base note value.
You can use straight, triplet or dotted note values (1/1 to 1/32).
Please refer to the separate PDF document “Plug-in Reference” for details about
the included effects.
Insert Effects
As the name implies, insert effects are inserted into the audio signal path – this
means that the audio channel data will be routed through the effect.
In Cubase Elements, you can add up to eight different insert effects independently
for each audio-related channel (audio track, group channel track, FX channel track,
VST instrument channel, or ReWire channel) or output bus. In Cubase AI and
Cubase LE, four insert slots are available for audio-related tracks. Also, ReWire
channels are not available in Cubase LE.
The signal passes through the effects in series from the top downwards, with the
signal path shown below:
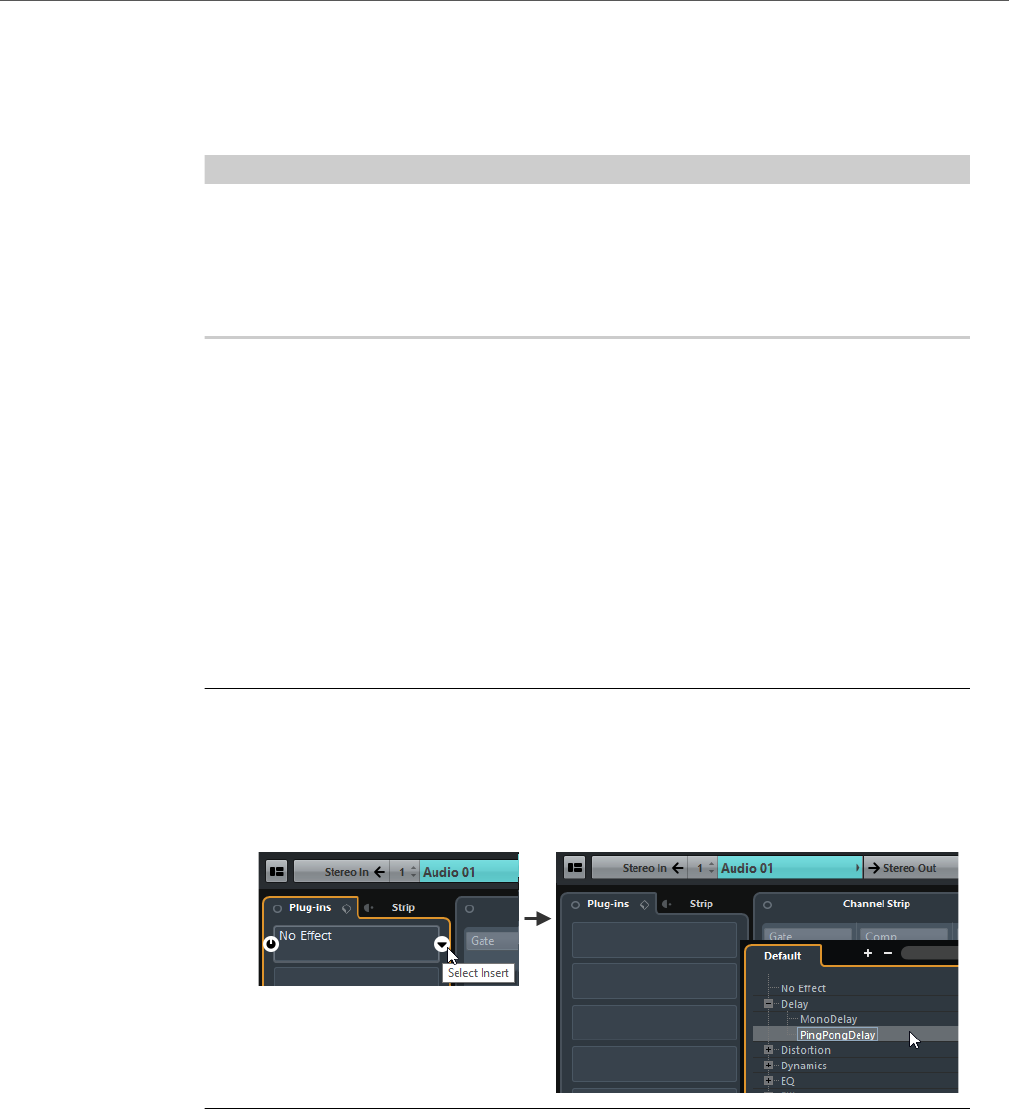
Audio Effects
Insert Effects
243
In Cubase Elements, slots 7 and 8 are post-EQ and post-fader. Post-fader slots are
best suited for insert effects where you do not want the level to be changed after
the effect, such as dithering and maximizers – both typically used as insert effects
for output busses.
NOTE
Applying several effects on several channels may be too much for your CPU to
handle! If you want to use the same effect with the same settings on several
channels, it may be more efficient to set up a group channel and to apply your effect
only once, as a single insert for this group. You can use the VST Performance
window to keep an eye on the CPU load.
RELATED LINKS
Dithering (Cubase Elements only) on page 245
Routing Through Insert Effects
Insert effect settings are available in the Channel Settings window and the
Inspector.
The examples below show the Channel Settings window, but the procedures are
the same for all the inserts sections.
PROCEDURE
1. Bring up the Channel Settings window.
The insert slots are found on the Inserts tab.
2. Move the mouse over the first insert slot, click on the arrow symbol that is
displayed, and select an effect from the selector.
RESULT
The effect is loaded and automatically activated and its control panel opens. You
can open the control panel for a loaded effect by double-clicking in the middle of
the insert slot.
• If the effect has a dry/wet Mix parameter, you can use this to adjust the
balance between the dry signal and the effect signal.
• To remove an effect, open the pop-up selector and select “No Effect”.
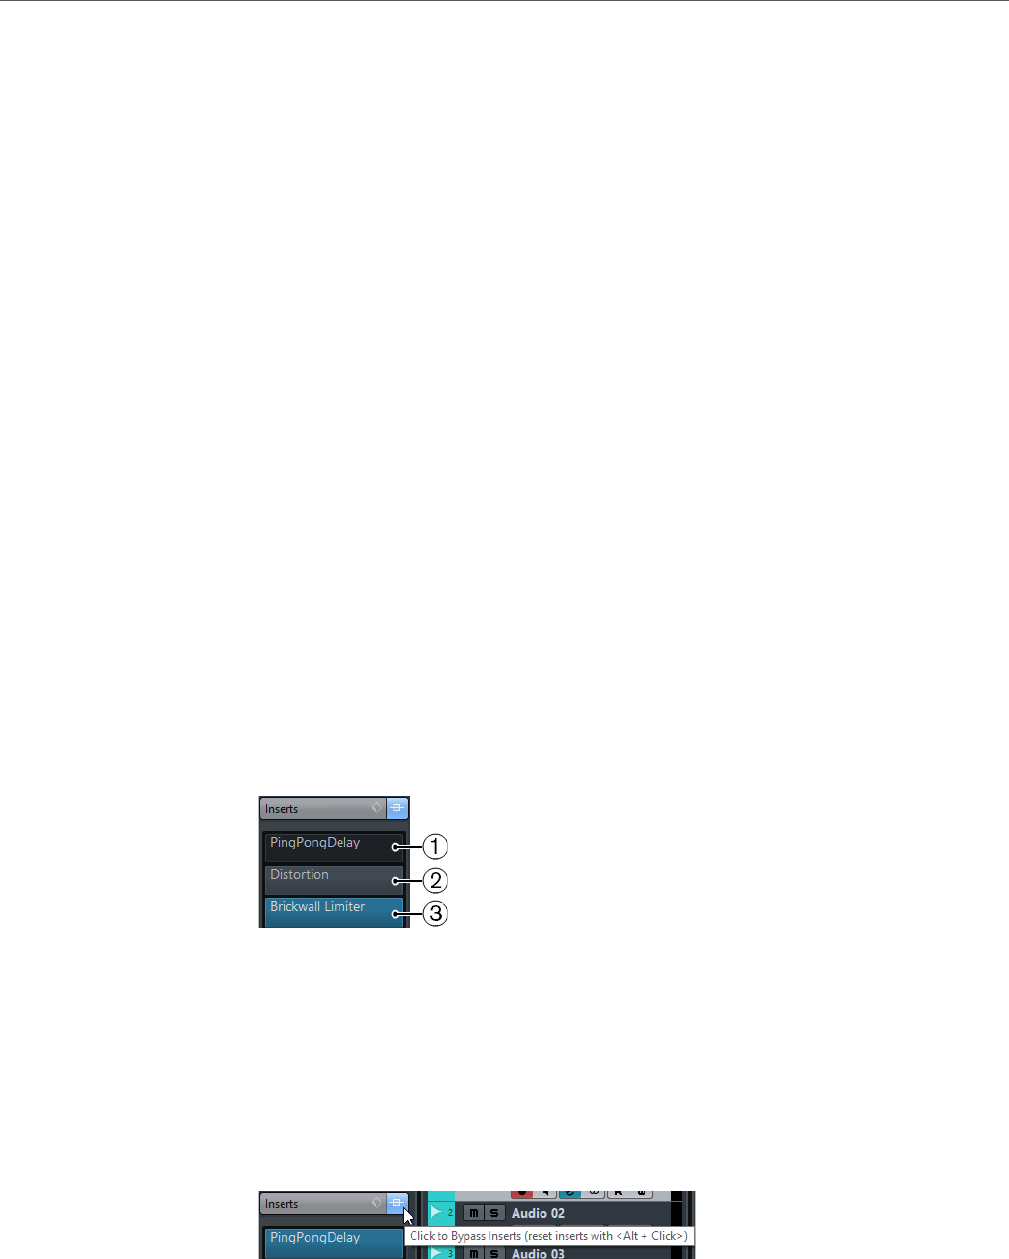
Audio Effects
Insert Effects
244
• In Cubase Elements, you can add up to 8 insert effects per channel this way.
In Cubase AI and Cubase LE, 4 insert effects can be added.
• You can reorder the effects by clicking and dragging.
• You can copy an effect into another effect slot (for the same channel or
between channels) by holding down [Alt]/[Option] and dragging it onto
another effect slot.
• You can open all plug-ins inserted for a particular track at once by holding
[Ctrl]/[Command]-[Shift]-[Alt]/[Option] and clicking the edit button for that
track in the Inspector or in the MixConsole. [Shift]-click the edit button to
close any insert plug-ins for the track.
Deactivating vs. Bypassing
If you want to listen to the track without having it processed by a particular effect,
but do not want to remove this effect completely from the insert slot, you can either
deactivate or bypass it.
Deactivating means to terminate all processing, whereas bypassing means to play
back only the unprocessed original signal – a bypassed effect is still processing in
the background. Bypassing allows for crackle-free comparison of the original (“dry”)
and the processed (“wet”) signal.
• To bypass an effect, click the button on the left in the insert slot.
When an effect is bypassed, the slot turns gray.
• To deactivate an effect, hold [Alt]/[Option] and click its Bypass button.
1) This effect is deactivated.
2) This effect is bypassed.
3) This effect is activated.
• To bypass all inserts for a track, click the “Bypass Inserts” button.
This button can be found on the right of the header of the Inserts section in
the Inspector. It lights up in yellow to indicate that one or more inserts of this
track are bypassed.
In the Channel Settings window, you can find the button on the left of the
Inserts tab.

Audio Effects
Insert Effects
245
Adding Insert Effects to Busses
You can add insert effects to busses. The easiest way to add insert effects is the
Channel settings window.
If you add insert effects to an output bus, all audio routed to that bus is affected.
Dithering (Cubase Elements only)
Dithering is a method for controlling the noise produced by quantization errors in
digital recordings. The theory behind this is that during low level passages, only a
few bits are used to represent the signal, which leads to quantization errors and
hence distortion.
For example, when “truncating bits”, as a result of moving from 24 to 16 bit
resolution, quantization errors are added to an otherwise immaculate recording. By
adding a special kind of noise at an extremely low level, the effect of these errors is
minimized. The added noise could be perceived as a very low-level hiss under
exacting listening conditions. However, this is hardly noticeable and much preferred
to the distortion that otherwise occurs.
When should I use dithering?
• Consider dithering when you mix down to a lower resolution, either in realtime
(during playback) or with the Export Audio Mixdown function.
A typical example is when you mix down a project to a 16-bit stereo audio file
for audio CD burning.
What is a “lower resolution” then? Well, Cubase uses 32-bit float resolution
internally, which means that all integer resolutions (16 bit, 24 bit, etc.) are lower.
The negative effects of truncation (no dithering) are most noticeable when mixing
down to 8 bit, 16 bit and 20 bit format; whether to dither when mixing down to
24 bits is a matter of taste.
Applying Dithering
PROCEDURE
1. Open the Channel Settings window for the output channel by clicking its Edit
button in the MixConsole.
2. Open the effect selector for slot 7 or 8.
The two last Insert effect slots (for all channels) are post-fader, which is crucial for a
dithering plug-in. The reason is that any master gain change applied after dithering
would bring the signal back to the internal 32 bit float domain, rendering the dithering
settings useless.
3. Select the included UV22HR plug-in from the selector.
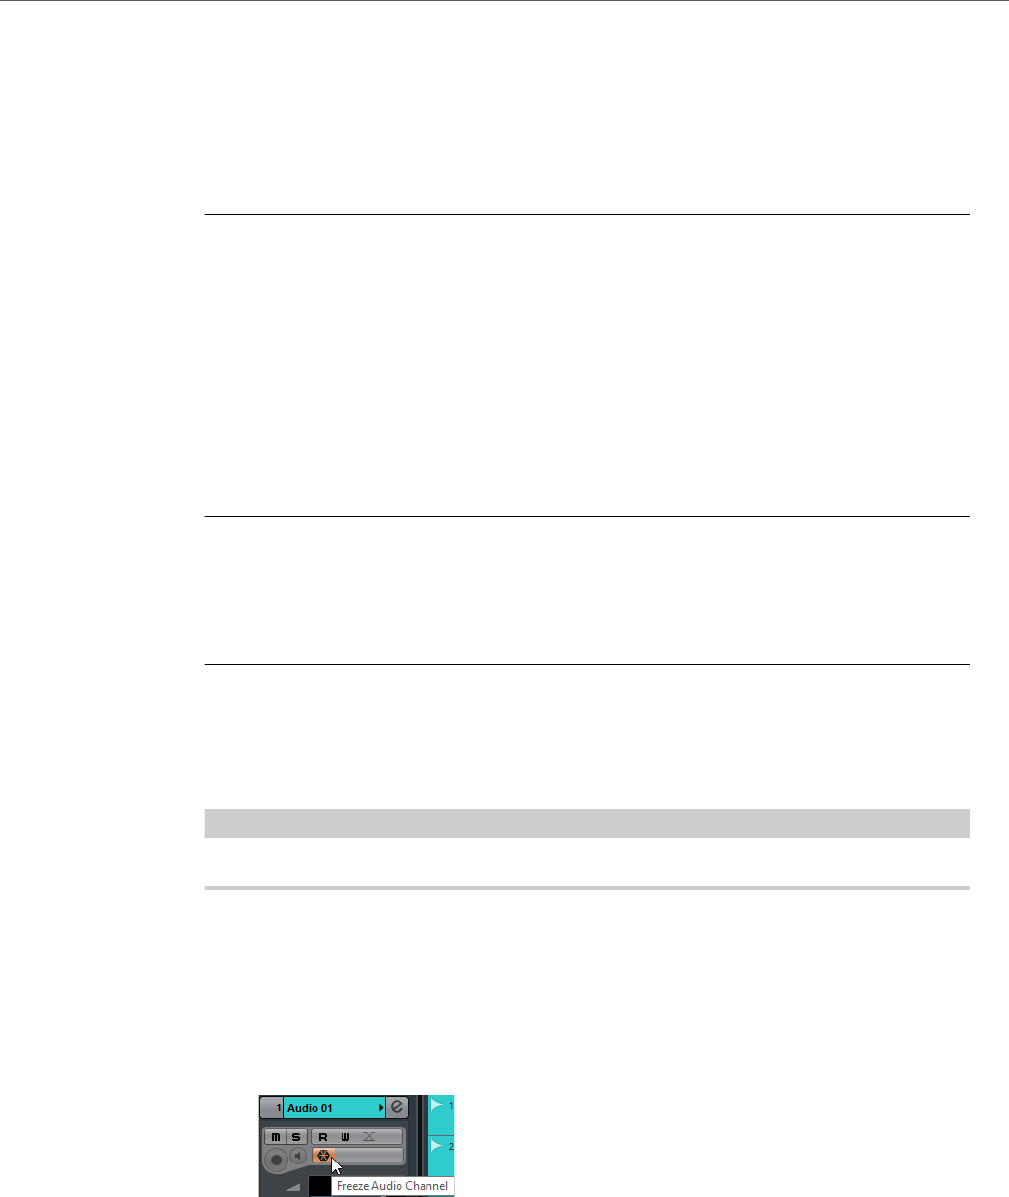
Audio Effects
Insert Effects
246
4. Make sure that the plug-in is set to dither to the correct resolution.
This would be the resolution of your audio hardware (on playback) or the desired
resolution for the mixdown file you want to create (as set in the Export Audio Mixdown
dialog).
5. Use the other parameters in the control panel to set up the dithering to your
liking.
RELATED LINKS
Export Audio Mixdown on page 551
Adding Insert Effects to Group Channels
You can add insert effects to group channels. This is useful if you have several audio
tracks that you want to process through the same effect (e. g. different vocal tracks
that you want to be processed by the same compressor).
PROCEDURE
1. Create a group channel track and route it to the desired output bus.
2. Add the desired effect to the group channel as an insert effect.
3. Route the audio track to the group channel.
RESULT
The signal from the audio track is sent directly to the group, where it passes through
the insert effect.
NOTE
You can also process mono audio tracks through stereo insert effects.
Freezing Insert Effects for a Track
Freezing insert effects for a track allows you to reduce processor power.
• To freeze a track, click its Freeze button in the Inspector.
• The Freeze Channel Options dialog opens, allowing you to set a “Tail Size”
time in seconds.
This adds time at the end of the rendered file to allow reverb and delay tails to
fully fade out.

Audio Effects
Send Effects
247
• The program now renders the output of the track, including all pre-fader insert
effects, to an audio file.
This file is placed in the “Freeze” folder within the Project folder.
• The frozen audio track is locked for editing in the Project window.
The frozen insert effects cannot be edited or removed and you cannot add
new insert effects for the track (except post-fader effects).
• On playback, the rendered audio file is played back. You can still adjust the
level and panning in the MixConsole, make EQ settings and adjust the effect
sends.
In the MixConsole, the channel for a frozen track is indicated by a “snow flake”
symbol above the channel name.
After freezing the Inserts for a track, you hear the track play back as before but the
insert effects do not have to be calculated in real time, easing the load on the
computer processor. Typically, you would freeze a track when it is finished and you
do not need to edit it anymore.
NOTE
You can only freeze audio tracks this way, not group channel tracks or FX channel
tracks.
NOTE
Cubase Elements only: Post-fader inserts can not be frozen.
• To unfreeze a frozen track, click its Freeze button again.
Send Effects
Send effects are outside of an audio channel’s signal path, i. e. the audio data to be
processed must be sent to the effect.
To this end, Cubase provides FX channel tracks. When you have created such a
track, it is added to the track list and can be selected as a routing target in the Send
slots of audio channels.
• When selecting an FX channel track in one of the send slots of an audio
channel, the audio is sent to the FX channel and through any insert effects set
up for it.
The sends can be routed to different FX channels, and thus different FX
channel insert effect configurations. You control the amount of signal sent to
the FX channel by adjusting the effect send level.
• If you have added several effects to the FX channel, the signal passes through
the effects in series, from the top (the first slot) downward.
This allows for “custom” send effect configurations – e. g. a chorus followed
by a reverb followed by an EQ and so on.
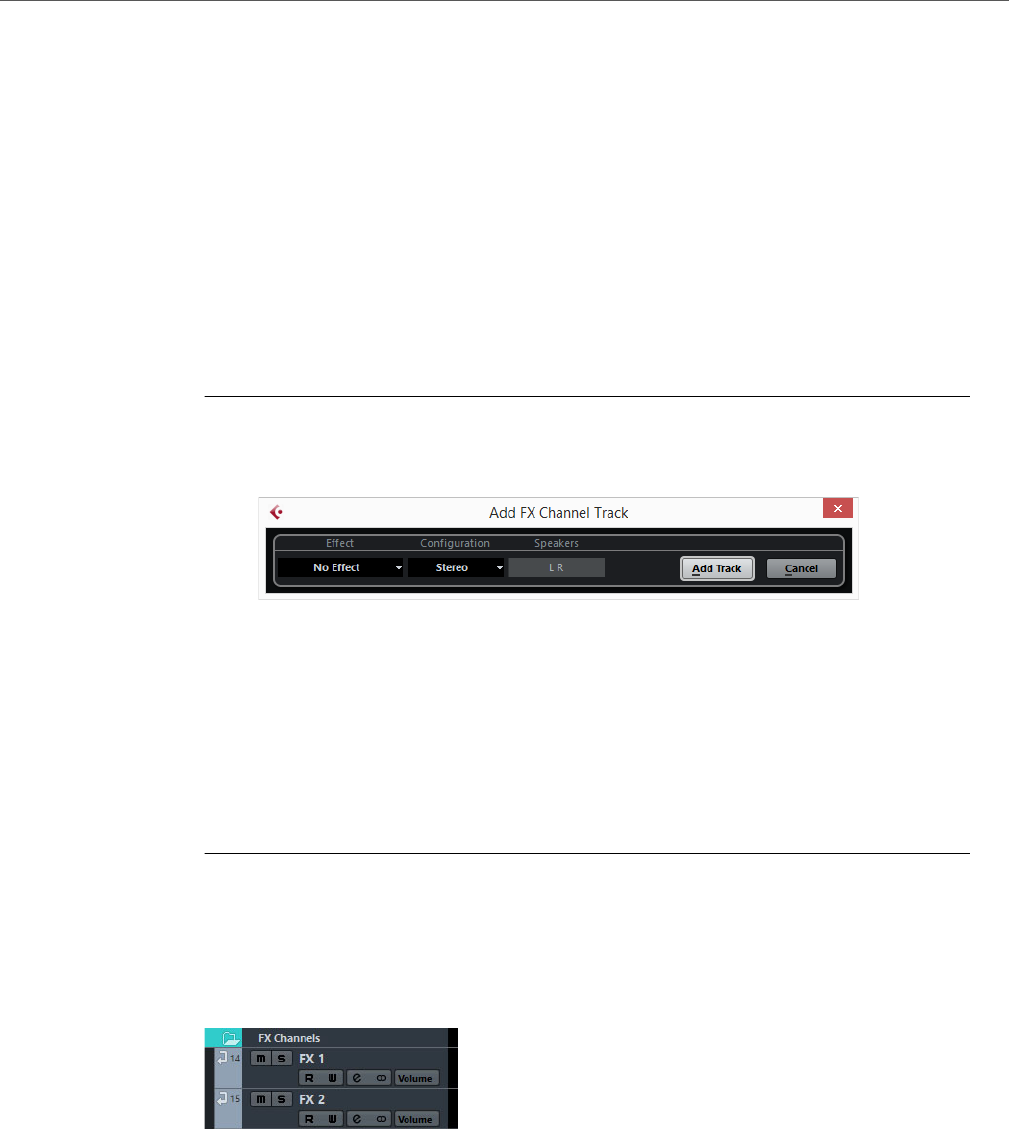
Audio Effects
Send Effects
248
• The FX channel track has its own channel in the MixConsole.
Here you can adjust the effect return level and balance, add EQ and route the
effect return to any output bus.
• Each FX channel track can have any number of automation tracks, for
automating various effect parameters.
RELATED LINKS
Automation on page 359
Adding an FX Channel Track
PROCEDURE
1. Select Project > Add Track > FX Channel.
A dialog opens.
2. Select a channel configuration for the FX channel track.
Normally, stereo is a good choice since most effect plug-ins have stereo outputs.
3. Select an effect for the FX channel track.
4. Click Add Track.
An FX channel track is added to the track list, and the selected effect, if any, is loaded
into the first insert effect slot for the FX channel (in that case, the lit Inserts tab for the
FX channel track in the Inspector indicates that an effect has been assigned and
automatically activated).
RESULT
All FX channel tracks you create will appear in a dedicated “folder” track in the track
list. This makes it easy to manage and keep track of all your FX channel tracks, and
also allows you to save screen space by folding in the FX Channel folder.
FX channel tracks are automatically named “FX 1”, “FX 2” etc., but you can rename
them if you wish. Just double-click the name of an FX channel track in either the
track list or the Inspector and type in a new name.
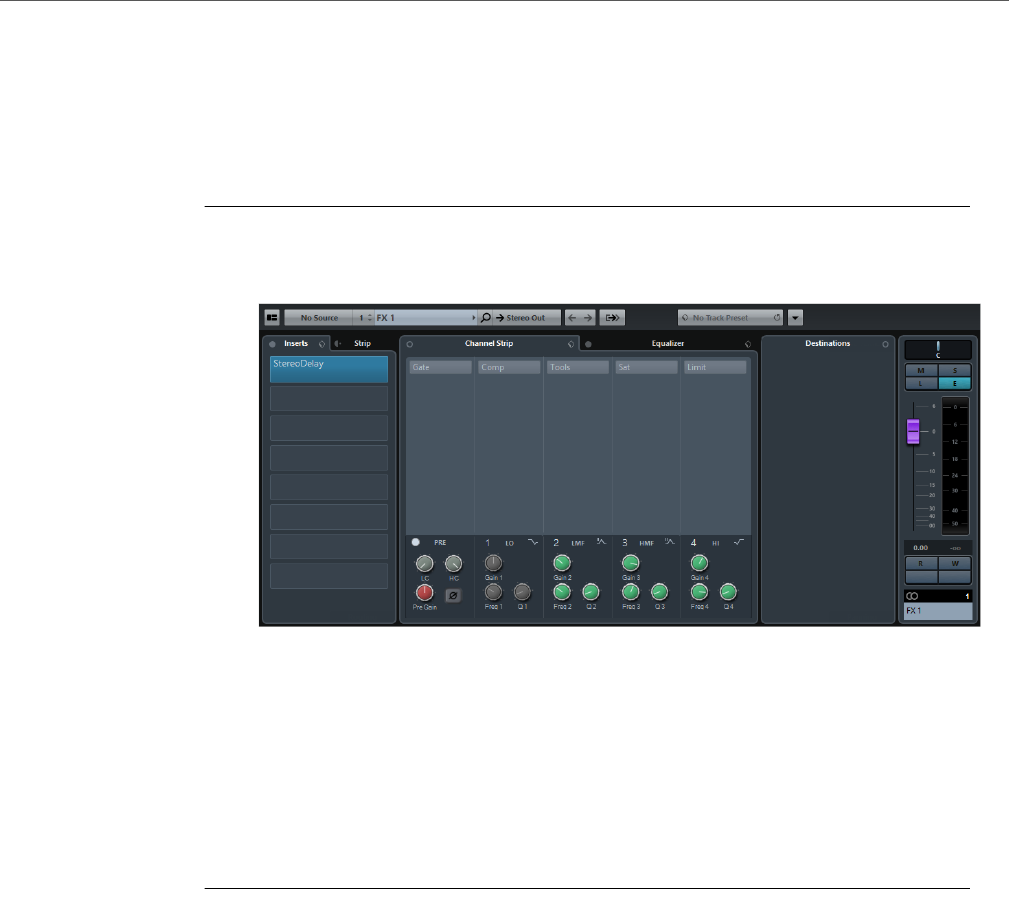
Audio Effects
Send Effects
249
Adding and Setting Up Effects
You can add a single insert effect when you create the FX channel track. To add
and set up effects after the FX channel track is created, you can either use the
Channel Settings window or the Inspector for the track.
PROCEDURE
1. In the track list, the MixConsole, or the Inspector, click the Edit button for the
FX channel track to open the Channel Settings window.
On the left in the window you can find the Inserts section.
2. On the toolbar, open the Output pop-up menu and make sure that the FX
channel is routed to the correct output bus.
3. To add an insert effect in an empty slot (or to replace the current effect in a
slot), click the slot and select an effect from the selector.
4. In the control panel of the effect, set the wet/dry Mix control to all wet.
This is because you control the balance between the wet and the dry signal with the
effect sends.
RESULT
The handling and operation of insert plug-ins for FX channels is the same as for
audio channels. You can adjust level, pan and EQ for the send in the Channel
Settings window, the MixConsole or in the Inspector.
RELATED LINKS
Routing Through Insert Effects on page 243
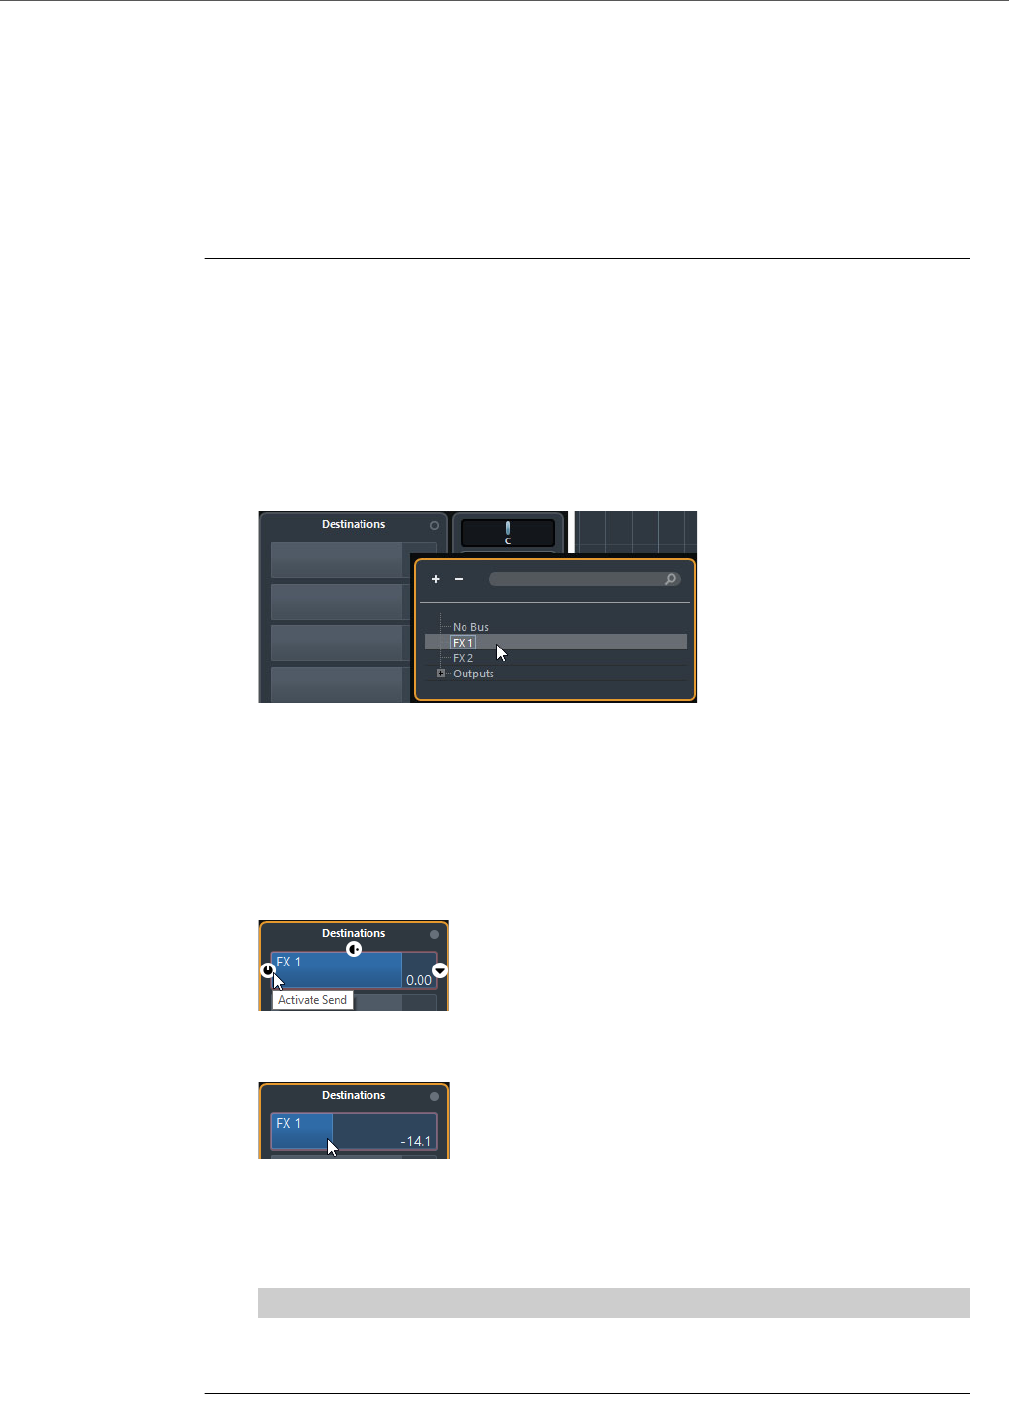
Audio Effects
Send Effects
250
Routing an Audio Channel to the FX Channel
The next step is to set up a send for an audio channel and route it to the FX channel.
This can be done in the Channel Settings window or in the Inspector for the audio
track. The example below shows the Channel Settings window, but the procedure
is similar for all the sections:
PROCEDURE
1. Click the “e” button for an audio channel to bring up its Channel Settings
window.
Each of the sends has the following controls:
• An On/Off button for activating/deactivating the effect
• A send level slider
2. Click the arrow icon in an empty send slot to open the selector, and select an
FX channel track as routing destination.
• If the first item on this menu (“No Bus”) is selected, the send is not routed
anywhere.
• Items called “FX 1”, “FX 2” etc. correspond to existing FX tracks. If you
renamed an FX track, that name will appear on this menu instead of the default.
• The menu also allows for routing a send directly to output busses, separate
output bus channels or Group channels.
3. Activate the On/Off button for the send.
4. Click and drag the send level slider to determine how much of the signal from
the audio channel is routed to the FX channel.
Setting the Send level
You can also double-click and enter a value numerically. If you hold down [Alt]/[Option]
when double-clicking, the send destination is shown in the Channel Settings window.
If you have routed the send to an FX channel, the plug-in panel opens.
NOTE
To determine how much of the signal from the FX channel is sent to the output bus,
open the Channel Settings window for the FX track and adjust the effect return level.
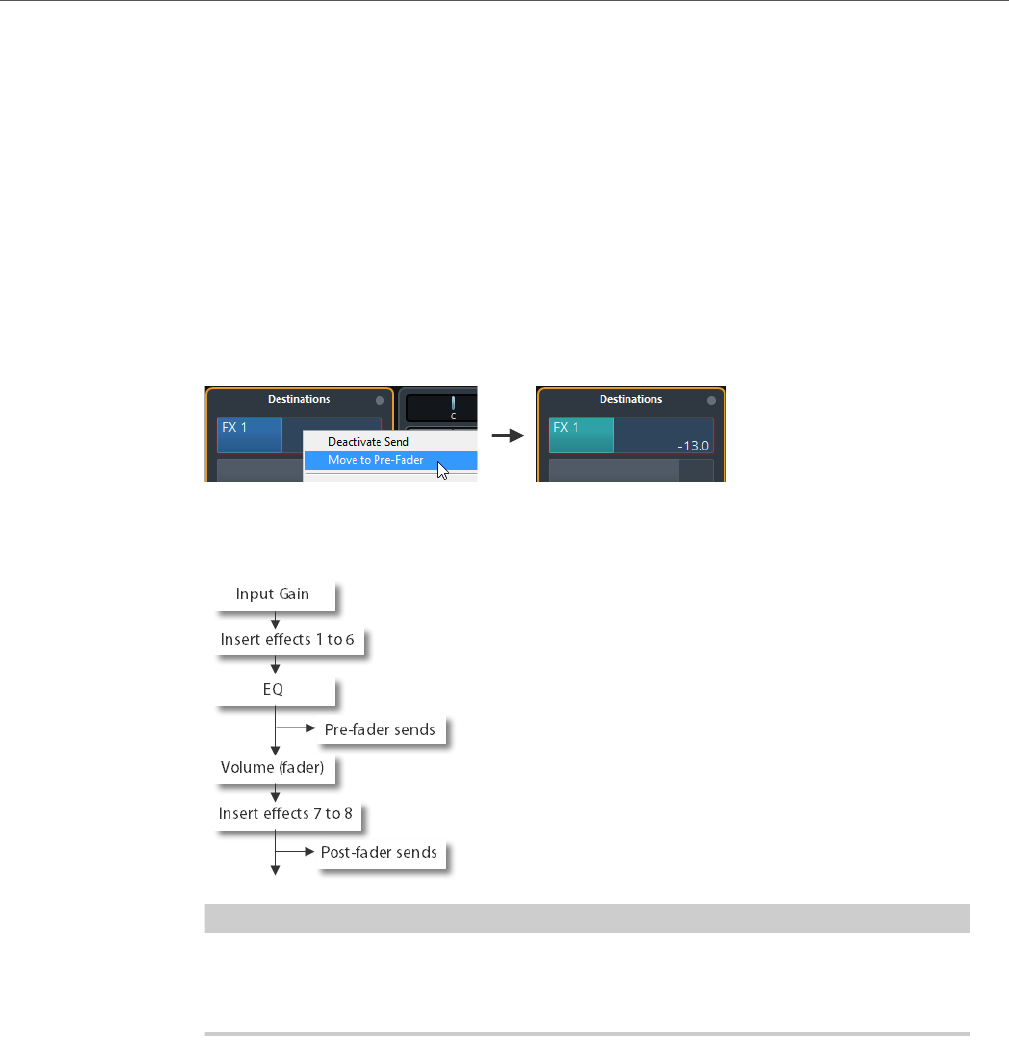
Audio Effects
Send Effects
251
RELATED LINKS
Adding an FX Channel Track on page 248
Pre/Post Fader Sends
Normally you want the effect send to be proportional to the channel volume
(post-fader send). However, you can send the signal to the FX channel before the
audio channel’s volume fader.
• If you want the signal to be sent to the FX channel before the audio channel’s
volume fader in the MixConsole, right-click on a send and select “Move to
Pre-Fader”.
The picture below shows where the sends are “tapped” from the signal in pre and
post-fader mode:
NOTE
Use the channel’s Mute button to determine whether a send in pre-fader mode is
affected. This is done with the “Mute Pre-Send when Mute” option in the
Preferences dialog (VST page).
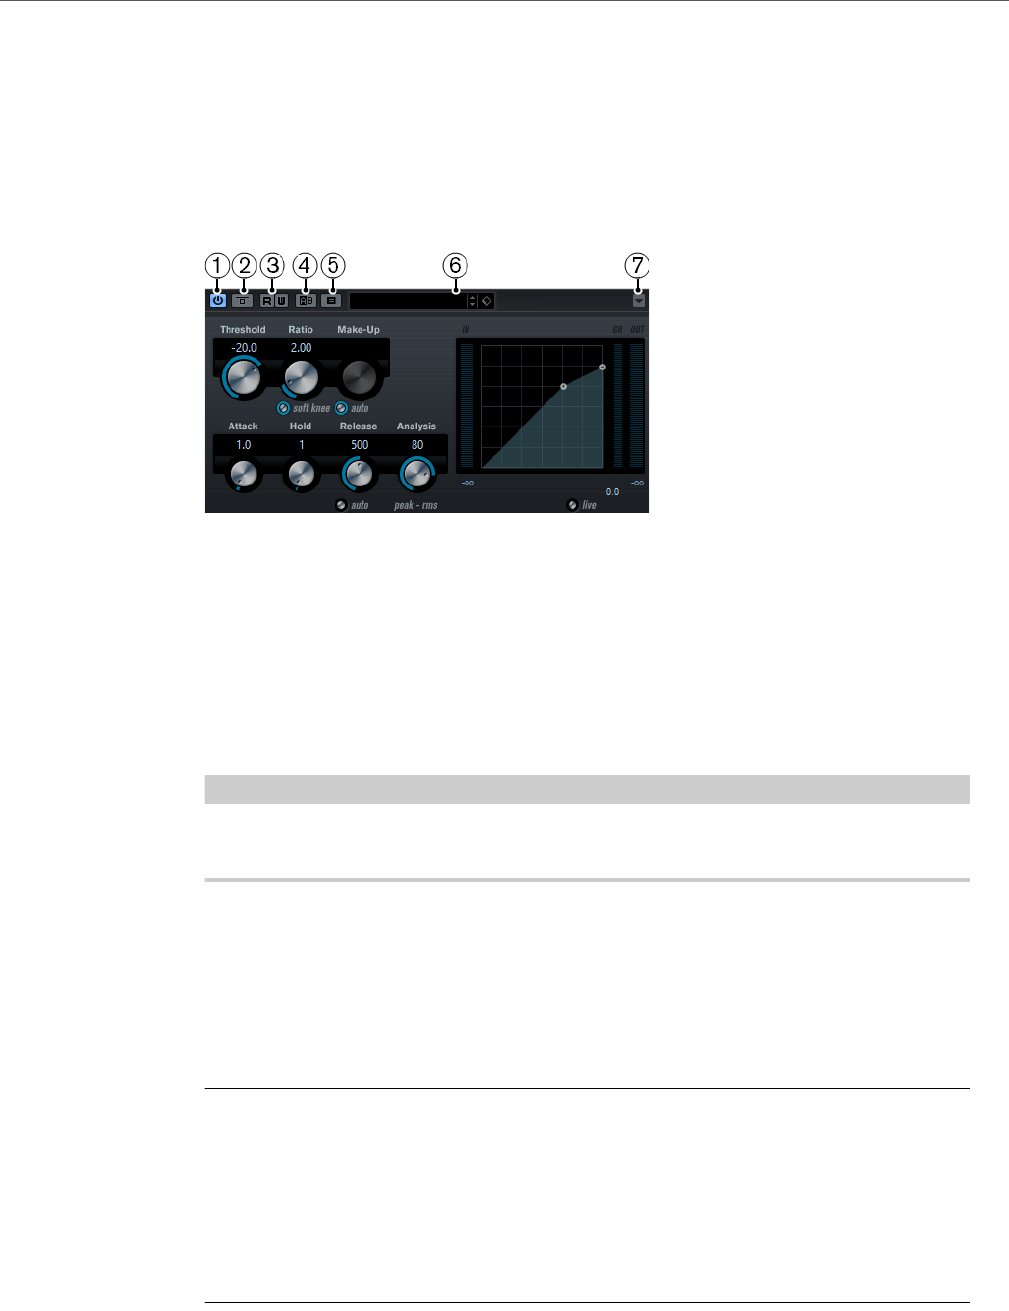
Audio Effects
Effect Control Panel
252
Effect Control Panel
You can open the control panel for the loaded plug-in by double-clicking the center
part of an insert or a send slot. If you edit the parameters for an effect, these settings
are saved automatically with the project.
The contents, design and layout of the control panel depend on the selected effect.
1) Activate Effect
2) Bypass Effect
3) Read/Write Automation
4) Switch between A/B Settings
5) Copy A to B
6) Preset selector
7) Functions menu
NOTE
The included effects and their parameters are described in detail in the separate
PDF document “Plug-in Reference”.
Comparing Effect Settings
You can compare two different parameter settings for an effect.
PROCEDURE
1. Adjust the effect parameters for setting A.
2. Click A/B Setting to activate setting B.
As a starting point for setting B, the parameters for setting A are copied.
3. Adjust the parameters for setting B.
4. Click A/B Setting to activate setting A and compare both settings.

Audio Effects
Effect Presets
253
RESULT
You can compare the settings between A and B using the corresponding buttons.
Settings A and B are saved with the project.
Setting A active
Setting B active
Effect Presets
In the MediaBay – or with certain limits in the Save Preset dialog – you can assign
attributes to presets which allow you to organize and browse them according to
various criteria. Cubase comes with categorized track and VST presets that you can
use straight out of the box.
You can also preview effect presets before loading them which considerably
speeds up the process of finding the right effect preset.
Effect presets can be divided into the following main categories:
• VST presets for a plug-in.
These are plug-in parameter settings for a specific effect.
• Inserts presets that contain insert effect combinations.
These can contain the whole insert effects rack with settings for each effect.
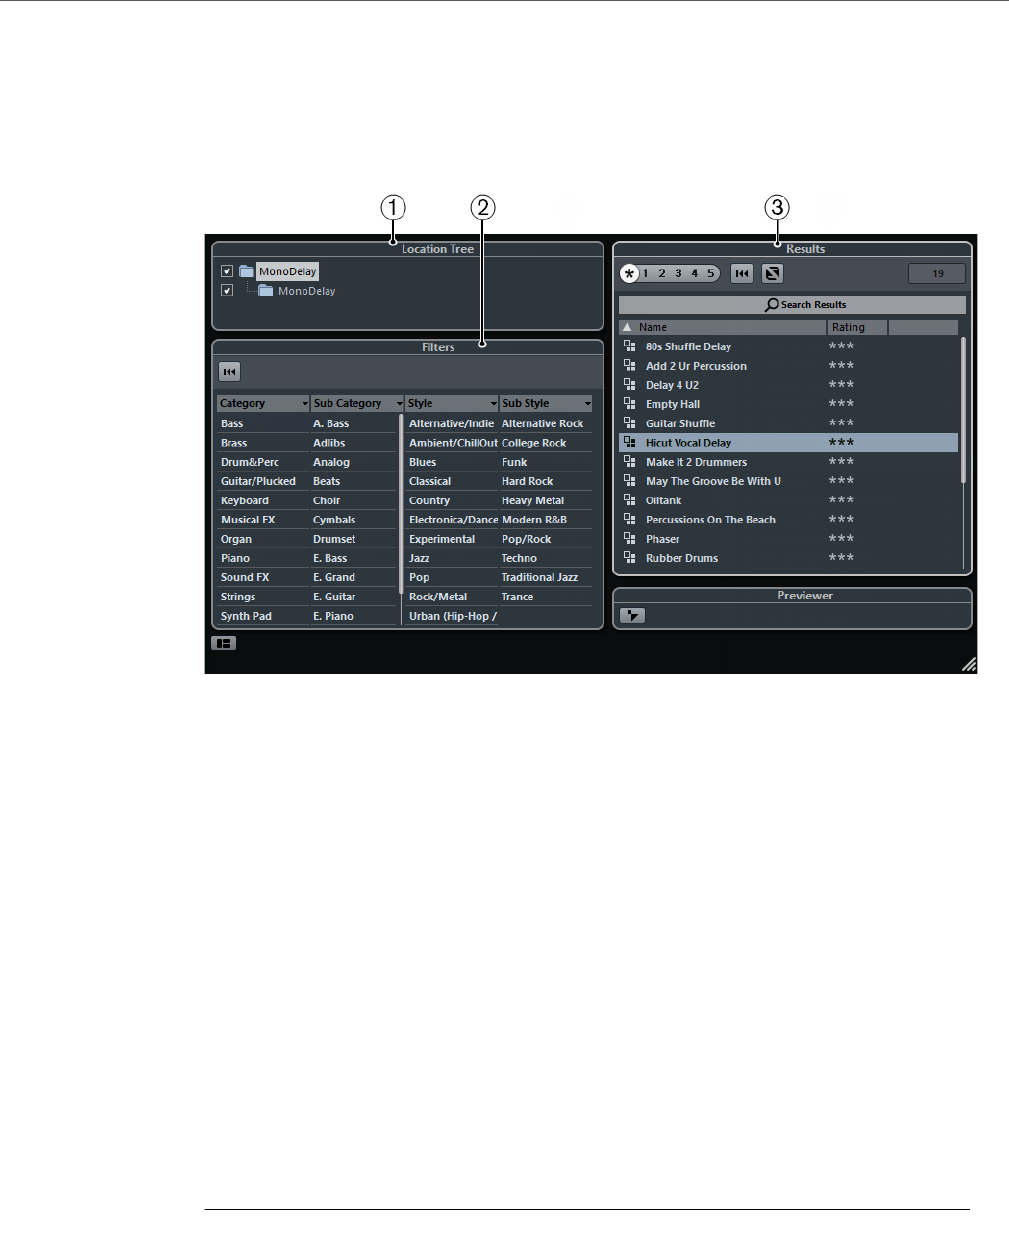
Audio Effects
Effect Presets
254
Presets Browser
The Presets browser contains the Results, the Filters and the Location Tree
sections.
1) Location Tree section
Shows the folder that is searched for preset files.
To show the Location Tree section, click Set Up Window Layout and activate
Location Tree. This is only available if Filters is also active.
2) Filters section
Shows the available preset attributes for the selected effect.
To show the Filters section, click Set Up Window Layout and activate Filters.
3) Results section
Lists the available presets for the selected effect.
Selecting Effect Presets
Most VST effect plug-ins come with a number of useful presets for instant selection.
PROCEDURE
1. Load an effect, either as a channel insert or into an FX channel.
The control panel for the effect is displayed.
2. Perform one of the following actions to open the Presets browser:
• Click in the preset field at the top of the control panel.
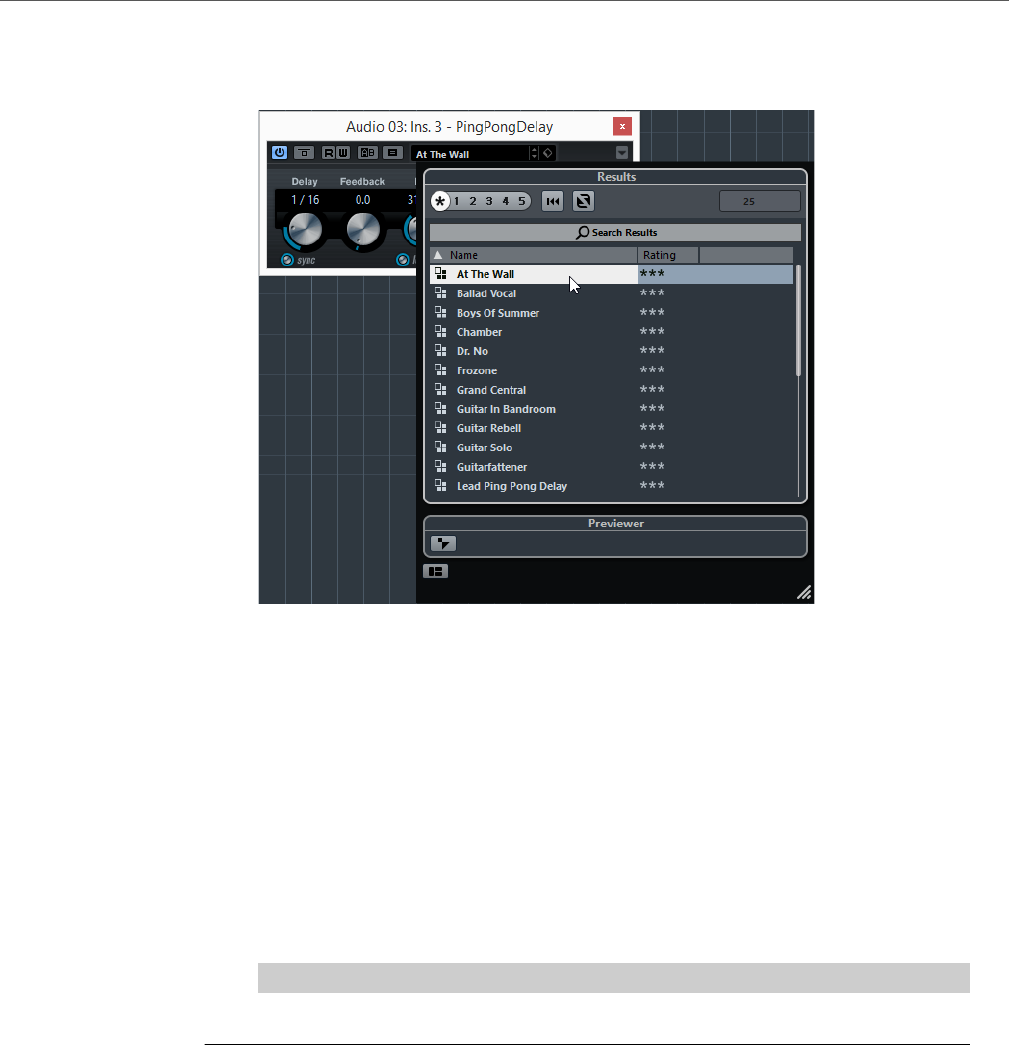
Audio Effects
Effect Presets
255
• Click the button to the right of the preset field and select “Load Preset”.
This opens the Presets browser.
You can also open the Presets browser from the Inspector (Inserts tab) or the
Channel Settings window.
3. In the Results section, select a preset from the list.
4. Activate playback to audition the selected preset.
Step through the presets until you find the right sound. It may be helpful to set up
cycle playback of a section to make comparisons between different preset settings
easier.
5. When you have found the preset that you want, double-click on it (or click
outside the Presets browser).
The preset is applied.
• To return to the preset that was selected when you opened the Presets
browser, click the “Revert to Last Setting” button.
NOTE
The preset handling for VST 2 plug-ins is slightly different.
RELATED LINKS
Earlier VST Effect Presets on page 257
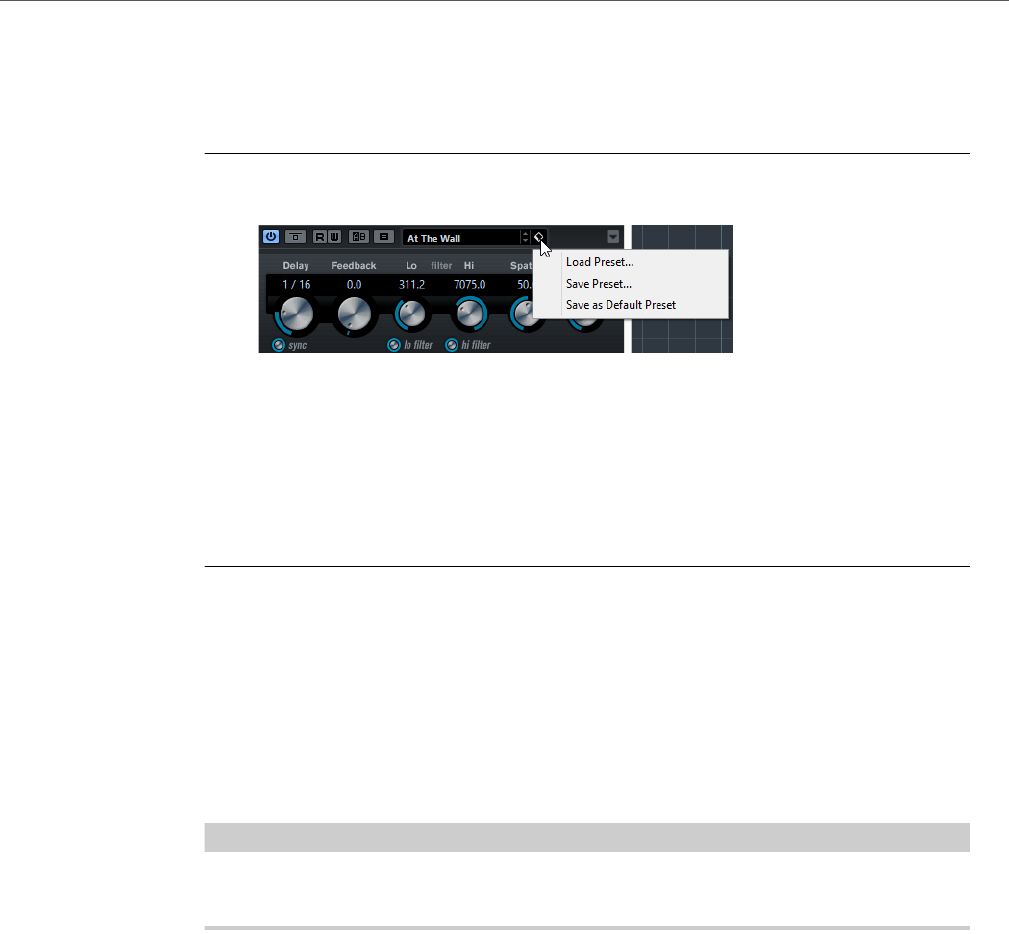
Audio Effects
Effect Presets
256
Saving Effect Presets
You can save your effect settings as presets for further use.
PROCEDURE
1. Open the Preset Management pop-up menu.
2. Select Save Preset.
The Save Preset dialog opens.
3. In the New Preset section, enter a name for the new preset.
4. Optional: Click the button at the bottom left to open the Attribute Inspector
and save attributes for the preset.
5. Click OK to save the preset and exit the dialog.
RESULT
User-defined presets are saved in the following location:
•Windows: \Users\<user name>\My Documents\VST3
Presets\<company>\<plug-in name>
•Mac: /Users/<user
name>/Library/Audio/Presets/<company>/<plug-in name>
NOTE
You cannot change the default folders, but you can add further subfolders inside
the individual effect preset folders (by clicking the New Folder button).
Default Effect Presets
You can save a default effect preset with your parameter settings. This is loaded
automatically when you open the effect.
• To save a default preset, open the Preset Management pop-up menu, and
select Save as Default Preset.
• To recall a default preset, open the Presets browser and select Default. You
can also open the plug-in context menu and select Default Preset > Reset
to Default Preset.
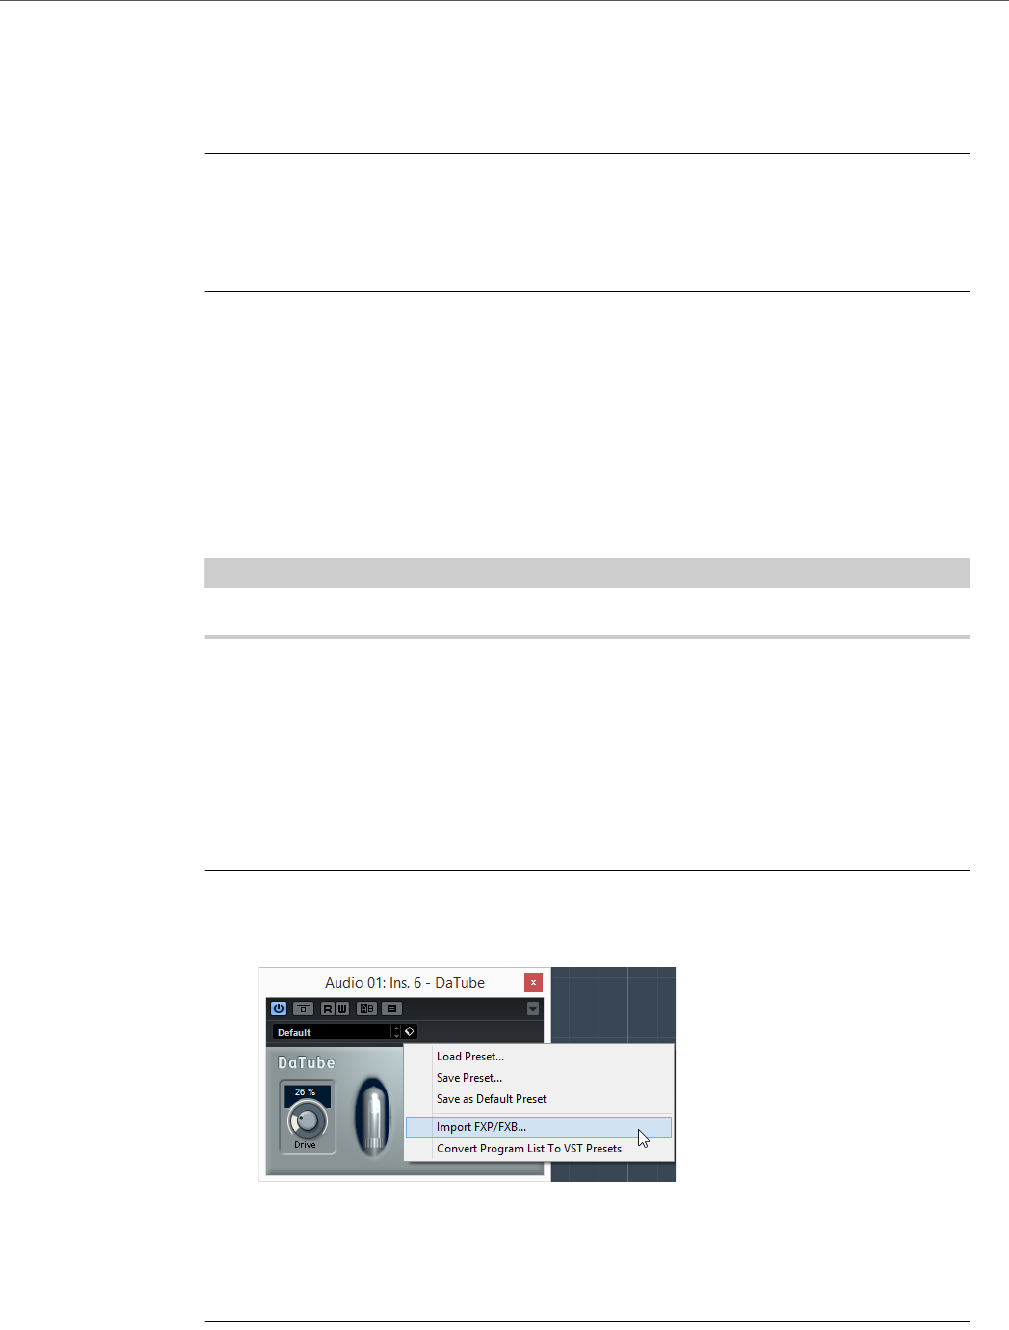
Audio Effects
Effect Presets
257
Copying and Pasting Effect Presets
You can copy a plug-in preset and paste it in another instance of the same plug-in.
PROCEDURE
1. Open the plug-in context menu and select Copy (plug-in name) Setting.
2. Select another instance of the same plug-in, open the context menu and
select Paste (plug-in name) Setting.
Earlier VST Effect Presets
Some VST 2.x plug-ins have presets in the old FX program/bank format (.fxp/.fxb).
To use all features, you must convert these presets to VST 3 presets. If you save
new presets for the included VST 2 plug-ins, these will automatically be saved in
the .vstpreset format.
IMPORTANTIMPORTANTIMPORTANTIMPORTANT
All VST 2 presets can be converted to VST 3 presets.
Converting Earlier VST Presets
PREREQUISITE
You have created your own .fxp/.fxb presets with a previous version of Cubase (or
any other VST 2 application).
PROCEDURE
1. Load any VST 2 effect you may have installed, and open the Preset
Management pop-up menu.
2. Select Import FXB/FXP.
3. In the file dialog, locate the file and click Open.
If you load a bank (.fxb), it will replace the current set of all effect programs. If you load
a single program, it will replace the currently selected effect program only.
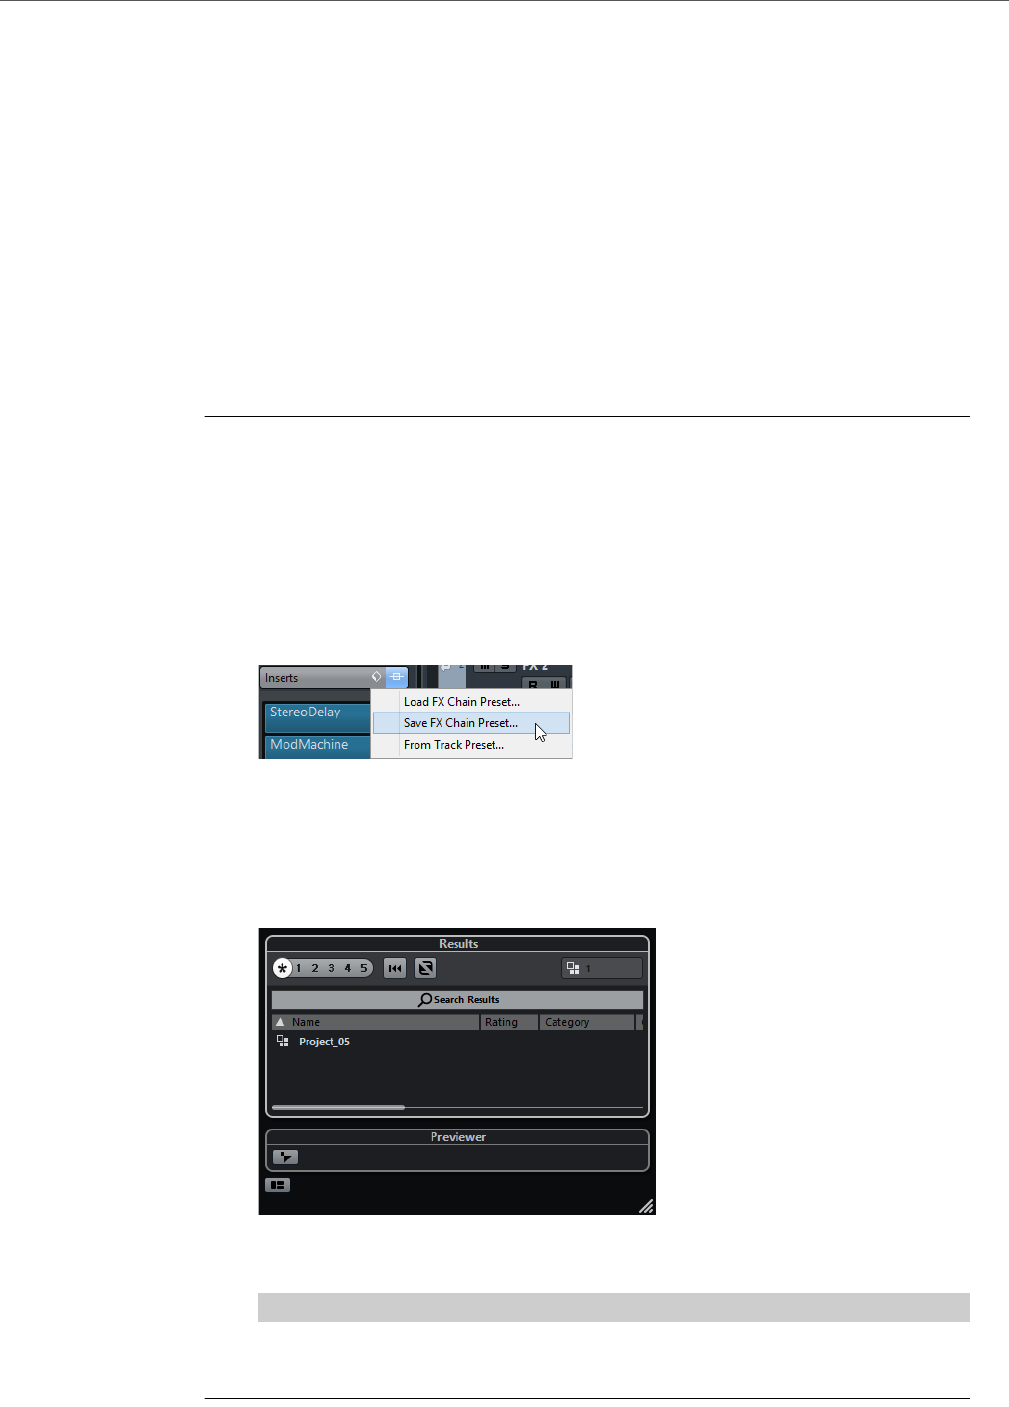
Audio Effects
Effect Presets
258
AFTER COMPLETING THIS TASK
You can convert the current program list to VST presets by opening the Preset
Management pop-up menu and selecting Convert Program List to VST Presets.
After converting, the presets will be available in the Presets browser. The converted
presets will be stored in the VST 3 Preset folder.
Saving Insert Presets
You can save the complete insert effect rack for a channel together with all
parameter settings as an inserts preset. Inserts presets can be applied to audio,
instrument, FX channel, or group tracks.
PROCEDURE
1. In the track list, select the track and in the Inspector, open the Inserts section.
2. Load a combination of insert effects and adjust the parameters (or select
effect presets) for each effect.
3. At the top of the Inserts tab, click the Preset Management button to open the
pop-up menu for the inserts and select “Save FX Chain Preset”.
This can also be done from the Channel Settings window using the Preset
Management button at the top of the Inserts section.
4. In the dialog that opens, type in a name for the preset.
5. Select the track (audio/group/instrument/FX channel) to which you want to
apply the new preset.
6. On the Inserts tab, click the Preset Management button and select “Load FX
Chain Preset”.
7. In the dialog that opens, select the preset that you created.
The effects are loaded into the Insert slots of the new track.
NOTE
When loading insert combination presets, any plug-ins that were previously loaded
for the track will be removed, regardless of whether these slots are used in the preset.
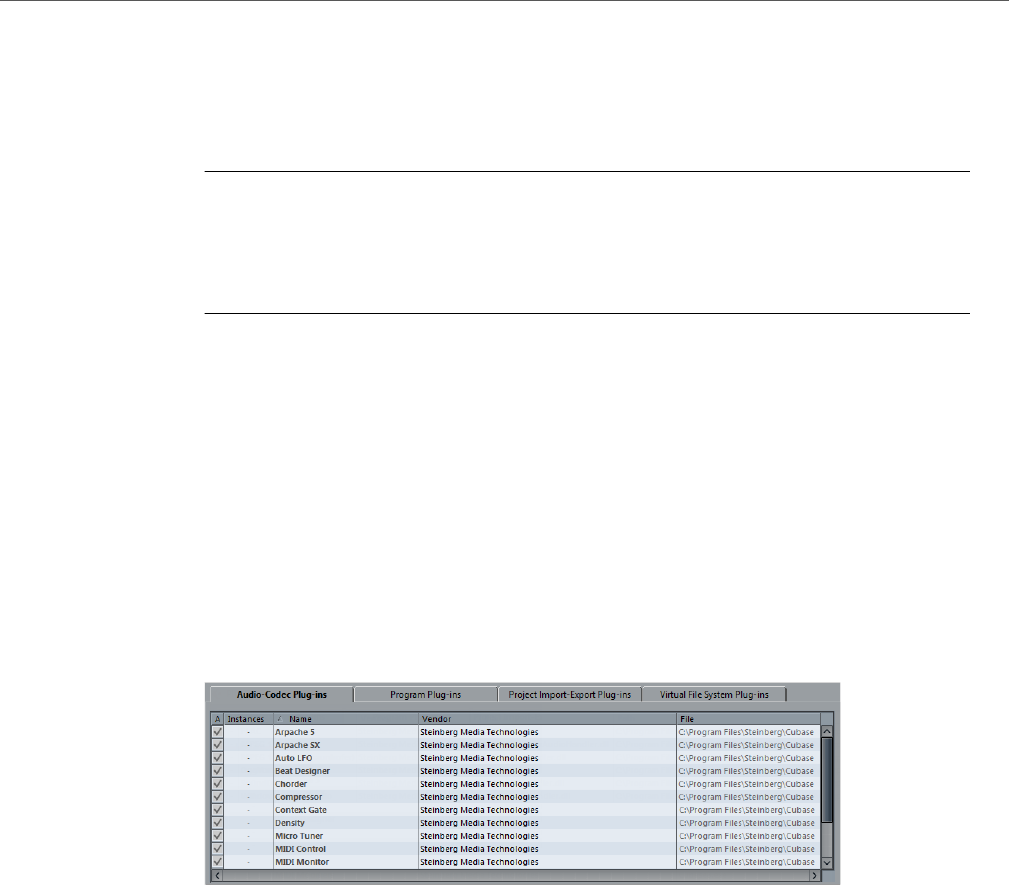
Audio Effects
Plug-In Information Window
259
Extracting Insert Effect Settings from Track Presets
You can extract the effects used in a track preset and load them into your inserts
rack.
PROCEDURE
1. On the Preset Management pop-up menu, select From Track Preset.
2. In the dialog, select an item in the list.
The effects used in the track preset are loaded.
RELATED LINKS
Track Presets on page 101
Plug-In Information Window
The Plug-in Information window lists all the available audio-codec plug-ins,
program plug-ins, project import-export plug-ins, and the virtual file system plug-ins.
• To open the Plug-in Information window, select Devices > Plug-in
Information.
Update
Makes Cubase re-scan the designated plug-in folders for updated plug-in
information.
The following columns are available:
Instances
Indicates how many instances of the plug-in are currently used in Cubase.
Name
The name of the plug-in.
Vendor
The manufacturer of the plug-in.
File
The name of the plug-in with extension.

Audio Effects
Plug-In Information Window
260
Path
The path and name of the folder in which the plug-in file is located.
Category
Indicates the category of each plug-in.
Version
The version of the plug-in.
SDK
Shows with which version of the VST protocol a plug-in is compatible.
Managing Plug-Ins in the Plug-In Information Window
• To make it available for selection, activate the checkbox in the left column.
Only the enabled plug-ins will appear on the effect selectors.
• To see where a plug-in is used, click in the Instances column.
A pop-up opens and shows where each plug-in is used.
NOTE
A plug-in may be in use even if it is not enabled in the left column.
You might for example have opened a project containing effects that are
currently disabled on the menu. The left column only determines whether or
not the plug-in is visible on the effect selectors.
Exporting Plug-In Information Files
You can save plug-in information as an XML file, for example for archiving purposes
or troubleshooting.
• The plug-in information file contains information on the installed/available
plug-ins, their version, vendor, etc.
• The XML file can then be opened in any editor application supporting the XML
format.
NOTE
The export function is not available for program plug-ins.
PROCEDURE
1. In the Plug-in Information window, right-click on a tab and select Export.
A file dialog opens.

Audio Effects
Plug-In Information Window
261
2. In the dialog, specify a name and location for the plug-in information export
file.
3. Click OK to export the file.

262
Audio processing and functions
Background
Audio processing in Cubase can be called “non-destructive”, in the sense that you
can always undo changes or revert to the original versions. This is possible because
processing affects audio clips rather than the actual audio files, and because audio
clips can refer to more than one audio file.
This is how it works:
PROCEDURE
1. If you process an event or a selection range, a new audio file is created in the
Edits folder, within your project folder.
This new file contains the processed audio, while the original file is unaffected.
2. The processed section of the audio clip (the section corresponding to the
event or selection range) then refers to the new, processed audio file.
The other sections of the clip will still refer to the original file.
• The original, unprocessed audio file can still be used by other clips in the
project, by other projects or by other applications.
Audio processing
You apply processing by making a selection and selecting a function from the
Process submenu of the Audio menu.
Processing is applied according to the following rules:
• When events are selected in the Project window or the Audio Part Editor, the
processing will be applied to these events only.
Processing will only affect the clip sections that are referenced by the events.
• When an audio clip is selected in the Pool, the processing will be applied to
the whole clip.
• When you have made a selection range, the processing will be applied to this
range only.
Other sections of the clip are not affected.

Audio processing and functions
Audio processing
263
If you attempt to process an event that is a shared copy (i. e. the event refers to a
clip that is used by other events in the project), you are asked whether you want to
create a new version of the clip.
Select “New Version” if you want the processing to affect the selected event only.
Select “Continue” if you want the processing to affect all shared copies.
Common settings and features
If there are any settings for the selected Audio processing function, these will
appear when you select the function from the Process submenu. While most
settings are specific for the function, some features and settings work in the same
way for several functions.
The “More…” button
If the dialog has a lot of settings, some options may be hidden when the dialog
opens.
• To reveal these, click the “More…” button.
• To hide the settings, click the button again (now labeled “Less…”).
The Preview, Process, and Cancel buttons
These buttons have the following functionality:
Preview button
Allows you to listen to the result of the processing with the current settings.
Playback will continue repeatedly until you click the button again (the button
is labeled “Stop” during Preview playback). You can make adjustments during
Preview playback, but the changes are not applied until the start of the next
“lap”. Some changes may automatically restart the Preview playback from the
beginning.
NOTE
To start or stop previewing, you can also press [Space].
Process button
Performs the processing and closes the dialog.
NOTE
To perform the process, you can also press [Enter] or [Return].
Cancel button
Closes the dialog without processing.
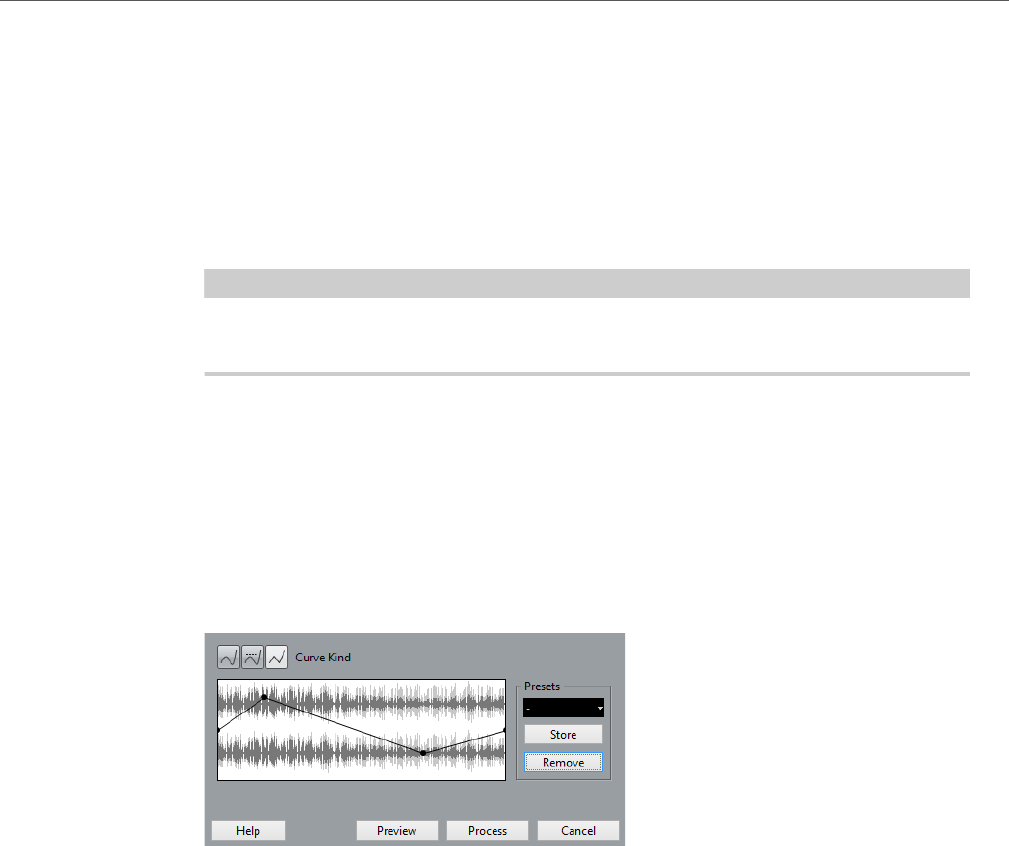
Audio processing and functions
Audio processing
264
Pre/Post-Crossfade
Some processing functions allow you to gradually mix the effect in or out. This is
done with the Pre/Post-Crossfade parameters. For example, if you activate
Pre-Crossfade and specify a value of 1000 ms, the processing is applied gradually
from the start of selection, reaching full effect 1000 ms after the start. Similarly, if
you activate Post-Crossfade, the processing is gradually removed, starting at the
specified interval before the end of the selection.
IMPORTANTIMPORTANTIMPORTANT
IMPORTANT
The sum of the Pre-Crossfade and Post-Crossfade times cannot be larger than the
length of the selection.
This only works if the entire audio event is selected (separately or as part of a
selection range).
Envelope
The Envelope function allows you to apply a volume envelope to the selected audio.
The dialog contains the following settings:
Curve Kind buttons
These determine whether the envelope curve consists of spline curve
segments (left button), damped spline segments (middle button) or linear
segments (right button).
Envelope display
Shows the shape of the envelope curve. The resulting waveform shape is
shown in dark gray, with the current waveform shape in light gray. You can
click on the curve to add points, and click and drag existing points to change
the shape. To remove a point from the curve, drag it outside the display.
Presets
If you have set up an envelope curve that you may want to apply to other
events or clips, you can save it as a preset by clicking the Store button.
• To apply a stored preset, select it from the pop-up menu.
• To rename the selected preset, double-click on the name and enter a
new one in the dialog that opens.
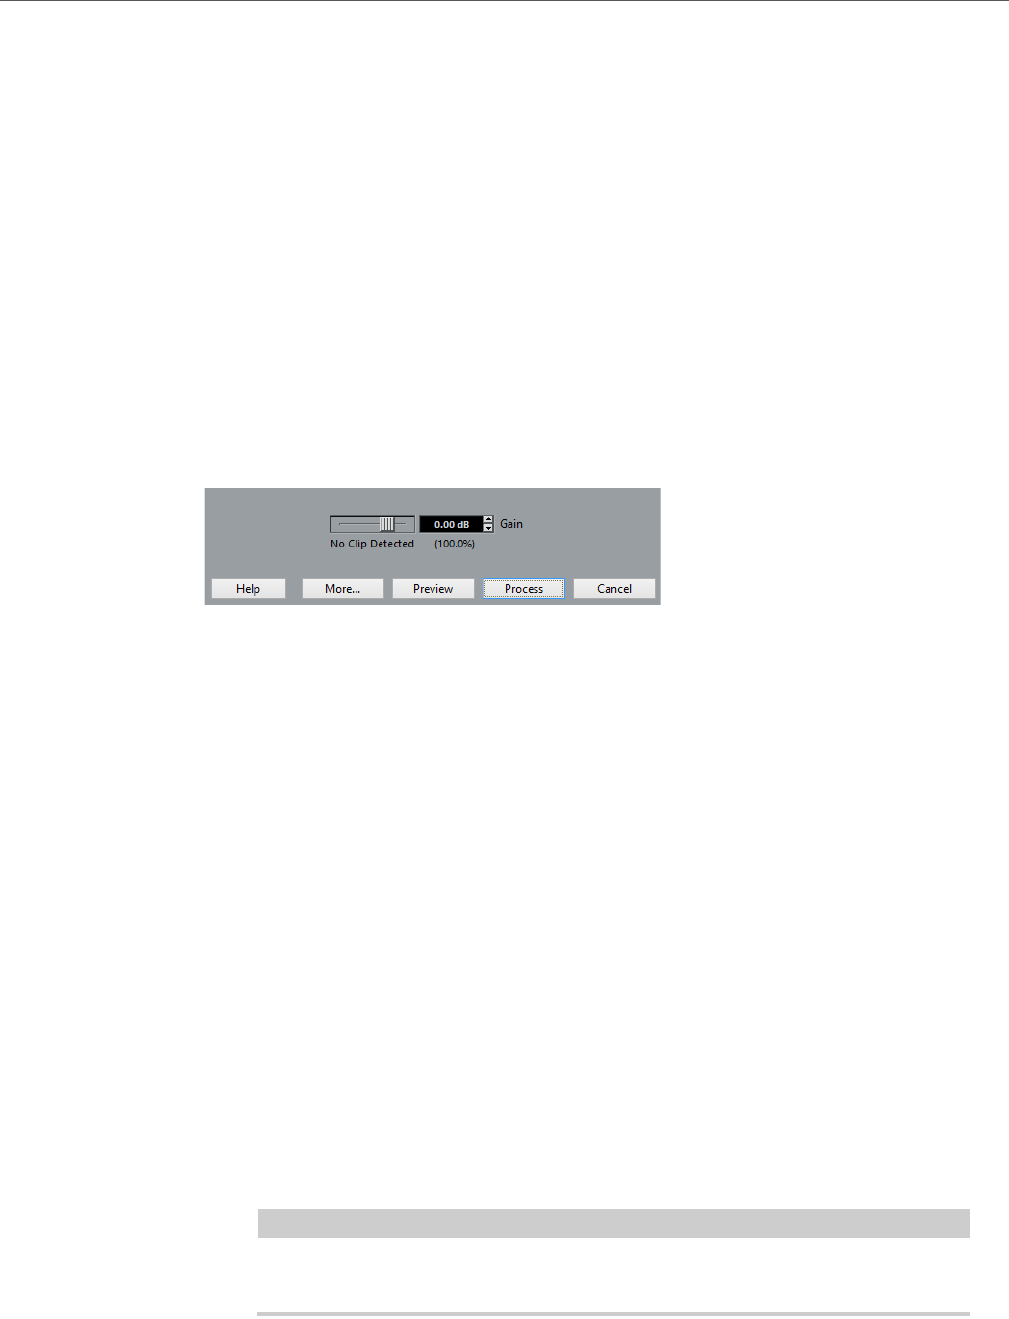
Audio processing and functions
Audio processing
265
• To remove a stored preset, select it from the pop-up menu and click
Remove.
Fade In and Fade Out
For a description of these functions, click on the related link.
RELATED LINKS
Fades and crossfades on page 174
Gain
Allows you to change the gain (level) of the selected audio.
The dialog contains the following settings:
Gain
This is where you set the desired gain, between -50 and +20 dB. The setting
is also indicated below the Gain display as a percentage.
Clipping detection text
If you use the Preview function before applying the processing, the text below
the slider indicates whether the current settings result in clipping (audio levels
above 0 dB). If that is the case, lower the Gain value and use the Preview
function again.
• If you want to increase the level of the audio as much as possible
without causing clipping, use the Normalize function instead.
Pre/Post-Crossfade
Some processing functions allow you to gradually mix the effect in or out. This
is done with the Pre/Post-Crossfade parameters. For example, if you activate
Pre-Crossfade and specify a value of 1000 ms, the processing is applied
gradually from the start of selection, reaching full effect 1000 ms after the
start. Similarly, if you activate Post-Crossfade, the processing is gradually
removed, starting at the specified interval before the end of the selection.
IMPORTANT
The sum of the Pre-Crossfade and Post-Crossfade times cannot be larger
than the length of the selection.
RELATED LINKS
Normalize on page 267
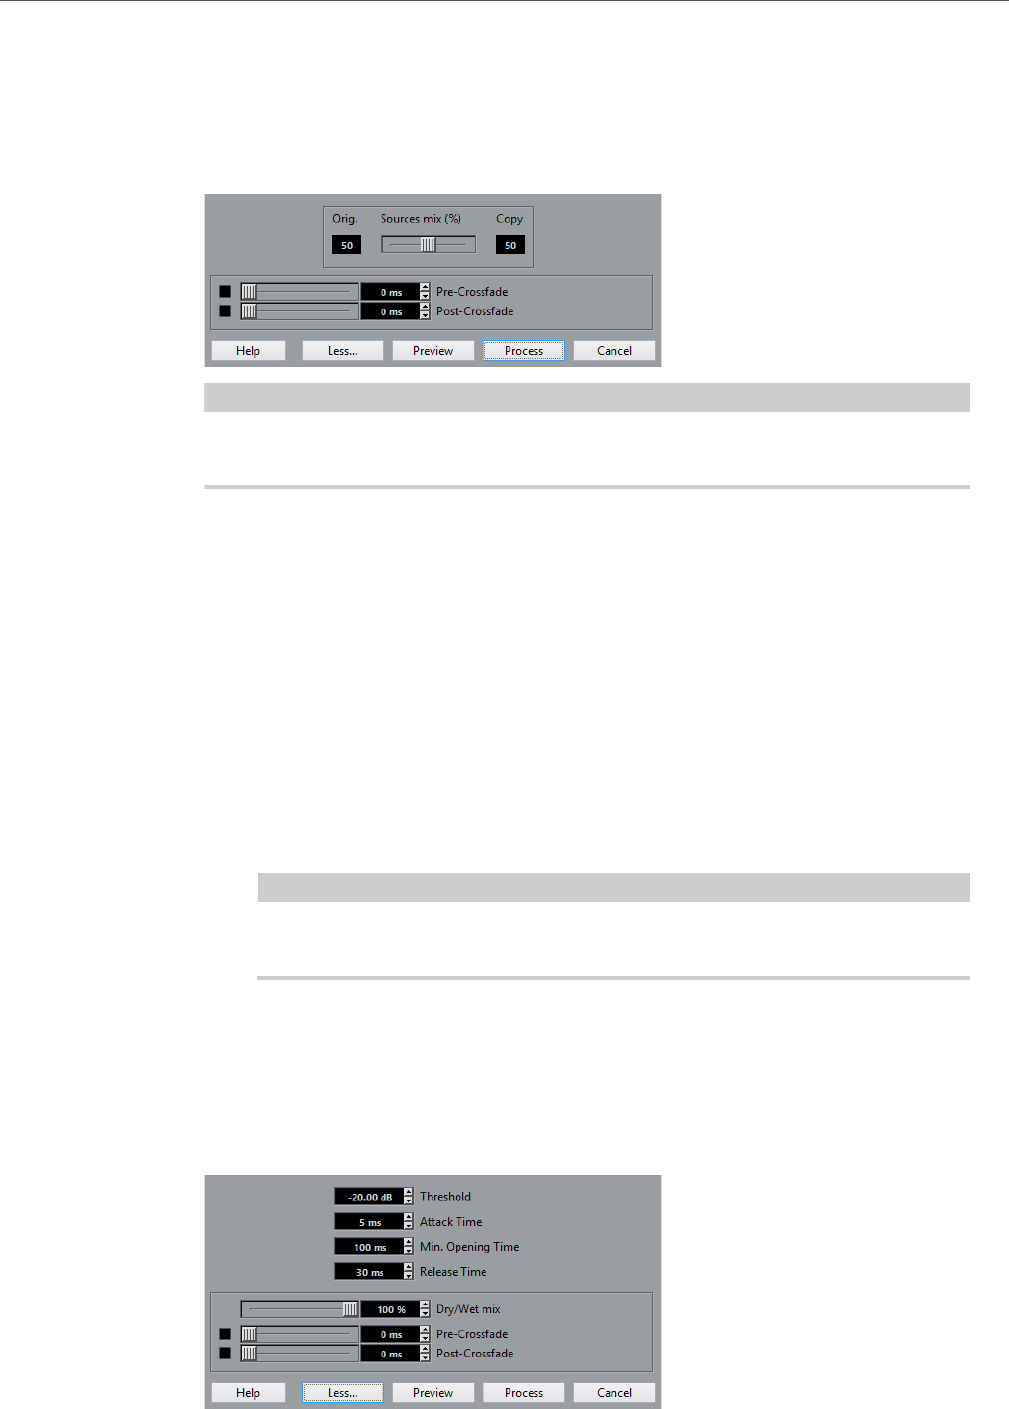
Audio processing and functions
Audio processing
266
Merge Clipboard
This function mixes the audio from the clipboard into the audio selected for
processing, starting at the beginning of the selection.
IMPORTANTIMPORTANTIMPORTANTIMPORTANT
For this function to be available, you need to have cut or copied a range of audio in
the Sample Editor first.
The dialog contains the following settings:
Sources mix
Allows you to specify a mix ratio between the original (the audio selected for
processing) and the copy (the audio on the clipboard).
Pre/Post-Crossfade
Some processing functions allow you to gradually mix the effect in or out. This
is done with the Pre/Post-Crossfade parameters. For example, if you activate
Pre-Crossfade and specify a value of 1000 ms, the processing is applied
gradually from the start of selection, reaching full effect 1000 ms after the
start. Similarly, if you activate Post-Crossfade, the processing is gradually
removed, starting at the specified interval before the end of the selection.
IMPORTANT
The sum of the Pre-Crossfade and Post-Crossfade times cannot be larger
than the length of the selection.
Noise Gate
Scans the audio for sections weaker than a specified threshold level and replaces
them with silence.

Audio processing and functions
Audio processing
267
The dialog contains the following settings:
Threshold
The level below which you want audio to be silenced. Levels below this value
will close the gate.
Attack Time
The time it takes for the gate to open fully after the audio level has exceeded
the threshold level.
Min. Opening Time
This is the shortest time the gate will remain open. If you find that the gate
opens and closes too often when processing material that varies rapidly in
level, try raising this value.
Release Time
The time it takes for the gate to close fully after the audio level has dropped
below the threshold level.
Dry/Wet mix
Allows you to specify a mix ratio between “dry” and processed sound.
Pre/Post-Crossfade
Some processing functions allow you to gradually mix the effect in or out. This
is done with the Pre/Post-Crossfade parameters. For example, if you activate
Pre-Crossfade and specify a value of 1000 ms, the processing is applied
gradually from the start of selection, reaching full effect 1000 ms after the
start. Similarly, if you activate Post-Crossfade, the processing is gradually
removed, starting at the specified interval before the end of the selection.
IMPORTANT
The sum of the Pre-Crossfade and Post-Crossfade times cannot be larger
than the length of the selection.
Normalize
The Normalize function allows you to specify the desired maximum level of the
audio. It then analyzes the selected audio and finds the current maximum level.
Finally it subtracts the current maximum level from the specified level and raises the
gain of the audio by the resulting amount (if the specified maximum level is lower
than the current maximum, the gain will be lowered instead). A common use for
Normalizing is to raise the level of audio that was recorded at too low an input level.
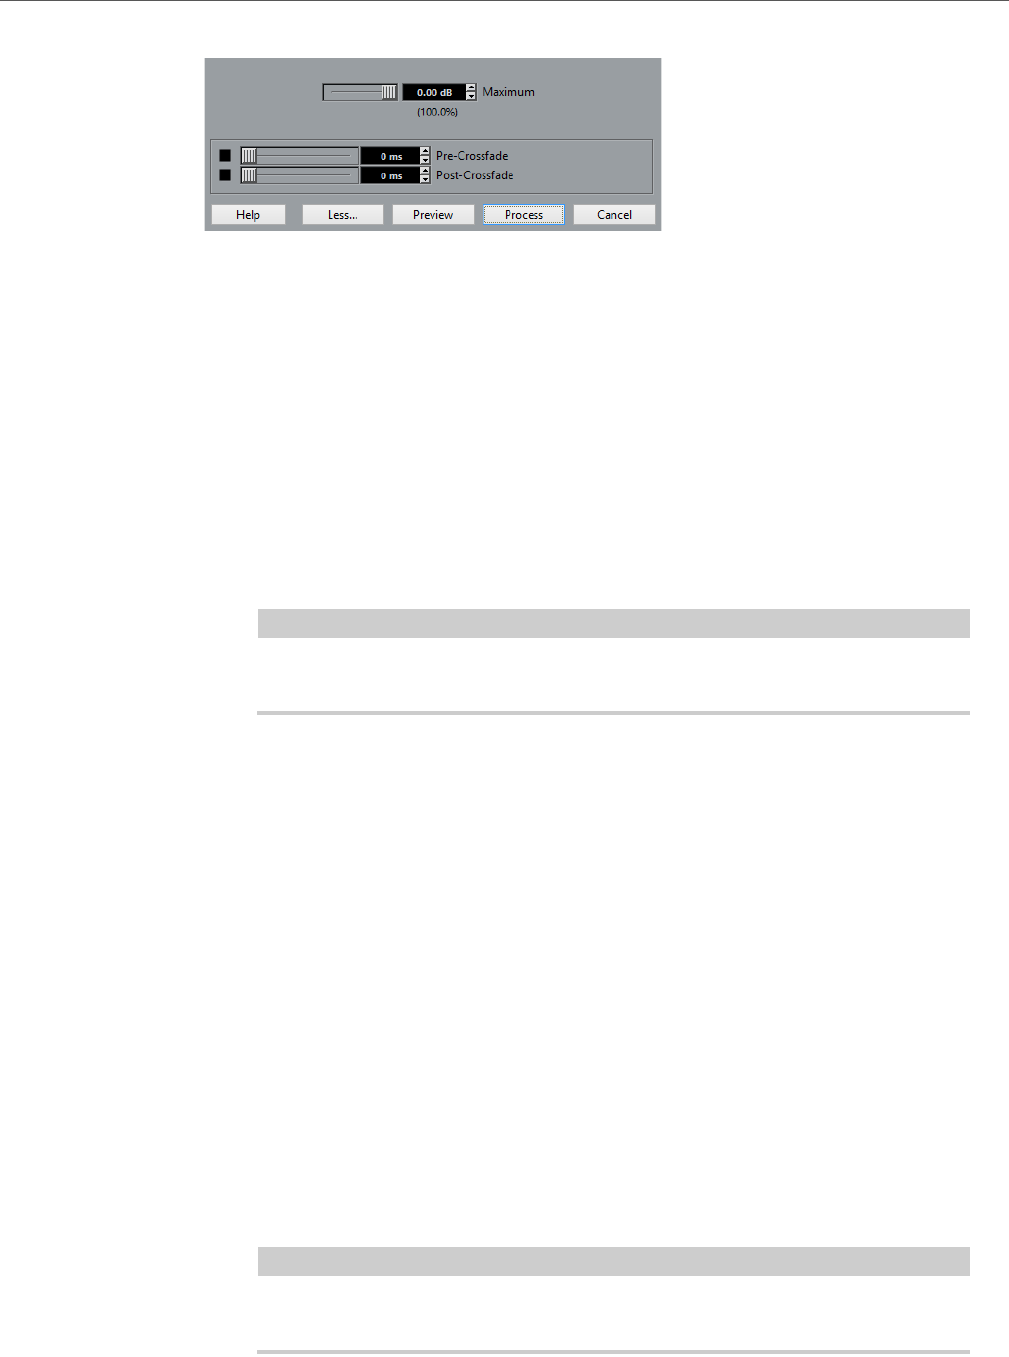
Audio processing and functions
Audio processing
268
The dialog contains the following settings:
Maximum
The desired maximum level for the audio, between -50 and 0 dB. The setting
is also indicated below the Gain display as a percentage.
Pre/Post-Crossfade
Some processing functions allow you to gradually mix the effect in or out. This
is done with the Pre/Post-Crossfade parameters. For example, if you activate
Pre-Crossfade and specify a value of 1000 ms, the processing is applied
gradually from the start of selection, reaching full effect 1000 ms after the
start. Similarly, if you activate Post-Crossfade, the processing is gradually
removed, starting at the specified interval before the end of the selection.
IMPORTANT
The sum of the Pre-Crossfade and Post-Crossfade times cannot be larger
than the length of the selection.
Phase Reverse
Reverses the phase of the selected audio, turning the waveform “upside down”.
The dialog contains the following settings:
Phase Reverse on
When processing stereo audio, this pop-up menu allows you to specify which
channel(s) are phase-reversed.
Pre/Post-Crossfade
Some processing functions allow you to gradually mix the effect in or out. This
is done with the Pre/Post-Crossfade parameters. For example, if you activate
Pre-Crossfade and specify a value of 1000 ms, the processing is applied
gradually from the start of selection, reaching full effect 1000 ms after the
start. Similarly, if you activate Post-Crossfade, the processing is gradually
removed, starting at the specified interval before the end of the selection.
IMPORTANT
The sum of the Pre-Crossfade and Post-Crossfade times cannot be larger
than the length of the selection.
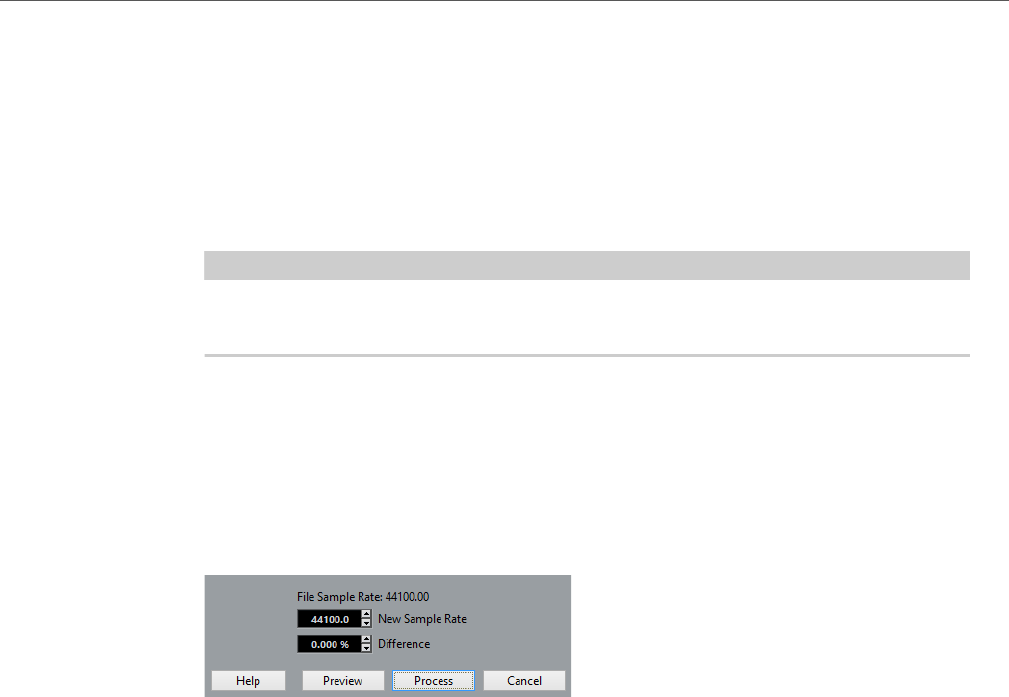
Audio processing and functions
Audio processing
269
Remove DC Offset
This function will remove any DC offset in the audio selection. A DC offset is when
there is too large a DC (direct current) component in the signal, sometimes visible
as the signal not being visually centered around the “zero level axis”. DC offsets do
not affect what you actually hear, but they affect zero crossing detection and certain
processing, and it is recommended that you remove them.
IMPORTANTIMPORTANTIMPORTANT
IMPORTANT
It is recommended that this function is applied to complete audio clips, since the
DC offset (if any) is normally present throughout the entire recording.
Resample
The Resample function can be used for changing the length, tempo and pitch of an
event.
The original sample rate of the event is listed in the dialog. Resample the event to a
higher or lower sample rate by either specifying a sample rate or by specifying the
difference (as a percentage value) between the original sample rate and the desired
new one.
• Resampling to a higher sample rate will make the event longer and cause the
audio to play back at a slower speed with a lower pitch.
• Resampling to a lower sample rate will make the event shorter and cause the
audio to play back at a faster speed with a higher pitch.
• You can audition the result of the resampling by entering the desired value
and clicking “Preview”.
The event will then be played back as it will sound after the resampling.
• When you are satisfied with the preview result, click “Process” to close the
dialog and apply the processing.
Reverse
Reverses the audio selection, as when playing a tape backwards. There are no
parameters for this function.
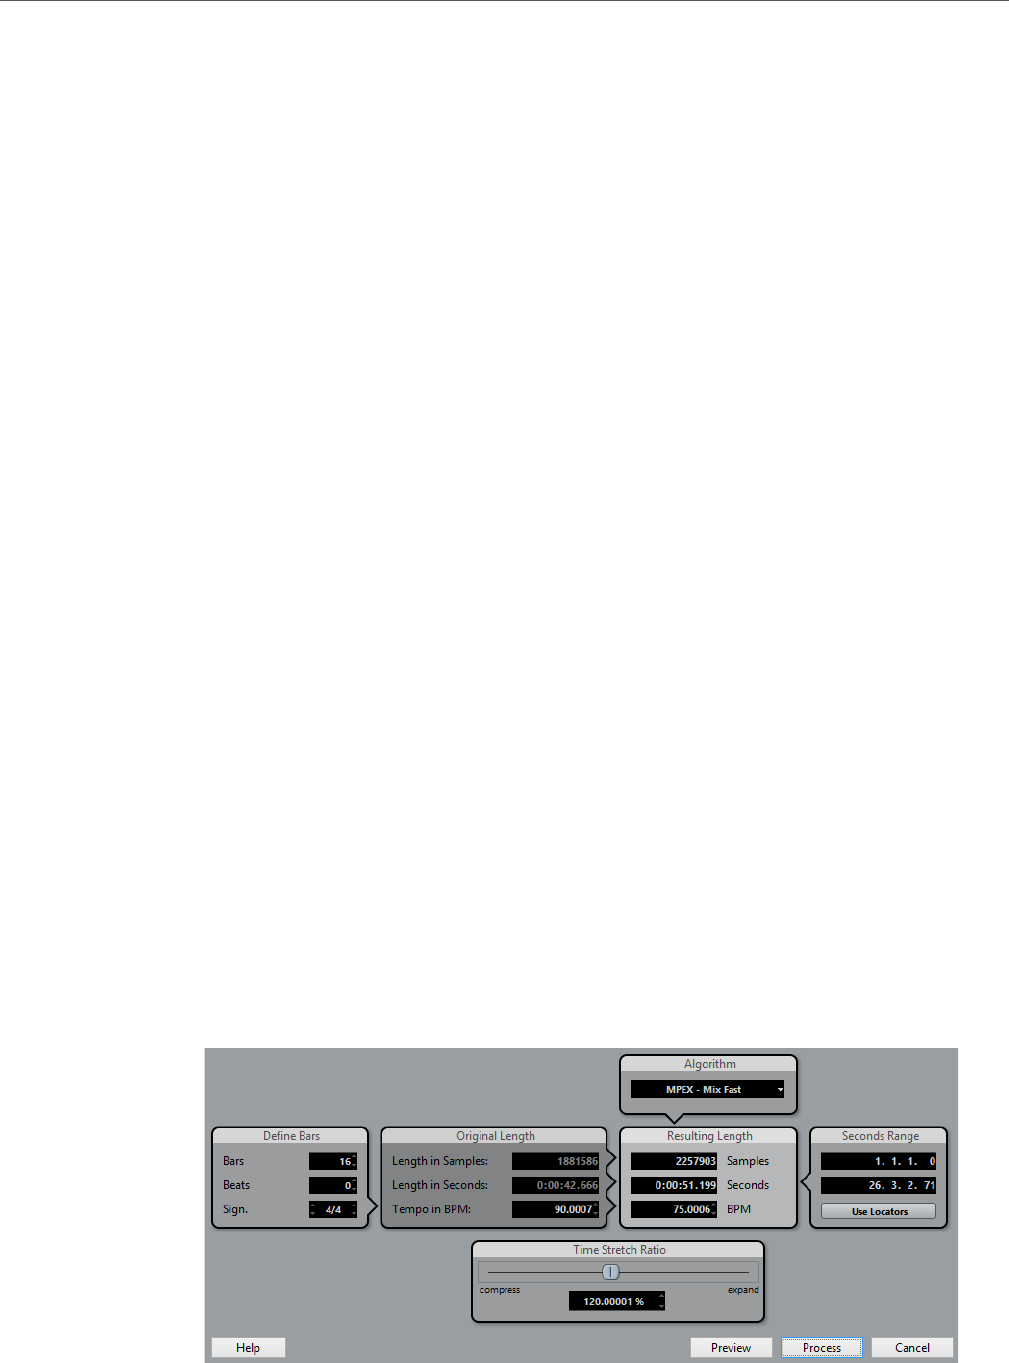
Audio processing and functions
Audio processing
270
Silence
Replaces the selection with silence. There are no parameters for this function.
Stereo Flip
This function works with stereo audio selections only. It allows you to manipulate the
left and right channel in various ways.
The dialog contains the following parameters:
Mode
This pop-up menu determines what the function does:
•Flip Left-Right
Swaps the left and right channel.
•Left to Stereo
Copies the left channel sound to the right channel.
•Right to Stereo
Copies the right channel sound to the left channel.
•Merge
Merges both channels on each side for mono sound.
•Subtract
Subtracts the left channel information from the right. This is typically
used as a “Karaoke effect”, for removing centered mono material from a
stereo signal.
Time Stretch
This function allows you to change the length and “tempo” of the selected audio
without affecting the pitch.

Audio processing and functions
Audio processing
271
The dialog contains the following parameters:
Define Bars section
In this section, you set the length of the selected audio and the time signature:
•Bars
If you use the tempo setting (see below), specify the length of the
selected audio here, in bars.
•Beats
If you use the tempo setting, specify the length of the selected audio
here, in beats.
•Sign.
If you use the tempo setting, specify the time signature here.
Original Length section
This section contains information and settings regarding the audio selected
for processing:
•Length in Samples
The length of the selected audio, in samples.
•Length in Seconds
The length of the selected audio, in seconds.
•Tempo in BPM
If you are processing music, and know the actual tempo of the audio,
you can enter it here as beats per minute. This makes it possible to
time-stretch the audio to another tempo, without having to compute the
actual time stretch amount.
Resulting Length section
These settings are used if you want to stretch the audio to fit within a specific
time span or tempo. The values will change automatically if you adjust the
Time Stretch Ratio (see below).
•Samples
The desired length in samples.
•Seconds
The desired length in seconds.
•BPM
The desired tempo (beats per minute). For this to work, you have to
know the actual tempo of the audio, and specify this (along with time
signature and length in bars) in the Original Length section to the left.
Seconds Range section
These settings allow you to set the desired range for the time stretch.
•Range
Allows you to specify the desired length as a range between two time
positions.
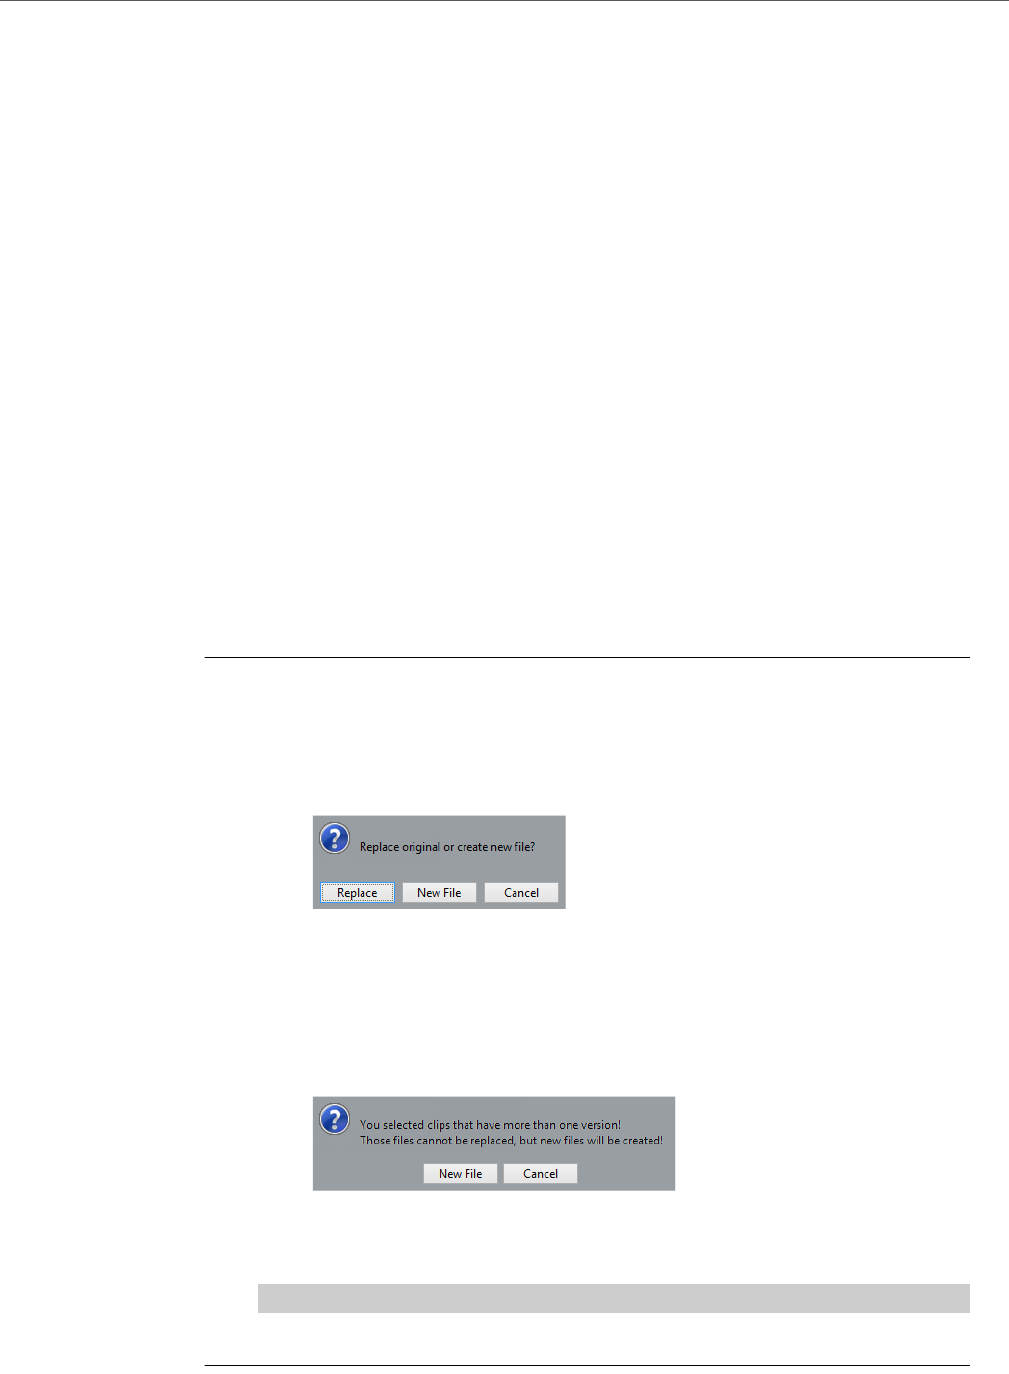
Audio processing and functions
Freeze Edits
272
•Use Locators
Clicking the diamond-shaped button below the Range fields sets the
Range values to the left and right Locator positions, respectively.
Time Stretch Ratio section
The Time Stretch Ratio determines the amount of time stretch as a
percentage of the original length. If you use the settings in the Resulting
Length section to specify the amount of time stretch, this value will change
automatically.
Algorithm section
Here you can choose a preset for the realtime time stretch algorithm.
RELATED LINKS
Time stretch algorithm on page 279
Freeze Edits
The Freeze Edits function on the Audio menu allows you to make all processing and
applied effects permanent for a clip:
PROCEDURE
1. Select the clip in the Pool or one of its events in the Project window.
2. Select “Freeze Edits…” from the Audio menu.
• If there is only one edit version of the clip (no other clips refer to the same audio
file), the following dialog will appear:
If you select “Replace”, all edits will be applied to the original audio file (the one
listed in the clip’s Path column in the Pool). If you select “New File”, the Freeze
Edits operation will create a new file in the Audio folder within the project folder
(leaving the original audio file unaffected).
• If the selected clip (or the clip played by the selected event) has several edit
versions (i. e. there are other clips referring to the same audio file), the following
alert will appear:
As you can see, you do not have the option to Replace the original audio file in
this case. This is because that audio file is used by other clips. Select “New
File” to have a new file created in the Audio folder within the project folder.
NOTE
After a Freeze Edits, the clip refers to a new, single audio file.
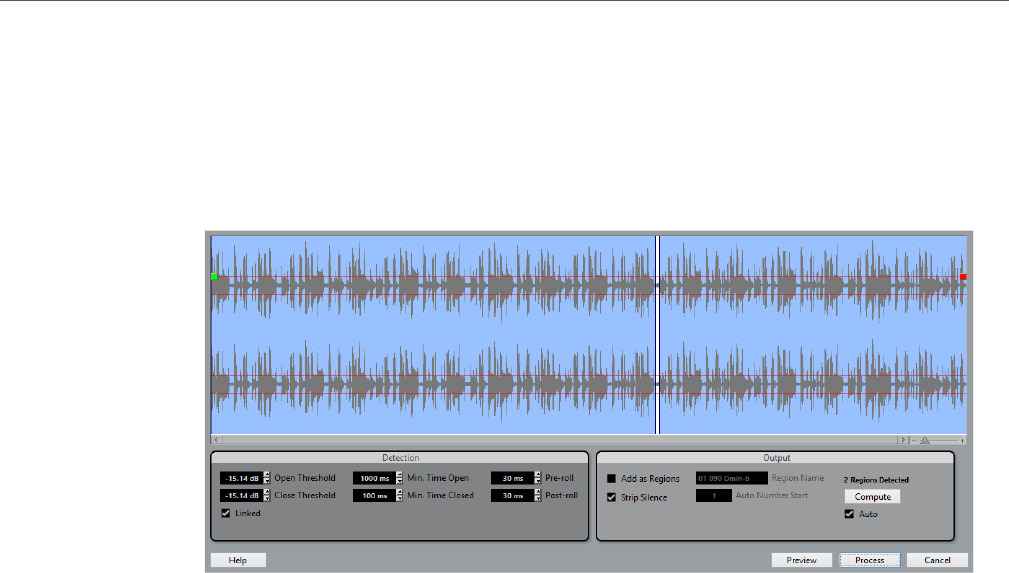
Audio processing and functions
Detect Silence
273
Detect Silence
The Detect Silence function searches for silent sections in an event and either splits
the event, removing the silent parts from the project, or creates regions
corresponding to the non-silent sections.
• To open the Detect Silence dialog, select one or several audio events in the
Project window or the Audio Part Editor. On the Audio menu, open the
Advanced submenu and select “Detect Silence”.
If you select more than one event, the Detect Silence dialog allows you to
process the selected events successively with individual settings or to apply
the same settings to all selected events at once.
The settings have the following functionality:
Open Threshold
When the audio level exceeds this value, the function “opens”, i. e. lets the
sound pass. Audio material below the set level is detected as “silence”. Set
this value low enough to open when a sound starts, but high enough to
remove unwanted noise during “silent” sections.
Close Threshold
When the audio level drops below this value, the function “closes”, i. e. sounds
below this level are detected as “silence”. This value cannot be higher than
the Open Threshold value. Set this value high enough to remove unwanted
noise during “silent” sections.
Linked
If this checkbox is activated, the Open and Close Threshold values are always
set to the same value.
Min. time open
Determines the minimum time that the function will remain “open” after the
audio level has exceeded the Open Threshold value.
If the audio contains repeated short sounds, and you find that this results in
too many short “open” sections, try raising this value.

Audio processing and functions
Detect Silence
274
Min. time closed
Determines the minimum time that the function will remain “closed” after the
audio level has dropped below the Close Threshold value.
Set this to a low value to avoid removing sounds.
Pre-roll
Allows you to cause the function to “open” slightly before the audio level
exceeds the Open Threshold value. In other words, the start of each “open”
section is moved to the left according to the time you set here.
This is useful to avoid removing the attack of sounds.
Post-roll
Allows you to cause the function to “close” slightly after the audio level drops
below the Close Threshold value.
This is useful to avoid removing the natural decay of sounds.
Add as Regions
“Add as Regions” will create regions according to the non-silent sections.
If you activate the “Add as Regions” option, you can specify a name for the
regions in the Region Name field. In addition to the name, the regions will be
numbered, starting with the number specified in the “Auto Number Start” field.
Strip Silence
“Strip Silence” will split the event at the beginning and end of each non-silent
section, and remove the silent sections in between.
Process all selected Events
If you have selected more than one event, you can activate the “Process all
selected Events” checkbox to apply the same settings to all selected events.
Compute
The audio event is analyzed, and the waveform display is redrawn to indicate
which sections are considered “silent” according to your settings. Above the
Compute button, the number of detected regions is displayed.
Auto
If you activate the Auto checkbox next to the Compute button, the audio event
is analyzed (and the display is updated) automatically every time you change
the settings in the Detection section of the dialog. Deactivate this option when
you are working with very long files, as this process might take some time.
Adjustments in the waveform display
The upper part of the dialog displays a waveform image of the selected audio event.
In case you have selected several audio events, the waveform of the event that you
have selected first is shown.

Audio processing and functions
Detect Silence
275
You can make the following adjustments:
• With the zoom slider below the waveform to the right, zoom in and out on the
waveform.
You can also click in the waveform, keep the mouse button pressed, and
move the mouse for zooming. Move the mouse down to zoom in and move it
up to zoom out.
• If you have zoomed in on the waveform, it may not be completely visible
anymore. In this case, the scrollbar to the left of the zoom slider allows you to
scroll through the waveform.
You can also use the mouse wheel for scrolling through the waveform.
• If the Linked option in the Detection section is deactivated, you can use the
green square at the beginning and the red square at the end of the audio file
to graphically adjust the Open and Close Threshold values (respectively).
When “Linked” is activated, you can use either square to adjust both values.
The Open and Close Threshold values in the Detection section reflect these
changes.
Making settings and processing
The lower part of the Detect Silence dialog provides settings for the detection and
processing of “silent” sections.
PROCEDURE
1. Adjust the settings in the Detection section to the left.
2. Click the Compute button.
The audio event is analyzed, and the waveform display is redrawn to indicate which
sections are considered “silent” according to your settings. Above the Compute
button, the number of detected regions is displayed.
3. Click “Preview” to listen to the result.
The event is played back repeatedly in its entire length, but with the “closed” sections
silenced.
4. Adjust the settings in the Detection section until you are satisfied with the
result.
5. In the Output section, activate the “Add as Regions” or the “Strip Silence”
option, or both.
6. Click the Process button.
The event is split and/or regions are added.
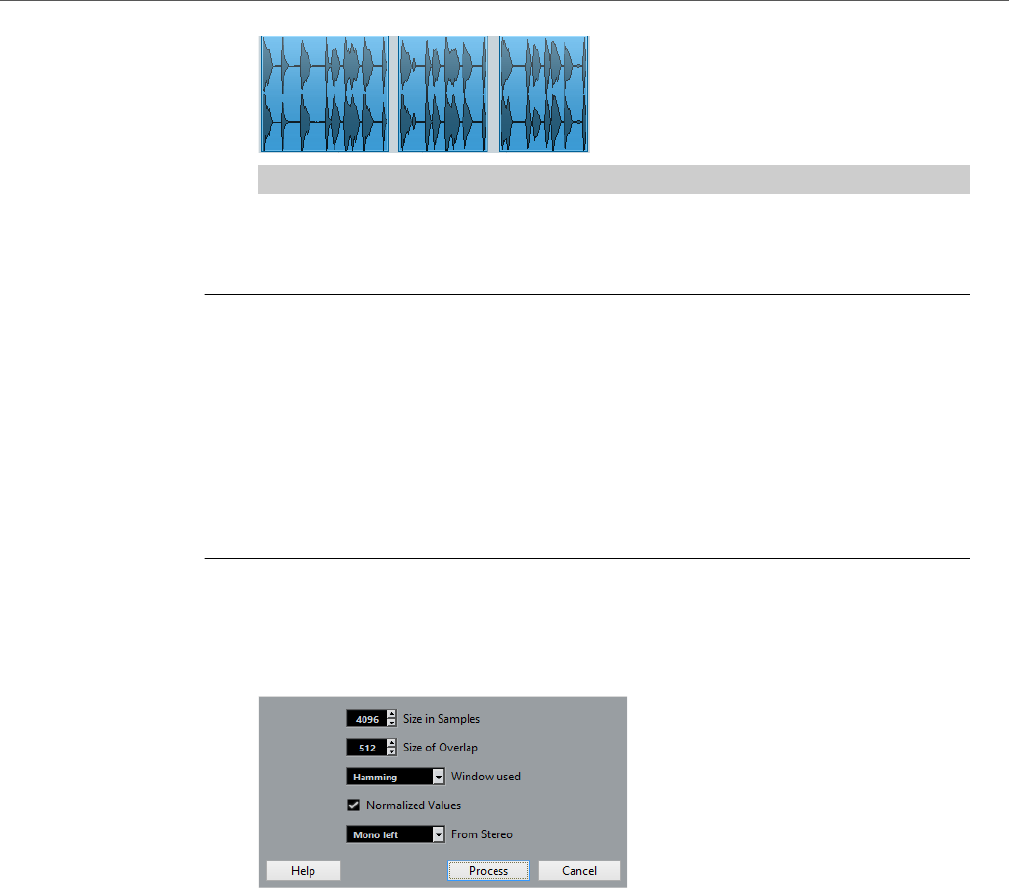
Audio processing and functions
The Spectrum Analyzer
276
NOTE
If you have selected more than one event and did not activate the “Process all
selected Events” option in the Output section, the dialog opens again after
processing, allowing you to make separate settings for the next event.
The Spectrum Analyzer
This function analyzes the selected audio, computes the average “spectrum” (level
distribution over the frequency range) and displays this as a two-dimensional graph,
with frequency on the x-axis and level on the y-axis.
PROCEDURE
1. Make an audio selection (a clip, an event or a range selection).
2. Select “Spectrum Analyzer” from the Audio menu.
A dialog with settings for the analysis appears.
The default values give good results in most situations, but you can adjust the settings
if you like:
•Size in Samples
The function divides the audio into “analysis blocks”, the size of which is set
here. The larger this value, the higher the frequency resolution of the resulting
spectrum.
•Size of Overlap
The overlap between each analysis block.
•Window used
Allows you to select which window type is used for the FFT (Fast Fourier
Transform, the mathematical method used for computing the spectrum).
•Normalized Values
When this is activated, the resulting level values are scaled, so that the highest
level is displayed as “1” (0 dB).
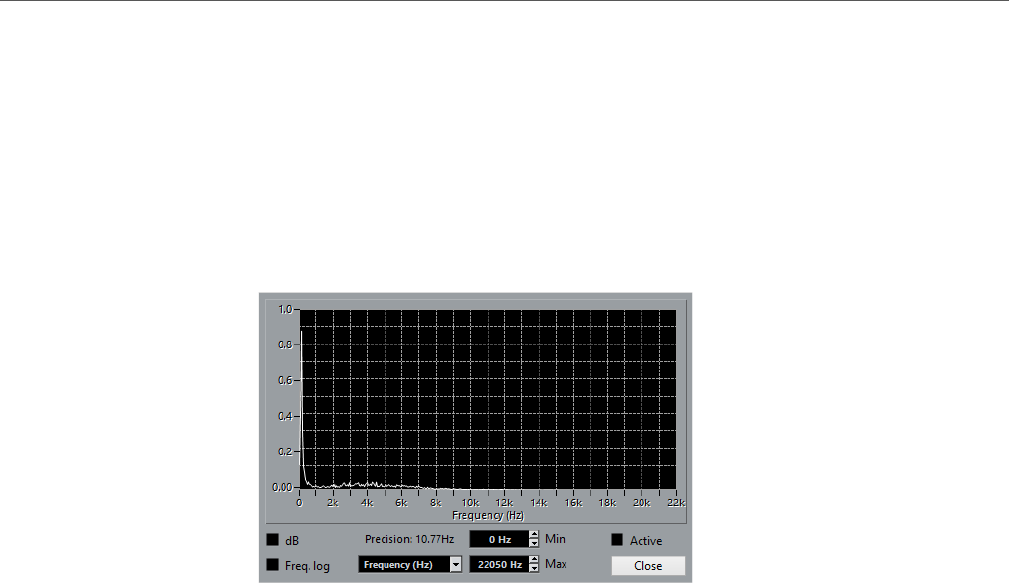
Audio processing and functions
The Spectrum Analyzer
277
•From Stereo
When analyzing stereo material, there is a pop-up menu with the following
options:
Mono mix – the stereo signal is mixed to mono before analyzing.
Mono left/right – the left or right channel signal is used for analysis.
Stereo – both channels are analyzed (two separate spectrums will be
displayed).
3. Click the Process button.
The spectrum is computed and displayed as a graph.
4. You can adjust the display with the settings in the display window:
•dB
When this is activated, the vertical axis shows dB values. When it is
deactivated, values between 0 and 1 are shown.
•Freq. log
When this is activated, frequencies (on the horizontal axis) are displayed on a
logarithmic scale. When it is deactivated, the frequency axis is linear.
•Precision
Indicates the frequency resolution of the graph. This value cannot be changed
here, but is governed by the Size in Samples setting in the previous dialog.
•Frequency/Note
Allows you to select whether you want the frequencies to be displayed in Hertz
or with note names.
•Min.
Sets the lowest frequency shown in the graph.
•Max.
Sets the highest frequency shown in the graph. By adjusting the Min and Max
values, you can take a closer look at a smaller frequency range.
•Active
When this is activated, the next Spectrum Analysis will appear in the same
window. When deactivated, new Spectrum Analysis results will appear in
separate windows.
5. If you move the mouse pointer over the graph, a cross-hair cursor follows the
graph curve and the display in the upper right corner shows the
frequency/note and level at the current position.
To compare the level between two frequencies, move the pointer to one of the
frequencies, right-click once and move the pointer to the second frequency. The delta
value (the difference in level between the current position and the right-click position)
is displayed in the upper right corner (labeled “D”).
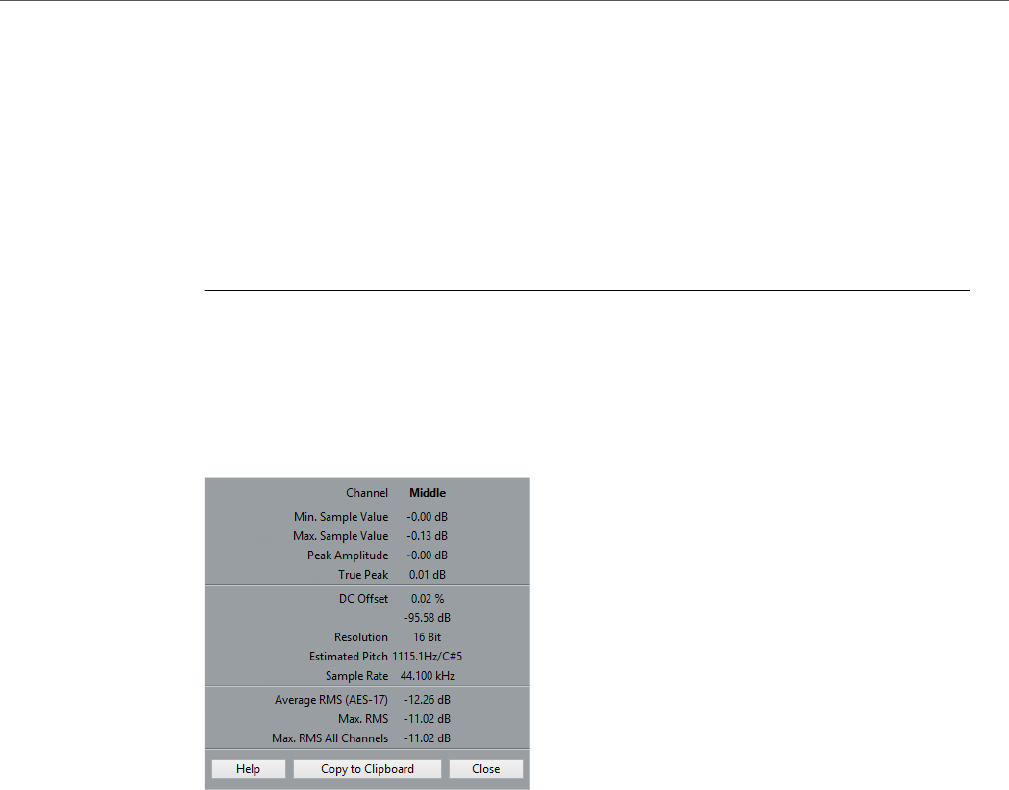
Audio processing and functions
Statistics
278
• If you analyze stereo audio and selected the “Stereo” option in the first dialog,
the graphs for the left and right channel are superimposed in the display, with
the left channel graph in white and the right channel graph in yellow.
The display in the upper right corner shows the values for the left channel – to
see the right channel values, hold down [Shift]. An “L” or “R” is displayed to
indicate which channel values are shown.
6. You can leave the window open or close it by clicking the “Close” button.
If you leave it open and the “Active” checkbox is ticked, the result of the next
Spectrum Analysis will be displayed in the same window.
Statistics
The Statistics function on the Audio menu analyzes the selected audio (events,
clips, or range selections) and displays a window with the following information:
Channel
The name of the analyzed channel.
Min. Sample Value
The lowest sample value in dB.
Max. Sample Value
The highest sample value in dB.
Peak Amplitude
The largest amplitude in dB.
True Peak
The maximum absolute level of the audio signal waveform in the continuous
time domain.
DC Offset
The amount of DC Offset as a percentage and in dB.

Audio processing and functions
Time stretch algorithm
279
Resolution
The current calculated audio resolution.
Estimated Pitch
The estimated pitch.
Sample Rate
The sample rate.
Average RMS (AES-17)
The average loudness in accordance with the AES-17 standard.
Max. RMS
The highest RMS value.
Max. RMS All Channels
The highest RMS value of all channels.
RELATED LINKS
Remove DC Offset on page 269
Time stretch algorithm
Standard
The Standard algorithm is optimized for CPU efficient realtime processing.
The following presets are available:
Standard – Drums
This mode is best for percussive sounds, because it does not change the
timing of your audio. Using this option with certain tuned percussion
instruments may lead to audible artifacts. In this case, try the Mix mode as an
alternative.
Standard – Plucked
Use this mode for audio with transients and a relatively stable spectral sound
character (e. g. plucked instruments).
Standard – Pads
Use this mode for pitched audio with slower rhythm and a stable spectral
sound character. This minimizes sound artifacts, but the rhythmic accuracy is
not preserved.
Standard – Vocals
This mode is suitable for slower signals with transients and a prominent tonal
character (e. g. vocals).

Audio processing and functions
Time stretch algorithm
280
Standard – Mix
This mode preserves the rhythm and minimizes the artifacts for pitched
material that does not meet the above criteria (i. e. with a less homogenous
sound character).
This preset is selected by default for audio that is not categorized.
Standard – Custom
This preset allows you to manually tweak the time stretching parameters (see
below). By default, the settings that are shown when you open the dialog are
those of the last preset used (except if the Solo preset has been selected, see
below).
Standard – Solo
This mode preserves the timbre of the audio. Only use it for monophonic
material (solo woodwind/brass instruments or solo vocals, monophonic
synths or string instruments that do not play harmonies).
If you select the “Standard – Custom” option, a dialog opens where you can
manually adjust the three parameters that govern the sound quality of the time
stretching:
Grain size
The standard time-stretching algorithm splits the audio into small pieces
called “grains”. This parameter determines the size of the grains. For material
with many transients, use low grain size values for best results.
Overlap
Overlap is the percentage of the whole grain that will overlap with other
grains. Use higher values for material with a stable sound character.
Variance
Variance is also a percentage of the whole length of the grains, and sets a
variation in positioning so that the overlapping area sounds smooth. A
Variance setting of 0 will produce a sound akin to time stretching used in early
samplers, whereas higher settings produce more (rhythmic) “smearing”
effects but less audio artifacts.
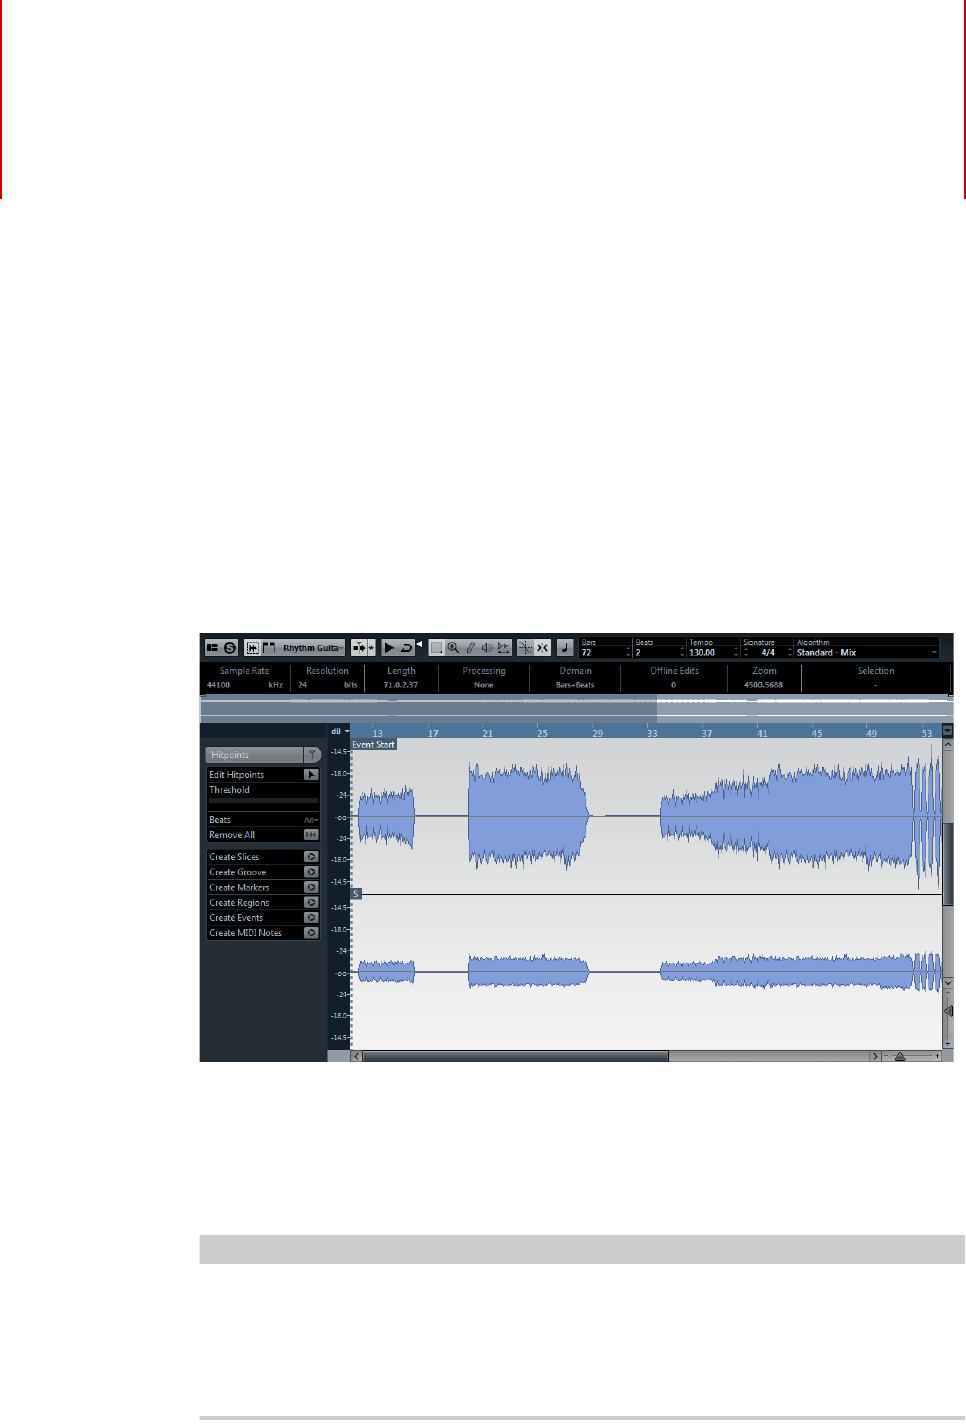
281
Sample Editor
Window overview
The Sample Editor allows you to view and manipulate audio by cutting and pasting,
removing, or drawing audio data, and by processing audio. This editing is
“non-destructive”: The actual file will remain untouched so that you can undo
modifications or revert to the original settings at any time.
The Sample Editor also contains most of the realtime time stretching functions in
Cubase. These can be used to match the tempo of audio to the project tempo.
Another special feature of the Sample Editor is hitpoint detection. Hitpoints allow
you to create audio slices, which can be useful in many situations, for example, if
you want to change the tempo without introducing artifacts.
NOTE
The term “loop” is used throughout this chapter and in this context usually means
an audio file with a musical time base. That means that the length of the loop
represents a certain number of bars and beats at a certain tempo. Playing the loop
back at the right tempo in a cycle set to the correct length will produce a continuous
loop without gaps.
RELATED LINKS
Audio processing and functions on page 262
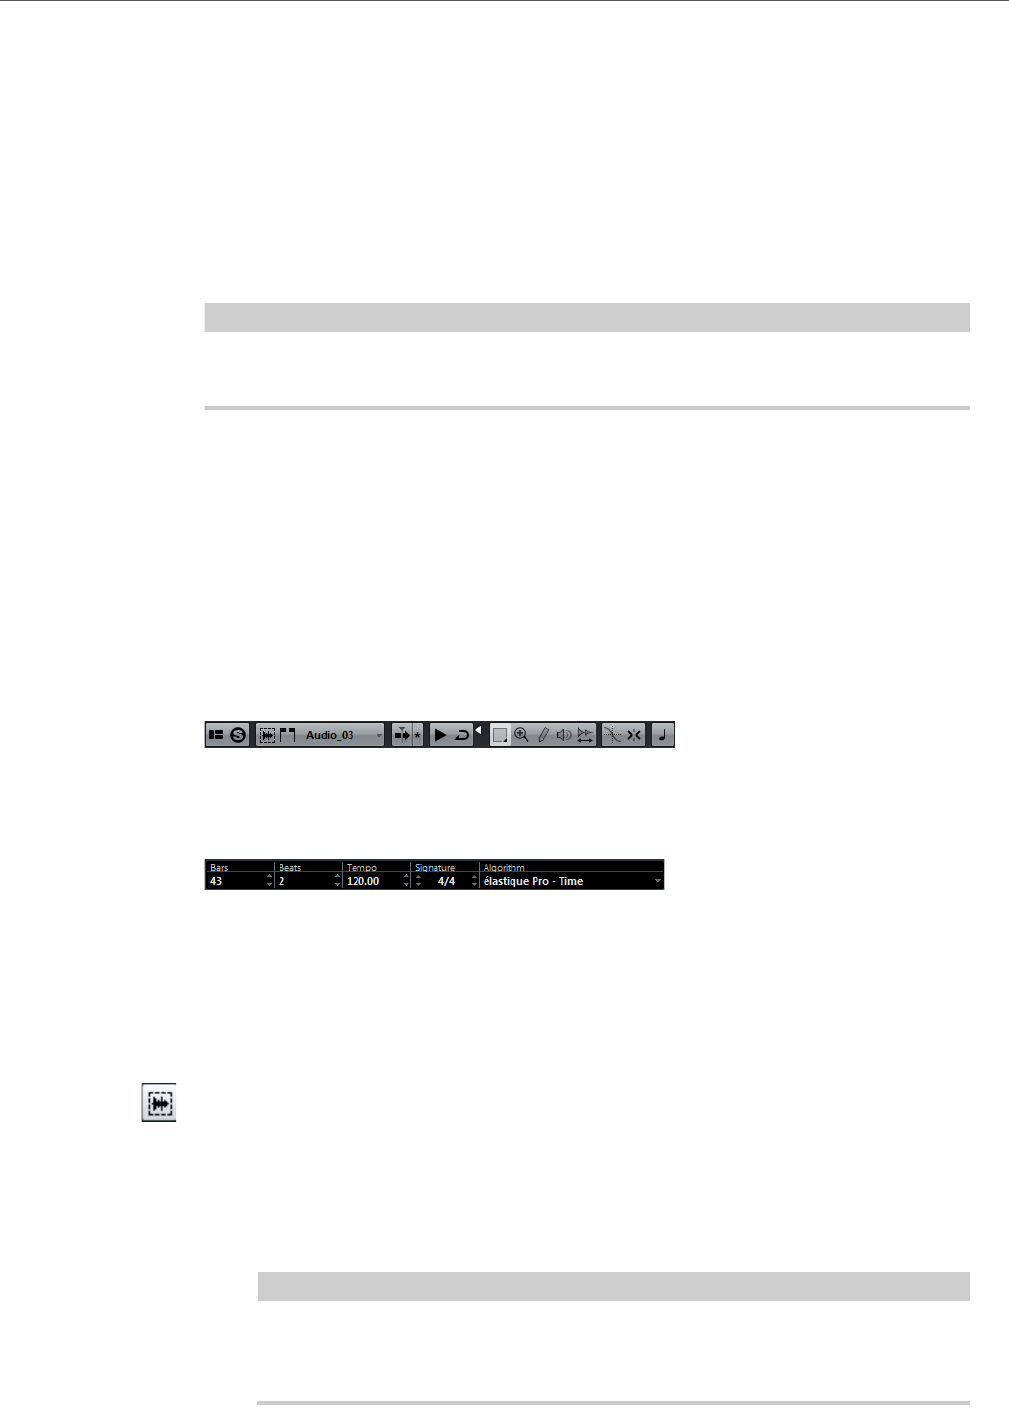
Sample Editor
Window overview
282
Warping audio on page 297
Working with hitpoints and slices on page 297
Opening the Sample Editor
To open the Sample Editor, double-click an audio event in the Project window or
the Audio Part Editor, or double-click an audio clip in the Pool. You can have more
than one Sample Editor window open at the same time.
NOTE
Double-clicking an audio part in the Project window opens the Audio Part Editor,
even if the part contains a single audio event only.
RELATED LINKS
Audio Part Editor on page 306
The toolbar
The toolbar contains various tools for selecting, manipulating and playing back
audio, as well as options that affect the appearance and behavior of the Sample
Editor.
In the Musical Information section at the right of the toolbar, the estimated length of
your audio file is displayed in bars and beats (PPQ) together with the estimated
tempo and the time signature. These values are important for using Musical Mode.
The Algorithm pop-up menu allows you to select an algorithm for the realtime time
stretching.
• You can customize the toolbar by right-clicking it and using the context menu
to hide or show items.
Show Audio Event
When the “Show Audio Event” button is activated on the toolbar, the section
corresponding to the edited event is highlighted in the waveform display and
the Overview. The sections of the audio clip not belonging to the event are
shown with a gray background.
• You can adjust the start and end of the event in the clip by dragging the
event handles in the waveform display.
IMPORTANT
This button is only available if you have opened the Sample Editor by
double-clicking an audio event in the Project window or the Audio Part Editor.
It is not available if you have opened the audio event from the Pool.
Sample Editor
Window overview
283
Snap
The Snap function helps you to find exact positions when editing in the
Sample Editor by restricting horizontal movement and positioning to certain
grid positions. You turn Snap on or off by clicking the Snap button in the
Sample Editor toolbar.
NOTE
The Sample Editor Snap function is independent of the Snap setting in the
Project window toolbar or other editors. It has no effect outside the Sample
Editor.
Snap to Zero Crossing
When this option is activated, editing is done at zero crossings (positions in
the audio where the amplitude is zero). This helps you to avoid pops and
clicks, which might otherwise be caused by sudden amplitude changes.
NOTE
The Sample Editor function “Snap to Zero Crossing” is independent of the
same setting in the Project window toolbar or other editors. It has no effect
outside the Sample Editor.
Auto-Scroll
When the Auto-Scroll option is activated on the Sample Editor toolbar, the
waveform display will scroll during playback, keeping the project cursor visible
in the editor.
NOTE
This setting is independent of the Auto-Scroll setting in the Project window
toolbar or other editors.
RELATED LINKS
Musical Mode on page 296
Selecting an algorithm for realtime playback on page 296
Chord Functions on page 505
Using the Setup options on page 627
The info line
The info line is displayed below the toolbar. It shows information about the audio
clip, such as the audio format and the selection range.
Initially, length and position values are displayed in the format specified in the
Project Setup dialog.
• To show or hide the info line, click the “Set up Window Layout” button on the
toolbar and activate or deactivate the Info Line option.
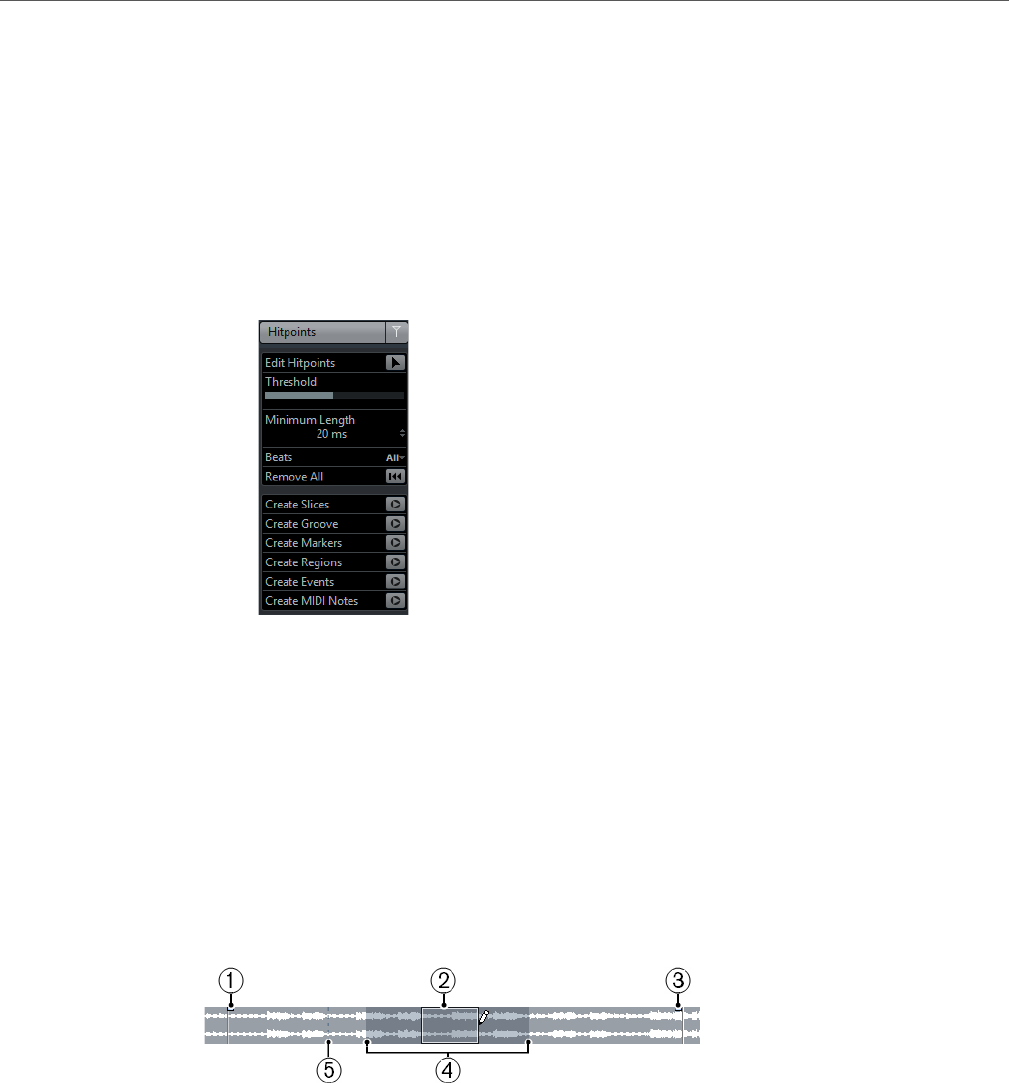
Sample Editor
Window overview
284
RELATED LINKS
Using the Setup options on page 627
The Sample Editor Inspector
On the left in the Sample Editor, you will find the Sample Editor Inspector. It
contains tools and functions for working in the Sample Editor.
The Hitpoints tab
On this tab, hitpoints can be marked and edited. Hitpoints allow you to slice
your audio and to create groove quantize maps from your audio. You can also
create markers, regions, and events based on hitpoints.
RELATED LINKS
Working with hitpoints and slices on page 297
The overview line
The overview line displays the whole clip.
1) Event Start
2) Selection
3) Event End
4) Viewing area
5) Snap Point
The section currently shown in the main waveform display of the Sample Editor (the
viewing area) is indicated by a rectangle in the overview line, and the current
selection range is also shown. If the “Show Audio Event” button is activated on the
toolbar, event start/end and snap point are shown in the overview line.
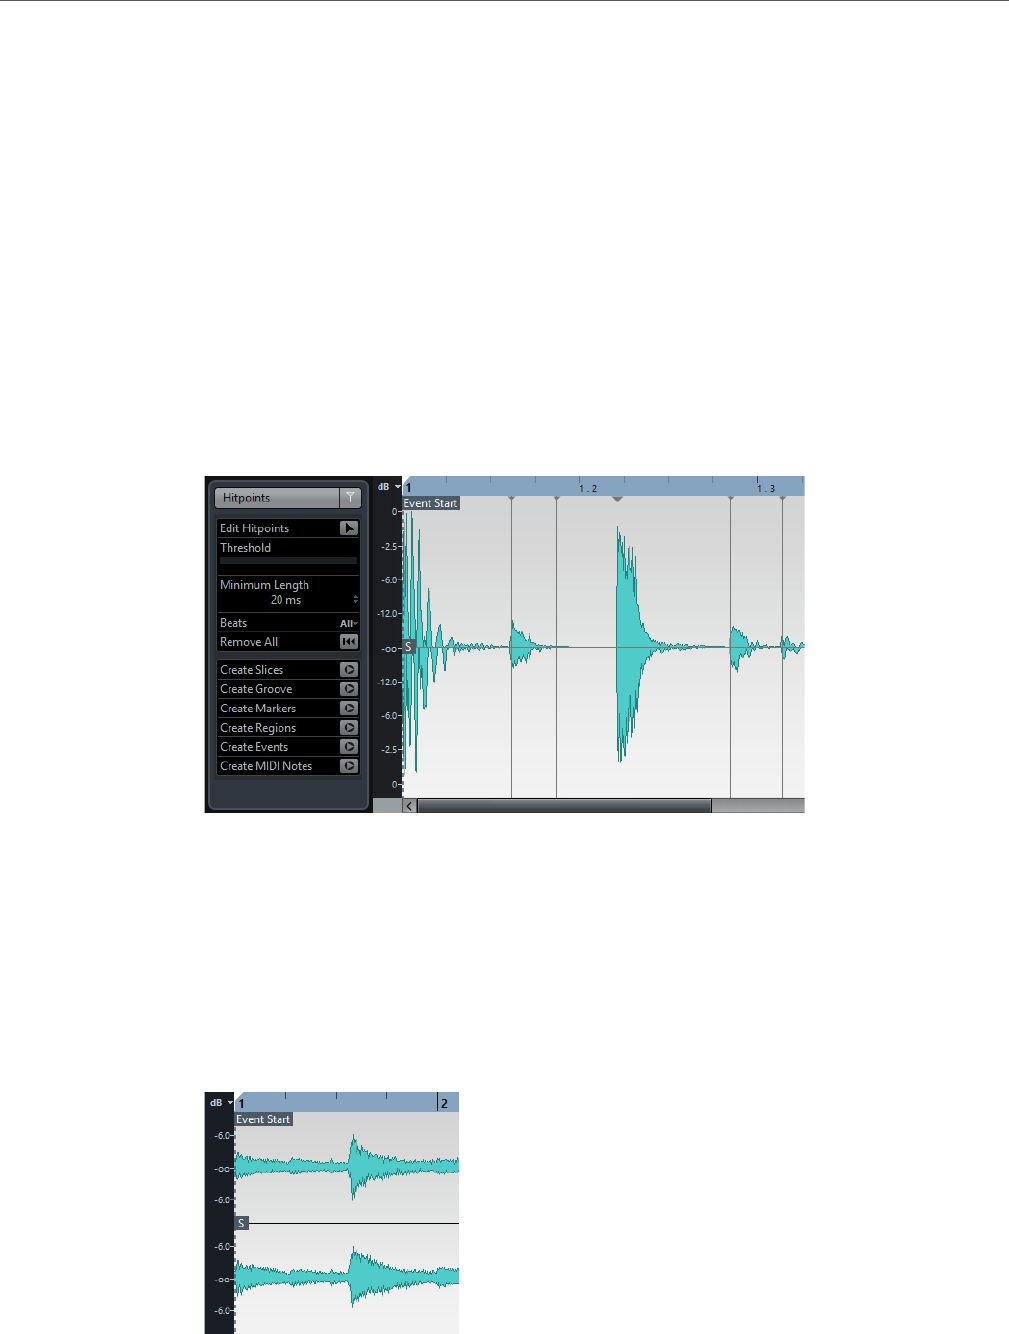
Sample Editor
Window overview
285
• To view other sections of the clip, move the viewing area in the overview line.
Click in the lower half of the viewing area and drag to the left or right to move
it.
• To zoom in or out, horizontally, resize the viewing area by dragging its left or
right edge.
• To define a new viewing area, click in the upper half of the Overview and drag
a rectangle.
The ruler
The Sample Editor ruler is located between the overview line and the waveform
display.
RELATED LINKS
Ruler on page 29
The waveform display and the level scale
The waveform display shows the waveform image of the edited audio clip according
to the wave image style set in the Preferences dialog (Event Display–Audio page).
To the left of the waveform display a level scale is shown, indicating the amplitude
of the audio.
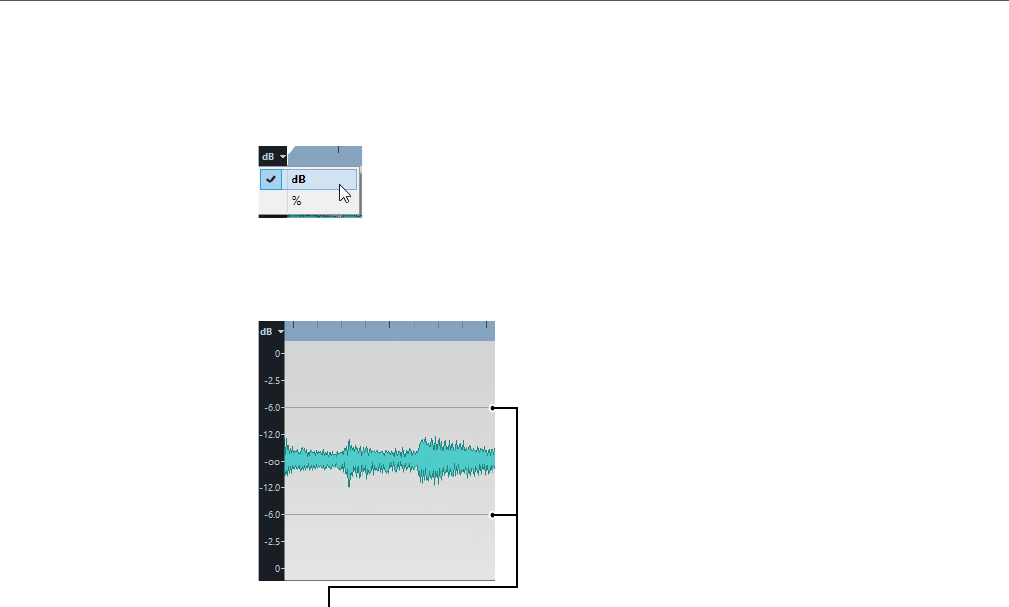
Sample Editor
General Functions
286
• You can select whether the level is shown as a percentage or in dB.
This is done by opening the level scale pop-up menu at the top of the level
scale and selecting an option.
• Cubase Elements only: Select the “Show Half Level Axis” option on the
context menu of the waveform display, if you want the half level axes to be
shown.
Half-level axis
RELATED LINKS
Event Display on page 656
General Functions
Zooming
Zooming in the Sample Editor is done according to the standard zoom procedures,
with the following special notes to keep in mind:
• The vertical zoom slider changes the vertical scale relative to the height of the
editor window, in a way similar to the waveform zooming in the Project
window.
• The vertical zoom will also be affected if the “Zoom Tool Standard Mode:
Horizontal Zooming Only” preference (Editing–Tools page) is deactivated
and you drag a rectangle with the Zoom tool.
The following options relevant to the Sample Editor are available on the Zoom
submenu of the Edit menu or the context menu:
Zoom In
Zooms in one step, centering on the position cursor.

Sample Editor
General Functions
287
Zoom Out
Zooms out one step, centering on the position cursor.
Zoom Full
Zooms out so that the whole clip is visible in the editor.
Zoom to Selection
Zooms in so that the current selection fills the editor display.
Zoom to Selection (Horiz.)
Zooms in horizontally so that the current selection fills the editor display.
Zoom to Event
Zooms in so that the editor shows the section of the clip corresponding to the
edited audio event. This is not available if you have opened the Sample Editor
from the Pool (in which case the whole clip is opened for editing, not an
event).
Zoom In/Out Vertically
This is the same as using the vertical zoom slider (see above).
Undo/Redo Zoom
These options allow you to undo/redo the last zoom operation.
• The current zoom setting is shown in the info line, as a “samples per screen
pixel” value.
NOTE
You can zoom in horizontally to a scale of less than one sample per pixel! This
is required for drawing with the Draw tool.
• If you have zoomed in to one sample per pixel or less, the appearance of the
samples depends on the “Interpolate Audio Images” option in the Preferences
dialog (Event Display–Audio page).
If the option is deactivated, single sample values are drawn as “steps”. If the
option is activated, they are interpolated to a “curve” form.
RELATED LINKS
Drawing in the Sample Editor on page 290
Zooming in the Project Window on page 35
Auditioning
While you can use the regular play commands to play back audio when the Sample
Editor is open, it is often useful to listen to the edited material only.
Clicking the Audition icon on the toolbar plays back the edited audio, according to
the following rules:
• If you have made a selection, this selection will be played back.

Sample Editor
General Functions
288
• If there is no selection and “Show Event” is deactivated, playback will start at
the cursor position.
• If the Audition Loop icon is activated, playback will continue repeatedly until
you deactivate the Audition Loop icon. Otherwise, the section will be played
back once.
NOTE
There is a separate Play button for auditioning regions.
Using the Speaker tool
If you click somewhere in the waveform display with the Speaker (“Play”) tool
and keep the mouse button pressed, the clip is played back from the position
where you click. Playback will continue until you release the mouse button.
Using key commands
If you activate the “Playback Toggle triggers Local Preview” option in the
Preferences dialog (Transport page), you can start/stop auditioning by
pressing [Space]. This is the same as clicking the Audition icon on the toolbar.
The Sample Editor also supports the “Preview start” and “Preview stop” key
commands in the Media category of the Key Commands dialog. These key
commands stop the current playback, whether you are in normal playback or
in audition mode.
RELATED LINKS
Auditioning regions on page 294
Scrubbing
The Scrub tool allows you to locate positions in the audio by playing back, forwards,
or backwards, at any speed:
PROCEDURE
1. Select the Scrub tool.
2. Click in the waveform display and keep the mouse button pressed.
The project cursor is moved to the position where you clicked.
3. Drag to the left or right.
The audio is played back. The speed and pitch of the playback depend on how fast
you drag.
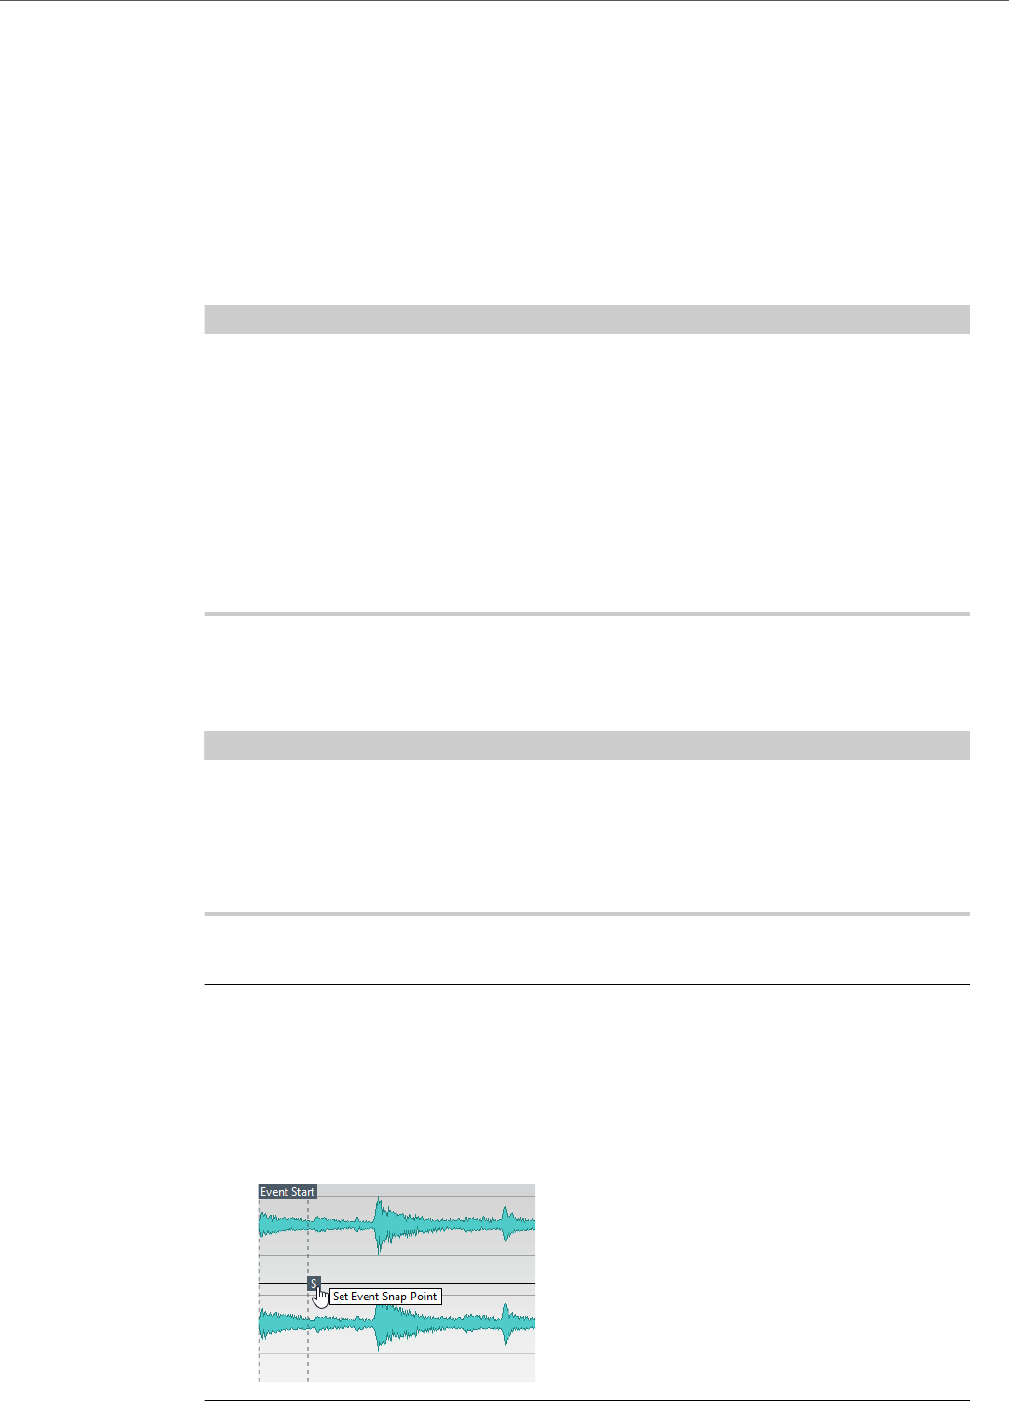
Sample Editor
General Functions
289
Adjusting the snap point
The snap point is a marker within an audio event. It is used as a reference position
when you move events with snap activated, so that the snap point is “magnetic” to
whatever snap positions you have selected.
By default, the snap point is set at the beginning of the audio event, but often it is
useful to move the snap point to a “relevant” position in the event, such as a
downbeat.
NOTE
• If you adjust the snap point with the Scrub tool, the audio is played back.
• Cubase Elements only: You can also adjust the snap point by setting the
project cursor at the desired position and selecting “Snap Point To Cursor”
on the Audio menu.
The snap point will be set to the position of the cursor. This method can also
be used in the Project window and the Audio Part Editor.
• It is also possible to define a snap point for a clip (for which there is no event
yet).
To open a clip in the Sample Editor, double-click it in the Pool. After having set the
snap point, you can insert the clip into the project from the Pool or the Sample Editor
with the set snap point position.
IMPORTANTIMPORTANTIMPORTANTIMPORTANT
Events and clips can have different snap points. If you open a clip from the Pool, you
can edit the clip snap point. If you open a clip from within the project window, you
can edit the event snap point. The clip snap point serves as a template for the event
snap point. However, it is the event snap point that is taken into account when
snapping.
To adjust the snap point, proceed as follows:
PROCEDURE
1. Activate the “Show Audio Event” option on the toolbar, so that the event is
displayed in the editor.
2. If needed, scroll until the event is visible, and locate the “S” flag in the event.
If you have not adjusted this previously, it is located at the beginning of the event.
3. Click on the “S” flag and drag it to the desired position.
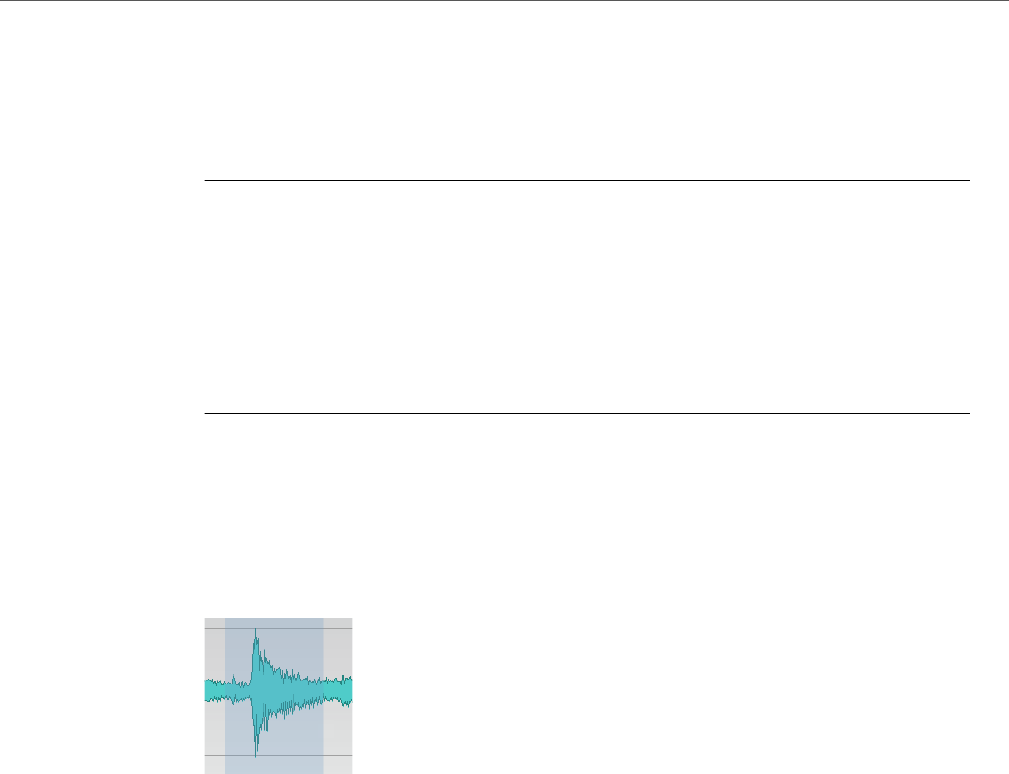
Sample Editor
General Functions
290
Drawing in the Sample Editor
It is possible to edit the audio clip at sample level by drawing with the Draw tool.
This can be useful if you need to manually edit out a spike or click, etc.
PROCEDURE
1. Zoom in to a zoom value lower than 1.
This means that there is more than one screen pixel per sample.
2. Select the Draw tool.
3. Click at the beginning of the section that you want to correct and draw in the
new curve.
A range selection covering the edited section is automatically applied.
Making selections
To select an audio section in the Sample Editor, click and drag with the Range
Selection tool.
A selected range
• If “Snap to Zero Crossing” is activated on the toolbar, the selection’s start and
end are always at zero crossings.
• You can resize the selection by dragging its left and right edge or by
[Shift]-clicking.
Using the Select menu
On the Select submenu of the Edit menu you find the following options:
All
Selects the whole clip.
None
Selects no audio (the selection length is set to “0”).
In Loop
Selects all audio between the left and right locator.

Sample Editor
General Functions
291
Select Event
Selects only the audio that is included in the edited event. This is grayed out
if you have opened the Sample Editor from the Pool (in which case the whole
clip is opened for editing, not an event).
From Start to Cursor
Selects all audio between the clip start and the project cursor.
From Cursor to End
Selects all audio between the project cursor and the end of the clip. For this
to work, the project cursor must be within the clip boundaries.
Left Selection Side to Cursor
Moves the left side of the current selection range to the project cursor
position. For this to work, the cursor must be within the clip boundaries.
Right Selection Side to Cursor
Moves the right side of the current selection range to the project cursor
position (or the end of the clip, if the cursor is to the right of the clip).
NOTE
Several of these options are also available on the Sample Editor context menu.
Editing selection ranges
Selections in the Sample Editor can be processed in several ways.
If you attempt to edit an event that is a shared copy (i. e. the event refers to a clip
that is used by other events in the project), you are asked whether you want to
create a new version of the clip.
• Select “New Version” if you want the editing to affect the selected event only.
Select “Continue” if you want the editing to affect all shared copies.
NOTE
If you activate the “Please, don’t ask again” option in the dialog, any further
editing will conform to the selected method (“Continue” or “New Version”).
You can change this setting at any time with the “On Processing Shared
Clips” pop-up menu in the Preferences dialog (Editing–Audio page).
Cut, Copy, and Paste
The Cut, Copy, and Paste commands (on the Edit menu in the Sample Editor
context menu or on the main Edit menu) work according to the following rules:
• Selecting Copy copies the selection to the clipboard.
• Selecting Cut removes the selection from the clip and moves it to the
clipboard.
The section to the right of the selection is moved to the left to fill the gap.

Sample Editor
General Functions
292
• Selecting Paste copies the data from the clipboard into the clip.
If there is a selection in the editor, this is replaced by the pasted data. If
there is no selection, the pasted data is inserted starting at the project
cursor. The section to the right of the line is moved to make room for the
pasted material.
Delete
Selecting Delete (on the Edit menu in the Sample Editor context menu or on
the main Edit menu) removes the selection from the clip. The section to the
right of the selection is moved to the left to fill the gap.
Insert Silence
Selecting “Insert Silence” (on the Range submenu of the main Edit menu)
inserts a silent section with the same length as the current selection, at the
selection start.
• The selection is not replaced, but moved to the right to make room.
If you want to replace the selection, use the “Silence” function instead.
Processing
The Processing features (on the Process submenu of the Audio menu) can be
applied to selections in the Sample Editor.
RELATED LINKS
Silence on page 270
Audio processing and functions on page 262
Creating a new event from the selection using drag & drop
You can create a new event that plays only the selected range.
PROCEDURE
1. Make a selection range.
2. Drag the selection range to an audio track in the Project window.
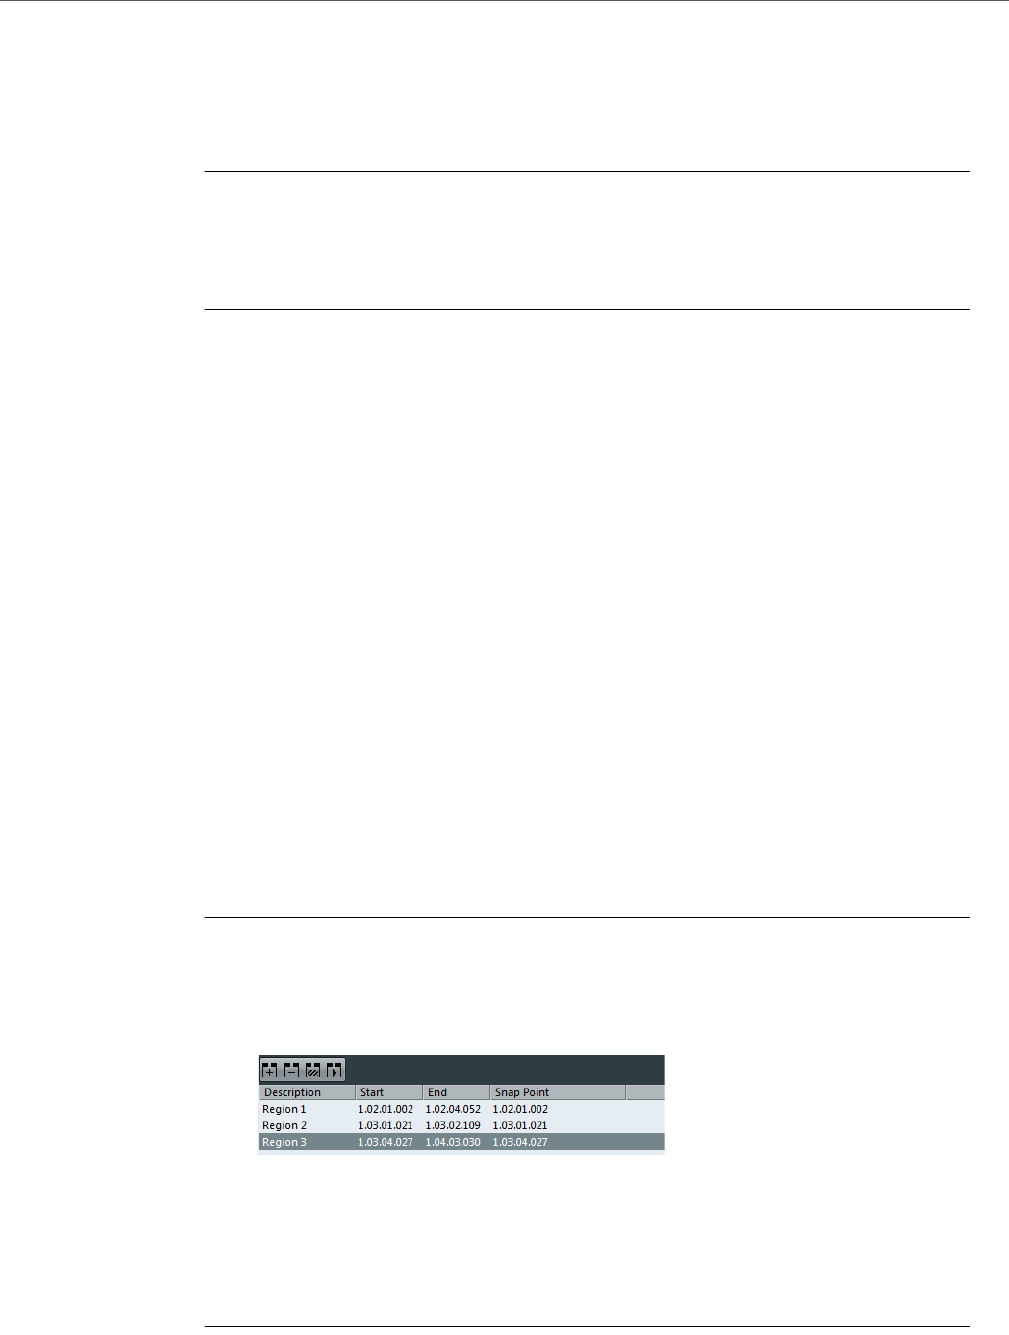
Sample Editor
General Functions
293
Creating a new clip or audio file from the selection
You can extract a selection from an event and either create a new clip or a new
audio file.
PROCEDURE
1. Make a selection range.
2. Open the context menu and select “Bounce Selection” from the Audio
submenu.
RESULT
A new clip is created and added to the Pool, and another Sample Editor window
opens with the new clip. This clip refers to the same audio file as the original clip,
but contains the audio corresponding to the selection range only.
Working with regions
Regions are sections within a clip. One of the main uses for regions is Cycle
recording, in which the different “takes” are stored as regions.
You can also use this feature for marking important sections in the audio clip.
Regions can be dragged into the Project window from the Sample Editor or the
Pool to create new audio events.
RELATED LINKS
Cycle Recording on page 147
Creating and removing regions
PROCEDURE
1. Select the range that you want to convert into a region.
2. Click the “Set up Window Layout” button and activate the Regions option.
The regions list is displayed on the right.
3. Click the Add Region button above the regions list (or select “Event or Range
as Region” from the Advanced submenu of the Audio menu).
A region is created, corresponding to the selected range.
4. To name the region, double-click on it in the list and enter a new name.
Using this procedure, regions can be renamed at any time.
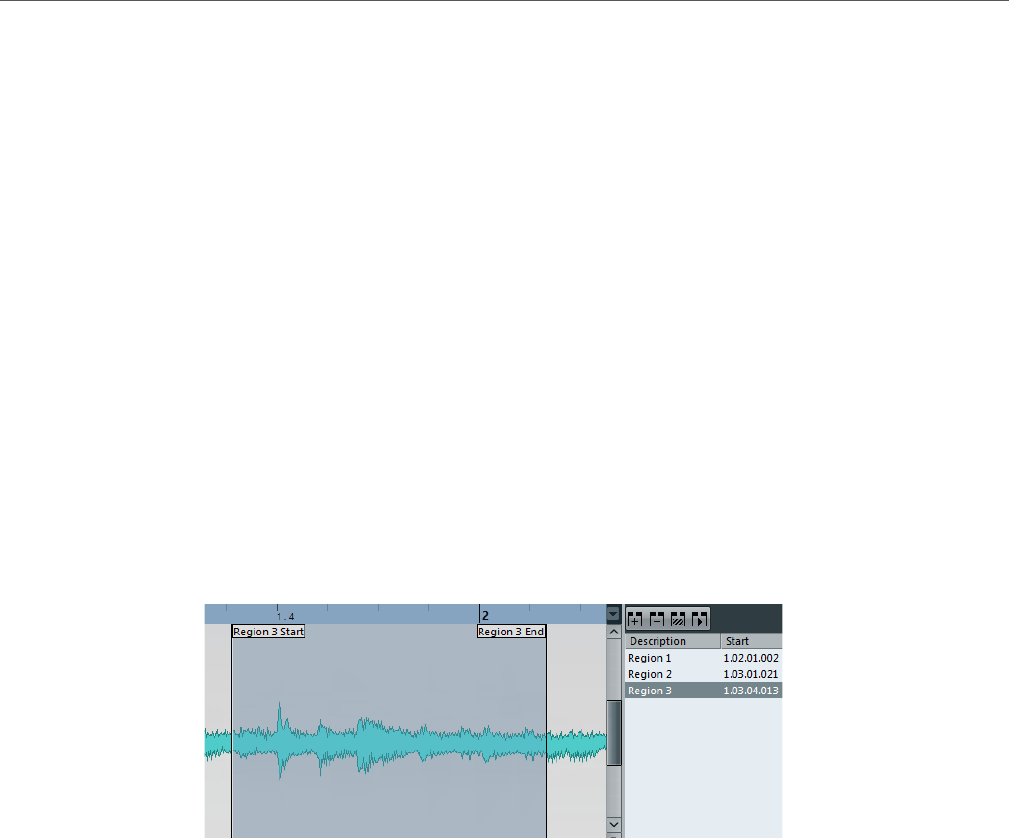
Sample Editor
General Functions
294
RESULT
When you click on a region in the regions list, it is instantly displayed in the Sample
Editor.
To remove a region from a clip, select it in the list and click the Remove Region
button above the list.
Creating regions from hitpoints
If your audio event contains calculated hitpoints, you can choose to automatically
create regions from hitpoints. This can be useful to isolate recorded sounds.
RELATED LINKS
Working with hitpoints and slices on page 297
Editing regions
The region selected in the list is displayed in gray in the waveform display and the
overview line.
There are two ways to edit the start and end positions of a region:
• Click and drag the region start and end handles in the waveform display (with
any tool).
When you move the pointer over the handles, it automatically changes to
indicate that you can drag the handles.
• Edit the Start and End positions in the corresponding fields in the regions list.
The positions are shown in the display format selected for the ruler and info
line, but are relative to the start of the audio clip rather than the project
timeline.
Auditioning regions
You can listen to a region by selecting it in the list and clicking the Play Region
button above the list. The region will play back once or repeatedly, depending on
whether the Loop icon on the toolbar is activated or not.
Sample Editor
General Functions
295
You can also listen to a region by selecting it in the list and clicking the Audition icon
on the toolbar. This way you can preview separate regions by clicking on them in
the list or by selecting them with the up/down arrow keys on your computer
keyboard.
Making selections from regions
If you select a region in the list and click the Select Region button above, the
corresponding section of the audio clip is selected (as if you had selected it with
the Range Selection tool) and zoomed. This is useful if you want to apply processing
to the region only.
NOTE
You can also double-click a region in the Pool to have its audio clip opened in the
Sample Editor with the area of the region automatically selected.
Creating audio events from regions
You can create new audio events from regions using drag & drop.
PROCEDURE
1. In the list, click on the region and keep the mouse button pressed.
2. Drag the region to the desired position in the project and release the mouse
button.
RESULT
A new event is created.
You can also use the “Events from Regions” function from the Advanced submenu
of the Audio menu.
RELATED LINKS
Region Operations on page 123
Exporting regions as audio files
If you create a region in the Sample Editor, the region can be exported to disk as a
new audio file. This is done from the Pool.
RELATED LINKS
Exporting Regions as Audio Files on page 329
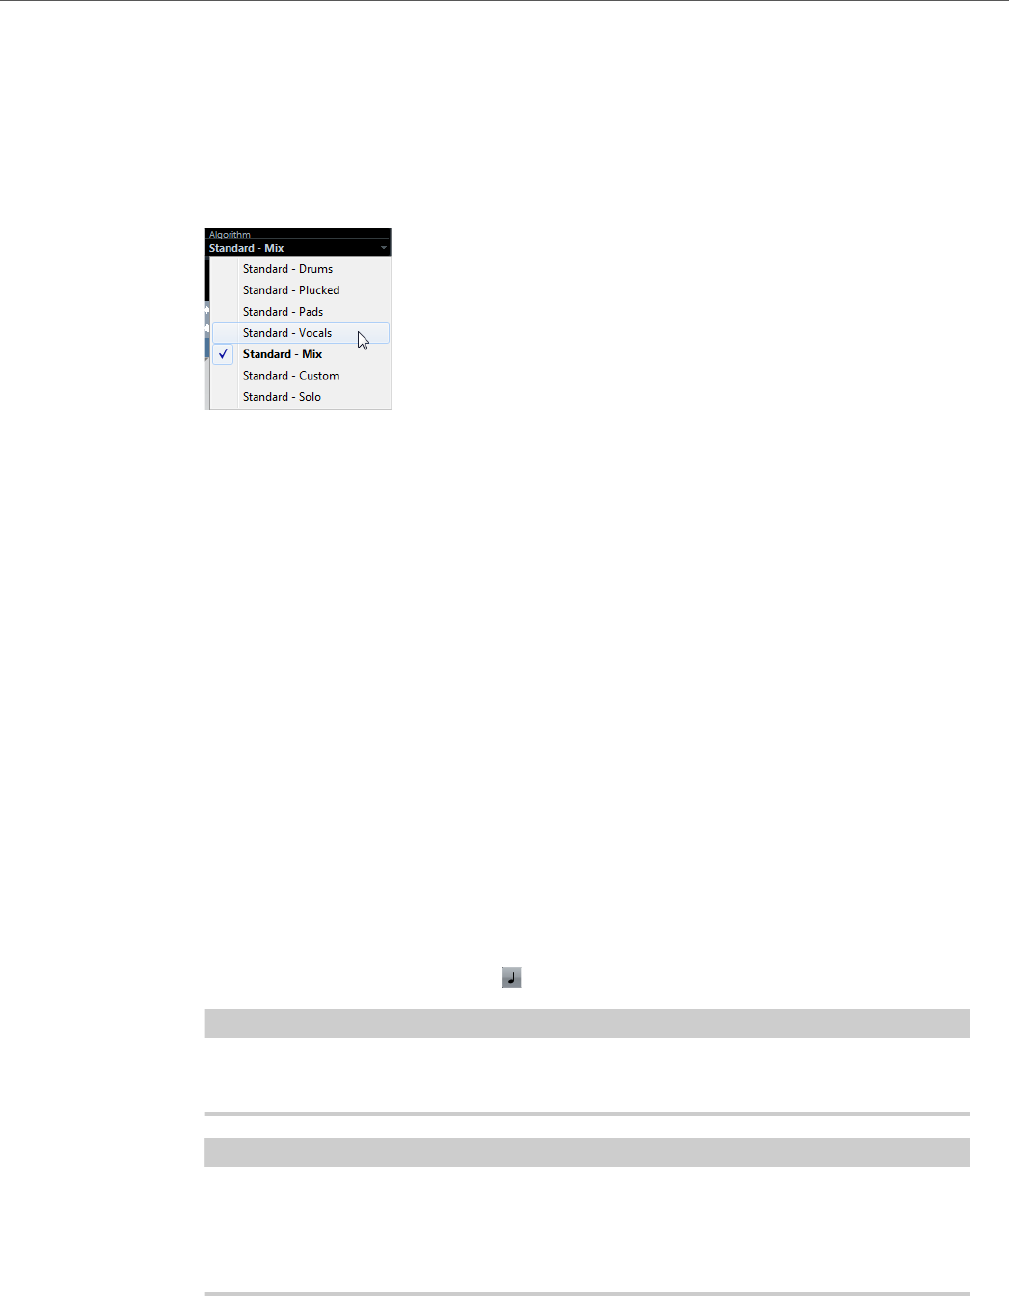
Sample Editor
General Functions
296
Selecting an algorithm for realtime playback
On the Algorithm pop-up menu on the toolbar you can select the algorithm preset
to be applied during realtime playback.
This setting affects warp changes in Musical Mode.
The pop-up menu contains various options that govern the audio quality of the
realtime time stretching. There are presets for common uses and a Custom option
that allows you to manually set warp parameters.
RELATED LINKS
Time stretch algorithm on page 279
Musical Mode
You can use the Musical Mode to tempo-match audio loops to the project tempo.
Musical Mode allows you to lock audio clips to the project tempo by using realtime
time stretching. This is very useful if you want to use audio in your project without
worrying too much about timing.
If you want to use Musical Mode, verify that the length in bars corresponds to the
audio file you imported. If necessary, listen to your audio and enter the correct
length in bars and beats.
When Musical Mode is activated, audio events will adapt to any tempo changes in
Cubase, just like MIDI events.
You can activate Musical Mode on the toolbar.
NOTE
It is also possible to activate/deactivate Musical Mode from within the Pool by
clicking the corresponding checkbox in the Musical Mode column.
IMPORTANTIMPORTANTIMPORTANTIMPORTANT
Cubase supports ACID® loops. These loops are standard audio files but with
embedded tempo/length information. When ACID® files are imported into Cubase,
Musical Mode is automatically activated and the loops will adapt to the project
tempo.
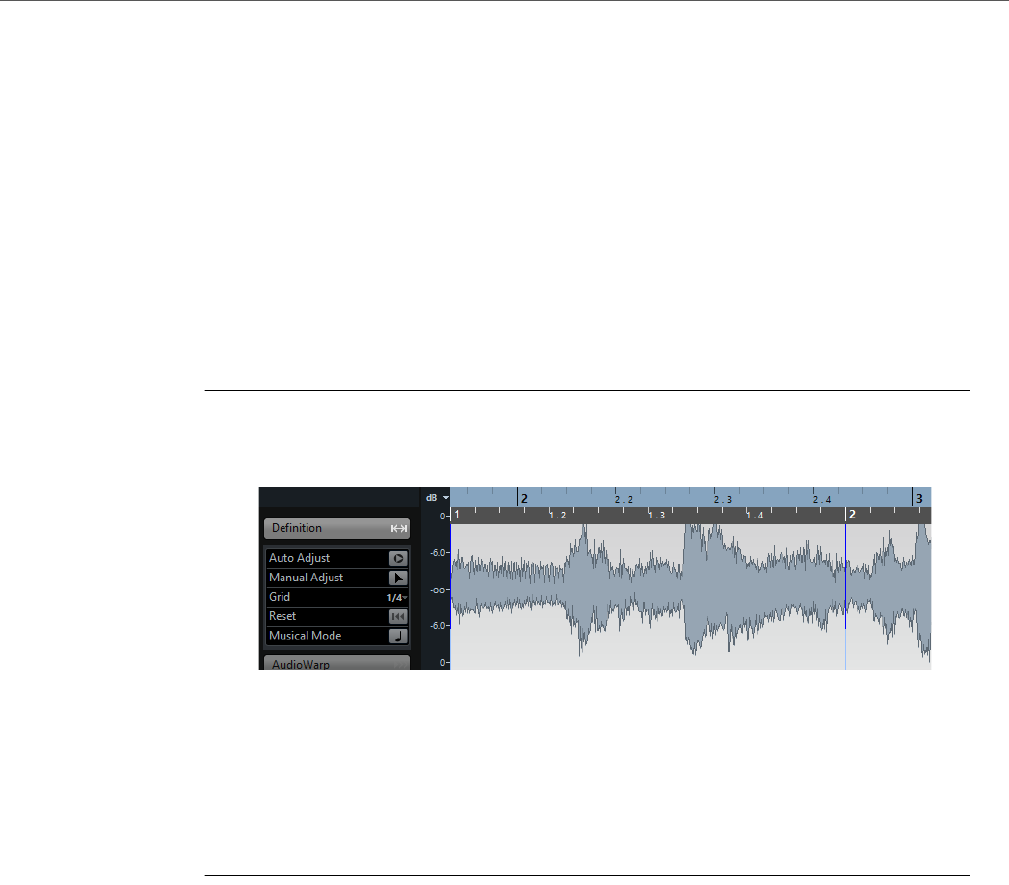
Sample Editor
Warping audio
297
Warping audio
Warping is a term used to describe the realtime time stretching of a selected
section of audio. Warping is generally used to correct the tempo or timing of audio.
Adjusting loops to the project tempo using Musical Mode
Audio loops are normally short audio files containing a defined number of bars with
straight beats. These loops can be adjusted to the project tempo by using the
Musical Mode function.
PROCEDURE
1. Import an audio loop into a project and double-click it to open the Sample
Editor.
2. From the Algorithm pop-up menu on the toolbar, select the algorithm preset
to be applied during realtime playback.
3. Listen to the loop and, if necessary, correct the Bars and Beats values on the
toolbar.
4. Activate the Musical Mode button.
Your loop is warped and stretched automatically to adapt it to the project tempo.
RESULT
In the Project window, the audio event is now shown with a note symbol and a warp
symbol in the upper right corner to indicate that time stretching has been applied.
RELATED LINKS
Time stretch algorithm on page 279
Working with hitpoints and slices
Cubase can detect hitpoints, musically relevant positions, by analyzing onsets and
melodic changes. At these positions a type of marker is added. Hitpoints allow you
to create slices, where each slice ideally represents each individual sound or “beat”.
Drum or other rhythmic recordings or loops work best with this feature.

Sample Editor
Working with hitpoints and slices
298
Purpose and preparation
Hitpoints are useful to slice up audio to make it fit the project tempo or to create a
situation that allows the song tempo to be changed while retaining the timing of a
rhythmic audio loop.
When you have successfully detected the hitpoints for an audio file, you can do a
number of useful things:
• Change the tempo of the audio material without affecting the pitch and audio
quality.
• Use slices to replace individual sounds in a drum loop.
• Extract sounds from loops.
You can further edit these slices in the Audio Part Editor. You can, for example:
• Remove or mute slices.
• Change the loop by reordering or replacing slices.
• Apply processing to individual slices.
• Create new files from individual slices using the “Bounce Selection” function
on the Audio menu.
• Edit slice envelopes.
Hitpoints can also be used to quantize audio material without creating slices.
RELATED LINKS
Quantizing MIDI and Audio on page 166
Which audio files can be used?
Here are some guidelines as to what type of audio files are suited for slicing using
hitpoints:
• Each individual sound should have a noticeable attack.
Slow attacks, legato playing, etc. may not produce the expected result.
• Poorly recorded audio might be difficult to slice correctly.
In these cases, try to normalize the files or to remove DC Offset.
• The recorded audio should contain as little crosstalk signals as possible.
Crosstalk refers to the “bleeding” of a sound into a microphone placed before
another instrument during recording.
• There may be problems with sounds drowned in smearing effects, like short
delays.
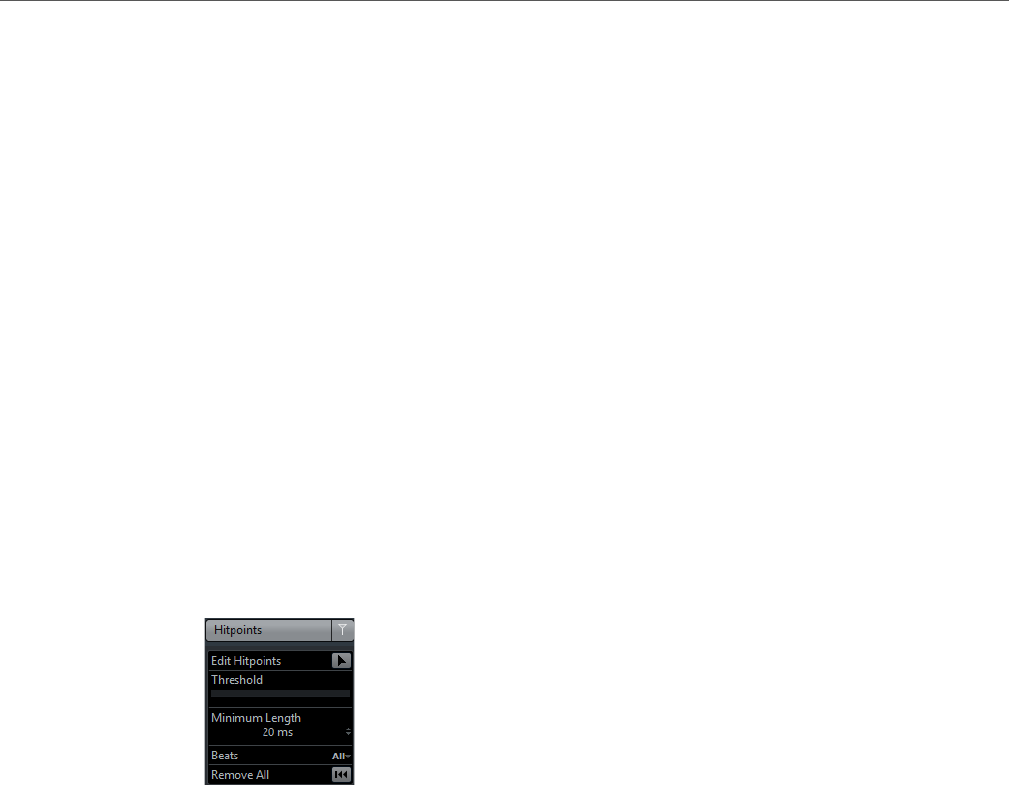
Sample Editor
Working with hitpoints and slices
299
Automatic Hitpoint Detection
When you add an audio file to your project by recording or by importing, Cubase
automatically detects hitpoints. This allows you to navigate to hitpoints of an audio
file from within the Project window.
For long audio files, hitpoint detection may take a while. All operations that are
based on hitpoints are disabled during the calculation.
• To disable automatic hitpoint detection, select File > Preferences > Editing
> Audio and deactivate Enable Automatic Hitpoint Detection.
• In the Project window, hitpoints are shown for the selected event, provided
that the zoom factor is high enough.
To hide them, select File > Preferences > Event Display > Audio and
disable Show Hitpoints on Selected Events.
Filtering hitpoints
You can filter hitpoints in the Hitpoints Inspector tab of the Sample Editor.
You can use the following parameters to filter hitpoints:
Threshold
This filters hitpoints by their peaks. This allows you to discard hitpoints of
quieter crosstalk signals, for example.
Minimum Length
This filters hitpoints by the distance between two hitpoints. This allows you to
avoid creating slices that are too short.
Beats
This allows you to filter hitpoints by their musical position. This allows you to
discard hitpoints that do not fit within a certain range of a defined beat value.

Sample Editor
Working with hitpoints and slices
300
Using Hitpoints to Locate Audio Positions in the Project Window
You can navigate through the hitpoints of an audio event in the Project window.
PREREQUISITE
Enable Automatic Hitpoint Detection is activated (File > Preferences > Editing
> Audio).
PROCEDURE
1. Select the audio track that contains the audio event for which you want to
locate hitpoints.
2. Press [Alt]/[Option]-[N] to navigate to the next hitpoint, or [Alt]/[Option]-[B] to
navigate to the previous hitpoint.
RESULT
The project cursor jumps to the respective hitpoint.
Auditioning and hitpoints
• You can audition the hitpoint slices, that is the area between two hitpoints, by
pointing and clicking in any slice area.
The pointer changes to a speaker icon and the corresponding slice is played
back from the beginning to the end.
Navigating between hitpoints
• You can navigate between the slices using the arrow keys or by pressing the
[Tab] key.
• You can select the next or previous hitpoint marker using the “Locate
Next/Previous Hitpoint” commands.
The default key commands for this are [Alt]/[Option]-[N] and
[Alt]/[Option]-[B].
Editing hitpoints
You can change the state of a hitpoint, insert new hitpoints manually, and move
existing hitpoints.
Hitpoints can have three different states: enabled, locked, and disabled. “Enabled”
is the normal state a hitpoint has immediately after the detection. Hitpoints can be
“disabled” so that they are still visible as gray triangles on the timeline, but will not
be taken into account for further operations. “Locking” hitpoints is an easy way to
make sure that hitpoints are not accidentally filtered out. Locked hitpoints are not
affected by the Threshold slider and Beats pop-up menu.

Sample Editor
Working with hitpoints and slices
301
An enabled, a disabled, and a locked hitpoint
Disabling and locking hitpoints
After applying the different hitpoint filters, you may find that you want to keep
individual hitpoints that were filtered out or disable hitpoints that you do not need.
Furthermore, you may want to lock certain hitpoints.
• To lock a hitpoint, move the mouse pointer over the gray triangle on the
timeline so that the tooltip “Lock Hitpoint” is shown. Click on the triangle.
This way, enabled and disabled hitpoints can be locked.
• To lock a disabled hitpoint, you can also press [Alt]/[Option] and move the
mouse over the waveform. At positions where a disabled hitpoint can be
locked, a gray hitpoint line and the tooltip “Lock Hitpoint” are shown. Click to
lock the hitpoint.
• To lock multiple hitpoints, press [Shift]-[Alt]/[Option] so that the tooltip “Lock
multiple hitpoints” is shown and drag a rectangle over the hitpoints.
All enabled and disabled hitpoints within the area defined by the rectangle
become locked.
• To disable hitpoints, press [Shift] so that the tooltip “Disable Hitpoints” is
shown and click on the line of a single hitpoint or drag a rectangle over all the
hitpoints that you want to disable.
This way, enabled and locked hitpoints can be disabled.
• To disable a locked hitpoint, you can also point the mouse at the blue hitpoint
triangle on the timeline so that the tooltip “Disable Hitpoint” is shown. Click
on the triangle.

Sample Editor
Working with hitpoints and slices
302
Resetting hitpoints
Sometimes it can be useful to reset hitpoints to their original state, e. g. because you
still want them to be affected by the Threshold slider.
PROCEDURE
• To reset hitpoints to their original state, press [Ctrl]/[Command]-[Alt]/[Option]
so that the tooltip “Enable/Unlock Hitpoints” is shown and drag a rectangle
over the hitpoints.
RESULT
All disabled and locked hitpoints within the area defined by the rectangle are reset.
Note that some of the hitpoints may still appear as disabled due to the Threshold
slider and Beats pop-up menu settings.
Inserting hitpoints
If you get too few hitpoints using the filter options, you can insert hitpoints manually.
PROCEDURE
• To insert a new hitpoint, press [Alt]/[Option] and click at the position where
you want to enter the new hitpoint (i. e. at the start of the sound).
Manually added hitpoints are locked by default.
Moving hitpoints
If a hitpoint was either placed too far away from the start of the sound or too far into
the sound, you can move it.
PROCEDURE
• To move a hitpoint, press [Alt]/[Option] and point the mouse at the vertical line
of the hitpoint.
RESULT
The mouse pointer changes to a double arrow and the tooltip “Move Hitpoint” is
shown. You can now drag the hitpoint to its new position.
NOTE
Moved hitpoints are locked by default.

Sample Editor
Working with hitpoints and slices
303
Slicing audio
Once you have set up the hitpoints as needed, you can slice the audio by clicking
the Create Slices button on the Hitpoints tab. Alternatively, you can select the
“Create Audio Slices from Hitpoints” command from the Hitpoints submenu of the
Audio menu.
The following happens:
• The Sample Editor closes.
• The audio event is “sliced” so that the sections between the hitpoints become
separate events, all referring to the same original file.
• The audio event is replaced by an audio part, containing the slices
(double-click the part to view the slices in the Audio Part Editor).
IMPORTANTIMPORTANTIMPORTANTIMPORTANT
When you create slices, all events referring to the edited clip are also replaced.
• The audio is automatically adapted to the project tempo, taking the specified
tempo or bars and beats values into account: if the event was one bar long,
the part is resized to fit exactly one bar in the Cubase tempo, and the slices
are moved accordingly, keeping their relative positions within the part.
• In the Pool, the sliced clip is shown with a different icon. Dragging the sliced
clip from the Pool to an audio track creates an audio part with the slices
adapted to the project tempo, just as above.
The audio should now play back seamlessly at the tempo set in the project!
Slices and the project tempo
If the project tempo is slower than the tempo of the original audio event, there may
be audible gaps between the slice events in the part. To remedy this, you can apply
the “Close Gaps (Timestretch)” function from the Advanced submenu of the Audio
menu on the parts containing the slice events. Time stretch is applied to each slice
to close the gaps. Depending on the length of the part and the algorithm set in the
Preferences dialog (Editing–Audio page), this can take a while.
NOTE
If you open the Pool, you will see that new clips were created, one for each slice.
If you decide to change the tempo again after using the “Close Gaps (Timestretch)”
function, undo the Close Gaps operation or start over again, using the original,
unstretched file.
Also consider activating auto fades for the corresponding audio track – fade-outs
set to about 10 ms will help eliminate any clicks between the slices when you play
back the part.
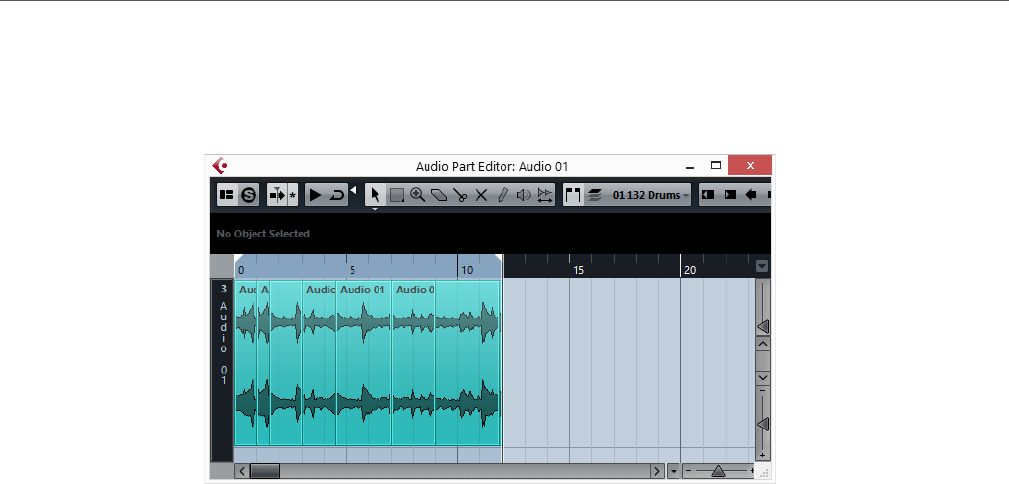
Sample Editor
Working with hitpoints and slices
304
If the project tempo is higher than the tempo of the original audio event, the slice
events are overlapping. Activate auto crossfades for the track to smooth out the
sound. Furthermore, you can select the overlapping events inside the part and apply
the “Delete Overlaps” function from the Advanced submenu of the Audio menu.
The slices in the Audio Part Editor. Here, the project tempo was higher than the clip’s
original tempo – the slice events overlap.
RELATED LINKS
Making global Auto Fade settings on page 182
Making Auto Fade settings for individual tracks on page 183
Other hitpoint functions
On the Hitpoints tab of the Sample Editor Inspector, you will also find the following
functions. Many of these functions are also available on the Hitpoints submenu of
the Audio menu. If selected on the Audio menu, they can be applied on several
events and even range selections at the same time.
Create Groove
You can generate a groove quantize map based on hitpoints that you have created.
RELATED LINKS
Creating Groove Quantize Presets on page 172
Create Markers
If an audio event contains calculated hitpoints, you can click the Create Markers
button on the Hitpoints tab to add a marker for each hitpoint. If your project has no
marker track, it will be added and activated automatically. Markers can be useful to
snap to hitpoints, e. g. for locating hitpoints.
RELATED LINKS
Markers on page 196
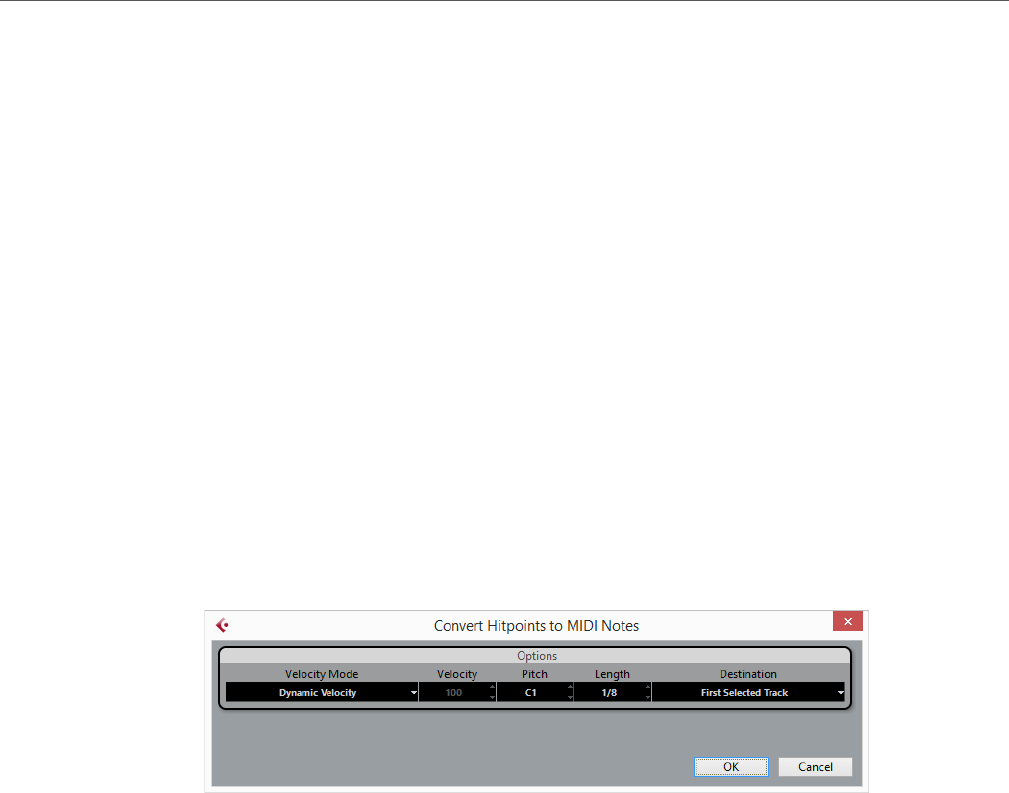
Sample Editor
Working with hitpoints and slices
305
Create Regions
If your audio event contains calculated hitpoints, you can click the Create Regions
button on the Hitpoints tab to automatically create regions from hitpoints. This can
be useful to isolate recorded sounds.
Create Events
If your audio event contains calculated hitpoints, you can click the Create Events button
on the Hitpoints tab to automatically create separate events based on the hitpoints.
Create MIDI Notes
You can export your hitpoints to a MIDI part containing a MIDI note for each hitpoint.
For example, you can use this function to double, replace, or enrich drum hits by
triggering sounds of a VST instrument at the positions of the hitpoints.
To convert the hitpoints into MIDI notes, click the “Create MIDI Notes” button. Make
the desired settings in the Convert Hitpoints to MIDI Notes dialog and click OK.
The following options are available:
Velocity Mode/Velocity
• Dynamic Velocity Value – The velocity values of the created MIDI notes
vary, according to the peak levels of the corresponding hitpoints.
• Fixed Velocity Value – The created MIDI notes get the same velocity
value. You can set this value using the Velocity field.
Pitch/Length
• Hitpoints do not contain any information about pitch or duration.
Therefore, all created MIDI notes get the same pitch and note length.
Use these fields to specify the desired values.
Destination
• First Selected Track – The MIDI part is placed on the first selected MIDI
or instrument track. Note that any MIDI parts from previous conversions
that are on this track will be deleted.
• New MIDI Track – A new MIDI track is created for the MIDI part.
• Project Clipboard – The MIDI part is copied into the clipboard so that
you can insert it at the desired position on a MIDI or instrument track.
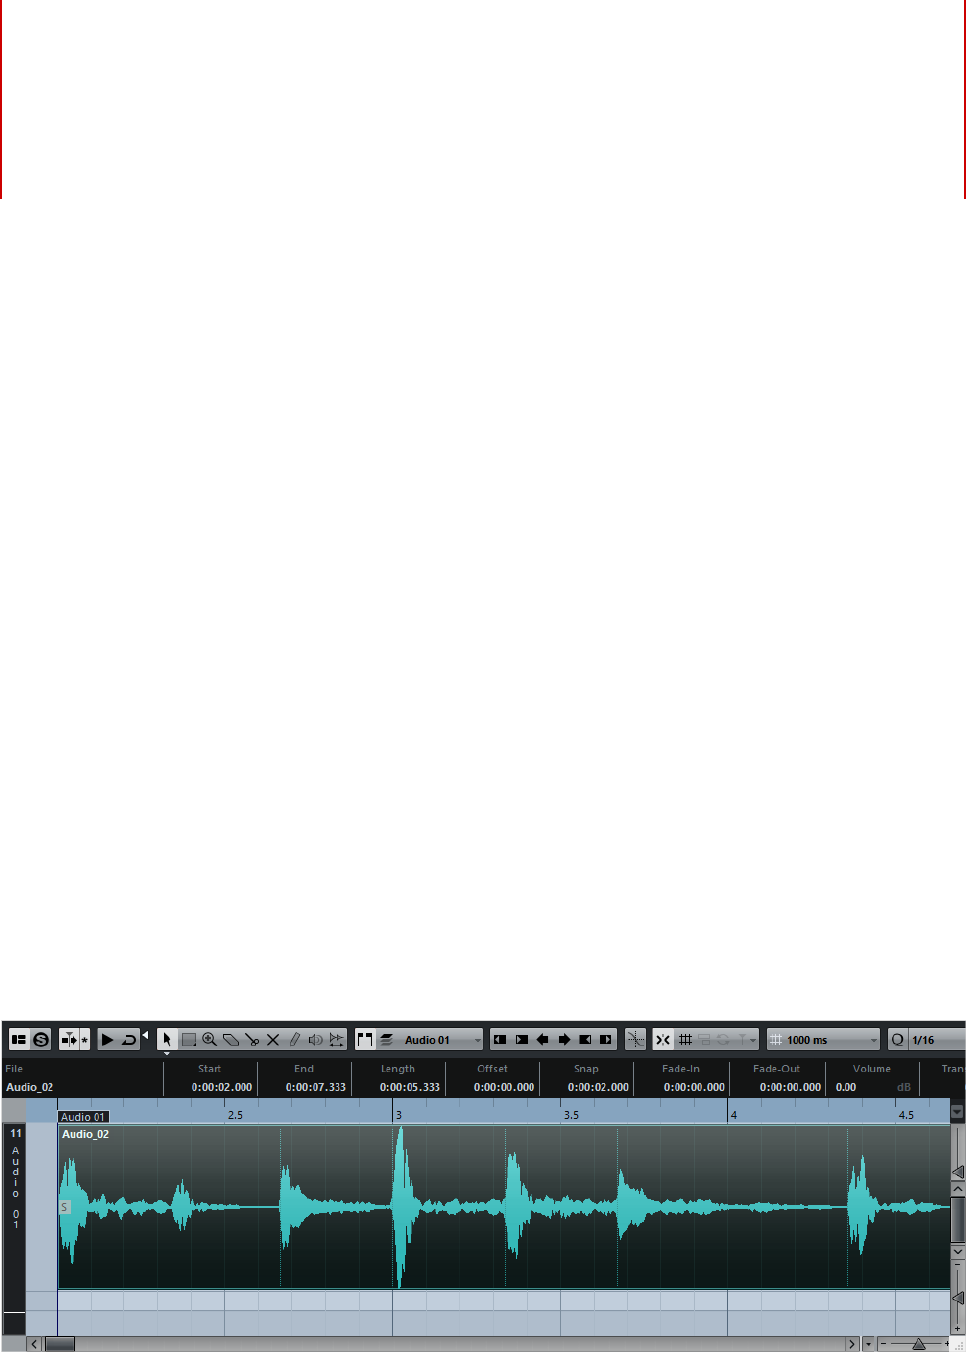
306
Audio Part Editor
The Audio Part Editor allows you to view and edit the events inside audio parts.
Essentially, this is the same type of editing that you do in the Project window.
Audio parts are created in the Project window in one of the following ways:
• Select one or several audio events on the same track, and select Audio >
Events to Part.
• Glue together two or more audio events on the same track with the Glue tool.
• Draw an empty part with the Draw tool.
• Double-click between the left and right locators on an audio track.
With the last two methods, an empty part is created. You can then add events to
the part by pasting, or by using drag and drop from the Pool.
RELATED LINKS
Project Window on page 24
Window Overview

Audio Part Editor
Window Overview
307
Toolbar
The tools, settings, and icons on the toolbar have the same functionality as in the
Project window, with the following differences:
• A Solo button.
• Separate tools for auditioning (Speaker) and scrubbing.
• No Line or Glue Tube tools.
• Play and Loop icons and an Audition Volume control.
• Independent Track Loop settings.
• Part List controls for handling several parts: activating parts for editing,
restricting editing to active parts only and showing part borders.
NOTE
You can customize the toolbar by hiding or reordering its items.
RELATED LINKS
Auditioning on page 309
Scrubbing on page 311
Setting Up the Independent Track Loop on page 310
Handling Several Parts on page 311
Using the Setup options on page 627
The Ruler and Info Line
These have the same functionality and appearance as their counterparts in the
Project window.
You can select a separate display format for the Audio Part Editor ruler by clicking
on the arrow button on the right and selecting an option from the pop-up menu.
RELATED LINKS
Ruler Display Formats on page 29
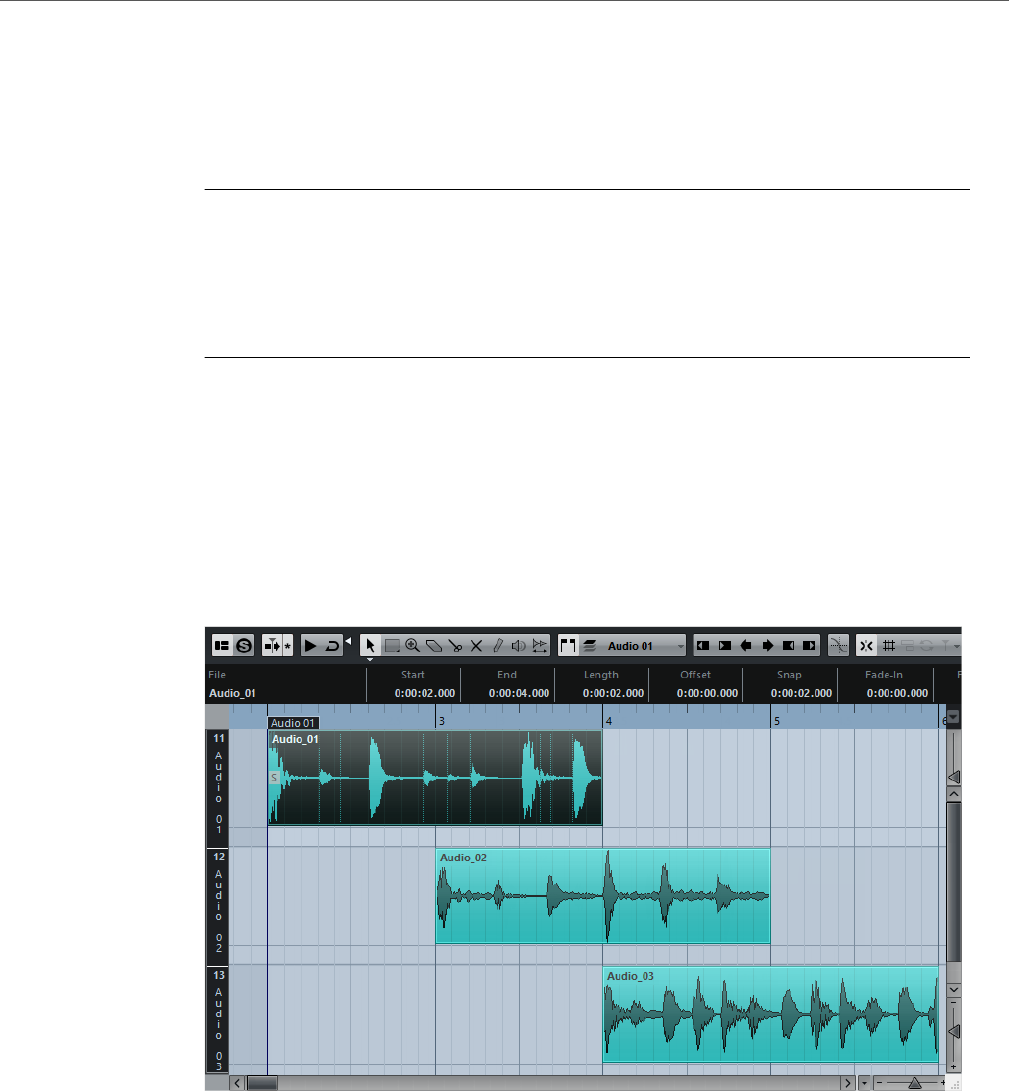
Audio Part Editor
Opening the Audio Part Editor
308
Opening the Audio Part Editor
The Audio Part Editor can display several parts at once, and you can also have more
than one Audio Part Editor open at the same time.
PROCEDURE
1. Select one or more audio parts in the Project window.
2. Double-click on any one of them or use the Edit-Open key command, by
default [Ctrl]/[Command]-[E].
Double-clicking on an audio event in the Project window will open the Sample Editor.
RELATED LINKS
Opening the Sample Editor on page 282
About Lanes
Lanes can make it easier to work with several audio events in a part. Moving some
of the events to another lane can make selection and editing much easier.
If the Snap function is deactivated and you want to move an event to another lane
without accidentally moving it horizontally, press [Ctrl]/[Command] while dragging
it up or down.
RELATED LINKS
Track Handling on page 91
Audio Part Editor
Operations
309
Operations
Zooming, selecting and editing in the Audio Part Editor are done just as in the
Project window.
NOTE
If a part is a shared copy (i. e. you have previously copied the part by
[Alt]/[Option]-[Shift] and dragging), any editing you perform will affect all shared
copies of this part.
RELATED LINKS
Project Window on page 24
Auditioning
There are several ways to listen to the events in the Audio Part Editor.
By Using the Speaker Tool
If you click somewhere in the editor’s event display with the Speaker tool and keep
the mouse button pressed, the part will be played back from the position where you
clicked. Playback will continue until you release the mouse button.
By Using the Audition Icon
Audition and Audition Loop icons
Clicking the Audition icon on the toolbar plays back the edited audio, according to
the following rules:
• If you have selected events in the part, only the section between the first and
last selected event will be played back.
• If you have made a range selection, only this section will be played back.
• If there is no selection, the whole part will be played back. If the project cursor
is within the part, playback starts from the current cursor position. If the cursor
is outside the part, playback starts from the beginning of the part.
• If the Audition Loop icon is activated, playback will continue until you
deactivate the Audition icon. Otherwise, the section will be played back once.
When auditioning with the Speaker tool or Audition icon, audio will be routed
directly to the Main Mix (the default output bus).
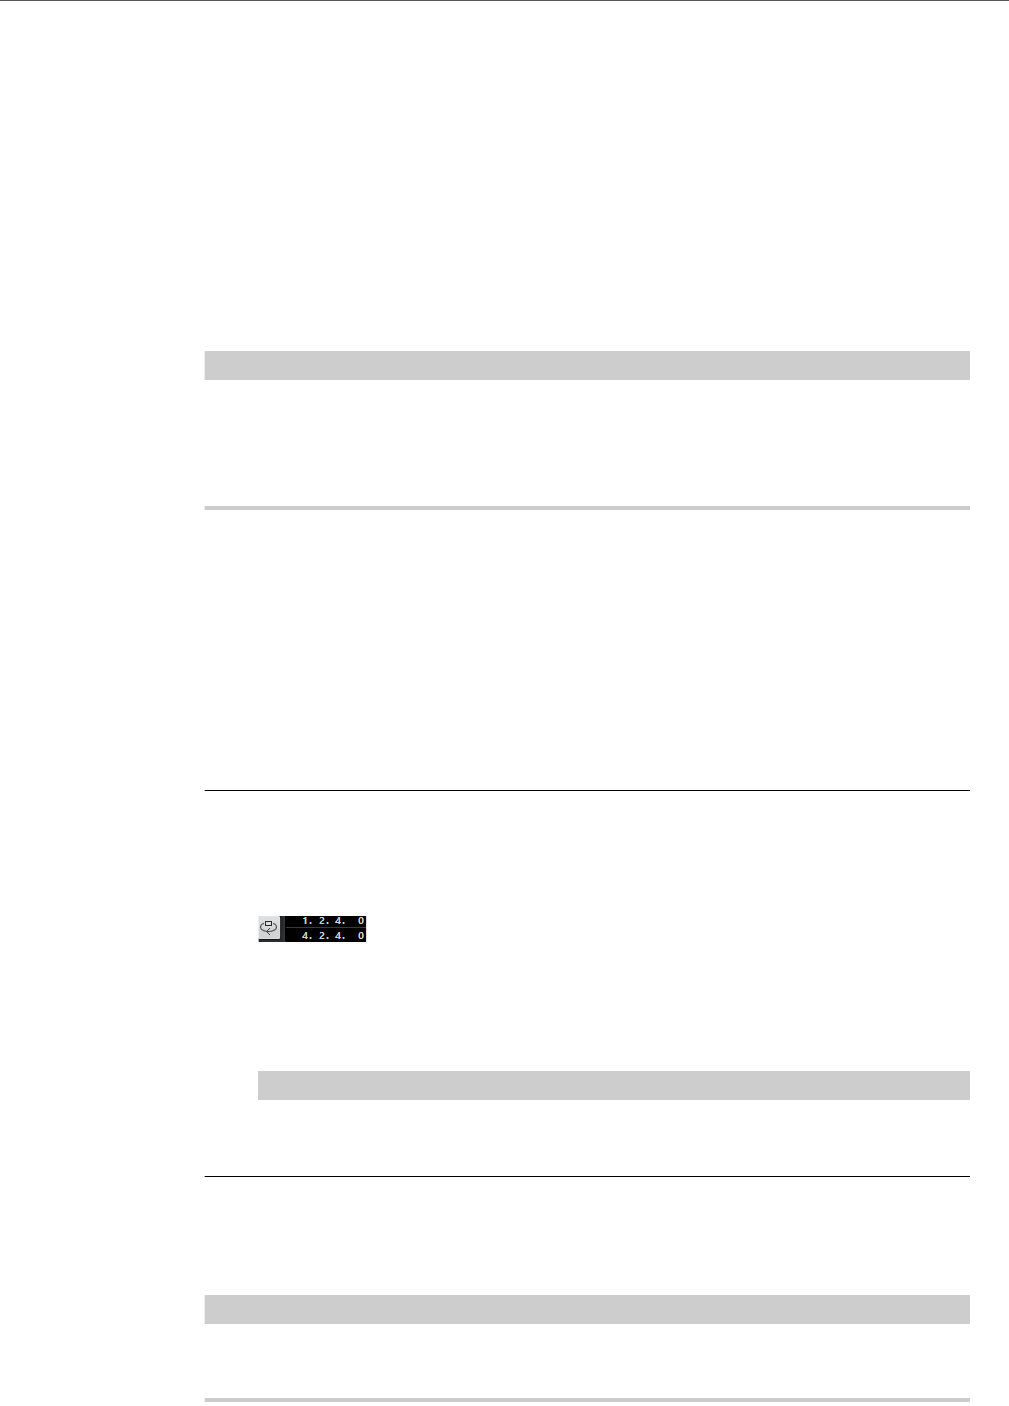
Audio Part Editor
Operations
310
By Using Regular Playback
You can of course use the regular playback controls while in the Audio Part Editor.
Furthermore, if you activate the Solo Editor button on the toolbar, only the events in
the edited part will be played back.
Using Key Commands
If you activate the “Playback Toggle triggers Local Preview” option in the
Preferences dialog (Transport page), you can start/stop auditioning by pressing
[Space]. This is the same as clicking the Audition icon on the toolbar.
NOTE
The Audio Part Editor also supports the key commands “Preview start” and
“Preview stop” in the Media category of the Key Commands dialog. These key
commands stop the current playback, no matter if you are in normal playback or in
audition mode.
Setting Up the Independent Track Loop
The independent track loop is a sort of mini-cycle, affecting only the edited part.
When the loop is activated, the events in the parts that are within the loop will be
repeated continuously and completely independent – other events (on other tracks)
are played back as usual. The only interaction between the loop and the regular
playback is that the loop starts every time the cycle starts over again.
PROCEDURE
1. Turn on the loop by clicking the Independent Track Loop button on the toolbar.
If it is not visible, right-click the toolbar and add the Independent Track Loop Settings
section.
When the loop is activated, the cycle is not shown in the editor’s ruler. Now you need
to specify the length of the loop.
2. [Ctrl]/[Command]-click in the ruler to set the start and [Alt]/[Option]-click to
set the end of the loop.
NOTE
You can also edit the loop start and end positions numerically in the fields next to the
Loop button.
RESULT
The loop is indicated in purple in the ruler.
NOTE
The events will be looped as long as the Loop button is activated and the Audio Part
Editor window is open.
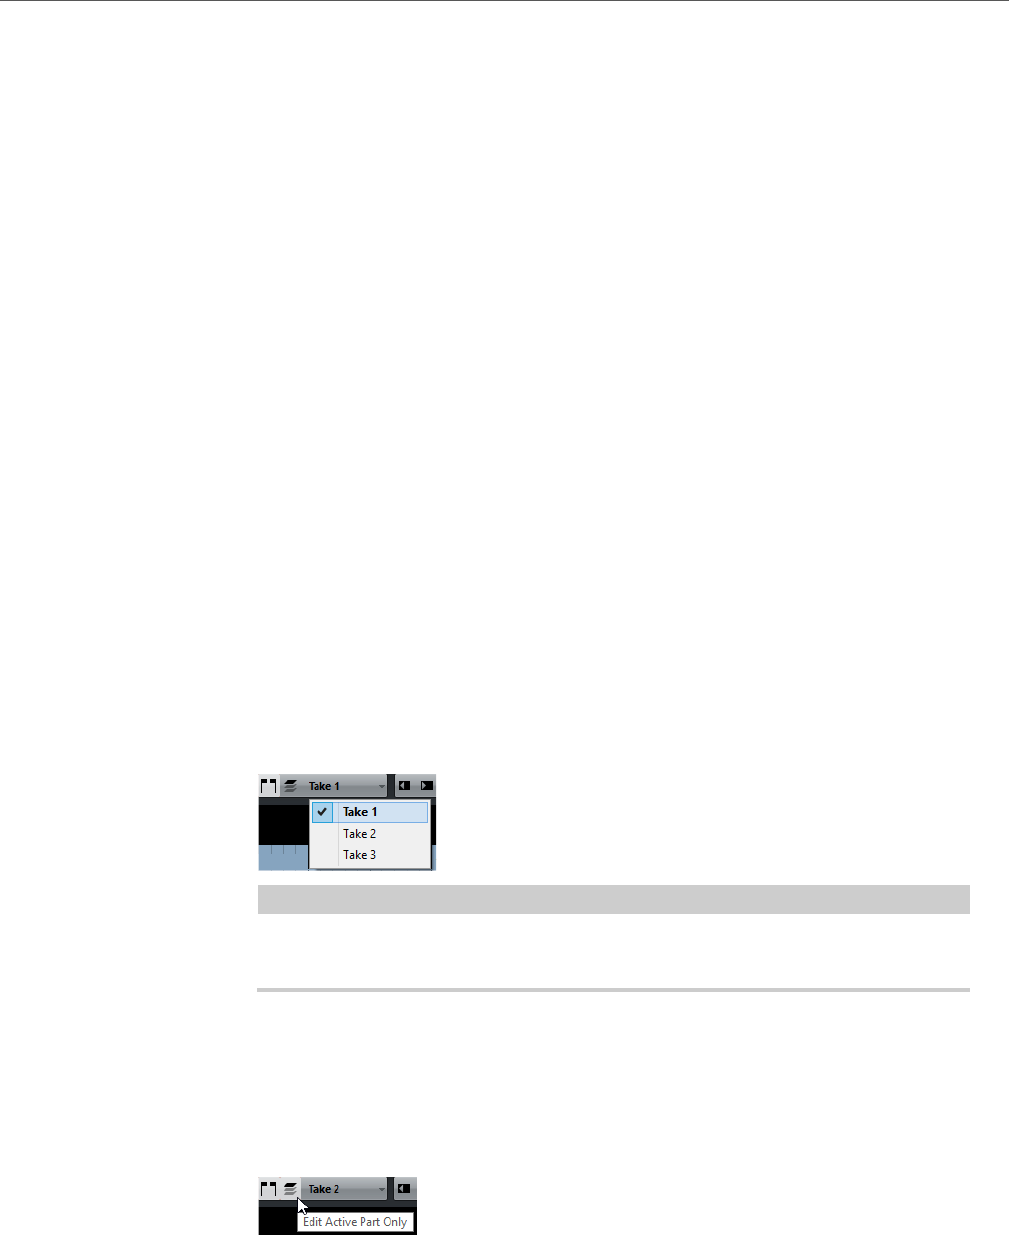
Audio Part Editor
Operations
311
RELATED LINKS
Using the Setup options on page 627
Scrubbing
In the Audio Part Editor, the Scrub tool has a separate icon on the toolbar. Apart
from that, scrubbing works exactly as in the Project window.
RELATED LINKS
Using the Scrub Tool on page 110
Handling Several Parts
When you open the Audio Part Editor with several parts selected – all on the same
track or on different tracks – they might not all fit in the editor window, which can
make it hard to get an overview of the different parts when editing.
Therefore, the toolbar features a few functions to make working with multiple parts
easier and more comprehensive:
• The “Currently Edited Part” pop-up menu lists all parts that were selected
when you opened the editor, and lets you select which part is active for
editing.
When you select a part from the list, it is automatically made active and
centered in the display.
NOTE
Note that it is also possible to activate a part by clicking on it with the Object
Selection tool.
• The “Edit Active Part Only” button lets you restrict editing operations to the
active part only.
If you for example select “All” from the Select submenu of the Edit menu with
this option activated, all events in the active part will be selected but not the
events in other parts.
• You can zoom in on an active part so that it is displayed in its entirety in the
window by selecting “Zoom to Event” from the Zoom submenu of the Edit
menu.

Audio Part Editor
Options and Settings
312
• The “Show Part Borders” button can be used if you want to see clearly
defined borders for the active part.
When this is activated, all parts except the active one are grayed out, making
the borders easily discernible. There are also two markers in the ruler with the
name of the active part, marking its beginning and end. These can be moved
freely to change the part borders.
• It is possible to cycle between parts, making them active using key
commands.In the Key Commands dialog – Edit category, there are two
functions: “Activate Next Part” and “Activate Previous Part”. If you assign key
commands to these, you can use them to cycle between parts.
RELATED LINKS
Setting up key commands on page 603
Options and Settings
The following options and settings are available in the Audio Part Editor:
Snap
The Snap functionality in the Audio Part Editor is exactly the same as in the
Project window.
Auto-Scroll
When Auto-Scroll is activated on the toolbar, the window will scroll during
playback, keeping the project cursor visible in the editor. This setting can be
activated or deactivated individually for each window.
Snap to Zero Crossing
When this option is activated, all audio edits are done at zero crossings
(positions in the audio where the amplitude is zero). This helps you avoid pops
and clicks which might otherwise be caused by sudden amplitude changes.
RELATED LINKS
Snap Function on page 39

313
Pool
Every time that you record on an audio track, a file is created on your hard disk. A
reference to this file, a clip, is added to the Pool.
The following rules apply to the Pool:
• All audio and video clips that belong to a project are listed in the Pool.
• Every project has a separate Pool.
The way the Pool displays folders and their contents is similar to the way the
Windows Explorer/Mac OS Finder display folders and file lists. In the Pool, you can
perform operations that affect files on disk and operations that only affect clips.
Operations That Affect Files
• Importing clips (audio files can automatically be copied and/or converted)
• Converting file formats
• Renaming clips (this also renames the referenced files on disk) and regions
• Deleting clips
• Preparing file archives for backup
• Minimizing files
Operations That Affect Clips
• Copying clips
• Auditioning clips
• Organizing clips
• Applying audio processing to clips
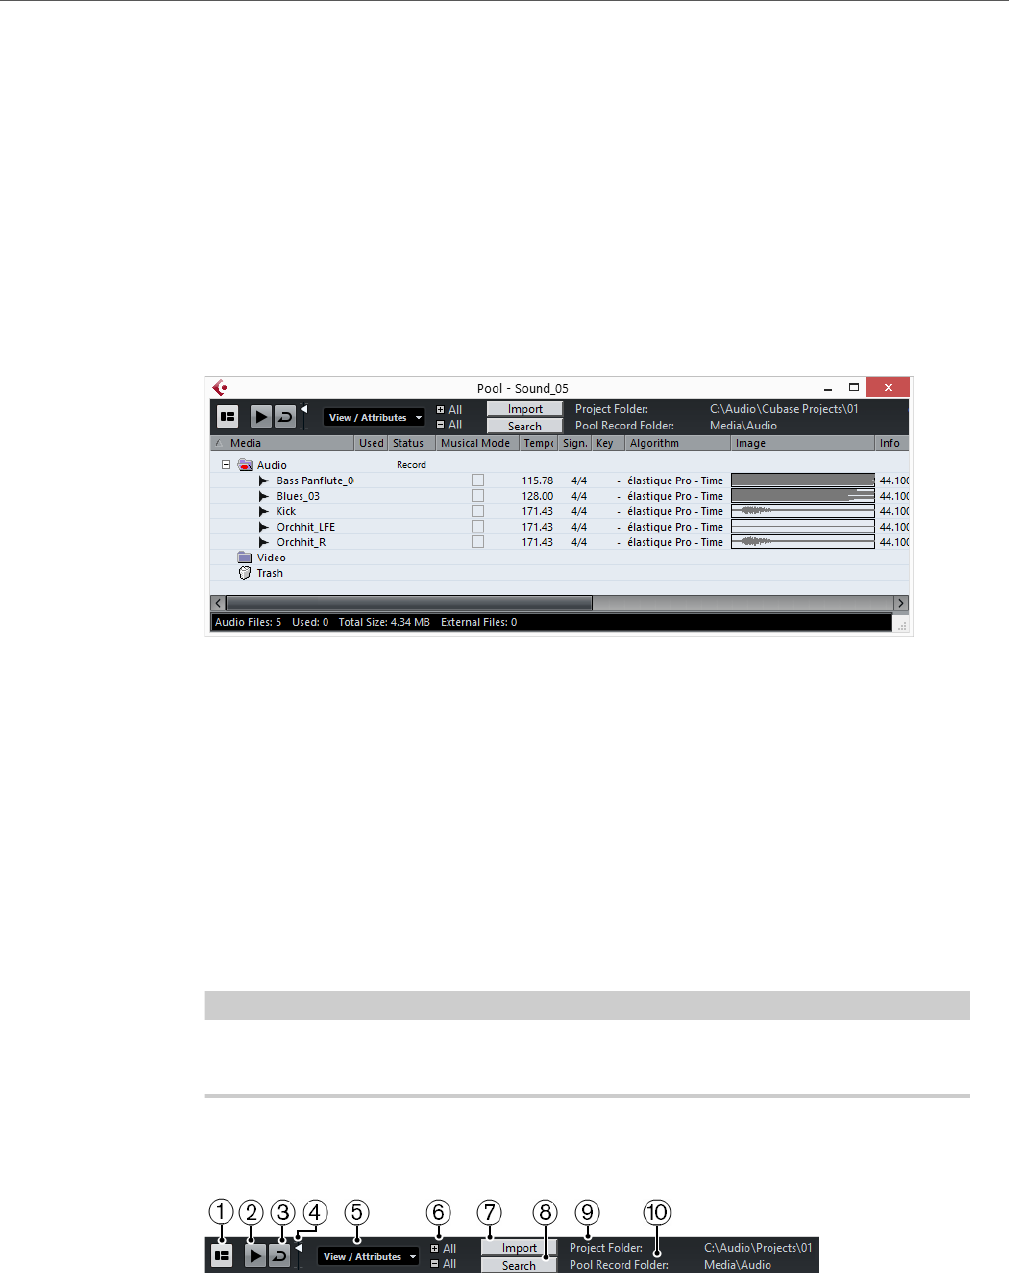
Pool
Pool Window
314
Pool Window
The Pool window allows you to manage the media files of the active project.
You can open the Pool in the following ways:
• On the Project window toolbar, click the Open Pool Window button. If this
icon is not visible, you must activate the Media & MixConsole Windows
option on the toolbar context menu.
•Select Project > Pool.
•Select Media > Open Pool Window.
The content of the Pool is divided into the following folders:
Audio Folder
Contains all audio clips and regions that are currently in the project.
Video Folder
Contains all video clips that are currently in the project.
Trash Folder
Contains unused clips that have been moved here for later permanent removal
from the hard disk.
NOTE
You cannot rename or delete these folders, but you can add any number of
subfolders.
Toolbar
1) Show Info
Activates/deactivates the info line.

Pool
Pool Window
315
2) Audition
If this option is activated and you select a clip in the Pool, it is played back.
3) Audition Loop
If this option is activated, the playback of the selected clip is looped.
4) Volume
Lets you specify the playback volume.
5) View/Attributes
Lets you activate/deactivate which attributes are displayed in the Pool
window.
6) Open/Close all folders
Opens/Closes all folders.
7) Import
Lets you import media files to the Pool.
8) Search
Lets you search the Pool and connected disks for media files.
9) Project Folder
Displays the path to the folder of the active project.
10) Pool Record Folder
Displays the path to the record folder of the active project. By default, this is
the Audio folder. However, you can create a new Audio subfolder and
designate this as your Pool record folder.
Pool Window Columns
Various information about the clips and regions can be viewed in the Pool window
columns. The columns contain the following information:
Media
Contains the Audio, Video, and Trash folders. If the folders are opened, the
clip or region names are shown and can be edited.
Used
Displays how many times a clip is used in the project. If there is no entry in this
column, the corresponding clip is not used.
Status
Displays various icons that relate to the current Pool and clip status. The
following symbols can be displayed:
•
Indicates the current Pool record folder.

Pool
Pool Window
316
•
Indicates that a clip has been processed.
•
Indicates that a clip is referenced in the project but missing from the
Pool.
•
Indicates that the file the clip related to is external, for example, located
outside the current Audio folder for the project.
•
Indicates that the clip has been recorded in the currently open version
of the project. This is useful for finding recently recorded clips quickly.
Musical Mode
You can use the Musical Mode to tempo-match audio loops to the project
tempo. The checkbox in this column allows you to activate or deactivate
Musical Mode. If the Tempo column displays “???”, you must enter the
correct tempo before you can activate Musical Mode.
Tempo
Displays the tempo of audio files, if available. If no tempo has been specified,
the column displays “???”.
Sign.
Displays the time signature, for example, “4/4”.
Key
Displays the root key if one has been specified for the file.
Algorithm
Displays the algorithm preset that is used if the audio file is processed.
• To change the default preset, click the preset name and select another
preset from the pop-up menu.
Info
For audio clips, this column displays the sample rate, bit resolution, number of
channels, and length.
For regions, it displays start and end times in frames.
For video clips, it displays the frame rate, resolution, number of frames, and
length.
Type
Displays the file format of the clip.
Date
Displays the date when the audio file was last changed.
Pool
Pool Window
317
Origin Time
Displays the original start position where a clip was recorded in the project.
As this value can be used as a basis for the Insert into Project option in the
Media or context menu, you can change it if the Origin Time value is
independent (for example, not for regions).
Cubase Elements only: You can change the value by editing the value in the
column, or by selecting the corresponding clip in the Pool, moving the project
cursor to the new position and selecting Audio > Update Origin.
Image
Displays waveform images of audio clips or regions.
Path
Displays the path to the location of a clip on the hard disk.
Reel Name
Audio files may include this attribute, which is then shown in this column. The
Reel Name describes the reel or tape from which the media was originally
captured.
Info Line
The info line displays additional information regarding the files in the pool.
• To activate the info line, click the Show Info button at the left of the toolbar.
The info line shows the following information:
Audio Files
The number of audio files in the Pool.
Used
The number of audio files in use.
Total Size
The total size of all audio files in the Pool.
External Files
The number of files in the Pool that do not reside in the project folder (for
example, video files).
Customizing the View
You can set up which columns are shown or hidden and rearrange the order of the
columns in the Pool.
• To specify which columns are shown or hidden, open the View/Attributes
menu on the toolbar, and activate or deactivate items.

Pool
Working with the Pool
318
• To rearrange the order of columns, drag a column heading to the left or right.
Working with the Pool
NOTE
Most of the Pool-related main menu functions are also available on the Pool context
menu.
Renaming Clips or Regions in the Pool
IMPORTANTIMPORTANTIMPORTANTIMPORTANT
Renaming clips or regions in the Pool also renames the referenced files on disk. It
is recommended to rename clips or regions in the Pool. Otherwise, the reference
from the clip to the file may get lost.
PROCEDURE
1. In the Pool window, select a clip or region, and click the existing name.
2. Type in a new name and press [Return].
RELATED LINKS
About Missing Files on page 324
Duplicating Clips in the Pool
You can create duplicates of clips and apply different processing methods to them.
NOTE
Duplicating a clip does not create a new file on disk, but a new edit version of the
clip that refers to the same audio file.
PROCEDURE
1. In the Pool window, select the clip that you want to duplicate.
2. Select Media > New Version.
RESULT
A new version of the clip appears in the same Pool folder. The duplicated clip has
the same name as the original but with a version number after it. Regions within a
clip are also copied, but keep their name.
Pool
Working with the Pool
319
Inserting Clips into a Project
To insert a clip into a project, you can either use the insert commands on the Media
menu or use drag and drop.
Inserting Clips into a Project Via Menu Commands
PROCEDURE
1. In the Pool window, select the clips that you want to insert into the project.
2. Select Media > Insert into Project and select one of the insert options.
If several clips are selected, choose whether to insert them on one track or each on
a different track.
NOTE
The clips are positioned so that their snap points are aligned with the selected insert
position. If you want to adjust the snap point before inserting a clip, double-click a clip
to open the Sample Editor. Here, you can adjust the snap position and then perform
the insert options.
RESULT
The clip is inserted on the selected track or on a new audio track. If several tracks
are selected, the clip will be inserted on the first selected track.
RELATED LINKS
Adjusting the snap point on page 289
Inserting Clips into a Project Via Drag and Drop
You can drag a clip from the Pool into the Project window.
Snap is taken into account if the snap option is activated.
While you drag the clip into the Project window, its position is indicated by a marker
line and a numerical position box. These indicate the position of the snap point in
the clip.
If you position the clip in an empty area in the event display (for example, below
existing tracks), a new track is created for the inserted event.
RELATED LINKS
Adjusting the snap point on page 289
Deleting Clips from the Pool
You can delete clips from the Pool with or without deleting the corresponding file
from the hard disk.

Pool
Working with the Pool
320
Removing Clips from the Pool
NOTE
Removing clips from the Pool does not delete the corresponding file from the hard
disk.
PROCEDURE
1. In the Pool window, select the clips that you want to remove, and select Edit
> Delete
You can also press [Backspace] or [Delete].
2. Depending on whether the clips are used by an event, you have the following
options:
• If the clips are used by an event, click Remove and then click Remove from
Pool.
• If the clips are not used by an event, click Remove from Pool.
RESULT
The clips are no longer available in the Pool for this project, but the files still exist on
the hard disk and can be used in other projects, etc. This operation can be undone.
Deleting Files from the Hard Disk
To delete a file permanently from the hard disk, you must first move the
corresponding clips to the Trash folder in the Pool.
IMPORTANTIMPORTANTIMPORTANTIMPORTANT
• Before you permanently delete audio files from the hard disk, make sure that
they are not used in another project.
• The following operation cannot be undone.
PROCEDURE
1. In the Pool window, select the clips that you want to delete from the hard disk,
and select Edit > Delete
You can also press [Backspace] or [Delete], or drag the clips into the Trash folder.
NOTE
You can retrieve a clip or region from the Trash folder by dragging it back into an
Audio or Video folder.
2. Depending on whether the clips are used by an event, you have the following
options:
• If the clips are used by an event, click Remove and then click Trash.
• If the clips are not used by an event, click Trash.

Pool
Working with the Pool
321
3. Select Media > Empty Trash.
4. Click Erase.
RESULT
The files are deleted from the hard disk.
Removing Unused Clips from the Pool
You can find all clips in the Pool that are not used in the project. This allows you to
quickly remove all unused clips.
PROCEDURE
1. In the Pool, select Media > Remove Unused Media.
2. Do one of the following:
• To move the clips to the Trash folder, select Trash.
• To remove the clips from the Pool, select Remove from Pool.
Removing Regions from the Pool
PROCEDURE
• In the Pool, select a region and select Edit > Delete.
You can also press [Backspace] or [Delete].
IMPORTANT
You are not warned if the region is still in use.
Locating Events and Clips
You can quickly display to which clips the selected events belong to and to which
events the selected clips belong to.
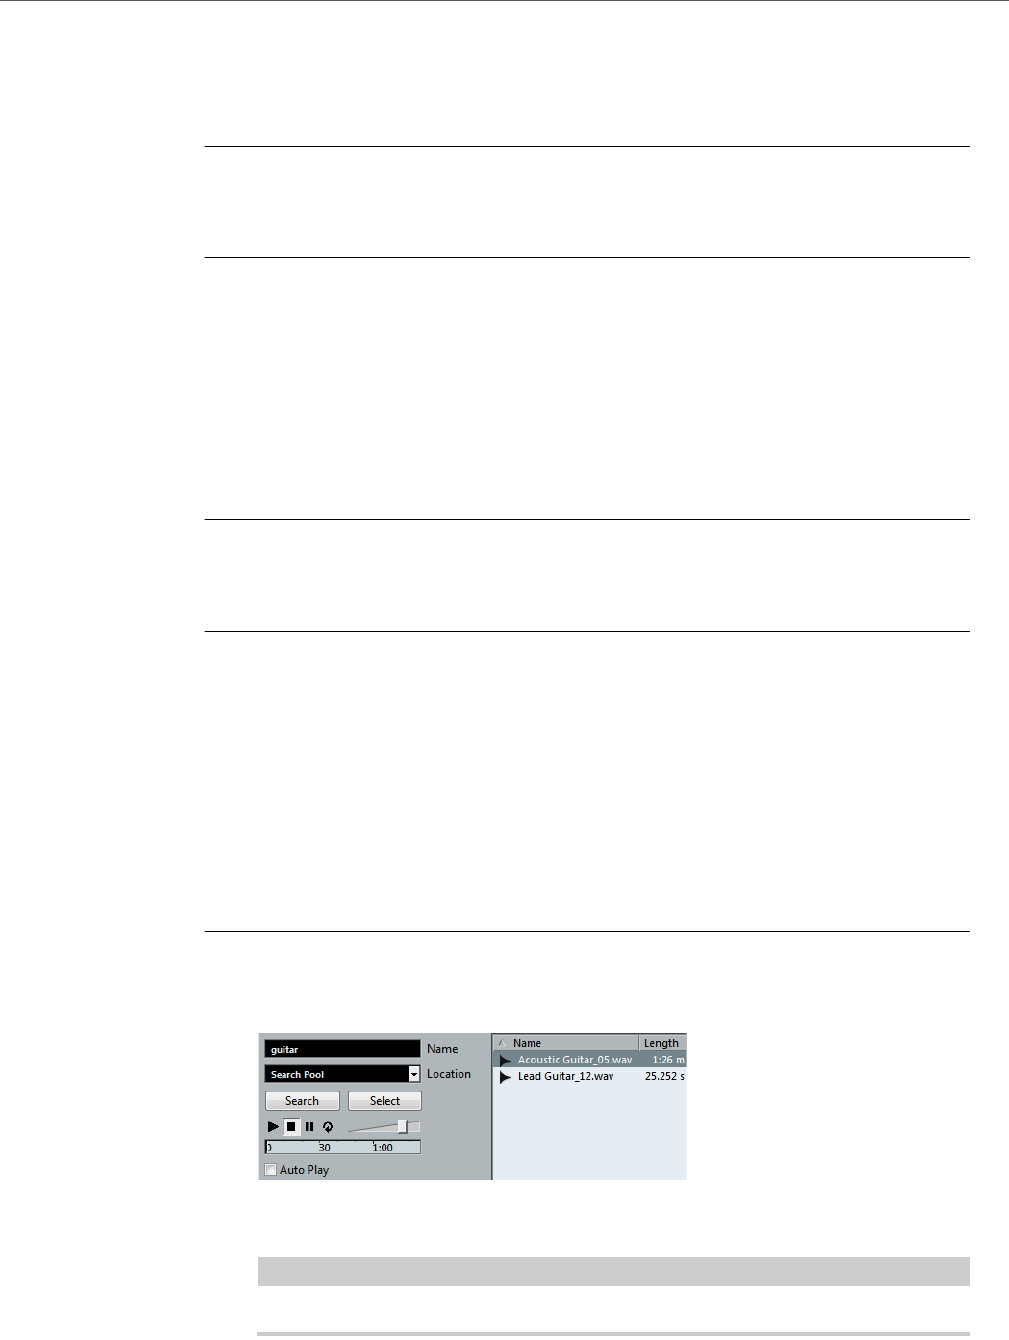
Pool
Working with the Pool
322
Locating Events via Clips in the Pool
You can find out which events in the project refer to a particular clip in the Pool.
PROCEDURE
1. In the Pool window, select one or more clips.
2. Select Media > Select in Project.
RESULT
All events that refer to the selected clips are now selected in the Project window.
Locating Clips via Events in the Project Window
You can find out which clip belongs to a particular event in the Project window.
PROCEDURE
1. In the Project window, select one or more events.
2. Select Audio > Find Selected in Pool.
RESULT
The corresponding clips are located and highlighted in the Pool.
Searching for Audio Files
The search functions help you locate audio files in the Pool, on your hard disk, or on
other media. This works much like the regular file search, but with extra features.
PROCEDURE
1. In the Pool window, click the Search button on the toolbar.
A search pane appears at the bottom of the window, displaying the search functions.
2. Specify the files that you search for in the Name field.
You can use partial names or wildcards (*).
NOTE
Only audio files of the supported formats will be found.
3. Use the Location pop-up menu to specify where to search.
The pop-up menu lists all your local drives and removable media.
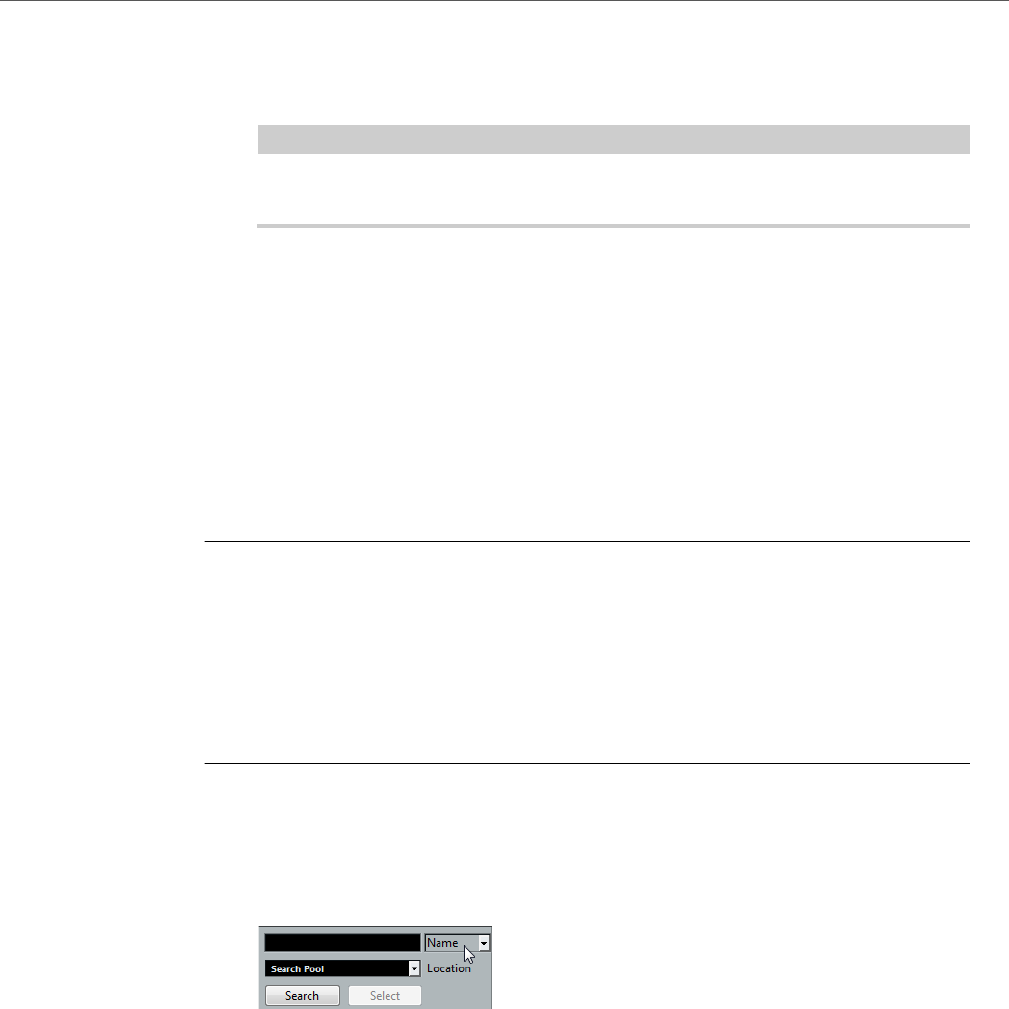
Pool
Working with the Pool
323
• To limit the search to certain folders, select Select Search Path, and in the
dialog that opens, select the folder in which you want to search.
The search will include the selected folder and all subfolders.
NOTE
Folders that you have recently selected using the Select Search Path function
appear on the pop-up menu, so that you can quickly select them again.
4. Click the Search button.
The search is started and the Search button is labeled Stop.
• To cancel the search, click Stop.
When the search is finished, the files that are found are listed on the right.
• To audition a file, select it in the list and use the playback controls to the left
(Play, Stop, Pause, and Loop). If Auto Play is activated, selected files are
automatically played back.
• To import a file into the Pool, double-click the file in the list or select it and click
the Import button.
5. To close the search pane, click the Search button on the toolbar again.
Using the Extended Search Functionality
Apart from the search criterion Name, additional search filters are available. The
extended search options allow for a detailed search, helping you to master even the
largest sound database.
PROCEDURE
1. In the Pool window, click the Search button on the toolbar
The Search pane is displayed in the lower part of the Pool window.
2. Click the Name text to open the extended search pop-up menu where you
can select and define a search criterion.
The menu also contains the Add Filter and Presets submenus.
The search criteria have the following parameters:
•Name: partial names or wildcards (*)
•Size: Less than, More than, Equal, Between (two values), in seconds, minutes,
hours, and bytes
•Bitsize (resolution): 8, 16, 24, 32
•Channels: Mono, Stereo, and from 3 to 16
•Sample Rate: various values, choose Other for free setting
•Date: various search ranges
3. Select one of the search criteria in the pop-up menu.
The search criteria changes to the selected criteria.
4. Optional: To display more search options, open the extended search pop-up
menu, select the Add filter submenu, and select an element.

Pool
Working with the Pool
324
5. Optional: To save your search filter settings as a preset, open the extended
search pop-up menu, select Presets > Save Preset, and enter a name for
the preset.
Saved presets are added to the Presets submenu.
6. Optional: To remove a search filter settings preset, open the extended search
pop-up menu, select the preset, and then select Remove Preset.
Find Media Window
The Find Media window is a stand-alone window that offers the same functionality
as the Search Media option in the Pool.
• To open the Find Media window, select Media > Search Media.
• To insert a clip or region into the project from the Find Media window, select
it in the list, select Media > Insert into Project, and select one of the insert
options.
RELATED LINKS
Inserting Clips into a Project on page 319
About Missing Files
When you open a project and one or more files are missing, the Resolve Missing
Files dialog opens. If you click Close, the project opens without the missing files.
In the Pool, you can check which files are considered missing. This is indicated by
a question mark in the Status column.
A file is considered missing under one of the following conditions:
• The file has been moved or renamed outside the program since you last
worked with the project, and you ignored the Resolve Missing Files dialog
when you opened the project for the current session.
• You have moved or renamed the file outside the program during the current
session.
• You have moved or renamed the folder in which the missing files are located.
Locating Missing Files
PROCEDURE
1. Select Media > Find Missing Files.
2. In the Resolve Missing Files dialog, decide if you want the program to find
the file for you (Search), if you want to find it yourself (Locate), or if you want
to specify in which directory the program will search for the file (Folder).

Pool
Working with the Pool
325
• If you select Search, a dialog opens to let you specify which folder or disk will
be scanned by the program. Click the Search Folder button, select a directory
or a disk, and click the Start button. If found, select the file from the list and
click Accept. Afterwards Cubase tries to map all other missing files
automatically.
• If you select Locate, a file dialog opens, allowing you to locate the file manually.
Select the file and click Open.
•If you select Folder, a dialog opens to let you specify the directory in which the
missing file can be found. This might be the preferred method if you have
renamed or moved the folder containing the missing file, but the file still has the
same name. Once you select the correct folder, the program finds the file and
you can close the dialog.
Reconstructing Missing Edit Files
If a missing file cannot be found, this is normally indicated with a question mark in
the Status column in the Pool. However, if the missing file is an edit file (a file that
is created when you process audio and stored in the Edits folder within the project
folder), it may be possible for the program to reconstruct it by recreating the editing
to the original audio file.
PROCEDURE
1. In the Pool window, locate the clips for which files are missing.
2. Check the Status column. If the status of the files is “Reconstructible”, the
files can be reconstructed by Cubase.
3. Select the reconstructable clips and select Media > Reconstruct.
RESULT
The editing is performed and the edit files are recreated.
Removing Missing Files from the Pool
If the Pool contains audio files that cannot be found or reconstructed, you may want
to remove these.
PROCEDURE
• In the Pool window, select Media > Remove Missing Files.
RESULT
All missing files from the Pool and the corresponding events from the Project
window are removed.

Pool
Working with the Pool
326
Auditioning Clips in the Pool
You can audition clips in the Pool using key commands, the Audition button, or by
clicking in the waveform image for a clip.
• Key commands
If you activate the Playback Toggle triggers Local Preview option in the
Preferences dialog (Transport page), you can use [Space] to audition. This is
the same as activating the Audition button on the toolbar.
• Select a clip and activate the Audition button.
The whole clip plays back. To stop playback, click the Audition button again.
• Click in the waveform image for a clip.
The clip plays back from the selected position in the waveform until the end.
To stop playback, click the Audition button or anywhere else in the Pool
window.
The audio is routed directly to the Main Mix (the default output) bus, bypassing the
settings of the audio channel, effects, and EQs.
NOTE
You can adjust the auditioning level with the miniature level fader on the toolbar.
This does not affect the regular playback level.
If you have activated the Audition Loop button before you audition, the following
happens:
• When you click the Audition button to audition a clip, the clip is repeated
indefinitely until you stop playback by clicking the Audition or Audition Loop
button again.
• When you click in the waveform image to audition, the section from the selected
point to the end of the clip is repeated indefinitely until you stop playback.
Opening Clips in the Sample Editor
The Sample Editor allows you to perform detailed editing on the clip.
• To open a clip in the Sample Editor, double-click a clip waveform icon or a
clip name in the Media column.
• To open a certain region of a clip in the Sample Editor, double-click a region
in the Pool.
You can use this to set a snap point for a clip, for example. When you later
insert the clip from the Pool into the project, the defined snap point allows it
to be properly aligned.
RELATED LINKS
Adjusting the snap point on page 289
Sample Editor on page 281

Pool
Working with the Pool
327
Importing Media
The Import Medium dialog lets you import files directly into the Pool.
To open the dialog, select Media > Import Medium, or click the Import button on
the Pool toolbar.
This opens a standard file dialog, where you can navigate to other folders, audition
files, etc. The following audio file formats can be imported:
• Wave (Normal or Broadcast)
• AIFF and AIFC (Compressed AIFF)
•REX or REX 2
• FLAC (Free Lossless Audio Codec)
• SD2 (Sound Designer II) (Mac only)
• MPEG Layer 2 and Layer 3 (MP2 and MP3 files)
• Ogg Vorbis (OGG files)
• Windows Media Audio (Windows only)
• Wave 64 (W64 files)
The following characteristics are possible:
• Stereo or mono
•Any sample rate
NOTE
Files that have a different sample rate than the project sample rate are played
back at the wrong speed and pitch.
• 8, 16, 24, or 32 bit float resolution
• Various video formats
NOTE
You can also use the commands on the Import submenu of the File menu to import
audio or video files into the Pool.
RELATED LINKS
Broadcast Wave files on page 559
Importing ReCycle files on page 620
Importing compressed audio files on page 621
Video File Compatibility on page 585
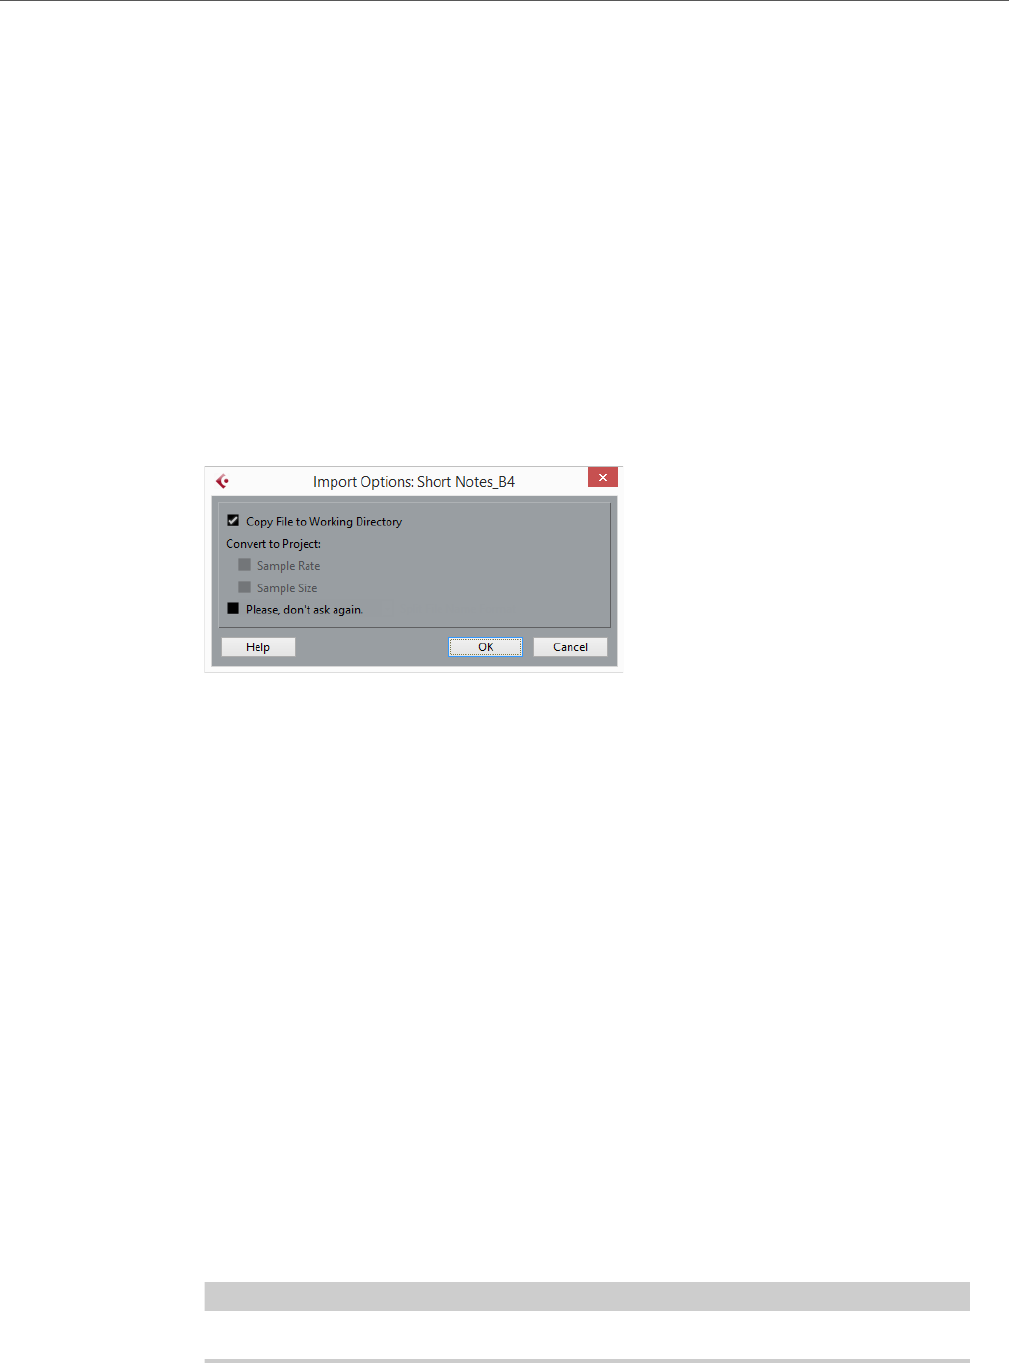
Pool
Working with the Pool
328
Importing Audio CDs in the Pool
You can import tracks or sections of tracks from an audio CD directly into the Pool.
This opens a dialog in which you can specify which tracks are copied from the CD,
converted to audio files, and added to the Pool.
• To import an audio CD to the Pool, select Media > Import Audio CD.
RELATED LINKS
Importing audio CD tracks on page 617
Import Options Dialog
When you select a file in the Import Medium dialog and click Open, the Import
Options dialog opens.
Copy File to Working Directory
If this option is activated, the file is copied to the Audio folder of the project,
and the clip refers to this copy.
If the option is deactivated, the clip refers to the original file in the original
location and will be marked as “external” in the Pool.
Convert to Project
If you are importing a single audio file, you can convert the sample rate
provided that the sample rate is different than the one set for the project. You
can also convert the sample size provided that the sample size is lower than
the record format that is used in the project.
If you are importing several audio files at once, the Import Options dialog
contains a Convert and Copy to Project if needed checkbox instead. When
this option is activated, the imported files will be converted only if the sample
rate is different or if the sample size is lower than the project sample size.
Please, don’t ask again
If this option is activated, files will always be imported according to the
settings that you have made, without this dialog appearing. This can be reset
in the Preferences dialog (Editing > Audio).
NOTE
You can also convert files later with the Convert Files or Conform Files options.

Pool
Working with the Pool
329
RELATED LINKS
Status on page 315
Converting Files on page 331
Conforming Files on page 333
Exporting Regions as Audio Files
If you have created regions within an audio clip, these can be exported as separate
audio files. If you have two clips that refer to the same audio file, you can create a
separate audio file for each clip.
PROCEDURE
1. In the Pool window, select the region that you want to export.
2. Select Audio > Bounce Selection.
3. Select the folder in which you want the new file to be created and click OK.
4. If you are using the Bounce Selection option to create a separate audio file
for a clip that refers to the same audio file as another clip, enter a name for the
new audio file.
RESULT
A new audio file is created in the specified folder. The file has the name of the region
and is automatically added to the Pool.
RELATED LINKS
Working with regions on page 293
Changing the Pool Record Folder
All audio clips that you record in the project will end up in the Pool Record folder.
The Pool Record folder is indicated by the text Record in the Status column and by
a red dot on the folder itself.
By default, this is the main Audio folder. However, you can create a new Audio
subfolder and designate this as your Pool Record folder.
NOTE
The folders that you create in the Pool are only for organizing your files in the Pool.
All files are recorded to the folder that you specified as the Pool Record Folder.
PROCEDURE
1. In the Pool, select the Audio folder or any audio clip.
NOTE
You cannot designate the Video folder or any of its subfolders as the Pool Record
folder.

Pool
Working with the Pool
330
2. Select Media > Create Folder.
3. Rename the new folder.
4. Select the new folder and select Media > Set Pool Record Folder, or click
in the Status column of the new folder.
RESULT
The new folder becomes the Pool Record folder. Any audio recorded in the project
will be saved in this folder.
Organizing Clips and Folders
If you accumulate a large number of clips in the Pool, it can be difficult to quickly
find specific items. Organizing clips in new subfolders with names that reflect the
content can be a solution. For example, you could put all sound effects in one folder,
all lead vocals in another, etc.
PROCEDURE
1. In the Pool window, select the type of folder, audio or video, for which you
want to create a subfolder.
NOTE
You cannot put audio clips in a video folder and vice versa.
2. Select Media > Create Folder.
3. Rename the folder.
4. Drag the clips to the new folder.
Applying Processing to Clips in the Pool
You can apply audio processing to clips from within the Pool in the same way as to
events in the Project window.
PROCEDURE
1. In the Pool window, select the clips that you want to process.
2. Select Audio > Process and select a processing method.
RESULT
A red and gray waveform symbol indicates that the clips have been processed.
RELATED LINKS
Audio processing and functions on page 262

Pool
Working with the Pool
331
Minimizing Files
You can minimize the audio files according to the size of the audio clips referenced
in the project. The files that are produced using this option only contain the audio
file portions that are actually used in the project.
This can significantly reduce the size of the project if large portions of the audio files
are unused. Therefore, the option is useful for archiving purposes after you have
completed a project.
IMPORTANTIMPORTANTIMPORTANTIMPORTANT
This operation will permanently change the selected audio files in the Pool. This
cannot be undone. If you only want to create the minimized audio files as a copy,
leaving the original project untouched, you can use the Back up Project option.
NOTE
Minimizing files clears the entire edit history.
PROCEDURE
1. In the Pool window, select the files that you want to minimize.
2. Select Media > Minimize File.
3. Click Minimize.
After the minimizing is finished, the file references in the stored project have become
invalid.
4. Do one of the following.
• To save the updated project, click Save Now.
• To proceed with the unsaved project, click Later.
RESULT
Only the audio portions that are actually used in the project remain in the
corresponding audio files in the Pool Record folder.
RELATED LINKS
Backing Up Projects on page 57
Converting Files
In the Pool, you can convert files to another format or change file attributes.
PROCEDURE
1. In the Pool window, select the files that you want to convert.
2. Select Media > Convert Files.
3. In the Convert Options dialog, make your settings and click OK.
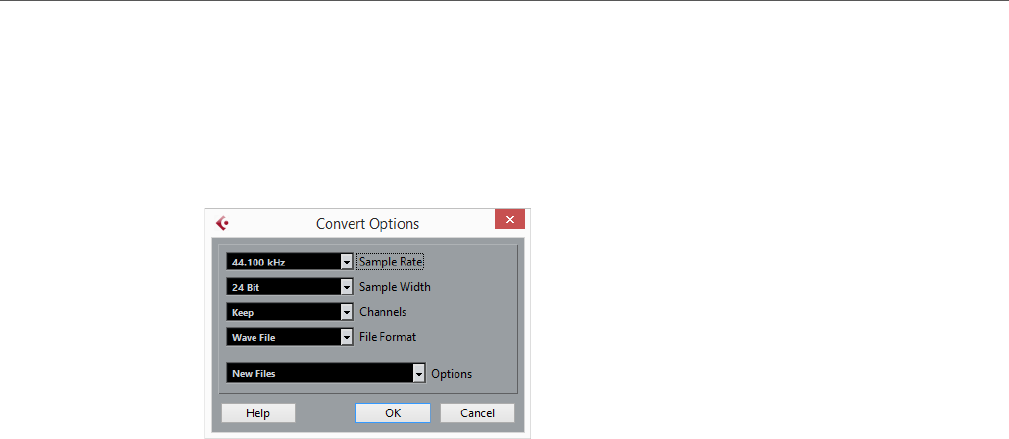
Pool
Working with the Pool
332
Convert Options Dialog
In this dialog, you can change the file format and attributes of audio files in the Pool.
To open the Convert Options dialog, select a clip in the Pool window, and select
Media > Convert Files.
Sample Rate
Allows you to convert to another sample rate.
Sample Width
Allows you to convert to 16 Bit, 24 Bit, or 32 Bit Float.
Channels
Allows you to convert to Mono or Stereo Interleaved.
File Format
Allows you to convert to Wave, AIFF, Wave 64, or Broadcast Wave format.
Options
You can use the Options pop-up menu to set one of the following options:
•New Files
Creates a copy of the file in the audio folder and converts this new file
according to the chosen attributes. The new file is added to the Pool,
but all clip references still point to the original, unconverted file.
•Replace Files
Converts the original file without changing clip references. However, the
references are saved with the next save action.
•New + Replace in Pool
Creates a new copy with the chosen attributes, replaces the original file
with the new one in the Pool and redirects the current clip references
from the original file to the new file. Select the latter option if you want
your audio clips to refer to the converted file, but want to keep the
original file on disk, for example, if the file is used in other projects.

Pool
Working with the Pool
333
Conforming Files
You can align the file attributes with the project attributes. This is useful if the
attributes of the selected files are different from the project attributes.
PROCEDURE
1. In the Pool window, select the clips that you want to conform.
2. Select Media > Conform Files.
3. Select whether to keep or replace the original unconverted files in the Pool.
• If you select the Replace option, files in the Pool and in the Audio folder of the
project are replaced.
•If any Keep option is selected, original files remain in the Audio folder of the
project and new files are created.
RESULT
The files are conformed. Clip or event references in the Pool are redirected to the
conformed files.
Extracting Audio from Video File
You can extract audio from video files. This automatically generates a new audio clip
that appears in the Pool Record folder.
NOTE
This function is not available for MPEG-1 video files.
PROCEDURE
1. In the Pool window, select Media > Extract Audio from Video File.
2. Select the video file from which you want to extract audio and click Open.
RESULT
The audio is extracted from the video file. The audio file gets the same file format
and sample rate/width as in the current project, and the same name as the video file.
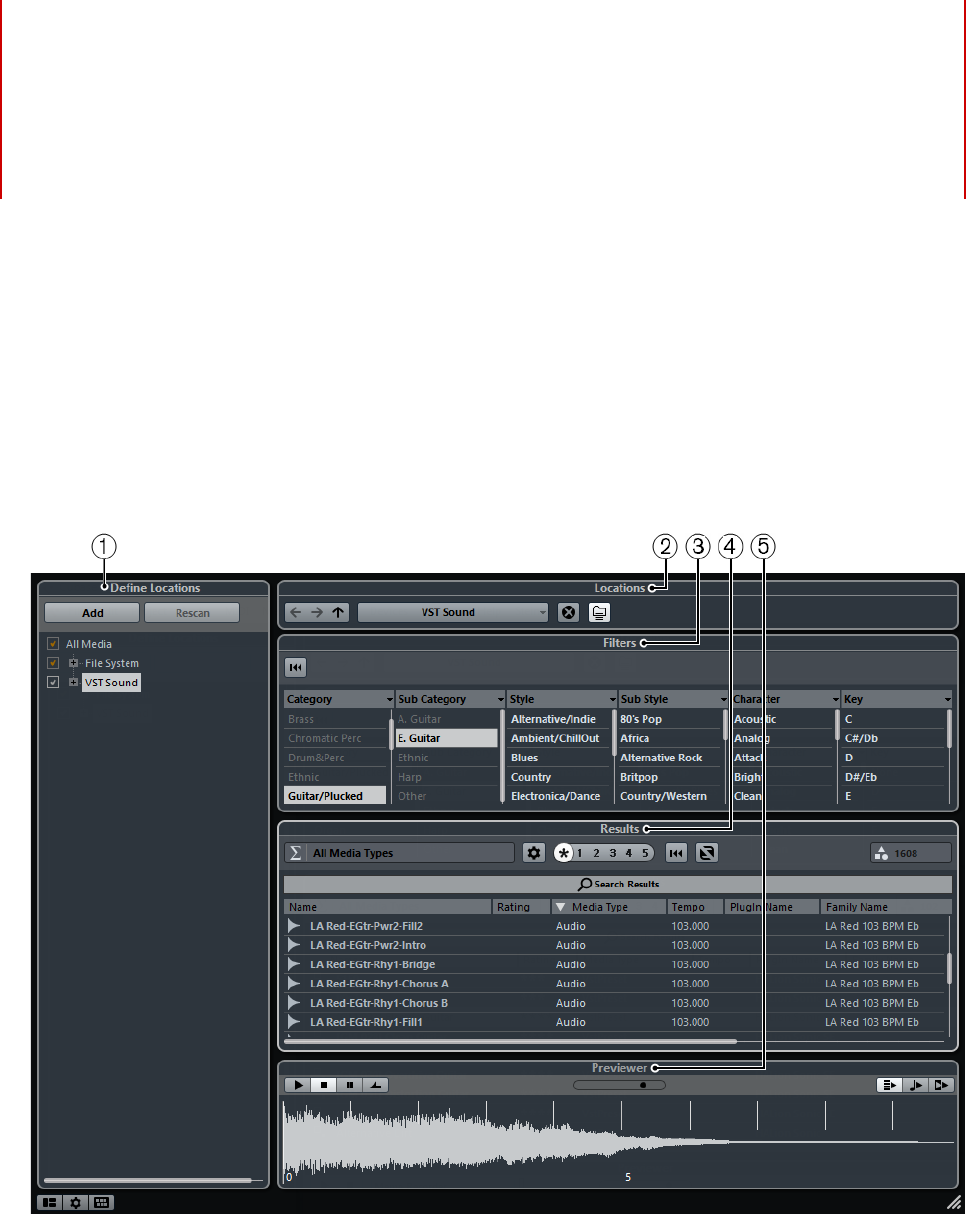
334
MediaBay
With the MediaBay, you can manage all your media files and presets from multiple
sources.
To open the MediaBay, select Media > MediaBay, or press [F5].
The MediaBay is divided into several sections:
1) Define Locations
Allows you to create presets for locations on your system that you want to
scan for media files.
2) Locations
Allows you to switch between the previously defined locations.
3) Filters
Allows you to filter the results list using a logical or an attribute filter.

MediaBay
Working With the MediaBay
335
4) Results
Displays all found media files. You can filter the list and perform text searches.
5) Previewer
Allows you to preview the files shown in the results list.
Working With the MediaBay
When working with many music files, the most important thing is to find the content
that you need quickly and easily.
The MediaBay helps you to find and organize your content. After scanning your
folders, all media files of the supported formats that have been found are listed in
the Results section.
The first thing to do is to set up Locations, that is folders or directories on your
system that contain media files. Usually, files are organized in a specific way on your
computer. You might have folders reserved for audio content, folders for special
effects, folders for combinations of sounds making up the ambience noise that you
need for a certain film take, etc. These can all be set as different Locations in the
MediaBay, allowing you to limit the files available in the Results list according to
context.
Whenever you expand your computer system, you should save the new volumes as
Locations or add them to your existing Locations.
By using the search and filter options, you can narrow down the results.
You can insert the files into your project by using drag & drop, by double-clicking,
or by using the context menu options.
Setting Up the MediaBay
You can show and hide the different sections of the MediaBay. This saves screen
space and enables you to display only the information that you need.
PROCEDURE
1. Click the Set up Window Layout button in the lower left corner of the
MediaBay.
A transparent pane appears, containing checkboxes for the different sections.
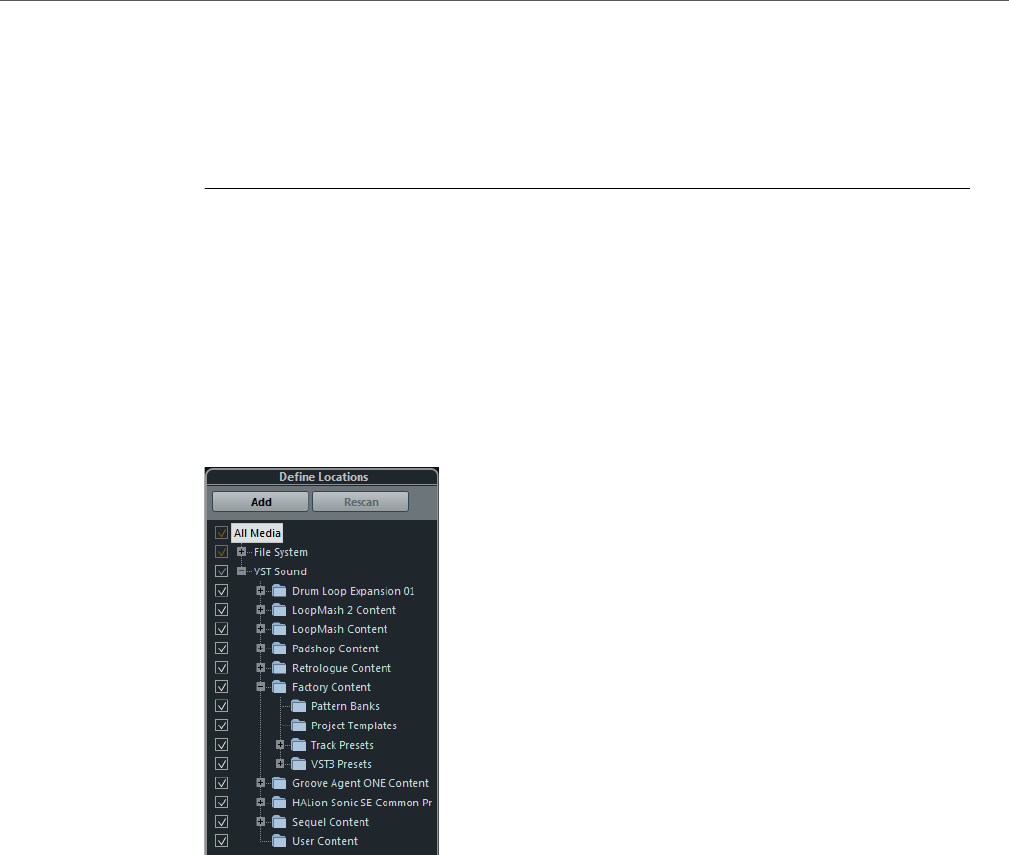
MediaBay
Define Locations Section
336
2. Deactivate the checkboxes for the sections that you want to hide.
You can also use key commands for this: use the [Up]/[Down] and [Left]/[Right] arrow
keys to step through the checkboxes and press [Space] to activate/deactivate the
selected checkbox.
3. When you are done, click outside the pane to exit the setup mode.
Define Locations Section
In the Define Locations section, you can specify which folders or directories you
want to include in the scan for media files. To do so, activate/deactivate the
checkboxes for the folders.
The color of the checkmark helps you to identify which folders and subfolders are
scanned:
• White indicates that all subfolders are scanned.
• Orange indicates that at least one subfolder is excluded from the scan.
To revert to scanning a complete folder including all subfolders, click on an
orange checkmark.
The scanning status for the individual folders is indicated by the color of the folder
icons:
• Red indicates that the folder is currently being scanned.
• Light blue indicates that the folder has been scanned.
• Dark blue indicates that a folder is excluded from the scan.
• Orange indicates that the scanning process for the folder was interrupted.
• Yellow indicates that a folder has not yet been scanned.

MediaBay
Scanning Your Content
337
VST Sound Node
The VST Sound node is a shortcut to your user content and the factory content files,
including the preset folders.
The folders below the VST Sound node represent the directories in which content
files and track presets, VST presets, etc. are stored by default.
Scanning Your Content
You can specify which folders or directories you want to include in the scan.
• To include a folder in the scan, activate its checkbox.
• To exclude a folder from the scan, deactivate its checkbox.
• To restrict the search to individual subfolders, activate/deactivate their
checkboxes.
The scan result is saved in a database file. When you deactivate the checkbox for a
folder that has already been scanned, a message appears, allowing you to keep the
gathered scan data in this database file or to completely remove the data for this
folder from the database file.
• To keep the database entries and exclude the folder from being scanned,
select Keep.
• To remove the contents from the database, select Remove.
All files that are found in the specified folders are shown in the Results list.
Updating the MediaBay
When you have made changes to the content of media folder or modified attributes,
you must update the MediaBay. You can update the MediaBay by rescanning or
by refreshing.
Rescanning
If you have made changes to the content of specific media folders and want those
changes to be displayed in the MediaBay you must rescan them.
• To rescan the selected folder and its subfolders, click the Rescan button in
the Define Locations section. You can also right-click a folder and select
Rescan Disk.
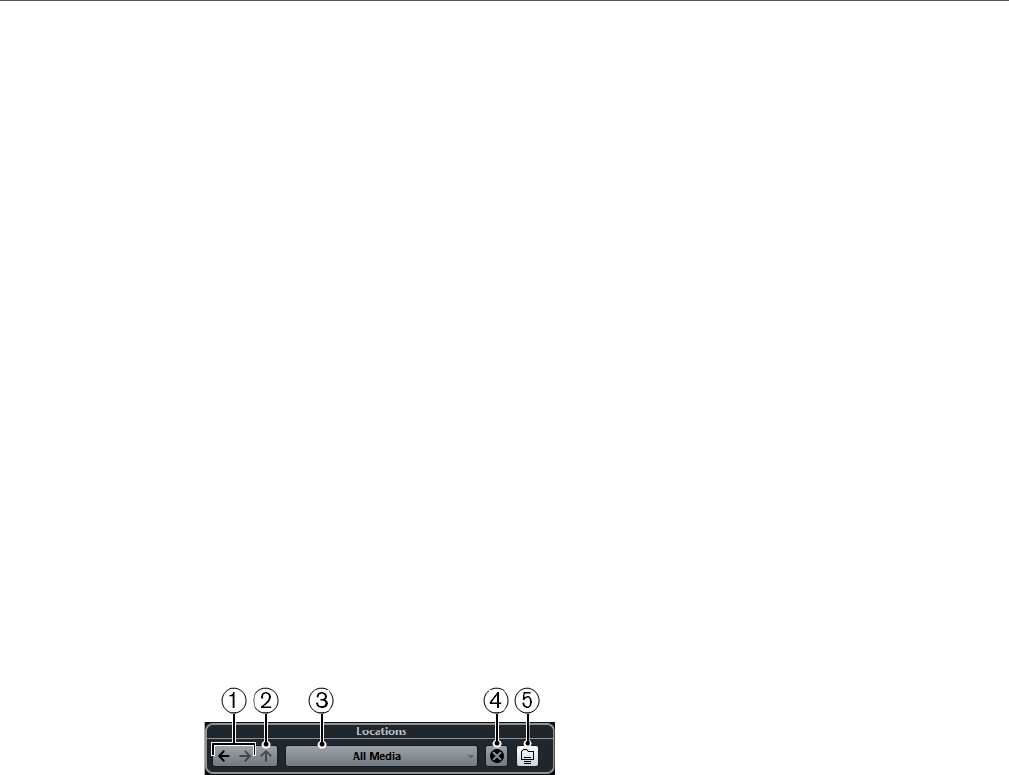
MediaBay
Locations Section
338
• To rescan only the folders that have changed since the last scan, right-click
in the Define Locations section, and select Quick Rescan Disk.
Refreshing
If you have modified attribute values or mapped a new network, you must refresh the
corresponding folders.
• To refresh a folder, in the Define Locations section of the MediaBay
right-click a folder, and select Refresh Views.
• To display a new network drive, in the Define Locations section of the
MediaBay right-click the parent node, and select Refresh Views. You can
then scan the drive for media files.
Locations Section
When you open the Select Defined Browse Location pop-up menu and select a
location, the media files that are found in that location are shown in the Results list.
By switching between the locations you defined, you can quickly browse to the files
you are looking for.
1) Previous/Next Browse Location
Selects the previous/next browse location.
2) Browse Containing Folder
Opens the parent location of the selected folder.
3) Select Defined Browse Location
The following location presets are available by default:
All Media, Local Harddisks, VST Sound, Documents, Desktop, Music,
Cubase Projects.
4) Remove Browse Location Definition
Removes the selected browse location.
5) Deep Results
If this option is activated, the media files that are located in the subfolders of
the selected location are also displayed in the results list.

MediaBay
Locations Section
339
Defining Locations
You can define locations, that is shortcuts to the folders that you want to work with.
These are shown in the Locations section.
PREREQUISITE
Set up the Define Locations section and scan the content.
PROCEDURE
1. In the Define Locations section in the MediaBay, select the folder that you
want to define as a location.
2. Click the Add button.
3. Accept the default name or enter a new name.
4. Click OK.
The new location is added to the Select Defined Browse Location pop-up menu in
the Locations section.
5. Repeat these steps to add as many locations as you want.
AFTER COMPLETING THIS TASK
Once you have set up your locations, you can hide the Define Locations section
from view, to save screen space.
Browsing the Locations
You can quickly switch between different locations.
• To change the browse location, select another location from the Select
Defined Browse Location pop-up menu.
If the available locations do not include the files that you want to display or if
the folder that you want to scan for files is not part of any of the locations,
define a new location in the Define Locations section.
• To select the previous or next folder, click the Previous/Next Browse
Location buttons. These paths are deleted when you close the MediaBay.
• To select the parent folder of the selected folder, click the Browse
Containing Folder button.
• To remove a location from the pop-up menu, select it and click the Remove
Browse Location Definition button.
• To show the files contained in the selected folder and any subfolders, activate
the Deep Results button. When this button is deactivated, only the folders
and files contained in the selected folder are shown.
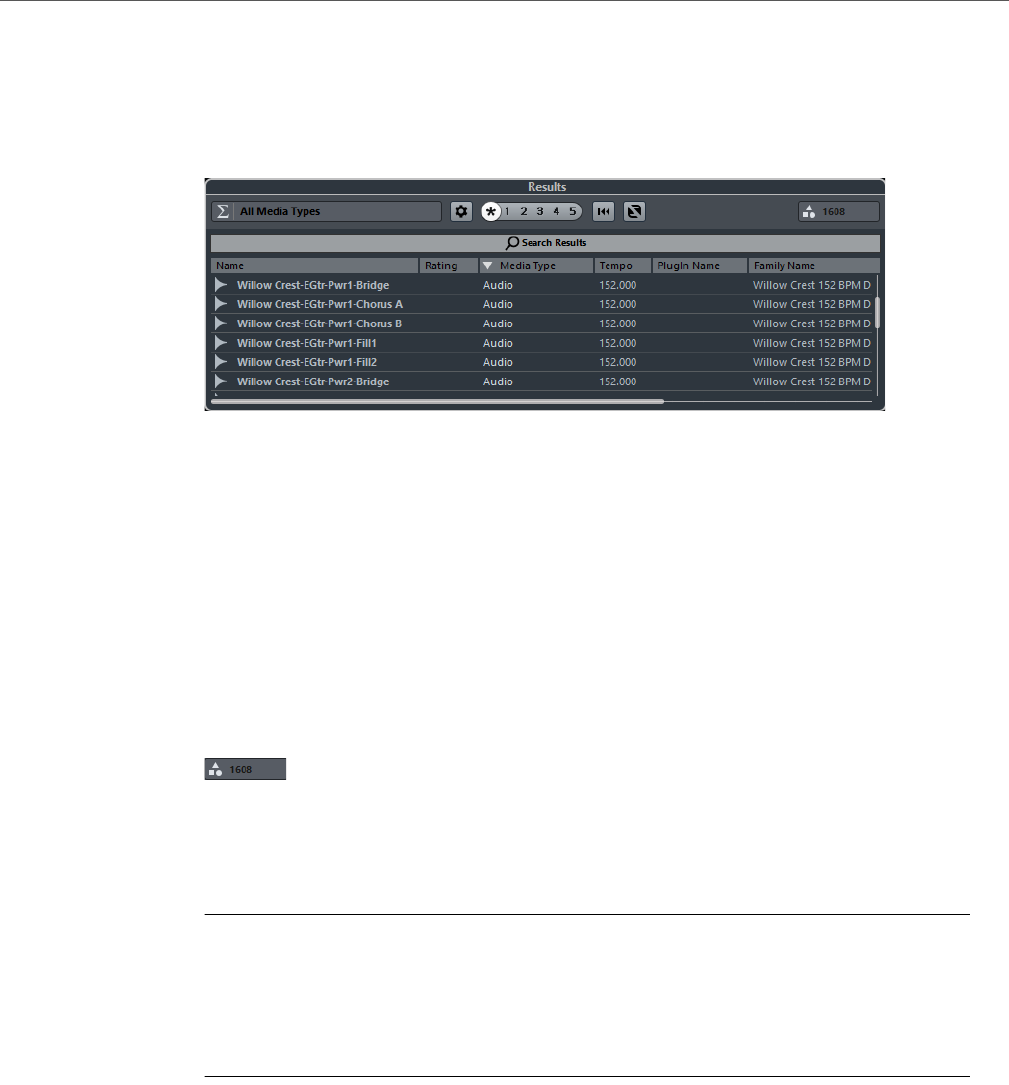
MediaBay
Results Section
340
Results Section
The Results list shows all media files that are found in the selected location.
The info field in the top right corner of the Results section shows how many files
were found with the current filter settings. As the number of files displayed can be
huge, you can use any of the filter and search options in the MediaBay to narrow
down the list.
To set the maximum number of files that are displayed in the Results list, specify a
new value for Maximum Items in Results List in the MediaBay Preferences.
Search in Progress Indicator
An indicator to the right of the number of files found indicates that a media search
is in progress.
Inserting Files into the Project
PROCEDURE
• To insert a file into your project, do one of the following:
• Right-click the file and select one of the Insert into Project options.
• Double-click the file.
• Drag it into the project.
RESULT
Depending on the track type, the following happens:
• Audio files, MIDI loops, and MIDI files are inserted on the active track if this
matches the file type or onto a new track if no corresponding track is active.
The files are inserted at the project cursor position.
• If you double-click a track preset it is applied to the active track if the track
type matches the track preset. Otherwise, a new track is inserted, containing
the settings of the track preset.
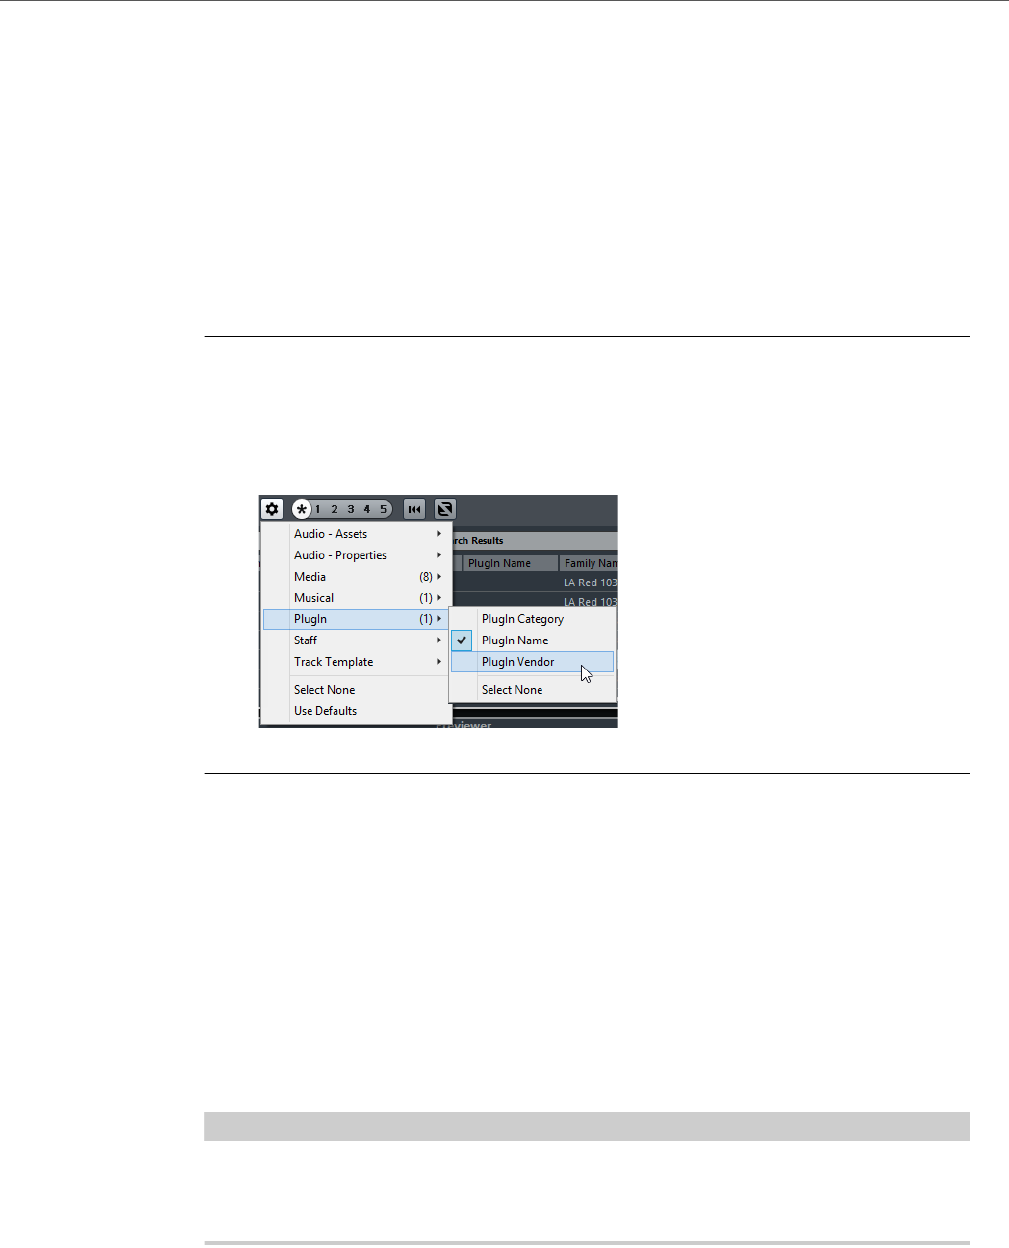
MediaBay
Results Section
341
• If you double-click a VST preset, an instrument track is added to the project,
containing an instance of the corresponding instrument. For some VST
presets, this loads the entire instrument settings, programs, etc. For others,
only one program is loaded.
Setting Up the Results List Columns
For each media type, or for combinations of media types, you can specify the
attribute columns that are displayed in the Results list.
PROCEDURE
1. In the Results section of the MediaBay, select the media types that you want
to make settings for.
2. Click the Set up Result Columns button and activate or deactivate the
options on the submenus.
To exclude a particular category, select Select None on the corresponding submenu.
Managing Media Files in the Results List
• To move or copy a file from the Results list to another location, drag it to
another folder in the Define Locations section.
• To change the order of the columns in the Results list, click on a column
header, and drag that header to another position.
• To delete a file, right-click it in the list and select Delete. The file is
permanently deleted from your computer.
IMPORTANTIMPORTANTIMPORTANTIMPORTANT
If you delete a file using the Windows Explorer/Mac OS Finder, it is still displayed
in the Results list, although it is no longer available to the program. To remedy this,
re-scan the corresponding folder.
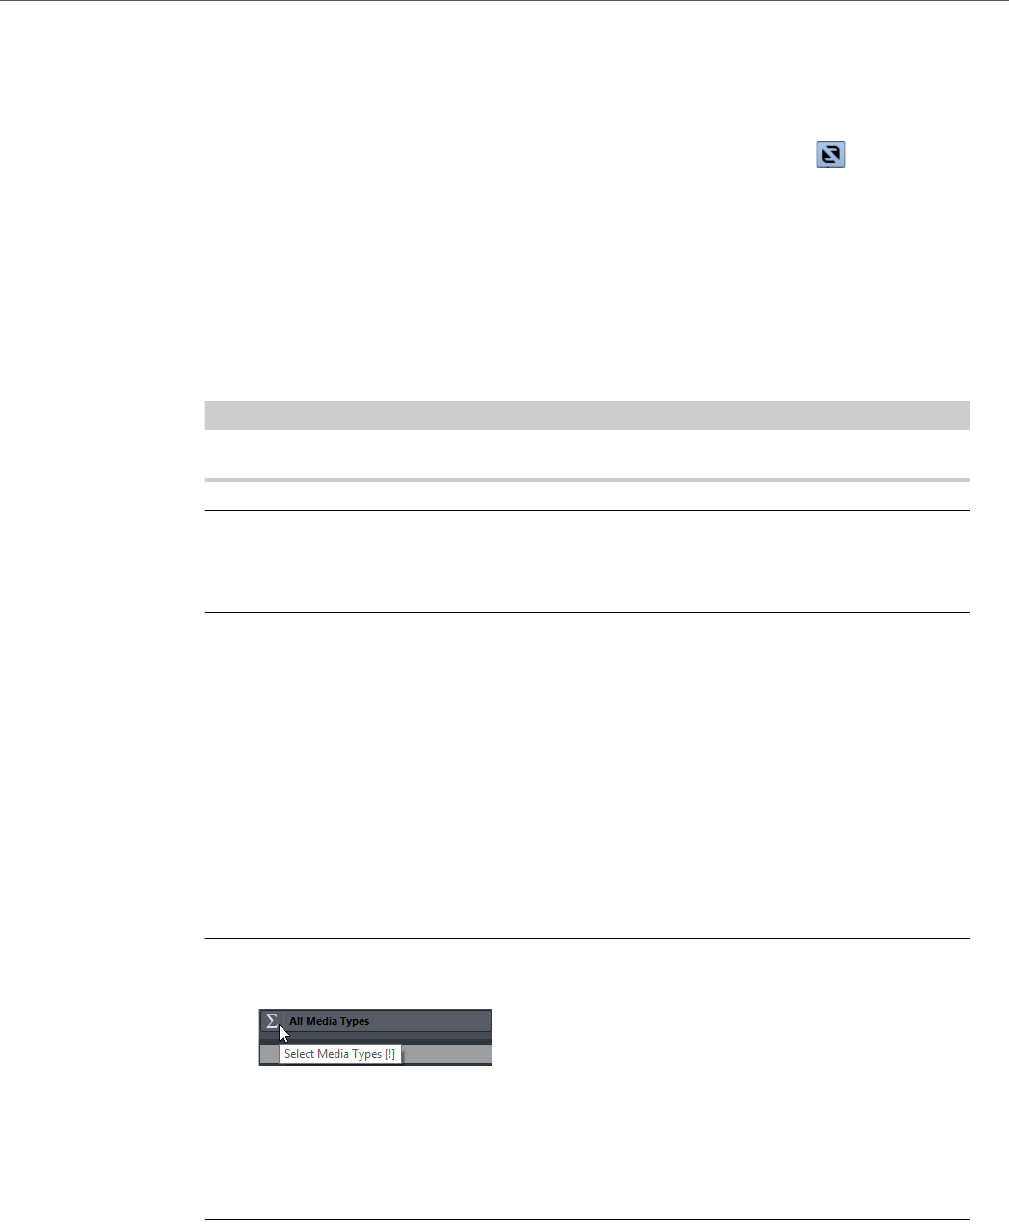
MediaBay
Results Section
342
Shuffling the Results List
You can display the Result list entries in a random order.
• To shuffle the Results list, click the Shuffle Results button in the
MediaBay.
Finding the Location of a File
You can open the Windows Explorer/Mac OS Finder to show the location of a file
on your system.
NOTE
This function is not available for files which are part of a VST Sound archive.
PROCEDURE
• In the Results list, right-click a file, and select Show in Explorer (Win)/Reveal
in Finder (Mac).
RESULT
The Windows Explorer/Mac OS Finder opens and the corresponding file is
highlighted.
Filtering According to Media Type
You can set up the Results list to display only a particular media type or a
combination of media types.
PROCEDURE
1. In the Results section, click the Select Media Types button.
2. In the Show Media Types dialog, activate the media types that you want to
be displayed in the Results list.
When you have filtered the list to show a particular media type, this is indicated by the
corresponding icon to the left of Select Media Types button. When you have
selected several media types, the Mixed Media Type icon is used.
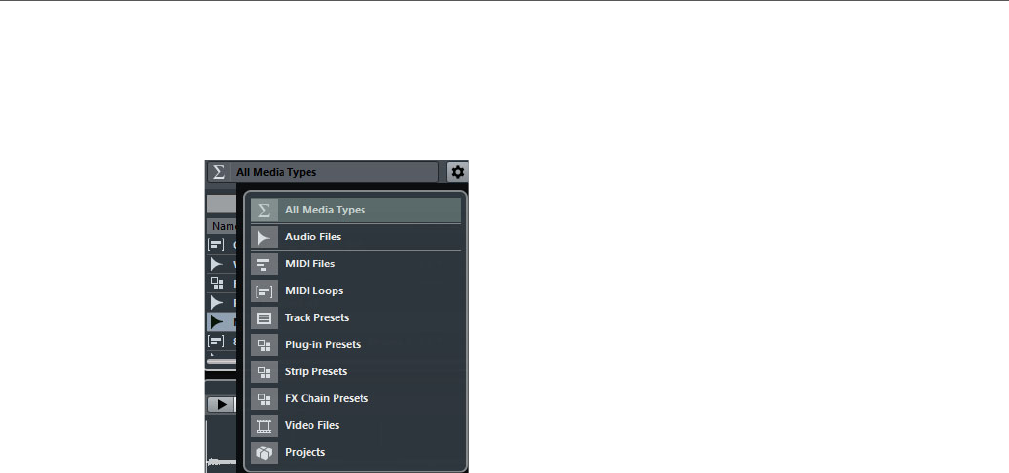
MediaBay
Results Section
343
Show Media Types Selector
You can activate the media types that you want to be displayed in the Results list.
The following media types are available:
Audio Files
When this option is activated, the list shows all audio files. The supported
formats are .wav, .w64, .aiff, .aifc, .rex, .rx2, .mp3, .mp2, .ogg,
.sd2 (Mac only), .wma (Win only).
MIDI Files
When this option is activated, the list shows all MIDI files (file name extension
.mid).
MIDI Loops
When this option is activated, the list shows all MIDI loops (file name
extension .midiloop).
Track Presets
When this option is activated, the list shows all track presets for audio, MIDI,
and instrument tracks (file name extension .trackpreset). Track presets
are a combination of track settings, effects, and MixConsole settings that can
be applied to new tracks of various types.
Plug-in Presets
When this option is activated, the list shows all VST presets for instrument
and effect plug-ins. Furthermore, EQ presets that you save in the MixConsole
are listed. These presets contain all parameter settings for a particular plug-in.
They can be used to apply sounds to instrument tracks and effects to audio
tracks.
Strip Presets
When this option is activated, the list shows all strip presets (file name
extension .strippreset). These presets contain channel strip effect
chains.

MediaBay
Results Section
344
FX Chain Presets
When this option is activated, the list shows all effect chain presets (file name
extension .fxchainpreset). These presets contain insert effect chains.
Video Files
When this option is activated, the list shows all video files.
Projects
When this option is activated, the list shows all project files (.cpr).
RELATED LINKS
Track Presets on page 101
Saving/Loading Strip Presets on page 235
Saving/Loading EQ Presets on page 228
Saving/Loading FX Chain Presets on page 225
Video File Compatibility on page 585
Filtering According to Rating
With the Rating Filter, you can filter files according to their rating. This allows you
to exclude files from the search according to their quality.
PROCEDURE
1. In the Results section of the MediaBay, drag the Rating Filter to the left or
right.
2. To display all media files regardless of their rating, click the asterisk icon.
Performing a Text Search
You can perform a text search in the Results list. If you enter text in the text search
field, only media files whose attributes match the entered text are displayed.
The Search Results field has the same function as the matches operator of the
logical filter. However, the search is applied to all file attributes.
• Click in the field and enter the text that you want to find.
For example, if you are looking for all audio loops relating to drum sounds,
enter “drum” in the search field. The search results contain loops with names,
such as “Drums 01”, “Drumloop”, “Snare Drum”, etc. In addition, all media
files with the Drum&Percussion category attribute or any other attribute that
contains “drum” are found. You can also add apostrophes to find exact
matches for the entered words and use boolean operators.
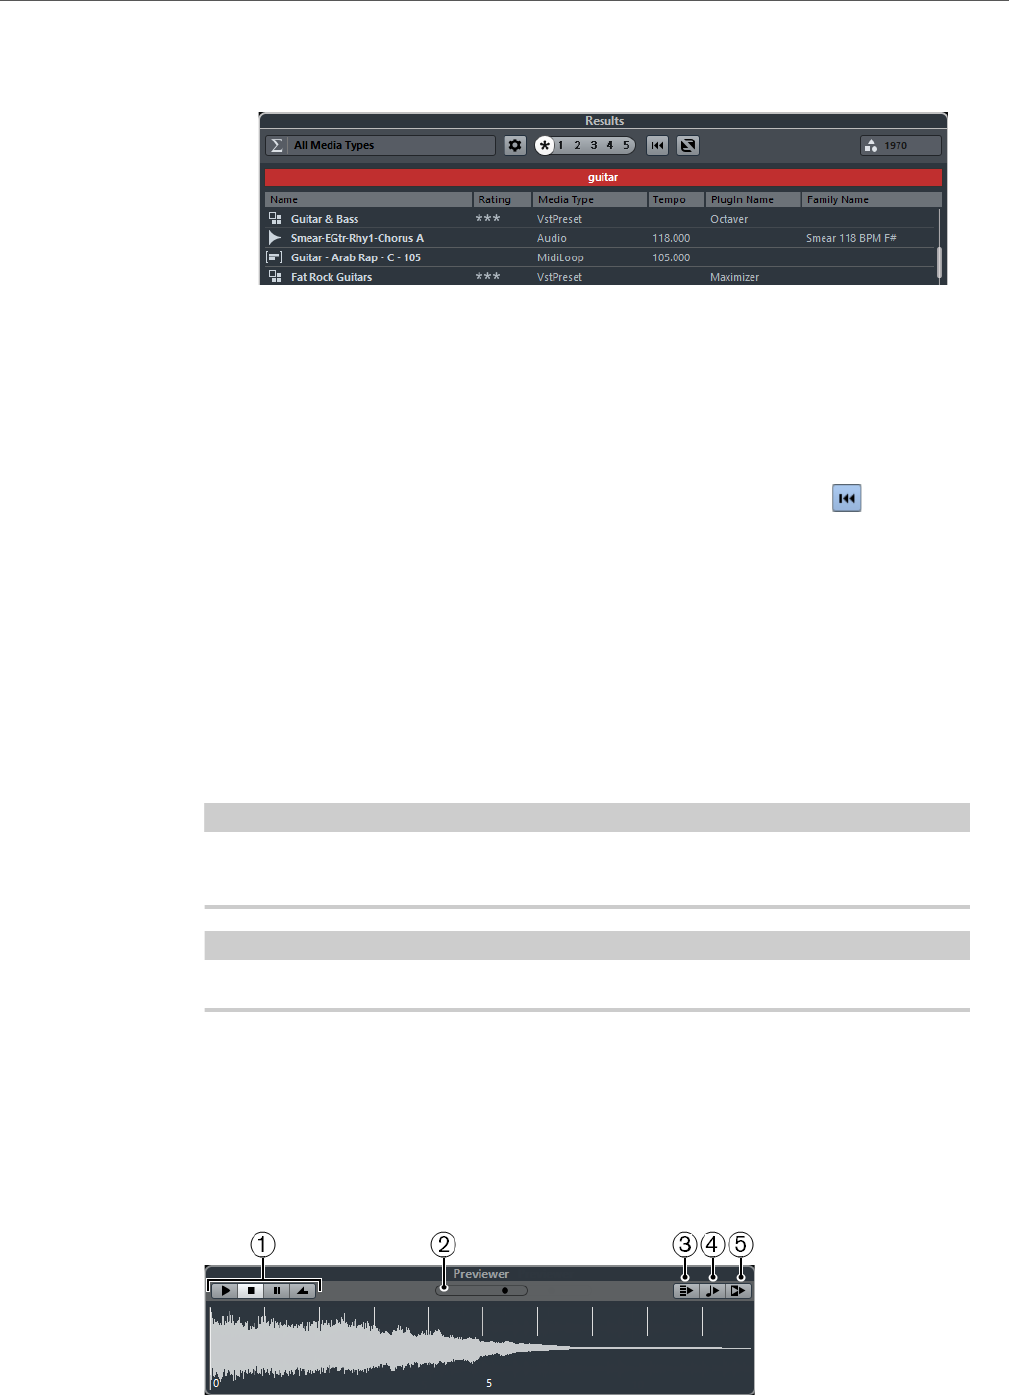
MediaBay
Previewer Section
345
When you enter text in the field, its background becomes red, to indicate that
a text search is active for the list.
• To reset the text search, delete the text.
Resetting the Results List
You can reset all filter settings and filter results.
• To reset the Results list, click the Reset Result Filter button in the
MediaBay.
Previewer Section
You can preview individual files in the Previewer section to find out which one to
use in your project.
The elements visible in this section and their functions depend on the media type.
IMPORTANTIMPORTANTIMPORTANTIMPORTANT
The Previewer section is not available for video files, project files, and audio track
presets. You can preview track presets in the Presets browser.
NOTE
Some MediaBay-specific preferences affect the playback of media files.
RELATED LINKS
MediaBay Preferences on page 352
Previewing Audio Files
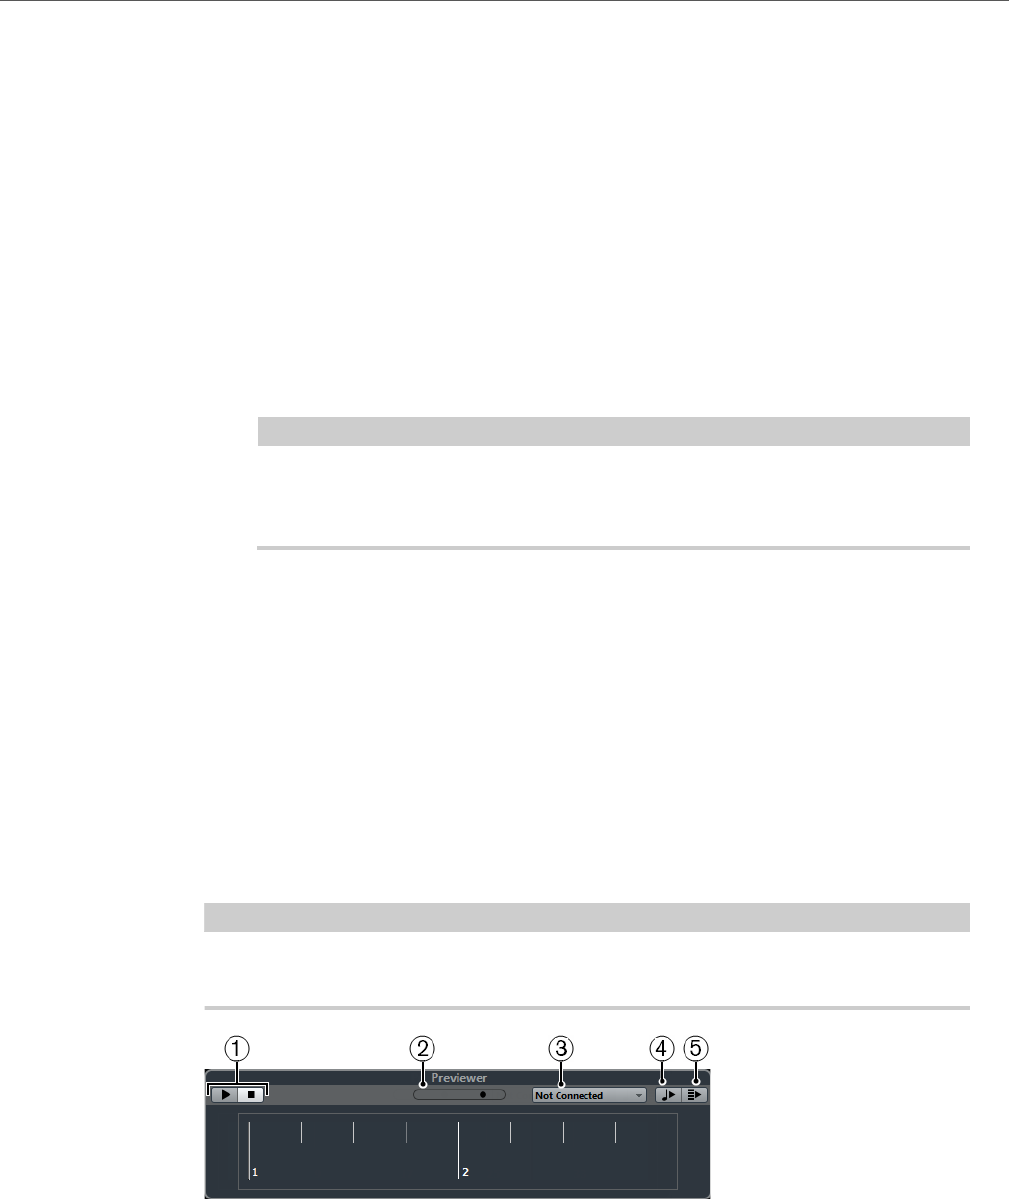
MediaBay
Previewer Section
346
1) Transport Controls
Let you start, stop, pause, and cycle the preview.
2) Preview Level Fader
Lets you specify the preview level.
3) Auto Play New Results Selection
If this option is activated, the selected file is automatically played back.
4) Align Beats to Project
If this option is activated, the selected file is played back in sync with the
project, starting at the project cursor position. Note that this can apply
realtime time stretching to your audio file.
NOTE
If you import an audio file into your project for which Align Beats to Project
is activated in the Previewer, Musical Mode is automatically activated for the
corresponding track.
5) Wait for Project Play
If this option is activated, the play and stop functions from the Transport panel
are synchronized with the play and stop buttons in the Previewer section.
To use this option to its full extent, set the left locator at the beginning of a bar,
then start playing back the project using the Transport panel. The loops that
you now select in the Results list will start together with the project in perfect
sync.
Previewing MIDI Files
IMPORTANTIMPORTANTIMPORTANTIMPORTANT
To preview a MIDI file, you must select an output device from the Output pop-up
menu.
1) Transport Controls
Let you start and stop the preview.
2) Preview Level Fader
Lets you specify the preview level.
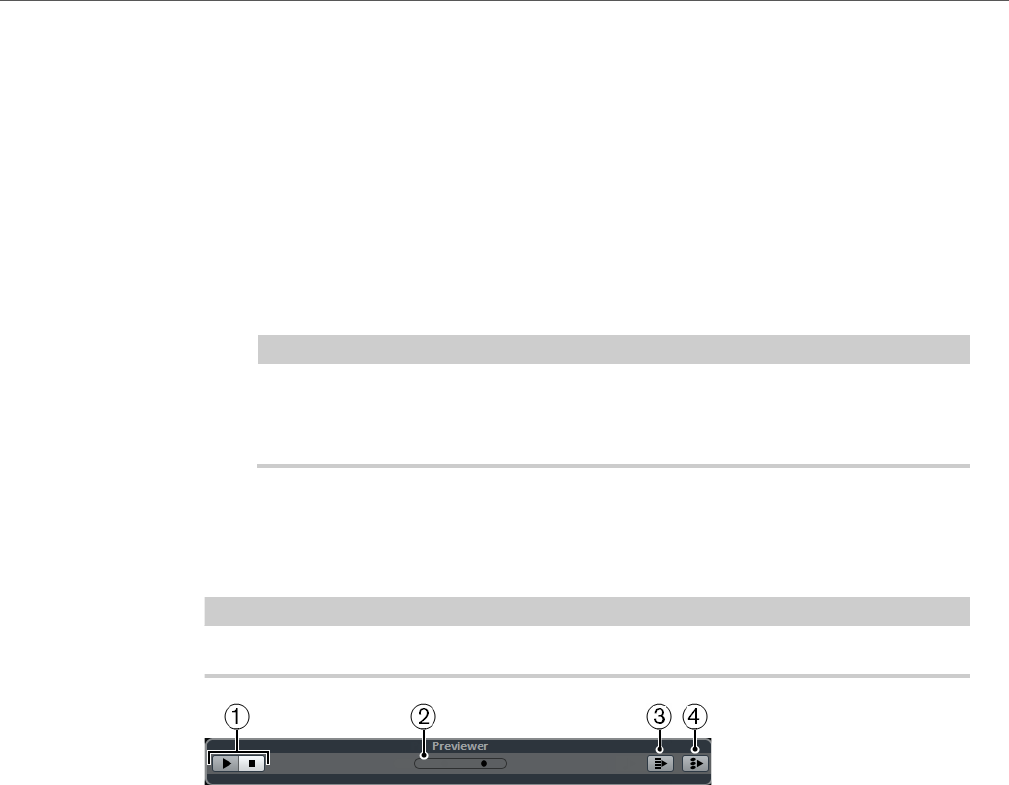
MediaBay
Previewer Section
347
3) Output
Lets you select the output device.
4) Auto Play New Results Selection
If this option is activated, the selected file is automatically played back.
5) Align Beats to Project
If this option is activated, the selected file is played back in sync with the
project, starting at the project cursor position. Note that this can apply
realtime time stretching to your MIDI file.
NOTE
If you import a MIDI file into your project for which Align Beats to Project is
activated in the Previewer, Musical Mode is automatically activated for the
corresponding track.
Previewing MIDI Loops
NOTE
MIDI loops are always played back in sync with the project.
1) Transport Controls
Let you start and stop the preview.
2) Preview Level Fader
Lets you specify the preview level.
3) Auto Play New Results Selection
If this option is activated, the selected file is automatically played back.
4) Link Playback to Chord Track
If this option is activated, the events of the MIDI loop are transposed to play
back in context with the chord track. Note that you need a chord track with
chord events for this.
If this option is activated, and you insert a MIDI loop into the project, Follow
Chord Track is automatically activated for the track.
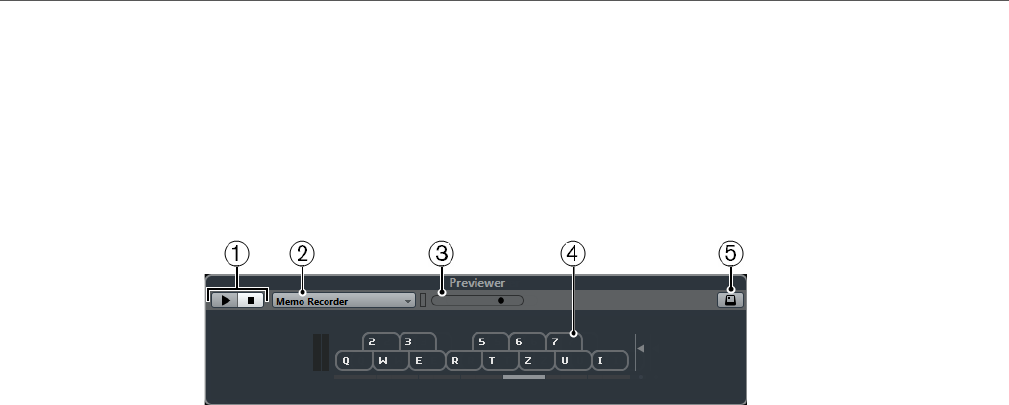
MediaBay
Previewer Section
348
Previewing VST Presets and Track Presets for MIDI and
Instrument Tracks
To preview track presets for MIDI or instrument tracks and VST presets you need
some MIDI notes. These notes can be sent to the track preset via MIDI Input, using
a MIDI file, the Memo Recorder mode, or via the computer keyboard.
Virtual keyboard in keyboard display mode.
1) Transport Controls
Let you start and stop the preview.
2) Previewer Sequence Mode Menu
Lets you load a MIDI file to apply the currently selected preset to the MIDI file.
You can also select the Memo Recorder mode that continually repeats a
given sequence of notes as a loop.
3) Preview Level Fader
Lets you specify the preview level.
4) Virtual Keyboard
You can display the virtual keyboard in the keyboard display mode or in the
piano display mode.
5) Computer Keyboard Input
If this option is activated, you can use your computer keyboard to preview the
presets.
RELATED LINKS
Previewing Presets Using the Memo Recorder Mode on page 349
Virtual Keyboard on page 143
Previewing Presets Via MIDI Input
MIDI input is always active, for example, when a MIDI keyboard is connected to your
computer and set up properly, you can directly start playing the notes to preview the
selected preset.

MediaBay
Previewer Section
349
Previewing Presets Using a MIDI File
PROCEDURE
1. On the Previewer Sequence Mode pop-up menu, select Load MIDI File.
2. In the file dialog that opens, select a MIDI file and click Open.
The name of the MIDI file is displayed on the pop-up menu.
3. Click the Play button to the left of the pop-up menu.
RESULT
The notes received from the MIDI file are played back with the settings of the track
preset applied.
NOTE
The recently used MIDI files are kept on the menu, for quick access. To remove an
entry from this list, select it on the menu and then select Remove MIDI File.
Previewing Presets Using the Memo Recorder Mode
The Memo Recorder mode continually repeats a given sequence of notes as a
loop.
NOTE
You cannot use the Memo Recorder mode when previewing presets using a MIDI
file.
PROCEDURE
1. On the Previewer Sequence Mode pop-up menu, select Memo Recorder.
2. Activate the Play button.
3. Play some notes on the MIDI keyboard or on the computer keyboard.
RESULT
The notes are played back with the preset settings applied.
When you stop playing notes and wait for 2 seconds, the note sequence that you
played until this moment is played back in a continuous loop.
To use another sequence, start entering notes again.
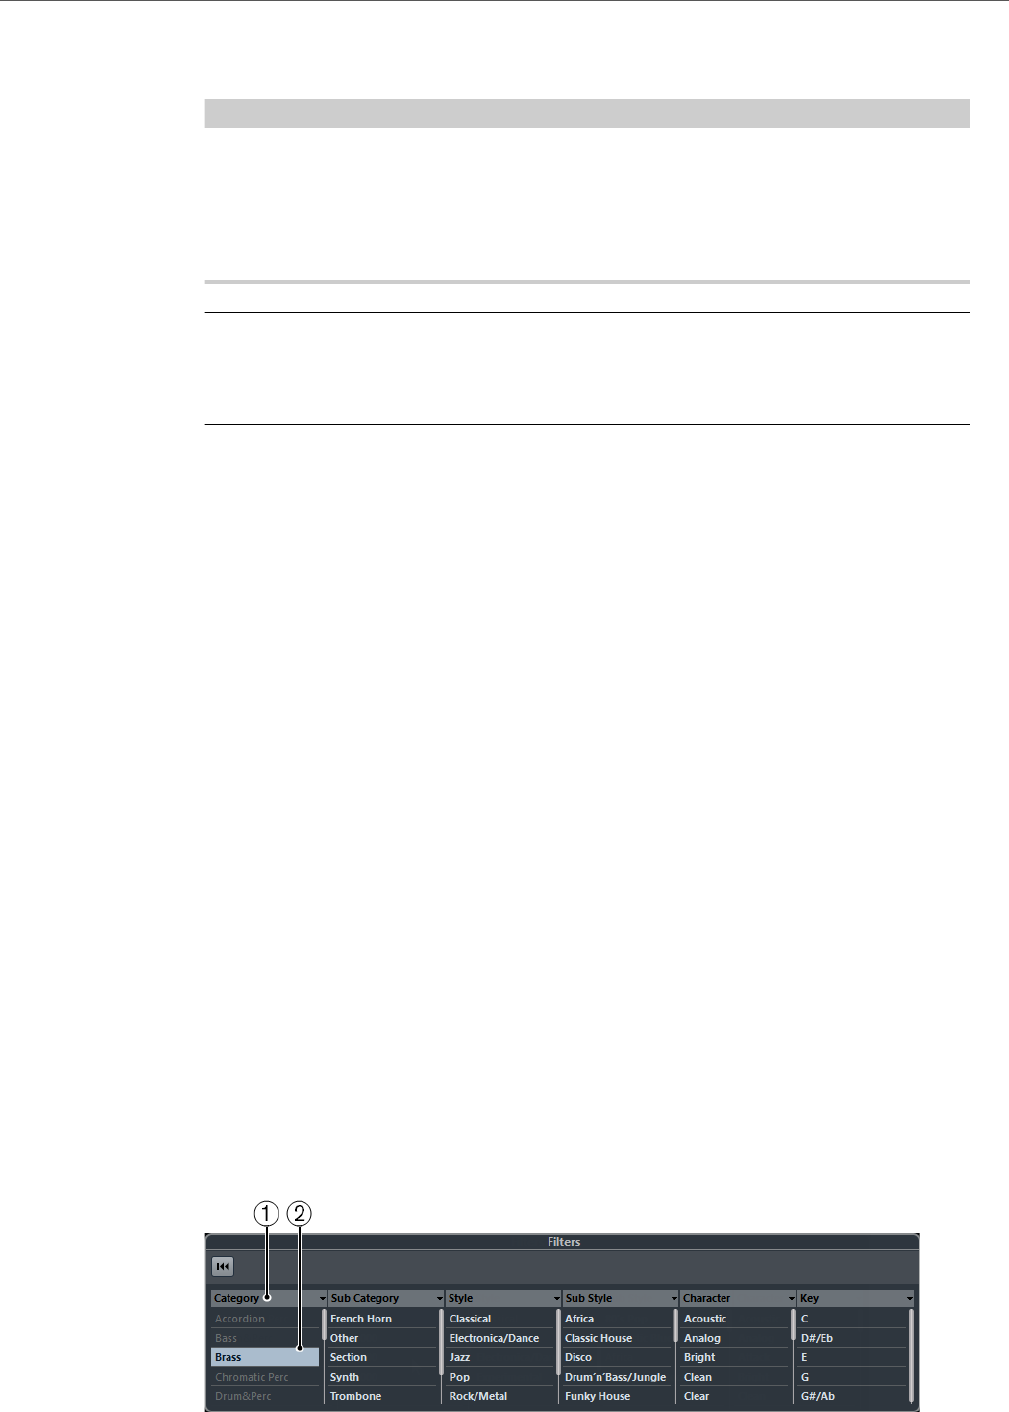
MediaBay
Filters Section
350
Previewing Presets Via the Computer Keyboard
NOTE
If you activate the Computer Keyboard Input button, the computer keyboard is
used exclusively for the Previewer section. However, you can still use the following
key commands: [Ctrl]/[Command]-[S] (Save), Num [*] (Start/Stop Record), [Space]
(Start/Stop Playback), Num [1] (Jump to left locator), [Delete] or [Backspace], Num
[/] (Cycle on/off), and [F2] (Show/Hide Transport panel).
PROCEDURE
1. Activate the Computer Keyboard Input button.
2. Play some notes on the computer keyboard.
Filters Section
With the MediaBay, you can perform very refined file searches.
About Attributes for Media Files
Attributes for media files are sets of meta data providing additional information on
the file.
The different types of media files have different attributes. For example, .wav audio
files have attributes like name, length, size, sample rate, etc., while .mp3 files have
additional attributes such as artist or genre.
Attribute Filter
Assigning attribute values to your files makes it easy to organize the media files.
With the Attribute filter, you can view and edit some of the standard file attributes
found in your media files.
The Filters section displays all values found for a specific attribute. Selecting one
of these values displays a list of files that contain this attribute value.

MediaBay
Filters Section
351
1) Attribute columns
Let you select different attribute categories. If the columns are wide enough,
the number of files that match this criteria is displayed to the right of the filter
name.
2) Attribute values
Displays the attribute values and how often a certain attribute value is
available among your media files.
NOTE
• Some attributes are directly linked to each other. For example, for each
category value, there are certain sub category values available. Changing the
value in one of these attribute columns displays different values in the other
column.
• Each attribute column displays only the attribute values found in the currently
selected location.
Applying an Attribute Filter
With the Attribute filter you can quickly find audio files with certain attributes.
• To apply an Attribute filter, click on an attribute value.
The Results list is filtered accordingly. Apply more attribute filters to restrict
the result even more.
• To find files that match either one or the other attribute,
[Ctrl]/[Command]-click different attribute values in the same column.
• To change the displayed attribute values of a column, click on the attribute
column and select another attribute.
NOTE
Character attributes always form an AND condition.
Resetting the Filter
PROCEDURE
• To reset the filter, click the Reset Filter button at the top of the Filters section.
This also resets the Results list.
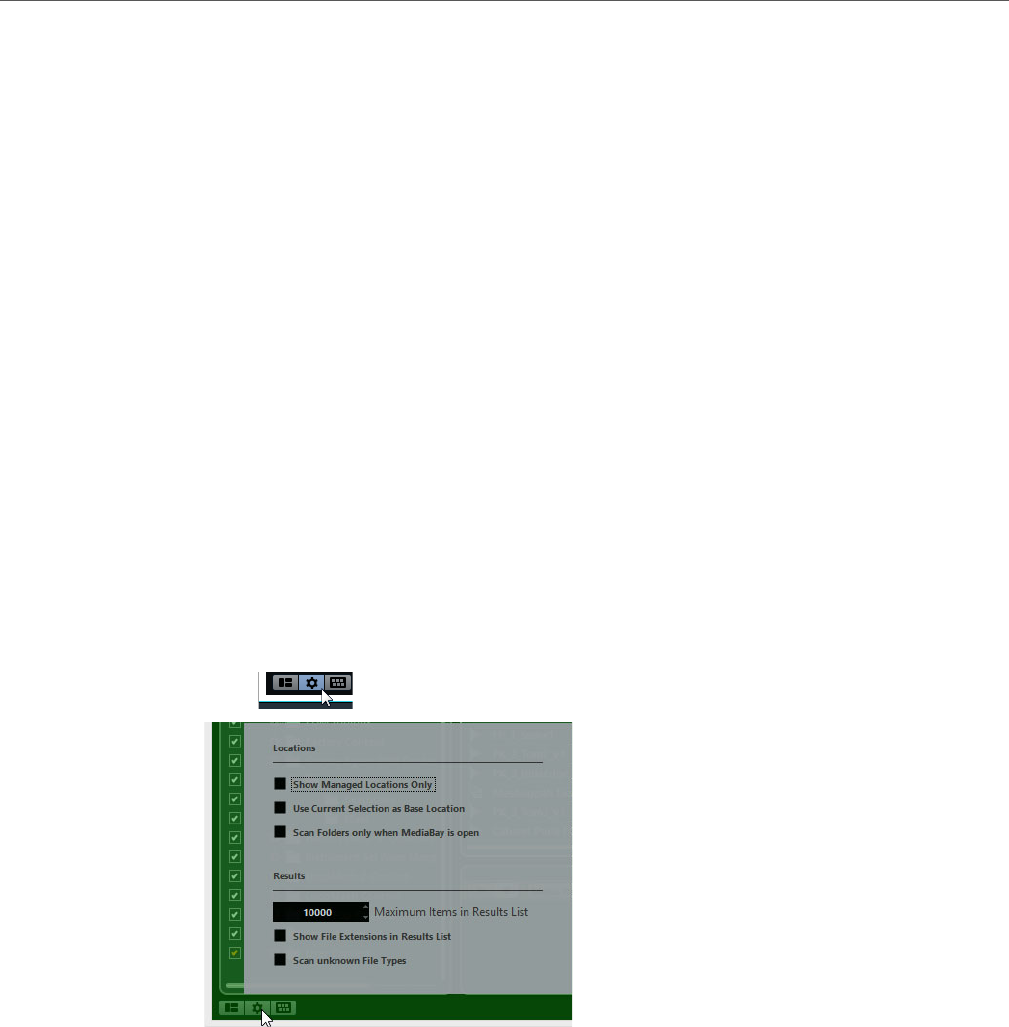
MediaBay
Sound Browser and Mini Browser
352
Sound Browser and Mini Browser
The Loop Browser and Sound Browser show different views of the MediaBay.
The Loop Browser lets you quickly browse your loops, for example, audio files and
MIDI loops.
The Sound Browser lets you quickly search sounds. By default, it is set to display
track presets and plug-in presets.
These browser windows offer the same functions as the MediaBay, for example,
you can specify different browse locations, define searches, set up the available
panes, etc.
MediaBay Preferences
The Preferences dialog in Cubase contains a special MediaBay page where you
can set up the MediaBay. These settings are also available from within the
MediaBay.
• To display the preferences, click the MediaBay Preferences button in the
lower left corner of the MediaBay.
Show Managed Locations Only
If this option is activated, all folders that are not scanned for files are hidden.
This keeps the tree view in the Define Locations section less cluttered.
Use Current Selection as Base Location
If this option is activated, only the selected folder and its subfolders are
shown.
Scan Folders only when MediaBay is open
If this option is activated, Cubase only scans for media files when the
MediaBay window is open.
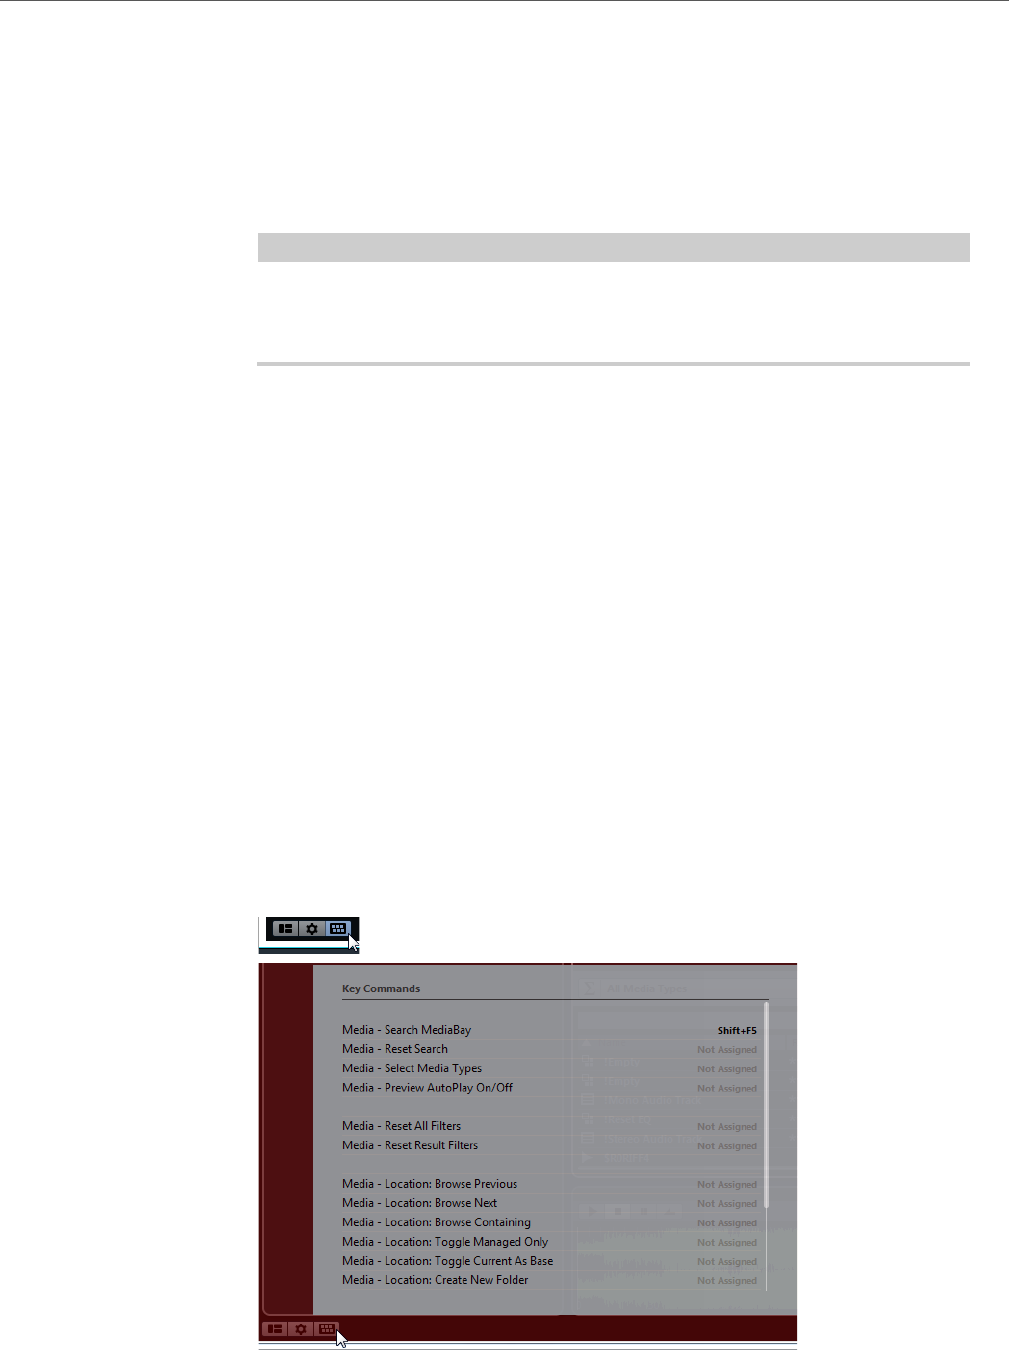
MediaBay
MediaBay Key Commands
353
If this is deactivated, the folders are scanned in the background even when
the MediaBay window is closed. However, Cubase never scans folders while
playing back or recording.
Maximum Items in Results List
Specifies the maximum number of files that are displayed in the Results list.
This avoids unmanageably long lists of files.
NOTE
The MediaBay does not warn you if the maximum number of files has been
reached. There might be situations where a certain file you are looking for
cannot be found because the maximum number of files was reached.
Show File Extensions in Results List
If this option is activated, file name extensions are displayed in the Results list.
Scan unknown File Types
When scanning for media files, the MediaBay ignores files with an unknown
file extension. If this option is activated, the MediaBay tries to open and scan
any file in the search location and ignores those files that cannot be
recognized.
MediaBay Key Commands
You can display the available MediaBay key commands from within the MediaBay
window. This is useful if you want to get a quick overview over the assigned and the
available MediaBay key commands.
• To open the key commands pane, click the Key Commands button in the
lower left corner of the MediaBay.
• To close the key commands pane, click anywhere outside of the pane.
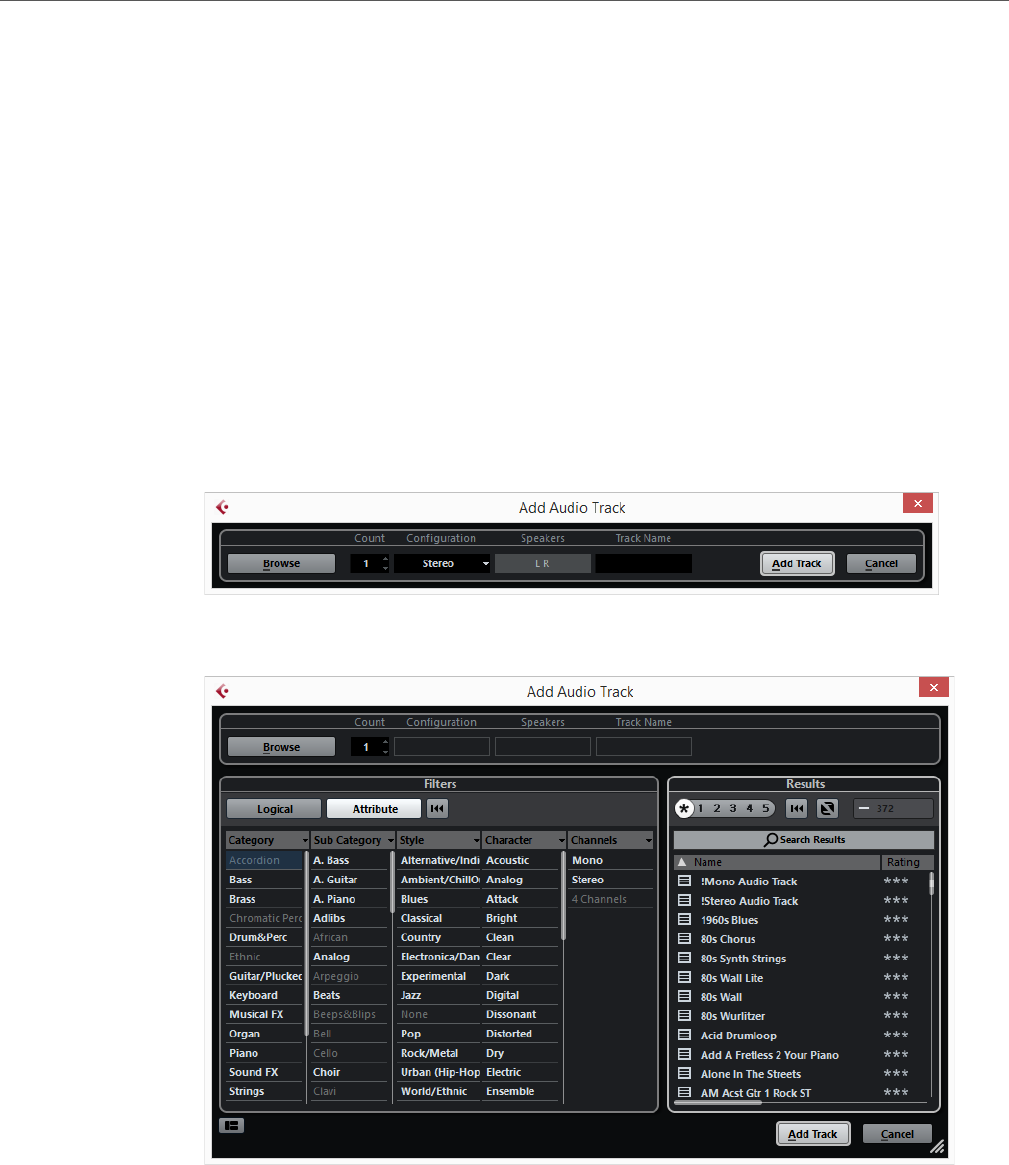
MediaBay
Working with MediaBay-Related Windows
354
• To assign or modify a key command, click the corresponding key command.
RELATED LINKS
Key Commands on page 602
Working with MediaBay-Related Windows
The MediaBay concept can be found throughout the program, for example, when
adding new tracks or when choosing presets for VST instruments or effects. The
workflow in all MediaBay-related windows is the same as in the MediaBay.
Adding Tracks
If you add a track by selecting Project > Add Track, the following dialog opens:
Click the Browse button to expand the dialog to show the Results list. Only file
types that can be used in this context are shown.
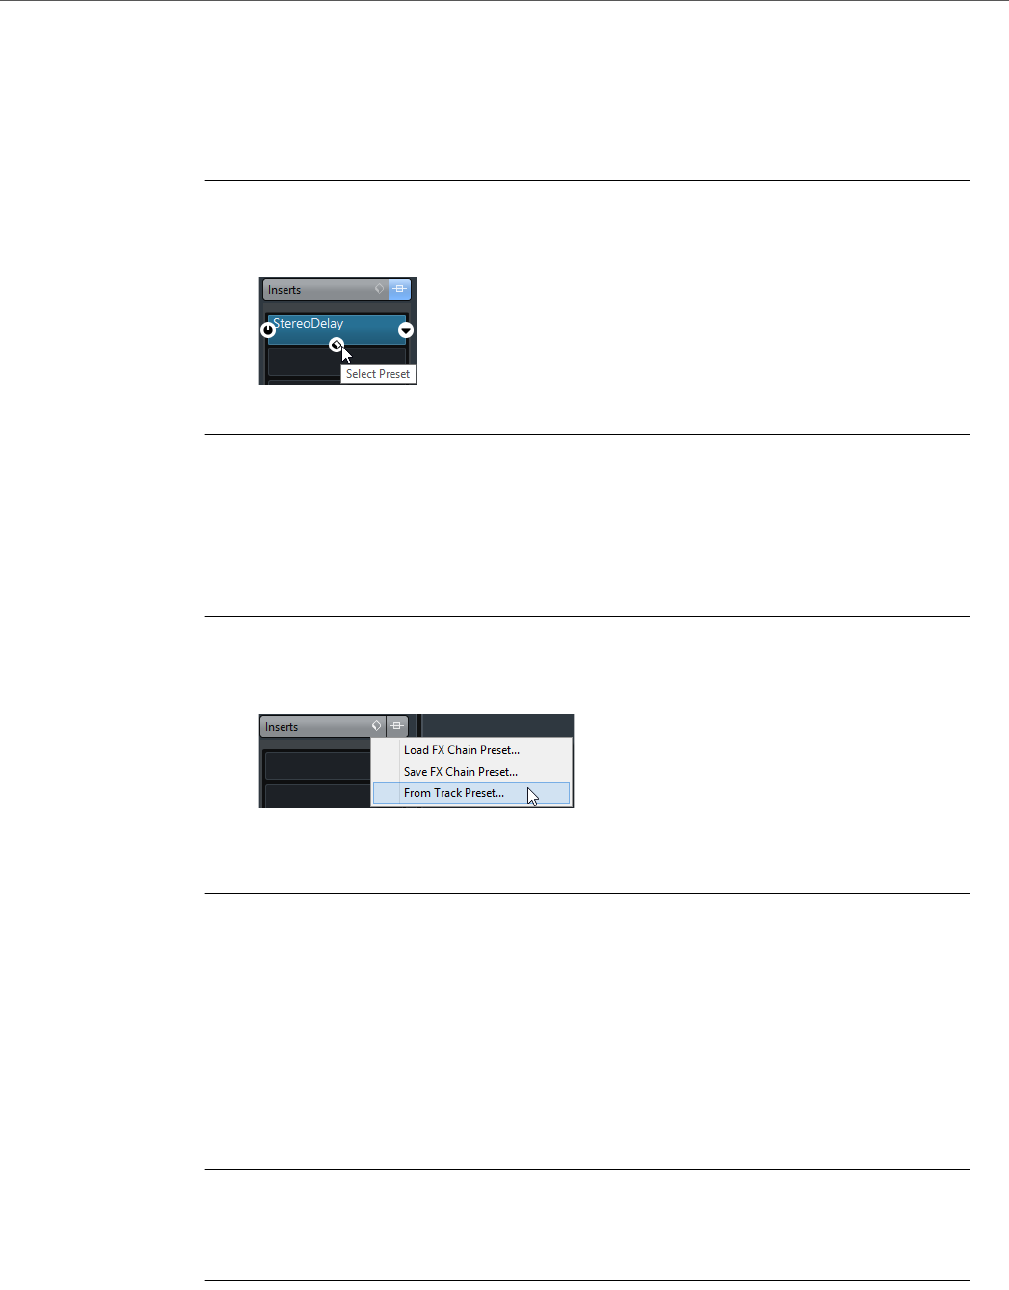
MediaBay
Working with MediaBay-Related Windows
355
Applying Effect Presets
If you have added an insert effect to a track, you can choose from a variety of presets
via the Results browser for the effect slot.
PROCEDURE
1. In the Inserts tab of the Inspector, click the Select Preset icon below the
preset name.
2. In the Results browser, double-click a preset to apply it.
Applying Track Presets
You can choose from a variety of track presets.
PROCEDURE
1. In the Inspector, click the Preset Management icon on the right of the
Inserts tab.
2. Select From Track Preset.
3. In the Results browser, double-click a track preset to apply it.
RELATED LINKS
Track Presets on page 101
Applying Instrument Presets
When working with VST instruments, you can choose from a variety of presets via
the Results browser.
PROCEDURE
1. In the track list, right-click the instrument track and select Load Track Preset.
2. In the Results browser, double-click a preset to apply it.
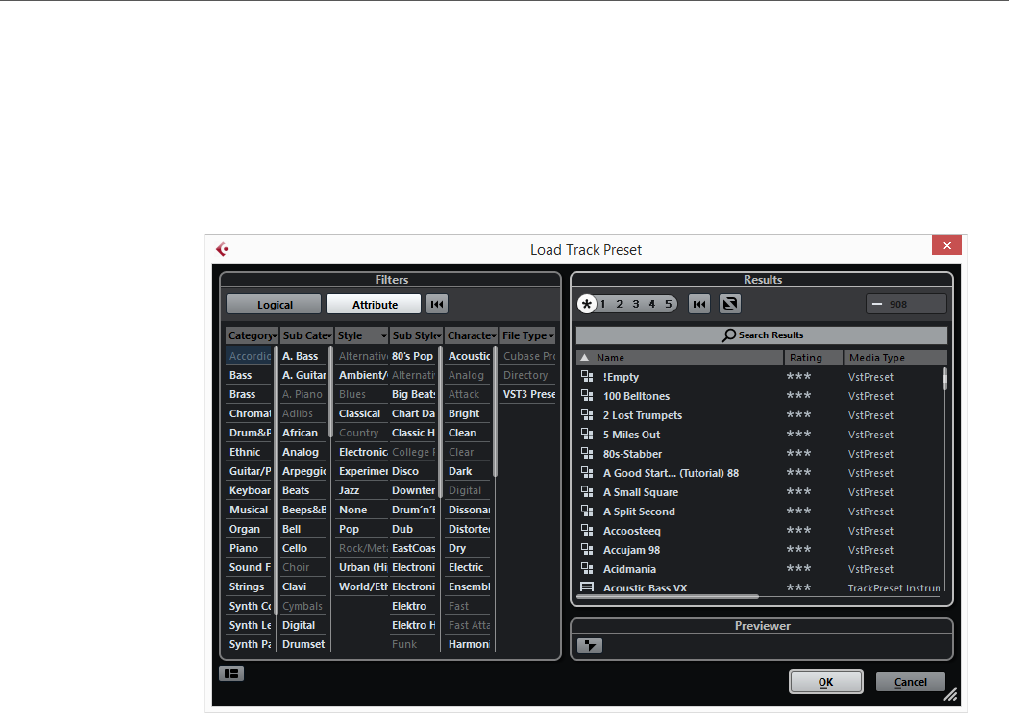
MediaBay
Working With Volume Databases
356
Instrument Presets Results Browser
The Results browser for instrument track presets lets you preview VST presets and
apply them to your instrument track.
To open the Results browser, right-click an instrument track, and select Load
Track Preset.
VST presets for instruments can be divided into the following groups:
Presets
Presets contain the settings of the entire plug-in. For multi-timbral
instruments, this means the settings for all sound slots as well as the global
settings.
Programs
Programs contain only the settings for one program. For multi-timbral
instruments, this means only the settings for one sound slot.
Working With Volume Databases
Cubase stores all media file information used in the MediaBay, such as paths and
attributes, in a local database file on your computer. However, in some cases, it
might be necessary to browse and manage this kind of metadata on an external
volume.
For example, a sound editor might have to work both at home and in a studio, on
two different computers. Therefore, the sound effects are stored on an external
storage medium. To be able to connect the external device and directly browse its
contents in the MediaBay without having to scan the device, you have to create a
volume database for the external device.
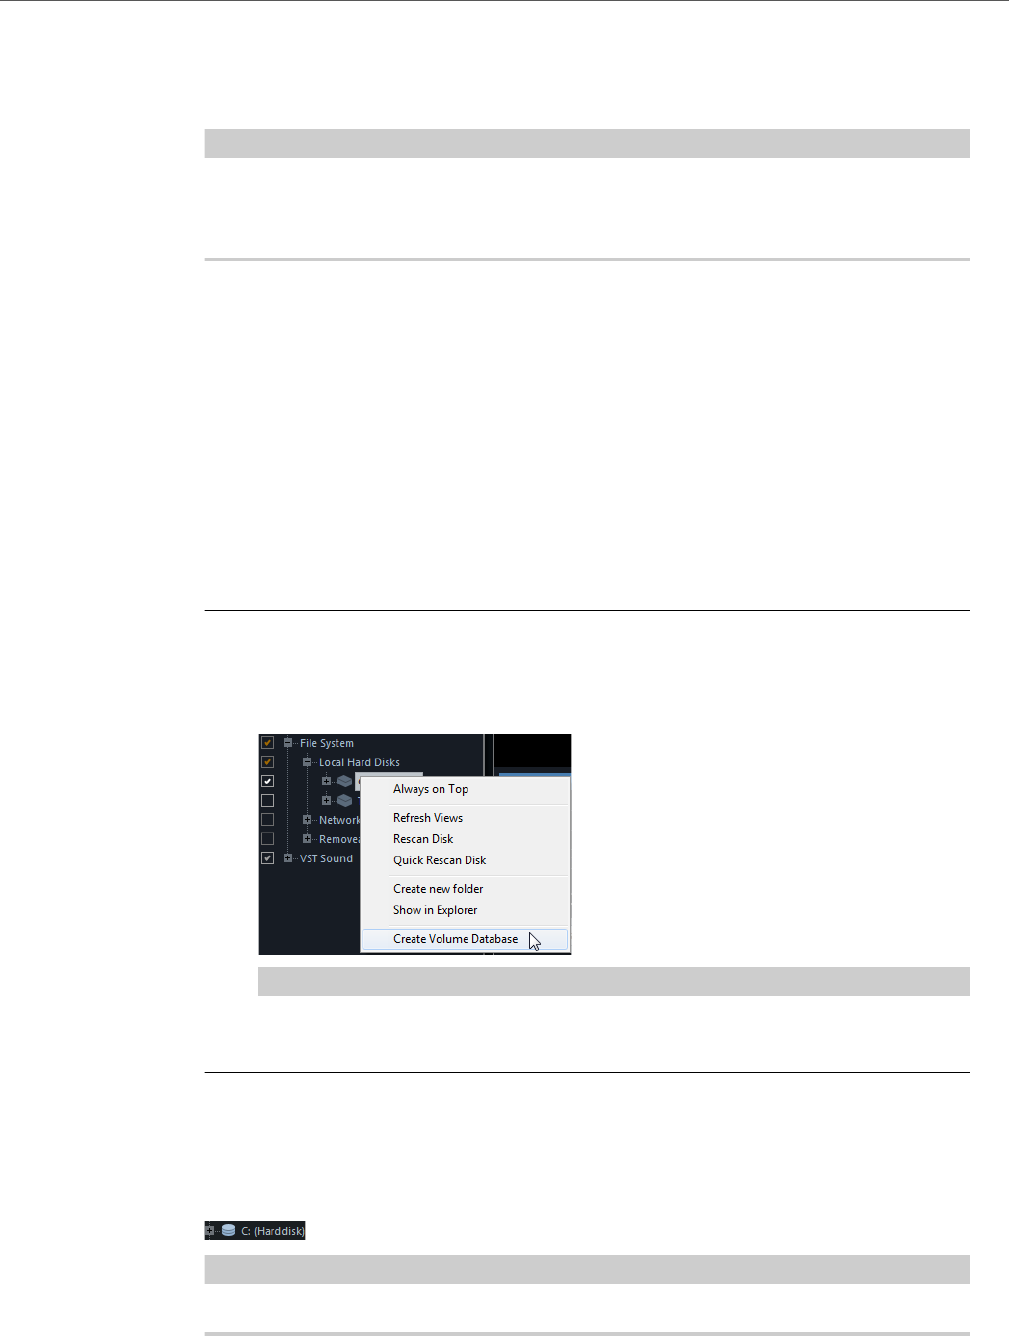
MediaBay
Working With Volume Databases
357
Volume databases can be created for drives of your computer or for external
storage media. They contain the same kind of information about the media files on
these drives as the regular MediaBay database.
NOTE
When you launch Cubase, all available volume databases are automatically
mounted. Databases that are made available while the program is running have to
be mounted manually.
Rescanning and Refreshing Volume Databases
If you have modified the scan settings on a different system, you must rescan or
refresh the MediaBay.
RELATED LINKS
Updating the MediaBay on page 337
Creating a Volume Database
PROCEDURE
• In the Define Locations section, right-click the external storage medium,
drive, or partition of your computer system that you want to create a database
for, and select Create Volume Database.
IMPORTANT
You must select the topmost level (root) for this. You cannot create a database file for
a lower-level folder.
RESULT
The file information for this drive is written into a new database file. When the new
database file is available, this is reflected by the symbol to the left of the drive name.
NOTE
If the drive contains a large amount of data, this process may take a while.

MediaBay
Working With Volume Databases
358
Volume databases are automatically mounted when Cubase is launched. They are
shown in the Define Locations section and their data can be viewed and edited in
the Results list.
Removing a Volume Database
If you have worked on another computer using an external hard disk and return to
your own computer and connect the external device again as part of your system
setup, you do not need a separate volume database for it any more. Any data on this
drive can then be included in the local database file again, by removing the extra
database file.
PROCEDURE
• In the Define Locations section, right-click the volume database and select
Remove Volume Database
RESULT
The metadata is integrated in the local MediaBay database file and the volume
database file is deleted.
NOTE
If the drive contains a large amount of data, this process may take a while.
Mounting and Unmounting Volume Databases
Volume databases that are made available while Cubase is running must be
mounted manually.
• To mount a volume database manually, right-click the external storage
medium, drive, or partition of your computer system that you want to mount
and select Mount Volume Database.
• To unmount a volume database, right-click it and select Unmount Volume
Database.

359
Automation
In essence, automation means recording the values for a particular MixConsole or
effect parameter. When you create your final mix, Cubase can adjust this particular
parameter control.
Recording your Actions
If the settings in your current project are crucial, you may not want to experiment
with automation until you know more about how it all fits together. If so, you can
create a new project for the following example. The project does not have to contain
any audio events, just a few audio tracks.
PROCEDURE
1. In the Project window toolbar, click W to activate write for all tracks.
2. Start playback and adjust some volume faders and/or other parameter
settings in the MixConsole.
Stop playback when you are done, and return to the position where you started
playback.
3. Click W to deactivate the write mode and click R to activate read for all tracks.
4. Start playback, and watch the MixConsole.
All your actions that were performed during the previous playback are reproduced
exactly.
5. Select Project > Show All Used Automation to view all recorded
automation events.
6. To redo anything that was recorded, click W again and start playback from the
same position.
NOTE
You can have W and R activated simultaneously, if you want to watch and listen to
your recorded MixConsole actions while you are recording fader movements for
another channel, etc.

Automation
Automation Curves
360
Automation Curves
Within a Cubase project, the changes in a parameter value over time are reflected
as curves on automation tracks.
There are two kinds of automation curves:
1) Ramp curves
Ramp curves are created for any parameter that generates continuous
multiple values, such as fader or encoder movements.
2) Jump curves
Jump curves are created for on/off parameters such as mute.
Static Value Line
When you open an automation track for the first time, it does not contain any
automation events. This is reflected in the event display as a straight horizontal black
line, the static value line. This line represents the current parameter setting.
If you manually added any automation events or used write automation for the
corresponding parameter and then disable the reading of automation data, the
automation curve is grayed-out in the event display and the static value line is used
instead.
As soon as Read is enabled, the automation curve becomes available.
Write/Read Automation
You can automation enable tracks and MixConsole channels by activating their
automation write W and read R buttons.
• If you activate W for a channel, virtually all MixConsole parameters that you
adjust during playback for that specific channel are recorded as automation
events.
•If R is activated for a channel, all your recorded MixConsole actions for that
channel are performed during playback.
The R and W buttons for a track in the track list are the same as the R and W buttons
in the MixConsole.

Automation
MIDI Part Data vs. Track Automation
361
NOTE
The R button is automatically enabled when you enable the W button. This allows
Cubase to read existing automation data at any time. You can separately deactivate
W if you only want to read existing data.
There are also global read and write indicator buttons Activate/Deactivate
Read/Write for All Tracks on the MixConsole toolbar and at the top of the track
list. These buttons light up as soon as there is an enabled R or W button on any
channel/track within your project. Furthermore, they can be clicked to activate or
deactivate the R/W buttons of all tracks simultaneously.
MIDI Part Data vs. Track Automation
You can enter or record MIDI controller data in two ways: as automation data on an
automation track or as part data in the MIDI part.
•If Read Automation for a track is enabled, controller data is written as
automation data on an automation track in the Project window.
•If Read Automation is disabled, the controller data is written in the MIDI part
and can be viewed and edited for example in the Key Editor.
Nevertheless, you can end up with both kinds of controller data for a MIDI part if you
recorded controller part data in one pass and automation data during another. In
this case, these conflicting data types are combined during playback as follows:
• Part automation only begins when the first controller event within the part is
reached. At the end of the part, the last controller value is kept until an
automation breakpoint is reached on the automation track.
Writing Automation Data
There are two approaches that you can use to create automation curves: manually
and automatically.
• Manual writing makes it easy to quickly change parameter values at specific
points without having to activate playback.
• Automatic writing lets you work almost as if you were using a real mixer.
With both methods, any applied automation data is reflected in both the MixConsole
(a fader will move for example) and in the corresponding automation track curve.
RELATED LINKS
Manual Writing of Automation Data on page 362
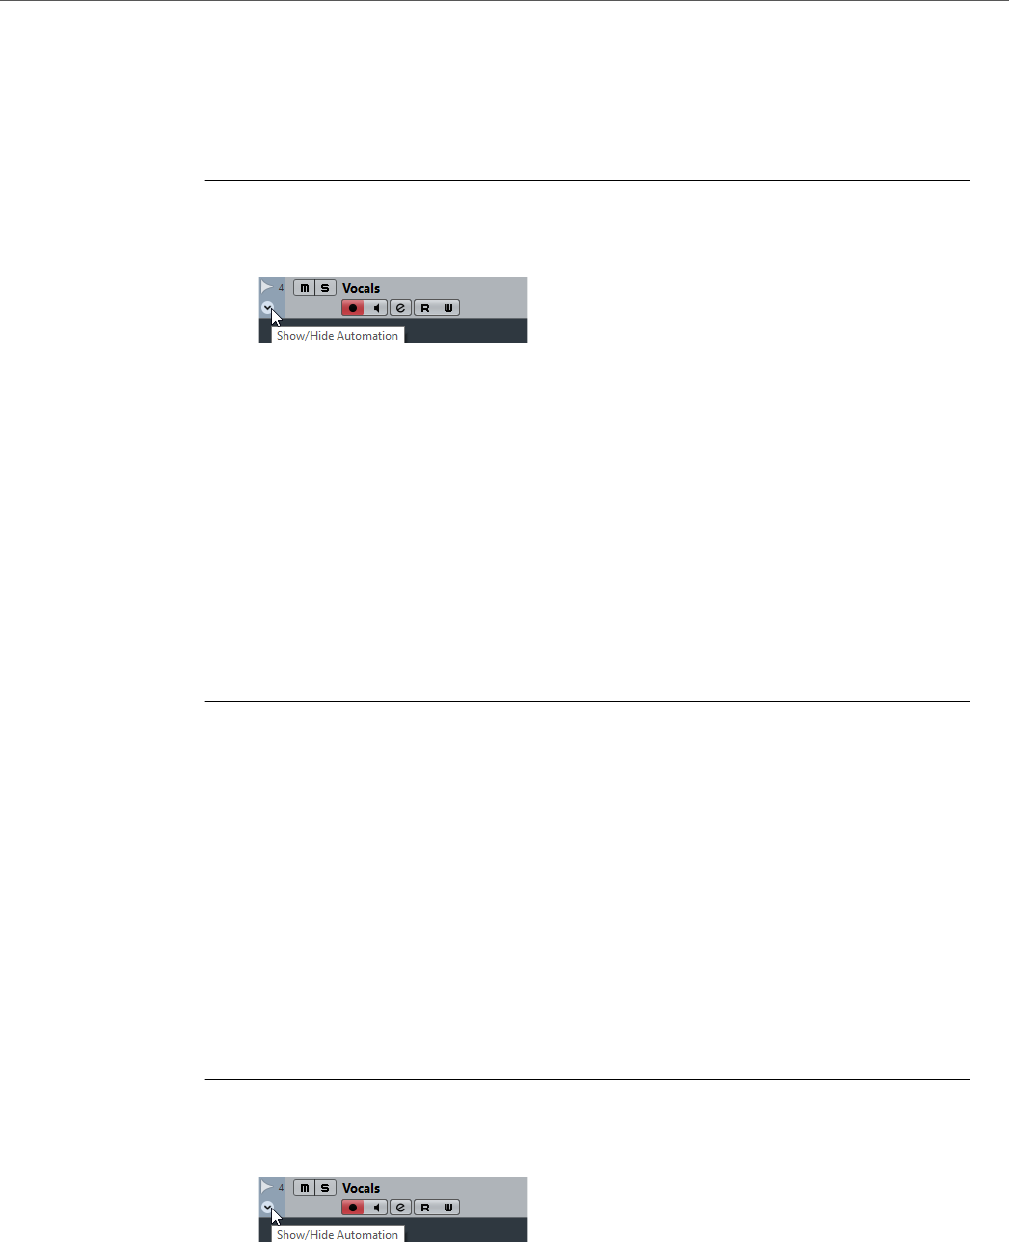
Automation
Writing Automation Data
362
Automatic Writing of Automation Data
Every action that you perform is automatically recorded on automation tracks which
you can later open for viewing and editing.
PROCEDURE
1. In the track list, click Show/Hide Automation for a track to open its
automation track.
2. Click W to enable the writing of automation data on this track.
3. Start playback.
4. Adjust the parameters in the MixConsole, in the Channel Settings window,
or in the effect control panel.
The value settings are recorded and displayed as a curve on the automation tracks.
When automation data is being written, the color of the automation track changes to
red and the delta indicator in the automation track shows the relative amount by which
the new parameter setting deviates from any previously automated value.
5. Stop playback and return to the position where you started playback.
6. Click W to disable the writing of automation data.
7. Start playback.
RESULT
All actions that you recorded are reproduced exactly. When you drag a plug-in to a
different insert slot on the same channel, any existing automation data moves with
the plug-in. When you drag it to an insert slot on a different channel, any existing
automation data is not transferred to the new channel.
Manual Writing of Automation Data
You can add automation events manually by drawing automation curves on an
automation track.
PROCEDURE
1. In the track list, click Show/Hide Automation for a track to open its
automation track.
2. Click the automation parameter name and select the parameter from the
pop-up menu.
3. Select the Draw tool.
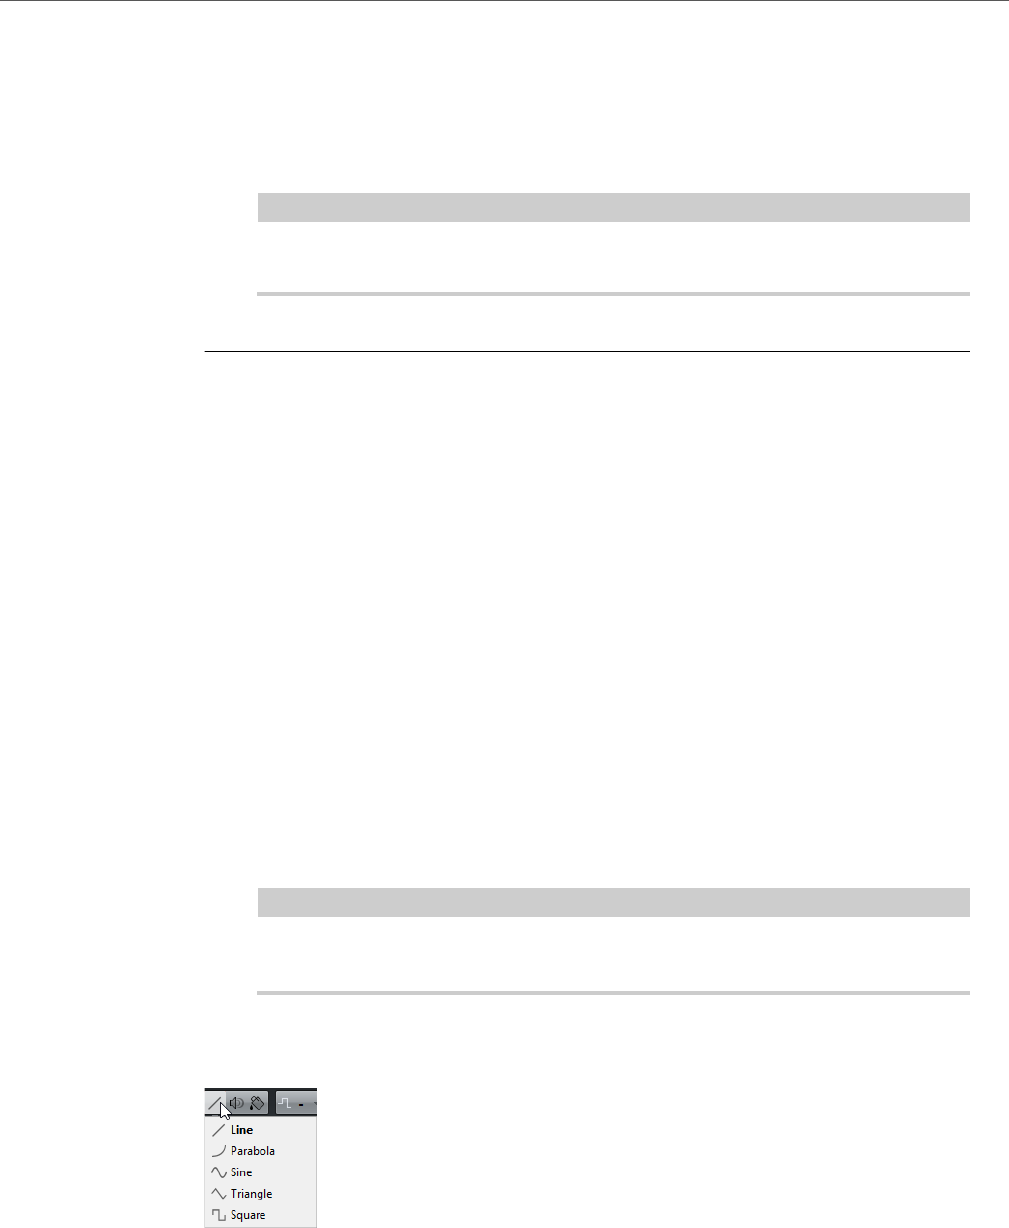
Automation
Writing Automation Data
363
4. Click on the static value line.
An automation event is added, read automation mode is automatically activated, and
the static value line changes to a colored automation curve.
5. Click and hold to draw a curve by adding many automation events.
When you release the mouse button, the number of automation events is reduced.
NOTE
To adjust the thinning out of events, select File > Preferences > Editing and change
the Automation Reduction Level.
6. Start playback.
RESULT
The automated parameter changes with the automation curve, and the
corresponding fader in the MixConsole moves accordingly.
AFTER COMPLETING THIS TASK
Repeat the procedure if you are not happy with the result. If you draw over existing
events, a new curve is created.
Tools for Drawing Automation Data
Apart from the Draw tool, you can use the following tools to draw automation
events:
•Object Selection tool
If R is activated and you click on an automation track with the Object
Selection tool, you can add automation events.
NOTE
Events that are introduced between two existing events that do not deviate
from the existing curve are removed as soon as you release the mouse button.
To activate the Line tool in any other available mode, click the Line tool and click
again to open a pop-up menu where you can select the mode.
The following Line tool modes are available:
Line mode
If you click on the automation track and drag with the Line tool in Line mode,
you can create automation events in a line. This is a quick way to create linear
fades, etc.
Automation
Editing Automation Data
364
Parabola mode
If you click and drag on the automation track with the Line tool in Parabola
mode, you can create more natural curves and fades.
NOTE
The result depends on the direction from which you draw the parabolic curve.
Sine, Triangle, or Square mode
If you click and drag on the automation track with the Line tool in Sine,
Triangle, or Square mode and snap to grid is activated, the period of the
curve (the length of one curve cycle) is determined by the grid setting. If you
press [Shift] and drag, you can set the period length manually, in multiples of
the grid value.
NOTE
The Line tool can only be used for ramp type automation curves.
Editing Automation Data
Automation events can be edited much like other events.
You can cut, copy, paste, and nudge events, etc.
• If you move an event or part on a track and you want the automation events to
follow automatically, select Edit > Automation follows Events.
All automation events for the track between the start and end of the event or
part are moved. Any automation events at the new position are overwritten.
Selecting Automation Events
• To select an automation event, click it with the Object Selection tool.
The event turns black, and you can drag it in any direction between two
events.
• To select multiple events, [Shift]-click the events or drag a selection rectangle
with the Object Selection tool.
All events inside the selection rectangle are selected and the automation track
editor becomes available.
• To select all automation events on an automation track, right-click the
automation track and select Select All Events from the context menu.
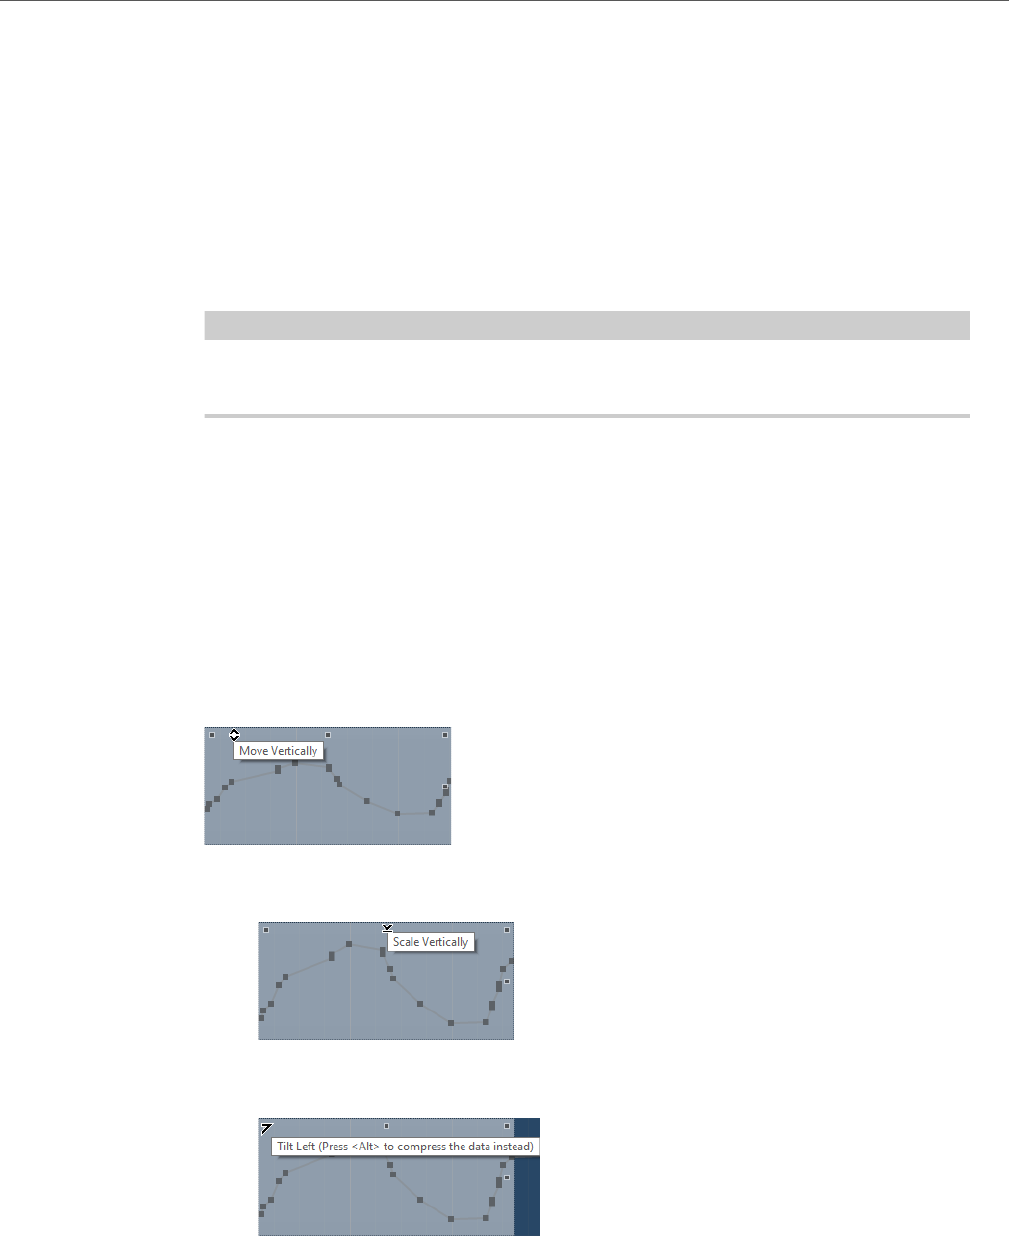
Automation
Editing Automation Data
365
Removing Automation Events
• To remove an automation event, click on it with the Erase tool.
• To remove multiple automation events, select them and press [Backspace] or
[Delete] or select Edit > Delete.
• To remove all automation events from the automation track and close the
automation track, click the automation parameter name in the track list and
select Remove Parameter from the pop-up menu.
NOTE
When removing automation events, the curve is redrawn to connect the remaining
events.
Adjusting Automation Ramp Curves
You can adjust automation ramp curves in the automation track editor.
• To open the automation track editor, activate the Object Selection tool and
drag a selection rectangle on a ramp type automation track.
On the borders of the automation track editor, smart controls for specific editing
modes are displayed:
• To move the entire curve up or down, click in an empty area on the upper
border of the editor. This is useful to boost or attenuate a curve.
• To raise or lower the values in relative amounts, click in the middle of the upper
border of the editor.
• To tilt the left or the right part of the curve, click in the upper left or right corner
of the editor. This is useful if the curve form is exactly the way that you want it,
but the start or end needs to be boosted or attenuated a bit.
• To compress the left or the right part of the curve instead, [Alt]/[Option]-click
in the upper left or right corner of the editor.
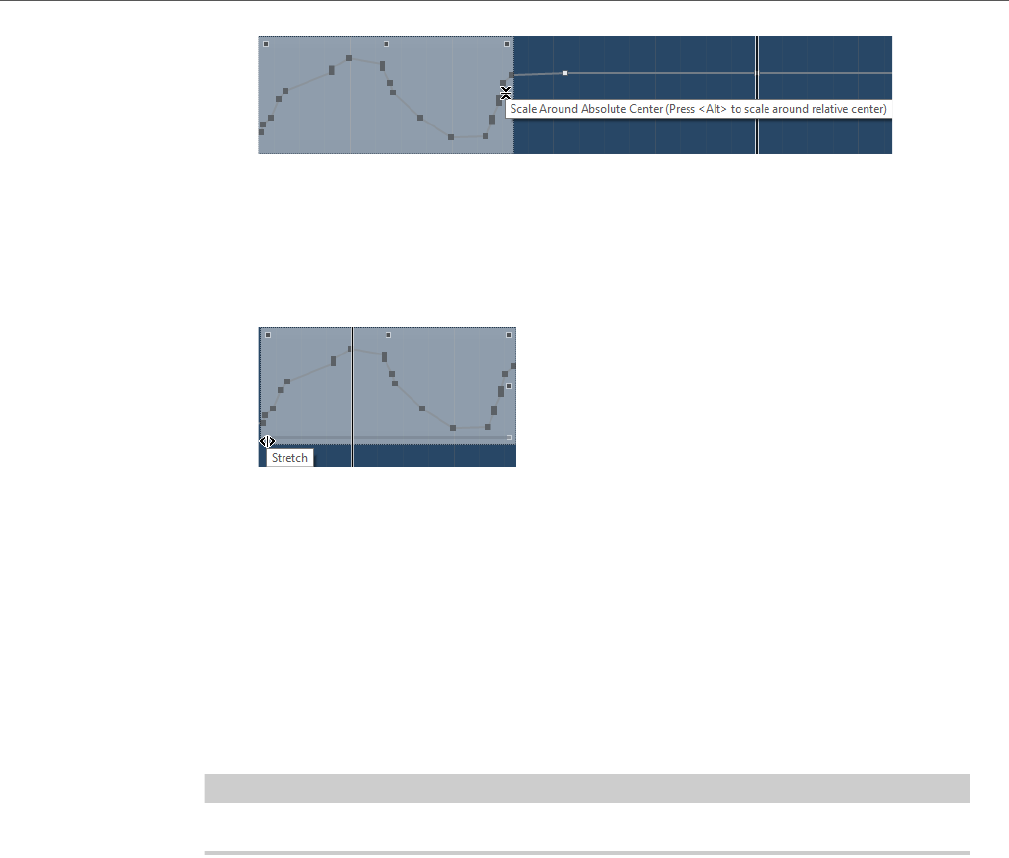
Automation
Automation Tracks
366
• To scale the curve around the absolute center, for example, horizontally
around the center of the editor, click in the middle of the right border of the
editor.
• To scale the curve relative to its center instead, [Alt]/[Option]-click in the
middle of the right border of the editor.
• To stretch the selected curve, click and drag in the lower part of the editor.
[Shift]-click on any of the smart controls to scale vertically.
• To scale the automation curves on several tracks at the same time, drag a
selection rectangle across the corresponding automation tracks, hold down
[Ctrl]/[Command], and use the scaling smart controls.
• To move the whole selection up/down or left/right, click inside the editor and drag.
• To restrict the direction to horizontal or vertical movement, press
[Ctrl]/[Command] and drag.
NOTE
Snap is taken into account when moving automation curves horizontally.
Automation Tracks
Most of the tracks in your project have automation tracks, one for each automated
parameter.
Automation tracks are hidden by default.
Showing/Hiding Automation Tracks
• Position the mouse pointer over the lower left corner of the track and click the
arrow icon (Show/Hide Automation) that appears.
• Right-click the track in the track list and select Show/Hide Automation from
the context menu.
• To open another automation track, position the mouse pointer over the lower
left corner of an automation track, and click + (Append Automation Track).

Automation
Automation Tracks
367
• To show all used automation tracks in the track list, right-click any track and
select Show All Used Automation from the context menu.
• To open the corresponding automation track on writing automation
parameters, select File > Preferences > Editing and activate Show
Automation Track in Project on Writing Parameter.
Removing Automation Tracks
• To remove an automation track together with all automation events, click the
parameter name and from the pop-up menu, select Remove Parameter.
• To remove all automation tracks from a track that do not contain automation
events, select Remove Unused Parameters from any of its automation
parameter name pop-up menus.
• To remove automation tracks, you can also select Project > Automation
Panel > Functions and select one of the options to delete automation.
Assigning a Parameter to an Automation Track
Default parameters are already assigned to automation tracks when you open them,
according to their order in the parameter list.
PROCEDURE
1. Open an automation track and click on the automation parameter name.
A parameter list is shown. The contents depend on the track type.
2. From the pop-up menu, select the parameter or select More to open the Add
Parameter dialog that lists all parameters that can be automated, and select
the parameter there.
3. Select the Parameter.
The parameter replaces the current parameter in the automation track.
NOTE
The replacing of the automation parameter is non-destructive. If the automation track
contains any automation data for the parameter that you just replaced, this data is
there, although it is not visible. By clicking on the automation parameter name in the
track list, you can switch back to the replaced parameter. On the pop-up menu, all
automated parameters are indicated by an asterisk (*) after the parameter name.
Muting Automation Tracks
By muting an automation track you turn off automation for a single parameter.
• To mute individual automation tracks, click their Mute buttons in the track list.
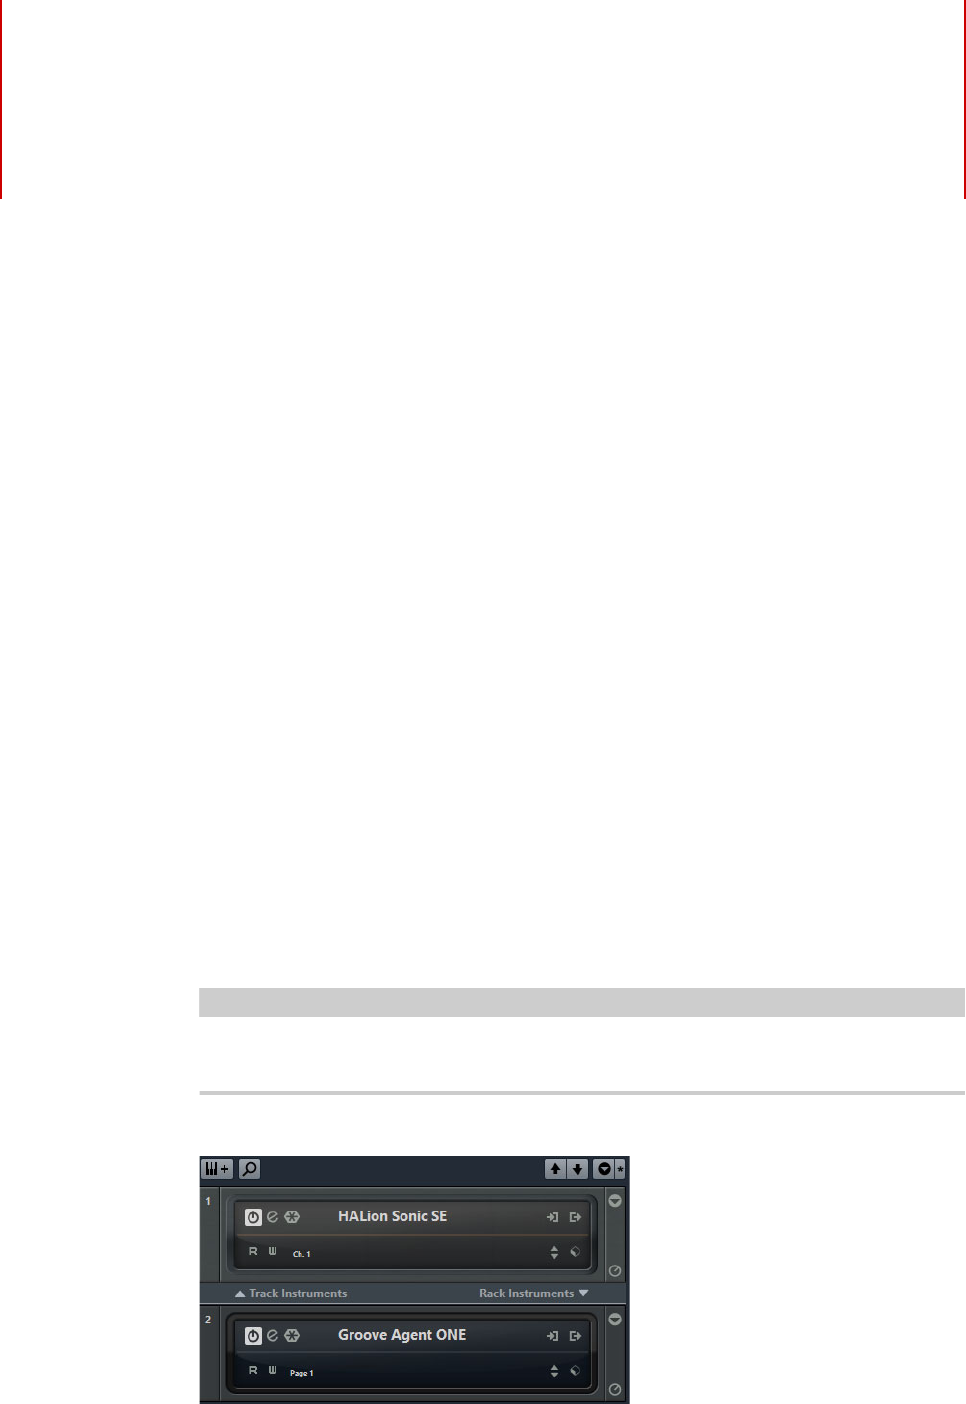
368
VST Instruments
VST instruments are software synthesizers or other sound sources that are
contained within Cubase. They are played internally via MIDI. You can add effects
or EQ to VST instruments.
Cubase allows you to make use of VST instruments in the following ways:
• By adding an instrument in the VST Instruments window (not in Cubase LE).
This creates a VST instrument channel, which can be played by one or several
MIDI tracks routed to it.
• By creating an instrument track.
This is a combination of a VST instrument, an instrument channel, and a MIDI
track. You play and record MIDI note data directly for this track.
VST Instruments Window
The VST Instruments window allows you to add VST instruments for MIDI and
instrument tracks, giving you an overview of all instruments used in a project. It also
offers you access to 8 quick controls for each added instrument.
IMPORTANTIMPORTANTIMPORTANT
IMPORTANT
In Cubase LE, the VST Instruments window is not available. Only instrument tracks
and the related functions can be used in this program version.
To open the VST Instruments window, select Devices > VST Instruments.
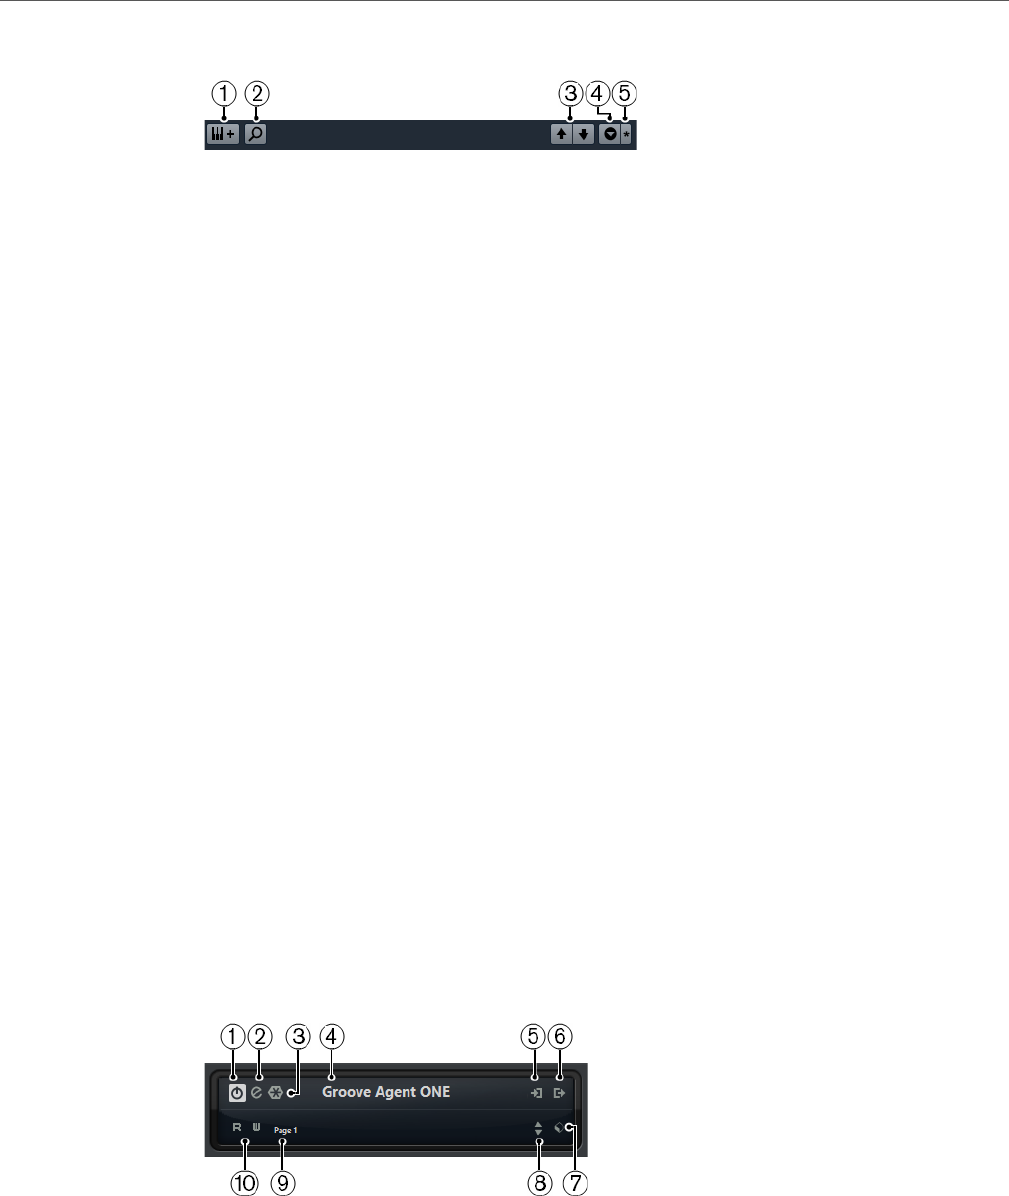
VST Instruments
VST Instruments Window
369
The following controls can be found in the VST Instruments window:
1) Add Track Instrument
Opens the Add Instrument Track dialog that allows you to select an
instrument and add an instrument track that is associated to this instrument.
2) Find Instruments
Opens a selector that allows you to find an instrument in the VST
Instruments window.
3) Set Remote-Control Focus for VST Quick Controls to Previous/Next
Instrument
Shows and activates the quick controls for the next/previous instrument in the
VST Instruments window.
4) Show/Hide all VST Quick Controls
Shows/Hides the default quick controls for all loaded instruments.
5) Settings
Opens the Settings menu, where you can activate/deactivate the following
modes:
Show VST Quick Controls for One Slot Only shows the VST Quick
Controls exclusively for the selected instrument.
MIDI Channel follows track selection ensures that the Channel selector
follows the MIDI track selection in the Project window. Use this if you work
with multitimbral instruments.
Remote-Control Focus for VST Quick Controls follows track selection
ensures that the VST Quick Control remote-control focus follows the track
selection.
The following controls are available on each instrument:
1) Activate Instrument
Activates/Deactivates the instrument.
2) Edit Instrument
Opens the instrument panel.
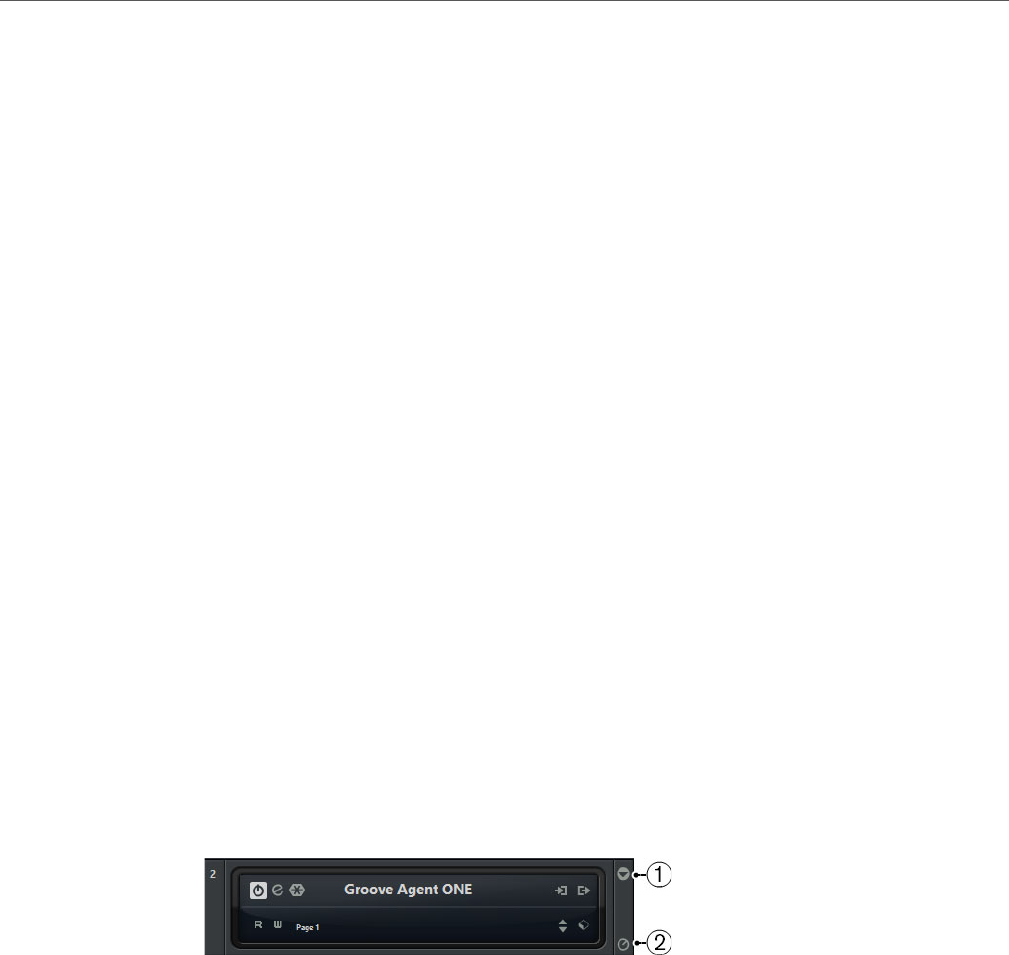
VST Instruments
VST Instruments Window
370
3) Freeze Instrument
Freezes the instrument. This allows you to save CPU power.
4) Instrument Selector
Allows you to select another instrument. Double-click to rename the
instrument. The name is shown in the VST Instruments window in the Output
Routing pop-up menu for MIDI tracks. This is useful when you work with
several instances of the same instrument.
5) Input Options
This lights up when MIDI data is received by the instrument. Click this button
to open a pop-up menu that allows you to select, mute/unmute, and
solo/unsolo for tracks that send MIDI to the instrument (inputs).
6) Activate Outputs
Allows you to activate one or more outputs for the instrument.
7) Preset Browser
Allows you to load or save an instrument preset.
8) Load Previous/Next Program
Allows you to load the previous/next program.
9) Select Quick Control Layer
Allows you to select a program.
10) Read/Write Automation
Allows you to read/write automation for the instrument parameter settings.
The following controls are available on each rack:
1) Show/Hide VST Quick Controls
Allows you to show/hide the VST Quick Controls for the instrument.
2) Set Remote-Control Focus for VST Quick Controls
Allows you to activate the VST Quick Controls to remote-control the
instrument.
VST Instruments Window Context Menu
The following functions are available in the VST Instruments window context menu:
Always on Top
If this option is activated, the VST Instruments window is always on top.

VST Instruments
Adding VST Instruments
371
Add Track Instrument
Opens the Add Instrument Track dialog that allows you to select an
instrument and add an instrument track that is associated to this instrument.
Add Rack Instrument
Opens a selector that allows you to add a VST instrument.
Instruments Context Menu
The following functions are available in the instruments context menu:
Copy/Paste instrument Setting
Allows you to copy the instrument settings and paste them to another
instrument.
Load/Save Preset
Allows you to load/save an instrument preset.
Default Preset
Allows you to define and save a default preset.
Switch to B Setting
Activates the setting B.
Copy A to B
Copies the effect parameters of effect setting A to effect setting B.
Activate Outputs
Allows you to activate one or more outputs for the instrument.
Remote Control Editor
Opens the Remote Control Editor.
Adding VST Instruments
PROCEDURE
1. On the Devices menu, select VST Instruments.
2. Right-click on an empty area of the VST Instruments window.
3. From the context menu, select one of the following:
•Add Track Instrument
•Add Rack Instrument
4. From the instrument selector, select an instrument.
•Click Add Track, if you chose to add a track instrument.
•Click Create, if you chose to add a rack instrument.

VST Instruments
Presets for Instruments
372
RESULT
If you chose Add Track Instrument, the instrument control panel opens, and an
instrument track with the name of the instrument is added to your project.
If you chose Add Rack Instrument, the instrument control panel opens, and the
following tracks are added to the track list:
• A MIDI track with the name of the instrument. The output of the MIDI track is
routed to the instrument.
NOTE
In the Preferences dialog (VST–Plug-ins page), you can specify what
happens when you load a VST instrument.
• A folder with the name of the instrument that is added within a VST
Instruments folder. The instrument folder contains two automation tracks: one
for the plug-in parameters, and one for the synth channel in the MixConsole.
Presets for Instruments
You can load and save presets for instruments. These contain all the settings that
are required for the sound that you want.
The following presets for instruments are available:
•VST presets include the parameter settings of a VST instrument.
These are available from the VST instruments window, from the instrument
control panels, and from the Programs field in the Inspector.
•Track presets include the instrument track settings and the settings for the
corresponding VST instrument.
These are available from the Inspector or the track list context menu.
Loading VST Presets
You can load VST presets from the VST instruments window, from the instrument
panel, or from the Inspector.
PROCEDURE
1. Do one of the following:
• Select the track that contains the VST instrument and in the Inspector, click
the Programs field.
• In the VST Instruments window, click the Preset Browser button for the
instrument, and select Load Preset.
• In the control panel for the VST instrument, click the Preset Browser button,
and select Load Preset.

VST Instruments
Presets for Instruments
373
2. In the preset browser, select a preset from the list and double-click it to load it.
RESULT
The preset is applied. To return to the previously loaded preset, open the preset
browser again and click Revert to Last Setting
Saving VST Presets
You can save your settings on VST instruments as VST presets for further use.
PROCEDURE
1. Do one of the following:
• In the VST Instruments window, click the Preset Browser button for the
instrument, and select Save Preset.
• In the control panel for the VST instrument, click the Preset Browser button,
and select Save Preset.
2. In the Save <VST instrument name> Preset dialog, enter a name for the
preset.
3. Optional: Click Show Attribute Inspector and define attributes for the
preset.
4. Click OK to save the preset and close the dialog.
Loading Track Presets
You can load track presets for instrument tracks from the Inspector.
PROCEDURE
1. Do one of the following:
• Select the instrument track and in the Inspector, click the Load Track Preset
field.
• Right-click the instrument track and from the context menu, select Load Track
Preset.
2. In the preset browser, select a preset from the list and double-click it to load it.
RESULT
The track preset is applied. To return to the previously loaded preset, open the
preset browser again and click Revert to Last Setting.

VST Instruments
VST Quick Controls
374
Saving Track Presets
You can save your settings on instrument tracks as Track presets for further use.
PROCEDURE
1. Do one of the following:
• Select the instrument track and in the Inspector, click the Save Track Preset
button.
• Right-click the instrument track and from the context menu, select Save Track
Preset.
2. In the Save Track Preset dialog, enter a name for the preset.
3. Optional: Click Show Attribute Inspector and define attributes for the
preset.
4. Click OK to save the preset and close the dialog.
VST Quick Controls
VST Quick Controls allow you to remote-control a VST instrument from within the
VST Instruments window.
To show the VST Quick Controls on the VST Instruments window, activate the
Show/Hide all VST Quick Controls button.
Connecting Quick Controls with Remote Controllers
Quick Controls become powerful when used in combination with a remote
controller.
PREREQUISITE
Your remote device is connected to Cubase via MIDI.
PROCEDURE
1. Select Devices > Device Setup.
2. In the Devices list, select Track Quick Controls or VST Quick Controls.
This opens the respective section on the right.
3. From the MIDI Input pop-up menu, select the MIDI port on your computer.
If your remote controller has its own MIDI input and supports MIDI feedback, you can
connect your computer to the device input. Select the corresponding MIDI port in the
MIDI Output pop-up menu.
Alternatively, you can select All MIDI Inputs.
4. Click Apply.
5. Activate Learn.

VST Instruments
VST Quick Controls
375
6. In the Control Name column, select QuickControl 1.
7. On your remote control device, move the control that you want to use for the
first quick control.
8. Select the next slot in the Control Name column and repeat the previous
steps.
9. Click OK.
NOTE
In addition to using the Learn function to set up the table in the Quick Controls
section, you can modify the values manually. The available options are identical to the
ones available for the Generic Remote device.
RESULT
The quick controls are now associated with control elements on your external
remote controller. If you move a control element, the value of the parameter that is
assigned to the corresponding Quick Control changes accordingly.
The remote controller setup for Quick Controls is saved globally, that is, it is
independent of any projects. If you have various remote controllers, you can save
and load several Quick Control setups using the Export and Import buttons.
RELATED LINKS
The Generic Remote device on page 392
Activating Pick-up Mode for Hardware Controls
Pick-up Mode allows you to change configured Quick Control parameters without
accidentally modifying their previous values.
Often, the parameter settings of your Quick Controls are initially different from the
settings of your hardware controls, for example, when the hardware controls control,
different Quick Controls on different tracks. In this case, you will notice that moving
a hardware control changes the previous value of a parameter in a way that it is
initially set to the zero position, before it is changed. Thus, you always lose your
previous setting of the parameter.
To avoid this, you can activate Pick-up Mode. This has the effect that when you
move your hardware control, you can only change the parameter once the control
reaches the parameter’s previous value. The control “picks up” the parameter at the
value to which it was last set.
NOTE
This only applies to hardware controllers whose controls use specific ranges.
PROCEDURE
1. Select Devices > Device Setup.
2. In the Devices list, select Track Quick Controls or VST Quick Controls.

VST Instruments
Playing Back VST Instruments
376
3. Activate Pick-up Mode.
4. Click OK.
Playing Back VST Instruments
After you have added a VST instrument and selected a sound, you can play back
the VST instrument using the instrument or MIDI track in your project.
PROCEDURE
1. In the track list, activate the Monitor button for the track that has the VST
instrument loaded.
2. Press one or more keys on your MIDI keyboard or use the virtual keyboard.
The corresponding sounds are triggered on your VST instrument.
3. Select Devices > MixConsole to open the MixConsole and adjust the
sound, add EQ or effects, assign another output routing, etc.
VST Instruments and Processor Load
VST instruments can consume a lot of CPU power. The more instruments you add,
the more likely you will run out of processor power during playback.
If the CPU overload indicator in the VST Performance window lights up or you get
crackling sounds, you have the following options:
• Activate Freeze for instruments.
This renders the instrument into an audio file and unloads it.
• Activate Suspend VST3 plug-in processing when no audio signals are
received for VST 3 instruments.
This ensures that your instruments do not consume CPU power on silent
passages.
RELATED LINKS
Freezing Instruments on page 377
Suspend VST3 plug-in processing when no audio signals are received
on page 674

VST Instruments
Playing Back VST Instruments
377
Freezing Instruments
If you are using a moderately powerful computer or a large number of VST
instruments, your computer may not be able to play back all instruments in realtime.
At this point, you can freeze instruments.
PROCEDURE
1. Do one of the following:
• Select Devices > VST Instruments.
• Select the instrument track and open the top Inspector tab.
2. Click the Freeze button.
3. In the Freeze Instrument Options dialog, make your settings.
4. Click OK.
RESULT
• The instrument is rendered to an audio file and on playback you hear the same
sound as before freezing.
• Less CPU load is used.
• The Freeze button lights up.
• The MIDI/instrument track controls are grayed out.
• The MIDI parts are locked.
NOTE
To edit the tracks, parameters, or synth channels again, and to delete the rendered
file, unfreeze the instrument by clicking the Freeze button again.
Freeze Instrument Options
The Freeze Instrument Options dialog opens when you click the Freeze button.
It allows you to specify exactly what should happen, if you freeze an instrument.
The following controls can be found in the Freeze Instrument Options dialog:
Freeze Instrument Only
Activate this option if you still want to be able to edit insert effects on the synth
channel after freezing the instrument.
Freeze Instrument and Channels
Activate this option if you do not need to edit the insert effects on your synth
channels.
NOTE
You can still adjust level, pan, sends, and EQ.

VST Instruments
About Latency
378
Tail Size
Allows you to set a Tail Size time to let sounds complete their normal release
cycle.
Unload Instrument when Frozen
Activate to unload the instrument after freezing. This makes the RAM available
again.
About Latency
The term latency stands for the time it takes for the instrument to produce a sound
when you press a key on your MIDI controller. It can be an issue when using VST
instruments in realtime. Latency depends on your audio hardware and its ASIO
driver.
In the Device Setup dialog (VST Audio System page), the input and output latency
values should ideally be a few milliseconds.
If the latency is too high to allow comfortable realtime VST instrument playback from
a keyboard, you can use another MIDI sound source for live playback and recording,
and switch to the VST instrument for playback.
RELATED LINKS
Selecting a Driver on page 9
Delay Compensation
During playback Cubase automatically compensates any delay inherent in the VST
plug-ins you use.
You can specify a Delay Compensation Threshold in the Preferences dialog
(VST page) so that only plug-ins with a delay higher than this threshold setting are
affected.
Constrain Delay Compensation
To avoid Cubase to add latency when you play a VST instrument in realtime or
record live audio, you can activate Constrain Delay Compensation. This minimizes
the latency effects of the delay compensation, while maintaining the sound of the
mix as far as possible.
The Constrain Delay Compensation function is available on the toolbar and in the
MixConsole on the Functions menu.
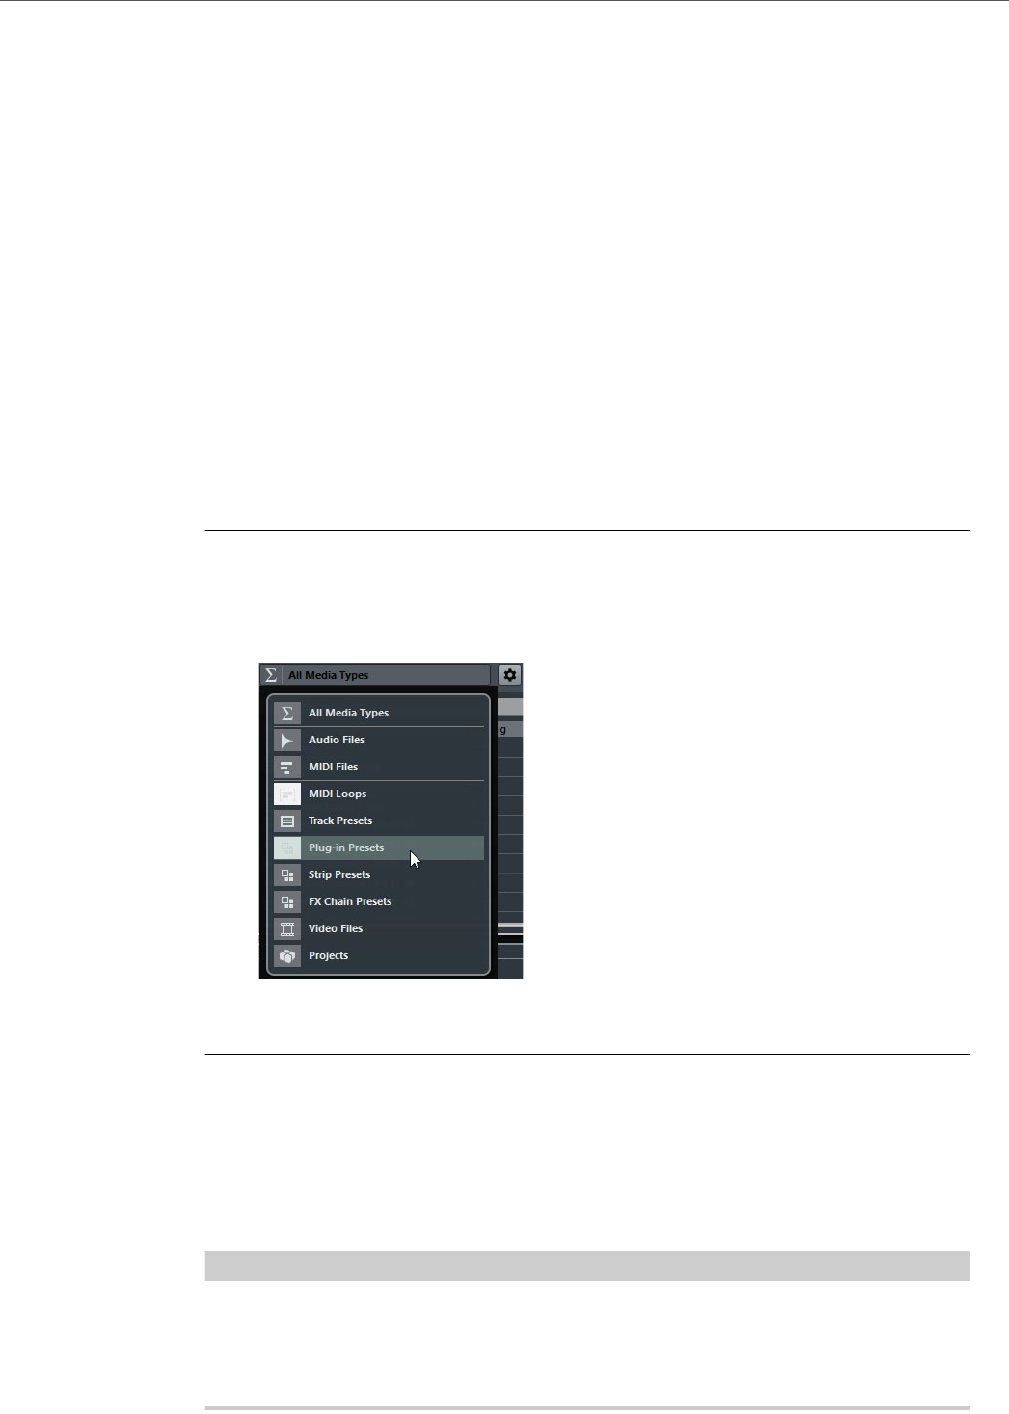
VST Instruments
Import and Export Options
379
Activating Constrain Delay Compensation turns off VST plug-ins which are activated
for VST instrument channels, audio track channels that are record enabled, group
channels, and output channels. VST plug-ins which are activated for FX channels are
disregarded. After recording or using a VST instrument Constrain Delay
Compensation should be deactivated again in order to restore full delay compensation.
Import and Export Options
Importing MIDI Loops
You can import MIDI loops (file extension .midiloop) in Cubase. These files contain
MIDI part information (MIDI notes, controllers, etc.) and all the settings that are
saved in instrument track presets. This way, you can reuse instrument patterns in
other projects or applications, for example.
PROCEDURE
1. Select Media > MediaBay.
2. Optional: In the Results section, open the Select Media Types menu, and
activate MIDI Loops and Plug-in Presets.
3. In the results list, select a MIDI loop and drag it to an empty section in the
Project window.
RESULT
An instrument track is created and the instrument part is inserted at the position
where you dragged the file. The Inspector reflects all settings that are saved in the
MIDI loop, for example, the VST instrument that was used, applied insert effects,
track parameters, etc.
NOTE
You can also drag MIDI loops onto existing instrument or MIDI tracks. However, this
only imports the part information. This means this part only contains the MIDI data
(notes, controllers) that is saved in the MIDI loop, but no inspector settings or
instrument parameters.

VST Instruments
Import and Export Options
380
RELATED LINKS
Presets for Instruments on page 372
Filtering According to Media Type on page 342
Exporting MIDI Loops
You can export MIDI loops to save a MIDI part together with its instrument and
effect settings. This allows you to reproduce patterns that you created without
having to search for the correct sound, style, or effect.
PROCEDURE
1. Select an instrument part.
2. Select File > Export > MIDI Loop.
A file dialog opens.
3. In the New MIDI Loop section, enter a name for the MIDI loop.
4. Optional: To save attributes for the MIDI loop, click the button below the New
MIDI Loop section at the bottom left.
The Attribute Inspector section opens, allowing you to define attributes for your MIDI
loop.
5. Click OK to close the dialog and save the MIDI loop.
RESULT
MIDI Loop files are saved in the following folder:
Windows: \Users\<user name>\AppData\Roaming\Steinberg\MIDI
Loops
Mac: /Users/<user name>/Library/Application Support/
Steinberg/MIDI Loops/
The default folder cannot be changed. However, you can create subfolders within
this folder to organize your MIDI loops. To create a subfolder, click the New Folder
button in the Save MIDI Loop dialog.
VST Instruments
Import and Export Options
381
Exporting Instrument Tracks as MIDI File
You can export instrument tracks as standard MIDI files.
NOTE
As there is no MIDI patch information in an instrument track, this information is
missing in the resulting MIDI file.
NOTE
If you activate Export Inspector Volume/Pan, volume and pan information of the
VST instrument are converted and written into the MIDI file as controller data.
RELATED LINKS
Exporting MIDI files on page 622

382
Installing and Managing
Plug-ins
Installing VST plug-ins
Cubase supports the VST 2 and VST 3 plug-in standards. You can install effects
and instruments that comply with these formats.
A plug-in is a piece of software that adds a specific functionality to Cubase. The
audio effects and instruments that are used in Cubase are VST plug-ins.
NOTE
If an effect or instrument plug-in has its own installation application, you should use
this. Dragging an already installed plug-in to a different location may lead to
problems. As a general rule, always read the documentation or readme files before
installing new plug-ins.
Cubase comes with a number of effect plug-ins included. These effects and their
parameters are described in the separate PDF document Plug-in Reference.
Installing VST 3 Plug-ins on Mac OS X Systems
To install a VST 3.x plug-in on a Mac OS X system, quit Cubase and drag the
plug-in file into one of the following folders:
• /Library/Audio/Plug-Ins/VST3/
This is only possible if you are the system administrator. Plug-ins that are
installed in this folder are available to all users, for all programs that support
VST 3.
• /Users/<user name>/Library/Audio/Plug-Ins/VST3/
<user name> is the name you use to log on to the computer. The easiest way
to open this folder is to open your Home folder and use the path
/Library/Audio/Plug-Ins/VST3/ from there. Plug-ins that are
installed in this folder are only available to you.
When you scan for newly installed plug-ins, or relaunch Cubase, the new effects
appear on the effect selectors. In the VST 3 protocol, the effect category, subfolder
structure, etc. are built-in and cannot be changed. Therefore, you find the effects in
the corresponding category folders.

Installing and Managing Plug-ins
Plug-in Manager
383
Installing VST 2 Plug-ins on Mac OS X Systems
To install a VST 2.x plug-in on Mac OS X systems, quit Cubase and drag the plug-in
file to one of the following folders:
• Library/Audio/Plug-Ins/VST/
This is only possible if you are the system administrator. Plug-ins that are
installed in this folder are available to all users, for all programs that support
VST 2.x.
• user name>/Library/Audio/Plug-Ins/VST/
<user name> is the name you use to log on to the computer. The easiest way
to open this folder is to go to your Home folder and use the path
/Library/Audio/Plug-Ins/VST/ from there. Plug-ins that are installed
in this folder are only available to you.
When you scan for newly installed plug-ins, or relaunch Cubase, the new effects
appear on the effect selectors.
Installing VST 3 Plug-ins on Windows Systems
On Windows systems, VST 3 plug-ins are installed by dragging the files with the
extension .vst3 into the VST3 folder in the Cubase application folder. When you
scan for newly installed plug-ins, or relaunch Cubase, the new effects appear on
the effect selectors. In the VST 3 protocol, the effect category, subfolder structure,
etc. are built-in and cannot be changed. Therefore, you find the new effects in the
corresponding category folders.
Installing VST 2 Plug-ins on Windows Systems
On Windows systems, VST 2.x plug-ins are installed by dragging the files with the
extension .dll into the Vstplugins folder in the Cubase application folder, or into
the Shared VST Plug-ins folder (Windows 32 bit only). When you scan for
newly installed plug-ins, or relaunch Cubase, the new effects appear on the effect
selectors.
Plug-in Manager
The Plug-in Manager provides lists of the effects and VST instruments that are
installed on your computer. These lists are used in the selectors for VST instruments
and effects.
The Plug-in Manager allows you to do the following:
• You can view lists of all effects and VST instruments that are loaded by
Cubase when you launch the program.
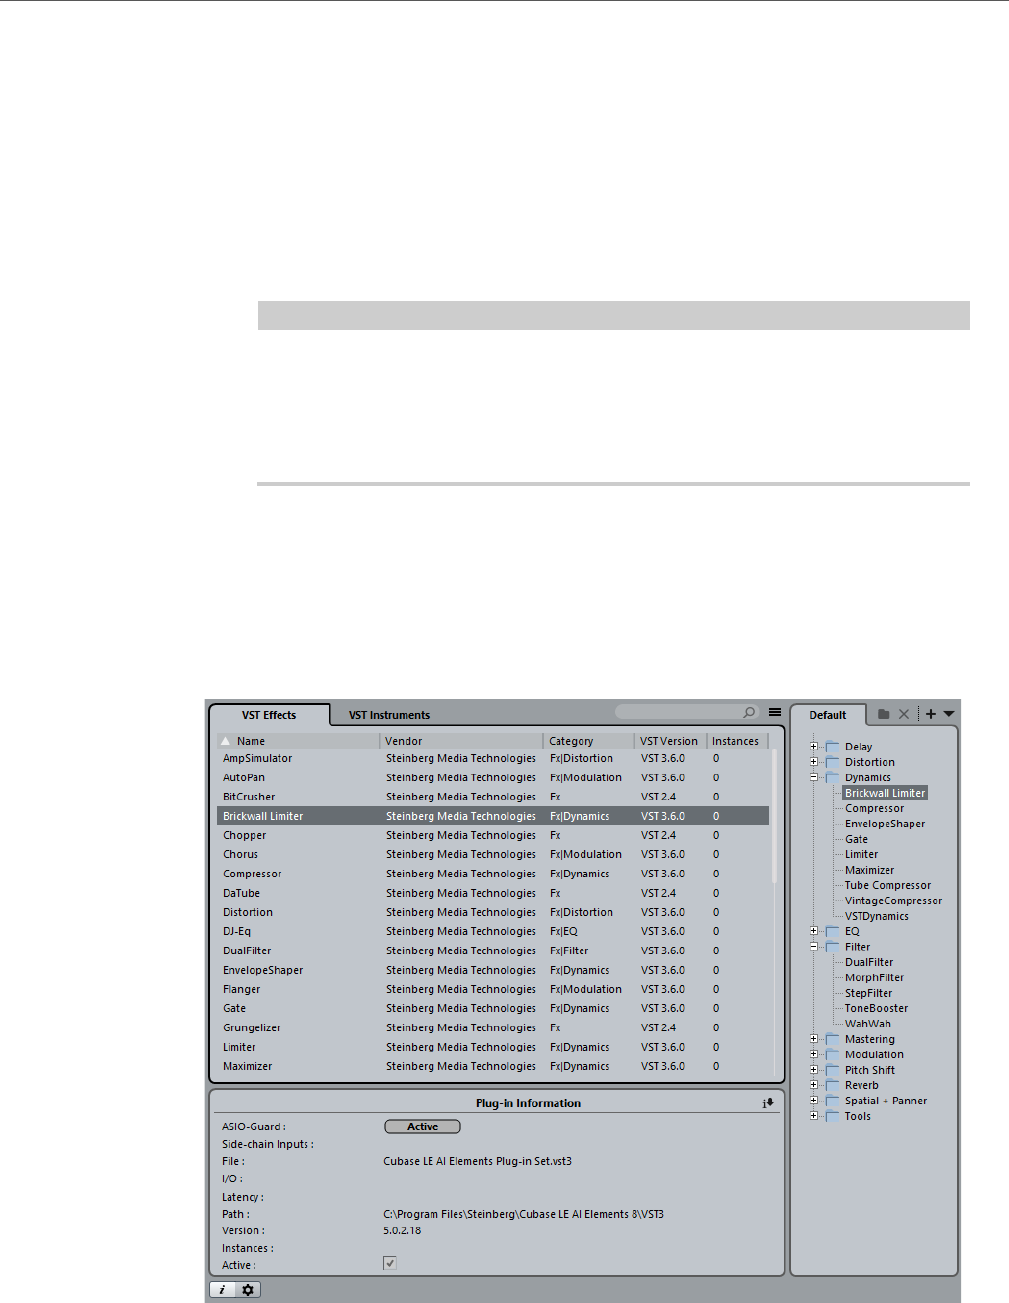
Installing and Managing Plug-ins
Plug-in Manager
384
The lists of all effects or VST instruments are created automatically every time
you start Cubase. You can also initiate a rescan at any time. This ensures that
these lists are always up-to-date.
• You can create your own lists of effects or instruments for use in the selectors
for effects or instruments. User-defined lists are called collections.
Collections allow you to create sub-sets of the available effects or
instruments, for example, to give you a better overview of the effects used in
a project.
NOTE
If an installed effect or instrument cannot be loaded by Cubase, it does not
appear in the list of all effects or instruments. Also, the effect or instrument is
grayed out in any collections in which it is included. For example, this can
happen if a copy-protection dongle required to run the effect or instrument is
missing, or after deinstallation of a plug-in.
Plug-in Manager Window
You can manage your effects and VST instruments in the Plug-in Manager window.
• To open the Plug-in Manager window, select Devices > Plug-in Manager.
Installing and Managing Plug-ins
Plug-in Manager
385
The Plug-in Manager window shows the following:
VST Effects/VST Instruments
Open these tabs to see lists of all VST effects and VST instruments that were
loaded by Cubase when you launched the program.
Collection list
By default, the window section to the right shows the Default collection,
which contains all effects or VST instruments currently loaded by the program.
The Default collection cannot be changed.
You can compile your own collections of effects or VST instruments by
clicking New Collection and dragging and dropping items from the list of all
effects or VST instruments to the collection list.
Collections are shown in the selectors for effects/VST instruments, and all
changes made to collections in the Plug-in Manager are immediately
reflected in the selectors.
Enter the name of a plug-in in the search field. The list of all effects or VST
instruments is filtered to show only those plug-ins whose names contain the
text that you entered.
The Toggle list to show all/show only FX/VSTi not in current collection
button allows you to filter the lists of all effects or VST instruments to show
either all loaded plug-ins, or only those that are not part of the current
collection.
The New Folder button allows you to create a new folder in the current
collection.
The Delete button allows you to delete the selected item in the current
collection.
The New Collection button allows you to create a new collection.
To create a new, empty list, select Empty. To create a new collection based
on the list of all effect, select Add All Plug-ins. To create a new collection
based on the current collection, select Add Current Collection.
The User Collections drop-down menu allows you to select a different
collection, and to rename or delete the current collection.
To remove unavailable plug-ins from all collections, select Remove
Unavailable Plug-ins from All Collections.
Installing and Managing Plug-ins
Compiling a New Effects Collection
386
The Show Plug-in Information button opens a section at the bottom of the
window in which more information about the selected item is shown. If you
select several plug-ins, the information for the plug-in that you have selected
first is shown. In this section, you can also deactivate selected plug-ins.
Deactivated plug-ins are no longer available in collections. This is useful if you
have plug-ins installed that you do not want to use in Cubase.
The Plug-in Manager Settings button opens a section at the bottom of the
window in which all current paths to VST 2 plug-ins are listed. You can add
or remove folder locations by using the corresponding buttons. Click Rescan
All to rescan your computer for plug-ins.
RELATED LINKS
Plug-in Manager on page 383
Compiling a New Effects Collection
You can create a new collection of effects or VST instruments for use in the plug-in
selectors.
PREREQUISITE
A number of effect plug-ins is correctly installed on your computer, and these
plug-ins are listed on the VST Effects tab of the Plug-in Manager window.
PROCEDURE
1. In the Plug-in Manager window, click the New Collection button and do one
of the following:
• To create a new collection based on the list of all effects, select Add All
Plug-ins.
• To create a new collection based on the current collection, select Copy
Current Collection.
2. Enter a name for the new collection and click OK.
3. Drag items from the list of all effects and drop them to the new collection. A
blue line indicates the drop position.
• Click the New Folder button to create folders and place items directly in them.
• You can drag items to new positions within the collection.
• Drag items from the collection list to the list of all plug-ins to delete them, or
select items and click Delete.
RESULT
The new collection is saved automatically.

Installing and Managing Plug-ins
Compiling a New Effects Collection
387
The procedure is the same for compiling collections of VST instruments.
In the plug-in selectors, found, for example, in the Project window > track
inspector > Inserts tab, collections are available as tabs at the top of the selector.

388
Remote controlling Cubase
It is possible to control Cubase via MIDI.
A large number of MIDI control devices is supported. This chapter describes how
to set up Cubase for remote control. The supported devices are described in the
separate PDF document “Remote Control Devices”.
There is also a Generic Remote Device option, allowing you to use any MIDI
controller to remote control Cubase.
RELATED LINKS
The Generic Remote device on page 392
Setting Up
Connecting the remote device
Connect the MIDI output on the remote unit to a MIDI input on your MIDI interface.
Depending on the remote unit model, you may also need to connect a MIDI Out on
the interface to a MIDI In on the remote unit (this is necessary if the remote unit
features “feedback devices” such as indicators, motorized faders, etc.).
If you are recording MIDI tracks, you do not want any MIDI data from the remote unit
to be accidentally recorded as well. To avoid this, you should make the following
setting:
PROCEDURE
1. Open the Device Setup dialog from the Devices menu.
2. Select “MIDI Port Setup” in the list on the left.
3. Check the table on the right and locate the MIDI input to which you have
connected the MIDI remote unit.
4. Deactivate the checkbox in the “In ‘All MIDI Inputs’” column for that input, so
that the State column reads “Inactive”.
5. Click OK to close the Device Setup dialog.
Remote controlling Cubase
Setting Up
389
RESULT
Now you have removed the remote unit input from the “All MIDI Inputs” group. This
means that you can record MIDI tracks with the “All MIDI Inputs” port selected
without risking to record the data from the remote unit at the same time.
Selecting a remote device
PROCEDURE
1. Open the Device Setup dialog from the Devices menu.
2. If you cannot find the remote device you are looking for, click on the plus sign
in the top left corner and select the device from the pop-up menu.
The selected device is added to the Devices list.
NOTE
Note that it is possible to select more than one remote device of the same type. If you
have more than one remote device of the same type, these will be numbered in the
Devices list. For example, to be able to use a Mackie Control Extender, you must
install a second Mackie control device.
3. Select your MIDI control device model from the Devices list.
Depending on the selected device, either a list of programmable function commands
or a blank panel is shown in the right half of the dialog window.
4. Select the correct MIDI input from the pop-up menu.
If necessary, select the correct MIDI output from the pop-up menu.
5. Click OK to close the dialog.
Remote controlling Cubase
Operations
390
RESULT
You can now use the MIDI control device to move faders and knobs, activate Mute
and Solo, etc. The exact parameter configuration depends on which external MIDI
control device you are using.
A white stripe in the Project window and in the MixConsole indicates which
channels are currently linked to the remote control device.
IMPORTANTIMPORTANTIMPORTANTIMPORTANT
Sometimes communication between Cubase and a remote device is interrupted or
the handshaking protocol fails to create a connection. To re-establish
communication with any device in the Devices list, select it and click the Reset
button in the lower part of the Device Setup dialog. The “Send Reset Message to
all Devices” button at the top left of the dialog next to the “+” and “-” buttons will
reset every device in the Devices list.
Operations
Global options for remote controllers
In the Device Setup dialog, on the page for your remote device, some (or all) of the
following global functions may be available (depending on your remote device):
Bank pop-up menu
If your remote device contains several banks, you can select the bank you
want to use.
The bank you select here is used by default when Cubase is launched.
Smart Switch Delay
Some of the Cubase functions (e. g. Solo and Mute) support the so called
smart switch behavior: In addition to regular activation/deactivation of a
function by clicking a button, you can also activate the function for as long as
the button is pressed. Upon releasing the mouse button, the function is
deactivated.
This pop-up menu allows you to specify how long a button must be pressed
before it goes into smart switch mode. When “Off” is selected, the smart
switch function is deactivated in Cubase.

Remote controlling Cubase
Operations
391
Enable Auto Select
If this option is activated, touching a fader on a touch-sensitive remote control
device automatically selects the corresponding channel. On devices without
touch-sensitive faders, the channel gets selected as soon as you move the
fader.
Writing automation using remote controls
Automating the MixConsole using a remote control device is done in the same way
as when you operate on-screen controls in Write mode. In order to replace existing
automation data for a control, the computer needs to know how long the user
actually “grabbed” or used the control. When doing this “on screen”, the program
simply detects when the mouse button is pressed and released. When you are
using an external remote control device without touch-sensitive controls, Cubase
cannot tell whether you “grab and hold” a fader or simply move it and release it.
Therefore, when you are using a device without touch-sensitive controls and want
to replace existing automation data, pay attention to the following:
• If you activate Write mode and move a control on the remote control device,
all data for the corresponding parameter is replaced from the position where
you moved the control, up to the position where playback is stopped.
In other words, as soon as you move a control in Write mode, it remains
“active” until you stop playback.
• Make sure that you move only the controller you want to replace.
Assigning remote key commands
For some remote devices, you can assign any Cubase function (to which a key
command can be assigned) to generic buttons, wheels, or other controls.
PROCEDURE
1. Open the Device Setup dialog and select your remote device.
On the right side of the window you will find a three column table. This is where you
assign commands.
2. Use the Button column to locate a remote device control or button to which
you wish to assign a Cubase function.
3. Click in the Category column for the control and select one of the Cubase
function categories from the pop-up menu.
4. Click in the Command column and select the desired Cubase function from
the pop-up menu.
The available items on the pop-up menu depend on the selected category.
5. Click “Apply” when you are done.
Click “Reset” to revert to the default settings.
Remote controlling Cubase
The Generic Remote device
392
RESULT
The selected function is now assigned to the button or control on the remote device.
A note about remote controlling MIDI tracks
While most remote control devices will be able to control both MIDI and audio
channels in Cubase, the parameter setup may be different. For example,
audio-specific controls (such as EQ) will be disregarded when controlling MIDI
channels.
The Generic Remote device
If you have a generic MIDI controller, you can use this for remote control of Cubase
by setting up the Generic Remote device:
PROCEDURE
1. Open the Device Setup dialog on the Devices menu.
If the Generic Remote device is not on the Devices list, you need to add it.
2. Click the “+” sign in the top left corner and select the “Generic Remote”
device from the pop-up menu.
When the Generic Remote device is added in the Device Setup dialog, you can open
the corresponding window by selecting “Generic Remote” from the Devices menu.
3. Select the Generic Remote device in the Devices list to the left.
The settings for the Generic Remote device are displayed, allowing you to specify
which control on your device should control which parameter in Cubase.
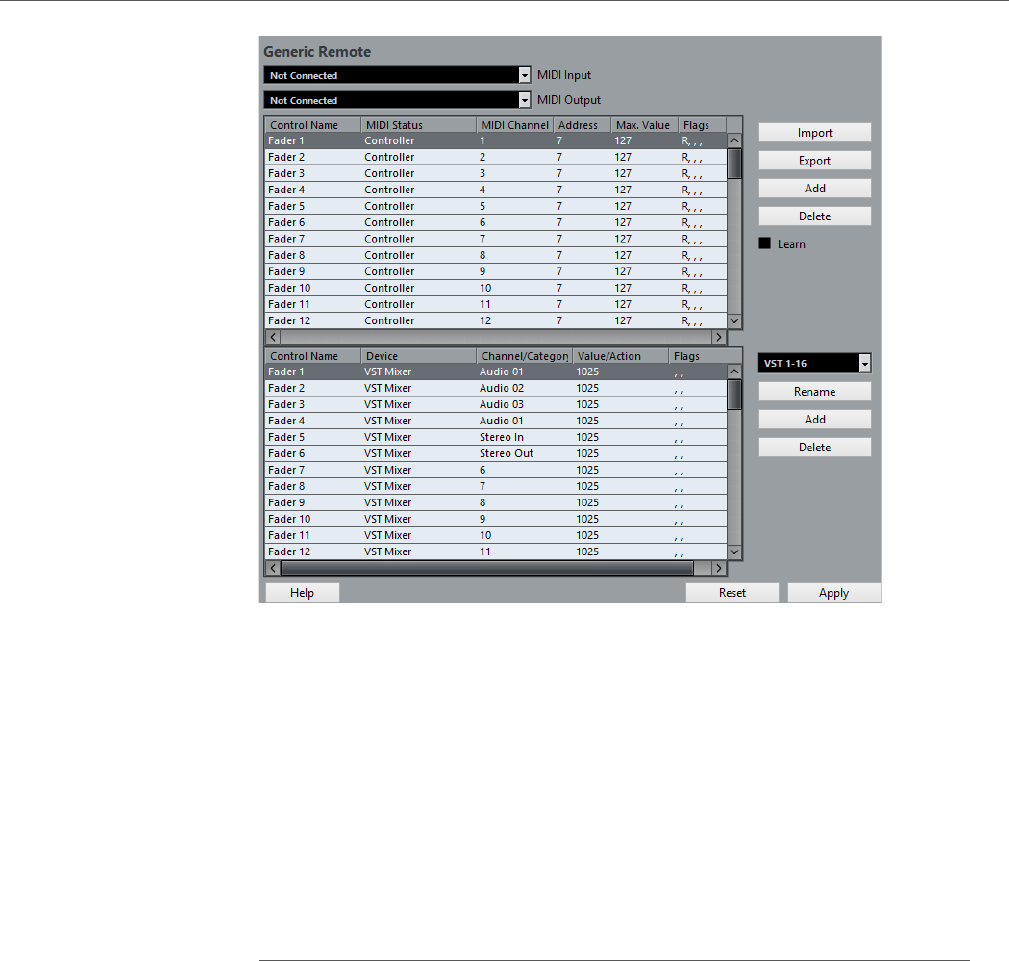
Remote controlling Cubase
The Generic Remote device
393
4. Use the MIDI Input and Output pop-up menus to select the MIDI port(s) to
which your remote device is connected.
5. Use the pop-up menu to the right to select a bank.
Banks are combinations of a certain number of channels, and are used because most
MIDI devices can control only a limited number of channels at a time (often 8 or 16).
For example, if your MIDI control device has 16 volume faders, and you are using 32
MixConsole channels in Cubase, you would need two banks of 16 channels each.
When the first bank is selected you can control channel 1 to 16; when the second
Bank is selected you can control channel 17 to 32.
6. Set up the table at the top according to the controls on your MIDI control
device.
The columns have the following functionality:
Column Description
Control
Name
Double-clicking this field allows you to enter a descriptive name for the
control (typically a name written on the console). This name is
automatically reflected in the Control Name column in the lower table.
MIDI
Status
Clicking in this column opens a pop-up menu, allowing you to specify
the type of MIDI message sent by the control (e. g. Controller, Prog.
Change Trigger).
The NRPN and RPN controllers are part of the MIDI specification and
present a way to extend the available control messages. The “Ctrl
JLCooper” option is a special version of a Continuous Controller where
the 3rd byte of a MIDI message is used as address instead of the 2nd
byte (a method supported by various JL-Cooper remote devices). For a
description of the Ctrl-Houston status value, see the Steinberg Houston
hardware manual.
MIDI
Channel
Clicking in this column opens a pop-up menu, allowing you to select the
MIDI channel on which the controller is transmitted.

Remote controlling Cubase
The Generic Remote device
394
• If you find that the table at the top holds too many or too few controls, you can
add or remove controls with the Add and Delete buttons to the right of the
table.
• If you are uncertain of which MIDI message a certain controller sends, you can
use the Learn function.
Select the control in the upper table (by clicking in the Control Name column),
move the corresponding control on your MIDI device and click the Learn button
to the right of the table. The MIDI Status, MIDI Channel, and Address values
are automatically set to those of the moved control.
• If you use the Learn function for a control that sends a Program Change value,
the “Prog. Change Trigger” option is automatically selected on the “MIDI
Status” pop-up menu. This allows you to use the different values of a Program
Change parameter to control different parameters in Cubase.
If this does not give you the result you want, try using the “Prog. Change” value
instead.
7. Use the table at the bottom to specify which Cubase parameters you want to
control.
Each row in the table is associated to the controller in the corresponding row in the
first table (as indicated by the Control Name column). The other columns have the
following functionality:
Address The Continuous Controller number, the pitch of a note, or the address of
a NRPN/RPN Continuous Controller.
Max.
Value
The maximum value the control will transmit. This value is used by the
program to “scale” the value range of the MIDI controller to the value
range of the program parameter.
Flags Clicking in this column opens a pop-up menu, allowing you to activate
or deactivate three flags:
• Receive – activate this if the MIDI message should be processed on
reception.
• Transmit – activate this if a MIDI message should be transmitted when
the corresponding value in the program changes.
• Relative – activate this if the control is an “endless” rotary encoder,
which reports the number of turns instead of an absolute value.
Column Description
Device Clicking in this column opens a pop-up menu, used for determining
which device in Cubase is controlled. The special “Command” option
allows you to perform certain command actions by remote control. One
example of this is the selection of remote banks.
Channel/
Category
This is where you select the channel to be controlled or, if the
“Command” Device option is selected, the Command category.
Value/
Action
Clicking in this column opens a pop-up menu, allowing you to select the
parameter of the channel to be controlled (typically, if the “VST Mixer”
Device option is selected, you can choose between volume, pan, send
levels, EQ, etc.).
If the “Command” Device option is selected, this is where you specify
the “Action” of the category.
Column Description

Remote controlling Cubase
The Generic Remote device
395
8. If necessary, make settings for another bank.
NOTE
Note that you only need to make settings in the bottom table for this bank. The table
at the top is already set up according to the MIDI remote device.
If necessary, you can add banks by clicking the Add button below the Bank pop-up
menu.
Clicking the Rename button allows you to assign a new name to the currently
selected bank, and you can remove an unneeded bank by selecting it and clicking the
Delete button.
9. When you are finished, close the Device Setup window.
Now, you can control the specified Cubase parameters from the MIDI remote device.
To select another bank, use the pop-up menu in the Generic Remote window (or use
a control on the MIDI remote device, if you have assigned one for this).
Importing and exporting remote setups
The Export button in the top right corner of the Generic Remote Setup window
allows you to export the current setup, including the Control configuration (the table
at the top) and all banks. The setup is saved as a file (with the file extension “.xml”).
Clicking the Import button allows you to import saved remote setup files.
NOTE
The last imported or exported remote setup will automatically be loaded when the
program starts or the Generic Remote control is added in the Device Setup dialog.
Flags Clicking in this column opens a pop-up menu, allowing you to activate
or deactivate three flags:
• Push Button – When activated, the parameter is only changed if the
received MIDI message shows a value unequal to 0.
• Toggle – When activated, the parameter value is switched between
minimum and maximum value each time a MIDI message is received.
The combination of Push Button and Toggle is useful for remote
controls which do not latch the state of a button. One example is
controlling mute status with a device on which pressing the Mute
button turns it on, and releasing the Mute button turns it off. If Push
Button and Toggle are activated, the Mute status will change between
on and off whenever the button is pressed on the console.
• Not Automated – When activated, the parameter will not be
automated.
Column Description
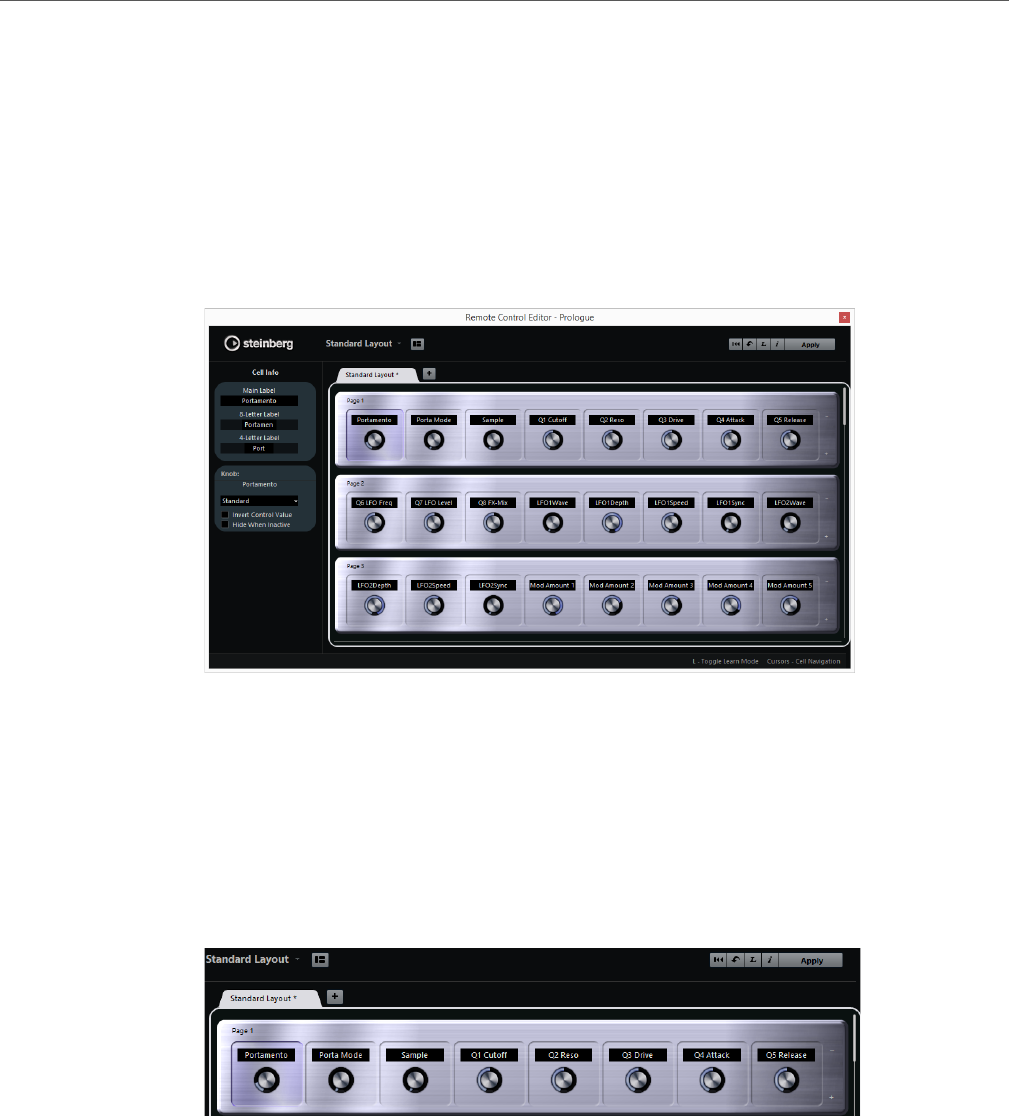
Remote controlling Cubase
The Remote Control Editor (Cubase Elements only)
396
The Remote Control Editor (Cubase Elements only)
Often, the automatic mapping of plug-in parameters to remote control devices
appears rather random, and not very intuitive. The Remote Control Editor allows you
to define your own mapping of VST plug-in parameters to the controls of the
supported hardware controllers.
• To open the Remote Control Editor, right-click the plug-in panel of the plug-in
that you want to remote-control and select “Remote Control Editor”.
Layout Section
The main area of the editor is the Layout section. Layouts represent the hardware
devices that are used to remote-control the plug-in parameters. Like these devices,
a layout can have a number of pages. These pages contain a number of cells, which
in turn contain controls. The available controls are a text label, a knob, and two
switches.
You can perform the following editing operations:
• Change the parameter assignments
• Change the name in the text label
• Set up the cells
• Arrange the order of cells and pages
When you open the editor for the first time, the Standard Layout is shown.
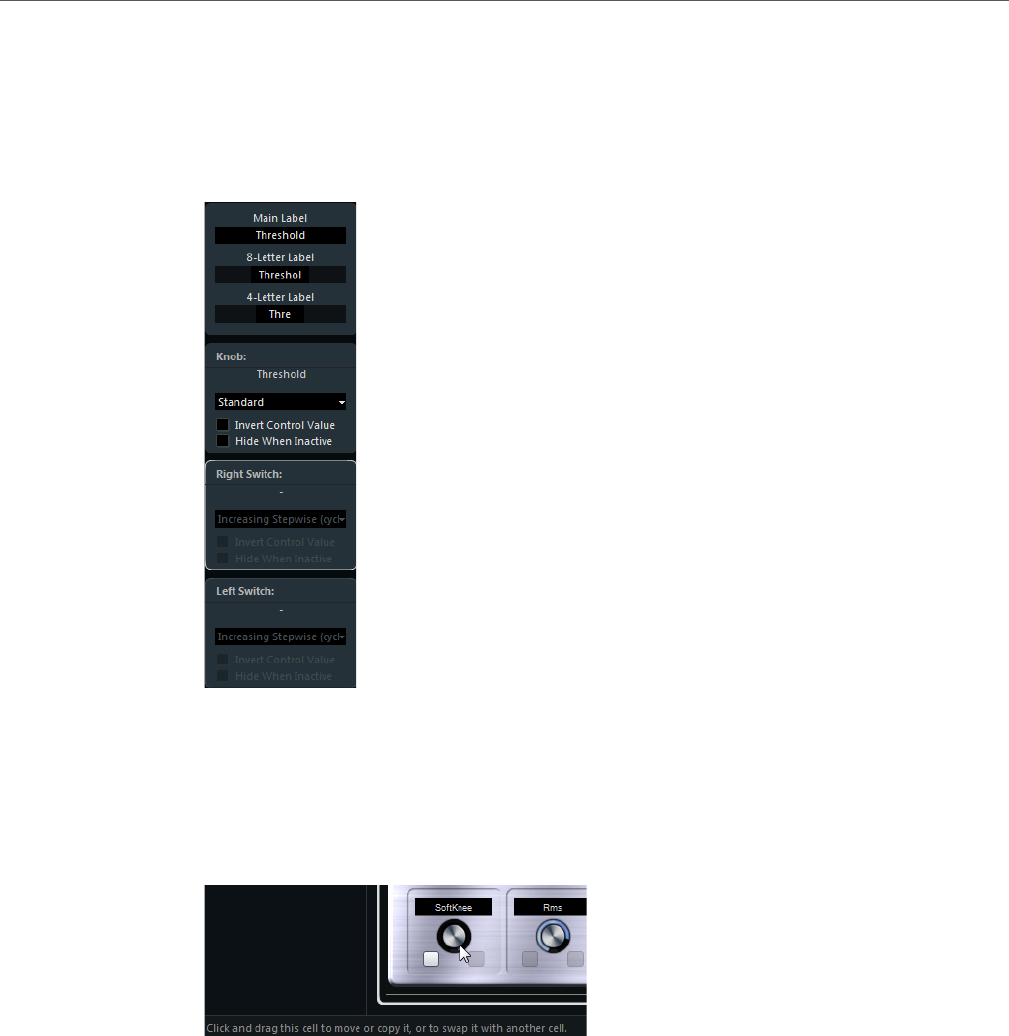
Remote controlling Cubase
The Remote Control Editor (Cubase Elements only)
397
Inspector Section
The Inspector contains the settings and the parameter assignment for the selected
cell. The upper section contains settings for the text label. The lower section
contains settings for the knob and the switches.
Status Bar
When you position the mouse pointer over an element in the editor window, the
status bar shows information on what you can do with this element.
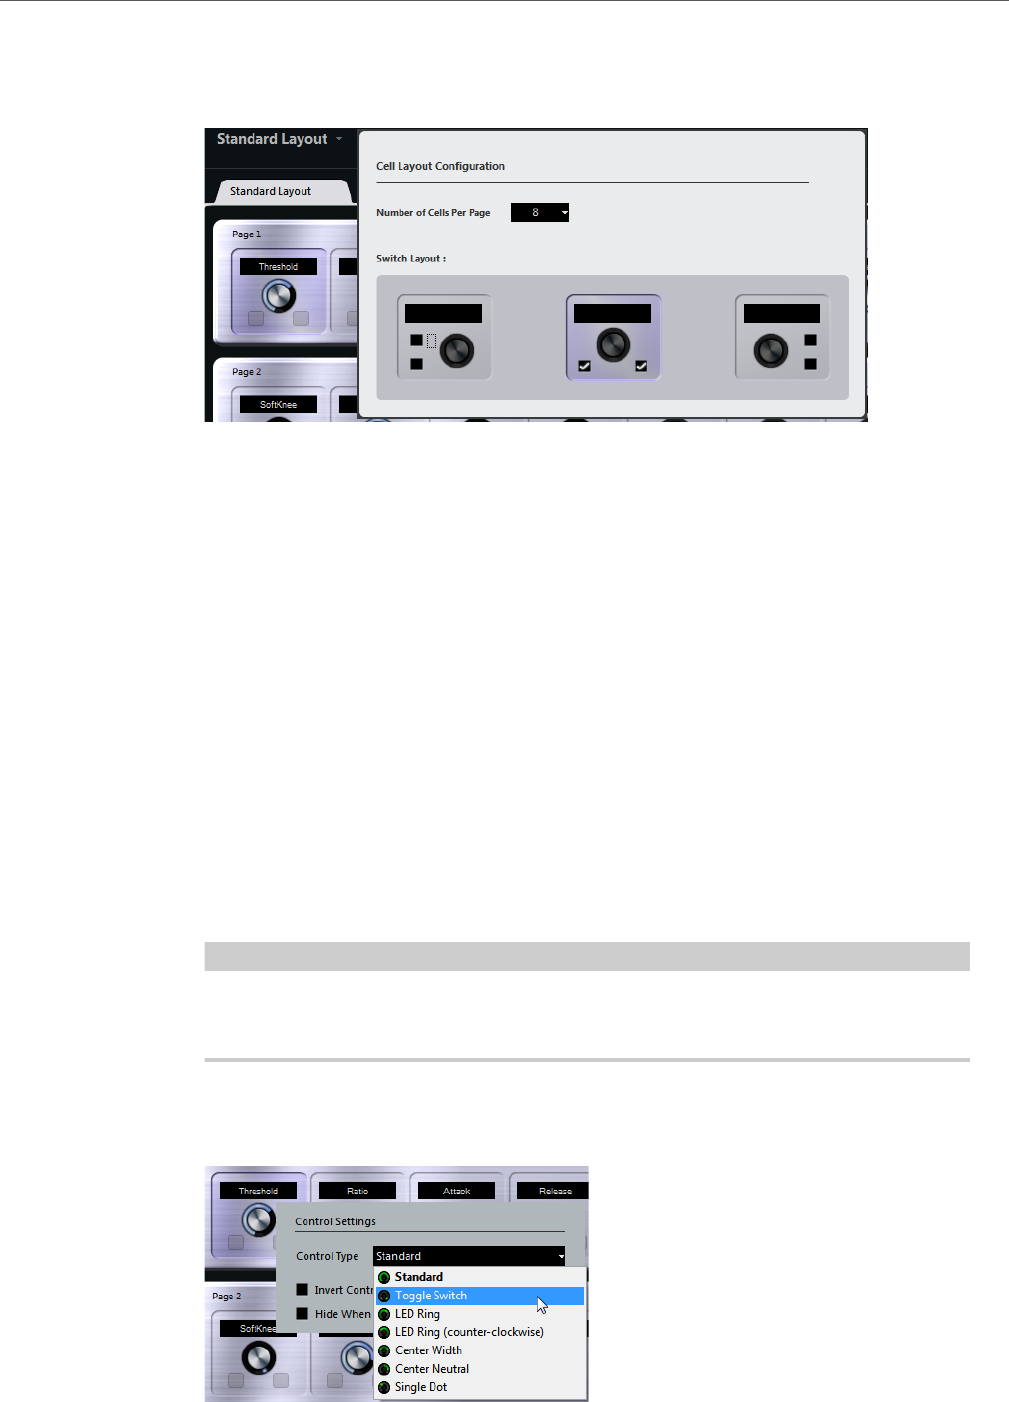
Remote controlling Cubase
The Remote Control Editor (Cubase Elements only)
398
Setting up the Standard Layout
Click the “Set up Cell Layout” button to open the Cell Layout Configuration panel.
Here, you can make the following settings:
• Use the pop-up menu to specify the number of cells per page.
• In the lower section, select the switch layout that you want to use for the
pages.
You can specify the number of switches for a cell by activating/deactivating
them.
Defining the Controls
You can define the operation for a particular switch or knob. This includes changing
the LED ring or changing its behaviour, from continuous value representation to
on/off, for example.
Right-click the control and select a new control style in the settings window or
select the control and select a style in the inspector.
NOTE
• To be able to make settings for a control, it has to be assigned to a function.
• Not all hardware devices support all control type settings.
Control Type Settings for Knobs
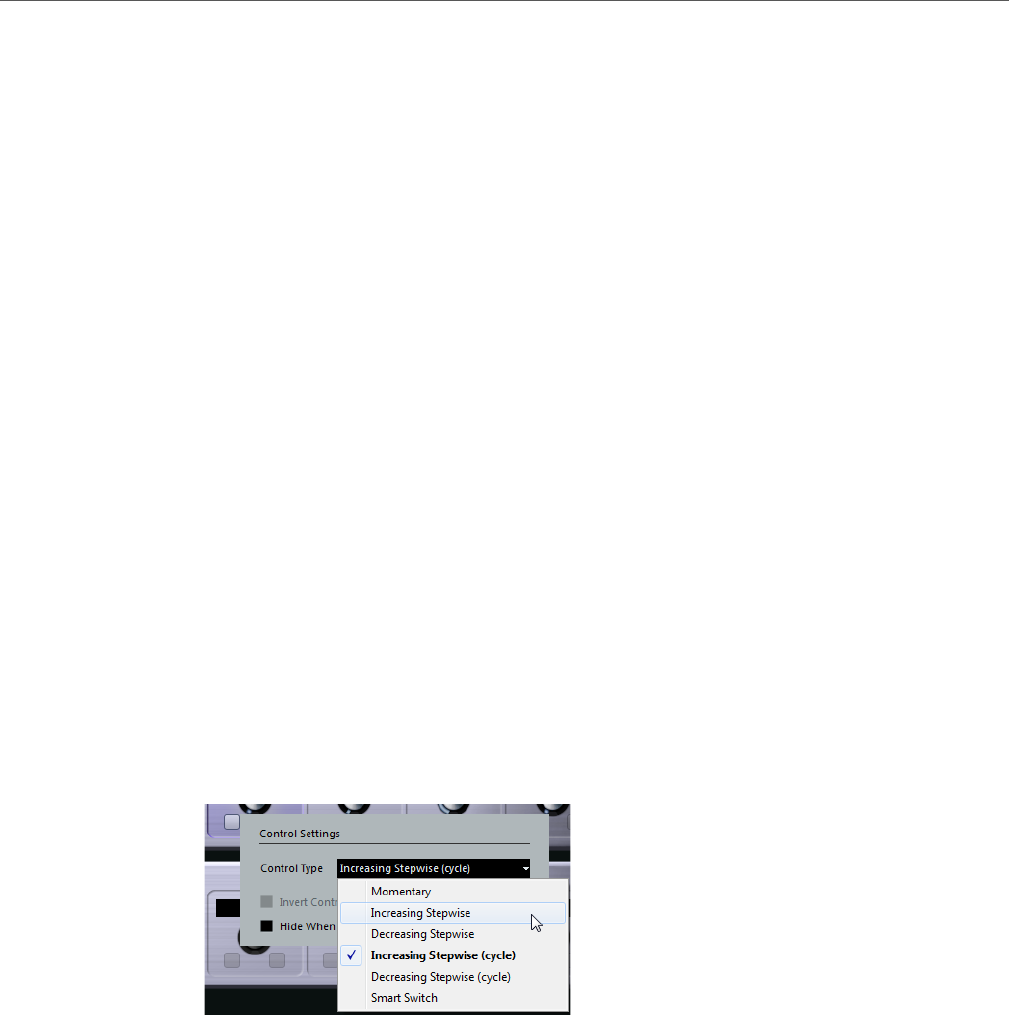
Remote controlling Cubase
The Remote Control Editor (Cubase Elements only)
399
The following control types are available for knobs:
Standard
A standard knob with undefined LED style.
Toggle Switch
This is best used for parameters with two states, like On/Off buttons.
LED Ring
An LED ring is shown around the knob. The setting increases clockwise.
LED Ring (counter-clockwise)
An LED ring is shown around the knob. The setting increases
counter-clockwise from right to left.
Center Width
The LED ring starts at the top center position and when the settings increase,
an LED is shown growing in both directions.
Center Neutral
The dial starts at the top center position and can be moved left or right, like a
pan control, for example.
Single Dot
As “LED Ring”, but showing only a dot to indicate the current value.
Control Type Settings for Switches
The following options are available for switches:
Momentary
The assigned function is active for as long as you keep the switch pressed.
Increasing Stepwise
Pressing the switch steps through the available settings until the maximum is
reached.
Decreasing Stepwise
Pressing the switch steps through the available settings in reverse order until
the minimum is reached.
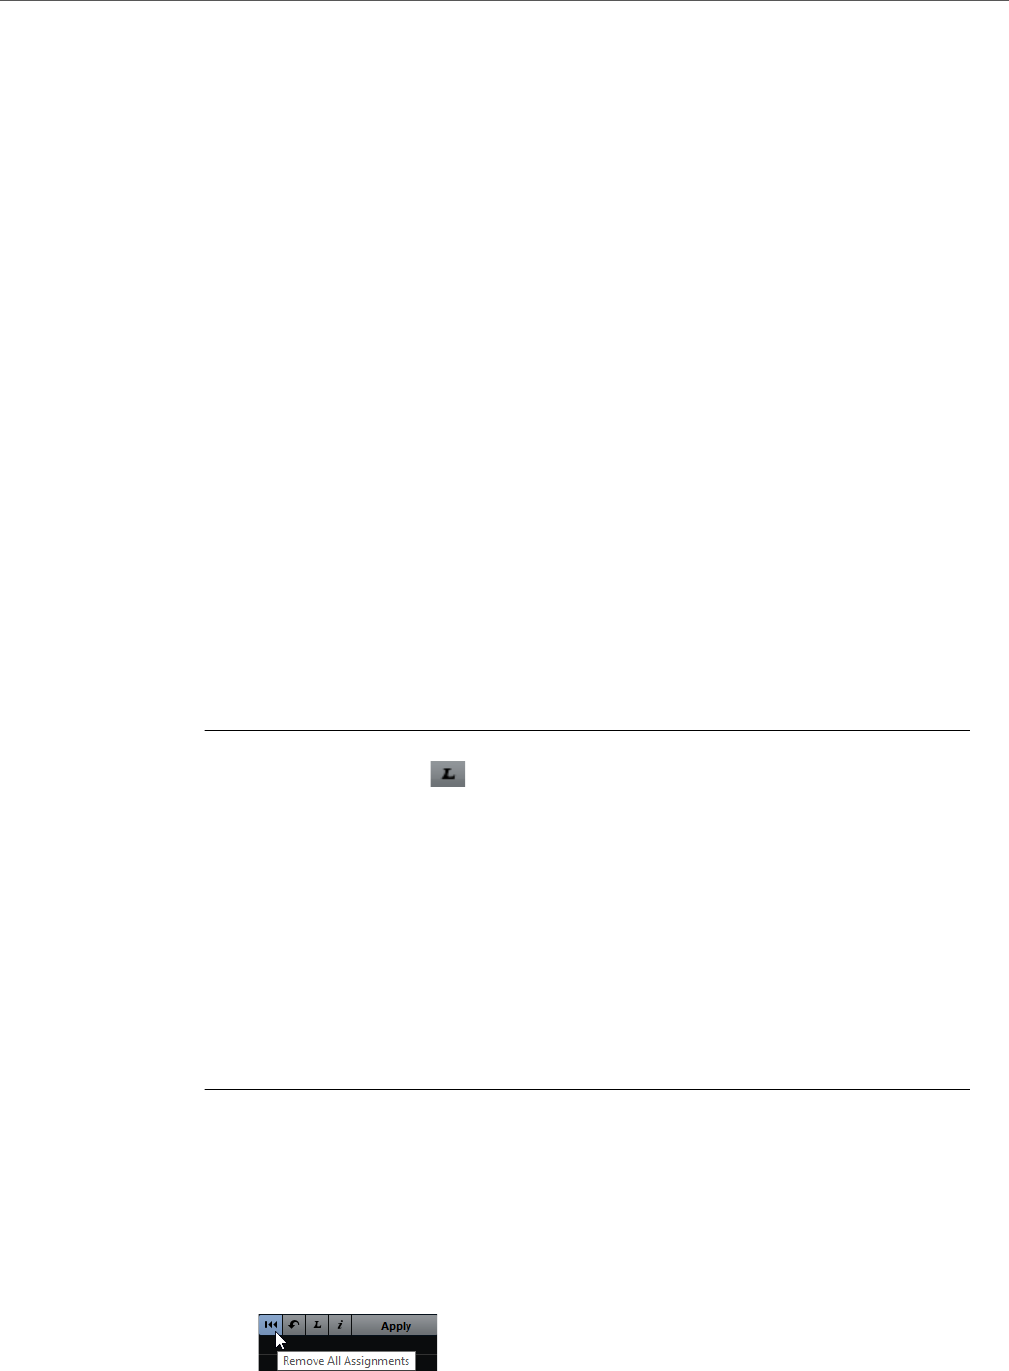
Remote controlling Cubase
The Remote Control Editor (Cubase Elements only)
400
Increasing Stepwise (cycle)
Pressing the switch steps through the available settings, starting over with the
minimum value when the maximum is reached.
Decreasing Stepwise (cycle)
Pressing the switch steps through the available settings in reverse order,
starting over with the maximum value when the minimum is reached.
Smart Switch
This changes between two states every time you press the switch, like an On/Off
button. Furthermore, if you keep the switch pressed, you enter Momentary mode,
that is, the corresponding function stays active for as long as the button is pressed.
Invert Control Value
This inverts the control state/value.
Hide Control When Inactive
Hides plug-in parameters when they are inactive or disabled.
Assigning Parameters to Controls
PROCEDURE
1. Click the L button on the toolbar to activate Learn mode for the editor.
2. In the editor, select the control that you want to assign to a plug-in parameter.
A colored frame around a control shows that this control has the Learn focus.
3. Click on a parameter on the plug-in panel.
This assigns that parameter to the control.
You can also double-click on a control in the editor to open the list of available plug-in
parameters, and click a parameter to assign it to the control.
4. Click on another control to set the Learn focus to that control and assign a
parameter to it.
5. Press [Esc] to end Learn mode.
Removing the Parameter assignment
• To remove the parameter assignment for a cell, activate Learn mode, select
the cell, and press [Delete] or [Backspace].
• To remove all assignments, click the “Remove All Assignments” button.
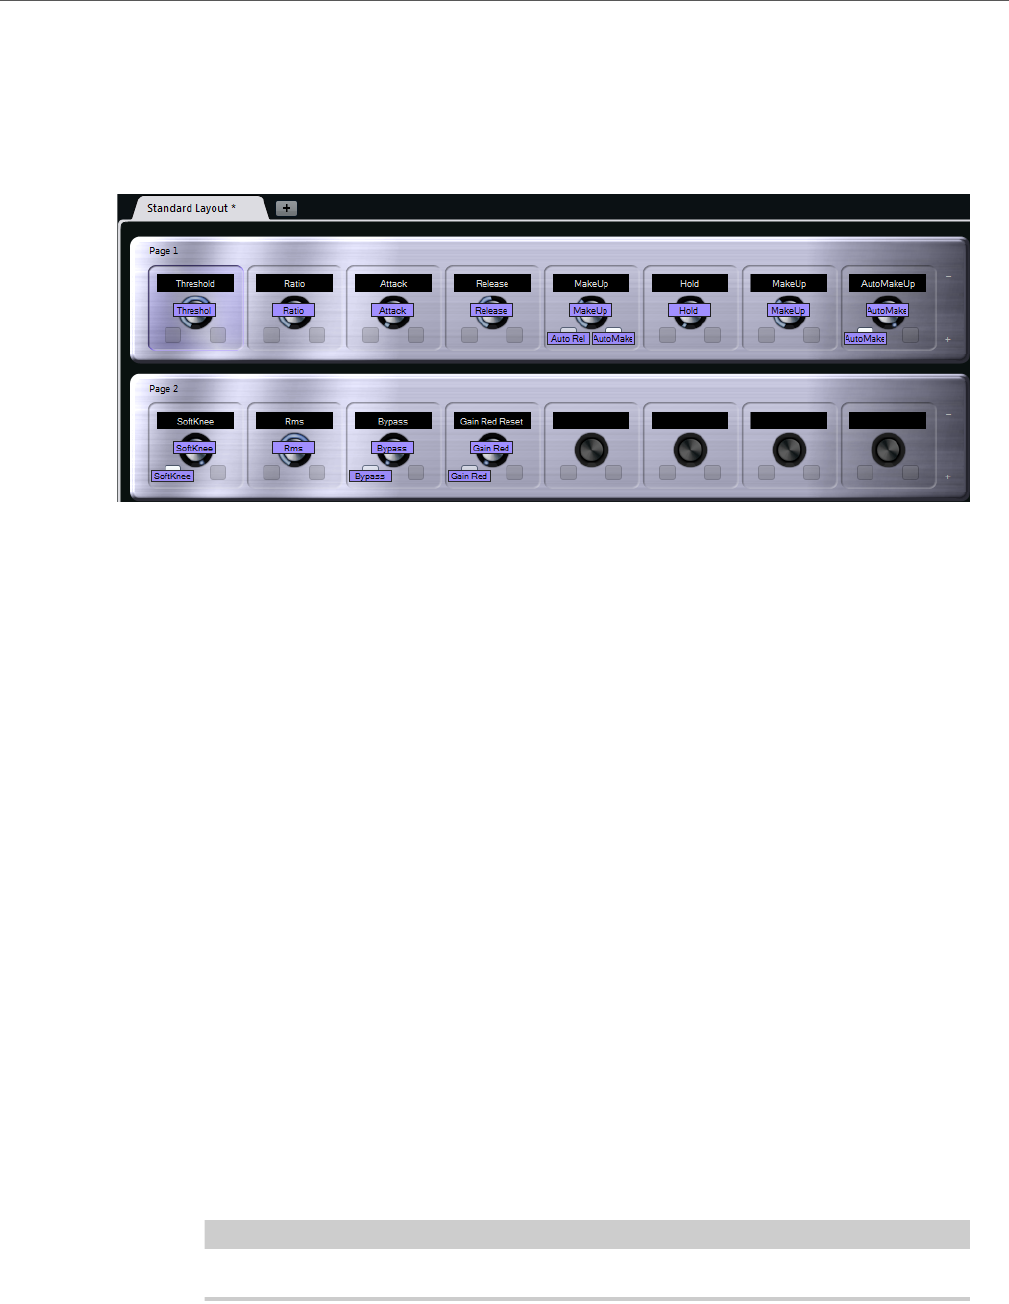
Remote controlling Cubase
The Remote Control Editor (Cubase Elements only)
401
Assignment Status
You can show the current assignment of all cells in a layout by activating the “i”
button in the top right corner of the editor. This is useful to get a quick overview of
the parameters that are assigned to the available controls.
Editing the Layout
In the Layout section, you can perform a number of editing operations and arrange
the pages to your liking.
Making Name Settings for the Cells
The top three text fields in the Inspector can be used to specify the names for a cell.
This is useful if you are working with hardware devices that have value fields that
only display a limited number of characters, for example. The first text field shows
the long name, as it is shown in the cell. In the second field, you can enter a name
that can contain up to 8 characters, and up to 4 characters in the third.
Rearranging the order of a page or a cell
• To copy the settings of one cell to another, select a cell, press [Alt]/[Option]
and drag it to another cell.
• To move a cell, drag it to an empty cell.
• To swap the contents of two cells, press [Ctrl]/[Command] and drag one cell
to the other.
NOTE
Drag and drop also works between different pages.

Remote controlling Cubase
The Remote Control Editor (Cubase Elements only)
402
Navigating
• You can use the cursor keys to navigate in all directions.
• When Learn mode is active, pressing [Shift] allows you to step between the
controls within the cells.
• To step forwards or backwards through the different layouts, use [Tab] and
[Shift]-[Tab].
Adding/Removing Pages
• To add a page to a layout, click the “+” button on the right of a page.
• To remove a page, click the corresponding “-” button.
NOTE
A layout always contains at least one page.
Adding/Removing a New Hardware Layout
• To add a hardware layout for a particular hardware type, click the “+” button
to the right of the tabs.
• To remove a hardware layout, click the “x” icon of a tab.
Changing the Settings in a Layout
• To modify an existing layout, save the new settings by clicking the Apply
button in the top right corner of the editor.
If the hardware supports this function, the changes are immediately reflected
on the hardware controllers.
Resetting the Layout and Copying Layout Settings between Pages
Click the arrow button in the top right corner of the editor to revert to the default
settings for the current layout or to copy the settings of one layout page to another.
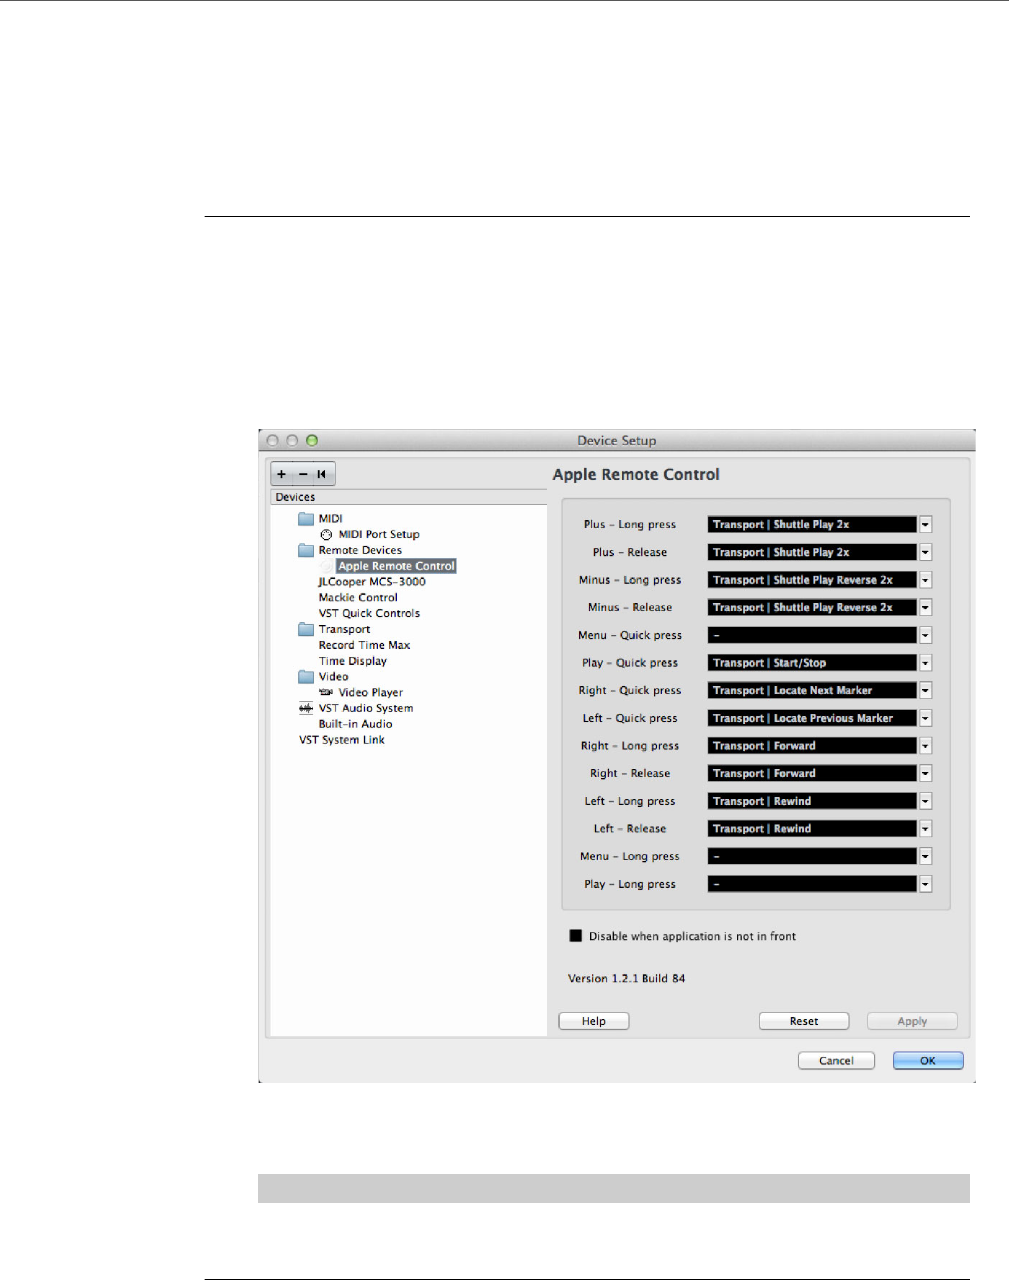
Remote controlling Cubase
Apple Remote (Macintosh only)
403
Apple Remote (Macintosh only)
Many Apple computers come with an Apple Remote Control, a small hand-held
device akin to TV remote controls. It allows you to remotely control certain features
in Cubase.
PROCEDURE
1. Open the Device Setup dialog and select Apple Remote Control from the Add
Device pop-up menu.
2. In the list on the right, the Apple Remote’s buttons are listed. For each button
you can open a pop-up menu from which you can select a Cubase parameter.
The parameter you select is assigned to the corresponding button on the Apple
Remote.
By default, the Apple Remote always controls the application that currently has the
focus on your Macintosh computer (provided that this application supports the Apple
Remote).
NOTE
When the “Disable when application is not in front” option is not selected, the Apple
Remote will control Cubase even if it does not have the focus.
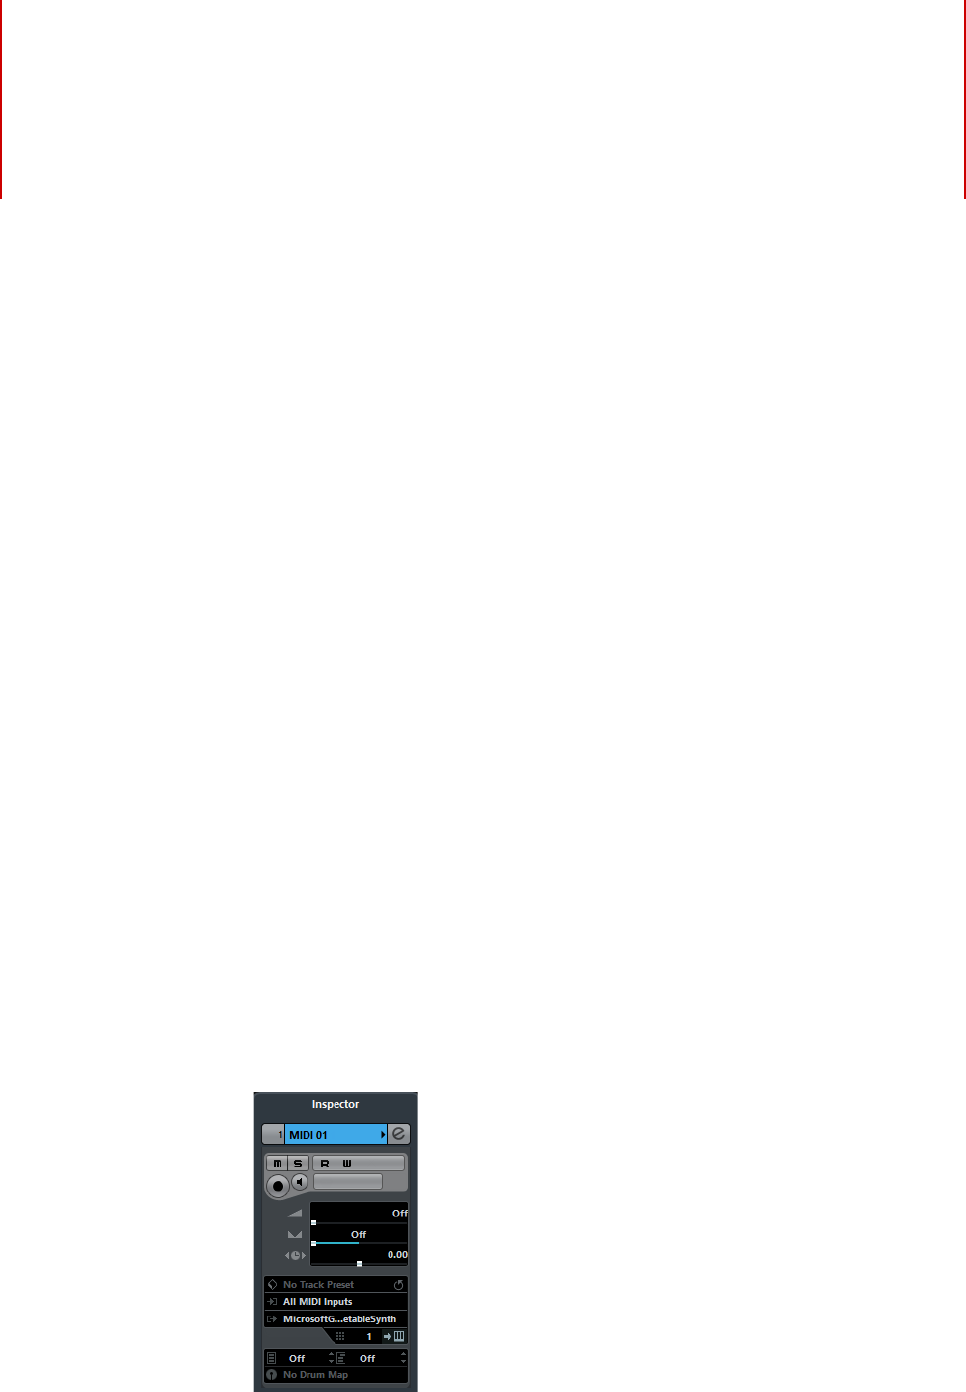
404
MIDI realtime parameters
For each MIDI track, you can set up a number of track parameters, or modifiers.
These affect how the MIDI data is played back, “transforming” MIDI events in
realtime before they are sent to the MIDI outputs.
On the following pages, the available parameters and effects are described. Keep
in mind:
• The actual MIDI events will not be affected – the changes happen “on the fly”.
• Since the modifier settings do not change the actual MIDI data on the track,
they will not be reflected in the MIDI editors. To convert the track settings into
“real” MIDI events, use the Freeze MIDI Modifiers function or the Merge MIDI
in Loop function.
RELATED LINKS
Making your settings permanent on page 423
The Inspector – general handling
The MIDI modifiers and effects are set up in the Inspector.
• To show the Inspector, click the “Set up Window Layout” button on the
toolbar and activate the Inspector option.
The Inspector is displayed to the left of the track list.
• For MIDI tracks, several sections are available in the Inspector. Which of these
are displayed is determined in the setup context menu or the Setup dialog of
the Inspector.
MIDI realtime parameters
The Inspector sections
405
• You can fold or unfold the sections individually by clicking on the section
name.
Clicking the name for a hidden section brings it to view and hides the other
sections. [Ctrl]/[Command]-clicking the tab allows you to hide or show a
section without affecting other sections. [Alt]/[Option]-clicking a tab shows or
hides all sections in the Inspector.
NOTE
Folding or hiding (via the Setup dialog) a section does not affect the functionality
but merely hides the section from view. This means your settings will still be active
even if you fold or hide the Inspector settings.
RELATED LINKS
Using the Setup options on page 627
The Inspector sections
Basic track settings
The topmost Inspector section contains the basic track settings. These settings
either affect the basic functionality for the track (mute, solo, enable record, etc.) or
send out additional MIDI data to the connected devices (program change, volume,
etc.). The section contains all settings that are available in the track list, with a few
additional parameters:
Load/Save Track Preset button
Allows you to load or save a track preset.
Track name field
Click once to show/hide the topmost Inspector section. Double-click to
rename the track.
Edit button
This opens the Channel Settings window for the track (a window showing a
channel with volume fader and other controls, along with effect settings).
Mute/Solo buttons
Mutes or solos the MIDI track.
Read/Write buttons
Used for automating the track settings.
Record enable button
Activate this to make the track ready for recording.

MIDI realtime parameters
The Inspector sections
406
Monitor button
When this is activated (and the “MIDI Thru Active” option is activated in the
Preferences dialog, MIDI page), incoming MIDI will be routed to the selected
MIDI output.
Volume
Use this to adjust the level for the track. Changing this setting will move the
track’s fader in the MixConsole and vice versa.
MIDI Pan
Use this to adjust the panning of the track.
Delay
This adjusts the playback timing of the MIDI track. Positive values delay the
playback while negative values cause the track to play earlier. The values are
set in milliseconds.
In/Out/Chn pop-up menus
This is where you select MIDI input, MIDI output, and MIDI channel for the track.
Edit Instrument button
If the MIDI track is routed to a VST instrument, clicking this button opens the
control panel for the VST instrument.
Bank and Program Selector pop-up menu
Allows you to select a sound, see below. (If no bank is available, only the
Program selector is shown.)
Map pop-up menu
Allows you to select a drum map for the track.
NOTE
• Note that the functionality of the Bank and Program selector settings (used
for selecting sounds in the connected MIDI instrument) depends on the
instrument to which the MIDI output is routed, and how you have set it up in
the MIDI Device Manager. The MIDI Device Manager allows you to specify
which MIDI instruments and other devices are connected to the various MIDI
outputs, thus making it possible to select patches by name.
• Many of the basic track settings are duplicated in the MIDI Fader section of
the Inspector.
RELATED LINKS
Track List on page 33
Using Channel Settings on page 236
Writing Automation Data on page 361
Applying Track Presets on page 103
Setting Volume on page 219
MIDI Fader section on page 411
Using MIDI devices on page 413
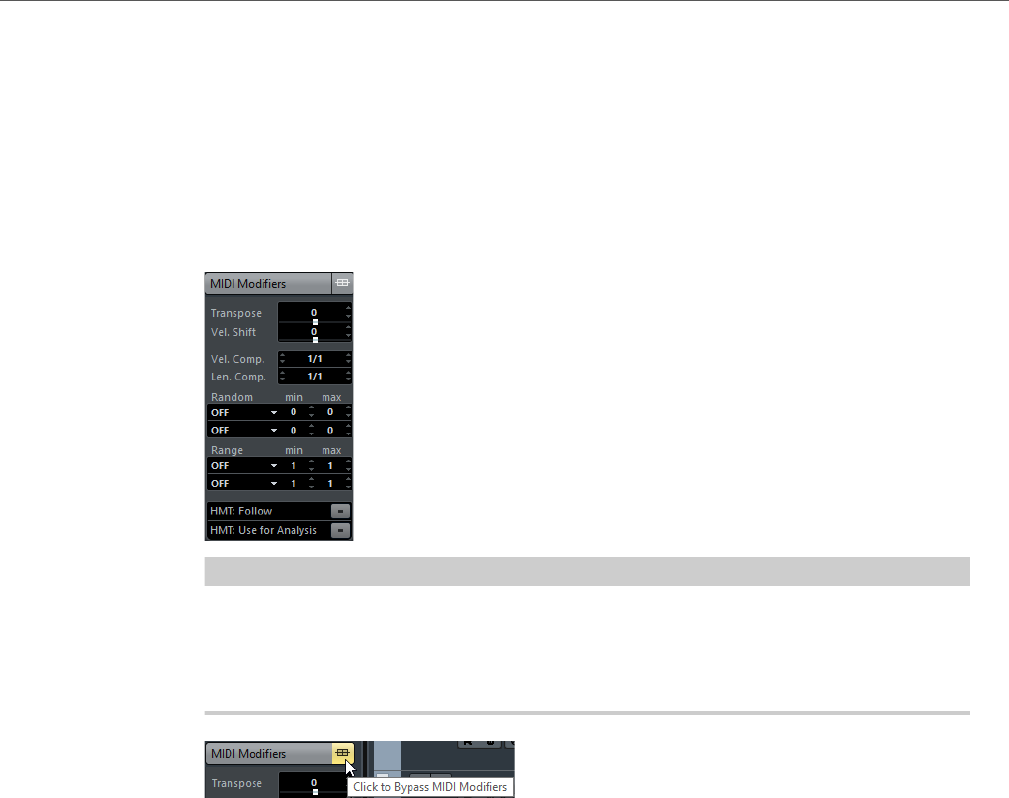
MIDI realtime parameters
The Inspector sections
407
MIDI Modifiers
The settings on this tab affect the MIDI events on the track in realtime during
playback. They will also be in effect if you play “live” with the track selected and
record enabled (provided that “MIDI Thru Active” is activated in the Preferences
dialog, MIDI page). This makes it possible, for example, to transpose or adjust the
velocity of your live playing.
NOTE
If you want to compare the result of your modifier settings with the “unprocessed”
MIDI, you can use the Bypass button in the MIDI Modifiers section. When this is
activated, the MIDI Modifiers settings will be temporarily disabled. A bypassed
section is indicated by a yellow Bypass button.
Transpose
This allows you to transpose all notes on the track in semitones. The available
range is -127 to +127 semitones, but remember that the total range of MIDI
note numbers is 0 to 127. Furthermore, not all instruments can play back
notes over the whole range. Therefore, extreme transpositions can give rather
strange and unwanted results.
• You can also transpose individual MIDI parts using the Transpose field
in the info line.
The transposition in the info line (for the individual part) is added to the
transpose value you have set up for the whole track in the Inspector.
Velocity Shift
This setting lets you change the dynamics of all notes on the track. The value
in this field is added to the velocity of each note message that is sent out (use
negative values to lower the velocities). The range is -127 to +127 with 0
representing no change in velocity.

MIDI realtime parameters
The Inspector sections
408
Note that the effect of changing the velocity depends on the sound and
instrument.
NOTE
You can also adjust the velocity of events in individual MIDI parts using the
Velocity field in the info line. The velocity shift in the info line (for the individual
part) is added to the velocity shift you have set up for the whole track in the
Inspector.
Velocity Compression
This function multiplies the velocity values with the factor you specify. This
factor is set using a numerator (left value) and a denominator (right value),
resulting in a fractional number (1/2, 3/4, 3/2 etc.). For example, if you set the
factor to 3/4, the velocities will be three quarters of their original values. This
will also affect the difference in velocity between the notes, thus compressing
or expanding the velocity scale. Typically, you would combine this setting with
the Velocity Shift parameter.
An example:
Let’s say you have three notes with the velocity values 60, 90 and 120, and
wish to “even out” the velocity differences somewhat. If you set the Velocity
Compression value to 1/2, the notes will play back with the velocities 30, 45
and 60. By adding 60 in the Velocity Shift field, the notes will play back with
the velocities 90, 105 and 120, meaning you have compressed the velocity
range.
In a similar way, you can use Velocity Compression values greater than 1/1
together with negative values in the Velocity Shift field, to expand the velocity
range.
IMPORTANT
Remember that the maximum velocity is always 127 no matter how much you
try to expand.
Length Compression
This value adjusts the lengths of all notes on the track. As with Velocity
Compression, the value is set with a numerator and denominator. For
example, the value 2/1 means that all note lengths will be doubled, while 1/4
means all note lengths will be a quarter of the actual lengths.
Random
The Random settings let you introduce random variations to various
properties of MIDI notes. Anything from very subtle variations to dramatic
changes can be applied.
Range
The Range function lets you specify a note (pitch) or velocity range and either
force all notes to fit within this range, or exclude all notes outside this range
from playback. As with the Random function, there are two separate Range
settings.

MIDI realtime parameters
The Inspector sections
409
HMT: Follow (Cubase Elements only)
Activating this button for a track applies Hermode Tuning to the notes played
on this track. Hermode Tuning retunes the notes you play and creates clear
frequencies for every fifth and third interval, for example. Retuning only affects
individual notes and maintains the pitch relationship between keys and notes.
The retuning is a continuous process and takes the musical context into
account.
When you apply Hermode Tuning to tracks that use VST 2 instruments, the
played notes are retuned with every keystroke. Dynamic retuning while notes
are playing is only possible with VST 3 instruments that support Micro Tuning
and Note Expression. For VST instruments that support Note Expression,
Hermode Tuning also works in MIDI Thru mode.
To activate Hermode tunig, activate the “HMT: Follow” button, and select one
of the following tuning types in the “HMT Type” pop-up menu of the Project
Setup dialog:
NOTE
It may take a moment until all notes are recalculated and you hear the results
of the retuning. Notes that are produced by MIDI plug-ins are not taken into
account.
HMT: Use for Analysis (Cubase Elements only)
If you activate this option, the notes played on the track are used to calculate
retuning. Keep this activated when working with Hermode Tuning. On tracks
with acoustic piano, we recommend to activate this option, and to deactivate
“HMT: Follow”. This excludes the piano from being tuned which would sound
unnatural.
Editing Transpose and Velocity for MIDI Parts
When one or several MIDI parts are selected, the info line contains transpose and
velocity fields.
Mode Description
None No tuning is applied.
Reference (pure
3/5)
Tunes pure thirds and fifths.
Classic (pure 3/5
equalized)
Tunes pure thirds and fifths. In conflict situations, a slight
equalization is applied. This tuning type is suitable for all kinds of
music.
Pop Jazz (3/5/7) Tunes pure thirds and fifths, and natural sevenths. This tuning
type should not be applied to polyphonic music. Try this with pop
or jazz.
Baroque (3/5
adaptive)
Tunes pure thirds and fifths. The degree of purity changes
according to the sequence of harmonies. This tuning type is
suitable for church organ and polyphonic music.
MIDI realtime parameters
The Inspector sections
410
• Adjusting the Transpose field transposes the selected parts in semitone
steps.
• Adjusting the Velocity field shifts the velocity for the selected parts. The value
that you specify is added to the velocities of the notes in the parts.
NOTE
This transposition does not change the actual notes in the part. It only affects the
notes on playback. The transposition that you specify for a part on the info line is
added to the transposition set for the whole track.
Setting up random variations
There are two separate “random generators”, set up in the following way:
PROCEDURE
1. Open the Random pop-up menu and select which note property is
randomized.
The options are position, pitch, velocity and length.
NOTE
Keep in mind that depending on the content of the track, certain parameter changes
might not be immediately noticeable or have any effect at all (as would be the case if
applying random length to a percussion track playing “one-shot” samples for
example). To best audition the random changes, choose a track with clearly defined
rhythm and note content (as opposed to a string pad).
2. Set the desired range of random deviation by entering values in the two
number fields.
The two values govern the limits of the randomization, so that the values will vary
between the left value and the right value (you cannot set the left value higher than
the right value). The maximum random range for each property is listed in the table
below:
NOTE
You can make independent settings for the two random generators.
To deactivate the Random function, open the Random pop-up menu(s) and select
“OFF”.
Property Range
Position -500 to +500 ticks
Pitch -120 to +120 semitones
Velocity -120 to +120
Length -500 to +500 ticks
MIDI realtime parameters
The Inspector sections
411
Setting up ranges
PROCEDURE
1. Open the Range pop-up menu and select one of the following four modes:
2. Use the two fields to the right to set the minimum and maximum values.
These values will be shown as numbers (0 to 127) for the velocity modes and as note
numbers (C-2 to G8) for the pitch modes.
NOTE
Note that you can make independent settings for the two Range functions.
To deactivate the Range function, open the Range pop-up menu(s) and select “OFF”.
MIDI Fader section
This contains a single channel, allowing you to set volume, pan, mute/solo and other
parameters for the track, and a panel view of the active sends/inserts. This is a
“mirror” of the track’s channel in the MixConsole.
Notepad section
This is a standard notepad, allowing you to enter notes and comments about the
track. Each track has its own notepad in the Inspector.
Mode Description
Vel. Limit This function affects all velocity values outside the specified range.
Velocity values below the Min setting (the lower limit of the range) are
set to the Min value, and velocity values above the Max setting are set to
the Max value. Notes with velocity values within the set range are not
affected. Use this if you want to force all velocity values to fit within a
certain range.
Vel. Filter Velocity Filter works by excluding all notes with velocity values outside
the specified range. Notes with velocity values below the Min setting or
above the Max setting will not be played back. Use this to “isolate” notes
with certain velocity values.
Note Limit This function allows you to specify a pitch range, and forces all notes to
fit within this range. Notes outside the specified range are transposed
up or down in octave steps until they fit within the range.Note: If the
range is too “narrow”, so that some notes cannot be fit within the range
by octave-transposing, these notes will get a pitch in the middle of the
range. For example, if you have a note with a pitch of F3, and the range
is C4-E4, that note will be transposed to D4.
Note
Filter
Note Filter works by excluding all notes with pitches outside the
specified range. Notes lower than the Min setting or higher than the Max
setting will not be played back. Use this to “isolate” notes with certain
pitches.

MIDI realtime parameters
The Inspector sections
412
VST Instrument section (Cubase Elements only)
If the MIDI track is routed to a VST instrument, a new section will appear at the
bottom of the Inspector, labeled with the name of the VST instrument. Clicking this
section shows a duplicate of the Inspector settings for the VST instrument channel.
This makes it easy to adjust the channel settings for the VST instrument while you
are editing the MIDI track.
• If multiple outputs for a VST instrument are activated, there is a setting called
“Output” at the top of the VST Instrument section.
New sections will also be added in the following cases:
• When a MIDI track is routed to an effect plug-in that also receives audio data,
i. e. that is used as an insert effect for an audio track (e. g. MIDI Gate), a section
for this audio track appears in the MIDI track inspector.
• If a MIDI track is routed to a plug-in assigned to an FX channel track, an FX
section is added to the Inspector.
NOTE
For an easy way to combine MIDI and VST instruments, check out instrument tracks.
RELATED LINKS
VST Instruments on page 368

413
Using MIDI devices
The MIDI Device Manager allows you to specify and set up your MIDI devices,
making global control and patch selection easy.
MIDI devices – general settings and patch handling
On the following pages, we will describe how to install and set up preset MIDI
devices, and how to select patches by name from within Cubase.
About Program Change and Bank Select
To instruct a MIDI instrument to select a certain patch (sound), you send a MIDI
Program Change message to the instrument. Program Change messages can be
recorded or entered in a MIDI part like other events, but you can also enter a value
in the Program Selector field in the Inspector for a MIDI track. This way, you can
quickly set each MIDI track to play a different sound.
With Program Change messages, you are able to select between 128 different
patches in your MIDI device. However, many MIDI instruments contain a larger
number of patch locations. To make these available from within Cubase, you need
to use Bank Select messages, a system in which the programs in a MIDI instrument
are divided into banks, each bank containing 128 programs. If your instruments
support MIDI Bank Select, you can use the Bank Selector field in the Inspector to
select a bank, and then the Program Selector field to select a program in this bank.
Unfortunately, different instrument manufacturers use different schemes for how
Bank Select messages are constructed, which can lead to some confusion and
make it hard to select the correct sound. Also, selecting patches by numbers this
way seems unnecessarily cumbersome, when most instruments use names for their
patches nowadays.
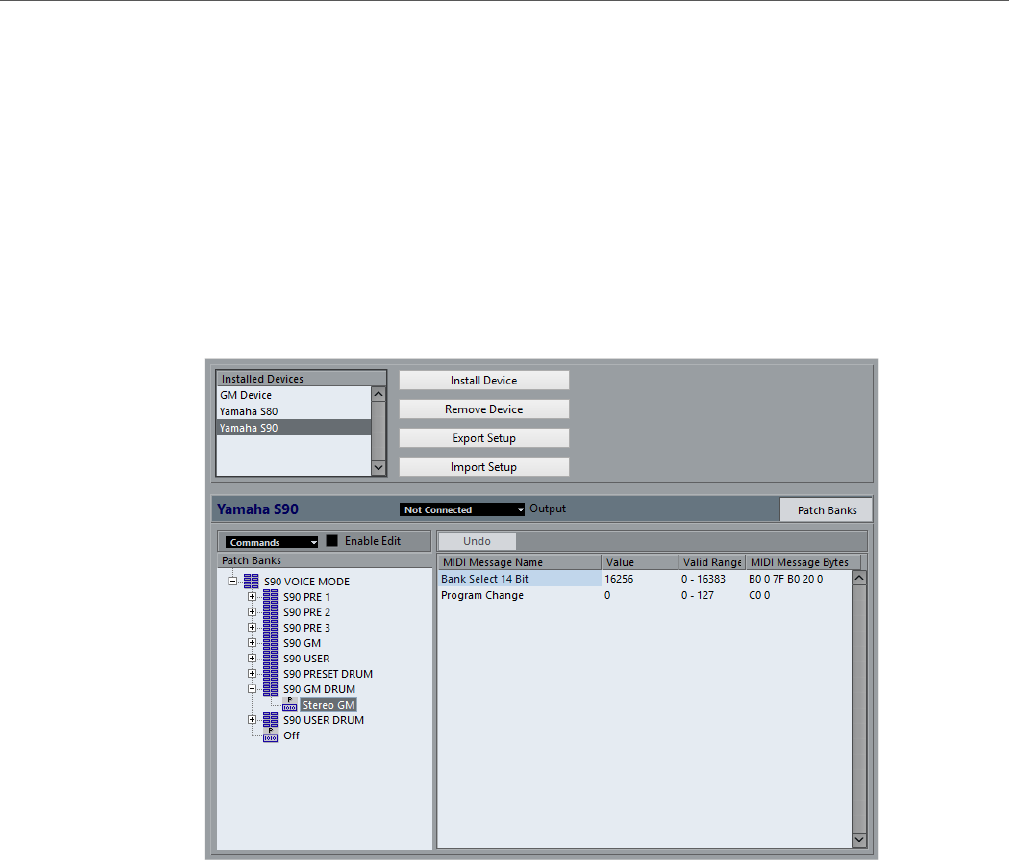
Using MIDI devices
MIDI devices – general settings and patch handling
414
To help with this, you can use the MIDI Device Manager to specify which MIDI
instruments you have connected by selecting from a vast list of existing devices or
by specifying the details yourself. Once you have specified which MIDI devices you
are using, you can select to which particular device each MIDI track is routed. It is
then possible to select patches by name in the track list or Inspector.
Opening the MIDI Device Manager
Select MIDI Device Manager from the Devices menu to bring up the following
window:
Installed Devices
List of connected MIDI devices. The first time you open the MIDI Device
Manager, this list will be empty.
Install Device/Remove Device
Use these buttons to install/remove devices.
Export Setup/Import Setup
Use these buttons to import/export XML Device setups.
Open Device
This button opens the selected device.
Output
Here you specify to which MIDI output the selected device is connected.

Using MIDI devices
MIDI devices – general settings and patch handling
415
Commands
This pop-up menu lets you edit the selected device (provided that “Enable
Edit” is ticked). The patch structure for the selected device is shown on the
left side of the dialog.
MIDI Messages
This area on the right side of the dialog shows exactly which MIDI messages
are sent out to select the patch highlighted in the list to the left.
When you open the MIDI Device Manager for the first time, it will be empty (because
you have not installed any devices yet). On the following pages we describe how to
add a pre-configured MIDI device to the list, how to edit the settings and how to
define a device from scratch.
Note that there is an important difference between installing a preset MIDI device
(“Install Device”) and importing a MIDI device setup (“Import Setup”):
• The presets do not include any device mapping of parameters and controls
and no graphic panels.
They are simply patch name scripts. When you install a preset MIDI device, it
is added to the Installed Devices list. For more information about patch name
scripts, see the separate PDF document “MIDI Devices”.
• A device setup can include device mapping and/or patch information.
Device setups are also added to the list of installed devices when imported.
Defining a new MIDI device
If your MIDI device is not included in the list of pre-configured devices (and is not a
“plain” GM or XG device), you need to define it manually to make it possible to
select patches by name.
PROCEDURE
1. In the MIDI Device Manager, click the Install Device button.
The Add MIDI Device dialog opens.
2. Select “Define New…” and click OK.
A dialog appears.
3. Enter the name of the device and the MIDI channels you would like the device
to use and click OK.
The device appears in the Installed Devices list.
4. Select the device in the list.
As you can see, it currently contains only an Empty Bank item.
5. Make sure that the Enable Edit checkbox is activated.
Now you can use the functions on the Commands pop-up menu on the left to
organize the patch structure of the new device.
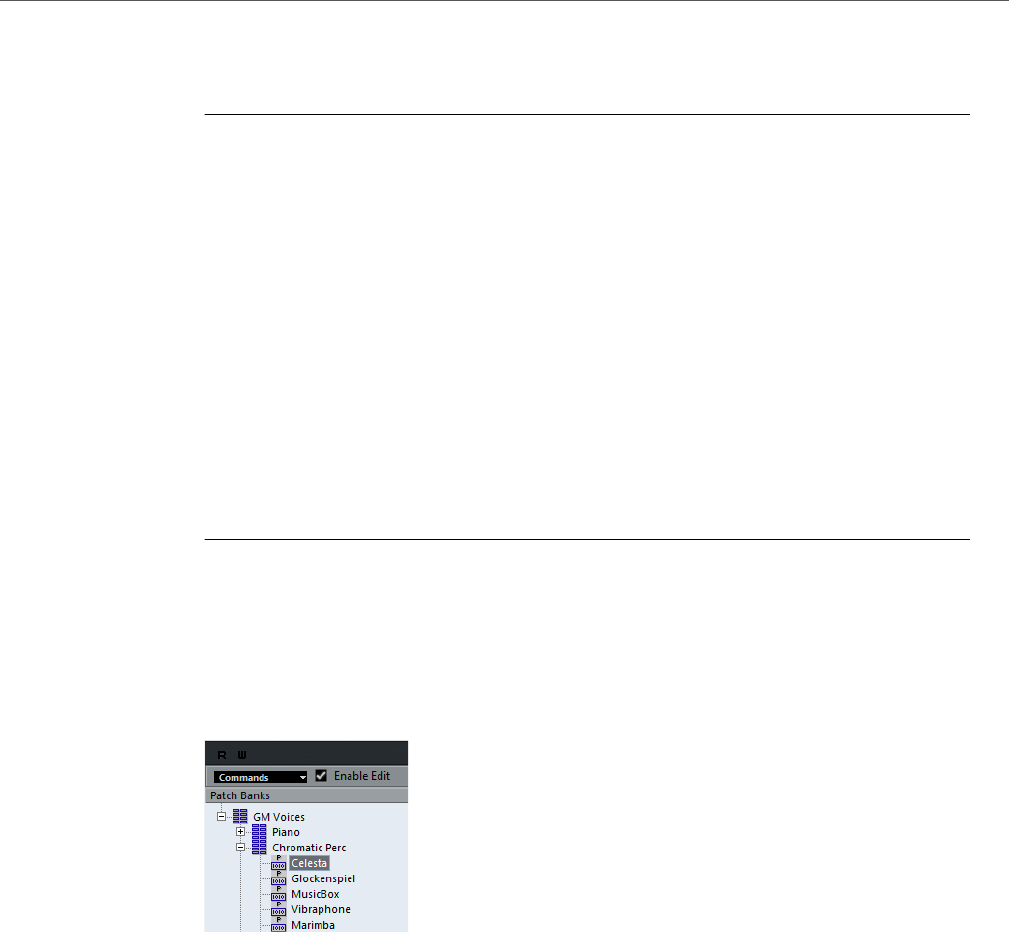
Using MIDI devices
MIDI devices – general settings and patch handling
416
Installing a preset MIDI device
PROCEDURE
1. Click the Install Device button.
A dialog opens listing all pre-configured MIDI devices. For now we assume that your
MIDI device is included in this list.
2. Locate and select the device in the list and click OK.
If your MIDI device is not included in the list but is compatible with the GM (General
MIDI) or XG standards, you can select the generic GM or XG Device options at the
top of the list.
When you select one of these options, a name dialog will appear. Enter a name for
the instrument and click OK.
The device now appears in the Installed Devices list to the left.
3. Make sure that the new device is selected in the list and open the Output
pop-up menu.
4. Select the MIDI output that the device is connected to.
RESULT
The Patch Banks list in the left half of the window shows the patch structure of the
device. This could simply be a list of patches, but it is usually one or several layers
of banks or groups containing the patches (much like a folder structure on a hard
disk for example).
• You can rename a device in the Installed Devices list by double-clicking and
typing – this is useful if you have several devices of the same model, and want
to separate them by name instead of by number.
• To remove a device from the Installed Devices list, select it and click Remove
Device.
About Patch Banks
Depending on the selected device, you may find that the Patch Banks list is divided
in two or more main banks. Typically, these are called Patches, Performances,
Drums, etc. The reason for having several patch banks is that different “types” of
patches are handled differently in the instruments. For example, while “patches”
typically are “regular” programs that you play one at the time, “performances” may
be combinations of programs, which could be split across the keyboard, layered, or
used for multi-timbral playback, and so on.
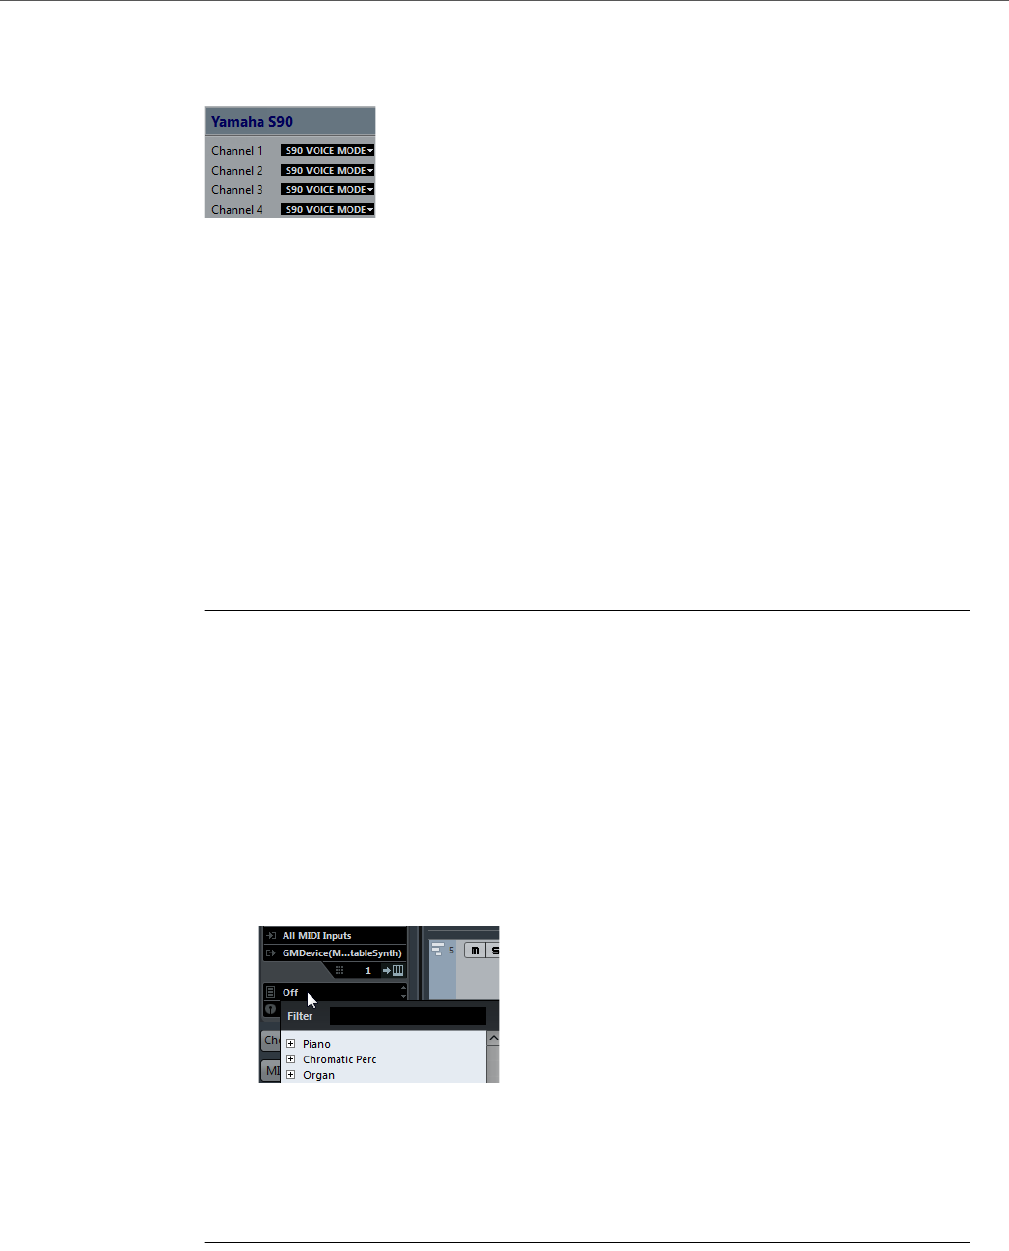
Using MIDI devices
MIDI devices – general settings and patch handling
417
Devices with several banks have an additional tab “Bank Assignment”. Select this
tab to specify for each MIDI channel which bank it should use.
The selection here will affect which bank is displayed when you select programs by
name for the device in the track list or Inspector. For example, many instruments use
MIDI channel 10 as an exclusive drum channel, in which case you would want to
select the “Drums” (or “Rhythm Set”, “Percussion”, etc.) bank for channel 10 in this
list. This would then let you choose between different drum kits in the track list or
Inspector.
Selecting a patch for an installed device
If you return to the Project window at this point, you will find that the installed device
has been added to the MIDI Output menus (in the track list and the Inspector). Now
you can select patches by name, in the following way:
PROCEDURE
1. Open the Output menu (in the track list or Inspector) for the track you want to
associate the installed device with, and select the device.
This directs the track to the MIDI output specified for the device in the MIDI Device
Manager. The Bank and Program Selector fields in the track list and Inspector are
replaced by a single Program Selector field that currently reads “Off”.
2. Click the Program Selector field to display a pop-up menu, hierarchically
listing all the patches in the device.
The list is similar to the one displayed in the MIDI Device Manager. You can scroll the
list up and down (if required), click the plus/minus signs to show or hide subgroups,
etc.
You can also use a filter function here. For this, enter the search term in the Filter field,
e.g. “drum”, and press [Return] to display all sounds with “drum” in the name.
3. Click a patch in the list to select it.
This sends the appropriate MIDI message to the device. You can also scroll the
program selection up or down, as with any value.

Using MIDI devices
MIDI devices – general settings and patch handling
418
Renaming patches in a device
The pre-configured devices list is based on the factory-preset patches, i. e. the
patches included in the device when you first bought it. If you have replaced some
of the factory presets with your own patches, you need to modify the device so that
the patch name list matches the actual device:
PROCEDURE
1. In the MIDI Device Manager, select the device in the Installed Devices list.
Make sure that the Patch Banks tab is selected.
2. Activate the Enable Edit checkbox.
When this is turned off (default), you cannot edit the pre-configured devices.
3. In the Patch Banks list, locate and select the patch you want to rename.
In many instruments, the user-editable patches are located in a separate group or
bank.
4. Click on the selected patch in the Patch Banks list to edit its name.
5. Type in the new name and press [Return].
6. Rename the desired patches in this way, and finish by deactivating Enable
Edit again (to avoid modifying the device by accident).
NOTE
You can also make more radical changes to the patch structure in a device (adding
or deleting patches, groups or banks), see below. For example, this is useful if you
expand your MIDI device by adding extra storage media such as RAM cards.
Patch Structure
Patches are structured as follows:
• Banks are the main categories of sounds – typically patches, performances
and drums, as described above.
• Each bank can contain any number of groups, represented by folders in the
list.
• The individual patches, performances or drum kits are represented by presets
in the list.
The Commands pop-up menu contains the following items:
Create Bank
Creates a new bank at the highest hierarchical level of the Patch Banks list.
You can rename this by clicking on it and typing a new name.

Using MIDI devices
MIDI devices – general settings and patch handling
419
New Folder
Creates a new subfolder in the selected bank or folder. This could correspond
to a group of patches in the MIDI device, or just be a way for you to categorize
sounds, etc. When you select this item, a name dialog opens, allowing you to
name the folder. You can also rename the folder afterwards by clicking it and
typing in the list.
New Preset
This adds a new preset in the selected bank or folder.
You can rename the preset by clicking it and typing a new name.
When the preset is selected, the corresponding MIDI events (Program
Change, Bank Select, etc.) are shown in the event display to the right. The
default setting for a new preset is Program Change 0 – to change this,
proceed as follows:
IMPORTANT
For details on which MIDI events are used for selecting patches in the MIDI
device, consult its documentation.
• To change which Program Change value is sent out to select the patch,
adjust the number in the Value column for the Program Change event.
• To add another MIDI event (e. g. Bank Select) click directly below the
last event in the list and select a new event from the pop-up menu.
After adding a new event, you need to set its value in the Value column,
as with Program Change.
• To replace an event, click on it and select another event from the pop-up
menu.
For example, a MIDI device may require that a Bank Select message is
sent first, followed by a Program Change message, in which case you
would need to replace the default Program Change message with a
Bank Select message and add a new Program Change after that.
• To remove an event, select it and press [Delete] or [Backspace].
IMPORTANT
Different devices use different schemes for Bank Select. When you insert a
Bank Select event, you should check the device’s documentation to find out
whether to choose “CC: BankSelect MSB”, “Bank Select 14 Bit”, “Bank
Select 14 Bit MSB-LSB Swapped” or some other option.
Add Multiple Presets
This opens a dialog, allowing you to set up a range of presets to be added to
the selected bank or folder.
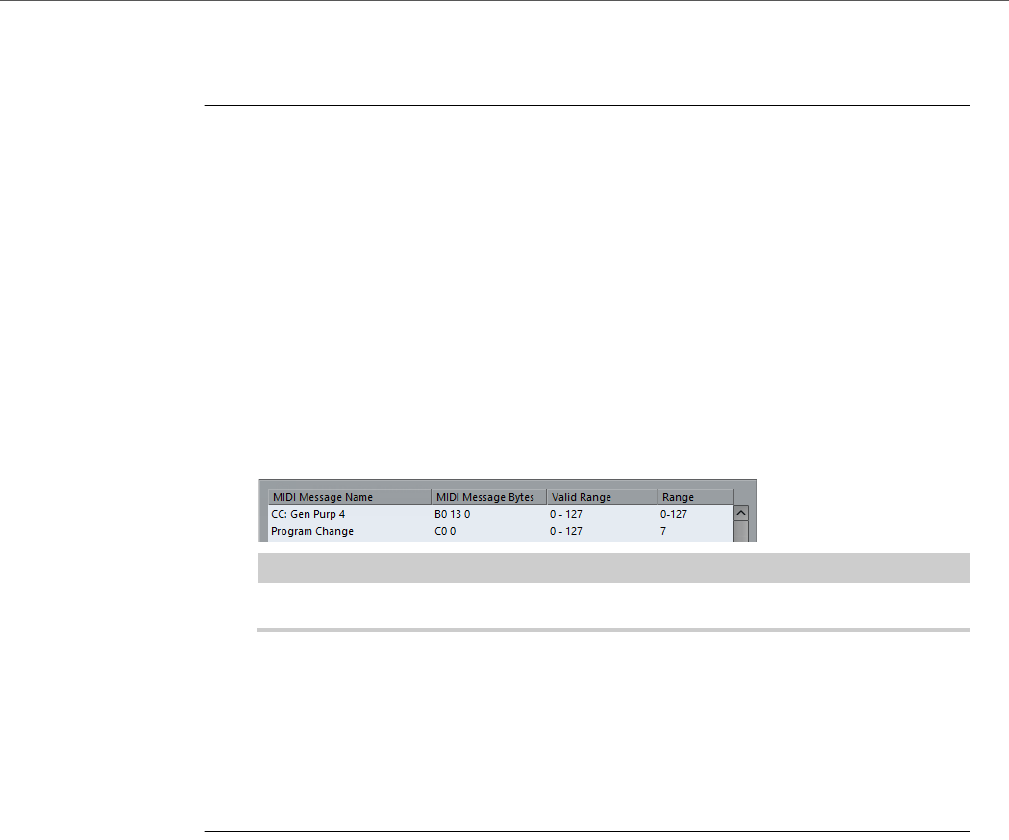
Using MIDI devices
MIDI devices – general settings and patch handling
420
Adding Multiple Presets
PROCEDURE
1. Add the event types required for selecting a patch in the MIDI device.
This is done just as when editing the settings for a single event: clicking in the event
display brings up a pop-up menu from which you can select an event type.
2. Use the Range column to set up either a fixed value or a range of values for
each event type in the list.
This requires some explanation:
If you specify a single value in the Range column (e. g. 3, 15 or 127), all added presets
will have an event of this type set to the same value.
If you instead specify a value range (a start value and an end value, separated by a
dash, e. g. 0–63), the first added preset will have an event set to the start value, the
next value will be incrementally raised by one and so on, up to and including the end
value.
NOTE
The number of added presets depends on the Range setting.
3. Specify a Default Name below the event display.
The added events will get this name, followed by a number. You can rename presets
manually in the Patch Banks list later.
4. Click OK.
A number of new presets have now been added to the selected bank or folder,
according to your settings.
Other editing functions
• You can move presets between banks and folders by dragging them to the
Patch Banks list.
• You can remove a bank, folder or preset by selecting it in the Patch Banks list
and pressing [Backspace].
• If you specify more than one bank, a Bank Assignment tab is added next to
the Patch Banks tab.
RELATED LINKS
About Patch Banks on page 416

421
MIDI Processing
This chapter describes the various MIDI processing functions available on the MIDI
menu. They offer various ways to edit MIDI notes and other events, either in the
Project window or from within a MIDI editor.
MIDI functions vs. MIDI modifiers
In some cases, the result of a MIDI function can also be obtained by using MIDI
modifiers. For example, the operations “Transpose” and “Quantize” are available
both as MIDI modifiers and as MIDI functions.
The main difference is that MIDI modifiers do not affect the actual MIDI events on
the track in any way, while MIDI functions change the events “permanently”
(although recent changes can be undone).
Use the following guidelines to decide which path to choose for operations that are
available both as modifiers and as functions:
• If you want to adjust a few parts or events only, use MIDI functions. The MIDI
modifiers affect the output of the whole track (although they can be made
permanent in a specific area with the Merge MIDI in Loop function).
• If you want to experiment with different settings, use MIDI modifiers.
• MIDI modifiers settings are not reflected in the MIDI editors, since the actual
MIDI events are not affected.
This can be potentially confusing; if you have transposed notes using
modifiers for example, the MIDI editors will still show the notes with their
original pitch (but they will play back at their transposed pitch). Therefore,
MIDI functions are a better solution if you want to see the effects of your
editing in the MIDI editors.
RELATED LINKS
MIDI realtime parameters on page 404
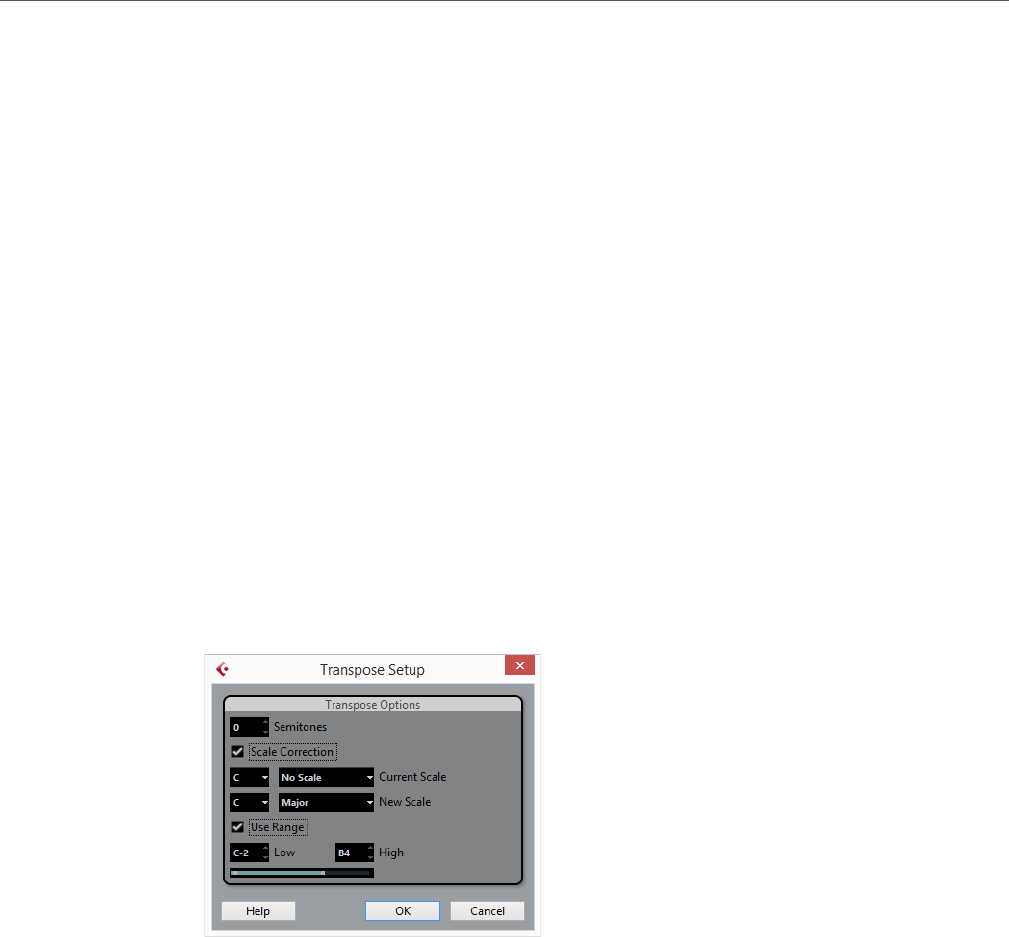
MIDI Processing
What is affected by the MIDI functions?
422
What is affected by the MIDI functions?
Which events are affected when you use a MIDI function depends on the function,
the active window and the current selection:
• Some MIDI functions only apply to MIDI events of a certain type.
For example, quantization only affects notes, while the Delete Controllers
function only applies to MIDI controller events.
• In the Project window, the MIDI functions apply to all selected parts, affecting
all events (of the relevant types) in them.
• In the MIDI editors, the MIDI functions apply to all selected events. If no events
are selected, all events in the edited part(s) will be affected.
Transpose
The “Transpose Setup…” option on the MIDI menu opens a dialog with settings for
transposing the selected notes.
Semitones
This is where you set the amount of transposition.
Scale Correction
Scale Correction transposes the selected notes by forcing them to the
closest note of the selected scale type. This can be used for creating
interesting key and tonal changes, either by itself or in conjunction with the
other settings in the Transpose Setup dialog.
• To activate Scale Correction, click the checkbox.
• Select a root note and scale type for the current scale from the upper
pop-up menus.

MIDI Processing
Making your settings permanent
423
• Select a root note and scale type for the new scale from the lower
pop-up menus.
Make sure to select the correct root note if you want to keep the result
in the same key as the original notes, or select an entirely different key
if you want to experiment.
Use Range
When this is activated, transposed notes will remain within the limit that you
specify with the Low and High values.
If a note would end up outside this limit after transposition, it is shifted to
another octave, keeping the correct transposed pitch if possible. If the range
between the upper and lower limit is very narrow, the note will be transposed
“as far as possible”, i. e. to notes specified with the Low and High values. If
you set Low and High to the same value, all notes will be transposed to this
pitch!
OK and Cancel
Clicking OK performs the transposition. Clicking Cancel closes the dialog
without transposing.
Making your settings permanent
The settings described in the chapter “MIDI realtime parameters” do not change the
MIDI events themselves, but work like a “filter”, affecting the music on playback.
Therefore, you may want to make them permanent, i. e. convert them to “real” MIDI
events, for example to transpose a track and then edit the transposed notes in a
MIDI editor. For this, you can use two commands from the MIDI menu: “Freeze MIDI
Modifiers” and “Merge MIDI in Loop”.
RELATED LINKS
MIDI realtime parameters on page 404
Freeze MIDI Modifiers
“Freeze MIDI Modifiers” applies all filter settings permanently to the selected track.
The settings are “added” to the events on the track, and all modifiers are set to zero.
The “Freeze MIDI Modifiers” function affects the following settings for MIDI tracks:
• Several settings on the main tab of the Inspector (program and bank selection
and the Delay parameter).
• The settings on the MIDI Modifiers tab (i. e. Transpose, Velocity Shift, Velocity
Compression, and Length Compression).
The following settings for MIDI parts are taken into account as well:
• The Transpose and Velocity settings for parts displayed on the info line – the
Volume setting is not taken into account.

MIDI Processing
Making your settings permanent
424
Merge MIDI in Loop
The “Merge MIDI in Loop” function combines all unmuted MIDI events on all
unmuted tracks, applies MIDI modifiers, and generates a new MIDI part, containing
all the events as you would hear them during playback.
PROCEDURE
1. Mute all the tracks that you do not want to include in the merge.
Instead of muting whole tracks, you can also mute individual parts.
2. Set up the left and right locators to encompass the area that you want to
merge.
Only events starting within this area will be included.
3. Select the track on which you want the new part to be created.
If you do not select a track, a new MIDI track is created. If several MIDI tracks are
selected, the new part is inserted on the first selected track. Existing data on the
selected track can be kept or overwritten (see below).
4. On the MIDI menu, select “Merge MIDI in Loop…”.
The MIDI Merge Options dialog opens.
5. Activate the desired options and click OK.
A new part is created between the locators on the destination track, containing the
processed MIDI events.
NOTE
If you only want to include events from a single track in the merge operation, you may
want to solo the track.
RELATED LINKS
MIDI Merge Options Dialog on page 424
MIDI Merge Options Dialog
The following options are available:
Include Inserts
If this is activated, any MIDI modifiers currently activated for the tracks will be
applied.
Erase Destination
If this is activated, any existing MIDI data between the left and right locators
on the destination track will be deleted.
Include Chase
If this is activated, events placed outside the selected part but relating to it will be
included in the processing, e. g. a Program Change right before the left locator.
RELATED LINKS
Chase on page 142

MIDI Processing
Dissolve Part
425
Applying effects to a single part
Normally, the MIDI modifiers affect a whole MIDI track. This may not always be what
you want. For example, you may want to apply some MIDI modifiers to a single part
(without having to create a separate track for that part only). The “Merge MIDI in
Loop” function can help:
PROCEDURE
1. Set up your MIDI modifiers the way you want them for the part.
This will of course affect the whole track, but focus on the part for now.
2. Set the locators to encompass the part.
An easy way to do this is to select the part and choose Locators to Selection from the
Transport menu (or use the corresponding key command, by default [P]).
3. Make sure that the track holding the part is selected in the track list.
4. On the MIDI menu, select “Merge MIDI in Loop…”.
The MIDI Merge Options dialog opens.
5. Activate the desired options, making sure that “Erase Destination” is
activated, and click OK.
A new part is created on the same track, containing the processed events. The
original part is deleted.
6. Turn off or reset all MIDI modifiers, so that the track plays back as before.
Dissolve Part
The Dissolve Part function on the MIDI menu allows you to separate MIDI events
according to channels or pitches:
• When you work with MIDI parts (on MIDI channel “Any”) containing events on
different MIDI channels, activate the “Separate Channels” option.
• To separate MIDI events according to pitch, activate the “Separate Pitches”
option.
Typical examples are drum and percussion tracks, where different pitches
usually correspond to separate drum sounds.
NOTE
When dissolving a part into either separate channels or separate pitches, you can
automatically remove the silent (empty) areas of the resulting parts by activating the
“Optimized Display” checkbox in the Dissolve Part dialog.
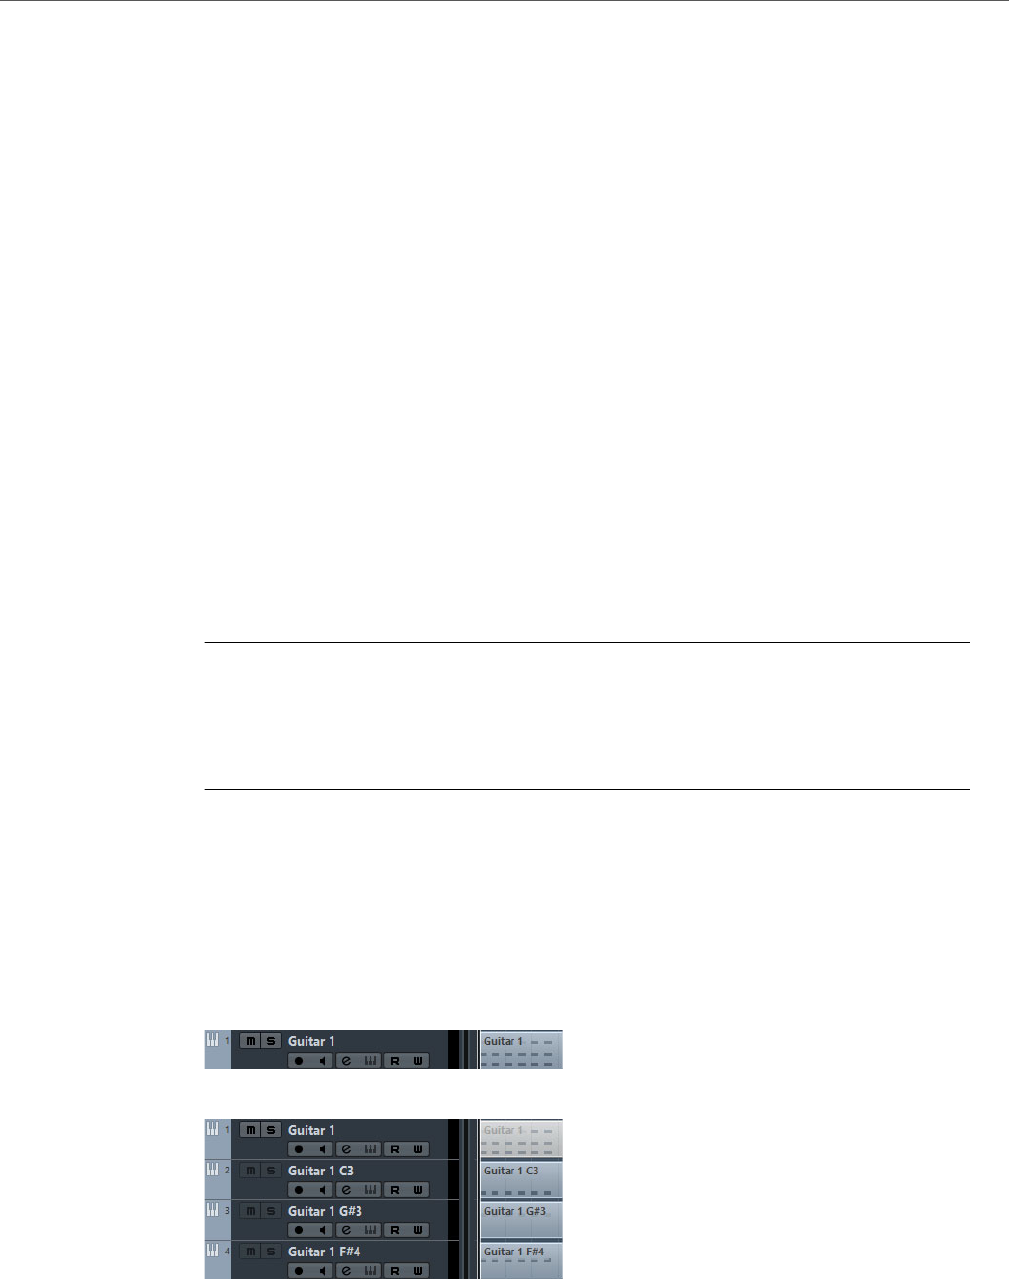
MIDI Processing
Dissolve Part
426
Dissolving parts into separate channels
Setting a track to MIDI channel “Any” will cause each MIDI event to play back on its
original MIDI channel, rather than a channel set for the whole track. There are two
main situations when “Any” channel tracks are useful:
• When you record several MIDI channels at the same time.
You may for example have a MIDI keyboard with several keyboard zones,
where each zone sends MIDI on a separate channel. Recording on an “Any”
channel track allows you to play back the recording with different sounds for
each zone (since the different MIDI notes play back on separate MIDI
channels).
• When you have imported a MIDI file of Type 0.
MIDI files of Type 0 contain only one track, with notes on up to 16 different
MIDI channels. If you were to set this track to a specific MIDI channel, all notes
in the MIDI file would be played back with the same sound; setting the track
to “Any” will cause the imported file to play back as intended.
The Dissolve Part function scans MIDI parts for events on different MIDI channels
and distributes the events into new parts on new tracks, one for each MIDI channel
found. This allows you to work with each musical part individually.
PROCEDURE
1. Select the parts containing MIDI data on different channels.
2. Select “Dissolve Part” from the MIDI menu.
3. In the dialog that opens, select the “Separate Channels” option.
RESULT
Now, for each MIDI channel used in the selected parts, a new MIDI track is created
and set to the corresponding MIDI channel. Each event is then copied into the part
on the track with the corresponding MIDI channel. Finally, the original parts are
muted.
An example:
This part contains events on MIDI channels 1, 2, and 3.
Selecting “Dissolve Part” creates new parts on new tracks, set to channels 1, 2, and 3.
Each new part contains only the events on the respective MIDI channel. The original MIDI
part is muted.
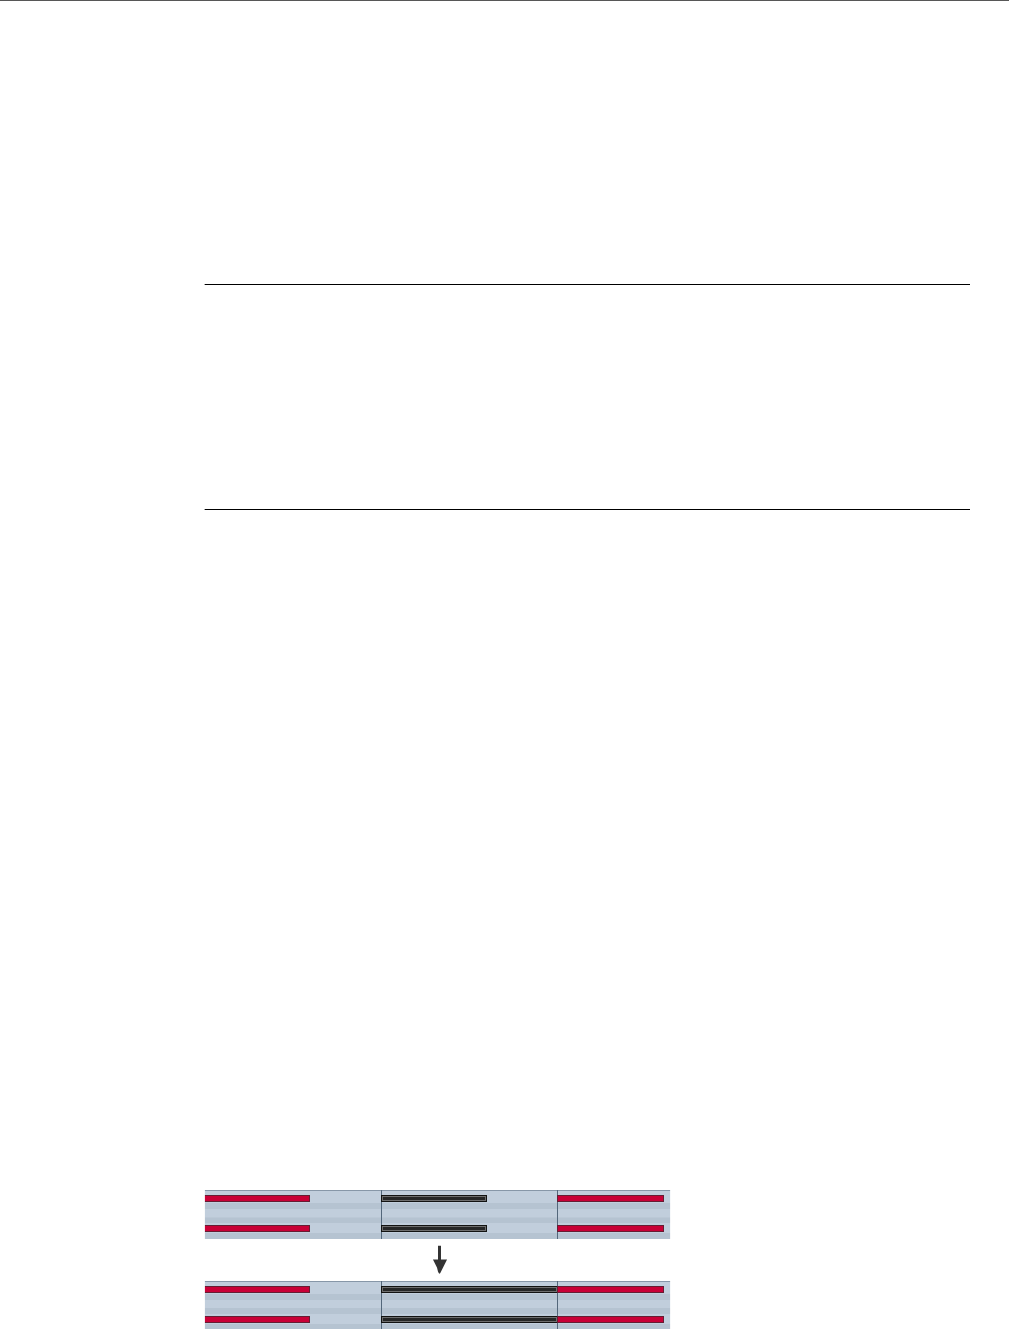
MIDI Processing
Repeat Loop
427
Dissolving parts into separate pitches
The Dissolve Part function can also scan MIDI parts for events of different pitches,
and distribute the events into new parts on new tracks, one for each pitch. This is
useful when the different pitches are not used in a melodic context, but rather for
separating different sounds (e. g. MIDI drum tracks or sampler sound FX tracks). By
dissolving such parts, you can work with each sound individually, on a separate
track.
PROCEDURE
1. Select the parts containing MIDI data.
2. Select “Dissolve Part” from the MIDI menu.
3. In the dialog that opens, select the “Separate Pitches” option.
A new MIDI track is created for each used pitch in the selected parts. The events are
then copied into the parts on the track for the corresponding pitch. Finally, the original
parts are muted.
Repeat Loop
With this function, the events inside the independent track loops will be repeated
until the end of the part, i. e. the notes that were previously only played repeatedly
are now actual notes on the MIDI track. Events to the right of the independent track
loop (within the same part) will be replaced by this function.
RELATED LINKS
Setting Up the Independent Track Loop on page 310
Other MIDI functions
The following items can be found on the Functions submenu of the MIDI menu:
Legato
Extends each selected note so that it reaches the next note.
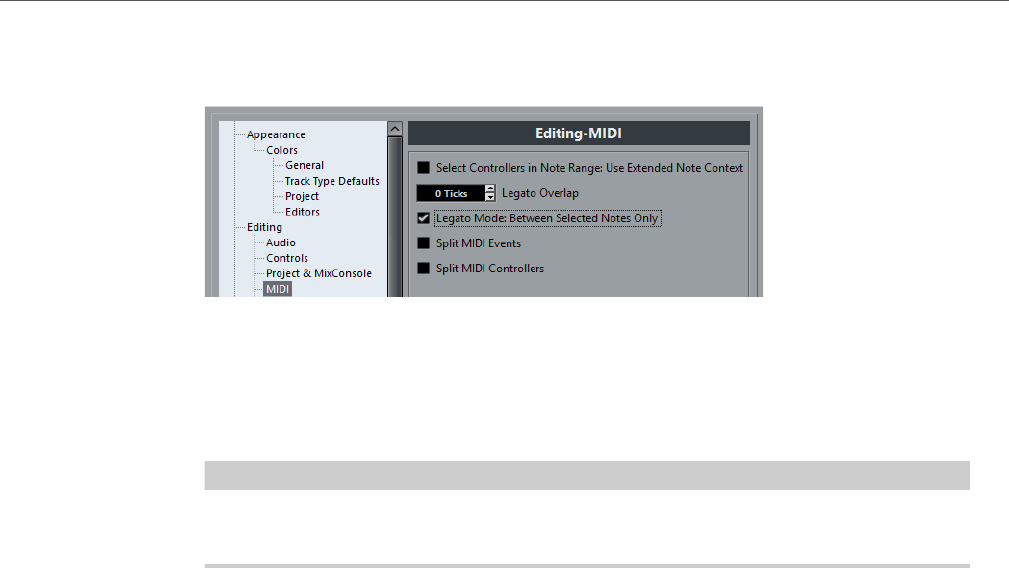
MIDI Processing
Other MIDI functions
428
You can specify a gap or overlap for this function with the “Legato Overlap” setting
in the Preferences dialog (Editing–MIDI page).
When using Legato with this setting, each note will be extended to end 5 ticks before the
next note.
When you activate “Legato Mode: Between Selected Notes Only”, the length of the
note will be adjusted so that it reaches the next selected note, allowing you to apply
Legato only to your bass line, for example.
NOTE
You can also apply a legato using the “Scale Length/Legato” slider in the MIDI
editors.
RELATED LINKS
Inspector on page 449
Fixed Lengths
This function resizes all selected notes to the length set with the Length Quantize
pop-up menu on the MIDI editor toolbar.
Pedals to Note Length
This function scans for Sustain pedal on/off events, lengthens the affected notes to
match the Sustain pedal off position, and then removes the Sustain Controller
on/off events.
Delete Overlaps (mono)
This function allows you to make sure that no notes of the same pitch overlap (i. e.
that one starts before the other ends). Overlapping notes of the same pitch can
confuse some MIDI instruments (a new Note On is transmitted before the Note Off
is transmitted). This command can then be used to automatically solve the problem.
Delete Overlaps (poly)
This function shortens notes when required, so that no note begins before another
ends. This happens regardless of which pitch the notes have.
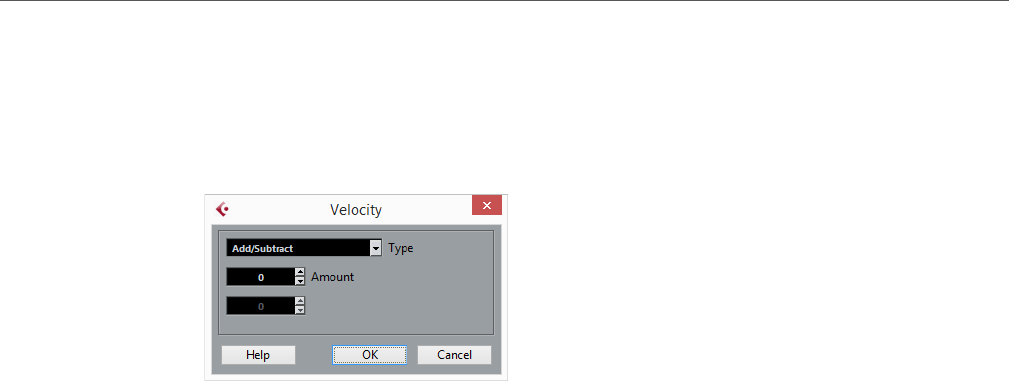
MIDI Processing
Other MIDI functions
429
Velocity
This function opens a dialog that allows you to manipulate the velocity of notes in
various ways.
The following types of velocity processing are available:
Add/Subtract
This simply adds a fixed number to the existing velocity values. You set the
value (positive or negative) with the Amount parameter.
Compress/Expand
Compresses or expands the “dynamic range” of MIDI notes by scaling the
velocity values according to the Ratio setting (0 to 300 %). The principle
behind this is that multiplying different velocity values with a factor higher than
1 (over 100 %) will also make the differences between velocity values greater,
while using a factor lower than 1 (under 100 %) will make the differences
smaller. In short:
• To compress (“even out” velocity differences), use ratio values below
100 %.
After compression, you would probably want to add a velocity amount
(with the Add/Subtract function) to maintain the average velocity level.
• To expand (create greater difference in velocity), use ratio values above
100 %.
Before you expand, you may want to adjust the velocity with the
Add/Subtract function, so that the average velocity is somewhere in the
middle of the range. If the average velocity is high (near 127) or low
(near 0), expansion will not work properly, simply because velocity
values can only be between 0 and 127!
Limit
This function allows you to make sure that no velocity values fall outside a
given range (the Lower and Upper values). Any velocity values outside this
range are raised/lowered to exactly the Lower/Upper values.
Fixed Velocity
This function sets the velocity of all selected notes to the Insert Velocity value on the
toolbar in the MIDI editors.
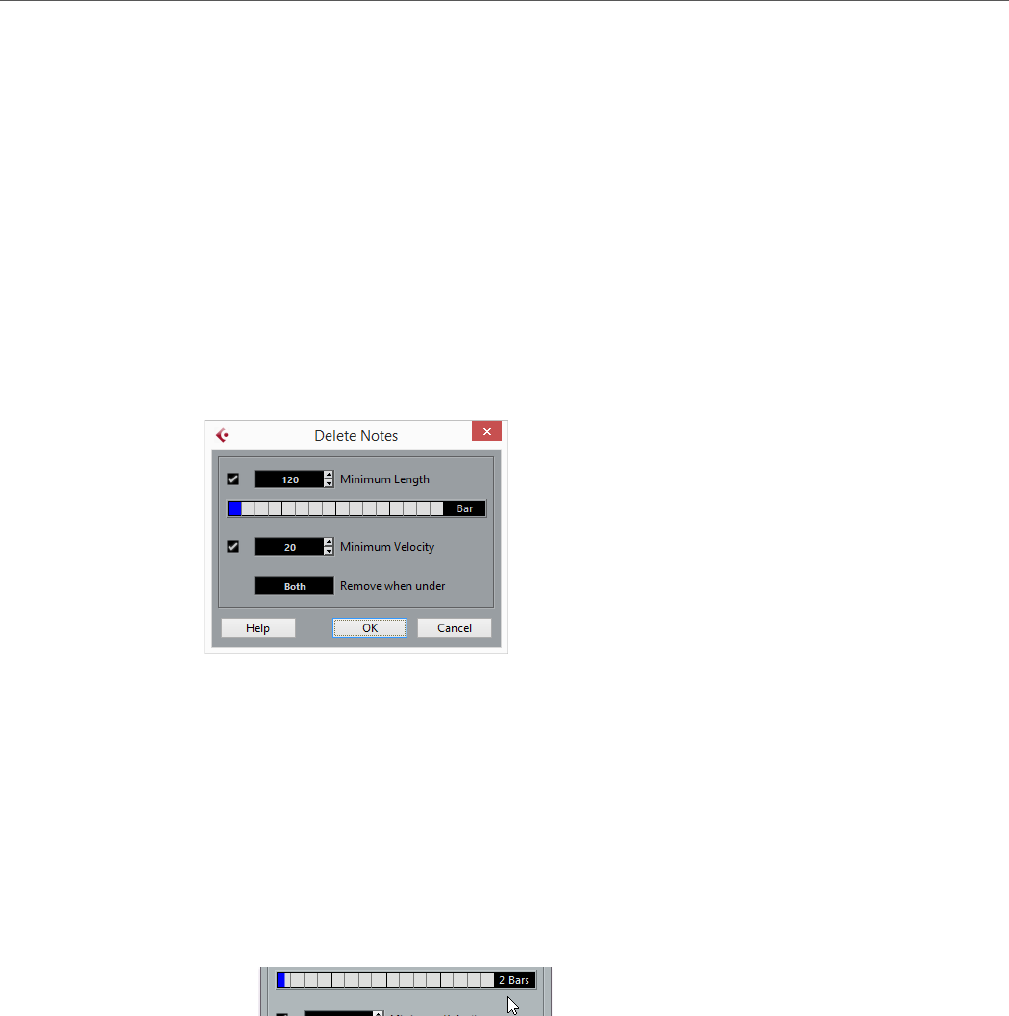
MIDI Processing
Other MIDI functions
430
Delete Doubles
This function removes double notes, i. e. notes of the same pitch on the exact same
position from the selected MIDI parts. Double notes can occur when recording in
Cycle mode, after Quantizing, etc.
Delete Notes
Allows you to delete very short or weak notes. This is useful for automatically
removing unwanted “ghost notes” after recording. Selecting “Delete Notes…”
opens a dialog in which you set up the criteria for the function.
The parameters have the following functionality:
Minimum Length
When the Minimum Length checkbox is activated, the note length is taken into
account, allowing you to remove short notes. You can either specify the
minimum length (for notes to be kept) in the value field or by dragging the blue
line in the graphical length display below.
• The graphical length display can correspond to 1/4 bar, one bar, two
bars or four bars.
You change this setting by clicking in the field to the right of the display.
In this case, the whole length display corresponds to two bars, and the Minimum
Length is set to 32nd notes (60 ticks).
Minimum Velocity
When the Minimum Velocity checkbox is activated, the velocity of notes is
taken into account, allowing you to remove weak notes. You specify the
minimum velocity (for notes to be kept) in the value display.
Remove when under
This setting is only available when both Minimum Length and Minimum
Velocity is activated. By clicking in this field, you select whether both the
length and the velocity criteria must be met for notes to be deleted, or whether
one of the criteria will suffice.

MIDI Processing
Other MIDI functions
431
OK and Cancel
Clicking OK performs the automatic delete according to the rules set up.
Clicking Cancel closes the dialog without deleting notes.
Delete Controllers
This function removes all MIDI controllers from the selected MIDI parts.
Delete Continuous Controllers
This function removes all “continuous” MIDI controller events from the selected
MIDI parts. Therefore, “on/off” events such as sustain pedal events are not removed.
Restrict Polyphony
Selecting this item opens a dialog in which you can specify how many “voices” are
used (for the selected notes or parts). Restricting the polyphony this way is useful
when you have an instrument with limited polyphony and want to make sure all notes
will be played. The effect is achieved by shortening notes as required, so that they
end before the next note starts.
Thin Out Data
Thins out MIDI data. Use this to ease the load on your external MIDI devices if you
have recorded very dense controller curves, etc.
You can also manually thin out the controller data by using the quantize function in
the Key Editor.
MIDI Processing
Other MIDI functions
432
Extract MIDI Automation
This is an extremely useful function as it allows you to quickly and easily convert the
continuous controllers of your recorded MIDI parts into MIDI track automation data,
making them available for editing in the Project window.
PROCEDURE
1. Select the desired MIDI part containing the continuous controller data.
2. On the MIDI menu, open the Functions submenu and select “Extract MIDI
Automation”.
3. In the Project window, open the automation tracks for the respective MIDI
track. You will find that an automation track has been created for each of the
continuous controllers in the part.
RESULT
NOTE
In the MIDI editors, the controller data will automatically be removed from the
controller lane.
This function can only be used for continuous controllers. Data such as Aftertouch,
Pitchbend, or SysEx cannot be converted to MIDI track automation data.
NOTE
MIDI controller automation is also affected by the Automation Merge Mode.
Reverse
This function inverts the order of the selected events (or of all events in the selected
parts) rhythmically, causing the MIDI music to play backwards. Note that the effect
is different from reversing an audio recording. With MIDI, the individual notes will
still play as usual in the MIDI instrument – it is only the order of playback that is
changed. Technically, this function reverses the Note On message of a note within
a part or selection.
Mirror
This function inverts the order of the selected events (or of all events in the selected
parts) graphically. Technically, this function turns a Note On message into a Note
Off message and vice versa which can lead to rhythmic inaccurancies if the Note
Off position of a note has not been quantized.

433
MIDI Editors
There are several ways to edit MIDI in Cubase. You can use the tools and functions
in the Project window for large-scale editing or the functions on the MIDI menu to
process MIDI parts in various ways. To manually edit your MIDI data on a graphical
interface, you can use the MIDI editors.
• The Key Editor is the default MIDI editor, presenting notes graphically in a
piano roll-style grid. The Key Editor also allows for detailed editing of
non-note events such as MIDI controllers.
• The Drum Editor is similar to the Key Editor, but each key corresponds to a
separate drum sound.
You can use the Drum Editor to edit drum or percussion parts.
• The Score Editor shows MIDI notes as a musical score and offers basic
score editing and printing.
RELATED LINKS
Key Editor on page 443
Drum Editor on page 483
Score Editor on page 470
Opening MIDI editors
PROCEDURE
1. Do one of the following:
• Select one or several MIDI parts.
• Select a whole MIDI track without selecting parts.
2. Do one of the following:
• To open the Key Editor, select MIDI > Open Key Editor.
• To open the Drum Editor, select MIDI > Open Drum Editor.
• To open the Score Editor, select MIDI > Scores > Open Score Editor.
• To open the default MIDI editor, double-click a part.
RESULT
The selected editor opens and displays the selected parts or tracks. If no parts were
selected, all parts on the track are shown.
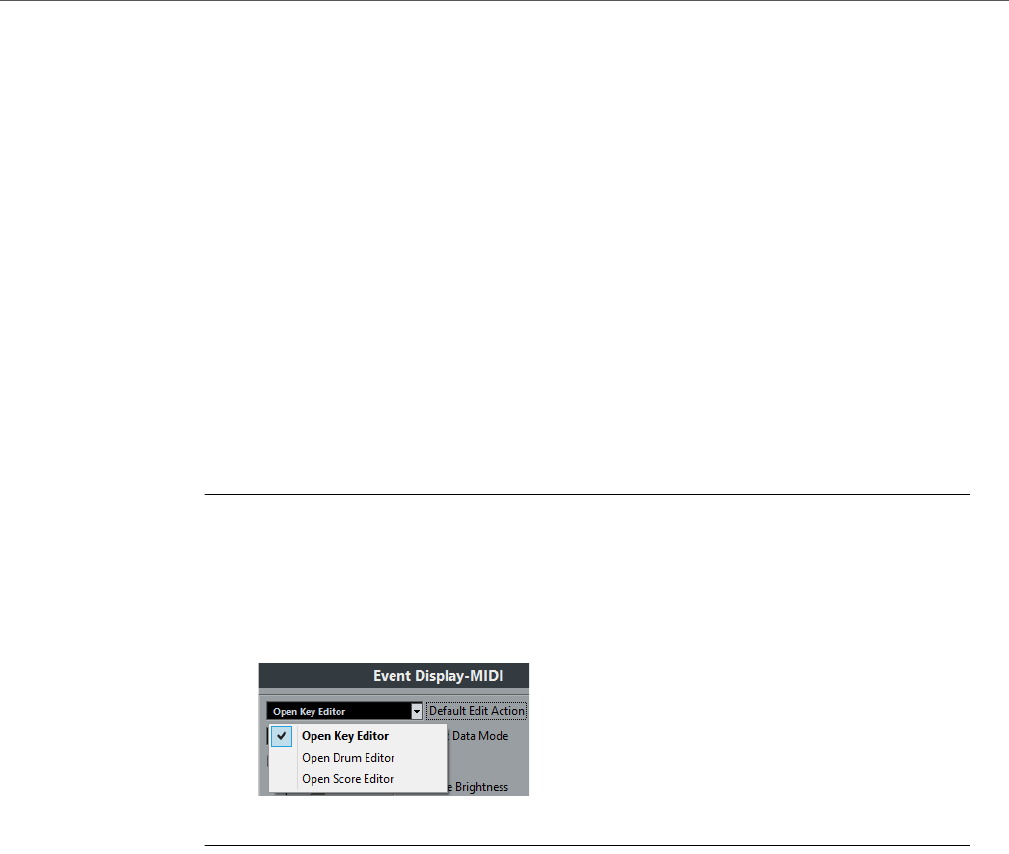
MIDI Editors
Changing the Default MIDI Editor
434
Opening a Drum Map in the Drum Editor
You can automatically open a drum map in the Drum Editor.
•Select Preferences > Event Display > MIDI and activate Edit as Drums
when Drum Map is assigned.
RELATED LINKS
Selecting a Drum Map for a Track on page 498
Changing the Default MIDI Editor
When you double-click a MIDI part, the default MIDI editor opens. The Key Editor
is the default MIDI editor. You can set any MIDI editor as the default MIDI editor.
PROCEDURE
1. Click File > Preferences.
2. Select Event Display > MIDI.
3. From the Default Edit Action pop-up menu, select the MIDI editor that you
want to use.
4. Click OK.
Common MIDI Editor Functions
You can use the tools and functions within the MIDI editors to process MIDI parts
in various ways.
Changing the Display Format for the Ruler
By default, the ruler shows the timeline in the display format that is selected on the
transport panel.
You can change the display format for the ruler. Click the arrow button to the right
of the ruler and select an option from the pop-up menu.
RELATED LINKS
Ruler Display Formats on page 29
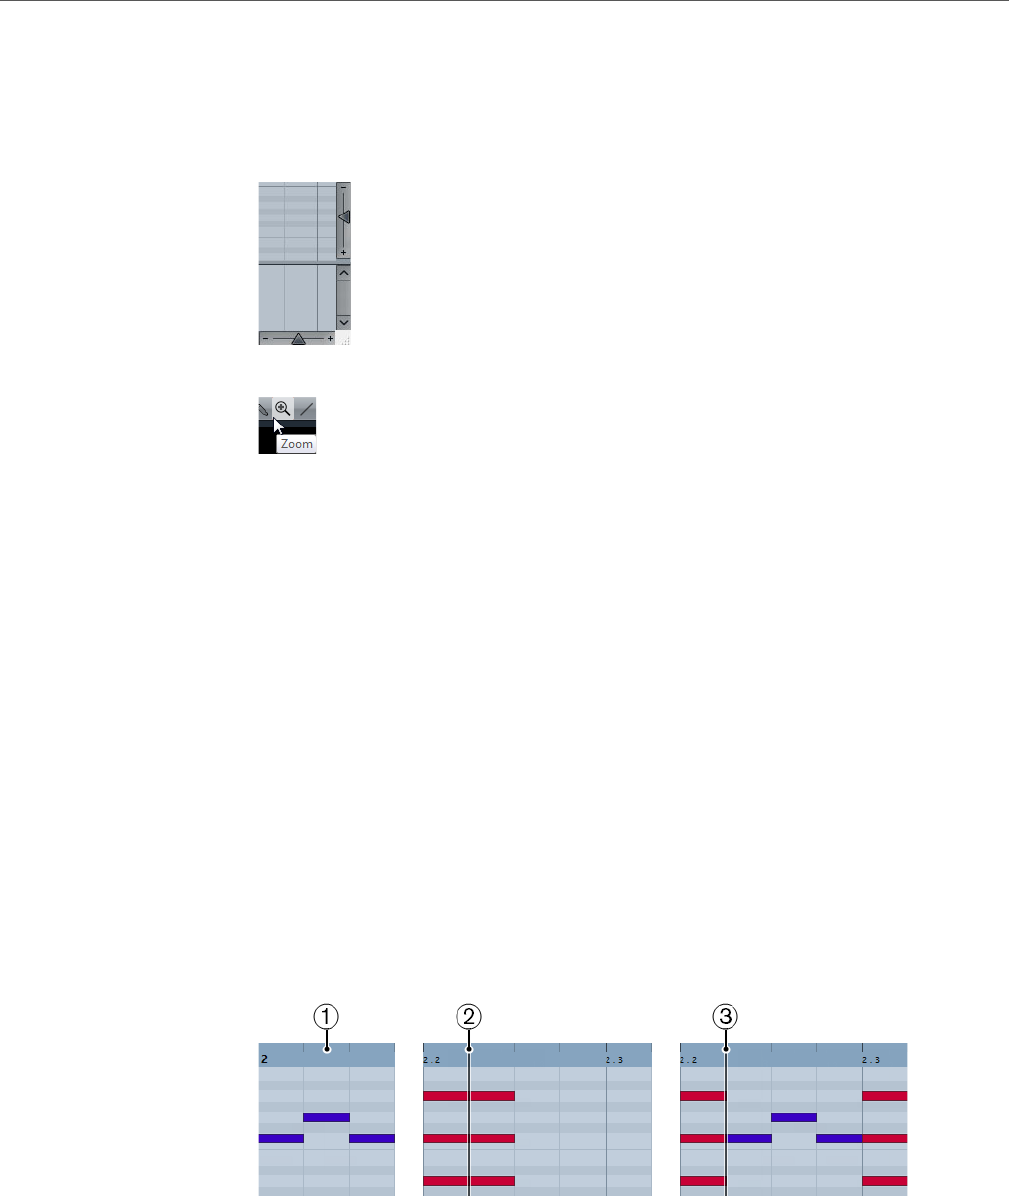
MIDI Editors
Common MIDI Editor Functions
435
Zooming in MIDI Editors
The MIDI editors provide several zooming options:
• Zoom sliders
•Zoom tool
•Via Edit > Zoom.
When you use the Zoom tool for zooming, you can determine if you want to zoom
horizontal only or horizontal and vertical at a time.
• To activate/deactivate the corresponding option, select File > Preferences
> Editing > Tools and activate/deactivate Zoom Tool Standard Mode:
Horizontal Zooming Only.
Using Cut and Paste
You can use the Cut, Copy, and Paste options from the Edit menu to move or copy
material within a part or between different parts.
• To insert note events at the project cursor position without affecting existing
notes, select Edit > Paste.
• To insert note events at the project cursor position, move, and if necessary
split the existing note events to make room for the pasted notes, select Edit
> Range > Paste Time.
1) Data on clipboard
2) Cursor position
3) Pasted data at cursor position
MIDI Editors
Common MIDI Editor Functions
436
Following the Project Cursor During Playback
Auto-Scroll allows the event display to scroll during playback, keeping the project
cursor visible in the window.
Auto-Scroll in MIDI editors is independent of the Auto-Scroll function in the Project
Window.
• To activate/deactivate Auto-Scroll, click Auto-Scroll .
Soloing a MIDI Editor
• To only hear the parts of a particular MIDI editor during playback, activate
Solo Editor .
Acoustic Feedback
If Acoustic Feedback is activated, individual notes are automatically played back
(auditioned) when you move or transpose them, or when you create new notes by
drawing. This makes it easier to hear what you are doing.
• To activate acoustic feedback, activate Acoustic Feedback on the
toolbar.
Handling Note Events
Coloring Notes and Events
You can select different color schemes for the note events in the MIDI editor.
The following options are available on the Event Colors pop-up menu on the
toolbar:
Velocity
The note events get different colors depending on their velocity values.
Pitch
The note events get different colors depending on their pitch.
Channel
The note events get different colors depending on their MIDI channel value.
Part
The note events get the same color as their corresponding part in the Project
window. Use this option when you are working with two or more tracks in an
editor, to see which note events belong to which track.

MIDI Editors
Common MIDI Editor Functions
437
Grid Match
The note events get different colors depending on their time position. For
example, this mode enables you to see if the notes of a chord start at the exact
same beat.
Voice
The note events get different colors depending on their voice (soprano, alto,
tenor, etc.).
Chord Track
The note events get different colors depending on whether they match the
current chord, scale, or both.
For all of the options except Part, the pop-up menu also contains a Setup option.
This option opens a dialog in which you can specify the colors that are associated
with velocities, pitches, or channels.
Selecting Note Events
The selected MIDI editor determines which of the following methods apply.
Do one of the following:
•Use the Object Selection tool to drag a selection rectangle around the
note events that you want to select. You can also click individual events.
•Select Edit > Select and select one of the options.
• To select the previous or next note event, use the left or right arrow keys.
• To select several notes, press [Shift] and use the arrow keys.
• To select all notes of a certain pitch, press [Ctrl]/[Command] and click on a
key in the keyboard display to the left.
• To select all the following note events of the same pitch/staff, press [Shift] and
double-click a note event.
RELATED LINKS
Selecting Note Events using the Select Submenu on page 437
Editing on page 648
Selecting Note Events using the Select Submenu
The Select submenu offers you several options to select note events.
To open the Select submenu, select Edit > Select.
All
Selects all note events in the edited part.
None
Deselects all note events.

MIDI Editors
Common MIDI Editor Functions
438
Invert
Inverts the selection. All selected note events are deselected and all notes
that were not selected are selected instead.
In Loop
Selects all note events that are partially or completely inside the boundaries
of the left and right locators (only visible if locators are set).
From Start to Cursor
Selects all note evens that begin to the left of the project cursor.
From Cursor to End
Selects all note events that end to the right of the project cursor.
Equal Pitch - all Octaves
Selects all note events of the highlighted part that have the same pitch (in any
octave) as the currently selected note event.
NOTE
This function requires that a single note event is selected.
Equal Pitch - same Octave
Selects all note events of the highlighted part that have the same pitch (same
octave) as the currently selected note event.
NOTE
This function requires that a single note event is selected.
Select Controllers in Note Range
Selects the MIDI controller data within the range of the selected note events.
RELATED LINKS
Deleting Note Events on page 439
Muting Note Events
You can mute individual note events in a MIDI editor. Muting individual notes allows
you to exclude note events from playback.
Do one of the following:
• Click on a note event with the Mute tool.
• Drag a rectangle with the Mute tool, enclosing all note events that you want
to mute.
• Select the note events and select Edit > Mute.
• To unmute a note event, click it or enclose it with the Mute tool. You can also
select a note event and select Edit > Unmute.
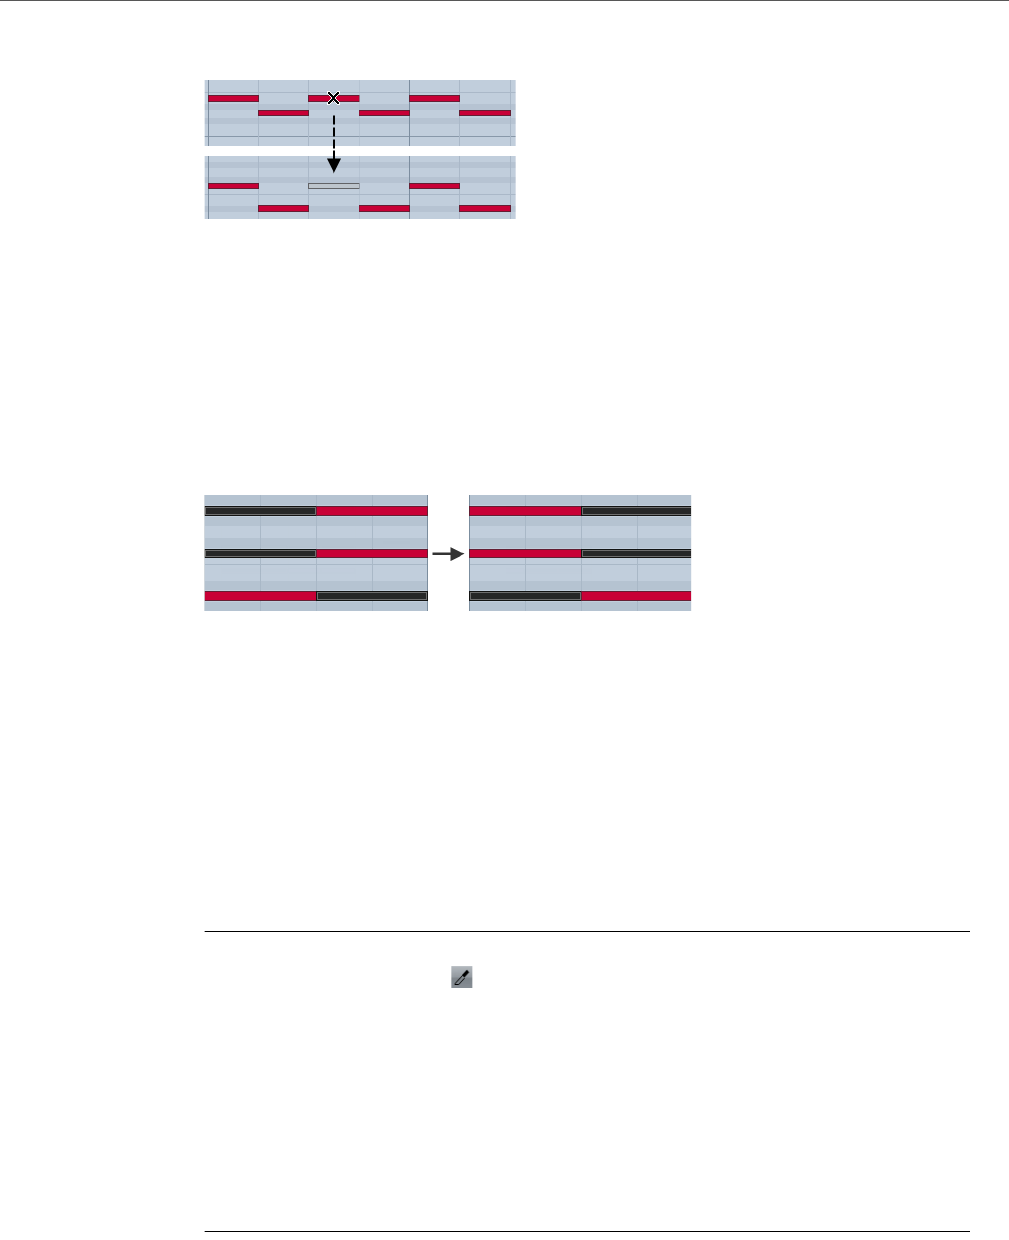
MIDI Editors
Common MIDI Editor Functions
439
Muted notes are dimmed in the note display.
Toggle Selections
• To toggle selected elements within a selection rectangle, press
[Ctrl]/[Command] and enclose the same elements within a new selection
rectangle.
Once you release the mouse button, the previous selection is deselected and vice
versa.
Deleting Note Events
• To delete note events, click on them with the Erase tool or select them and
press [Backspace].
Cutting Note Events
The Trim tool allows you to cut off the end or the beginning of note events.
PROCEDURE
1. Select the Trim tool on the toolbar.
2. Do one of the following:
• To trim the end of a single note event, click on the note event.
• To trim the beginning of a single note event, press [Alt]/[Option] and click the
note event.
• To trim several note events, click and drag with the mouse across the note
events.
• To set the same start and end time for all edited note events, press
[Ctrl]/[Command] and vertically drag along the note events.
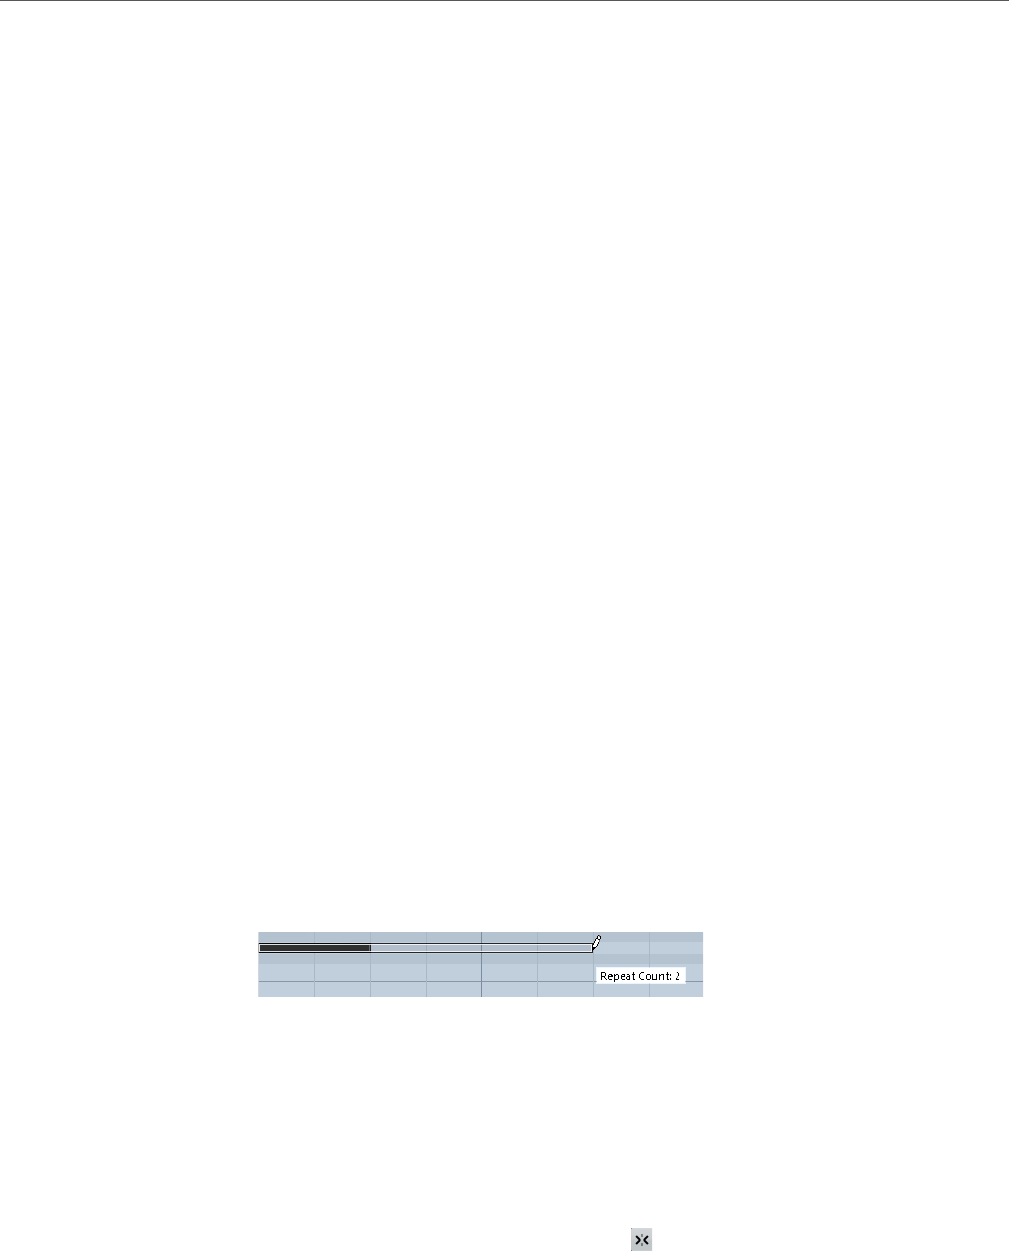
MIDI Editors
Common MIDI Editor Functions
440
Editing Note Events on the Info Line
You can move, resize, transpose, or change the velocity of note events on the info
line using regular value editing.
• To apply a value change to all selected note events, press [Ctrl]/[Command]
and change a value on the info line.
• To adjust the pitch or velocity of note events via your MIDI keyboard, click in
the Pitch or Velocity fields on the info line, and play a note on your MIDI
keyboard.
If you have several note events selected and change a value, all selected
events are changed by the set amount.
Duplicating and Repeating Note Events
You can duplicate and repeat note events in the same way as events in the Project
window.
• To duplicate the selected note events, hold down [Alt]/[Option] and drag the
note events to a new position.
If Snap is activated, it determines to which positions you can copy notes.
• To copy the selected note events and place them directly behind the original,
select Edit > Functions > Duplicate.
If several note events are selected, all of them are copied as one unit,
maintaining the relative distance between the note events.
• To create a number of copies of the selected note events, select Edit >
Functions > Repeat, specify the number, and click OK.
You can also press [Alt]/[Option] and drag the right edge of the note events
to the right to create copies of the note events.
Finding Exact Positions with Snap
The Snap function restricts horizontal movement and positioning to certain
positions. This helps you find exact positions in the note display when editing note
events in a MIDI editor. Affected operations include moving, duplicating, drawing,
sizing, etc.
• To activate/deactivate snap, click Snap .
If you select the Bars+Beats display format, the snap grid is set by the
quantize value on the toolbar. This makes it possible to snap to straight note
values and to swing grids that have been set up in the Quantize Panel.
If you select any of the other display formats, positioning is restricted to the
displayed grid.

MIDI Editors
Common MIDI Editor Functions
441
Setting Velocity Values
When you draw note events in the MIDI editor, the note events get the velocity value
that is set in the Insert Velocity field on the toolbar. There are different methods to
set the velocity.
•Use the Edit Velocity tool modifier. The cursor changes into a speaker, and
next to the note, a field with the Note Velocity slider shows the value. Move
the mouse pointer up or down to change the value.
Value changes are applied to all selected notes.
For this, a tool modifier must be assigned for the Edit Velocity action. To see
or edit the tool modifier, select File > Preferences > Editing > Tool
Modifiers > Select Tool.
• Open the Insert Velocity pop-up menu and select a velocity value.
On this menu, you can also select Setup and specify custom velocity values
for the pop-up menu.
• Double-click the Insert Velocity field on the toolbar and enter a velocity value.
• Assign key commands to Insert Velocity 1-5 and use them.
This allows you to quickly switch between different velocity values when you
enter note events.
Handling Several MIDI Parts
• To activate a part for editing, open the Currently Edited Part menu and select
a part.
When you select a part from the list, it is automatically active and centered in
the note display.
• To zoom in on an active part, select Edit > Zoom > Zoom to Event.
• To display defined borders for the active part, activate Show Part Borders.
If this option is activated, all parts, except the active part, are grayed out.
• To restrict editing operations to the active part, activate Edit Active Part Only.
MIDI Editors
Common MIDI Editor Functions
442
• To change the size of the part, drag the part borders.
The part borders display the name of the active part.
NOTE
If the part that you open for editing is a shared copy, any editing that you perform
affects all shared copies of this part. In the Project window, shared copies are
indicated by an equal sign in the top right corner of the part.
Looping MIDI Parts
The Independent Track Loop function allows you to loop a MIDI part independent
from the project playback.
When you activate the loop, the MIDI events within the loop are repeated
continuously while other events on other tracks are played back as usual. Every time
the cycle restarts, the independent track loop also restarts.
PROCEDURE
1. Activate Independent Track Loop on the toolbar.
If the Independent Track Loop button is not visible, right-click the toolbar and select
Independent Track Loop from the menu.
If you have set up a loop range in the Project window, it is hidden from the ruler in the
MIDI editor.
2. [Ctrl]/[Command]-click in the ruler to specify the start of the independent
track loop.
3. [Alt]/[Option]-click in the ruler to specify the end of the independent track
loop.
RESULT
The independent loop range is indicated in a different color.
The start and end of the loop range are displayed on the status line.
AFTER COMPLETING THIS TASK
To repeat the events of the loop range and fill up the active MIDI part select MIDI >
Repeat Loop.
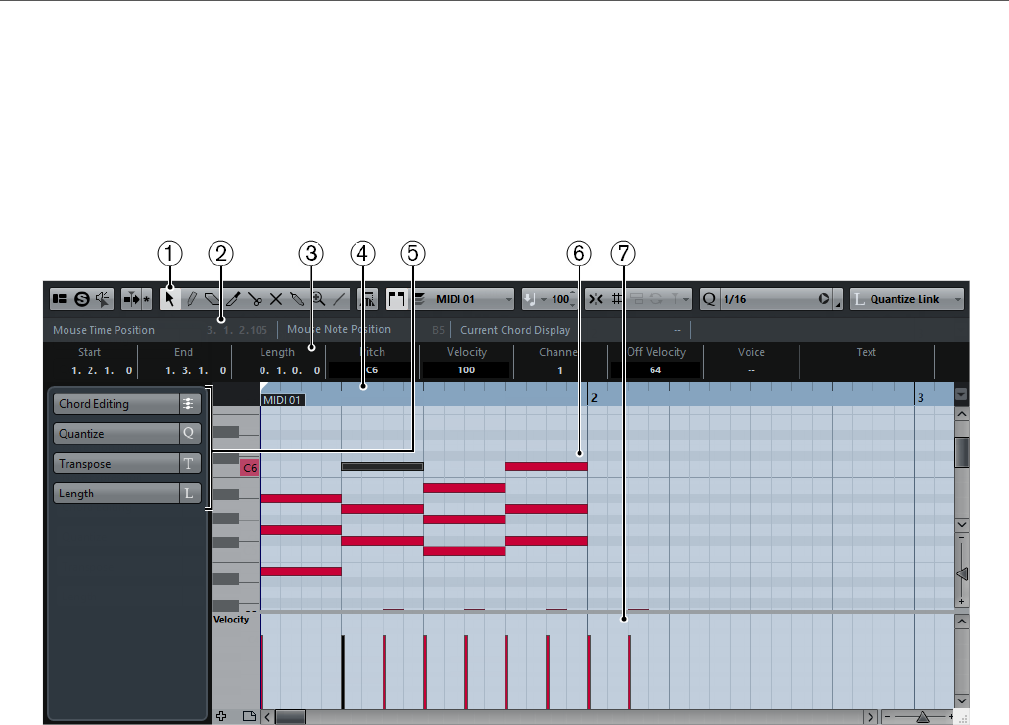
MIDI Editors
Key Editor
443
Key Editor
The Key Editor is the default MIDI editor. It displays notes graphically in a piano
roll-style grid. The Key Editor allows for detailed editing of notes and non-note
events, such as MIDI controllers.
1) Toolbar
Contains tools and settings.
2) Status line
Informs about the mouse time position, mouse note position, and current
chord display.
3) Info line
Displays note event information about a selected MIDI note.
4) Ruler
Displays the time line.
5) Key Editor Inspector
Contains tools and functions for working with MIDI data.
6) Note display
Contains a grid in which MIDI notes are displayed as boxes.
7) Controller display
The area below the note display consists of one or multiple controller lanes.

MIDI Editors
Key Editor
444
Toolbar
The toolbar contains tools and settings for the Key Editor.
• To show or hide the toolbar elements, right-click the toolbar and activate or
deactivate the elements.
Static Buttons
Set up Window Layout
Allows you to show/hide specific window sections, for example, the Status
Line, the Info Line, the Inspector, etc. Which sections are available, depends
on the MIDI editor.
Solo Editor
If this button is activated, you hear only the edited MIDI parts during playback.
Acoustic Feedback
If this button is activated, individual notes are automatically played back when
you move or transpose them, or when you create them by drawing.
Auto Scroll
Auto Scroll
If this button is activated, the project cursor is always visible in the window.
Tool Buttons
Object Selection
Allows you to select events.
Draw
Allows you to draw events.
Erase
Allows you to delete events.
Trim
Allows you to resize selected events by moving their start or end positions in
steps according to the Length Quantize value.
Split
Allows you to split a MIDI event.
Mute
Allows you to mute events.
Glue
Allows you to glue together events of the same pitch.
MIDI Editors
Key Editor
445
Zoom
Allows you to zoom in/out. Hold [Alt]/[Option] and click to zoom out.
Line
Allows you to create a series of contiguous events.
Time Warp
Allows you to adjust the tempo track so that material with a musical time base
can be matched to material with a linear time base.
Independent Track Loop
Independent Track Loop
Activates/Deactivates the independent track loop for the edited part.
Auto Select Controllers
Auto Select Controllers
If this button is activated and a note is selected in the editor, the
corresponding controller data is also automatically selected.
Multiple Part Controls
Show Part Borders
If this button is activated, the part borders are shown in the editor.
Edit Active Part Only
If this button is activated, editing operations are applied only to the active part.
Currently Edited Part
This pop-up menu lists all parts that are currently open in the editor. This
allows you to select a part for editing.
Insert Velocity
Insert Velocity
Allows you to specify a velocity value for new notes.
Nudge Palette
Trim Start Left
Increases the length of the selected element by moving its start to the left.
Trim Start Right
Decreases the length of the selected element by moving its start to the right.
Move Left
Moves the selected element to the left.
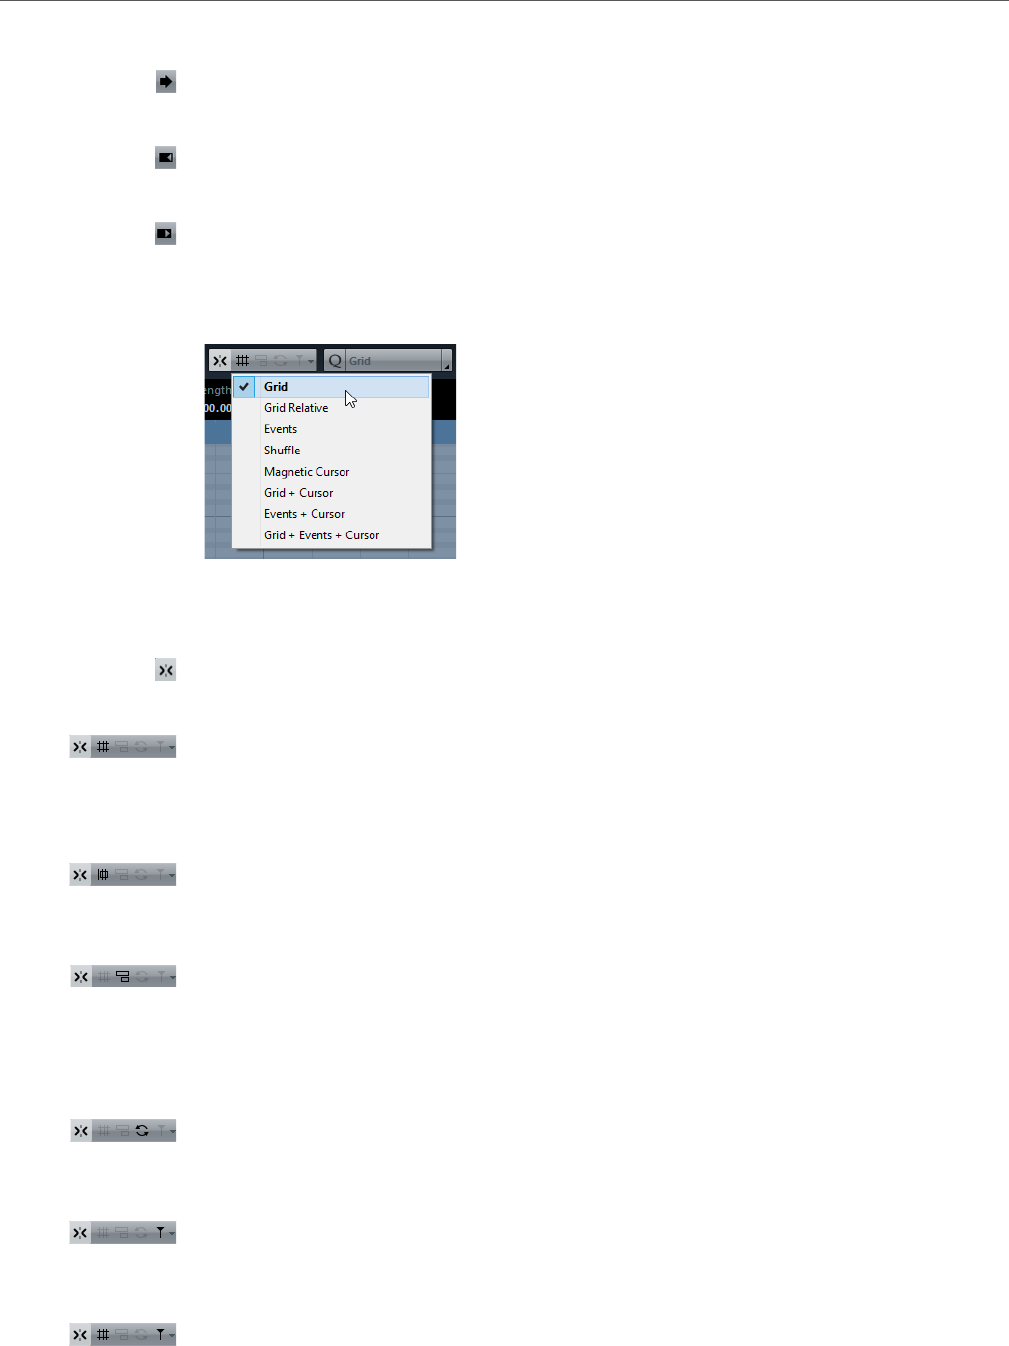
MIDI Editors
Key Editor
446
Move Right
Moves the selected element to the right.
Trim End Left
Decreases the length of the selected element by moving its end to the left.
Trim End Right
Increases the length of the selected element by moving its end to the right.
Snap/Quantize
The following options are available on the Snap/Quantize menu:
Snap On/Off
Activates/Deactivates the snap function.
Grid
If this option is activated, the snap positions are set with the Grid Type
pop-up menu. The available options depend on the display format selected for
the ruler.
Grid Relative
If this option is activated, events keep their relative positions to the grid when
they are moved.
Events
If this option is activated, the start and end positions of other events and parts
are magnetic. This means that if you drag an event to a position near the start
or end of another event, it is automatically aligned with the start or end of the
other event.
Shuffle
Shuffle allows you to change the order of adjacent events. If you drag the first
one to the right, past the second event, the two events change places.
Magnetic Cursor
If this option is activated, the project cursor is magnetic. When you drag an
event near the cursor, the event is aligned with the cursor position.
Grid + Cursor
This is a combination of Grid and Magnetic Cursor.
MIDI Editors
Key Editor
447
Events + Cursor
This is a combination of Events and Magnetic Cursor.
Grid + Events + Cursor
This is a combination of Events, Grid, and Magnetic Cursor.
Iterative Quantize On/Off
Activates/Deactivates iterative quantize.
Quantize Presets
Allows you to select a quantize or a groove preset.
Apply Quantize
Applies the quantize settings.
Open Quantize Panel
Opens the Quantize Panel.
Step/MIDI Input
Step Input
Activates/Deactivates the Step Input mode.
MIDI Input/Note Expression MIDI Input
Activates/Deactivates MIDI Input modes.
Move Insert Mode
Activates/Deactivates the Move Insert mode. For this function, Step Input
must be activated.
Record Pitch
If Step Input is activated, use this button to determine that the pitch is
included when you insert notes.
Record NoteOn Velocity
If Step Input is activated, use this button to determine that NoteOn Velocity
is included when you insert notes.
Record NoteOff Velocity
If Step Input is activated, use this button to determine that NoteOff Velocity
is included when you insert notes.
Event Colors
Event Colors
Allows you to select a color scheme for the events in the editor.
Hide Colors
Allows you to hide the colors.
MIDI Editors
Key Editor
448
Status Line
The status line is displayed below the toolbar. It displays important information
about the mouse position.
To show or hide the status line, click Set up Window Layout on the toolbar, and
activate or deactivate Status Line.
Mouse Time Position
Displays the exact time position of the mouse pointer, depending on the
selected ruler display format. This lets you edit or insert notes at exact
positions.
Mouse Note Position
Displays the exact pitch of the mouse pointer position. This facilitates finding
the right pitch when entering or transposing notes.
Current Chord Display
When the project cursor is positioned over notes that form a chord, the chord
is displayed here.
Independent Track Loop
A mini-cycle, affecting only the MIDI part that is being edited. If Independent
Track Loop is activated, MIDI events within the loop range are repeated
continuously.
RELATED LINKS
Setting Up the Independent Track Loop on page 310
Info Line
The info line shows values and properties of the selected events. If several notes are
selected, the values for the first note are displayed in color.
To show or hide the info line, click the Set up Window Layout button on the
toolbar, and activate or deactivate Info Line.
Length and position values are displayed in the selected ruler display format.
RELATED LINKS
Editing Note Events on the Info Line on page 440
Changing the Display Format for the Ruler on page 434

MIDI Editors
Key Editor
449
Inspector
The Inspector is located to the left of the note display. The inspector contains tools
and functions for working with MIDI data.
Chord Editing (Cubase Elements only)
Allows you to enter chords instead of single notes.
Quantize
Allows you to access the main quantize parameters. These are identical with
the functions on the Quantize panel.
Transpose
Allows you to access the main parameters for transposing MIDI events.
Length
Contains length-related options, similar to the Functions submenu of the
MIDI menu.
• To change the length of the selected MIDI events or all events of the active
part if no events are selected, use the Scale Length/Legato slider.
At the maximum value the notes reach the beginning of the next note.
• To make the new length settings permanent, use the Freeze MIDI
Lengths button to the right of the Scale Length/Legato slider.
• To fine-tune the distance between consecutive notes, use the Overlap
slider.
At 0 Ticks, the Scale Legato slider extends each note so that it reaches
the next note exactly. Positive values cause the notes to overlap and
negative values allow you to define a small gap between the notes.
• To use the Legato function or slider to extend a note until the next
selected note, activate Between Selected.
This is identical with activating the Legato Mode: Between Selected
Notes Only option in the Preferences dialog.
RELATED LINKS
Quantize Panel on page 167
Other MIDI functions on page 427
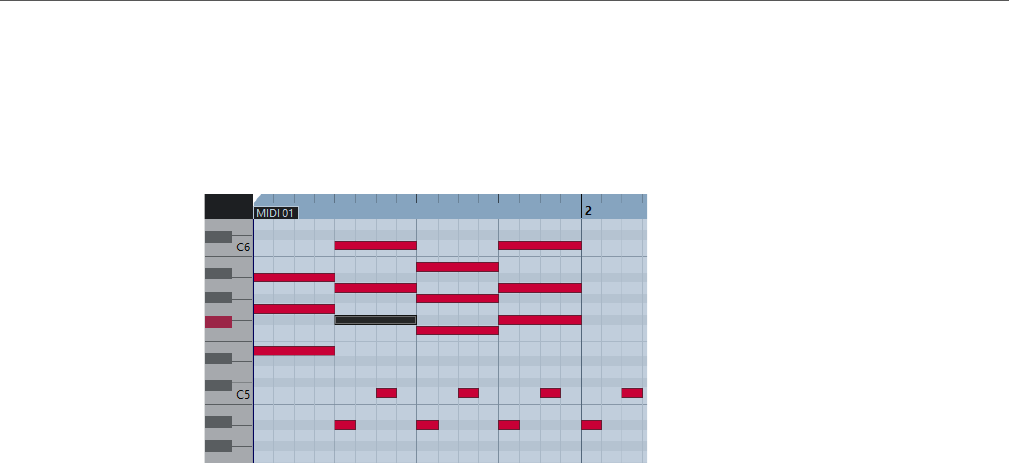
MIDI Editors
Key Editor
450
Note Display
The note display is the main area in the Key Editor. It contains a grid in which note
events are shown as boxes.
The width of a box corresponds to the note length. The vertical position of a box
corresponds to the note number (pitch), with higher note events higher up in the
grid. The piano keyboard helps you to find the right note number.
Controller Display
The area at the bottom of the Key Editor window is the controller display. It contains
the controller events.
The controller display consists of one or several controller lanes that show one of
the following properties or event types:
• Velocity values of the notes
•Pitchbend events
•Aftertouch events
•Poly Pressure events
•Program Change events
•System Exclusive events
• Any type of continuous controller event
Velocity values are shown as vertical bars in the controller display. Each velocity bar
corresponds to a note event in the note display. Higher bars correspond to higher
velocity values.
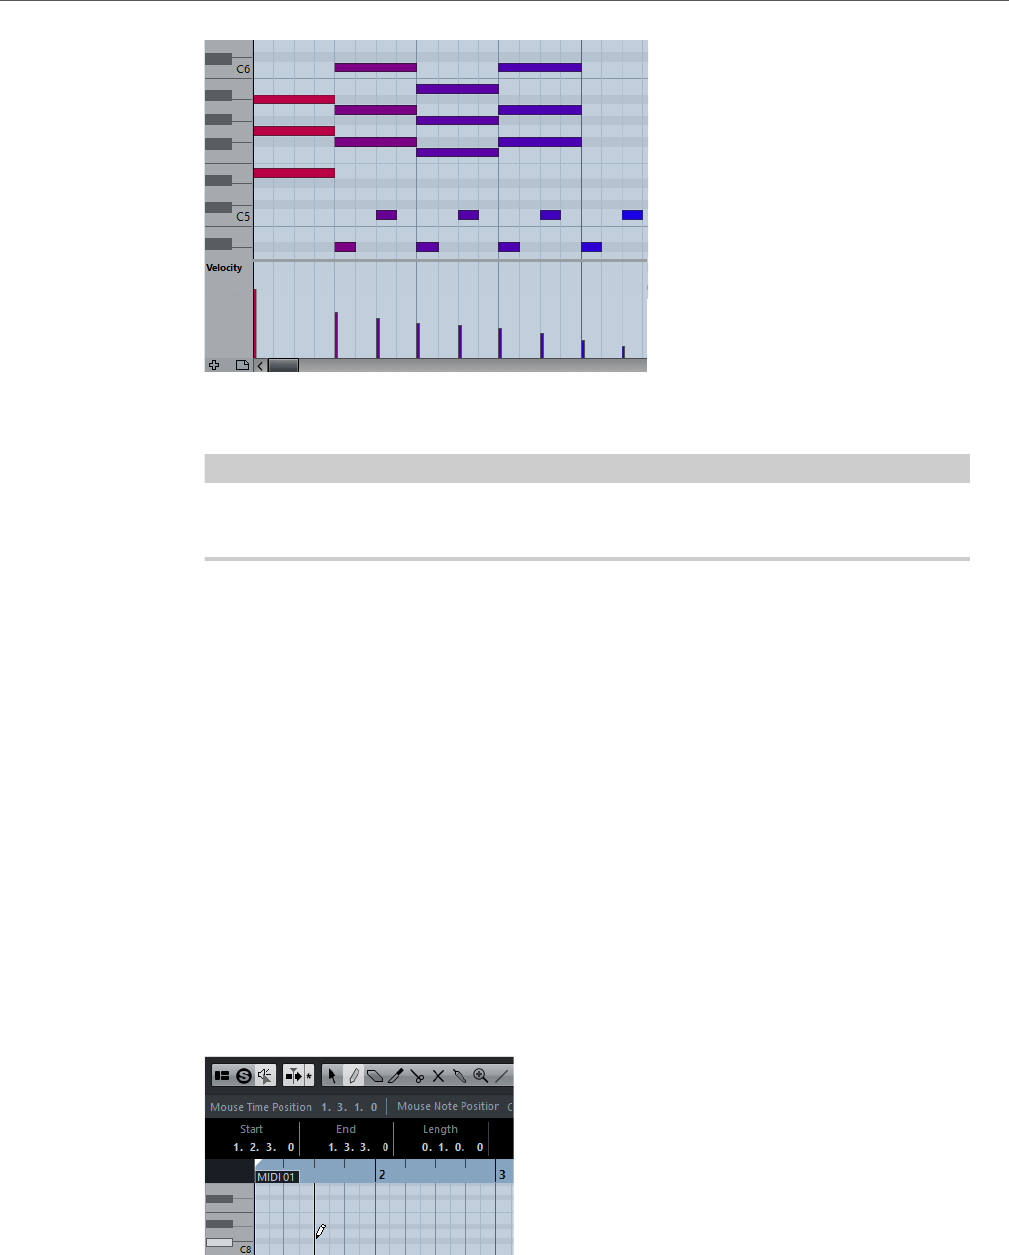
MIDI Editors
Key Editor Operations
451
Events other than velocity values are shown as blocks. The block corresponds to
the event values. The beginning of an event is marked by a curve point.
NOTE
Unlike note events, controller events have no length. The value of a controller event
in the display is valid until the beginning of the next controller event.
Key Editor Operations
This section describes the principal editing operations within the Key Editor.
Drawing Note Events with the Draw Tool
The Draw tool allows you to insert single note events in the note display. The
horizontal position of the note event corresponds to the time, the vertical position to
the pitch.
When you move the cursor inside the note display, its position is indicated on the
status line. Its pitch is indicated both on the status line and on the piano keyboard
to the left.
• To draw a note, click in the note display.
The note event has the length that is set on the Length Quantize pop-up
menu.
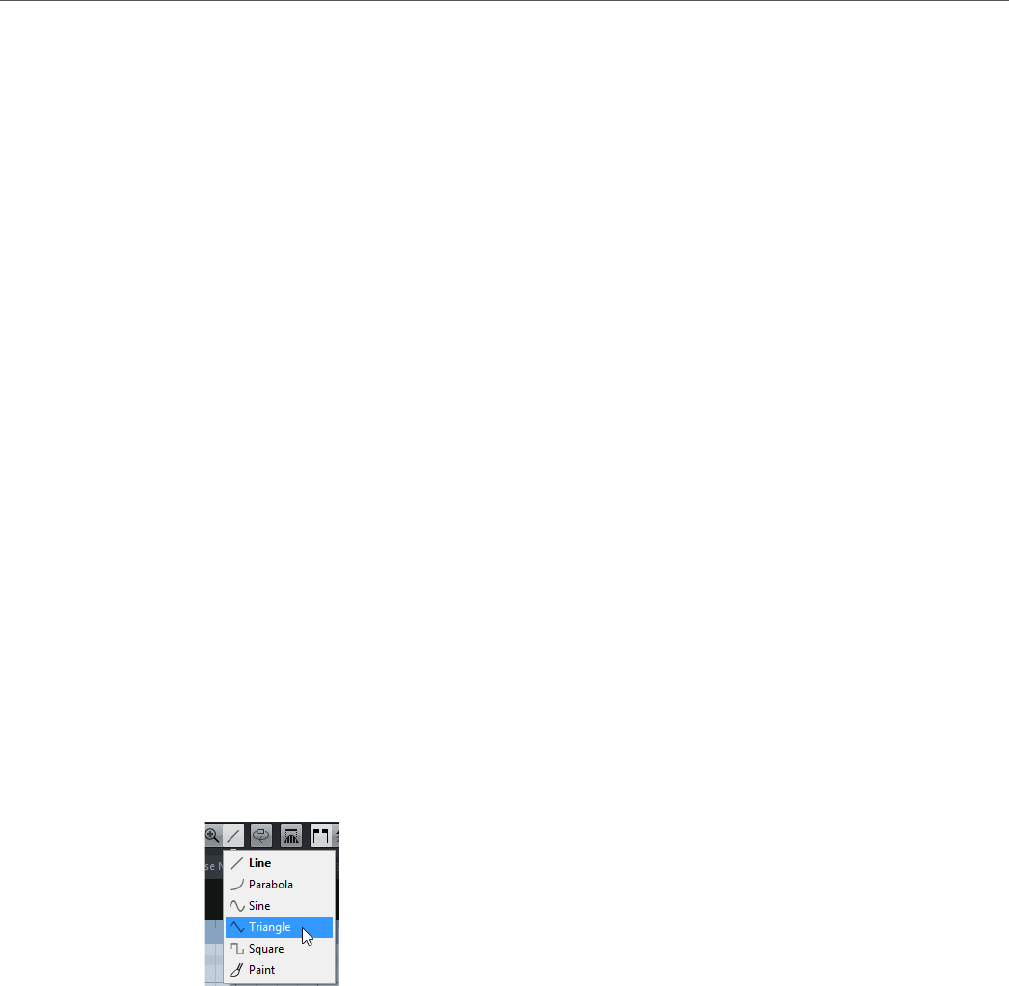
MIDI Editors
Key Editor Operations
452
• To draw longer note events, click and drag in the note display.
The length of the note event is a multiple of the Length Quantize value. If
Length Quantize is set to Quantize Link, the note value is determined by the
quantize grid. The Snap function is taken into account.
Drawing Note Events with the Line Tool
In the note display, the Line tool allows you to draw a series of contiguous note
events along different line shapes.
• To create contiguous note events, click and drag in the note display.
• To restrict movement to horizontal, press [Ctrl]/[Command] and drag.
The notes have the same pitch.
If Snap is activated, the note events and controller events are positioned and sized
according to the Quantize and Length Quantize values.
RELATED LINKS
The Line Tool Modes on page 452
The Line Tool Modes
The Line tool allows you to create a series of contiguous note events along different
line shapes. You can also edit multiple controller events simultaneously.
To select a different line mode, click the Line button and select a mode from the
menu.
The following line modes are available:
Line
If this option is activated, you can click and drag to insert note events in the
note display along a straight line in any angle. Use this option to edit controller
data along a straight line in the controller display.
Parabola, Sine, Triangle, Square
These modes insert note events along different curve shapes.
Paint
This mode allows you to insert note events by painting in the note display.

MIDI Editors
Key Editor Operations
453
Moving and Transposing Note Events
There are several options to move and transpose note events.
• To move note events in the editor, select the Object Selection tool and drag
them to a new position.
All selected note events are moved, maintaining their relative positions. Snap
is taken into account.
• To allow only horizontal and vertical movement, hold down [Ctrl]/[Command]
while dragging.
• To move note events via the Nudge Palette buttons on the toolbar, select the
note events and click a Nudge Palette button.
This moves the selected note events by the amount that is set on the
Quantize pop-up menu.
• To move note events to the project cursor position, select the note events and
select Edit > Move to > Cursor.
• To move a note event via the info line, select a note event and edit the
Position or Pitch on the info line.
• To transpose note events, select the note events and use the up and down
arrow keys.
• To transpose note events via the Transpose Setup dialog, select the note
events and select MIDI > Transpose Setup.
• To transpose note events in steps of one octave, press [Shift] and use the up
and down arrow keys.
NOTE
• When you move selected note events to a different position, any selected
controllers for these note events move accordingly.
• You can also adjust the position of note events by quantizing.
RELATED LINKS
Transpose on page 422
Resizing Note Events
Do one of the following:
• To resize the note event, position the Object Selection tool at the start or the
end of a note event and drag the mouse cursor to the left or right.
• To move the start or end positions of the selected notes in steps according to
the Length Quantize value on the toolbar, use the Trim Start/End buttons
on the Nudge palette.
• Select the note and adjust its length on the info line.
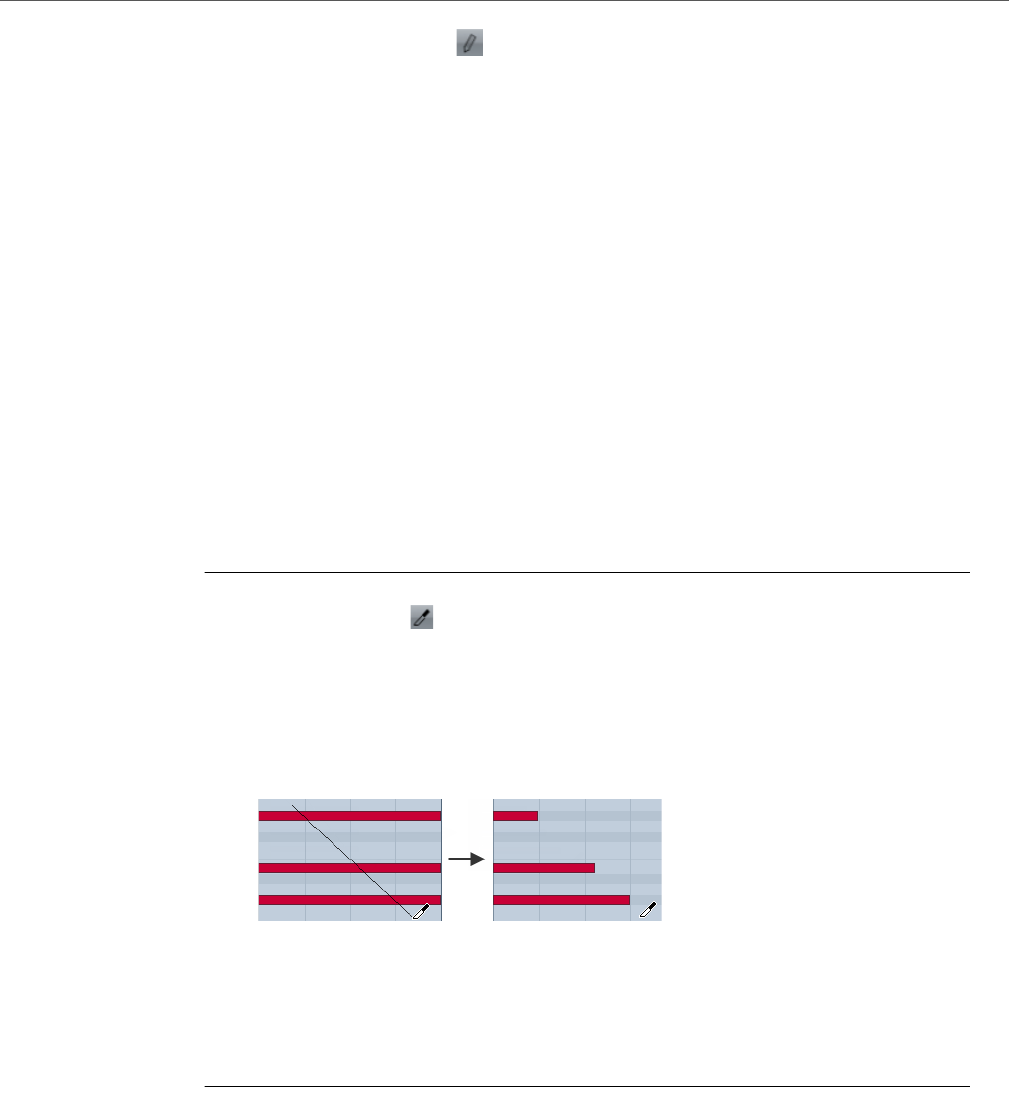
MIDI Editors
Key Editor Operations
454
• Select the Draw tool and drag left or right within the note display to draw
a note.
The resulting note event length is a multiple of the Length Quantize value on
the toolbar.
• Select the Trim tool and cut off the end or the beginning of note events.
RELATED LINKS
Using the Setup options on page 627
Editing in the Info Line on page 28
Using the Trim Tool on page 454
Resizing Events Using Time Stretch on page 117
Using the Trim Tool
The Trim tool allows you to change the length of note events by cutting off the end
or the beginning of notes. Using the Trim tool means moving the note-on or the
note-off event for one or several notes to a position defined with the mouse.
PROCEDURE
1. Select the Trim button on the toolbar.
The mouse pointer changes to a knife symbol.
2. To edit a single note, click on it with the Trim tool.
The range between the mouse pointer and the end of the note will be removed. Use
the mouse note info on the status line to find the exact position for the trim operation.
3. To edit several notes, click and drag with the mouse across the notes.
By default, the Trim tool cuts off the end of notes. To trim the beginning of notes,
press [Alt]/[Option] while dragging. When dragged across several notes, a line is
displayed. The notes will be trimmed along this line. If you press [Ctrl]/[Command]
while dragging, you will get a vertical trim line, allowing you to set the same start or
end time for all edited notes. You can change the Trim tool key commands in the
Preferences dialog (Editing–Tool Modifiers page).
Splitting Note Events
Do one of the following:
• To split the note at the position that you point, click on a note with the Split
tool.
If several notes are selected, they are all split at the same position. The snap
setting is taken into account.

MIDI Editors
Key Editor Operations
455
• To split all notes that are intersected by the project cursor position, select Edit
> Functions > Split at Cursor.
• To split all notes that are intersected by the left or right locator at the locator
positions, select Edit > Functions > Split Loop.
Gluing Note Events
You can glue together note events of same pitch.
• To glue note events, select the Glue tool and click on a note event.
The note event is glued together with the next note event of the same pitch.
The result is a long note event that spans from the start of the first note to the
end of the second note and with the properties (velocity, pitch, etc.) of the first
note event.
Changing the Pitch of Chords (Cubase Elements only)
You can use the chord type buttons to change the pitch of chords.
PROCEDURE
1. In the Inspector, open the Chord Editing section.
2. In the note display, select the notes that you want to edit.
If the chord is recognized, the root note, chord type, and tensions are indicated in the
Chord Type field. This also works with arpeggiated notes.
3. In the Chord Editing section, activate one of the Triads buttons or 4-Note
Chords buttons.
The selected notes are transposed so that they fit the selected chord type.
4. Use the up or down arrow keys on your computer keyboard to change the
pitch of the chord.
Changing the Voicing of Chords (Cubase Elements only)
PROCEDURE
1. In the Inspector, open the Chord Editing section.
2. In the note display, select the notes that you want to edit.
3. In the Chord Editing section, use the Inversions buttons and the Drop
Notes buttons to change the voicing.
RESULT
The selected notes are transposed so that they fit the selected chord type.
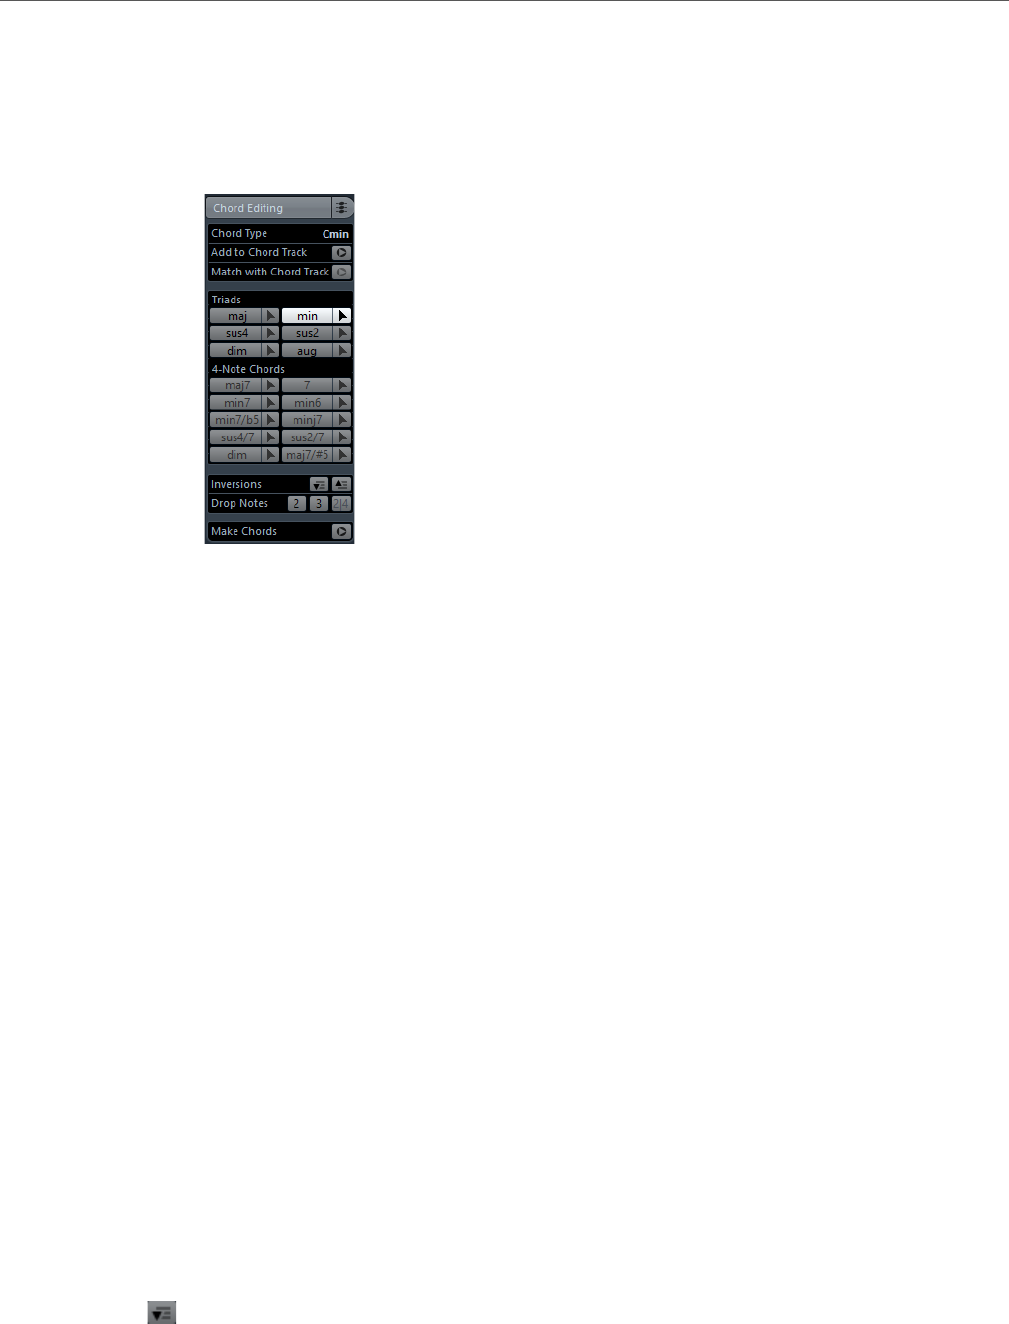
MIDI Editors
Key Editor Operations
456
Chord Editing Section (Cubase Elements only)
The Chord Editing section in the Inspector allows you to insert and edit chords,
and change voicings.
Chord Type
Shows the chord type of the selected chords.
Add to Chord Track
Adds the chord indicated in the Chord Type field to the chord track. The
chord event is inserted at the position on the chord track that corresponds to
the position of the MIDI notes. Any existing chord events at this position are
overwritten.
Match with Chord Track
Applies the chord events from the chord track to the selected notes in the
MIDI editor. The chord event that is effective at the position of the first
selected note is applied to the selected notes, which are then transposed.
Only the basic chord type is applied. Tensions are not taken into account.
Only the first effective chord event is applied.
Triads
Allows you to insert triads to the note display. You can also click one of the
Triads buttons to transpose the selected notes so that they fit to the selected
chord type.
4-Note Chords
Allows you to insert 4-note chords to the note display. You can also click one
of the 4-Note Chords buttons to transpose the selected notes so that they fit
to the selected chord type.
Inversions - Move highest note to bottom
Inverts the highest note of a chord. The corresponding notes are transposed
by as many octaves as needed.
MIDI Editors
Key Editor Operations
457
Inversions - Move lowest note to top
Inverts the lowest note of a chord. The corresponding notes are transposed
by as many octaves as needed.
Drop Notes - Move the second highest note an octave lower
Moves the second highest note of a chord down by one octave.
Drop Notes - Move the third highest note an octave lower
Moves the third highest note of a chord down by one octave.
Drop Notes - Move the second and fourth highest notes an octave lower
Moves the second and fourth highest notes of a chord down by one octave.
Make Chords
Performs a chord analysis of the selected notes. If nothing is selected, the
whole MIDI part is analyzed.
Inserting Chords (Cubase Elements only)
You can use the tools in the Chord Editing section of the Inspector to insert and
edit chords.
PROCEDURE
1. In the Inspector, open the Chord Editing section.
2. Select Tool to the right of the chord type that you want to insert.
3. Click in the note display, drag to the left or right to determine the length of the
chord. Drag up or down to determine its pitch.
To change the chord type while you insert chords, hold [Alt]/[Option] and drag up or
down.
If Acoustic Feedback is activated, you hear the chord while dragging. A tooltip
indicates the root note and chord type of the inserted chord. Snap and Length
Quantize are taken into account.

MIDI Editors
Key Editor Operations
458
Applying Chord Events to Note Events (Cubase Elements only)
You can apply chord events from the chord track to notes in the MIDI editor.
PREREQUISITE
Create a chord track and add chord events.
PROCEDURE
1. Open the MIDI editor.
2. In the Inspector, open the Chord Editing section.
3. Select Match with Chord Track.
RESULT
The first chord event of the chord track is applied to the selected notes. Only the
basic chord type is applied. Tensions are not taken into account.
Drum Map Handling (Cubase Elements only)
When a drum map is assigned to a MIDI or instrument track, the Key Editor displays
the drum sound names as defined by the drum map. This allows you to use the Key
Editor for drum editing, for example, when editing drum note lengths or when
editing several parts to identify drum events.
The name of the drum sound is displayed in the following locations:
• On the info line in the Pitch field.
• On the status line in the Mouse Note Position field.
• In the note event if the zoom factor is high enough.
• When dragging a note event.
Editing Note Events via MIDI
Since you can directly hear your editing results. Editing the properties of note
events via MIDI can be a quick way to, for example, set the velocity value of a note
event.
PROCEDURE
1. In the Key Editor, select the note event that you want to edit.
2. Click MIDI Input on the toolbar.
Editing via MIDI is enabled.
MIDI Editors
Key Editor Operations
459
3. Use the note buttons on the toolbar to decide which properties are changed
by the MIDI input.
You can enable editing of pitch, note-on and/or note-off velocity. For example, with
the following setting, the edited notes get the pitch and velocity values of the notes
input via MIDI, but the note-off velocities remain as they are.
4. Play a note on your MIDI instrument.
RESULT
The selected note gets the pitch, velocity and/or note-off velocity of the played note.
The next note in the edited part is automatically selected, to allow quick editing of a
series of notes.
AFTER COMPLETING THIS TASK
To try another setting, select the note again and play a note on your MIDI instrument.
Step Input
Step input, or step recording, allows you to enter note events or chords one at a
time without worrying about the exact timing. This is useful, for example, when you
know the part that you want to record but are not able to play it exactly as you want
it.
PROCEDURE
1. On the toolbar, activate the Step Input button.
2. Use the note buttons to the right to determine which properties are included
when you insert the note events.
For example, you can include the velocity and/or note-off velocity of the played notes.
You can also deactivate the pitch property, in which case all notes get a pitch C3, no
matter what you play.
3. Click anywhere in the note display to set the start position of the first note
event or chord.
The step input position is shown as a blue line in the note display.
4. Specify the note event spacing and length with the Quantize and Length
Quantize pop-up menus.
The note events that you insert are positioned according to the Quantize value and
have the length of the Length Quantize value.
NOTE
If Length Quantize is set to Quantize Link, the note length is also determined by the
Quantize value.
MIDI Editors
Key Editor Operations
460
5. Play the first note event or chord on your MIDI instrument.
The note event or chord appears in the editor and the step input position advances
by one quantize value step.
NOTE
If Move Insert Mode is activated, all note events to the right of the step input position
are moved to make room for the inserted note event or chord.
6. Continue in the same way with the rest of the note events or chords.
You can adjust the Quantize or Length Quantize values, to change the timing or
note event lengths. You can also move the step input position manually by clicking
anywhere in the note display.
To insert a rest, press the right arrow key on the computer keyboard. This advances
the step input position by one step.
7. When you are done, click the Step Input button again to deactivate step
input.
Using the Controller Display
The Controller Display displays the controller events. By default, the controller
display has a single lane that shows one event type at a time. However, you can add
as many lanes as you need. The use of several controller lanes allows you to view
and edit different controllers at the same time.
Each MIDI track has its own controller lane setup (number of lanes and selected
event types). When you create new tracks, they get the last used controller lane
setup.
The controller display with three lanes.
• To add a controller lane, click the Create Controller Lane button or open
the Controller Selection and Functions menu and select Create Controller
Lane.
• To remove a controller lane, open the Controller Selection and Functions
pop-up menu and select Remove this Lane.
This hides the lane from view. It does not affect the events in any way.
MIDI Editors
Key Editor Operations
461
If you remove all lanes, the controller display is hidden. To bring it back, click
the Create Controller Lane button.
• To show/hide multiple lanes, open the Controller Lane Setup pop-up menu,
and select Show/Hide Controller Lanes.
• To reset the controller display to show only the velocity lane, open the
Controller Lane Setup pop-up menu, and select Velocity only.
• To automatically show all controller lanes with controller data, open the
Controller Lane Setup pop-up menu, and select Show Used Controllers.
Selecting the Event Type
Each controller lane shows one event type at a time. You can select which event
type to display on a controller lane.
• To select which type is displayed, open the Controller Selection and
Functions pop-up menu and select an event type.
Setting up Available Continuous Controllers
In the MIDI Controller Setup dialog, you can specify which continuous controllers
are available for selection.
NOTE
The MIDI Controller Setup dialog can be opened from different areas in the
program. The settings are global, that is, the setup you choose here affects all areas
of the program where MIDI controllers can be selected.
PROCEDURE
1. Select Controller Selection and Functions > Setup.
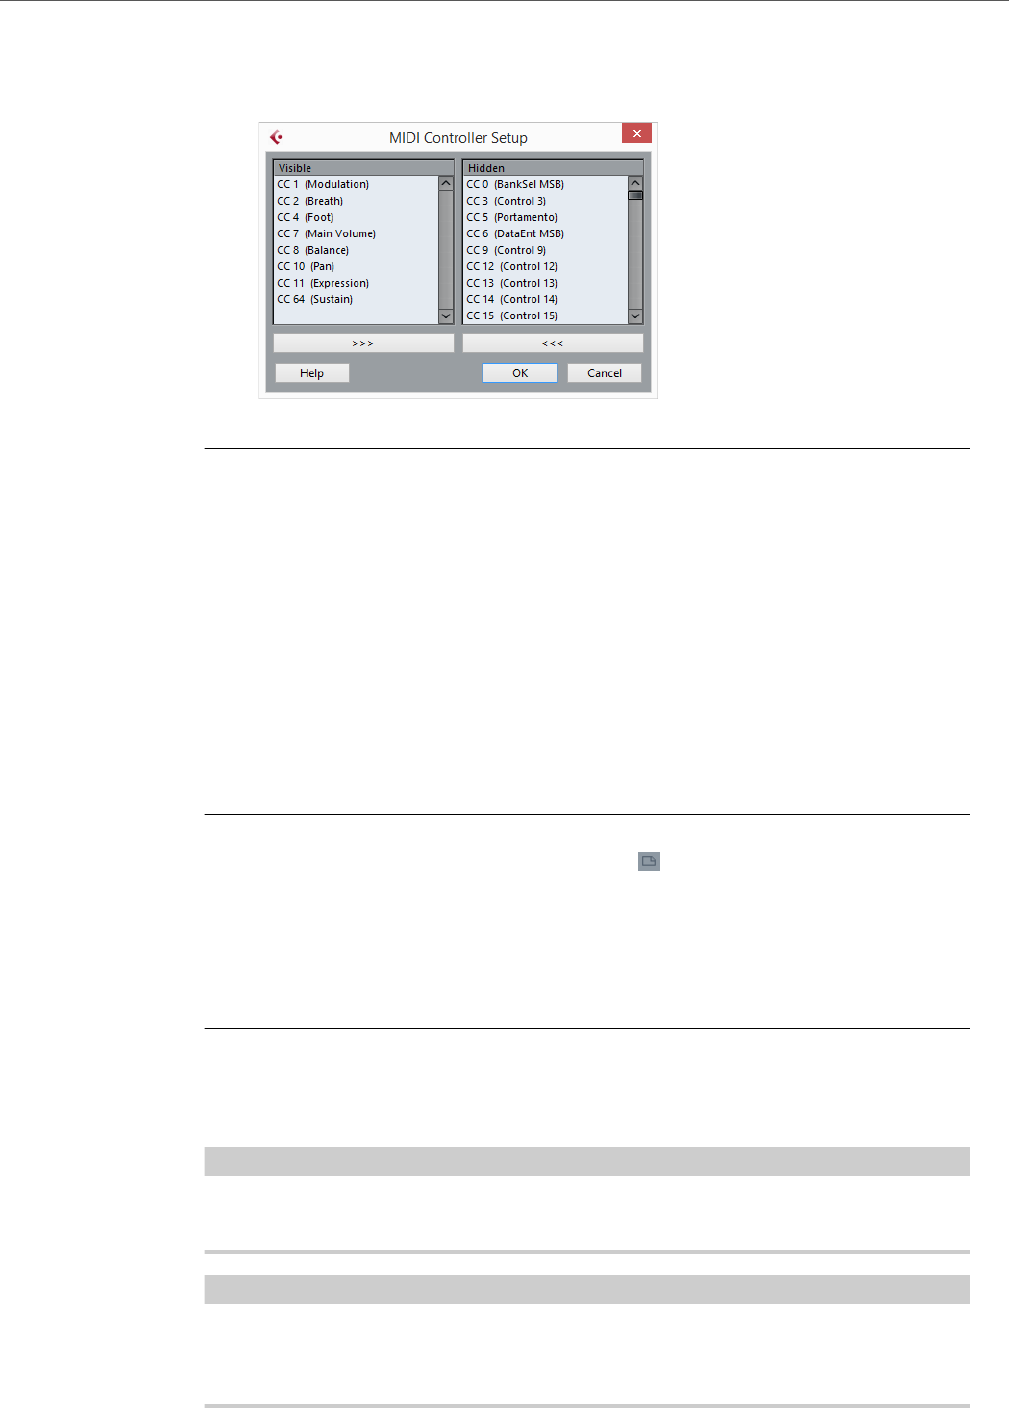
MIDI Editors
Key Editor Operations
462
2. In the MIDI Controller Setup dialog, move all the controllers that you need to
the list on the left and move the controllers that you do not need to the list on
the right.
3. Click OK.
Handling Controller Lane Presets
Once you have made up your controller lane setup, you can save it as a controller
lane preset. For example, you can have a preset with one velocity lane and another
preset with a combination of several controller lanes, such as velocity, pitchbend, or
modulation.
Saving a Controller Lane Setup as Preset
You can save a controller lane setup via the Controller Lane Setup pop-up menu.
PROCEDURE
1. Click the Controller Lane Setup button .
2. Select Add Preset.
The Type In Preset Name dialog opens.
3. Enter a name for the preset.
4. Click OK.
RESULT
Your controller lane setup is now available as a controller lane preset.
NOTE
To apply a saved preset, open the Controller Lane Setup pop-up menu and select
the preset.
NOTE
To remove or rename a preset, open the Controller Lane Setup pop-up menu and
select Organize Presets. A dialog opens, where you can remove and rename
presets.
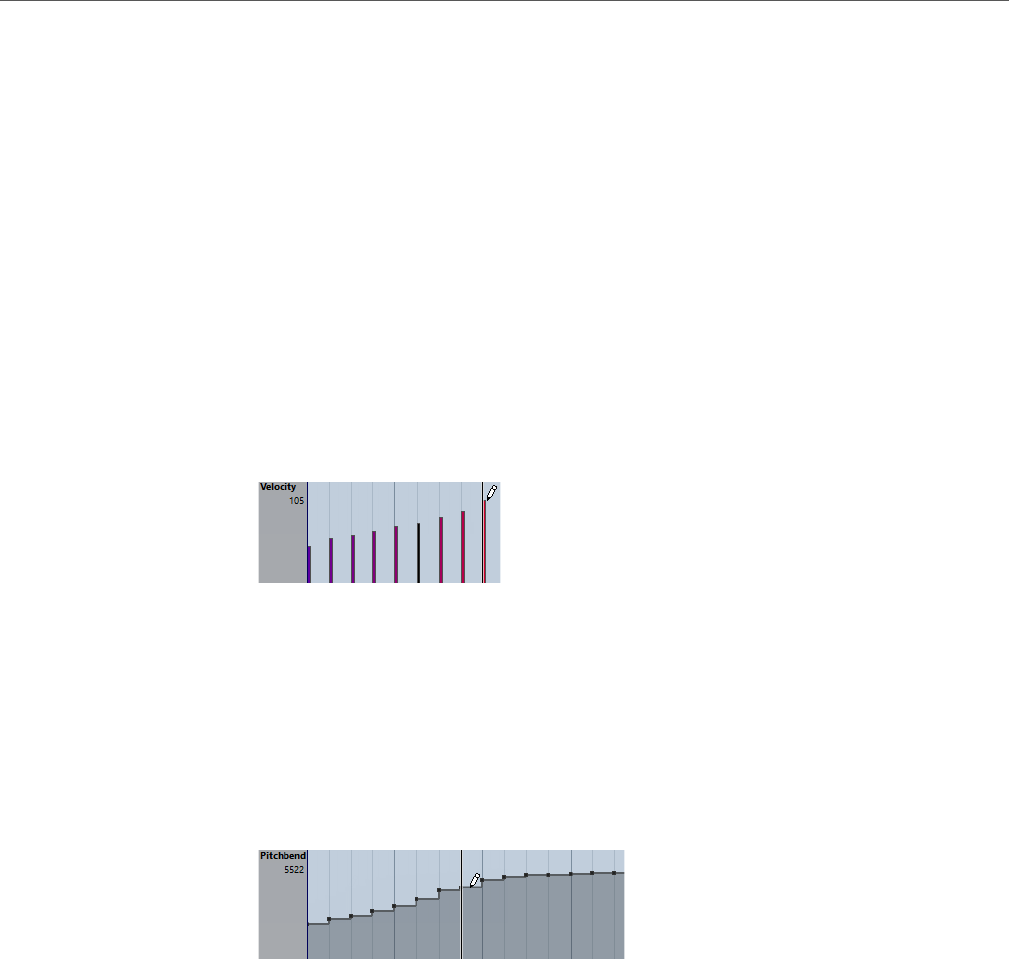
MIDI Editors
Key Editor Operations
463
Adding Events in the Controller Display
• To create a new event in the velocity controller display, click with the Draw
tool or the Line tool in the event display.
• To create a new event for any other event type, click with the Draw tool or the
Line tool in the controller display.
Editing Events in the Controller Display
All controller values can be edited with the Draw tool or the Line tool. If you have
selected more than one controller event on a controller lane, the controller lane
editor is displayed.
• To edit events in the velocity controller display, use the Draw tool or the Line
tool and drag the event.
The Object Selection tool automatically switches to the Draw tool when you
move the pointer into the controller display.
When you move the pointer in the controller lane, the corresponding event
type value is displayed below the event type name.
In velocity mode, no new controller events are added this way.
• To edit the values of any other event type in the controller display, press
[Alt]/[Option] and drag, or use the Draw tool or the Line tool and drag.
When you move the pointer inside a controller lane, the event type value
changes corresponding to the pointer movement. The event type value is
displayed below the event type name, left of the controller display.
• If there is more than one note at the same position, their velocity bars overlap
on the controller lane. If none of the notes are selected, all notes at the same
position are set to the same velocity value when you draw.
To edit the velocity of only one of the notes at the same position, first select
the note in the note display.
• To select all events on a controller lane, open the Controller Lane Setup
pop-up menu and select the Select all Controller Events option.
• To use the Object Selection tool to select events in the velocity controller
display, press [Alt]/[Option].
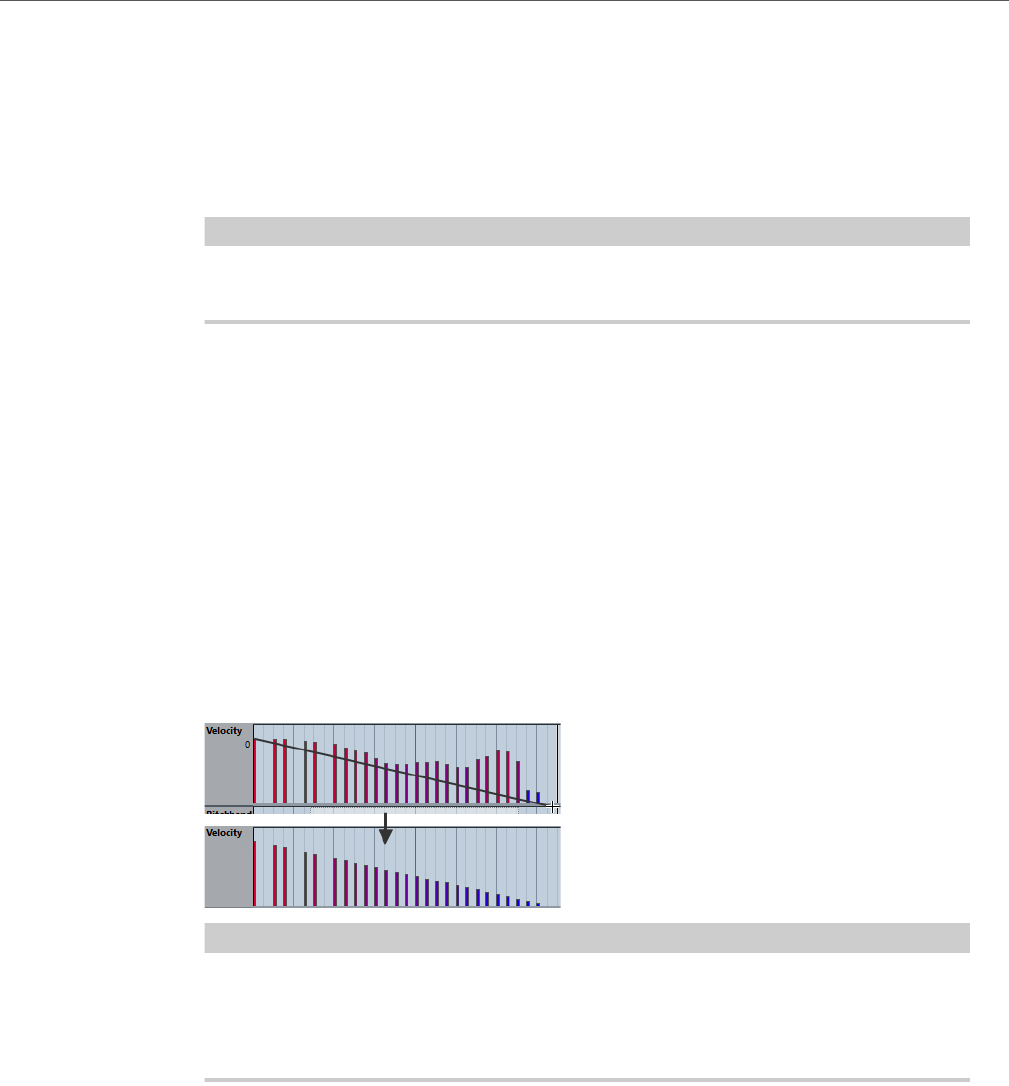
MIDI Editors
Key Editor Operations
464
• To cut, copy, and paste events in the controller display select the event and
select Edit > Cut/Copy/Paste.
When pasting events, the events on the clipboard are added, starting at the
project cursor position and maintaining their relative distances. If a pasted
event ends up at the same position as an existing event of the same type, the
old event is replaced.
NOTE
If the speaker icon (Acoustic Feedback) is activated on the toolbar, the notes are
played back when you adjust the velocity. This allows you to audition your changes.
RELATED LINKS
Controller Lane Editor on page 468
Editing Events in the Controller Display Using the Line Tool
You can draw and edit events in the controller display with the Line tool.
Line Mode
In Line mode, you can draw events in a straight line.
• To draw a straight line in the controller display, click where you want the ramp
to start and drag the cursor to where you want the ramp to end.
NOTE
If Snap is activated the Length Quantize value determines the density of created
controller curves. For very smooth curves, use a small Length Quantize value or
deactivate Snap. To avoid over-dense controller curves, which can cause MIDI
playback to stutter, use a medium-low density.
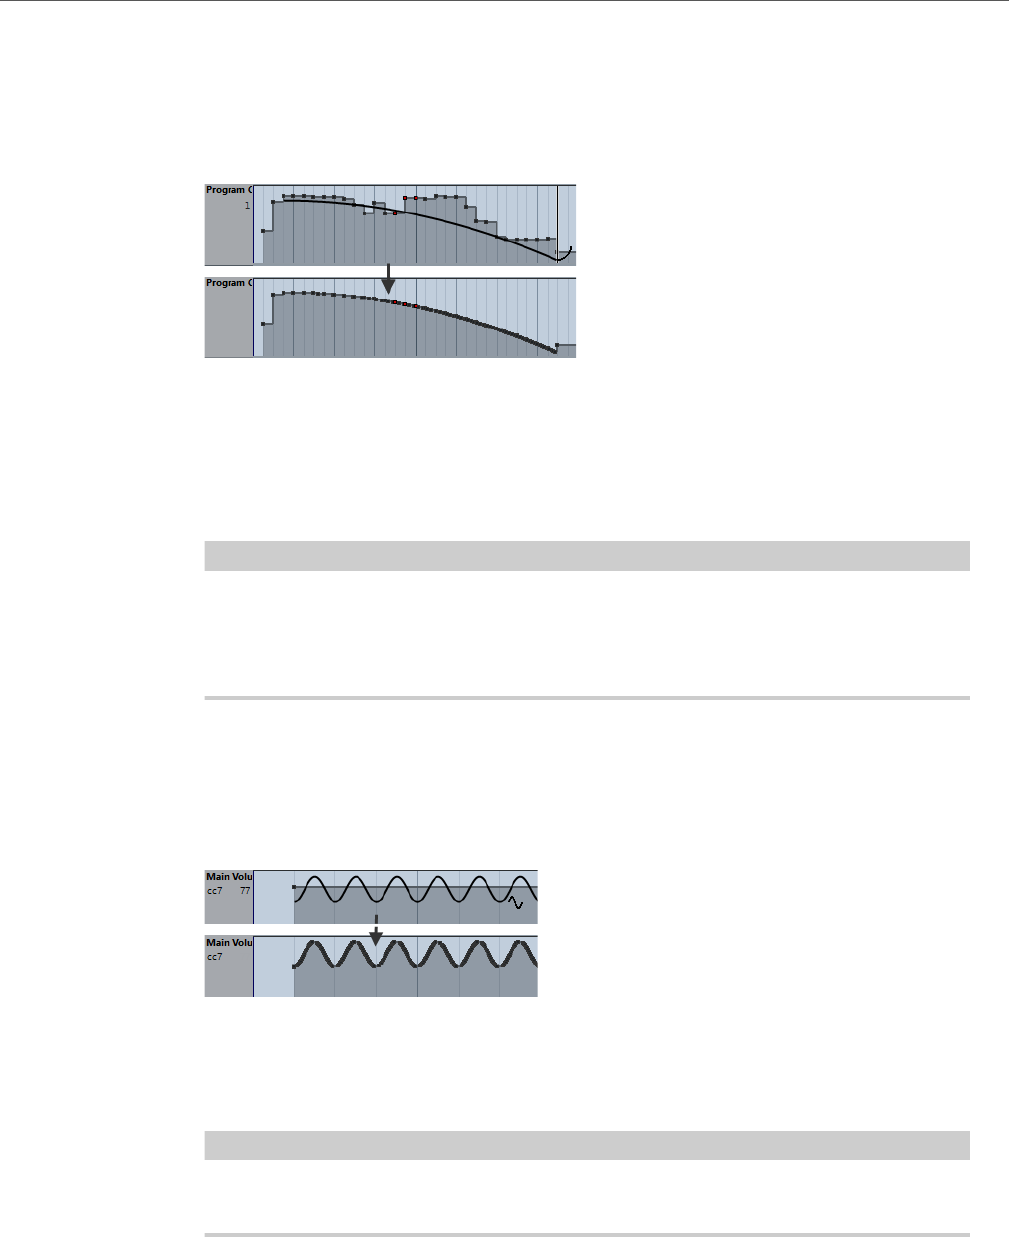
MIDI Editors
Key Editor Operations
465
Parabola Mode
In Parabola mode, you can draw events on a parabola curve. This gives more
natural curves and fades. The result depends on the direction from which you draw
the parabola.
You can use modifier keys to determine the shape of the parabola curve.
• To reverse the parabola curve, press [Ctrl]/[Command].
• To change the position of the whole curve, press [Alt]/[Option].
• To increase or decrease the exponent, press [Shift].
NOTE
If Snap is activated the Length Quantize value determines the density of created
controller curves. For very smooth curves, use a small Length Quantize value or
deactivate Snap. To avoid over-dense controller curves which can cause MIDI
playback to stutter, use a medium-low density.
Sine, Triangle, and Square Mode
The Sine, Triangle, and Square modes create events with values that are aligned
to continuous curves.
In these modes, the quantize value determines the period of the curve that is the
length of one curve cycle and the Length Quantize value determines the density of
the events. The lower the Length Quantize note value becomes, the smoother the
curve gets.
NOTE
If Length Quantize is set to Quantize Link and you enter data in Sine, Triangle or
Square mode, the density of the events depends on the Zoom factor.
You can use modifier keys to determine the shape of the curve.
• To change the phase of the beginning of the curve, press [Ctrl]/[Command].
• To change the position of the whole curve, press
[Alt]/[Option]-[Ctrl]/[Command].
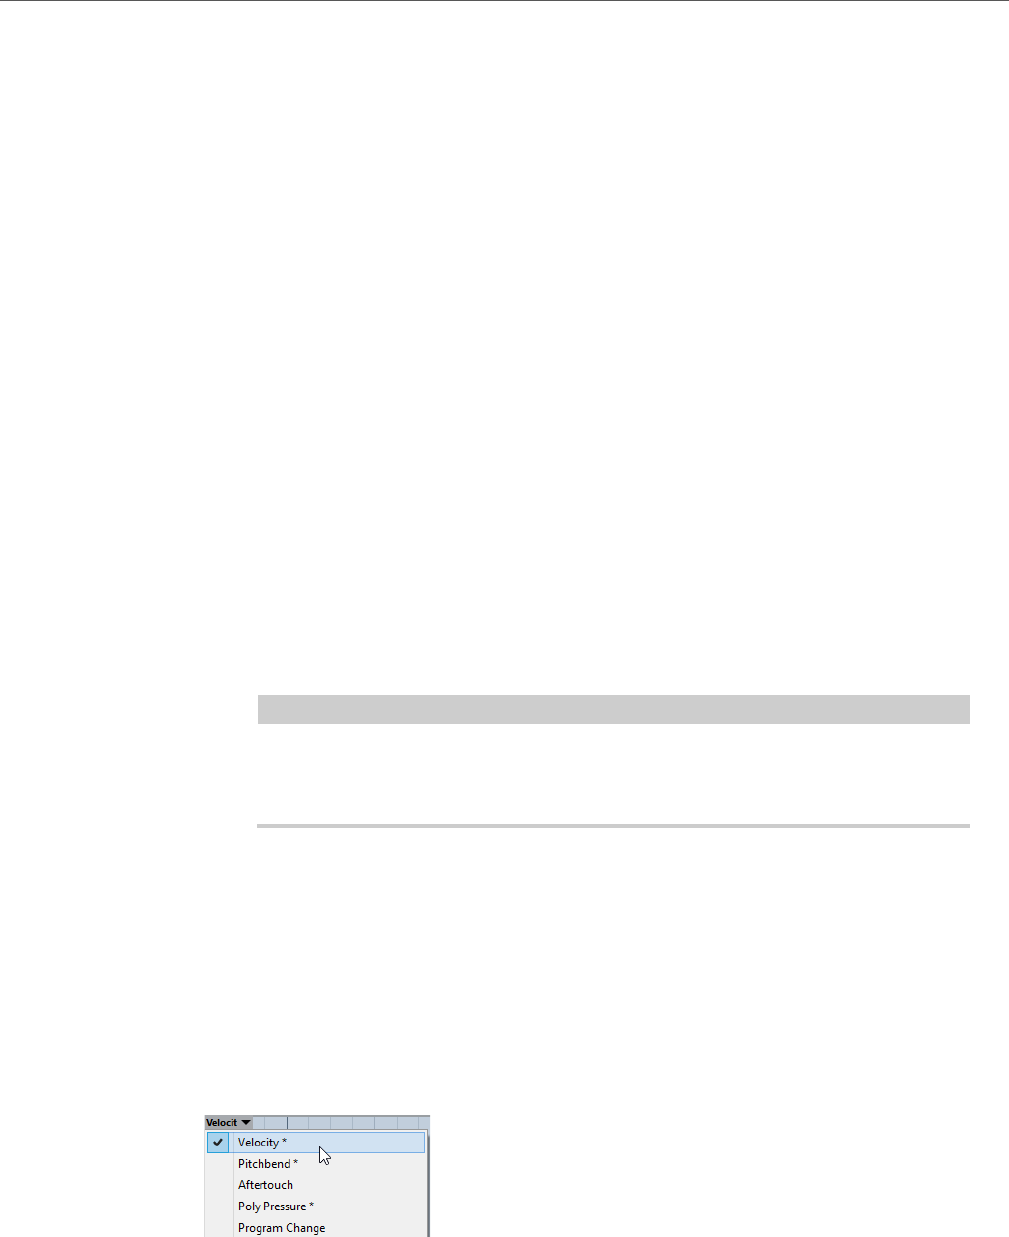
MIDI Editors
Key Editor Operations
466
• To change the maximum position of the triangle curve or the pulse of the
square curve in Triangle and Square mode, press [Shift]-[Ctrl]/[Command].
This creates sawtooth curves.
• You can also set the curve period freely by holding down [Shift] when you
insert events in Sine, Triangle, or Square mode. Activate Snap, [Shift]-click
and drag to set the length of one period. The period length will be a multiple
of the quantize value.
Paint Mode
In Paint mode, you can draw in multiple notes.
The quantize value determines the density of created controller curves. For very
smooth curves, use a small quantize value or deactivate Snap. However, this
creates a large number of MIDI events, which can cause MIDI playback to stutter in
some situations. A medium-low density is often sufficient.
Editing Events using the Draw Tool
You can draw and edit events in the controller display with the Draw tool. The Draw
tool has the same functionality as the Line tool in Paint mode.
• To change the velocity of a single note, click on its velocity bar and drag the
bar up or down.
NOTE
When you move the pointer inside a controller lane, the event type value
changes corresponding to the pointer movement. The event type value is
displayed below the event type name, left of the controller display.
Using Continuous Controllers
When a continuous controller is selected for a controller lane, additional data is
displayed on the controller lane. This is due to the fact that MIDI controller data can
be recorded or entered either for an automation track or for a MIDI part.
If automation data already exists for a controller, this is indicated by an asterisk that
is displayed next to the controller name on the Controller Selection and Functions
pop-up menu.
If the automation data is controller data that you have entered in a MIDI editor, the
data is displayed on the controller lane. If the controller data was recorded on an
automation track in the Project window, no events are displayed on the controller
lane.

MIDI Editors
Key Editor Operations
467
On the controller lane, you can also see the controller curve that is applied before
the part starts. This tells you which controller value is currently being used at the
starting point of the part so that you can choose the start value accordingly.
Poly Pressure Events
Poly Pressure events are events that belong to a specific note number (key). That is, each
poly pressure event has two editable values: the note number and the amount of pressure.
When Poly Pressure is selected on the Controller Selection and Functions
pop-up menu, there are two value fields to the left of the controller display, one for
the note number and one for the amount.
Adding Poly Pressure Events
PROCEDURE
1. Open the Controller Selection and Functions pop-up menu and select Poly
Pressure.
2. Click on the keyboard display to set the note number.
The selected note number is displayed in the upper value field to the left of the
controller display.
NOTE
This only works for the topmost lane. If you have selected Poly Pressure for several
controller lanes, you have to type in the note number directly in the lower value field
to the left of each lane.
3. Use the Draw tool to add a new event.
Editing Poly Pressure Events
PROCEDURE
1. Open the Controller Selection and Functions pop-up menu and select Poly
Pressure.
2. Click on the arrow button next to the note number to the left of the controller
lane.
A pop-up menu appears and lists all note numbers for which there already are Poly
Pressure events.
3. Select a note number from the pop-up menu.
The Poly Pressure events for the selected note number are shown in the controller
lane.
4. Use the Draw tool to edit the events.
To edit events without adding new events, press [Ctrl]/[Command]+[Alt]/[Option]
while drawing.
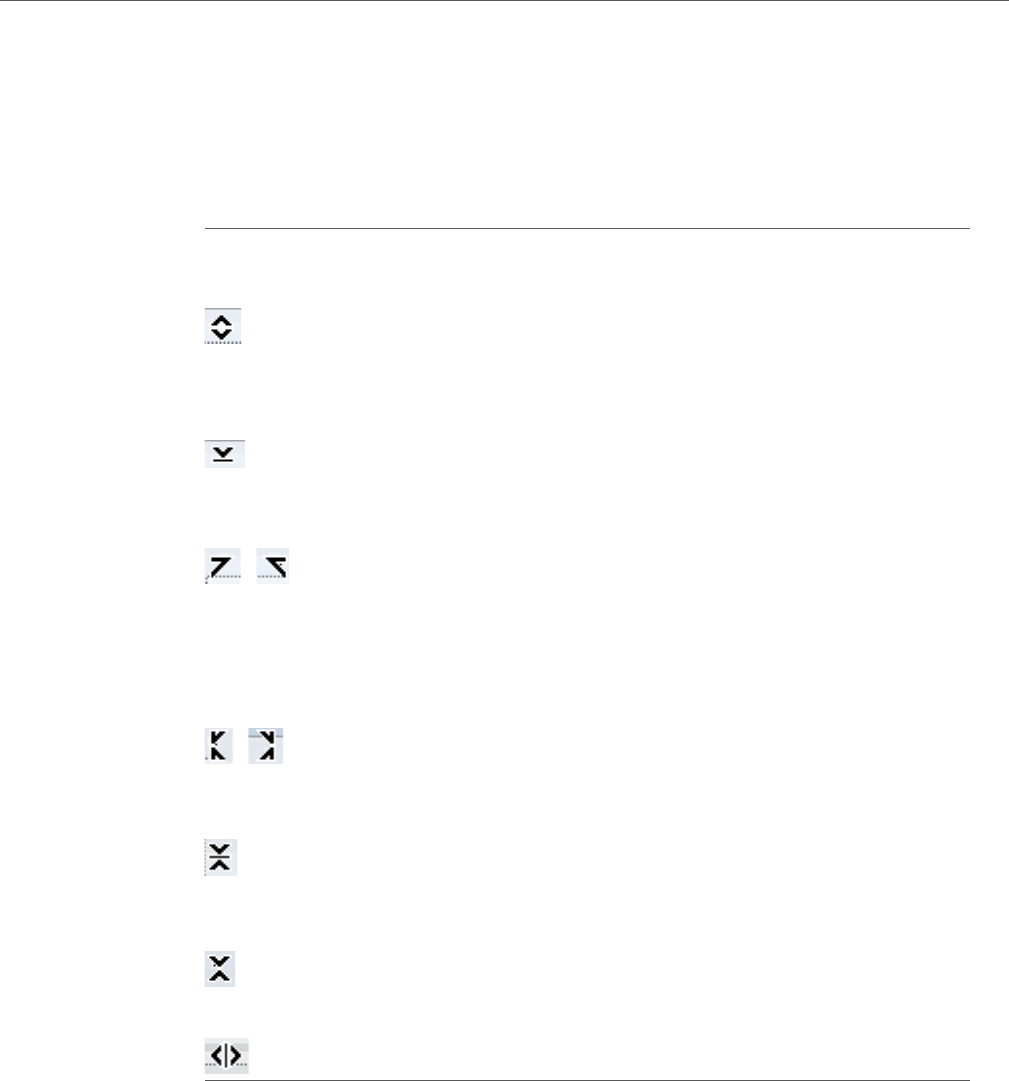
MIDI Editors
Key Editor Operations
468
Controller Lane Editor
The controller lane editor allows you to perform additional scaling operations for
selection ranges on existing controller curves.
In the controller lane editor, the following smart controls appear on the borders of
the editor:
Editing Selection Ranges
The controller lane editor allows you to perform additional scaling operations for
selection ranges on existing controller curves.
• To open the controller lane editor, use the Object Selection tool to create a
selection rectangle on the controller lane, encompassing the controller events
that you want to edit.
For velocity lanes, press [Alt]/[Option] to get the Object Selection tool.
Editing mode To activate this mode Description
Move Vertically Click in an empty area on the
upper border of the editor.
This mode allows you to move
the entire curve up or down,
which is useful to boost or
attenuate an otherwise perfect
curve.
Scale Vertically Click the smart control in the
middle of the upper border of the
editor.
Use this mode to relatively scale
the curve, that is to raise or lower
the values in percent.
Tilt the left/right part
of the curve
Click the smart control in the
upper left/right corner of the
editor.
These modes allow you to tilt the
left or the right part of the curve.
This is useful if the curve form is
exactly the way you want it, but
the start or end needs to be
boosted or attenuated a bit.
Compress the
left/right part of the
curve
[Alt]/[Option]-click the smart
control in the upper left/right
corner of the editor.
These modes allow you to
compress the left or the right part
of the curve.
Scale Around
Absolute Center
Click the smart control in the
middle of the right border of the
editor.
This mode allows you to scale
the curve around the absolute
center, i. e. horizontally around the
center of the editor.
Scale Around
Relative Center
[Alt]/[Option]-click the smart
control in the middle of the right
border of the editor.
This mode allows you to scale
the curve relative to its center.
Stretch Click and drag in the lower part
of the editor (not available for
velocity lanes).
This allows you to stretch the
selected controller events.

MIDI Editors
Key Editor Operations
469
• To switch the controller lane editor to vertical scaling mode, press [Shift] and
click on any of the smart controls.
• To move the whole selection up/down or left/right, click on a controller event
inside the editor and drag the curve.
• To restrict the direction to horizontal or vertical movement, depending on the
direction in which you start dragging, press [Ctrl]/[Command] when dragging.
NOTE
Snap is taken into account when moving controller curves horizontally.
Moving Events in the Controller Display
You can move events in a controller lane.
PROCEDURE
1. Select the events that you want to move with the Object Selection tool.
You can also click and drag to create a selection rectangle that encompasses the
events that you want to move.
2. Click on a curve point inside the selection and drag the events.
RESULT
The events inside the selection are moved to the new position. Snap is taken into
account.
NOTE
If Auto Select Controllers is activated in the Key Editor toolbar, selecting notes
also selects the corresponding controller events. Moving events in the note display
also moves the corresponding controller events.
RELATED LINKS
Selecting Controllers within the Note Range on page 470
Deleting Events in the Controller Display
IMPORTANTIMPORTANTIMPORTANTIMPORTANT
If there is more than one note at the same position, there is only one visible velocity
bar. Make sure that you delete only the notes that you want to delete.
• To delete events, click on them with the Erase tool or select them and press
[Backspace].
You can also delete notes by deleting their velocity bars in the controller display.
If there is more than one note at the same position, there may still only be one
velocity bar visible. Make sure that you delete only the desired notes!
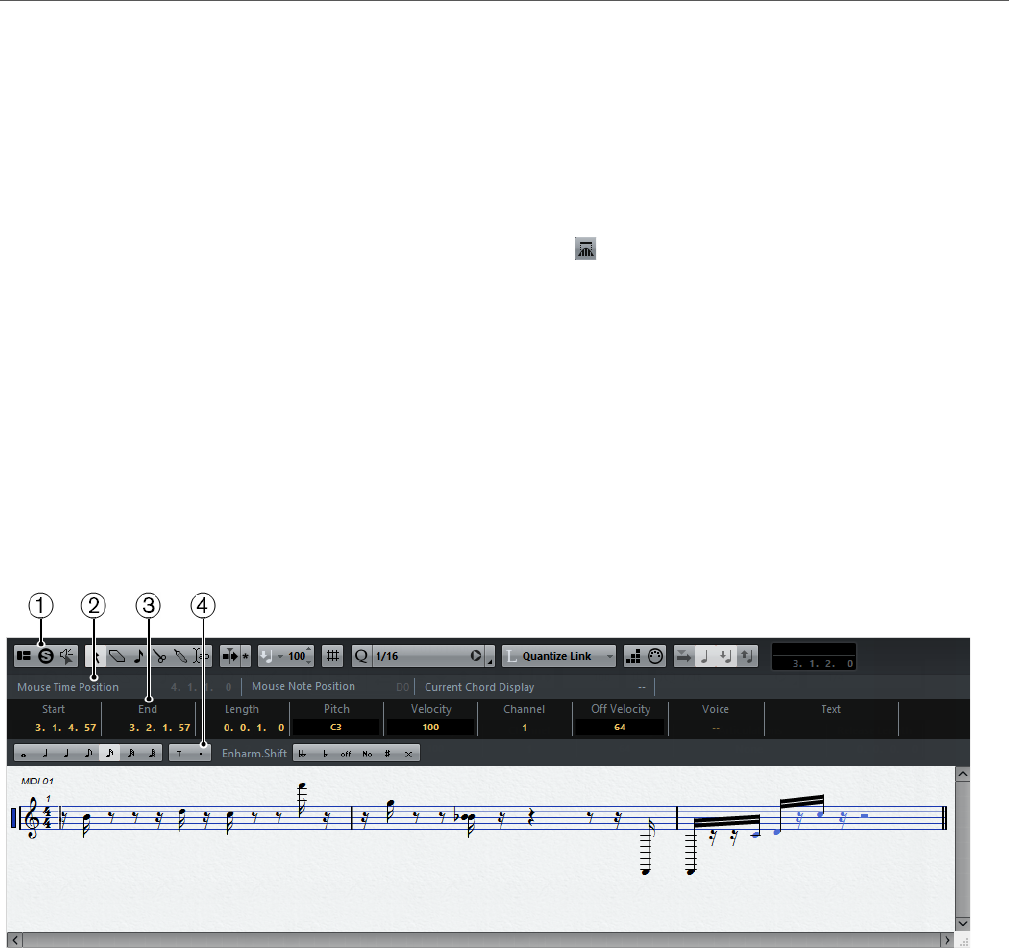
MIDI Editors
Score Editor
470
Selecting Controllers within the Note Range
A note range lasts until the start of the next note or the end of the part. Selected
controllers for notes are moved when the corresponding notes are moved.
You can select the controllers within the range of the selected notes.
• To always select the corresponding controllers when you select a note event,
activate Auto Select Controllers .
• To select the controllers within the note range, select Edit > Select > Select
Controllers in Note Range.
For this to work, only 2 notes have to be selected.
Score Editor
The Score Editor shows MIDI notes as a musical score.
1) Toolbar
2) Status line
3) Info line
4) Extended toolbar
• To open one or several parts in the Score Editor, select one or several tracks
or any number of parts, and select MIDI > Scores > Open Score Editor.
If you have selected parts on several tracks, you get one staff for each track.
The staves are tied together by bar lines and placed in the order of the tracks
in the Project window.
• To rearrange the staves, close the editor and in the Project window, rearrange
the tracks. Then reopen the Score Editor.
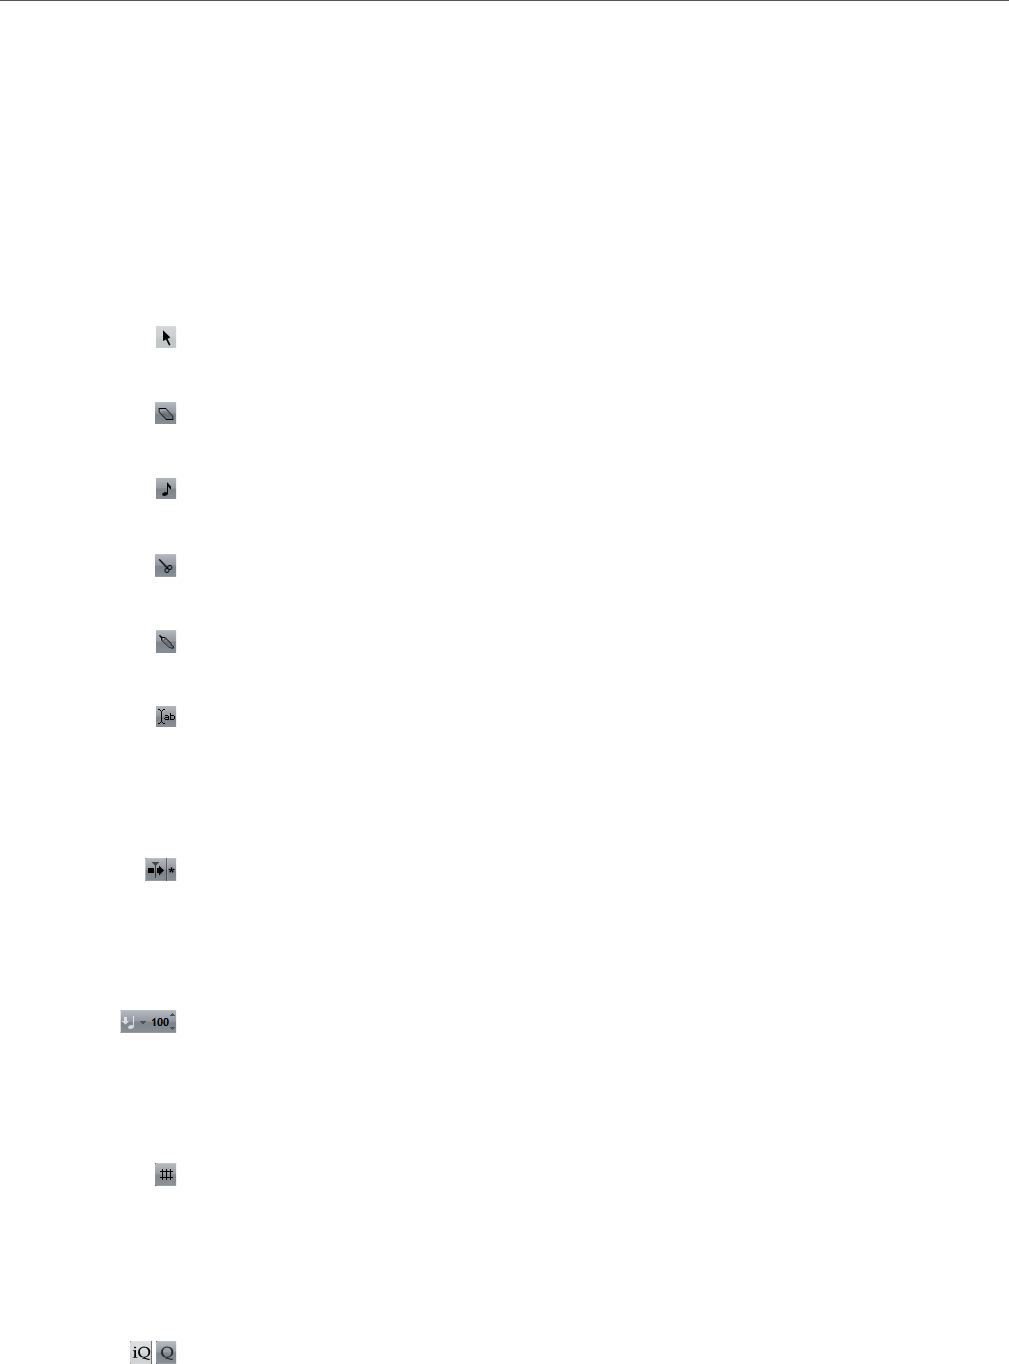
MIDI Editors
Score Editor
471
Toolbar
The toolbar contains tools and various settings for the Score Editor.
• To show or hide the toolbar elements, right-click the toolbar and activate or
deactivate the elements.
Tool Buttons
Object Selection
Allows you to select events.
Erase
Allows you to delete events.
Insert Note
Allows you to insert notes in the score display.
Split
Allows you to split a MIDI event.
Glue
Allows you to glue together events of the same pitch.
Insert Text
Allows you to insert text in the score display.
Auto Scroll
Auto Scroll
If this button is activated, the project cursor is always visible in the window.
Insert Velocity
Insert Velocity
Allows you to specify a velocity value for new notes.
Snap/Quantize
Snap Type
Allows you to select the snap type.
If Grid is activated, events snap to exact grid positions when they are moved.
If Grid Relative is activated, events keep their relative positions to the grid
when they are moved.
Iterative Quantize On/Off
Activates/Deactivates iterative quantize.
MIDI Editors
Score Editor
472
Quantize Presets
Allows you to select a quantize or a groove preset.
Apply Quantize
Applies the quantize settings.
Open Quantize Panel
Opens the Quantize Panel.
Length Quantize
Determines the event length for the Length Quantize function.
Step/MIDI Input
Step Input
Activates/Deactivates the Step Input mode.
MIDI Input/Note Expression MIDI Input
Activates/Deactivates MIDI Input modes.
Move Insert Mode
Activates/Deactivates the Move Insert mode. For this function, Step Input
must be activated.
Record Pitch
If Step Input is activated, use this button to determine that the pitch is
included when you insert notes.
Record NoteOn Velocity
If Step Input is activated, use this button to determine that NoteOn Velocity
is included when you insert notes.
Record NoteOff Velocity
If Step Input is activated, use this button to determine that NoteOff Velocity
is included when you insert notes.
RELATED LINKS
Using the Setup options on page 627
Status Line
The status line is displayed below the toolbar. It displays important information
about the mouse position and the chord displays. Select the notes that form
(compose) the chord to make the status line appear in the Current Chord Display.
To show or hide the status line, click Set up Window Layout on the toolbar, and
activate or deactivate Status Line.
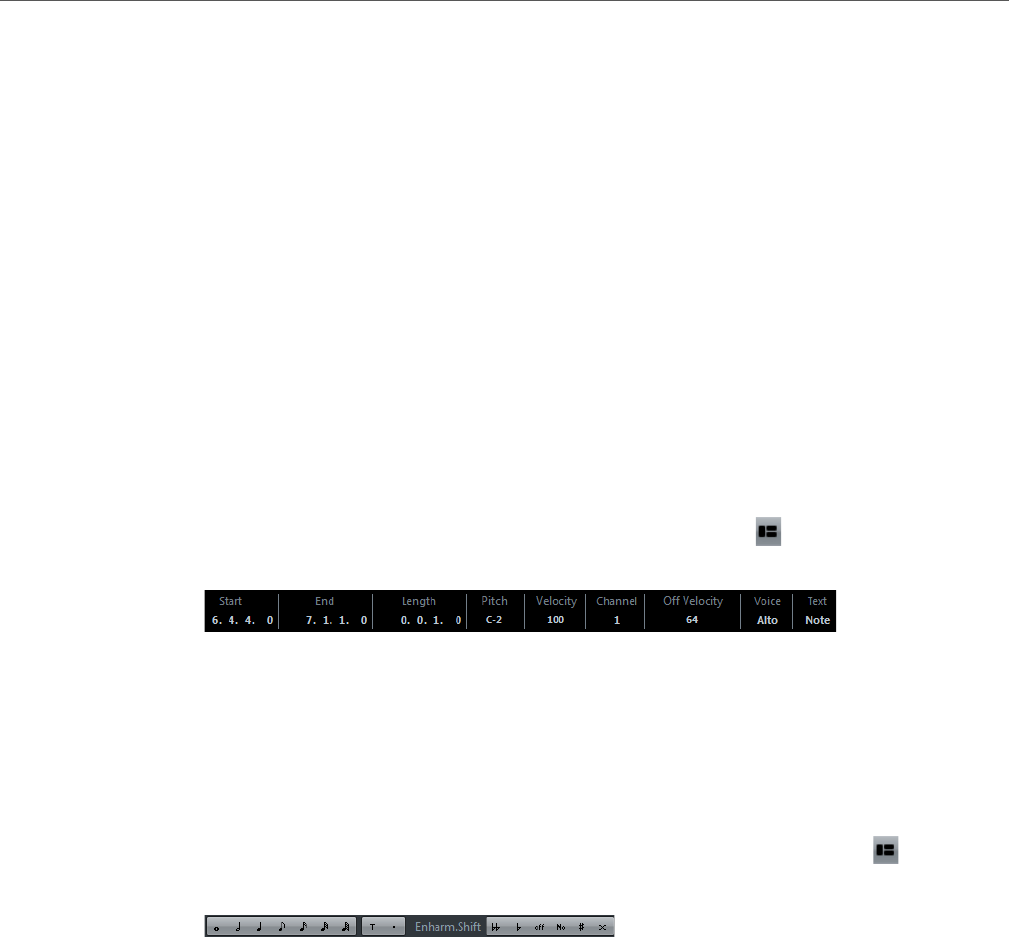
MIDI Editors
Score Editor
473
Mouse Time Position
Displays the exact time position of the mouse pointer, depending on the
selected ruler display format. This lets you edit or insert notes at exact positions.
Mouse Note Position
Displays the exact pitch of the mouse pointer position. This facilitates finding
the right pitch when entering or transposing notes.
Current Chord Display
When the project cursor is positioned over notes that form a chord, this chord
is displayed here.
Info Line
The info line shows values and properties of the selected MIDI notes. If several
notes are selected, the values for the first note are displayed in color.
To show or hide the info line, click Set up Window Layout on the toolbar, and
activate or deactivate Info Line.
RELATED LINKS
Changing the Display Format for the Ruler on page 434
Extended Toolbar
The extended toolbar contains note value buttons and enharmonic shift buttons.
To show or hide the extended toolbar, click the Set up Window Layout button
on the toolbar, and activate or deactivate Tools.
Note Value Buttons
Allows you to select a note value for input. The T and . options are for triplet
and dotted note values.
The selected note value is displayed in the Length value field on the toolbar
and in the Insert Note tool shape.
To resize all selected notes to the same note value, press [Ctrl]/[Command]
and click one of the note value buttons.
Enharmonic Shift
Allows you to manually select whether a note is displayed with flat or sharp
accidentals. The Off button resets the notes to original display. The other
options are double flats, flats, No (no accidentals shown, regardless of
pitch), sharps, and double sharps.
RELATED LINKS
Enharmonic Shift on page 480
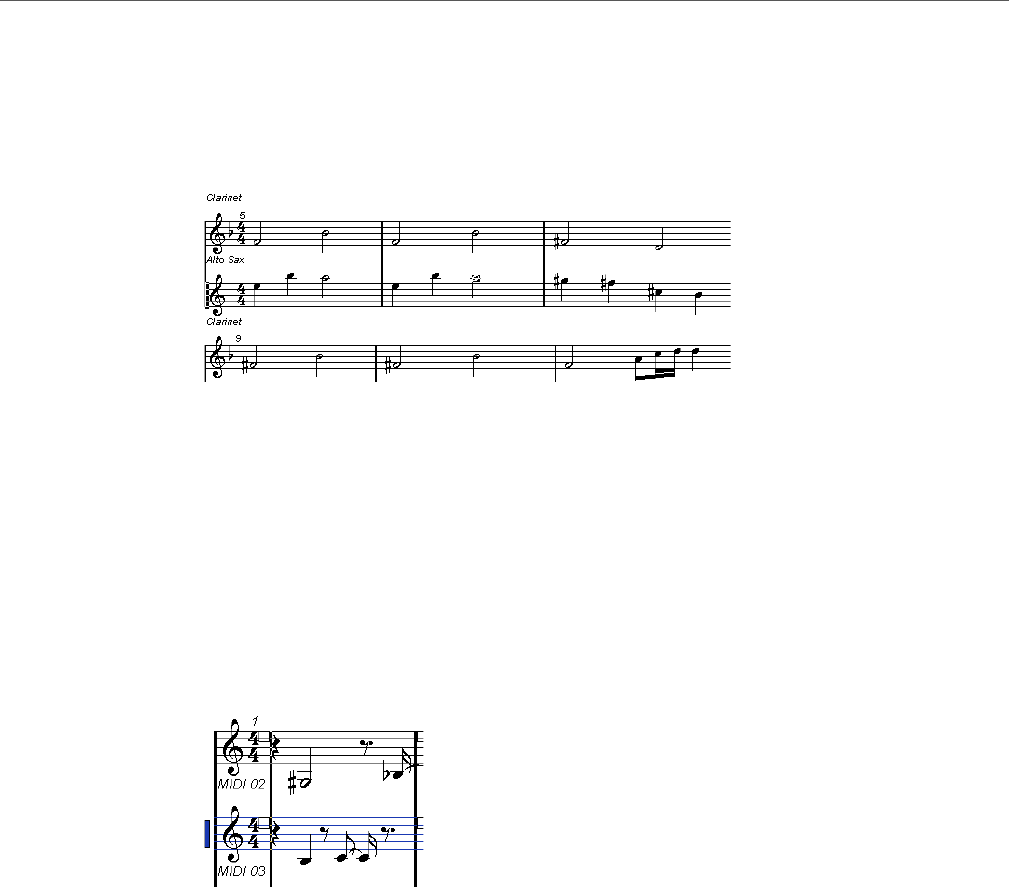
MIDI Editors
Score Editor Operations
474
Score Display
The main area of the Score Editor window shows the notes in the edited parts on
one or several staves. Parts on different tracks are shown on different staves.
• If you are editing one or several parts on the same track, as much of them as
possible is shown on several staves, comparable with a score on paper.
• If you are editing parts on several tracks, they are put on a grand staff. A grand
staff is composed of multiple staves that are tied together by bar lines.
• The number of bars that are displayed on the screen depends on the size of
the window and the number of notes in each bar.
• The end of the last part is indicated by a double bar line.
All MIDI input is directed to one of the tracks, which is called the active staff. The
active staff is indicated by a blue rectangle to the left of the clef symbol.
• To change the active staff, click on the staff that you want to activate.
Score Editor Operations
This section describes the principal editing operations within the Score Editor.
Improving the Score Display
When you open the Score Editor for a part that was recorded in real time, the score
may not look as legible as you expect. The Score Editor can ignore the minor time
variances in performance and make a neater score. To achieve this, the Staff
Settings dialog provides settings that determine how the program displays the
music.
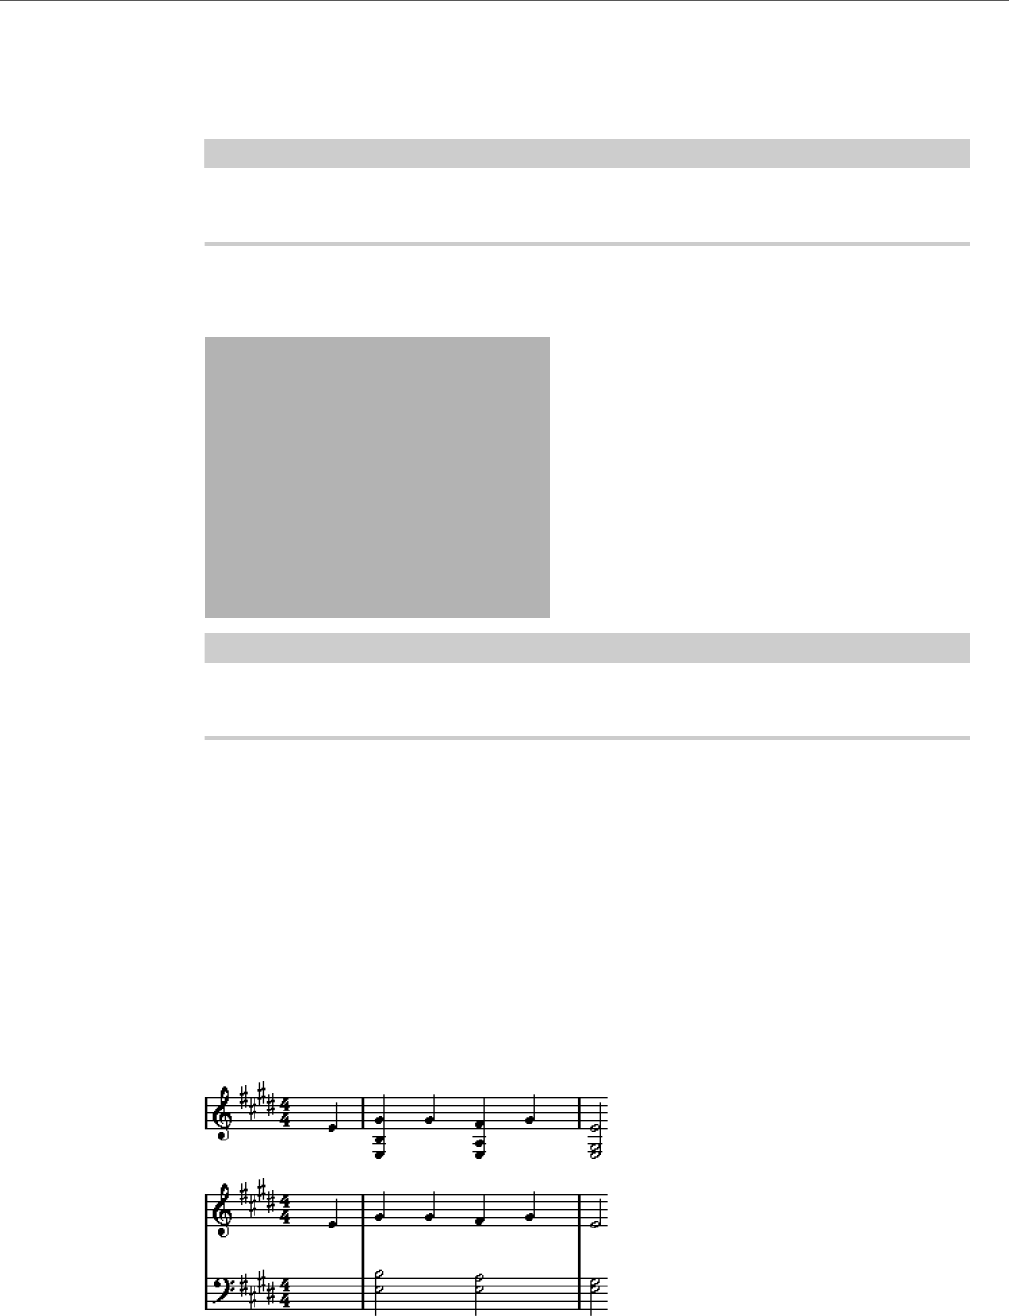
MIDI Editors
Score Editor Operations
475
Staff Settings Dialog
This dialog allows you to change how Cubase displays the music.
IMPORTANTIMPORTANTIMPORTANTIMPORTANT
The settings that you make in this dialog are independent for each staff (track), but
common for a piano staff that you have created with the Split option.
To open the Staff Settings dialog, double-click in the area to the left of the staff, or
select a staff and select MIDI > Scores > Staff Settings.
NOTE
The time signature follows the time signatures that are set in the Tempo Track
editor. These settings are common to all tracks/staves in the score.
Staff Mode
The Staff Mode determines how the staff is shown.
•In Single mode, all notes in the part are shown in the same staff.
•In Split mode, the part is split on the screen into a bass and treble clef, as in
a piano score.
The Split Point value determines where you want the split to occur. Notes
above and including the split note appear on the upper staff, and notes below
the split note appear on the lower staff.
Before and after setting a split at C3.

MIDI Editors
Score Editor Operations
476
Display Quantize
This section allows you to change the way Cubase displays scores.
IMPORTANTIMPORTANTIMPORTANTIMPORTANT
These display values are only used for the graphical display in the Score Editor.
They do not affect the playback.
Notes
Determines the smallest note value to be displayed and the smallest position
to be recognized and properly displayed. Set this to the smallest significant
note position used in your music.
For example, if you have notes on odd sixteenth note positions, set this value
to 16. The T values are for triplet note values. This setting is partly overridden
by Auto Quantize.
Rests
This value is used as a recommendation. Cubase does not display rests
smaller than this value, except where necessary. In effect, this setting also
determines how the length of notes is displayed. Set this value according to
the smallest note value (length) that you want to be displayed for a single note,
positioned on a beat.
Auto Quantize
Allows you to make your score look as legible as possible. Auto Quantize
allows you to mix straight notes with tuplets (triplets) in a part. However, Auto
Quantize also uses the (display) quantize value. If there is no appropriate note
value for a certain note or group of notes, it uses the set quantize value is used
to display it.
Generally, only activate this option if your music contains mixed triplets and
straight notes. If the part is imprecisely played and/or complex, Auto
Quantize may have a problem figuring out exactly what you mean.
Dev.
If this option is activated, triplets/straight notes are detected even if they are
not exactly on the beat. However, if you know that your triplets/straight notes
are perfectly recorded, either through quantizing or entered by hand,
deactivate this option.
This option is only available if Auto Quantize is activated.
Adapt
If this option is activated, the program guesses that when one triplet is found,
there are probably more triplets surrounding it. Activate this option if not all of
your triplets are detected.
This option is only available if Auto Quantize is activated.

MIDI Editors
Score Editor Operations
477
Clef and Key
In this section, you can set the correct clef and key.
Clef/Key Display
Allows you to select the clef or key via the scrollbar.
Lower Staff
Sets the clef and key to the lower staff.
Auto Clef
If this option is activated, Cubase attempts to guess the correct clef, judging
from the pitch of the music.
Display Transpose
In this section, you can specify a separate display transpose setting for each staff
(track). This transposes the notes in the score without affecting how the notes are
played back. This allows you to record and play back a multi staff arrangement and
still score each instrument according to its own transposition.
Semitones
Allows you to manually set a display transpose value.
Instrument
Allows you to select the instrument for which you are scoring.
Interpretation Options
In this section, you can make additional settings on how the score is displayed.
Clean Lengths
If this option is activated, notes that are considered to be chords are shown
with identical lengths. Longer notes are displayed shorter than they are. Notes
with very short overlaps are also cut off. This is similar to the No Overlap
option, but with a more subtle effect.
No Overlap
If this option is activated, one note is never shown as overlapping another,
lengthwise. This allows long and short notes that start at the same point to be
displayed without ties. The long notes are cut off in the display. This makes
the music more legible.
A sample measure with No Overlap deactivated.
A sample measure with No Overlap activated.
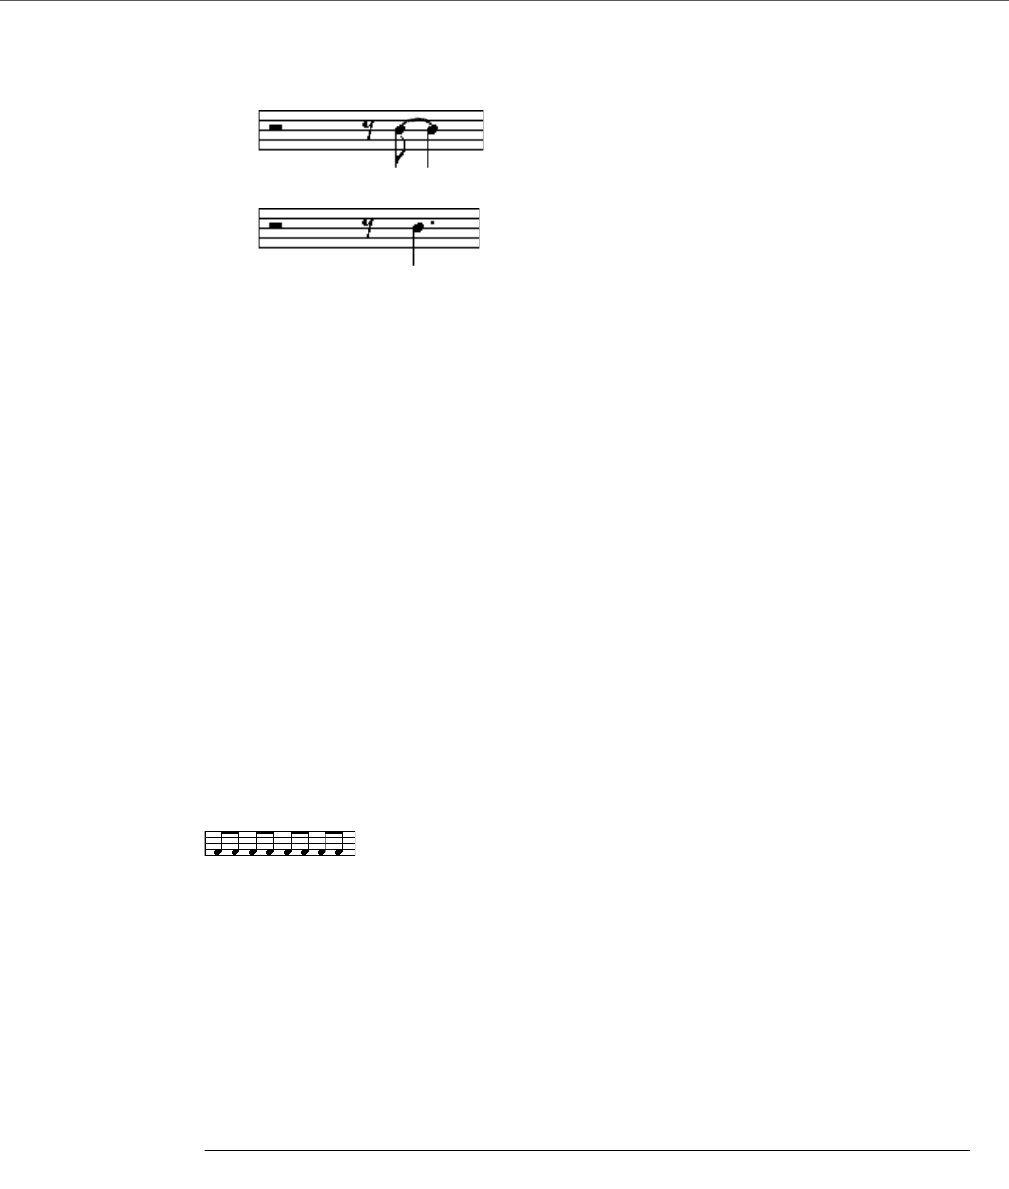
MIDI Editors
Score Editor Operations
478
Syncopation
If this option is activated, syncopated notes are shown in a more legible way.
A dotted quarter note at the end of a bar when Syncopation is deactivated.
A dotted quarter note at the end of a bar when Syncopation is activated.
Shuffle
If this option is activated and you have played a shuffle beat, the beat is
displayed as straight notes, not as triplets. This is very common in jazz
notation.
Quantize Value
When you move the mouse pointer over the score, the Mouse Time Position field
on the status line tracks your movement and shows the current position in bars,
beats, sixteenth notes, and ticks.
The quantize value controls the positioning on screen. If you set the value to 1/8,
you can only insert and move notes to eighth note positions, at quarter notes, at half
bars, or at bar positions.
It is recommended to set the quantize value to the smallest note value in the piece.
This does not stop you from inputting notes at coarser positions. However, if you
set the quantize value to a too small note value, it is easier to make mistakes.
With the quantize value set to 1/8, you can only input notes at eighth note positions.
You can also use the Quantize Panel to create other quantize values, irregular
grids, etc.
Creating Notes
In the score display, the Insert Note tool allows you to create notes. However, you
must first set the note value (length) and spacing.
PROCEDURE
1. Set the note value in one of the following ways:
• Click the note symbols on the extended toolbar.
• Select an option from the Length Quantize pop-up menu on the toolbar.
2. Select the Insert Note tool.
If you selected the note value via the extended toolbar buttons, the Insert Note tool
is automatically selected.

MIDI Editors
Score Editor Operations
479
3. Open the Quantize Presets pop-up menu on the toolbar and select a
quantize value.
4. Move the mouse over the staff to find the correct position.
The position is displayed on the Mouse Time Position display on the status line. The
position snaps to the grid that is defined by the quantize value.
5. Move the mouse vertically to find the correct pitch.
The Mouse Note Position display on the status line shows the pitch at the pointer
position.
6. Click in the staff.
RESULT
The note appears in the score. The notes get the insert velocity value that is set in
the Insert Velocity field on the toolbar.
NOTE
If the notes that you enter appear to have the wrong note value you may have to
adjust the Display Quantize settings. For example, you enter a 1/32 note that is
displayed as a 1/16 note.
RELATED LINKS
Setting Velocity Values on page 441
Display Quantize on page 476
Moving and Transposing Notes
PROCEDURE
1. Open the Quantize Presets pop-up menu on the toolbar and select a
quantize value.
2. If you want to hear the pitch of the note while moving, activate the Acoustic
Feedback button on the toolbar.
3. Select the notes that you want to move.
4. Click one of the selected notes and drag it to a new position and/or pitch.
The horizontal movement of the note is snaps to the current quantize value. The
position boxes on the toolbar show the position and pitch for the dragged note.
To restrict moving to one direction, press [Ctrl]/[Command] while dragging.
Duplicating Notes
PROCEDURE
1. Open the Quantize Presets pop-up menu on the toolbar and select a
quantize value.
2. Select the notes that you want to duplicate.

MIDI Editors
Score Editor Operations
480
3. Press [Alt]/[Option] and drag the notes to their new position.
To restrict moving to one direction, press [Ctrl]/[Command] while dragging.
Changing the Note Length
The displayed note length is not necessarily the actual note length. It also depends
on the note values and rest values for Display Quantize in the Staff Settings
dialog. This is important to remember when you change the length of a note.
You can change the length of a note in the following ways:
• Select the notes that you want to change and [Ctrl]/[Command]-click on one
of the note icons on the extended toolbar.
All the selected notes are assigned to the length of the clicked note.
• Select the notes that you want to change and edit the length values on the
info line.
RELATED LINKS
Improving the Score Display on page 474
Editing Note Events on the Info Line on page 440
Splitting and Gluing Note Events
• To split 2 notes that are strung together by a tie, click on the tied note head
with the Cut tool.
The note is divided into two, with the respective length of the main and the
tied note.
• To glue a note to the next note with the same pitch, click on a note with the
Glue tool.
Enharmonic Shift
You can shift the display of selected notes. For example, an F# (F sharp) is instead
shown as a Gb (G flat) and vice versa.
PROCEDURE
1. Select the notes that you want to shift.
2. Click one of the enharmonic shift buttons on the extended toolbar.
RELATED LINKS
Extended Toolbar on page 473

MIDI Editors
Score Editor Operations
481
Flipping Stems
The direction of the note stems is automatically selected according to the note
pitches. However, you can change this manually.
PROCEDURE
1. Select the notes for which you want to flip the stem direction.
2. Select MIDI > Scores > Flip Stems.
Working with Text
You can use the Text tool to add comments, articulation, or instrumentation advice
and other text strings anywhere in the score display.
Adding Text
PROCEDURE
1. On the toolbar, select the Text tool.
2. Click anywhere in the score.
A blinking cursor indicates that you can enter text.
3. Enter the text and press [Return].
Editing Text
• To edit existing text, double-click it with the Object Selection tool.
This opens the text for editing. Use the arrow keys to move the cursor, delete
characters with the [Delete] or [Backspace] keys, press [Return] when your
are finished.
• To delete text blocks, select them with the Object Selection tool and press
[Backspace] or [Delete].
• To move text blocks, drag them to a new position.
• To duplicate text blocks, press [Alt]/[Option] and drag them to a new position.

MIDI Editors
Score Editor Operations
482
Changing the Text Font, Size, and Style
You can change the font, size, and style of the text that you have added to the score
display.
PROCEDURE
1. Do one of the following:
• To change the settings for a specific text block, click on the text with the Object
Selection tool.
• To set the default settings for all new text blocks, unselect any selected text
block and change the settings.
2. Select MIDI > Scores > Set Font.
3. In the Font Settings dialog, make your settings.
4. Click Apply.
5. Optional: Select another text block, adjust the settings, and click Apply.
Set Font Dialog
In this dialog, you can change the font, size, and style of the text that you have added
to the score display.
To open the Set Font dialog, select MIDI > Scores > Set Font.
Font
Allows you to specify the font for the text. Which fonts are available on the
pop-up menu depends on the fonts that you have installed on your computer.
IMPORTANT
Do not use the Steinberg fonts. These are special fonts used by the program,
for example, for score symbols, and not suited for common text.
Size
Sets the size of the text.
Frame
Allows you to enclose the text in a rectangular (box) or oval frame.
Font Options
Determine whether the text is formatted bold, italic, and/or underlined.
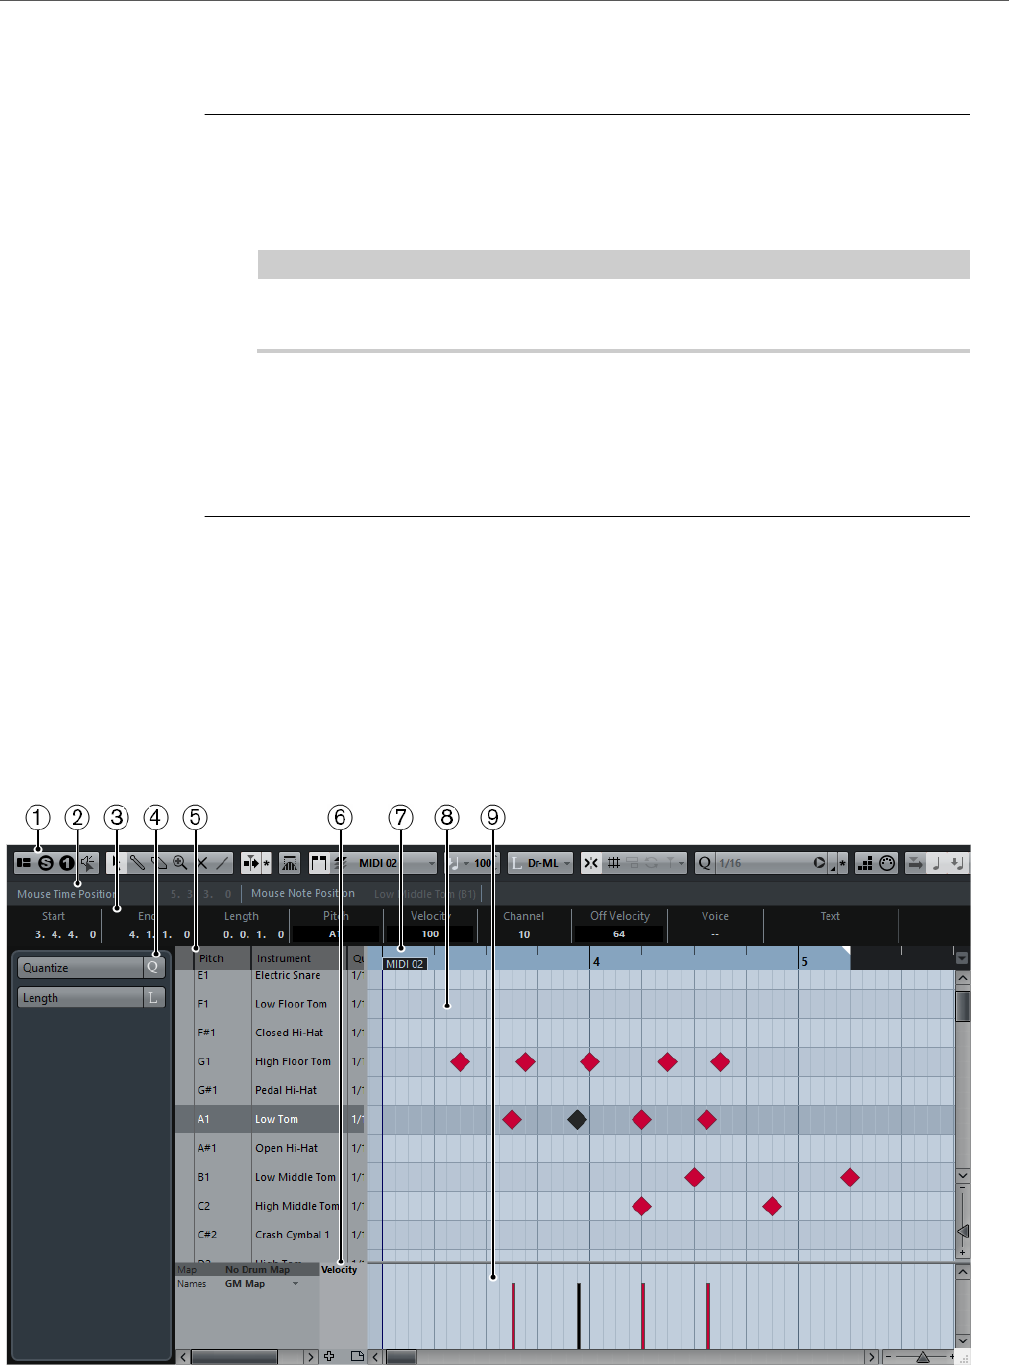
MIDI Editors
Drum Editor
483
Printing the Score
PROCEDURE
1. Open the parts that you want to print in the Score Editor.
2. Select File > Page Setup and make sure that all your printer settings are
correct.
IMPORTANT
If you change your setting for paper size, scale, and margins now, the score may
change its look.
3. Click OK.
4. Select File > Print.
5. In the Print dialog, make your settings.
6. Click Print.
Drum Editor
The Drum Editor is similar to the Key Editor, but takes advantage of the fact that
with drum parts, each key corresponds to a separate drum sound. This is the editor
to use when you are editing drum or percussion parts.

MIDI Editors
Drum Editor
484
1) Toolbar
Contains tools and settings.
2) Status line
Informs about the mouse time position, mouse note position, and current
chord display.
3) Info line
Displays note event information about a selected MIDI note.
4) Drum Editor Inspector
Contains tools and functions for working with MIDI data.
5) Drum sound list
Lists all drum sounds.
6) Drum map
Lets you select the drum map for the edited track or a list of drum sound
names.
7) Ruler
Displays the time line.
8) Note display
Contains a grid in which MIDI notes are displayed as boxes.
9) Controller display
The area below the Note display consists of one or multiple controller lanes.
Toolbar
The toolbar contains tools and various settings for the Drum Editor.
• To show or hide the toolbar elements, right-click the toolbar and activate or
deactivate the elements.
Solo/Feedback
Set up Window Layout
Allows you to show/hide specific window sections, for example, the Status
Line, the Info Line, the Inspector, etc. Which sections are available, depends
on the editor.
Solo Editor
If this button is activated, you hear only the edited MIDI parts during playback.
Solo Instrument
If this button is activated, you hear only the selected MIDI part during
playback.
MIDI Editors
Drum Editor
485
Acoustic Feedback
If this button is activated, individual notes are automatically played back when
you move or transpose them, or create them by drawing.
Tool Buttons
Object Selection
Allows you to select events.
Drumstick
Allows you to draw events.
Erase
Allows you to delete events.
Zoom
Allows you to zoom in/out. Hold [Alt]/[Option] and click to zoom out.
Mute
Allows you to mute events.
Line
Allows you to create a series of contiguous events.
Time Warp
Allows you to adjust the tempo track so that material with a musical time base
can be matched to material with a linear time base.
Auto Scroll
Auto Scroll
If this button is activated, the project cursor is always visible in the window.
Independent Track Loop
Independent Track Loop
Activates/Deactivates the independent track loop for the edited part.
Auto Select Controllers
Auto Select Controllers
If this button is activated and a note is selected in the editor, the
corresponding controller data is also automatically selected.
Multiple Part Controls
Show Part Borders
If this button is activated, the part borders are shown in the editor.
MIDI Editors
Drum Editor
486
Edit Active Part Only
If this button is activated, editing operations are applied only to the active part.
Currently Edited Part
This pop-up menu lists all parts that are currently open in the editor. This
allows you to select a part for editing.
Insert Velocity
Insert Velocity
Allows you to specify a velocity value for new notes.
Inserted Notes Length
Insert Length
Allows you to determine the length of an inserted note.
Nudge Palette
Trim Start Left
Increases the length of the selected element by moving its start to the left.
Trim Start Right
Decreases the length of the selected element by moving its start to the right.
Move Left
Moves the selected element to the left.
Move Right
Moves the selected element to the right.
Trim End Left
Decreases the length of the selected element by moving its end to the left.
Trim End Right
Increases the length of the selected element by moving its end to the right.
Transpose Palette
Move up
Transposes the selected event or chord up by a half note.
Move down
Transposes the selected event or chord down by a half note.
Move up more
Transposes the selected event up by an octave.
Move down more
Transposes the selected event down by an octave.
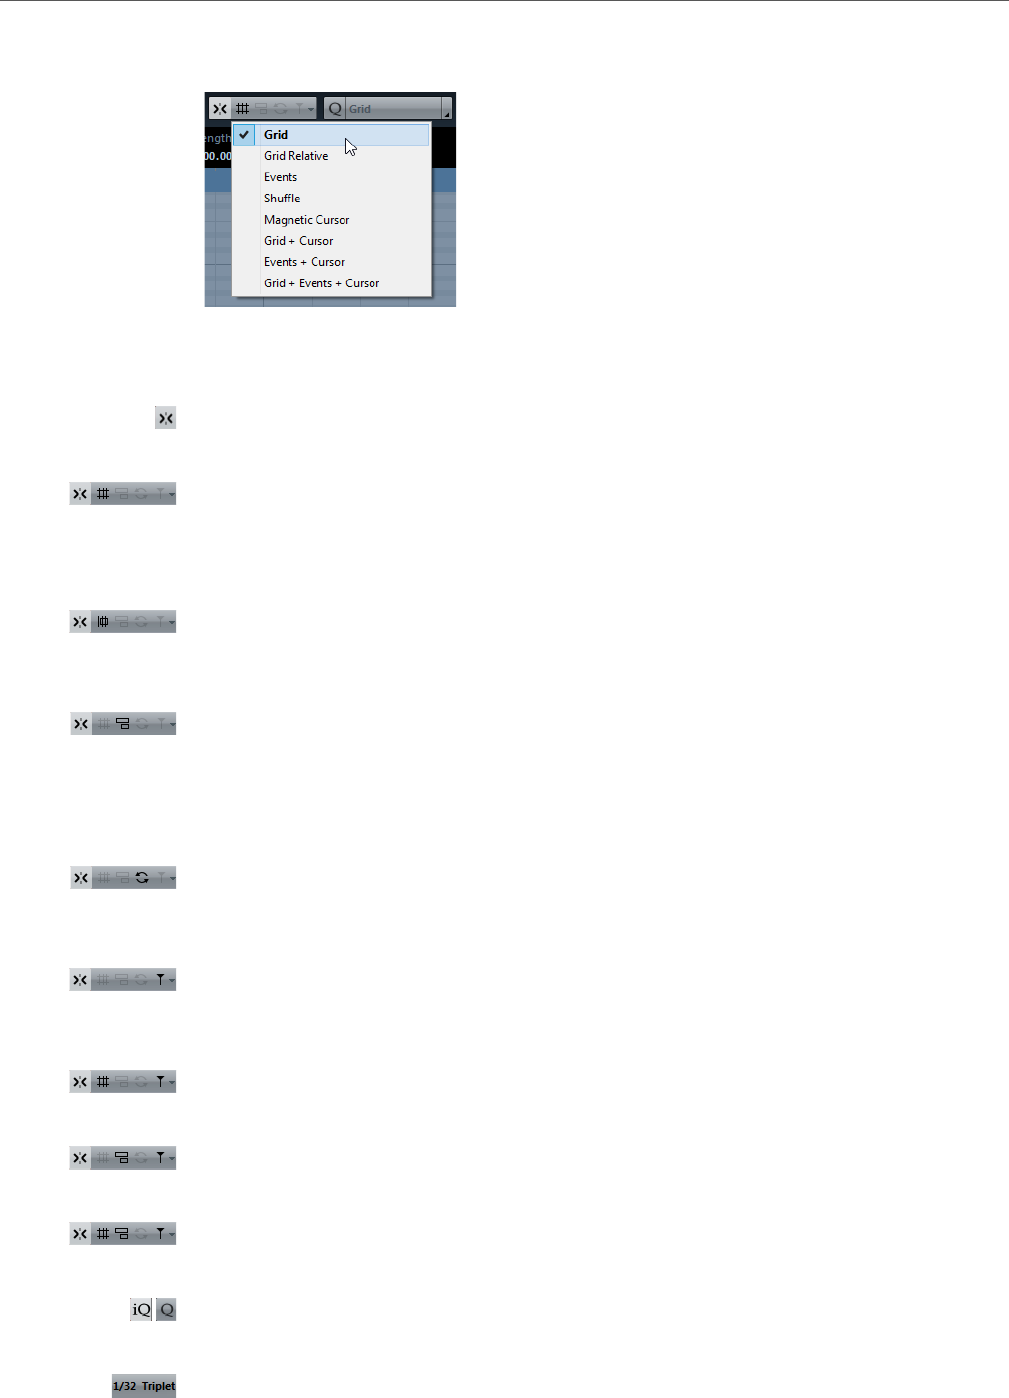
MIDI Editors
Drum Editor
487
Snap/Quantize
The following options are available on the Snap/Quantize menu:
Snap On/Off
Activates/Deactivates the snap function.
Grid
If this option is activated, the snap positions are set with the Grid Type
pop-up menu. The available options depend on the display format selected for
the ruler.
Grid Relative
If this option is activated, events keep their relative positions to the grid when
they are moved.
Events
If this option is activated, the start and end positions of other events and parts
are magnetic. This means that if you drag an event to a position near the start
or end of another event, it is automatically aligned with the start or end of the
other event.
Shuffle
Shuffle allows you to change the order of adjacent events. If you drag the first
one to the right, past the second event, the two events change places.
Magnetic Cursor
If this option is activated, the project cursor is magnetic. When you drag an
event near the cursor, the event is aligned with the cursor position.
Grid + Cursor
This is a combination of Grid and Magnetic Cursor.
Events + Cursor
This is a combination of Events and Magnetic Cursor.
Grid + Events + Cursor
This is a combination of Events, Grid, and Magnetic Cursor.
Iterative Quantize On/Off
Activates/Deactivates iterative quantize.
Quantize Presets
Allows you to select a quantize or a groove preset.
MIDI Editors
Drum Editor
488
Apply Quantize
Applies the quantize settings.
Open Quantize Panel
Opens the Quantize Panel.
Use Global Quantize
If this button is activated, drum notes are quantized according to the global
quantize value on the toolbar. If the button is deactivated, the individual
quantize values for the drum sounds are used.
Step/MIDI Input
Step Input
Activates/Deactivates the Step Input mode.
MIDI Input/Note Expression MIDI Input
Activates/Deactivates MIDI Input modes.
Move Insert Mode
Activates/Deactivates the Move Insert mode. For this function, Step Input
must be activated.
Record Pitch
If Step Input is activated, use this button to determine that the pitch is
included when you insert notes.
Record NoteOn Velocity
If Step Input is activated, use this button to determine that NoteOn Velocity
is included when you insert notes.
Record NoteOff Velocity
If Step Input is activated, use this button to determine that NoteOff Velocity
is included when you insert notes.
Event Colors
Event Colors
Allows you to select a color scheme for the events in the editor.
Hide Colors
Allows you to hide the colors.
Status Line
The status line is displayed below the toolbar. It displays important mouse
information.
To show or hide the status line, click Set up Window Layout on the toolbar, and
activate or deactivate Status Line.

MIDI Editors
Drum Editor
489
Mouse Time Position
Displays the exact time position of the mouse pointer, depending on the
selected ruler display format. This lets you edit or insert notes at exact
positions.
Mouse Note Position
Displays the exact pitch of the mouse pointer position. This facilitates finding
the right pitch when entering or transposing notes.
Independent Track Loop
A mini-cycle, affecting only the MIDI part that is being edited. If Independent
Track Loop is activated, MIDI events within the loop range are repeated
continuously.
RELATED LINKS
Setting Up the Independent Track Loop on page 310
Info Line
The info line shows values and properties of the selected events. If several notes are
selected, the values for the first note are displayed in color.
To show or hide the info line, click the Set up Window Layout button on the
toolbar, and activate or deactivate Info Line.
Length and position values are displayed in the selected ruler display format.
RELATED LINKS
Editing Note Events on the Info Line on page 440
Changing the Display Format for the Ruler on page 434
Inspector
The Inspector is located to the left of the note display. The inspector contains tools
and functions for working with MIDI data.
Quantize
Allows you to access the main quantize parameters. These are identical with
the functions on the Quantize Panel.
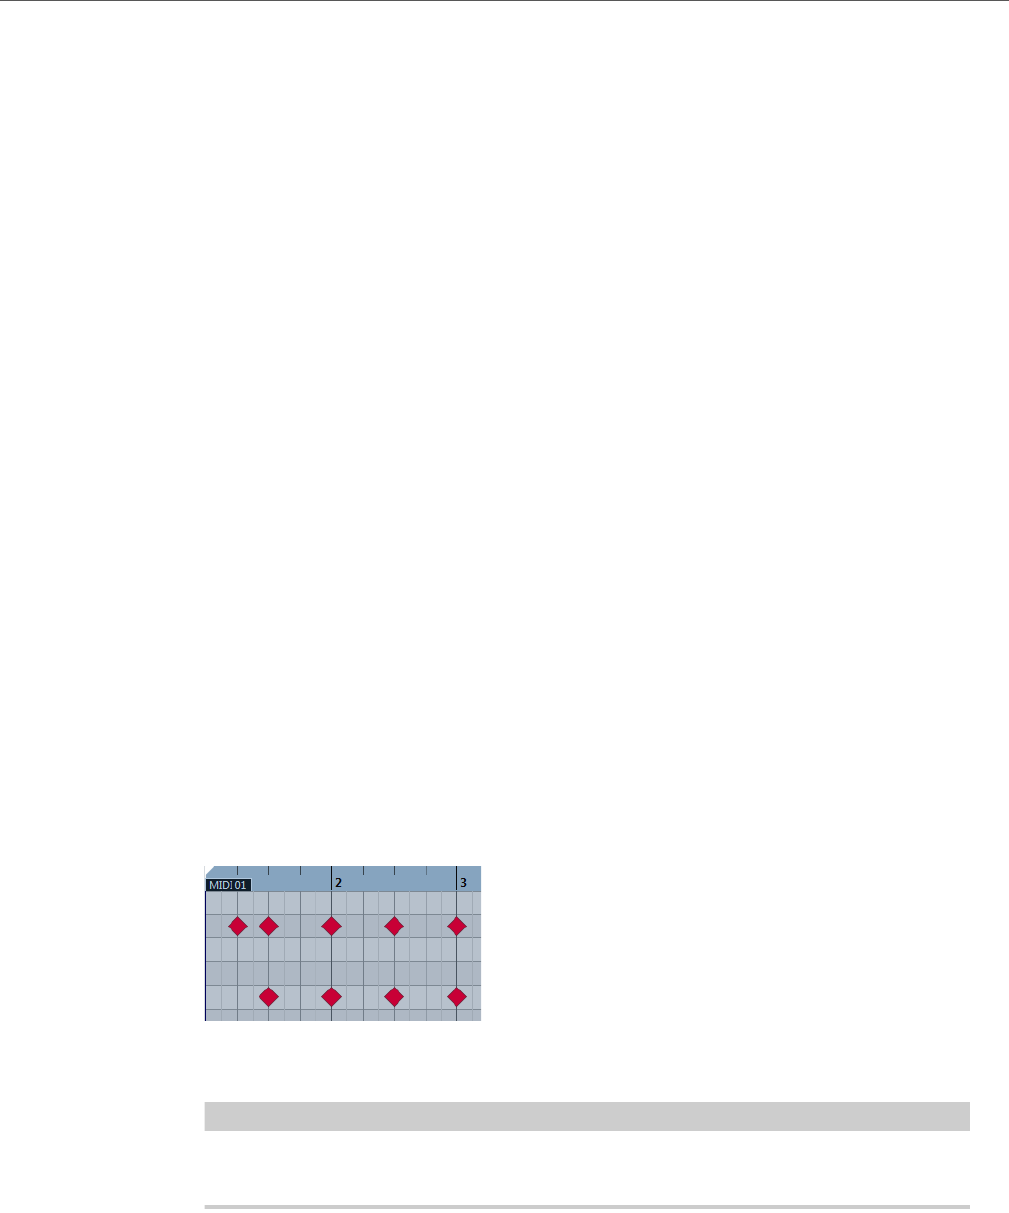
MIDI Editors
Drum Editor
490
Length
Contains length-related options, similar to the Functions submenu of the
MIDI menu.
• To change the length of the selected MIDI events or all events of the
active part if no events are selected, use the Scale Length/Legato
slider.
At the maximum value the notes reach the beginning of the next note.
• To make the new length settings permanent, use the Freeze MIDI
Lengths button to the right of the Scale Length/Legato slider.
• To fine-tune the distance between consecutive notes, use the Overlap
slider.
At 0 Ticks, the Scale Legato slider extends each note so that it reaches
the next note exactly. Positive values cause the notes to overlap and
negative values allow you to define a small gap between the notes.
• To use the Legato function or slider to extend a note until the next
selected note, activate Between Selected.
This is identical with activating the Legato Mode: Between Selected
Notes Only option in the Preferences dialog.
RELATED LINKS
Quantize Panel on page 167
Other MIDI functions on page 427
Note Display
The note display of the Drum Editor displays notes as diamond symbols.
The vertical position of the notes corresponds to the drum sound list to the left,
while the horizontal position corresponds to the note’s position in time.
NOTE
The diamond symbols do not indicate the length of the notes, since drum sounds
most often are “one-shot” samples that disregard note lengths.
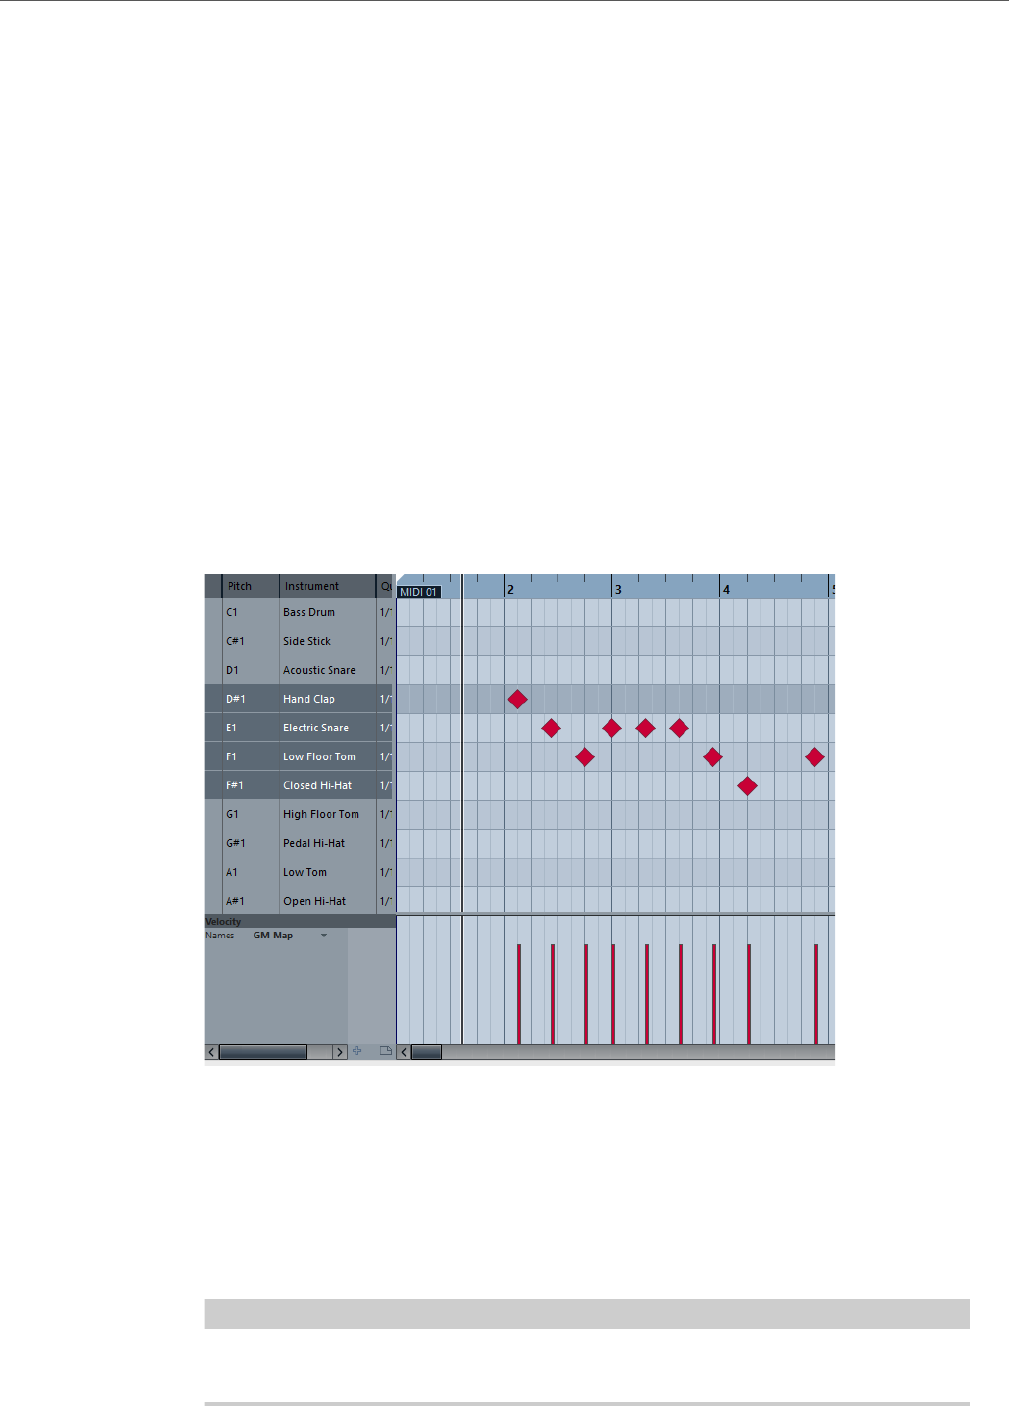
MIDI Editors
Drum Editor
491
Controller Display
The area at the bottom of the Drum Editor window is the controller display.
It consists of one or several controller lanes that show one of the following
properties or event types:
• Velocity values of the notes
• Pitchbend events
• Aftertouch events
• Poly Pressure events
• Program Change events
• System Exclusive events
• Any type of continuous controller event
Velocity values are shown as vertical bars in the controller display. Each velocity bar
corresponds to a note in the note display. Higher bars correspond to higher velocity
values.
Events other than velocity values are shown as blocks. The block corresponds to
the event values. The beginning of an event is marked by a curve point.
When you select a line in the drum sound list, only the velocity controller events that
belong to the note events on this line are displayed in the controller display.
If you select more than one line in the drum sound list, the controller lane shows all
velocity controller events for all notes on the selected lines. This is useful when you
have to adjust the controller values between different drum sounds.
NOTE
Unlike note events, controller events have no length. The value of a controller event
in the display is valid until the beginning of the next controller event.
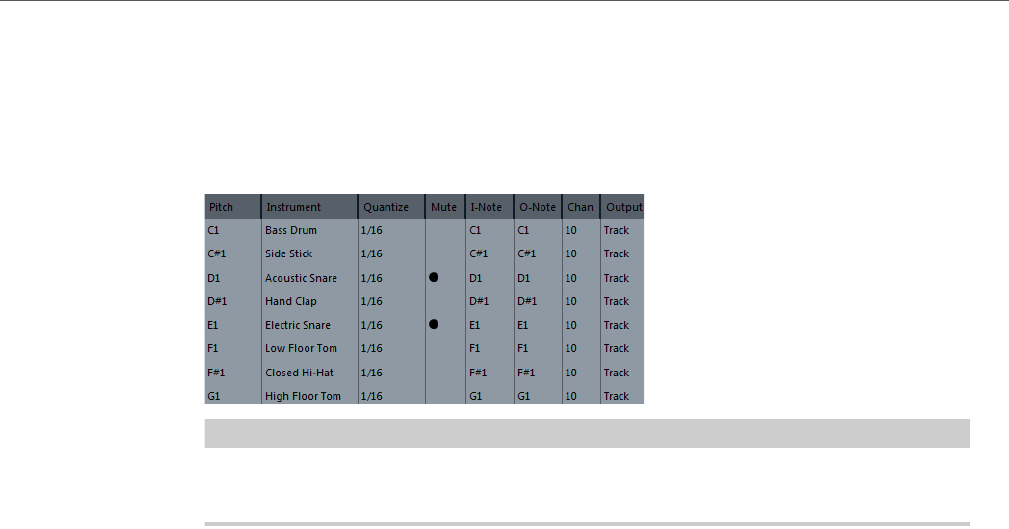
MIDI Editors
Drum Editor
492
Drum Sound List
The drum sound list lists all drum sounds by name and lets you adjust and
manipulate the drum sound setup in various ways.
NOTE
The number of columns in the list depends on whether a drum map is selected for
the track or not.
Pitch
Actual note number of the drum sound. This is what links notes on a MIDI track
to drum sounds. For example, with the GM Map, all MIDI notes with the pitch
C1 are mapped to the Bass Drum sound.
Instrument
Name of the drum sound.
Quantize
This value is used when entering and editing notes.
Mute
Mute drum sounds.
I-Note
Input note for the drum sound. When this MIDI note is sent into Cubase, that
is you play it, the note is mapped to the corresponding drum sound and
automatically transposed according to the Pitch setting for the sound.
O-Note
Output note, that is the MIDI note number that is sent out every time the drum
sound is played back.
Chan
MIDI channel, on which the drum sound is played back.
Output
MIDI output on which, the drum sound is played back. If you set this to
Default, the MIDI output selected for the track is used.
RELATED LINKS
Muting Notes and Drum Sounds on page 494

MIDI Editors
Drum Editor Operations
493
Drum Map and Names Menus
Below the drum sound list are two pop-up menus that are used for selecting a drum
map for the edited track or, if no drum map is selected, a list of drum sound names.
RELATED LINKS
Drum Maps on page 495
Drum Editor Operations
This section describes the principal editing operations within the Drum Editor.
Creating and Editing Note Events with the Drum Tool
• To create a note, select the Drumstick tool and click in the Drum Editor.
If Snap is deactivated on the toolbar, the note event appears exactly where
you clicked.
If you have activated Snap and deactivated Use Global Quantize on the
toolbar, the note events snap to positions according to the quantize value set
for the sound in the drum sound list. You can set up different quantize values
for different drum sounds.
If Snap and Use Global Quantize are activated, the note snaps to positions
according to the Quantize setting on the toolbar.
The length of the inserted note is determined by the Insert Length setting on
the toolbar. However, if this is set to Drum-Map Link, the note gets the length
of the quantize value for the drum sound.
• To remove a note, select the Drumstick tool and click on an existing note.
• To audition the drum sounds, click the leftmost column of the drum sound list.
Moving and Transposing Note Events
There are several options to move and transpose note events.
• To move note events in the editor, select the Object Selection tool and drag
them to a new position.
All selected note events are moved, maintaining their relative positions. Snap
is taken into account.
• To allow only horizontal and vertical movement, hold down [Ctrl]/[Command]
while dragging.
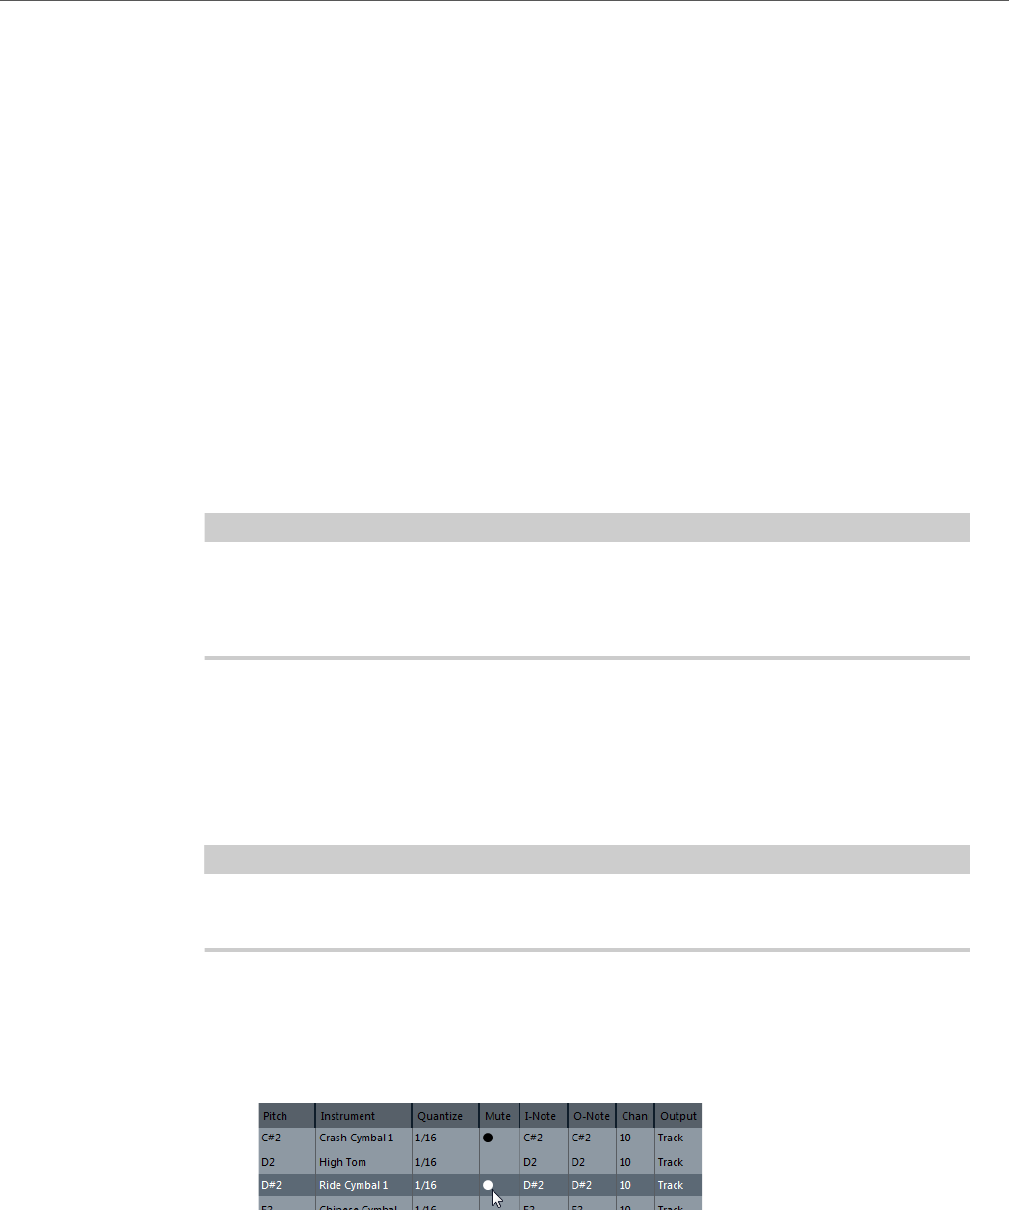
MIDI Editors
Drum Editor Operations
494
• To move note events via the Nudge Palette buttons on the toolbar, select the
note events and click a Nudge Palette button.
This moves the selected note events by the amount that is set on the
Quantize pop-up menu.
• To move note events to the project cursor position, select the note events and
select Edit > Move to > Cursor.
• To move a note event via the info line, select a note event and edit the
Position or Pitch on the info line.
• To transpose note events, select the note events and use the up and down
arrow keys.
• To transpose note events via the Transpose Setup dialog, select the note
events and select MIDI > Transpose Setup.
• To transpose note events in steps of one octave, press [Shift] and use the up
and down arrow keys.
NOTE
• When you move selected note events to a different position, any selected
controllers for these note events move accordingly.
• You can also adjust the position of note events by quantizing.
RELATED LINKS
Transpose on page 422
Muting Notes and Drum Sounds
IMPORTANTIMPORTANTIMPORTANTIMPORTANT
The mute state for drum sounds is part of the drum map. Therefore, any other tracks
using the same map are also affected.
• To mute individual notes, click or enclose them with the Mute tool, or select
Edit > Mute.
• If a drum map is selected, the drum sound list has a Mute column. Click in the
Mute column for a drum sound to mute that sound.
• To mute all drum sounds other than the selected one, click the Solo
Instrument button on the toolbar.
RELATED LINKS
Selecting a Drum Map for a Track on page 498

MIDI Editors
Drum Editor Operations
495
Drum Maps
A drum kit in a MIDI instrument is most often a set of different drum sounds with
each sound placed on a separate key. For example, the different sounds are
assigned to different MIDI note numbers. One key plays a bass drum sound, another
a snare, and so on.
Different MIDI instruments often use different key assignments. This can be
troublesome if you have made a drum pattern using one MIDI device and then want
to try it on another. When you switch devices, it is very likely that your snare drum
becomes a ride cymbal or your hi-hat becomes a tom, etc., because the drum
sounds are distributed differently in the two instruments.
To solve this problem and to simplify several aspects of MIDI drum kits, such as
using drum sounds from different instruments in the same drum kit, Cubase features
drum maps. A drum map is a list of drum sounds, with a number of settings for each
sound. When you play back a MIDI track for which you have selected a drum map,
the MIDI notes are filtered through the drum map before they are sent to the MIDI
instrument. The map determines which MIDI note number is sent out for each drum
sound and which sound is played on the receiving MIDI device.
When you want to try your drum pattern on another instrument, you simply switch
to the corresponding drum map, and your snare drum sound remains a snare drum
sound.
If you want to have the same drum maps included in your projects, you can load
these into the template.
NOTE
Drum maps are saved with the project files. If you have created or modified a drum
map, use the Save function to save it as a separate XML file to make it available for
loading into other projects.
RELATED LINKS
Saving a Project Template File on page 48
Drum Map Setup Dialog
This dialog allows you to load, create, modify, and save drum maps.
To open the Drum Map Setup dialog, select Drum Map Setup from the Map
pop-up menu or the MIDI menu.
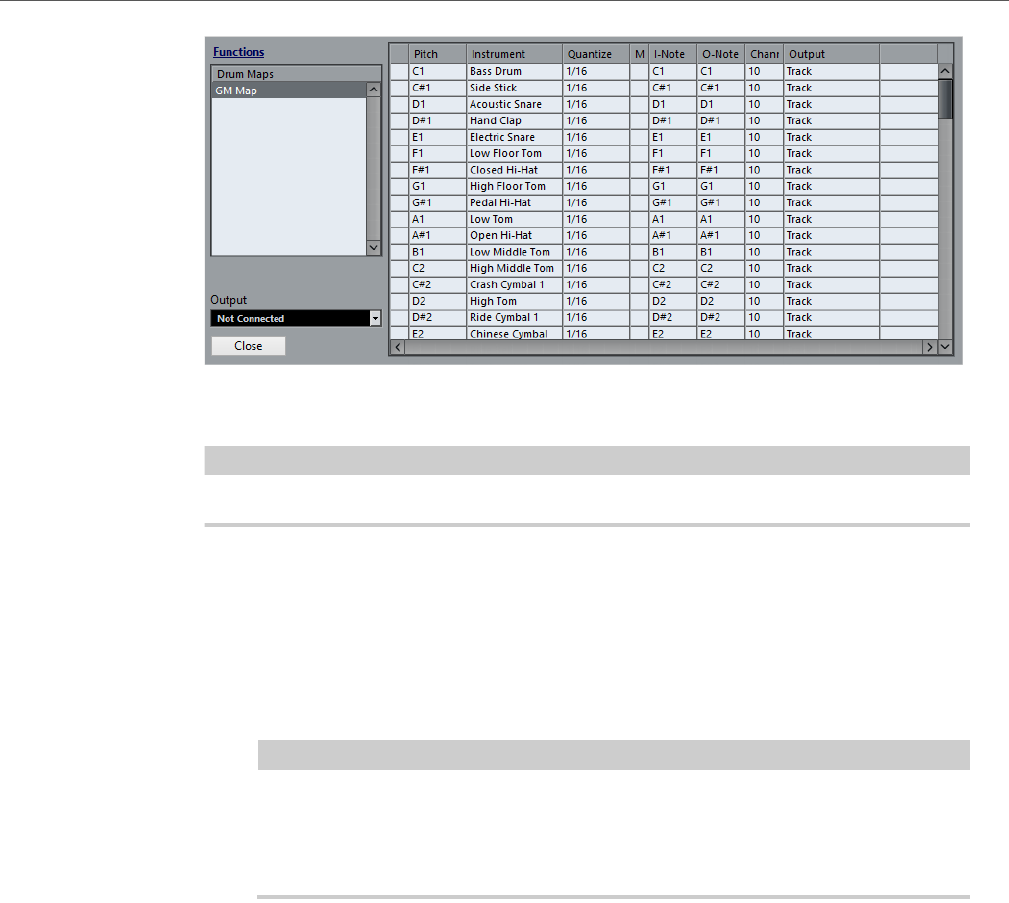
MIDI Editors
Drum Editor Operations
496
The list on the left shows the currently loaded drum maps. The sounds and settings
of the selected drum map are displayed on the right.
NOTE
The settings for the drum sounds are the same as in the Drum Editor.
Output
Allows you to select the output for the drum map sounds.
Drum Sound List
Lists all drum sounds and their settings. To audition a drum sound, click the
leftmost column.
NOTE
If you audition a sound in the Drum Map Setup dialog and the sound is set
to MIDI output Default, the output that is selected on the Output pop-up
menu in the lower left corner is used. When auditioning a default output sound
in the Drum Editor, the MIDI output selected for the track is used.
The Functions pop-up menu contains the following options:
New Map
Adds a new drum map to the project. The drum sounds are named “Sound 1,
Sound 2, etc.” and have all parameters set to default values. The map is
named “Empty Map”.
To rename the drum map, click the name in the list and type in a new name.
New Copy
Adds a copy of the currently selected drum map to create a new drum map.
You can then change the drum sound settings of the copy and rename the
drum map in the list.
Remove
Removes the selected drum map from the project.
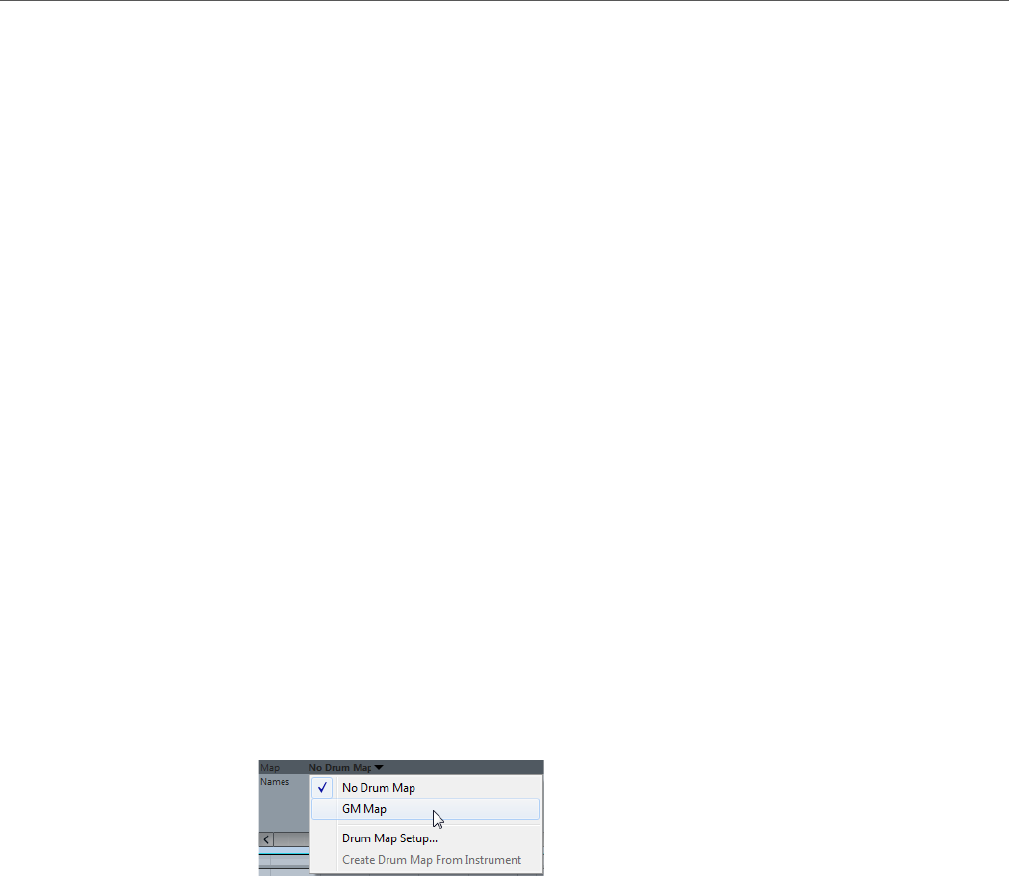
MIDI Editors
Drum Editor Operations
497
Load
Allows you to load drum maps into your project.
Save
Allows you to save the drum map that is selected in the list on disk. Drum map
files have the extension .drm.
Edit head pairs
Allows you to customize the note pairs.
Init Display Notes
Allows you to reset the Display Notes entry to the original setting, that is the
Pitch entry.
RELATED LINKS
Drum Map Settings on page 497
Channel and Output Settings on page 497
Drum Map Settings
A drum map consists of settings for 128 drum sounds, one for each MIDI note
number.
• To get an overview of the drum map settings, open the Drum Editor and use
the Map pop-up menu below the drum sound list to select the GM Map drum
map.
The GM map is set up according to the General MIDI standard.
You can change all drum map settings except the pitch directly in the drum sound
list or in the Drum Map Setup dialog. These changes affect all tracks that use the
drum map.
RELATED LINKS
Drum Sound List on page 492
Drum Map Setup Dialog on page 495
Channel and Output Settings
You can set separate MIDI channels and/or MIDI outputs for each sound in a drum
map. When a drum map is selected for a track, the MIDI channel settings in the
drum map override the MIDI channel setting for the track.
You can select different channels and/or outputs for different sounds. This allows
you to construct drum kits with sounds from several different MIDI devices, etc.
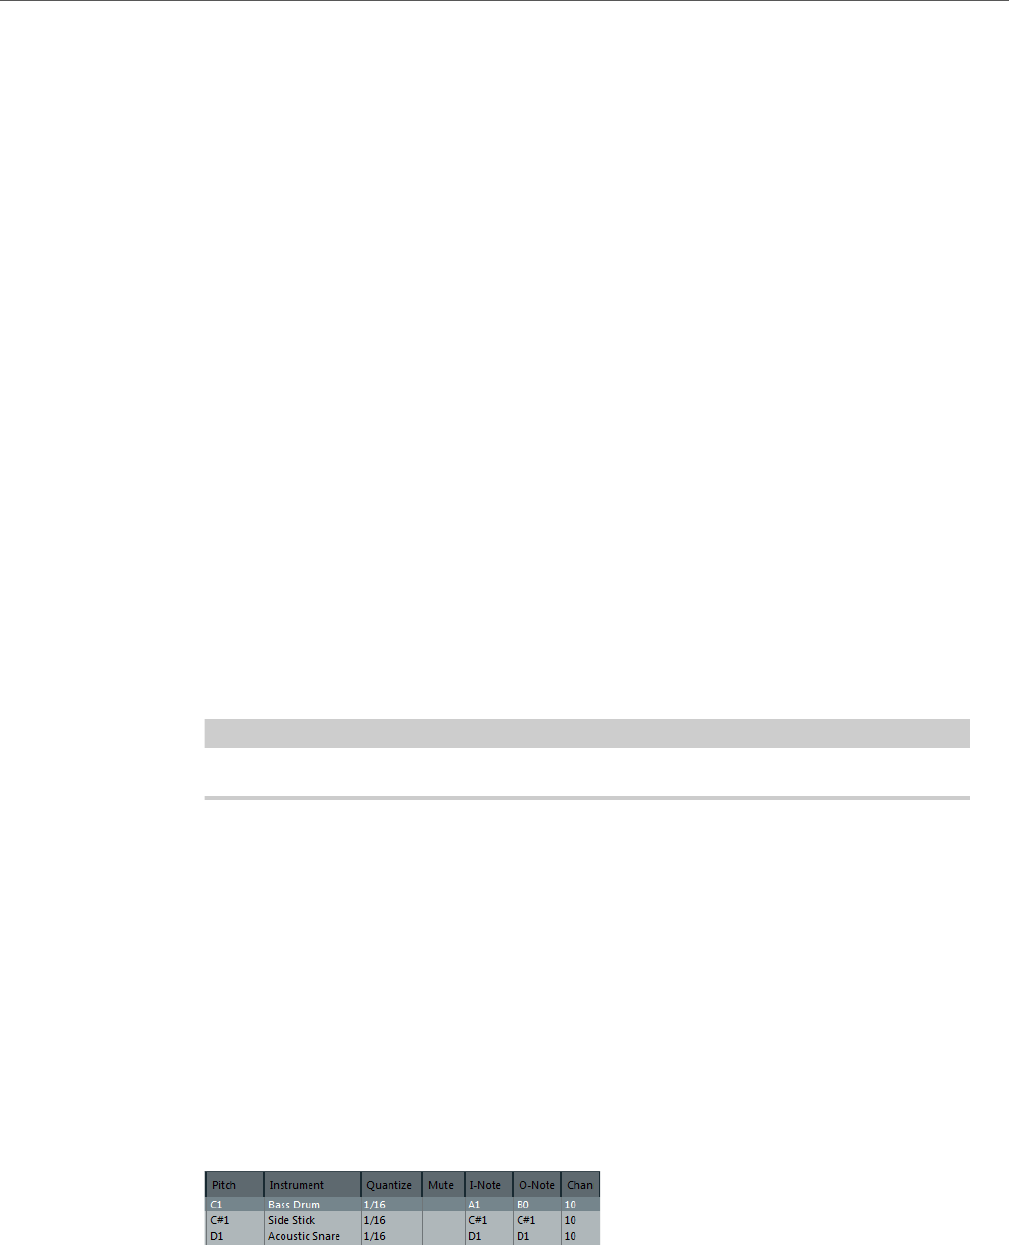
MIDI Editors
Drum Editor Operations
498
• To make a drum sound use the channel of the track, set the channel in the
drum map to Any.
• To make the sound use the MIDI output that is selected for the track, set the
MIDI output for a sound in a drum map to default.
• To send the sound to a specific MIDI output, select any other option.
• To select the same MIDI channel or MIDI device for all sounds in a drum map,
click in the Channel column, press [Ctrl]/[Command], and select a channel or
output.
• If you make specific MIDI channel and output settings for all sounds in a drum
map, you can switch between drum maps to send your drum tracks to another
MIDI instrument.
Selecting a Drum Map for a Track
• To select a drum map for a MIDI track, open the Map pop-up menu in the
Inspector or in the Drum Editor and select a drum map.
• To deactivate the drum map functionality in the Drum Editor, open the Map
pop-up menu in the Inspector or in the Drum Editor and select No Drum
Map.
Even if you do not use a drum map, you can still separate sounds by name
using a name list.
NOTE
Initially, the Map pop-up menu only contains GM Map.
About I-Notes, O-Notes and Pitches
Going through the following theory helps you make the most out of the drum map
concept – especially if you want to create your own drum maps.
A drum map is a kind of filter that transforms notes according to the settings in the
map. It does this transformation twice; once when it receives an incoming note that
is when you play a note on your MIDI controller, and once when a note is sent from
the program to the MIDI sound device.
The following example shows a modified drum map with a bass drum sound that has
different pitch, I-note, and O-note values.

MIDI Editors
Drum Editor Operations
499
I-Notes (Input Notes)
When you play a note on your MIDI instrument, the program looks for this note
number among the I-notes in the drum map. If you play the note A1, the program
finds that this is the I-note of the bass drum sound.
This is where the first transformation happens: the note gets a new note number
according to the pitch setting for the drum sound. In our case, the note is
transformed to a C1 note, because that is the pitch of the bass drum sound. If you
record the note, it is recorded as a C1 note.
For example, you can place drum sounds near each other on the keyboard so that
they can be easily played together, move sounds so that the most important sounds
can be played from a short keyboard, play a sound from a black key instead of a
white. If you never play your drum parts from a MIDI controller but draw them in the
editor you do not need the I-note setting.
O-Notes (Output Notes)
The next step is the output. This is what happens when you play back the recorded
note, or when the note you play is sent back out to a MIDI instrument in realtime
(MIDI Thru):
The program checks the drum map and finds the drum sound with the pitch of the
note. In our case, this is a C1 note and the drum sound is the bass drum. Before the
note is sent to the MIDI output, the second transformation takes place: the note
number is changed to that of the O-note for the sound. In our example, the note sent
to the MIDI instrument is a B0 note.
The O-note settings let you set things up so that the bass drum sound really plays
a bass drum. If you are using a MIDI instrument in which the bass drum sound is on
the C2 key, you set the O-note for the bass drum sound to C2. When you switch
to another instrument (in which the bass drum is on C1) you want the bass drum
O-note set to C1. Once you have set up drum maps for all your MIDI instruments,
you can select another drum map when you want to use another MIDI instrument for
drum sounds.
Setting Pitches of Notes According to their O-Note Settings
You can set the pitch of notes according to their O-note settings. This is useful if
you want to convert a track to a regular MIDI track with no drum map and still have
the notes play back the correct drum sound.
It’s a typical use case to export your MIDI recording as a standard MIDI file. If you
first perform an O-note conversion, you make sure that your drum tracks play back
as intended when they are exported.
• To perform an O-note conversion, select MIDI > O-Note Conversion.
RELATED LINKS
Exporting and importing standard MIDI files on page 622

MIDI Editors
SysEx Messages
500
Drum Name Lists
Drum name lists allow you to use the Drum Editor even if no drum map is selected
for the edited MIDI track. The drum sound list then consists of the columns
Audition, Pitch, Instrument (drum sound name), and Quantize.
This means that you can use the drum sound names in any loaded drum map
without using I-notes and O-notes.
In the drum name list mode, the names that are shown in the Instrument column
depend on the selection on the Names pop-up menu at the bottom of the Drum
Editor. The pop-up menu contains the currently loaded drum maps and GM Map.
SysEx Messages
SysEx (System Exclusive) messages are model-specific messages for setting
various parameters of a MIDI device. This makes it possible to address device
parameters that would not be available via normal MIDI syntax.
Every major MIDI manufacturer has its own SysEx identity code. SysEx messages
are typically used for transmitting patch data, for example, the numbers that make
up the settings of one or more sounds in a MIDI instrument.
Cubase allows you to record and manipulate SysEx data in various ways.
RELATED LINKS
Using MIDI devices on page 413
Bulk Dumps
In any programmable device, the settings are saved as numbers in computer
memory. If you change these numbers, you will change the settings. Normally, MIDI
devices allow you to dump (transmit) all or some settings in the device’s memory in
the form of MIDI SysEx messages.
A dump is therefore, among other things, a way of making backup copies of the
settings of your instrument: sending such a dump back to the MIDI device restores
the settings.
If your instrument allows the dumping of a few or all of its settings via MIDI by
activating some function on the front panel, this dump will probably be recordable
in Cubase.

MIDI Editors
SysEx Messages
501
Recording a Bulk Dump
IMPORTANTIMPORTANTIMPORTANTIMPORTANT
If your MIDI instrument does not offer a way to initiate a dump, you have to send a
Dump Request message from Cubase to start the dump. In that case, use the MIDI
SysEx Editor to insert the specific Dump Request message (see the instrument’s
documentation) at the beginning of a MIDI track. When you activate recording, the
Dump Request message is played back (sent to the instrument), the dump starts
and is recorded.
PROCEDURE
1. Do one of the following:
• On Microsoft Windows, select File > Preferences.
• On Mac, select the Cubase menu, and select Preferences.
2. In the Preferences dialog, select MIDI > MIDI Filter.
3. In the Record section, deactivate the SysEx checkbox to make sure that the
recording of SysEx data is not filtered.
This way, SysEx messages are recorded but not echoed back to the instrument. This
can lead to unpredictable results.
4. Activate recording on a MIDI track and initiate the dump from the front panel
of the instrument.
5. When you are done recording, select the new part and select MIDI > Key
Editor.
6. Open the controller lane for the part.
This allows you to check that the SysEx dump was recorded. There should be one or
several SysEx events in the controller lane.
Transmitting a Bulk Dump Back to a Device
PREREQUISITE
Route the MIDI track with the System Exclusive data to the device. Check your
device’s documentation to find details about which MIDI channel should be used,
etc.
PROCEDURE
1. Solo the track.
2. Make sure that the device is set up to receive SysEx messages.
3. If necessary, put the device in Standby to Receive System Exclusive mode.
4. Play back the data.

MIDI Editors
SysEx Messages
502
About Recording and Transmitting Bulk Dumps
• Do not transmit more data than you need. If all you want is a single program,
do not send all. Otherwise, it could get too difficult to find the recognized
program. Usually, you can specify exactly which data you want to send.
• If you want the sequencer to dump the pertinent sounds to your instrument
whenever you load a project, put the SysEx data in a silent count-in before the
project itself starts.
• If the dump is very short, which can, for example, be a single sound you can
put the dump in the middle of the project to quickly re-program a device.
However, you can achieve the same effect by using Program Change. This is
definitely preferable, since less MIDI data is sent and recorded. Some devices
may be set up to dump the settings for a sound as soon as you select it on
the front panel.
• If you create parts with useful SysEx dumps, you can put these on a special
muted track. To make use of these parts, drag it to an empty unmuted track
and play it back.
• Do not transmit several SysEx dumps to several instruments at the same time.
• Make a note of the current device ID setting of the instrument. If you change
this, the instrument may later refuse to load the dump.
Recording SysEx Parameter Changes
Often you can use SysEx to remotely change individual settings in a device, for
example, opening a filter, selecting a waveform, changing the decay of the reverb,
etc. Many devices are also capable of transmitting changes that are made on the
front panel as SysEx messages. These can be recorded in Cubase, and thus
incorporated into a regular MIDI recording.
For example: you open up a filter while playing some notes. In that case, you record
both the notes and the SysEx messages that are generated when you open the filter.
When you play back the recording, the sound changes exactly as it did when you
recorded it.
PROCEDURE
1. Select File > Preferences.
2. In the Preferences dialog, select MIDI > MIDI Filter and make sure that
SysEx is deactivated in the Record section.
3. Make sure that the instrument is set to transmit changes of front panel
controls as SysEx messages.
4. Record.
AFTER COMPLETING THIS TASK
On the controller lane, check if the events were recorded properly.
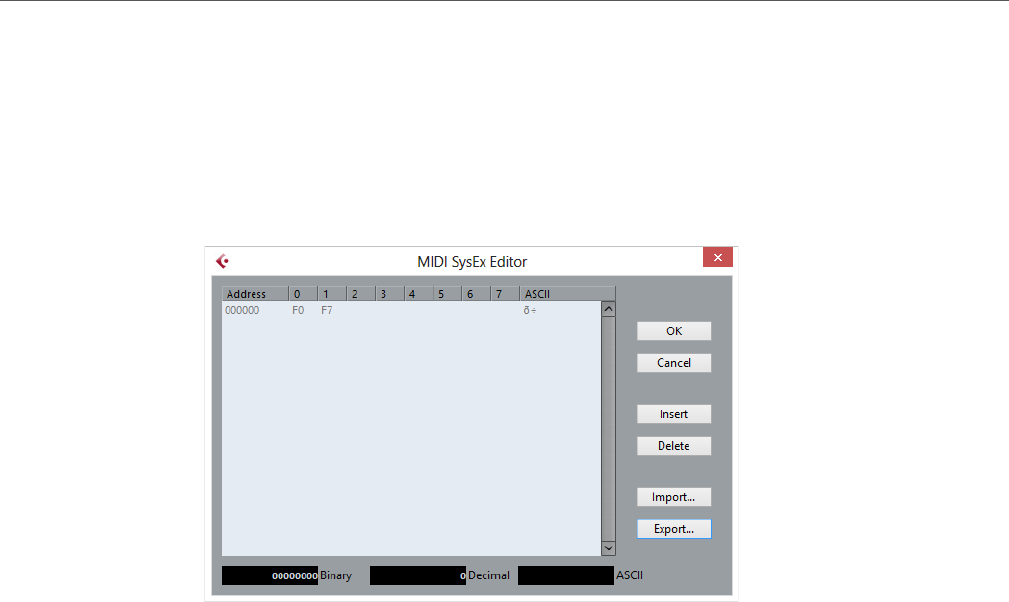
MIDI Editors
SysEx Messages
503
MIDI SysEx Editor
SysEx events are shown in the controller lane, their entire content is displayed in the
MIDI SysEx Editor.
• To open the MIDI SysEx Editor for a SysEx event, double-click the SysEx
event on the controller lane.
The display shows the entire message on one or several lines. SysEx messages
always begin with F0 and end with F7 and a number of arbitrary bytes in between.
If the message contains more bytes, so that they do not entirely fit on one line, it
continues on the next line. The Address indication to the left helps you find out on
which position in the message a certain value is located.
You can edit all values except for the first (F0) and the last ones (F7).
In the MIDI SysEx Editor, the bytes are displayed as follows:
• In the main display, values are shown in hexadecimal format.
• To the right of the main display, values are shown in ASCII format.
• At the bottom of the dialog, the selected value is shown in ASCII, binary, and
decimal formats.
Adding and Deleting Bytes
• To add a byte, open the MIDI SysEx Editor and click Insert. The byte is
added before the selected byte.
• To delete a byte, open the MIDI SysEx Editor, select a byte, and click Delete.
• To delete the complete SysEx message, select it in the controller lane and
press [Delete] or [Backspace].

MIDI Editors
SysEx Messages
504
Editing Byte Values
You can edit the selected byte value in the main display of the MIDI SysEx Editor,
or in the ASCII, decimal, and binary displays.
• To edit the selected value, open the MIDI SysEx Editor, click on a byte, and
type in the value.
Importing and Exporting SysEx Data
You can import SysEx data from disk and export the edited data to a file.
The file has to be in MIDI SysEx (.syx) binary format. Only the first dump in a SYX
file will be loaded.
• To import SysEx data, open the MIDI SysEx Editor and click Import.
• To export SysEx data, open the MIDI SysEx Editor and click Export.
NOTE
Do not confuse this format with MIDI files, which have the extension .mid.

505
Chord Functions
The chord functions provide you with many possibilities for working with chords.
The chord functions allow you to:
• Build chord progressions by adding chord events to the chord track.
• Convert chord events to MIDI.
• Use the chord track to control MIDI playback.
• Use the chord track voicing to change the pitches of your MIDI.
• Extract chord events from MIDI data to get an overview of the harmonic
structure of a MIDI file.
• Record chord events with a MIDI keyboard.
RELATED LINKS
Chord Editing Section (Cubase Elements only) on page 456
Chord Track
The chord track allows you to add chord events and scale events.
RELATED LINKS
Scale Events on page 511
Chord Events on page 506
Adding the Chord Track
PROCEDURE
•Select Project > Add Track > Chord.
RESULT
The chord track is added to your project.
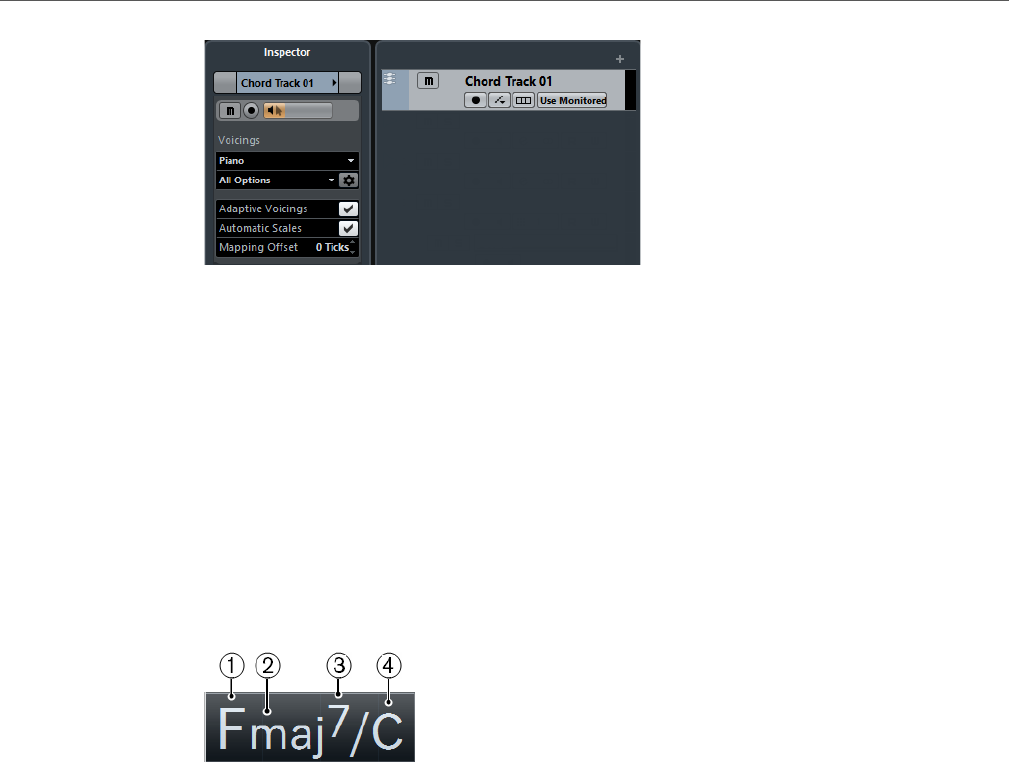
Chord Functions
Chord Events
506
Chord Events
Chord events are representations of chords that control or transpose playback on
MIDI and instrument tracks.
Chord events alter the pitches of MIDI notes, if their track is set up to follow the
chord track.
Chord events have a specific start position. Their end, however, is determined by
the start of the next chord event. They can have a root note, a type, a tension, and
a bass note:
1) Root note
2) Type
3) Tension
4) Bass note
RELATED LINKS
Controlling MIDI Playback using the Chord Track on page 515
Chord Editor
The Chord Editor allows you to define or change chord events, and to add new
chord events.
• To open the Chord Editor, double-click a chord event.
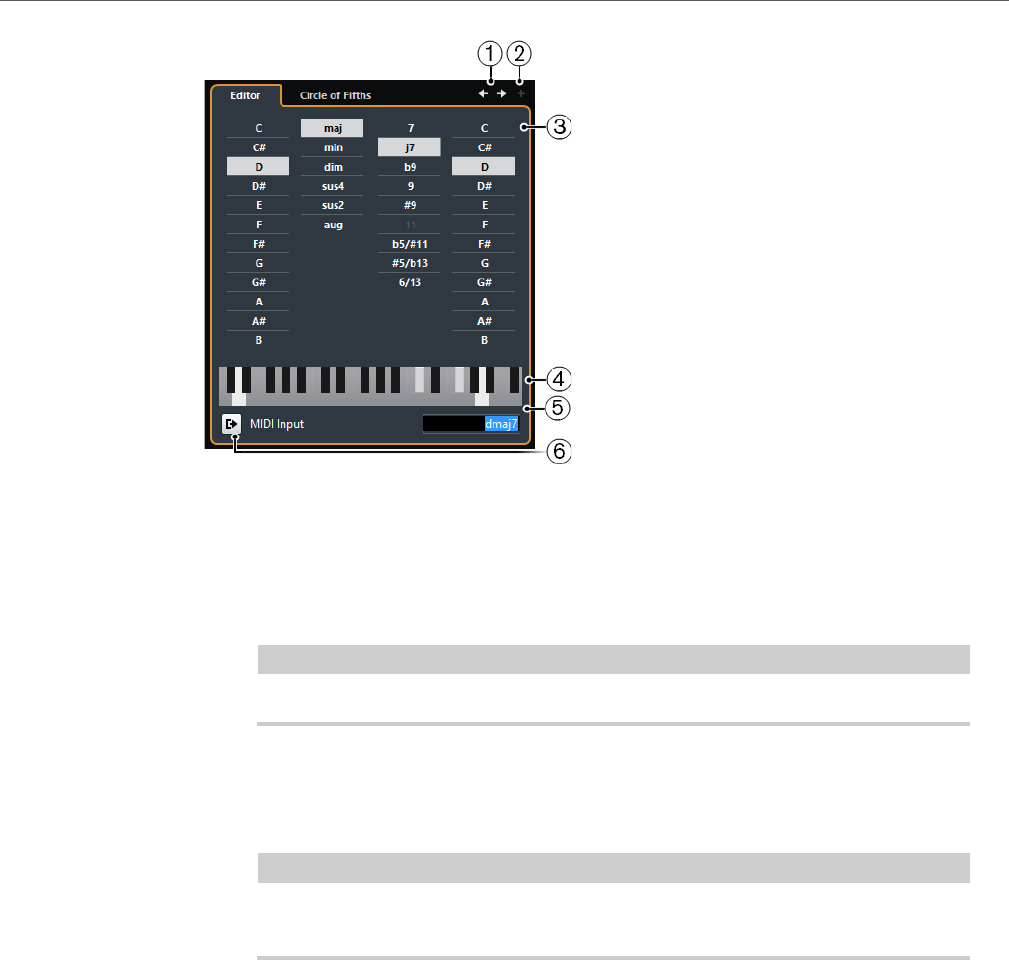
Chord Functions
Chord Events
507
1) Go to Previous/Next Chord
Allow you to select the previous/next chord on the chord track for editing.
2) Add Chord
Adds a new undefined chord event on the chord track.
NOTE
This works only if the last chord event on the chord track is selected.
3) Chord definition buttons
Activate these buttons to define a root note, a chord type, a tension, and a
bass note for your chord event.
NOTE
If you do not select a separate bass note, the setting is linked to the root note,
so that no extra bass note is heard.
4) Keyboard display
Shows the notes of the chord event, considering the current voicing settings.
5) Define Chord by Text Input
Allows you to define a chord using the computer keyboard.
6) Activate MIDI Input
Allows you to define a chord by playing a chord on your MIDI keyboard. If the
chord is recognized, it is reflected by the chord buttons and the keyboard
display.

Chord Functions
Chord Events
508
Adding Chord Events
PREREQUISITE
Add the chord track.
PROCEDURE
1. Select the Draw tool and click in the chord track.
An undefined chord event named X is added.
2. Select the Object Selection tool and double-click the chord event.
3. In the Editor, select a root note.
4. Optional: Select a chord type, tension, and bass note.
5. Do one of the following:
• To close the Editor, click anywhere outside the Editor.
• To add a new undefined chord event, click Add Chord.
RELATED LINKS
Adding the Chord Track on page 505
Defining Chords By Text Input
In the chord Editor, you can use the text input field to define a chord with the
computer keyboard.
PROCEDURE
1. Double-click a chord event to open the chord Editor.
2. Click in the text input field at the bottom of the Editor.
3. Enter a chord by performing the following actions:
• Define a root note, for example, C, D, E.
• Define accidentals, for example, # or b.
• Define the chord type, for example maj, min, dim, sus, or aug.
• Define a chord extension, for example 7, 9, or 13.
NOTE
If you have activated Solfège in the Note Name pop-up menu (File > Preferences
> Event Display > Chords), you can also enter chords in this format. You must
capitalize the first letter and write “Re” instead of “re”, for example. Otherwise, the
chord is not recognized.
4. Press [Tab] to add a new chord and define it.
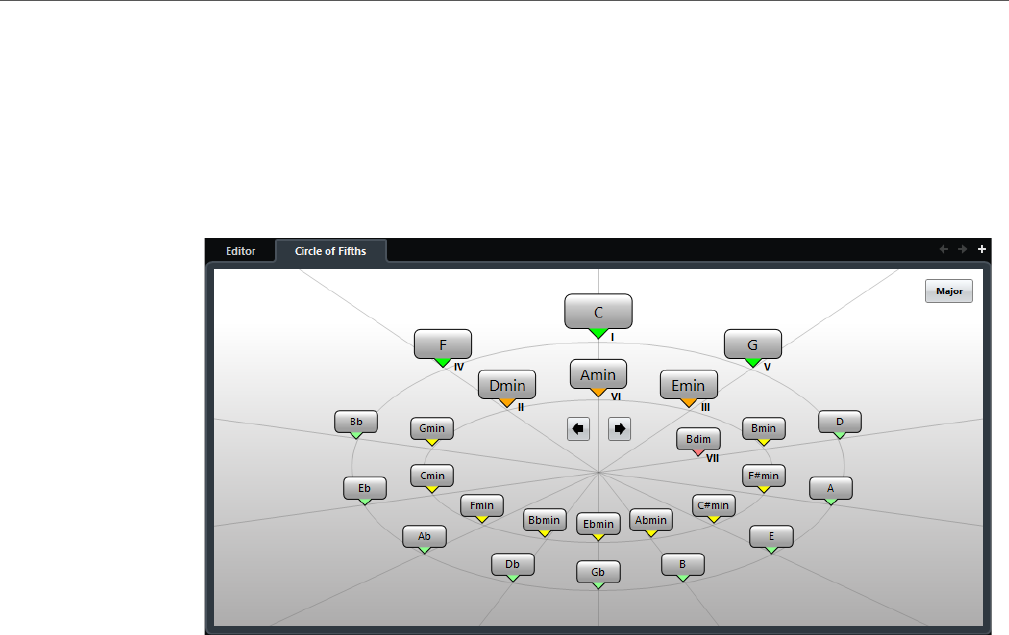
Chord Functions
Chord Events
509
Chord Assistant
The Chord Assistant allows you to use a chord as a starting point to get
suggestions for the next chord.
• To open the Chord Assistant, in the Chord Editor, click Circle of Fifths.
Chord Assistant – Circle of Fifths
The Circle of Fifths mode of the Chord Assistant shows the chords in an
interactive visualization of the circle of fifths.
The origin chord that defines the current key is shown in the center of the Chord
Assistant and is marked as tonic (I).
The outer circle shows the twelve major chords ordered in intervals of fifths.
The inner circle displays the corresponding parallel minor chords.
The roman numerals mark the chords of the current key with their scale degree. You
can use these chords to create typical chord progressions or you can use the other
chords for more creative results.
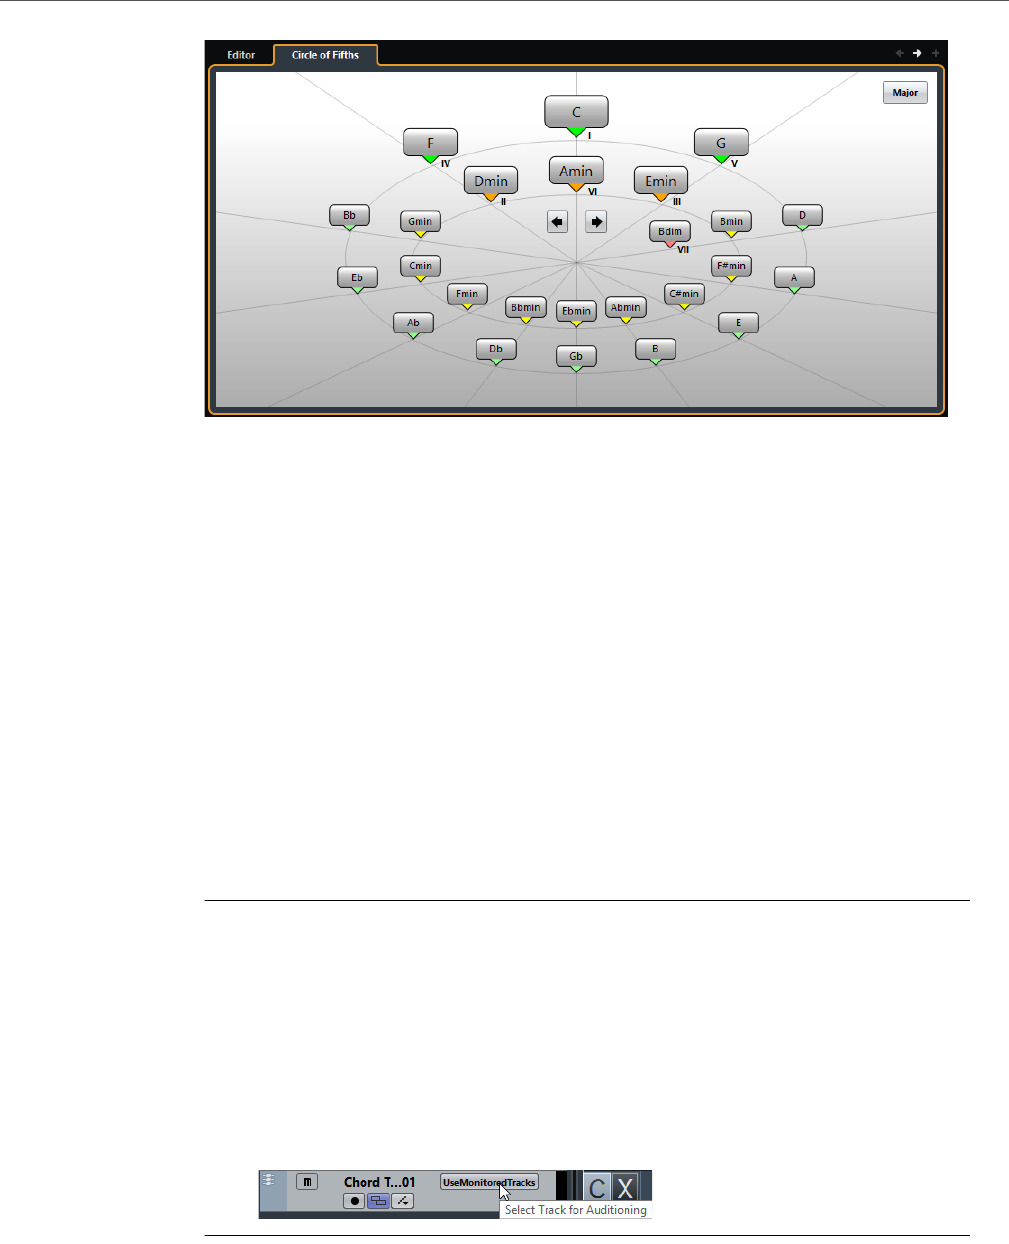
Chord Functions
Chord Events
510
• To play a chord and assign it to the selected chord event, click it.
The last three chords that you clicked are shown with a highlighted frame.
• To define a new key, right-click the chord in the Chord Assistant and select
Use as Origin, or use the Rotate Left/Rotate Right controls.
• To select the parallel minor chord and define it as key, click Major/Minor.
Auditioning Chord Events
To hear the chord events on the chord track, you must connect the chord track to
the output of an instrument or a MIDI track.
PREREQUISITE
Add the chord track and some chord events.
PROCEDURE
1. Do one of the following:
• To add an instrument track, select Project > Add Track > Instrument.
• To add a MIDI track, select Project > Add Track > MIDI.
2. Assign a VST instrument to your instrument or MIDI track and select a sound.
3. In the chord track Inspector, activate Acoustic Feedback.
4. From the Select Track for Auditioning pop-up menu, select the track that
you want to use for auditioning.
RESULT
The chord events on the chord track now trigger the sound of the assigned
instrument on the MIDI or instrument track.
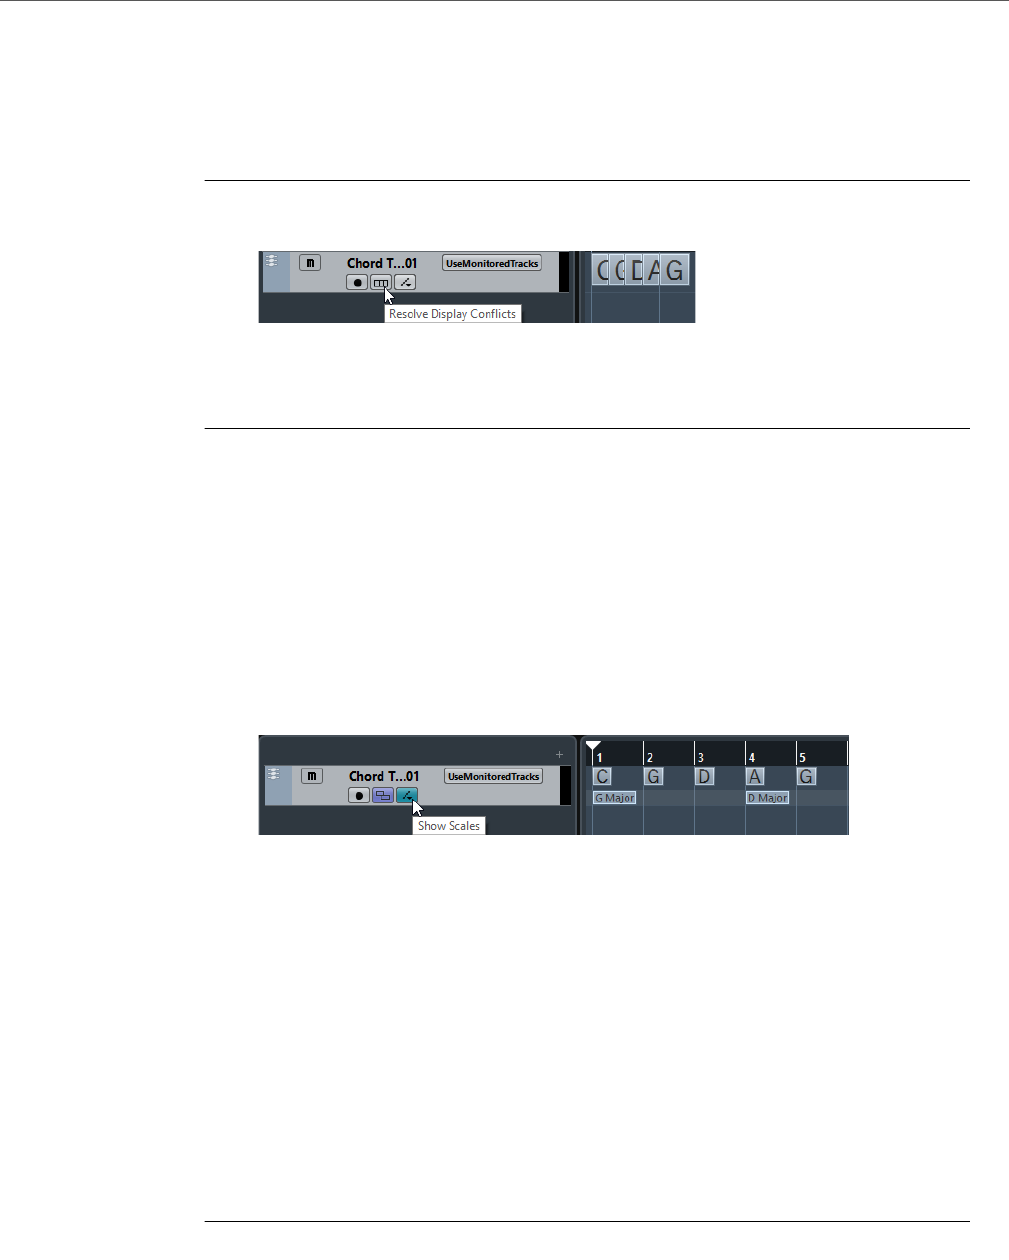
Chord Functions
Scale Events
511
Changing How Chord Events Are Displayed
You can change how chord events are displayed. This is useful, if chord events
overlap each other at low zoom levels, or if you do not like the font type.
PROCEDURE
1. On the chord track, activate Resolve Display Conflicts.
2. Select File > Preferences > Event Display > Chords and set up the chord
font.
Here you can also determine the note name and naming format.
Scale Events
Scale events inform you which chord events fit in a specific sequence of notes that
belong to a specific root note.
Cubase automatically creates scale events for your chord events.
• To show the scale events, activate Show Scales on the chord track.
• To audition the notes that belong to a scale event, click it.
However, you can also add and edit scale events manually.
Scale events have a specific start position. Their end is determined by the start of
the next scale event.
Editing Scale Events
PREREQUISITE
Add the chord track and chord events. Deactivate Automatic Scales in the chord
track Inspector.
PROCEDURE
1. On the chord track, activate Show Scales.
The scale lane is displayed.
2. Select the chord event.
A scale event is shown on the scale lane.
3. Do one of the following:
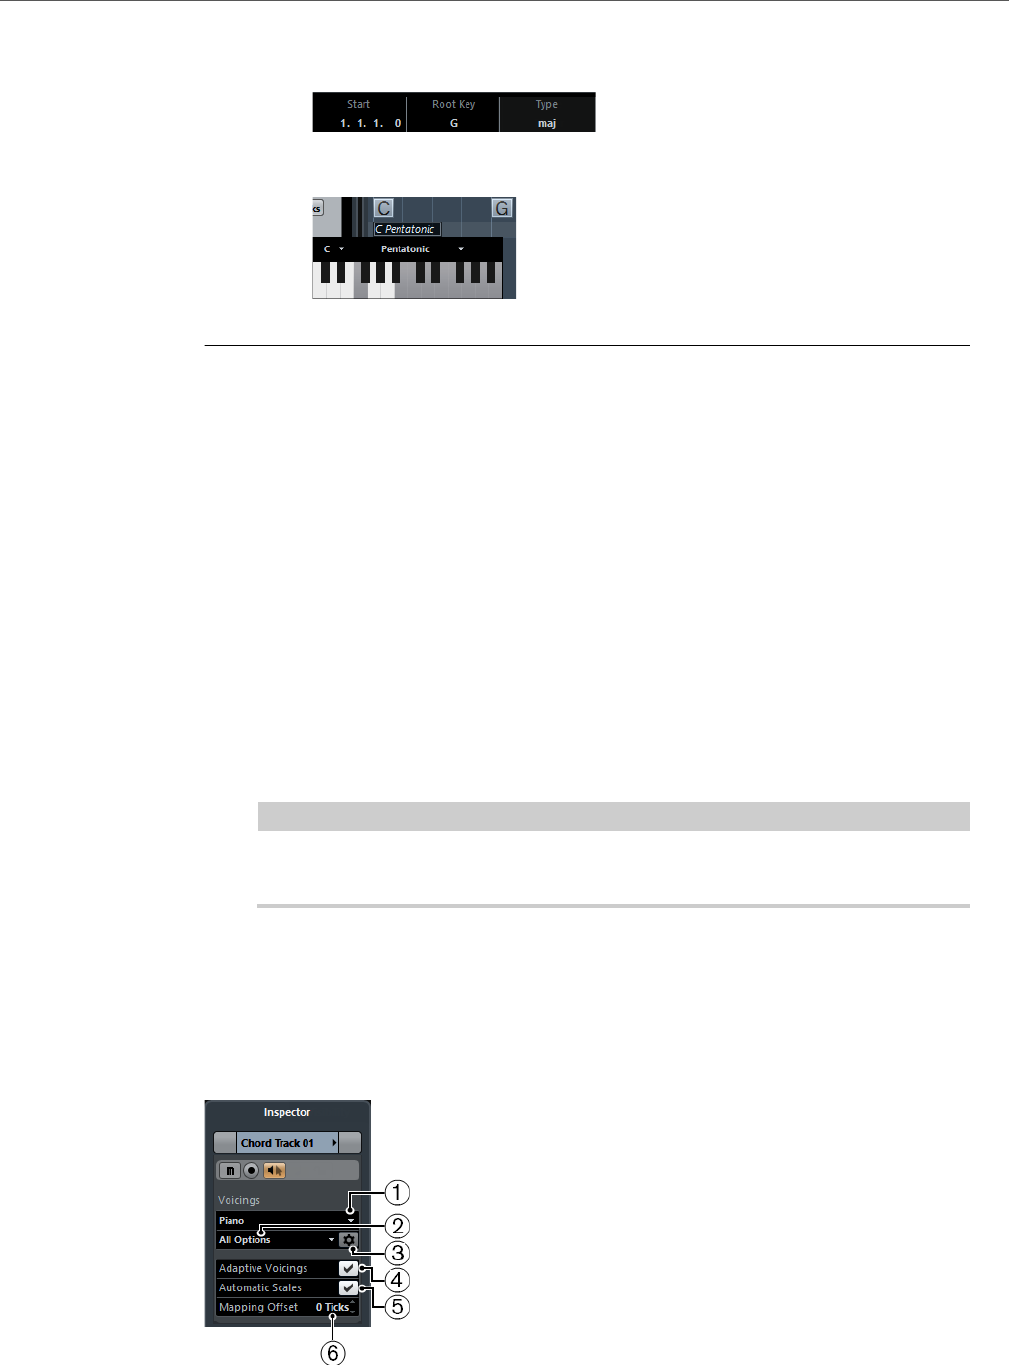
Chord Functions
Voicings
512
• Click the first scale event on the chord track, and on the info line, select a Root
Key and Type.
• Double-click the scale event, and in the keyboard that appears, select a Root
Key and Type of the scale.
The keys that correspond to the scale are highlighted.
Voicings
Voicings determine how chord events are set up. They define the vertical spacing
and order of the pitches in a chord, but also the instrumentation and genre of a
musical piece.
For example, a C chord can be spread over a wide range of pitches, and a pianist
will choose different notes than a guitarist. The pianist may also play completely
different pitches for different musical genres.
• You can set up voicing for the entire chord track in the chord track Inspector.
• You can set up voicings for individual chord events on the Voicing pop-up
menu on the info line.
NOTE
If Adaptive Voicings is activated in the chord track Inspector, you can only
change the voicings for the first chord event on the info line.
Setting up Voicings
To set up voicings for the entire chord track, you can use the chord track Inspector.

Chord Functions
Voicings
513
1) Voicing library
Allows you to select Guitar, Piano, or Basic as a voicing library.
2) Voicing library subset
NOTE
This is only available, if Guitar or Piano is set as voicing library.
Allows you to select a preset voicing library subset.
3) Configure voicing parameters
Allows you to configure your own voicing parameters for a specific voicing
scheme.
4) Adaptive Voicings
Activate this to let Cubase set the voicings automatically. This prevents the
individual voices from jumping too much.
5) Automatic Scales
Activate this to let Cubase set the scales automatically.
6) Mapping Offset
If you enter a negative number of ticks, the chord events will affect the MIDI
notes that have been triggered too early.
Configure Voicing Parameters
If you click Configure Voicing Parameters in the Voicings section of the
Inspector, you can configure your own voicing parameters for a specific voicing
scheme.
NOTE
The Start Voicing section for piano, guitar, and basic voicings lets you select a start
voicing. This is only available for MIDI and instrument tracks, but not for the chord
track, and only if you select Voicings in the Follow Chord Track pop-up menu.
In the Style section for Piano voicings, you can set up the following parameters:
Triads
Sets a triad. Chords with more than three notes are not changed.
Triads with maj9
Sets a triad with a major ninth, but without root note. Chords with more than
three notes are not changed.
Triads with maj9 and min9
Sets a triad with a major and a minor ninth, but without root note. Chords with
more than three notes are not changed.

Chord Functions
Voicings
514
4-note chords
Sets a default 4-note chord without root note. Chords with less than three
notes are not changed.
4-note chords (Open Jazz)
Sets a 4-note chord without root note and without fifth. Chords with less than
three notes are not changed.
5-note chords
Sets a 5-note chord with a ninth. Chords with less than four notes are not
changed.
In the Options section for Piano voicings, you can set up the following parameters:
Add Root Note
Adds a root note.
Duplicate Root
Duplicates the root note.
Fatten up
Duplicates the tenor.
In the Voicing Range section for Piano voicings, you can set up the following
parameters:
Lowest Root Note
Sets the limit for the lowest root note.
Lowest Note
Sets the limit for the lowest note, except the root note.
Highest Note
Sets the limit for the highest note, except the root note.
In the Style section for Guitar voicings, you can set up the following parameters:
Triads
Sets a triad with four, five or six voices.
4-Note Chords
Sets a 4-note chord with four, five or six voices without tensions.
3-String Triads
Sets a three string triad.
Modern Jazz
Sets 4-note, 5-note, and 6-note chords, partly without root note, but with
tensions.

Chord Functions
Converting Chord Events to MIDI
515
For Basic voicings only Octave Offset from C3 is available. This allows you to
determine an offset value for the default octave range.
Converting Chord Events to MIDI
You can convert chord events to MIDI for further editing or for printing a lead sheet
in the Score Editor.
PROCEDURE
1. Add an instrument track or a MIDI track.
• To add an instrument track, select Project > Add Track > Instrument.
• To add a MIDI track, select Project > Add Track > MIDI.
2. Do one of the following:
• To convert all chord events to MIDI, select Project > Chord Track > Chords
to MIDI.
• To convert only selected chords to MIDI, select the chord events and drag
them to the MIDI or instrument track.
RESULT
A new MIDI part is created, containing the chords as MIDI events.
Controlling MIDI Playback using the Chord Track
You can use the chord track to control MIDI playback.
Using Live Transform
Live Transform allows you to transpose the MIDI input live to a chord progression
on the chord track. This way, you do not have to worry about what key you hit on
your MIDI keyboard as the MIDI input is transposed to match chords or scales on
your chord track in realtime.
PROCEDURE
1. Create a MIDI or an instrument track and activate Record Enable.
2. In the Inspector, open the Chords section.
3. Open the Live Transform pop-up menu and do one of the following:
• To map the MIDI input to chord events, select Chords.

Chord Functions
Controlling MIDI Playback using the Chord Track
516
• To map the MIDI input to scale events, select Scales.
4. Hit some keys on your MIDI keyboard or on the Virtual Keyboard.
RESULT
Any key that you hit is mapped in realtime to the chord or scale events on the chord
track.
Using Follow Chord Track
This allows you to match an existing recording to a chord progression on the chord
track.
PROCEDURE
1. Select the track that you want to match to the chord track.
2. In the Inspector, click Chords.
3. Open the Follow Chord Track pop-up menu and select a mode.
NOTE
If this is the first time that you open this pop-up menu for the track, the Follow Chord
Track dialog opens.
4. In the Follow Chord Track dialog, make your settings.
5. Click OK.
RESULT
The events on your track now match the chord progression on the chord track.
NOTE
If you matched your MIDI track to the chord track, some of the original MIDI notes
may be muted. To hide these notes in the editors, select File > Preferences >
Editing > Chords and activate Hide muted Notes in Editors.
RELATED LINKS
Follow Chord Track Dialog on page 518
Follow Chord Track Modes on page 516
Follow Chord Track Modes
This section of the Inspector allows you to determine how your track follows the
chord track.
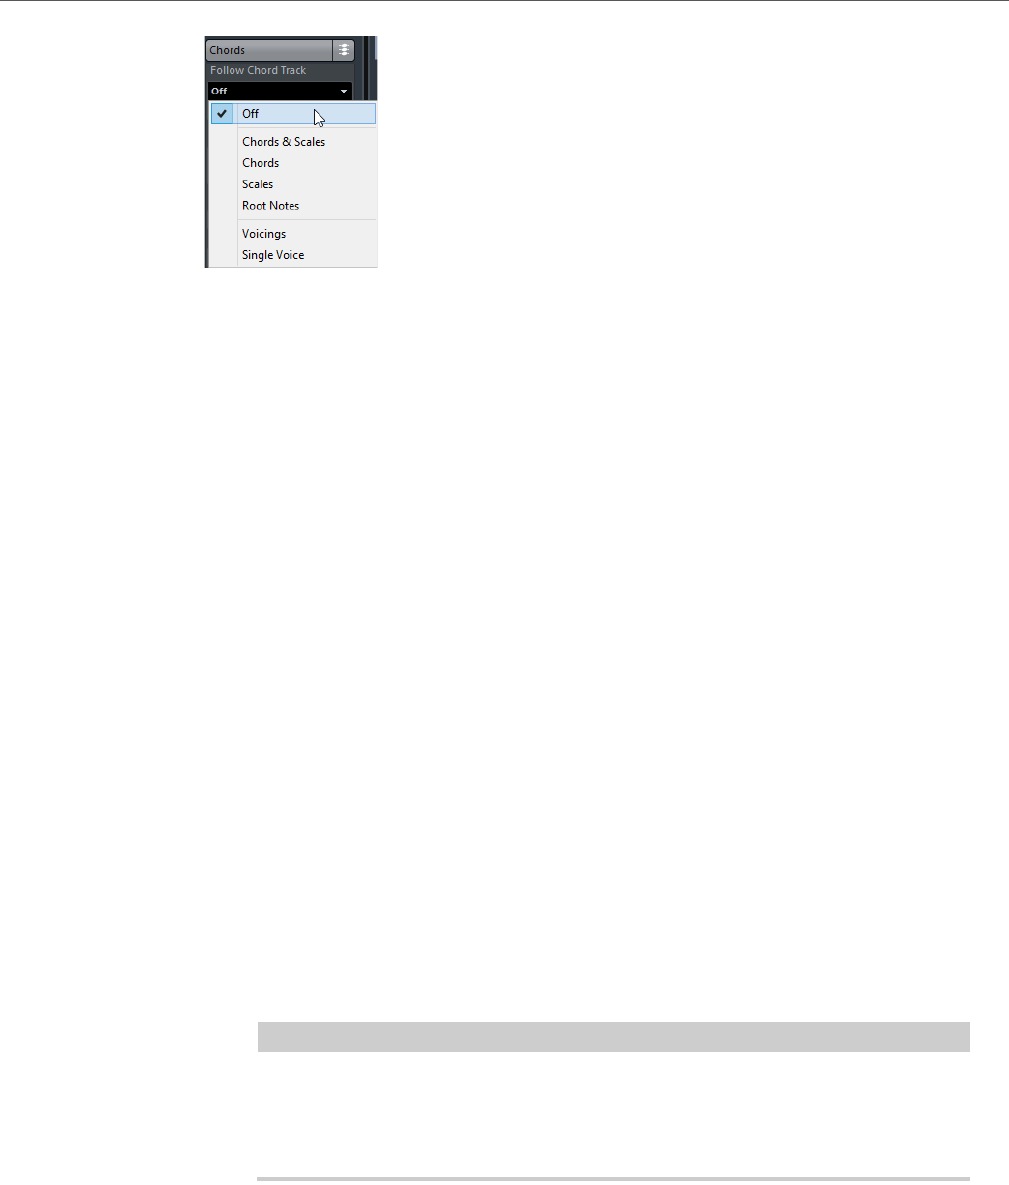
Chord Functions
Controlling MIDI Playback using the Chord Track
517
The following options are available on the Follow Chord Track pop-up menu:
Off
Follow Chord Track is deactivated.
Chords & Scales
This maintains the intervals of the original chord or scale as far as possible.
Chords
This transposes MIDI notes to match the key note and maps them to the
current chord.
Scales
This transposes MIDI notes to match the current scale. This allows a bigger
variety of notes and a more natural performance.
Root Notes
This transposes MIDI notes to match the root note of the chord event. The
effect corresponds to using the transpose track. This option is suitable for
bass tracks.
Voicings
This transposes MIDI notes to match the voices of the selected voicing library.
Single Voice
Maps MIDI notes to the notes of a single voice (soprano, tenor, bass, etc.) of
the voicing. Use the pop-up menu below to select the desired voice.
NOTE
If you apply this mode to a selection of tracks that contain separate voices,
you can set up one track as master and the others as voicing slaves. This way,
you can change the voicing of the master, and the slaves will follow
automatically.
RELATED LINKS
Assigning Voices to Notes on page 519
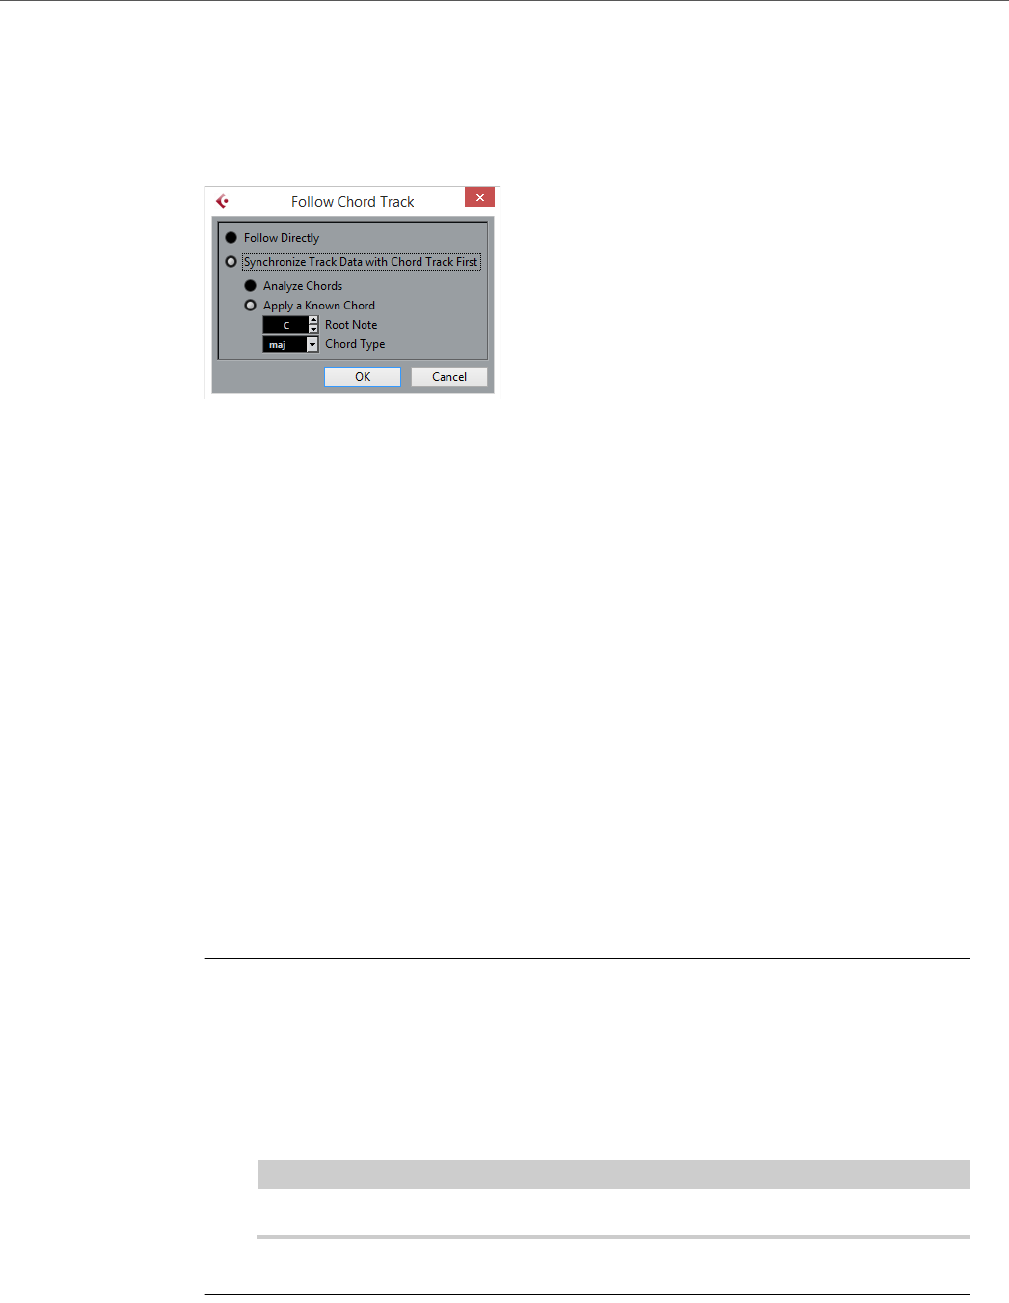
Chord Functions
Controlling MIDI Playback using the Chord Track
518
Follow Chord Track Dialog
This dialog opens the first time that you select an option on from the Follow Chord
Track pop-up menu on the Chords section of the Inspector.
Follow Directly
Activate this if your MIDI notes are already in accordance with the chord track.
This is the case if you extracted your chords from the MIDI events on the track
by selecting Project > Chord Track > Create Chord Symbols, for example.
Synchronize Track Data with Chord Track First
Activate Analyze Chords if the track data has nothing in common with the
chord events. This analyzes the MIDI events and matches the found chords to
the chord track. This is only available for MIDI.
Activate Apply a Known Chord if the track data has nothing in common with
the chord events and if there are no chord changes. Specify Root Note and
Chord Type of your events.
Using Map to Chord Track
This allows you to match individual parts or events to a chord progression on the
chord track.
PROCEDURE
1. In the Project window, select the events or parts that you want to map to the
chord track.
2. Select Project > Chord Track > Map to Chord Track.
The Map to Chord Track dialog opens.
3. From the Mapping Mode pop-up menu, select a mapping mode.
NOTE
If you select Voicings and no voices are found, Auto mode is used instead.
4. Click OK.
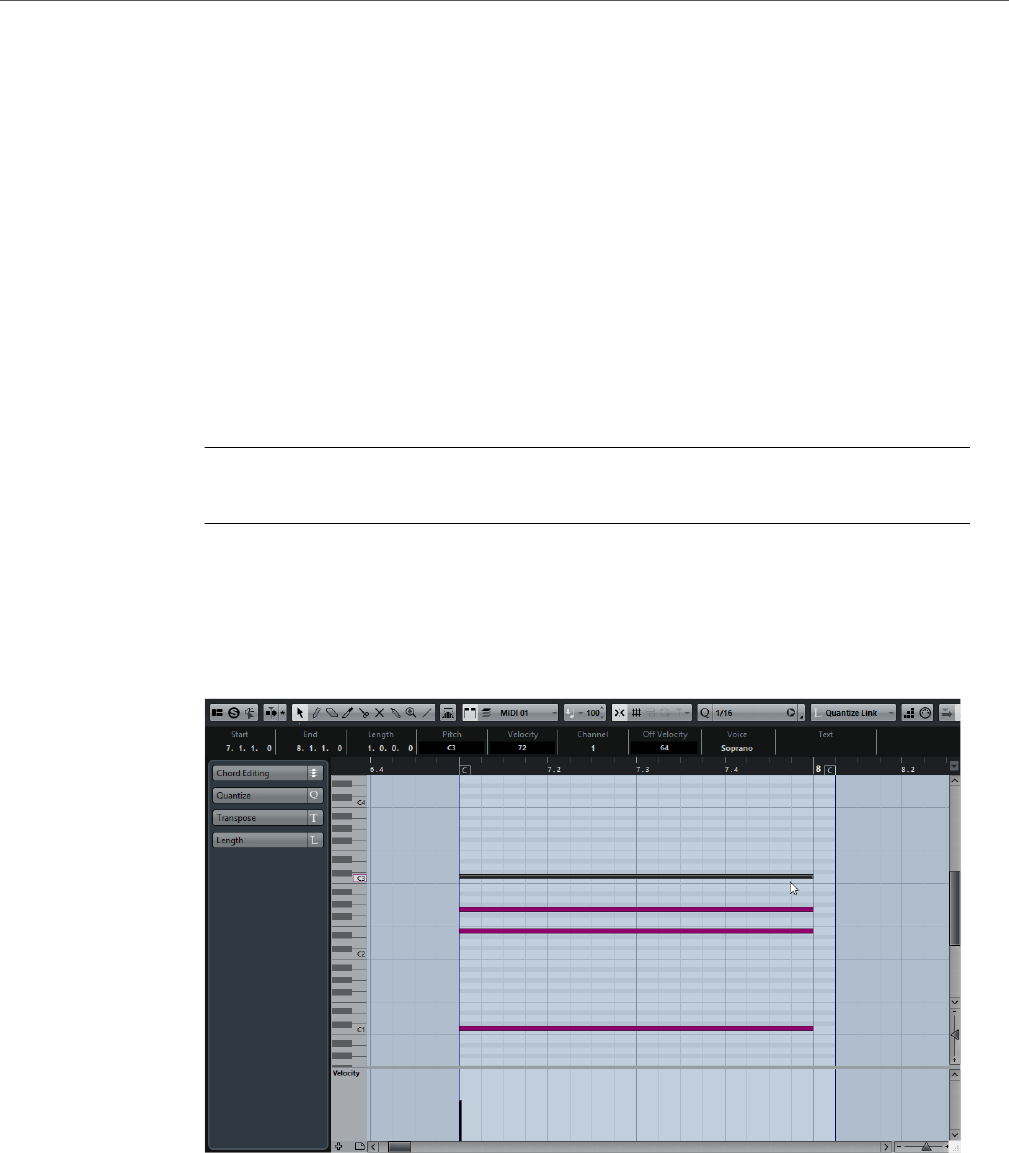
Chord Functions
Assigning Voices to Notes
519
RESULT
The chords and scales of each event or part are analyzed and used for mapping. If
no chords are found, Cubase assumes that the performance is in “C”. The available
mapping modes and voicings correspond to the Follow Chord Track parameters
in the Chords section of the Inspector.
RELATED LINKS
Follow Chord Track Modes on page 516
Assigning Voices to Notes
You can transpose MIDI notes to match the voices of a selected voicing library.
PROCEDURE
•Select Project > Chord Track > Assign Voices to Notes.
RESULT
The note pitches now match the voicing of the chord track and you can still edit the
MIDI notes. If you now select a note in the Key Editor, you see that Voice in the info
line is assigned.
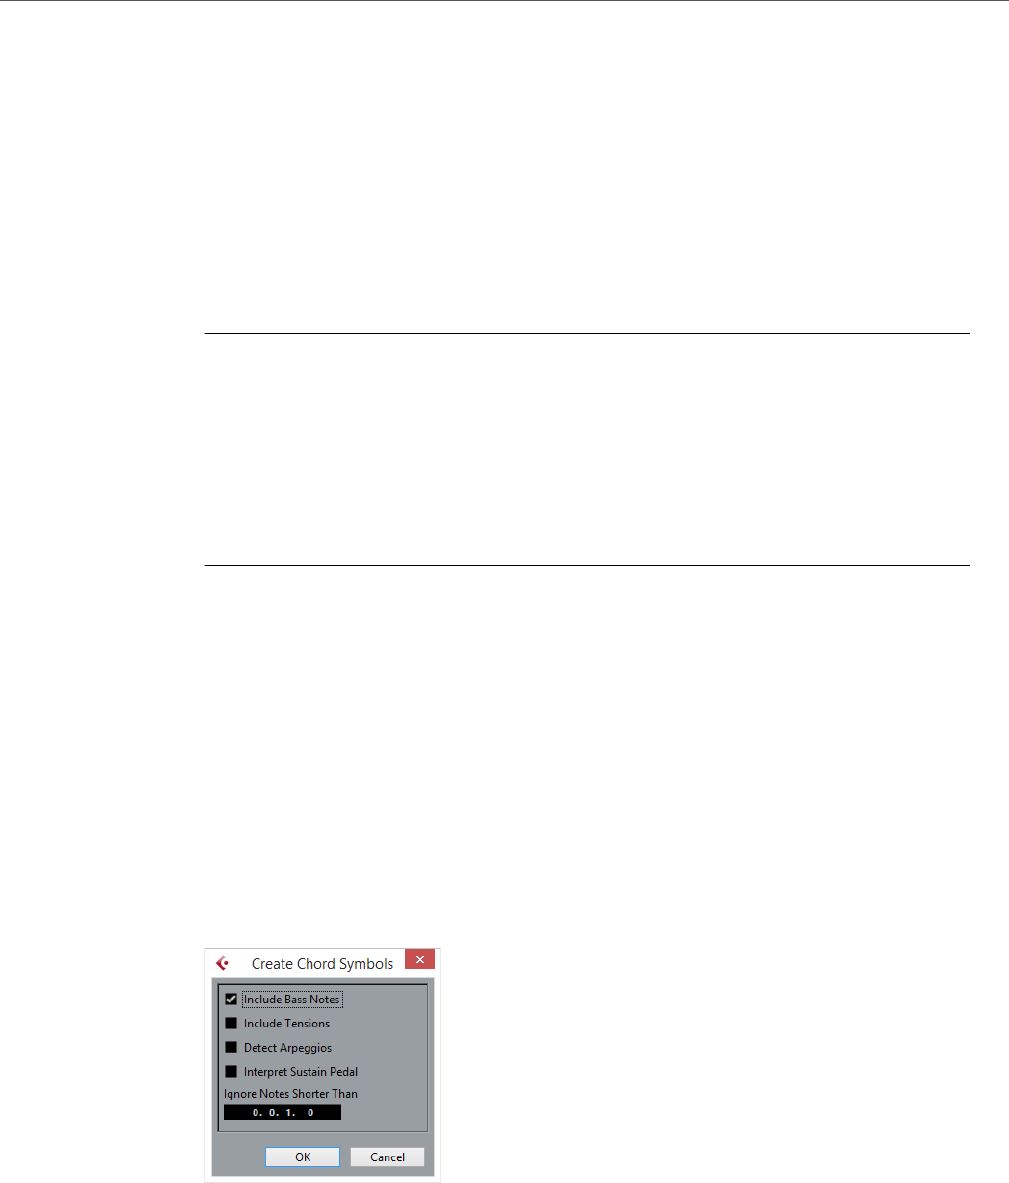
Chord Functions
Extracting Chord Events from MIDI
520
Extracting Chord Events from MIDI
You can extract chords from MIDI notes, parts, or tracks. This is useful, if you have
a MIDI file and want to show its harmonic structure, and use this file as starting point
for further experimenting.
PREREQUISITE
Add the chord track and create MIDI notes that can be interpreted as chords.
Drums, monophonic bass, or lead tracks are not suitable.
PROCEDURE
1. In the Project window, select a part or one or several MIDI tracks.
You can also select the MIDI tracks, parts, or notes that you want to extract in the Key
Editor, Score Editor, or In-Place Editor.
2. Select Project > Chord Track > Create Chord Symbols.
The Create Chord Symbols dialog opens.
3. Make your settings and click OK.
RESULT
The chord events are added on the chord track.
RELATED LINKS
Create Chord Symbols Dialog on page 520
Create Chord Symbols Dialog
This dialog allows you to determine, which MIDI data should be taken into account
when extracting chord events from MIDI.
Include Bass Notes
Activate this, if you want your chord events to contain a bass note.
Include Tensions
Activate this, if you want your chord events to contain tensions.

Chord Functions
Recording Chord Events with a MIDI Keyboard
521
Detect Arpeggios
Activate this, if you want your chord events to contain arpeggiated chords,
that is, chords whose notes are played one after another instead of all at once.
Interpret Sustain Pedal
Activate this, if you want your chord events to contain sustain pedal chords,
that is, notes that are played while the sustain pedal is held.
Ignore Notes Shorter Than
Allows you to determine the minimum length of the MIDI events that are taken
into account.
Recording Chord Events with a MIDI Keyboard
You can use a MIDI keyboard to record chord events on the chord track.
PREREQUISITE
Your project contains an instrument track with Record Enable or Monitor activated.
PROCEDURE
1. On the chord track, activate Record Enable.
2. On the Transport Panel, activate Record.
3. Play some chords on your MIDI keyboard.
RESULT
All recognized chords are recorded as chord events on the chord track.
NOTE
The chord track uses its own voicing settings. The recorded chord events may
therefore sound different.
RELATED LINKS
Creating Events from Chord Pads on page 541

522
Chord Pads
Chord pads allow you to play with chords, and to change their voicings and
tensions. In terms of harmonies and rhythms, they allow for a more playful and
spontaneous approach to composition than the chord track functions.
You can:
• Perform with chords in realtime via a MIDI keyboard.
• Record your performance as MIDI events on a MIDI or instrument track or
even on the chord track.
NOTE
We assume that you have a MIDI keyboard connected and set up.
RELATED LINKS
Voicings on page 512
Chord Pads Zone
The chord pads zone at the bottom of the Project window holds all functions that
you need to work with chord pads.
To open the chord pads zone do one of the following:
•Select Project > Chord Pads
• Select a MIDI or instrument track, and in the Inspector, open the Chords
section and activate Show/Hide Chord Pads Zone.
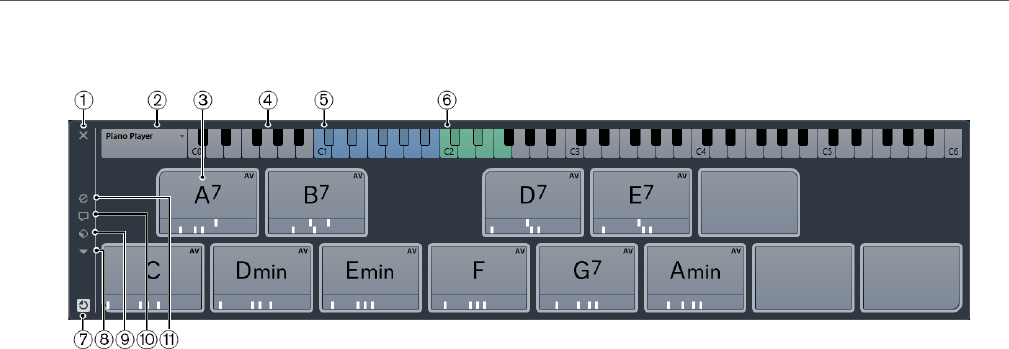
Chord Pads
Chord Pads Zone
523
The chord pads zone holds the following controls:
1) Close Chord Pads Zone
Closes the chord pads zone.
2) Current Player
Shows the current player and opens a menu where you can select another
player.
3) Chord Pad
Each chord pad can contain a chord symbol. To change it, click the Open
Editor control on the left edge of the chord pad.
4) Keyboard
Shows which keys are played when you trigger a chord pad. To zoom the
keyboard, click a key and drag up or down. To scroll the keyboard, click and
drag to the left or to the right.
5) Trigger Keys
The keys highlighted in blue on the keyboard correspond to the keys on your
MIDI keyboard that trigger the chord pads. You can define the trigger keys on
the Remote Control page of the chord pad Settings.
6) Remote Range for Voicings/Tensions/Transpose
The keys highlighted in green on the keyboard display correspond to the keys
on your MIDI keyboard that change the voicings, tensions, and transpose
settings of the pads. You can define these remote keys on the Remote
Control page of the chord pad Settings.
7) Activate/Deactivate Remote Control for Chord Pads
Allows you to activate/deactivate the chord pads zone. If you deactivate
remote control for chord pads, your MIDI keyboard no longer triggers the
pads.
8) Functions Menu
Opens a menu with specific functions and settings for the chord pads.
9) Chord Pads Presets
Allows you to save and load presets for chord pads and players.
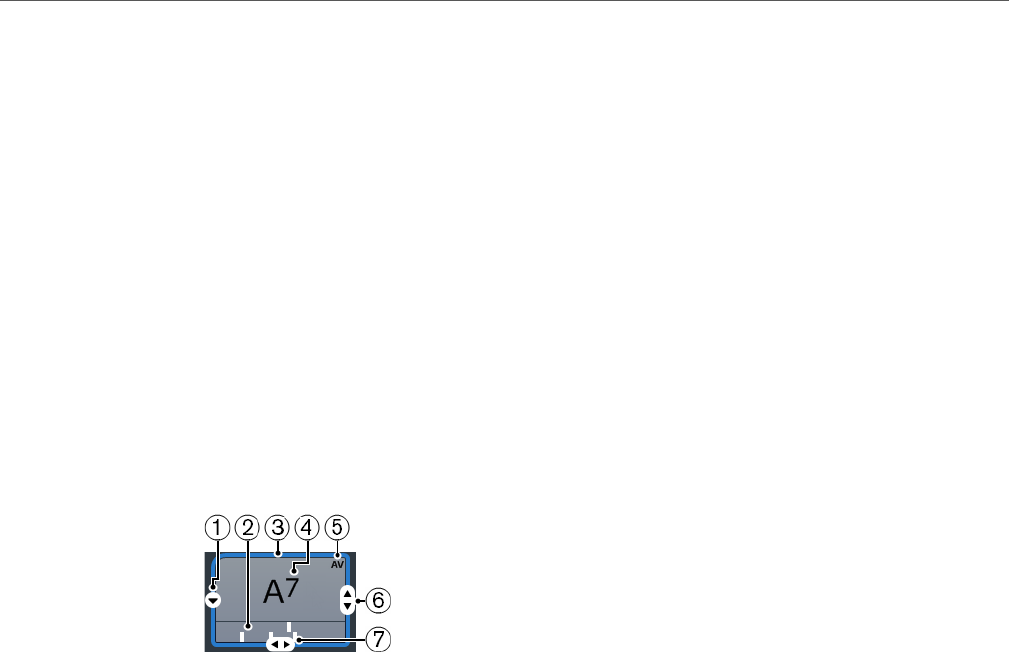
Chord Pads
Chord Pads Zone
524
10) Show/Hide Chord Assistant
Shows/Hides the Chord Assistant that shows suggestions of chords that
match the chord that you specified as the origin chord.
11) Show/Hide Settings
Shows/Hides the chord settings, where you can configure different players,
the pad layout, and the remote assignment.
RELATED LINKS
Chord Pad Settings – Remote Control on page 533
Players and Voicings on page 537
Chord Pad Controls
The chord pad controls allow you to edit the chord pads.
• To show the chord pad controls, move the mouse over a chord pad.
1) Voicing Indicators
Shows the voicing used for the chord. Voicing indicators can only be
displayed, if the horizontal zoom level for the chord pads is high enough.
2) Open Editor
Opens the chord Editor that allows you to select a chord for the chord pad.
3) Adaptive Voicing Reference/Use X as Origin for Chord Assistant
When the active chord pad is set as adaptive voicing reference, its borders
are shown in light green. All other chord pads will follow its voicing and are
set in a way that they do not get to far away from the reference.
If the chord pad is set as origin for the Chord Assistant, its borders are shown
in green. This chord pad is used as a basis for the suggestions in the Chord
Assistant window.
4) Assigned Chord
Shows the chord symbol that is assigned to the chord pad. Each chord pad
can contain one chord symbol. If the name of the assigned chord is too long
to display it on the chord pad, it is underlined, and the full chord name is
shown in a tooltip.
5) AV (Adaptive Voicing)/L (Lock)
By default, all chord pads follow the adaptive voicing. This is indicated by an AV
symbol. If you change the voicing for a pad manually however, Adaptive Voicing
is deactivated.
An L symbol indicates that the chord pad is locked for editing.

Chord Pads
Functions Menu
525
6) Voicing
Allows you to set another voicing for the chord pad.
7) Tensions
Allows you to add/remove tensions for the chord.
Chord Pad Context Menu
•Use X as Origin for Chord Assistant
Sets the chord of the current pad as an origin chord for the Chord Assistant.
•Assign Pad from MIDI Input
Allows you to assign a chord by pressing keys on your MIDI keyboard.
•Lock
Allows you to lock a chord pad for editing.
•Adaptive Voicing
Sets the current pad as adaptive voicing reference. If set, the automatic
voicings for the following pads will be set in a way that they do not get too far
away from the reference voicing. Only one pad can be set as adaptive voicing
reference.
•Adaptive Voicings Reference
Resets the adaptive voicing reference.
•Unassign Pad
Removes the chord assignment from the current pad.
Functions Menu
•Show Voicing Indicators
Allows you to activate/deactivate the voicing indicators that can be displayed
at the bottom of each chord pad.

Chord Pads
Preparations
526
•Assign Pads from Chord Track
Assigns the chord events from the chord track to the chord pads in the same
order as they appear on the chord track. Chord events that have more than
one occurrence are only assigned once.
•Snap Playback to Musical Grid
Allows you to delay the playback of a triggered chord pad to the next defined
musical position. This is useful, if you work with an arpeggiator or with the
Pattern Player.
•Transpose All Pads
Transposes all chord pads by a defined transpose value.
•Lock All Pads
Locks all chord pads for editing.
•Unlock All Pads
Unlocks all chord pads.
•Unassign All Pads
Removes the chord assignment from all pads.
Preparations
Before you can start working with the chord pads, you must add a MIDI or an
instrument track with an instrument loaded, and open the chord pads zone.
PREREQUISITE
You have installed and set up a MIDI keyboard.
PROCEDURE
1. Select Project > Add Track > Instrument.
2. In the Add Instrument Track dialog, select an instrument, and click Add
Track.
An instrument track with the selected instrument loaded is added to your project, and
select a sound that is suited for chords.
3. On the instrument track, click Record Enable.
4. Select Project > Chord Pads to open the Chord Pads Zone at the bottom
of the Project window.
RESULT
You can now click the chord pads or press some of the assigned keys on your MIDI
keyboard to trigger the preassigned chords.
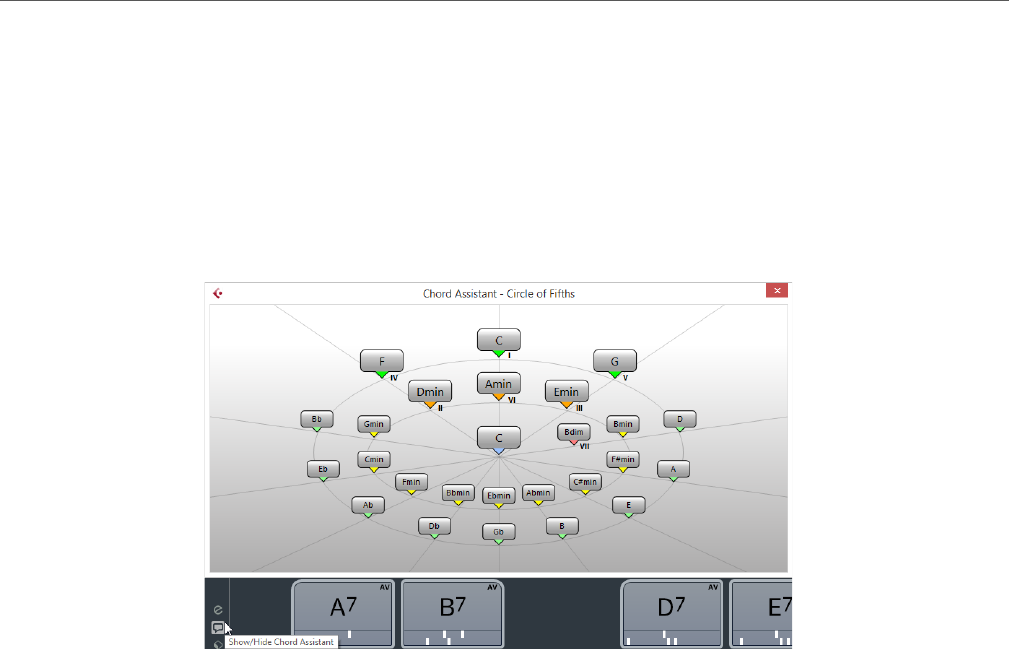
Chord Pads
Chord Assistant
527
Chord Assistant
The Chord Assistant allows you to use a chord as a starting point for suggestions
for the next chord. It assists you in finding the right chords for creating a chord
progression for your song.
•Click Show/Hide Chord Assistant on the left side of the chord pads area to
open the Chord Assistant.
You must define an origin chord as follows:
• Right-click the chord pad with the chord you want to use as origin and select
Use X as Origin for Chord Assistant.
The Chord Assistant shows suggestions for follow-on chords that you can assign
to the chord pads.
Chord Assistant – Circle of Fifths Mode
The Chord Assistant shows the chords in an interactive visualization of the circle
of fifths.
The origin chord that defines the current key is shown in the center of the Chord
Assistant. The tonic (I) of that key is displayed above the center. The outer circle
shows the twelve major chords ordered in intervals of fifths.
The inner circle displays the corresponding parallel minor chords.
The roman numerals mark the chords of the current key with their scale degree. You
can use these chords to create typical chord progressions. However, you can also
use the other chords for more creative results.
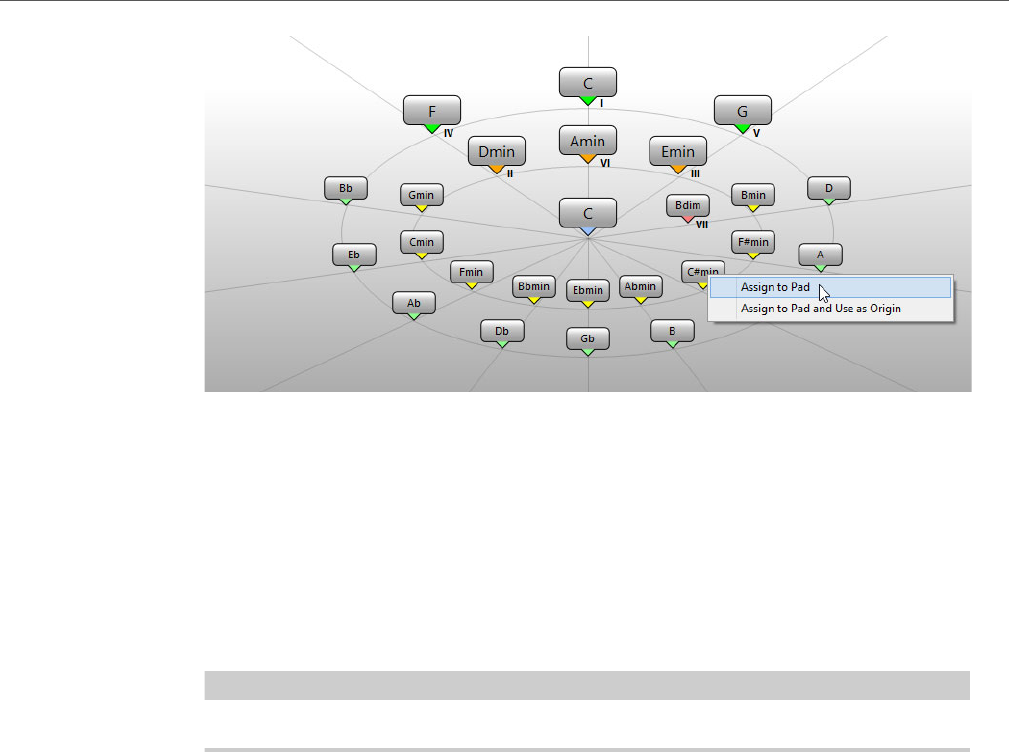
Chord Pads
Assigning Chords to Chord Pads
528
• To play a chord, click it.
The last three chords that you clicked are shown with a highlighted frame.
• To assign a chord to the next unassigned chord pad, right-click the suggested
chord and select Assign to Pad.
You can also drag the suggested chord and drop it on a chord pad.
• To assign a suggestion to the next unassigned chord pad and use this chord
as origin, right-click the chord and select Assign to Pad and Use as Origin.
NOTE
The Circle of Fifths is also available in the Chord Assistant for the chord track.
Assigning Chords to Chord Pads
Some chords are preassigned to the chord pads. But you can also assign your own
chords.
To assign chords to chord pads, you can use:
• The chord Editor
• The Chord Assistant – Circle of Fifths
•Your MIDI keyboard
• The chord events from the chord track
You can overwrite the preassigned chords, or clear all chord pads first to start from
scratch. Proceed as follows:
• To the left of the chord pads zone, open the Functions Menu and select
Unassign All Pads.
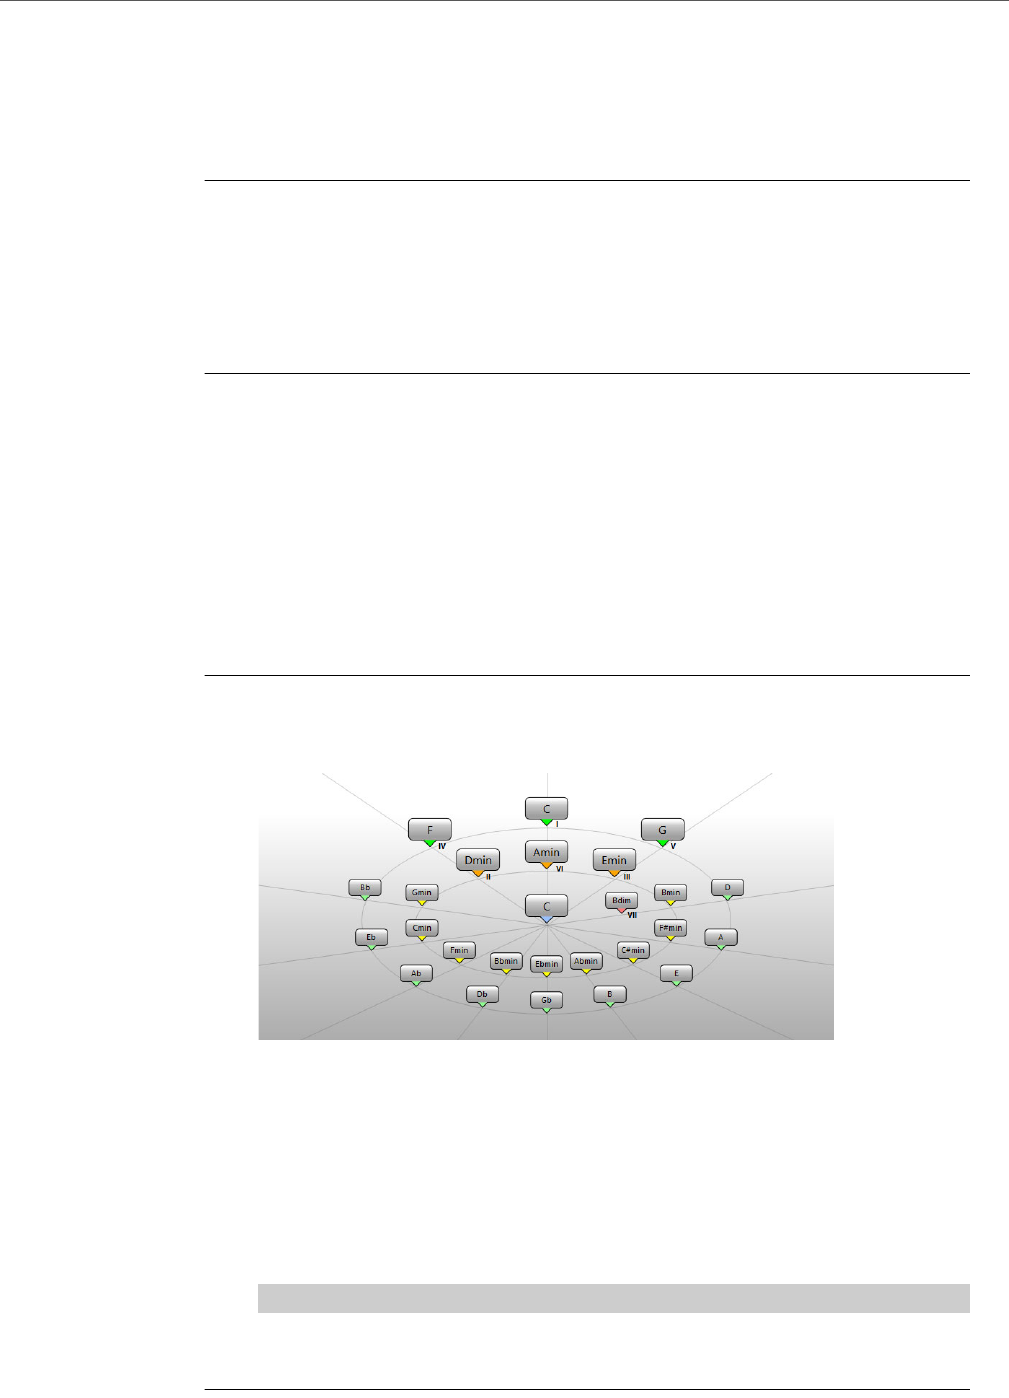
Chord Pads
Assigning Chords to Chord Pads
529
Assigning Chords with the Chord Editor
If you know exactly which chord you want to assign to a specific chord pad, you can
use the chord Editor.
PROCEDURE
1. Move the mouse pointer to the left edge of the chord pad, and click Open
Editor.
2. In the chord Editor, use the chord definition buttons to define a root note, a
chord type, a tension, and a bass note.
The new chord is triggered automatically to give an acoustic feedback.
RELATED LINKS
Chord Editor on page 506
Assigning Chords with the Chord Assistant – Circle of Fifths Mode
If you have a chord that you want to use as a starting point for a chord progression,
but you do not know how to create such a progression, you can use the Chord
Assistant – Circle of Fifths.
PROCEDURE
1. Right-click the chord pad that you want to use as a starting point and activate
Use x as Origin for Chord Assistant.
The Chord Assistant opens, and the borders of the chord pad change their color to
indicate that the assigned chord is now used as origin.
The origin chord is displayed in the center, and the chords that belong to the scale
are shown above it. The numerals indicate the scale degree of the chords. These help
you to create chord progressions.
2. In the Chord Assistant, click the chord symbols to trigger the corresponding
chords.
3. To assign a chord, drag it from the Chord Assistant and drop it on the chord pad.
NOTE
If one of the next chord pads is free, you can also right-click the chord in the Chord
Assistant and select Assign to Pad. This assigns the chord to the next free pad.

Chord Pads
Assigning Chords to Chord Pads
530
Assigning Chords with the MIDI Keyboard
If you know which chord you want to assign to a specific chord pad, you can use a
MIDI keyboard.
PREREQUISITE
You have selected a MIDI track or an instrument track.
PROCEDURE
1. Right-click the chord pad that you want to use for the new chord, and select
Assign Pad from MIDI Input.
The borders of the chord pad change their color to indicate that it is now ready for
recording.
2. On your MIDI keyboard, press the keys for the chord that you want to assign.
The chord and its voicing is assigned to the chord pad, and you hear an acoustic
feedback of the chord.
NOTE
The assigned voicing can be changed by the Adaptive Voicing setting. Therefore, if
you want to keep the voicing for that specific pad, right-click the chord pad and select
Lock from the context menu.
RELATED LINKS
Adaptive Voicing on page 537
Assigning Chords from the Chord Track
You can assign the chord events from the chord track to the chord pads.
PROCEDURE
• To the left of the chord pads zone click the Functions Menu button, and
select Assign Pads from Chord Track.
If chords are already assigned to the chord pads, a warning message informs you that
all previous assignments will be overwritten.
RESULT
The chord events are assigned to the chord pads in the same order as they appear
on the chord track.
NOTE
Chord events that have more than one occurrence on the chord track are only
assigned once.

Chord Pads
Moving and Copying Chord Pads
531
Moving and Copying Chord Pads
You can swap the chord assignments between 2 pads or copy a specific chord and
its settings from one pad to another.
• To swap the chord pad assignment between 2 pads, click a chord pad and
drag it to another chord pad.
While you drag, the border of the destination chord pad changes its color.
When you drop the pad on another, the chord assignments are swapped.
• To copy the chord assignment of one chord pad to another pad,
[Alt]/[Option]-click a chord pad and drag it to another chord pad.
While you drag, the border of the destination chord pad changes its color.
When you drop the pad on another, the first pad’s assignment is copied to the
destination chord pad.
NOTE
When you move or copy chord pads, the chord is moved or copied, and all its
settings are, except for the Adaptive Voicings Reference.
Playing Back and Recording Chords
Playing Back Chord Pads with your MIDI Keyboard
PREREQUISITE
You have connected and set up a MIDI keyboard.
PROCEDURE
1. Select Project > Add Track > Instrument.
2. In the Add Instrument Track dialog, select a VST instrument.
3. Click Add Track.
An instrument track with the selected VST instrument is added to your project.
4. On the instrument track, click Record Enable.
5. Select Project > Chord Pads to open the Chord Pads Zone at the bottom
of the Project window.
6. Press some keys on your MIDI keyboard to trigger the chords that are
preassigned to the chord pads.
RELATED LINKS
Chord Pad Settings – Remote Control on page 533
Changing the Pads Remote Range on page 535

Chord Pads
Playing Back and Recording Chords
532
Recording Chords on MIDI or Instrument Tracks
You can record the chords that are triggered through the chord pads on MIDI or
instrument tracks. This way, you can play back and edit your performance at any
time.
PREREQUISITE
You have connected and set up a MIDI keyboard, you have opened and set up the
chord pads zone, and you have added an instrument or a MIDI track for which a VST
instrument is loaded to your project.
PROCEDURE
1. On the instrument track, click Record Enable.
2. On the Transport panel, activate Record.
3. On your MIDI keyboard, press the keys that trigger the chord pads.
NOTE
Use the keys that are not assigned to play and record other chords.
RESULT
The triggered chords are recorded on the track. The note events are automatically
assigned to different MIDI channels according to their pitches. Note events that
correspond to the soprano voice are assigned to MIDI channel 1, alto is assigned
to MIDI channel 2, and so on.
AFTER COMPLETING THIS TASK
You can now open the Key Editor and fine-tune your recorded MIDI parts using the
chord editing functions, for example. You can also use MIDI > Dissolve Part to
dissolve the recorded chords by pitches/channels.
Recording Chords on the Chord Track
You can record the triggered chords on the chord track. This way, you can easily
create chord events for a lead sheet, for example.
PREREQUISITE
You have connected and set up a MIDI keyboard, you have opened and set up the
chord pads zone, and you have added an instrument or a MIDI track for which a VST
instrument is loaded.
PROCEDURE
1. On the instrument track, enable Monitor.
2. Select Project > Add Track > Chord to add the chord track.
3. In the Inspector for the chord track, click Record Enable.
4. On the Transport panel, activate Record.
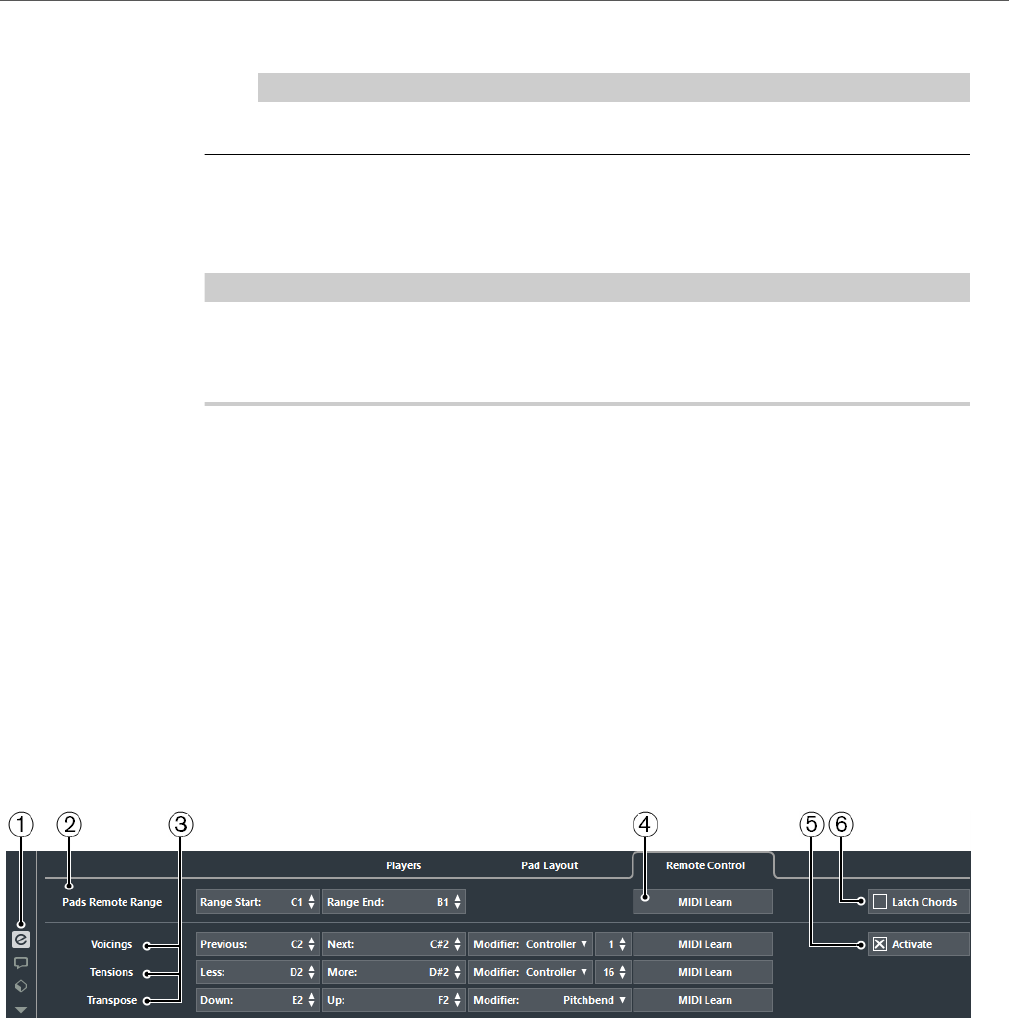
Chord Pads
Chord Pad Settings – Remote Control
533
5. On your MIDI keyboard, press the keys that trigger the chord pads.
NOTE
Use the keys that are not assigned to play and record other chords.
RESULT
The chord events are recorded on the chord track.
NOTE
The recorded chord events may sound different from the chord pad playback. This
is because the voicing settings for the chord track differ from the chord pad
voicings.
RELATED LINKS
Chord Functions on page 505
Voicings on page 512
Chord Pad Settings – Remote Control
On the Remote Control tab in the chord pad Settings, you can change the default
remote control assignments.
• To the left of the chord pads zone, click Show/Hide Settings and activate
the Remote Control tab.
1) Show/Hide Settings
Opens the settings for the chord pads.
2) Pads Remote Range
Allows you to set the start and end note for the remote range.
3) Voicings/Tension/Transpose
Allows you to assign remote keys for changing the voicings, tension, and
transposition settings of the last played chord pad. You can also assign
continuous controllers to change all chord pads simultaneously.
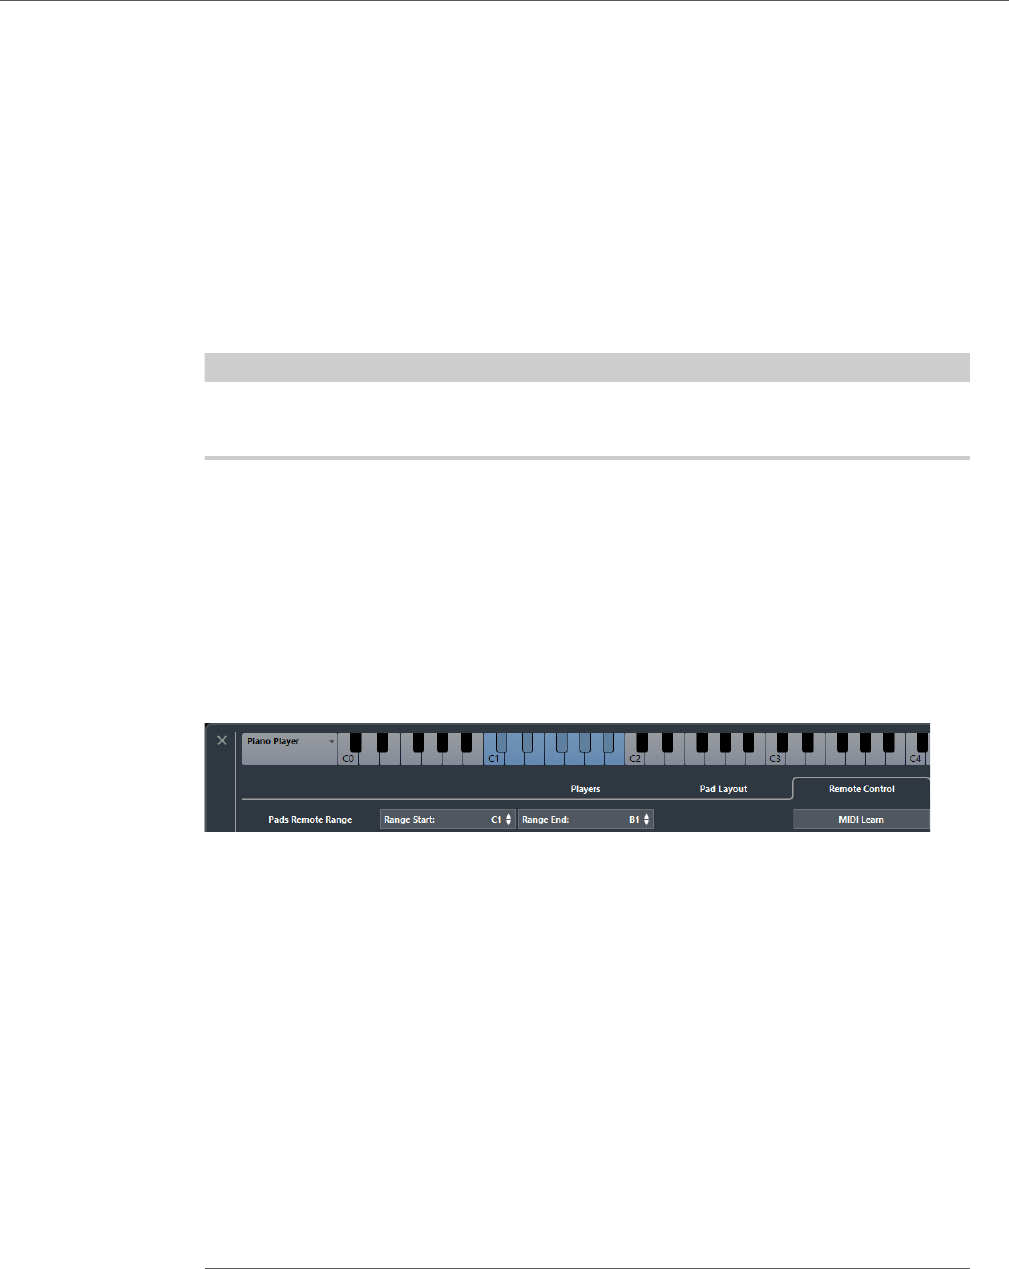
Chord Pads
Chord Pad Settings – Remote Control
534
4) MIDI Learn
Activates/Deactivates the MIDI Learn function to assign MIDI input to the Pads
Remote Range and to the parameters Voicings, Tensions, and Transpose.
5) Activate
Activates/Deactivates the remote key assignment for the parameters
Voicings, Tensions, and Transpose. If this is deactivated, only the remote
key assignment for the Pads Remote Range is active.
6) Latch Chords
Activate this if you want the chord pad to play back until it is triggered again.
NOTE
If you use MIDI controllers that are already assigned to other remote control
features, for example, the VST Quick Controls, all previous assignments are lost.
RELATED LINKS
Pads Remote Range on page 534
Pads Remote Range
The Pads Remote Range is the range of remote keys that trigger the chords that
are assigned to the chord pads.
By default, the Range Start is set to C1 and the Range End to B1. This is indicated
by the corresponding keys on the keyboard in the chord pads zone being
highlighted. You can trigger the chords that are assigned to the chord pads by
hitting the keys that correspond to this note range on your MIDI keyboard.
Default Remote Assignment
By default, the MIDI events C1 to B1 trigger the chords that are assigned to the
chord pads. All keys that are not assigned for remote control, by default G#2 and
further, can be used for regular playback.
You can change the voicing, tension or transposition of the triggered chord by
enabling Activate in the lower part of the Remote Control tab and using the
following default remote notes:
Action Description Remote Note
Voicings: Previous Plays back the previous voicing
of the last played chord.
C2
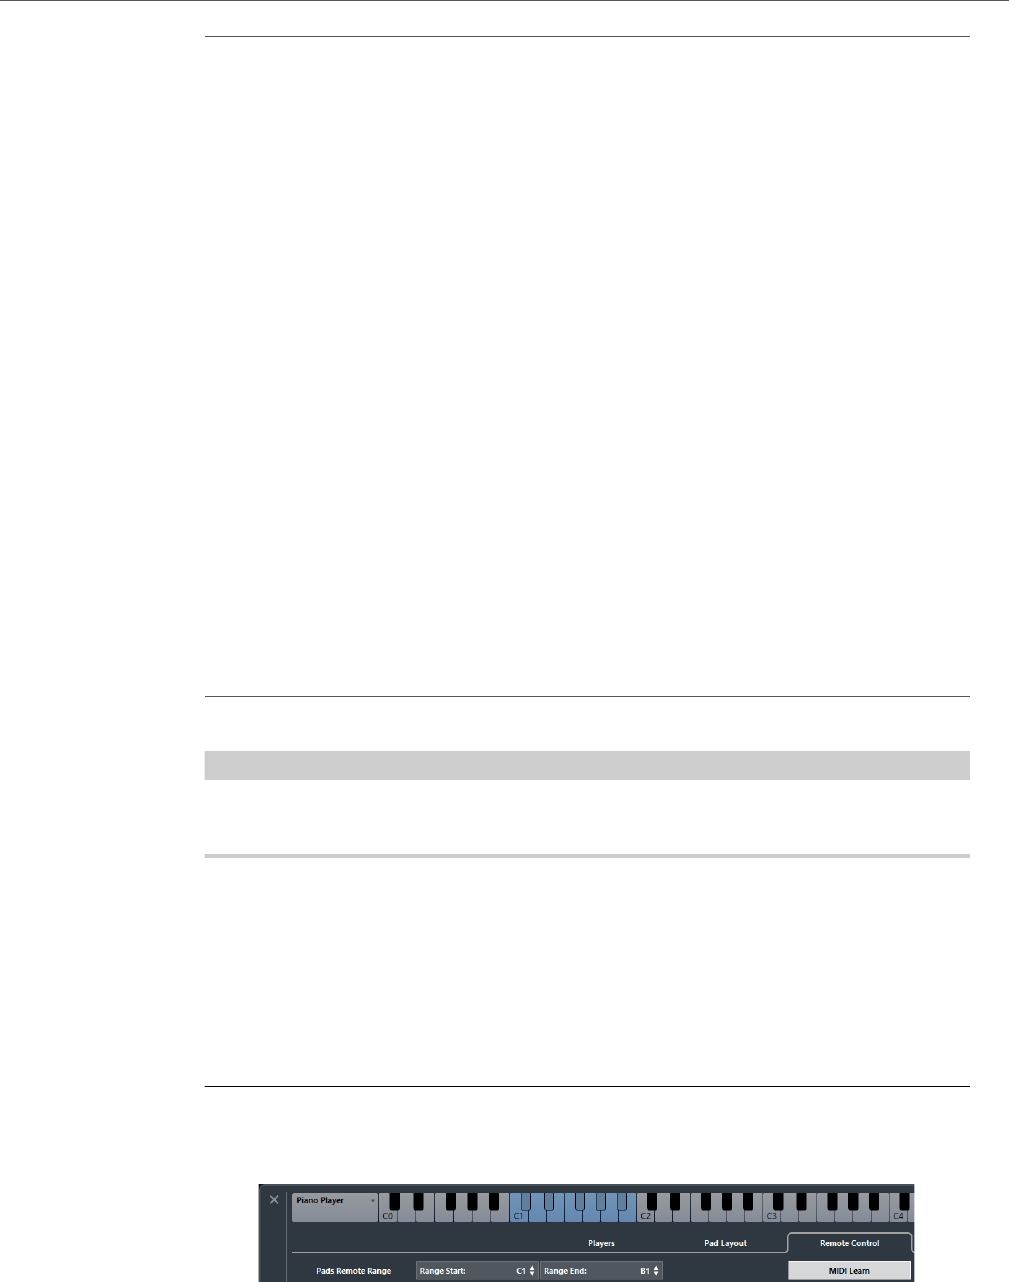
Chord Pads
Chord Pad Settings – Remote Control
535
Remote Assignments are saved globally.
NOTE
If you use the remote keys for voicings, tensions, or transposition after releasing the
remote key for the chord pad, the next played chord is affected.
Changing the Pads Remote Range
You can widen the pads remote range to access more chord pads. If you want to
use a wider key range on your MIDI keyboard for regular playing, you can narrow the
pads remote range.
PROCEDURE
1. Select Show/Hide Settings > Remote Control to open the remote control
assignments.
Voicings: Next Plays back the next voicing of the
last played chord.
C#2
Voicings for all chord pads The wheel position determines
the voicings for the next played
chords of all chord pads.
CC#1 Modulation wheel
Tensions: Fewer Plays back the last played chord
with fewer tensions.
D2
Tensions: More Plays back the last played chord
with more tensions.
D#2
Tensions for all chord pads Allows you to determine the
tension level for the next played
chord of all chord pads.
CC#16
Transpose: Down Plays back the last played chord
and transposes it downwards.
E2
Transpose: Up Plays back the last played chord
and transposes it upwards.
F2
Transpose all chord pads The wheel position determines
the transposition value for the
next played chords of all chord
pads. Moving the wheel all the
way up or all the way down
corresponds to +/-5 semitones.
Pitchbend wheel
Action Description Remote Note
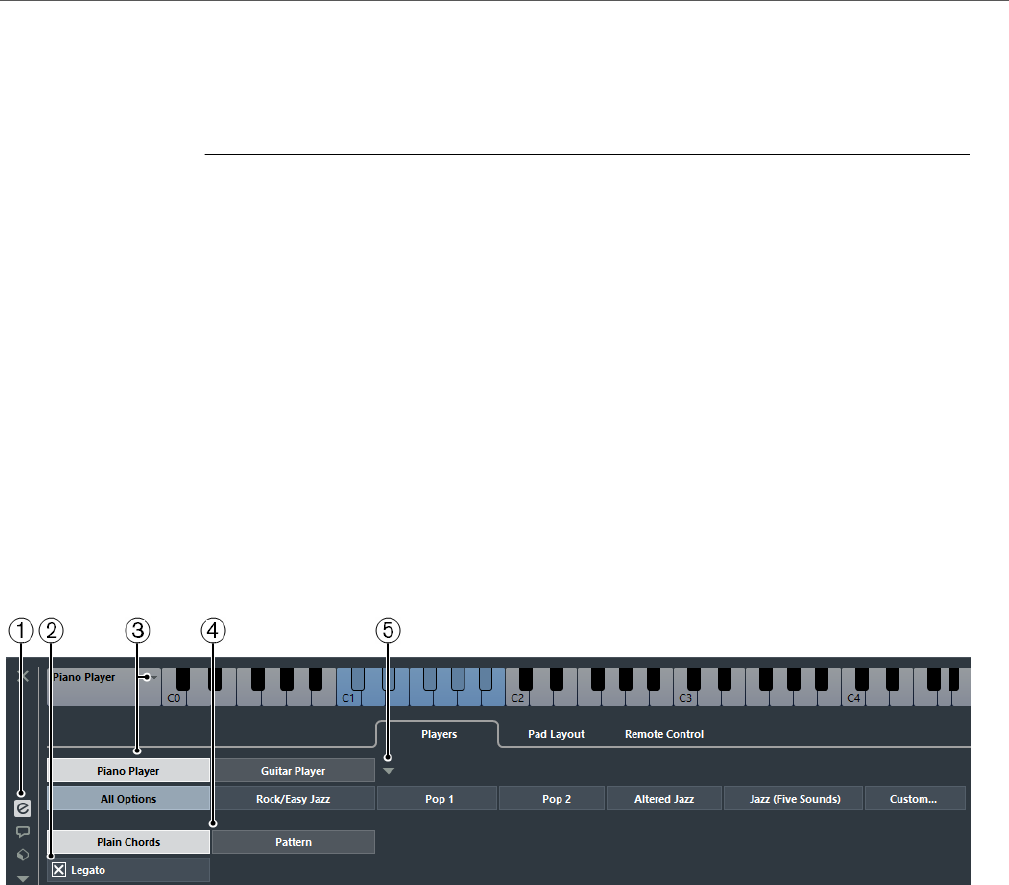
Chord Pads
Chord Pad Settings – Players
536
2. Do one of the following:
•Click MIDI Learn so that the button lights up, and on your MIDI keyboard, press
the two keys that you want to assign as range start and range end.
• Enter a new value in the Range Start and Range End fields.
RESULT
On the keyboard, the indication for pads remote range is changed.
Chord Pad Settings – Players
On the Players tab in the chord pad Settings you can change the voicing that is
used for the chord pads. You can select different players with specific voicing
settings that are typical for that kind of player. By default, the Piano Player option
is active.
• To the left of the chord pads zone, click Show/Hide Settings and activate
the Players tab.
1) Show/Hide Settings
Opens the settings for the chord pads.
2) Legato
If this is activated, the common notes of two subsequent chords are
connected.
3) Player Selection
Selects the player, and uses its voicing for the chord pads.
4) Plain Chords/Pattern
Select Plain Chords to trigger all notes of a chord simultaneously, or select
Pattern to break up the chords into their individual notes.
In Plain Chords mode, you can activate Legato to hold the common notes of
two subsequent chords instead of triggering them again.
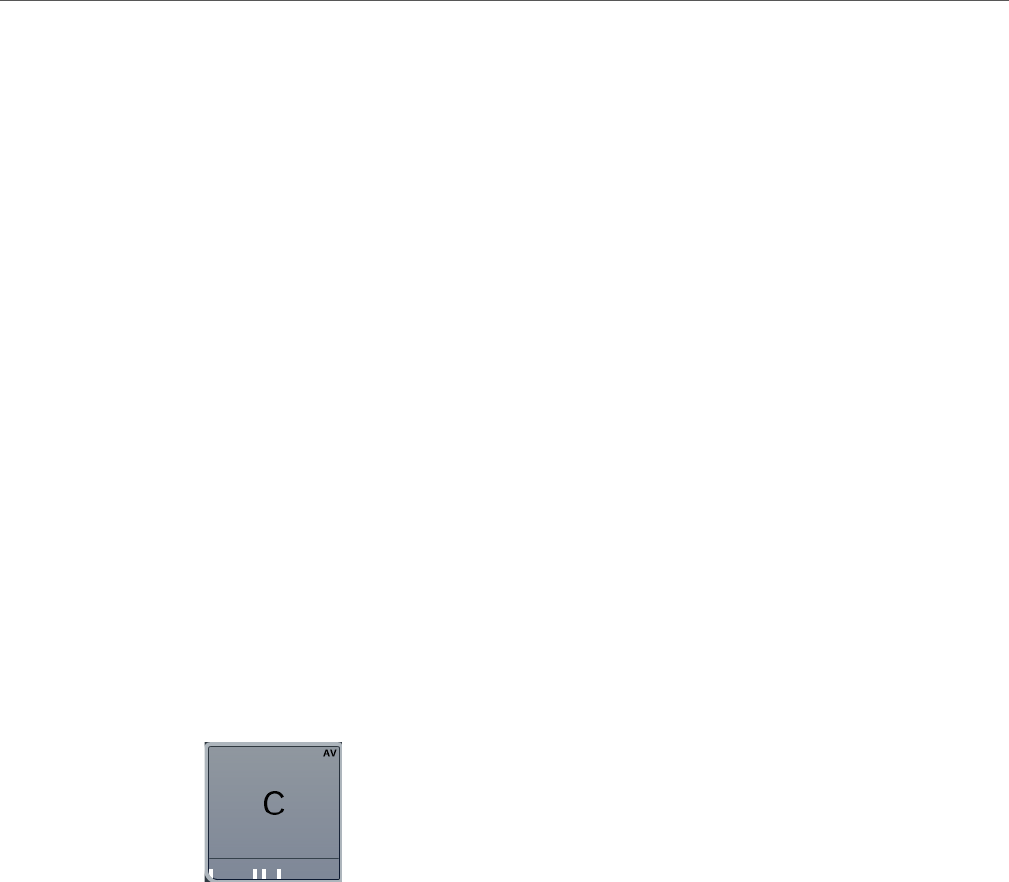
Chord Pads
Chord Pad Settings – Players
537
5) Add Player
Opens a menu where you can select the player that you want to add. From
here, you can also rename or remove the current player.
RELATED LINKS
Players and Voicings on page 537
Voicings on page 512
Players and Voicings
Different types of instruments and styles have different voicing libraries. These
determine how the chords are played back, and which pitches are played. In the
chord pads zone, these voicings are referred to as players.
RELATED LINKS
Voicings on page 512
Adaptive Voicing
In Cubase, the Adaptive Voicing setting ensures that pitches in chord
progressions do not change abruptly.
By default, Adaptive Voicing is activated and the voicings of the chord pads are
determined automatically according to specific voice leading rules.
If you want to set the voicing of a specific chord pad manually, and do not to want
it changed automatically, you can use the Voicing control to the right of a chord
pad. When you assign your own voicing, Adaptive Voicing is deactivated for that
chord pad, so that the pad does no longer follow the voice leading rules of the
voicing reference. To activate Adaptive Voicing again, right-click the chord pad
and activate Adaptive Voicing.
To lock the voicing for a chord pad, you can right-click the pad and activate Lock.
This locks this pad for editing and remote control changes, and deactivates
Adaptive Voicing. To unlock the chord pad again, right-click the pad and
deactivate Lock.
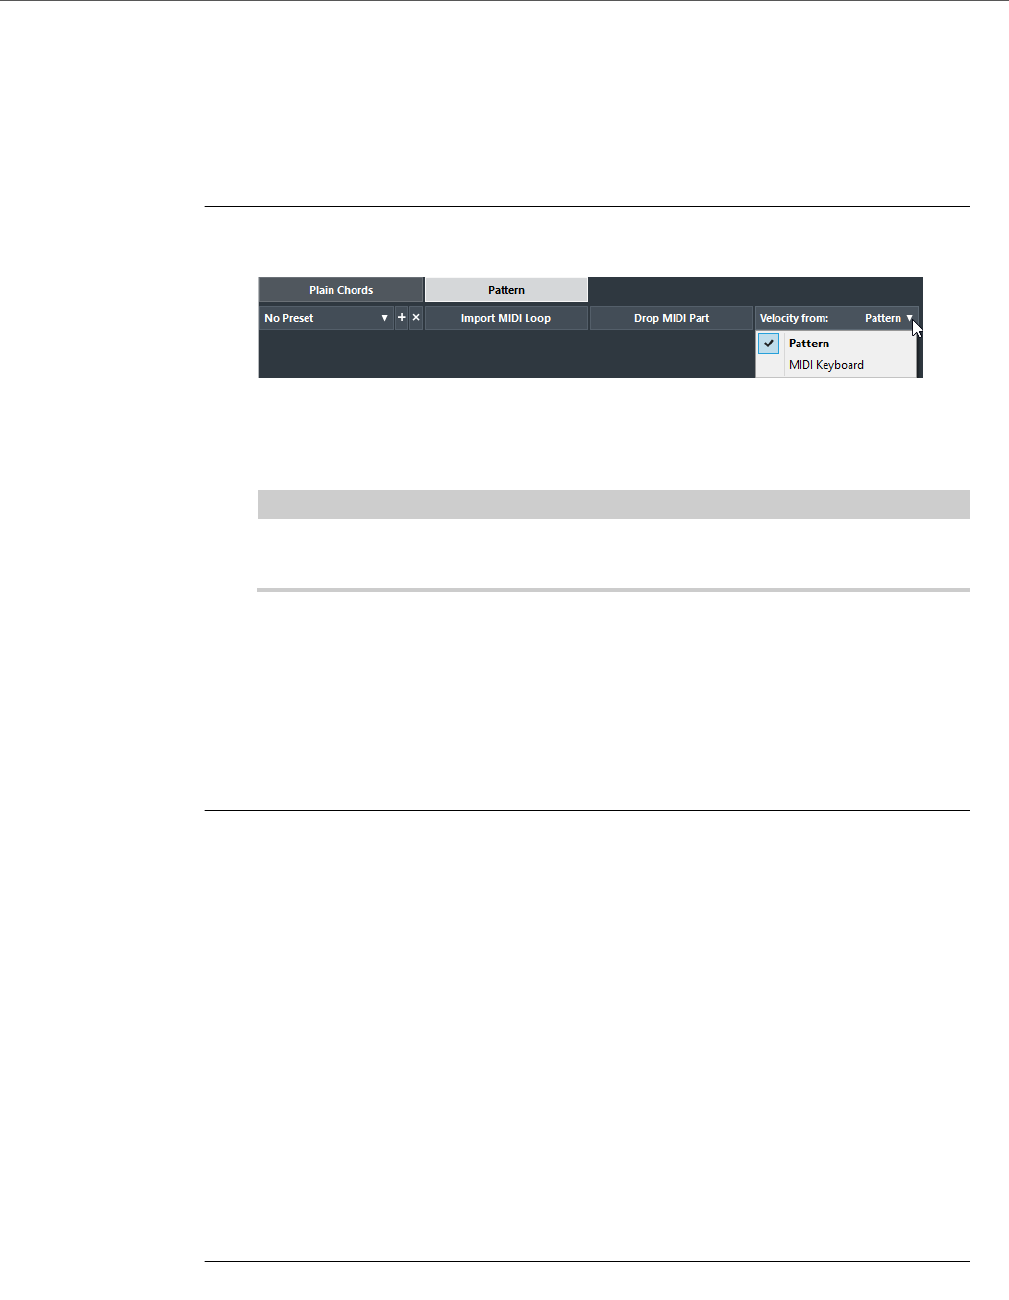
Chord Pads
Chord Pad Settings – Players
538
Using the Pattern Player
You can determine how the triggered chord is played: as a plain chord, or according
to a selected pattern. The pattern player plays the notes that make up the chord one
after another (arpeggio).
PROCEDURE
1. Select Show/Hide Settings > Players > Pattern.
2. Perform one of the following actions:
•Click Import MIDI Loop to select a MIDI loop that you want to use as a pattern.
• Drag a MIDI part from the event display to the Drop MIDI Part field.
NOTE
The loop or part must have between 3 and 5 voices. In the MediaBay, the number of
voices is indicated in the Voices column of the result list.
The loop or part is taken as a reference and defines how the chord is played. The
Drop MIDI Part field displays the name of the selected loop or part.
3. In the Velocity from: field, select a velocity source for the notes.
• Activate MIDI Keyboard to determine the velocity values by pressing the keys
on your MIDI keyboard harder or softer.
• Activate Pattern to use the velocity values from the MIDI loop or the MIDI part
that is selected as a pattern.
AFTER COMPLETING THIS TASK
If you have a pattern that you want to use in other projects, you can save it using the
presets section in the pattern player.
RELATED LINKS
Assigning Voices to Notes on page 519
Setting Up the Results List Columns on page 341
Using Different Players on Multiple Tracks
You can set up different players with different sounds on different tracks. If you
record-enable these tracks and play the chord pads, each track uses a dedicated
player.
PROCEDURE
1. Select Project > Add Track > Instrument.
2. In the Add Instrument Track dialog, enter the number of tracks in the Count
field, and select a VST instrument.
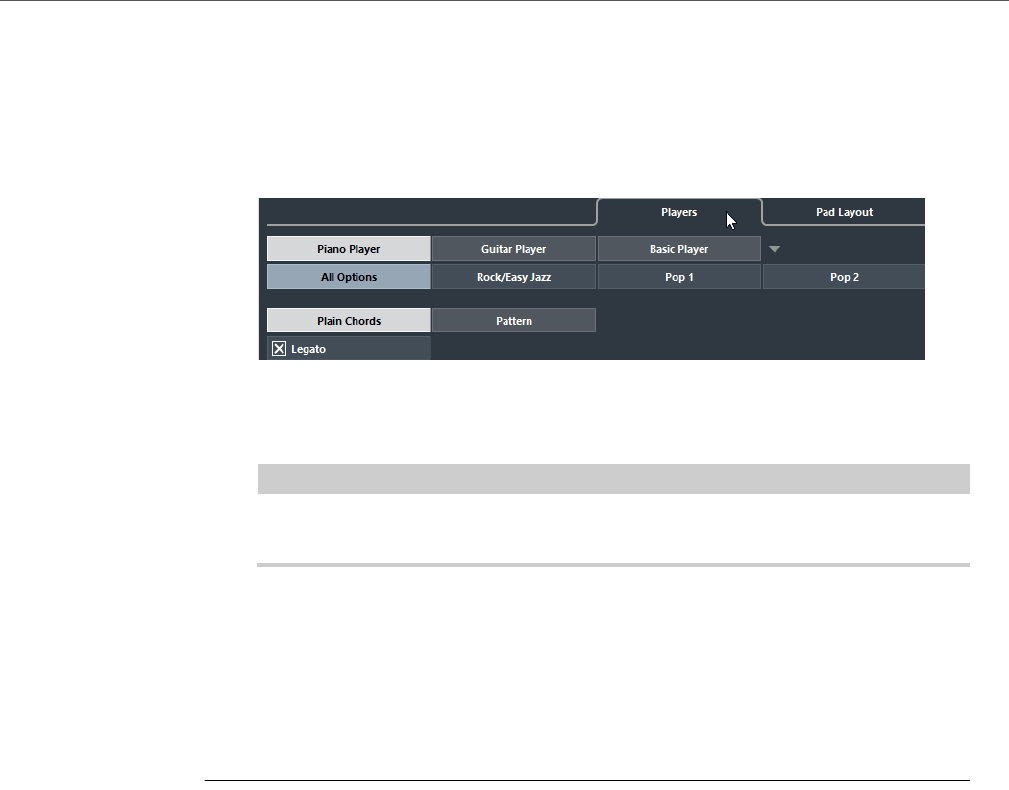
Chord Pads
Chord Pad Settings – Pad Layout
539
3. Click Add Track.
The instrument tracks are added to your project.
4. Select Project > Chord Pads to open the chord pads zone.
5. To the left of the chord pads zone, activate Show/Hide Settings and click
Players.
6. Select the first instrument track, select a sound on the VST instrument, and in
the chord pads zone, select a player.
For example, select a piano sound and assign a Piano Player.
NOTE
When setting up the player for a track, make sure that Record Enable or Monitor is
only active for this particular track.
7. Select the second instrument track, select a sound on the VST instrument,
and set up another player.
For example, select a guitar sound and assign a Guitar Player.
8. Select the next instrument track, and proceed as for the other 2 tracks.
For example, select a string sound and assign a Basic Player.
9. Select all instrument tracks, and click Record Enable.
RESULT
You can now play the chord pads and use the remote control parameters for
Tensions and Transpose to change all chord symbols for each player
simultaneously. However, if you change the Voicing, only the selected player is
affected.
Chord Pad Settings – Pad Layout
The Pad Layout tab in the chord pad Settings allows you to change the layout that
is used for the chord pads. By default, the keyboard layout is active, but you can
change to a grid layout, if you prefer that. After changing the pad layout you may
need to adjust the remote setup.
• To the left of the chord pads zone, click Show/Hide Settings and activate
the Pad Layout tab.

Chord Pads
Chord Pads Presets
540
1) Show/Hide Settings
Opens the settings for the chord pads.
2) Keyboard
Activate this to show the chord pads in a keyboard layout. You can display
one or two octaves, and you can select if the first chord pad starts with C, A
or E.
3) Grid
Activate this to show the chord pads in a grid layout. You can display up to 4
rows and 16 columns.
4) Layout display
Shows how the active chord pad layout is displayed.
Chord Pads Presets
Chord pads presets are templates that can be applied to newly created or to
existing chord pads.
Chord pads presets contain the chords that are assigned to the chord pads, as well
as the player configurations including any pattern data that you have imported via
the MediaBay or by using drag & drop. The chord pads presets allow you to quickly
load chords, or reuse player settings. The Chord Pads Presets menu is located to
the left of the chord pads zone. Chord pads presets are organized in the MediaBay,
and you can categorize them with attributes.
• To save/load a chord pads preset, select Chord Pads Presets > Save/Load
Chord Pads Preset.
You can also load only the assigned chords from a chord pads preset, without
loading the player configurations. This is useful if you want to use specific chords
that you have saved as a preset, but do not want to alter your current player setting.
• To load only the chords of a chord pads preset, select Chord Pads Presets
> Load Chords from Preset.
In the same way, you can also load only the player configurations of a chord pads
preset. This is useful if you have saved very complex player settings and want to
reuse them on other chord pads without changing the currently assigned chords.
• To load only the player settings of a chord pads preset, select Chord Pads
Presets > Load Players from Preset.
Chord Pads
Creating Events from Chord Pads
541
Saving Chord Pads Presets
If you have set up the chord pads, you can save them as chord pads presets.
PROCEDURE
1. To the left of the chord pads zone, select Chord Pads Preset > Save Chord
Pads Preset.
2. In the New Preset section, enter a name for the new preset.
NOTE
You can also define attributes for the preset.
3. Click OK to save the preset and exit the dialog.
Creating Events from Chord Pads
You can use the chords assigned to the chord pads to create chord events or MIDI
parts in the Project window.
• To create a chord event, drag a chord pad and drop it on the chord track.
• To create a MIDI part with the length of one bar, drag a chord pad an drop it
on a MIDI or instrument track.
RELATED LINKS
Recording Chord Events with a MIDI Keyboard on page 521

542
Editing tempo and signature
Background
Whenever you create a new project, Cubase will automatically set the tempo and
time signature for this project. The tempo and signature settings can be displayed
in the Tempo Track Editor.
Tempo modes
Before we go into detail about tempo and signature settings, you should understand
the different tempo modes.
The tempo can either be fixed throughout the entire project (this is called “fixed
tempo mode”) or follow the tempo track (this is called “tempo track mode”), which
may contain tempo changes.
• To switch between fixed tempo mode and tempo track mode, use the Tempo
button on the Transport panel:
When the Tempo button is lit (and the text “Track” is shown), the tempo follows the
tempo track; when it is deactivated (and the text “Fixed” is shown), a fixed tempo is
used. You can also switch the tempo mode with the Activate Tempo Track button
on the Tempo Track Editor toolbar.
In tempo track mode, the tempo cannot be changed on the Transport panel, i. e. the
tempo information here is for display purposes only.
Signature events are always active, regardless of whether fixed tempo mode or
tempo track mode is selected.
RELATED LINKS
Setting the fixed tempo on page 547
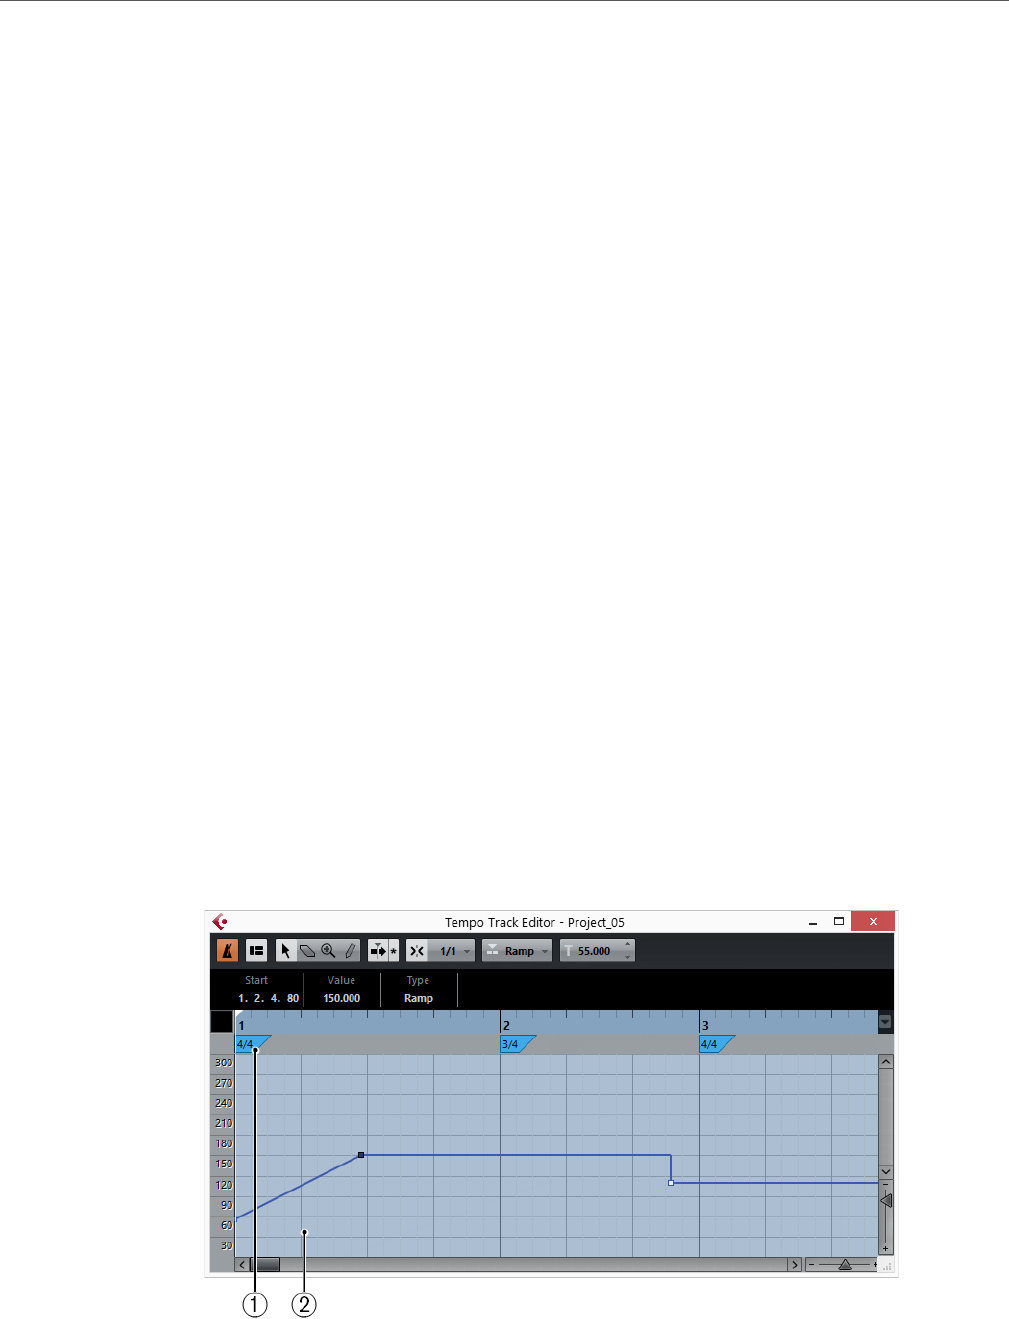
Editing tempo and signature
Tempo and signature display
543
A note about tempo-based audio tracks
The start position of audio events on the timeline depends on the current tempo
setting. However, it is important to realize that the actual audio (“within” the events)
will play back as recorded, regardless of any tempo changes you make. Therefore,
it is good practice to make the proper tempo and time signature settings before you
start recording tempo-based audio.
• To make an already recorded audio track follow the tempo changes, you can
use the Sample Editor.
RELATED LINKS
Sample Editor on page 281
Tempo and signature display
You can view the current tempo and signature settings of your project in a number
of ways:
• On the Transport panel.
• In the Tempo Track Editor.
Open the Project menu and select Tempo Track, or [Ctrl]/[Command]-click
the Tempo button on the Transport panel.
RELATED LINKS
Transport Panel on page 129
About the Tempo Track Editor
1) Time Signature area
2) Tempo curve display
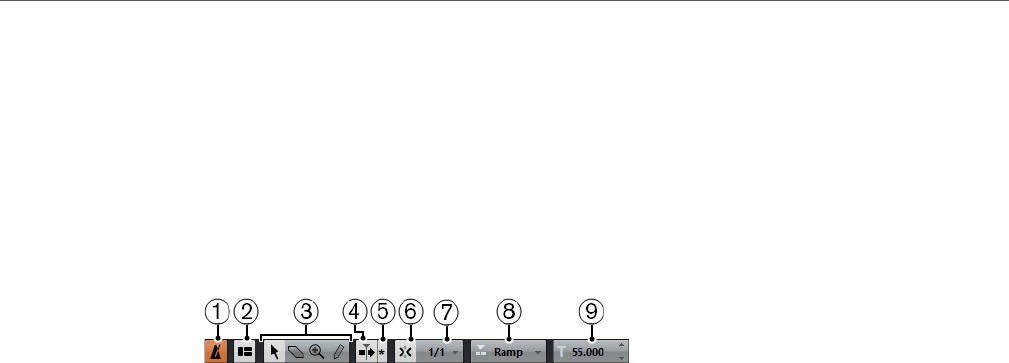
Editing tempo and signature
Tempo and signature display
544
The Tempo Track Editor has a toolbar, info line, and ruler just like other editors in
Cubase, plus an area for the display of time signature events and a tempo curve
display.
The toolbar
The toolbar contains various tools and settings:
1) Activate Tempo Track
2) Show Info
3) Tools
4) Auto-Scroll
5) Suspend Auto-Scroll when Editing
6) Snap on/off
7) Snap value
8) Curve type for new tempo events
9) The selected tempo
• The tools for Object Selection, Erase, Zoom and Draw are used in the same
way as in other editors. The Snap and Auto-Scroll functions also work exactly
like in the Project window.
Note that in the Tempo Track Editor, the Snap function affects tempo events
only. Time signature events always snap to the beginning of bars.
• The info line in the Tempo Track Editor allows you to change settings for
selected time signature events, and the type and tempo of selected tempo
curve points.
• The ruler in the Tempo Track Editor shows the timeline, and is similar to the
ruler in the Project window.
• The area below the ruler shows time signature events.
• The main display shows the tempo curve (or, if fixed tempo mode is selected,
the fixed tempo). To the left of the display you will find a tempo scale to help
you quickly locate the desired tempo.
Note that the vertical “grid lines” in the tempo curve display correspond to the
display format selected for the ruler.
RELATED LINKS
Ruler on page 29
Setting the fixed tempo on page 547
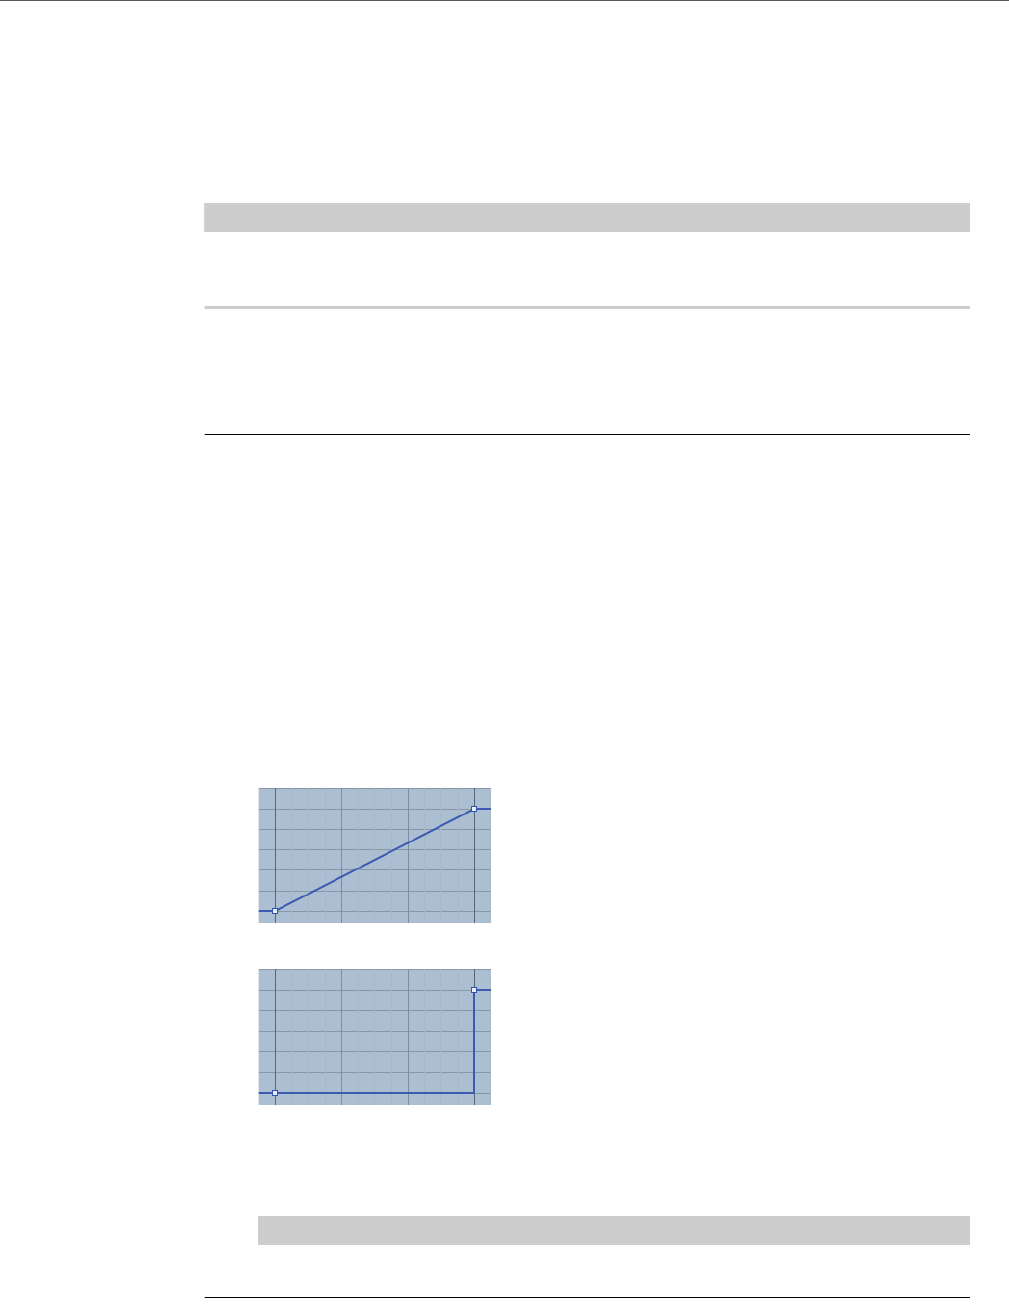
Editing tempo and signature
Editing tempo and signature
545
Editing tempo and signature
Editing the tempo curve
IMPORTANTIMPORTANTIMPORTANT
IMPORTANT
This section assumes that you are working in tempo track mode, i. e. the Tempo
button must be activated on the Transport panel.
Adding tempo curve points
PROCEDURE
1. Use the “Type of New Tempo Points” pop-up menu on the toolbar of the
Tempo Track Editor to select whether you want the tempo to change
gradually from the previous curve point to the new one (“Ramp”) or change
instantly to the new value (“Jump”).
You can also set this to Automatic. In this case, the types of existing tempo curve
points will be used when inserting new points at the same position.
2. Select the Draw tool.
3. Click and drag in the tempo curve display to draw a tempo curve.
When you click, the tempo display on the toolbar shows the tempo value. If Snap is
activated on the toolbar, this determines at which time positions you can insert tempo
curve points.
Type of New Tempo Points set to “Ramp”
Type of New Tempo Points set to “Jump”
You can also click on the tempo curve with the Object Selection tool.
This adds a single point with each click.
NOTE
Tempo values can also be automatically inserted by the Beat Calculator.
RELATED LINKS
The Beat Calculator on page 548
Snap Function on page 39

Editing tempo and signature
Editing tempo and signature
546
Selecting tempo curve points
Curve points can be selected as follows:
• Using the Object Selection tool.
The standard selection techniques apply.
• Using the Select submenu of the Edit menu.
The options are:
All
Selects all curve points on the tempo track.
None
Deselects all curve points.
Invert
Inverts the selection – all selected curve points are deselected and all curve
points that were not selected are selected instead.
In Loop
Selects all curve points between the left and right locator.
From Start to Cursor
Selects all points to the left of the project cursor.
From Cursor to End
Selects all points to the right of the project cursor.
• You can also use the left and right arrow keys on the computer keyboard to
go from one curve point to the next.
If you press [Shift] and use the arrow keys, you can select several points at
the same time.
Editing tempo curve points
Curve points can be edited in the following ways:
• By clicking and dragging horizontally and/or vertically with the Object
Selection tool.
If several points are selected, all of them are moved. If Snap is activated on
the toolbar, this determines to which time positions you can move curve
points.
• By adjusting the tempo value in the tempo display on the Tempo Track Editor
toolbar.
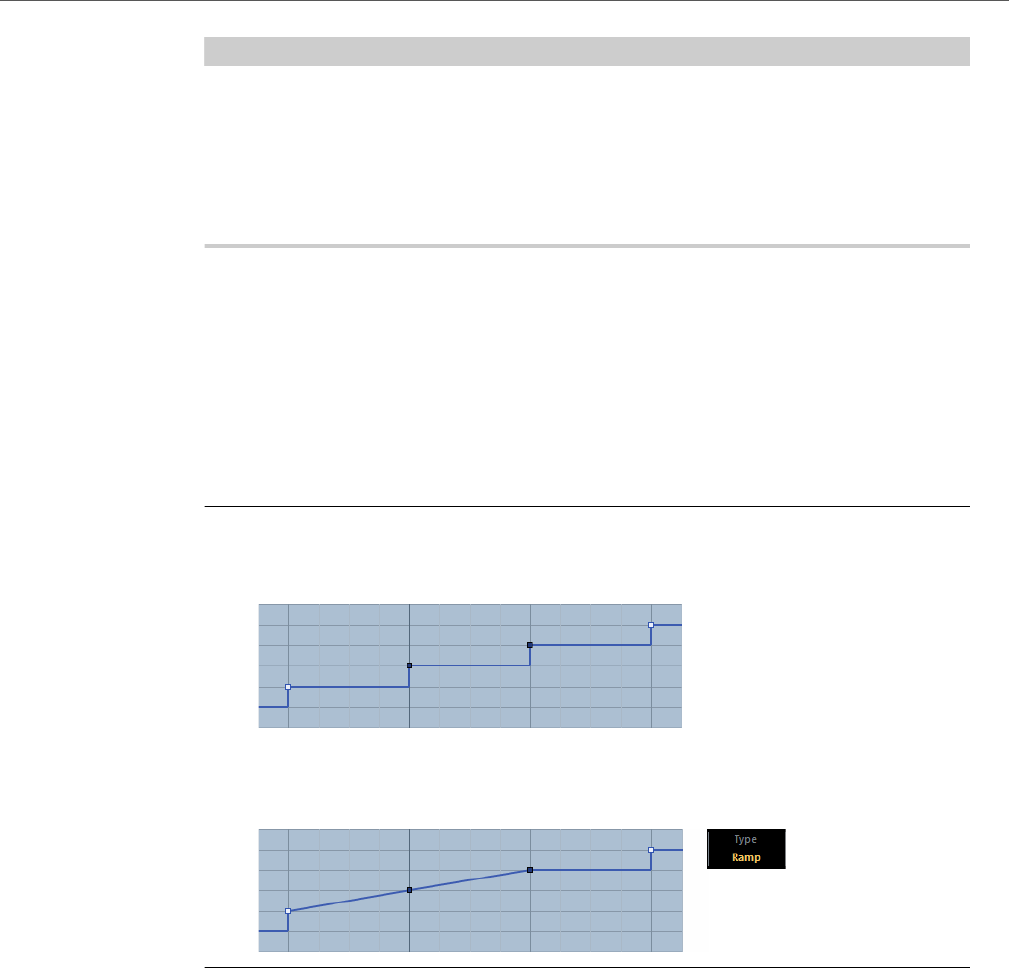
Editing tempo and signature
Editing tempo and signature
547
IMPORTANTIMPORTANTIMPORTANTIMPORTANT
We recommend using the Bars+Beats display format when editing tempo curves.
Otherwise, you may get confusing results. This is because moving a point will
change the relationship between tempo and time. If you move a tempo point to the
right and drop it at a certain time position, the mapping between tempo and time
will be adjusted. Since you have changed the tempo curve, the moved point will
appear at another position.
RELATED LINKS
Snap Function on page 39
Adjusting the curve type
You can change the curve type of a tempo curve segment at any time, using the
following method:
PROCEDURE
1. With the Object Selection tool, select all curve points within the segment you
want to edit.
2. In the info line, click below the word “Type” to switch the curve type between
“Jump” and “Ramp”.
The curve sections between the selected points are adjusted.
Removing tempo curve points
To remove a curve point, either click on it with the Erase tool or select it and press
[Backspace]. The first tempo curve point cannot be removed.
Setting the fixed tempo
When the tempo track is deactivated, the tempo track curve is grayed out (but still
visible). Since the tempo is fixed throughout the whole project, there are no tempo
curve points. Instead, the fixed tempo is displayed as a horizontal black line in the
tempo curve display.
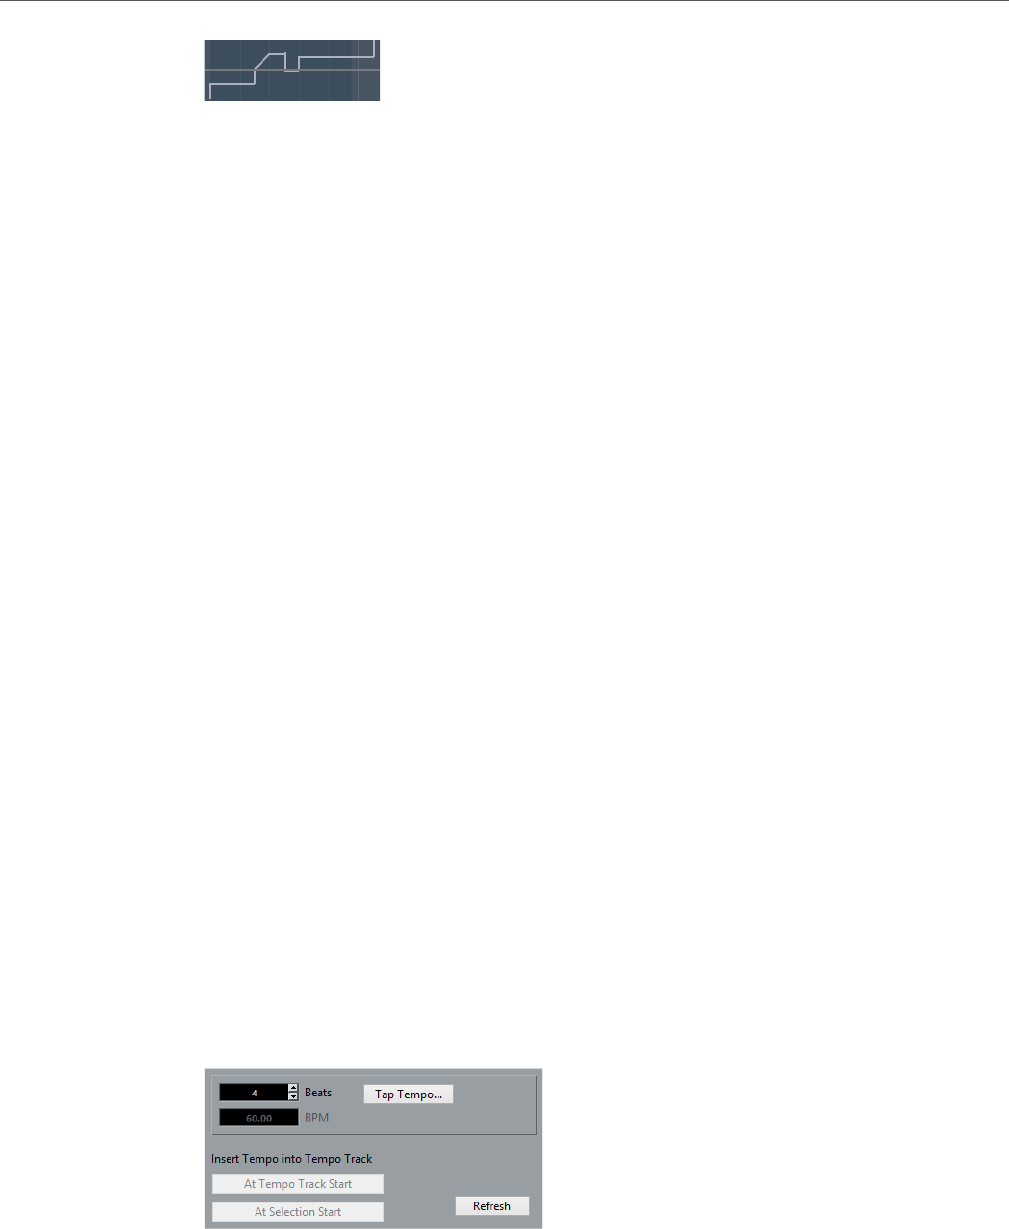
Editing tempo and signature
The Beat Calculator
548
To set the tempo in fixed mode:
• Adjust the value numerically in the tempo display on the Tempo Track Editor
toolbar.
• On the Transport panel, click on the tempo value to select it, enter a new value
and press [Enter].
Adding and editing time signature events
• To add a time signature event, click with the Draw tool in the time signature
area.
This adds a default 4/4 time signature event at the closest bar position.
• To edit the value of a time signature event, select it and adjust the value on the
info line, or double-click the event and enter a new value.
Note that there are two controls for the signature display; the left one adjusts
the numerator and the right one adjusts the denominator.
• To move a time signature event, click and drag it with the Object Selection
tool.
Note that you can [Shift]-click to select multiple events. Also note that time
signature events can only be positioned at the start of bars. This is also true if
Snap is deactivated.
• To remove a time signature, either click on it with the Erase tool or select it
and press [Backspace] or [Delete].
The first time signature event cannot be removed.
The Beat Calculator
The Beat Calculator is a tool for calculating the tempo of freely recorded audio or
MIDI material. It also allows you to set the tempo by tapping.

Editing tempo and signature
The Beat Calculator
549
Calculating the tempo of a recording
PROCEDURE
1. In the Project window, make a selection that covers an exact number of beats
of the recording.
2. Select “Beat Calculator…” from the Project menu.
The Beat Calculator window appears.
3. In the Beats field, enter the number of beats that the selection encompasses.
The corresponding tempo is calculated and displayed in the BPM field.
If you need to adjust the selection, you can go back to the Project window, leaving
the Beat Calculator open.
To re-calculate the tempo after adjusting the selection, click Refresh.
4. You can also insert the calculated tempo into the tempo track by clicking one
of the buttons in the lower left corner of the Beat Calculator window.
Clicking “At Tempo Track Start” will adjust the first tempo curve point, while “At
Selection Start” will add a new tempo curve point at the selection’s start position,
using the “Jump” curve type.
IMPORTANT
If fixed tempo mode is selected when you insert the calculated tempo, the fixed tempo
will be adjusted, regardless of which button you click.
RELATED LINKS
Adding tempo curve points on page 545
Using Tap Tempo
The Tap Tempo function allows you to specify a tempo by tapping:
PROCEDURE
1. Open the Beat Calculator.
2. If you want to tap the tempo to some recorded material, activate playback.
3. Click the Tap Tempo button.
The Tap Tempo window appears.
4. Tap the tempo on the Spacebar of the computer keyboard or with the mouse
button.
The tempo display will update the calculated tempo between each tap.
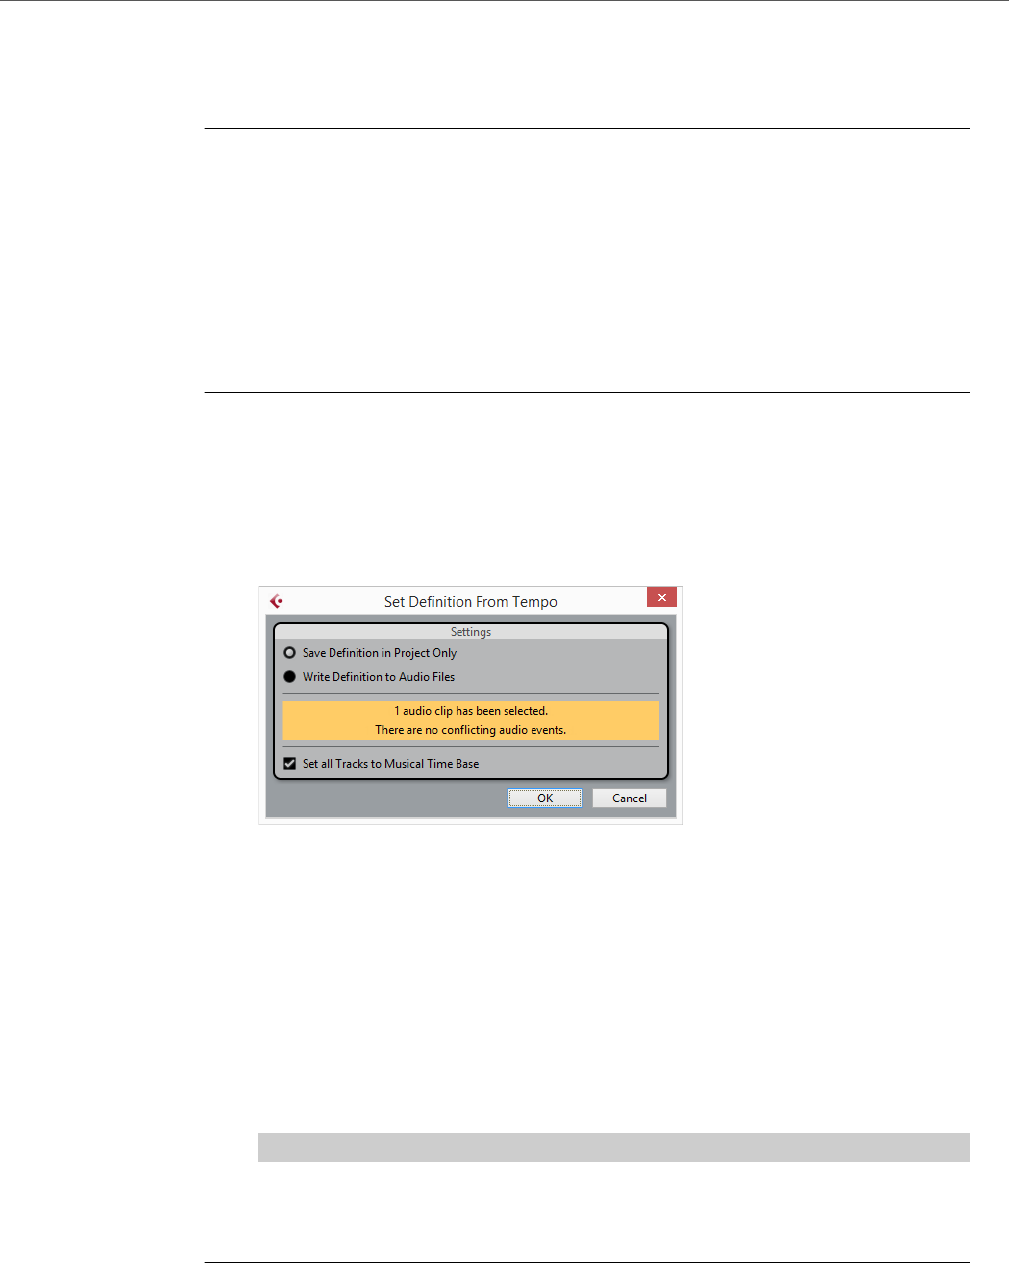
Editing tempo and signature
Adjusting the audio to the project tempo
550
5. Click OK to close the Tap Tempo dialog.
The tapped tempo is now shown in the Beat Calculator’s BPM display. You can insert
it into the tempo track as described above.
Adjusting the audio to the project tempo
If you want freely recorded audio to follow a fixed tempo or a different project tempo,
you can use the Set Definition From Tempo dialog to save the tempo information
from the tempo track in the corresponding audio clips.
PROCEDURE
1. Select the audio events that you want to have follow the project tempo.
For example, this could be the individual tracks in a multi-track drum session.
2. On the Audio menu, open the Advanced submenu and select the “Set
Definition From Tempo…” option.
The Set Definition From Tempo dialog opens.
3. Select whether you want to save the tempo information in the project file only
or in the selected audio clips.
Writing the definition into the audio files allows you to use these in other projects,
complete with tempo information.
4. Select if you want to set all tracks to musical time base.
If you do not activate this option, only the tracks containing the selected events are
set to musical time base.
5. Click OK.
The tempo information is now copied into the selected audio clips and the tracks are
set to musical time base. Furthermore, Musical Mode is activated for the audio events.
IMPORTANT
If you have placed audio events referring to the same audio clip at different positions on
the timeline and you apply the “Set Definition From Tempo” function simultaneously to
these events, new audio files are written for all the events except the first.
RESULT
The audio tracks will now follow any tempo changes in the project. Therefore, you
can disable the tempo track and set a fixed tempo for your project or edit the tempo
track for a new tempo map.

551
Export Audio Mixdown
Introduction
The Export Audio Mixdown function in Cubase allows you to mix down audio from
the program to a file on your hard disk.
You always mix down an output channel. For example, if you have set up a stereo
mix with tracks routed to a stereo output bus, mixing down that output bus would
give you a mixdown file containing the whole mix.
Please note the following:
• The Export Audio Mixdown function mixes down the area between the left and
right locators.
• When you mix down, you get what you hear – mutes, MixConsole settings,
record enable, and insert effects are taken into account.
Note though that you will only include the sound of the channel you select for
mixdown.
• MIDI tracks are not included in the mixdown!
To make a complete mixdown containing both MIDI and audio, you first need
to record all your MIDI music onto audio tracks (by connecting the outputs of
your MIDI instruments to your audio inputs and recording, as with any other
sound source).
Mixing down to audio files
PROCEDURE
1. Set up the left and right locators to encompass the section you want to mix
down.
2. Set up your tracks so that they play back the way you want.
This includes muting unwanted tracks or parts, making manual MixConsole settings
and/or activating the R (Read) automation buttons for some or all MixConsole
channels.
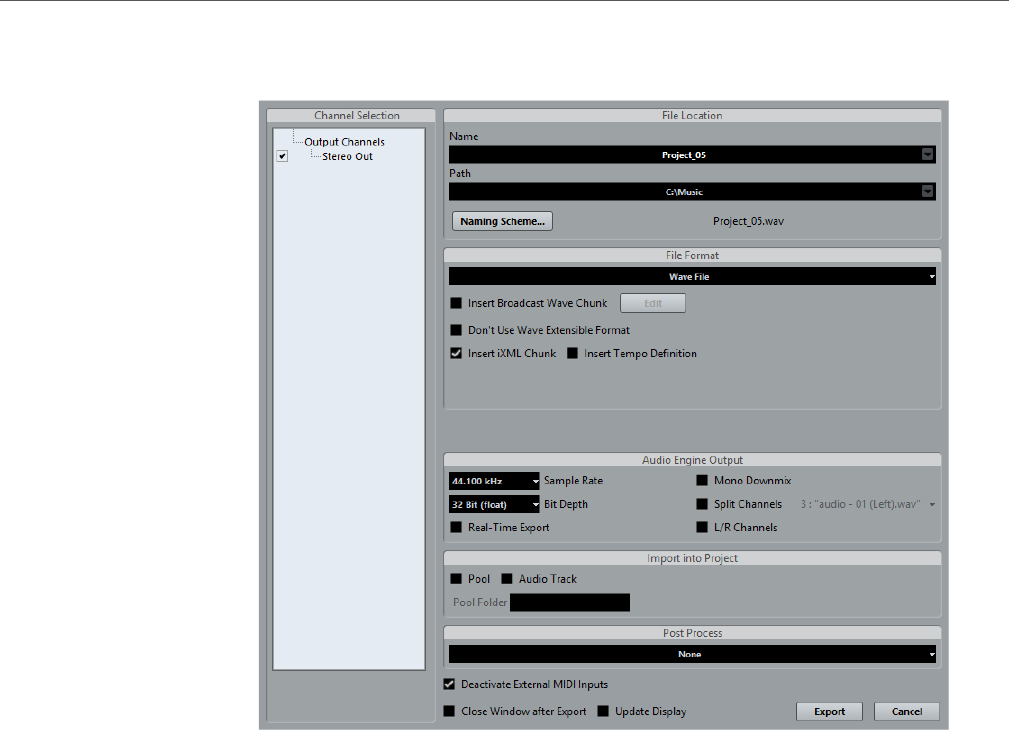
Export Audio Mixdown
Mixing down to audio files
552
3. Open the File menu and select “Audio Mixdown…” from the Export submenu.
The Export Audio Mixdown dialog opens.
4. In the Channel Selection section to the left, select the channel you want to mix
down. The list contains all output channels available in the project.
5. In the File Location section at the top you can specify a name and path for the
mixdown file.
6. Select an entry from the File Format pop-up menu and make additional
settings for the file to be created.
This includes codec settings, meta data, sample rate, bit depth, etc. The available
options depend on the selected file format.
7. In the Audio Engine Output section, activate the Split Channels option if you
want to export the two channels of a stereo bus as separate mono files.
8. Activate Real-Time Export if you want the export to happen in realtime.
9. If you want to automatically import the resulting audio file back into Cubase,
activate any of the checkboxes in the “Import into Project” section.
10. If you activate Update Display, the meters will be updated during the export
process.
This allows you to check for clipping, for example.
11. Click Export.
A dialog with a progress bar is displayed while the audio file is created.
To cancel the operation, you can click the Abort button.
• If the “Close Window after Export” option is activated, the dialog will be closed
automatically.

Export Audio Mixdown
The Export Audio Mixdown dialog
553
• If the “Deactivate External MIDI Inputs” option is activated, any MIDI inputs that
are performed on external devices during the export process are ignored.
• If you have activated any of the options in the “Import into Project” section, the
file will be imported back into the same project.
When playing back the reimported file, mute the original tracks so that you only
hear the mixdown.
IMPORTANT
If you set the export range in such a way that the effects applied to a preceding event
(e. g. reverb) reach into the next, these will be heard in the mixdown (even though the
event itself is not included). If you do not want this, you need to mute the first event
before exporting.
RELATED LINKS
About the Channel Selection section on page 553
About the File Location section on page 553
The available file formats on page 556
About the Audio Engine Output section on page 554
About the Import into Project section on page 555
The Export Audio Mixdown dialog
Below you will find detailed descriptions of the different sections of the dialog and
the corresponding functions.
About the Channel Selection section
The Channel Selection section shows all output channels available in the project.
• You can activate/deactivate channels by clicking on the checkboxes in front
of the channel names.
About the File Location section
In the File Location section you can specify a name and a path for the exported files.
At the right of the Name and the Path fields there are two pop-up menus with a
number of options:
Naming Options
• Select “Set to Project Name” to set the Name field to the project name.
• Activate the “Auto Update Name” option to add a number to the specified file
name every time you click the Export button.

Export Audio Mixdown
The Export Audio Mixdown dialog
554
Path Options
• Select “Choose…” to open a dialog in which you can browse for a path and
enter a file name.
The file name will automatically be shown in the Name field.
• Select an entry from the Recent Paths section to reuse a path specified for a
previous export.
This section is only shown after an export has been completed. With the
“Clear Recent Paths” option you can delete all entries from the Recent Paths
section.
• Activate the “Use Project Audio Folder” option to save the mixdown file in the
project’s Audio folder.
About the File Format section
In the File Format section, you can select the file format for your mixdown files and
make additional settings that are different for each file type.
RELATED LINKS
The available file formats on page 556
About the Audio Engine Output section
The Audio Engine Output section contains all the settings related to the output of
the Cubase audio engine. The following options are available:
Sample Rate (uncompressed file formats only)
This setting determines the frequency range of the exported audio – the lower
the sample rate, the lower the highest audible frequency in the audio. In most
cases, you should select the sample rate set for the project, since a lower
sample rate will degrade the audio quality (mainly reducing the high frequency
content) and a higher sample rate will only increase the file size, without
adding to audio quality. Also consider the future usage of the file: If you plan
to import the file into another application, for example, you should select a
sample rate supported by that application.
If you are making a mixdown for CD burning, you should select 44.100 kHz,
since this is the sample rate used on audio CDs.
Bit Depth (uncompressed file formats only)
Allows you to select 8, 16, 24 bit or 32 bit (float) files. If the file is an
“intermediate mixdown” that you plan to re-import and continue working on in
Cubase, we recommend that you select the 32 bit (float) option.
32 bit (float) is a very high resolution (the same resolution as used internally
for audio processing in Cubase), and the audio files will be twice the size of
16 bit files.

Export Audio Mixdown
The Export Audio Mixdown dialog
555
If you are making a mixdown for CD burning, use the 16 bit option, as CD
audio is always 16 bit.
In this case, we recommend dithering.
Cubase Elements only: Activate the UV-22HR dithering plug-in (see the
separate PDF document “Plug-in Reference” for details). This reduces the
effects of quantization noise and artifacts from being introduced when
converting the audio down to 16 bit. 8 bit resolution should only be used if
required, since it results in limited audio quality. 8 bit audio may be suitable in
some multimedia applications, etc.
Mono Downmix
Activate this if you want to downmix the two channels of a stereo bus to a
single mono file.
Split Channels
Activate this if you want to export the two channels of a stereo bus as separate
mono files.
Real-Time Export
Activate this if you want the export to happen in realtime, in which case the
process will take at least the same time as regular playback.
Some VST plug-ins, external instruments and effects require this in order to
have enough time to update correctly during the mixdown – consult the
plug-in manufacturers if uncertain.
Depending on the CPU and disk speed of your computer, it may not be
possible to export all channels simultaneously if Real-Time Export is activated.
If an error occurs during the realtime export, the program will automatically
stop the process, reduce the number of channels and start again. Afterwards
the next batch of files is exported. This is repeated as often as needed to
export all selected channels. Due to this splitting of the export process in
“runs”, the realtime export might take longer than the actual playback would.
RELATED LINKS
Dithering (Cubase Elements only) on page 245
About the Import into Project section
In this section you will find several options for importing the resulting mixdown files
back into the existing or into a new project:
• If you activate the Pool checkbox, the resulting audio file will automatically be
imported back into the Pool as a clip.
Use the Pool Folder option to specify in which Pool folder the clip will reside.
• If you activate the Audio Track option as well, an audio event that plays the
clip will be created and placed on a new audio track, starting at the left
locator.

Export Audio Mixdown
The available file formats
556
If you activate the Audio Track option, the Pool option will automatically be
activated as well, and deactivating the Pool option also deactivates the Audio
Track option.
RELATED LINKS
Importing Media on page 327
About the Import Options dialog
If you activate any of the options in the “Import into Project” section, the Import
Options dialog will open when the export is complete.
RELATED LINKS
Importing Media on page 327
About the Post Process section
In the Post Process section, you can select a process that you want to execute after
mixing down your audio file.
• You can select “Upload to SoundCloud” to launch SoundCloud, connect to
your user account, and upload your mixdown.
The available file formats
• AIFF files
•AIFC files
•Wave files
• Wave 64 files
•Broadcast Wave files
•FLAC files
•MP3 files
• Ogg Vorbis files
• Windows Media Audio Pro files (Windows only)
IMPORTANTIMPORTANTIMPORTANTIMPORTANT
Note that the Wave 64 file format is the only format that allows you to export files
with a resulting size of more than 2 GB.

Export Audio Mixdown
The available file formats
557
NOTE
Most of the settings described below for AIFF files are available for all file types.
Where this is not the case, you will find additional information in the corresponding
section.
RELATED LINKS
AIFF files on page 557
AIFC files on page 558
Wave files on page 558
Wave 64 files on page 559
Broadcast Wave files on page 559
FLAC files on page 559
MPEG 1 Layer 3 files on page 560
Ogg Vorbis files on page 560
Windows Media Audio Pro files (Windows only) on page 560
MP3 Export
This version of Cubase provides a function for exporting your audio mixdown as
MP3 files. This function is limited to 20 trial encodings or a trial period of 30 days
from the installation date (whichever ends first). After this period, the function will
be disabled until you purchase the MP3 encoder for Cubase.
• When the MP3 format is selected and you click the Export button, a window
opens showing you how many trial encodings you have left. You can upgrade
to an unlimited MP3 export function by clicking the “Go to Online Shop”
button in the dialog.
This will take you to Steinberg’s online shop where you can purchase the
upgrade. Note that a working internet connection is required.
AIFF files
AIFF stands for Audio Interchange File Format, a standard defined by Apple Inc.
AIFF files have the extension .aif and are used on most computer platforms. For AIFF
files the following options are available:
Insert Broadcast Wave Chunk
This allows you to include information about the date and time of creation, a
timecode position (allowing you to insert exported audio at the correct
position in other projects, etc.) along with author, description, and reference
text strings in the exported file. Some applications may not be able to handle
files with embedded info – if you get problems using the file in another
application, deactivate the option and re-export.

Export Audio Mixdown
The available file formats
558
Edit button
By clicking this button, the Broadcast Wave Chunk dialog opens, where you
can enter additional information that will be embedded in the exported files. If
you activate the Use this Timecode checkbox in this dialog, the timecode
position that is specified in the Timecode field will be used instead of the
timecode position that is automatically derived from the left locator.
NOTE
In the Preferences dialog (Record–Audio–Broadcast Wave page) you can
enter default text strings for author, description, and reference that will
automatically be displayed in the Broadcast Wave Chunk dialog.
Insert iXML Chunk
This allows you to include additional project-related metadata, for example,
project name, author, and project frame rate in the exported file. Some
applications may not be able to handle files with embedded info. If you get
problems using the file in another application, deactivate the option and
re-export.
NOTE
In the Project Setup dialog you can find the Author and Company fields that
you can use to include the corresponding data in the iXML chunk. These fields
are also available in the Preferences dialog (General–Personalization
page).
Insert Tempo Definition
This option is only available if Insert iXML Chunk is activated. When Insert
Tempo Definition is activated, tempo information from the tempo track or the
Definition tab of the Sample Editor is included in the iXML chunk of exported
files. This is useful if you want to use the files in other projects where they
need to adapt to the project tempo.
AIFC files
AIFC stands for Audio Interchange File Format Compressed, a standard defined by
Apple Inc. These files support compression ratios as high as 6:1 and contain tags
in the header. AIFC files have the extension “.aifc” and are used on most computer
platforms.
AIFC files support the same options as AIFF files.
Wave files
Wave files have the extension “.wav” and are the most common file format on the
PC platform.

Export Audio Mixdown
The available file formats
559
Wave files support the same options as AIFF files and have one additional option:
• Don’t Use Wave Extensible Format
The Wave Extensible format contains additional metadata, such as the
speaker configuration. It is an extension to the normal Wave format that some
applications may not be able to handle.
If you get problems using the Wave file in another application, activate this
option and re-export.
Wave 64 files
Wave 64 is a proprietary format developed by Sonic Foundry Inc. In terms of audio
quality, Wave 64 files are identical to standard Wave files, but in the file headers
Wave 64 files use 64- bit values for addressing where Wave files use 32-bit values.
The consequence of this is that Wave 64 files can be considerably larger than
standard Wave files. Wave 64 is therefore a good file format choice for really long
recordings (file sizes over 2 GB). Wave 64 files have the extension “.w64”.
Wave 64 files support the same options as AIFF files.
Broadcast Wave files
Broadcast Wave files are Wave files with additional meta data. To create a
Broadcast Wave file, select either Wave or Wave 64 as the file format and activate
the Insert Broadcast Wave Chunk option. Click Edit if you wish to edit the chunk
information, otherwise the defaults as specified in the Preferences dialog
(Record–Audio–Broadcast Wave page) will be used.
Broadcast Wave files have the extension “.wav”.
Broadcast Wave files support the same options as Wave files.
FLAC files
Free Lossless Audio Codec files are audio files that are typically 50 to 60 % smaller
than regular Wave files, for example. FLAC is an open source format.
Use the Compression Level fader to select the compression level for the FLAC file.
Since FLAC is a lossless format, the level has more influence on the encoding
speed than on the file size.

Export Audio Mixdown
The available file formats
560
MPEG 1 Layer 3 files
MPEG 1 Layer 3 files have the extension “.mp3”. By use of advanced audio
compression algorithms, MP3 files can be made very small, yet maintaining good
audio quality. In the File Format section, the following options are available for
MPEG 1 Layer 3 files:
Bit Rate fader
By moving this fader, you can select a bit rate for the MP3 file. As a rule, the
higher the bit rate, the better the audio quality and the larger the file. For stereo
audio, 128 kBit/s is often considered to result in “good” audio quality.
Sample Rate pop-up menu
On this pop-up menu you can select a Sample Rate for the MP3 file.
High Quality Mode option
When this is activated, the encoder will use a different resampling mode,
which can give better results depending on your settings. In this mode, you
cannot specify the Sample Rate, but only the Bit Rate for the MP3 file.
Insert ID3 Tag option
This allows you to include ID3 Tag information in the exported file.
Edit ID3 Tag button
When you click this, the ID3 Tag dialog opens, in which you can enter
information about the file. This additional information will be embedded as text
strings in the file, and can be displayed by most mp3 playback applications.
Ogg Vorbis files
Ogg Vorbis is an open source, patent-free audio encoding and streaming
technology, offering compressed audio files (extension “.ogg”) of small size, but
with comparatively high audio quality.
In the File Format section you will find only one setting: the Quality fader. The Ogg
Vorbis encoder uses variable bit rate encoding, and the Quality setting determines
between which limits the bit rate will vary. Generally speaking, the higher the Quality
setting, the higher the sound quality but also the larger the files.
Windows Media Audio Pro files (Windows only)
This is a continuation of the Windows Media Audio format developed by Microsoft
Inc. Due to the advanced audio codecs and lossless compression used, WMA Pro
files can be decreased in size with no loss of audio quality. Furthermore, WMA Pro
features the possibility of mixing down to 5.1 surround sound. The files have the
extension “.wma”.
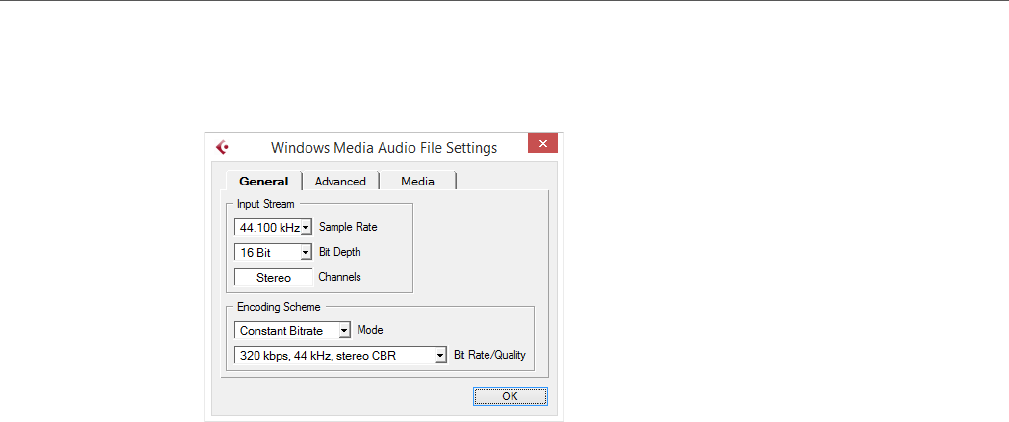
Export Audio Mixdown
The available file formats
561
When you select “Windows Media Audio File” as the file format, you can click the
“Codec Settings…” button to open the “Windows Media Audio File Settings”
window.
Note that the configuration options may vary, depending on the chosen output
channels.
General Tab
In the Input Stream section, you set the sample rate (44.1, 48 or 96 kHz) and the bit
resolution (16 bit or 24 bit) of the encoded file. Set these to match the sample rate
and bit resolution of the source material. If no value matches that of your source
material, use the closest available value that is higher than the actual value. For
example, if you are using 20 bit source material, set the bit resolution to 24 bit rather
than 16 bit.
• The setting in the Channels field depends on the chosen output and cannot
be changed manually.
The settings in the Encoding Scheme section are used for defining the
desired output from the encoder.
Make settings appropriate for the intended use of the file. If the file will be
downloaded or streamed on the internet, you might not want too high bit rates,
for example. See below for descriptions of the options.
• Mode pop-up menu
The WMA encoder can use either a constant bit rate or a variable bit rate, or
it can use lossless encoding for encoding to stereo.
The options on this menu are as follows:
Constant Bitrate
This will encode to a file with a constant bit rate (set in the Bit Rate/Channels
menu, see below).
Constant bit rate is preferably used if you want to limit the size of the final file.
The size of a file encoded with a constant bit rate is always the bit rate times
the duration of the file.

Export Audio Mixdown
The available file formats
562
Variable Bitrate
Encodes to a file with a variable bit rate, according to a quality scale (the
desired quality is set in the Bit Rate/Quality menu, see below).
When you encode with variable bit rates, the bit rate fluctuates depending on
the character and intricacy of the material being encoded. The more complex
passages in the source material, the higher the bit rate – and the larger the
final file.
Lossless
Encodes to a file with lossless compression.
• Bit Rate/Quality pop-up menu
This menu allows you to set the desired bit rate. The available bit rate settings vary
depending on the selected mode and/or output channels (see above). If the
Variable Bitrate mode is used, the menu allows you to select from various levels of
quality, with 10 being the lowest and 100 the highest. Generally, the higher the
bitrate or quality you select, the larger the final file will be.
Advanced tab
• Dynamic Range Control
These controls allow you to define the dynamic range of the encoded file. The
dynamic range is the difference in dB between the average loudness and the peak
audio level (the loudest sounds) of the audio. These settings affect how the audio
is reproduced if the file is played on a Windows computer with a player from the
Windows Media series, and the “Quiet Mode” feature of the player is activated to
control the dynamic range.
The dynamic range is automatically calculated during the encoding process, but you
can specify it manually as well.
To manually specify the dynamic range, first put a checkmark in the box to the left
by clicking in it, and then enter the desired dB values in the Peak and Average fields.
You can enter any value between 0 and -90 dB. Note, however, that it is usually not
recommended to change the Average value, since this affects the overall volume
level of the audio and therefore can have a negative effect on the audio quality.
The Quiet Mode in a Windows Media player can be set to one of three settings.
Below, these settings are listed together with an explanation of how the Dynamic
Range settings affect them:
• Off: If Quiet Mode is off, the dynamic range settings that were automatically
calculated during the encoding will be used.
• Little Difference: If this is selected and you have not manually changed the
dynamic range settings, the peak level will be limited to 6 dB above the
average level during playback. If you have manually specified the dynamic
range, the peak level will be limited to the mean value between the peak and
average values you specified.

Export Audio Mixdown
The available file formats
563
• Medium Difference: If this is selected and you have not manually changed the
dynamic range settings, the peak level will be limited to 12 dB above the
average level. If you have changed the dynamic range, the peak level will be
limited to the peak value you specified.
Media tab
In these fields you can enter a number of text strings with information about the file
– title, author, copyright information and a description of its contents. This
information will then be embedded in the file header and can be displayed by some
Windows Media Audio playback applications.

564
Synchronization
Background
What is synchronization?
Synchronization is the process of getting two or more devices to play back together
at the same exact speed and position. These devices can range from audio and
video tape machines to digital audio workstations, MIDI sequencers,
synchronization controllers, and digital video devices.
Synchronization basics
There are three basic components of audio/visual synchronization: position, speed,
and phase. If these parameters are known for a particular device (the master), then
a second device (the slave) can have its speed and position “resolved” to the first
in order to have the two devices play in perfect sync with one another.
Position
The position of a device is represented by either samples (audio word clock),
video frames (timecode), or musical bars and beats (MIDI clock).
Speed
The speed of a device is measured either by the frame rate of the timecode,
the sample rate (audio word clock) or by the tempo of the MIDI clock (bars
and beats).
Phase
Phase is the alignment of the position and speed components to each other.
In other words, each pulse of the speed component should be aligned with
each measurement of the position for the most accuracy. Each frame of
timecode should be perfectly lined up with the correct sample of audio. Put
simply, phase is the very precise position of a synchronized device relative to
the master (sample accuracy).
Master and slave
In this document, the following terms are used:
• The “timecode master” is the device generating position information or
timecode.

Synchronization
Timecode (positional references)
565
• The “timecode slave” is any device receiving the timecode and synchronizing
or “locking” to it.
Timecode (positional references)
The position of any device is most often described using timecode. Timecode
represents time using hours, minutes, seconds, and frames to provide a location for
each device. Each frame represents a visual film or video frame.
Timecode can be communicated in several ways:
• LTC (Longitudinal Timecode) is an analog signal that can be recorded on
tape. It should be used for positional information primarily. It can also be used
for speed and phase information as a last resort if no other clock source is
available.
• VITC (Vertical Interval Timecode) is contained within a composite video
signal. It is recorded onto video tape and is physically tied to each video frame.
• MTC (MIDI Timecode) is identical to LTC except that it is a digital signal
transmitted via MIDI.
Timecode standards
Timecode has several standards. The subject of the various timecode formats can
be very confusing due to the use and misuse of the shorthand names for specific
timecode standards and frame rates. The reasons for this confusion are described
in detail below. The timecode format can be divided into two variables: frame count
and frame rate.
Frame count (frames per second)
The frame count of timecode defines the standard with which it is labeled. There are
four timecode standards:
24 fps Film (F)
This frame count is the traditional count for film. It is also used for HD video
formats and commonly referred to as “24 p”. However, with HD video, the
actual frame rate or speed of the video sync reference is slower, 23.976
frames per second, so timecode does not reflect the actual realtime on the
clock for 24p HD video.
25 fps PAL (P)
This is the broadcast video standard frame count for European (and other PAL
countries) television broadcast.

Synchronization
Timecode (positional references)
566
30 fps non-drop SMPTE (N)
This is the frame count of NTSC broadcast video. However, the actual frame
rate or speed of the video format runs at 29.97 fps. This timecode clock does
not run in realtime. It is slightly slower by 0.1 %.
30 fps drop-frame SMPTE (D)
The 30 fps drop-frame count is an adaptation that allows a timecode display
running at 29.97 fps to actually show the clock-on-the-wall-time of the
timeline by “dropping” or skipping specific frame numbers in order to “catch
the clock up” to realtime.
Confused? Just remember to keep the timecode standard (or frame count) and
frame rate (or speed) separate.
Frame rate (speed)
Regardless of the frame counting system, the actual speed at which frames of video
go by in realtime is the true frame rate.
In Cubase the following frame rates are available:
24 fps
This is the true speed of standard film cameras.
25 fps
This is the frame rate of PAL video.
29.97 fps
This is the frame rate of NTSC video. The count can be either non-drop or
drop-frame.
30 fps
This frame rate is not a video standard anymore but has been commonly used
in music recording. Many years ago it was the black and white NTSC
broadcast standard. It is equal to NTSC video being pulled up to film speed
after a 2-3 telecine transfer.
Frame count vs. frame rate
Part of the confusion in timecode stems from the use of “frames per second” in both
the timecode standard and the actual frame rate. When used to describe a
timecode standard, frames per second defines how many frames of timecode are
counted before one second on the counter increments. When describing frame
rates, frames per second define how many frames are played back during the span
of one second of realtime. In other words: Regardless of how many frames of video
there are per second of timecode (frame count), those frames can be moving at
different rates depending on the speed (frame rate) of the video format. For
example, NTSC timecode (SMPTE) has a frame count of 30 fps. However, NTSC
video runs at a rate of 29.97 fps. So the NTSC timecode standard known as SMPTE
is a 30 fps standard that runs at 29.97 realtime.

Synchronization
Clock sources (speed references)
567
Clock sources (speed references)
Once the position is established, the next essential factor for synchronization is the
playback speed. Once two devices start playing from the same position, they must
run at exactly the same speed in order to remain in sync. Therefore, a single speed
reference must be used and all devices in the system must follow that reference.
With digital audio, the speed is determined by the audio clock rate. With video, the
speed is determined by the video sync signal.
Audio clock
Audio clock signals run at the speed of the sample rate used by a digital audio
device and are transmitted in several ways:
Word clock
Word clock is a dedicated signal running at the current sample rate that is fed
over BNC coaxial cables between devices. It is the most reliable form of audio
clock and is relatively easy to connect and use.
AES/SPDIF Digital Audio
An audio clock source is embedded within AES and SPDIF digital audio
signals. This clock source can be used as a speed reference. Preferably, the
signal itself does not contain any actual audio (digital black), but any digital
audio source can be used if necessary.
ADAT Lightpipe
ADAT Lightpipe, the 8-channel digital audio protocol developed by Alesis,
also contains audio clock and can be used as a speed reference. It is
transmitted via optical cables between devices.
NOTE
Do not confuse the audio clock embedded in the Lightpipe protocol with ADAT
Sync, which has timecode and machine control running over a proprietary DIN plug
connection.
MIDI clock
MIDI clock is a signal that uses position and timing data based on musical bars and
beats to determine location and speed (tempo). It can perform the same function as
a positional reference and a speed reference for other MIDI devices. Cubase
supports sending MIDI clock to external devices but cannot slave to incoming MIDI
clock.
IMPORTANTIMPORTANTIMPORTANTIMPORTANT
MIDI clock cannot be used to synchronize digital audio. It is only used for MIDI
devices to play in musical sync with one another. Cubase does not support being a
MIDI clock slave.
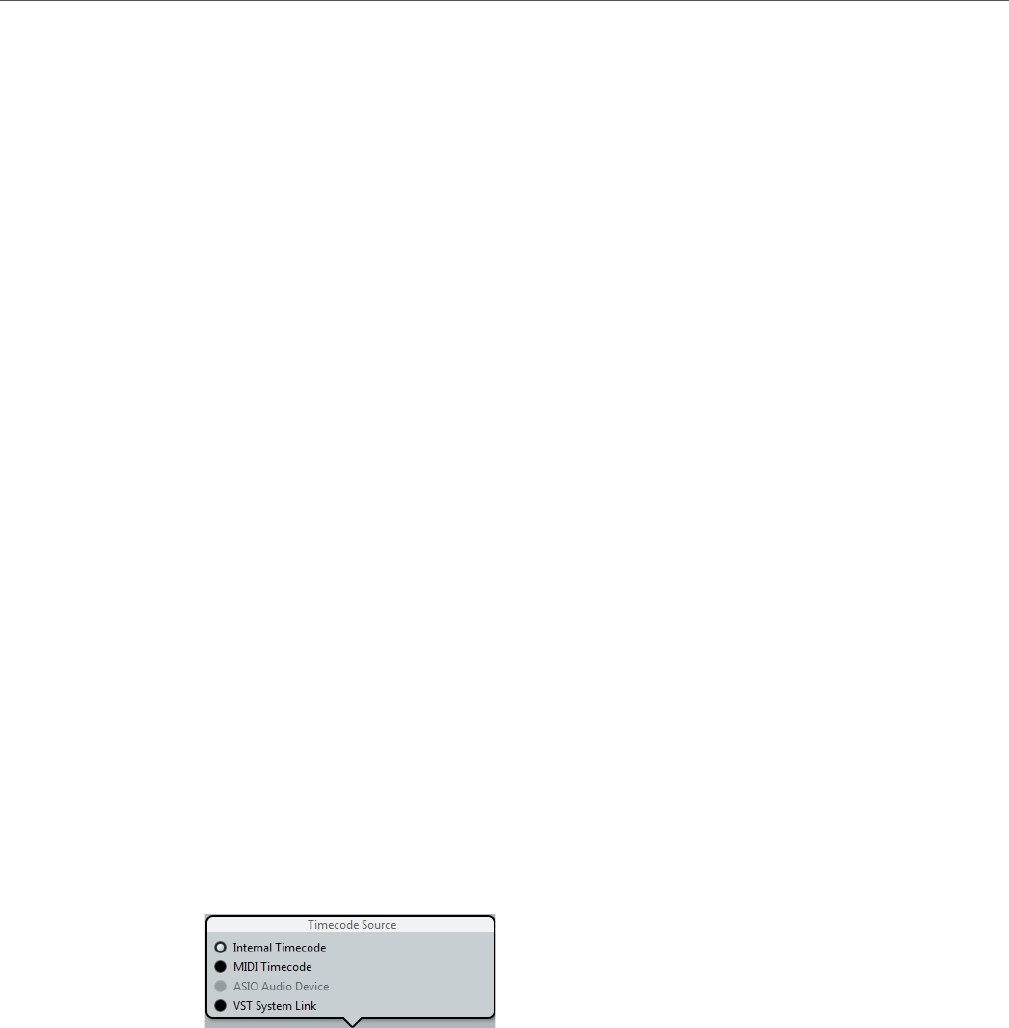
Synchronization
The Project Synchronization Setup dialog
568
The Project Synchronization Setup dialog
Cubase’s Project Synchronization Setup dialog provides a central place to
configure a complex synchronized system. In addition to settings for timecode
sources, project setup parameters are available along with basic transport controls
for testing the system.
To open the Project Synchronization Setup dialog, proceed as follows:
• On the Transport menu, select the “Project Synchronization Setup…” option.
• On the Transport panel, [Ctrl]/[Command]-click the Sync button.
The dialog is organized into sections separating related groups of settings. The
arrows shown between the various sections of the dialog indicate how settings in
one section influence settings in another section. In the following, the available
sections are described in detail.
The Cubase Section
At the center of the Project Synchronization Setup dialog is the Cubase section. It
is provided to help you visualize the role that Cubase takes in your setup. It shows
which external signals enter or leave the application.
Timecode Source
The Timecode Source setting determines whether Cubase is acting as timecode
master or slave.
When set to “Internal Timecode”, Cubase is the timecode master, generating all
position references for any other device in the system. The other options are for
external timecode sources. Selecting any of these, makes Cubase a timecode slave
when the Sync button is activated.
Internal Timecode
Cubase generates timecode based on the project timeline and project setup
settings. The timecode will follow the format specified in the Project Setup
section.
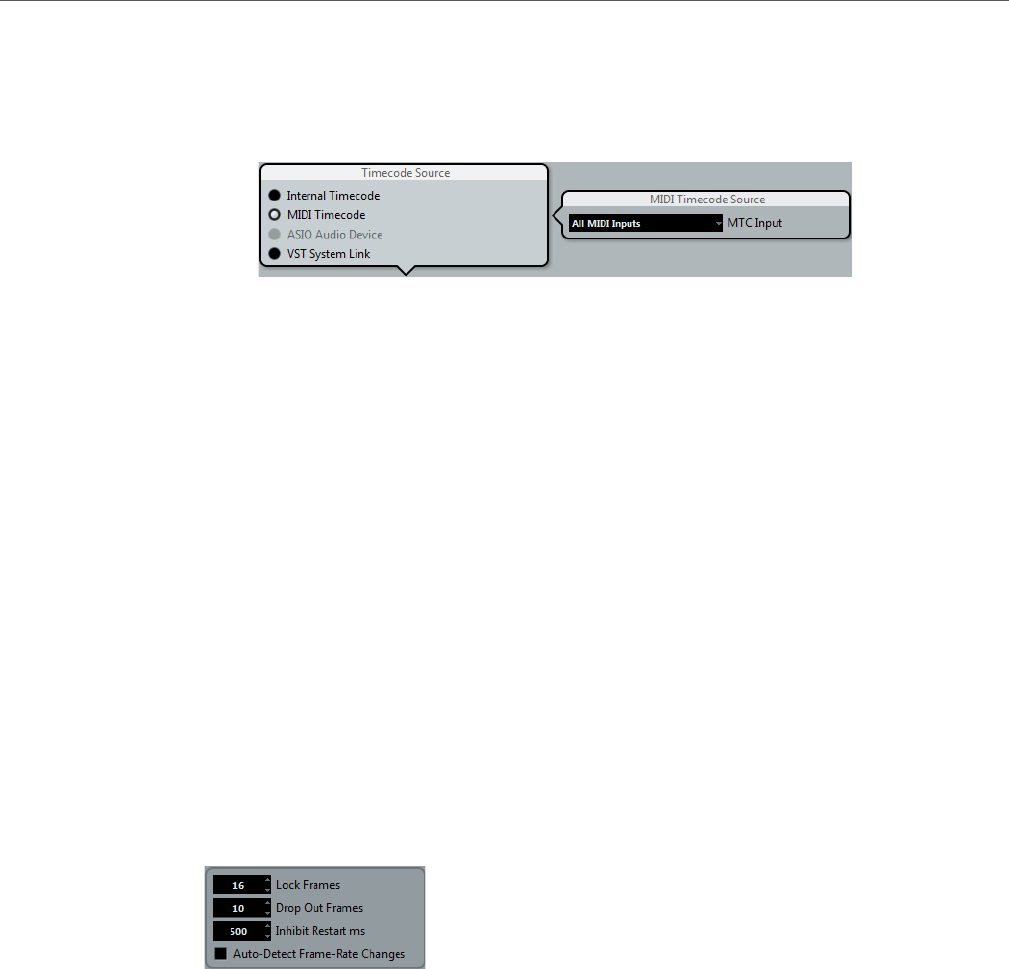
Synchronization
The Project Synchronization Setup dialog
569
MIDI Timecode
Cubase acts as a timecode slave to any incoming MIDI timecode (MTC) on
the port(s) selected in the MIDI Timecode section, to the right of the Timecode
Source section.
Selecting “All MIDI Inputs” allows Cubase to sync to MTC from any MIDI
connection. You can also select a single MIDI port for receiving MTC.
ASIO Audio Device
This option is only available with audio cards that support ASIO Positioning
Protocol. These audio cards have an integrated LTC reader or ADAT sync
port and can perform a phase alignment of timecode and audio clock.
VST System Link
VST System Link can provide all aspects of sample-accurate synchronization
between other System Link workstations.
RELATED LINKS
Working with VST System Link on page 572
Timecode Preferences
When MIDI Timecode is selected, additional options become available in the
Cubase section, providing several options for working with external timecode.
Lock Frames
This setting determines how many full frames of timecode it takes for Cubase
to try and establish sync or “lock”. If you have an external tape transport with
a very short start-up time, try lowering this number to make lock-up even
faster. This option can only be set to multiples of two.
Drop Out Frames
This setting determines the amount of missed timecode frames it takes for
Cubase to stop. Using LTC recorded on an analog tape machine can result
in some amount of drop outs. Increasing this number allows Cubase to
“free-wheel” over missed frames without stopping. Lowering this number
causes Cubase to stop sooner once the tape machine has stopped.
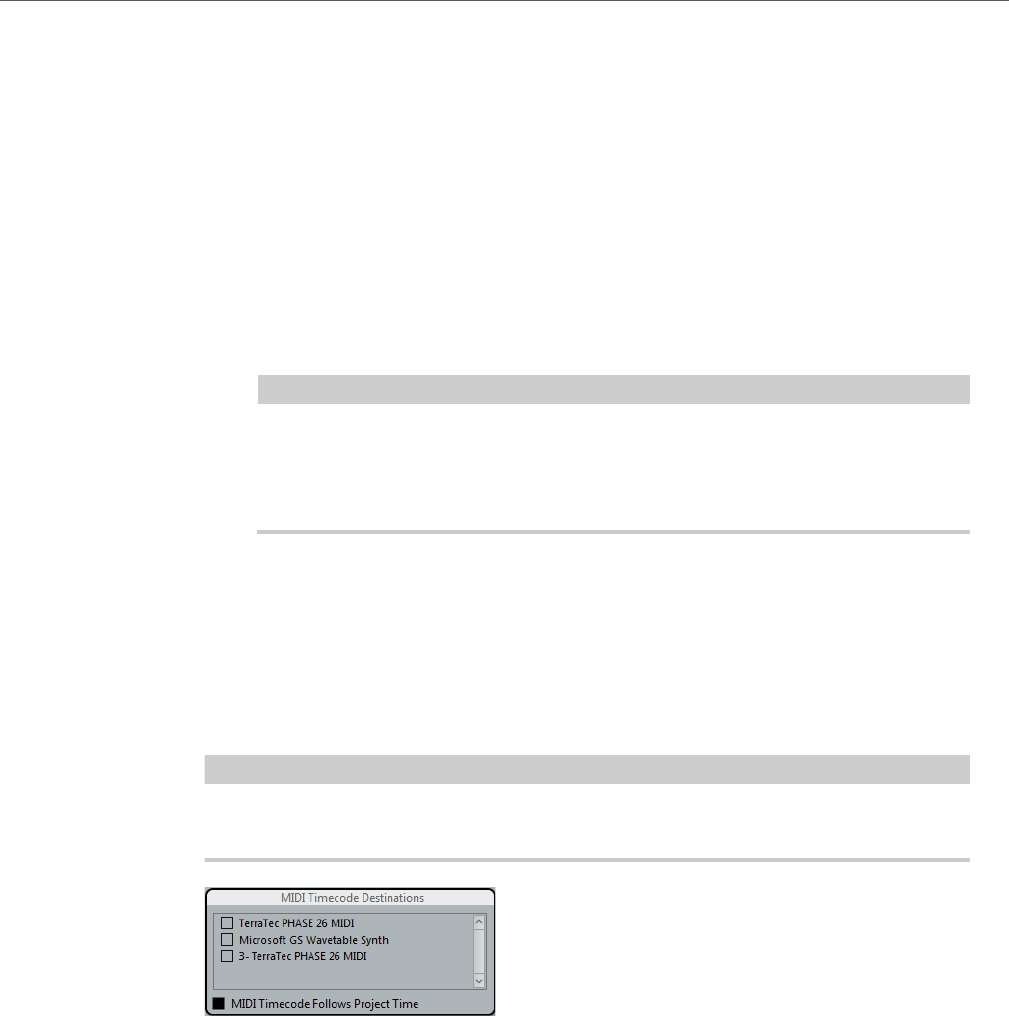
Synchronization
The Project Synchronization Setup dialog
570
Inhibit Restart ms
Some synchronizers still transmit MTC for a short period after an external tape
machine has been stopped. These extra frames of timecode sometimes cause
Cubase to restart suddenly. The “Inhibit Restart ms” setting allows you to
control the amount of time in milliseconds that Cubase will wait to restart
(ignoring incoming MTC) once it has stopped.
Auto-Detect Frame-Rate Changes
Cubase can notify the user when the frame rate of timecode changes at any
point. This is helpful in diagnosing problems with timecode and external
devices. This notification will interrupt playback or recording. Deactivating this
option will avoid any interruption in playback or recording.
IMPORTANT
If there is a discrepancy between the project frame rate in Cubase and
incoming timecode, Cubase might still be able to lock to the incoming
timecode. If the user is unaware of these differences, problems can arise later
in postproduction.
MIDI Timecode Destinations
Cubase can send MTC to any MIDI port. Use this section to specify the MIDI ports
to which MTC is routed. Devices that can lock to MTC will chase Cubase’s
timecode position.
NOTE
Some MIDI interfaces send MTC over all ports by default. If this is the case, only
select one port of the interface for MTC.
MIDI Timecode Follows Project Time
Activate this option to ensure that the MTC output follows Cubase’s time
position at all times including looping, locating, or jumping while playing. If not,
MTC will continue on without changing locations at a loop or jump point until
playback stops.
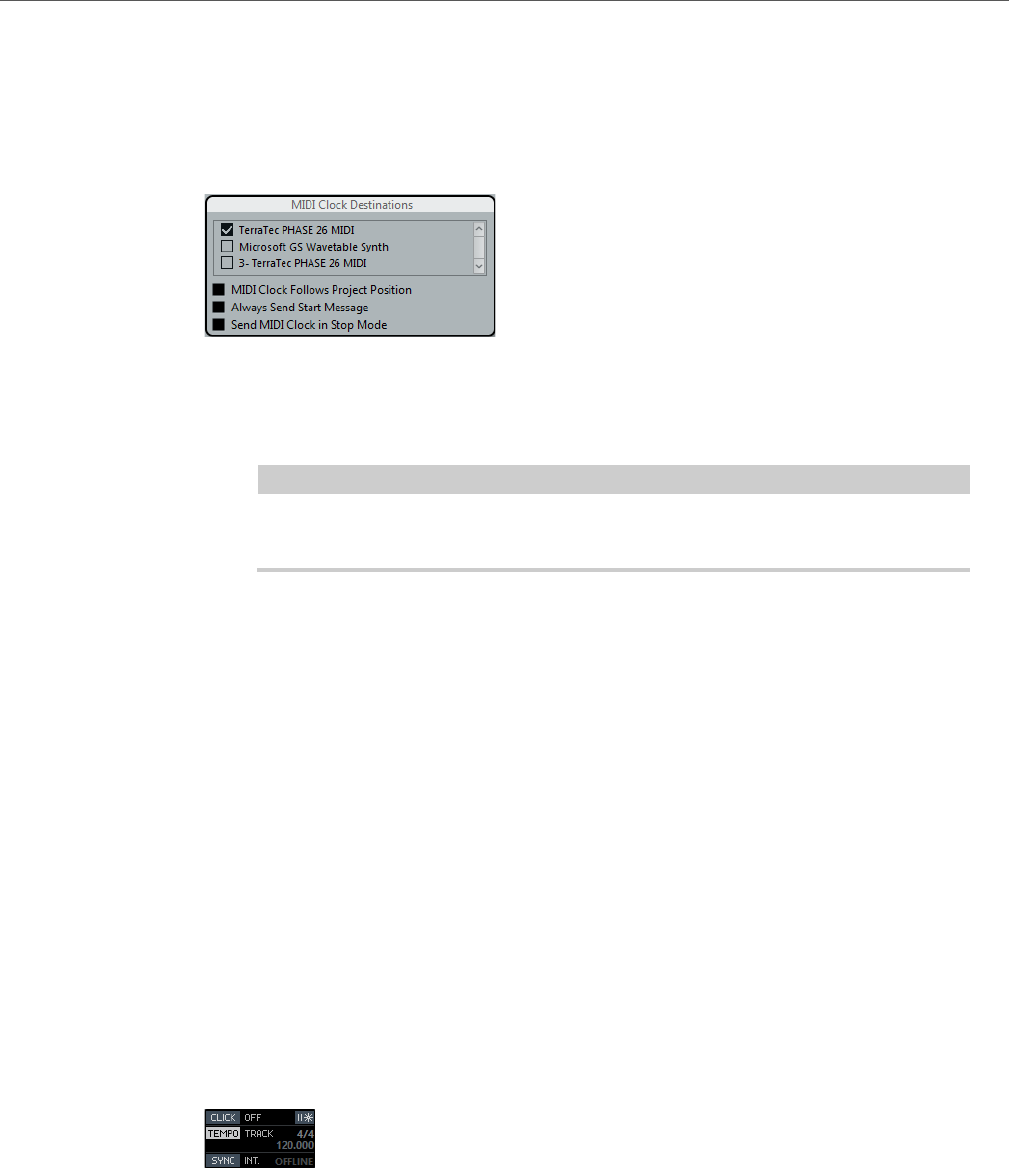
Synchronization
Synchronized operation
571
MIDI Clock Destinations
Some MIDI devices like drum machines can match their tempo and location to
incoming MIDI clock. Select any MIDI ports that you wish to output MIDI clock.
MIDI Clock Follows Project Position
Activate this option to ensure that the MIDI clock device follows Cubase when
looping, locating, or jumping while playing.
NOTE
Some older MIDI devices might not respond well to these positioning
messages and could take some time synchronizing to the new location.
Always Send Start Message
MIDI clock transport commands include Start, Stop, and Continue. However,
some MIDI devices do not recognize the Continue command. By activating
the “Always Send Start Message” option, you can avoid this problem with
specific MIDI devices.
Send MIDI Clock in Stop Mode
Activate this option if you are working with a device that needs MIDI clock to
run continuously in order to operate arpeggiators and loop generators.
Synchronized operation
Once you have connected all the devices that will be synchronized, it is important
to understand how Cubase operates in Sync mode. Sync mode is enabled by
activating the Sync button on the Transport panel.

Synchronization
Working with VST System Link
572
Sync mode
When you activate the Sync button, the following happens:
• Cubase awaits incoming timecode from the chosen timecode source defined
in the Project Synchronization Setup dialog in order to play.
Cubase will detect incoming timecode, locate to its current position, and start
playback in sync with the incoming timecode.
Working with VST System Link
VST System Link is a network system for digital audio that allows you to have
several computers working together in one large system. Unlike conventional
networks it does not require Ethernet cards, hubs, or CAT-5 cables; instead it uses
the kind of digital audio hardware and cables you probably already possess in your
studio.
VST System Link has been designed to be simple to set up and operate, yet give
enormous flexibility and performance gains in use. It is capable of linking computers
in a “ring” network (the System Link signal is passed from one machine to the next,
and eventually returns to the first machine). VST System Link can send its
networking signal over any type of digital audio cable, including S/PDIF, ADAT,
TDIF, or AES, as long as each computer in the system is equipped with a suitable
ASIO compatible audio interface.
Linking up two or more computers gives you vast possibilities:
• Dedicate one computer to running VST instruments while recording audio
tracks on another (not in Cubase LE).
• If you need lots of audio tracks, you may simply add tracks on another
computer.
• You could have one computer serve as a “virtual effect rack”, running
CPU-intensive send effect plug-ins only.
• Since you can use VST System Link to connect different VST System Link
applications on different platforms, you can take advantage of effect plug-ins
and VST instruments that are specific to certain programs or platforms.
Requirements
The following equipment is required for VST System Link operation:
• Two or more computers.
These can be of the same type or use different operating systems – it does
not matter. For example, you can link an Intel-based PC to an Apple
Macintosh without problems.
• Each computer must have audio hardware with specific ASIO drivers.

Synchronization
Working with VST System Link
573
• The audio hardware must have digital inputs and outputs.
To be able to connect the computers, the digital connections must be
compatible (i. e. the same digital formats and connection types must be
available).
• At least one digital audio cable must be available for each computer in the
network.
• A VST System Link host application must be installed on each computer.
Any VST System Link application can connect to another.
Additionally, use of a KVM switchbox is recommended.
Using a KVM switchbox
Whether you want to set up a multi-computer network or a small network in a limited
space, it is a good idea to invest in a KVM (Keyboard, Video, Mouse) switchbox.
With one of these you can use the same keyboard, monitor, and mouse to control
each computer in the system, and you can switch between computers very rapidly.
If you decide not to go this route, the network will function just the same, but you
may end up doing a lot of jumping from one machine to the other while setting up!
Making connections
Below, we assume that you are connecting two computers. Should you have more
than two computers, it is still best to start with two and add the others one by one
once the system is working – this makes troubleshooting easier if you run into
problems. For two computers, you will need two digital audio cables, one in each
direction:
PROCEDURE
1. Use the first digital audio cable to connect the digital output of computer 1 to
the digital input of computer 2.
2. Use the other cable to connect the digital output of computer 2 to the digital
input of computer 1.
If a card has more than one set of inputs and outputs, choose whichever one that suits
you – for simplicity usually the first set is best.
Synchronization
Before you proceed, you need to make sure that the clock signals on your ASIO
cards are synchronized correctly. This is essential when cabling any kind of digital
audio system, not just VST System Link.

Synchronization
Working with VST System Link
574
IMPORTANTIMPORTANTIMPORTANTIMPORTANT
All digital audio cables by definition always carry a clock signal as well as audio
signals, so you do not have to use a special word clock input and output for this
(although you may find that you get a slightly more stable audio system if you do,
especially when using multiple computers).
The clock mode or sync mode is set up in the ASIO control panel of the audio
hardware. Proceed as follows:
PROCEDURE
1. From the Devices menu, open the Device Setup dialog.
2. On the VST Audio System page, select your audio interface from the ASIO
Driver pop-up menu.
In the Devices list, the name of the audio interface now appears as a subentry to the
“VST Audio System” entry.
3. In the Devices list, select your audio interface.
4. Click the Control Panel button.
The ASIO control panel appears.
5. Open the ASIO control panel on the other computer as well.
If you are using another VST System Link host application on that computer, check
its documentation for details on how to open the ASIO control panel.
6. Now you need to make sure that one audio card is set to be the clock master
and all other cards are set to be clock slaves (i. e. they listen for the clock
signal coming from the clock master).
The naming and procedure for this differs depending on the audio hardware – consult
its documentation if required. If you are using Steinberg Nuendo ASIO hardware, all
cards default to the AutoSync setting. In this case you must set one of the cards (and
only one) to “Master” in the Clock Mode section of the control panel.
RESULT
Typically, the ASIO control panel for an audio card contains some indication of
whether or not the card receives a proper sync signal, including the sample rate of
that signal.
This is a good indication that you have connected the cards and set up clock sync
properly. Check your audio hardware’s documentation for details.
IMPORTANTIMPORTANTIMPORTANTIMPORTANT
It is very important that only one card is the clock master, otherwise the network
cannot function correctly. Once you have set this up, all the other cards in the
network will take their clock signal from this card automatically.
The only exception to this procedure is if you are using an external clock – from a
digital mixing desk or a special word clock synchronizer, for example. In that case
you must leave all your ASIO cards in clock slave or AutoSync mode and make sure
that each of them is listening for the signal coming from the synchronizer. This signal
is usually passed through your ADAT cables or word clock connectors in a daisy
chain fashion.

Synchronization
Working with VST System Link
575
VST System Link and latency
The general definition of latency is the amount of time it takes any system to respond
to whatever messages are sent to it. For example, if your system’s latency is high
and you play VST instruments in realtime, you will get a noticeable delay between
when you press a key and when you hear the sound of the VST instrument.
Nowadays, most ASIO-compatible audio cards are capable of operating with very
low latencies. Also, all VST applications are designed to compensate for latency
during playback, making the playback timing tight.
However, the latency time of a VST System Link network is the total latency of all
the ASIO cards in the system added together. Therefore it is extra important to
minimize the latency times for each computer in the network.
IMPORTANTIMPORTANTIMPORTANT
IMPORTANT
The latency does not affect the synchronization – it is always perfectly in time. But
it can affect the time it takes to send and receive MIDI and audio signals, or make
the system seem sluggish.
To adjust the latency of a system, you adjust the size of the buffers in the ASIO
control panel – the lower the buffer size, the lower the latency. It is best to keep to
fairly low latencies (buffer sizes) if your system can handle it – about 12 ms or less
is usually a good idea.
Setting up your software
Now it is time to set up your programs. The procedures below describe how to set
things up in Cubase. If you are using another program on the other computer,
please refer to its documentation.
Setting the sample rate
The projects in both programs must be set to use the same sample rate. Select
“Project Setup…” from the Project menu and make sure that the sample rate is the
same in both systems.
Streaming digital audio between applications
PROCEDURE
1. Create input and output busses in both applications and route these to the
digital inputs and outputs.
The number and configuration of the busses depend on your audio hardware and on
your needs. If you have a system with eight digital i/o channels (such as an ADAT
connection), you could create several stereo or mono busses, a surround bus
together with a stereo bus, or any combination you need. The important thing is that
you should have the same configuration in both applications – if you have four stereo
output busses on computer 1, you want four stereo input busses on computer 2, etc.

Synchronization
Working with VST System Link
576
2. Set things up so that computer 1 plays back some audio.
For example, you could import an audio file and play it back in Cycle mode.
3. In the Inspector or MixConsole, make sure that the channel containing the
audio material is routed to one of the digital output busses.
4. On computer 2, open the MixConsole and locate the corresponding digital
input bus.
The audio being played back should now “appear” in the program running on
computer 2. You should see the input bus level meters moving.
5. Reverse this procedure so that computer 2 plays back and computer 1
“listens”.
RESULT
Now you have verified that the digital connection works as it should.
NOTE
From this point on in this chapter, we refer to the busses connected to the digital
inputs and outputs as “VST System Link busses”.
Settings for the audio hardware
When you exchange VST System Link data between computers, it is important that
the digital information is not changed in any way between the programs. Therefore,
you should open the control panel (or additional application) for your audio
hardware and make sure that the following conditions are met:
• If there are additional “format settings” for the digital ports that you use for
VST System Link data, make sure that these are turned off.
For example, if you are using an S/PDIF connection for VST System Link,
make sure that “Professional format”, Emphasis, and Dithering are turned off.
• If your audio hardware has a mixer application allowing you to adjust the levels
of digital inputs and outputs, make sure that this mixer is disabled or that the
levels for the VST System Link channels are set to ±0 dB.
• Similarly, make sure no other forms of DSP (pan, effects, etc.) are applied to
the VST System Link signal.
Notes for Hammerfall DSP users
If you are using RME Audio Hammerfall DSP audio hardware, the Totalmix function
allows for extremely complex signal routing and mixing in the audio hardware. This
can in some situations lead to “signal loops” in which case the VST System Link will
not work. If you want to make absolutely sure this will not cause any problems,
select the default or “plain” preset for the Totalmix function.
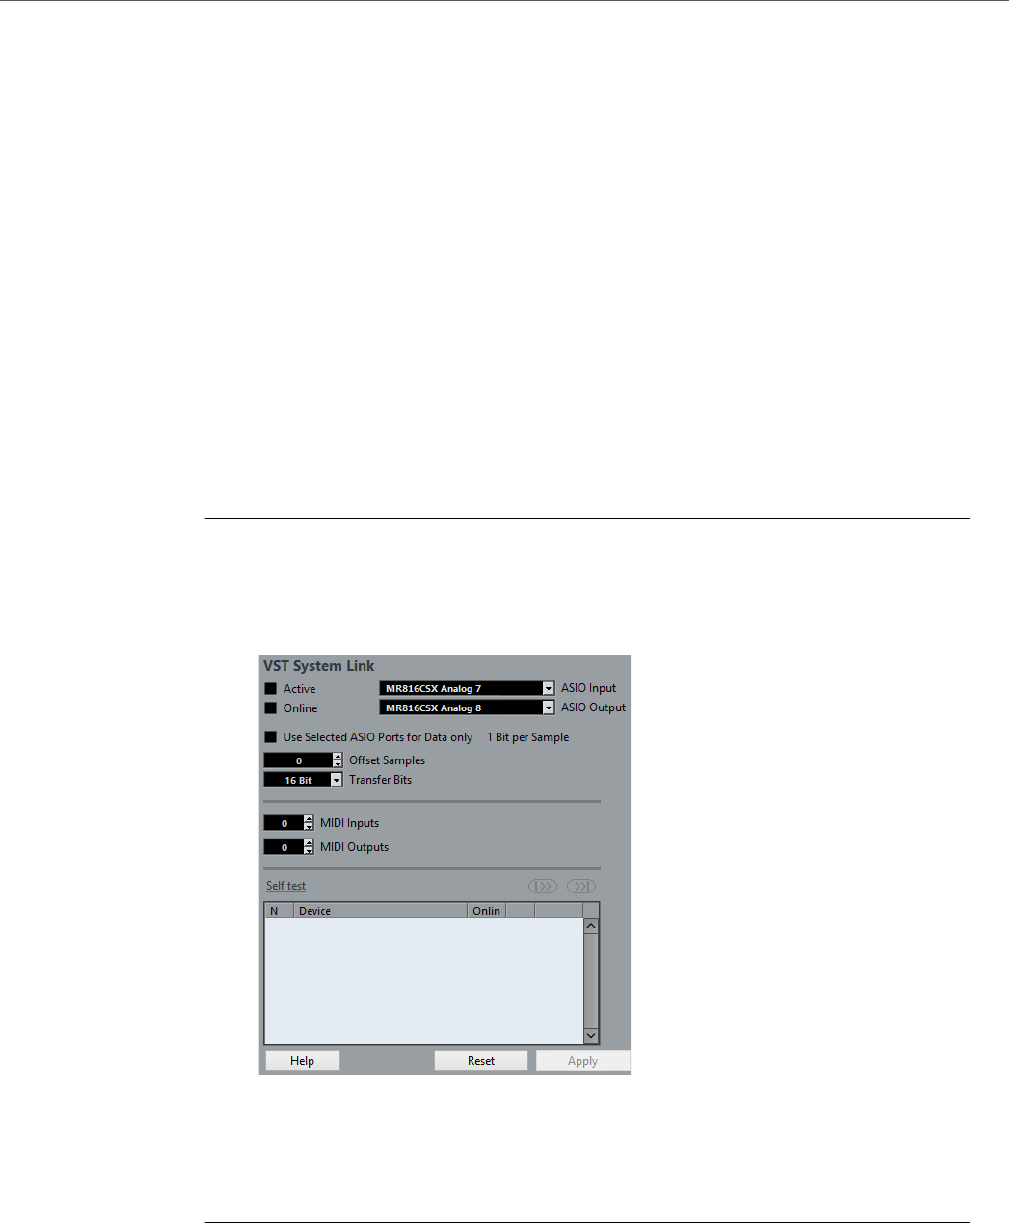
Synchronization
Activating VST System Link
577
Activating VST System Link
Before you proceed, you need to make sure that VST System Link is set as the
timecode source in the Project Synchronization Setup dialog and that the desired
Sync options are activated.
After setting up the inputs and outputs, you now need to define which input/output
will carry the actual VST System Link information.
The VST System Link networking signal is carried on only one bit of one channel.
This means that if you have an ADAT-based system which normally carries eight
channels of 24-bit audio, once you activate VST System Link you will have seven
channels of 24-bit audio and one channel of 23-bit audio (the least significant bit of
this last channel will be used for networking). In practice this makes no discernible
difference to the audio quality, since you will still have around 138 dB headroom on
this channel.
To set things up, open the VST System Link panel:
PROCEDURE
1. From the Devices menu, open the Device Setup dialog.
2. In the Devices list to the left, select the “VST System Link” entry.
The VST System Link settings are shown to the right of the Devices list.
3. Use the ASIO Input and ASIO Output pop-up menus to define which channel
is the networking channel.
4. Activate the Active checkbox at the top left of the panel.
5. Repeat the steps above for every computer in the network.

Synchronization
Activating VST System Link
578
RESULT
As the computers are made active, you should see the Sending and Receiving
indicators flashing on each active computer, and the name of each computer should
appear in the list at the bottom of the pane. Each computer is assigned a random
number – do not worry about this, it is just so the network knows internally which
one is which.
• You can double-click on the name in bold (which is the name of the computer
you are currently working on) and set it to whatever other name you wish.
This name will appear in the VST System Link window of every computer on
the network.
NOTE
If you do not see the name of each computer appearing once you have made it
active, you need to check your settings. Go through the procedure above again and
make sure that all ASIO cards are listening to the digital clock signals correctly, and
that each computer has the correct inputs and outputs assigned to the VST System
Link network.
RELATED LINKS
Timecode Preferences on page 569
Putting the network online
After each computer’s name you will see whether it is online or not. When a
computer is online, it will receive transport and timecode signals, and its sequencer
application can be started and stopped by remote control. If it is off-line, it can only
be started from its own keyboard – it is effectively an independent machine,
although it is still on the network.
NOTE
Note that any computer can control any and all of the others – VST System Link is
a peer-to-peer network and there is no absolute “master” computer.
To put all computers online, proceed as follows:
PROCEDURE
1. For all computers, activate the Online checkbox on the VST System Link
page.
2. Start playback on one computer to check that the system is working – all
computers should start almost instantly and play perfectly in time, with
sample-accurate precision.
• The Offset Samples setting allows you to adjust whether one machine will play
slightly ahead or behind the rest.
This is normally not needed, but occasionally with some hardware you may find
that the lock is a few samples out. For now, leave it set to 0 – it will most likely
be what you want.

Synchronization
Activating VST System Link
579
• The Transfer Bits setting allows you to specify whether you want to transfer 24
or 16 bits. This allows you to use older audio cards which do not support
transfer of 24 bits.
RESULT
VST System Link sends and understands all transport commands (such as play,
stop, fast forward, rewind, etc.). This allows you to control the entire network from
one computer without a problem – try it! If you jump to a locator point on one
machine, all other machines will also instantly jump to that locator point.
IMPORTANTIMPORTANTIMPORTANTIMPORTANT
Make sure that all computers have their tempos set to the same value, otherwise
your synchronization will be seriously skewed.
Scrubbing via VST System Link
You can scrub on one computer and have the video and audio on another computer
scrub along. However, the playback on the linked systems may not be perfectly in
sync while scrubbing and there are some further restrictions you should bear in
mind when scrubbing via VST System Link:
• Use the jog/shuttle control on the Transport panel or a remote controller for
scrubbing.
Scrubbing with the Scrub tool does not work over a VST System Link
connection.
• Always use the system where you started scrubbing to control the scrubbing,
e. g. change the scrub speed or stop scrubbing.
Changing the scrub speed on a remote system will only change the speed on
the local system.
• You can start playback on all systems.
This stops scrubbing and enters playback on all systems in sync.
Using MIDI
As well as supplying transport and sync control, VST System Link also supplies up
to 16 MIDI ports, with 16 channels each.
PROCEDURE
1. Use the MIDI Inputs and MIDI Outputs value fields to specify the number of
MIDI ports you need.
The default value is 0 MIDI In and 0 MIDI Out ports.
2. In the Project window, create a MIDI track and open the Inspector (top
section).
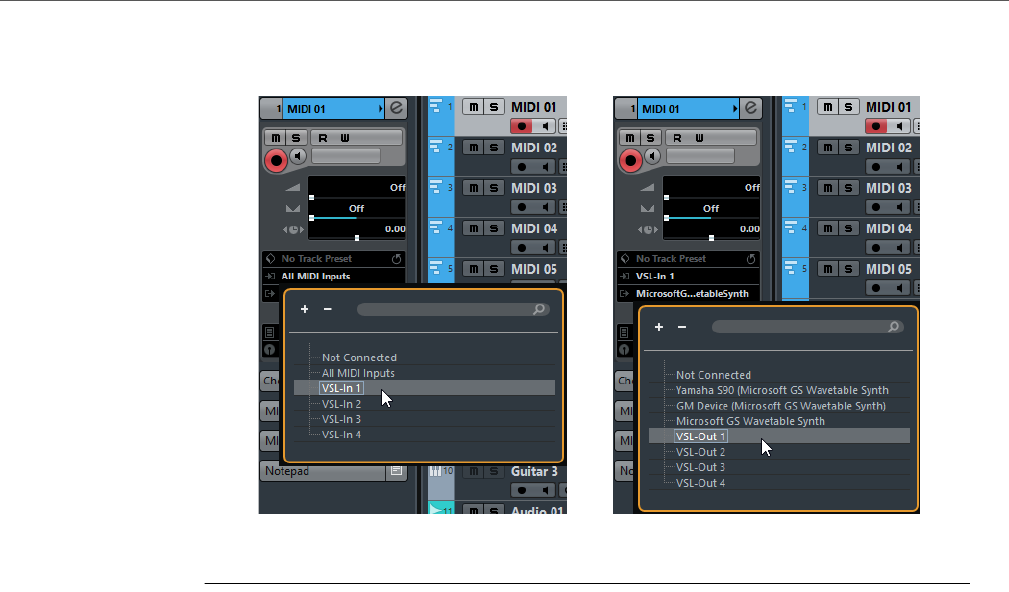
Synchronization
Activating VST System Link
580
3. If you now open the Input or Output Routing pop-up menu, you will find the
specified System Link ports added to the list of MIDI inputs or outputs.
This allows you to route MIDI tracks to VST instruments running on another computer,
as described in the application examples.
RELATED LINKS
Using one computer for VST instruments (not in Cubase LE) on page 583
The “Use Selected ASIO Ports for Data only” setting
If you are sending huge amounts of MIDI data at once, there is a small possibility
that you might run out of bandwidth on your VST System Link network. This will
manifest itself by notes “choking” or timing becoming erratic.
If this happens, you can devote more bandwidth to MIDI by activating the “Use
Selected ASIO Ports for Data only” option on the VST System Link page of the
Device Setup dialog. When this is activated, the VST System Link information will
be sent on the entire channel instead of just one bit, more than enough for all the
MIDI you could ever hope to use. The downside is that you can no longer use this
ASIO channel for audio transfer (do not connect it to a speaker!), thus leaving you
with only 7 audio channels in our ADAT cable example. Depending on how you
work, this might be a reasonable compromise.
Hearing the network audio
If you are using an external mixing desk, hearing your audio really is not an issue –
just plug the outputs of each computer into the desired channels on the external
mixing desk, start playback on one of the computers, and you are good to go.
However, many people prefer to mix internally inside the computer and just use a
desk for monitoring (or maybe not use any external mixer at all). In this case you will
need to select one computer to be your “main mix computer” and send the audio
from your other computers into this.

Synchronization
Activating VST System Link
581
In the following example, we assume you are using two computers, with computer
1 as your main mix computer and computer 2 running two additional stereo audio
tracks, an FX channel track with a reverb plug-in and a VST instrument plug-in with
stereo outputs.
PROCEDURE
1. Set things up so that you can listen to the audio playback from computer 1.
In other words, you need an unused set of outputs, e. g. an analog stereo output,
connected to your monitoring equipment.
2. On computer 2, route each of the two audio tracks to a separate output bus.
These should be busses connected to the digital outputs – let’s call them Bus 1 and
2.
3. Route the FX channel track to another VST System Link bus (Bus 3).
4. Route the VST instrument channel to yet another bus (Bus 4).
5. Go back to computer 1 and check the corresponding four VST System Link
input busses.
If you start playback on computer 2, the audio should “appear” on the input busses
on computer 1. However, to mix these audio sources you need actual mixer channels.
6. Add four new stereo audio tracks on computer 1 and route these to the output
bus you use for listening, e. g. to the analog stereo outputs.
7. For each of the audio tracks, select one of the four input busses.
Now, each computer 2 bus is routed to a separate audio channel on computer 1.
8. Activate monitoring for the four tracks.
RESULT
If you now start playback, the audio from computer 2 will be sent “live” to the new
tracks on computer 1, allowing you to hear them together with any tracks you play
back on computer 1.
Adding more tracks
What if you have more audio tracks than you have VST System Link busses
(physical outputs)? Then you just use the computer 2 mixer as a submixer: Route
several audio channels to the same output bus and adjust the output bus level if
needed.
NOTE
If your audio cards have multiple sets of input and output connections, you can link
up multiple ADAT cables and send audio via any of the busses on any of the cables.

Synchronization
Activating VST System Link
582
Internal mixing and latency
One problem with mixing inside the computer is the latency issue we mentioned
earlier. The VST engine always compensates for record latencies, but if you are
monitoring through computer 1 you will hear a processing delay while you listen to
signals coming from your other computers (not on your recording!). If your audio
card in computer 1 supports ASIO Direct Monitoring you should definitely turn this
on. You can find the setting on the VST Audio System device panel for your
hardware. Most modern ASIO cards support this function. If yours does not, you
may want to change the Offset Samples value on the VST System Link page to
compensate for any latency issues.
RELATED LINKS
ASIO Direct Monitoring on page 150
Setting up a larger network
Setting up a larger network is not much more difficult than a two-computer network.
The main thing to remember is that VST System Link is a daisy chain system. In
other words, the output of computer 1 goes to the input of computer 2, the output
of computer 2 goes to the input of computer 3, and so on around the chain. The
output of the last computer in the chain must always go back into the input of
computer 1, to complete the ring.
Once you have done this, the transmission of all the transport, sync, and MIDI
information to the whole network is handled pretty much automatically. However,
where you may run into confusion in a large network is in the transmission of audio
signals back to a central mix computer.
If you have lots of hardware inputs and outputs on your ASIO cards, you do not have
to send audio via the chain at all, but can transmit it directly to the master mix
computer via one or more of its other hardware inputs. For example, if you have a
Nuendo Digiset interface or 9652 card on computer 1, you could use ADAT cable
1 for networking, ADAT cable 2 as a direct audio input from computer 2, and ADAT
cable 3 as a direct audio input from computer 3.
You can also transmit audio via the ring system if you do not have enough hardware
I/Os for direct audio transmission. For example, in a four-computer scenario you
could send audio from computer 2 into a channel in the mixer in computer 3, from
there to a channel in the mixer in computer 4, and from there back to the master
mixer in computer 1. This can certainly be tricky to set up, so for complex networks
it is generally recommended to use ASIO cards with at least three separate digital
I/Os.

Synchronization
Activating VST System Link
583
Application examples
Using one computer for VST instruments (not in Cubase LE)
In this example, one computer will be used as main record and playback machine,
and another computer as a virtual synth rack.
PROCEDURE
1. Record a MIDI track into computer 1.
2. Once you have finished recording, route the MIDI output of that track to VST
System Link MIDI port 1.
3. On computer 2, open up the VST Instruments window and assign an
instrument to the first slot in the rack.
4. Route the VST instrument channel to the desired output bus.
If you are using computer 1 as your main mixing computer, this would be one of the
VST System Link output busses, connected to computer 1.
5. Create a new MIDI track in the Project window of computer 2 and assign the
MIDI output of the track to the VST instrument you created.
6. Assign the MIDI input of the track to be VST System Link port 1.
Now, the MIDI track on computer 1 is routed to the MIDI track on computer 2, which
in turn is routed to the VST instrument.
7. Now activate monitoring for the MIDI track on computer 2, so that it will listen
and respond to any MIDI commands coming in.
In Cubase, click the Monitor button in the track list or Inspector.
8. Start playback on computer 1.
It will now send the MIDI information on the track to the VST instrument loaded on
computer 2.
RESULT
Even with a slow computer you should be able to stack a whole bunch of extra VST
instruments this way, expanding your sound palette considerably. Do not forget that
VST System Link MIDI is also sample-accurate, and thus has much tighter timing
than any hardware MIDI interface ever invented!
Creating a virtual effect rack
The effect sends for an audio channel in Cubase can either be routed to an FX
channel track or to any activated group or output bus. This allows you to use a
separate computer as a “virtual effect rack”.
PROCEDURE
1. On computer 2 (the machine you will use as effect rack), add a new stereo
audio track.
You cannot use an FX channel track in this case, since the track must have an audio
input.

Synchronization
Activating VST System Link
584
2. Add the desired effect as an insert effect for the track.
Let’s say you add a high-quality reverb plug-in.
3. In the Inspector, select one of the VST System Link busses as input for the
audio track.
You want to use a separate VST System Link bus, which will only be used for this
purpose.
4. Route the channel to the desired output bus.
If you are using computer 1 as your main mixing computer, this would be one of the
VST System Link output busses, connected to computer 1.
5. Activate monitoring for the track.
6. Go back to computer 1 and select a track to which you want to add some
reverb.
7. Bring up the effect sends for the track in the Inspector or the MixConsole.
8. Open the Send Routing pop-up menu for one of the sends and select the VST
System Link bus assigned to the reverb in step 3.
9. Use the Send slider to adjust the amount of effect as usual.
RESULT
The signal will be sent to the track on computer 2 and processed through its insert
effect, without using any processor power on computer 1.
You can repeat the steps above to add more effects to the “virtual effect rack”. The
number of effects available this way is only limited by the number of ports used in
the VST System Link connection (and of course by the performance of computer 2,
but given that it will not have to handle any recording or playback, you should be
able to use quite a lot of effects).
Getting extra audio tracks
All computers on a VST System Link network are locked with sample-accuracy.
Therefore, if you find that the hard drive on one computer is not fast enough to run
as many audio tracks as you need, you can record new tracks on one of the other
computers instead. This would create a “virtual RAID system”, with several disks all
operating together. All tracks will remain locked together just as tightly as if they
were all running on the same machine. This means that you effectively have an
unlimited track count! Need another 100 tracks? Just add another computer.
Dedicated Video Playback
Playback of high-resolution video can be taxing on a system’s CPU. By dedicating
one computer for video playback via System Link, you can free up resources on your
main CPU for audio and MIDI processing. Since all transport commands will
respond on the VST System Link computers, scrubbing video is possible even
when it is coming from another computer.

585
Video
Cubase supports the integration of video files in your project.
You can play back video files in various formats and via different output devices from
within Cubase, edit your music to the video, extract the audio material from a video
file, and replace the audio later with different audio material.
Before You Start
When working on a project involving a video file, you first need to set up your system
according to your equipment and your demands.
The following sections provide some general information about video file formats,
frame rates, and video output devices.
Video File Compatibility
Because there are many types of video files, it can be difficult to determine if one
will work on your system.
There are two ways to figure out if Cubase can play back a certain video file:
• Open the video file with QuickTime 7.1 or higher, because Cubase uses
QuickTime for playing back video files.
• Check the file information of a video file in the Pool. If the information reads
“Invalid or not supported file!”, the video file is either corrupt or the format is
not supported by the available codecs.
NOTE
If you are not able to load a certain video file, you must use an external application
to convert the file into a compatible format or install the required codec.
RELATED LINKS
Codecs on page 586

Video
Before You Start
586
Video Container Formats
Video and other multi-media files come in a container format.
This container holds various streams of information including video and audio, but
also metadata such as synchronization information required to play back audio and
video together. Data regarding creation dates, authors, chapter markings, and more
can also be held within the container format.
The following container formats are supported by Cubase:
Cubase supports all these container formats, but problems may arise when the
computer does not have the correct software to decode compressed video and
audio streams within the container file. You must also know the type of codec that
was used to create the video file.
Codecs
Codecs are methods of data compression used to make video (and audio) files
smaller and more manageable for computers.
In order to play back a video file, your computer must have the correct codec
installed in the operating system to decode the video stream.
IMPORTANTIMPORTANTIMPORTANT
IMPORTANT
The names of codecs and container formats can be confusing. Because many
container formats have the same names as the codecs they use within the file, make
sure to differentiate the container format or file type, for example .mov or .dv, from
the codec used within it.
If you are not able to load a certain video file, the required codec is probably not
installed on your computer. In this case, you can search the internet (e. g. the
Microsoft or Apple web sites) for video codecs.
Format Description
MOV This is a QuickTime movie.
QT This is also a QuickTime movie, but it is only used on Windows
systems.
MPEG-1 This is the first standard of the Moving Picture Experts Group for
video and audio compression, used for making video CDs. Files of
this container format can have the extensions “.mpg” or “.mpeg”.
MPEG-4 This format is based on the QuickTime movie standard, can contain
various metadata for streaming, editing, local playback, and
interchange of content. Its file extension is “.mp4”.
AVI This format is a multimedia container format introduced by Microsoft.
DV This is a video format used by camcorders.

Video
Before You Start
587
Frame Rates
Cubase is capable of working with different types of video and film frame rates.
RELATED LINKS
Frame rate (speed) on page 566
Video Output Devices
Cubase supports several ways to play back video files.
Viewing video files onscreen in the Video Player window may work just fine for many
applications, but often it is necessary to display video in a large format for viewing
small details and so others involved in the session can also see the video. Cubase
provides the ability to use several types of video output devices to accomplish this.
Multi-Head Video Cards
One of the most common methods is the use of a multi-head video card installed in
the computer.
Multi-head video cards allow you to connect more than one computer monitor to the
card, in some cases up to four. If you direct the video output of Cubase to one of
these outputs, the video file is displayed in full screen mode on a computer monitor
or HD television screen.
NOTE
You can also use more than one video card to achieve the same result.
Different video cards support different types of outputs including standard VGA,
DVI, S-Video, HDMI, and component video. These options allow you to choose the
type of monitor you use for video. HD televisions and digital projectors provide the
largest viewing screens, but a normal computer monitor can function as a very
high-quality video monitor as well.
Dedicated Video Cards
The use of a dedicated video card is also supported in Cubase.
These cards are normally used in video editing systems to capture video to disk and
display it while editing. They usually have a high resolution and take some strain off
the host CPU by providing video compression and decompression processing on
the card.
NOTE
The Decklink cards by Blackmagic Design are automatically recognized by Cubase.
Video will be sent directly to its output.

Video
Preparing a Video Project
588
FireWire DV Output
You have the option to use FireWire ports on the computer to output DV video
streams to external converters such as various camcorders and standalone
FireWire to DV conversion units.
These units can be connected to a television or projector for large format viewing.
The FireWire protocol is capable of transporting data at high speed and is the most
common standard for communicating with video-related peripheral equipment.
IMPORTANTIMPORTANTIMPORTANTIMPORTANT
On Windows systems, it is important that you connect your device to the FireWire
port before launching Cubase. Otherwise it may not be detected properly by
Cubase.
Preparing a Video Project
The following sections describe the basic operations necessary for preparing a
Cubase project involving video.
It is advisable to save your video files on a separate hard drive from your audio files.
This can help prevent data streaming problems when using high-resolution video
with many audio tracks.
Importing Video Files
Importing a video file into your project is very straight forward once you know that
you have a compatible video file.
Video files are imported in the same manner as audio files:
• By using the File menu (Import–Video File).
In the Import Video dialog, you can activate the “Extract Audio From Video”
option. This imports any embedded audio streams to a newly created audio
track positioned below the video track. The new track and the clip will get the
name of the video file. The new audio event will start at the same time as the
video event, so that they are in sync with each other.
NOTE
If you try to import a non-supported video file with the Import Video option, the
Import Video dialog displays the text “Invalid or not supported file!”.
• By importing to the Pool first and then dragging to the Project window.
• By using drag and drop from the MediaBay, the Pool, the Windows Explorer,
or the Mac OS Finder.
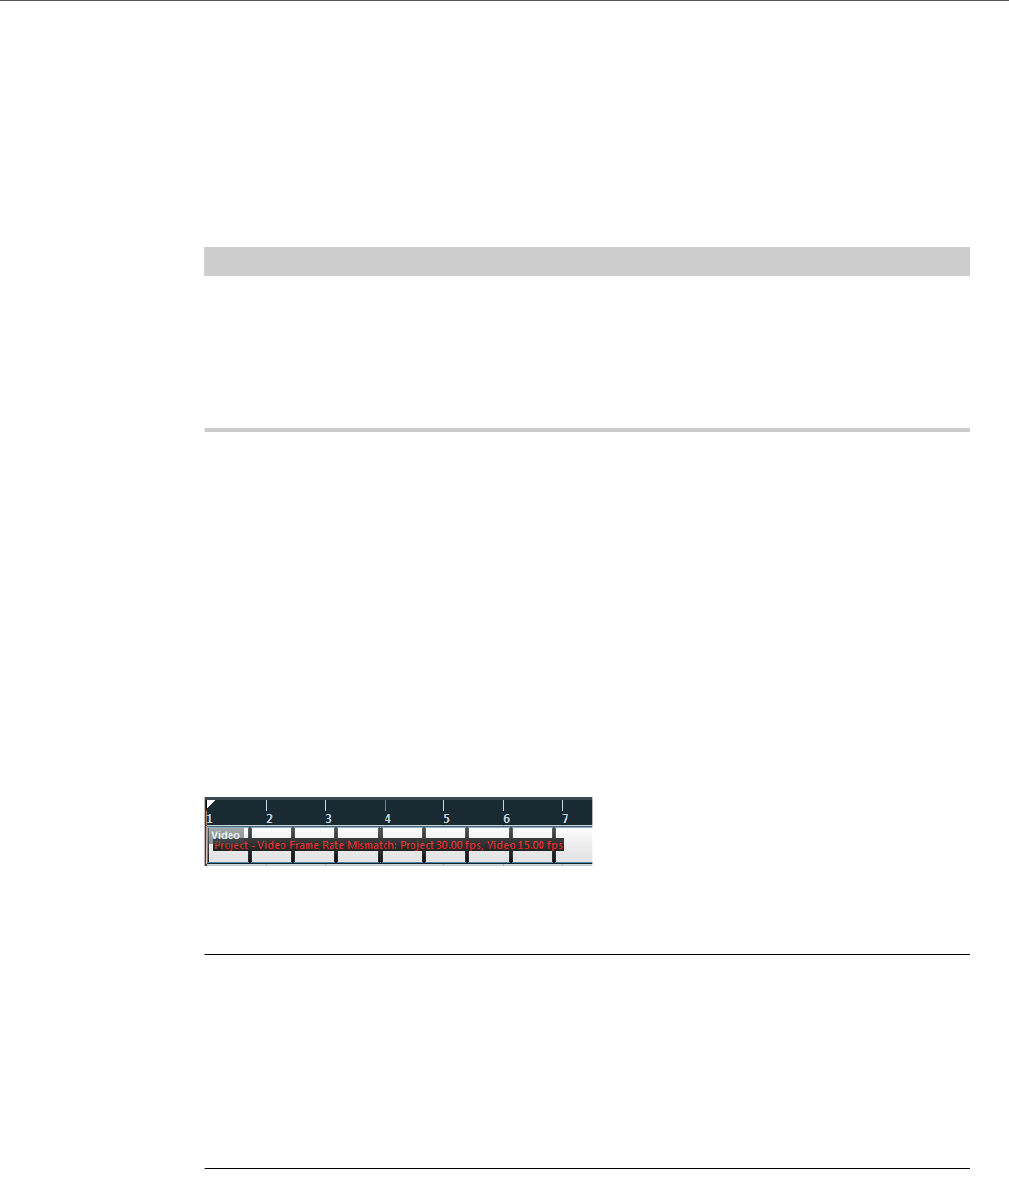
Video
Preparing a Video Project
589
When importing video files via the Pool or by using drag and drop, Cubase can
automatically extract the audio from a video file. Whether this happens, depends on
the “Extract Audio on Import Video File” setting in the Preferences dialog (Video
page).
When importing video, Cubase automatically creates a thumbnail cache file. The
generated file is stored in the same folder as the video file and gets the name of the
file with the suffix “.vcache”.
IMPORTANTIMPORTANTIMPORTANTIMPORTANT
In Cubase, you may work with multiple video files of differing frame rates and
formats on the same video track. Assuming you have the proper codecs installed,
all video files can be played back in one project, but note that proper
synchronization of audio and video events is ensured only if the frame rate of the
video file matches the project frame rate.
RELATED LINKS
Pool on page 313
Extracting Audio From a Video File on page 595
Adopting the Frame Rate
When using video files within Cubase, it is important to adjust the project’s frame
rate to that of the imported video. This ensures that the time displays of Cubase
correspond to the actual frames in the video. If the frame rate of an imported video
file differs from the frame rate set for the project, the video event shows a warning.
In order to match the two frame rates, you have to adjust the frame rate in the Project
Setup dialog.
PROCEDURE
1. Open the Project menu and select “Project Setup...”.
2. In the Project Setup dialog, click the “Get From Video” button.
Provided that the video file has a frame rate supported by Cubase, it is automatically
detected and applied to the project. If the project contains several video files with
different frame rates, the project frame rate is adjusted to the frame rate of the first
video event on the upper video track.
RESULT
The project frame rate setting will change to that of the video file and the project
start time will be altered to reflect the change in frame rate if needed.

Video
Preparing a Video Project
590
For example, when the project frame rate is switched from 30 fps to 29.97 fps, the
start time is changed so that all the events currently in the project remain at the
same positions in relation to realtime. If you want the project start time to remain the
same, you must manually change it back after clicking the “Get From Video” button.
In this case, it is important that the video event is snapped to the timeline to ensure
proper positioning and synchronization within the project.
NOTE
• Cubase can only detect the supported frame rates (these are the frame rates
listed in the Frame Rate pop-up menu in the Project Setup dialog). Video files
with non-supported frame rates can be played back, but the time displays are
not correct in this case and proper positioning is not guaranteed.
Furthermore, audio and video may not be in sync. Therefore, we recommend
that you use an external application to convert the video file to a frame rate
supported by Cubase.
• If you have more than one video file in a project, it is advisable that all video
files have the same frame rate consistent with the project frame rate.
Nevertheless, you can work with multiple video files of differing frame rates,
but in this case you should always change the project frame rate to the frame
rate of the video file that you are editing at the moment. This is done in the
Project Setup dialog by selecting the correct frame rate from the Frame Rate
pop-up menu.
About Thumbnails
The individual thumbnail images are positioned exactly at the beginning of the
corresponding frame.
When you zoom in and there is enough space between the frames, the thumbnail is
repeated as many times as there is free space available. Thus, you can always see
a thumbnail regardless of how much you zoom in.
Thumbnail Memory Cache Size
In the Preferences dialog on the Video page, you can enter a value for the
“Thumbnail Memory Cache Size”. This determines how much memory is available
for displaying “real” thumbnails. The currently shown image is buffered in the
thumbnail memory cache. Whenever you move to another image and there is no
memory capacity left, the “oldest” picture in the cache is replaced by the current
one. If you have long video clips and/or work with a large zoom factor, you may have
to raise the “Thumbnail Memory Cache Size” value.
About thumbnail cache files
When importing video, Cubase automatically creates a thumbnail cache file. The
cache file is used in situations where the processor load is very high and the correct
redrawing or realtime calculation of thumbnails might use system resources
necessary for editing or processing. When you zoom in on the thumbnails, you see

Video
Playing Back Video
591
that they are in a lower resolution, i. e. the pictures are not as clear as when they are
calculated. When the processes that rely heavily on the computer CPU are finished,
the frames are automatically recalculated, i. e. the program automatically switches
between realtime calculation of the pictures and using the cache file.
NOTE
There are situations where no thumbnail cache file can be generated, e. g. if you
import a video file from a folder that is write-protected. If you have access to the host
folder at a later stage, you can generate a thumbnail cache file manually.
Manually Generating Thumbnail Cache Files
If no thumbnail cache file could be generated during import or if you have to
“refresh” a thumbnail cache file of a certain video file, because the file has been
edited with an external video editing application, you have the possibility to generate
the thumbnail cache file manually.
To create a thumbnail cache file manually, you have the following possibilities:
• In the Pool, right-click on the video file that you want to create a thumbnail
cache file for and select the “Generate Thumbnail Cache” option from the
context menu.
A thumbnail cache file is created, or, in case there already existed a thumbnail
cache file for the video file, it is “refreshed”.
• In the Project window, open the context menu for the video event, and select
“Generate Thumbnail Cache” from the Media submenu.
• Open the Media Menu and select “Generate Thumbnail Cache”.
NOTE
• “Refreshing” an already existing thumbnail cache file can be done only from
within the Pool.
• The thumbnail cache file is generated in the background so that you can
continue working with Cubase.
Playing Back Video
Video is played back together with all other audio and MIDI material, using the
Transport controls.
IMPORTANTIMPORTANTIMPORTANT
IMPORTANT
• For playing back video files, you must have QuickTime 7.1 or higher installed
on your computer. There is a freeware version and a “pro” version, which
offers additional video conversion options. The player engine is the same in
both versions, so for mere playback in Cubase there is no need to purchase
the “pro” version.
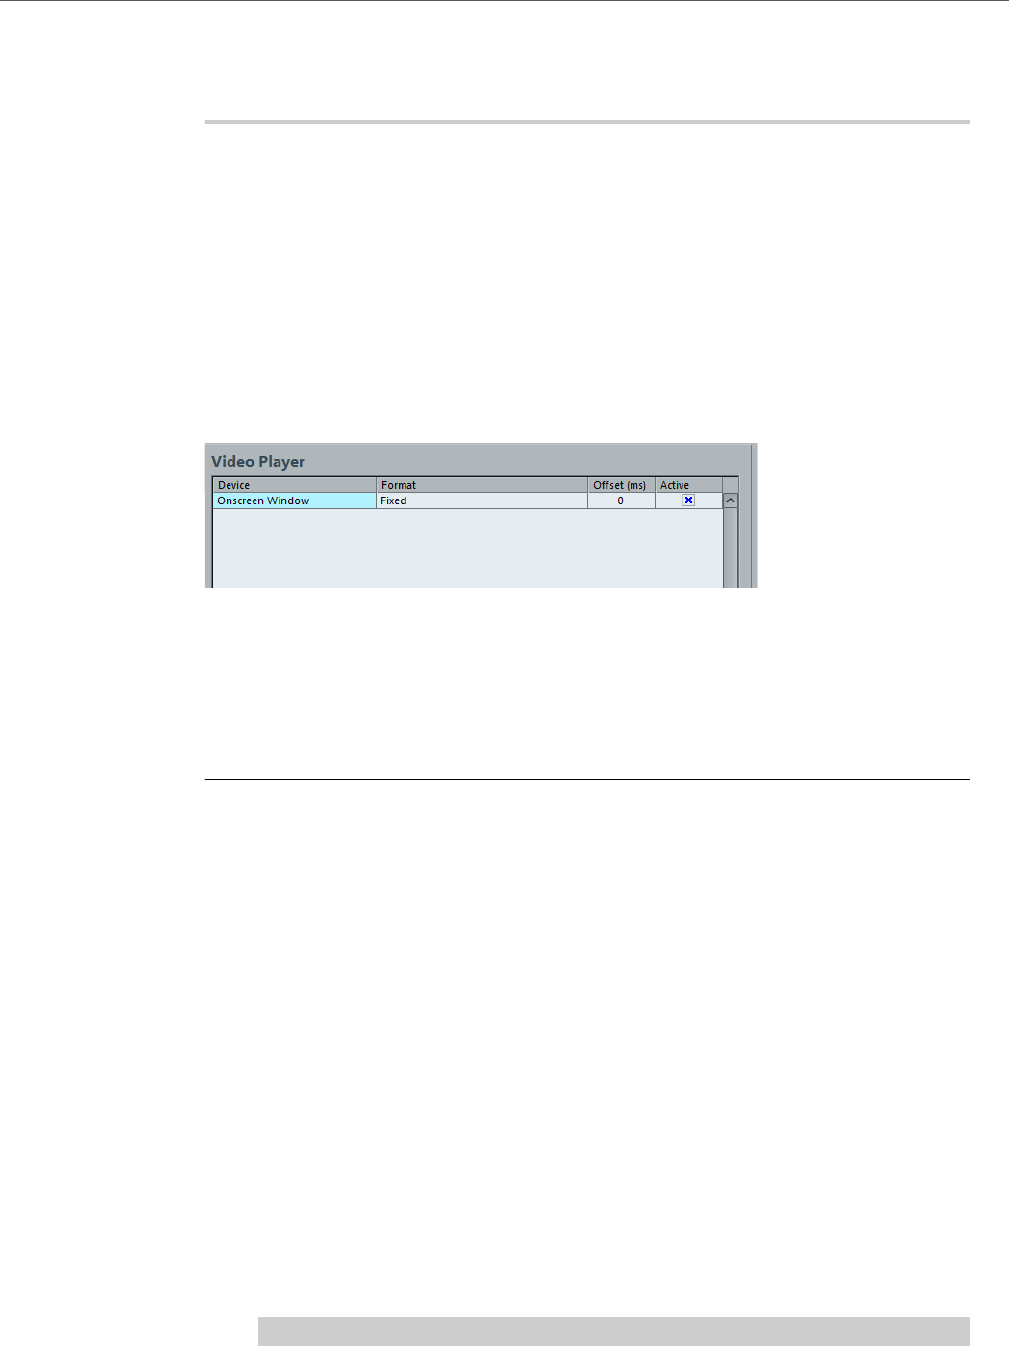
Video
Playing Back Video
592
• You need a video card that supports OpenGL (version 2.0 recommended) for
proper video playback. A card with OpenGL 1.2 can also be used, but might
put restrictions on the video functionality.
To check if your video equipment is capable of playing back a video from within
Cubase, open the Video Player page in the Device Setup dialog. If your system
does not meet the minimum video requirements, a corresponding message will be
displayed.
Device Setup
In the Device Setup dialog you determine which device is used for playing back
video files.
The Video Player page in the Device Setup dialog
You can switch between different output devices during playback.
Setting Up a Video Output Device
PROCEDURE
1. Open the Devices Menu and select “Device Setup...” to open the Device
Setup dialog, and select the Video Player page.
2. In the Active column, activate the checkbox for the device that you want to use
for playing back video.
All devices in your system that are capable of playing back video are listed. The
Onscreen Window device serves for playing back the video file on your computer
monitor.
3. From the pop-up menu in the Format column, select an output format.
For the Onscreen Window output, only a “fixed” format is available. For the other
output devices, you can select different output formats for playback depending on the
device.
4. Adjust the Offset setting to compensate for processing delays.
Due to delays while processing video, the video image may not match with the audio
in Cubase. By using the Offset parameter, you can compensate for this effect. The
Offset value indicates how many milliseconds the video will be delivered earlier in
order to compensate for the processing time of the video material. Each hardware
setup can have different processing delays, so you must try out different values to
determine which value is appropriate.
NOTE
• The Offset value can be set individually for each output device. It is saved
globally for each output device and is independent of the project.

Video
Playing Back Video
593
• The offset is only used during playback. It is defeated in stop and scrub
mode so that you always see the correct video frame.
AFTER COMPLETING THIS TASK
If the quality of the video image is not a critical factor or if you are experiencing
performance problems, try lowering the value on the Video Quality pop-up menu.
Although higher quality settings make the video display sharper and smoother, they
also lead to an increased processor load.
RELATED LINKS
Video Output Devices on page 587
Improving Video Performance
Sometimes, video problems, such as stutters during playback, are caused by
codecs that do not support multi-threading. This can be the case for video files that
use single-threaded decoding, such as Motion-JPEG, Photo-JPEG, and QuickTime
DV codecs. These types of video files are typically created when capturing video
with Decklink/AJA cards.
To compensate for this, you can activate the “Boost Video (Reduces Audio
Performance)” option on the Video Player page in the Device Setup dialog. This
excludes one of the available CPU cores from audio processing and reserves it for
video tasks like decoding and playback. However, this may reduce the audio
performance.
NOTE
For this option to have an effect, you must also activate the Multi Processing option
in the Device Setup dialog (VST Audio System page).
Video Player
The Video Player window is used for playing back video on your computer screen.
• To open the Video Player window, open the Devices menu and select the
“Video Player” option.
Setting the Window Size and Video Quality
To resize the Video Player window and/or change the playback quality of the video,
select the appropriate option on the context menu of the Video Player window.
Fullscreen Mode
The window is enlarged to occupy the whole (computer) screen. If you are
working with more than one monitor, you can move the Video Player window
to an extra monitor. Thus, you can work with Cubase on one monitor and let
the video play back on another monitor. You can exit full screen mode via the
window’s context menu or by pressing [Esc] on your computer keyboard.

Video
Playing Back Video
594
Quarter Size
The window size is reduced to a quarter of the actual size.
Half Size
The window size is reduced to half the actual size.
Actual Size
The window size corresponds to the size of the video.
Double Size
The window is enlarged to twice the actual size.
Video Quality
This submenu allows you to change the quality of the video image.
NOTE
• To resize the Video Player window, you can also drag the borders.
• The higher the resolution, the more processing power is needed for playback.
If you need to reduce the processor load, you can reduce the size of the Video
Player window, or lower the value on the Video Quality submenu.
Setting the Aspect Ratio
Resizing the Video Player window by dragging its borders may lead to a distorted
image. To prevent this, you can set an aspect ratio for video playback.
From the Aspect Ratio submenu of the Video Player context menu, select one of the
following options:
None
The aspect ratio of the video is not kept when resizing the window. The image
is enlarged/reduced to occupy the whole Video Player window.
Internal
The Video Player window can be resized at will, but the aspect ratio of the
video is kept and black borders are displayed around the video image to fill
the window.
External
The resizing of the Video Player window is limited according to the aspect
ratio of the video image, i. e. the video image always fills the full window and
its aspect ratio is kept.
NOTE
When the video is played back in full screen mode, the aspect ratio of the video is
always kept.

Video
Editing Video
595
Scrubbing Video
You can scrub video events, i. e. play them back forwards or backwards at any
speed. This is done by clicking in the Video Player window and moving the mouse
to the left or to the right. You can also use the Scrub controls on the Transport panel
or a jog wheel on a remote controller for scrubbing video events.
RELATED LINKS
Project Scrubbing - The Jog Wheel on page 132
Playing Back with the Shuttle Speed Wheel on page 132
Editing Video
Video clips are played back by events just as audio clips are.
You can use all the basic editing operations on video events, just as with audio
events. You can take a single event and copy it many times for the creation of mix
variations. A video event may also be trimmed using the event handles to remove a
countdown for instance. Furthermore, you can edit video clips in the Pool.
It is not possible to fade or crossfade video events. Furthermore, you cannot use the
Draw, Glue, and Mute tools with a video event.
NOTE
Windows only: If you find that you are unable to edit a video file copied from a CD,
this might be due to the fact that files copied from CD are write-protected by
default. To remove the write-protection, in the Windows Explorer, open the
Properties dialog and deactivate the “Read-Only” option.
RELATED LINKS
Pool on page 313
Extracting Audio From a Video File
If a video file contains audio, the audio stream can be extracted.
As always when importing audio material, a dialog is displayed allowing you to
select different import options.
There are several ways to extract audio from a video file:
• By activating the “Extract Audio From Video” option in the Import Video
dialog.
• By using the “Audio from Video File” option on the Import submenu of the File
menu.
This will insert an audio event starting at the project cursor position on the
selected audio track. If no audio track is selected, a new one will be created.

Video
Replacing the Audio in a Video File
596
• By activating the “Extract Audio on Import Video File” option in the
Preferences dialog (Video page).
This will automatically extract the audio stream from any video file during
import.
• By using the “Extract Audio from Video File” option on the Media menu.
This creates an audio clip in the Pool, but does not add any events to the
Project window.
IMPORTANTIMPORTANTIMPORTANT
IMPORTANT
These functions are not available for MPEG-1 video files.
RELATED LINKS
Audio file import options on page 616
Importing Video Files on page 588
Replacing the Audio in a Video File
Once you have edited all audio and MIDI data to the video and created a final mix,
you will need to put the new audio back with the video. You can do this by
embedding the audio in another stream within the video container file.
PROCEDURE
1. Place the left locator at the start of the video file in Cubase. This will ensure
that your audio and video streams are synchronized.
2. Open the File menu and select the Audio Mixdown option from the Export
submenu to export the audio file you wish to insert into the video container file.
3. From the File menu, select “Replace Audio in Video File…”.
A file dialog opens prompting you to locate the video file.
4. Select the video file and click Open.
Next, you are prompted to locate the corresponding audio file.
5. Select the audio file and click Open.
The audio is added to the video file, replacing its current audio stream.
AFTER COMPLETING THIS TASK
Once the process is completed, open the video file in a native media player and
check for proper synchronization.
RELATED LINKS
Export Audio Mixdown on page 551

597
ReWire (not in Cubase LE)
Introduction
ReWire is a special protocol for streaming audio between two computer
applications.
Developed by Propellerhead Software and Steinberg, ReWire provides the
following possibilities and features:
• Realtime streaming of up to 48 separate audio channels, at full bandwidth,
from the “synthesizer application” into the “mixer application”.
In this case, the “mixer application” is of course Cubase. An example of a
“synthesizer application” is Propellerhead Software’s Reason.
• Automatic, sample accurate synchronization between the audio in the two
programs.
• The possibility to have the two programs share one audio card and take
advantage of multiple outputs on that card.
• Linked transport controls that allow you to play, rewind, etc., either from
Cubase or from the synthesizer application (provided it has some kind of
transport functionality).
• Automatic audio mixing functions of separate channels as required.
In the case of Reason, for example, this allows you to have separate channels
for the different devices.
• Additionally, ReWire offers the possibility to route MIDI tracks in Cubase to
the other application, for full MIDI control.
For each ReWire compatible device, a number of extra MIDI outputs will be
made available in Cubase. In the case of Reason, this allows you to route
different MIDI tracks in Cubase to different devices in Reason, with Cubase
serving as the main MIDI sequencer.
• The overall load on your system is much reduced, compared to when using
the programs together in the conventional way.

ReWire (not in Cubase LE)
Launching and quitting
598
Launching and quitting
When using ReWire, the order in which you launch and quit the two programs is
very important.
Launching for normal use with ReWire
PROCEDURE
1. First launch Cubase.
2. Enable one or several ReWire channels in the ReWire Device dialog for the
other application.
3. Launch the other application.
It may take slightly longer for the application to start when you are using ReWire.
RELATED LINKS
Activating ReWire channels on page 599
Quitting a ReWire session
When you are finished, you also need to quit the applications in a special order.
PROCEDURE
1. First quit the synthesizer application.
2. Then quit Cubase.
Launching both programs without using ReWire
We cannot think of any scenario, in which you would need to run Cubase and the
synthesizer application simultaneously on the same computer, without using
ReWire, but you can.
PROCEDURE
1. First launch the synthesizer application.
2. Then launch Cubase.
NOTE
Please note that the two programs now compete for system resources such as audio
cards, just as when running either with other, non-ReWire audio applications.

ReWire (not in Cubase LE)
Activating ReWire channels
599
Activating ReWire channels
ReWire supports streaming of up to 48 separate audio channels. The exact number
of available ReWire channels depends on the synthesizer application. Using the
ReWire Device panels in Cubase, you can specify which of the available channels
you want to use.
PROCEDURE
1. Open the Devices menu and select the menu item with the name of the
ReWire application. All recognized ReWire compatible applications will be
available on the menu.
The ReWire panel appears. This consists of a number of rows, one for each available
ReWire channel.
2. Click on the power buttons to the left to activate/deactivate the desired
channels.
The buttons light up to indicate activated channels. Please note that the more ReWire
channels you activate, the more processing power is required.
For information about exactly what signal is carried on each channel, see the
documentation of the synthesizer application.
3. If desired, double-click on the labels in the right column, and type in another
name.
These labels will be used in the Cubase MixConsole to identify the ReWire channels.
Using the transport and tempo controls
IMPORTANTIMPORTANTIMPORTANTIMPORTANT
This is only relevant if the synthesizer application has some sort of built-in
sequencer or similar.
Basic transport controls
When you run ReWire, the transports in the two programs are completely linked. It
does not matter in which program you play, stop, fast forward or rewind. However,
recording (if applicable) is still completely separate in the two applications.
Loop settings
If there is a loop or cycle facility in the synthesizer application, that loop will be
completely linked to the cycle in Cubase. This means that you can move the start
and end point for the loop or turn the loop on or off in either program, and this will
be reflected in the other.

ReWire (not in Cubase LE)
How the ReWire channels are handled
600
Tempo settings
As far as tempo goes, Cubase is always the master. This means that both programs
will run in the tempo set in Cubase.
However, if you are not using the tempo track in Cubase, you can adjust the tempo
in either program, and this will immediately be reflected in the other.
IMPORTANTIMPORTANTIMPORTANT
IMPORTANT
If you are using the tempo track in Cubase (i. e. the Tempo button is activated on
the Transport panel), you should not adjust the tempo in the synthesizer application,
since a tempo request from ReWire will automatically deactivate the tempo track in
Cubase!
How the ReWire channels are handled
When you activate ReWire channels in the ReWire Device panels, they will become
available as channels in the MixConsole.
The ReWire channels have the following properties:
• ReWire channels may be any combination of mono and stereo, depending on
the synthesizer application.
• ReWire channels have the same functionality as regular audio channels.
This means you can set volume and pan, add EQ, insert effects and sends,
and route the channel outputs to groups or busses. However, ReWire
channels have no monitor buttons.
• All channel settings can be automated using the Read/Write buttons.
When you write automation, channel automation tracks will automatically
appear in the Project window. This allows you to view and edit the automation
graphically, just as with VST instrument channels, etc.
• You can mix down the audio from ReWire channels to a file on your hard disk
with the Export Audio Mixdown function.
You can export the output bus to which you have routed the ReWire channels.
You can also export individual ReWire channels directly – “rendering” each
ReWire channel to a separate audio file.
RELATED LINKS
Mixing down to audio files on page 551
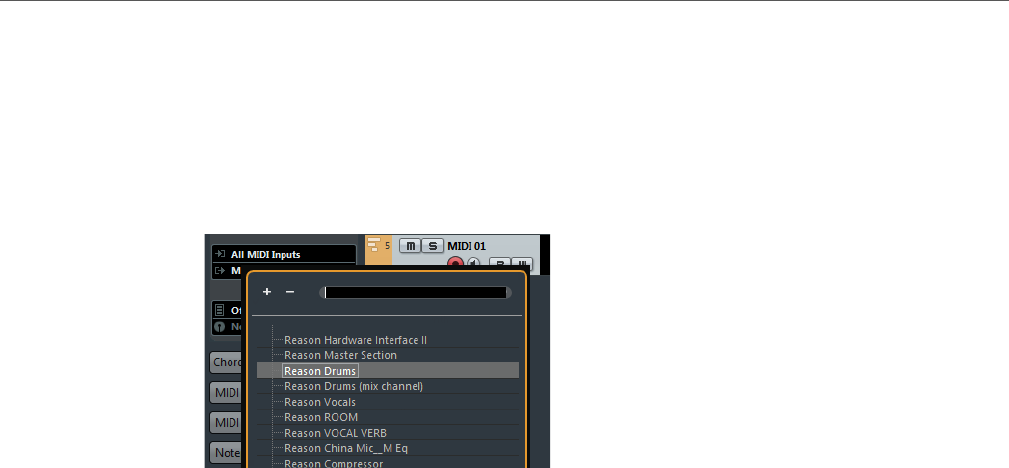
ReWire (not in Cubase LE)
Routing MIDI via ReWire
601
Routing MIDI via ReWire
When using Cubase with a ReWire-compatible application, additional MIDI outputs
will automatically appear on the MIDI Output pop-up menus for MIDI tracks. This
allows you to play the synthesizer application via MIDI from Cubase, using it as one
or several separate MIDI sound sources.
The MIDI outputs for a Reason song. Here, each output goes directly to a device in
the Reason rack.
• The number and configuration of MIDI outputs depends on the synthesizer
application.
Considerations and limitations
Sample rates
Synthesizer applications may be limited to audio playback in certain sample rates. If
Cubase is set to a sample rate other than those, the synthesizer application will play
back at the wrong pitch. Consult the documentation of the synthesizer application
for details.
ASIO drivers
ReWire works well with ASIO drivers. By using the Cubase bus system you can
route sounds from the synthesizer application to various outputs on an ASIO
compatible audio card.
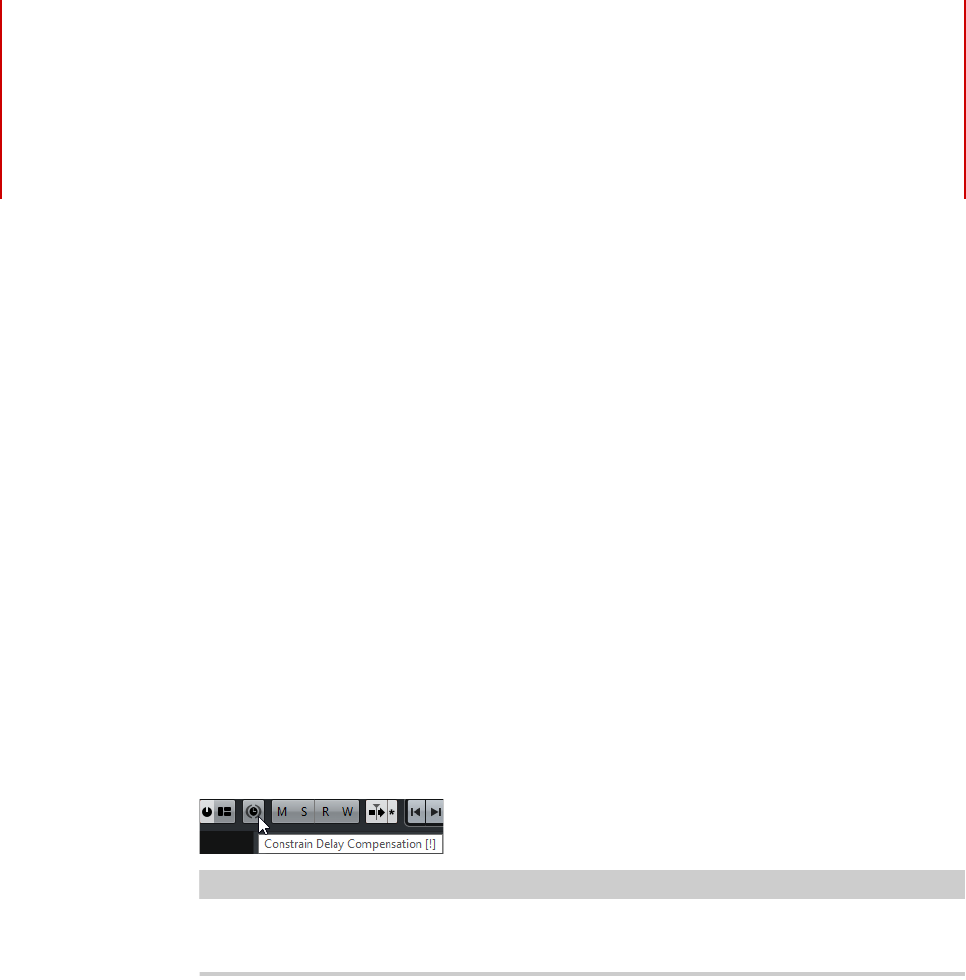
602
Key Commands
Introduction
Most of the main menus in Cubase have key command shortcuts for certain items
on the menus. In addition, there are numerous other Cubase functions that can be
performed via key commands. These are all default settings.
You can customize existing key commands to your liking, and also add commands
for many menu items and functions that currently have no key command assigned.
You can find out for which functions key commands can be assigned by looking in
the Key commands dialog (see below), or by checking the tooltip for a particular
interface element. If a tooltip shows [!] at the end, you can assign a key command
to this function. Assigned key commands are shown in the tooltips in square
brackets.
IMPORTANTIMPORTANTIMPORTANTIMPORTANT
You can also assign tool modifier keys, i. e. keys that change the behavior of various
tools when pressed. This is done in the Preferences dialog.
RELATED LINKS
Setting up tool modifier keys on page 607
How are key commands settings saved?
Every time you edit or add any key command assignment, this is stored as a global
Cubase preference – not as part of a project. If you edit or add a key command
assignment, any subsequent projects that you create or open will use these
modified settings. However, the default settings can be restored at any time by
clicking the Reset All button in the Key Commands dialog.
In addition, you can save key commands settings as a “key commands file”, which
is stored separately and can be imported into any project. This way you can quickly
and easily recall customized settings, when moving projects between different
computers, for example. The settings are saved in an XML file on the hard disk.
RELATED LINKS
Saving key commands presets on page 605
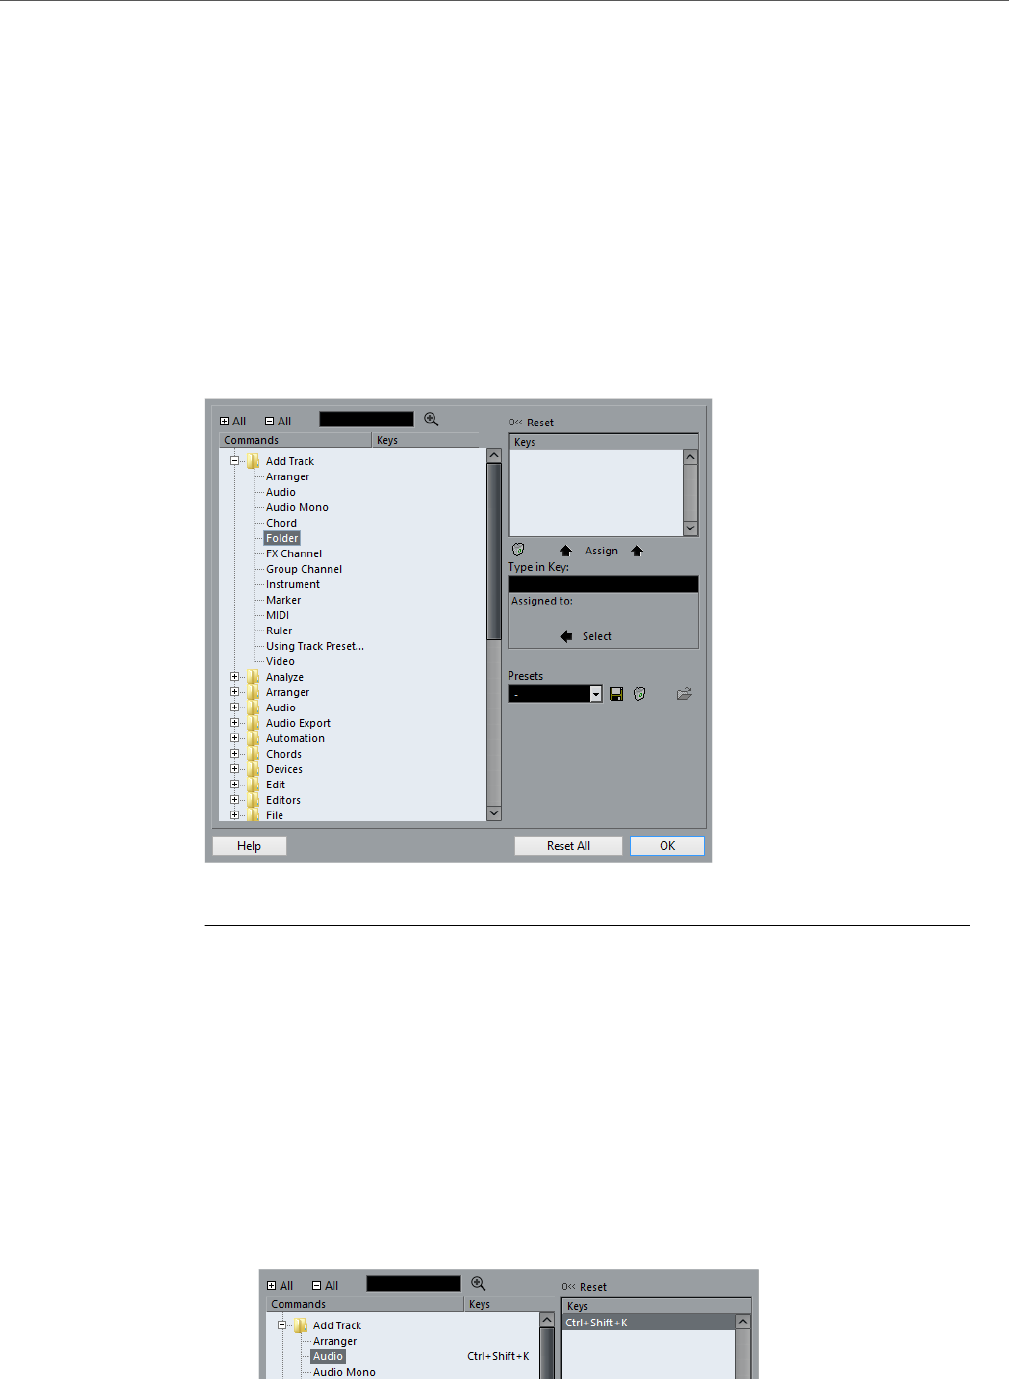
Key Commands
Setting up key commands
603
Setting up key commands
Adding or modifying a key command
In the Key Commands dialog you will find all main menu items and a large number
of other functions, arranged in a hierarchical way similar to the Windows Explorer
and Mac OS Finder. The function categories are represented by a number of
folders, each containing various menu items and functions.
When you open a category folder by clicking the “+” sign beside it, the items and
functions it contains are displayed with the currently assigned key commands.
To add a key command, proceed as follows:
PROCEDURE
1. Open the File menu and select “Key Commands…”.
The Key Commands dialog opens.
2. In the Commands list on the left, choose a category.
3. Click the “+” sign to open the category folder and display the items it
contains.
Note that you can also click the “global” “+” and “-” signs in the top left corner to open
and close all category folders at once.
4. In the list, select the item to which you want to assign a key command.
Already assigned key commands are shown in the Keys column as well as in the Keys
section in the top right corner.

Key Commands
Setting up key commands
604
5. Alternatively, you can use the search function in the dialog to find the desired
item.
For a description of how to use the search function, see below.
6. When you have found and selected the desired item, click in the “Type in Key”
field and enter a new key command.
You can choose any single key or a combination of one or several modifier keys
([Alt]/[Option], [Ctrl]/[Command], [Shift]) plus any key. Just press the keys you want
to use.
7. If the key command you enter is already assigned to another item or function,
this is displayed below the “Type in Key” field.
You can either ignore this and proceed to assign the key command to the new
function instead, or you can select another key command.
8. Click the Assign button above the field.
The new key command appears in the Keys List.
IMPORTANT
If the key command you enter is already assigned to another function, you will get a
warning message asking if you really want to reassign the command to the new
function.
9. Click OK to exit the dialog.
NOTE
You can set up several different key commands for the same function. Adding a key
command to a function that already has another key command will not replace the key
command previously defined for the function. If you wish to remove a key command,
see below.
Searching for key commands
If you want to know which key command is assigned to a certain function in the
program, you can use the Search function in the Key Commands dialog.
PROCEDURE
1. Click in the search text field at the top left of the dialog and type in the function
for which you want to know the key command.
This is a standard word search function, so you should type the command as it is
spelled in the program. Partial words can be used; to search for all quantize related
commands, type “Quantize”, “Quant”, etc.
2. Click the Search button (the magnifying glass icon).
The search is conducted and the first matching command is selected and displayed
in the Commands list below. The Keys column and the Keys list show the assigned
key commands, if any.
3. To search for more commands containing the word(s) you entered, click the
Search button again.
4. When you are done, click OK to close the dialog.

Key Commands
Setting up key commands
605
Removing a key command
PROCEDURE
1. Use the list of categories and commands to select the item or function for
which you wish to remove a key command.
The key command is shown in the Keys column and the Keys list.
2. Select the key command in the Keys list and click the Delete button (the trash
icon).
You are asked whether you really want to remove the key command.
3. Click Remove to remove the selected key command.
4. Click OK to close the dialog.
Saving key commands presets
As mentioned above, any changes made to the key commands are automatically
stored as a Cubase preference. However, it is also possible to save key commands
settings separately. This way, you can save any number of different key command
settings as presets for instant recall.
PROCEDURE
1. Set up the key commands to your liking.
When setting up key commands, remember to click “Assign” to make the changes.
2. Click the Save button next to the Presets pop-up menu.
A dialog opens, allowing you to type in a name for the preset.
3. Click OK to save the preset.
Your saved key commands settings are now available on the Presets pop-up menu.
Loading key command presets
To load a key command preset, simply select it from the Presets pop-up menu.
NOTE
The key command settings you load will replace the current key command settings
for the same functions (if any). If you have macros of the same name as those stored
in the preset you load, these will be replaced too. If you want to be able to revert to
your current settings again, make sure to save them first, as described above!
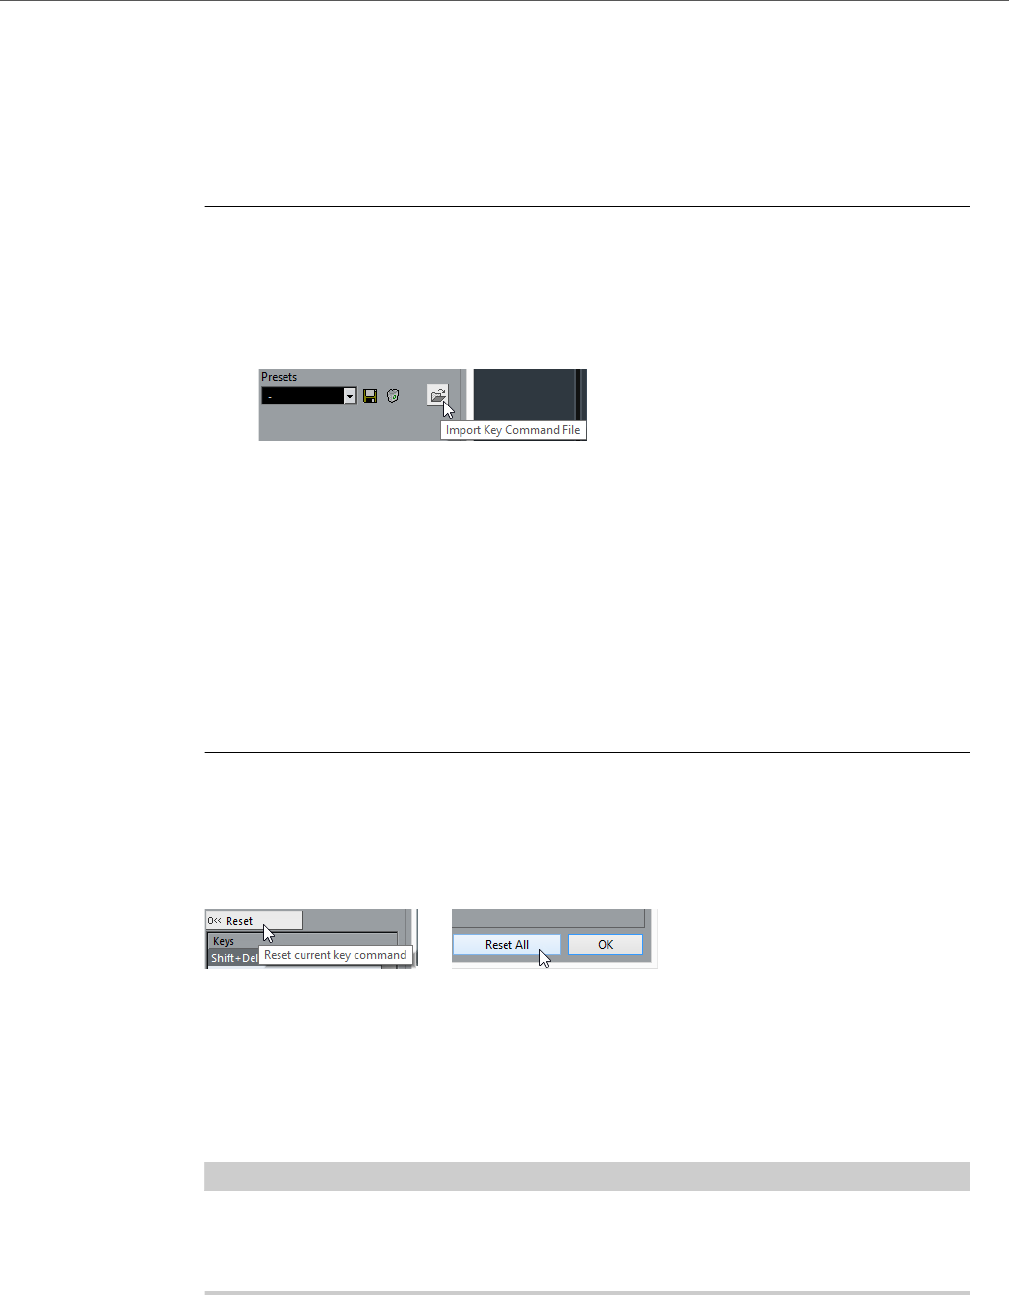
Key Commands
Setting up key commands
606
Loading earlier key commands settings
If you have saved key commands settings with an earlier program version, it is
possible to use them in this Cubase version, by using the “Import Key Command
File” function, which lets you load and apply saved key commands.
PROCEDURE
1. Open the Key Commands dialog.
2. Click the “Import Key Command File” button to the right of the Presets
pop-up menu.
A standard file dialog opens.
3. In the file dialog, use the “Files of type” pop-up menu to specify if you want to
import a key commands file (“.key”) or a macro commands file (extension
“.mac”).
When you have imported an older file, you might want to save it as a preset (see
above) to be able to access it from the Presets pop-up menu in the future.
4. Navigate to the file you want to import and click “Open”.
The file is imported.
5. Click OK to exit the Key Commands dialog and apply the imported settings.
The settings in the loaded key commands file or macros file now replace the current
settings.
About the Reset and Reset All functions
These two buttons in the Key Commands dialog will both restore the default
settings. The following rules apply:
• “Reset” will restore the default key command setting for the function selected
in the Commands list.
• “Reset All” will restore the default key commands for all commands.
IMPORTANTIMPORTANTIMPORTANTIMPORTANT
Note that the “Reset All” operation will cause any changes made to the default key
commands to be lost! If you want to be able to revert to these settings again, make
sure to save them first!
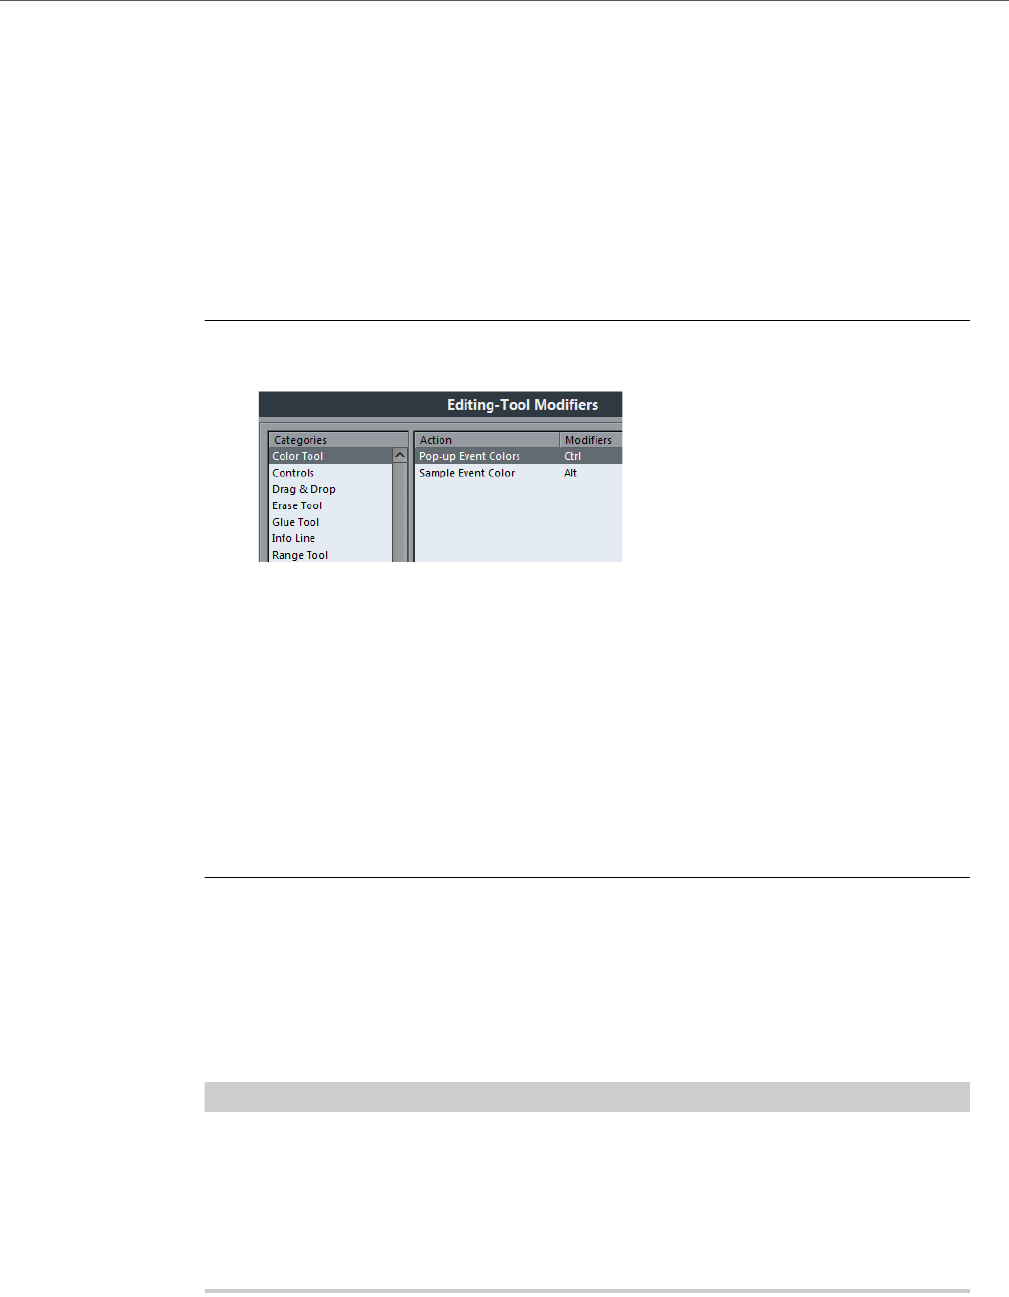
Key Commands
Setting up tool modifier keys
607
Setting up tool modifier keys
A tool modifier key is a key you can press to get an alternate function when using a
tool. For example, clicking and dragging an event with the Object Selection tool
normally moves it – holding down a modifier key (by default [Alt]/[Option]) while
dragging will copy it instead.
The default assignments for tool modifier keys can be found in the Preferences
dialog (Editing–Tool Modifiers page). Here, you can also edit them:
PROCEDURE
1. Open the Preferences dialog and select the Editing–Tool Modifiers page.
2. Select an option in the Categories list, and locate the action for which you
want to edit the modifier key.
For example, the “Copy” action mentioned above resides in the category “Drag &
Drop”.
3. Select the action in the Action list.
4. Hold down the desired modifier key(s) and click the Assign button.
The current modifier keys for the action are replaced. If the modifier keys you pressed
are already assigned to another tool, you will be asked whether you want to overwrite
them. If you do, this will leave the other tool without any modifier keys assigned.
5. When you are done, click OK to apply the changes and close the dialog.
The default key commands
Below, the default key commands are listed according to category.
NOTE
When the Virtual Keyboard is displayed, the usual key commands are blocked
because they are reserved for the Virtual Keyboard. The only exceptions are:
[Ctrl]/[Command]-[S] (Save), Num [*] (Start/Stop Record), [Space] (Start/Stop
Playback), Num [1] (Jump to left locator), [Delete] or [Backspace] (Delete), Num [/]
(Cycle on/off), [F2] (Show/Hide Transport panel), and [Alt]/[Option]-[K]
(Show/Hide Virtual Keyboard).

Key Commands
The default key commands
608
Audio category
Automation category
Chords
Devices category
Edit category
Option Key command
Adjust Fades to Range [A]
Crossfade [X]
Option Key command
Read Automation for All Tracks On/Off [Alt]/[Option]-[R]
Write Automation for All Tracks On/Off [Alt]/[Option]-[W]
Option Key command
Chord Pads [Ctrl]/[Command]-[Shift]-[C]
Option Key command
MixConsole [F3]
Video [F8]
Virtual Keyboard [Alt]/[Option]-[K]
VST Connections [F4]
VST Instruments (not in Cubase LE) [F11]
VST Performance [F12]
Option Key command
Activate/Deactivate Focused Object [Alt]/[Option]-A
Auto-Scroll On/Off [F]
Copy [Ctrl]/[Command]-[C]
Cut [Ctrl]/[Command]-[X]
Cut Time [Ctrl]/[Command]-[Shift]-[X]
Delete [Delete] or [Backspace]
Delete Time [Shift]-[Backspace]
Duplicate [Ctrl]/[Command]-[D]
Expand/Reduce [Alt]/[Option]-E

Key Commands
The default key commands
609
Insert Silence [Ctrl]/[Command]-[Shift]-[E]
Invert [Alt]/[Option]-F
Left Selection Side to Cursor [E]
Move to Cursor [Ctrl]/[Command]-[L]
Move to Front (Uncover) [U]
Mute [M]
Mute Events [Shift]-[M]
Mute/Unmute Objects [Alt]/[Option]-[M]
Open Default Editor [Ctrl]/[Command]-[E]
Open Score Editor [Ctrl]/[Command]-[R]
Open/Close Editor [Return]
Paste [Ctrl]/[Command]-[V]
Paste at Origin [Alt]/[Option]-[V]
Paste Relative to Cursor [Shift]-[V]
Paste Time [Ctrl]/[Command]-[Shift]-[V]
Primary Parameter: Decrease [Ctrl]/[Command]-[Shift]-[Down Arrow]
Primary Parameter: Increase [Ctrl]/[Command]-[Shift]-[Up Arrow]
Record Enable [R]
Redo [Ctrl]/[Command]-[Shift]-[Z]
Repeat [Ctrl]/[Command]-[K]
Right Selection Side to Cursor [D]
Secondary Parameter: Decrease [Ctrl]/[Command]-[Shift]-[Left Arrow]
Secondary Parameter: Increase [Ctrl]/[Command]-[Shift]-[Right Arrow]
Select All [Ctrl]/[Command]-[A]
Select None [Ctrl]/[Command]-[Shift]-[A]
Snap On/Off [J]
Solo [S]
Split At Cursor [Alt]/[Option]-[X]
Split Range [Shift]-[X]
Undo [Ctrl]/[Command]-[Z]
Unmute Events [Shift]-[U]
Write [W]
Option Key command

Key Commands
The default key commands
610
Editors category
File category
Inspector
Media category
Option Key command
Show/Hide Editors [Ctrl]/[Command]-[Alt]/[Option]-[E]
Show/Hide Info Line [Ctrl]/[Command]-[I]
Show/Hide Inspector [Alt]/[Option]-[I]
Show/Hide Overview [Alt]/[Option]-[O]
Show/Hide Rack [Alt]/[Option]-[T]
Toggle Rack Tabs [Ctrl]/[Command]-[Alt]/[Option]-[T]
Option Key command
Close [Ctrl]/[Command]-[W]
New [Ctrl]/[Command]-[N]
Open [Ctrl]/[Command]-[O]
Quit [Ctrl]/[Command]-[Q]
Save [Ctrl]/[Command]-[S]
Save As [Ctrl]/[Command]-[Shift]-[S]
Save New Version [Ctrl]/[Command]-[Alt]/[Option]-[S]
Option Key command
Toggle Inspector Footer Tabs [Ctrl]/[Command]-[Alt]/[Option]-[Shift]-[T]
Toggle Inspector Tabs [Ctrl]/[Command]-[Shift]-[T]
Option Key command
Open MediaBay [F5]
Preview Cycle On/Off [Shift]-Num [/]
Preview Start [Shift]-[Enter]
Preview Stop [Shift]-Num [0]
Search MediaBay [Shift]-[F5]
Toggle Filters [Ctrl]/[Command]-[Alt]/[Option]-Num [5]

Key Commands
The default key commands
611
MIDI category
Navigate category
Toggle Location Tree [Ctrl]/[Command]-[Alt]/[Option]-Num [4]
Toggle Locations [Ctrl]/[Command]-[Alt]/[Option]-Num [8]
Toggle Previewer [Ctrl]/[Command]-[Alt]/[Option]-Num [2]
Option Key command
Option Key command
Show/Hide Controller Lanes [Alt]/[Option]-[L]
Option Key command
Add Down:
Expand/Undo selection in the Project
window to the bottom/ Move selected event
in the Key Editor down 1 octave
[Shift]-[Down Arrow]
Add Left:
Expand/Undo selection in the Project
window/Key Editor to the left
[Shift]-[Left Arrow]
Add Right:
Expand/Undo selection in the Project
window/Key Editor to the right
[Shift]-[Right Arrow]
Add Up:
Expand/Undo selection in the Project
window to the top/Move selected event in
the Key Editor up one octave
[Shift]-[Up Arrow]
Bottom:
Select bottom track in the track list
[End]
Down:
Select next in the Project window/Move
selected event in the Key Editor one
semitone down
[Down Arrow]
Left:
Select next in the Project window/Key
Editor
[Left Arrow]
Right:
Select next in the Project window/Key
Editor
[Right Arrow]

Key Commands
The default key commands
612
Nudge category
Project category
Quantize category
Tool category
Top:
Select top track in the track list
[Home]
Toggle Selection [Ctrl]/[Command]-[Space]
Up:
Select next in the Project window/ Move
selected event in the Key Editor one
semitone up
[Up Arrow]
Option Key command
Option Key command
End Left [Alt]/[Option]-[Shift]-[Left Arrow]
End Right [Alt]/[Option]-[Shift]-[Right Arrow]
Left [Ctrl]/[Command]-[Right Arrow]
Right [Ctrl]/[Command]-[Right Arrow]
Start Left [Alt]/[Option]-[Left Arrow]
Start Right [Alt]/[Option]-[Right Arrow]
Option Key command
Open Markers [Ctrl]/[Command]-[M]
Open Pool [Ctrl]/[Command]-[P]
Open Tempo Track [Ctrl]/[Command]-[T]
Remove Selected Tracks [Shift]-[Delete]
Setup [Shift]-[S]
Option Key command
Quantize [Q]
Option Key command
Draw tool [8]
Drumstick tool [0]
Erase tool [5]
Glue tool [4]

Key Commands
The default key commands
613
Transport category
Mute tool [7]
Next Tool [F10]
Play tool [9]
Previous Tool [F9]
Range tool [2]
Object Selection tool [1]
Split tool [3]
Zoom tool [6]
Option Key command
Option Key command
Auto Punch In [I]
Auto Punch Out [O]
Cycle [÷] (Win)/[/] (Mac)
Exchange Time Formats [.]
Fast Forward [Shift]-Num [+]
Fast Rewind [Shift]-Num [-]
Forward Num [+]
Input Left Locator [Shift]-[L]
Input Position [Shift]-[P]
Input Right Locator [Shift]-[R]
Insert Marker [Insert] (Win)
Locate Next Event [N]
Locate Next Hitpoint [Alt]/[Option]-[N]
Locate Next Marker [Shift]-[N]
Locate Previous Event [B]
Locate Previous Hitpoint [Alt]/[Option]-[B]
Locate Previous Marker [Shift]-[B]
Locate Selection [L]
Locators to Selection [P]
Loop Selection [Alt]/[Option]-[P]
Metronome On/Off [C]
Nudge Cursor Left [Ctrl]/[Command]-Num [-]
Nudge Cursor Right [Ctrl]/[Command]-Num [+]
Panel (Transport panel) [F2]
Play Selection Range [Alt]/[Option]-[Space]

Key Commands
The default key commands
614
Windows category
Zoom category
Recall Cycle Marker 1 to 9 [Shift]-Num [1] to Num [9]
Record Num [*]
Retrospective Record [Shift]-Num [*]
Return to Zero Num [.] or Num [,] or Num [;]
Rewind Num [-]
Set Left Locator [Ctrl]/[Command]-Num [1]
Set Marker 1 [Ctrl]/[Command]-[1]
Set Marker 2 [Ctrl]/[Command]-[2]
Set Marker 3 to 9 [Ctrl]/[Command]-Num [3] to [9] or
[Ctrl]/[Command]- [3] to [9]
Set Right Locator [Ctrl]/[Command]-Num [2]
Start [Enter]
Start/Stop [Space]
Stop Num [0]
To Left Locator Num [1]
To Marker 1 [Shift]-[1]
To Marker 2 [Shift]-[2]
To Marker 3 to 9 Num [3] to [9] or [Shift]-[3] to [9]
To Right Locator Num [2]
Use External Sync [T]
Option Key command
Option Key command
Inline: Key Commands [Shift]-[F4]
Inline: Settings [Shift]-[F3]
Inline: View Layout [Shift]-[F2]
Option Key command
Zoom Full [Shift]-[F]
Zoom In [H]
Zoom In Tracks [Ctrl]/[Command]-[Down Arrow]
Zoom In Vertically [Shift]-[H]
Zoom Out [G]
Zoom Out Tracks [Ctrl]/[Command]-[Up Arrow]

Key Commands
The default key commands
615
Zoom Out Vertically [Shift]-[G]
Zoom to Event [Shift]-[E]
Zoom to Selection [Alt]/[Option]-[S]
Zoom Tracks Exclusive [Ctrl]/[Command]-[Alt]/[Option]-[Down
Arrow]
Option Key command

616
File handling
Importing audio
In Cubase audio can be imported in a variety of different formats. For example, you
can import tracks from audio CDs, or import audio files saved in different formats
(compressed and uncompressed).
RELATED LINKS
Importing Media on page 327
Audio file import options
When you are importing audio files, there are a number of options concerning how
the files should be treated by Cubase:
• You can choose to copy the file into the Audio folder of the project and have
the project make reference to the copied file rather than the original file.
This helps you keep your project “self-contained”.
• You can choose to split stereo and multi-channel files into a number of mono
files.
• You can set all files in the project to the same sample rate and sample size
(resolution).
Using the “On Import Audio Files” pop-up menu in the Preferences dialog
(Editing–Audio page), you can define what Cubase does when importing an audio
file. The available options are described in the following.
Open Options Dialog
An Options dialog appears when you import, allowing you to select whether you
want to copy the files to the Audio folder and/or convert them to the project settings.
Please note the following:
• When importing a single file of a format other than the project settings, you
can specify which properties (sample rate and/or resolution) are changed.

File handling
Importing audio
617
• When importing multiple files at the same time, you can select to convert the
imported files automatically if necessary, i. e. if the sample rate is different than
the project’s or the resolution is lower than the project setting.
NOTE
When you import 5-channel interleaved files that do not have the speaker
arrangement metadata (“BEXT”), Cubase always considers them as 5.0 format.
Use Settings
No Options dialog will appear when you import. Instead, you can select standard
actions from the list below the pop-up menu that are performed automatically each
time you import audio files:
Copy Files to Working Directory
If files are not already in the project’s audio folder, they are copied there
before being imported.
Convert and Copy to Project If Needed
If files are not already in the project’s audio folder, they are copied there
before being imported. Furthermore, if the files have a different sample rate or
a lower resolution than the project settings, they are automatically converted.
Importing audio CD tracks
You can import audio from audio CDs into Cubase projects in two ways:
• To import the CD tracks directly into project tracks, choose the “Audio CD…”
option from the Import submenu of the File menu.
The imported audio CD track(s) are inserted on the selected audio track(s) at
the project cursor position.
• To import the CD tracks into the Pool, select “Import Audio CD…” from the
Media menu.
This might be the preferred method if you want to import several CD tracks in
one go.
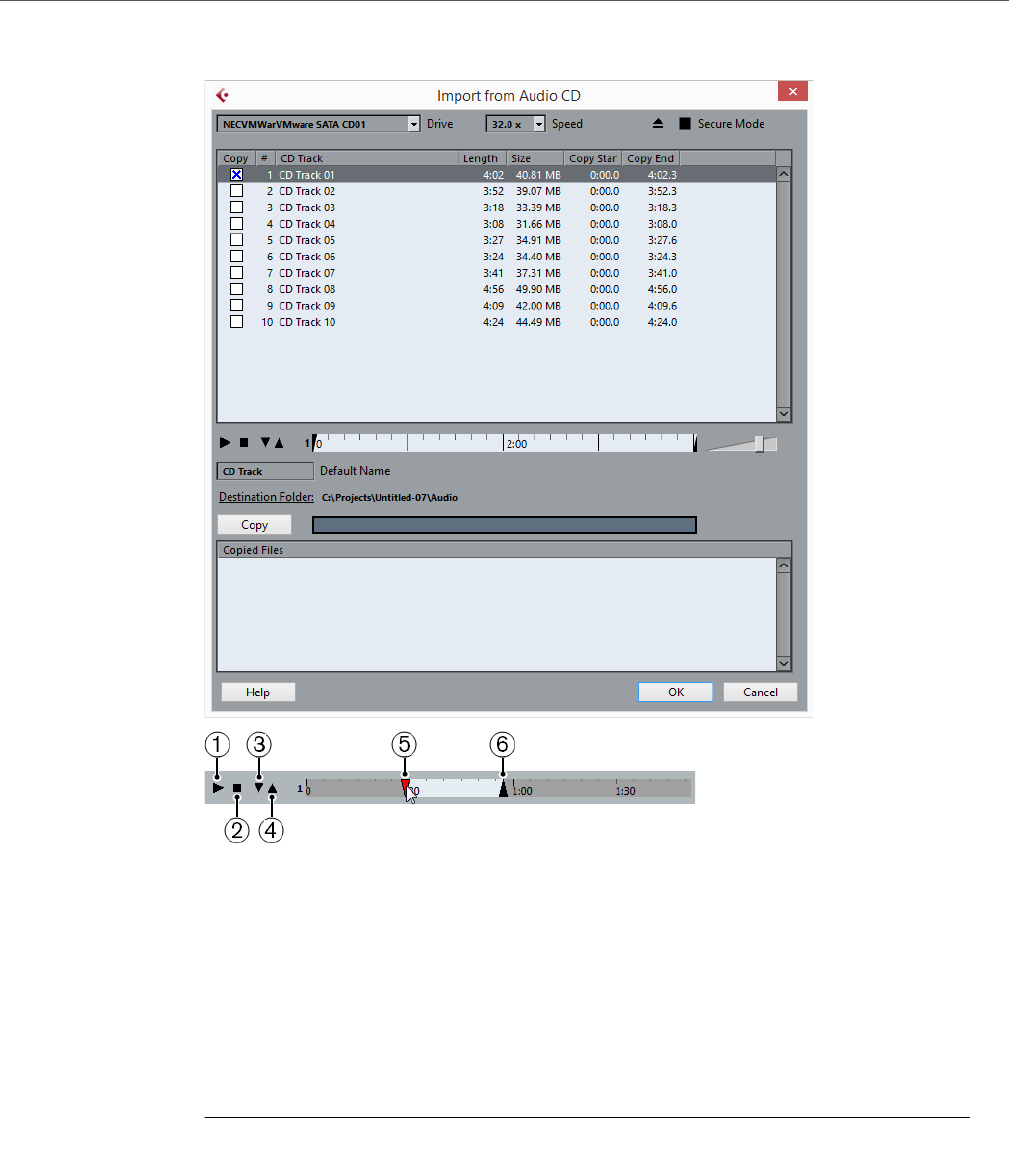
File handling
Importing audio
618
Selecting one of the Import Audio CD menu items brings up the following dialog:
1) Play
2) Stop
3) Play from Left Marker
4) Play to Right Marker
5) Start of selection handle
6) End of selection handle
To import one or more tracks, proceed as follows:
PROCEDURE
1. If you have more than one CD drive, select the correct one from the Drive
pop-up menu at the top left.
On opening the CD, the program tries to retrieve the track names from CDDB (a CD
database). If no connection to CDDB can be established or the CD track names are
not found, you can manually change the generic track name in the Default Name field.

File handling
Importing audio
619
2. Windows only: Activate the “Secure Mode” option if you want to use a Secure
Read mode.
Use this if you encounter problems when trying to import an audio CD. Error checking
and correction will be done during the process. Note that this mode will take more
time.
3. In the Windows version, select the data transfer speed from the Speed
pop-up menu.
While you normally want to use the fastest possible speed, you may have to select a
slower speed for flawless audio extraction.
4. Activate the Copy checkbox for every audio file you want to import.
You can also select a copy section for every file, see below.
5. Click on the Copy button to create a local copy of the audio file(s) or
section(s).
The copied files are listed at the bottom of the dialog. By default, imported audio CD
tracks will be stored as Wave files (Windows) or AIFF files (Mac) in the Audio folder
of the current project. To change the folder, click Destination Folder and select a
different folder from the dialog. During copying, the Copy button is labeled “Stop”;
click it to stop the process.
6. Click OK to import the copied audio files into the project, or click Cancel to
stop the import and discard the copied files.
If you import more than one audio file into project tracks, a dialog opens in which you
have to choose whether to insert the tracks on one track or on different ones.
The new track(s) are displayed in the Project window. New audio clips are created
and added to the Pool.
The columns in the “Import from Audio CD” dialog have the following functionality:
By default, complete tracks are selected.
Column Description
Copy Activate the checkbox in this column for the track you want to
copy/import. To activate more than one checkbox, click and drag over
the checkboxes (or press [Ctrl]/[Command] or [Shift] and click).
# This is the track number.
CD Track When you import an audio CD track, the file is named according to
this column. The names are pulled automatically from CDDB, if
possible. You can rename a track by clicking in the CD Track column
and typing a new name. You can also apply a generic name to all
audio CD tracks, if no name was available in CDDB.
Length The length of the audio CD track in minutes and seconds.
Size The file size of the audio CD track in MB.
Copy Start You can copy a section of a track if you like. This indicates the start of
the section to be copied in the track. By default, this is set to the start
of the track (0.000) but you can adjust this on the copy selection
ruler, see below.
Copy End Indicates the end of the section to be copied in the track. By default,
this is set to the end of the track but you can adjust this on the copy
selection ruler, see below.

File handling
Importing audio
620
• If you want to copy and import a section of an audio CD track only, select the
track in the list and specify the start and end of the selection to be copied by
dragging the handles in the copy selection ruler.
NOTE
Note that you can import sections of several audio CD tracks by selecting them in turn
and adjusting the selection. The start and end settings for each track are displayed in
the list.
• You can audition the selected audio CD track by clicking the Play button.
The track will be played back from selection start to selection end (or until you
click the Stop button).
• The Play from left Marker (down arrow) and Play to Right Marker (up arrow)
buttons allow you to audition the start and end of the selection only.
The down arrow button will play a short snippet beginning at the start of the
selection, while the up arrow button will play a snippet starting just before the
end of the selection.
• To open the CD drive, click on the Eject button at the top of the dialog.
Importing Audio from video files
While you can automatically extract the audio when importing a video file, it is also
possible to import the audio from a video file without importing the video itself:
PROCEDURE
1. Open the File menu, open the Import submenu and select “Audio from Video
File…”.
2. In the file dialog that opens, locate and select the video file and click Open.
The audio in the selected video file is extracted and converted to a Wave file in the
project’s Audio folder.
A new audio clip is created and added to the Pool. In the Project window, an event
referencing the audio file is inserted on the selected track at the project cursor
position. If no track was selected, a new track is created.
This works just like importing regular audio files.
RELATED LINKS
Extracting Audio From a Video File on page 595
Importing Video Files on page 588
Importing ReCycle files
ReCycle by Propellerhead Software is a program designed especially for working
with sampled loops. By “slicing” a loop and making separate samples of each beat,
ReCycle makes it possible to match the tempo of a loop and edit the loop as if it
was built of individual sounds. Cubase can import two file types created by
ReCycle:
• REX files (export file format of the first versions of ReCycle, extension “.rex”).

File handling
Importing audio
621
• REX 2 files (file format of ReCycle 2.0 and later, extension “.rx2”).
IMPORTANTIMPORTANTIMPORTANTIMPORTANT
For this to work, the REX Shared Library needs to be installed on your system.
PROCEDURE
1. Select an audio track and move the project cursor to where you want the
imported file to start.
You probably want to import REX files to tempo based audio tracks, since this will
allow you to change the tempo later on (having the imported REX file automatically
adjust).
2. Select “Audio File…” from the Import submenu of the File menu.
3. On the file type pop-up menu in the file dialog, select REX File or REX 2 File.
4. Locate and select the file you want to import, and click Open.
The file is imported and automatically adjusted to the current Cubase tempo.
Unlike a regular audio file, the imported REX file will consist of several events, one for
each “slice” in the loop. The events will automatically be placed in an audio part on
the selected track and positioned so that the original internal timing of the loop is
preserved.
5. If you now open the part in the Audio Part Editor, you can edit each slice
separately by muting, moving and resizing events, adding effects and
processing, etc.
You can also adjust the tempo and have the REX file automatically follow (provided
that its track is tempo based).
NOTE
You can achieve similar results by using Cubase’s own loop slicing features.
RELATED LINKS
Working with hitpoints and slices on page 297
Importing compressed audio files
Cubase can import several common audio compression formats. The procedure is
the same as when importing any non-compressed audio file, with one important
thing to note:
For most compressed file formats, Cubase creates a copy of the file and converts
this to Wave format (Windows) or AIFF format (Mac OS X) before importing it. The
original compressed file will not be used in the project.
The imported file is placed in the designated project Audio folder.
IMPORTANTIMPORTANTIMPORTANTIMPORTANT
The resulting Wave/AIFF file is several times larger than the original compressed
file.
The following file types are supported:

File handling
Exporting and importing standard MIDI files
622
FLAC files
FLAC is an open source format and stands for Free Lossless Audio Codec. Audio
files in this format are typically 50 to 60 % smaller than regular Wave files. FLAC
files are not converted to Wave files on import.
MPEG audio files
MPEG, which stands for Moving Picture Experts Group, is the name of a family of
standards used for encoding audio-visual information (e. g. movies, video, music) in
a digital compressed format.
Cubase can read two types of audio MPEG files: MPEG Layer 2 (*.mp2) and MPEG
Layer 3 (*.mp3). Currently, mp3 is the most common of these formats, while the
mp2 format is mostly used in broadcast applications.
Ogg Vorbis files
Ogg Vorbis is an open and patent-free format that offers very small audio files
maintaining comparatively high audio quality. Ogg Vorbis files have the extension
“.ogg”.
Windows Media Audio files (Windows only)
Windows Media Audio is an audio format developed by Microsoft, Inc. Due to
advanced audio compression algorithms, Windows Media Audio files can be made
very small, maintaining good audio quality. The files have the extension “.wma”.
RELATED LINKS
Export Audio Mixdown on page 551
Exporting and importing standard MIDI files
Cubase can import and export standard MIDI files, which makes it possible to
transfer MIDI material to and from virtually any MIDI application on any platform.
When you import and export MIDI files, you can also specify whether certain
settings associated with the tracks are included in the files (automation tracks,
volume and pan settings, etc.).
Exporting MIDI files
To export your MIDI tracks as a standard MIDI file, open the File menu and select
“MIDI File…” from the Export submenu. A regular file dialog opens, allowing you to
specify a location and name for the file.
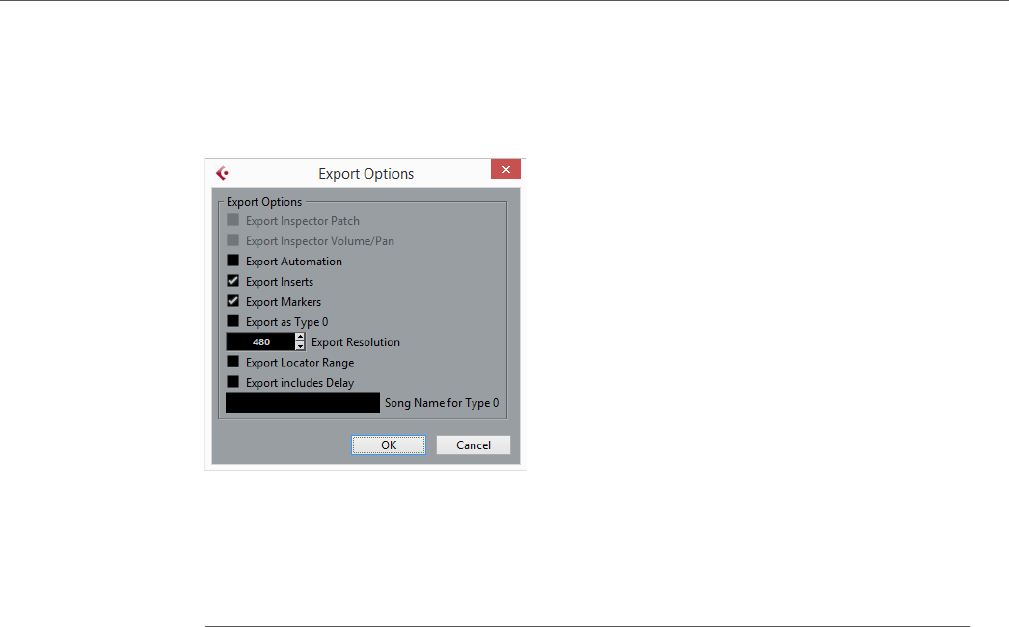
File handling
Exporting and importing standard MIDI files
623
When you have specified a location and a name for the file, click “Save”. The Export
Options dialog opens, allowing you to specify a number of options for the file, e. g.
what is included in the file, its type and its resolution (see below for a description of
the options).
You will also find most of these settings in the Preferences dialog (MIDI–MIDI File
page). If you set these up in the Preferences dialog, you only need to click OK in the
Export Options dialog to proceed.
The dialog contains the following options:
Option Description
Export
Inspector Patch
If this is activated, the MIDI patch settings in the Inspector – Bank
Select and Program Select (used for selecting sounds in the connected
MIDI instrument) are included as MIDI Bank Select and Program
Change events in the MIDI file.
Export
Inspector
Volume/Pan
If this is activated, Volume and Pan settings made in the Inspector are
included as MIDI Volume and Pan events in the MIDI file.
Export
Automation
If this is activated, the automation data (as heard during playback) are
converted to MIDI controller events and included in the MIDI file.
Cubase Elements only: This also includes automation recorded with the
MIDI Control plug-in (see the separate PDF document “Plug-in
Reference”).
Note that if a continuous controller (e. g. CC7) has been recorded but
the Read button is deactivated for the automation track (i. e. the
automation is effectively switched off for this parameter), only the part
data for this controller will be exported.
If this option is deactivated and the Automation Read button is activated,
no Continuous Controllers are exported. If the Read button is
deactivated, the Controller data of the MIDI part are exported (these will
now be handled like “regular” part data).
In most cases it is recommended to activate this option.
Export Inserts If this is activated, any MIDI modifiers that you have added will be
included in the MIDI file.
Export Markers If this is activated, any markers you have added will be included in the
MIDI file as standard MIDI file marker events.

File handling
Exporting and importing standard MIDI files
624
NOTE
The MIDI file will include the tempo information of the project (i. e. it will include the
tempo and time signature events of the Tempo Track Editor or, if the tempo track is
deactivated on the Transport panel, the current tempo and time signature).
NOTE
Inspector settings other than those specified in the Export options are not included
in the MIDI file! To include these, you need to convert the settings to “real” MIDI
events and properties by using the Merge MIDI in Loop function for each track.
RELATED LINKS
Automation on page 359
Markers on page 196
Basic track settings on page 405
Merge MIDI in Loop on page 424
Importing MIDI files
To import a MIDI file from disk, proceed as follows:
PROCEDURE
1. Select “MIDI File…” from the Import submenu of the File menu.
2. If there is already an open project, a dialog opens in which you can select
whether a new project is created for the file.
If you select “No”, the MIDI file will be imported into the current project.
Export as Type
0
If this is activated, the MIDI file will be of type 0 (all data on a single
track, but on different MIDI channels). If you do not activate this option,
the MIDI file will be of Type 1 (data on separate tracks). Which type to
choose depends on what you want to do with the MIDI file (in which
application or sequencer it should be used, etc.).
Export
Resolution
You can specify a MIDI resolution between 24 and 960 for the MIDI file.
The resolution is the number of pulses, or ticks, per quarter note (PPQ)
and determines the precision with which you will be able to view and edit
the MIDI data. The higher the resolution, the higher the precision.
Choose the resolution depending on the application or sequencer with
which the MIDI file will be used, though, since certain applications and
sequencers may not be able to handle certain resolutions.
Export Locator
Range
If this is activated, only the range between the locators will be exported.
Export includes
Delay
If this is activated, the delay of the MIDI track will be included in the MIDI
file.
Song name for
Type 0
You can use this text field to change the name of the MIDI file as
displayed when loading this file in a keyboard.
Option Description

File handling
Exporting and importing standard MIDI files
625
3. Locate and select the MIDI file in the file dialog that opens and click Open.
If you choose to create a new project, select the project folder.
Select an existing project folder or create a new one.
RESULT
The MIDI file is imported. The result depends on the contents of the MIDI file and
the Import Options settings in the Preferences dialog (MIDI–MIDI File page). The
Import Options are as follows:
Option Description
Extract First Patch If this is activated, the first Program Change and Bank Select
events for each track are converted to Inspector settings for
the track.
Extract First Volume/Pan If this is activated, the first MIDI Volume and Pan events for
each track are converted to Inspector settings for the track.
Import Controller as
Automation Tracks
If this is activated, MIDI controller events in the MIDI file will
be converted to automation data for the MIDI tracks. If this is
deactivated, controller data for the MIDI Parts will be
imported.
Import to Left Locator If this is activated, the imported MIDI file will be placed so that
it starts at the position of the left locator – otherwise it will
start at the beginning of the project. Note that if you choose
to have a new project created automatically, the MIDI file will
always start at the beginning of the project.
Import Markers If this is activated, any markers that have been added are
imported with the MIDI file.
Import dropped File as
single Part
If this is activated and you drag and drop a MIDI file into the
project, the whole file will be placed on a single track.
Ignore Master Track Events
on Merge
If this is activated and you import a MIDI file into the current
project, tempo track data in the MIDI file are ignored. The
imported MIDI file will play according to the current tempo
track in the project.
If this option is deactivated, the Tempo Track Editor will be
adjusted according to the tempo information in the MIDI file.
Auto Dissolve Format 0 If this is activated and you import a MIDI file of type 0 into the
project, the file will automatically be “dissolved”: For each
embedded MIDI channel in the file, a separate track will be
inserted in the Project window.
If this is deactivated, only one MIDI track will be created. This
track will be set to MIDI Channel “Any”, allowing all MIDI
events to play back on their original channels. You can also
use the “Dissolve Part” function on the MIDI menu to
distribute the events onto different tracks with different MIDI
Channels at a later stage.

File handling
Exporting and importing MIDI loops
626
RELATED LINKS
Markers on page 196
Support for the Yamaha XF data format
Cubase supports the Yamaha XF format. XF is an extension of the standard MIDI
file format that allows you to save song-specific data with a MIDI file of type 0.
When importing a MIDI file containing XF data, this data is placed in parts on
separate tracks called “XF Data”, “Chord Data”, or “SysEx Data”. You can edit such
a part in the List Editor (e. g. to add or change lyrics).
IMPORTANTIMPORTANTIMPORTANTIMPORTANT
Do not change the order of events within the XF data or the event data itself, unless
you have a lot of experience with XF data.
Cubase can also export XF data as part of a MIDI file of type 0. If you do not want
to export the XF data together with the MIDI data, mute or delete the tracks
containing the XF data.
Exporting and importing MIDI loops
Cubase allows you to import MIDI loops (file extension “.midiloop”) and to save
instrument parts as MIDI loops. MIDI loops are handy, as they contain not only MIDI
notes and controllers, but also the number of voices, the associated VST instrument
and instrument track preset settings.
RELATED LINKS
VST Instruments on page 368
Destination Here, you can specify what happens when you drag a MIDI
file into the project:
• If you select the “MIDI Tracks” option, MIDI tracks are
created for the imported file.
• If you select the “Instrument Tracks” option, instrument
tracks are created for each MIDI channel in the MIDI file.
Furthermore, the program automatically loads appropriate
presets.
• If you select the “HALion Sonic SE multi-timbral” option,
several MIDI tracks are created, each routed to a separate
instance of HALion Sonic SE in the VST Instruments
window and the appropriate presets are loaded.
Note that in Cubase LE, this is automatically set to “MIDI
Tracks” and the other options are not available.
Option Description
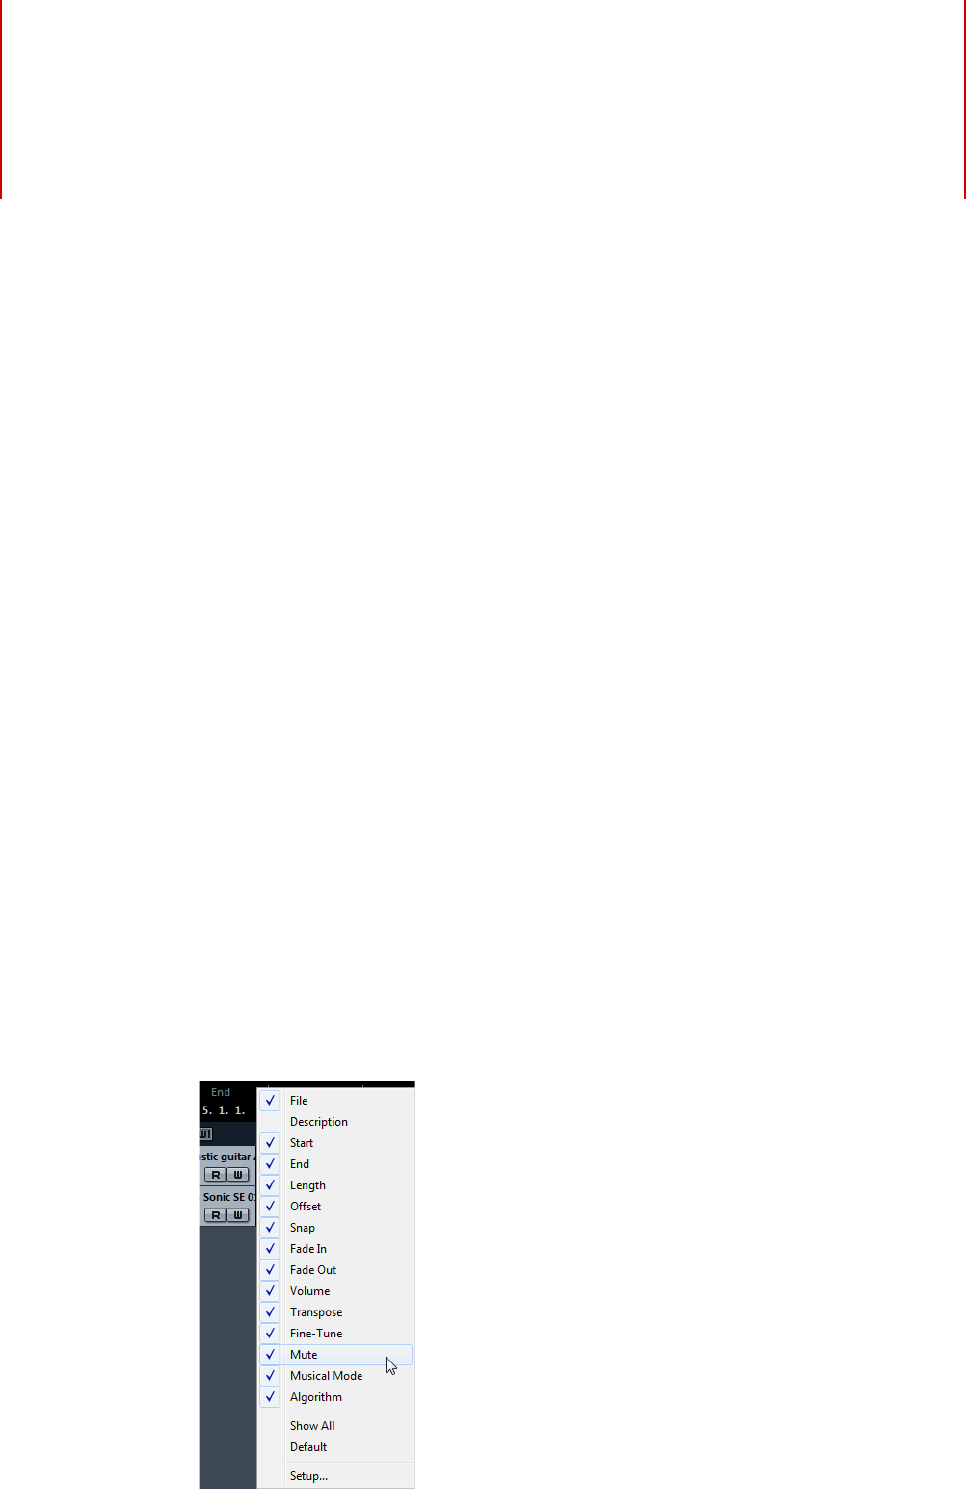
627
Customizing
Using the Setup options
You can customize the appearance of the following elements:
• Transport panel
• Info line
• Toolbars
•Inspector
The setup context menus
If you right-click the Transport panel, the toolbars, the info lines, or the Inspector,
the respective setup context menu opens.
The following general options are available on the setup context menus:
• “Show All” makes all items visible.
• “Default” resets the interface to the default setting.
• “Setup…” opens the Setup dialog, see below.
If presets are available, they can be selected on the lower half of the menu.
The info line setup context menu
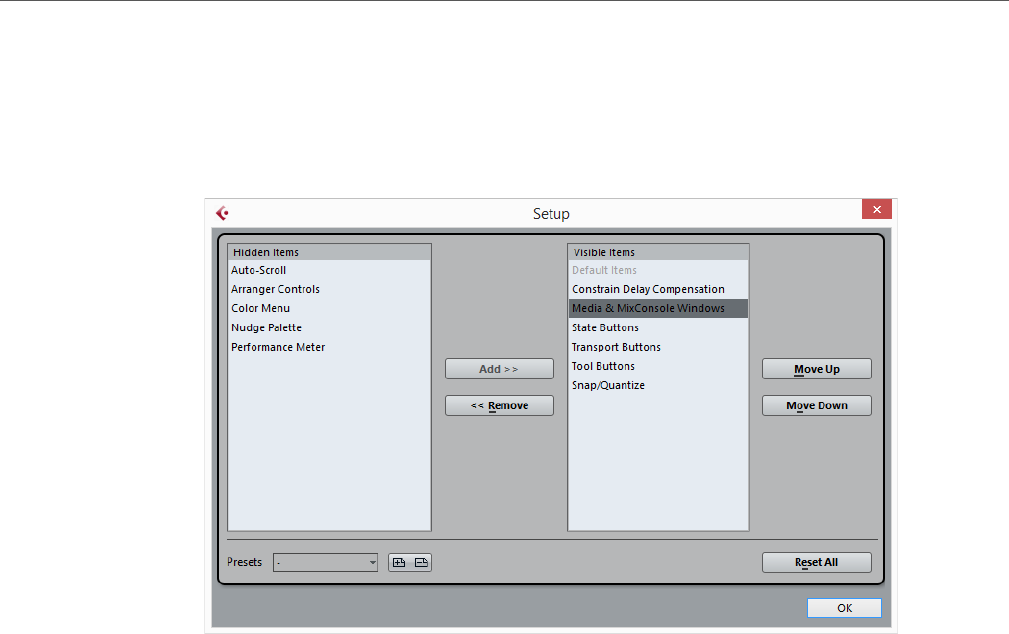
Customizing
Using the Setup options
628
The Setup dialogs
If you select “Setup…” from the setup context menus, the Setup dialog opens. This
allows you to specify which elements are visible/hidden and to set the order of the
elements. You can also save and recall setup presets in this dialog.
The dialog is divided into two sections. The left section displays the currently visible
items and the right section displays the currently hidden items.
• You can change the current show/hide status by selecting items in one
section and then use the arrow buttons in the middle of the dialog to move
them to the other section.
Changes are applied directly.
• By selecting items in the “Visible Items” list and using the Move Up and Move
Down buttons, you can reorder the items list.
Changes are applied directly. To undo all changes and revert to the standard
layout, select “Default” on the setup context menu.
• If you click the Save button (disk icon) in the Presets section, a dialog opens,
allowing you to name the current configuration and save it as a preset.
• To remove a preset, select it on the presets pop-up menu and click the trash
icon.
• Saved configurations are available for selection from the Presets pop-up
menu in the Setup dialog or directly from the setup context menu.

Customizing
Appearance
629
Appearance
In the Preferences dialog, the appearance of Cubase can be changed on the
Appearance (Colors) and on the Metering (Appearance) page.
The following subpages are available on the Appearance–Colors page:
•General
Allows you to adjust the default colors for the general interface of the
program.
•Track Type Defaults
Allows you to adjust the default colors for the different track types.
•Project
Allows you to adjust the default colors in the Project window.
•Editors
Allows you to adjust the default colors in the editors.
Appearance–Colors
The Appearance–Colors page features several subpages that allow you to change
the default color of the Cubase desktop, the track types, the Project, Editor
elements, and MixConsole elements.
To change a color, proceed as follows:
PROCEDURE
1. Select a subpage and click the color field of the element to which you want
to assign a new color.
A color selector pane opens.
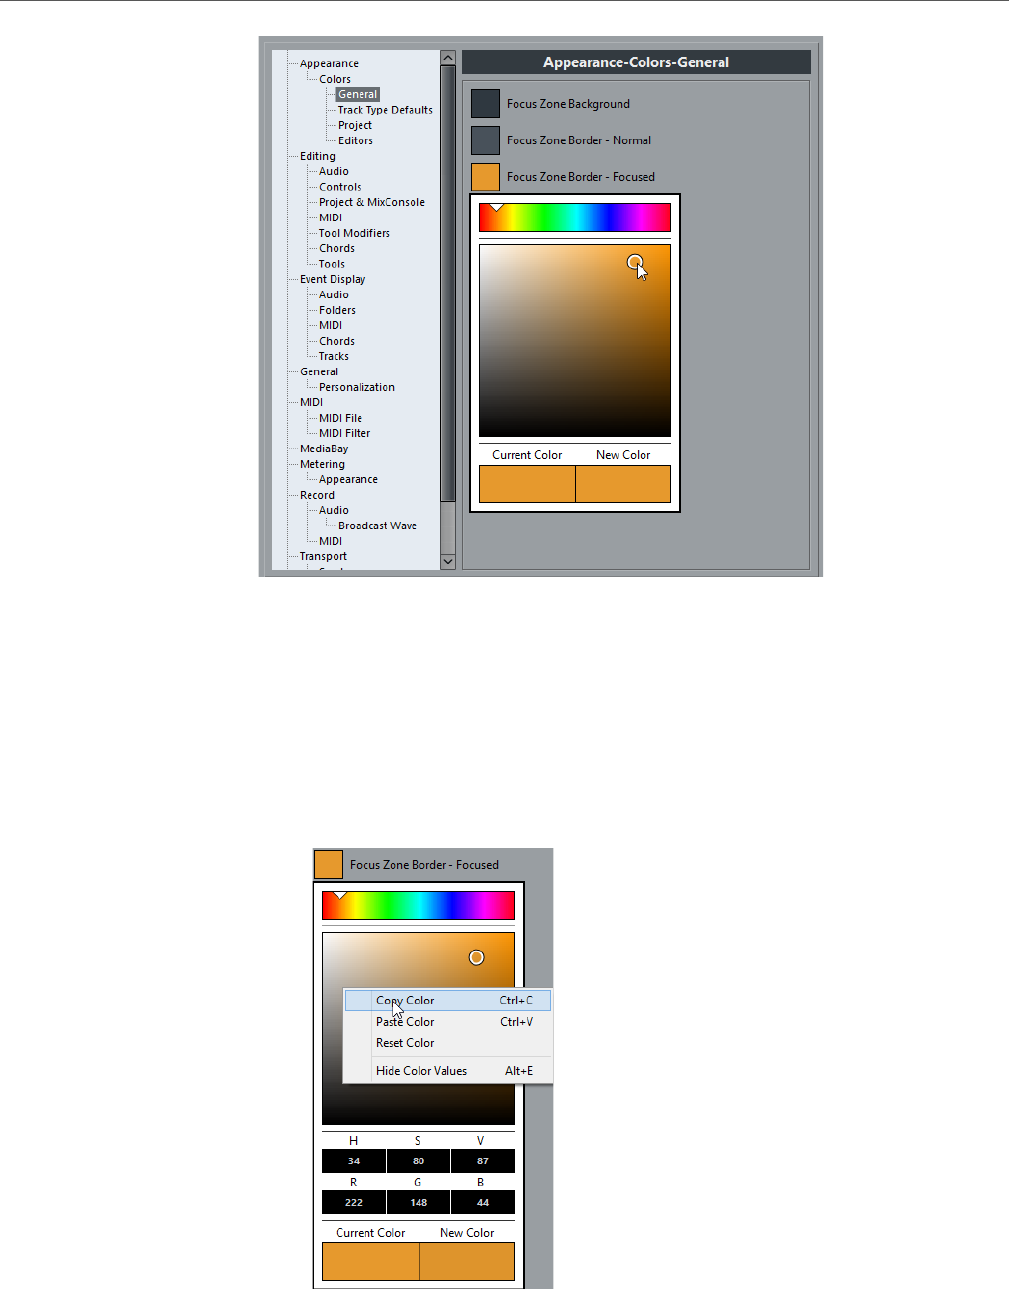
Customizing
Appearance
630
2. Use the tools in the color selector pane to select a new color.
The current and the new color are shown at the bottom of the pane.
3. Click outside the color selector pane to confirm your settings and apply your
changes.
Note that you must restart the application for some changes to take effect.
• To copy a color and paste it on another element, even on another subpage,
open the context menu in the color selector pane and select “Copy Color” and
“Paste Color”.
You can also copy colors on the same subpage using drag and drop.
• To edit the colors numerically, open the context menu in the color selector
pane, and select “Show Color Values”.
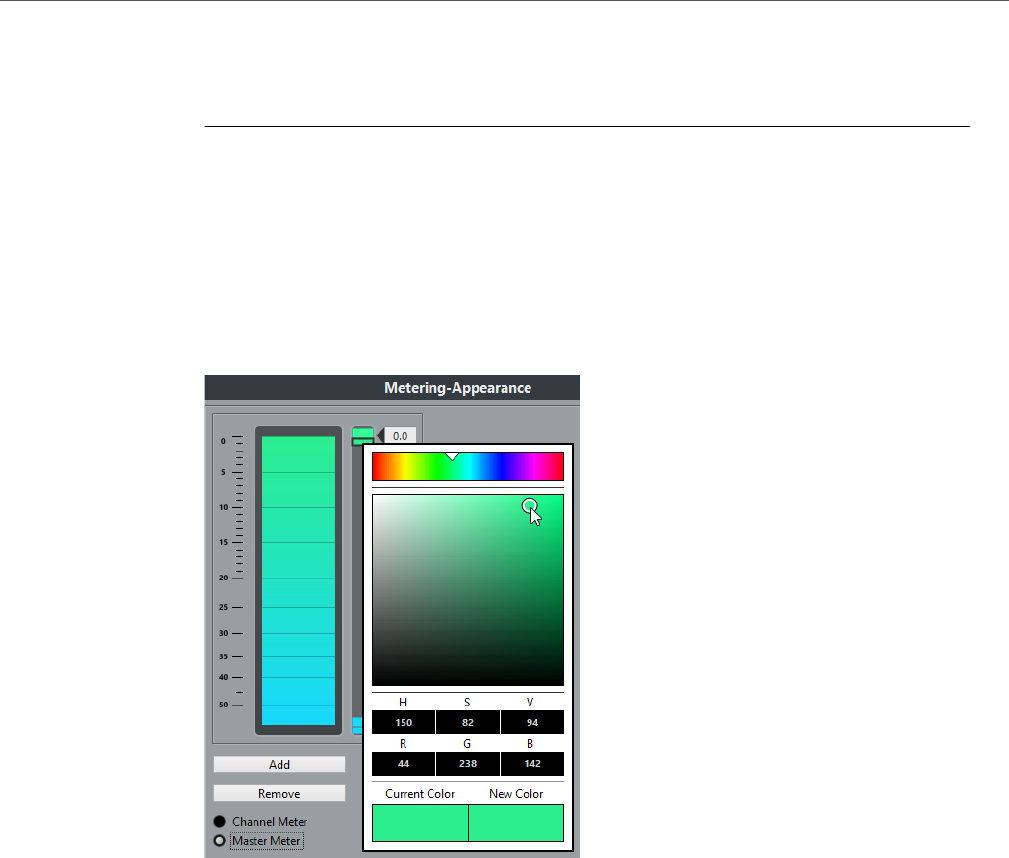
Customizing
Appearance
631
• To select any color in Cubase as new color, open the color selector pane, hold
down [Alt]/[Option], and click anywhere in the application.
The selected color is displayed in the “New Color” field.
Metering–Appearance
Cubase allows for precise color assignment of level meter values. On the
Metering–Appearance page you can specify colors for quick identification of what
levels are being reached.
You can adjust the colors for the Channel Meter or the Master Meter. For the Master
Meter you can only make changes for the Digital Scale scaling mode. Changes take
effect when you click Apply or OK.
To adjust the levels and colors, activate the Channel Meter or Master Meter option
and proceed as follows:
• To specify the level for a color change, double-click a handle to the right of
the meter scale and enter the level (dB) value.
Note that for dB values less than zero, you must add a minus sign before the
entered number.
You can also click a handle and drag it to a specific level. Press [Shift] for
more accurate positioning. Alternatively, you can nudge with the Arrow
Up/Down keys. Press [Shift] for faster positioning.
• To assign a color, click the upper or lower part of a handle so that a black
frame is shown, and use the color selector pane to select a color (see above).
Selecting the same color for the upper and lower part of the handle results in
a meter that changes its colors gradually, while separate colors indicate level
changes even more precisely.

Customizing
Applying colors in the Project window
632
• To add more color handles, click the Add button, or [Alt]/[Option]-click at a
level position to the right of the meter scale. Each new handle is automatically
associated with a default color.
• To remove a handle, select the handle and click the Remove button, or
[Ctrl]/[Command]-click the handle.
Applying colors in the Project window
You can use color scheming for an easier overview of tracks and events in the Project
window. Colors can be applied individually to tracks and events/parts. If you color a
track, the corresponding events and parts are displayed in the same color. However,
you can also color events and parts differently, “overriding” the applied track color.
In the following sections you will learn how to set up preferences to color tracks
automatically, how to color parts or events manually, how to determine whether you
want to color the events themselves or their background, and how to customize the
color palette for selecting colors.
Colorize Track Controls
In the Preferences dialog (Event Display–Tracks page), you can find the “Colorize
Track Controls” slider that allows you apply the track color to the track controls.
Colorize Folder Track Controls Only
You can restrict the effect of the Colorize Track Control function to folder tracks
only. This is useful in projects with a large number of tracks and folder tracks.
PROCEDURE
1. Select File > Preferences > Event Display > Tracks.
2. Drag the Colorize Track Controls slider to the right.
3. Activate Colorize Only Folder Track Controls.
4. Click OK.
5. In the track list, select the folder track that you want to colorize.
6. In the Project window toolbar, select the Color Tool and click again to select
a color.
RESULT
Only the folder track controls are colorized.
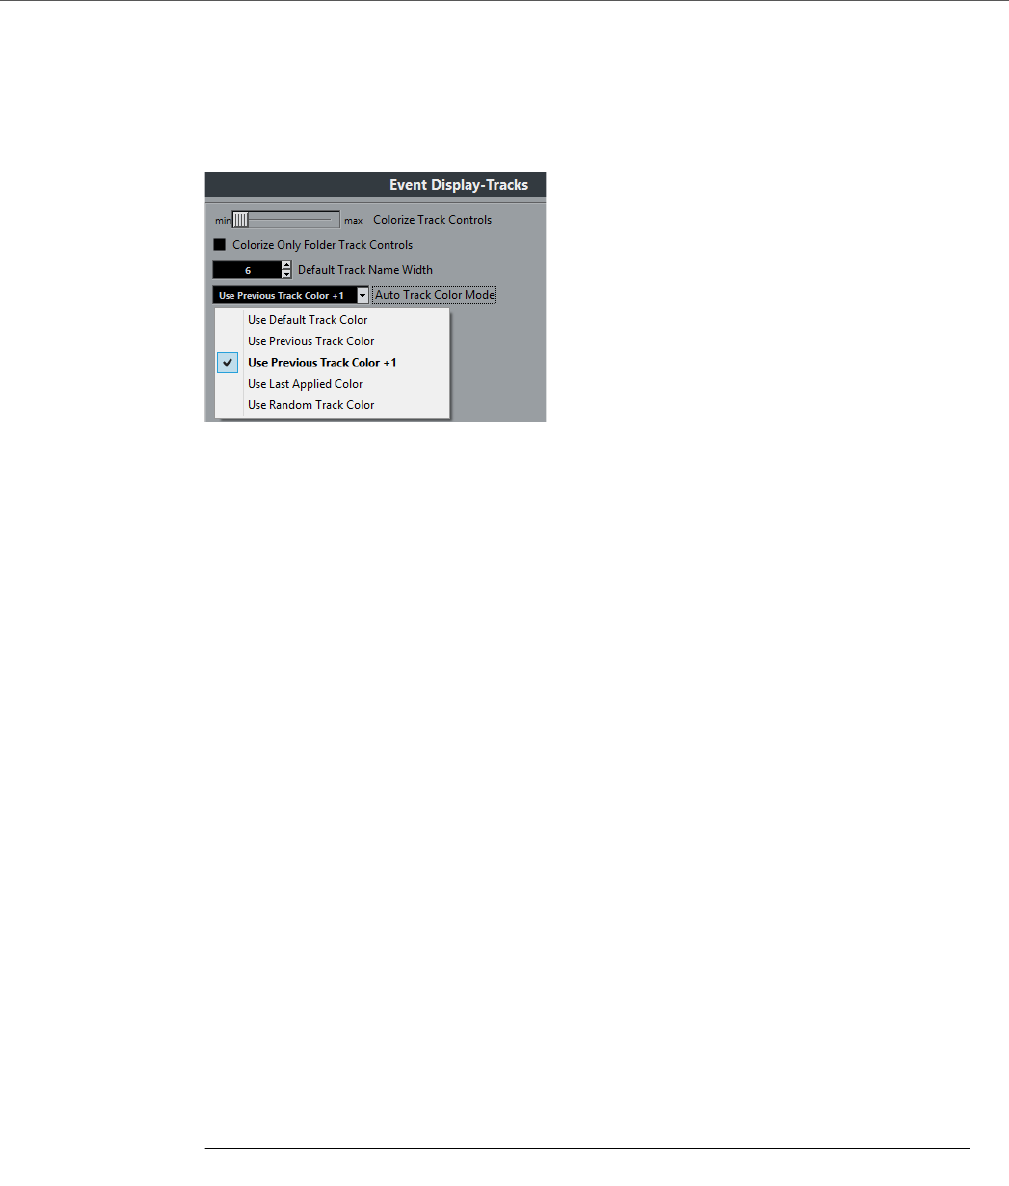
Customizing
Applying colors in the Project window
633
Applying track colors automatically
In the Preferences dialog (Event Display–Tracks page), you can find the “Auto Track
Color Mode” option.
This offers you several options for automatically assigning colors to tracks that are
added to the project. The following options are available:
Use Default Track Color
The default color (gray) is assigned.
Use Previous Track Color
Analyzes the color of the selected track and uses the same color for the new
track.
Use Previous Track Color +1
Analyzes the color of the selected track and uses the color that comes next in
the color palette for the new track.
Use Last Applied Color
Uses the color that is selected in the Select Colors pop-up menu.
Use Random Track Color
Uses the color palette as a basis to assign track colors randomly.
Coloring Tracks, Parts, or Events Manually
The Color tool on the Project window toolbar allows you to color each track, part,
or event individually.
PROCEDURE
1. In the Project window, do one of the following:
• To change the color of an event or part, select it.
• To change the color of a track, select the track and deselect all its events or
parts.
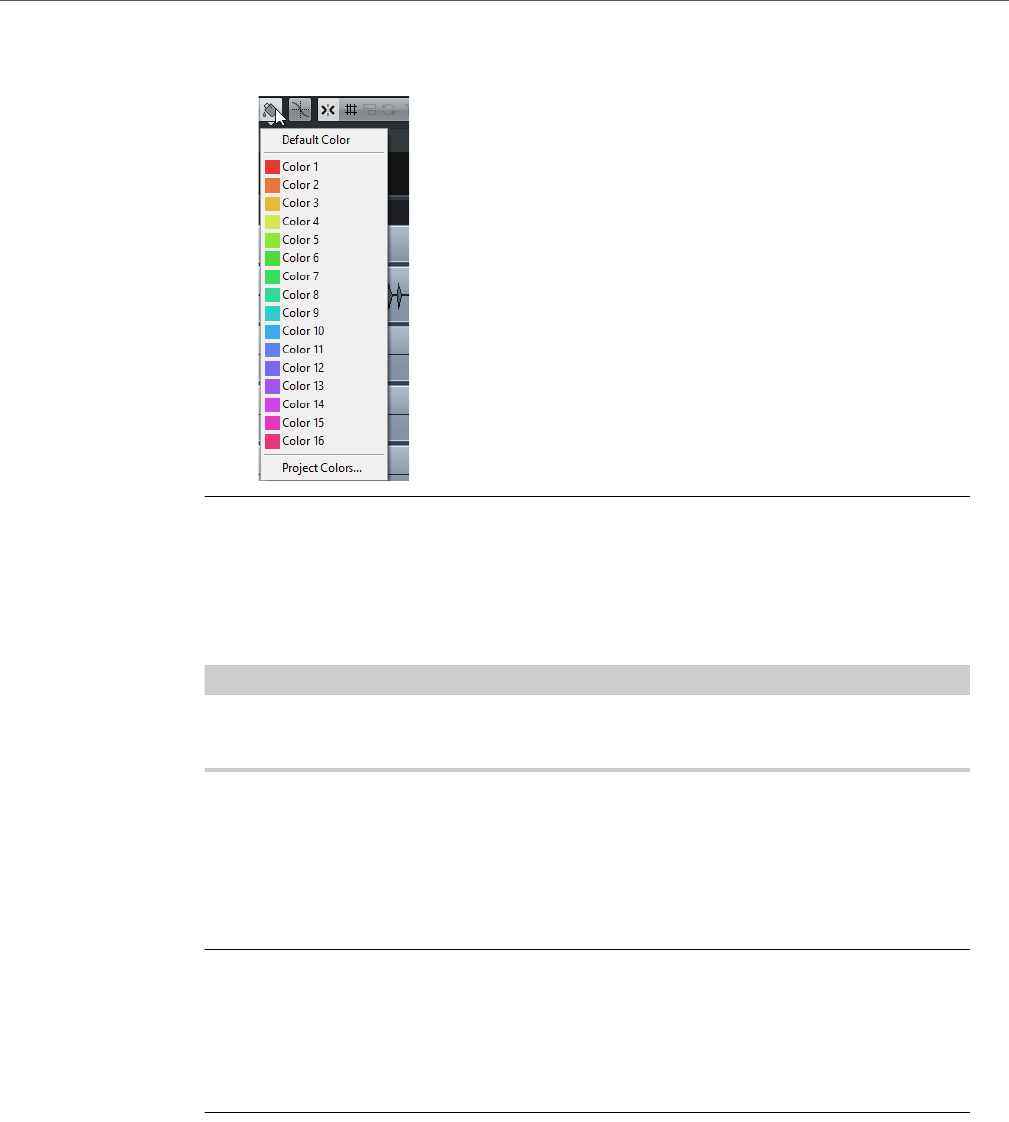
Customizing
Applying colors in the Project window
634
2. On the toolbar, select the Color tool, click again, and select a color from the
pop-up menu.
RESULT
The color is applied to the selected item. If you change the color of a track, the new
color is used for all events on the track and for the corresponding channel in the
MixConsole.
NOTE
If you assign a different color to individual parts or events, they no longer follow color
changes of the track.
Resetting the Default Color
You can reset the color of a track, part, or event to the default color.
PROCEDURE
1. In the Project window, select the event or part that you want to reset to the
default color.
2. On the toolbar, select the Color tool, click again, and select Default Color
from the pop-up menu.
Project Colors Dialog
The Project Colors dialog allows you to set up a different set of colors for items in
the Project window.
• To open the Project Colors dialog, select the Color tool in the Project
window toolbar. Click again to open a pop-up menu and select Project
Colors.
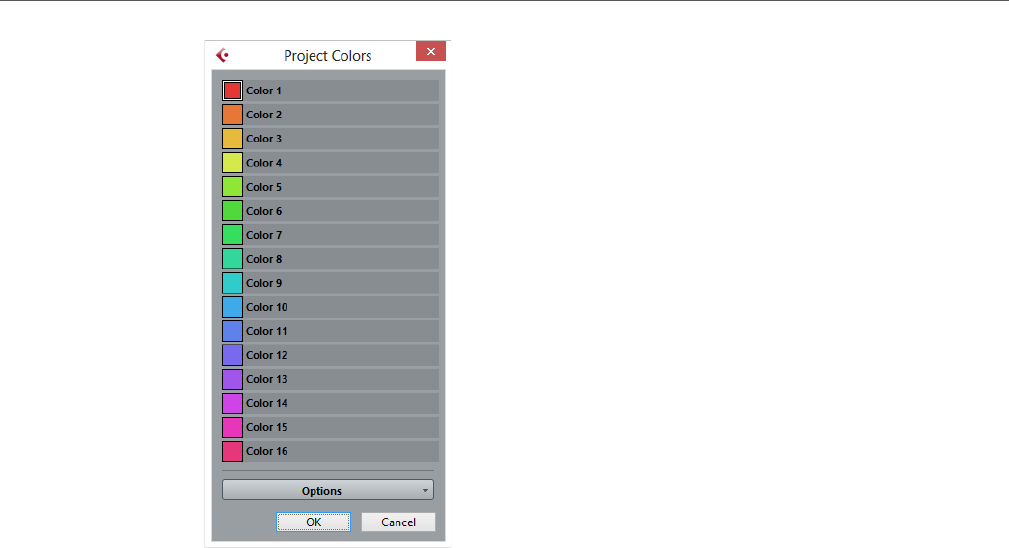
Customizing
Applying colors in the Project window
635
Color fields
Click a field to open a color selector pane that allows you to specify a new color.
Click Options for the following options.
Append New Color
Adds a new color button at the bottom of the color list.
Insert New Color before Selection
Adds a new color button above the selected color button.
Remove Selected Color
Removes the selected color.
Reset Selected Color
Resets the selected color to the factory settings.
Increase/Reduce Intensity of all Colors
Increases or reduces the intensity of all colors.
Increase/Reduce Brightness of all Colors
Increases or reduces the brightness of all colors.
Save Current Set as Program Defaults
Saves the current set of colors as default.
Load Program Defaults to Current Set
Applies the default set of colors.
Reset Current Set to Factory Settings
Returns to the standard color palette.
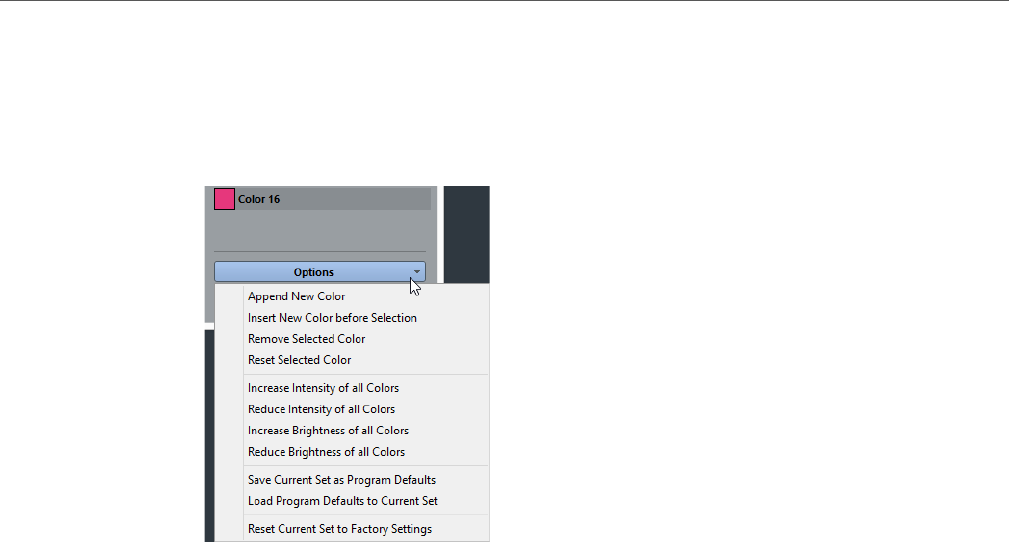
Customizing
Applying colors in the Project window
636
Adding and editing individual colors
You can use the Options menu in the Project Colors dialog to fully customize the
color palette.
The following options are available:
Append New Color
This adds a new color button at the bottom of the colors list. To define a color,
click the color button, and in the color selector pane that opens, define a color.
Insert New Color before Selection
This adds a new color button above the selected color button. To define a
color, click the color button, and in the color selector pane that opens, define
a color.
Remove Selected Color
This removes the selected color.
Reset Selected Color
This resets the selected color.
Increase/Reduce Intensity of all Colors
This increases or reduces the intensity of all colors.
Increase/Reduce Brightness of all Colors
This increases or reduces the brightness of all colors.
Save Current Set as Program Defaults
This saves the current set as default.
Load Program Defaults to Current Set
This applies the default set.
Reset Current Set to Factory Settings
This returns to Cubase’s standard color palette.

Customizing
Where are the settings stored?
637
Where are the settings stored?
As you have seen, there are a large number of ways in which you can customize
Cubase. While some of the settings you make are stored with each project, others
are stored in separate preference files.
If you need to transfer your projects to another computer (e. g. in another studio),
you can bring all your settings along by copying the desired preference files and
installing them on the other computer.
NOTE
It is a good idea to make a backup copy of your preference files once you have set
things up the way you want! This way, if another Cubase user wants to use his or
her personal settings when working on your computer, you can restore your own
preferences afterwards.
• On Windows systems, preference files are stored in the following location:
“\Users\<user name>\AppData\Roaming\Steinberg\<program name>\”.
On the Start menu, you will find a shortcut to this folder for easy access.
• On Mac OS X systems, preference files are stored in the following location:
“/Library/Preferences/<program name>/” under your home directory.
The full path is: “/Users/<user name>/Library/Preferences/<program
name>/”.
NOTE
The RAMpresets.xml file, which contains various presets settings (see below), is
saved when exiting the program.
NOTE
Program functions (e. g. crossfade) or configurations (e. g. panels) not used in the
project will not be stored.
Some of the preferences are not stored in the default preferences folder. A list can
be found in the Steinberg Knowledge Base.
To open the Knowledge Base, browse to the Steinberg web site, click “Support”
and choose “Knowledge Base” in the list on the left.
Updating from a Previous Version of Cubase
When you are updating from Cubase 6 or higher, the customized settings of your
previous installation are used for the new Cubase version.
When your previous Cubase version is older than Cubase 6, its settings are
discarded, and the default settings of the new version of Cubase are used.

Customizing
Where are the settings stored?
638
Disabling the Preferences
Sometimes you might experience odd program behaviour that can be due to
inconsistent preferences settings. In such a case, you should save your project and
relaunch Cubase. You can disable or delete the current preferences settings, and
load the factory defaults instead.
PROCEDURE
1. Quit Cubase.
2. Launch Cubase, and when the splash screen appears, hold down
[Shift]-[Ctrl]/[Command]-[Alt]/[Option].
3. Select one of the following options in the dialog that appears:
•Use current program preferences
Opens the program with the current preference settings.
•Disable program preferences
Disables the current preferences, and opens the program with the factory
default settings instead.
•Delete program preferences
Deletes the preferences and opens the program with the factory default
settings instead. This process cannot be undone. Note that this affects all
versions of Cubase installed on your computer.
RELATED LINKS
Preferences on page 645

639
Optimizing
Optimizing Audio Performance
This section gives you some hints and tips on how to get the most out of your
Cubase system, performance-wise. Some of this text refers to hardware properties
and can be used as a guide when upgrading your system. Look for details and
current information on the Cubase web site.
Performance Aspects
Tracks and Effects
The faster your computer, the more tracks, effects, and EQ you are able to play.
Exactly what constitutes a fast computer is almost a science in itself, but some hints
are given below.
Short Response Times (Latency)
Another aspect of performance is response time. The term “latency” refers to the
buffering, that is the temporary storing of small chunks of audio data during various
steps of the recording and playback process on a computer. The more and larger
those chunks, the higher the latency.
High latency is most irritating when playing VST instruments and when monitoring
through the computer, that is when listening to a live audio source via the Cubase
MixConsole and effects. However, very long latency times (several hundred
milliseconds) can also affect other processes like mixing, for example, when the
effect of a fader movement is heard only after a noticeable delay.
While Direct Monitoring and other techniques reduce the problems associated with
very long latency times, a system that responds fast will always be more convenient
to work with.
• Depending on your audio hardware, it may be possible to trim your latency
times, usually by lowering the size and the number of buffers.
• For details, refer to the audio hardware documentation.
Optimizing
Optimizing Audio Performance
640
System Factors That Affect Performance
RAM
The more RAM is installed in your computer, the better.
IMPORTANTIMPORTANTIMPORTANTIMPORTANT
On computers running a Windows 32-bit operating system, a running application
can address a maximum of 2 GB of RAM. On a Macintosh computer running 32-bit
Mac OS X, this limit is 4 GB. The 64-bit versions of Windows and Mac OS X are
able to assign considerably more than 4 GB of RAM to a running 64-bit application.
The RAM limitation is imposed by the operating system, and it is independent of the
amount of RAM that you may have installed in your computer.
Some program functions may use all the available memory, for example, recording,
the use of effect plug-ins, and the pre-loading of samples.
IMPORTANTIMPORTANTIMPORTANTIMPORTANT
When a function has used up all the memory made available by the operating
system, the computer will crash.
Always keep in mind the RAM limitation of your operating system when setting up
your projects.
RELATED LINKS
RAM Requirements for Recording on page 153
Smart Plug-In Processing on page 241
CPU and Processor Cache
The faster the computer processor, the better. But there are a number of factors that
affect the apparent speed of a computer: the bus speed and type (PCI is strongly
recommended), the processor cache size and of course, the processor type and
brand. Cubase relies heavily on floating point calculations. When shopping for a
processor, make sure that you get one that is powerful in calculating floating point
arithmetics.
Cubase features full support for multi-processor systems. If you own a computer
system with more than one processor, Cubase can take advantage of the total
capacity and evenly distribute the processing load to all available processors.
RELATED LINKS
Multi Processing on page 642

Optimizing
Optimizing Audio Performance
641
Hard Disk and Controller
The number of hard disk tracks that you can record and play back at the same time
also depends on the speed of your hard disk and hard disk controller. If you use
E-IDE disks and controllers, make sure that the transfer mode is DMA Busmaster.
Under Windows, you can check the current mode by launching the Windows
Device Manager and looking for properties of the IDE ATA/ATAPI controller’s
primary and secondary channel. DMA transfer mode is enabled by default, but may
be turned off by the system in case of hardware problems.
Audio Hardware and Driver
The hardware and its driver can have some effect on regular performance. A badly
written driver can reduce the performance of your computer. But where the
hardware driver design makes the most difference is with latency.
NOTE
We recommend that you use audio hardware for which there is a specific ASIO
driver.
This is especially true when using Cubase for Windows:
• Under Windows, ASIO drivers written specifically for the hardware are more
efficient than the Generic Low Latency ASIO Driver or a DirectX driver and
produce shorter latency times.
• Under Mac OS X, audio hardware with properly written Mac OS X (Core
Audio) drivers can be very efficient and produce very low latency times.
However, there are additional features currently only available with ASIO drivers,
such as the ASIO Positioning Protocol.
Settings That Affect Performance
Audio Buffer Settings
Audio buffers affect how audio is sent to and from the audio hardware. The size of
the audio buffers affects both the latency and the audio performance.
Generally, the smaller the buffer size, the lower the latency. On the other hand,
working with small buffers can be demanding for the computer. If the audio buffers
are too small, you may get clicks, pops or other audio playback problems.
• To adjust the buffer size settings under Mac OS X, select Devices > Device
Setup, and select the Device Setup dialog. You may also find buffer settings
in the control panel for the audio hardware.
• To adjust the buffer size settings under Windows, select Devices > Device
Setup, select the driver page, and click Control Panel.
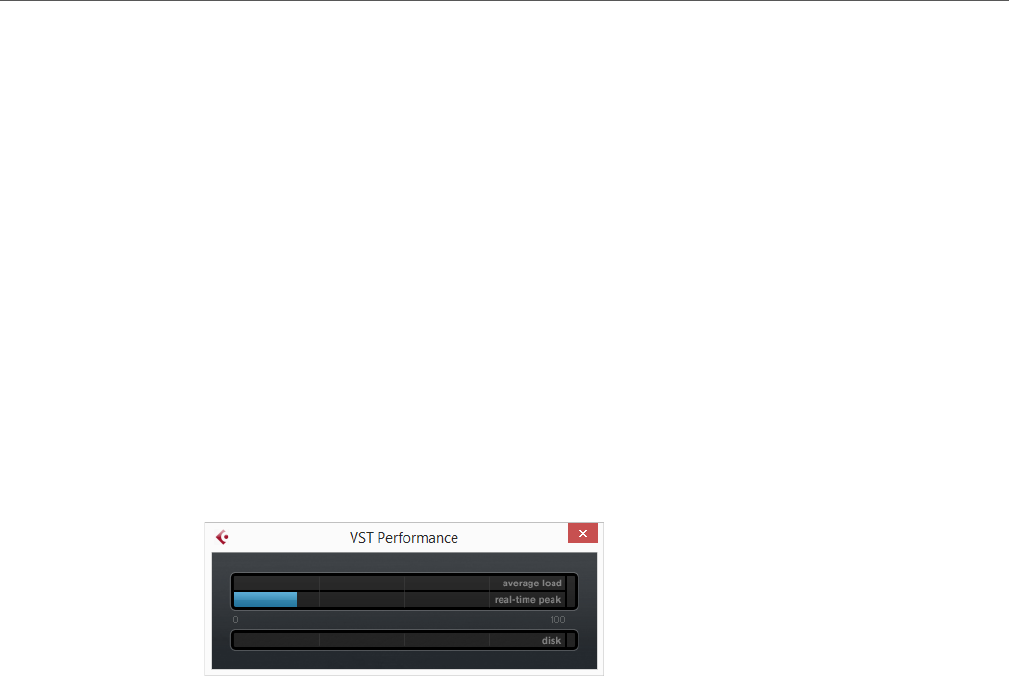
Optimizing
Optimizing Audio Performance
642
Multi Processing
When Multi Processing is activated and there is more than one CPU in your system,
the processing load is distributed evenly to all available CPUs, allowing Cubase to
make full use of the combined power of the multiple processors.
• To activate Multi Processing, select Devices > Device Setup, select VST
Audio System, and activate Multi Processing.
VST Performance Window
This window shows the audio processing load and the hard disk transfer rate. This
allows you to verify that you do not run into performance problems when adding
effects or plug-ins, for example.
• To open the VST Performance window, select Devices > VST
Performance.
Average load
Shows how much of the available CPU power is used for audio processing.
Real-time peak
Shows the processing load in the realtime path of the audio engine. The
higher this value, the higher the risk that dropouts occur.
Overload indicator
The overload indicator to the right of the real-time peak indicator and the
average load indicator displays overloads of the average or real-time
indicator.
If it lights up, decrease the number of EQ modules, active effects, and audio
channels that play back simultaneously. You can also activate the
ASIO-Guard.
Disk
Shows the hard disk transfer load.
Disk overload indicator
The overload indicator to the right of the disk indicator lights up if the hard disk
does not supply data fast enough.
If it lights up, use Disable Track to reduce the number of tracks playing back.
If this does not help, you need a faster hard disk.

Optimizing
Optimizing Audio Performance
643
NOTE
You can show a simple view of the performance meter on the Transport panel and
on the Project window toolbar. These meters only feature the average and the disk
indicator.
ASIO-Guard
The ASIO-Guard allows you to shift as much processing as possible from the ASIO
realtime path to the ASIO-Guard processing path. This results in a more stable
system.
The ASIO-Guard allows you to preprocess all channels as well as VST instruments
that do not need to be calculated in realtime. This leads to less dropouts, the ability
to process more tracks or plug-ins, and the ability to use smaller buffer sizes.
ASIO-Guard Latency
High ASIO-Guard levels lead to an increased ASIO-Guard latency. When you
adjust a volume fader, for example, you will hear the parameter changes with a slight
delay. The ASIO-Guard latency, in contrast to the latency of the audio hardware, is
independant from live input.
Restrictions
The ASIO-Guard cannot be used for:
• Realtime-dependent signals
• External effects and instruments
• Plug-ins that have a different bit version than the operating system
NOTE
If you select Devices > Plug-in Manager and click Show Plug-in
Information, you can deactivate the ASIO-Guard option for selected
plug-ins.
If you activate the monitoring for an input channel, a MIDI or a VST instrument
channel, the audio channel and all dependent channels are automatically switched
from ASIO-Guard to realtime processing and vice versa. This results in a gentle
fade out and fade in of the audio channel.
Activating the ASIO-Guard
PROCEDURE
1. Select Devices > Device Setup.
2. In the Device Setup dialog, open the VST Audio System page.

Optimizing
Optimizing Audio Performance
644
3. Activate the Activate ASIO-Guard option.
NOTE
This option is only available, if you activate Multi Processing.
4. Select an ASIO-Guard Level.
The higher the level, the higher the processing stability and audio processing
performance. However, higher levels also lead to an increased ASIO-Guard latency
and memory usage.
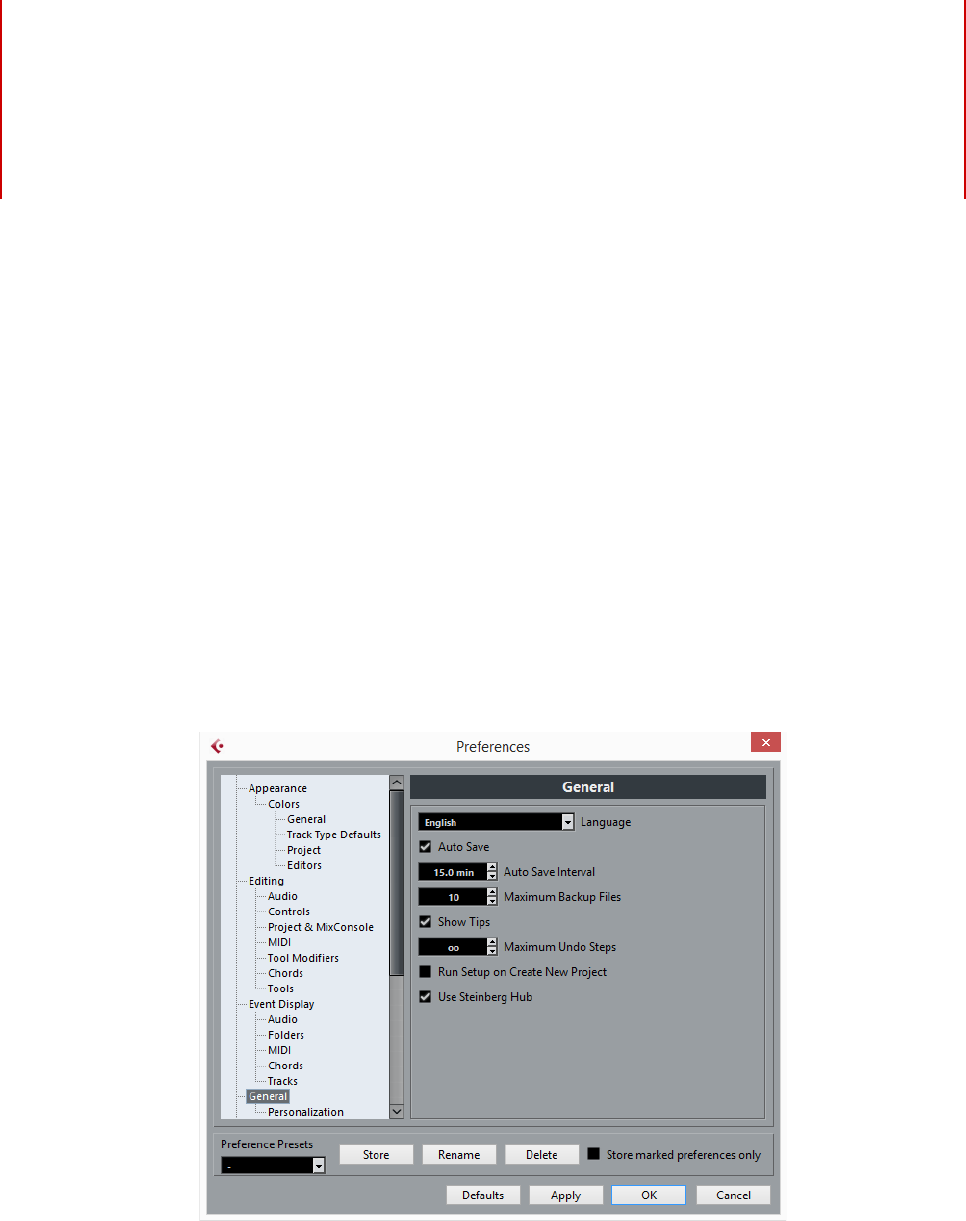
645
Preferences
The Preferences dialog provides options and settings that control the global
behavior of the program.
Preferences Dialog
The Preferences dialog is divided into a navigation list and a settings page. Clicking
one of the entries in the navigation list opens a settings page.
• To open the Preferences dialog, select File > Preferences.
In addition to the settings, the dialog provides the following options:
Preference Presets
Allows you to select a saved preference preset.
Store
Allows you to save the current preferences as a preset.
Rename
Allows you to rename a preset.

Preferences
Preferences Dialog
646
Delete
Allows you to delete a preset.
Store marked preferences only
Allows you to select which pages are included in the preset.
Help
Opens the dialog help.
Defaults
Resets the options on the active page to their default settings.
Apply
Applies any changes that you have made without closing the dialog.
OK
Applies any changes that you have made and close the dialog.
Cancel
Closes the dialog without saving any changes.
Saving a Preference Preset
You can save complete or partial preference settings as presets.
PROCEDURE
1. Select File > Preferences.
2. In the Preferences dialog make your settings.
3. Click the Store button in the lower left section of the dialog.
4. Enter a preset name and click OK.
RESULT
Your settings are now available on the Preferences Presets pop-up menu.
Saving Partial Preferences Settings
You can save partial preferences settings. This is useful when you have made
settings that only relate to a certain project or situation, for example. When you
apply a saved partial preference preset you only change the saved settings. All other
preferences will be left unchanged.
PROCEDURE
1. Select File > Preferences.
2. In the Preferences dialog make your settings.
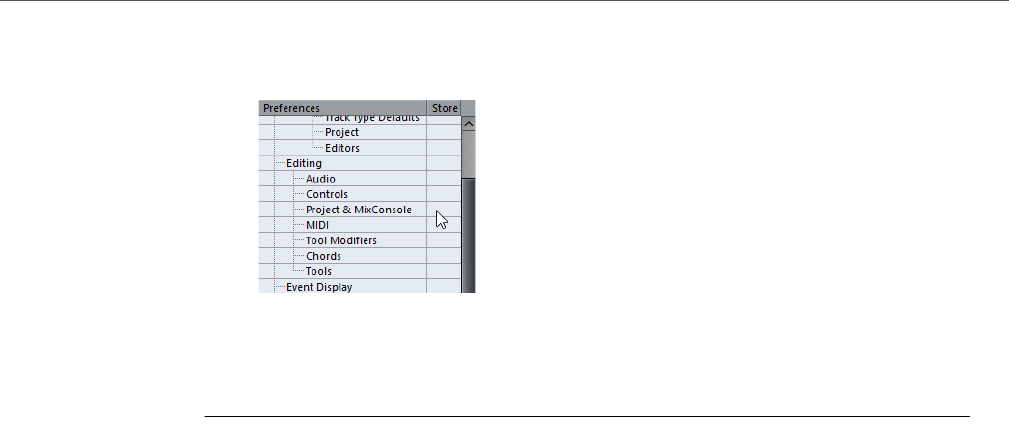
Preferences
Appearance
647
3. Activate Store marked preferences only.
In the preferences list a Store column is shown.
4. Click in the Store column of the preference pages that you want to save.
5. Click Store in the lower left section of the dialog.
6. Enter a preset name and click OK.
RESULT
Your settings are now available from the Preferences Presets pop-up menu.
Appearance
Colors
This page features subpages that allow you to change the default color settings.
General
Allows you to adjust the default colors for the general interface of the
program.
Track Type Defaults
Allows you to adjust the default colors for the different track types.
Project
Allows you to adjust the default colors in the Project window.
Editors
Allows you to adjust the default colors in the editors.
MixConsole Faders
Allows you to adjust the default colors for the level faders of the channel types
in the MixConsole.
MixConsole Racks
Allows you to adjust the default colors for the racks in the MixConsole.

Preferences
Editing
648
MixConsole Channel Strip
Allows you to adjust the default colors for the channel strips in the
MixConsole.
Editing
Select Track on Background Click
This allows you to select a track by clicking in the event display background.
Auto Select Events under Cursor
If this option is activated, all events in the Project window or in an editor that
are currently touched by the project cursor are automatically selected. This
can be helpful when you rearrange your project, because it allows you to
select whole sections (on all tracks) simply by moving the project cursor.
Cycle Follows Range Selection
If this is activated, range selections that you make in the Sample Editor will
be mirrored in the Project window as well. This lets you audition a range in
the Sample Editor as a loop with the main transport controls, rather than with
the Audition and Audition Loop controls in the Sample Editor.
Delete Overlaps
If this is activated and you move, size, or nudge an event so that it partly
overlaps another event, the other event is automatically resized so that the
overlapped (hidden) section is removed. Hold [Shift] while moving to override
this setting.
Link Editors
When this is activated, the parts or events shown in the open editor windows
will follow the selection that you make in the Project window.
Parts Get Track Names
If this is activated and you move an event from one track to another, the moved
event will automatically be named according to its new track. Otherwise, the
event will retain the name of the original track.
Quick Zoom
If this option is activated, the contents of parts and events will not be
continuously redrawn when you zoom manually. Instead, the contents are
redrawn once you have stopped changing the zoom – activate this if screen
redraws are slow on your system.
Use Up/Down Navigation Commands for Selecting Tracks only
• When this option is deactivated and no event/part is selected in the
Project window, the up/down arrow keys on the computer keyboard are
used to step through the tracks in the track list.

Preferences
Editing
649
• When this option is deactivated and an event/part is selected in the
Project window however, the up/down arrow keys still step through the
tracks in the track list. Only on the currently selected track, the first
event/part will also be selected.
• When this option is activated, the up/down arrow keys are only used to
change the track selection – the current event/part selection in the
Project window will not be altered.
Track Selection follows Event Selection
If this option is activated and you select an event in the Project window, the
corresponding track is also automatically selected.
Automation Reduction Level
This setting determines the amount of reduction applied when you add
automation events by drawing or by using the Write function. When you write
or draw Automation events, they are added as a continuous stream of densely
packed events. The Reduction function will remove superfluous event points,
and the automation curve contains only the event points that are necessary to
reproduce your actions.
• The lower the reduction level, the more automation events are retained,
resulting in a more detailed automation curve. Usually the default setting
is sufficient.
• The minimum reduction level setting is not recommended as this will
simply retain a lot of unnecessary events.
Show Automation Track in Project on Writing Parameter
If you activate this option, the corresponding automation track is revealed on
writing automation parameters. This is useful if you want to have a visual
control of all parameters that are changed during writing.
Automation follows Events
If you activate this option, automation events will automatically follow when
you move an event or part on the track.
This facilitates setting up automation that is related to a specific event or part,
instead of a specific position in the project. For example, you can automate
the panning of a sound effect event (having the sound pan from left to right,
etc.) – if you need to move the event, the automation will automatically follow.
The rules are:
• All automation events for the track between the start and end of the
event or part will be moved. If there are automation events in the position
to which you move the part or event, these will be overwritten.
• If you duplicate an event or part (by holding [Alt]/[Option] and dragging
or by using the Duplicate or Repeat functions) the automation events
will also be duplicated as well.
• This function also affects copying and pasting.

Preferences
Editing
650
Drag Delay
When you click and drag an event, this setting determines the delay before
the event is moved. This helps you avoid accidentally moving events when you
click on them in the Project window.
Editing - Audio
Treat Muted Audio Events like Deleted
If you have two overlapping audio events in your project and you mute the top
one (the event you hear during playback), playback of the other (obscured)
event will still only start at the end of the overlapping section.
If this is not what you want, Treat Muted Audio Events like Deleted allows
you to immediately play the obscured event when muting the top event.
Use Mouse Wheel for Event Volume and Fades
• If this is activated, you can use the mouse wheel to move the event
volume curve up or down.
• When you hold down [Shift] while moving the mouse wheel, the fade
curves will be affected. To move the end point of the fade in, position
the mouse in the left half of the event. To move the start point of the fade
out, position the mouse in the right half of the event.
On Import Audio Files
This setting determines what happens when importing an audio file into a
project:
•Open Options Dialog
An Import Options dialog opens when you import, allowing you to select
whether you want to copy the file to the audio folder and/or convert it to
the project settings.
•Use Settings
Allows you to set the following standard actions:
Copy Files to Working Directory copies the files to the project’s audio
folder before import.
Convert and Copy to Project If Needed copies the files to the
project’s audio folder before import and converts them if the files have
a different sample rate or a lower resolution than the project settings.
Enable Automatic Hitpoint Detection
If this is activated, and you add an audio file to your project by recording or by
importing, Cubase automatically detects its hitpoints. This allows you to
navigate to hitpoints of an audio file from within the Project window.
Remove Regions/Hitpoints on all Offline Processes
If this is activated and you perform offline processing on an audio range that
contains regions, these will be removed.

Preferences
Editing
651
On Processing Shared Clips
This setting determines what happens when you apply processing to a shared
clip, that is a clip that is used by more than one event in the project:
•Open Options Dialog
An Options dialog appears, allowing you to select whether you want to
create a new version of the clip or apply the processing to the existing
clip.
•Create New Version
A new editing version of the clip is automatically created, and the
processing is applied to that version (leaving the original clip
unaffected).
•Process Existing Clip
The processing is applied to the existing clip (which means that all
events playing that clip will be affected).
Default Warping Algorithm
Determines which warp algorithm is used for new audio clips in the project.
Editing - Controls
Many Cubase parameters are shown as rotary encoders, sliders, and buttons that
emulate hardware interfaces. Others are edited numerically in value fields. This
page allows you to select the preferred ways of controlling encoders, sliders, and
value fields.
Value Box/Time Control Mode
The menu contains the following options:
•Text Input on Left-Click
In this mode, clicking a value box will open it for editing by typing.
•Increment/Decrement on Left/Right-Click
In this mode, you can click with the left or right mouse button to
decrease or increase the value. To edit values by typing in this mode,
please double-click. Under Mac OS X, right-clicking is the same as
[Ctrl]/[Command]-clicking. We recommend that you use a two-button
mouse and set up the right button to generate a [Ctrl]/[Command]-click.
•Increment/Decrement on Left-Click and Drag
In this mode, you can click and drag up or down to adjust the value
(much like dragging a vertical fader). Double-click to enter values
manually.

Preferences
Editing
652
Knob Mode
The menu contains the following options:
•Circular
To move an encoder, click on it and drag in a circular motion, such as
turning a real encoder. When you click anywhere along the encoder’s
edge, the setting is immediately changed.
•Relative Circular
Works like the Circular option, but clicking does not automatically
change the setting. This means you can make adjustments to the
current setting by clicking anywhere on an encoder and dragging. There
is no need to click on the exact current position.
•Linear
To move an encoder, click on it and drag up or down (or left or right)
with the mouse button pressed – as if the encoder was a vertical (or
horizontal) slider.
Slider Mode
The menu contains the following options:
•Jump
In this mode, clicking anywhere on a slider will make the slider handle
instantly move to that position.
•Touch
In this mode, you have to click on the actual slider handle to adjust the
parameter. This reduces the risk of accidentally moving sliders.
•Ramp
In this mode, clicking anywhere on a slider (but not on the actual handle)
and keeping the mouse button pressed causes the handle to move
smoothly to the new position.
•Relative
In this mode, clicking on a slider will not immediately change the setting.
Instead you click and drag up or down – the setting will be changed
according to how far you drag, not according to where you click.
Editing - MIDI
Select Controllers in Note Range: Use Extended Note Context
When this is activated and you move notes together with their controllers, for
example, in the Key Editor, the extended note context will be taken into
account. This means that controllers between the last selected note and the
following note (or the end of the part) will also be moved. When this is
deactivated, only the controllers between the first and the last selected note
will be moved.

Preferences
Editing
653
Legato Overlap
Determines the result of the Legato function on the MIDI menu.
•If Legato Overlap is set to 0 Ticks, the Legato function extends each
selected note so that it reaches the next note exactly.
•Setting Legato Overlap to a positive value causes the notes to overlap
by the specified number of ticks.
•Setting Legato Overlap to a negative value makes the Legato function
leave a slight gap between the notes.
Legato Mode: Between Selected Notes Only
When this is activated, the length of selected notes will be adjusted so that
they reach the next selected note, allowing you to apply Legato only to your
bass line, for example.
Split MIDI Events
If you split a MIDI part in the Project window (with the Cut tool or one of the
split functions) so that the split position intersects one or several MIDI notes,
the result depends on this setting.
•If Split MIDI Events is activated, the intersected notes are split. This
creates new notes at the beginning of the second part.
•If Split MIDI Events is deactivated, the notes will remain in the first part,
but stick out after the end of the part.
Split MIDI Controllers
If you split a MIDI part containing controllers, the result depends on this
setting:
• If Split MIDI Controllers is activated and the part contains a controller
with a value other than zero at the split position, a new controller event
(of the same type and value) will be inserted at the split position (at the
start of the second part).
• If Split MIDI Controllers is deactivated, no new controller events will be
inserted.
NOTE
If you just split a part and play back the result, it will sound the same
regardless of this setting. However, if you split a part and delete the first half
or move the second half to a different position in the project, you may want to
activate Split MIDI Controllers to make sure all controllers have the correct
value at the beginning of the second part.

Preferences
Editing
654
Editing - Project & MixConsole
Select Channel/Track on Solo
When you activate this option, a track in the track list or a channel in the
MixConsole automatically gets selected when the Solo button is activated.
Deactivating this option always keeps the current selection status, regardless
of the solo setting for the tracks.
Select Channel/Track on Edit Settings
When you activate this option, a track in the track list or a channel in the
MixConsole automatically gets selected when you click the respective edit
button (e). Deactivating this option always keeps the current track/channel
selection.
Scroll To selected Track
If you activate this option, selecting a MixConsole channel automatically
scrolls the track list to display the respective track.
Enable Record on Selected Audio Track
When this is activated, selected audio tracks are automatically record
enabled.
Enable Record on Selected MIDI Track
When this is activated, the selected MIDI tracks are automatically record
enabled.
Enable Solo on Selected Track
When this is activated, the selected tracks are automatically soloed.
Enlarge Selected Track
Activate this option to enter a mode where the selected track in the Project
window will be enlarged. You can adjust the size directly in the track list if the
default enlargement factor does not suit you. When you select another track
in the track list, this track is automatically enlarged, and the previously
selected track is displayed in its previous size.

Preferences
Editing
655
Editing - Tool Modifiers
On this page you can specify which modifier keys are used for additional
functionality when using tools.
PROCEDURE
1. Select an option in the Categories list.
2. Select the action for which you want to edit the modifier key in the Action list.
3. On your computer keyboard, hold down the modifier keys and click Assign.
RESULT
The current modifier key(s) for the action is replaced. If this tool already has
assigned modifier key(s), you will be asked whether you want to replace them.
Editing - Chords
‘X’ Chords Mute Notes on Tracks That are in Follow Chord Track Mode
This determines what happens when you play back a track that follows the
chord track and the cursor reaches an undefined chord event (X chord).
Activate this option to mute playback. Deactivate this option to continue
playback of the last defined chord event.
Disable ‘Acoustic Feedback’ during Playback
If you activate this option, Acoustic Feedback is automatically disabled on
playback. This ensures that chord events are not triggered twice.
Hide muted Notes in Editors
If you set up a MIDI track to follow the chord track by activating one of the
Follow Chord Track options, some of the original MIDI notes may be muted.
Activate this option to hide these notes in the editors.
Editing - Tools
Select Tool: Show Extra Info
Activate this to show a tooltip for the Object Selection tool in the Project
window event display. This tooltip indicates the current pointer position and
the name of the track and event at which you are pointing.
Zoom Tool Standard Mode: Horizontal Zooming Only
This affects the result when using the Zoom tool (magnifying glass).
If this is activated and you drag a selection rectangle with the Zoom tool, the
window is only zoomed horizontally and the track height does not change. If
this option is deactivated, the window is zoomed both horizontally and
vertically.

Preferences
Event Display
656
Pop-up Toolbox on Right-Click
If this is activated, the toolbox opens on right-click in the event display and
editors. You can change the number of rows in which the tools are arranged
on the toolbox. Keep the right mouse button pressed until the mouse pointer
changes to a double arrow and drag to the bottom or right.
• To open the context menu instead of the toolbox, press any modifier key
when right-clicking.
Cross-Hair Cursor
This allows you to set up a cross-hair cursor when working in the event display
and editors, facilitating navigation and editing, especially when arranging in
large projects. You can set up the colors for the line and the mask of the
cross-hair cursor, and define its width. The cross-hair cursor works as
follows:
•If the Selection tool (or one of its subtools) is selected, the cross-hair
cursor appears when you start moving or copying a part/event or when
you use the event trim handles.
•If the Draw tool, the Cut tool, or any other tool that makes use of this
function is selected, the cross-hair cursor appears as soon as you move
the mouse over the event display.
• The cross-hair cursor is only available for tools where such a function is
of any use.
Event Display
The Event Display section contains several settings for customizing the display in
the Project window.
Show Event Names
Determines whether the names of parts and events are shown.
Hide Truncated Event Names
When zooming or resizing elements, the events can become very small so that
the name is no longer completely visible. The name gets truncated. If this
option is activated, event names are hidden if they do not fit into the event.
Show Overlaps
When events overlap, this setting allows you to specify when the overlapping
areas are displayed.
Grid Overlay Intensity
Increases or decreases the overlay intensity of the displayed grid lines.
Event Handling Opacity
Increases or decreases the opacity of an overlying event background when
you move it.

Preferences
Event Display
657
Smallest Track Height To Show Data
Specifies from which track height the track contents are displayed.
Smallest Track Height To Show Name
Specifies from which track height the track names are displayed.
Event Display - Audio
Interpolate Audio Waveforms
If you have zoomed in to one sample per pixel or less, the appearance of the
samples depends on this setting. If the option is deactivated, single sample
values are drawn as steps. If the option is activated, the sample values are
interpolated to form curves.
Show Event Volume Curves Always
If activated, event volume curves, as created by the fade and volume handles,
are shown for all events, regardless of whether they are selected or not. When
the option is deactivated, volume curves are only shown for selected events.
However, note that you can still adjust fades and volumes for events that are
not selected, by clicking and dragging the top left, middle, or right edge
respectively.
Show Waveforms
If activated, audio waveforms are displayed for audio events.
Show Hitpoints on Selected Events
If activated, hitpoints are displayed for audio events.
Waveform Brightness
Increases or decreases the brightness of the displayed waveforms.
Waveform Outline Intensity
Increases or decreases the intensity of the waveform outline.
Fade Handle Brightness
Increases or decreases the brightness of the set fade lines within audio
events.
Background Color Modulation
When this is activated, the backgrounds of audio waveforms reflect the
waveform dynamics. This is especially useful to get an overview when working
with small track heights.

Preferences
Event Display
658
Event Display - MIDI
Default Edit Action
Determines which editor is opened when you double-click a MIDI part or
when you select it and press [Ctrl]/[Command]-[E]. Note that this setting is
overwritten for tracks with drum maps if the Edit as Drums when Drum Map
is assigned option is activated.
Part Data Mode
Determines if and how events in MIDI parts are shown: not shown, as lines,
as score notes, as drum notes, or as blocks. Note that this setting is
overwritten for tracks with drum maps if the Edit as Drums when Drum Map
is assigned option is activated.
Show Controllers
Governs whether non-note events such as controllers, etc. are shown in MIDI
parts.
Note Brightness
Increases or decreases the brightness of note events.
Controller Brightness
Increases or decreases the brightness of controller events.
Edit as Drums when Drum Map is assigned
If this is activated, parts on MIDI tracks to which drum maps are assigned are
shown with drum note symbols. The parts will automatically open in the Drum
Editor on double-click. This overwrites the Default Edit Action setting.
Event Display - Chords
Pitch Notation
• The Note Name pop-up menu lets you select between three ways of
displaying chords.
• The Naming Format pop-up menu lets you determine how MIDI note
names (pitches) are displayed in editors, etc.
• The options Display ‘Bb’ as ‘B’ and Display ‘B’ as ‘H’ allow you to
change the corresponding pitch names.
Chord Font
Allows you to specify a font for all chord symbols.
Chord Symbols
There are several ways of indicating chord types, for example, major and minor
chords. These options allow you to select your preferred display method for
major 7th chords, minor chords, half-diminished chords, diminished chords,
and augmented chords.

Preferences
General
659
Event Display - Tracks
Colorize Track Controls
This slider allows you apply the track color to the track controls. Drag the
slider to the right to intensify the color.
Colorize Only Folder Track Controls
Activate this to restrict the effect of the Colorize Track Control function to
folder tracks only. This is useful in projects with a large number of tracks and
folder tracks.
Default Track Name Width
Allows you to determine the default name width for all track types.
Auto Track Color Mode
This offers you several options for automatically assigning colors to tracks that
are added to the project:
•Use Default Track Color
New tracks get the default event color.
•Use Previous Track Color
New tracks get the same color as the track above them in the track list.
•Use Previous Track Color + 1
This is similar to the Use Previous Track Color option, except that the
new tracks get the next color in the color palette.
•Use Last Applied Color
New tracks get the color that you last applied to an event/part.
•Use Random Track Color
Inserted tracks get random track colors.
General
The General page contains general settings that affect the program user interface.
Set these according to your preferred work methods.
Language
Allows you to select which language is used in the program. After switching
the language, you must restart the program for the change to take effect.
Auto Save
If this is activated, Cubase automatically saves backup copies of all open
projects with unsaved changes. These are named Name.bak, where name is
the name of the project, and are saved in the project folder. Backup copies of
unsaved projects are named #UntitledX.bak where X is an incremental
number, to allow multiple backup copies in the same project folder.

Preferences
General
660
Auto Save Interval
Allows you to specify how often a backup copy is created.
Maximum Backup Files
Allows you to specify how many backup files will be created with the Auto
Save function. When the maximum number of backup files is reached, the
existing files will be overwritten (starting with the oldest file).
Show Tips
If this is activated and you position the pointer over an icon or button in
Cubase, an explanatory tooltip is displayed after a second.
Maximum Undo Steps
Allows you to specify the number of undo levels.
Run Setup on Create New Project
If this is activated, Cubase automatically displays the Project Setup dialog
every time you create a new project. This allows you to specify the basic
project configuration.
Use Steinberg Hub
Activate this option to open Steinberg Hub when you start Cubase or create
a new project using the File menu.
General - Personalization
Default Author Name
Allows you to specify an author name that is used by default for new projects.
This will be included as metadata when exporting audio files with an iXML
chunk.
Default Company Name
Allows you to specify a company name that is used by default for new
projects. This will be included as metadata when exporting audio files with an
iXML chunk.

Preferences
MIDI
661
MIDI
This page contains settings that affect MIDI recording and playback.
MIDI Thru Active
If this is activated, all MIDI tracks that are record enabled or have monitoring
activated will “echo” incoming MIDI data, sending it back out on their
respective MIDI outputs and channels. This allows you to hear the correct
sound from your MIDI instrument during recording.
NOTE
If you use MIDI Thru, select Local Off mode on your MIDI instrument to
prevent each note from sounding twice.
Reset on Stop
If this is activated, Cubase sends out MIDI Reset messages (including noteoff
and controller resets) on stop.
Never Reset Chased Controllers
If this is activated, controllers are not reset to 0 when you stop playback or
move to a new position in the project.
Length Adjustment
This allows you to enter a length adjustment value in ticks by which the notes
that have the same pitch and MIDI channel are adjusted. This ensures that
there is always a short time between the end of one note and the start of
another. By default, there are 120 ticks per 1/16 note, but you can adjust this
with the MIDI Display Resolution setting.
Chase Events
Event types for which an option is activated are chased when you locate to a
new position and start playback. This makes your MIDI instruments sound as
they should when you locate to a new position and start playback.
If Chase not limited to Part Boundaries is activated, MIDI controllers are
also chased outside the part boundaries, and the chase is performed on the
part touched by the cursor as well as on all the parts to the left of it. Deactivate
this for very large projects, as it slows down processes such as positioning
and soloing.
MIDI Display Resolution
This allows you to set the display resolution for viewing and editing MIDI data.
This only affects how MIDI events are displayed and not how they are
recorded.
Insert Reset Events after Record
If this is activated, a reset event is inserted at the end of each recorded part.
This resets controller data, such as Sustain, Aftertouch, Pitchbend,
Modulation, Breath Control. This is useful if you stop recording before the
note off command is sent, for example.

Preferences
MIDI
662
MIDI Max. Feedback in ms
This allows you to set the maximum length of the notes when using Acoustic
Feedback in MIDI editors.
MIDI - MIDI File
Export Options
These options allow you to specify what data is included in exported MIDI files.
Export Inspector Patch
If this is activated, the MIDI patch settings in the Inspector - Bank Select and
Program Select (used for selecting sounds in the connected MIDI instrument)
are included as MIDI Bank Select and Program Change events in the MIDI file.
Export Inspector Volume/Pan
If this is activated, Volume and Pan settings made in the Inspector are
included as MIDI Volume and Pan events in the MIDI file.
Export Automation
If this is activated, the automation data (just as it is heard during playback) is
converted to MIDI controller events and included in the MIDI file. Cubase
Elements only: This also includes automation recorded with the MIDI Control
plug-in.
Note that if a continuous controller (e. g. CC7) has been recorded but the
Read button is deactivated for the automation track (i. e. the automation is
effectively switched off for this parameter), only the part data for this controller
will be exported.
If this option is deactivated and the Read Automation button is activated, no
continuous controllers will be exported. If the Read button is deactivated, the
controller data of the MIDI part are exported (these will now be handled like
“regular” part data).
It is recommended to activate the “Export Automation” option.
Export Inserts
If this is activated, any MIDI modifiers that you have added will be included in
the MIDI file.
Export Markers
If this is activated, any markers you have added will be included in the MIDI
file as Standard MIDI File Marker events.

Preferences
MIDI
663
Export as Type 0
If this is activated, the MIDI file will be of Type 0 (all data on a single track, but
on different MIDI channels). If you do not check this option, the MIDI file will
be of Type 1 (data on separate tracks). Which type to choose depends on
what you want to do with the MIDI file (in which application or sequencer it is
to be used).
Export Resolution
You can specify a MIDI resolution between 24 and 960 for the MIDI file. The
resolution is the number of pulses, or ticks, per quarter note (PPQ) and
determines the precision with which you will be able to view and edit the MIDI
data. The higher the resolution, the higher the precision. The resolution should
be chosen depending on the application or sequencer with which the MIDI file
will be used though, because certain applications and sequencers may not be
able to handle certain resolutions.
Export Locator Range
If this is activated, only the range between the left and right locator will be
exported.
Export includes Delay
If this is activated, any delay settings you have made in the Inspector will be
included in the MIDI file.
NOTE
To include other Inspector settings, you must convert the settings to real MIDI
events and properties by using the Merge MIDI in Loop function for each track.
NOTE
Exported MIDI files include the tempo and time signature events of the Tempo
Track Editor or, if the tempo track is deactivated, the current tempo and time
signature.
Import Options
These options allow you to specify what data is included in imported MIDI files.
Extract First Patch
If this is activated, the first Program Change and Bank Select events for each
track are converted to Inspector settings for the track.
Extract First Volume/Pan
If this is activated, the first MIDI Volume and Pan events for each track are
converted to Inspector settings for the track.

Preferences
MIDI
664
Import Controller as Automation Tracks
If this is activated, MIDI controller events in the MIDI file will be converted to
automation data for the MIDI tracks. If this is deactivated, controller data for
the MIDI parts will be imported.
Import to Left Locator
If this is activated, the imported MIDI file will be placed so that it starts at the
position of the left locator - otherwise it will start at the beginning of the
project. Note that if you choose to have a new project created automatically,
the MIDI file will always start at the beginning of the project.
Import Markers
If this is activated, any markers that have been added are imported with the
MIDI file.
Import dropped File as single Part
If this is activated and you drag and drop a MIDI file into the project, the whole
file will be placed on a single track.
Ignore Master Track Events on Merge
If this is activated and you import a MIDI file into the current project, tempo
track data in the MIDI file is ignored. The imported MIDI file will play according
to the current Tempo track in the project.
If this option is deactivated, the Tempo Track Editor will be adjusted
according to the tempo information in the MIDI file.
Auto Dissolve Format 0
If this is activated and you import a MIDI file of type 0 into the project, the file
will automatically be “dissolved”: For each embedded MIDI channel in the file,
a separate track will be inserted in the Project window.
If this is deactivated, only one MIDI track will be created. This track will be set
to MIDI Channel “Any”, allowing all MIDI events to play back on their original
channels. You can also use the “Dissolve Part” function on the MIDI menu to
distribute the events onto different tracks (or lanes) with different MIDI
Channels at a later stage.
Destination
This allows you to specify what happens when you drag a MIDI file into the project:
•Select MIDI Tracks to create MIDI tracks for the imported file.
•Select Instrument Tracks to create instrument tracks for each MIDI
channel in the MIDI file and let the program automatically load
appropriate presets.
•Select HALion Sonic SE multi-timbral to create several MIDI tracks,
each routed to a separate instance of HALion Sonic SE in the VST
Instruments window and load the appropriate presets.
NOTE
In Cubase LE, this is automatically set to MIDI Tracks.

Preferences
MediaBay
665
Import Karaoke Lyrics as Text
Activate this to convert karaoke lyrics in the MIDI file to text that can be
displayed in the Score Editor. If this is deactivated, lyrics are only shown in
the List Editor.
MIDI - MIDI Filter
This page allows you to prevent certain MIDI messages from being recorded and/or
echoed by the MIDI Thru function (thruput). The page is divided into four sections:
Record
Activating any of these options prevents the corresponding type of MIDI
message from being recorded. It will, however, be thruput, and if already
recorded, it will play back normally.
Thru
Activate any of these options to prevent the corresponding type of MIDI
message from being thruput. It will, however, be recorded and played back
normally.
Channels
If you activate a Channel button, no MIDI messages on that MIDI Channel will
be recorded or thruput. Already recorded messages will however be played
back normally.
Controller
Allows you to prevent certain MIDI controller types from being recorded or
thruput.
To filter out a controller type, select it from the list at the top of the section and
click “Add”. It will appear in the list below.
To remove a controller type from the list (allow it to be recorded and thruput),
select it in the lower list and click “Remove”.
MediaBay
Scan unknown File Types
Activate this to open and scan any file in the search location and ignore files
that cannot be recognized.
Maximum Items in Results List
This allows you to specify the maximum number of files that are displayed in
the Results list. This helps you to avoid unmanageably long lists of files in the
Results list.

Preferences
Metering
666
Show File Extensions in Results List
Activate this to display file name extensions in the Results list.
Scan Folders only when MediaBay is open
Activate this to scan Cubase for media files when the MediaBay window is
open. Otherwise, the folders are scanned in the background even when the
MediaBay window is closed.
NOTE
During playing back or recording no folder scans are performed.
Metering
Map Input Bus Metering to Audio Track (in Direct Monitoring)
This allows you to map the input bus metering to monitor-enabled audio
tracks, giving you the opportunity to watch the input levels of your audio tracks
when working in the Project window. For this to work, activate Direct
Monitoring in the Device Setup dialog.
• If this option is activated, audio tracks show the metering signal from the
input bus to which they are routed as soon as the track is
monitor-enabled. Note that the tracks are mirroring the input bus signal,
that is, you will see the same signal in both places. When using mapped
metering, any functions, such as trimming, that you apply to the audio
track are not reflected in its meters.
• If this option is not activated, metering works as usual.
Meters’ Peak Hold Time
This allows you to specify for how long the peak levels are held in the meters.
For this to work, deactivate Meters - Hold Forever in the MixConsole.
Meters’ Fallback
This allows you to specify how quickly the meters in the MixConsole return to
lower values after signal peaks.
Metering - Appearance
On this page you can assign colors to level meter values to quickly identify what
levels are reached. You can adjust the colors for the channel meter or the master
meter. For the master meter you can only make changes for the Digital Scale
scaling mode. Changes take effect when you click Apply or OK.

Preferences
Record
667
To adjust the levels and colors, activate the channel meter or master meter option
and proceed as follows:
• To specify the level for a color change, double-click a handle to the right of
the meter scale and enter the level (dB) value. Note that for dB values less
than 0, you must add a minus sign before the entered number. You can also
click a handle and drag it to a specific level. Press [Shift] for more accurate
positioning. Alternatively, you can nudge with the Arrow Up/Down keys. Press
[Shift] for faster positioning.
• To assign a color, click the upper or lower part of a handle so that a black
frame is shown, and use the color selector pane to select a color. Selecting
the same color for the upper and lower part of the handle results in a meter
that changes its colors gradually, while different colors indicate level changes
even more precisely.
• To add more color handles, click the Add button, or [Alt]/[Option]-click at a
level position to the right of the meter scale. Each new handle is automatically
associated with a default color.
• To remove a handle, select the handle and click the Remove button, or
[Ctrl]/[Command]-click the handle.
Record
This page contains settings related to audio and MIDI recording. Select one of the
available entries.
Record - Audio
Audio Pre-Record Seconds
This allows you to specify for how many seconds any incoming audio you play
is captured in buffer memory during playback or in stop mode.
When Recording Wave Files larger than 4GB
This allows you to specify what happens if you record Wave files that are
larger than 4 GB.
• To split the Wave file, activate Split Files.
Use this, if you work on a FAT32 file system that supports only file sizes
up to 4 GB.
• To save the Wave file as RF64 file, activate Use RF64 Format.
RF64 files use the .wav extension. However, they can only be opened
with an application that supports the RF64 standard.

Preferences
Record
668
Create Audio Images During Record
If this option is activated, Cubase calculates the waveform image and displays
it during the actual recording process.
NOTE
This realtime calculation uses some extra processing power.
Record - Audio - Broadcast Wave
This page allows you to specify the Description, Author, and Reference text
strings that are embedded in recorded Broadcast Wave files. The settings you
make here also appear as default strings in the Broadcast Wave Chunk dialog
when you export files to certain formats (not only Broadcast Wave files can contain
embedded information, but also Wave, Wave 64, and AIFF files).
Record - MIDI
Record-Enable allows MIDI Thru
Activate this option if you do not want record-enabled MIDI or instrument
tracks to echo incoming MIDI data. This prevents hearing doubled notes on
record-enabled tracks to which a VST instrument is assigned.
Snap MIDI Parts to Bars
Activate this to lengthen recorded MIDI parts automatically to start and end at
whole bar positions. If you are working in a Bars+Beats-based context, this
can make editing (Moving, Duplicating, Repeating, etc.) easier.
Solo Record in MIDI Editors
Activate this to automatically Record Enable a track when you open a part for
editing in a MIDI editor. For all other MIDI tracks Record Enable is deactivated
until you close the editor again.
This makes it easier to record MIDI data when you edit a part – you will always
be sure the recorded data ends up in the edited part and not on any other
track.
MIDI Record Catch Range in ms
When you record starting at the left locator, this setting helps you make sure
that the very start of the recording is included. If you raise the Record Catch
Range, Cubase will catch the events played just before the recording start
point, eliminating this problem.
Retrospective Record
When this is activated, the program captures MIDI input in buffer memory,
even when not recording. The contents of the buffer memory can then be
retrieved and turned into a MIDI part on a record enabled MIDI track. This
therefore allows you to capture any MIDI notes you play in stop mode or
during playback and later turn them into a recorded MIDI part.

Preferences
Transport
669
Use the “Retrospective Record Buffer Size” setting to determine how much
MIDI data can be captured in the buffer.
ASIO Latency Compensation Active by Default
This determines the initial state of the “ASIO Latency Compensation” button
in the track list for MIDI or instrument tracks.
If you record live on a VST instrument, you usually compensate the latency of
your audio card by playing too early. In consequence, the timestamps are
recorded too early. By activating this option, all recorded events are moved by
the current latency, and playback sounds like during the recording situation.
Replace Recording in Editors
This affects the result of recording in a MIDI editor when Replace Mode is
selected (Linear Record Mode on the Transport panel):
•None
Nothing is replaced, even though Replace Mode is selected.
•Controller
Only controller data is replaced, not notes.
•All
Replace mode works as usual - notes and controllers are replaced
when recording.
Transport
This page contains options related to playback, recording and positioning.
Playback Toggle triggers Local Preview
When this option is activated, you can use the [Space bar] on your keyboard
to start/stop “local” playback of the selected file in the Sample Editor or the
Pool.
When the Sample Editor is not open or when there is no audio file selected
in the Pool, the [Space bar] still toggles the “global” project playback.
If this option is deactivated, the [Space bar] is used to start/stop playback of
the project.
Zoom while Locating in Time Scale
If this option is activated, you can zoom in or out by clicking in the Ruler and
dragging down or up.
Cursor Width
Adjusts the width of the Project Cursor line.

Preferences
Transport
670
Return to Start Position on Stop
If this option is activated and you stop playback, the project cursor
automatically returns to the position where recording or playback last started.
If this option is deactivated and you stop playback, the project cursor remains
at the position where you stop playback.
If you click Stop again, the project cursor returns to the position where
recording or playback last started.
Deactivate Punch In on Stop
If this is activated, Punch In on the Transport panel is automatically
deactivated whenever you enter Stop mode.
Stop after Automatic Punch Out
If this is activated, playback will automatically stop after automatic Punch Out
(when the Project Cursor reaches the Right Locator and Punch Out is
activated on the Transport panel). If the Post-roll value on the Transport panel
is set to a value other than zero, playback will continue for the set time before
stopping.
Stop playback while winding
You can use the winding functions during playback. When this option is
activated, audio playback is stopped as soon as you click the Rewind or Fast
Forward buttons on the Transport panel.
When this option is deactivated, audio playback will continue until you release
the Rewind or Fast Forward button.
Wind Speed Options
These options affect the fast forward/rewind speed.
•If Adjust to Zoom is activated, the wind speed will be adapted to the
horizontal zoom factor.
If you zoom in very close for detailed editing, you probably do not want
to have a high fast forward/rewind speed. Because of this, the Speed
Factor does not have any effect in this mode. The Fast Wind Factor still
applies though.
•If Fixed is activated, the wind speed will always be the same regardless
of the horizontal zoom factor.
• Use the Speed Factor option to set the wind speed. You can set a
value between 2 and 50. The higher the value, the faster the wind speed
will be.
If Adjust to Zoom is activated, this has no effect.
• Use the Fast Wind Factor to set the wind speed multiple for fast
winding.
If you press [Shift] while fast forwarding or rewinding, the wind speed
will increase. The increase in speed is a multiple of the Speed Factor.
Meaning that if you set the Fast Wind Factor to 2, the wind speed will
be twice as fast. If you set it to 4, the wind speed will be four times as
fast, etc. You can set a value between 2 and 50.

Preferences
VST
671
Show Timecode Subframes
If this is activated, all frame based display formats (“.fps” and “.dfps”) will also
show subframes. There are 80 subframes per frame.
Stationary Cursors
If this option is activated, the Project cursor will be positioned in the middle of
the screen (if possible), and the window will scroll continuously during
playback (instead of moving from one “page” to the next).
Locate When Clicked in Empty Space
When this is activated, you can move the Project Cursor by clicking anywhere
in an “empty” area of the Project window.
Transport - Scrub
Scrub Volume
This lets you set the playback volume for the Scrub function in the Project
window and audio editors.
Use High Quality Scrub Mode
When you activate this option, effects are enabled for scrubbing and the
resampling quality is higher. However, scrubbing will be more demanding on
the processor.
Use Inserts While Scrubbing
When you activate this option, you can activate insert effects for scrubbing
with the shuttle speed control. By default, insert effects are bypassed.
VST
This page contains settings for the VST audio engine.
Connect Sends automatically for each newly created Channel
When this option is enabled, creating a new audio or group channel will
automatically connect the send routing for existing FX channels. Note that this
option is disabled by default to save memory resources.
Instruments use Automation Read All and Write All
If you deactivate this option, the Read and Write automation status in VST
instrument panels are not affected by the “Activate/Deactivate Read for All
Tracks” and “Activate/Deactivate Write for All Tracks” automation switches.
Mute Pre-Send when Mute
If this is activated, sends set to “Pre-fader” mode will be muted if you mute
their channels.

Preferences
VST
672
Default Send Level
This allows you to specify a default level for your send effects.
Group Channels: Mute Sources as well
By default, when you mute a group channel no audio will pass through the
group. However, other channels that are routed directly to that group channel
will remain unmuted. If any of those channels have cue sends routed to other
group channels, FX channels or output busses, those will still be heard.
If Group Channels: Mute Sources as well is activated, muting a group
channel will cause all other channels directly routed to it to be muted as well.
Pressing mute again will unmute the group channel and all other channels
directly routed to it. Channels that were muted prior to the group channel
being muted will not remember their mute status and will be unmuted when
the group channel is unmuted.
NOTE
Group Channels: Mute Sources as well does not affect how mute
automation is written. Writing mute automation on a group channel only
affects the group channel and not channels routed to it. When writing the
automation you will see the other channels being muted when this option is
checked. However, upon playback, only the group channel will respond to the
automation.
Delay Compensation Threshold (for Recording)
Cubase features full delay compensation - any delay inherent in the VST
plug-ins you use will automatically be compensated for during playback.
However, when you play a VST instrument in realtime or record live audio
(with monitoring through Cubase activated), this delay compensation may
result in added latency. To avoid this, you can click the Constrain Delay
Compensation button on the Project window toolbar. This function tries to
minimize the latency effects of the delay compensation, while maintaining the
sound of the mix as far as possible.
The Delay Compensation Threshold setting is a kind of “tolerance” setting for
the Constrain Delay Compensation function - only plug-ins with a delay higher
than this threshold setting will be affected by the Constrain Delay
Compensation function. By default, this is set to 0.0 ms, which means that all
plug-ins will be affected (e. g. turned off) when you activate Constrain Delay
Compensation. If you feel that a little latency is acceptable, you can raise this
threshold value.
Auto Monitoring
Determines how Cubase handles monitoring (listening to the input signal
during recording). The following options are available:
•Manual
This option allows you to turn input monitoring on or off by clicking the
monitor button in the track list, Inspector, or MixConsole.
•While Record Enabled
With this option you will hear the audio source connected to the
channel input whenever the track is record enabled.
Preferences
VST
673
•While Record Running
This option switches to input monitoring only during recording.
•Tapemachine Style
This option emulates standard tapemachine behavior: input monitoring
in Stop mode and during recording, but not during playback.
NOTE
The automatic monitoring options apply when you are monitoring through
Cubase, or when you are using ASIO Direct Monitoring. If you are monitoring
externally (listening to the input signal from an external mixer, for example),
select the “Manual” mode and keep all audio monitor buttons turned off in
Cubase.
Warn on Processing Overloads
When you activate this option, a warning message is displayed as soon as the
CPU overload indicator (on the Transport panel) lights up during recording.
VST - Plug-ins
Warn Before Removing Modified Effects
If this is activated, a dialog will appear whenever you remove an effect plug-in
for which you have made parameter changes, asking for confirmation as to
whether you really want to remove the effect.
If you do not want this dialog to appear and modified effects to be removed
without confirmation, leave this option deactivated.
Open Effect Editor after Loading it
When this is activated, loading an effect or VST instrument (e. g. in one of the
plug-in slots of the Send or Insert sections) will automatically open the control
panel for the plug-in.
Create MIDI track when loading VSTi (not in Cubase LE)
This pop-up menu allows you to what specify happens when you add a VSTi
in the VST Instruments window. The following options are available:
•Always
When this is selected, a corresponding MIDI track will always be
created when you add a VST instrument.
•Do not
When this is selected, no MIDI track will be created when you add a
VSTi in the VST Instruments window. This is the behavior from earlier
versions of Cubase.
•Always ask to
When this is selected, you will be asked whether a corresponding MIDI
track is created when you add a VSTi in the VST Instruments window.
Preferences
Video
674
Suspend VST3 plug-in processing when no audio signals are received
When this is activated, VST plug-ins will not consume any CPU power during
“silent” passages, i. e. when no audio is passing through them. This can
improve system performance noticeably.
NOTE
Note however that this might lead to situations where you loaded more
plug-ins in Stop mode than the system will be able to play back
simultaneously. As a safety measure, try playing back the part of your project
which contains the largest number of audio events to make sure that your
computer system can handle the current number of VST plug-ins.
Synchronize Plug-in Program Selection to Track Selection
If you route multiple MIDI tracks to multi-timbral instruments and activate this
option, track selection and plug-in program selection are synchronized.
Plug-in Editors “Always on Top”
When this is activated, the control panels for effect plug-ins and VST
instruments will always be shown on top of other windows.
Video
Extract Audio on Import Video File
If this option is activated and you import a video file, the audio data of the video
is automatically extracted and saved as a separate audio clip.
Thumbnail Memory Cache Size
The value entered here determines how much memory is available for
displaying thumbnails. The currently shown image of a video is buffered in the
thumbnail memory cache. Whenever you move to another image and there is
no memory capacity left, the “oldest” picture in the cache is replaced by the
current one. If you have long video clips and/or work with a large zoom factor,
you may have to raise this value.

675
Index
A
ACID® loops 296
Acoustic feedback 436
Activate Project 53
ADAT Lightpipe 567
Add Track 91
Add Track dialog 91
Adding chords 508
AES/SPDIF Digital Audio 567
AIFF files 557
Algorithms
Sample Editor 296
Time stretching 279
Aligning file and project attributes
Pool 333
All MIDI Inputs 15
Appearance
Colors 647
Metering 666
Applying Track Presets 103
Archive
Prepare 56
Arranger track 72
Arranger tracks
Adding 184
Creating a chain 185
Flattening 189
Renaming events 184
ASCII display
Editing byte values 504
ASIO
Direct Monitoring 13
ASIO devices
Plug and play support 13
ASIO Direct Monitoring 150
ASIO driver
DirectX setup 10
ASIO Latency Compensation
Active by Default 668
ASIO ports
Using for data only 580
ASIO-Guard 643
Aspect ratio
Video Player window 593
Audio
Handling 107
Overlapping 100
Slicing 303
Audio channels
Mixing down to file 551
Audio clips
About 107, 262
Audio clock
About 567
Audio effects
Using VST System Link 583
Audio events
About 107
Auditioning 109
Creating from regions 295
Editing in Sample Editor 282
Editing selections 291
Fade handles 174
Making selections 290
Showing in Sample Editor 282
Slicing 303
Volume handles 176
Audio files
Exporting 551
Removing unused 56
Audio hardware 641
Connections 8
Externally clocked 11
Audio loops
Musical Mode 297
Tempo matching 297
Audio parts
Auditioning 109
Creating 108
Editing in Audio Part Editor 306
Audio performance
Optimizing 639
Audio Pre-Record Seconds 667
Audio processing
Pool 330
Audio Record Modes 155
Audio Recording 154
Preparations 153
Pre-Record Time 156
RAM Requirements 153
Record File Format 152
Record Folder 152
Record Modes 155
Recording with Effects 155
Recovering 157
Recovering recordings 156
Undo 156
Audio regions
About 107
Audio tracks 59
Audition chords 510
Auditioning
Audio events 109
Audio Part Editor 309
Audio parts 109
Sample Editor 287
Speaker tool 287
Using key commands 287, 309
Auditioning key commands
Pool 326
Auto fades
Global settings 182
Track settings 183
Auto Monitoring 671
Auto Punch In 148
Auto Punch Out 148
Auto Save 659
Auto save 54
Auto Save Internal 659
Auto Select Events under
Cursor 648
Auto Track Color Mode 659
Automatic scales 511
Automatic voicings 512
Automatically generating new
audio clips
Pool 333

Index
676
Automation
About 359
Data 361
Jump curves 360
Ramp curves 360
Read 360
Recording actions 359
Static value line 360
Write 360
Writing 359
Automation data
Adjusting curves 365
Editing 364
Removing 365
Selecting 364
Automation follows Events 648
Automation Reduction Level 648
Automation tracks
About 366
Assigning parameters 367
Hiding 366
Muting 367
Removing 367
Showing 366
Auto-Scroll
Crossfades 180
Sample Editor 282
B
Back up Project 56
Background Color Modulation 657
Bank assignments 416
Basic chord types
Applying to selected notes 458
Batch export
Audio channels 551
Beat Calculator 548
Binary display
Editing byte values 504
Bounce (Export Audio) 551
Bounce Selection 122
Sample Editor 293
Broadcast Wave Files
Embedded information 668
Broadcast Wave files
Exporting 559
Buffer
Settings 641
Busses
Adding 20
Mixing down to file 551
Byte values
Editing in ASCII display 504
Editing in binary display 504
Editing in decimal display 504
C
Changing styles 482
Channel overview
MixConsole 206
Channel racks 211, 220
EQ 225
Filters 223
Gain 223
Inserts 224
Phase 224
Pre 222
Routing 221
Sends 236
Strips 228
Channel settings 236
Copying 216
Channel strip rack 228
Compressor 228
EQ position 228
Gate 228
Limiter 228
Presets 235
Saturation 228
Transformer 228
Channel types
MixConsole 211
Channels
Linking 214
Chase Events 661
Chase events 142
Chord Assistant 509, 527
Assigning Chords to Chord
Pads 529
Circle of Fifths 527
Proximity 527
Chord Editor
Assigning Chords to Chord
Pads 529
Chord editor 506
MIDI Input 509
Chord events 506
Adding 508
Adding chords 508
Auditioning 510
Chord type 506
Converting to MIDI 515
Editing 508
Extracting from MIDI 520
Mapping offset 512
Resolving Display Conflicts 511
Tension 506
Voicings 512
Chord Font 658
Chord Pad Controls 524
Chord Pad Settings
Pad layout 539
Players 536
Remote Control 533
Chord Pads 522, 527
Adaptive voicing 537
Assigning Chords from the
Chord track 530
Assigning Chords to Chord
Pads 528
Assigning Chords with the
Chord Assistant 529
Assigning Chords with the
Chord Editor 529
Assigning Chords with the MIDI
keyboard 530
Changing the pads remote
range 535
Context menu 525
Controls 527
Creating events from chord
pads 541
Default remote assignment 534
Functions menu 525
Moving and Copying 531
Pads remote range 534
Pattern player 538
Players 537
Playing back with a MIDI
keyboard 531
Preparations 526
Presets 540
Recording chords on MIDI or
instrument tracks 532
Recording chords on the Chord
track 532
Saving presets 541
Setting up 527
Using different players on
multiple tracks 538
Voicings 537
Zone 527
Chord Pads Zone 522, 524, 525
Chord Symbols 658
Chord track 73
About 505
Assign Pads 530
Controlling MIDI or audio
playback 516
Live transform 515
Chord voicing
Changing 455
Chords
Changing pitch 455
Changing voicing 455
Editing 456
Inserting 457
Cleanup 616
Clip editing
Pool 326
Clock sources 567

Index
677
Coloring
Events 436
Note events 436
Coloring tracks 93
Colorize Track Controls 659
Colors
Customizing 629
Preferences 647
Compressor
Strip module 228
Connect Sends automatically for
each newly created
Channel 671
Connecting
Audio 8
MIDI 14
Constrain Delay
Compensation 378
Contiguous note events 452
Continuous controllers
Controller display 461
Controller lane 466
Control link 214
Controller Brightness 658
Controller curves
Smart controls for scaling 468
Controller display 460
Adding events 463
Continuous controllers 461
Deleting events 469
Drum Editor 491
Editing events 463
Editing events with Draw
tool 466
Editing events with Line tool 464
Key Editor 450
Moving events 469
Controller lane
Continuous controllers 466
Editor 468
Selecting event types 461
Setting up as preset 462
Controller lane editor
Opening 468
Controller lane presets 462
Controllers
Selecting 470
Convert to Real Copy 120
Converting chord events to
MIDI 515
Create Audio Images During
Record 667
Create MIDI track when loading
VSTi 673
Crossfades
Auto Zoom 180
Auto-Scroll 180
Creating 179
Editing in dialog 180
Equal Gain 180
Equal Power 180
Presets 180
Removing 180
Simple Crossfade Editor 180
Symmetric Fades 180
Cross-Hair Cursor 655
Cross-hair cursor 41
Cursor Width 669
Customizing
Appearance 629
Colors 629
Info line 627
Inspector 627
Toolbars 627
Transport panel 627
Cycle Follows Range
Selection 648
Cycle markers
About 196
Editing with tools 197
Using 197
Zooming 197
Cycle recording 147
D
DC Offset
Removing 269
Deactivate Punch In on Stop 669
Decimal display
Editing byte values 504
Default Author Name 660
Default Company Name 660
Default Edit Action 658
Default MIDI editor 434
Default Send Level 671
Default Warping Algorithm 650
Delay compensation
Constraining 378
Delay Compensation Threshold (for
Recording) 671
Delete Overlaps 648
Deleting
Continuous Controllers 431
Controllers 431
Doubles 430
MIDI controllers 431
Notes 430
Deleting Overlaps
Mono (MIDI) 428
Poly (MIDI) 428
Designating a new pool record
folder
Pool 329
Detect Silence 273
Device ports
Selecting for busses 20
Disable ’Acoustic Feedback’ during
Playback 655
Disable Track 98
Display format
Ruler 29
Dithering
About 245
Applying 245
Effects 245
Drag Delay 648
Draw tool
Drawing note events 451
Editing controller display
events 466
Editing events 466
Drawing
In Sample Editor 290
Driver 641
Drum Editor 483
Controller display 491
Info line 448, 489
Note display 490
Status line 488
Toolbar 484
Drum maps 498
Key Editor 458
Opening automatically 434
Selecting 493
Setting up 495, 497
Drum patterns
On different instruments 495
Drum sound setup
Drum sound list 492
Drum sounds
From different instruments 495
Settings 497
Drum tool 493
Dump request messages
MIDI SysEx Editor 501
Dumping sounds to instrument 502
Duplicate tracks 98
Duplicating
Note events 479
Duplicating events 119
E
Edit as Drums when Drum Map is
assigned 658
Edit button
MIDI track Inspector 405
Edit History dialog 42
Edits folder 262

Index
678
Effects
About 240
Comparing settings 252
Control panel 252
Converting earlier presets 257
Copying presets 257
Default presets 256
Dithering 245
Earlier presets 257
Exporting plug-in information
files 260
Extracting insert effect settings
from track presets 259
Insert effects 240, 242
Managing plug-ins 260
Offline 240
Pasting presets 257
Plug-in delay compensation 241
Plug-in information window 259
Pre/Post fader sends 251
Presets 253
Presets browser 254
Routing 250
Saving insert presets 258
Saving presets 256
Selecting Presets 254
Send effects 240, 247
Setting up 249
Tempo sync 242
VST 3 241
Enable Automatic Hitpoint
Detection 650
Enable Record on Selected Audio
Track 654
Enable Record on Selected MIDI
Track 654
Enable Solo on Selected
Track 654
Enable Track 98
Enharmonic shift 480
Enlarge Selected Track 96, 654
Envelope
Process 264
EQ
Channel racks 225
Presets 228
EQ position
Strip module 228
EQ presets 228
Equal Gain
Crossfades 180
Equal Power
Crossfades 180
Equalizer curve
MixConsole 206
Erase tool 439
Event display
About 34
Folder tracks 100
Modifying on folder tracks 100
Event Handling Opacity 656
Event lenghts
Changing with Trim tool 454
Event types
Selecting in controller lane 461
Events
About 106
Adding in controller display 463
Coloring 436
Copying and Pasting 119
Creating from hitpoints 305
Creating new files from
events 122
Cutting 119
Deleting in controller
display 469
Displaying on folder tracks 100
Duplicating 119
Editing 112
Editing with Draw tool 464, 466
Gluing 118
Locking 121
Moving 114
Moving in controller display 469
Muting 122
Poly Pressure 467
Renaming 116
Repeating 120
Resizing 116
Selecting 112
Sliding the contents 120
Splitting 118
Export audio mixdown 551
Audio engine settings 554
Channel selection 553
File naming 553
In realtime 554
Exporting
MIDI files 622
Exporting markers 204
External monitoring 150
Extract Audio on Import Video
File 674
Extracting
Audio from video 595, 620
MIDI Automation 432
Extracting chord events from
MIDI 520
F
Fade Handle Brightness 657
Fade handles 174
Fade In/Out functions 176
Fader section (MixConsole) 217
Fades
Auto fades 182
Creating 174
Editing in dialog 177
Presets 177
Processing 176
Removing 176
With Range Selection tool 175
Fill Loop 120
FireWire DV Output 588
Fixed lengths 428
Fixed tempo 542
Fixed velocity 429
Flipping
Stem direction 481
Folder parts 111
Editing 111
Folder tracks 79
Displaying events 100
Modifying event display 100
Follow Chord Track 516
Auto 516
Chords 516
Directly 518
Scale events 518
Single Voice 516
Synchronizing Track Data 518
Using 516
Frame count 565
Frame rates
Mismatch 589
Synchronization 565
Video 589
Freeze
Edits 272
Insert effects 246
MIDI Quantize 172
VST instruments 377
FX chain presets 225
FX Channel tracks 75
FX channel tracks
Adding 248
Mixing down to file 551
G
Gain 265
Gate
Strip module 228
Generic remote device 392
Global track controls 32
Gluing
Notes 480
Gluing events 118
Grid Overlay Intensity 656
Groove quantizing 172
Group Channel tracks 81

Index
679
Group channels
Adding insert effects 246
Routing 222
Group Channels - Mute Sources as
well 671
H
Hardware controls
Activating pick-up mode 375
Hardware setup
Control panel 9
Hermode tuning 407
Hide muted Notes in Editors 655
Hide Truncated Event Names 656
Hitpoints
About 297
Beats pop-up menu 299
Creating events 305
Creating markers 304
Creating regions 294, 305
Slicing audio 303
HMT
Follow 407
Use for Analysis 407
I
Importing
Audio from video files 620
MIDI files 622
MPEG files 621, 622
Ogg Vorbis files 622
REX files 620
Video files 588
WMA files 622
Importing markers 204
Independent track loop
Audio Part Editor 310
Info line
Drum Editor 448, 489
Key Editor 448, 489
Project window 28
Sample Editor 283
Score Editor 473
I-notes (Input notes) 498
Input busses
Adding 20
Renaming 18
Routing 221
Input gain
MixConsole 223
Input levels 9
Input ports 13
Inputs
Meter position options 220
Insert Effects
Adding to busses 245
Adding to Group channels 246
Insert effects 240
About 242
Bypass 244
Deactivate 244
Freezing 246
Routing 243
Insert Reset Events after
Record 661
Insert Silence
Sample Editor 291
Inserting and finding media
Pool 324
Inserts
FX chain presets 225
MixConsole 224
Inspector
About 30
Key Editor 449
MIDI tracks 404
Subpanels 412
Instrument Freeze 377
Instrument tracks 64
Instruments use Automation Read
All and Write All 671
Interpolate Audio Waveforms 657
J
Jog wheel 132
K
Key commands
About 602
Default 607
Importing 606
Loading 605
Modifying 603
Removing 605
Resetting 606
Saving 605
Searching for 604
Key Editor 443
Controller display 450
Cut and paste 435
Info line 448, 489
Inspector 449
Note display 450
Status line 448
Toolbar 444
Keyboard navigation
MixConsole 239
Knob Mode 651
L
Lanes
Audio Part Editor 308
Language (Preferences) 659
Latency
Optimizing 639
VST System Link 575
Legato 427
Legato Mode - Between Selected
Notes Only 652
Legato Overlap 652
Length
Compression 407
Length Adjustment 661
Level meters (MixConsole) 219
Level scale
Half-level axis 285
Sample Editor 285
Limiter
Strip module 228
Line tool 452
Drawing note events 452
Editing controller display
events 464
Editing events 464
Link Editors 648
Link groups 214
Q-Link 214
Live transform
Chord track 515
Loading Multi-Track Presets 104
Loading Track Presets 103
Loading VST Presets 103
Locate When Clicked in Empty
Space 669
Locators
Setting 136
Lock Event Attributes 121
Lock Record 165
Loop
Audio Part Editor 310
Looping
MIDI parts 442
M
Mac OS X
Port activation 19
Port selection 19
Machine control
About 564
Main mix
Setting up 20
Make Chords 520
Managing media files
Pool window 314
Map Input Bus Metering to Audio
Track 666
Map pop-up menu 497
Mapping offset 512
Marker attributes 200
Marker IDs 202
Marker preferences 200
Marker track 85, 202

Index
680
Marker window
About 198
Functions 199
Marker list 199
Markers
About 196
Creating from hitpoints 304
Cycle markers 196
Exporting 204
Exporting via MIDI 205
Importing 204
Importing via MIDI 204
Position markers 196
Maximum Backup Files 659
Maximum Items in Results List 665
Maximum Undo Steps 659
MediaBay
About 334
Attribute filtering 350
Defining locations 336, 339
Filtering 350
Hiding sections 335
Key commands 353
Preferences 352
Previewing 345
Scanning operations 336
Selecting locations 339
Showing sections 335
Viewing results 340
Volume databases 356
VST Sound node 337
Merge Clipboard (function) 266
Merge MIDI in Loop 424
Meter peak options 220
Hold forever 220
Hold peaks 220
Meter position options 220
Input 220
Post-Fader 220
Post-Panner 220
Meters
Settings 220
Meters’ Fallback 666
Meters’ Peak Hold Time 666
MIDI
Dissolve parts 425
MIDI channels
Separating for drum map
sounds 497
MIDI clock
Destinations 571
Synchronization 567
MIDI devices
Defining new for patch
selection 415
Device Manager 414
Editing patches 418
Installing 416
Selecting patches 417
MIDI Display Resolution 661
MIDI Editor
Muting note events 438
MIDI editors
Opening 433
Soloing 436
Zooming 435
MIDI Export Options 662
MIDI files 622
MIDI Filter 665
MIDI Import Options 662
MIDI Input
Chord editor 509
MIDI Inputs
Setting up 158
MIDI interface
Connecting 14
MIDI Max. Feedback in ms 661
MIDI Modifiers 407
MIDI note numbers 495, 497
MIDI notes
Transpose (function) 422
MIDI part data
Automation 361
MIDI parts
Adding events 108
Creating 108
Handling several 441
Looping 442
Processing 434
MIDI Port Setup 158
MIDI ports
Setting up 14
MIDI Record Catch Range in
ms 668
MIDI Record Mode 162
MIDI Recording
Channel and Output 159
Instruments and channels 157
MIDI Input setting 158
Naming MIDI ports 158
Preparations 157
Record mode 162
Recording continuous
messages 161
Recording different types of
messages 160
Recording notes 160
Recording Program Change
Messages 161
Recording System Exclusive
Messages 161
Recovering recordings 164
Reset 161
Retrospective Record 164
Sound selection 159
MIDI recordings
Exporting to MIDI file 499
MIDI SysEx Editor
Dump request messages 501
MIDI Thru Active 661
Monitoring 151
MIDI timecode
Destinations 570
MIDI tracks 68
MIDI Modifiers 407
Routing to device 501
Settings 405
Missing ports
Re-routing 53

Index
681
MixConsole 206
Channel linking 214
Channel overview 206
Channel racks 211
Channel selector 209
Channel types 211
Configuring 208
EQ presets 228
Equalizer curve 206
Fader section 217
FX chain presets 225
Hiding channels 208
Level meters 219
Mute 218
Notepad 238
Opening 206
Panning 218
Pre rack 222
Racks 220
Sections 206
Set up window layout 208
Setting volume 219
Solo 218
Solo Defeat 218
Strip presets 235
Visibility tab 209
Zoom tools 208
Modifier keys 607
Monitoring 149
About 13
ASIO Direct Monitoring 150
External 150
MIDI 151
Via Cubase 149
Mouse information 488
Moving tracks 92
MP3 files
Exporting 560
Importing 621, 622
MPEG files 621, 622
Multi processing 641
Multi-channel tracks
Export 551
Musical Mode
About 296
Adjusting audio loops 297
Pool 296
Mute
MixConsole 218
Mute Pre-Send when Mute 671
Muting events 122
N
Navigating
MixConsole 239
Never Reset Chased
Controllers 661
Noise Gate 266
Normalize
Audio effect 267
Note Brightness 658
Note display
Drum Editor 490
Key Editor 450
Shifting 480
Note events
Adding in controller display 463
Changing the velocity 466
Colori ng 436
Creating 493
Creating in Score Editor 478
Cutting 439
Deleting in controller
display 469
Drawing with Draw tool 451
Drawing with Line tool 452
Duplicating 440, 479
Editing 440
Editing via MIDI 458
Editing with Draw tool 464
Excluding from playback 438
Gluing 455, 480
Moving 453, 493
Moving in controller display 469
Muting 438
Repeating 440
Resizing 453
Selecting 437
Setting values 478
Setting with Snap 440
Splitting 454, 480
Transposing 453, 493
Note lengths
Changing 480
Note stems
Flipping the direction 481
Note values
Setting 478
Notepad
MixConsole 238
O
Ogg Vorbis files
Exporting 560
Importing 622
On Import Audio Files 650
On Processing Shared Clips 650
O-notes (Output notes) 498
Open Effect Editor after Loading
it 673
Organizing files in subfolders
Pool 330
Output busses
Adding 20
Default 20
Mixing down to file 551
Renaming 18
Routing 222
Output ports 13
Overlapping Audio 100
Overview line
Project window 28
P
Panning
Bypass 218
MixConsole 218
Part Data Mode 658
Parts
About 106, 108
Displaying in score 474
Dissolving (MIDI) 425
Editing 112
Folder 111
Sliding the contents 120
Parts Get Track Names 648
Paste at Origin 119
Paste Relative to Cursor 119
Patch Banks 416
Pedals
To note length 428
Performance
Aspects 639
Audio hardware 641
CPU and processor cache 640
Driver 641
Hard disk and controller 641
Optimizing 639
RAM 640
VST performance 642
Phase
MixConsole 224
Phase Reverse 268
Piano voicings 512
Pick-up Mode 375
Pitch
Changing for chords 455
Pitch Notation 658
Pitch shifting
Algorithms 279
Playback
Excluding note events 438
Playback Toggle triggers Local
Preview 669
Plug-in delay compensation 241
Plug-in Editors"Always on
Top" 673
Plug-in Information 259
Plug-in information
Managing plug-ins 260

Index
682
Plug-in Manager 383
Collections 384
Window 384
Plug-ins
Installing 382
Managing 382
Poly Pressure events 467
Polyphony
Restricting 431
Pool
Aligning file and project
attributes 333
Applying different processing
methods 318
Audio processing 330
Auditioning key commands 326
Automatically generating new
audio clips 333
Clip editing 326
Designating a new pool record
folder 329
Inserting and finding media 324
Managing large sound
databases 323
Organizing files in
subfolders 330
Reducing the project size 331
Reference file 313
Resolve missing files dialog 324
Show/hide columns 317
Pool Window
Managing media files 314
Pop-up Toolbox on
Right-Click 655
Position markers
About 196
Post fader sends 251
Post-Crossfade 264
Post-roll
Recording 148
Pre fader sends 251
Pre-Crossfade 264
Preference Presets
Saving 646
Preferences
Colors 647
Dialog 645
Store marked preferences
only 646
Pre-Record time
Audio recording 156
Pre-roll
Recording 148
Presets
Controller lane 462
Controller lane setups 462
Presets browser
Effects 254
Processing
About 262
Settings and functions 263
Project Assistant 46
Project cursor
Keeping it visible 436
Project scrubbing 132
Project Setup Dialog 49
Project window
About 24
Event display 34
Global track controls 32
Info line 28
Inspector 30
Overview line 28
Ruler 29
Snap 39
Snap to zero crossings 39
Status line 27
Toolbar 25
Toolbox 26
Track list 33
Zooming 35
Projects
About project files 47
About template files 47
Activating 53
Auto save 54
Back up 56
Creating new 44, 46
Location 55
Missing ports 53
Opening 52
Opening recent 53
Prepare archive 56
Project Assistant 46
Removing unused audio files 56
Revert 55
Saving 54
Saving templates 48
Setting up 49
Steinberg Hub 45
Punch In/Out
Common Record Modes 148
Putting SysEx dumps on a special
muted track 502
Q
Q-Link 214
Quantize Panel
About 167
Common settings 168
Quantizing to a grid 170
Quantizing to a groove 171
Quantize value 478
Quantizing
About 166
Audio event starts 166
Auto Apply 168
Catch Range 170
Freeze 172
MIDI event ends 167
MIDI event lengths 167
MIDI event starts 167, 241
Non-Quantize 168
Original position 171
Pre-Quantize 171
Quantize presets 168
Randomize 168
Reset Quantize 168, 172
Swing 170
Tuplets 170
Using groove presets 172
Quick Controls
Connecting with Remote
Controllers 374
Quick Zoom 648
R
Rack settings 212
Copying 216
Racks
MixConsole 220
RAM
Recording 153
Range Editing 124
Range Selection tool 124
Creating fades 175
Read automation 360
Realtime algorithm
About 279
Realtime export 551
Recent projects 53
Record File Format
Audio 152
Record Folder
Audio 152
Record Time Max 164
Record-Enable allows MIDI
Thru 668
Recording
About 145
Activating 146
Common Record Modes 148
Cycle 147
Levels 9
Lock Record 165
Pre-roll and post-roll 148
Remaining Record Time 164
Stopping 147
Recording with Effects 155
Recovering audio recordings 156
Recovering MIDI recordings 164

Index
683
ReCycle files 620
Reducing the project size
Pool 331
Reference file
Pool 313
Regions
About 123, 293
Auditioning 294
Creating 293
Creating from hitpoints 294,
305
Creating with Detect
Silence 275
Editing 294
Event or Range as Region 123
Events from Regions 123
Exporting as audio files 295
Removing 293
Remote control
Key commands 391
Setting up 388
Writing automation 391
Remote Controllers
Connecting with Quick
Controls 374
Remove Empty Tracks 92
Remove Regions/Hitpoints on all
Offline Processes 650
Remove Selected Tracks 92
Rename object 116
Renaming events 116
Renaming tracks 93
Repeat
Loop 427
Repeat events 120
Replace Recording in Editors 668
Re-Record
Activating 149
Common Record Modes 148,
149
Reset
Quantize 168, 172
Reset on Stop 661
Resizing events 116
Retrospective Record 668
MIDI 164
Return to Start Position on
Stop 669
Reverse (audio processing) 269
Reverse (MIDI function) 432
ReWire
About 597
Activating 599
Channels 600
Routing MIDI 601
REX files 620
Routing
Group channels 222
Input busses 221
MixConsole 221
Output busses 222
Routing through insert effects 243
Ruler
Display format 29
Sample Editor 285
Timeline 434
Ruler track 86
Run Setup on Create New
Project 659
S
Sample Editor
Audio clip information 283
Audition 287
Auto-Scroll 282
Info line 283
Inspector 284
Musical Mode 296
Opening 282
Overview line 284
Regions 293
Ruler 285
Show Audio Event 282
Snap function 282
Tempo matching audio 297
Toolbar 282
Zooming 286
Samplerate
Externally clocked 11
Saturation
Strip module 228
Save As Template 48
Save partial preferences
settings 646
Save Track Preset 105
Scale events
About 511
Adding 511
Auditioning 511
Automatic scales 511
Changing 511
Follow Chord Track 518
Showing 511
Scan Folders only when MediaBay
is open 665
Scan unknown File Types 665
Score
Displaying 474
Score display 474
Score Ed itor
Toolbar 471
Score Editor 470
Info line 473
Staff settings 475
Status line 472
Score texts 482
Adding 481
Changing fonts 482
Changing sizes 482
Changing styles 482
Editing 481
Scores
Printing 483
Scroll to selected Track 654
Scrolling during playback 436
Scrub Volume 671
Scrubbing 110
Events in Sample Editor 288
Project 132
Scrub tool 110
Select Channel/Track on Edit
Settings 654
Select Channel/Track on Solo 654
Select Controllers in Note Range -
Use Extended Note Context 652
Select Tool - Show Extra Info 655
Select Track for Auditioning 510
Select Track on Background
Click 648
Selecting tracks 97
Selection Ranges
Creating 124
Editing 126
Selection ranges
Editing in controller lane
editor 468
Send effects 240
About 247
Adding FX channel tracks 248
Sends
MixConsole 236
Set up Window Layout
MixConsole 208
Shared Copies
Convert to Real Copy 120
Creating 120
Shifting
Note display 480
Show Automation Track in Project
on Writing Parameter 648
Show Controllers 658
Show Event Names 656
Show Event Volume Curves
Always 657
Show File Extensions in Results
List 665
Show Hitpoints on Selected
Events 657

Index
684
Show Overlaps 656
Show Scales 511
Show Timecode Subframes 669
Show Tips 659
Show Track Pictures 94
Show Waveforms 657
Show/hide columns
Pool 317
Silence 270
Inserting 128
Simple Crossfade Editor 180
Single Voice
Follow Chord Track 516
Slices
About 297
Creating 303
Slider Mode 651
Smallest Track Height To Show
Data 656
Smallest Track Height To Show
Name 656
Snap 440
About 39
Sample Editor 282
Zero crossings (Sample
Editor) 282
Snap MIDI Parts to Bars 668
Snap point
Setting 39
Setting in Sample Editor 289
Snap Point To Cursor 39
Snap to Zero Crossing
Audio Part Editor 312
Snap to zero crossings
About 39
Snap type
Selecting 40
Solo
Audio Part Editor 309
MixConsole 218
Solo Defeat
MixConsole 218
Solo Record in MIDI Editors 668
Soloing
MIDI editors 436
Speaker tool
Audio Part Editor 309
Sample Editor 287
Spectrum Analyzer 276
Split at Cursor 118
Split Loop 118
Split MIDI Controllers 652
Split MIDI Events 652
Splitting
By ranges 128
Notes 480
Splitting events 118
Start Recording at Cursor
Common Record Modes 148
Start Recording at Left Locator
Common Record Modes 148
Static value line
Automation 360
Stationary Cursors 669
Statistics 278
Status line
Key Editor 448
Project window 27
Score Editor 472
Steinberg Hub 45
Deactivating 46
Stems
Flipping the direction 481
Step recording 459
Stereo Flip 270
Stop after Automatic Punch
Out 669
Stop playback while winding 669
Strip presets 235
Strip Silence 275
Suspend VST3 plug-in processing
when no audio signals are
received 241, 673
Swing
Quantizing 170
Synchronization
9-Pin devices 568
About 564
Nuendo SyncStation 568
Operation (Sync mode) 572
Setting up 568
Speed references 567
Timecode 565
Timecode preferences 569
Timecode source 568
Synchronize Plug-in Program
Selection to Track
Selection 673
Synchronizing Track Data
Follow Chord Track 518
SysEx
Changing device settings
remotely 502
SysEx Messages 500
T
Template projects 47
Templates
Renaming 49
Tempo
About 542
Calculating 548
Editing 545
Matching audio 297
Write definition to files 550
Texts
Adding in Score Editor 481
Editing in Score Editor 481
Thumbnail Memory Cache
Size 674
Thumbnails
About 590
Thumbnail cache files 590
Time display 138
Time signatures
Editing 548
Time stretch 270
Algorithms 279
Timecode
Standards 565
Synchronization 565
Timeline
Ruler 434
Tool modifier keys 607
Tool Modifiers 655
Toolbar
Audio Part Editor 307
Drum Editor 484
Key Editor 444
Project window 25
Sample Editor 282
Score Editor 471
Toolbox
Project window 26
Track automation data
Automation 361
Track Controls Settings 88
Track Height 96
Track list
About 33
Dividing 33
Track Pictures 94
Track Pictures Browser 94
Track Presets
About 101
Applying 103
Audio 101
Creating 105
Extracting Sounds 104
Instrument 101
Loading 103
MIDI 102
Multi-Track 102
VST Presets 102
Track Selection follows Event
Selection 648
Track Zoom 96

Index
685
Tracks
About 59
Adding 91
Arranger 72
Audio 59
Chord 73
Coloring 93
Customizing track controls 88
Disabling audio tracks 98
Duplicating 98
Folder 79
FX Channel 75
Group Channel 81
Instrument 64
Marker 85
MIDI 68
Moving 92
Removing 92
Renaming 93
Ruler 86
Selecting 97
Video 87
Transformer
Strip module 228
Transport menu
Functions 133
Playback options 133
Transport panel
Display format 138
Hiding 129
Overview 129
Sections 129
Showing 129
Transpose
MIDI function 422
MIDI Modifier 407
Treat Muted Audio Events like
Deleted 650
Trim tool
Changing event lengths 454
Tuplets
Quantizing 170
U
Undo
Edit history 42
Maximum undo steps 43
Undoing Recording
Audio 156
Use High Quality Scrub Mode 671
Use Inserts While Scrubbing 671
Use Mouse Wheel for Event
Volume and Fades 650
Use Steinberg Hub 659
Use Up/Down Navigation
Commands for Selecting Tracks
only 648
V
Value Box/Time Control Mode 651
Velocity
Changing for note events 466
MIDI function 429
Velocity compression 407
Velocity shift 407
Video
Bi-level signals 567
Codecs 586
Device Setup 592
Editing 595
Extracting audio from 595
Formats 586
Importing 588
Output devices 587
Playback 591
Replacing audio 596
Scrubbing 593
Synchronization 567
Thumbnails 590
Tri-level signals 567
Video Player window 593
Aspect ratio 593
Setting video quality 593
Setting window size 593
Video track 87
Virtual Keyboard
About 143
Computer keyboard 144
Modulation 144
Note velocity level 144
Octave offset 144
Options 144
Piano keyboard 144
Pitchbend 144
Recording MIDI 143
Visibility
MixConsole 209
Voicing
Changing for chords 455
Voicings 512
Automatic voicings 512
Configuring parameters 512
Library 512
Library subset 512
Octave offset 512
Piano 512
Range 512
Volume
MixConsole 219
Volume handle 176
VST
Input ports 13
Output ports 13
VST 3
Suspend plug-in
processing 376
VST 3 Standard 241
VST Audio System 9
VST Connections 17
About 17
Editing 22
Presets 21
VST instruments
Freezing 377
Presets 372
Saving presets 373
Setting up 368
Using VST System Link 583
VST plug-ins
Installing 382
VST Presets
Loading 103
VST System Link
About 572
Activating 577
Connections 573
Latency 575
MIDI 579
Putting computers online 578
Requirements 572
Setting up sync 573
Settings 575
W
Warn Before Removing Modified
Effects 673
Warn on Processing
Overloads 671
Wave 64 files 559
Wave files 558
Waveform Brightness 657
Waveform display
Sample Editor 285
Waveform Outline Intensity 657
When Recording Wave Files larger
than 4 GB 667
Wind Speed Options 669
Windows Media Audio files
Exporting 560
Importing 560, 622
Surround format (Pro) 560
Word clock
About 567
Working with MIDI data
Tools and functions for 489
Write automation 360
Writing automation
Automatically 361, 362
Manually 361, 362
Tools 363
