Stormblue MD-S Memory Drive User Manual MDSManual Eng
Stormblue Co., Ltd. Memory Drive MDSManual Eng
UserManual.wiki
>
Stormblue
>
MD S User Manual
Users Manual
Navigation menu
Upload a User Manual
Namespaces
Wiki Guide
HTML
PDF
Info
Views
User Manual
Discussion / Help
Navigation
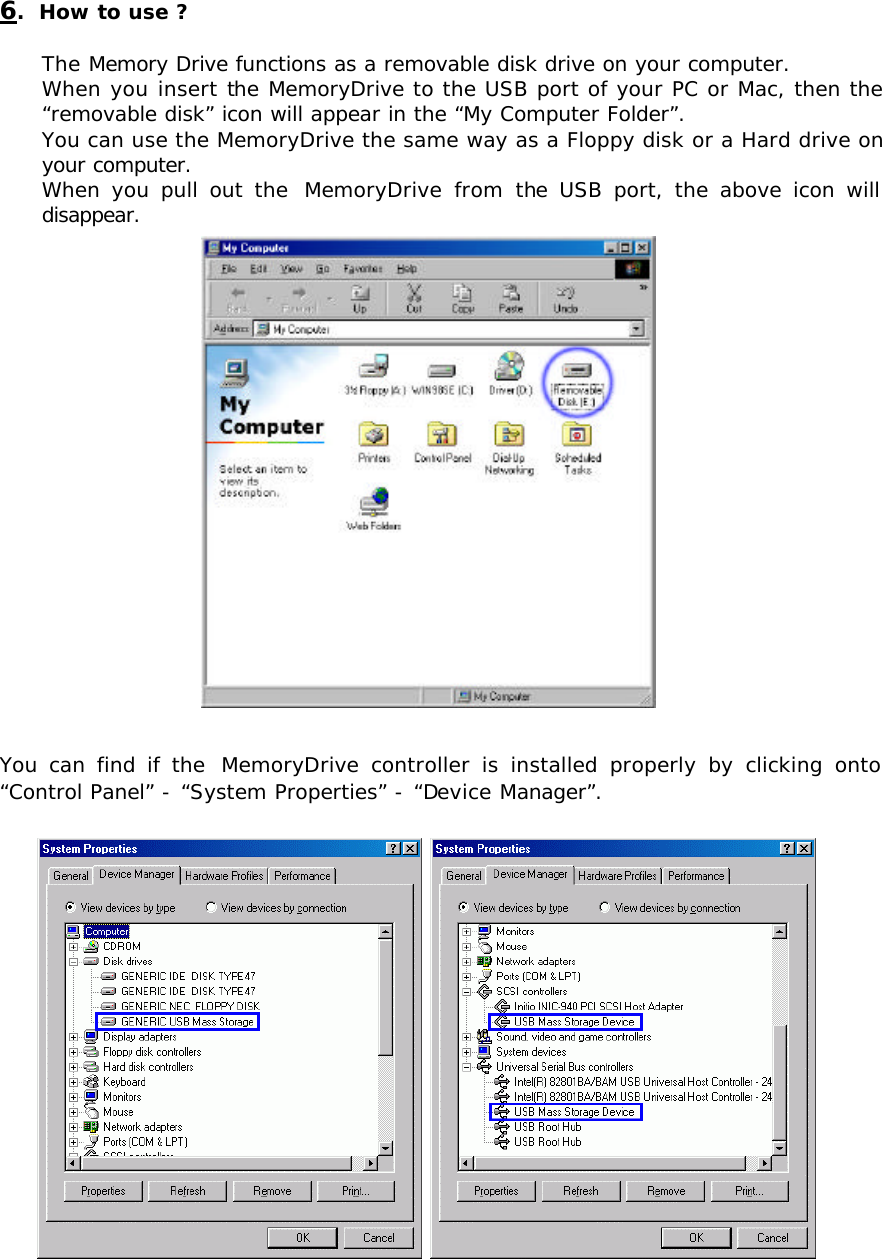
![4. Driver Installation for Windows98/SE (AutoSetup Package) 4.1 Before installation of the drivers, check first that the USB controller of your computer is working well. Open the [Control Panel] à [System Properties] à [Device Manager], then check if it shows “Universal Serial Bus controllers” and see if they are in good working condition. If your computer does not have USB controller, then the USB device will not work. 4.2 The screen as below is appeared if insert CD-ROM for installing the driver. Click the “Start” button to install the driver.](https://usermanual.wiki/Stormblue/MD-S/User-Guide-266886-Page-3.png)
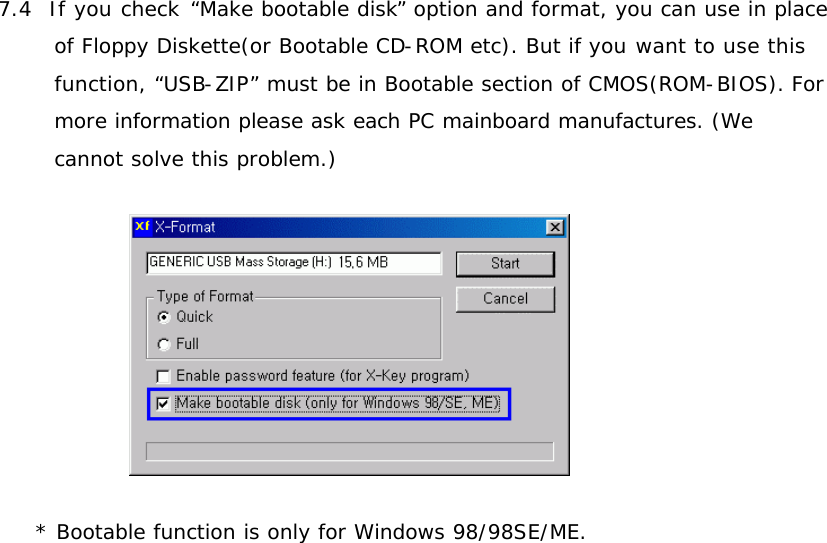
![7. X-Format (xFormat.exe) 7.1 Open xFormat window, you can choice two type format as following. [Pic. (a)] 1) Quick Format : It's called Logical Format like Windows Format. 2) Full Format : It's called Physical Format, in case of Full Format, cleaning all sector of the memory. But it takes long time, so it is not often used. and click “Start” button then execute format. [Pic. (b)] 7.2 Full(Physical) Format must be use in unavoidable case as below. 1) The BSOD(Blue Screen Of Death) is appeared on writing and reading. (It is caused by that bad sectors are created inside the memory from careless.) 2) Windows(or DOS) Format is not working. * Format will erase all the data in the device. 7.3 You can use this function after check “Enable password feature” option and format. (Refer to 8. for how to use X-Key.) * For use of this function, if the format is completed, execute X-Key program after Memory Drive disconnect and connect again to USB port.](https://usermanual.wiki/Stormblue/MD-S/User-Guide-266886-Page-8.png)