SunComm Technology SC-397-GH3G 3G WCDMA GSM Fixed Wireless Phone Cordless Dock Charger User Manual D168H 2016 4 11
SunComm Technology Co.,Ltd 3G WCDMA GSM Fixed Wireless Phone Cordless Dock Charger D168H 2016 4 11
User manual
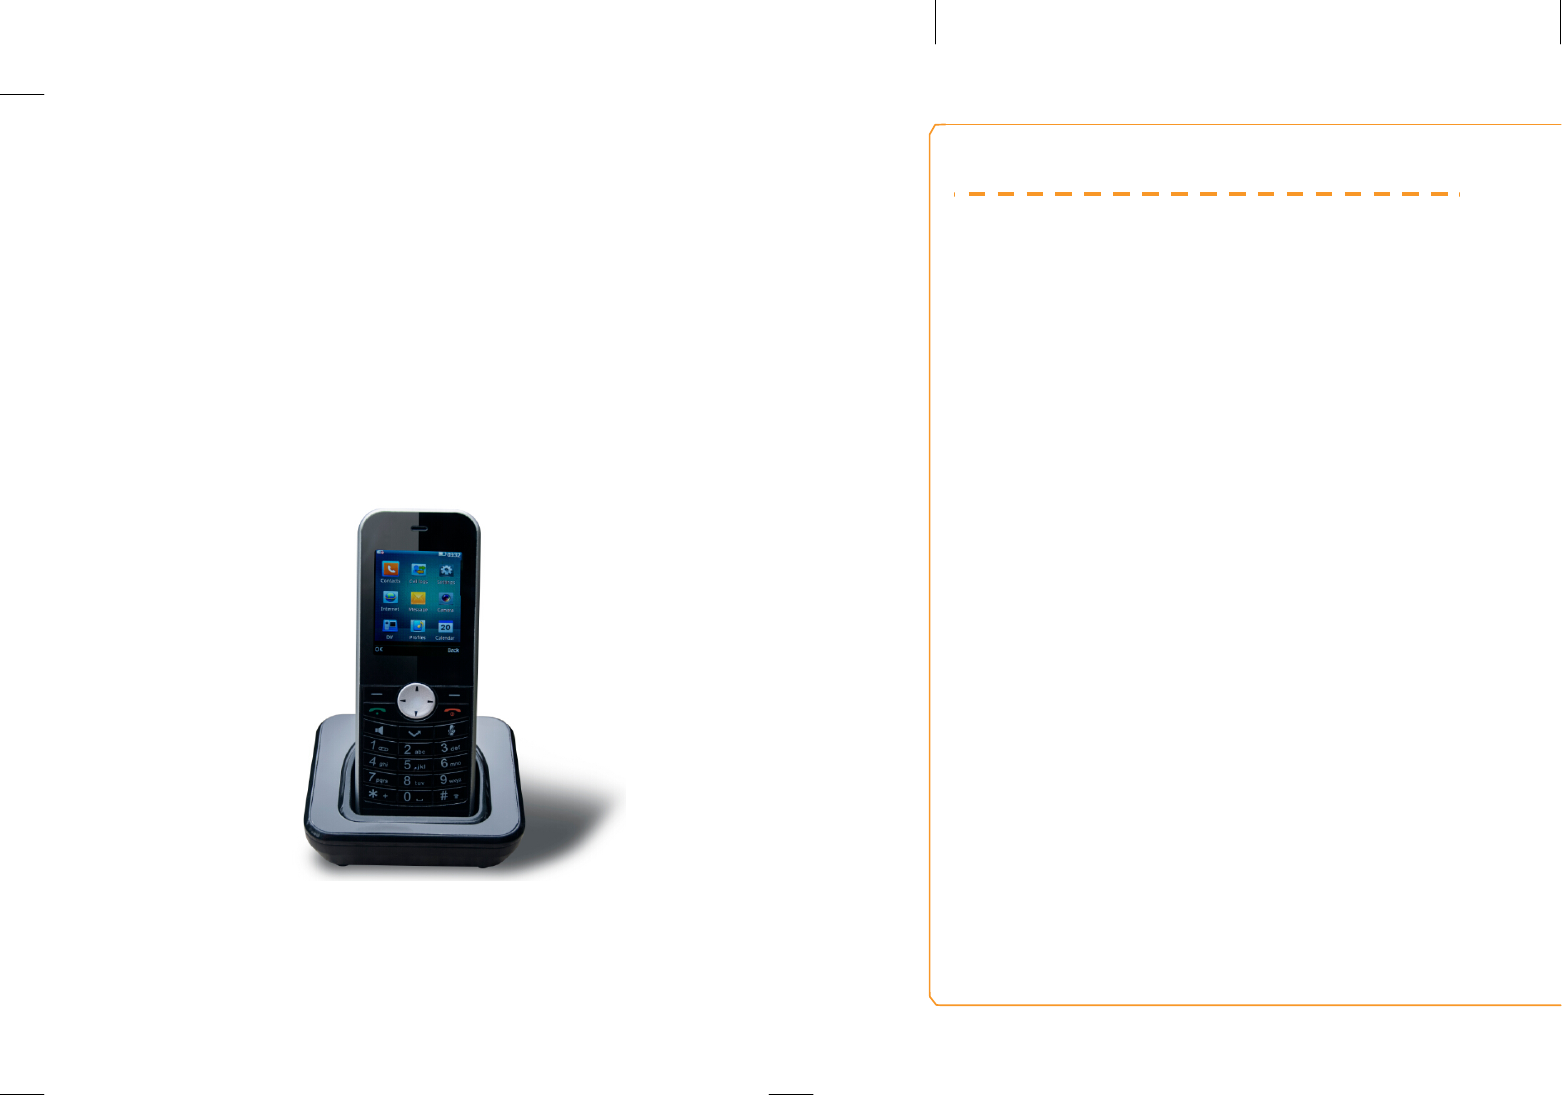
D168H
Installation and user Guide
Index
Installation and Commissioning
............
4
Important information Security
.................. 6
Environmental Recycling ...................
10
Locating controls .
........................
............
11
Keys and features ............................
13
Screen icons ...........................
............
15
Installing the SIM card and Battery
........... 15
On and off............
...................................
....
19
Use function menu ....
...............................
20
Basic functions ............................
............
21
Text Input
........................
.......................
27
Texting ...........................
........................
29
Agenda
............................................ 34
Adjustments
....................................... 39
Profiles
............................................. 45
Calendar
........................................ 46
Calculator
............................................ 48
Alarm
......................................................... 49
Do any doubt ...........
..................................
50
DoC
....................................................... 51
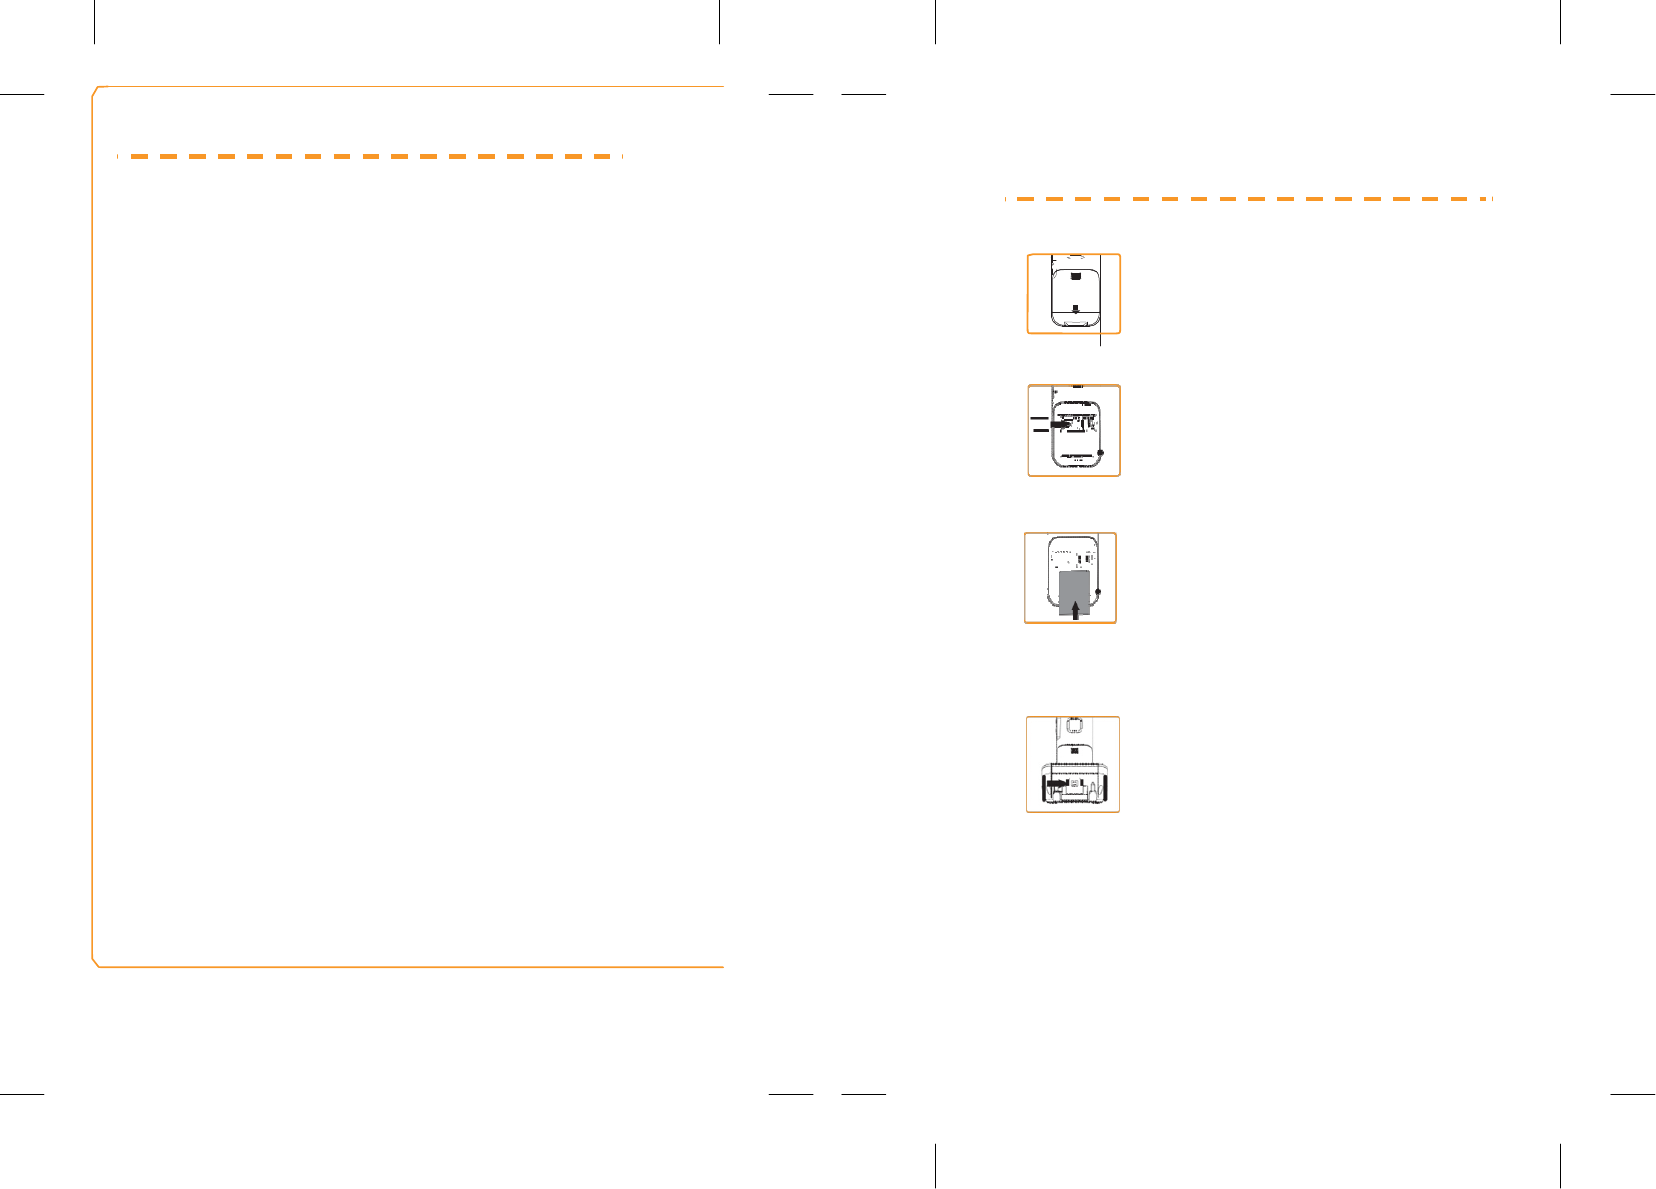
Installation and Commissioning
1. press lightly and remove
the battery cover
2. Insert the SIM card
matching the gold
contacts on the phone
and the card
3. Insert the battery by
aligning the gold contacts
on the phone and battery
4. to load the terminal,connect
the charger to the charging
socket and any home.
Check the orientation of the
connector and do not force
the connection if it is not
immediate. Place the
phone on this base

6. dial the phone number
with the numeric
keypad and press to
make a call
5. press and hold for a
few seconds to turn
the
p
hone. Enter the
Important safety
Before using the appliance please read this
manual startup, especially the safety
instructions.
safety warnings
The working temperature is from -10℃ to 55 .℃
In each country may be different rules in force
regarding the use of mobile phones (for
example, while driving, in hospitals, service
stations or aircraft).
Observe the laws regarding the use of existing
mobile phone at home and turn off the device
when its use is prohibited or when it may cause
interference or danger situations.
Use the device only in accordance with its
intended use and only in places where a phone
call in no danger.
Use only the power adapter and battery
manufacturer. If an unsuitable or not properly
adapter is used, there is danger of explosion.

The battery should not be opened or exposed
to flame. Dispose of used batteries according to
the current regulations.
The correct operation of medical appliances
may be altered by the use of mobile phones.
Pacemaker manufacturers recommend that a
minimum distance of 20 cm between devices
when the mobile phone is on. Do not carry your
phone in your pocket next to the chest.
Attention
Do not expose the unit to moisture or extreme
heat
(strong sunlight or direct radiation),
or cold
(persistent frost).
Do not drop the unit and avoid
subjecting it to shock, impact or pressure.
Do not drop the unit and avoid subjecting it to
shock, impact or pressure.
The phone may cause interference to be near
televisions, radios and other electrical
appliances.
Do not ever spray with spray cleaners as it can
penetrate through the holes and damage the
appliance.
Hearing Protection
When listening to music, adjust the
volume to a moderate level.
Continuous exposure to high volume may
impair your hearing.
Environmental Recycling
Never pull the phone with household waste
.
Ask your municipality about proper disposal
possibilities do not ruin the environment. The
cardboard box, the plastic contained in the
packaging and the pieces in the mobile phone
can be recycled in accordance with the rules in
force in Spain on recycling.
Always follow the existing rules on the subject.
Violators are subject to sanctions and measures
established by law.
The bin symbol the cross,
located on the device means
that when the equipment has
reached the end of its useful life,
must be brought to collection
centers, and that treatment must
be separated from waste urban.
To protect the environment, when you replace
the batteries, remember to use public recycling
bins for batteries
Hardware
14
1
2
3
15
16
4
5
13
6
12
7 11
17
8
9
10
18

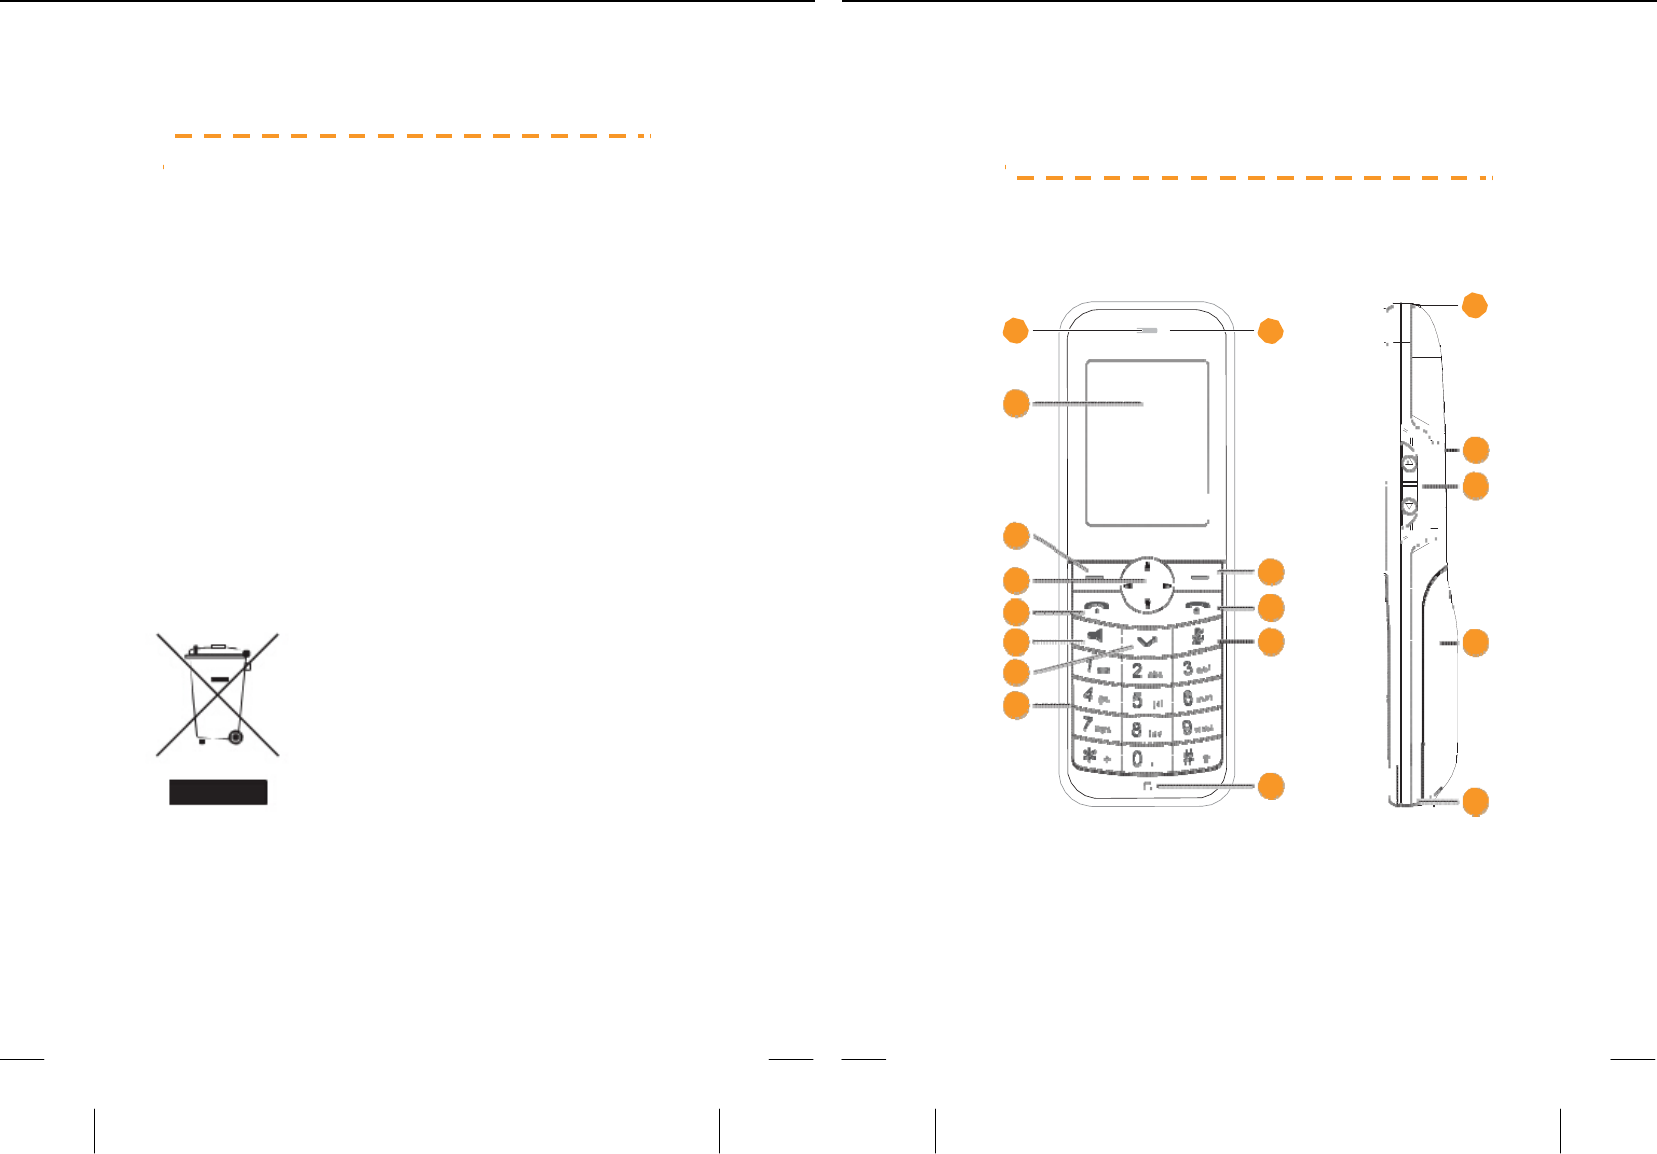
note:
The pictures of your phone for reference only.
Product appearance may vary by phone model
acquired.
1
Headset
2
Light (LED)
3
Screen
4
Left soft key
5
Navigation Keys
6
Key Mark / Pickup
7
Speakerphone Key
8
Transfer key
9
Keypad
10 Microphone
11 Mute button
12
Key On / Off / End Call / Reject /
Return to initial screen
13 Right soft key
14 Headphone jack
15
Speaker
16 Keys control audio volume, timbre
17 Battery compartment and SIM card
18 Power Connector
Keys and features
Left soft key
Access Agenda in standby mode.
Select the option on the bottom left of the
screen.
Right soft key
Access the main menu in standby mode.
Select the option on the bottom right of the screen
.
Navigation keys
In standby mode, press:
1.
up / down to access the phonebook
2. left to write a new text message
3.
right to access the profiles
You can modify these shortcuts in Menu /
Settings / Phone / Shortcuts.
Key call / redial
Make or answer a call.
In standby mode, view the history of calls made.
Speakerphone key
During a conversation, press to activate /
deactivate hands free speaker.
Ignition key
Press and hold to turn on / off the phone.
End a call or reject an incoming call.
Back to standby.
Mute button
During a conversation, press to activate /
deactivate the microphone.
Key transfer
With a hold and another call in progress, press to
transfer the call
.
Connected head
p
hones
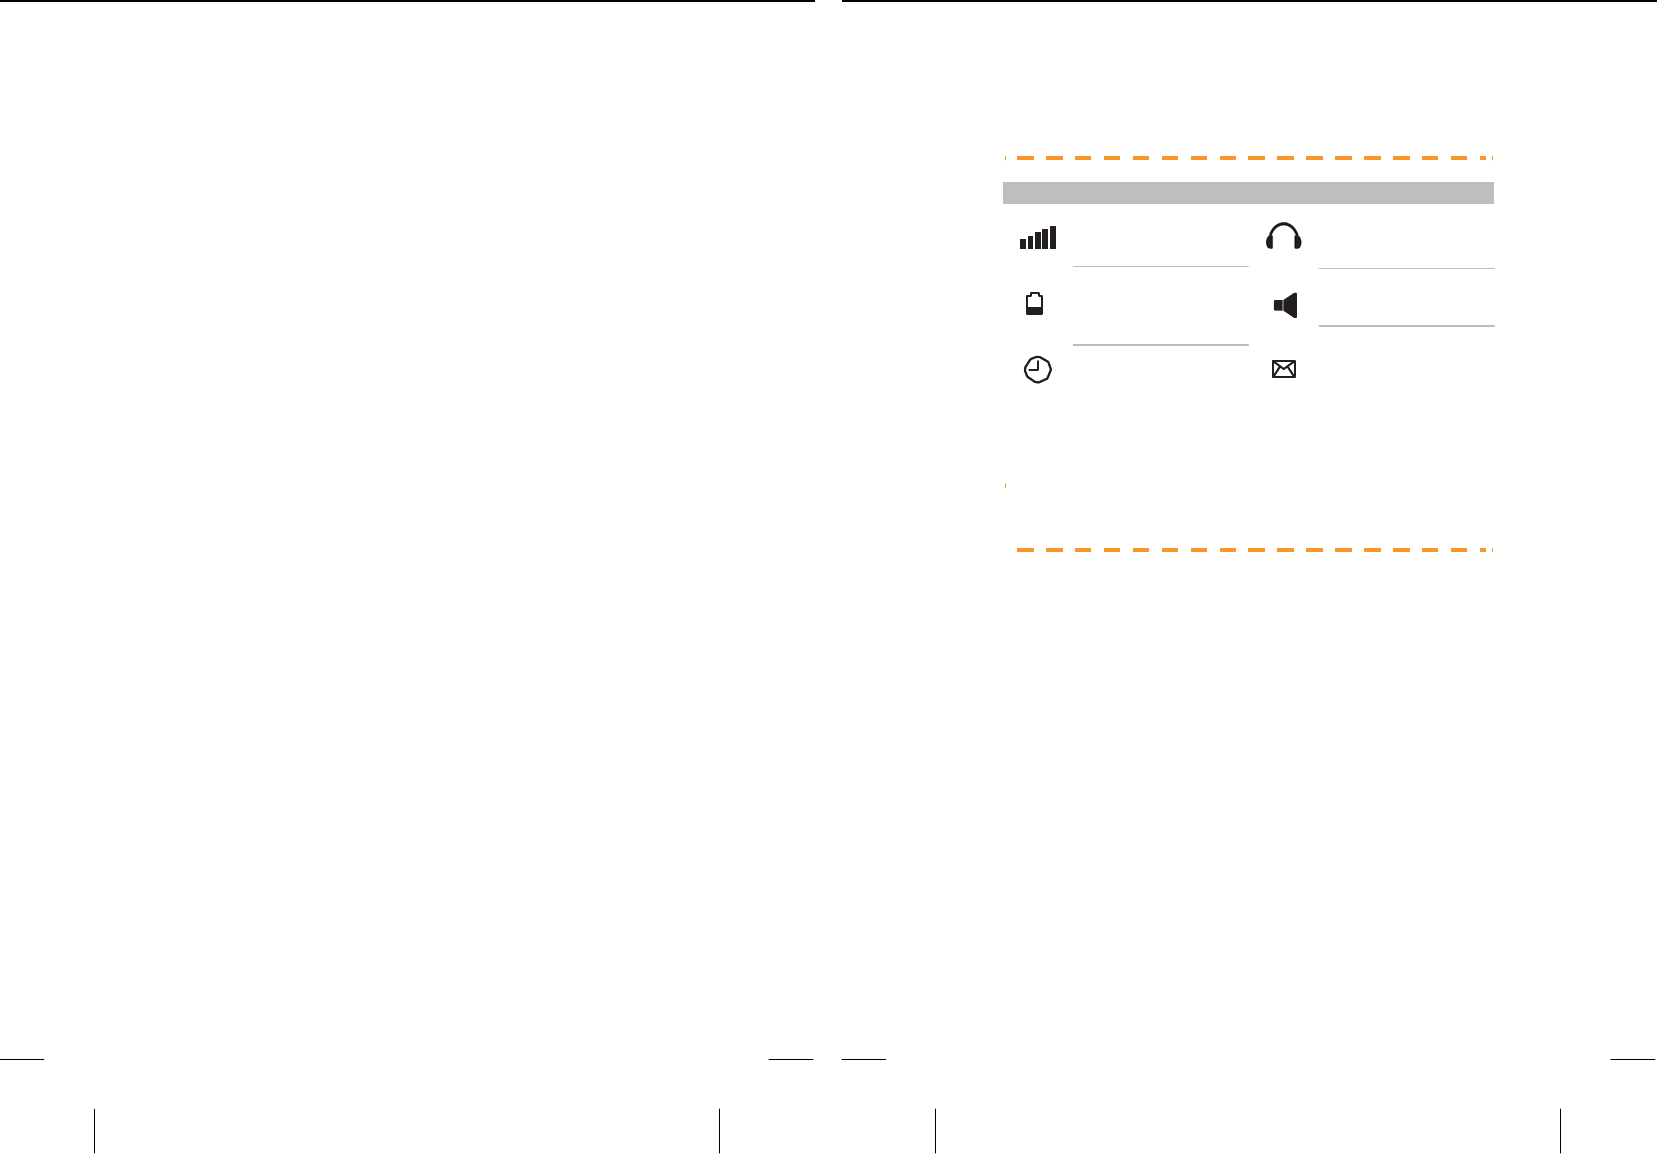
Screen icons
icon description icon description
Singnal
Level of battery
handsfree
activated
set alarm
new message
Installing the SIM card and battery
Insert the SIM card
1. Press the battery cover and slide it down
2. Remove the battery and insert the SIM
card into the slot under the battery.
3.
make sure that the gold contact on the SIM card
is facing down and the beveled edge is aligned
with the corresponding edge of the SIM card slot

PIN
and
PUK:
The personal identification number (PIN)
protects your SIM card against unauthorized
use. The PIN Unblocking Key (PUK number)
can unlock a PIN locked.
The PIN and PUK are supplied with the SIM card.
For more details, contact your network operator
.
Put the battery
1. Insert the battery into the compartment
matching phone contacts and battery
2.
place the lid on the compartment and slide
it up.
Phone charging
To charge the phone
:
2. connect the adapter provided in the box on
any socket in your home
3. place the handset on the base to charge the
battery
4.
a message will be displayed if the connection is
correct
Important Notice on loading:
For the first installation, charge the battery
between 12 and 16 hours.
Subsequently, if the phone is left on the base
during the night will be enough to keep the
battery charged.
To extend battery life, it is recommended not to
leave the phone charging on the basis for long
periods of time (vacations, etc.). Preferably the
battery from a full discharge.
If the phone is not in use for a long time,
remove the battery.
If the battery has not been used for a long time
or if you are exhausted, it is likely that the
phone screen does not work when you reload.
Once the battery has been charging for a while,
you can switch the phone to use it..
Danger of explosion if battery is replaced by an
incorrect type. Dispose of used batteries according
to the instructions
.

Battery indicator light
When charging the battery the red light will be
fixed and the bars of battery icon will move
.
When the battery is fully charged, the red
indicator light will turn off and the battery icon is
displayed in full screen.
Low battery warning:
When the battery is nearly exhausted, the
battery indicator will be empty, the phone will
beep and display a message on screen. You
must place the handset on the base or connect
the power adapter to charge the battery.
If the phone is no battery power will go out, and
can not make or receive calls.
Battery indicator
fully loaded
loaded
80%
loaded
60%
loaded
40%
loaded
20%
Battery empty
On and off
To turn on your phone:
1. hold down the power key (12) until
the display lights
2. enter each digit of the PIN number if so
requested by the team. If you enter an
incorrect digit, press the button
(13) to delete.
3. Press the button (4) to accept.
To turn off the phone, hold the power key (12)
until the screen turns off
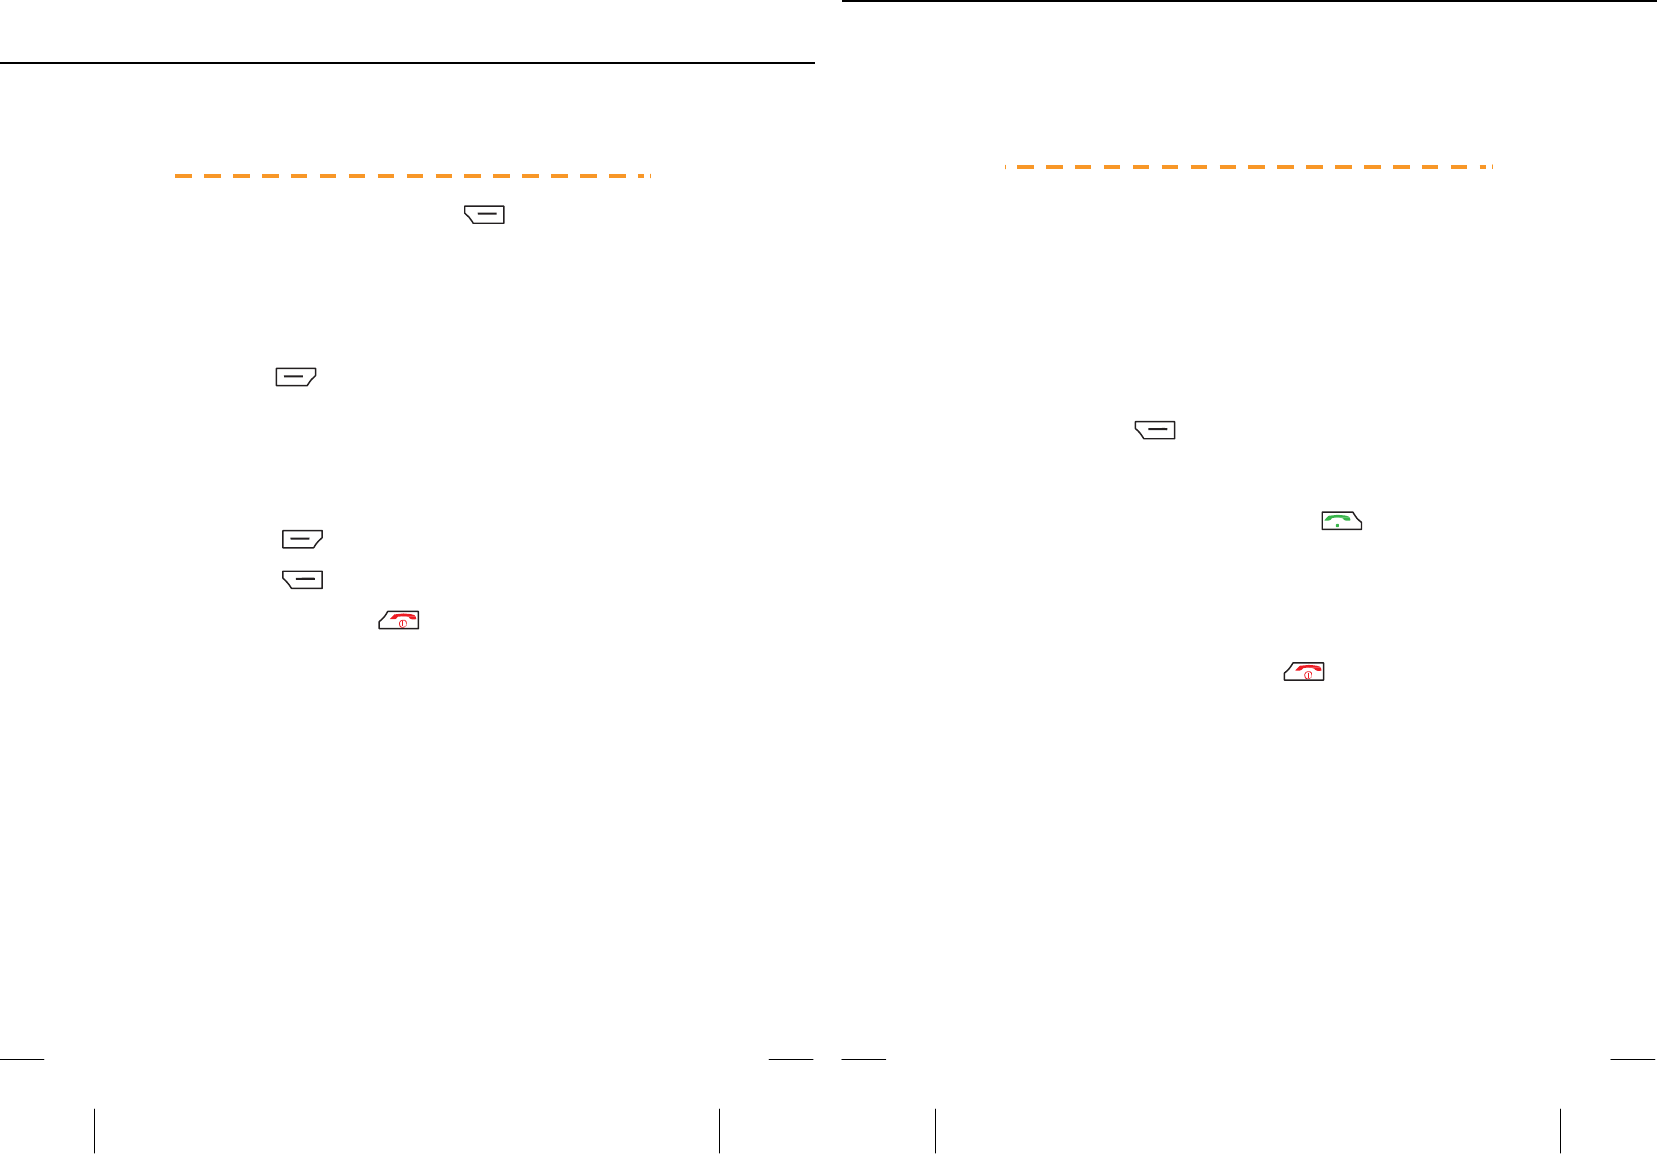
Use function menu
1. In standby mode, press (13) to access
the main menu.
2. use the navigation keys to scroll through
the menu
3. press (4) to open a menu of options
and view the content
4. again use the navigation keys to scroll
through this menu and
5. press (4) to select the desired option
6. press (13) to return to the previous
menu or press (12) to return to the
home screen.
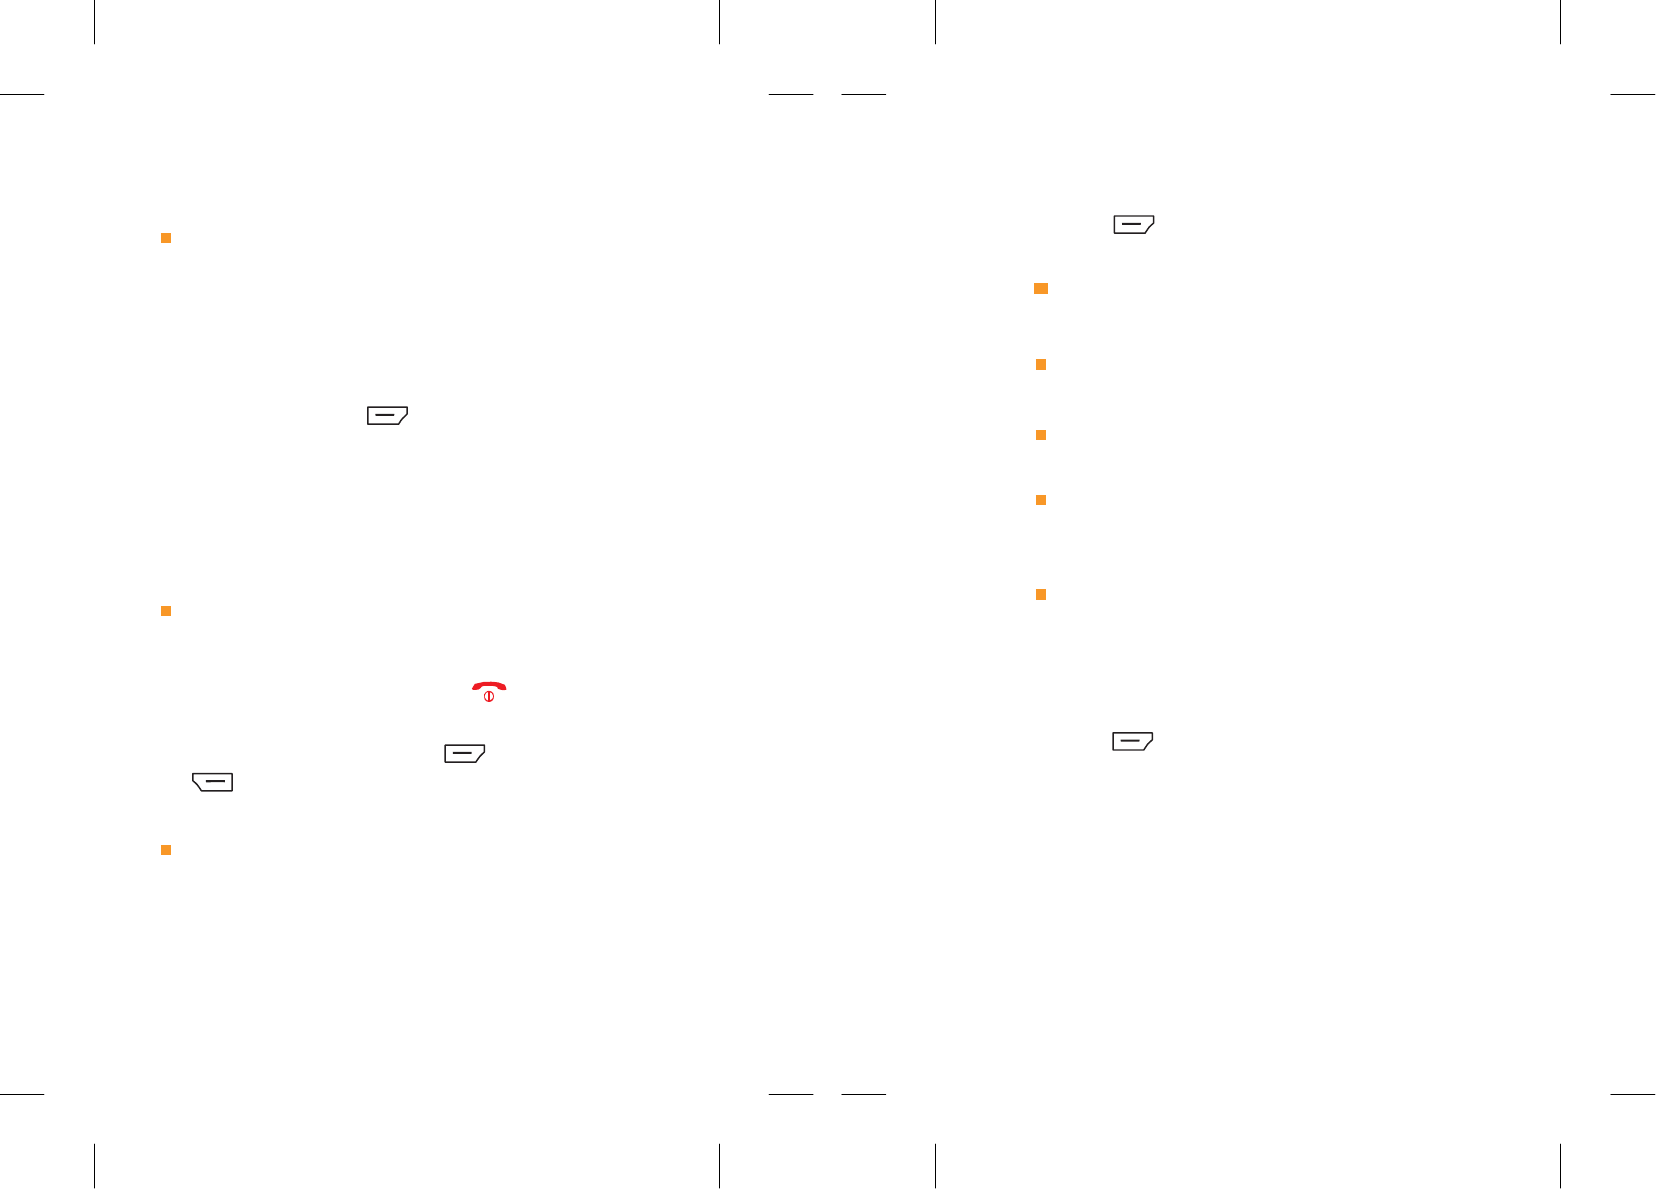
Basic functions
Make a call
1 when the phone in standby mode, dial the
number you want to call using the
alphanumeric keypad
2 if you have entered one digit incorrectly,
press the (13) to delete the last digit or
press and hold to delete all digits
3 press the green start calling (6) to dial the
number. If the number is stored in the
phonebook contact name appears on the
screen
4 press the red end call (12) to end the
call
Important note:
If the phone keypad is locked, you must unlock
it to make calls.

Make a call from the phonebook
1. When the phone in standby, press the left
soft key (4) to access the calendar. The
display will show the contact list in
alphabetical order
2. use the navigation keys to scroll through the
list to the desired contact
3. press the green start calling (6)to dial the
number.
4. press the red end call .
Make a call from History
1. with the phone in standby, press (6)
to access the list of dialed or press the
navigation keys up or down to access the list
of missed calls
2.use the navigation keys to scroll through the
list
3. select a file and press (6) to dial the
number
Make a call using speed dial
Press and hold the number key (2-9) set to fast
memory.The contact name stored in the memory
is displayed on the screen and the phone call
that number.
note:
You need to configure the keys previously. See
page 51 for more information.
Talk
During the conversation you can:
z Activate the loudspeaker:
1. press the speakerphone key (7) during
a conversation to activate handsfree
2. press the same key again to deactivate
z Mute the microphone:
You can mute the microphone during
a conversation:
1. press the Mute (11) during a
conversation to mute the microphone
2. press again the same key to activate.

z Hold / Retrieve a call:
1. press the right button (13) to hold / retrieve
the call. A confirmation message is displayed
when the call is retained appears / gets.
2. You can also do this by selecting the "hold"
option in the options menu
3. When you have multiple simultaneous
conversations you can switch from one to
another, end one or all, etc., from the
"Options" menu
z Setting up a conference:
This function allows you to talk to two people at
the same time. A conference may be
established when:
With a call, receive a new call.
With a call in progress, retains the
current call, and looking for a contact in
the phonebook to call.
In these cases, an active call and a held:
1. access the options by pressing "Options."
and select "Merge calls"
2. the two calls will be active and you can talk
to both parties.
3. access the menu again to separate calls and
talks separately or end the conference
z Call Transfer:
This feature allows you to transfer a call to
another phone number. To do this:
1. during a call, press the key (13) to hold
the call
2. then dial the number you want to transfer
the call or look it up in the phonebook
accessed by pressing the "Options"
(4) and selecting Menu /Phonebook
3. press the call key (6) to mark
4. can transfer the call as you hear the dial tone
or wait to respond
5. to complete the transfer, press the transfer
(8). The held call will be transferred to
another phone number

Note:
The call transfer is a service provided by your
operator. See him for more information
.
Answer a call
When you receive a call the telephone rings
and the display shows the number or contact
name (if stored in the directory):
1. press the green call key (6) to answer
2. press the red call end (12) to reject
the call or to hang up after the
conversation
Text Input
The text entry mode is the font that is used for
messages, enter contacts, etc. The options are:
Sp (caps), sp (lowercase), SP (upper) and 123
Default is Sp (caps).
Change the text input mode
The indicator of the current input mode is
displayed at the top right of the screen.
1. Press to see the available input
modes.
2. use the navigation keys up / down to
highlight the desired and press the key
to confirm
Character input
In either case, once press the key that contains
the desired letters to enter the first letter on the
key, twice for the second letter and so on.

Press once the key (13) to delete the last
character entered.
Hold down the button (13) to delete all
characters entered once.
Select "123" mode to enter only numeric values.
note:
If the letter you want is on the same key as the
letter before, you can enter the last letter
appears once again after the cursor or pressing
the right key to move the cursor to the next
space.
note:
In insert mode, "SP", "Sp" or "sp", press the "0"
key once to insert a space and twice to enter
"0"
.
In insert mode, "SP", "Sp" or "sp", press the "1"
key repeatedly to select and introduce the most
commonly used punctuation.
Introducing symbols
1. to display the list of symbols, press the key
in any input mode in any input mode
2. press the arrow keys to select the symbol
3. press (4) to enter the selected symbol
SMS text messages
New message received
When you receive a new text message, the
phone will beep and show "New Message"
screen . It also displays the icon at the top of
the screen and the LED flash.
1. from the main menu, go to "Messages" and
then to "Inbox". The list of received
messages sorted from newest to oldest
2. new messages are marked with the icon of
an envelope
3. press "Select" to open and read the message
Note:
The LED will flash and the new icon message
remain on the screen if there are unread
messages.
Read messages are marked with the icon of a
SIM card or phone memory depending on
where you have been saved. To change the
storage memory can do so from the Settings
submenu SMS / Save.

Message Options:
When you open a message, you can:
delete - delete the current message
answer - respond to the message with
another message
forward - forward the message to another
contact
call - call the person who will
sent the message
move - save the message in another
memory (SIM / Phone)
copy - copy the message to another
memory (SIM / Phone)
add sender - add the sender's number to a
new contact or an existing contact in the
phonebook
details - see the details of message
delivery
Write and send a message
1. access the "Posts" menu in the main menu
2.
Select "Write SMS" option
3. enter the recipient's number or search the
directory by pressing the key . You can
manually add multiple recipients, separated by
a semicolon (;) and you can also do it from the
agenda:
a. Highlight the desired contact, press
and Select
b. When you have marked all recipients,
press , and select OK. All recipients
are shown at the top of the message
4. press the down navigation key to move to
the text input
5. enter the text as explained in paragraph 12
Entering Text
6. Press the button (4) to view the
available options: Send, Insert template, Add
contact, Save as Draft, output:

Send: select to send the message
Insert template: Use this option to enter a
predefined text
Add contact information: Select this
option to add the contact information of
his agenda in the message text
Save As Draft: If you select this option,
the message is saved in the "Drafts",
"Messages" menu folder
Output: Select to exit the menu.
Confirmation is requested to save the
message
Read saved messages
From the menu "Messages" can access the list
of received messages, sent and drafts.
1. select the "Messages" in the main menu.
2. scroll to the desired option and press
(4) to select
3. will show the list of messages received / sent
/ drafts sorted from newest to oldest

Agenda
See the schedule
1. with the phone in standby, press the
button (4) to access the agenda
2. use the navigation keys up
/ Down to scroll through the list and see all
contacts
Quick Search:
With the contact list screen, enter the first few
letters of the contact you are looking for.
Contacts that contain those letters are
displayed..
For example: to find the contact Juan wish-list
1.press once ➔ the five key contacts that
contain the letter J is shown
2. press the 8 key twice ➔ contacts that contain
the letters shown JU
3. use the navigation keys up / down to scroll to
the desired contact if they appear more than
one in the list
Agenda options
Without there being a highlighted contact,
press (4) for options available agenda.
.
a.
New - Add a new contact to the list
b. delete multiple - delete multiple contacts
c. copy - copy contacts from the SIM card to
the phone or vice versa
d. other:
Speed Dial - make the contacts for speed
dialing
Own Number - Enter your phone number
Service number - access the service
numbers of your service
Memory status - see the status of the
SIM and phone memory

Contact options
In addition to the above, if there is a contact
highlighted, the following options will be
displayed
a. edit - edit contact information
b.
New - Add a new contact
c.
write SMS - write a message text to this
contact
d.
call - call the contact
1. in the main menu, select "Calendar" and then
select "New"
2. select the "Phone" option if you want the
contact remains stored in the phone memory
or select "SIM" to save the contact to your
SIM card
3. Four options are displayed:
a. name
b. number
c. group
d. tone
4. highlight the first option and press (4) to edit the
name. Enter the name using the keypad and press
to confirm
5.
Repeat these steps to enter the number
6. highlight the third option group, select the
group that you want to include the new
contact. You can leave it blank if you wish.
Press (4) to accept
7. repeat the above steps to select the default
ringtone for this contact
Speed-dial
You can assign a speed dial number to the
keys 2 to 9 For this reason, from this menu:
1. highlight the key you want to change and
press (4)
2. Select Edit and enter the phone number
manually or press (4) to open the
calendar and select a contact
3. once set the number, press (4) to accep

4. if the key is already set up with a number,
press (4) to see the detail, edit, select a
contact from the phonebook, etc
To call using speed dial, from the phone's home
screen, press and hold the set button. The phone
dials the number automatically.
note:
Key 1 is configured by default to access
voicemail. Ask your operator about the service
Adjustments
Phone
From the main menu, select "Settings" and then
"Phone" to modify:
date and time - set the date and time as
well as the format you want to display
Language - Spanish default setting, you
can also select English as the language
shortcuts - select the function displayed
by pressing the navigation keys and
function keys left and right
auto on / off - set a time for the phone turn
on or off automatically
battery level - check the battery level of
the terminal
Reset to Defaults

If selected, the terminal will change current
settings to the default. They therefore change
parameters as wallpaper, shortcuts, ringtones,
volume level, etc.
The information stored in the phone memory
will be maintained.
This option is password protected (1234).
Screen
From this menu you have access to modify:
Wallpaper - select a picture as wallpaper
Home screen - select the fields you want
on the home screen
backlight level - change the backlight
level with the cursor left and right
navigation
backlight duration - select the duration of
light on the screen. If you select "Always
On", the screen never turn off. Note that
this will consume the battery faster
Keyboard Illumination - Choose duration of
light in keyboard
Keypad Lock
This option is disabled by default.
From this menu you can select the idle time
after which the keypad locks to prevent
unwanted keystrokes.
when the phone is locked "Unlock" is
displayed on the left soft key (4)
pto unlock the phone, press the button (4)
(Unlock) followed by the (OK) key.
Safety
Since this option will access the security
settings of the phone and the SIM card.
PIN:
Access this option to enable / disable / change
the PIN on your SIM card. You need to know
the current PIN before you can change it.
Phone Lock
If you wish you can lock your phone with a code
to prevent others from accessing your data.
This code is required to turn on the phone.
1. Press the button (4) to activate the
2. the key will be requested (default 1234)
3. follow the same steps to disable the lock
Lock with key Hang
This option allows you to lock the phone by
pressing the power key / End (12) when the
phone is in the home screen.
To unlock, press the button (4) followed
by (OK).
blacklist
Add to blacklist all those contacts you do not
want to receive calls or messages.
Within the Blacklist menu, go to the first option
to check the contacts added to this list. Press
the button (4) for:
new - add a new number to blacklist
edit - edit a contact from the list
remove - remove contact seleccinado
Contact import - import a contact from
your phonebook
erase all - erase all contacts from the list
Within the Blacklist menu, select the second
option to block calls and / or messages from
contacts blacklist. Highlight the desired option
and press (4) to confirm.

Call
Since this option will have access to features
such as forwarding, blocking, call restriction, etc.
Contact your mobile operator about the
availability of these services.
Within this menu will show the following options:
a.
call forwarding - Incoming calls can be
diverted to another phone number. Check
with your operator for more information
b.
Call Waiting
➔
with this feature enabled, the
phone will alert you of a new incoming call
while a call is in progress
c.
Restricted calls - since this option to block
incoming and / or outgoing calls. Activation
and deactivation of this option is locked
with code (default 0000). Check with your
operator for more information
d.other - access to extra features such as call
duration notification, automatic redial and
Reply with SMS
Profiles
The terminal has the following audio profiles:
General, Silent, Interior and Exterior.
You can modify each of these profiles
according to your preferences. for this:
Select one of the profiles, press the button
(4) and then select Settings. A new menu from
where you can be displayed:
rename - change the current profile name
tone settings - select the ring tone and
message
adjust the volume - Select the volume of
the ringtone, message, alarms, etc.tone
type - select the type of tone (ringing or
silence) for calls, messages, etc
Other Alert Tones - modify other tones
You can also create new profiles. To do this press
the button (4) and click Add. Follow the steps
above to complete the profile definition.

Calendar
1. In the main menu, select the "Calendar"
option. The display shows a view of the
current month with the current day
highlighted in another color
2. use the navigation keys to scroll through the
calendar.
3. Press the button (4) to access the options:
a.
new task - create a new task / reminder
.
Complete the information requested on the
screen and press (4) to save the changes.
The selected day will show a colored corner
and the information of the day's work will be
displayed under the calendar
b. see tasks - displays the day's work
highlighted
c. all tasks - displays the list of all saved
jobs
d. today delete tasks - delete tasks for the
selected day
e. delete all tasks - delete all saved jobs
f. go to date - enter a date in the calendar
to view
g.
Weekly - change the view to weekly
h. daily - view the selected day divided by hours

Calculator
Access this option to perform basic arithmetic
operations.
Use the navigation keys to select the operations
add, subtract, multiply, divide and press the call
button to get the result.
Since options have access to save the values
obtained in memories and so further operation
with the stored values.
Alarm
From this option, you can set up 3 different
alarms and select the ring for them.
1. use the navigation keys to highlight an alarm
2. use the arrow left and right navigation to
Enable / Disable the selected alarm
3. Press the button (4) to edit the alarm. A
list of fields on the screen will be shown.
Use the navigation keys up / down to move
from one field to another:
a. Message - Enter a name for the alarm
b. Time - Enter the time for the alarm
c. Timbre - defaults to the "Ring 1". Press the
button (4) to open the list of rings. Use
the navigation keys up / down to hear all
the bells and select the desired
d. Repetition - defaults to "once". Press the
button (4) to show the repeat options:
Once, Daily, labor. Press (4) to confirm

e. Message to the highlighted option, press
the button (4) to save the alarm.
Confirmation is requested. Press the key
to confirm
4. when the alarm is set the icon is displayed in
the icon bar at the top of the screen
When the time of the alarm will sound, and can be
turned off by pressing the button (4) or delay it
by pressing (13). In the latter case the alarm
will sound after 5 minutes.
FMradio
From this option, you can save and listen to
your favorite radio channel.
1. In the main menu, select the "FM radio" option.
2.To turn on the radio, you should plug in the headphone
3.Turn off FM Radio: In the FM radio home menu select Exit FM radio.
Set Frequency:
Enter the bandwidth frequency of your favorite FM radio station.
1.In the FM radio main menu, press Menu>Manual search>OK.
2.Input the band width frequency between 88 and 108MHz.
3.To save the channel in the Channel list, press Options>
Save as preset.
Channels:
Press Menu>FM Radio>Select>Options>Channel list
>OK>Options>Channel to play /edit / delete the selected channel.
Auto Search:
1.In the FM radio home menu, press Select>Options>Auto search
and save.
2.In the prompt, press “OK” to commence.
3.The phone will scan for clear FM radio channels and stores them in the
Channel list memory.
Press Up or Down key to change channel.

Do any doubt
The phone can not turn on
Make sure the battery is inserted properly and
charged.
Hold down the power key for a few seconds
until the screen lights
The display shows "emergency calls only"
The SIM card is not inserted in the phone or
has been placed incorrectly.
Turn off the phone, remove the back cover of
the phone and then remove the battery....
Correctly insert the SIM card.
The SIM card is
not correct. see your operator.
You can not make calls
Make sure you are in a coverage area. If the
coverage indicator has no bar means no
cover. You have to move to another place with
better signal
Make sure your SIM card has enough to make
calls and your phone number will not be blocked or
unsubscribed balance. Check with your mobile
operator
We hereby declare that ( all essential radio test
suites have been carried out and that) the above
named product is in conformity to all the essential
requirements of Directive 1999/5/EC.
The Conformity assessment procedure referred
to in Article 10 and detailed in Annex III or IV of
Directive 1995/5/EC has been followed with the
involvement of the following Notified Body(ies):
Identification mark: CE ****
FCC Statement:
1. This device complies with Part 15 of the FCC Rules. Operation
is subject to the following two conditions:
(1) This device may not cause harmful interference.

(2) This device must accept any interference received, including
interference that may cause undesired operation.
2. Changes or modifications not expressly approved by the party
responsible for compliance could void the user's authority to
operate the equipment.
NOTE:
This equipment has been tested and found to comply with the
limits for a Class B digital device, pursuant to Part 15 of the FCC
Rules. These limits are designed to provide reasonable protection
against harmful interference in a residential installation.
This equipment generates uses and can radiate radio frequency
energy and, if not installed and used in accordance with the
instructions, may cause harmful interference to radio
communications. However, there is no guarantee that
interference will not occur in a particular installation. If this
equipment does cause harmful interference to radio or television
reception, which can be determined by turning the equipment off
and on, the user is encouraged to try to correct the interference
by one or more of the following measures:
Reorient or relocate the receiving antenna.
Increase the separation between the equipment and receiver.
Connect the equipment into an outlet on a circuit different from
that to which the receiver is connected.
Consult the dealer or an experienced radio/TV technician for help.
SAR Information Statement
Your wireless Tablet PC is a radio transmitter and receiver. It is
designed and manufactured not to exceed the emission limits for
exposure to radiofrequency (RF) energy set by the Federal
Communications Commission of the U.S. Government. These
limits are part of comprehensive guidelines and establish
permitted levels of RF energy for the general population. The
guidelines are based on standards that were developed by
independent scientific organizations through periodic and
thorough evaluation of scientific studies. The standards include a
substantial safety margin designed to assure the safety of all
persons, regardless of age and health. The exposure standard for
wireless Tablet PCs employs a unit of measurement known as
the Specific Absorption Rate, or SAR. The SAR limit set by the
FCC is 1.6 W/kg. * Tests for SAR are conducted with the Tablet
PC transmitting at its highest certified power level in all tested
frequency bands. Although the SAR is determined at the highest
certified power level, the actual SAR level of the Tablet PC while
operating can be well below the maximum value. This is because
the Tablet PC is designed to operate at multiple power levels so
as to use only the power required to reach the network. In
general, the closer you are to a wireless base station antenna,
the lower the power output. Before a Tablet PC model is available
for sale to the public, it must be tested and certified to the FCC

that it does not exceed the limit established by the government
adopted requirement for safe exposure. The tests are performed
in positions and locations (e.g., at the ear and worn on the body)
as required by the FCC for each model. The highest SAR value
for this model Tablet PC when tested for use at the ear is
0.995W/Kg and when worn on the body, as described in this user
guide, is 0.205W/Kg(Body-worn measurements differ among
Tablet PC models, depending upon available accessories and
FCC requirements). The maximum scaled SAR in hotspot mode
is1.006W/Kg. While there may be differences between the SAR
levels of various Tablet PC and at various positions, they all
meet the government requirement for safe exposure. The FCC
has granted an Equipment Authorization for this model Tablet PC
with all reported SAR levels evaluated as in compliance with the
FCC RF exposure guidelines. SAR information on this model
Tablet PC is on file with the FCC and can be found under the
Display Grant section of http://www.fcc.gov/ oet/fccid after
searching on
FCC ID: 2ACSKSC-397-GH3G Additional information on
Specific Absorption Rates (SAR) can be found on the Cellular
Telecommunications Industry Asso-ciation (CTIA) web-site at
http://www.wow-com.com. * In the United States and Canada, the
SAR limit for Tablet PC used by the public is 1.6watts/kg (W/kg)
averaged over one gram of tissue. The standard incorporates a
sub-stantial margin of safety to give additional protection for the
public and to account for any variations in measurements.
Body-worn Operation
This device was tested for typical body-worn operations. To
comply with RF exposure requirements, a minimum separation
distance of 15mm must be maintained between the user’s body
and the handset, including the antenna. Third-party belt-clips,
holsters, and similar accessories used by this device should not
contain any metallic components. Body-worn accessories that do
not meet these requirements may not comply with RF exposure
requirements and should be avoided. Use only the supplied or an
approved antenna.