Sunpark Electronics 12055D Torchiere Fluorescent Fixture User Manual ASSEMBLY INSTRUSTION 2
Sunpark Electronics Corp Torchiere Fluorescent Fixture ASSEMBLY INSTRUSTION 2
users manual
READ ALL INSTRUCTIONS PRIOR TO ASSEMBLY THIS FIXTURE
ASSEMBLY INSTRUCTIONS FOR TORCHIERE FLUORESCENT FIXTURE
1. Unpack all parts onto a flat surface preferably on a carpet or area rug. All wiring comes
complete and pre-assembled so careful handling is required during the unpacking and
assembly.
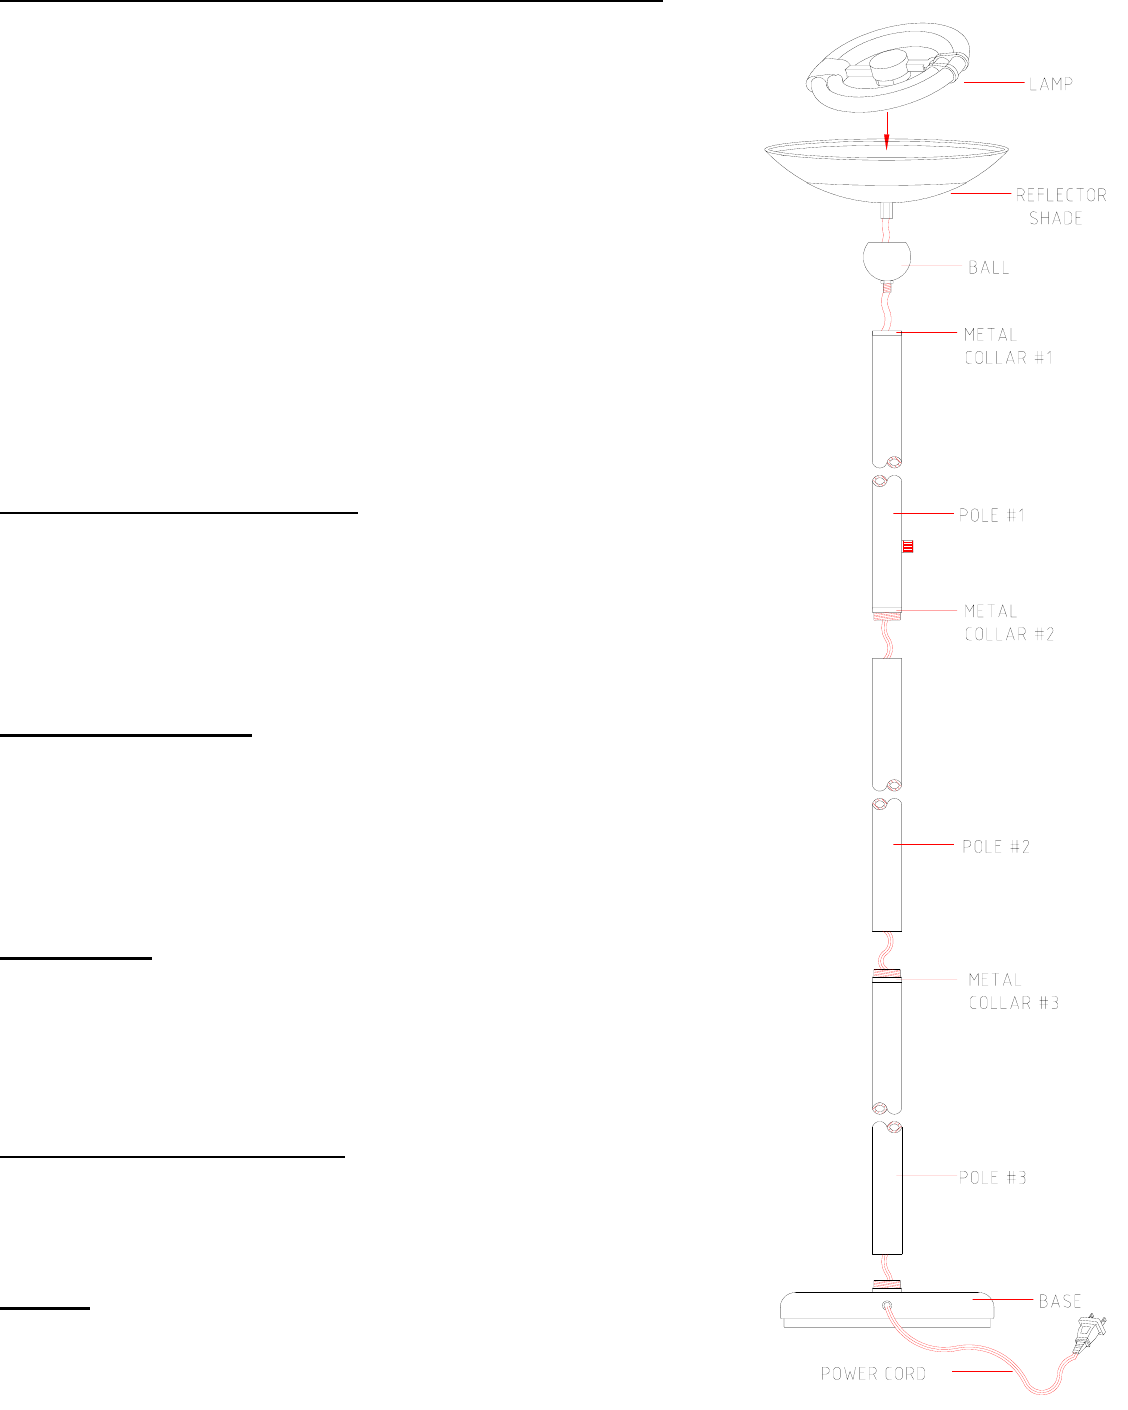
2. Place the reflector/shade upside down on the carpet and screw the ball to the bottom of
the reflector/shade by turning the ball clockwise.
3. Unscrew the metal collar #1from the pole #1 (counterclockwise) and screw collar #1 to
the ball (clockwise).
4. Slowly push the loose wire (with white insulation) into pole #1. Turn the pole #1
counter-clockwise about 3 times before screwing to the collar #1 of the ball/reflector
assembly by turning clockwise. Leave the assembled parts with the shade upside
down.
5. Assemble pole #3 onto the base by turning in a clockwise direction.
6. Assemble pole #2 onto pole #3, again in a clockwise direction.
7. Tile the assembled pole towards the other inverted pole #1/reflector assembly and pull
the cord under the center of the base to make the two assemblies as close as possible
and then pull the cord through the side.
8. Slowly stand the base-pole assembly with one hand and using the other hand, slowly lift
and turn the ball/reflector assembly upright.
9. Turn the ball/reflector assembly counter-clockwise around 3 times and then slowly turn
clockwise to screw the assemblies together.
10. Install the lamp by carefully matching the base socket.
LAMP REPLACEMENT INSTRUCTIONS
Replacing only with G.E. 55W 2D lamp or 55W 2C lamp.
1. Turn the torchiere off, and allow sufficient time of the unit and lamp to cool properly
before handling.
2. Remove the lamp by grasping the plastic center section of the lamp housing. Pull
straight out. Be careful not to drop the lamp that is fragile, and can break.
3. Grasp the replacement lamp in the same manner, and re-insert the new lamp into the
ballast socket. Please check the orientation of the lamp plug to the socket. This lamp
will only fit the ballast socket one way. DO NOT FORCE THE LAMP.
CLEANING INSTRUCTIONS
Your fixture is made from quality materials that will last for many, many years with a
minimum of care. You may want to periodically clean the inside of the reflector housing and
outside parts, using a mild non-abrasive glass cleaner and soft cloth. When cleaning, make
sure you have unplugged the fixture, and have allowed sufficient time for the fixture to cool
to room temperature. Do not use solvents, or cleaners containing abrasive agents. We
recommend you remove the lamp prior to cleaning the inside of the reflector. Do not spray
liquid cleaner directly onto the lamp, or ballast. All liquid should be properly wiped away with
a cloth or towel prior to restoring power to the torchiere.
FCC WARNING
This equipment has been tested and found to comply with the limits for a Consumer device,
Pursuant to Part 18 of the FCC Rules. Operation is subject to the following conditions: (1)
this device may not cause harmful interference, and (2) this device must accept any
interference received, including interference that may cause undesired operation.
This product may cause interference to radio equipment and should not be installed near
maritime safety communications equipment or other critical navigation or communication
equipment operating between 0.45-30MHz.
IMPORTANT SAFETY INSTRUCTIONS
THIS PORTABLE LAMP HAS A POLARIZED PLUG (ONE BLADE IS WIDER THAN THE OTHER) AS A SAFETY
FEATURE TO REDUCE THE RISK OF ELECTRIC SHOCK. THIS PLUG WILL FIT IN A POLARIZED OUTLET ONLY
ONE WAY
. IF THE PLUG DOES NOT FIT FULLY IN THE OUTLET, REVERSE THE PLUG. IF IT STILL DOES NOT
FIT, CONTACT A QUALIFIED ELECTRICIAN. NEVER USE WITH AN EXTENSION CORD UNLESS PLUG CAN BE
FULLY INSERTED. DO NOT ATTEMPT TO DEFEAT THIS SAFETY FEATURE.
CAUTION
TO PREVENT ELECTRIC SHOCK, MATCH WIDE BLADE OF PLUG TO WIDE SLOT, FULLY INSERTED.