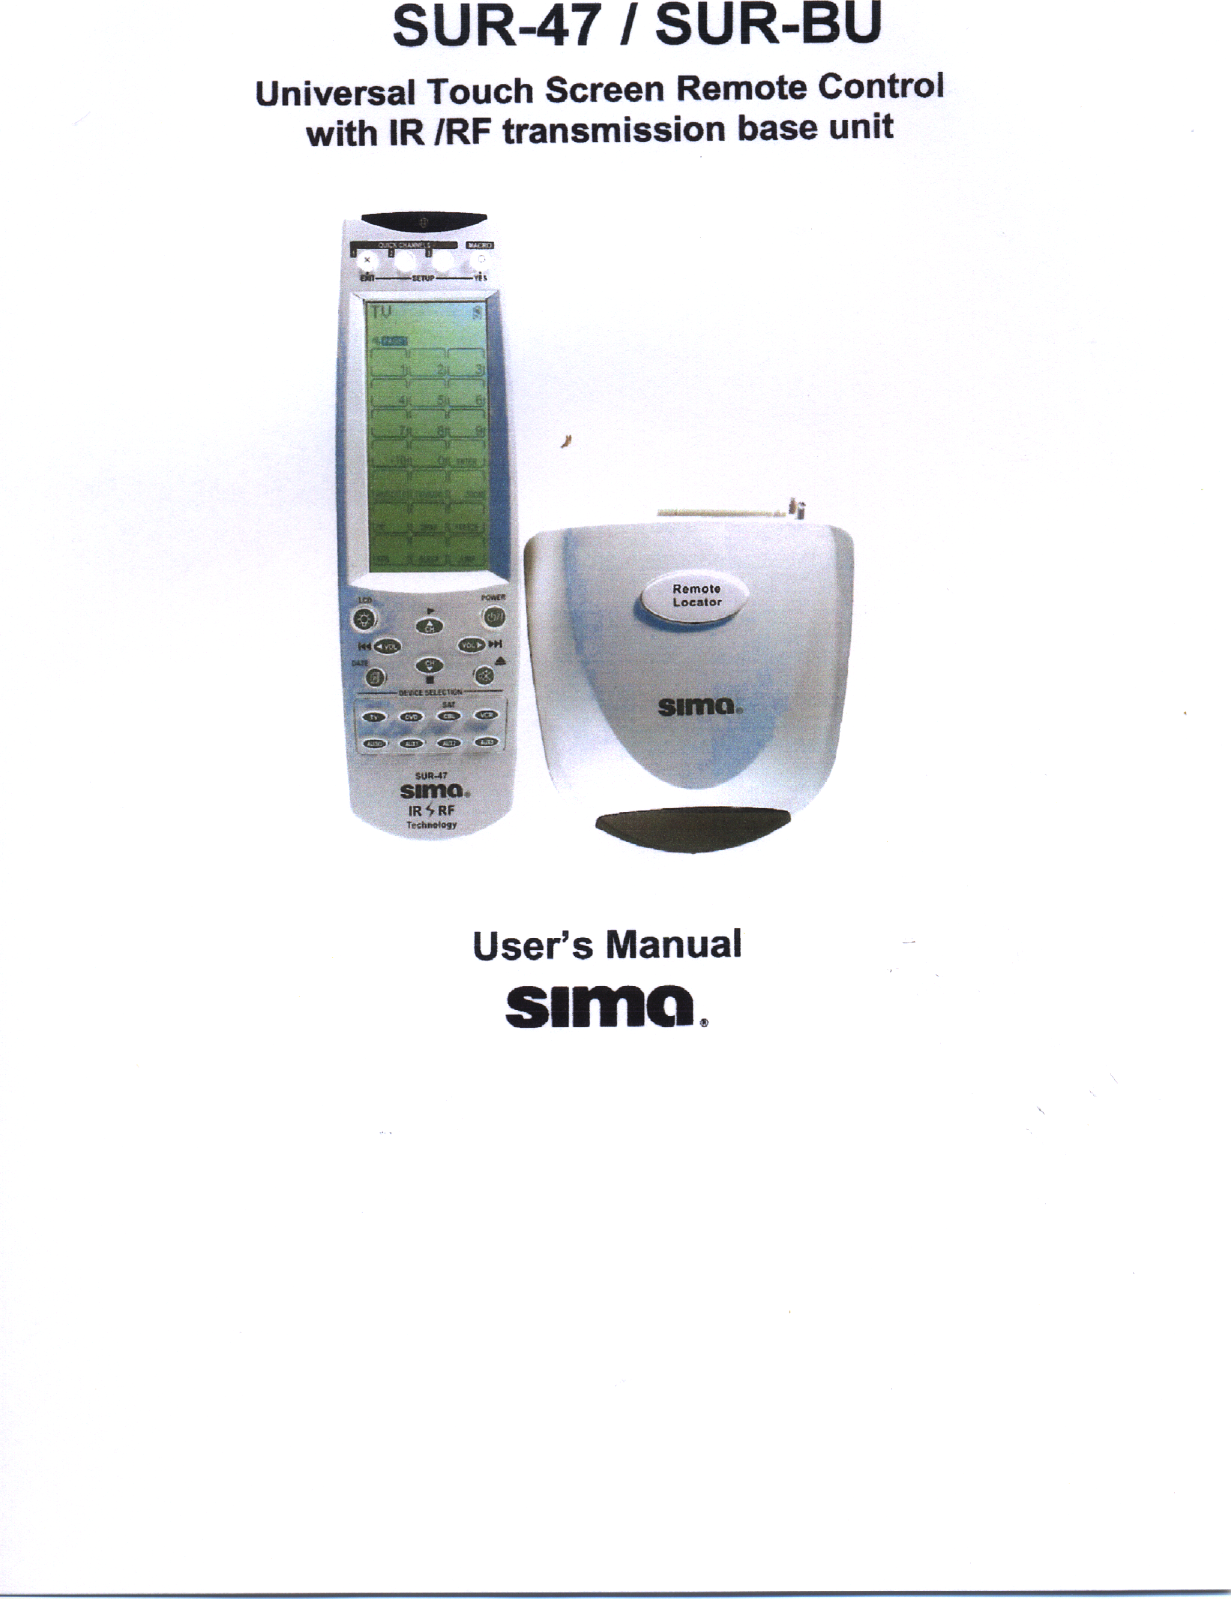
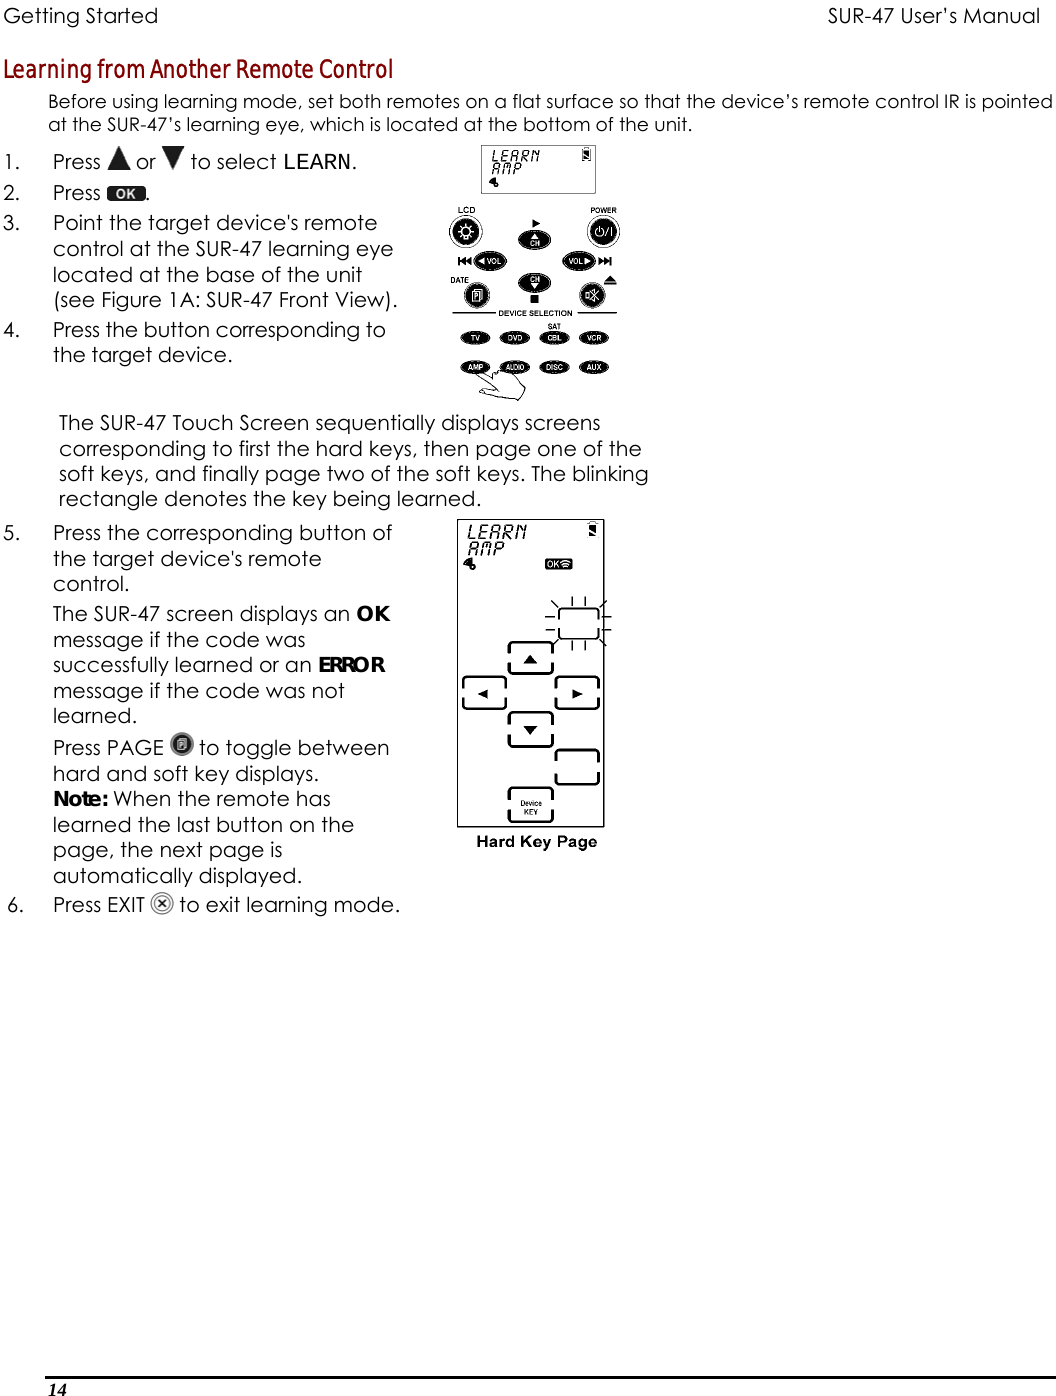
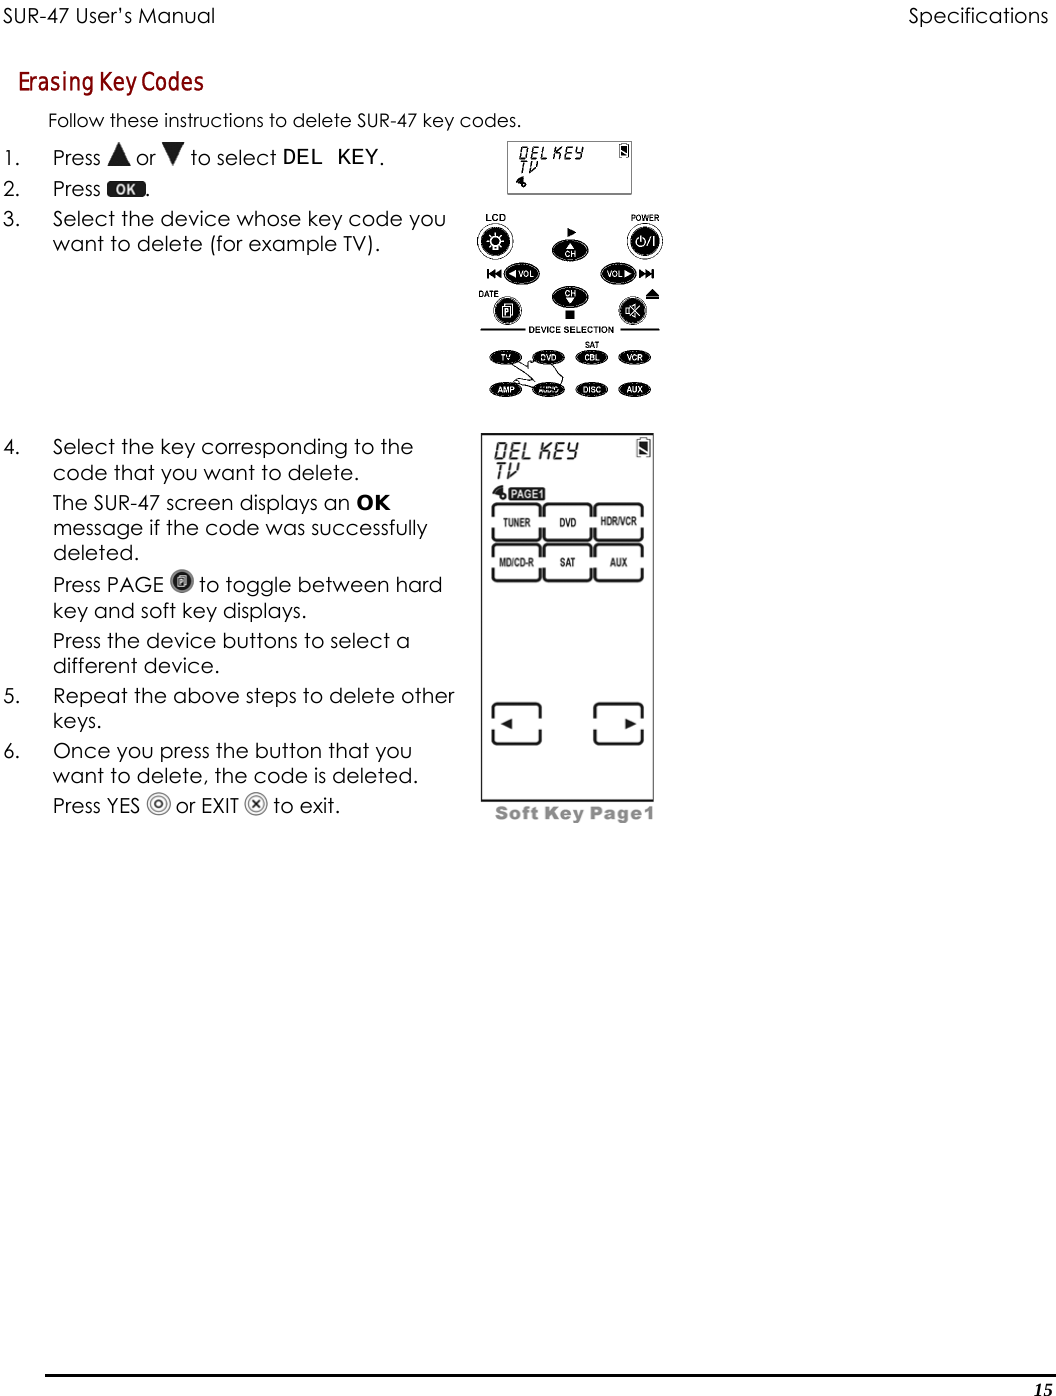
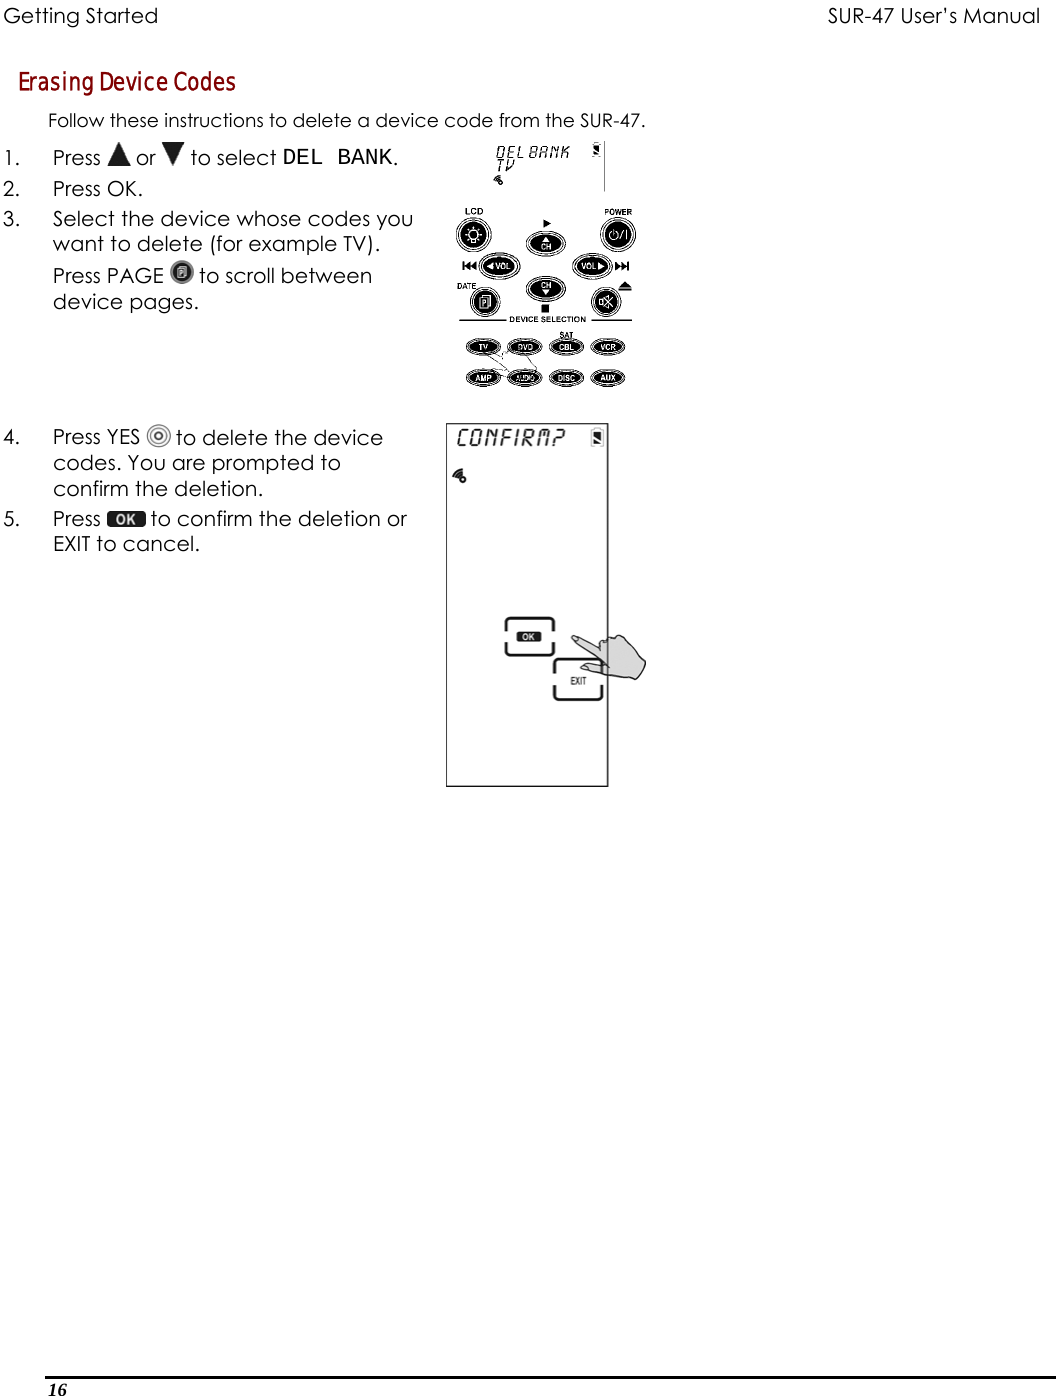
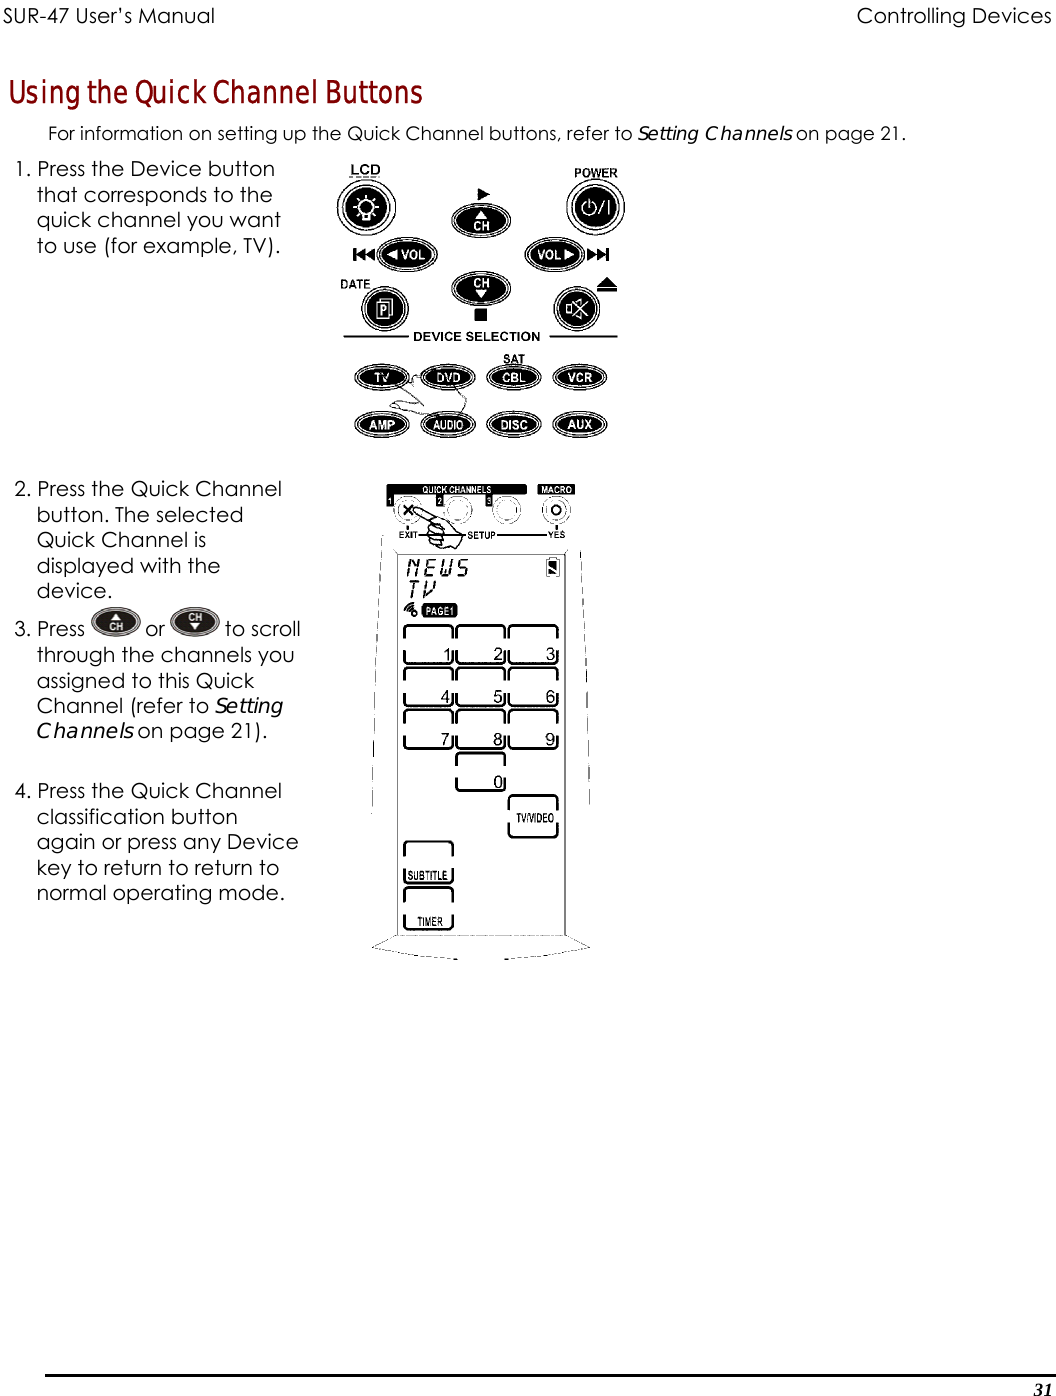
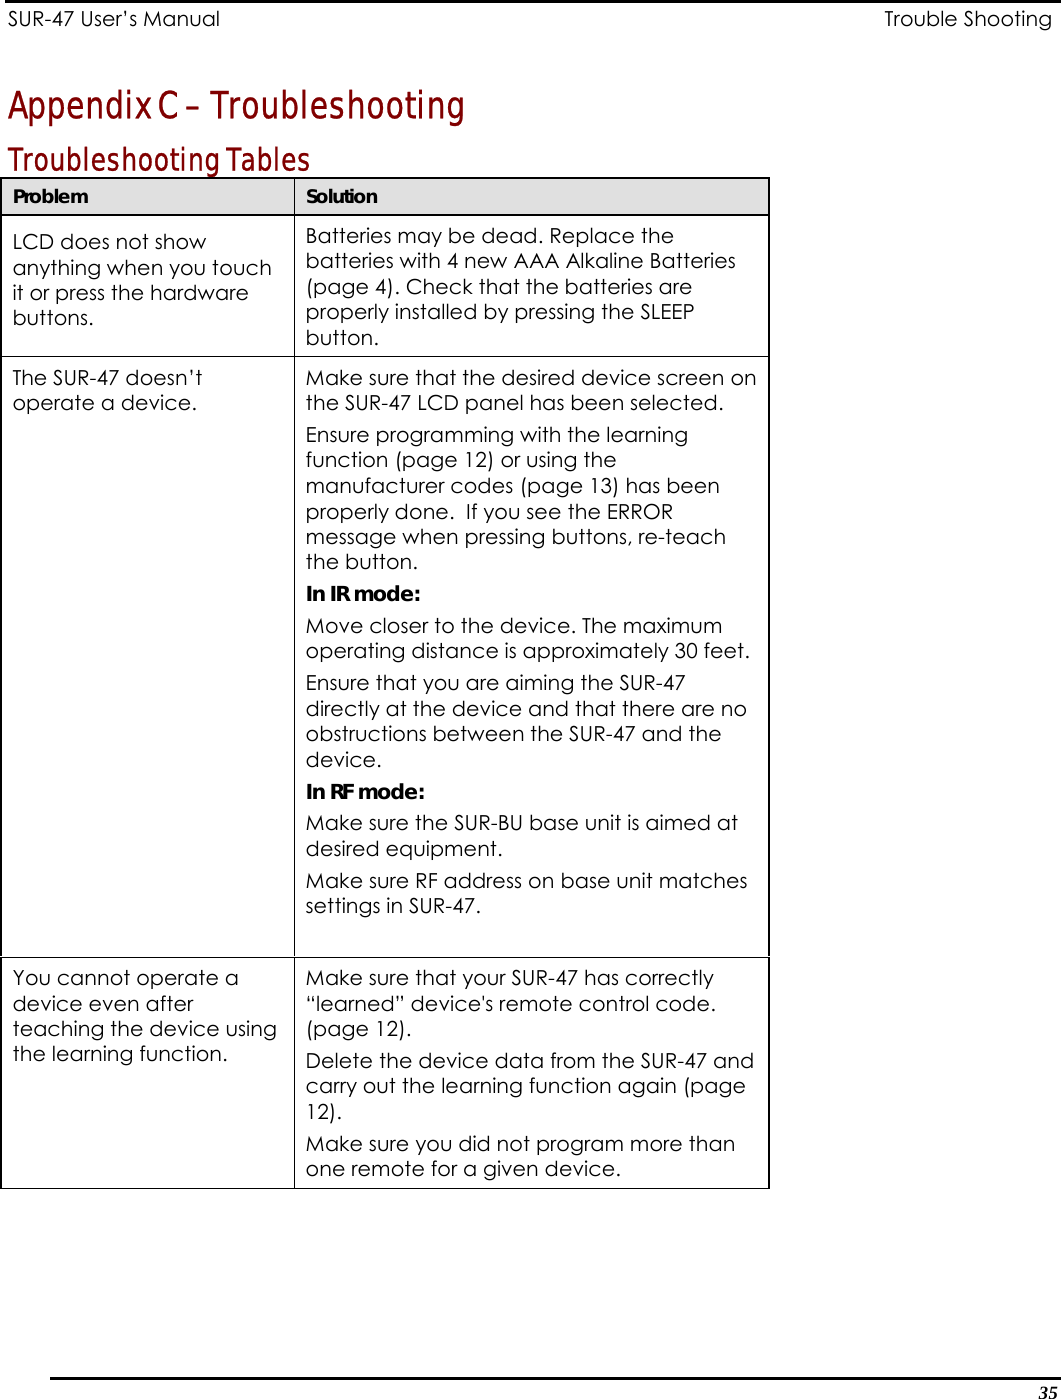
Sunwave Technology SEL6000 Universal Remote Control Transceiver Base Unit User Manual SRC 9310
Sunwave Technology Corp. Universal Remote Control Transceiver Base Unit SRC 9310
UserManual.wiki
>
Sunwave Technology
>
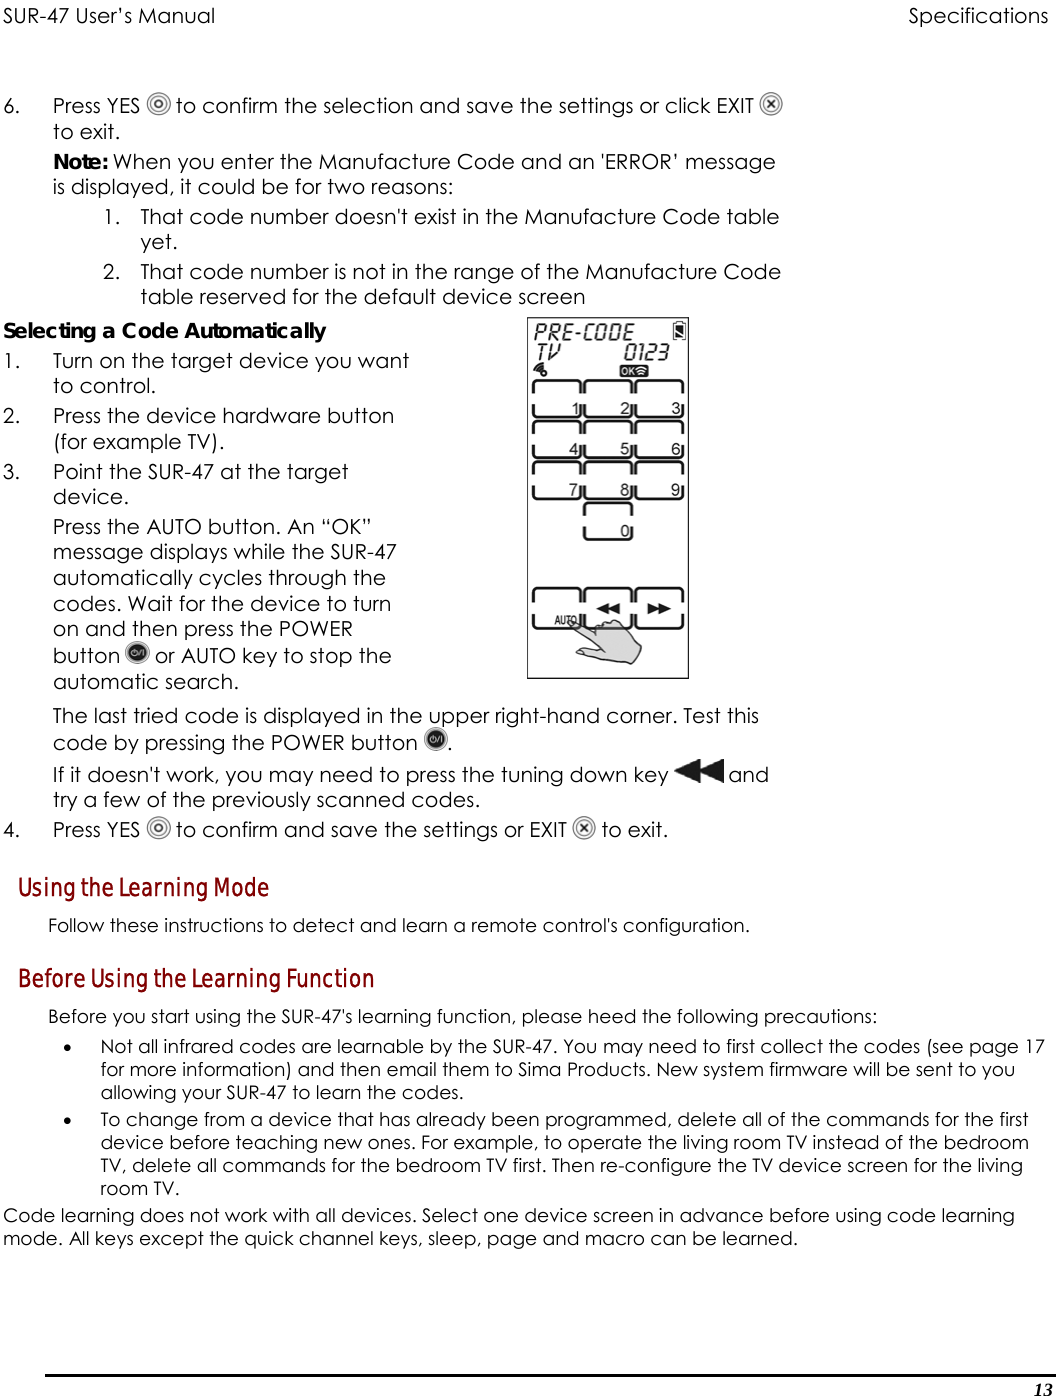
SEL6000 User Manual
User Manual
Navigation menu
Upload a User Manual
Namespaces
Wiki Guide
HTML
PDF
Info
Views
User Manual
Discussion / Help
Navigation