Suprema BIOENTRYPLUS FINGERPRINT SYSTEM User Manual Users manual
Suprema Inc. FINGERPRINT SYSTEM Users manual
UserManual.wiki
>
Suprema
>
BIOENTRYPLUS User Manual
Users manual
Navigation menu
Upload a User Manual
Namespaces
Wiki Guide
HTML
PDF
Info
Views
User Manual
Discussion / Help
Navigation
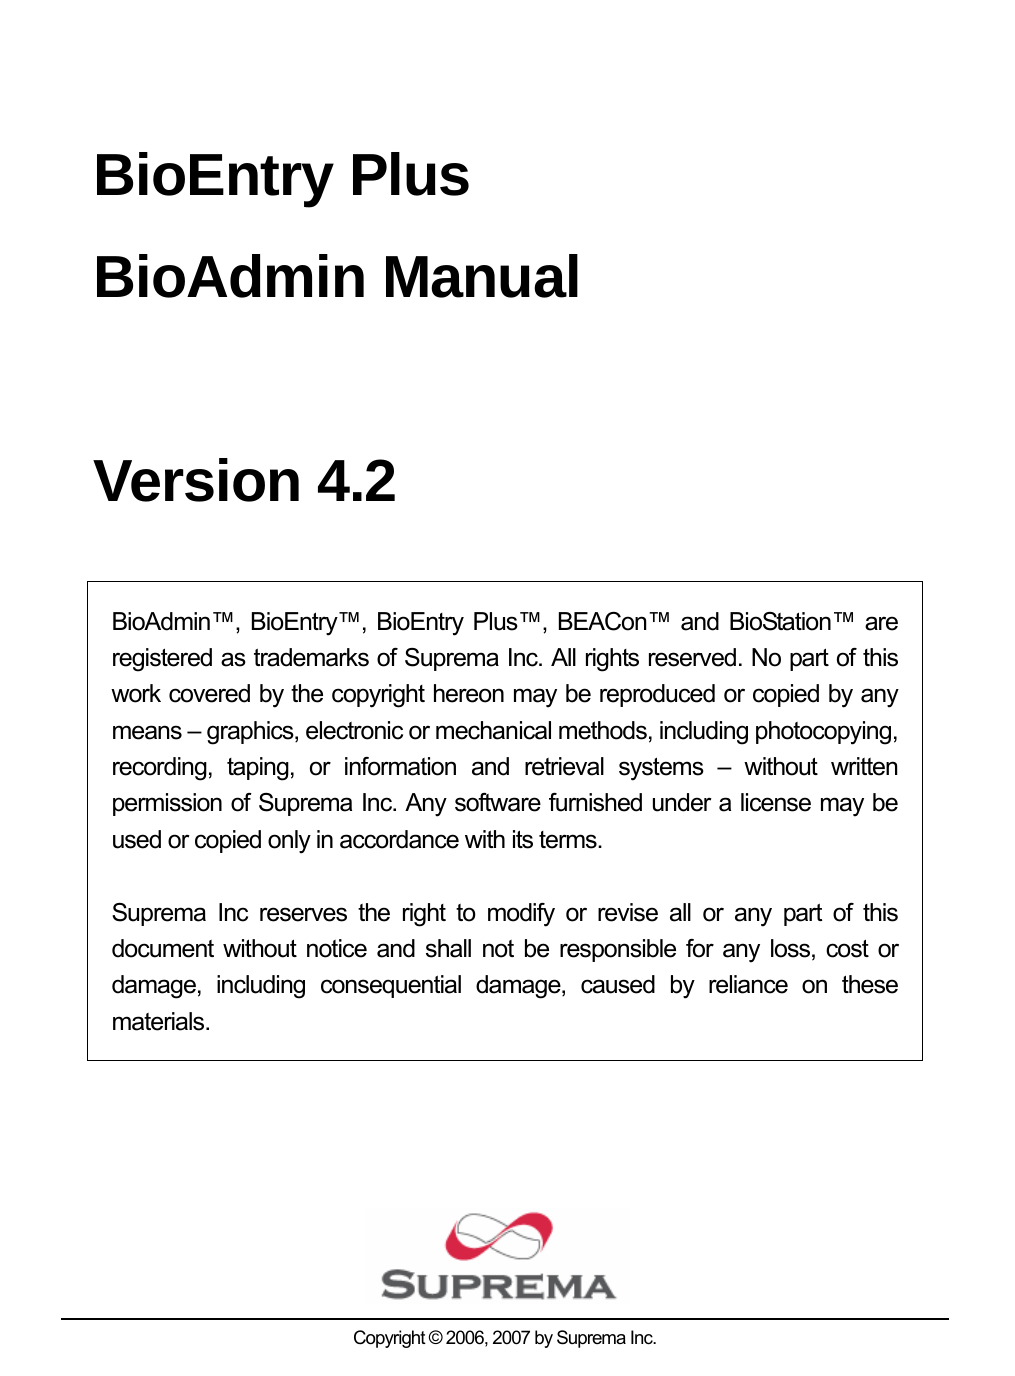


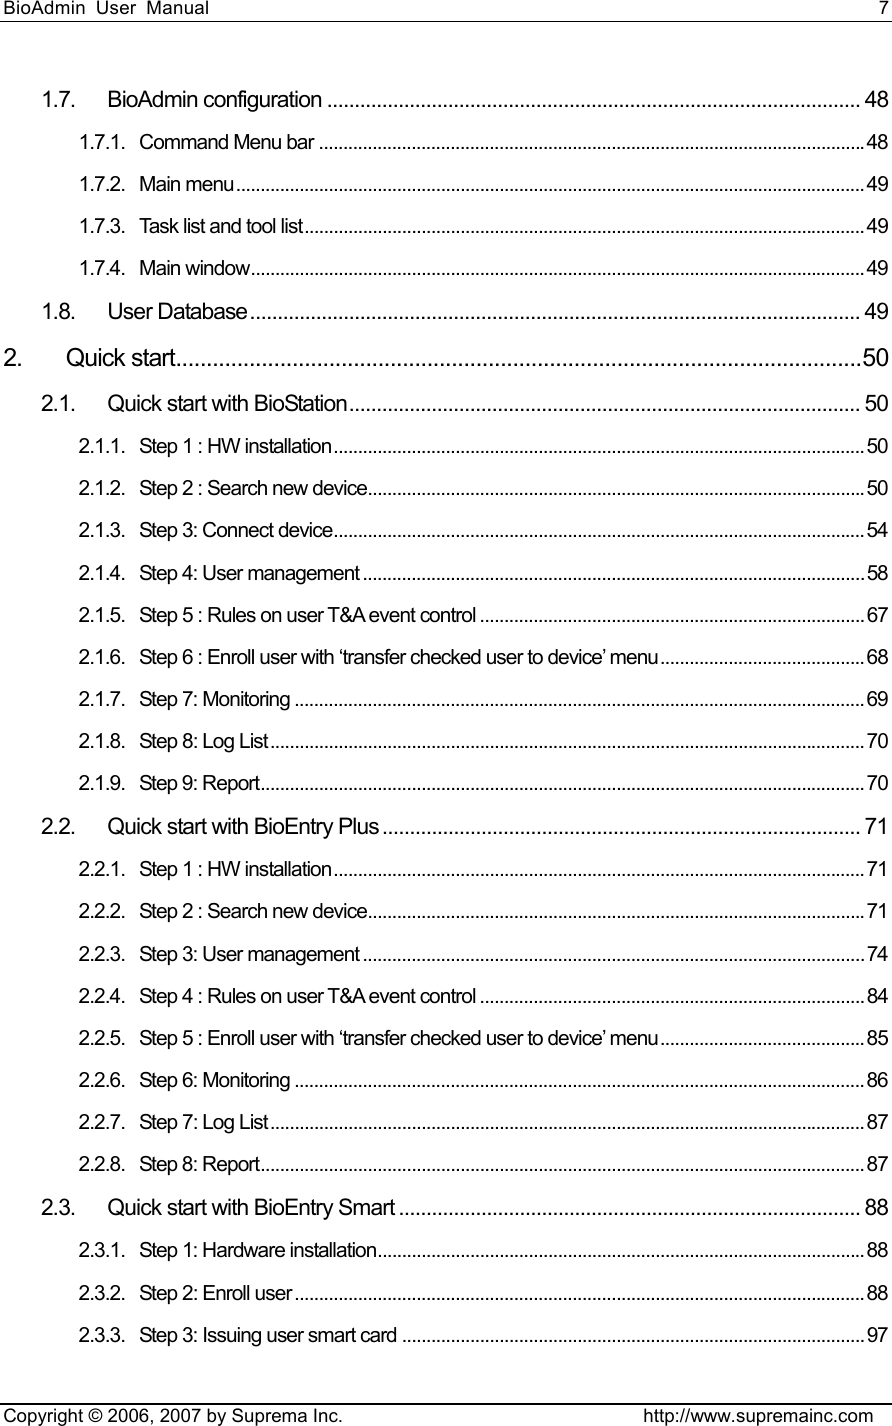

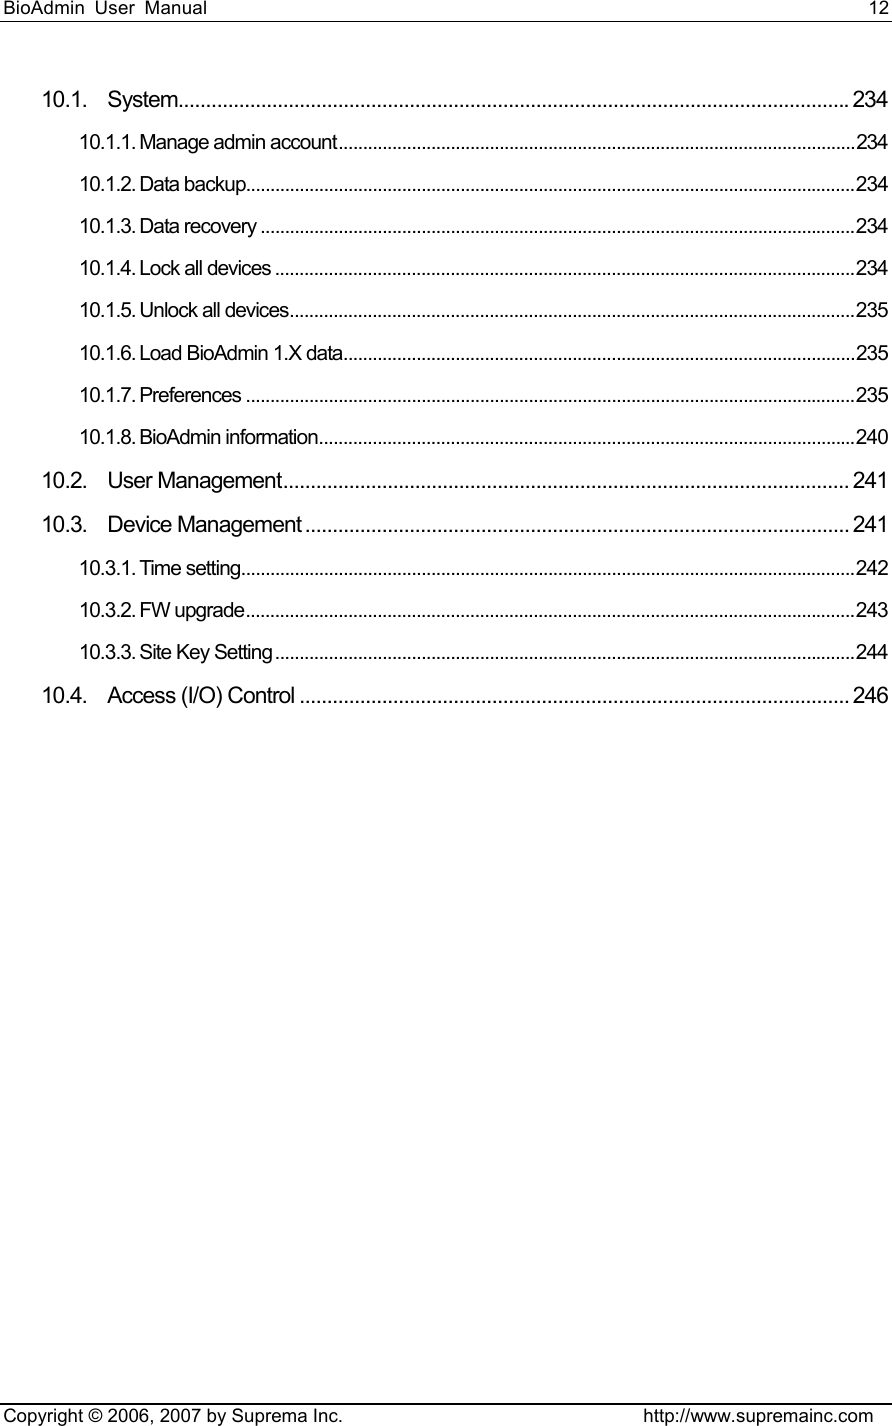
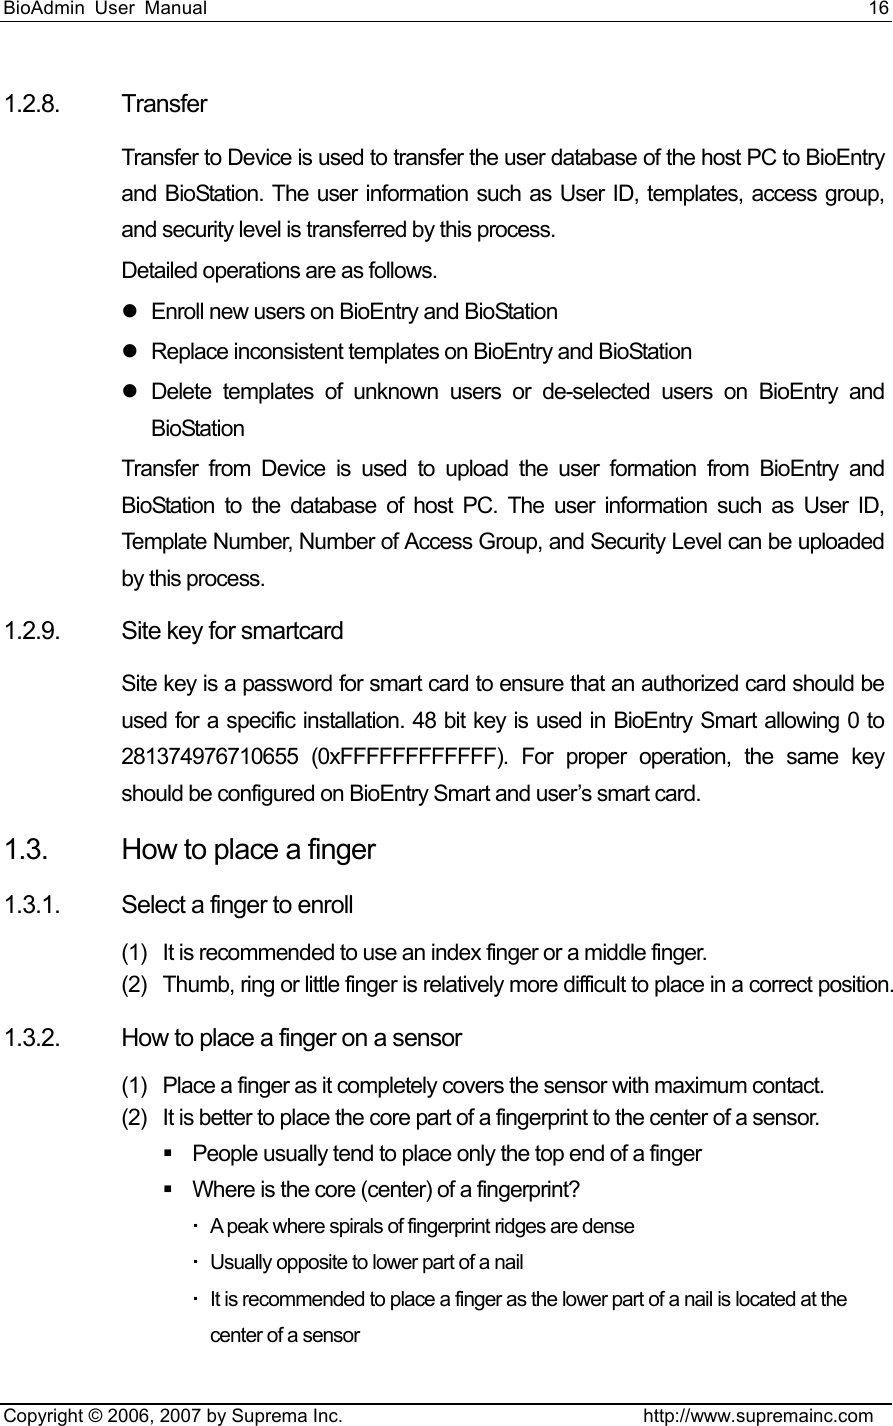
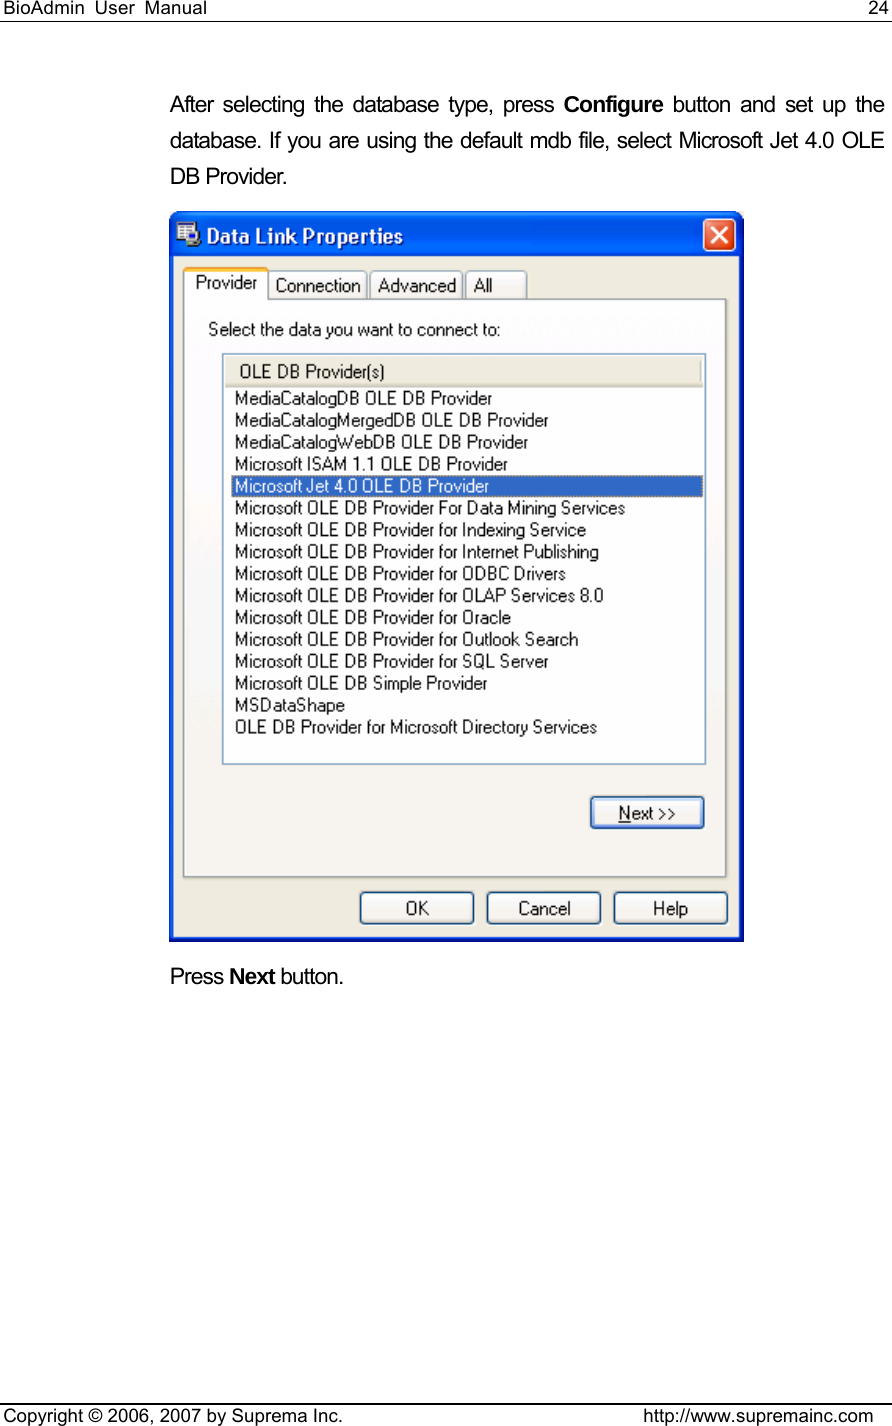
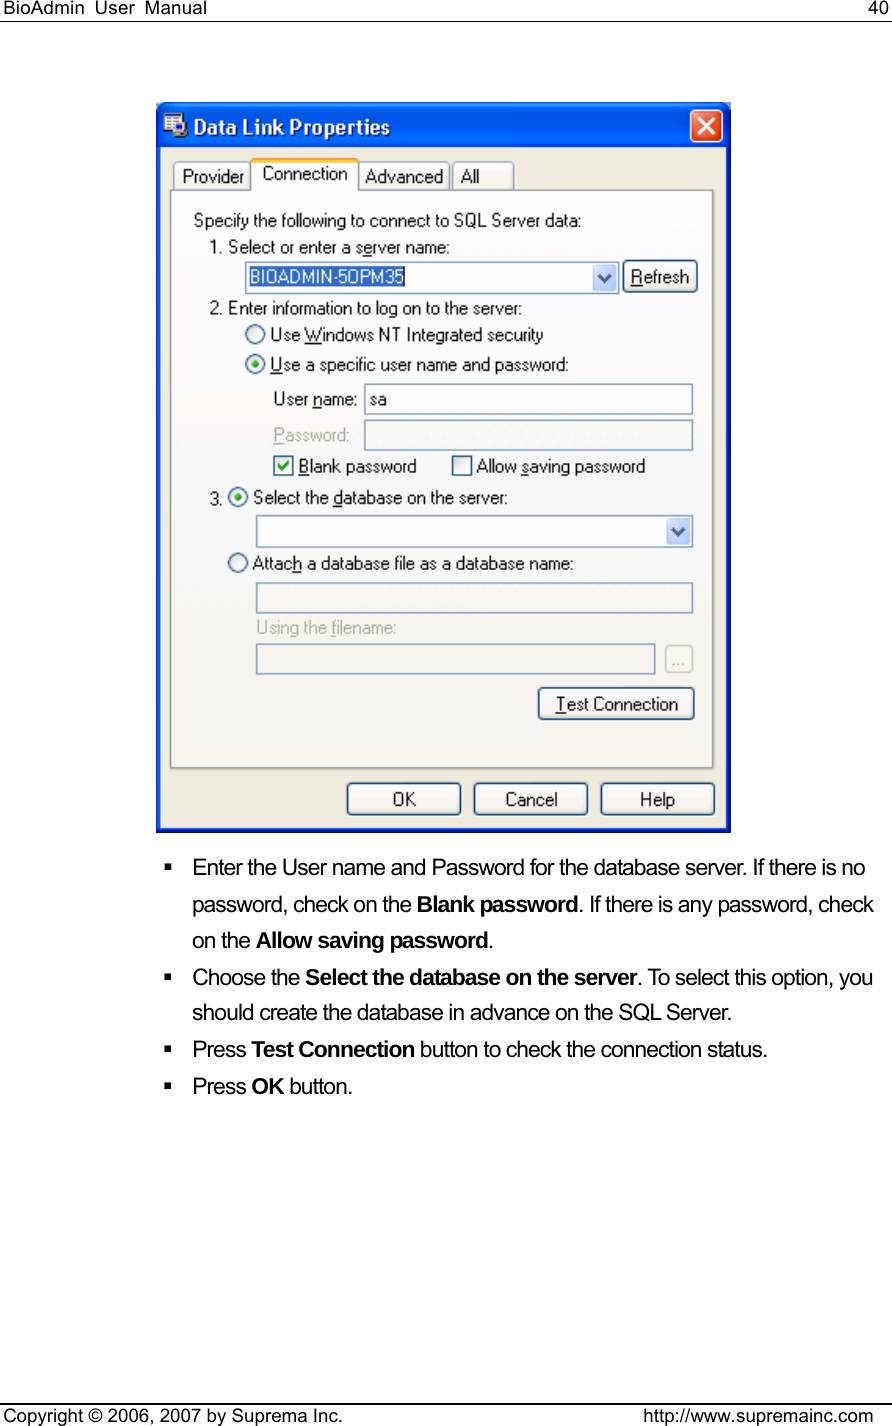
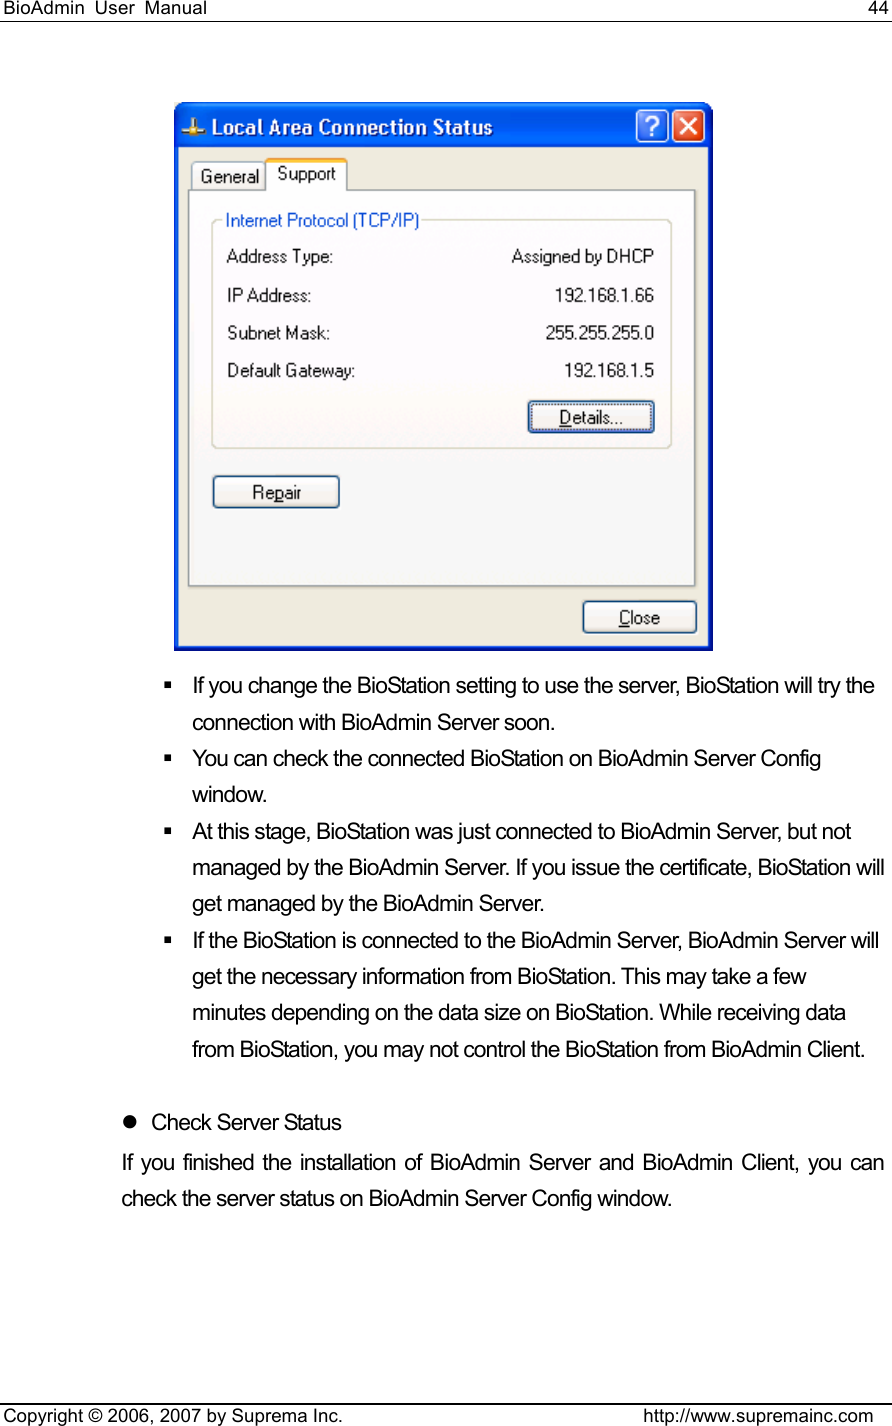
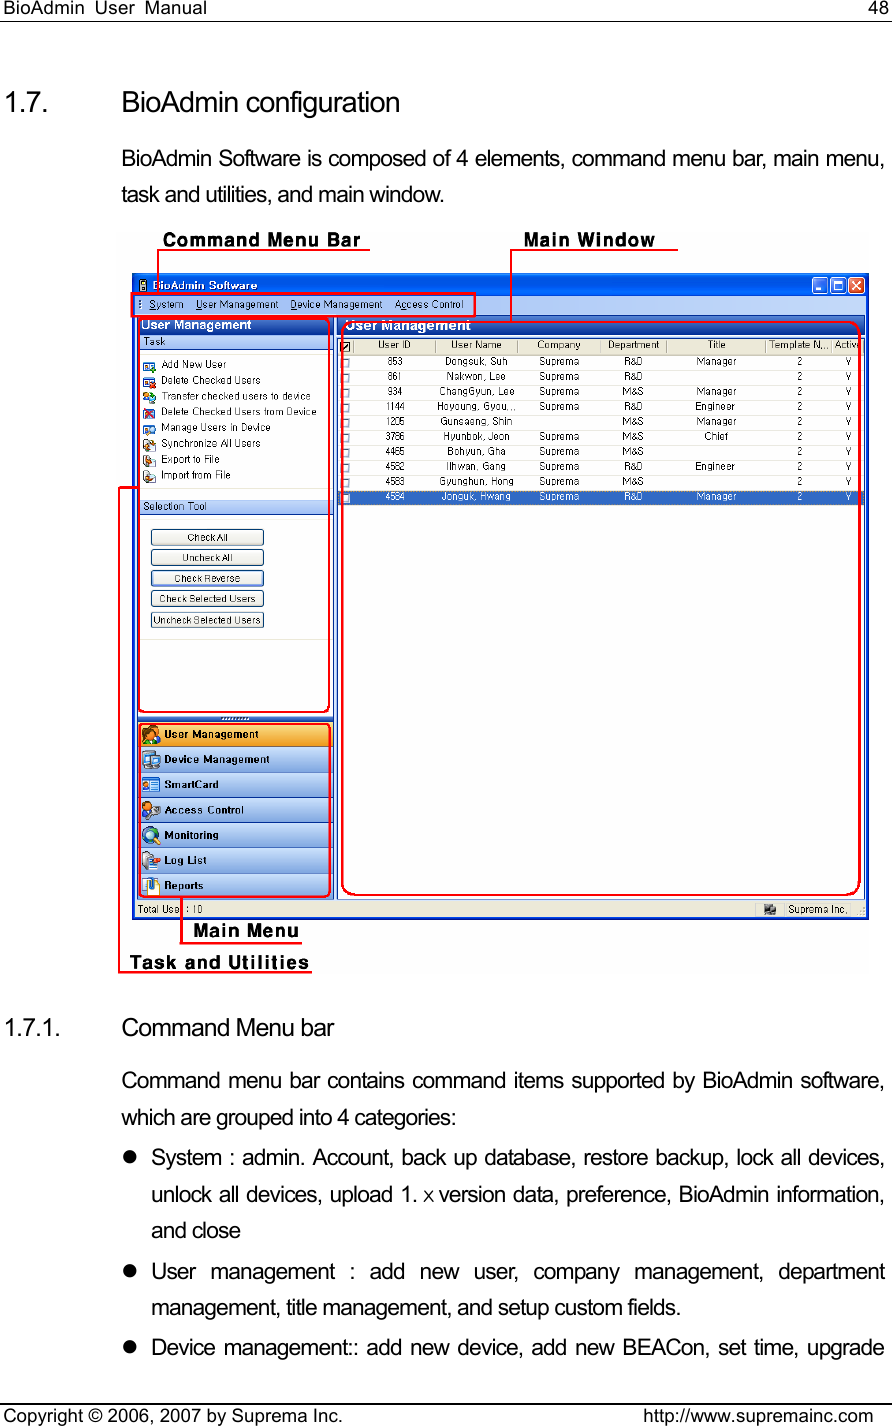
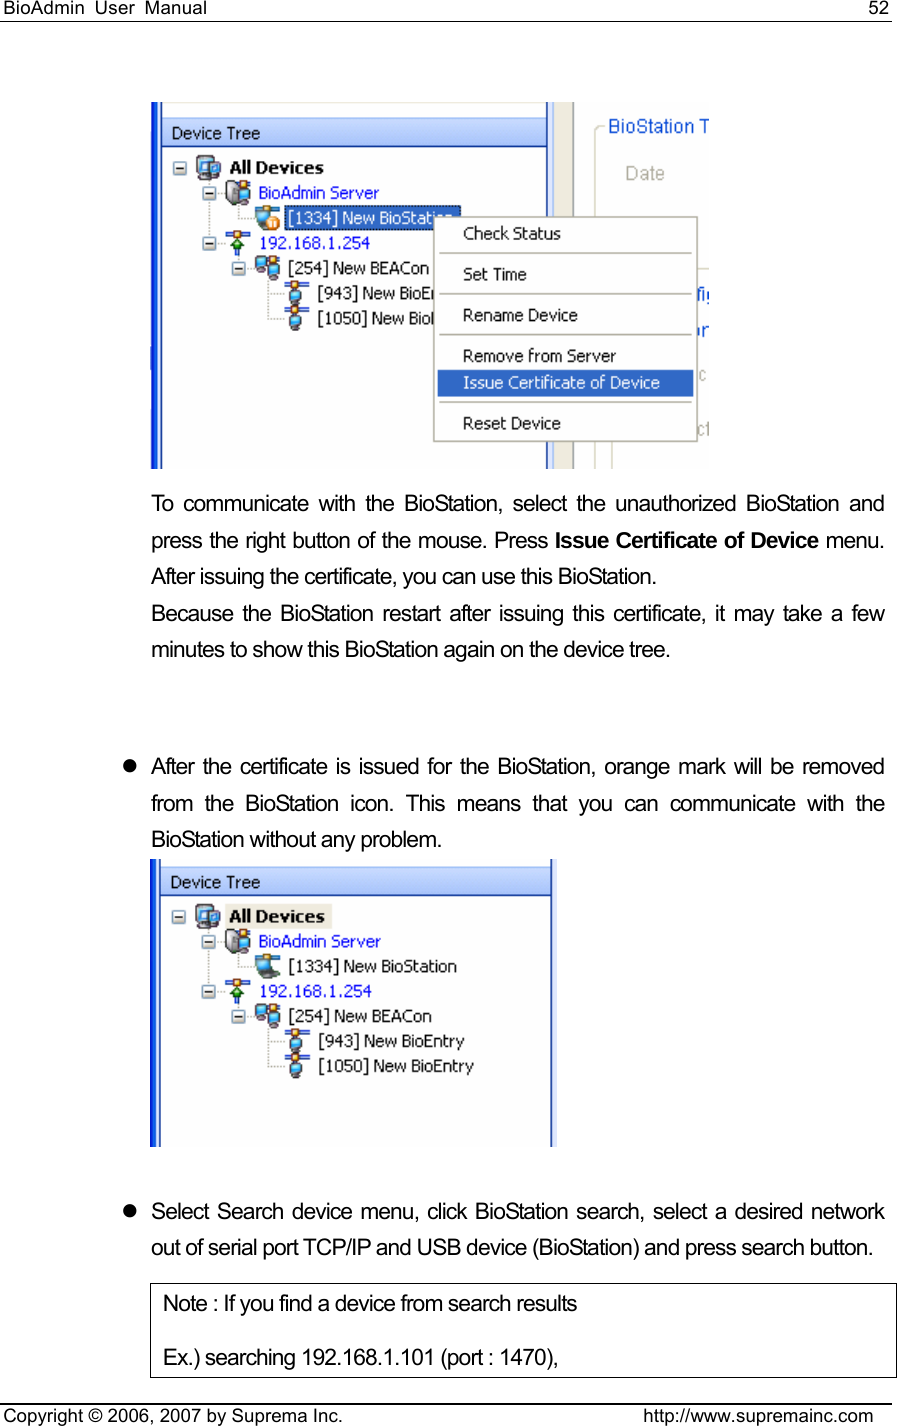
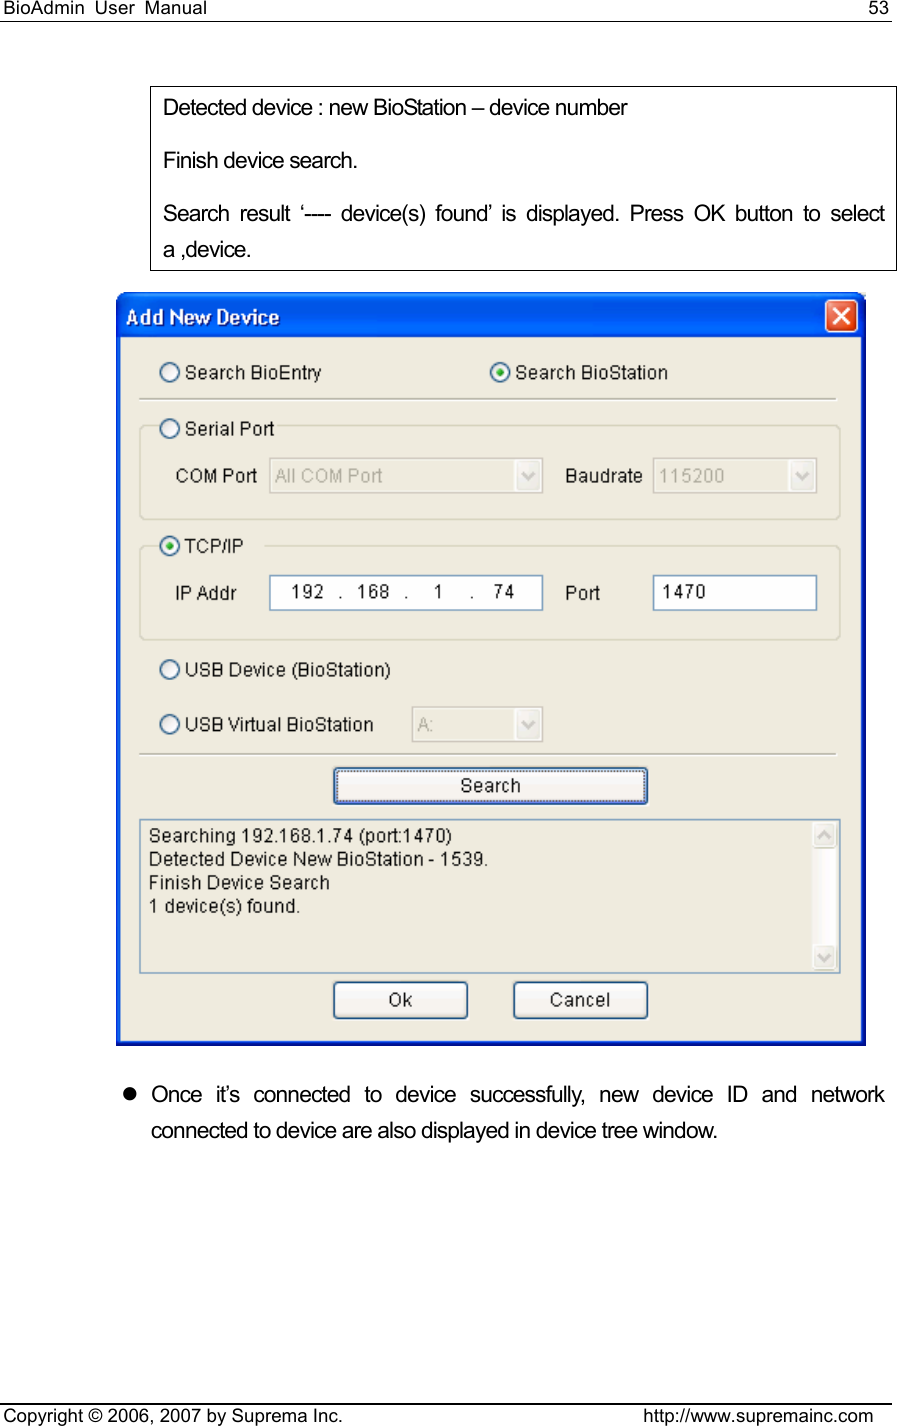
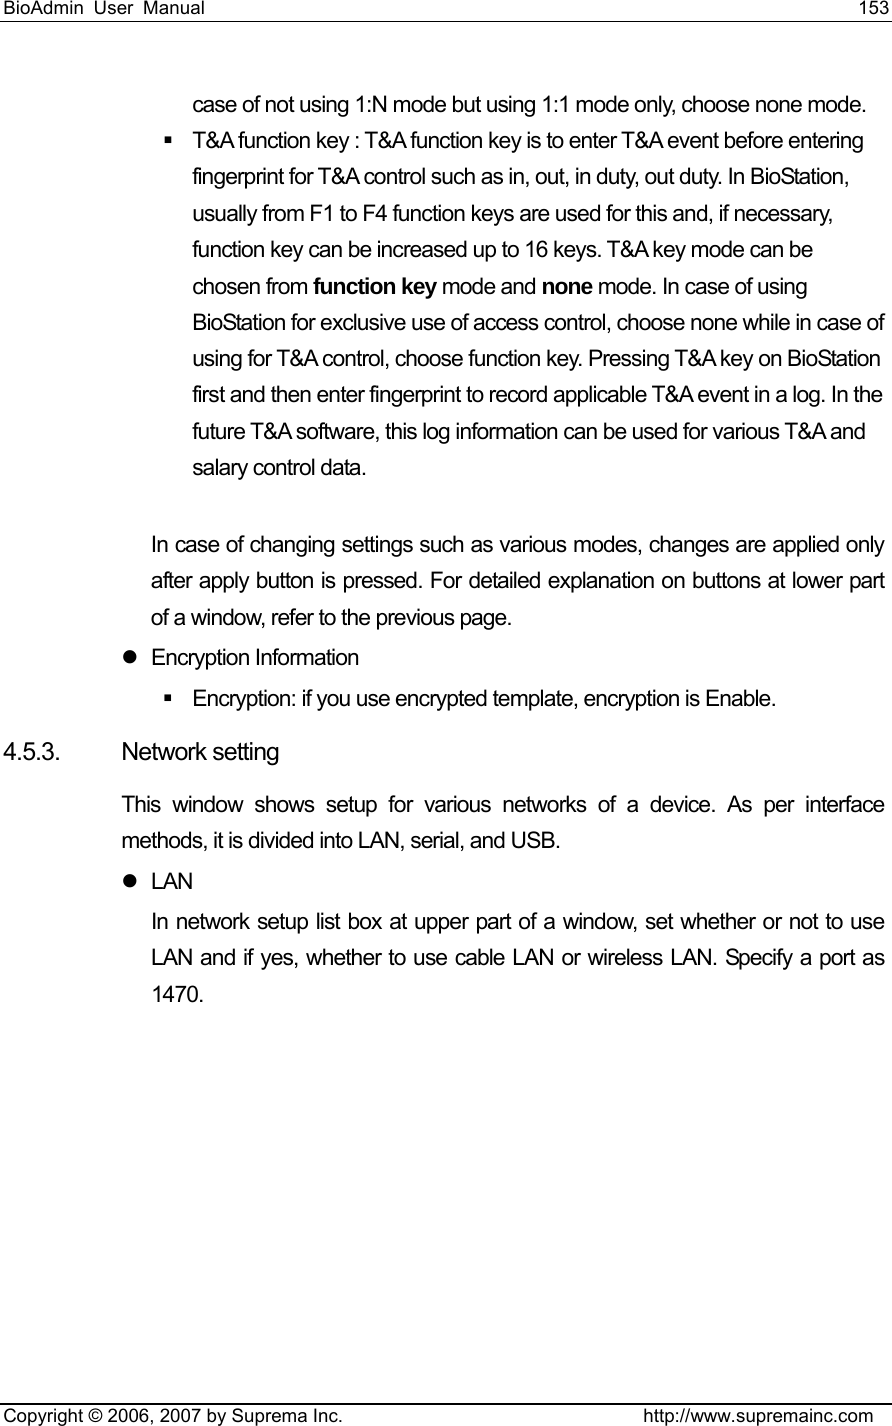
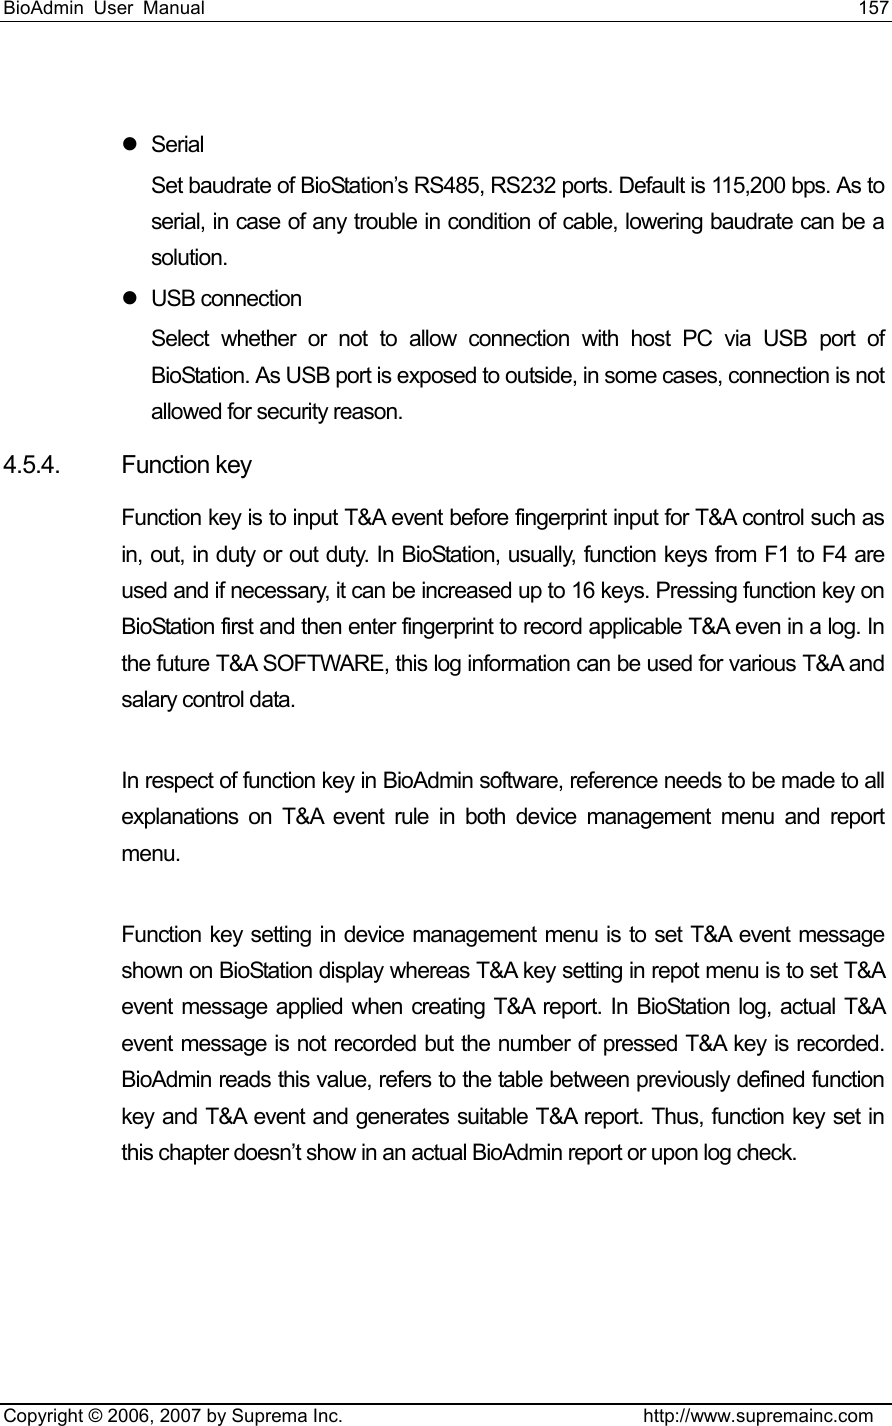
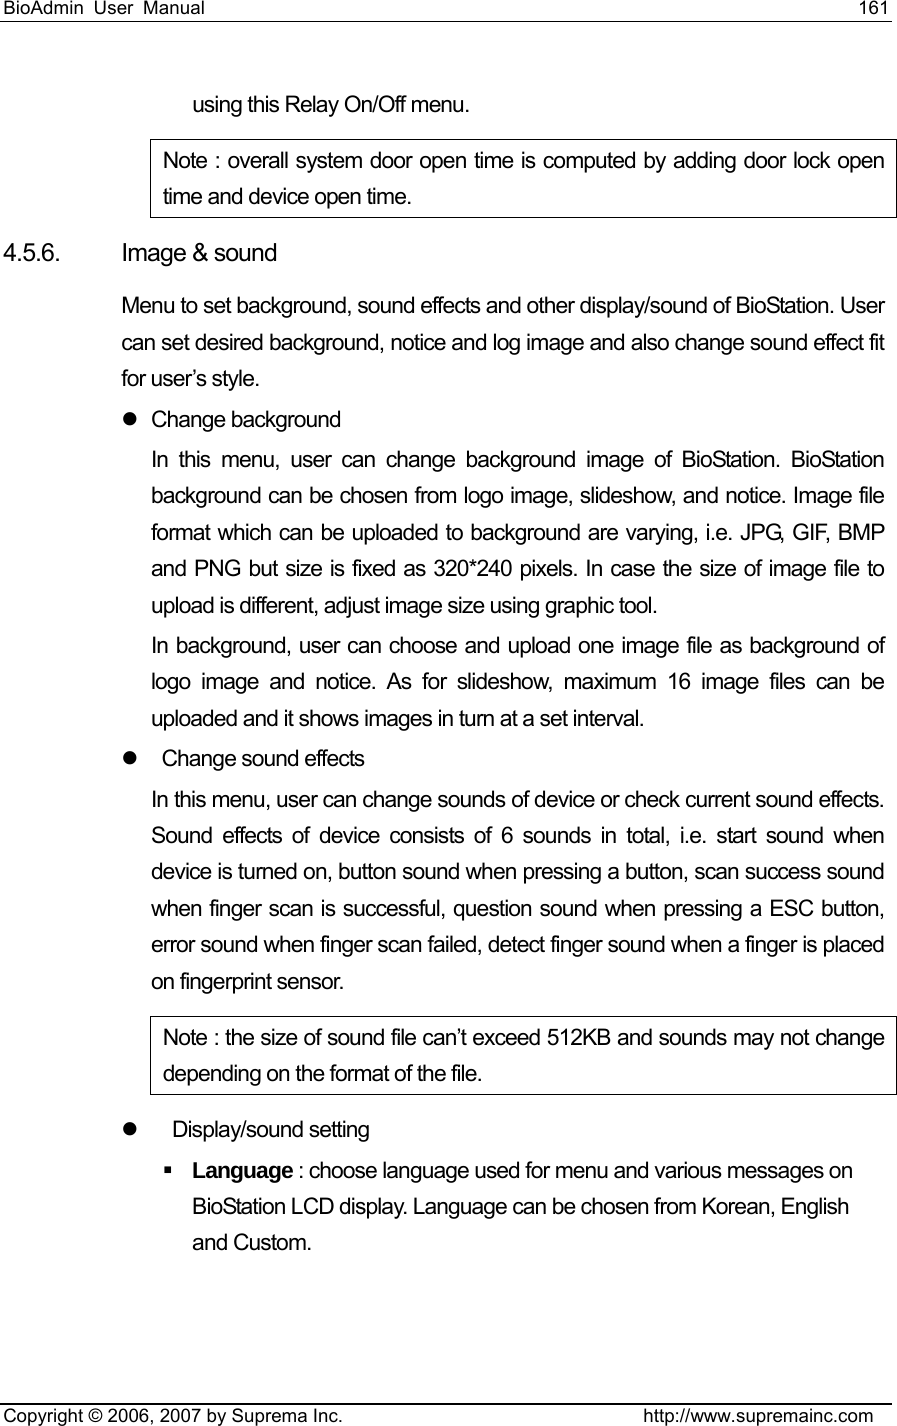
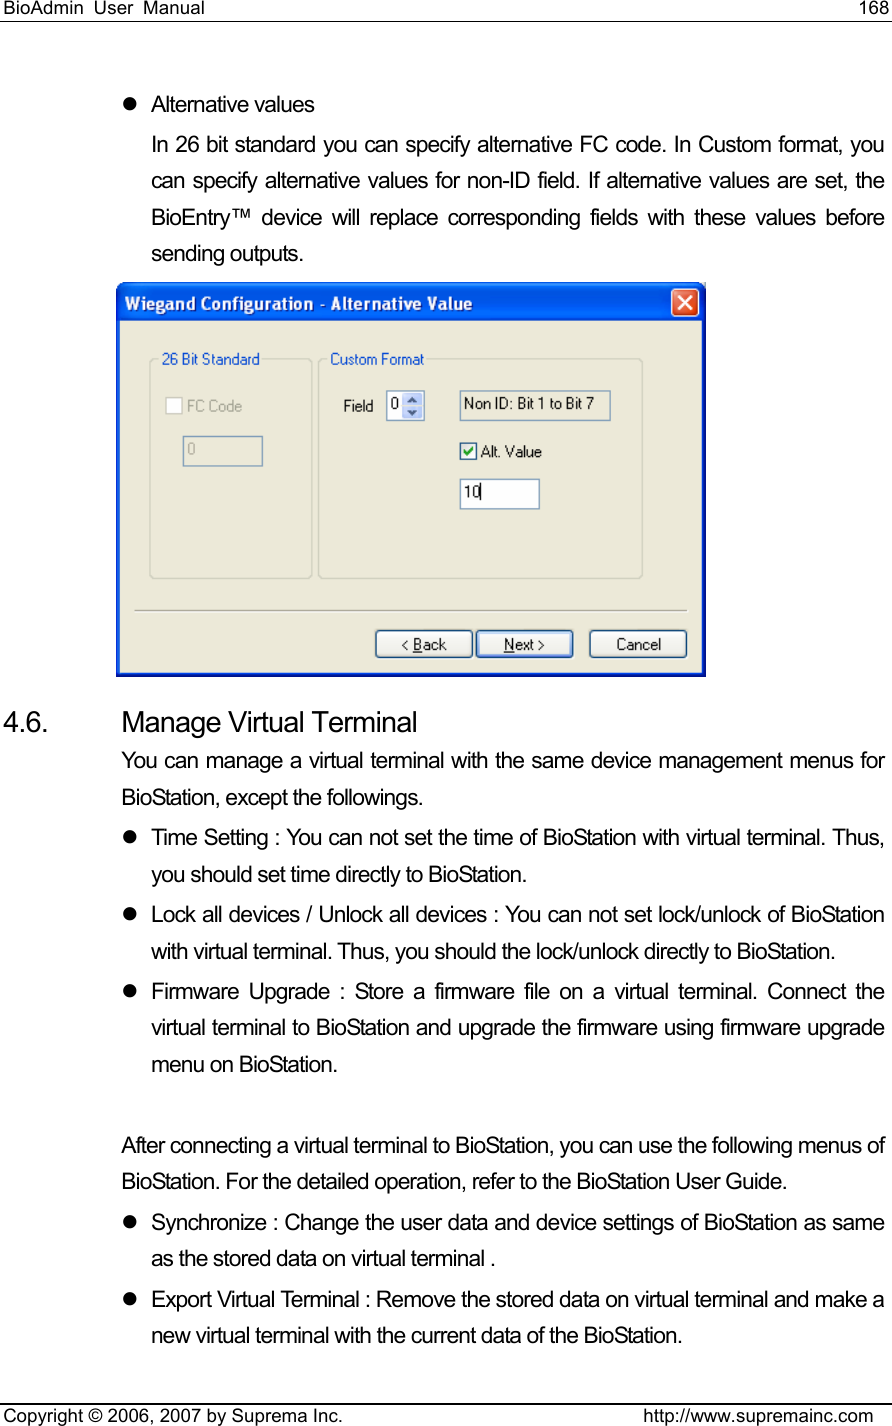
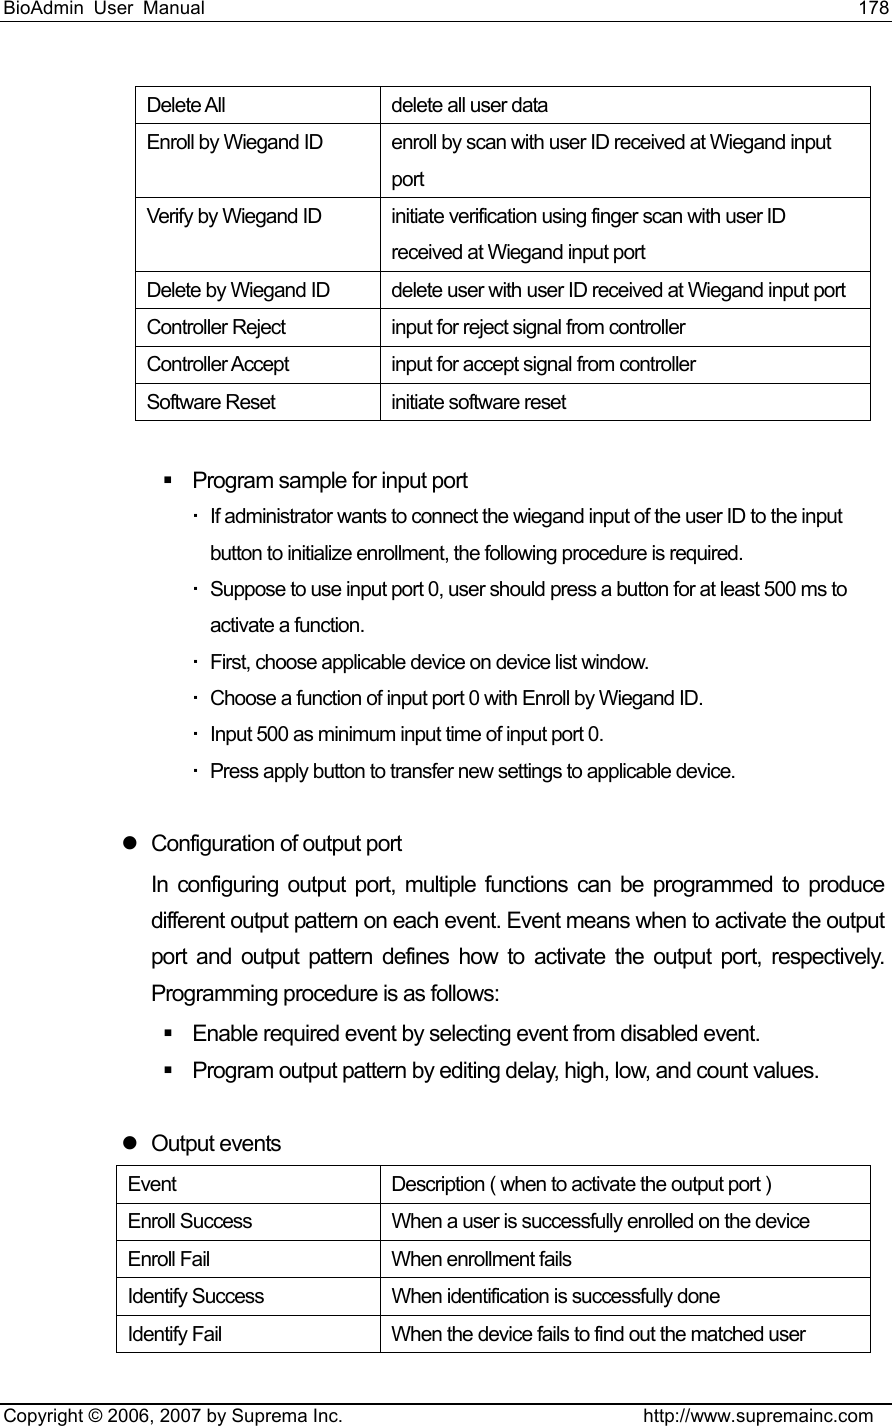
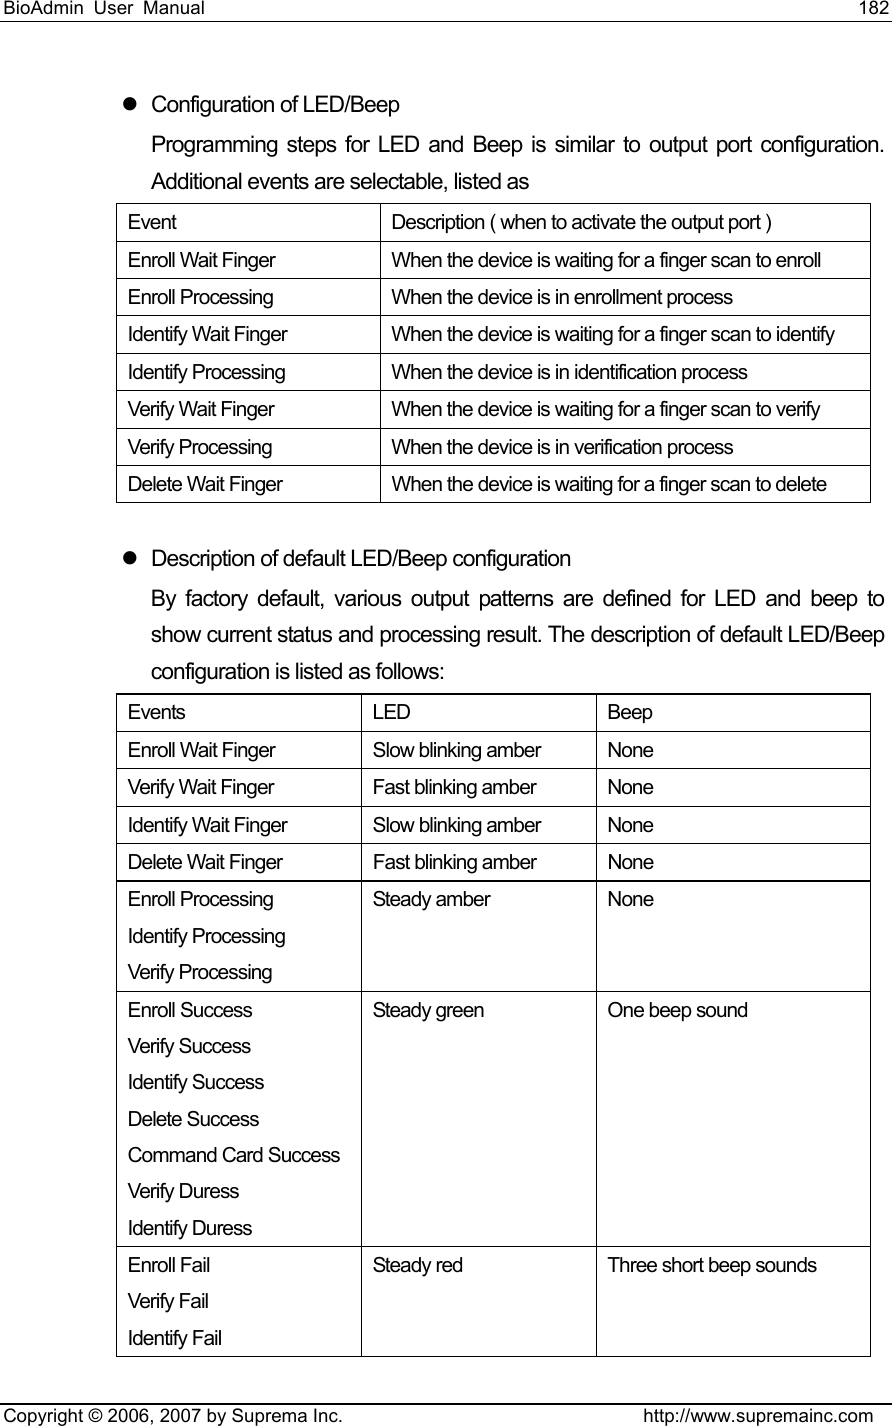
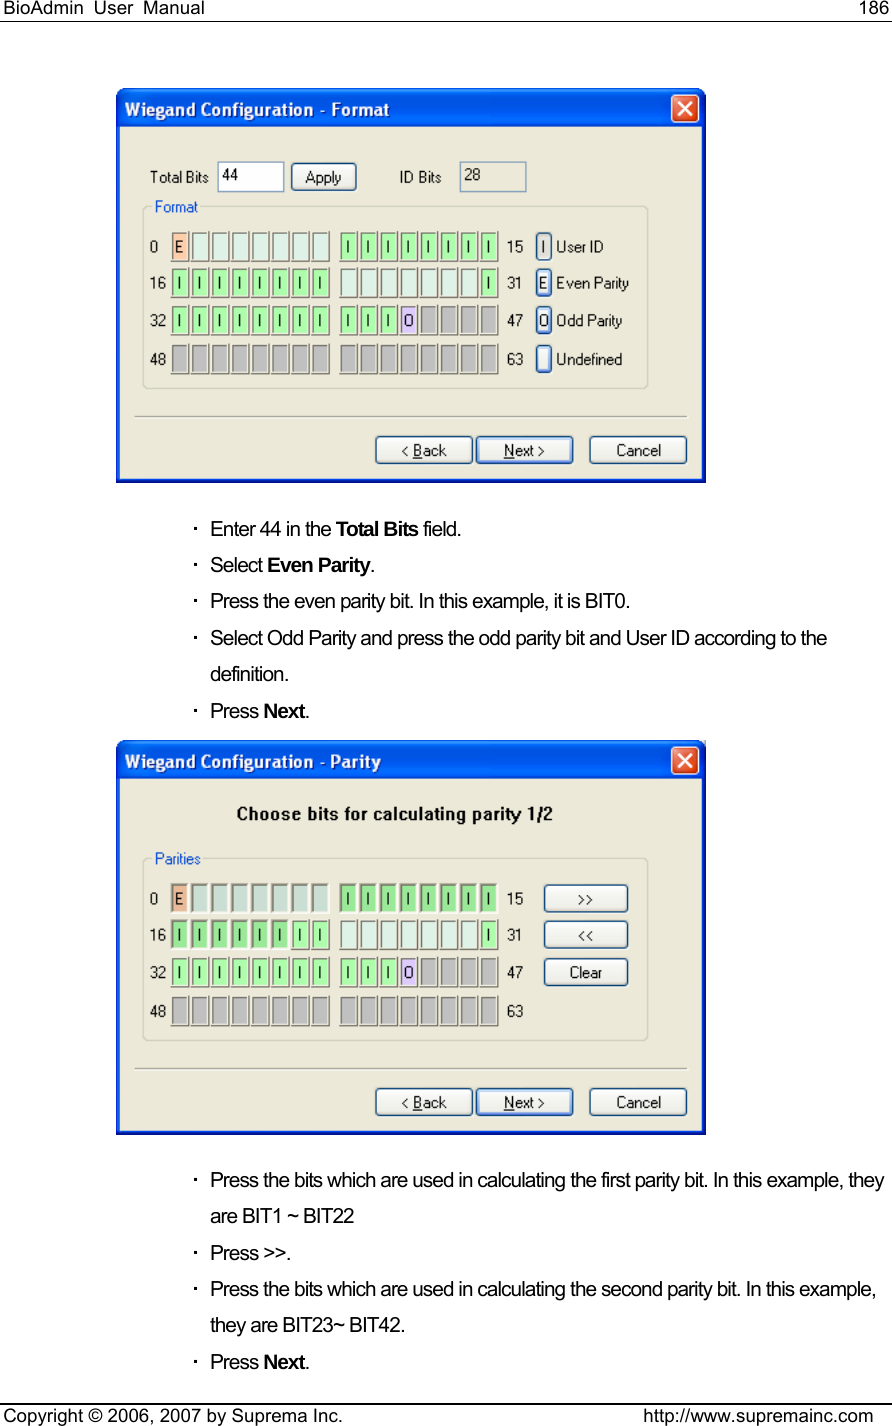
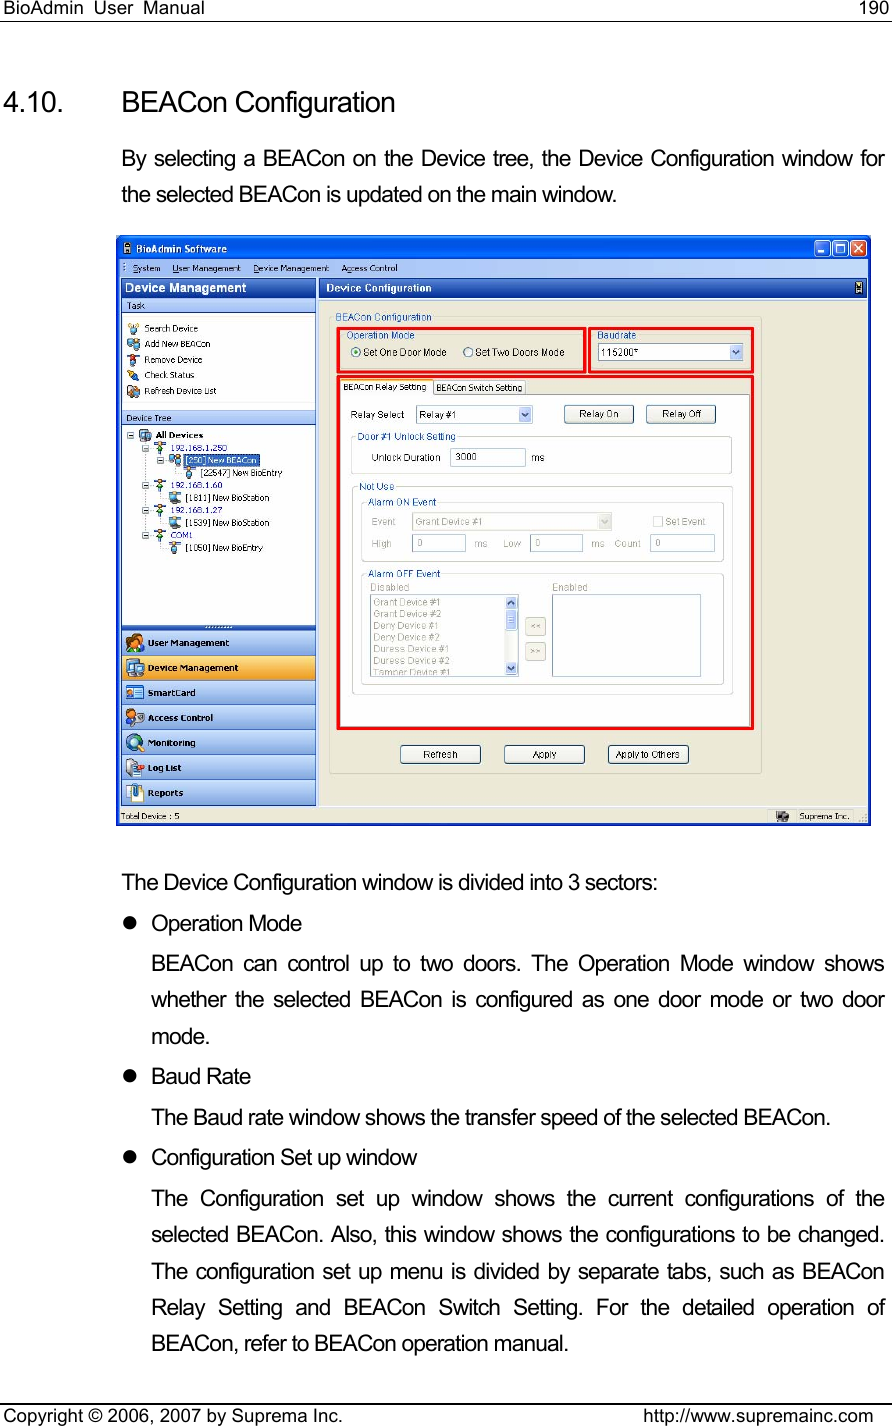
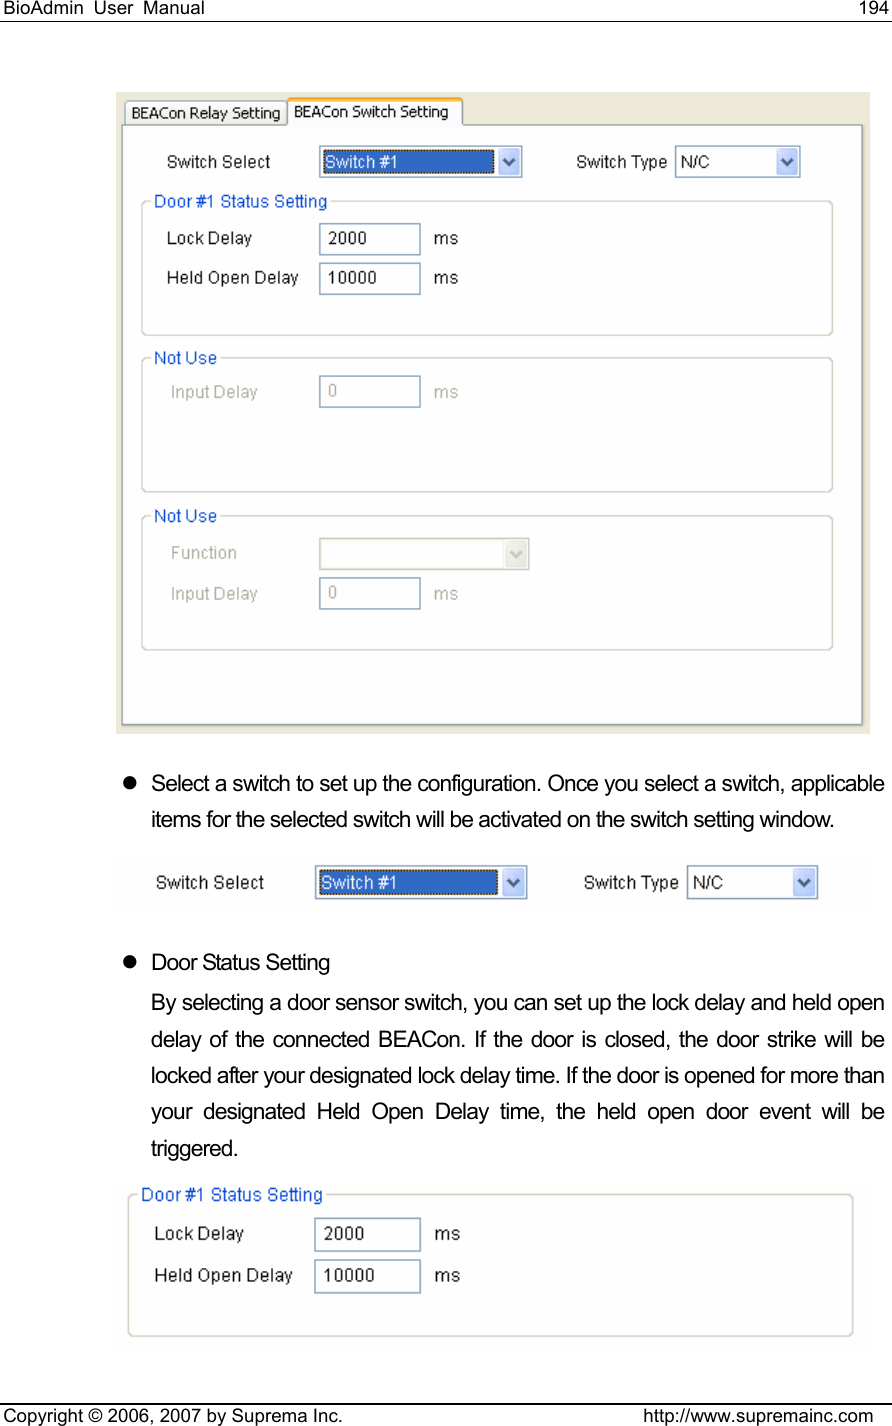
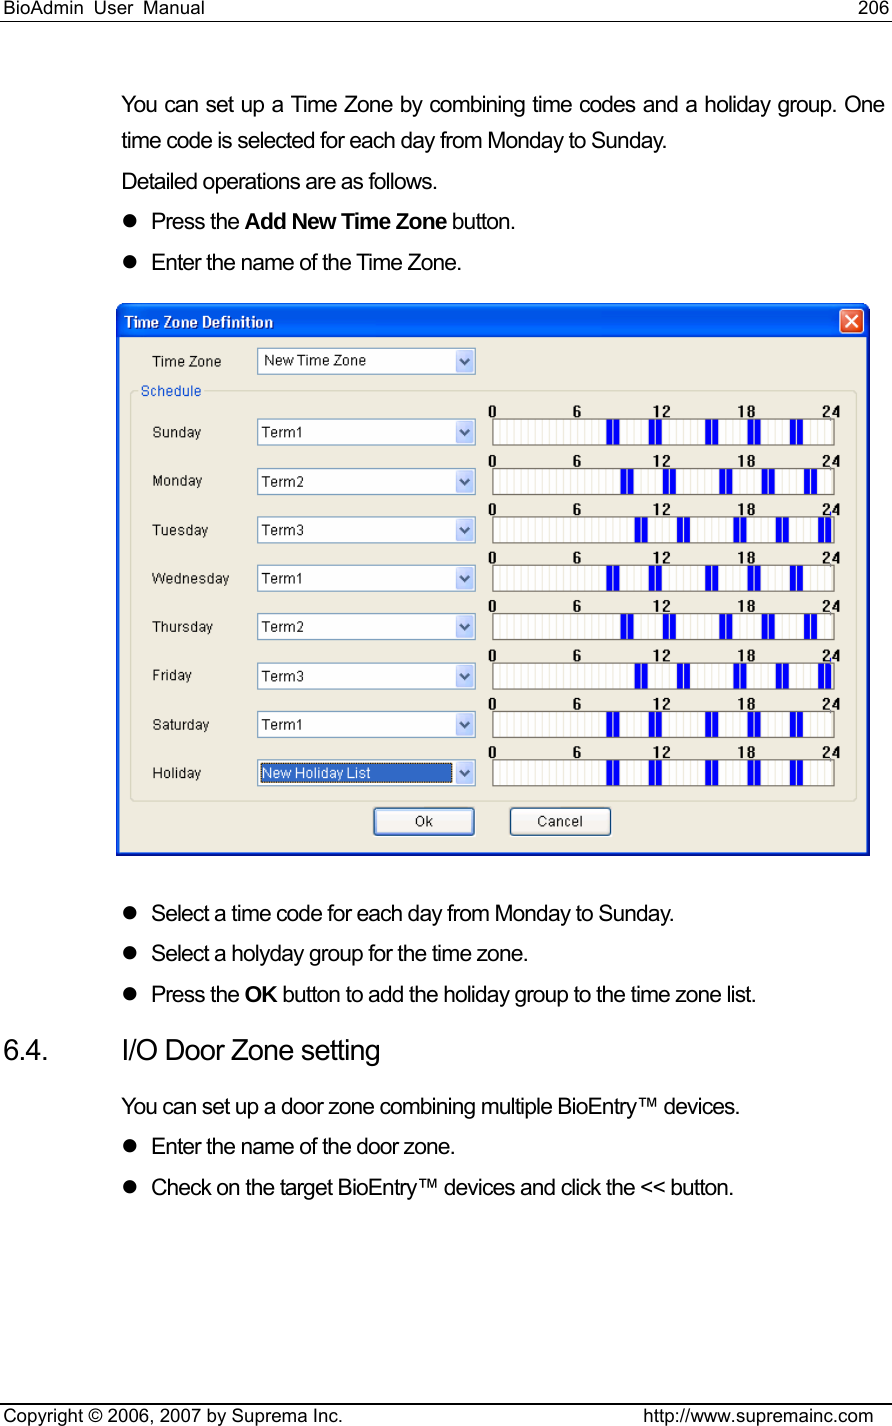
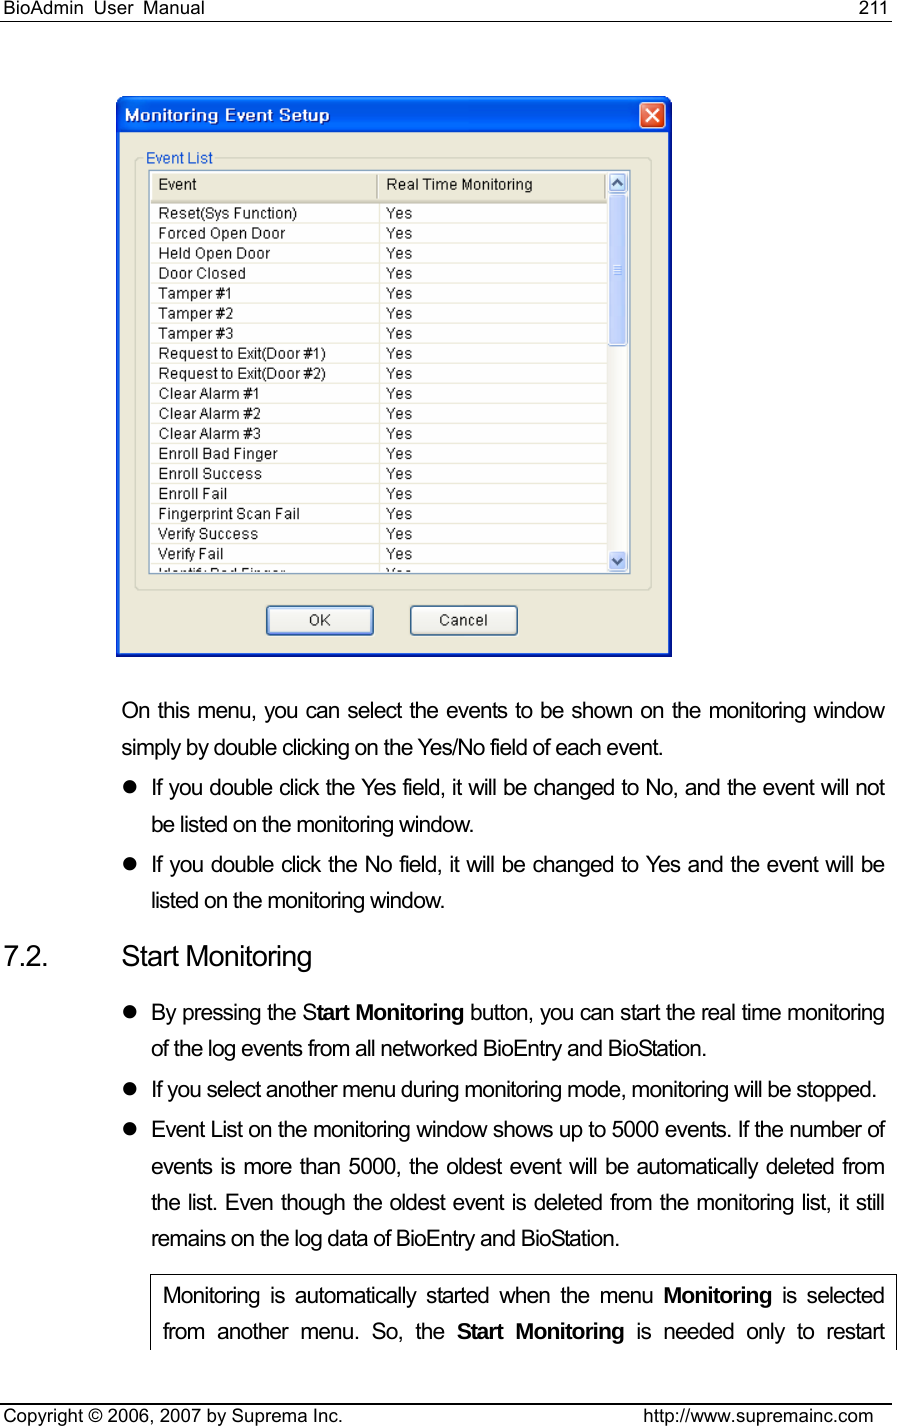
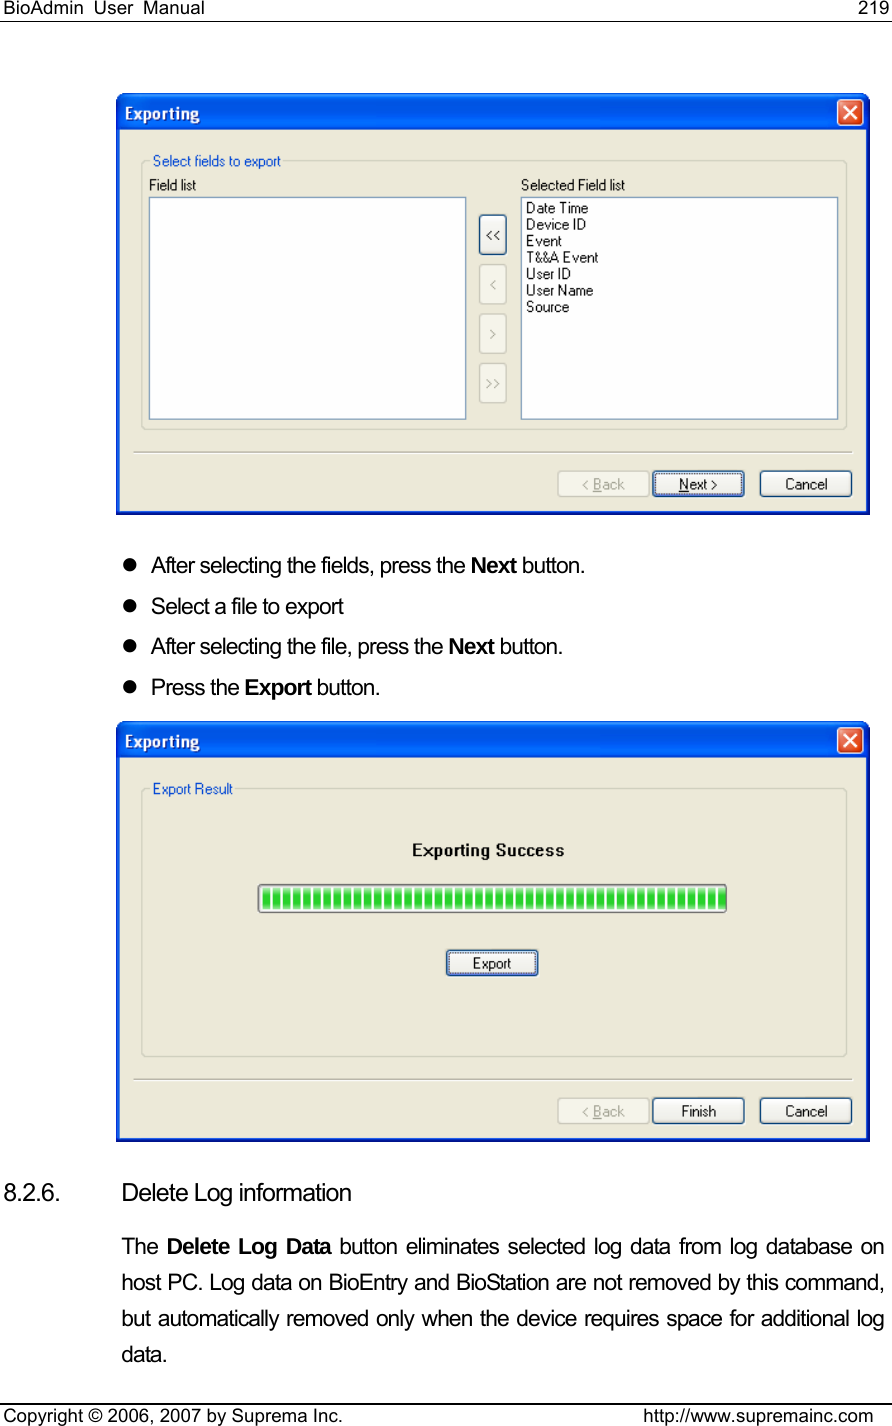
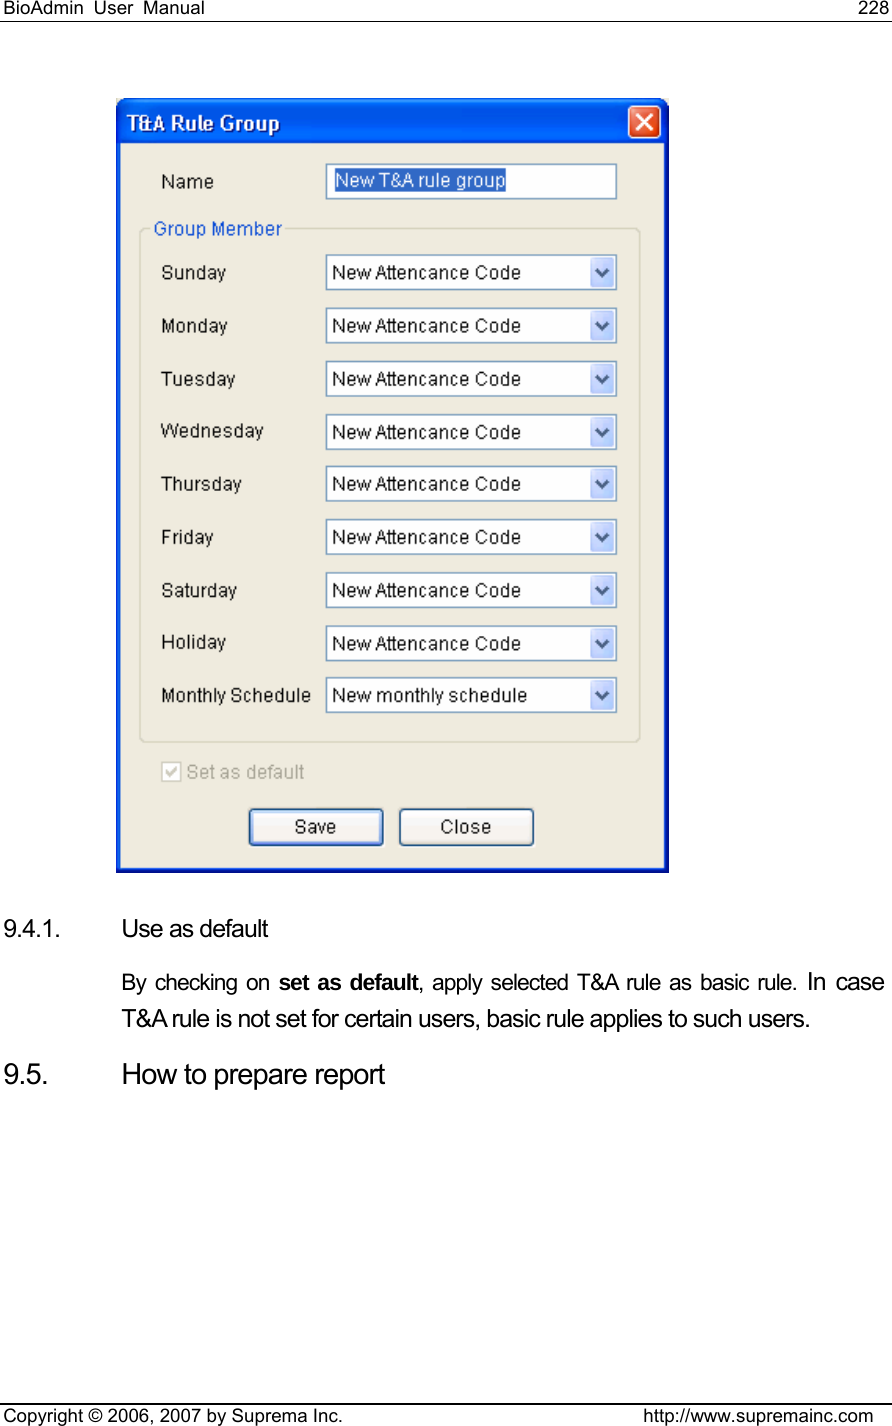
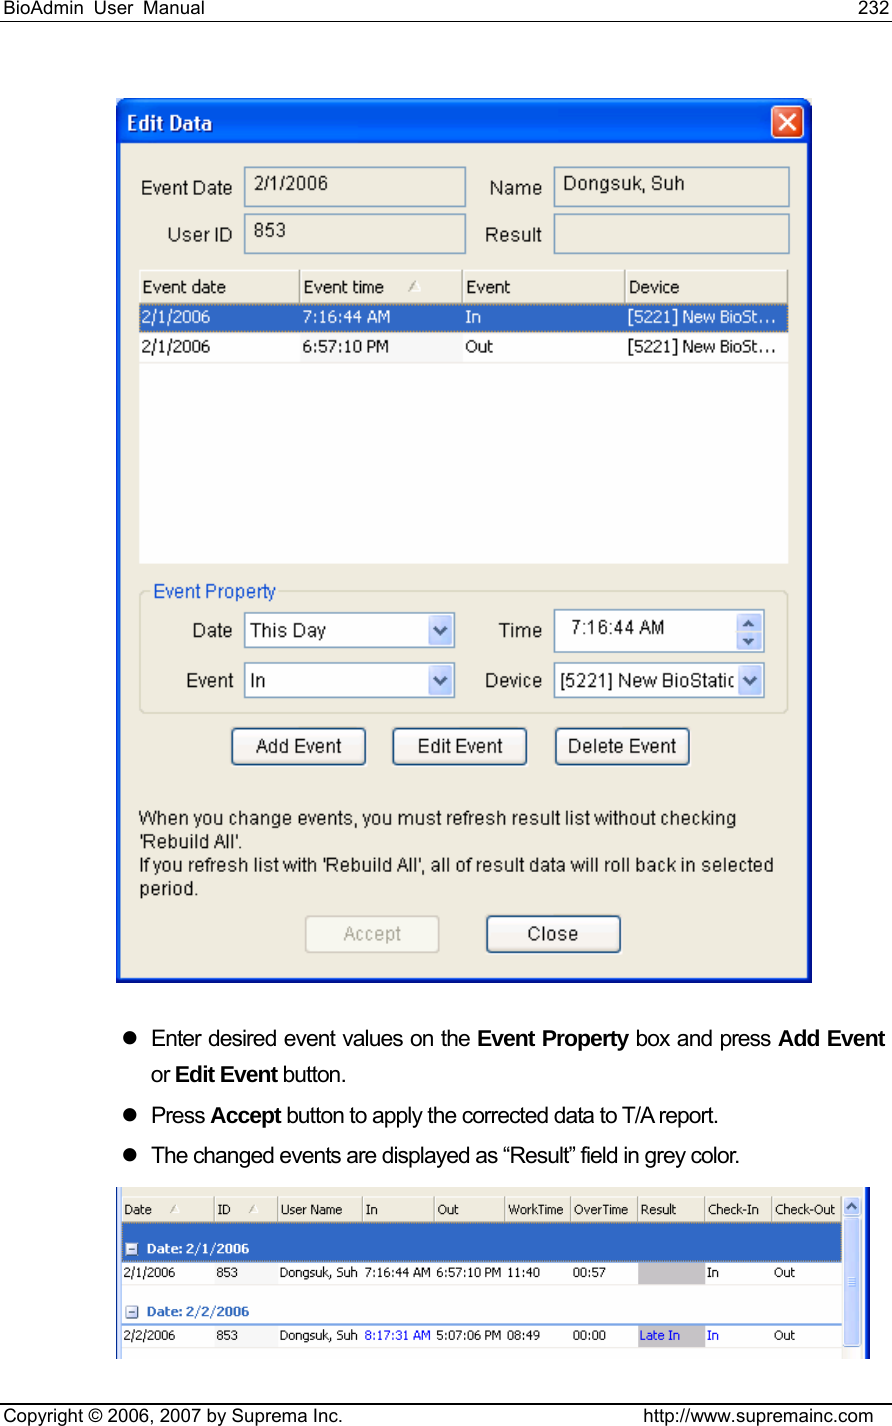
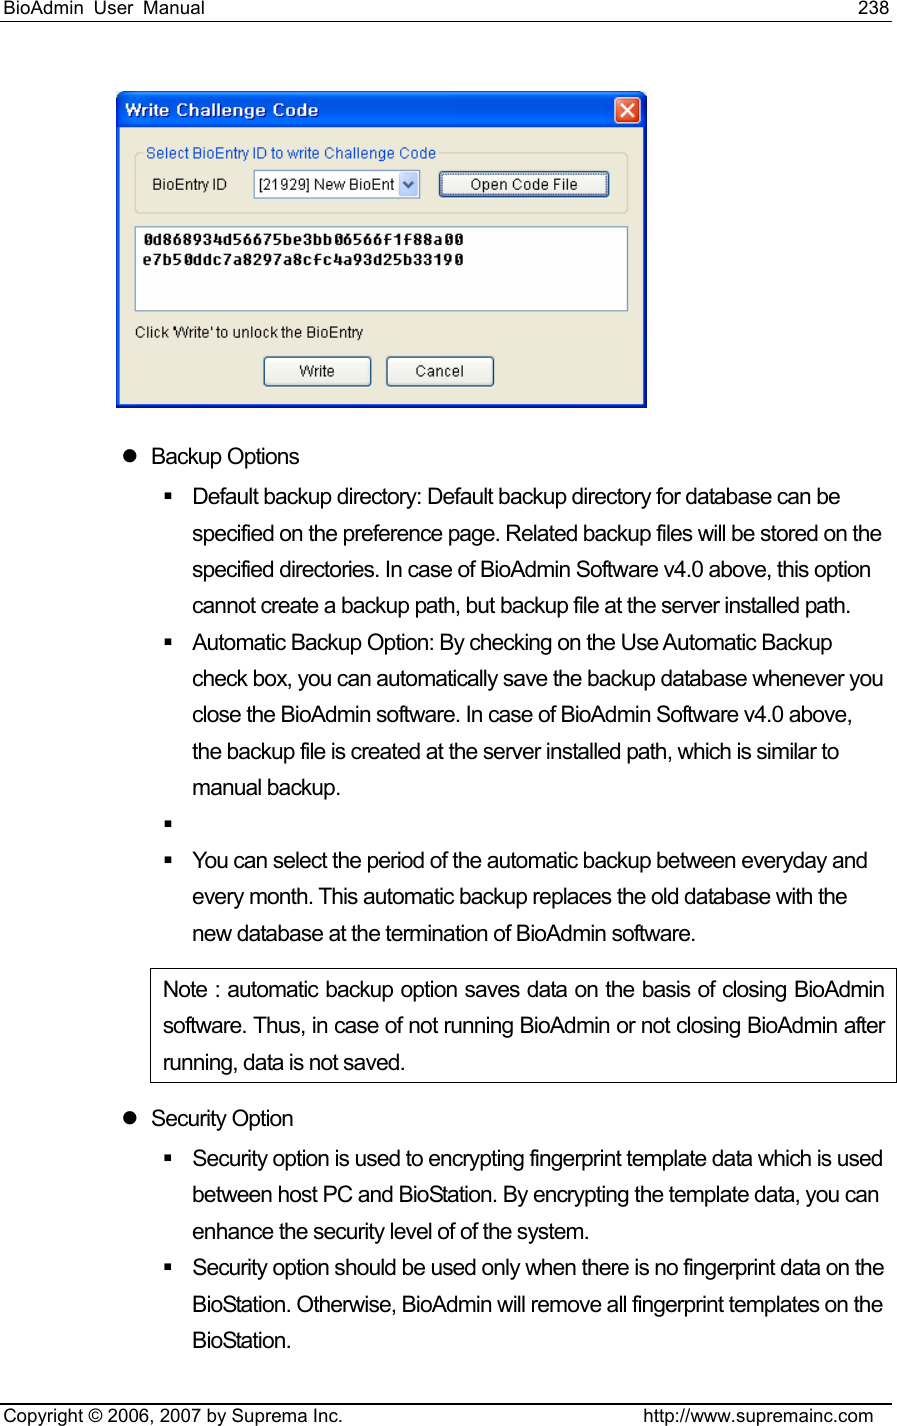
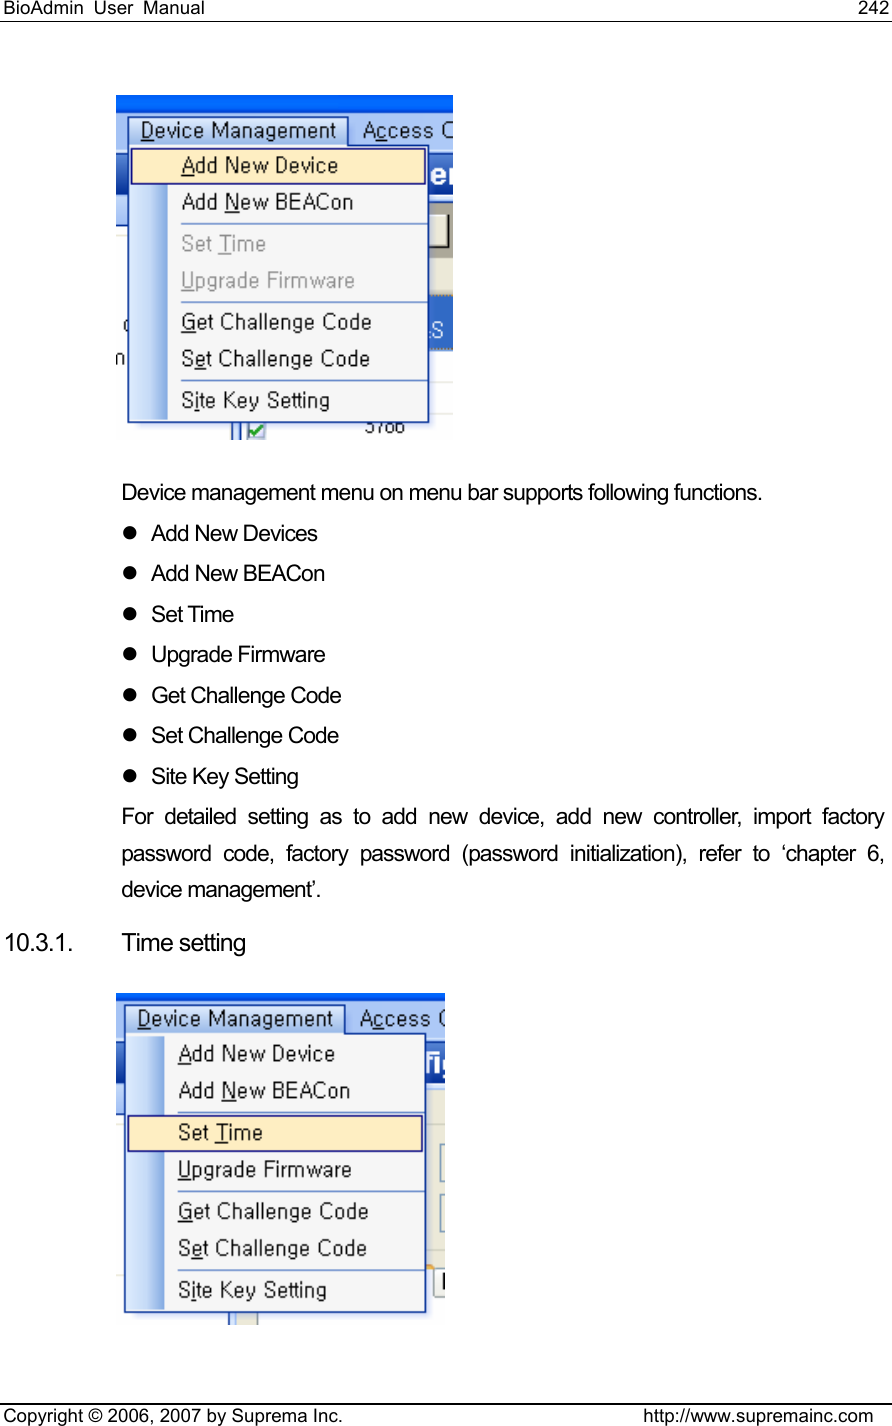
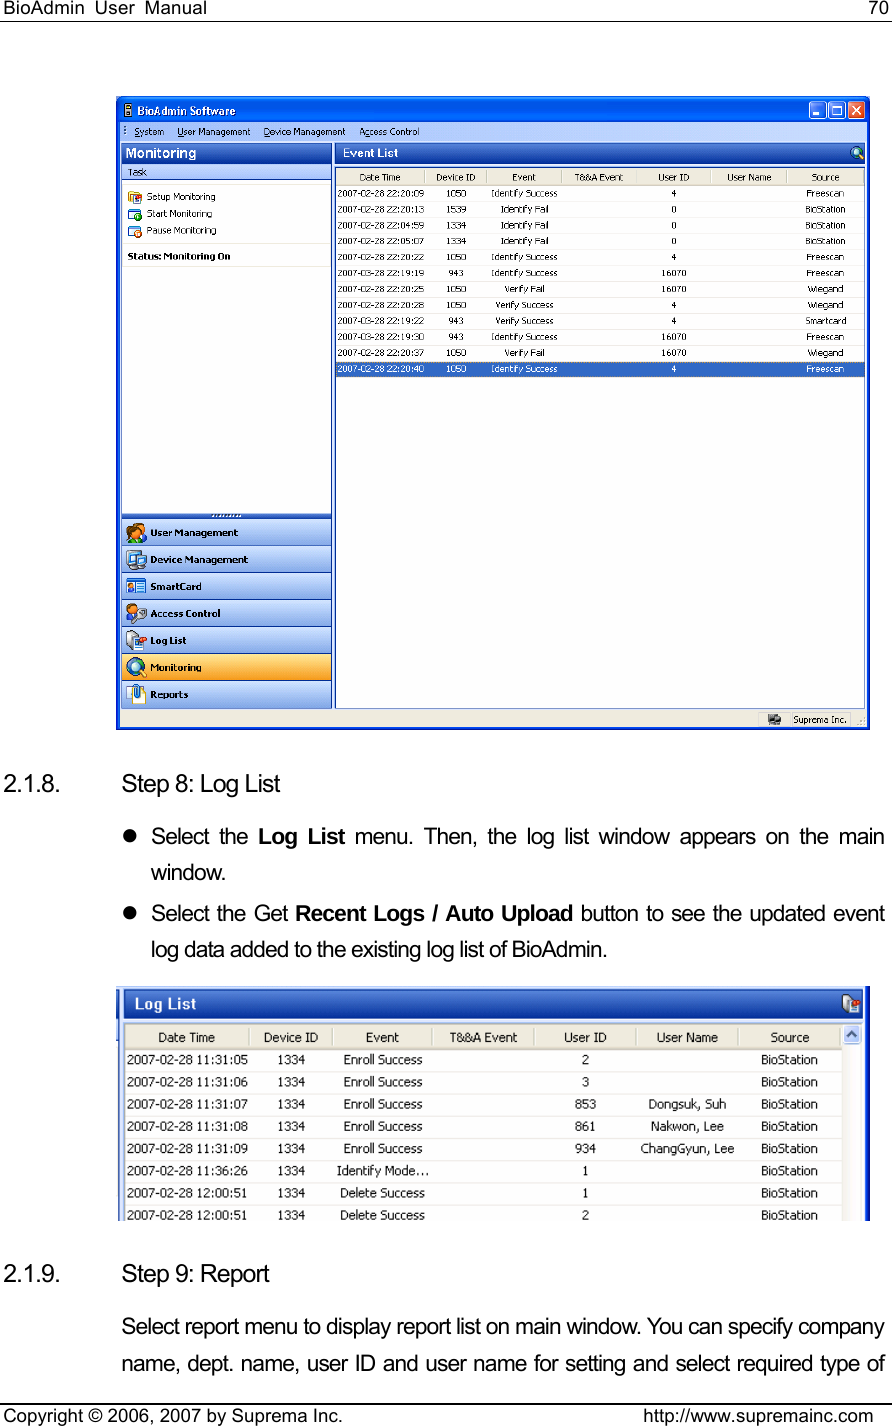
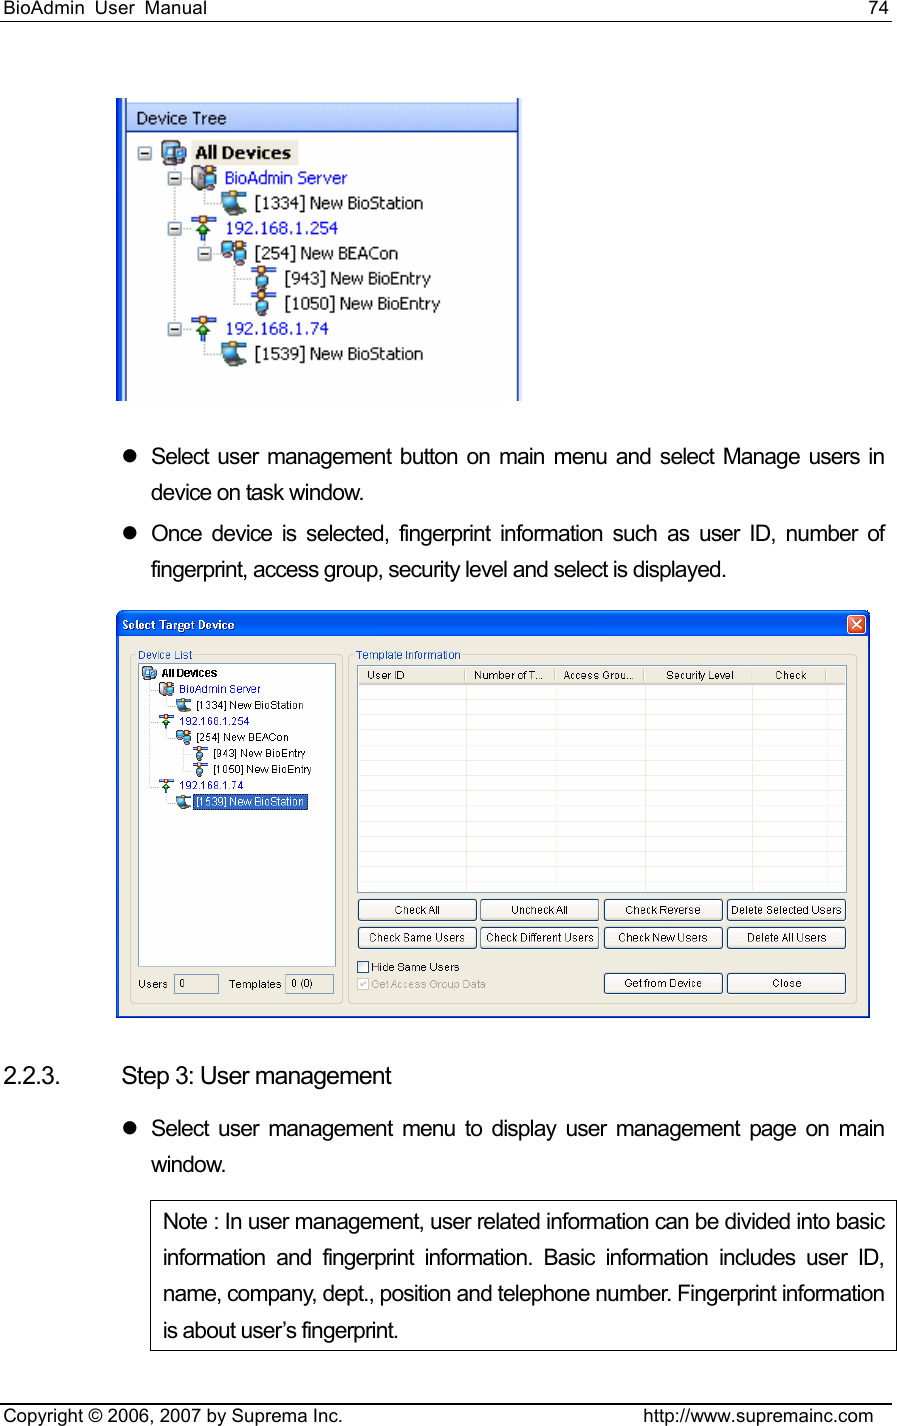
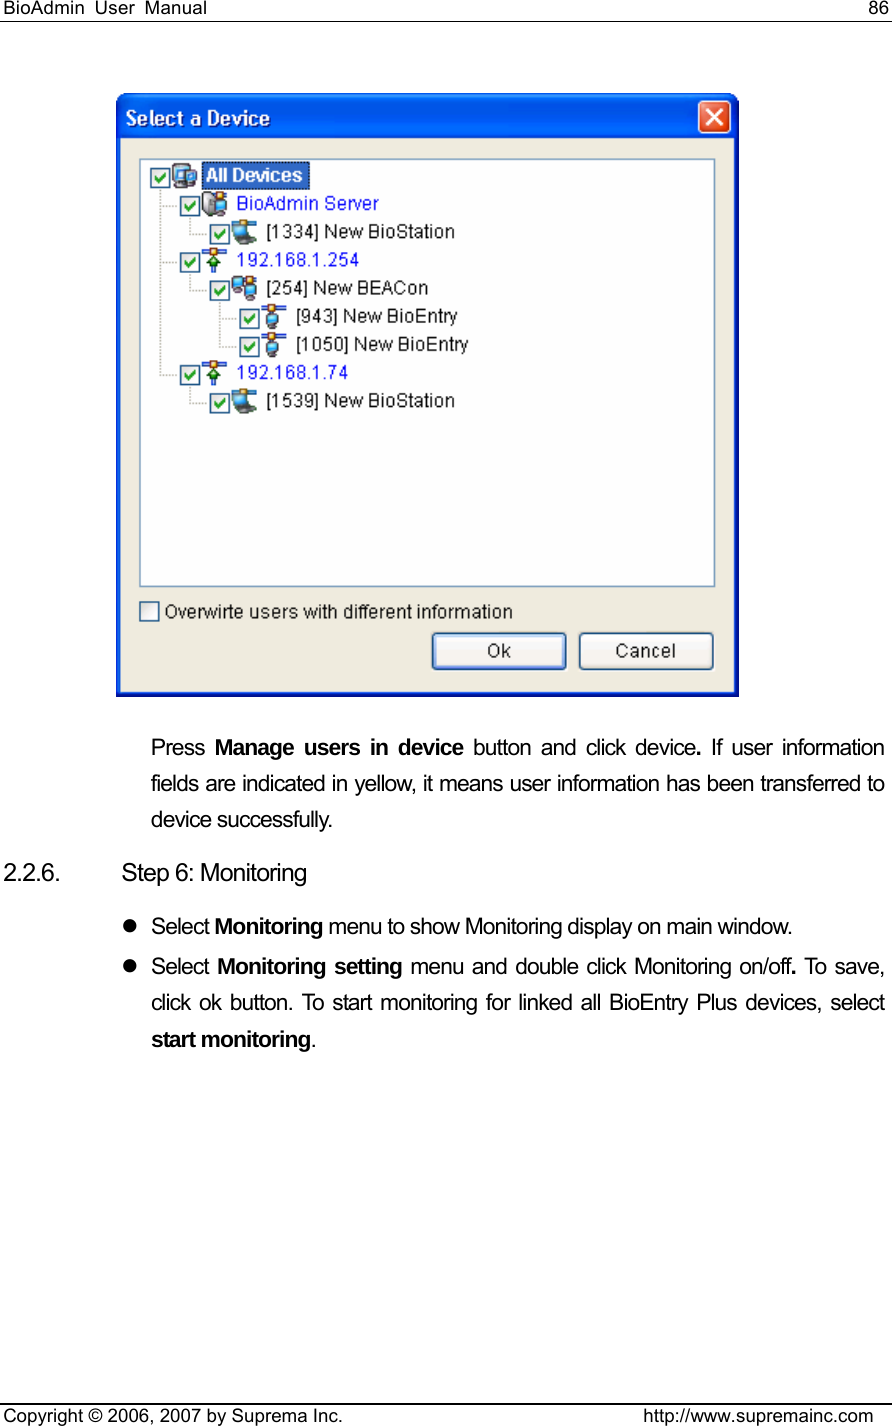
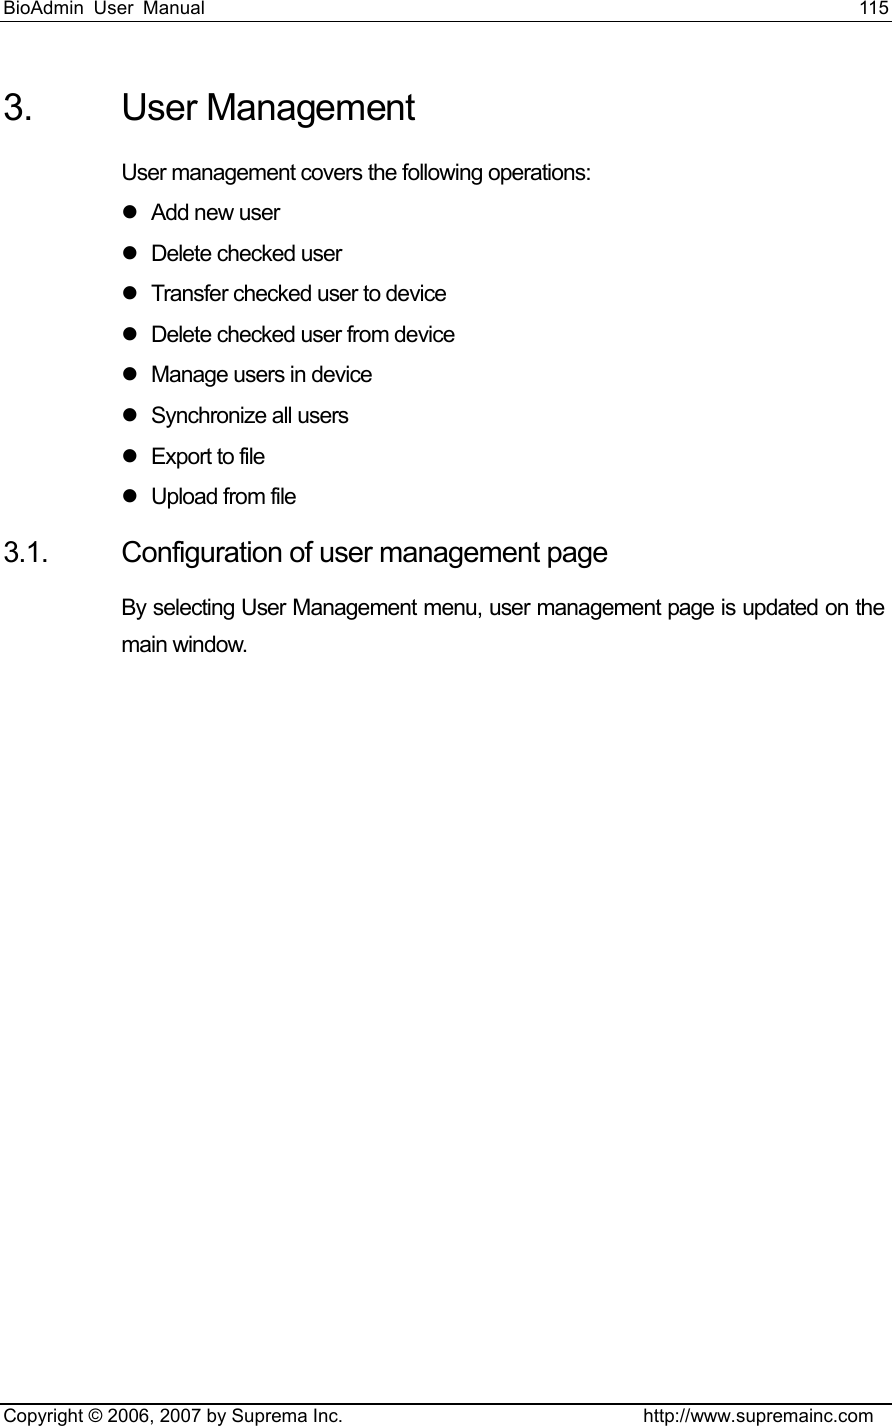
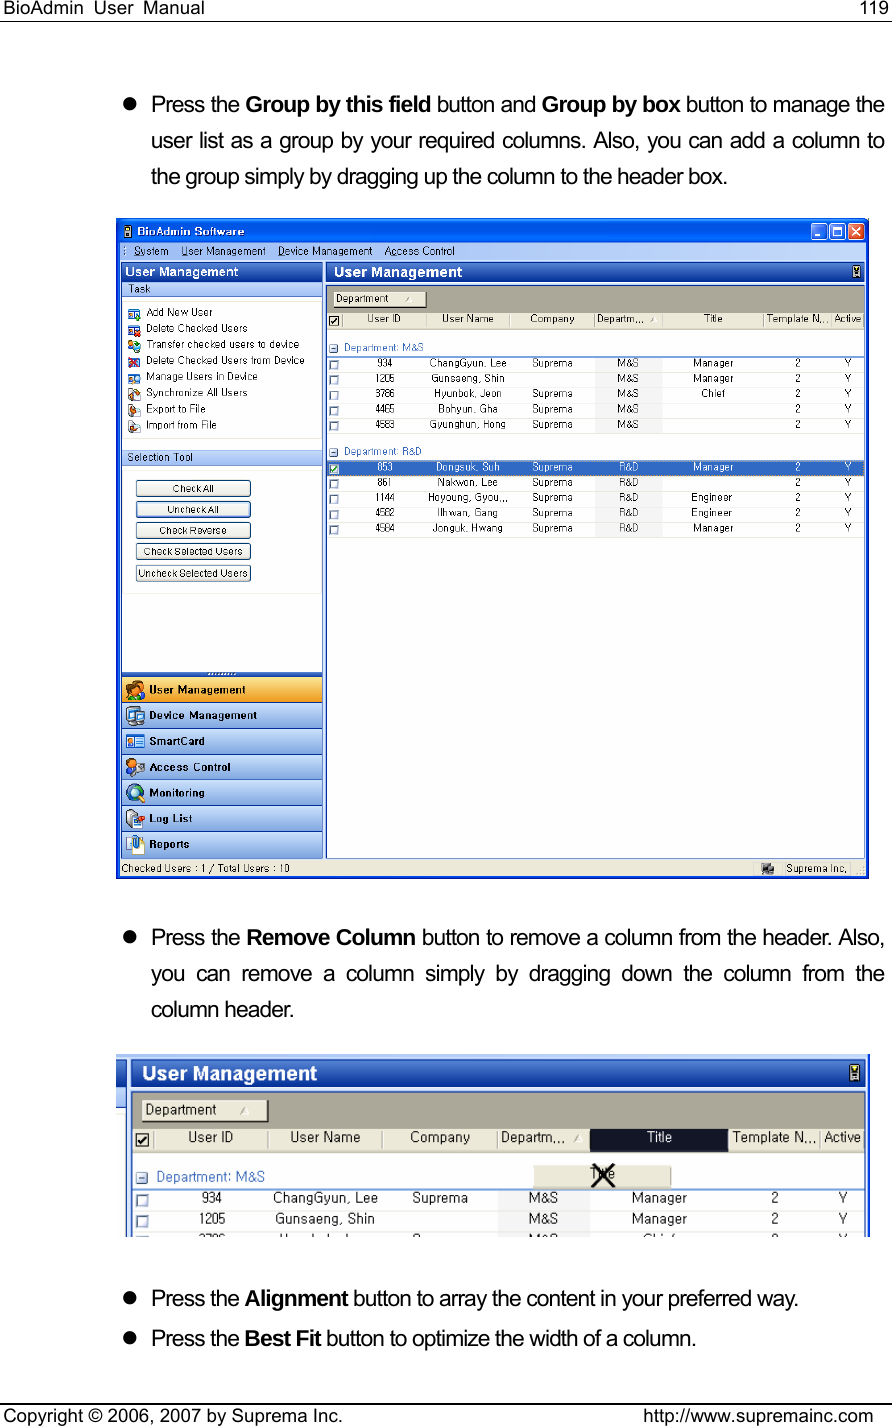
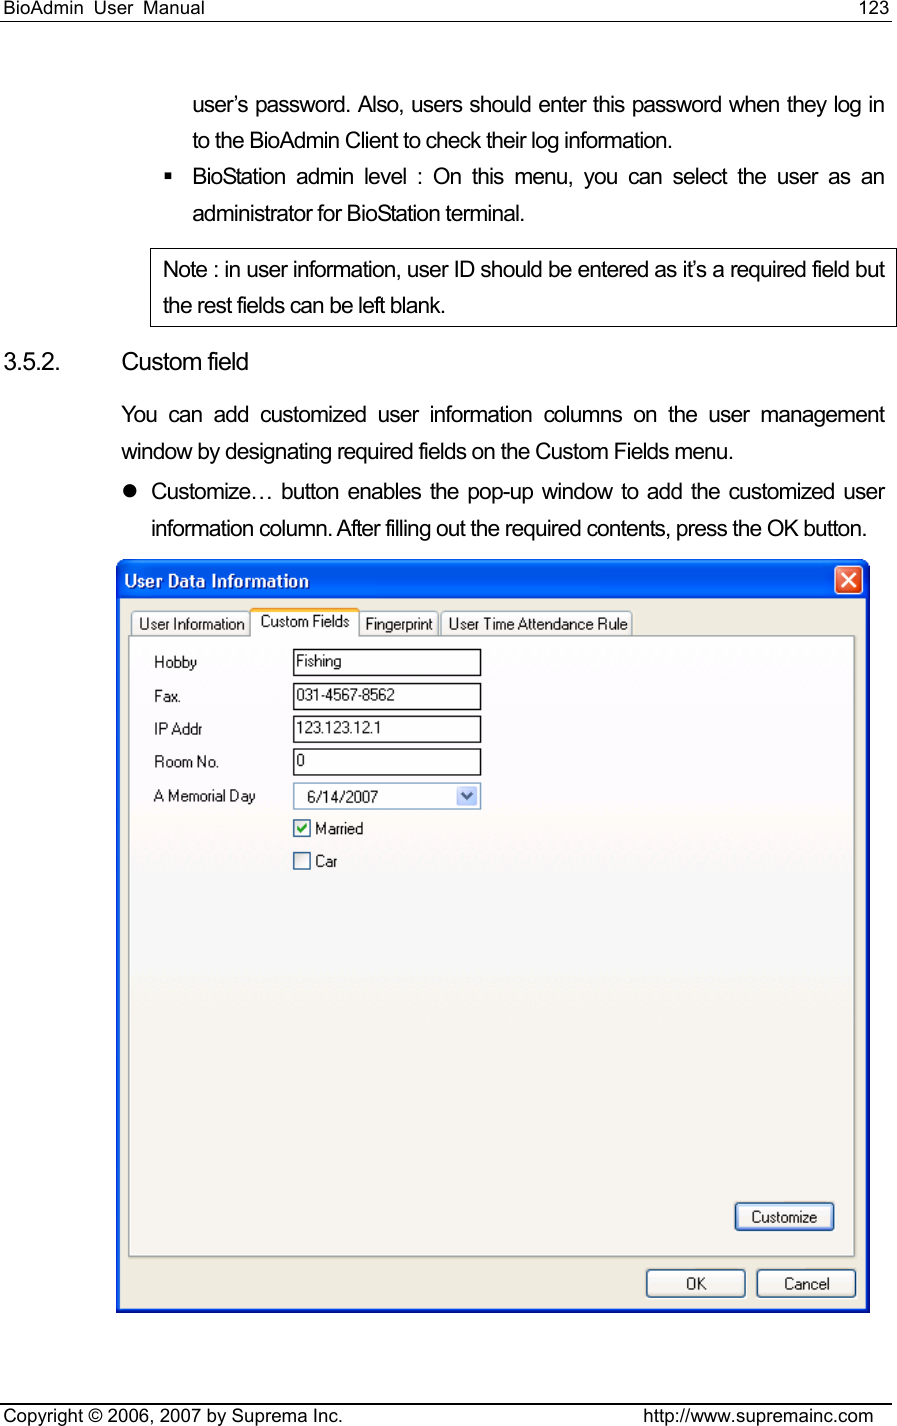
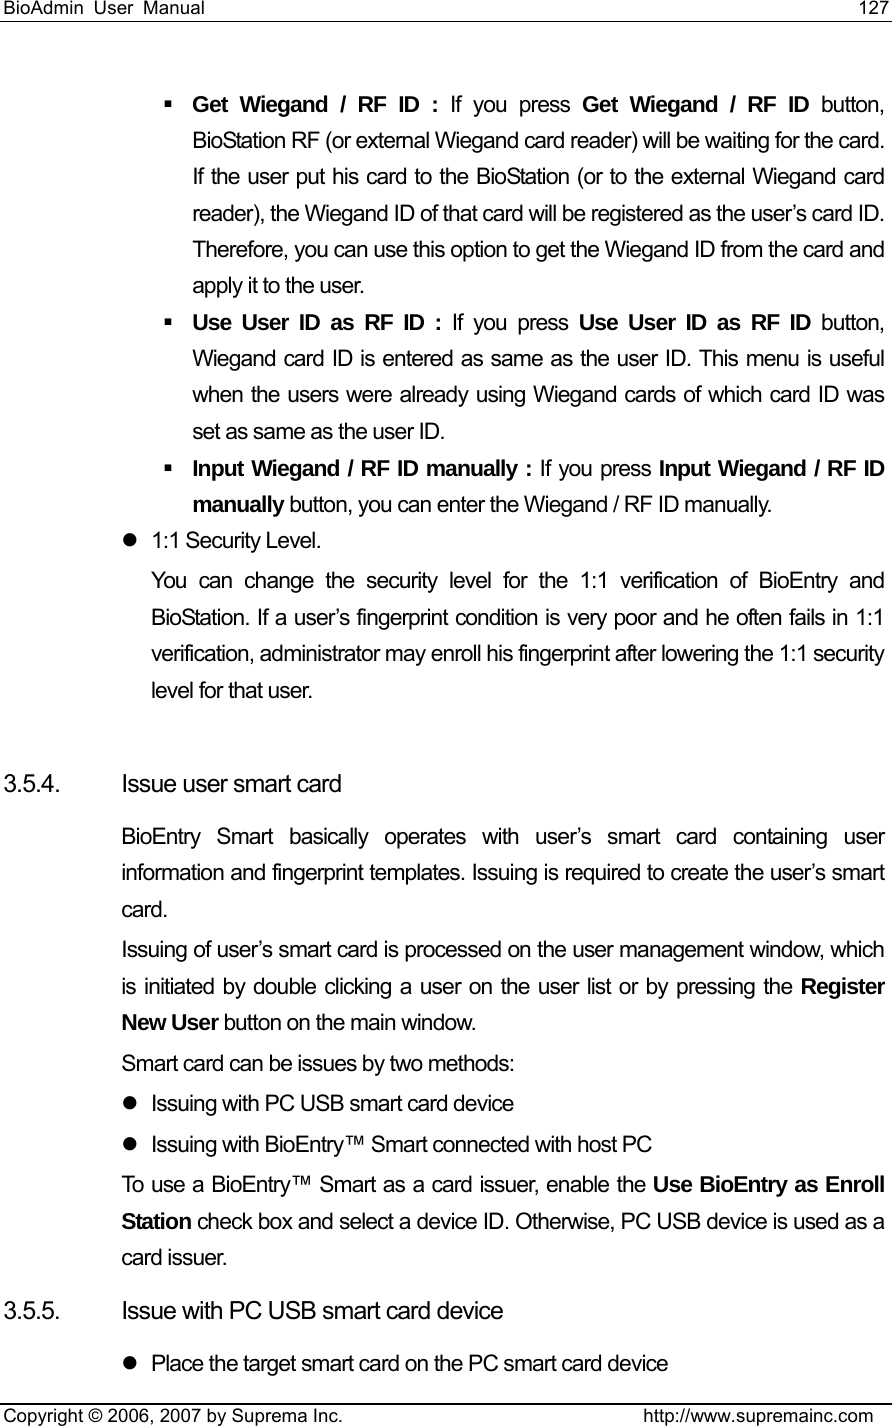
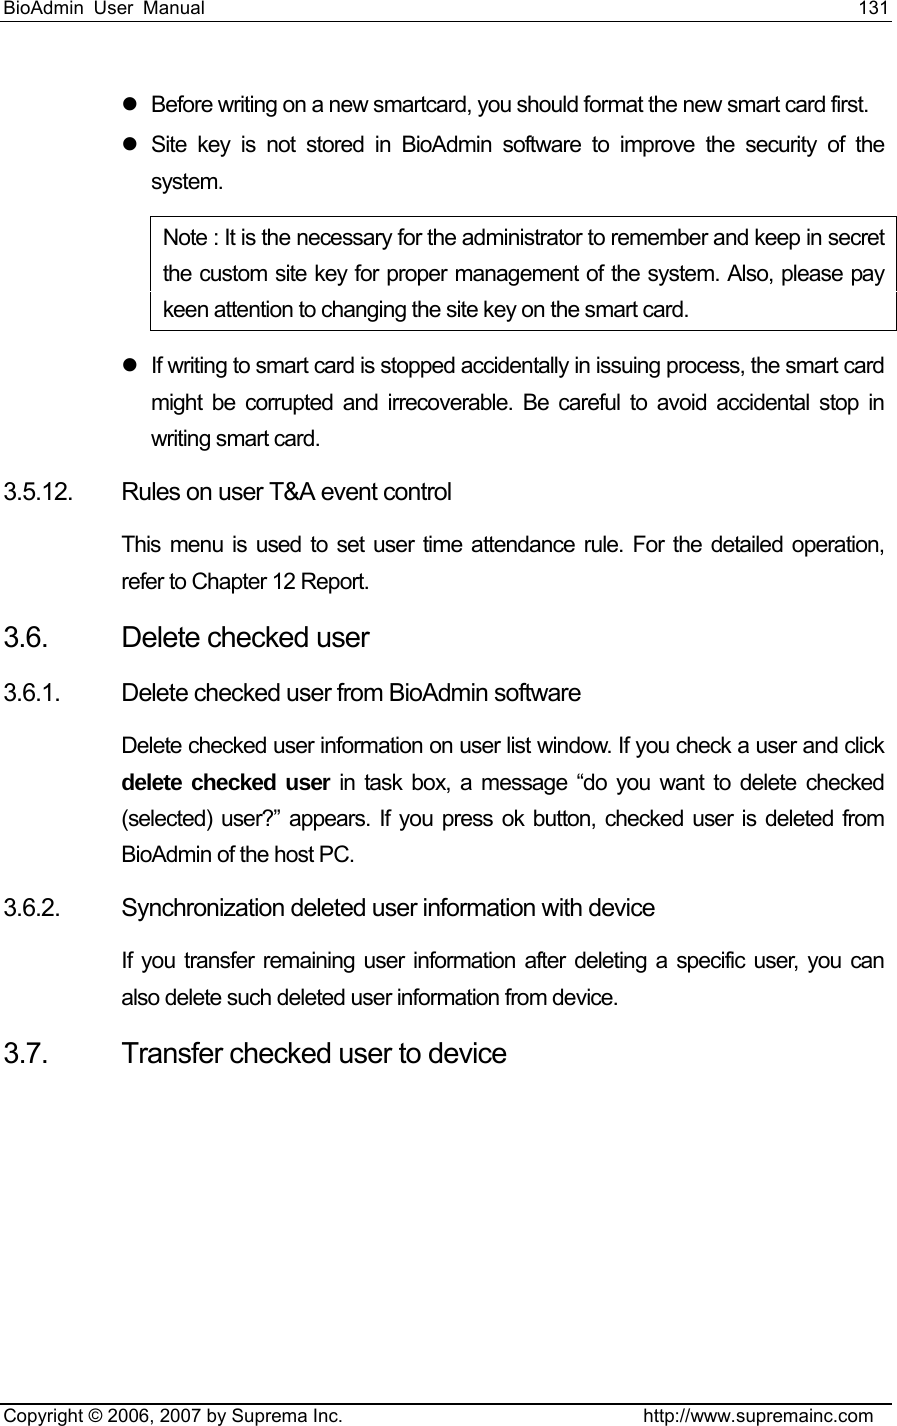
![BioAdmin User Manual 55 Copyright © 2006, 2007 by Suprema Inc. http://www.supremainc.com Administrator needs to know IP address and port # (1470). Once device is connected properly, IP address is displayed as one group and device ID is displayed with a bracket [****] on device tree window. z Wireless network setup](https://usermanual.wiki/Suprema/BIOENTRYPLUS/User-Guide-840626-Page-55.png)
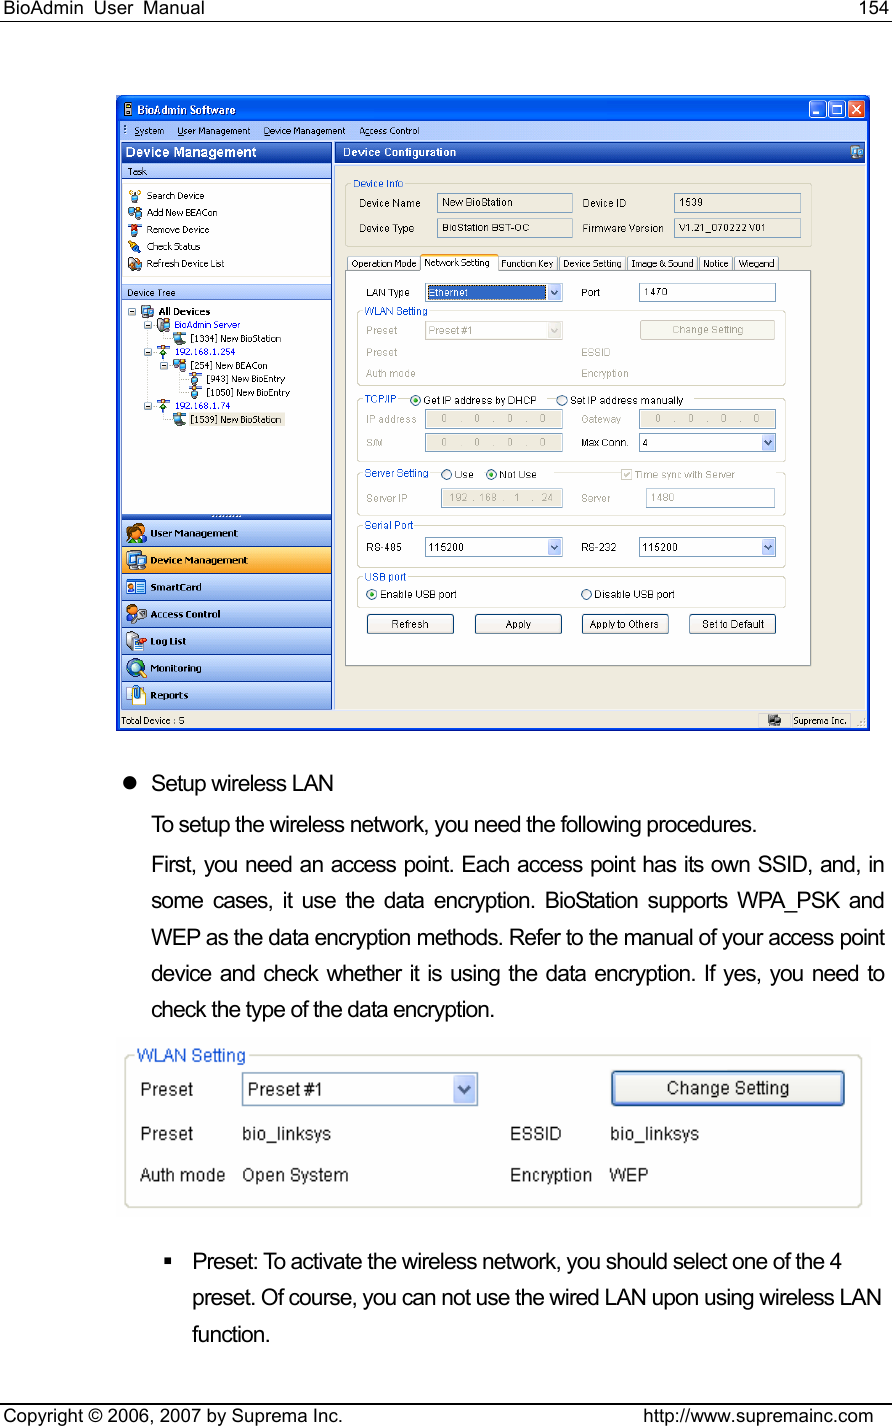
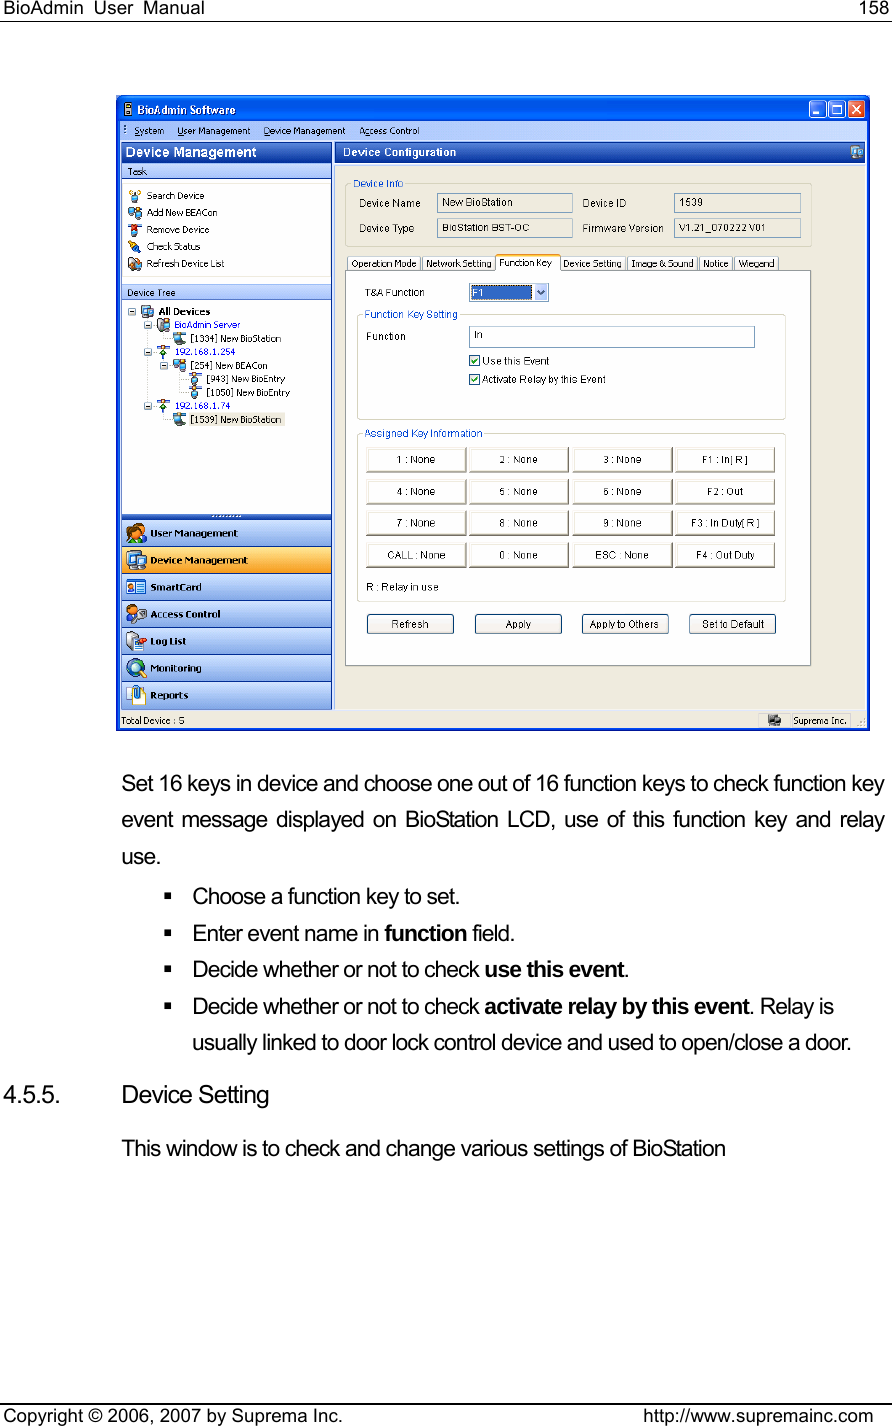
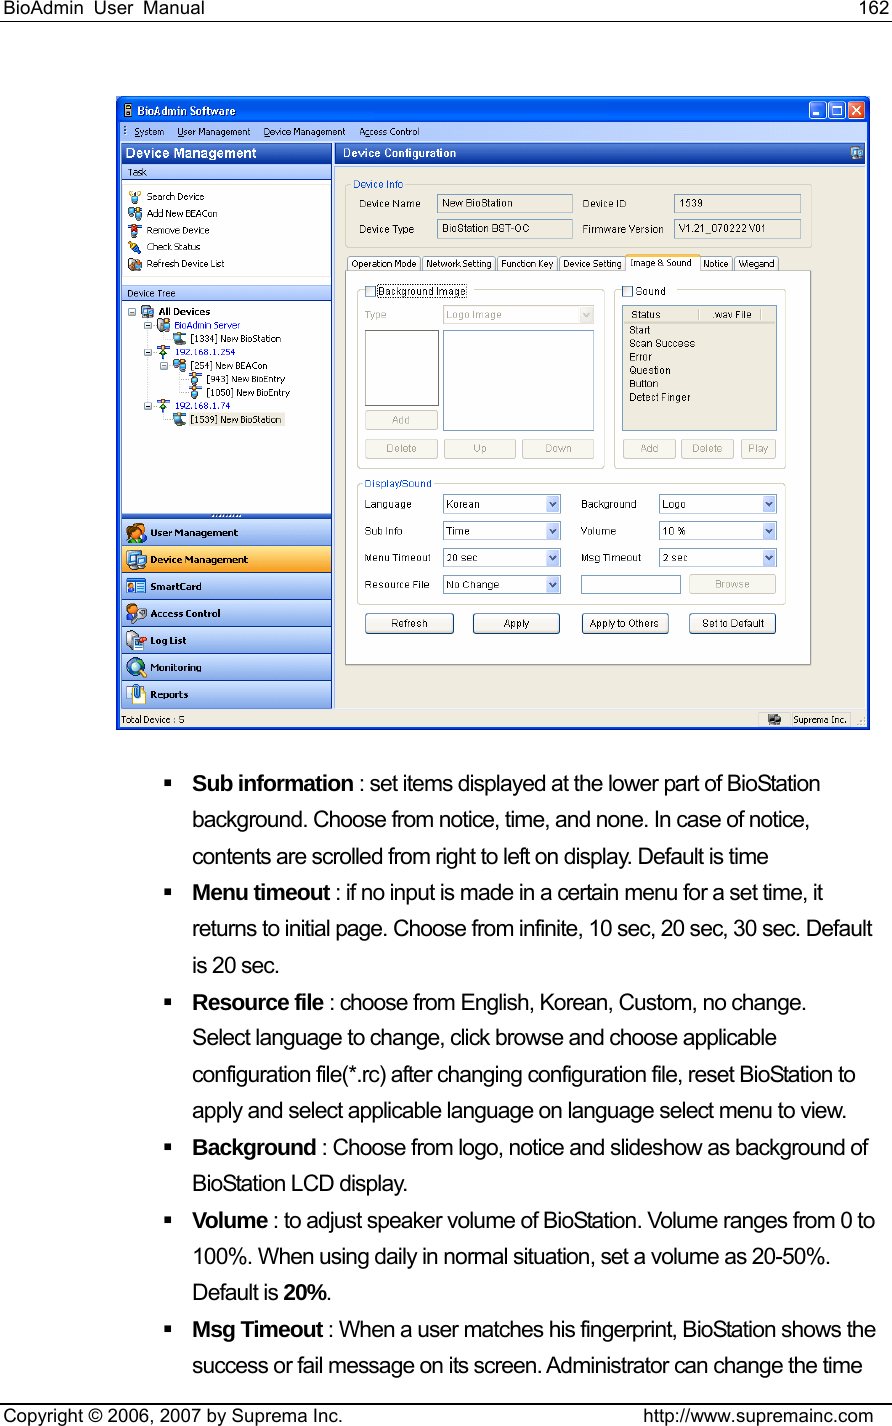
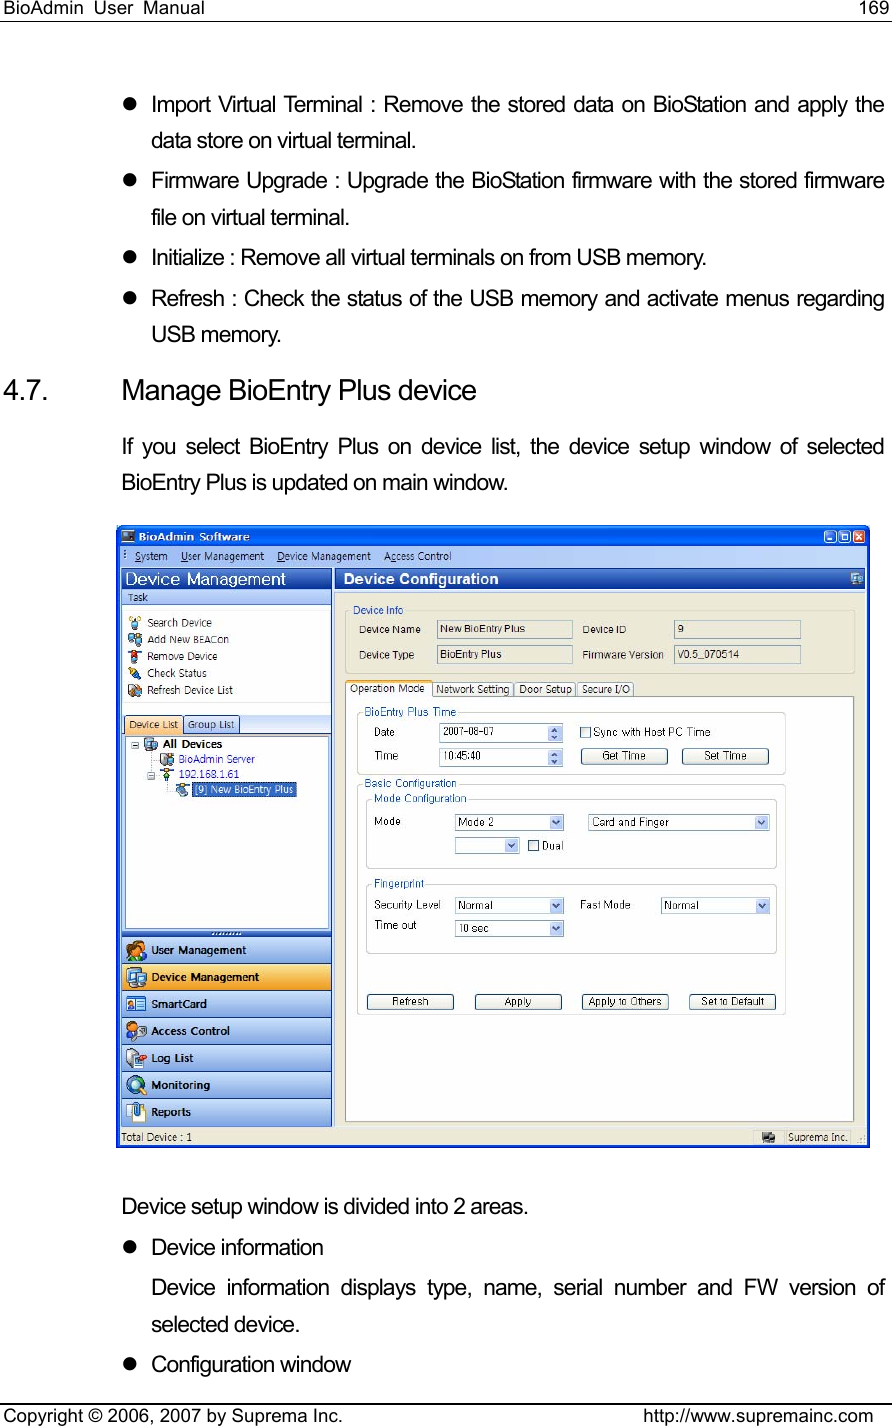
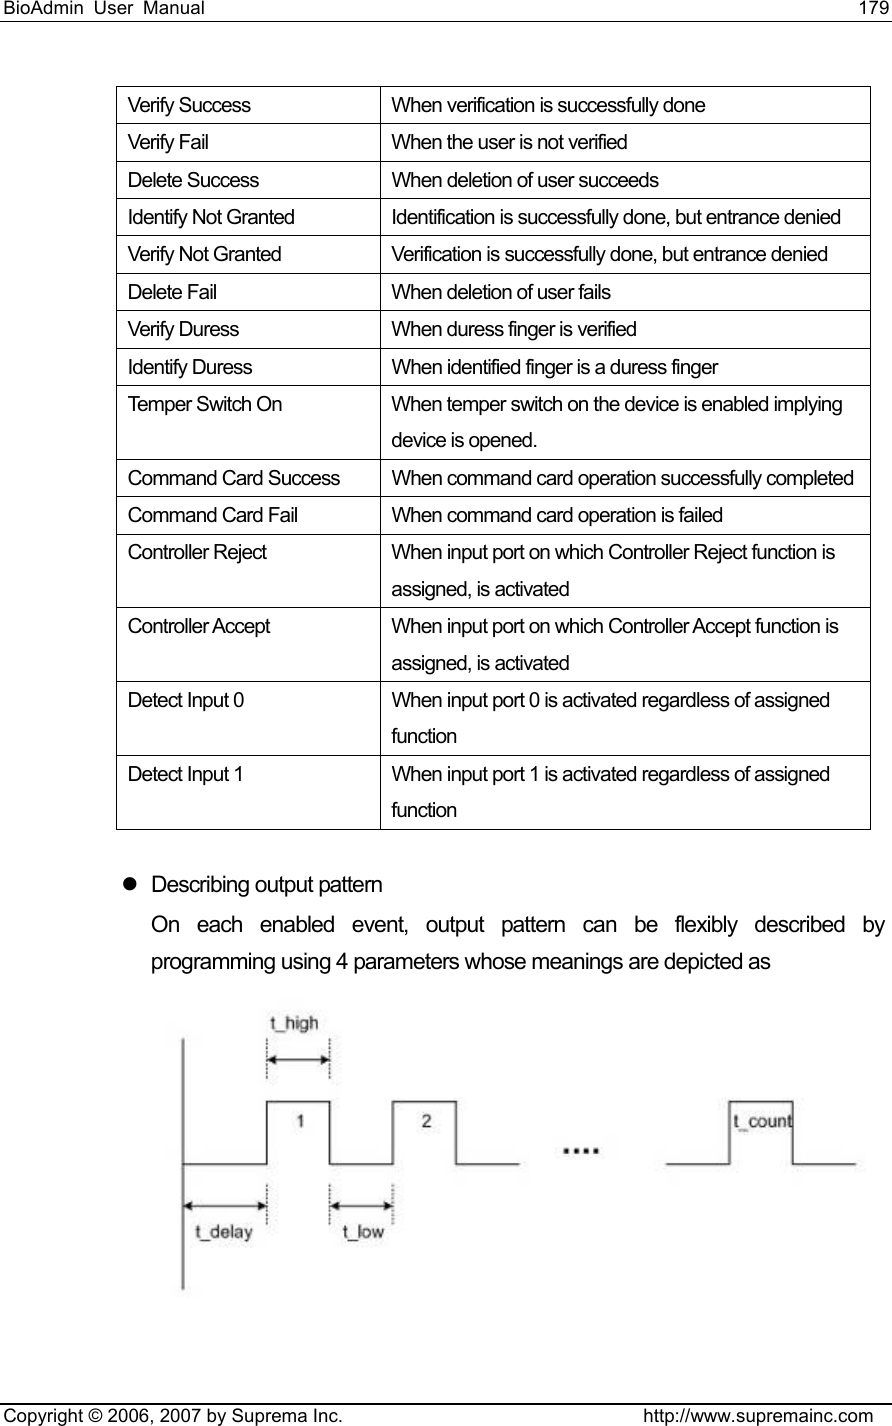
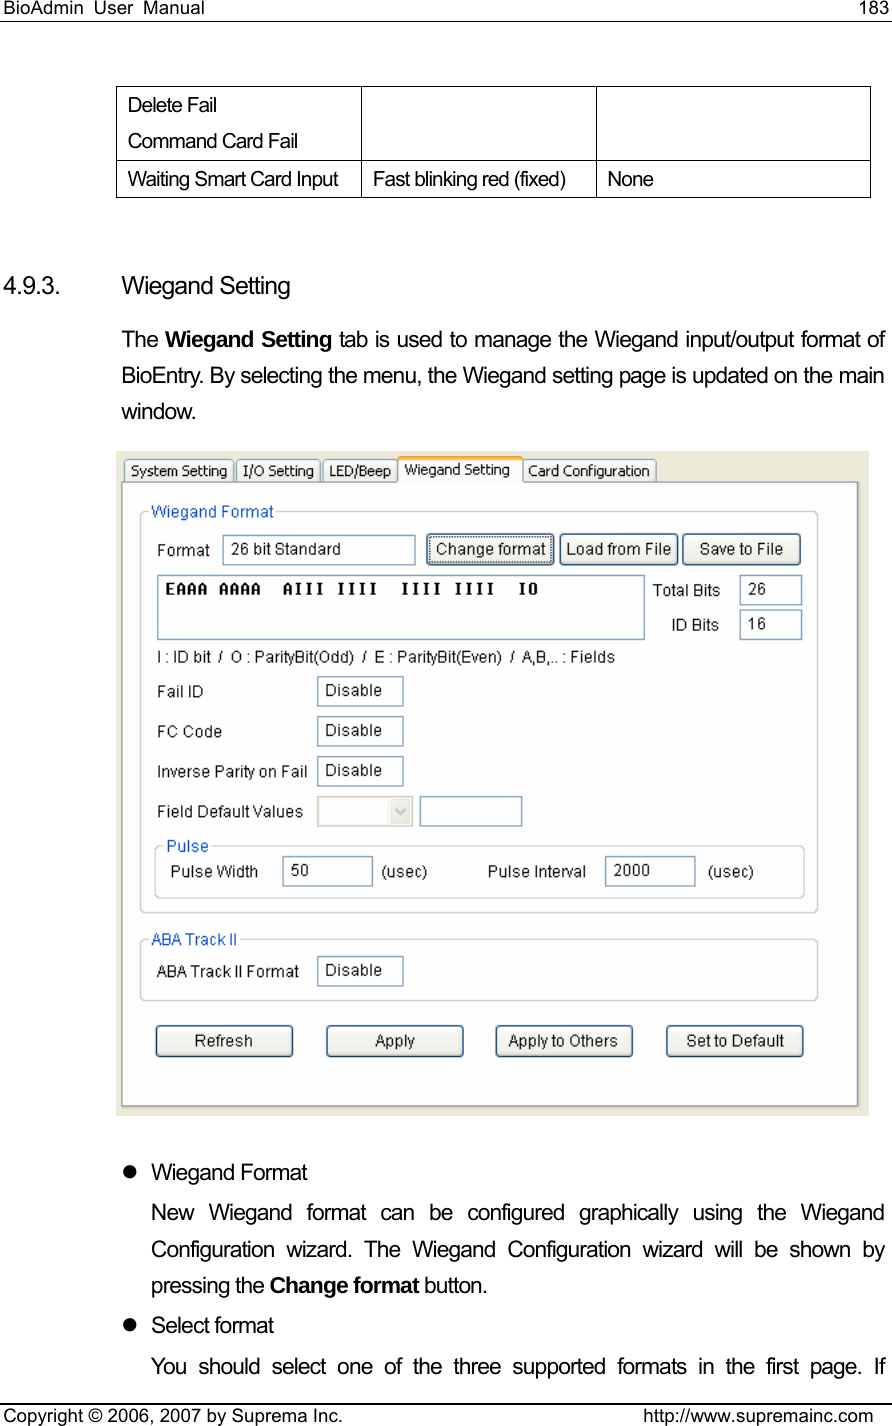
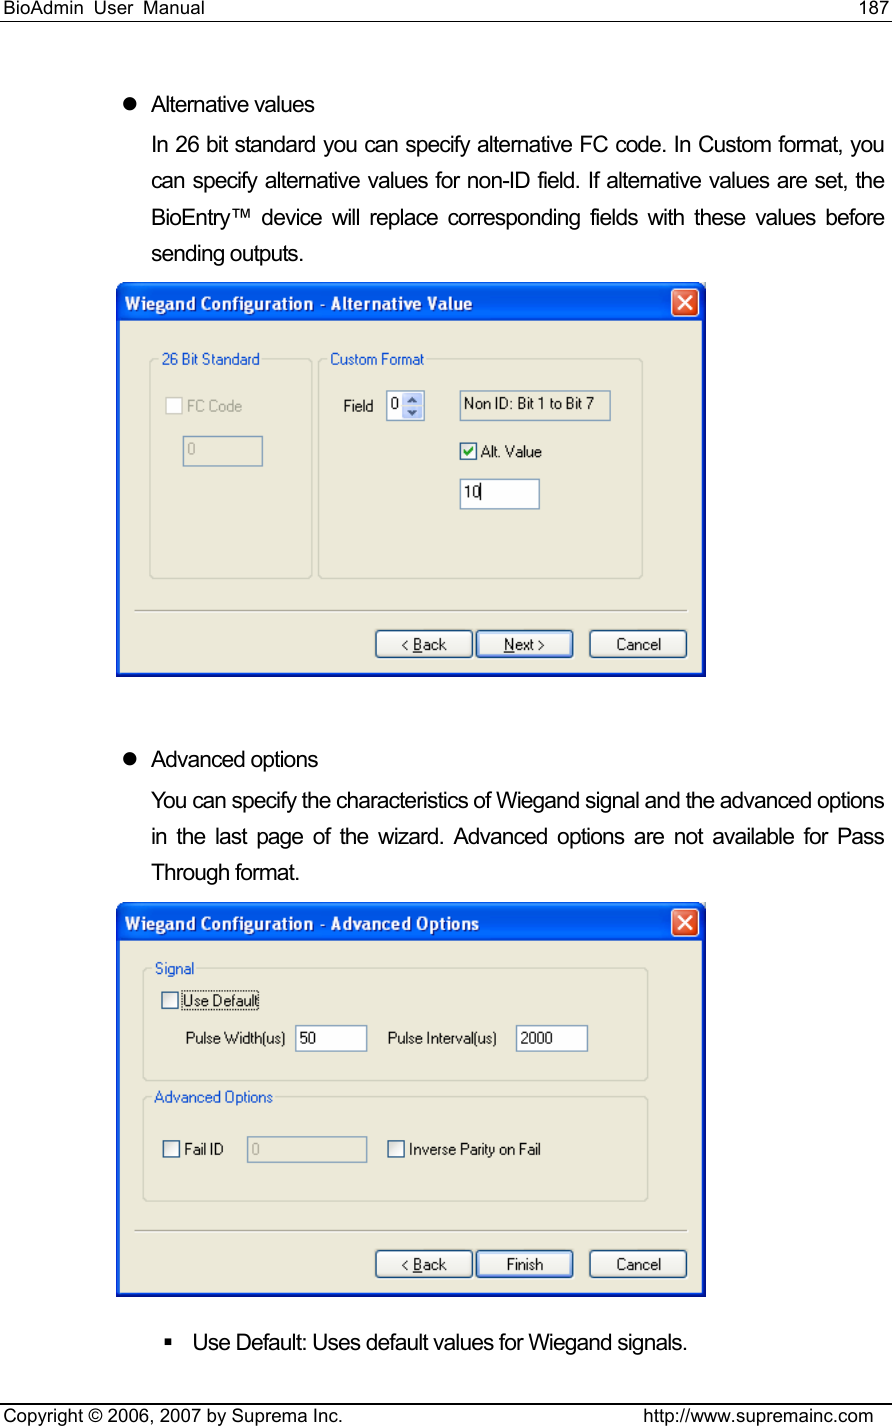
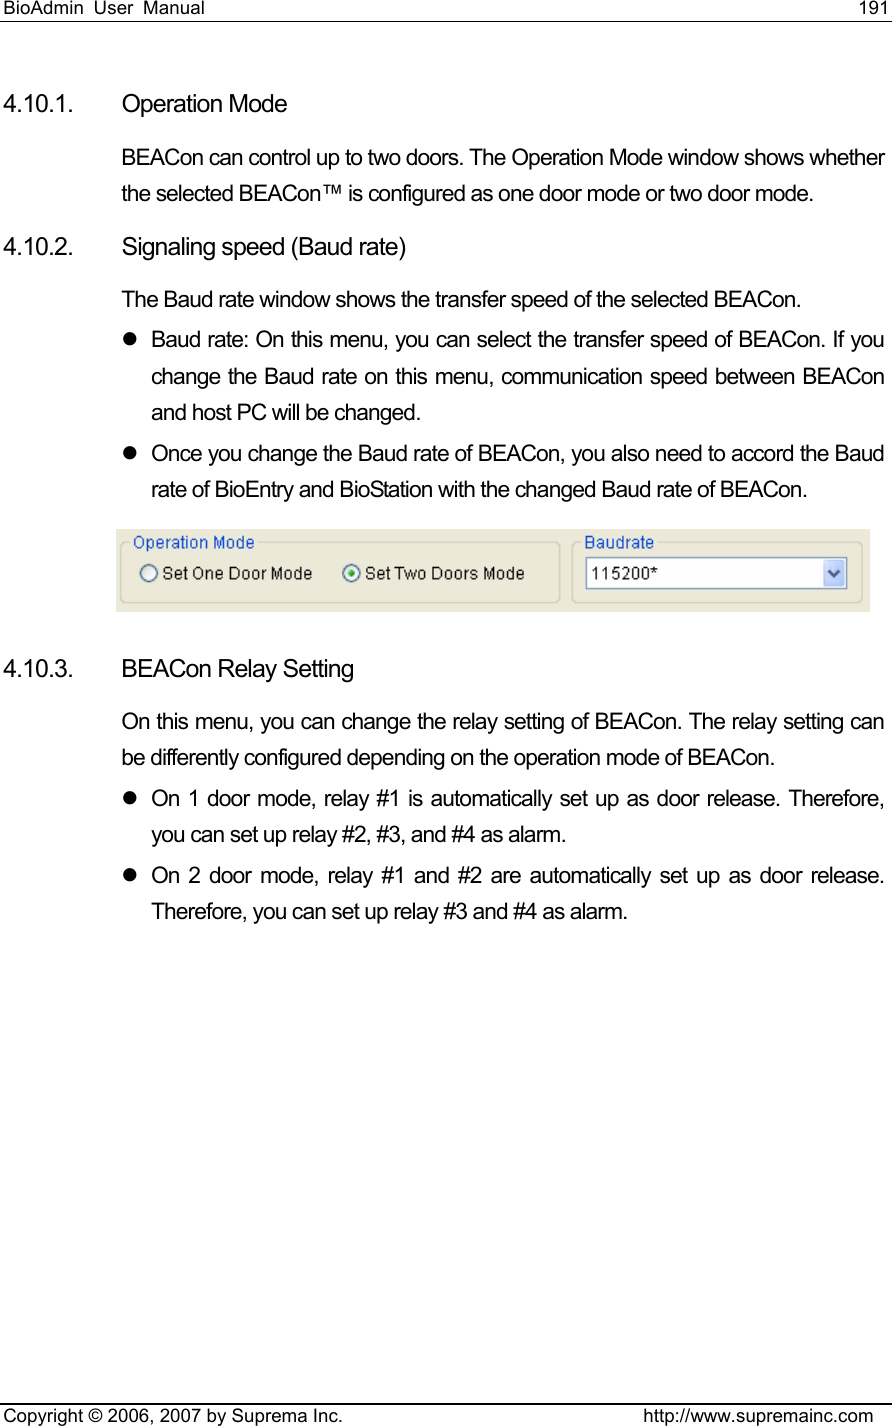
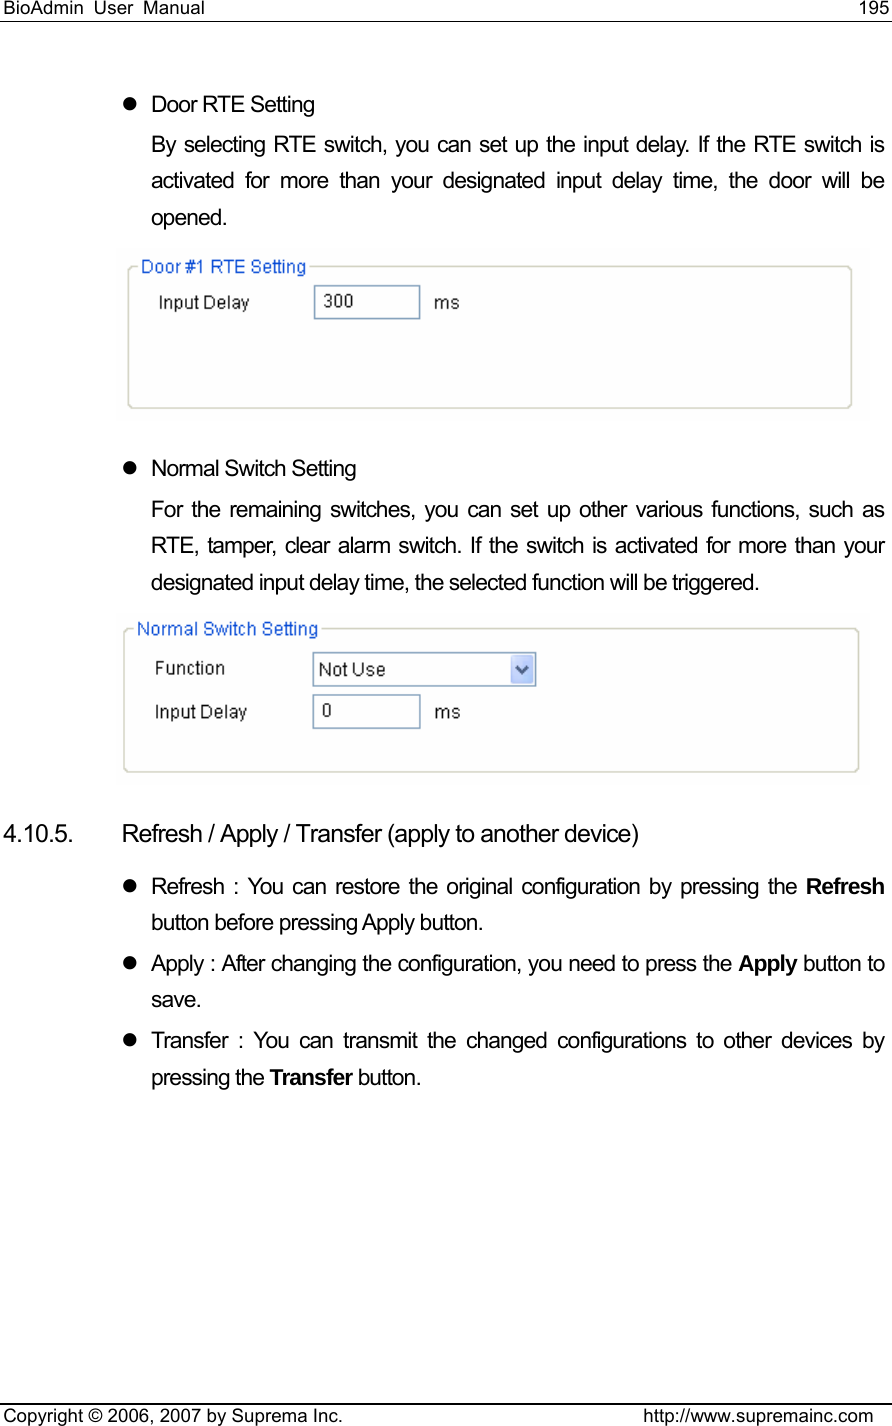
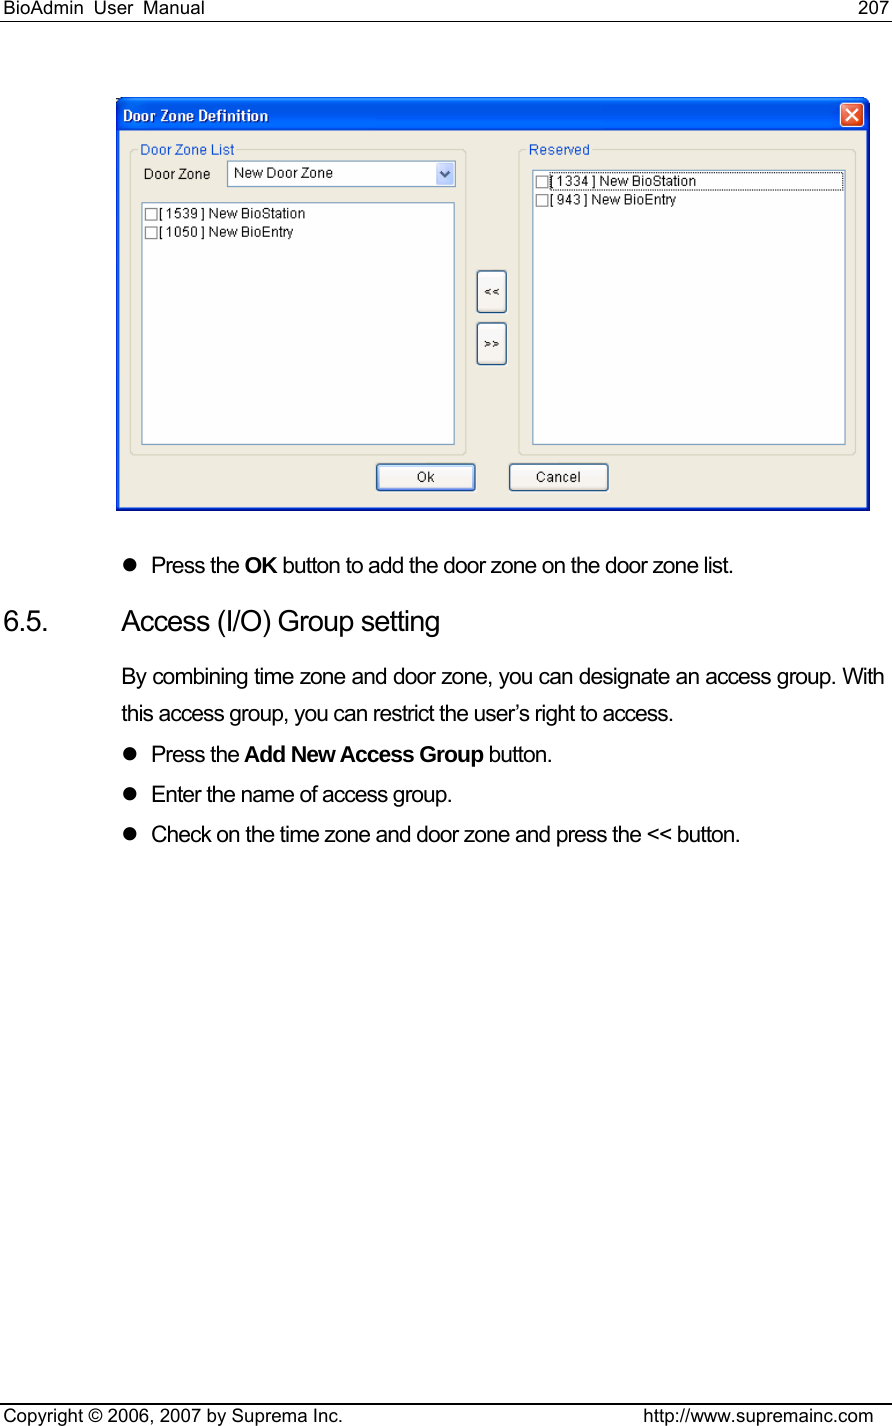
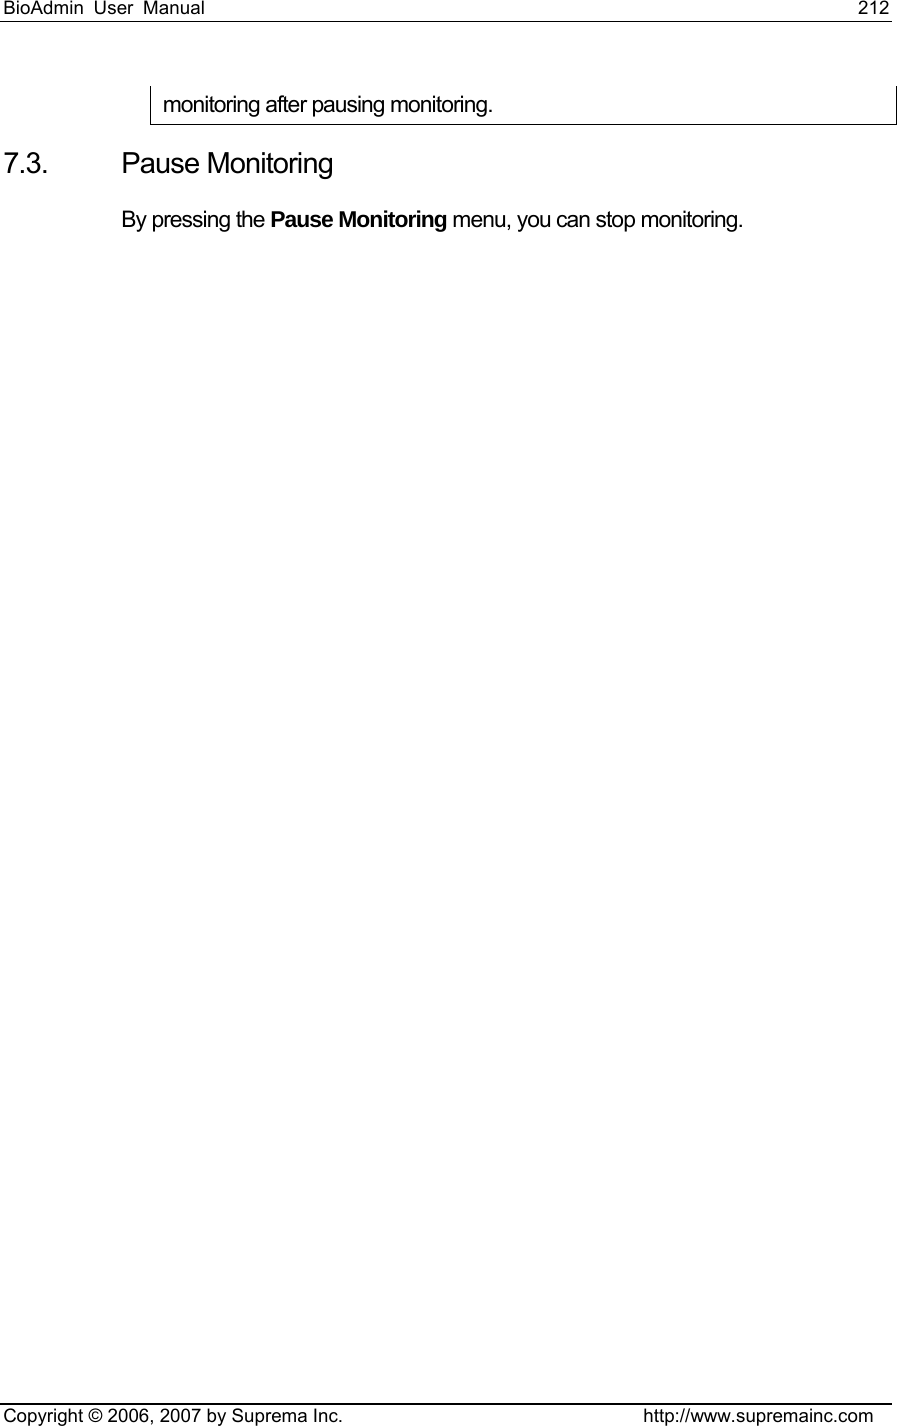
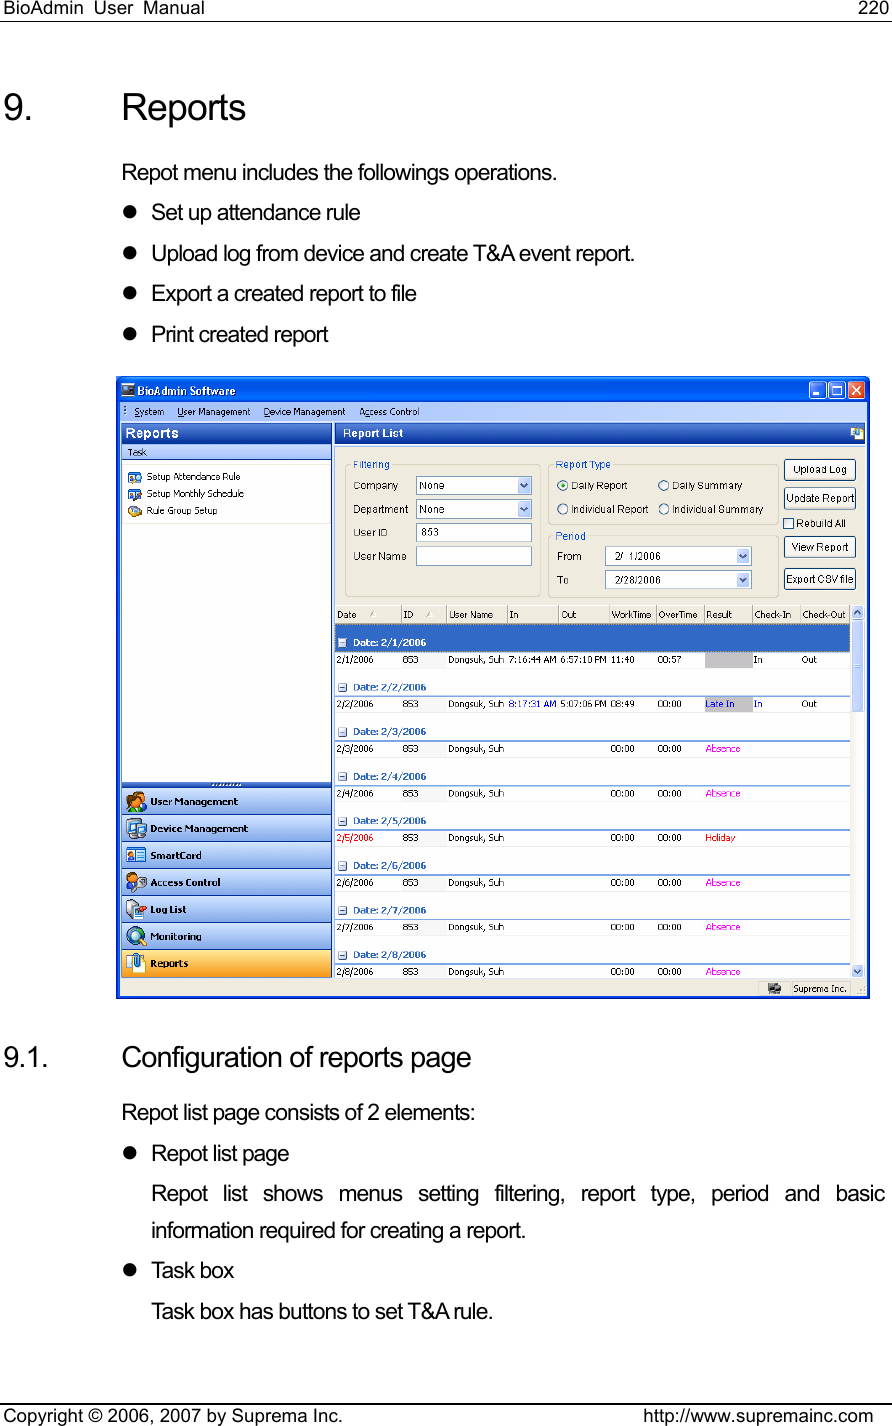
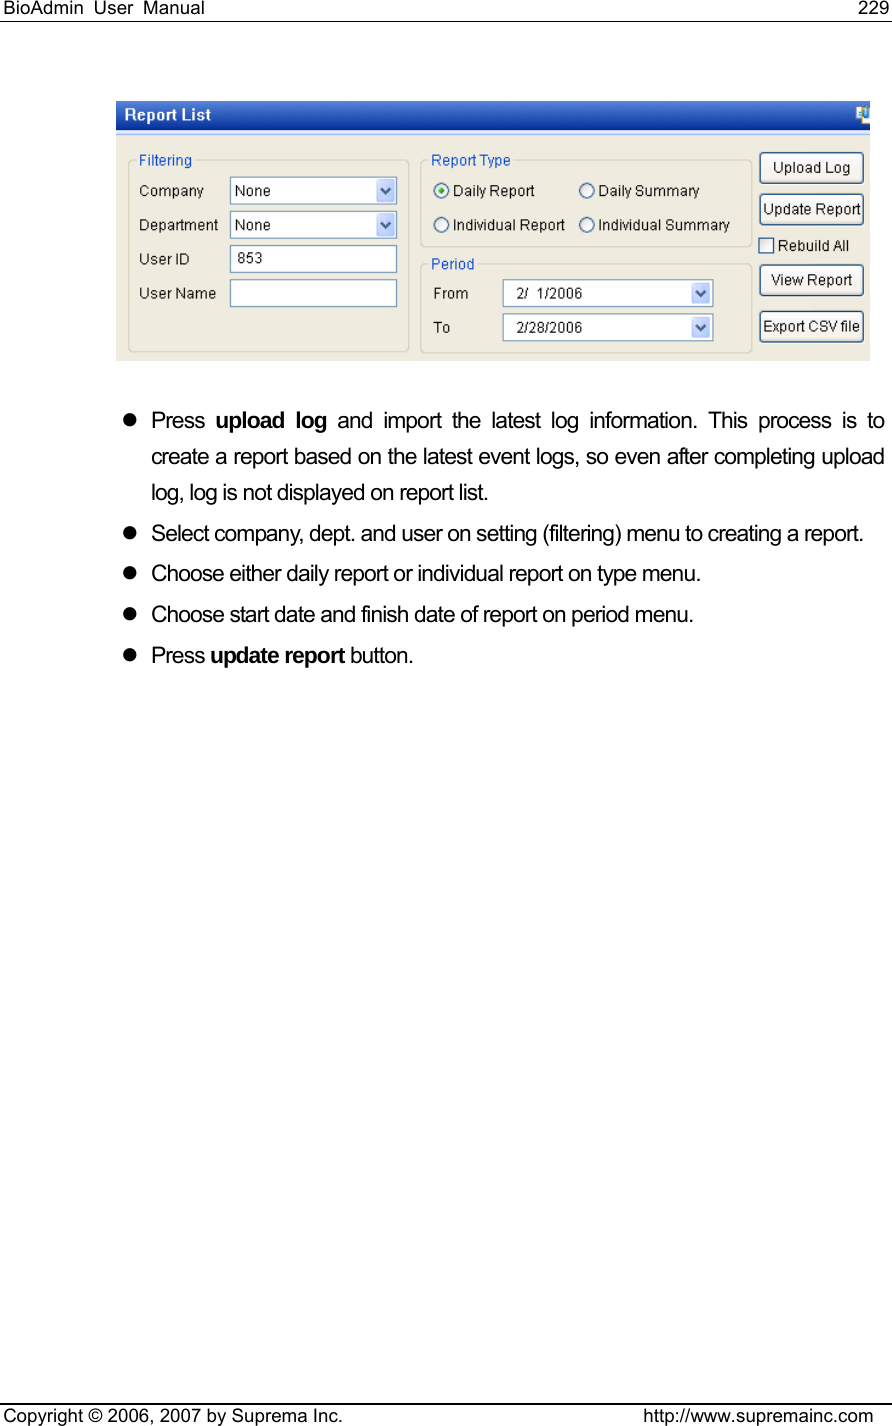
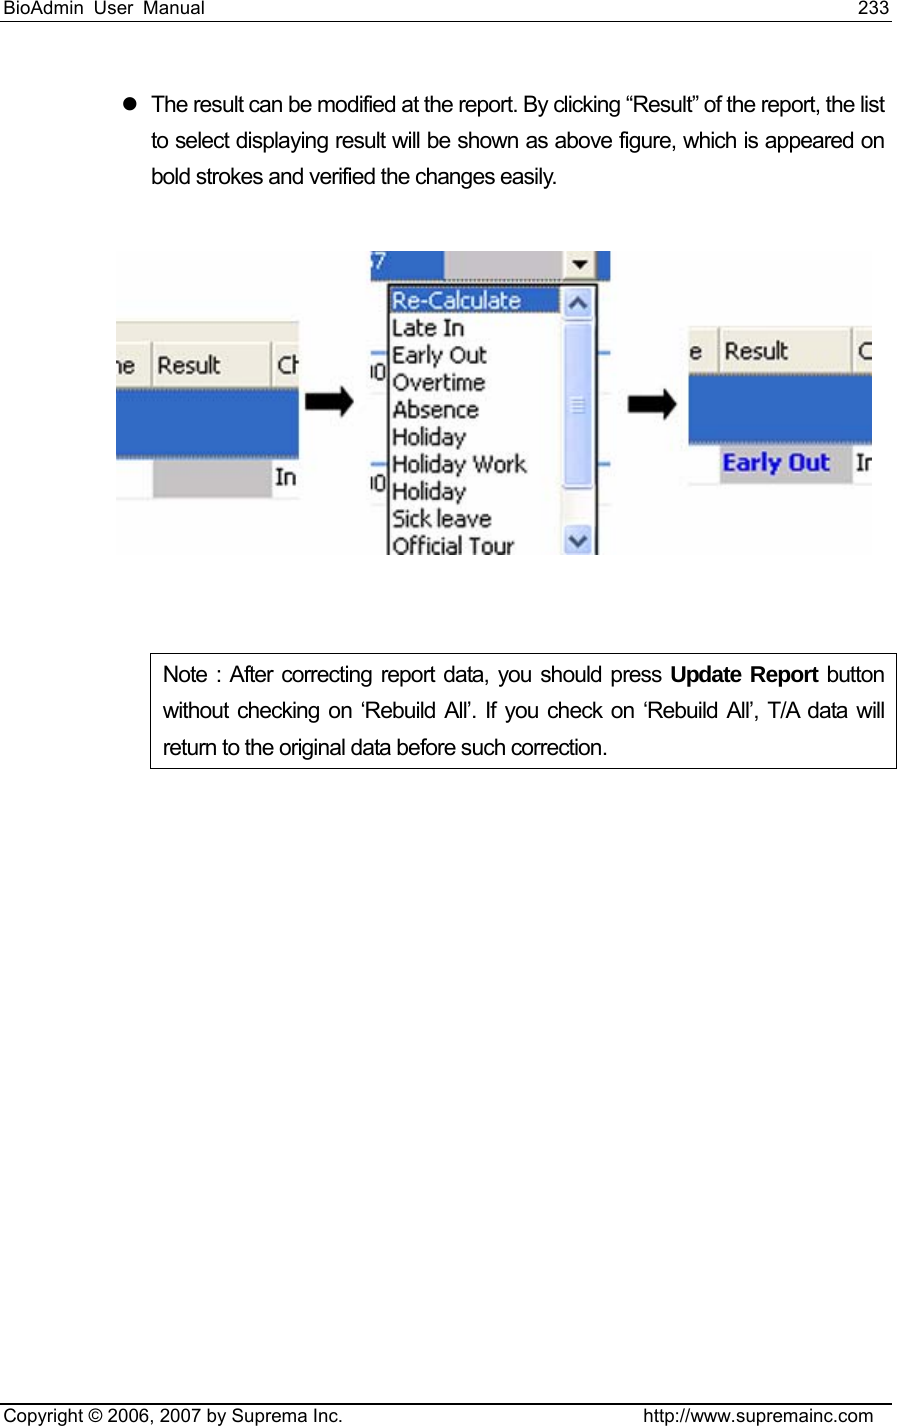
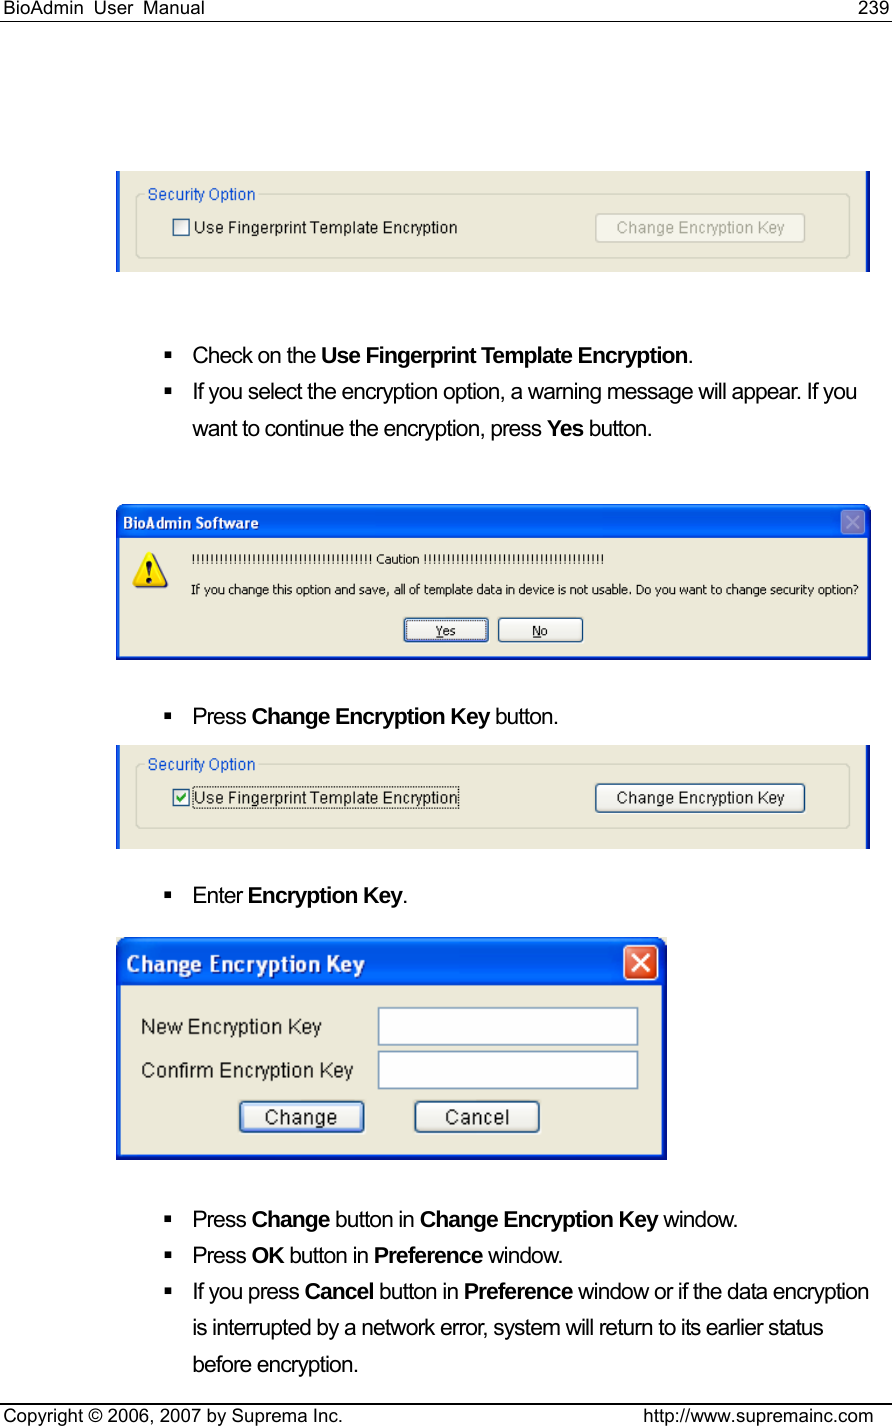
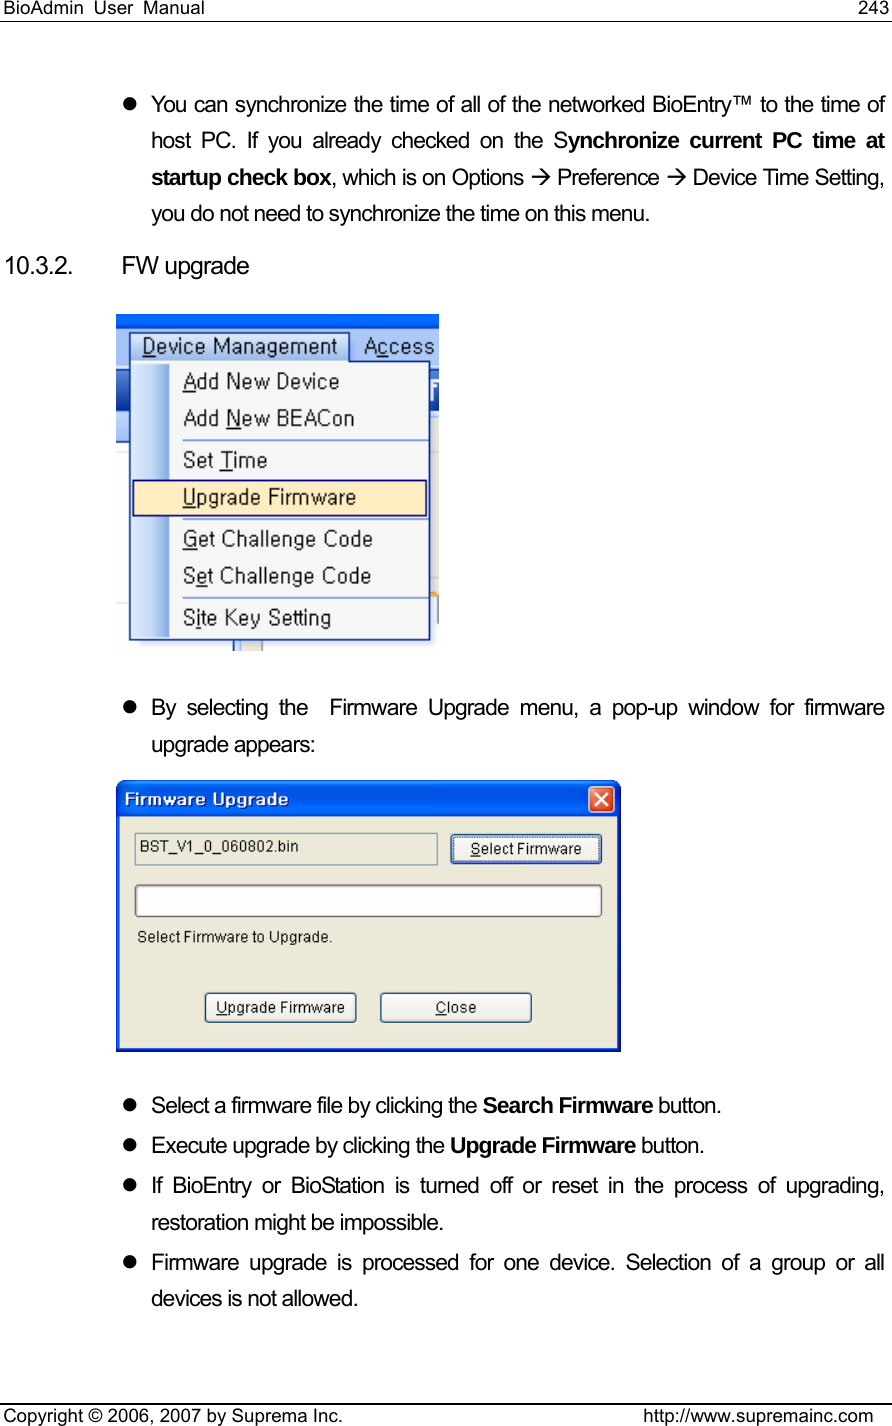
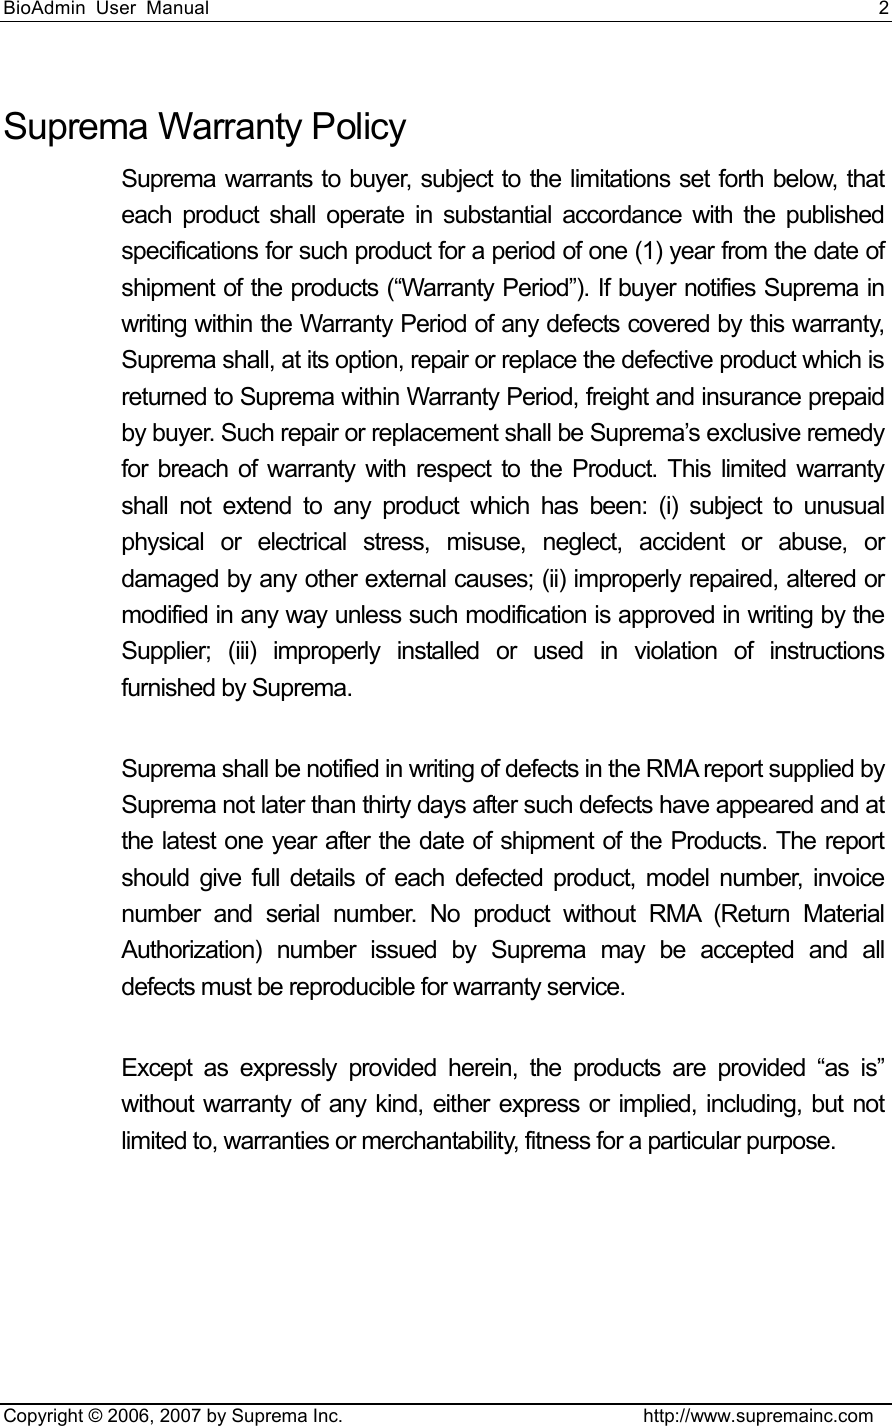
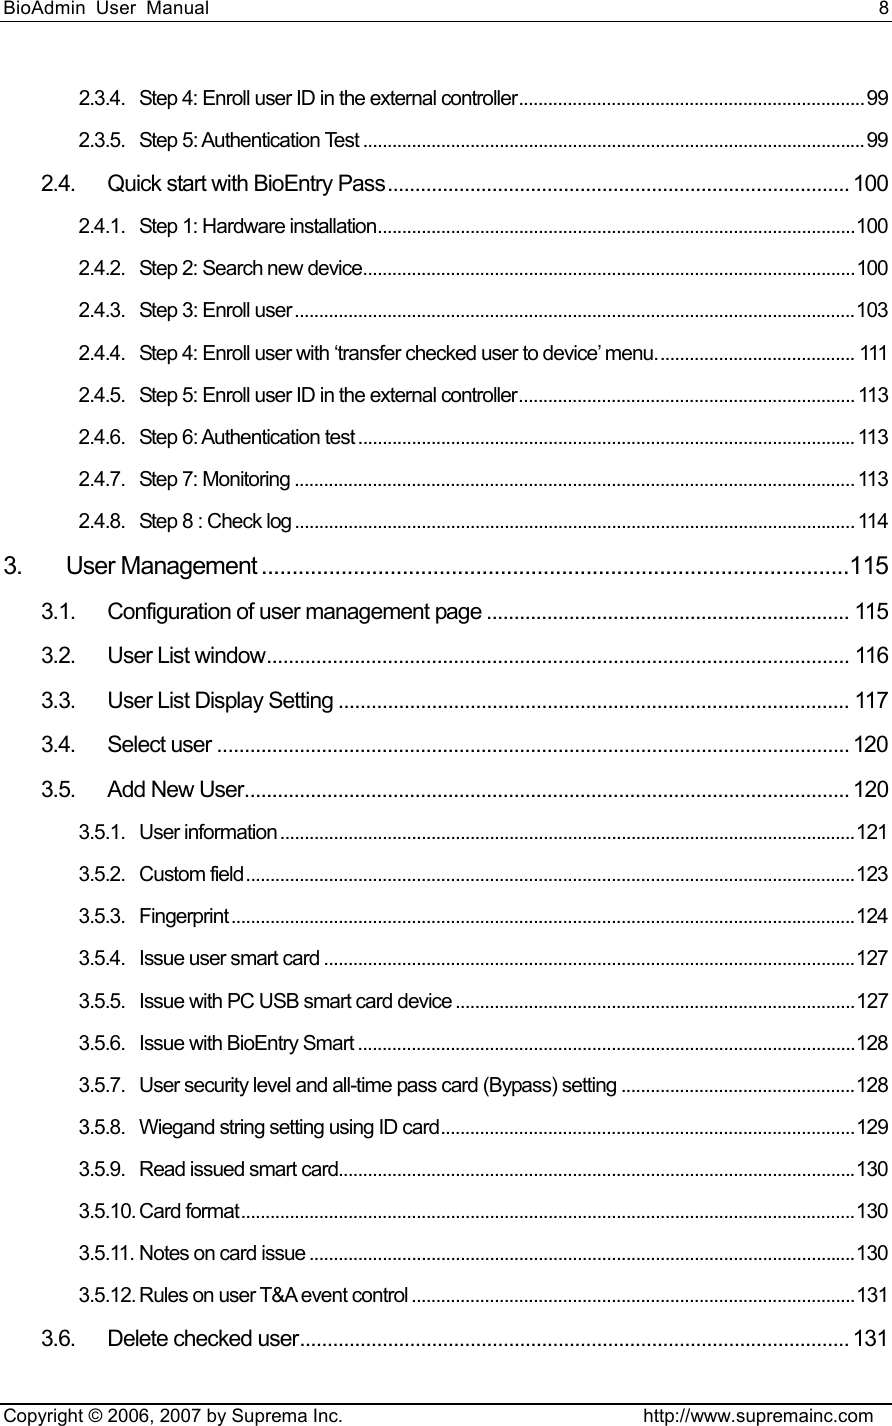
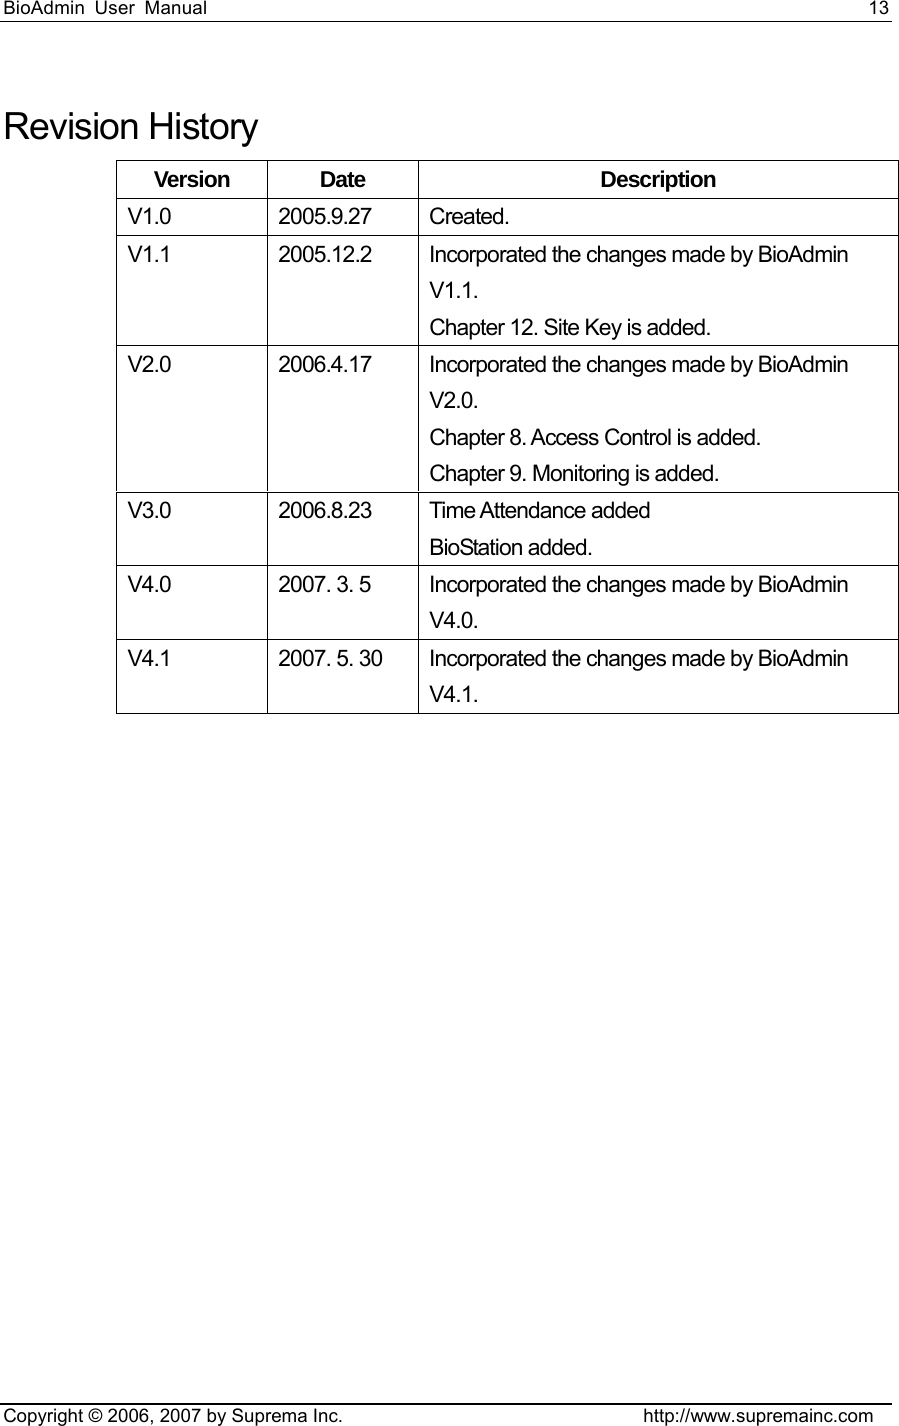
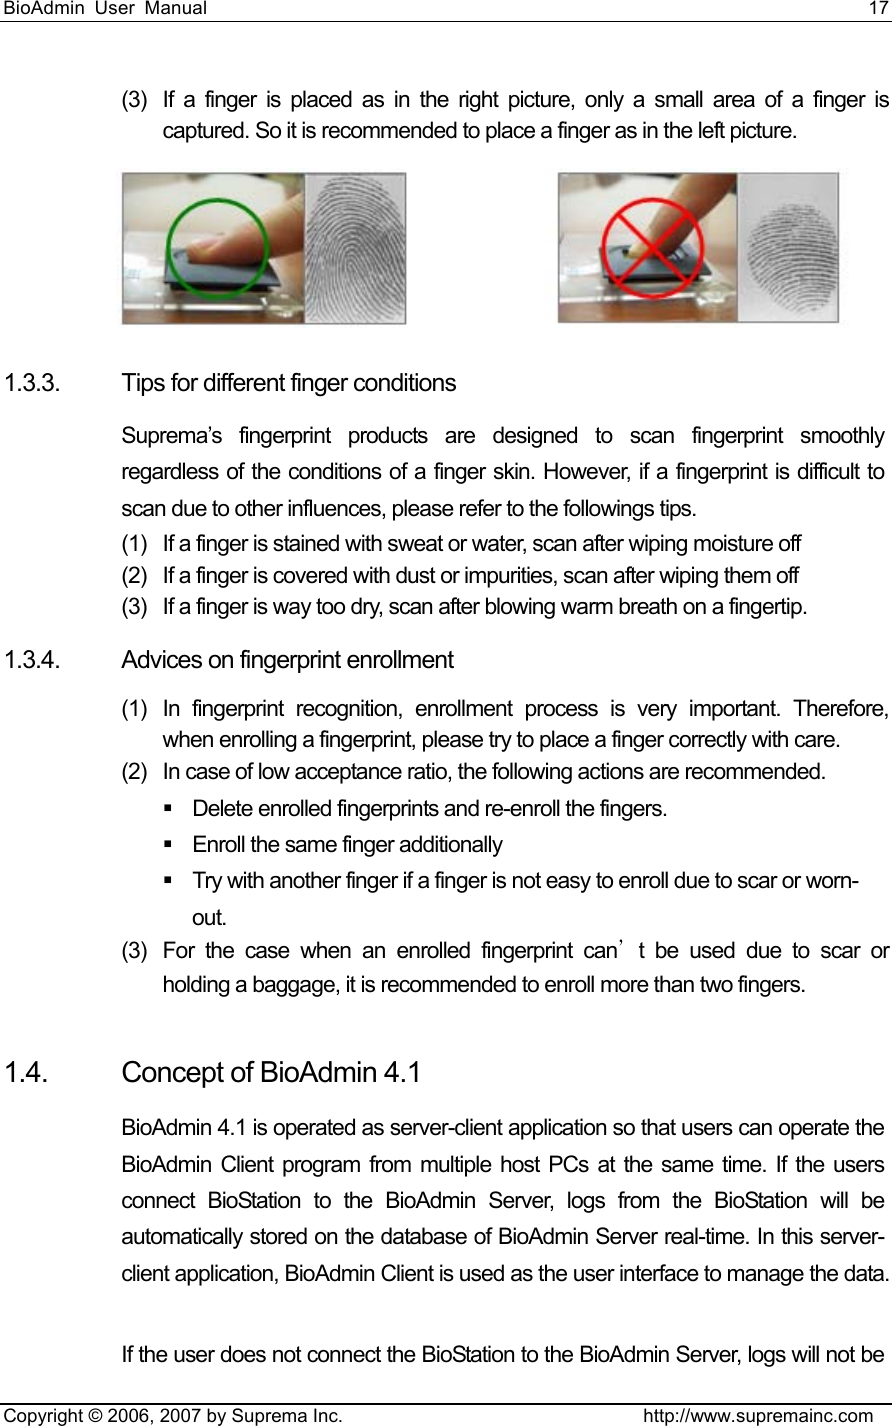
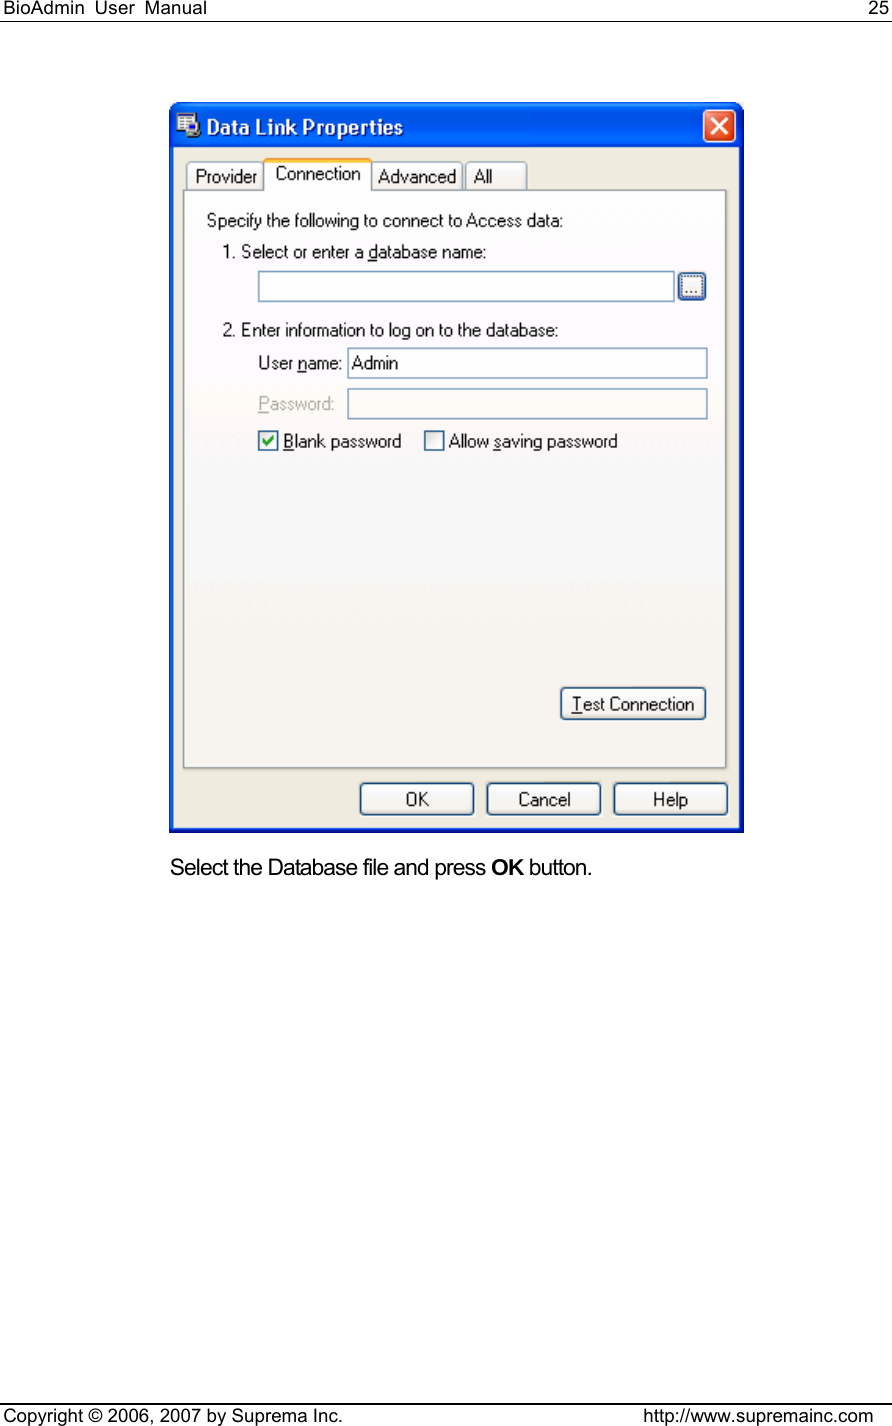
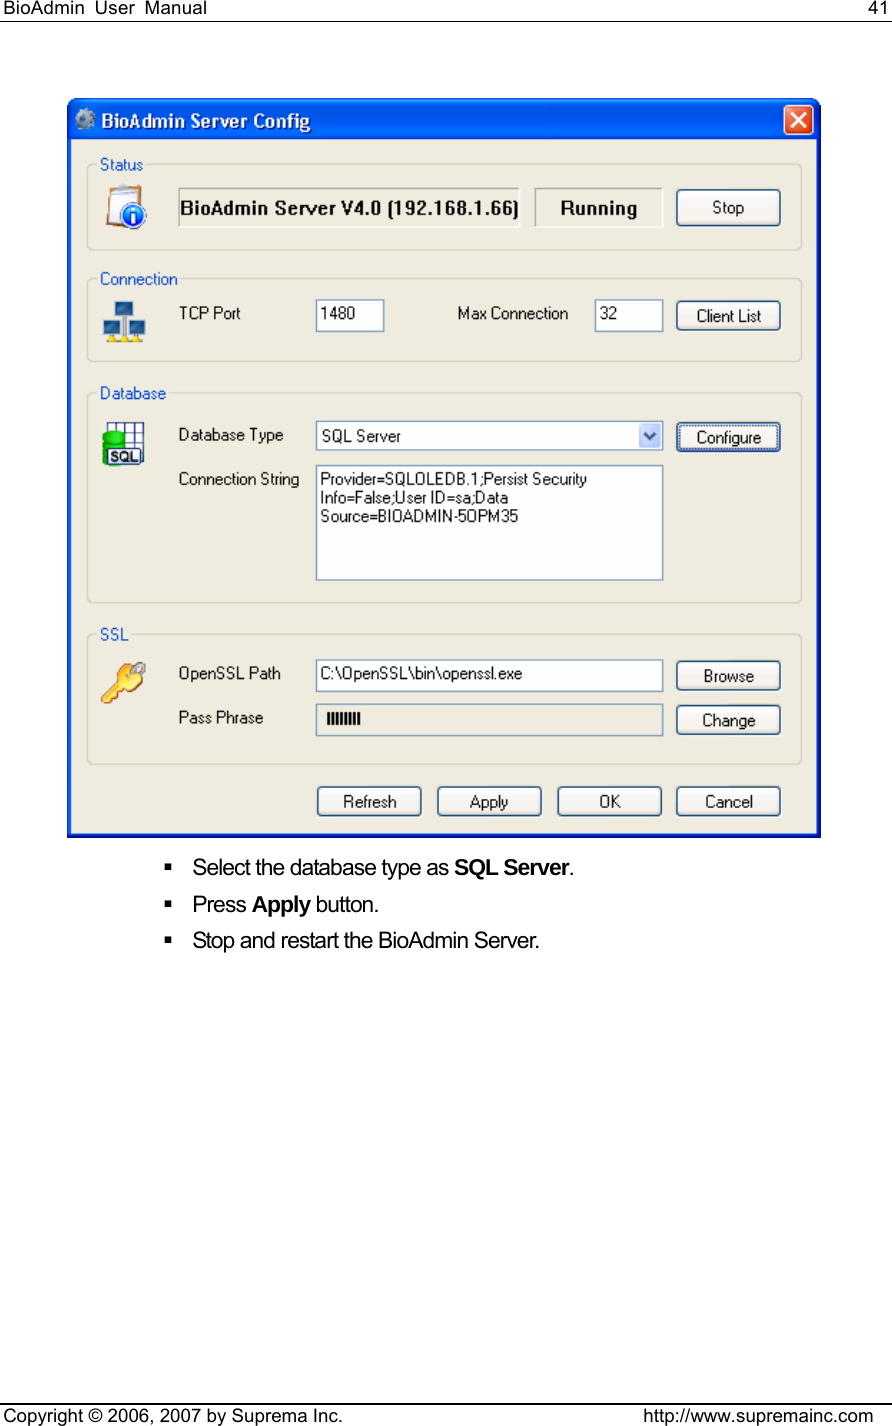
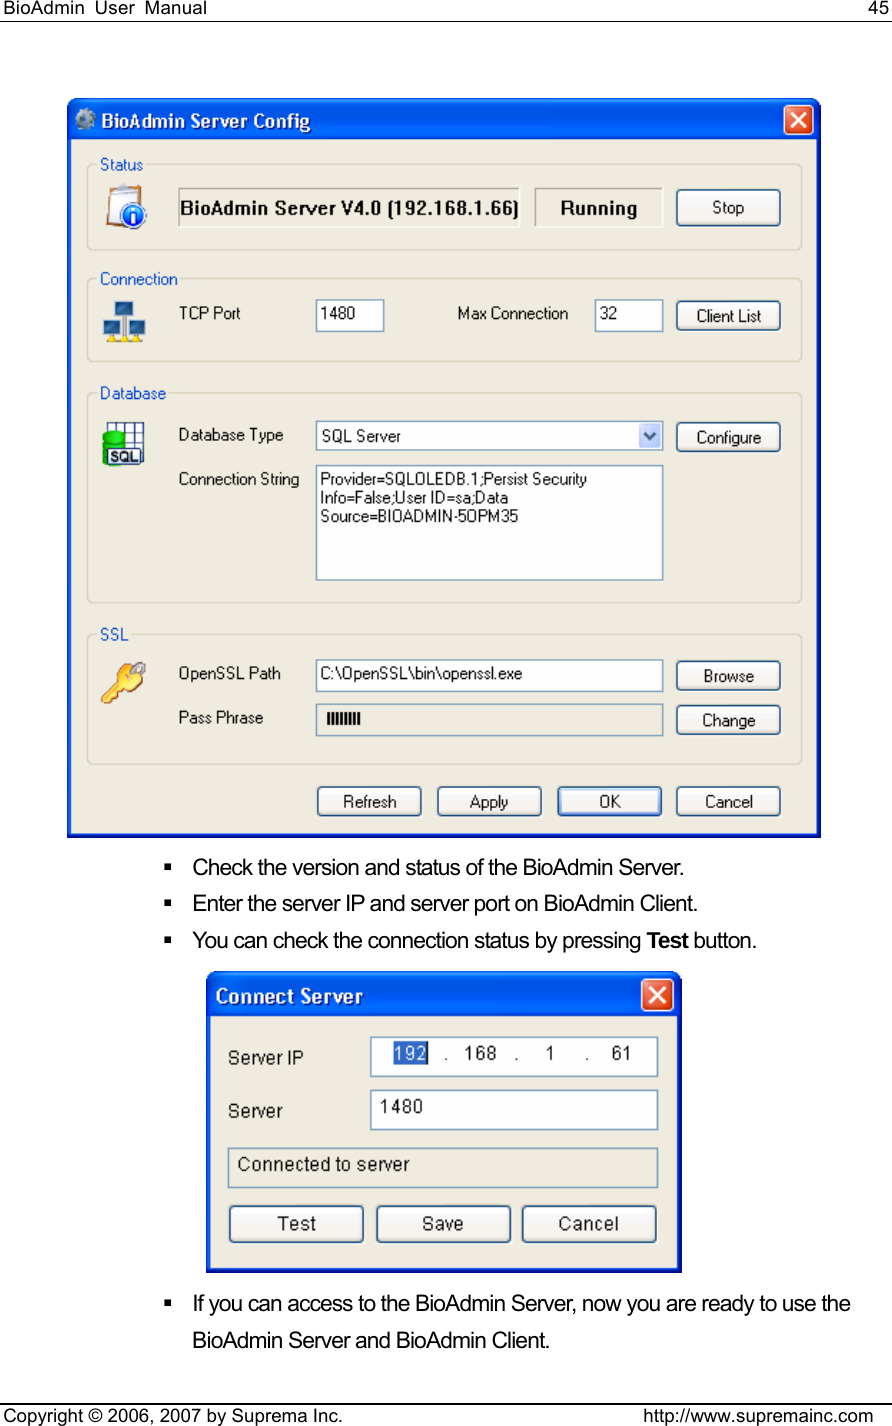
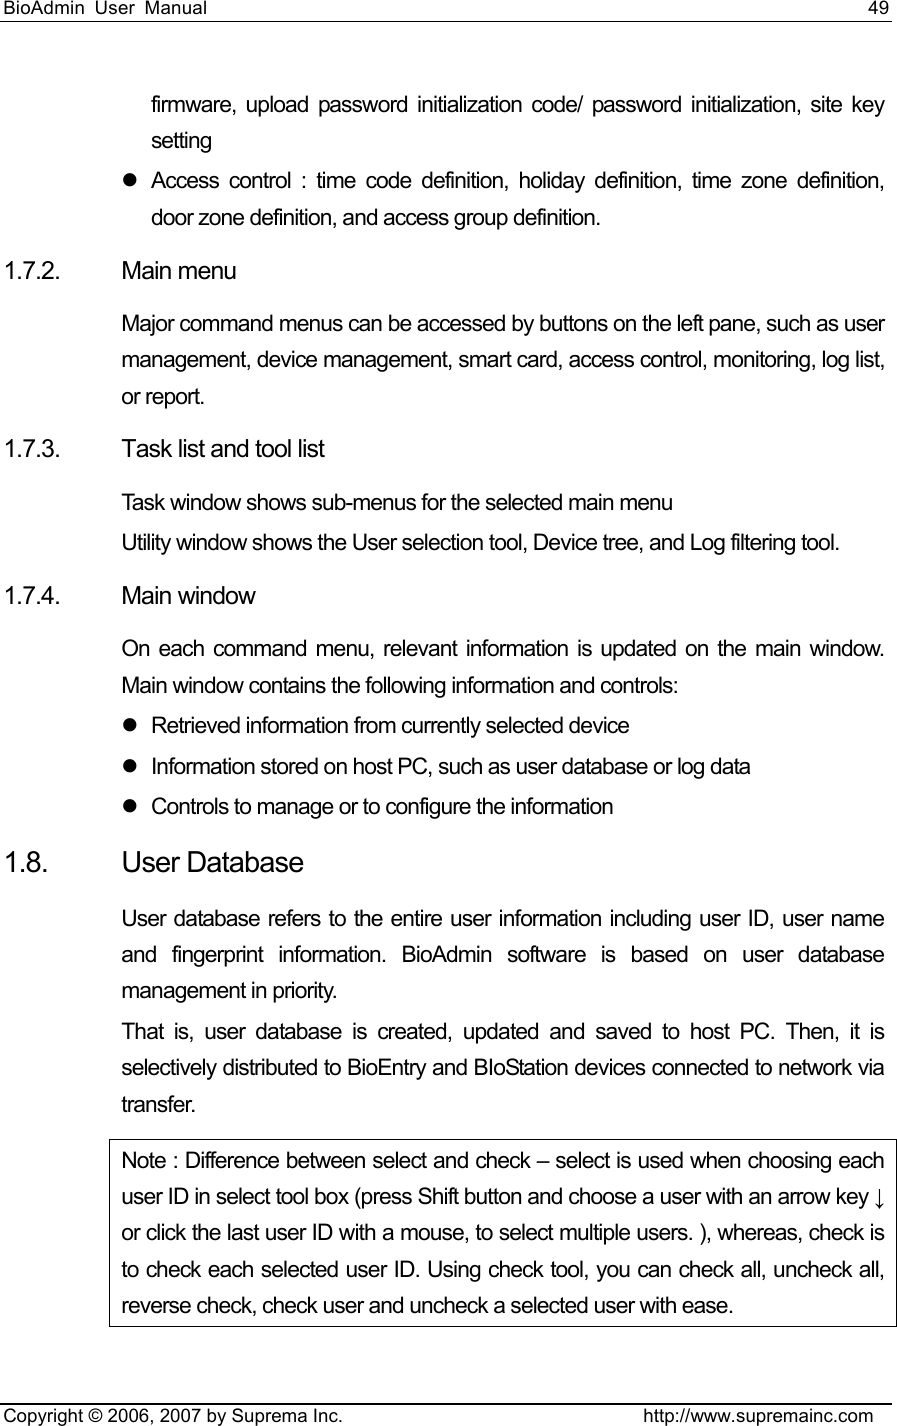
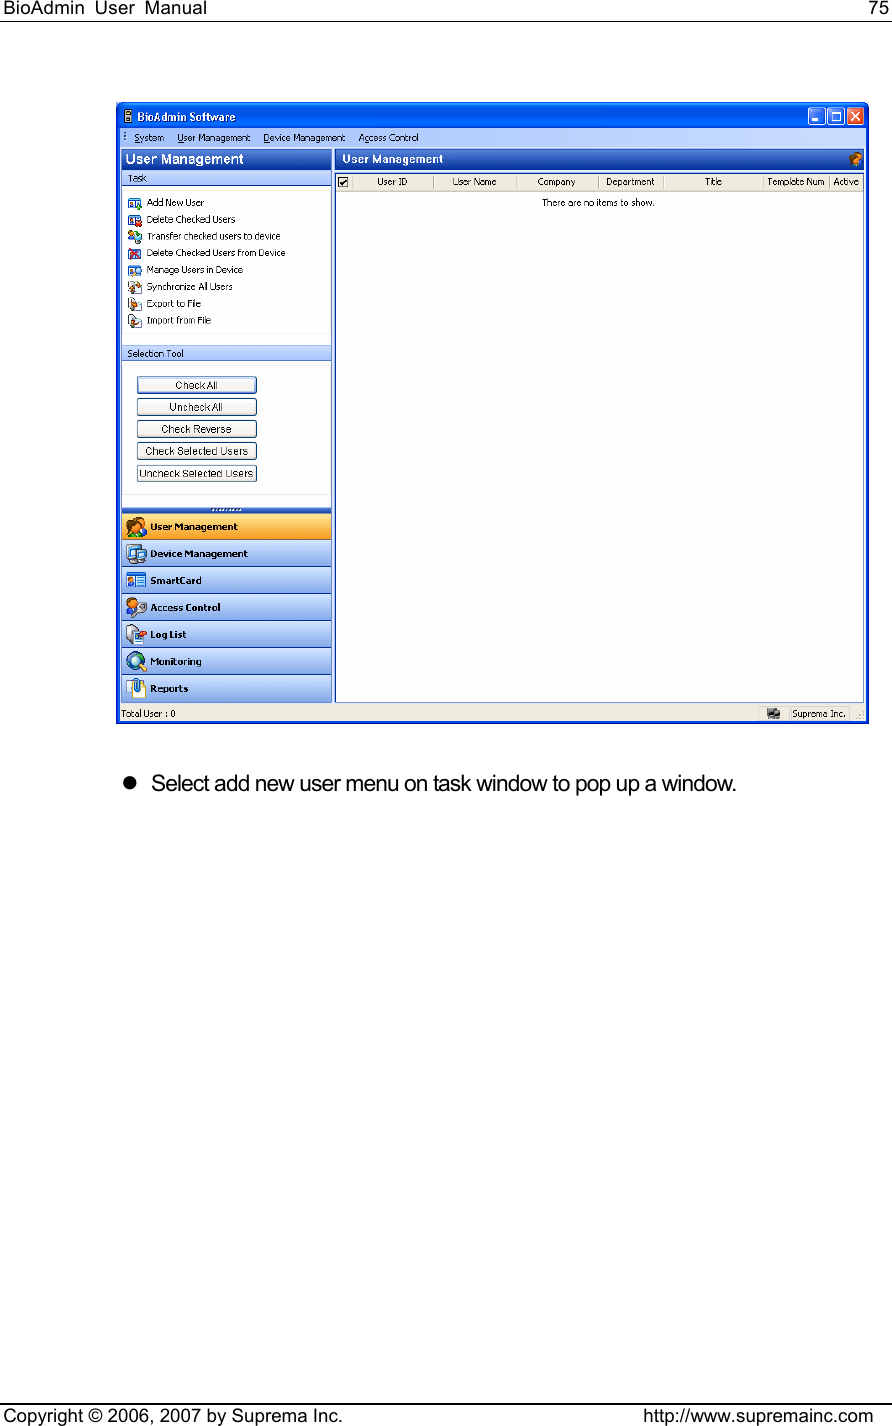
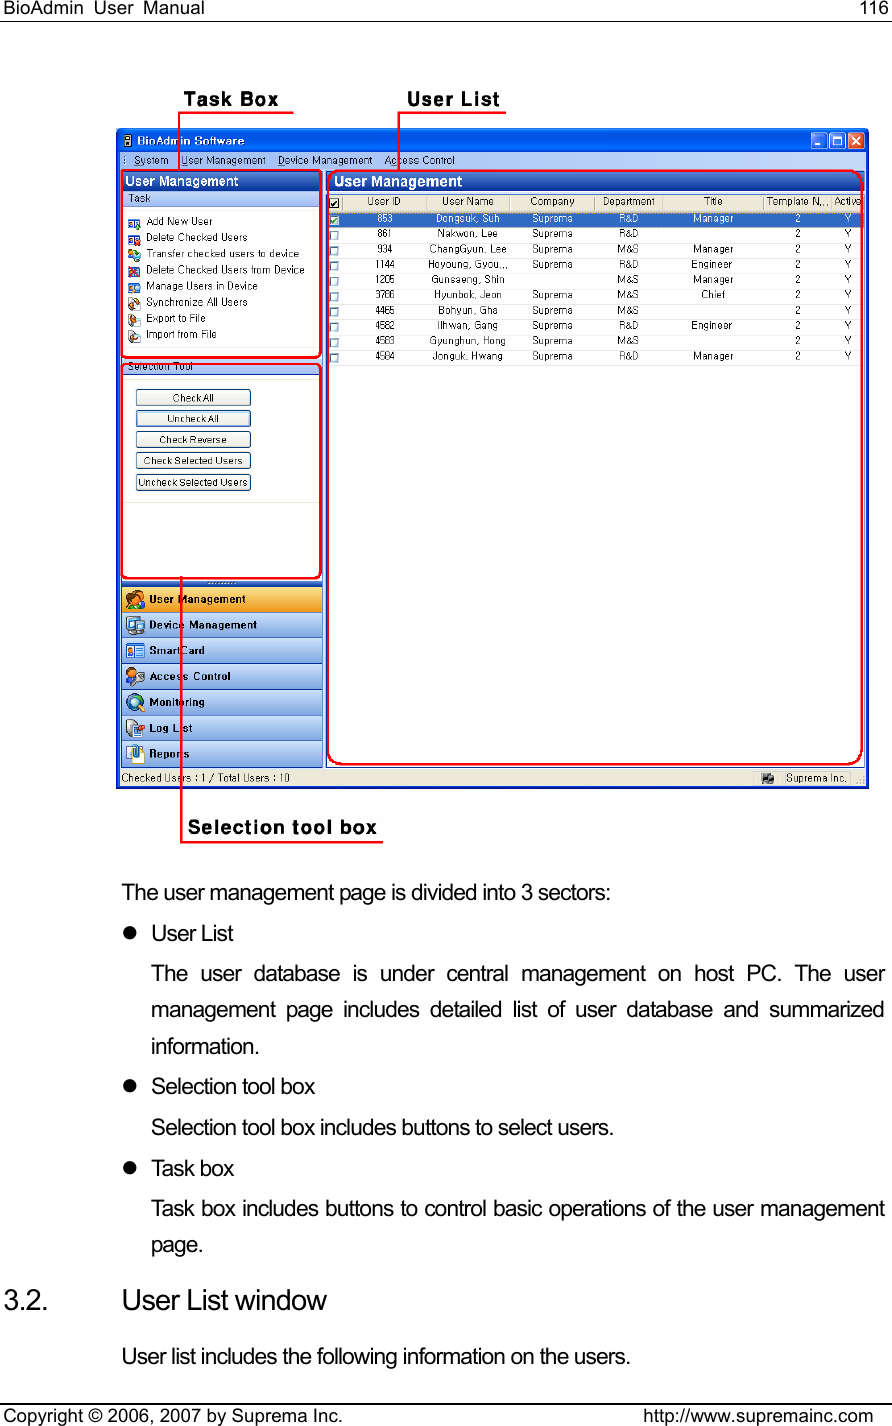
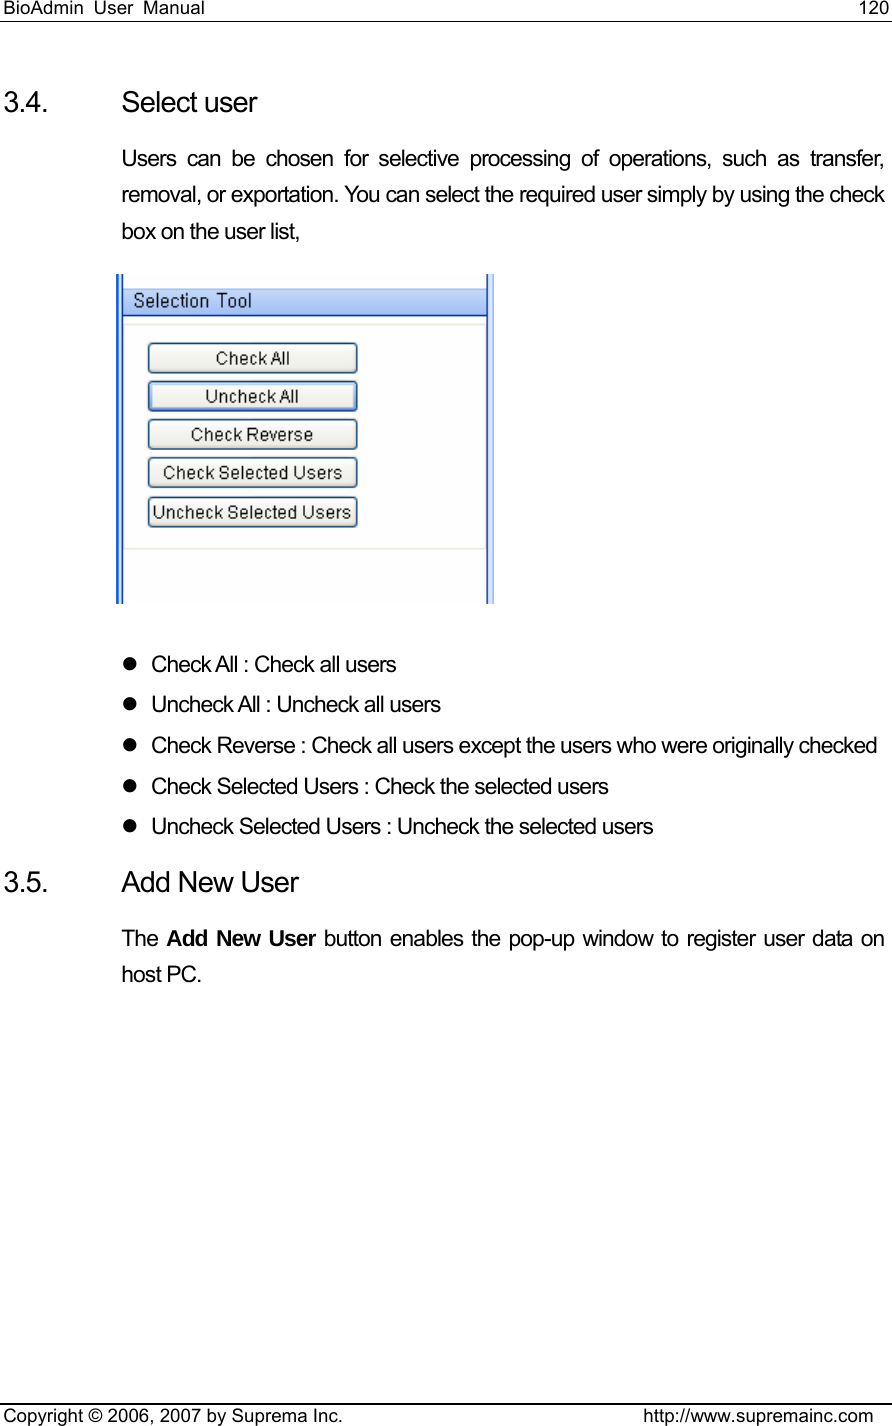
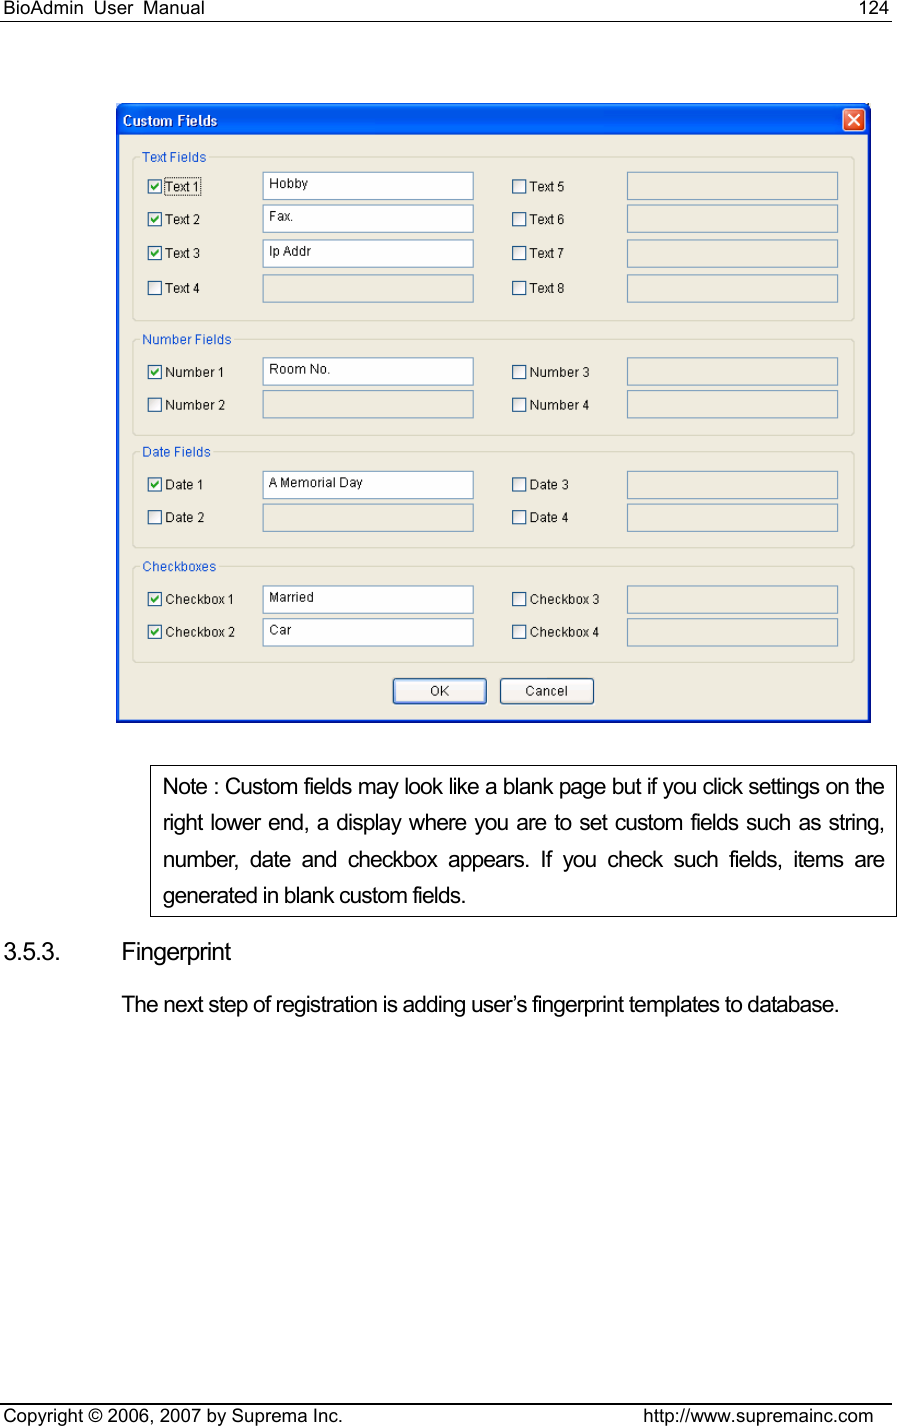
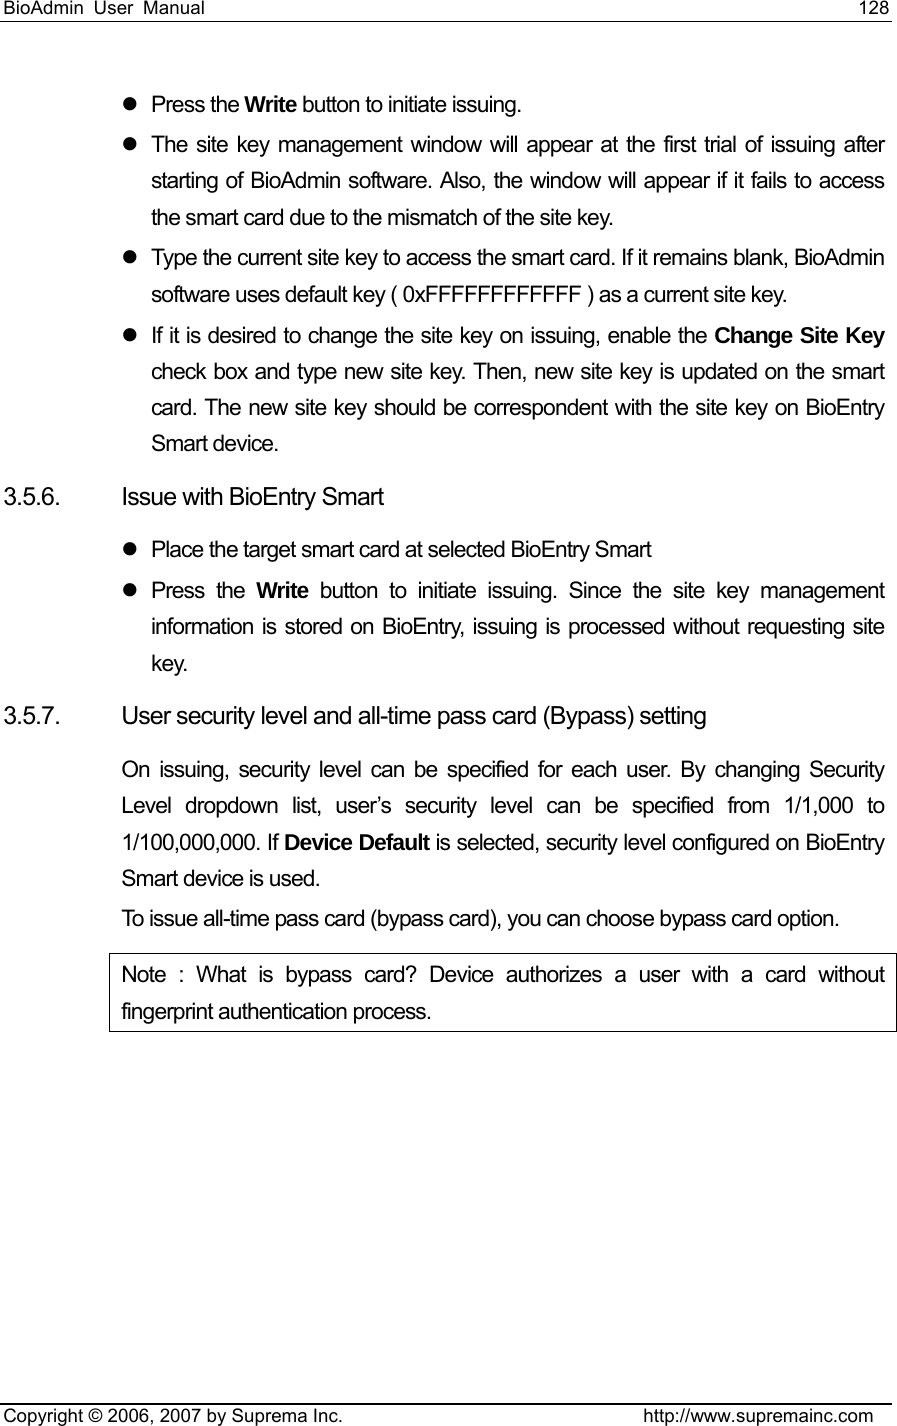
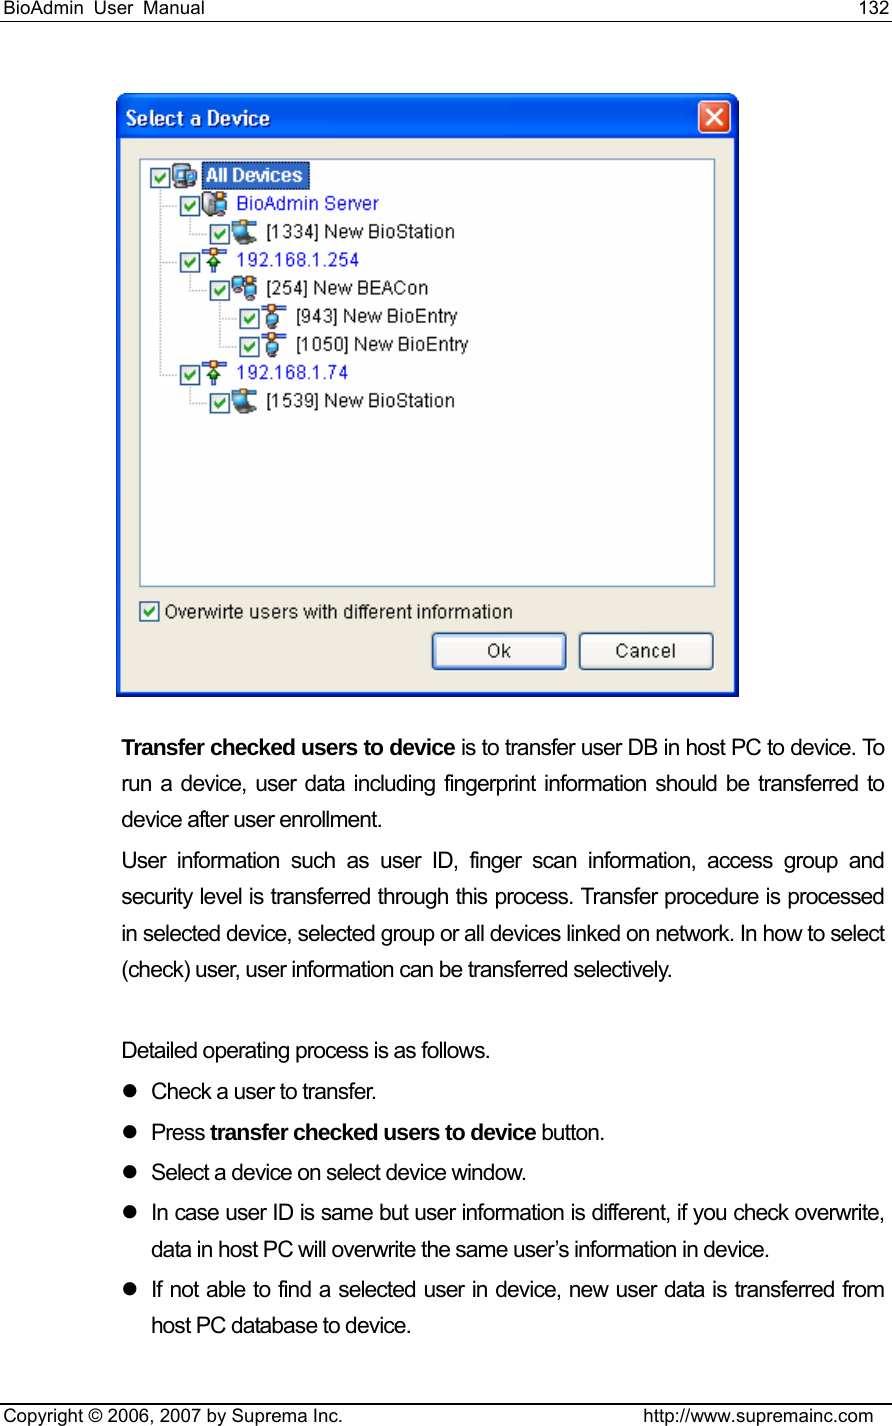
![BioAdmin User Manual 56 Copyright © 2006, 2007 by Suprema Inc. http://www.supremainc.com Set up free set name, network name (SSID), data encryption, key type, and network key check on wireless network setup before operation. Applying DHCP, you can set automatic upload of IP address on BioAdmin in order to get IP address automatically, check such an IP address and search a device in device management. When setting IP address manually, you can search a device by specifying assigned IP address, gateway and subnet mask. z Serial On RS422/485 network, a new device can be detected automatically or added by new device search menu in device management. Once device is connected to network properly, device ID will be displayed with a bracket [****] under port on device tree window. Baudrate in RS485 / RS232 interface represents the frequency of carrier wave changing status per sec. In communicating with BioStation device, default is 115200 but if any trouble, lowering the baudrate can solve the problem.](https://usermanual.wiki/Suprema/BIOENTRYPLUS/User-Guide-840626-Page-56.png)
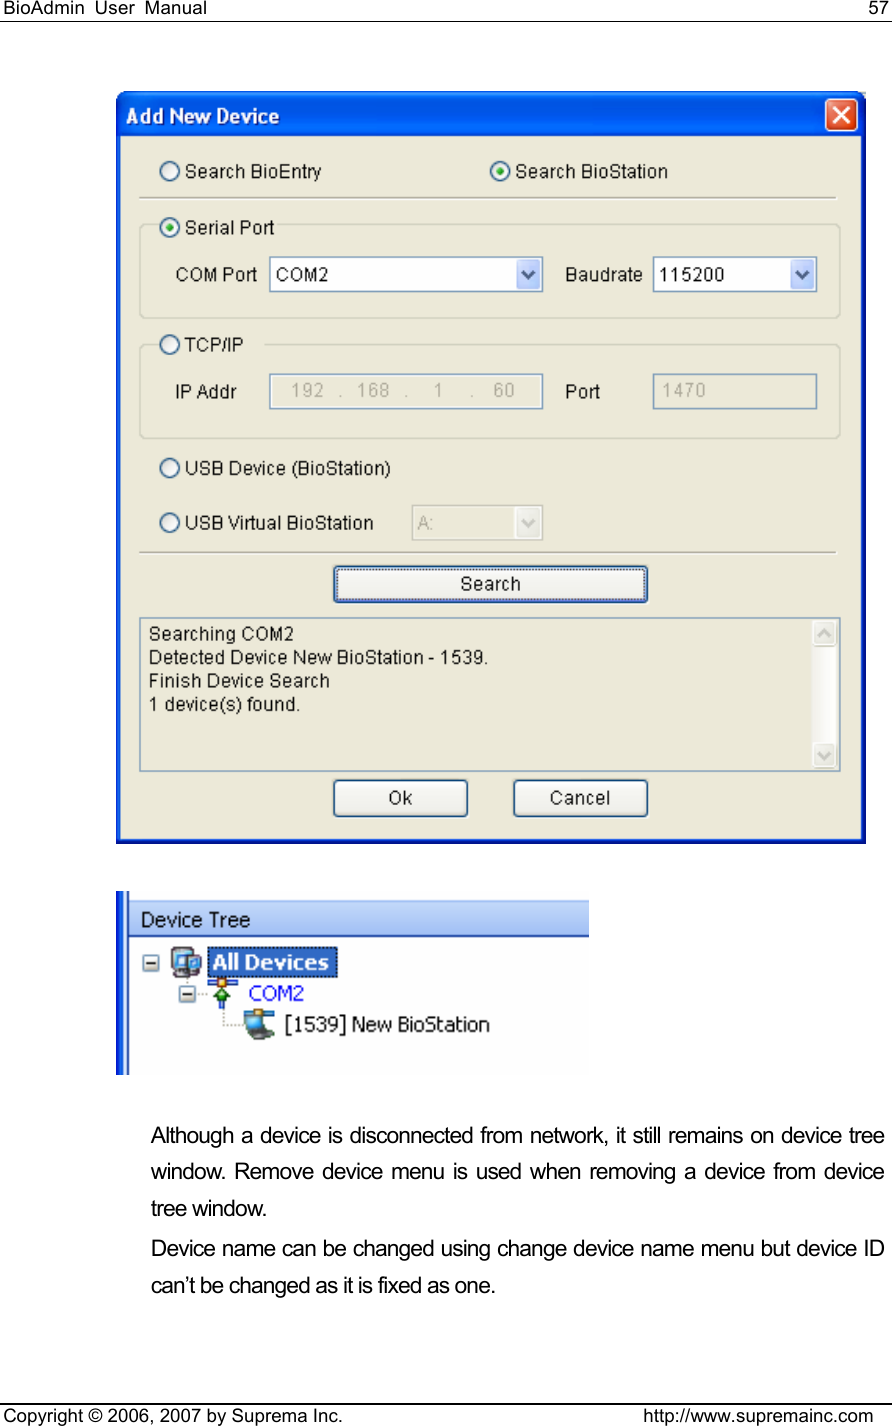


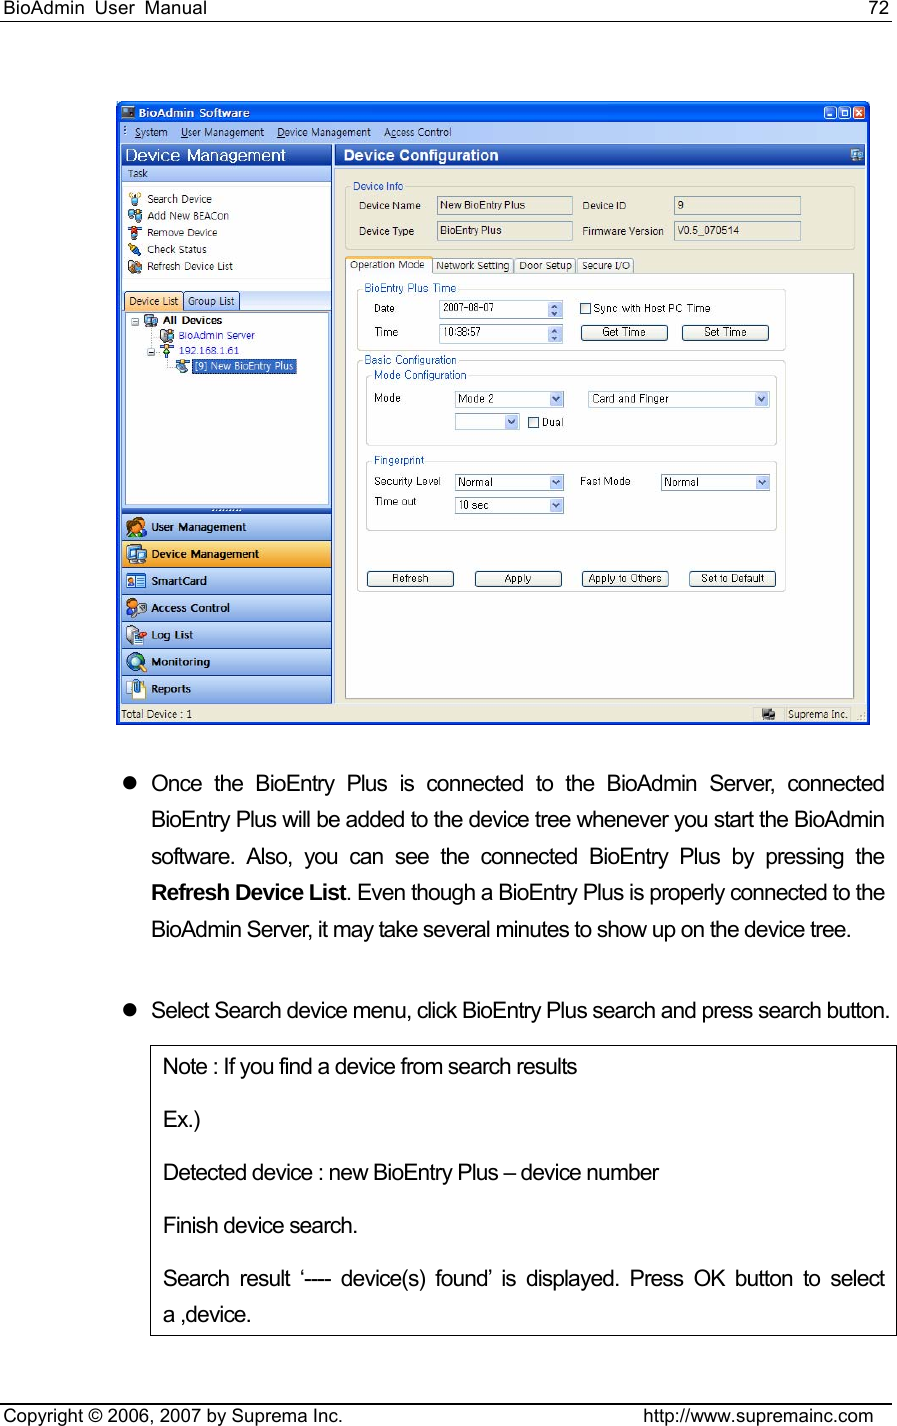
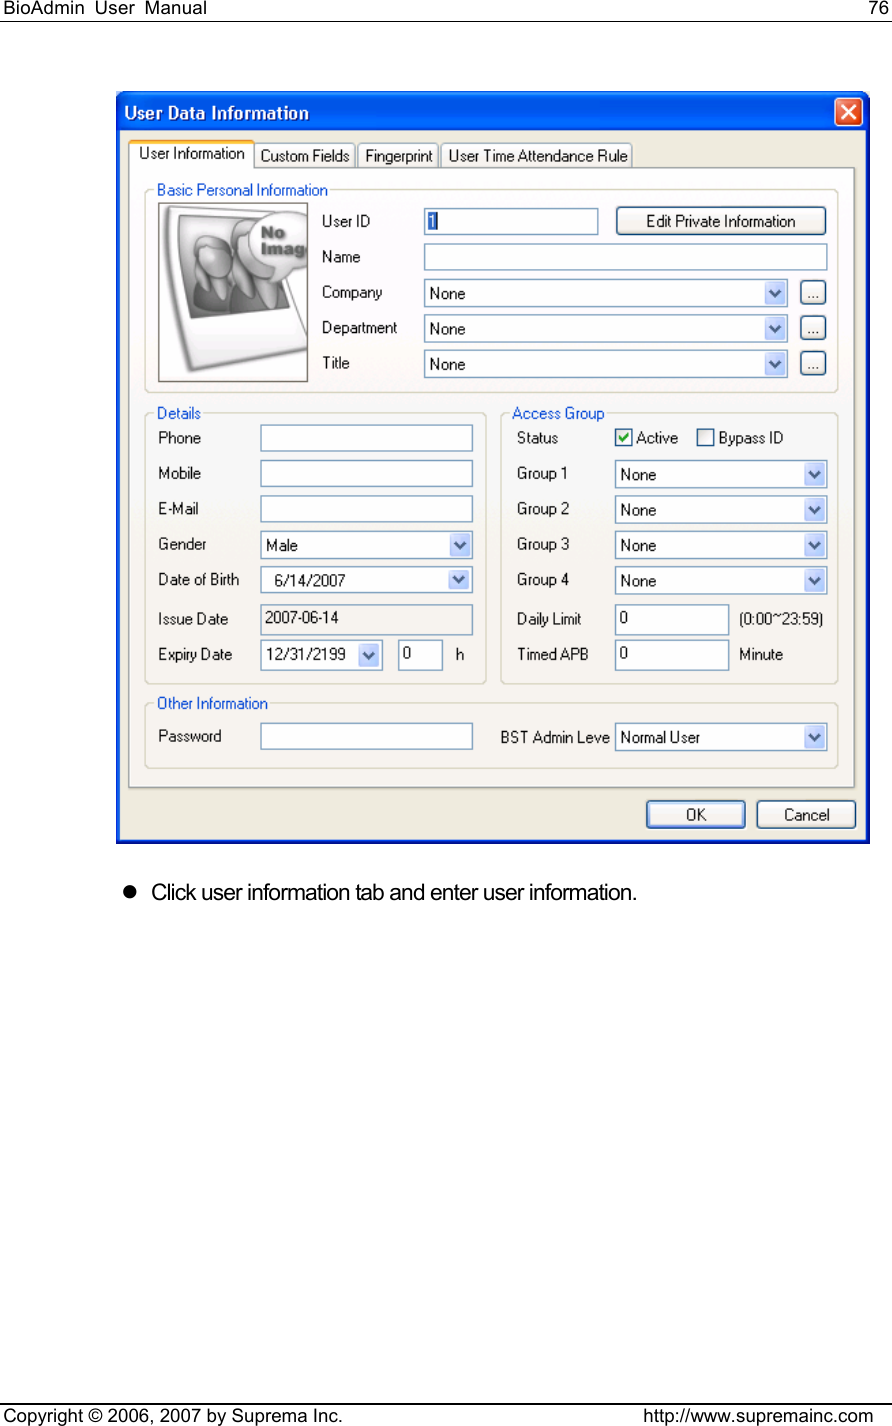


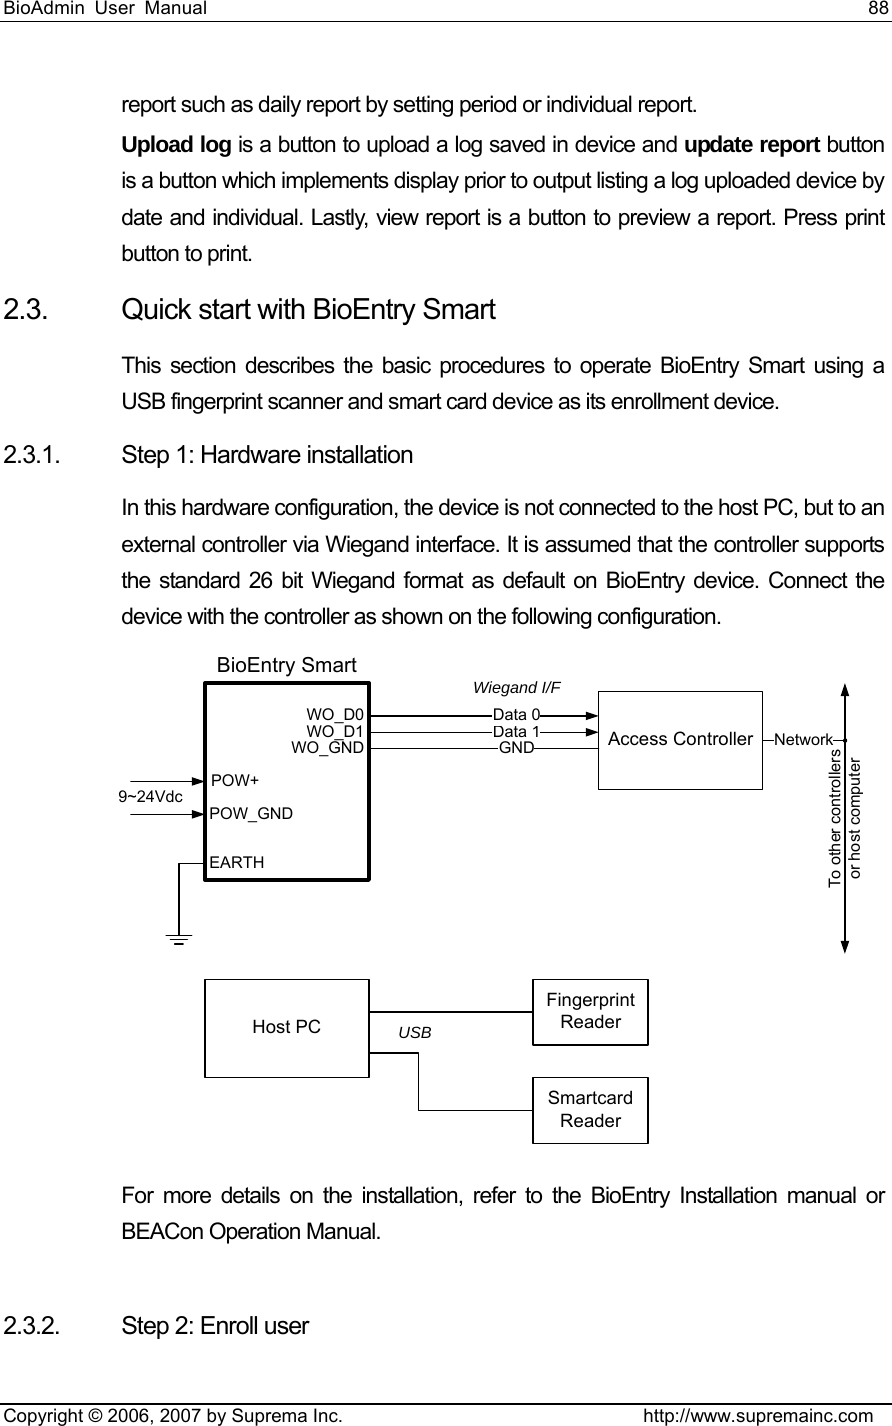


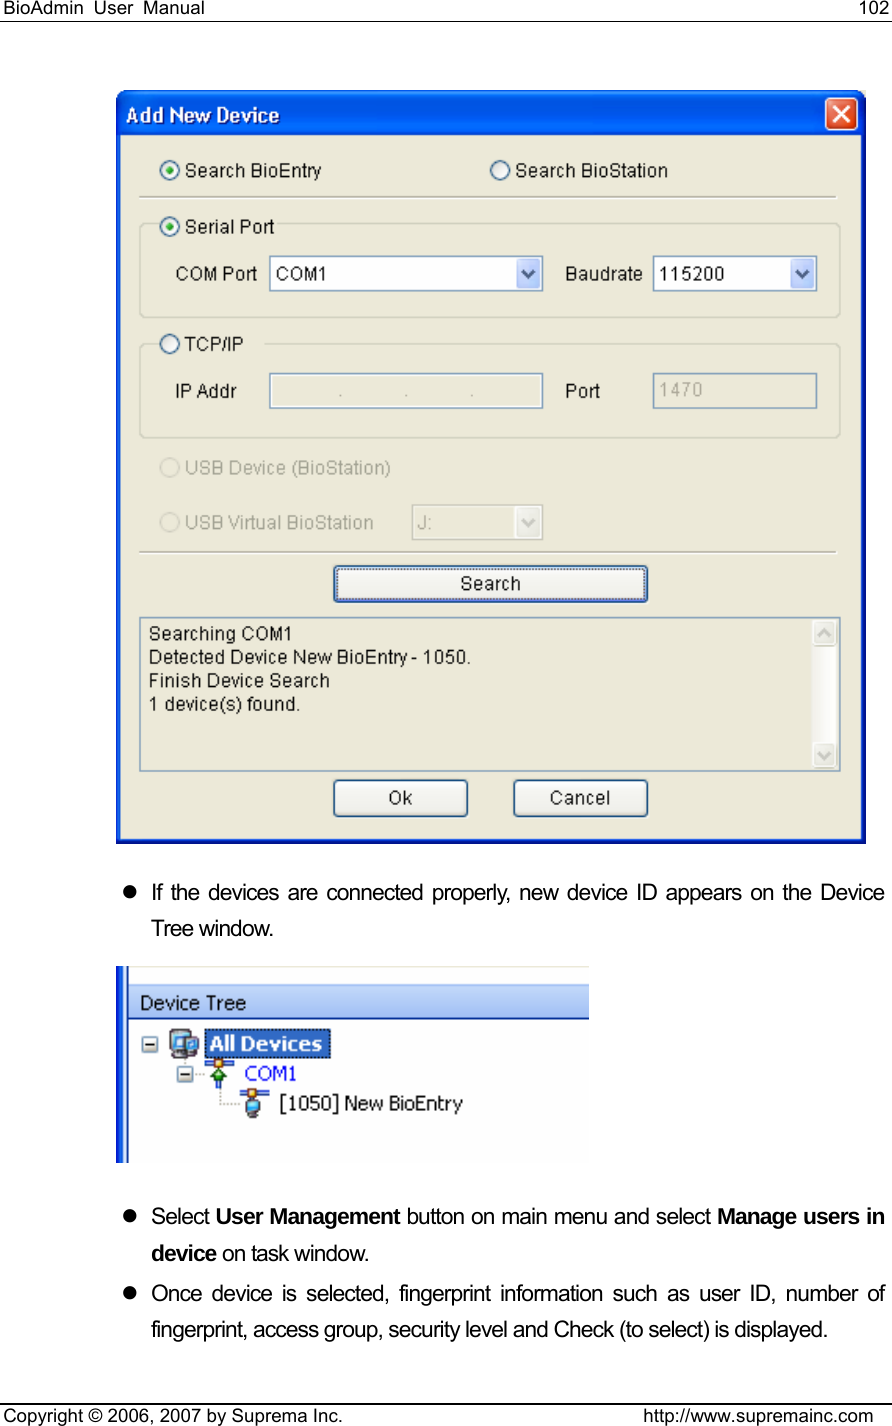
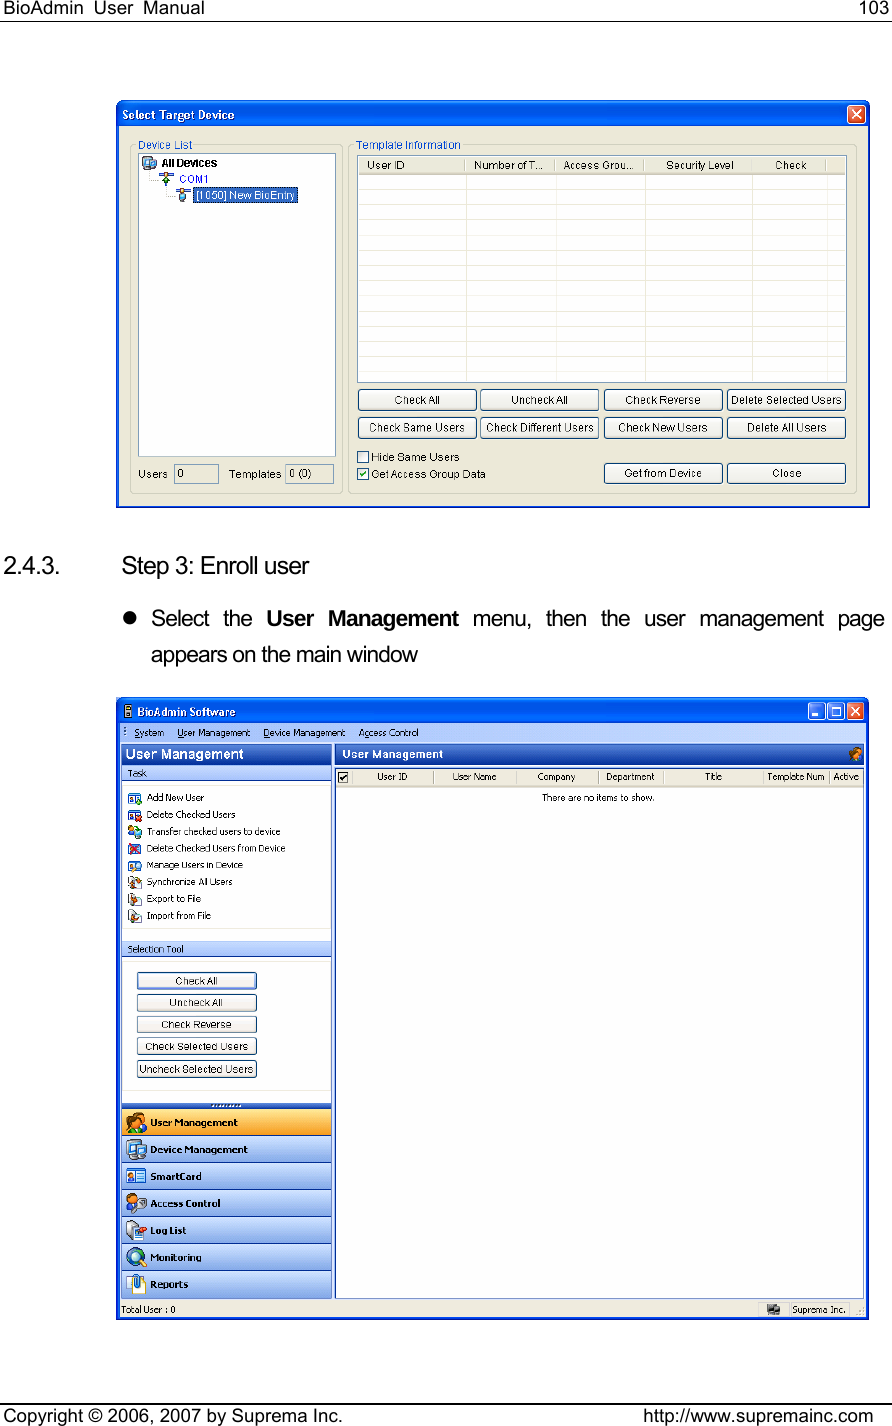

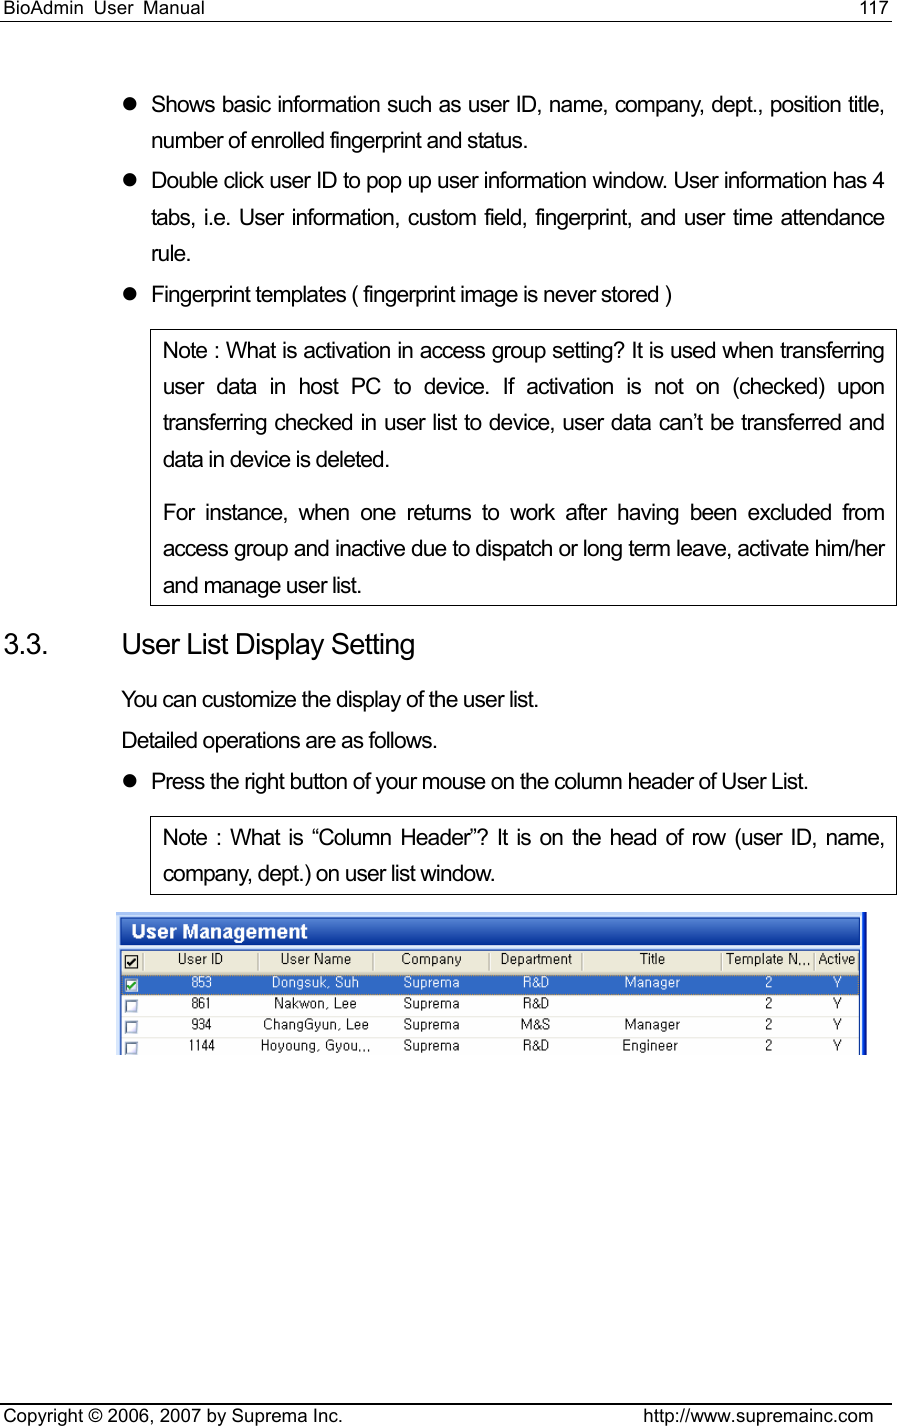
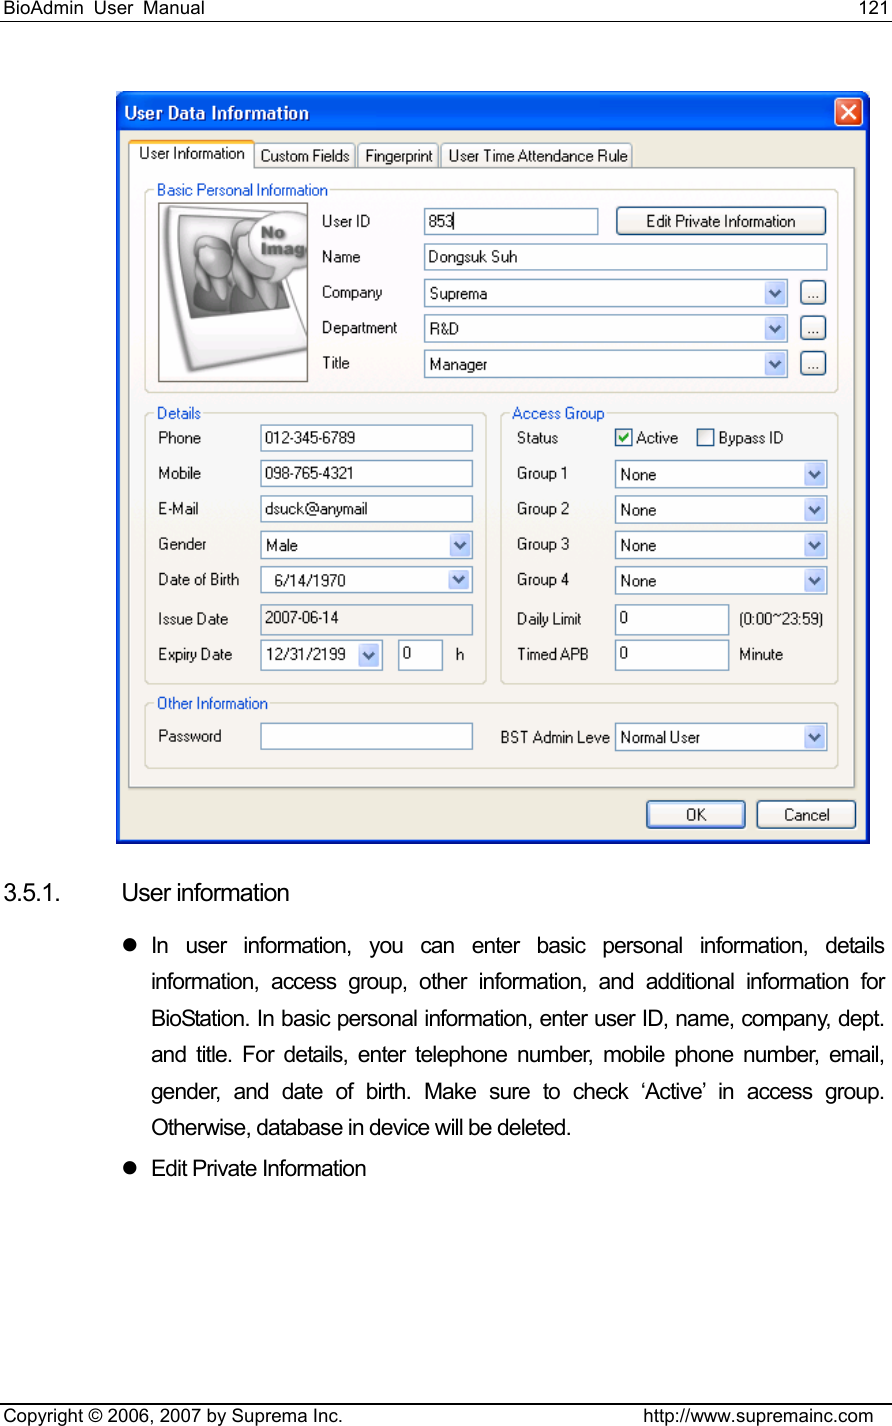
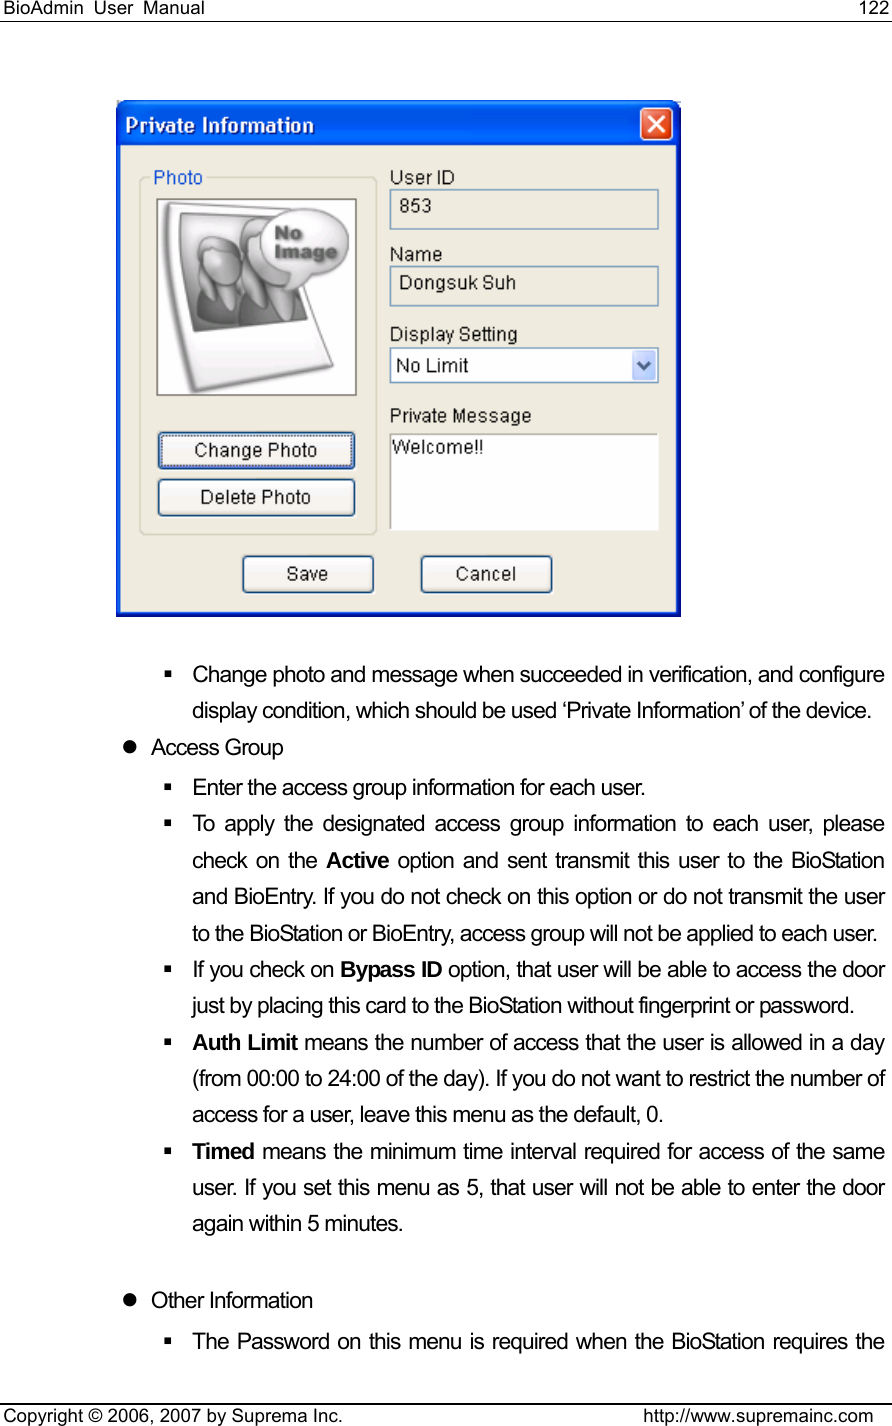
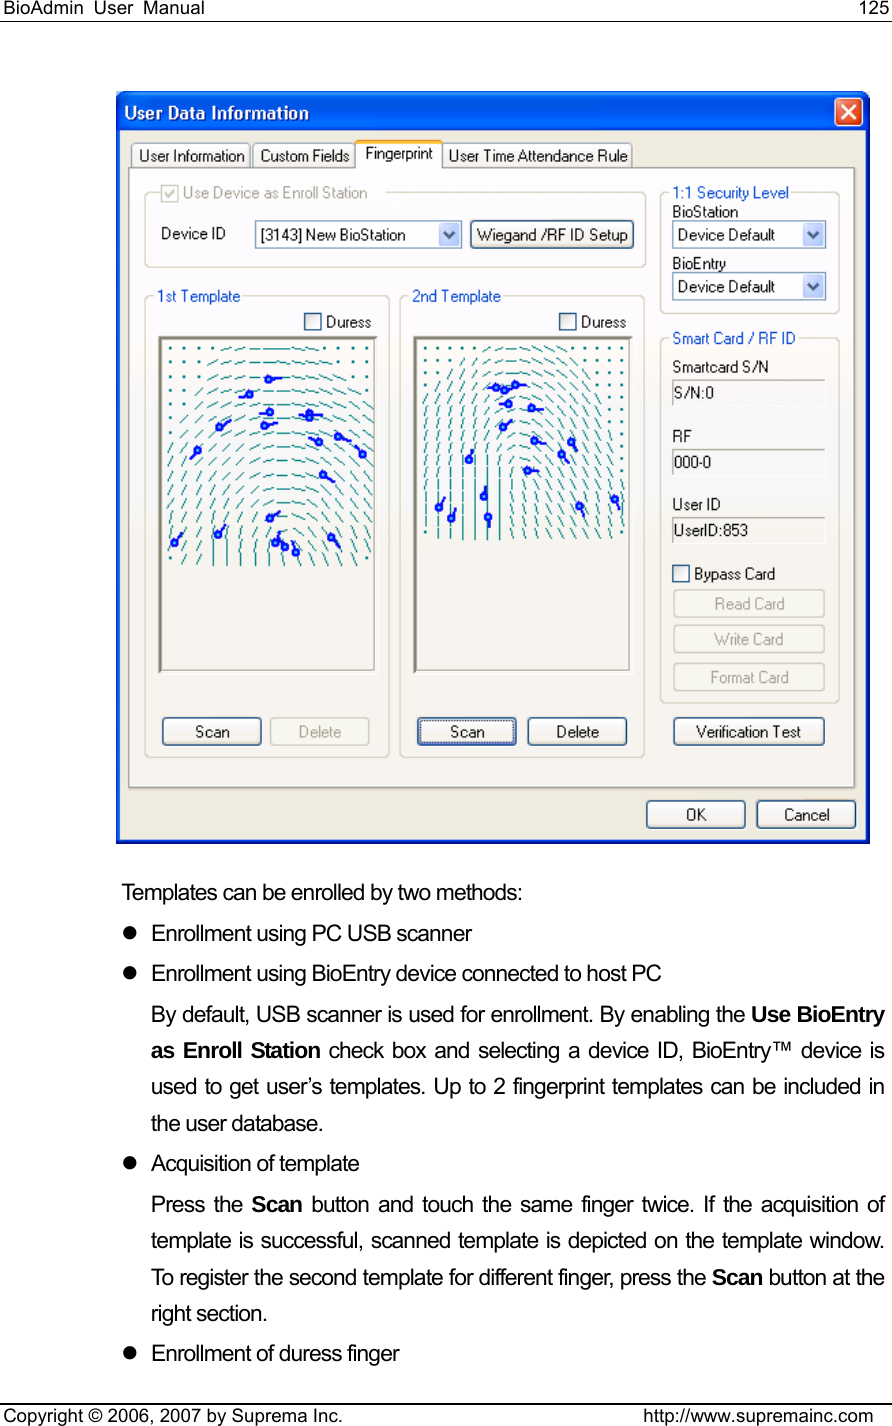
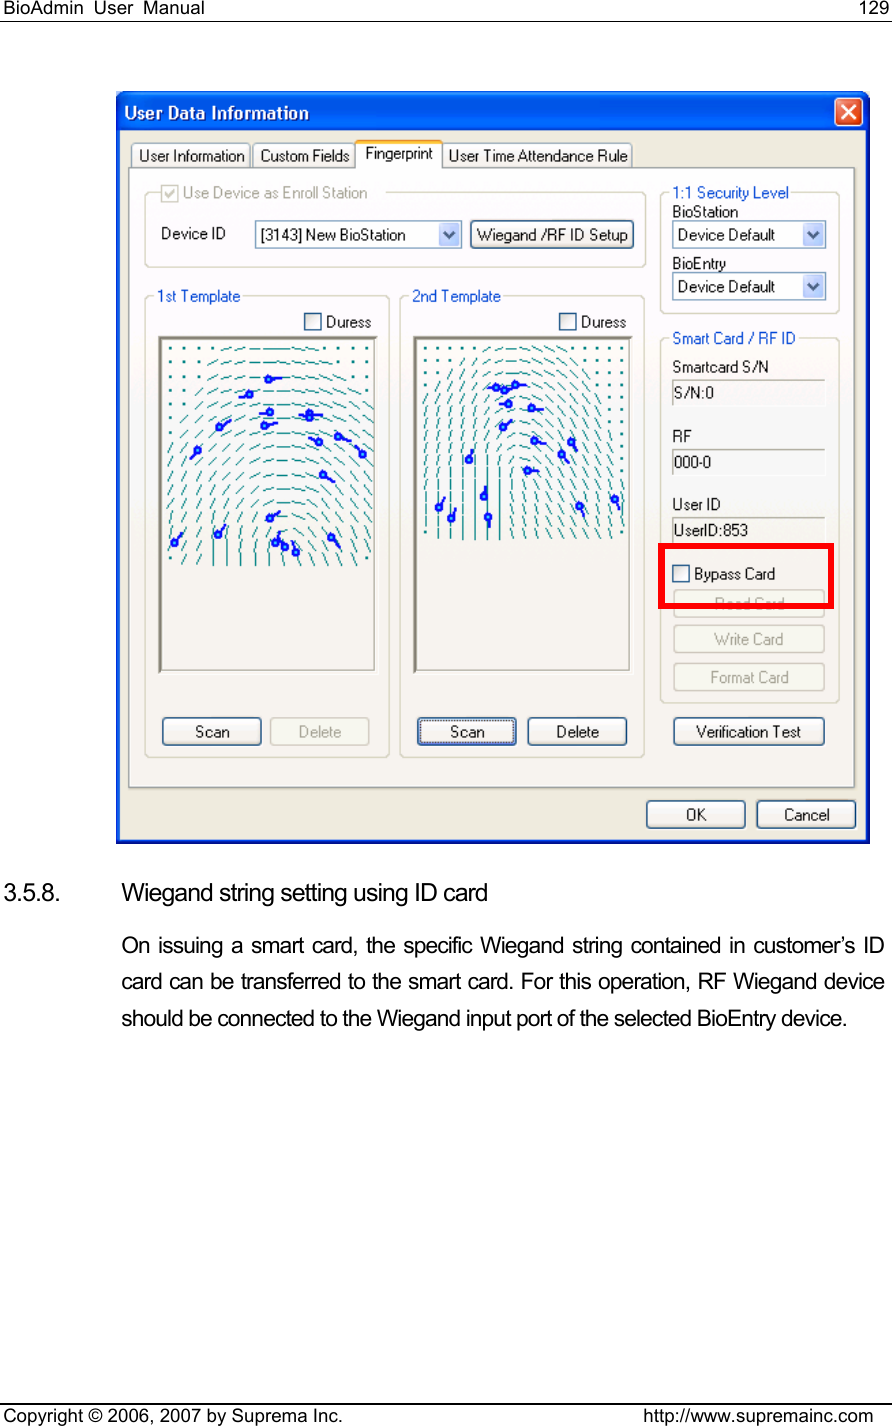
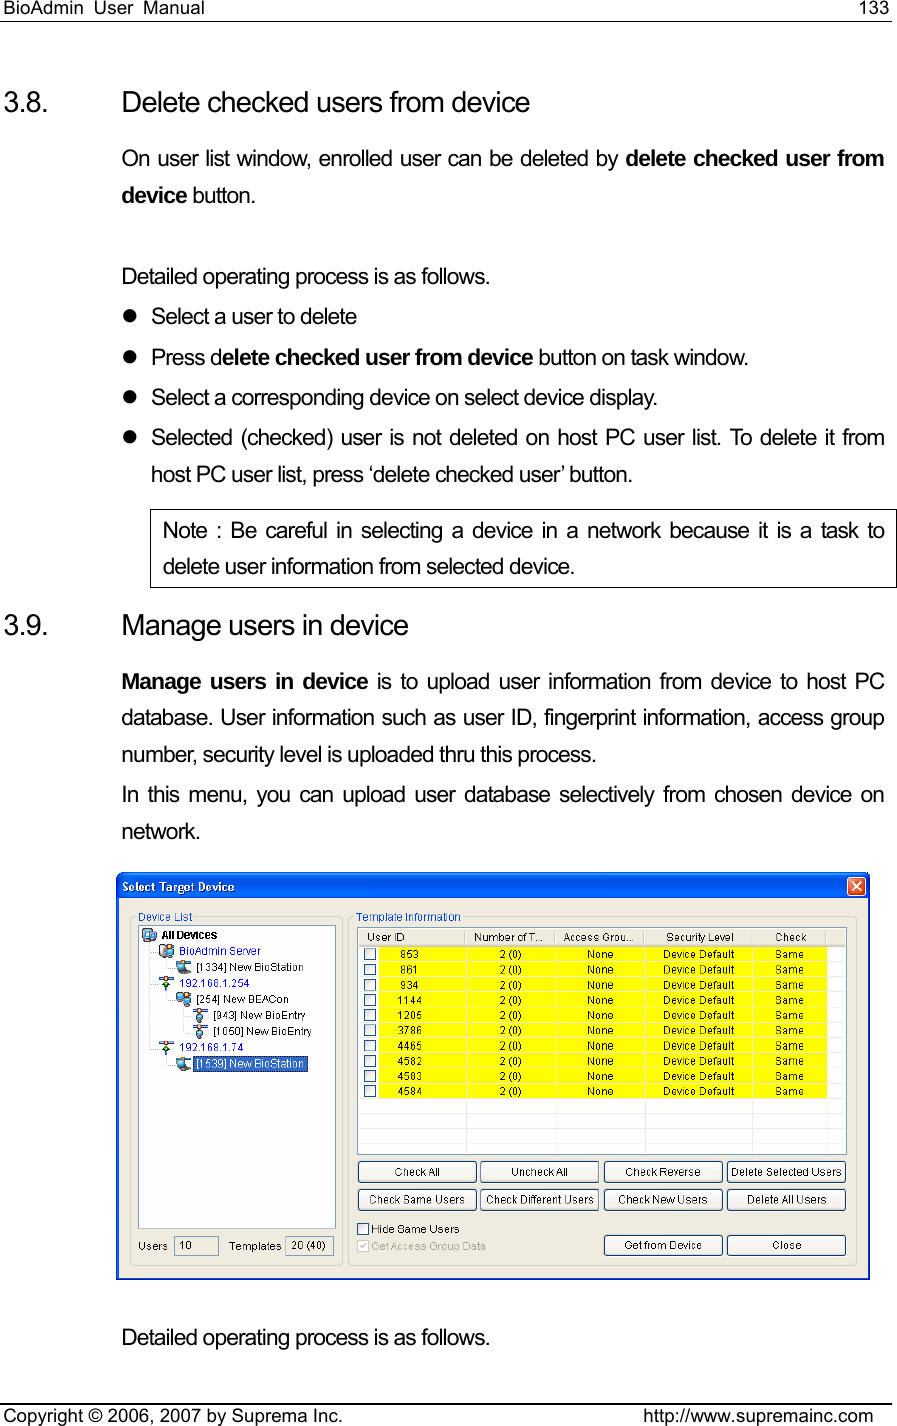


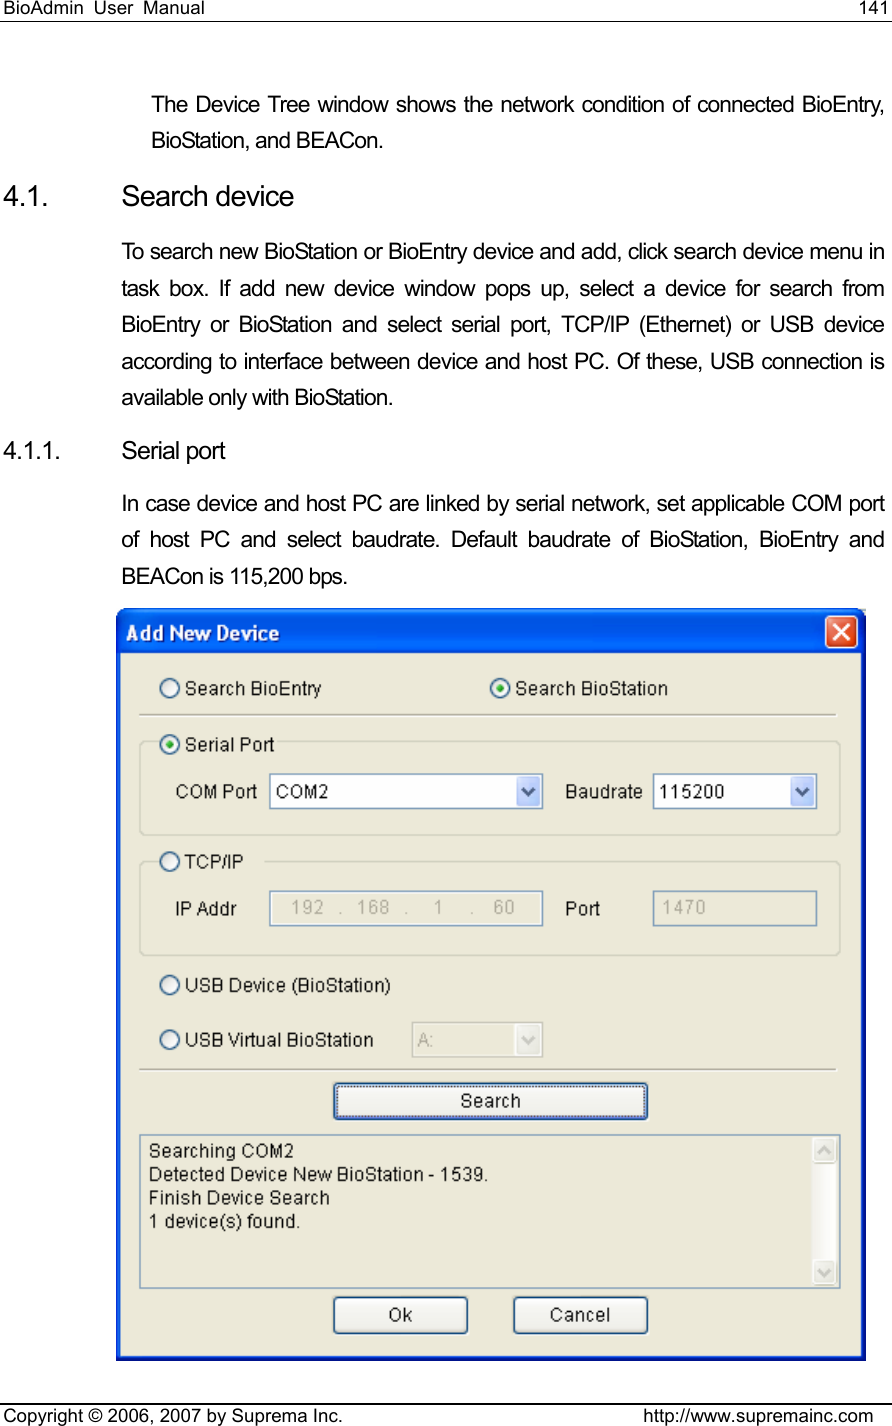
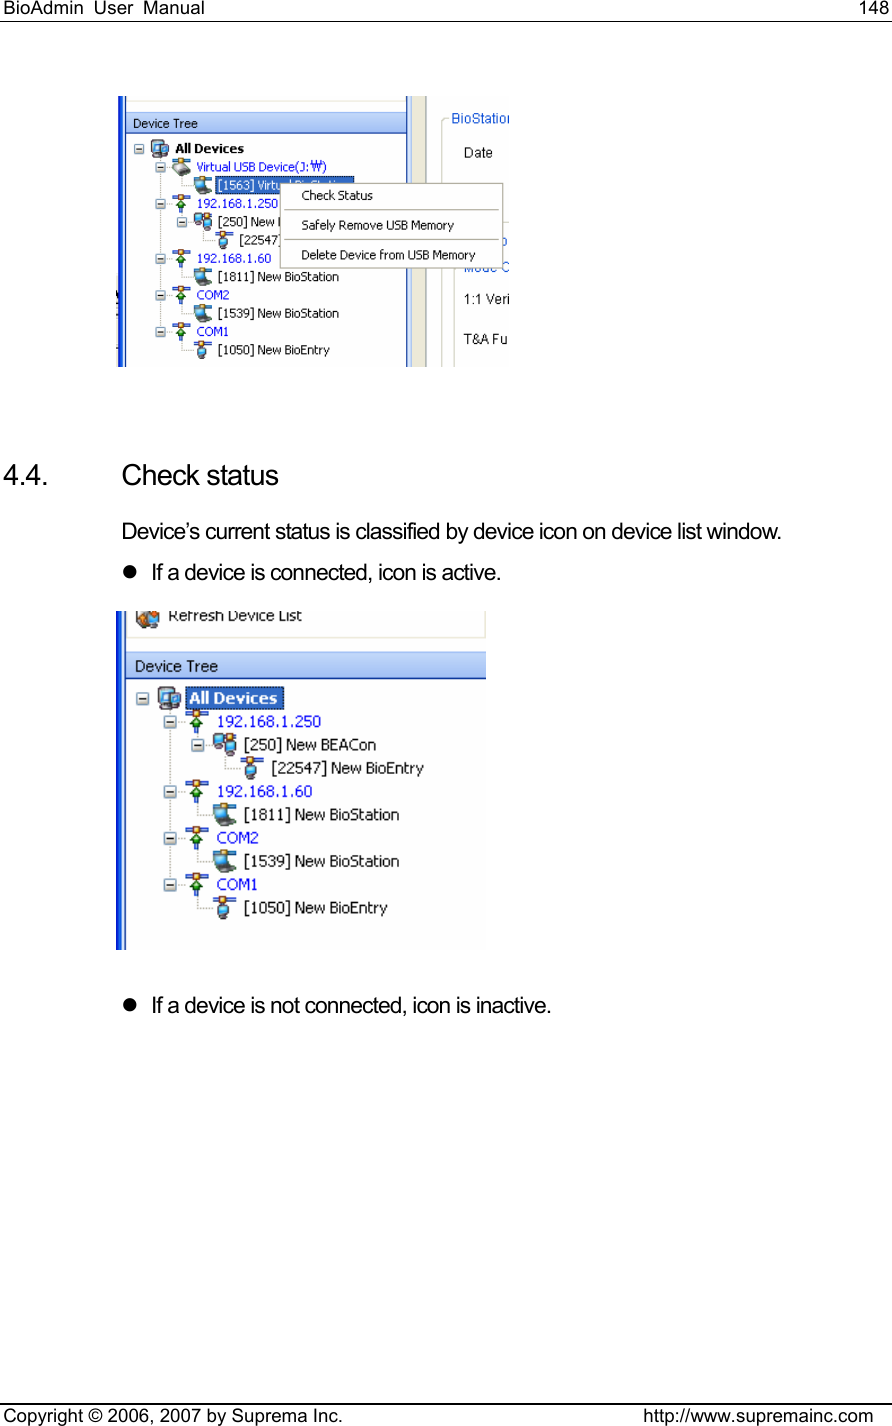
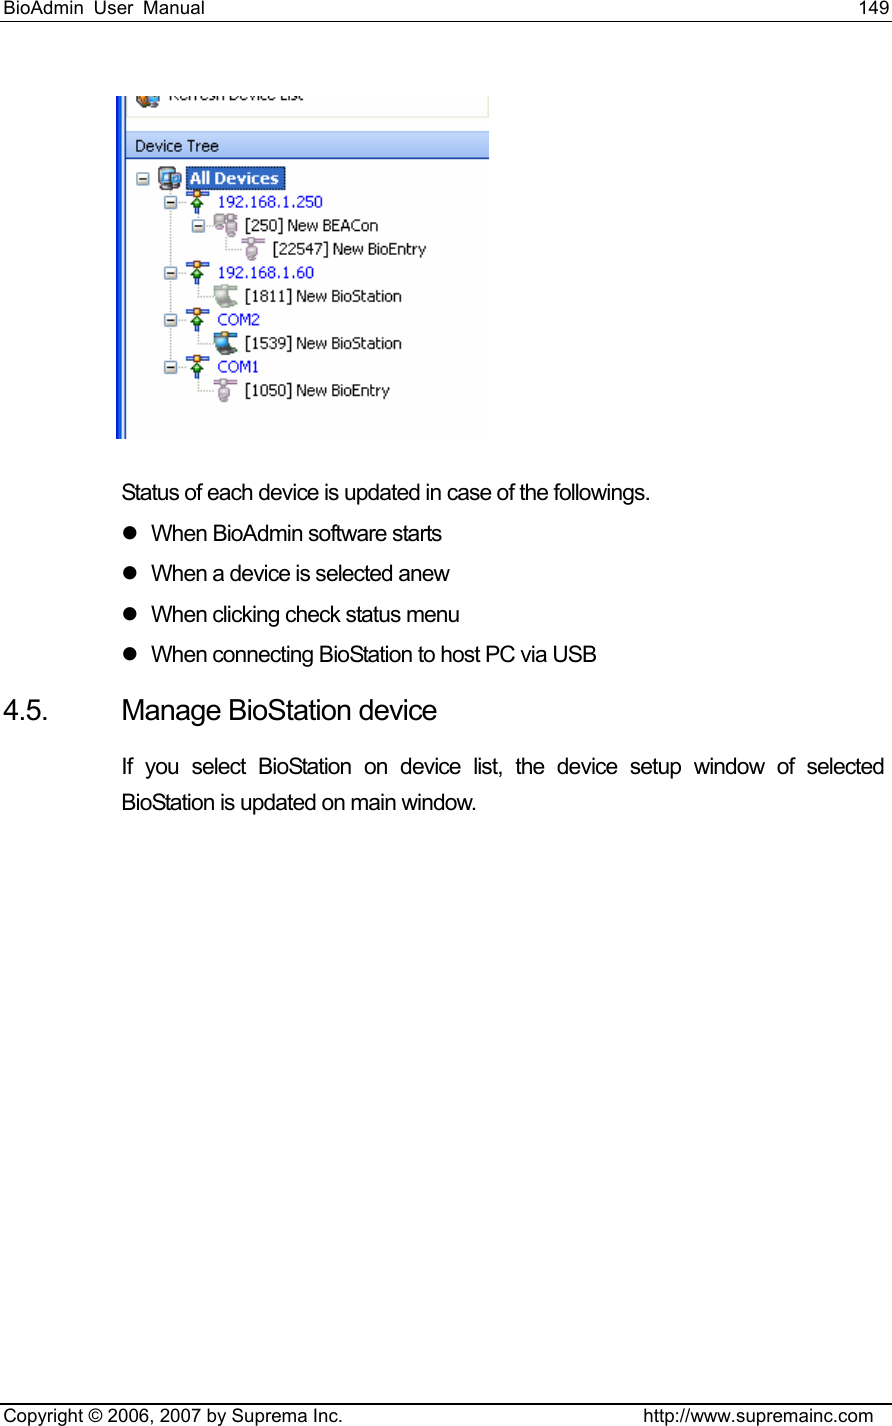
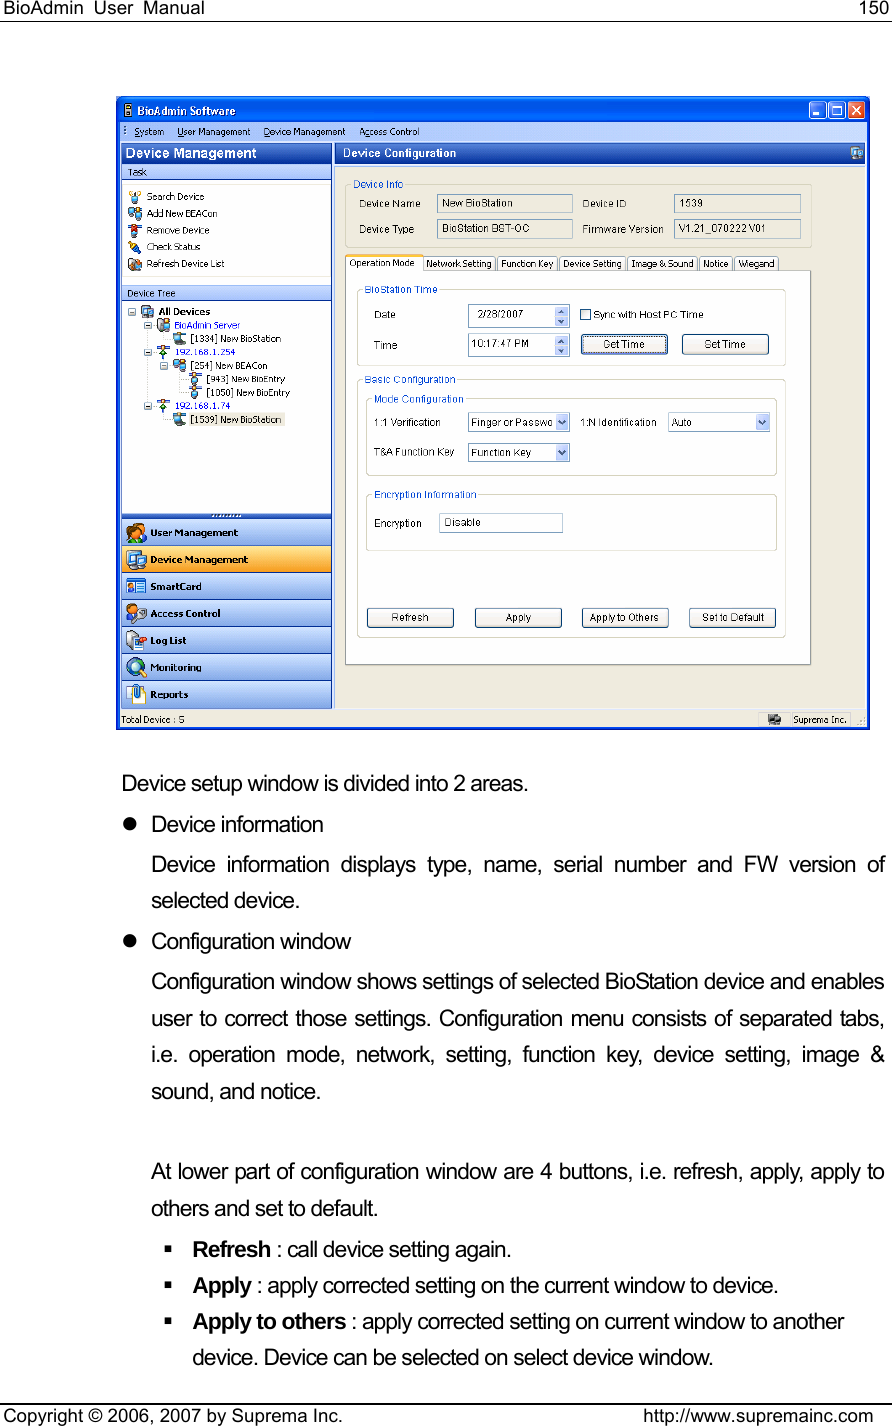
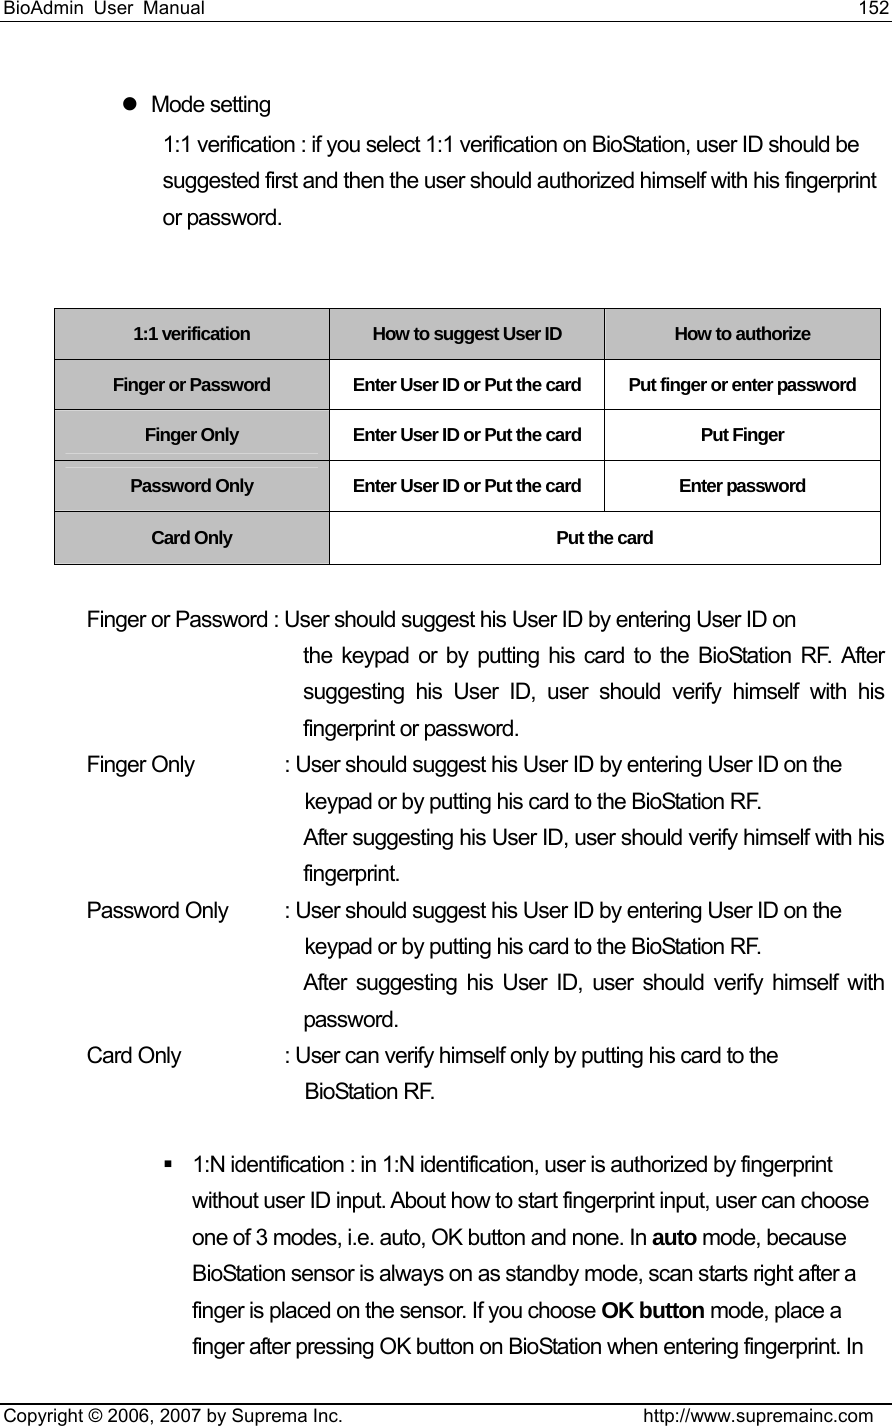
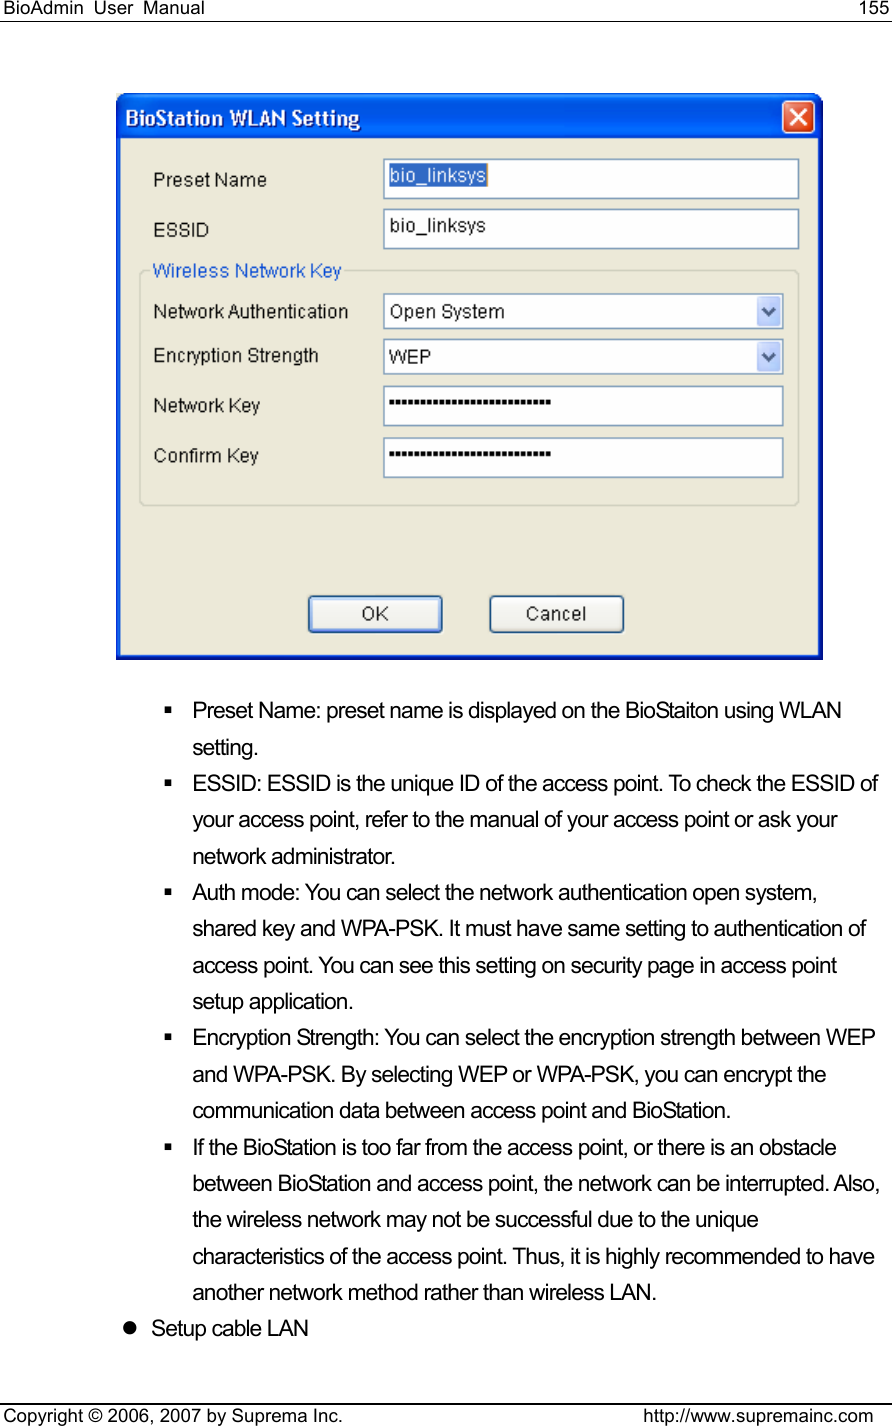
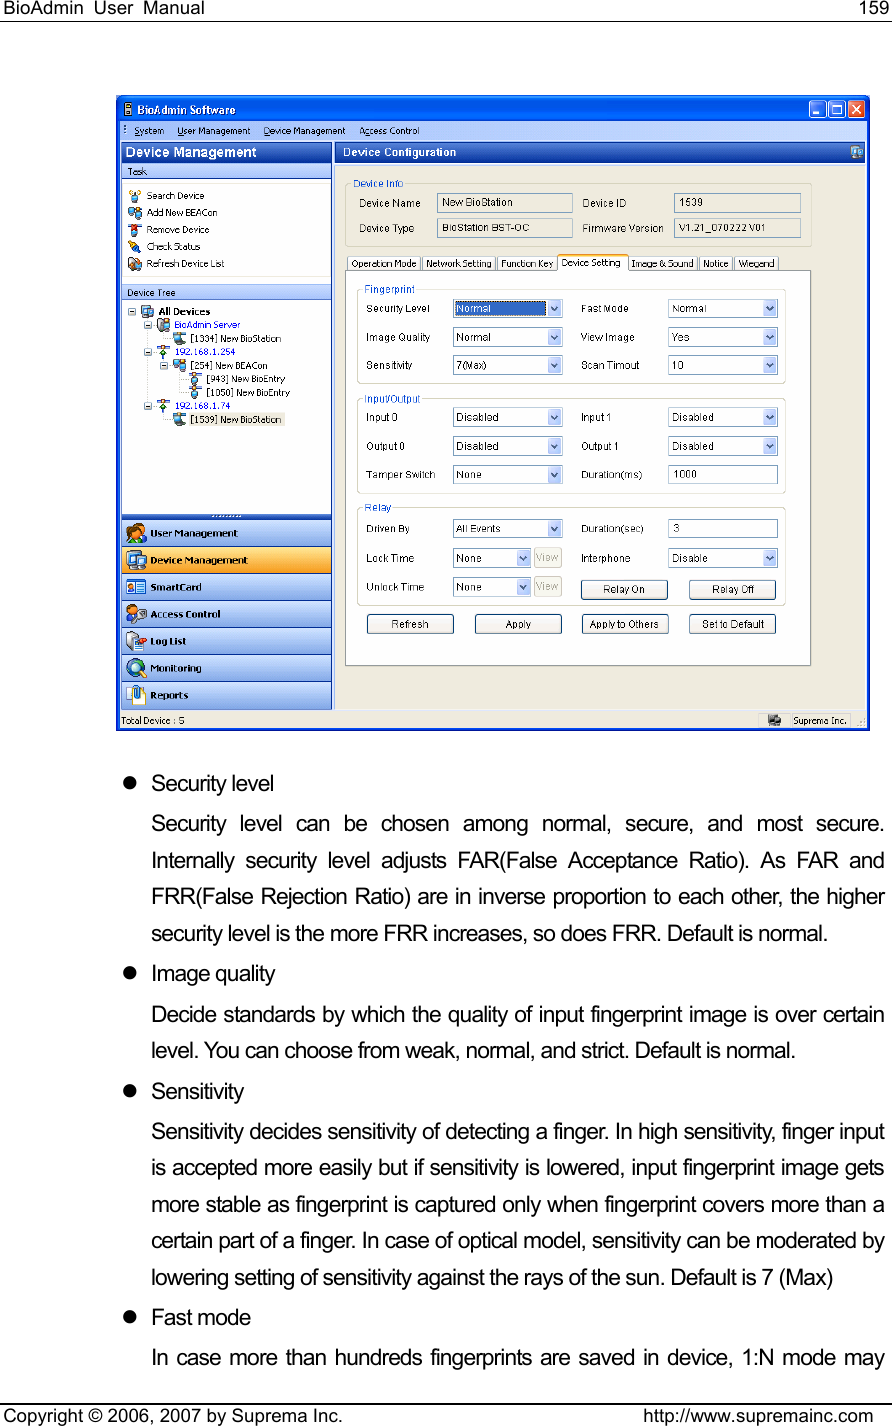
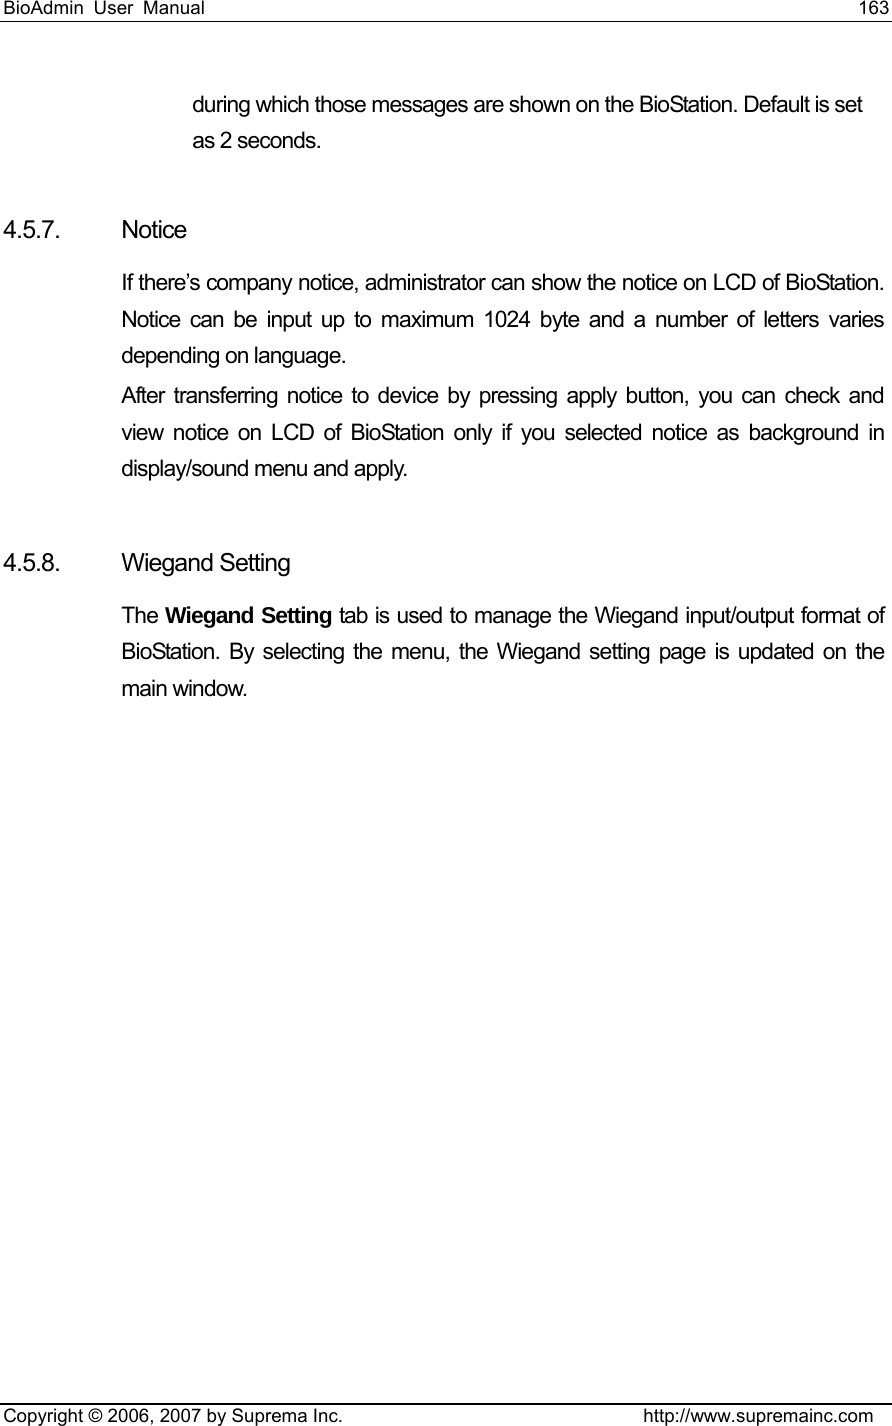
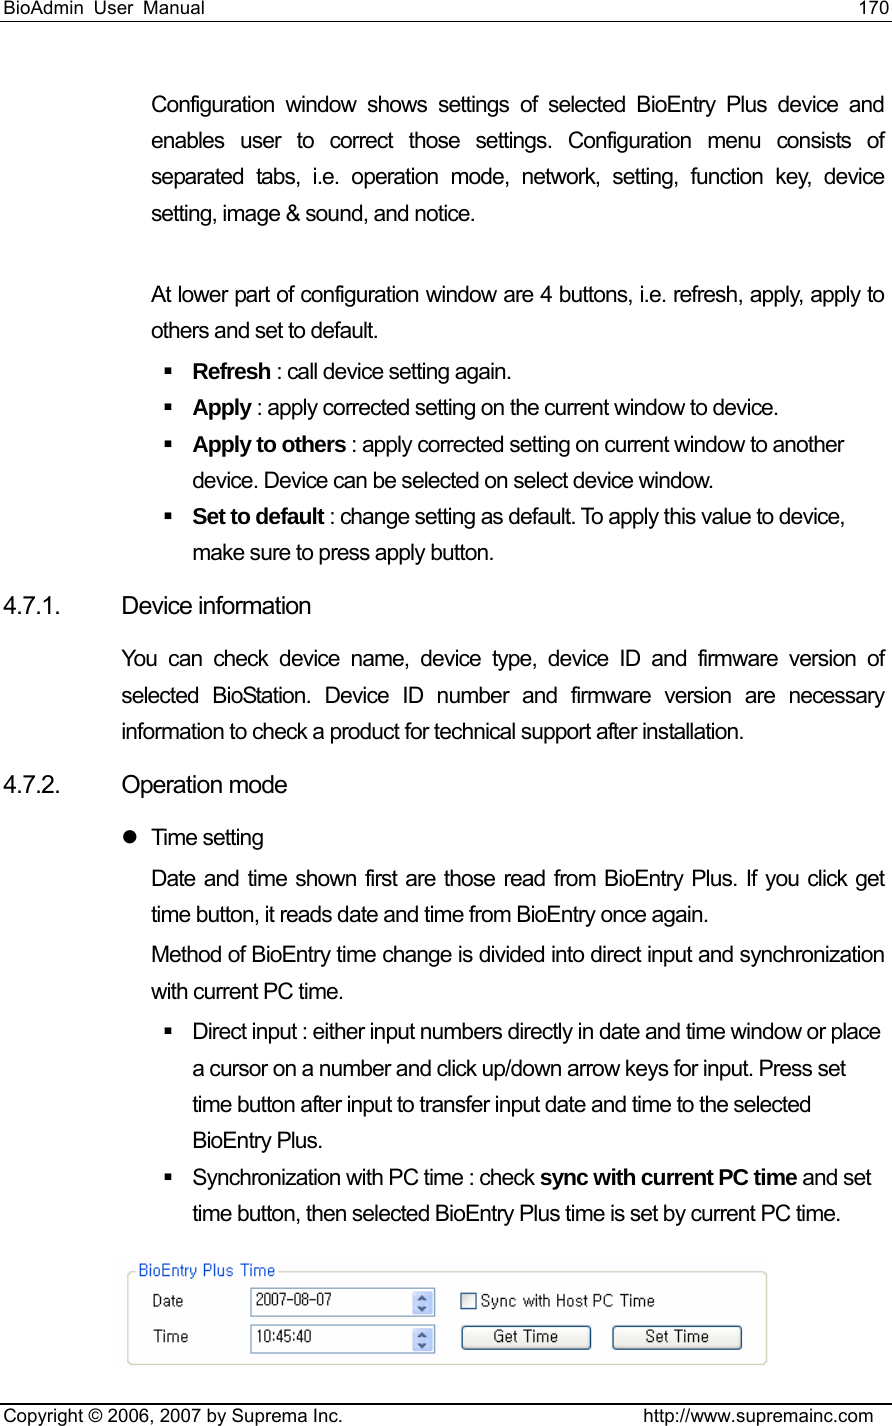
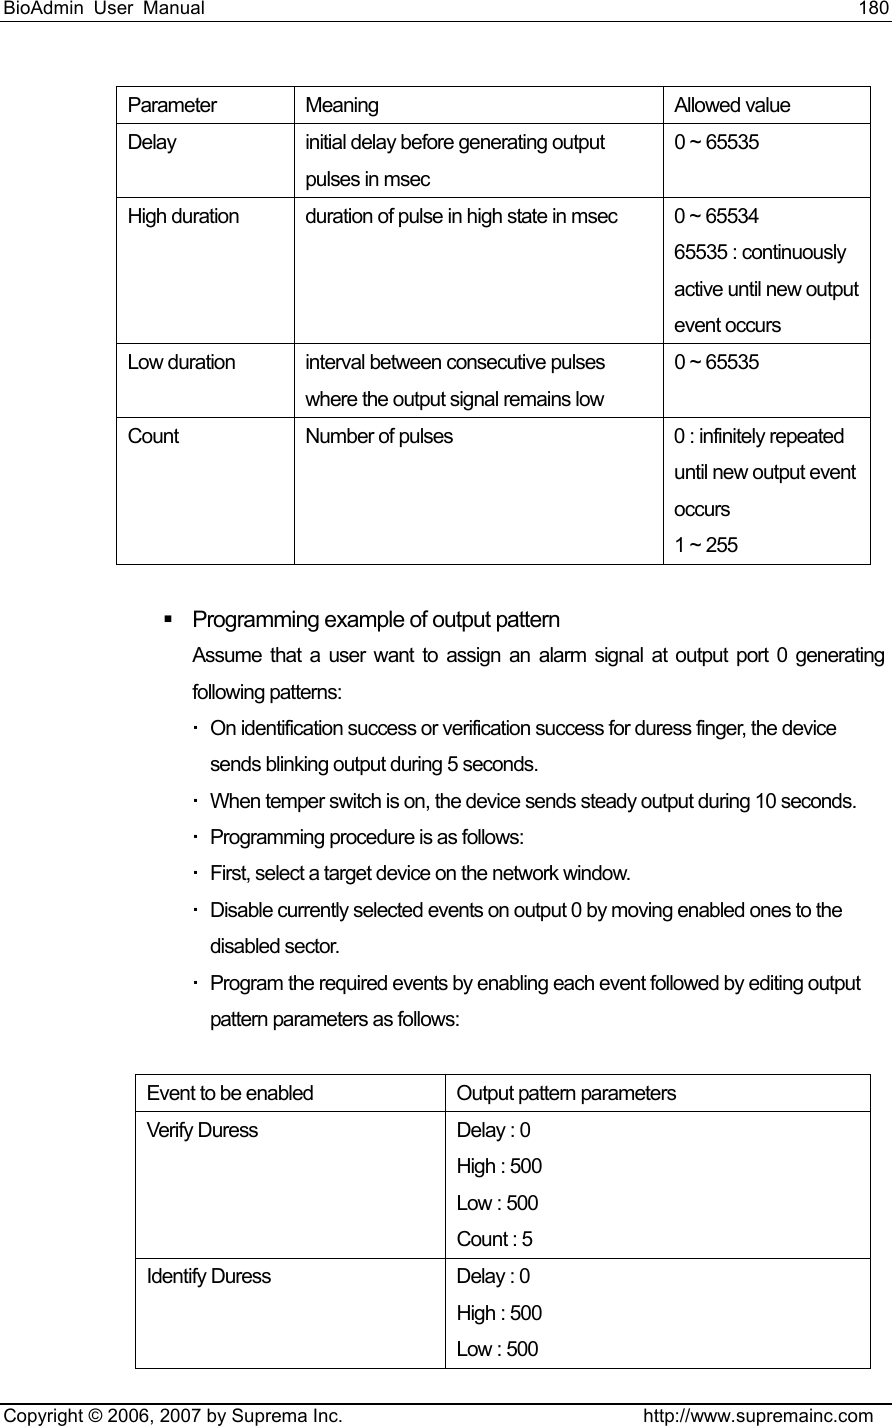
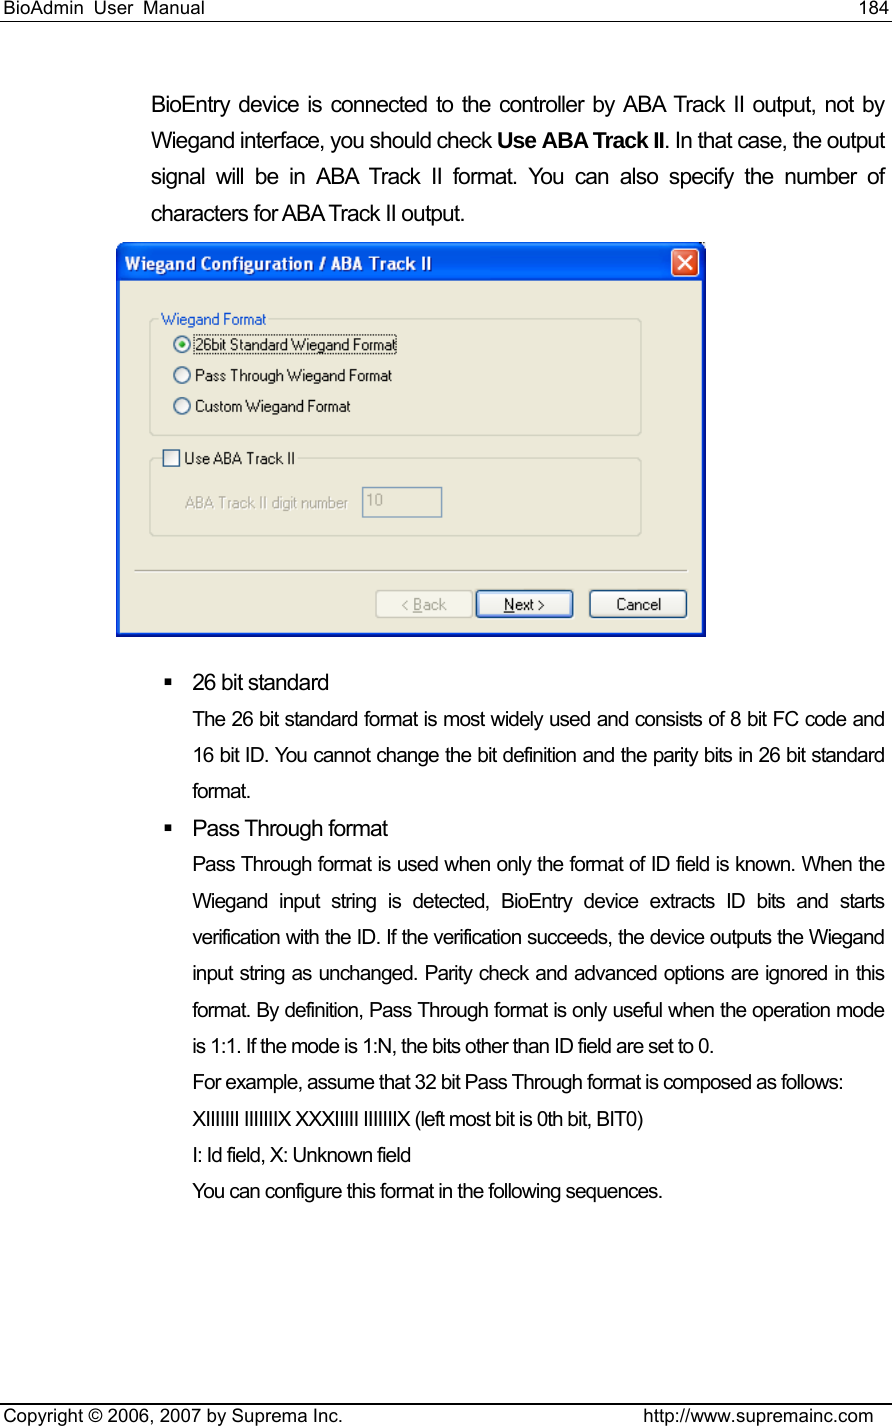
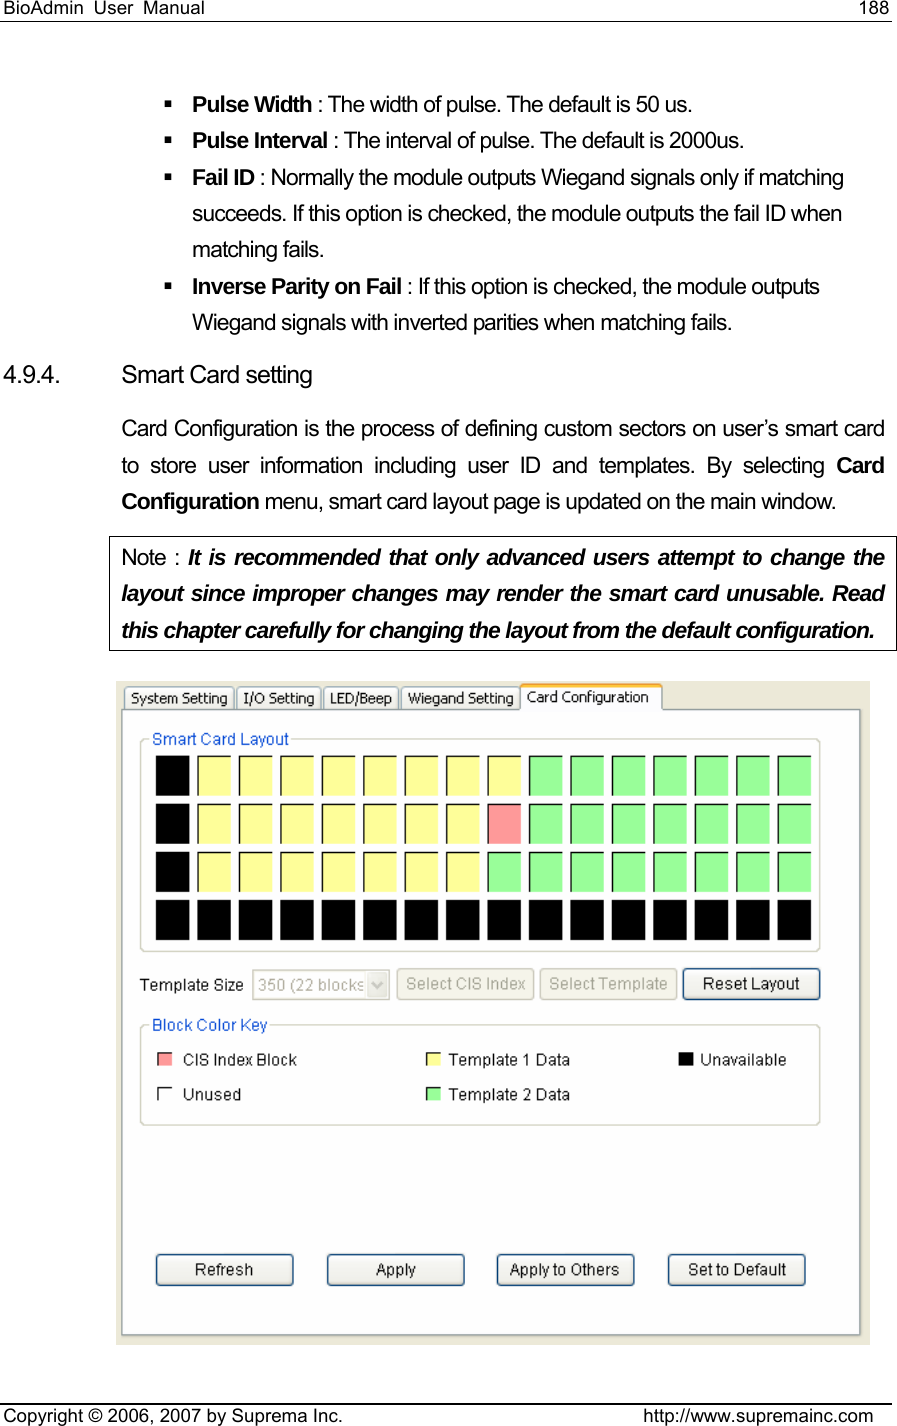
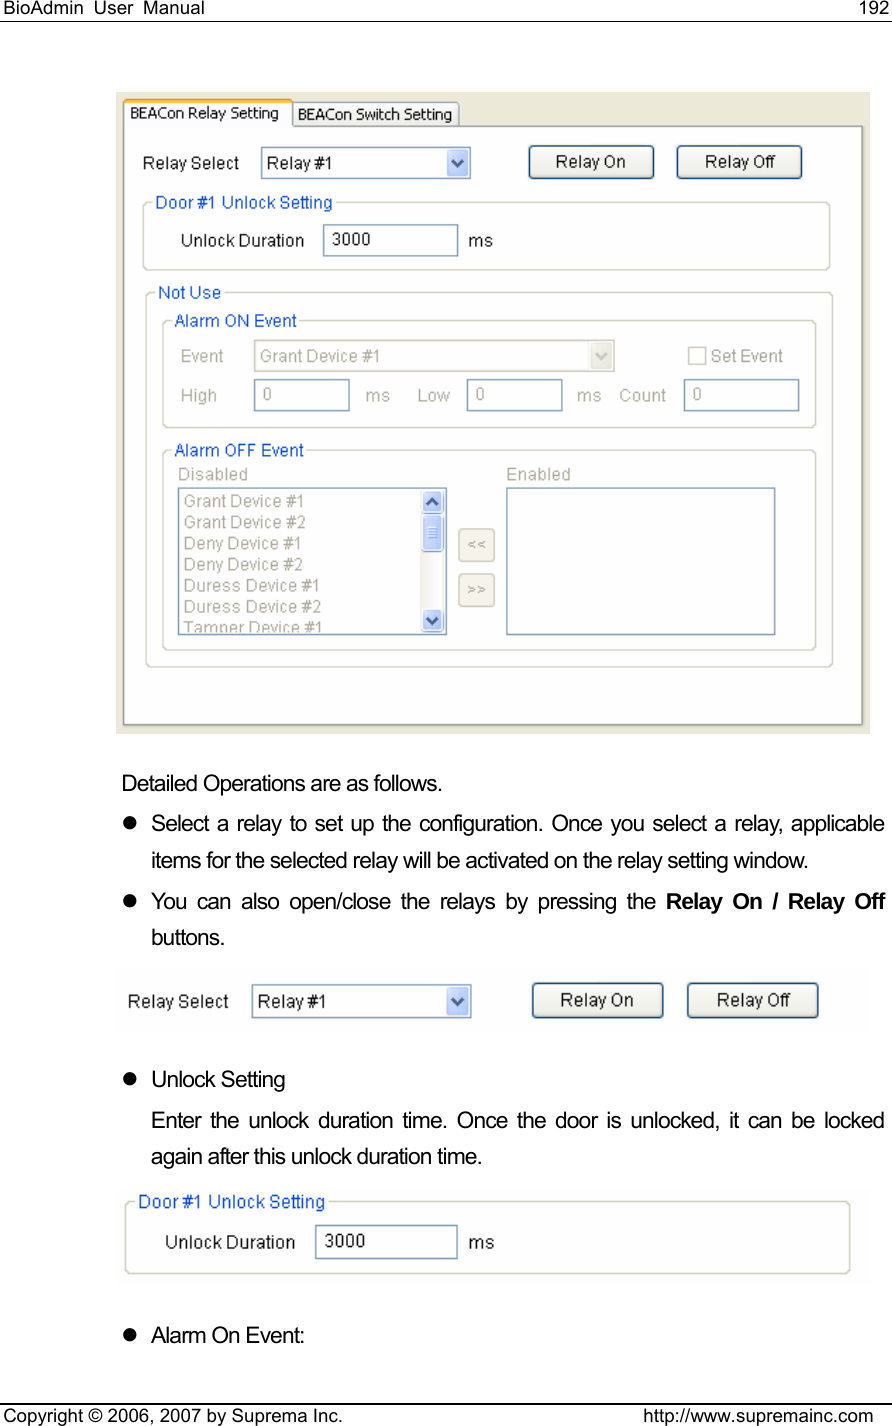
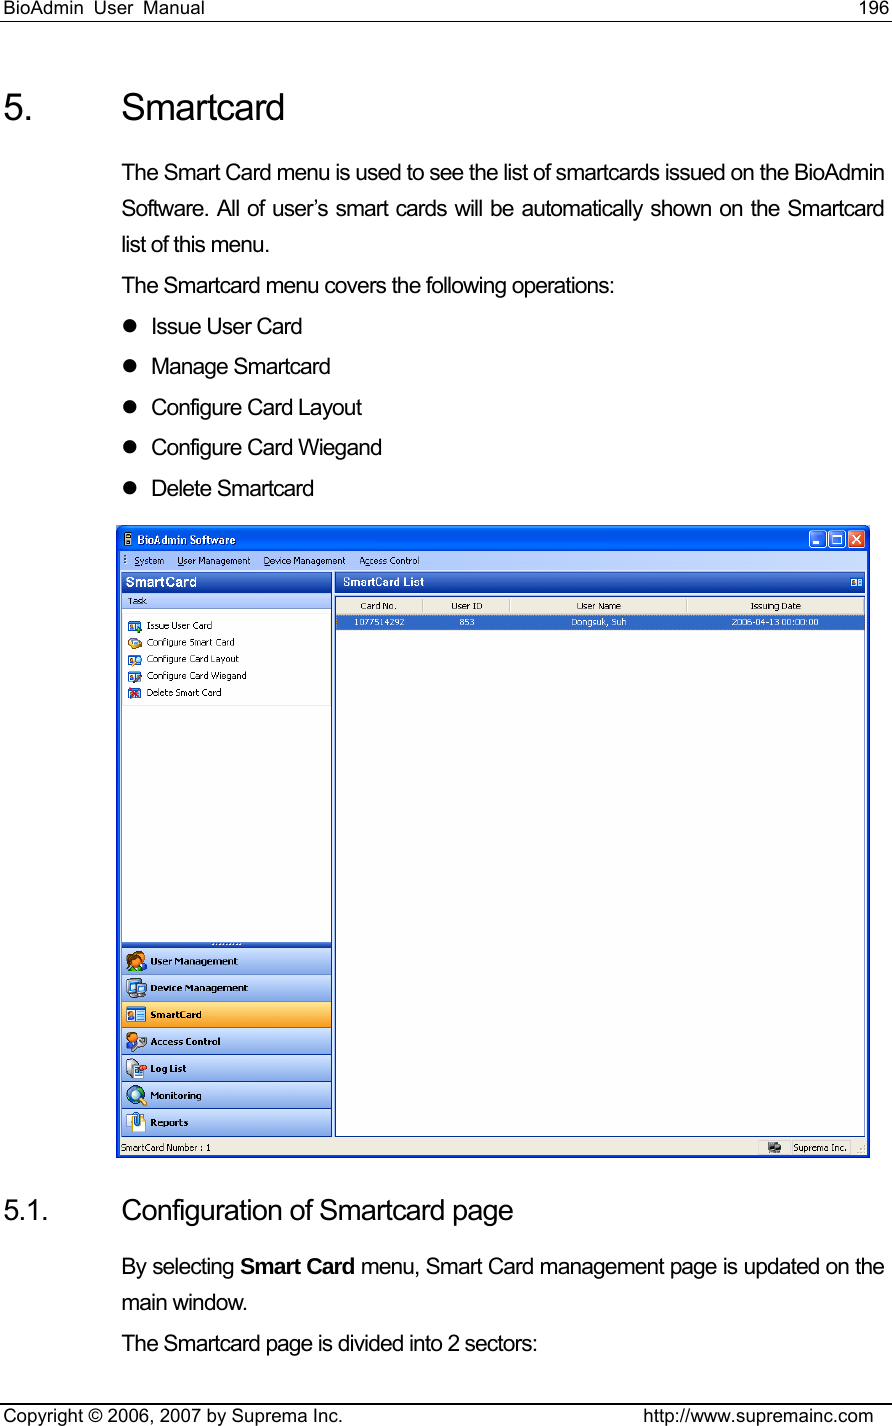
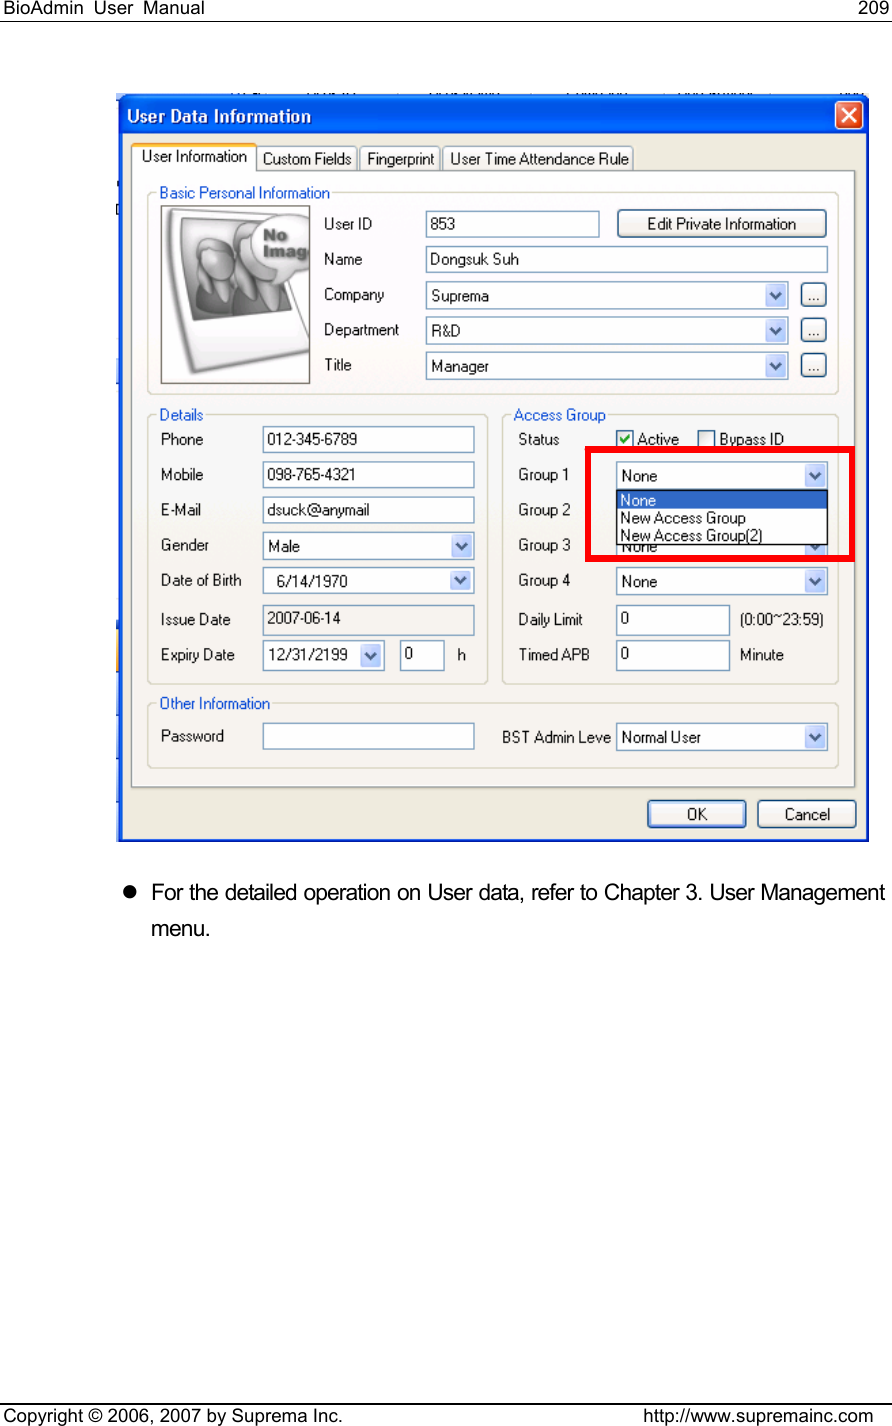
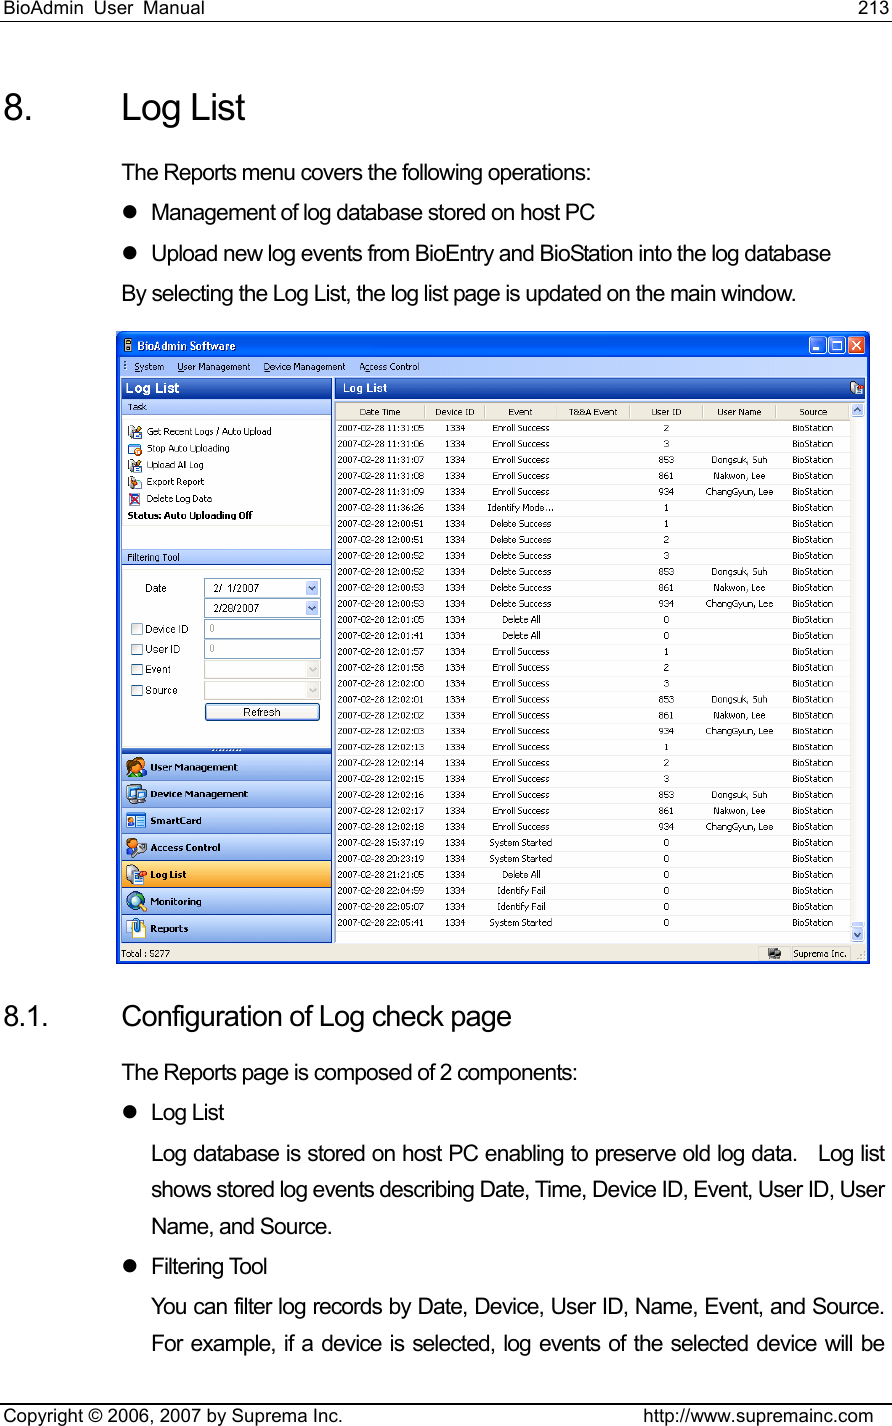
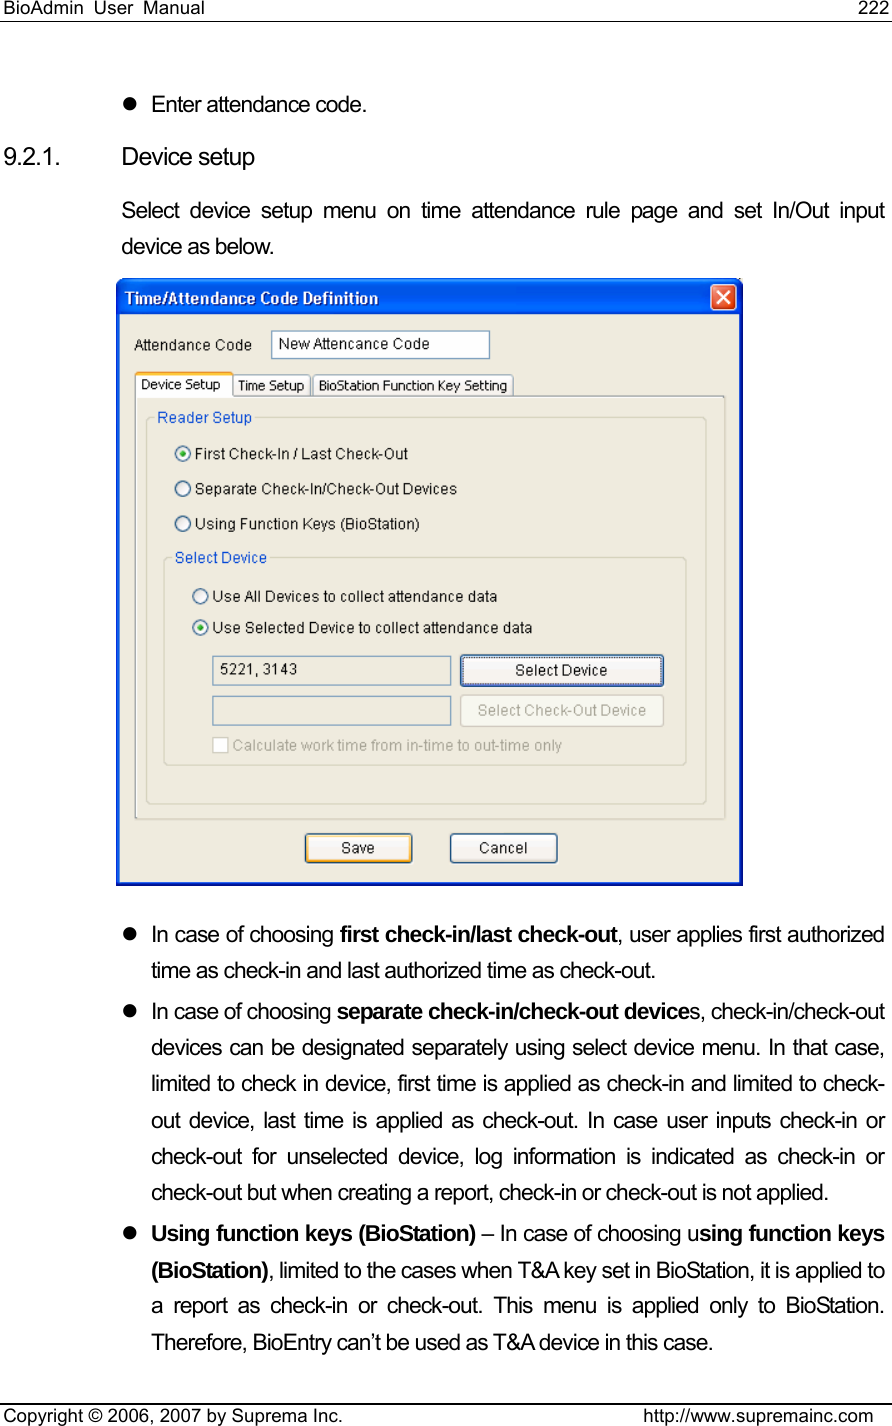
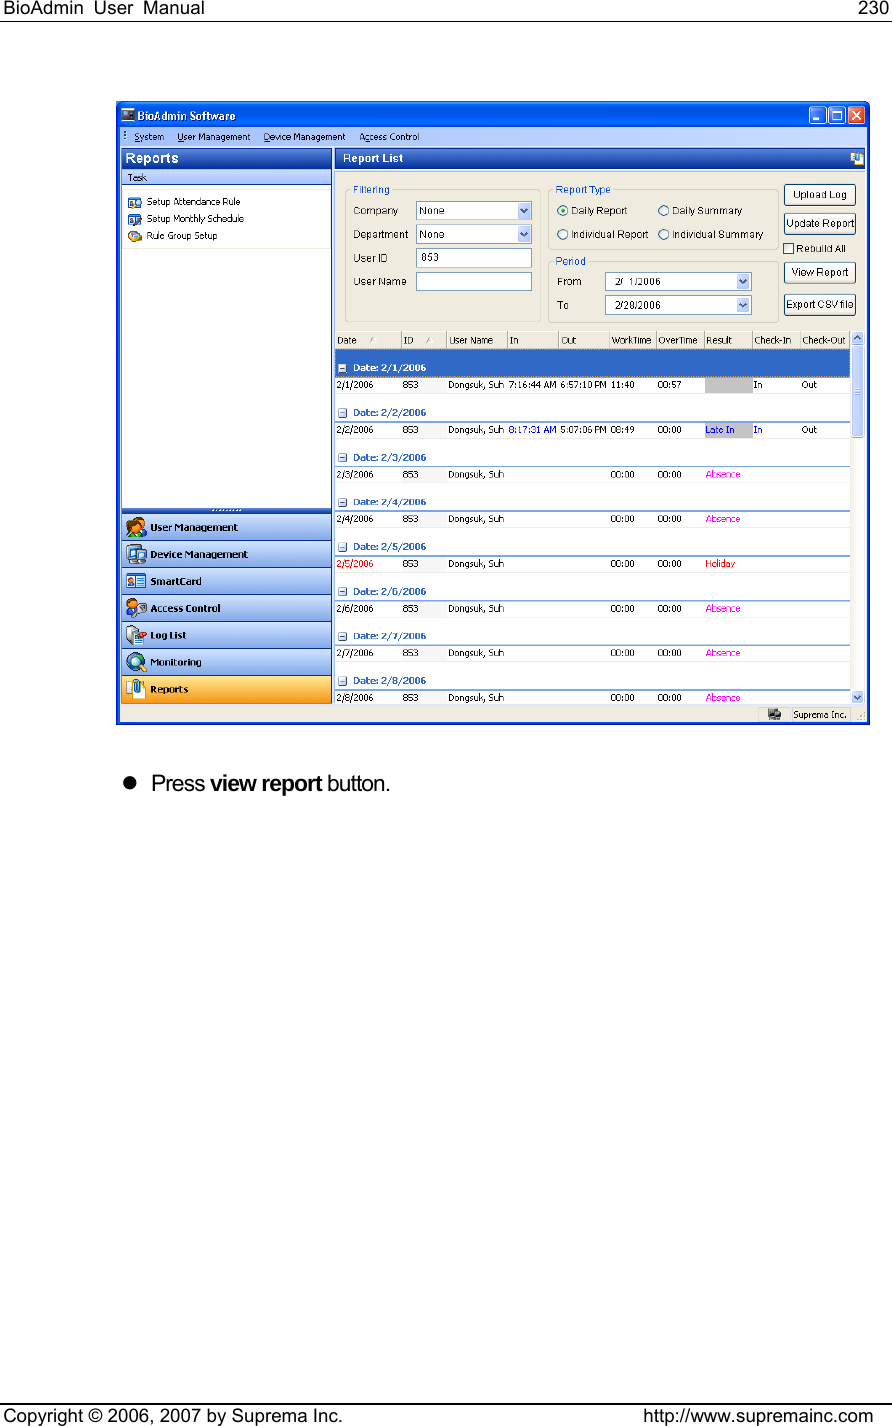
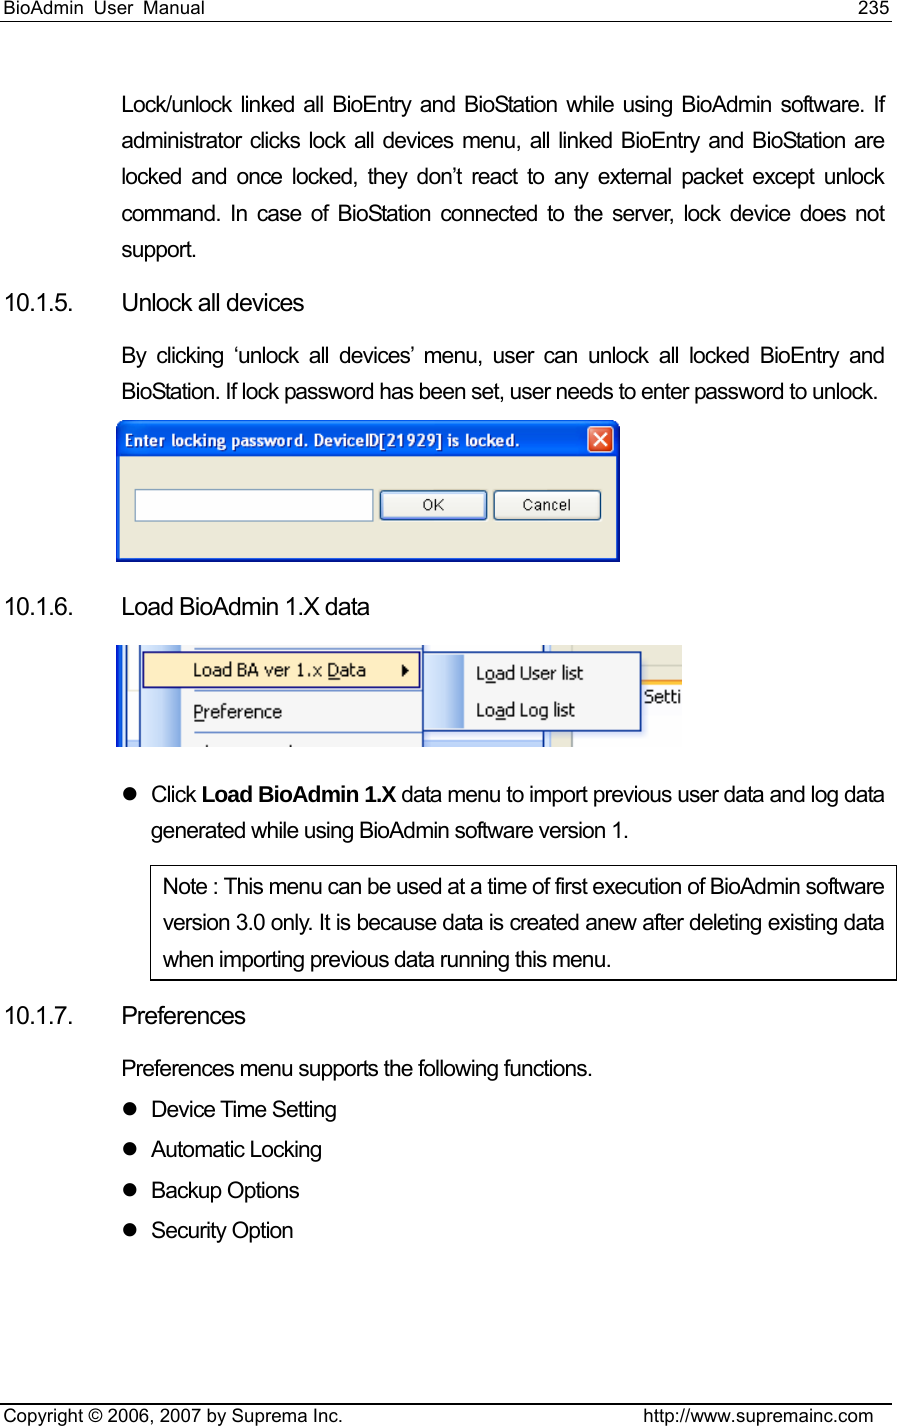
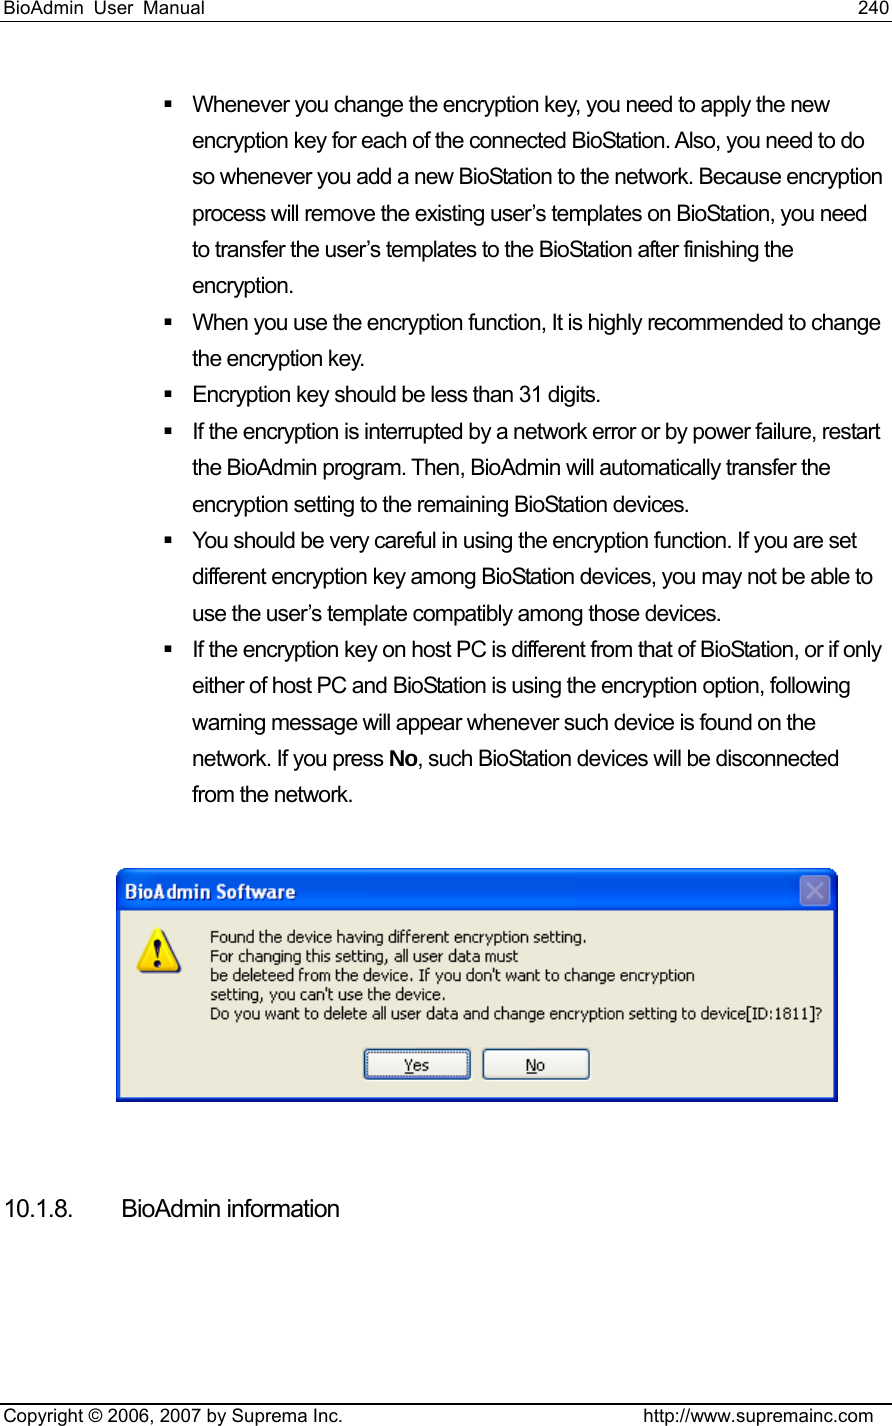
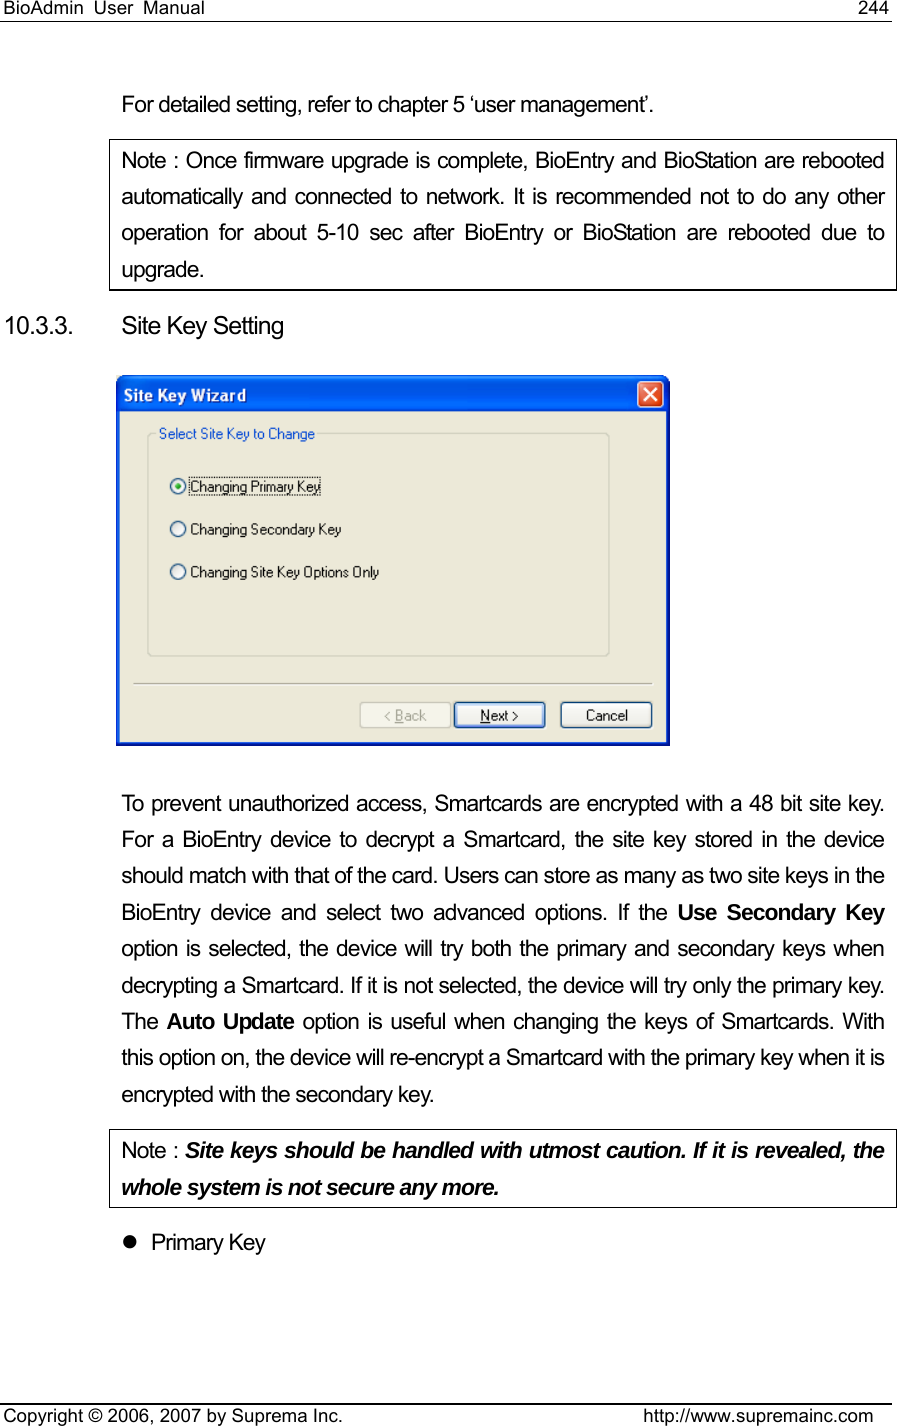
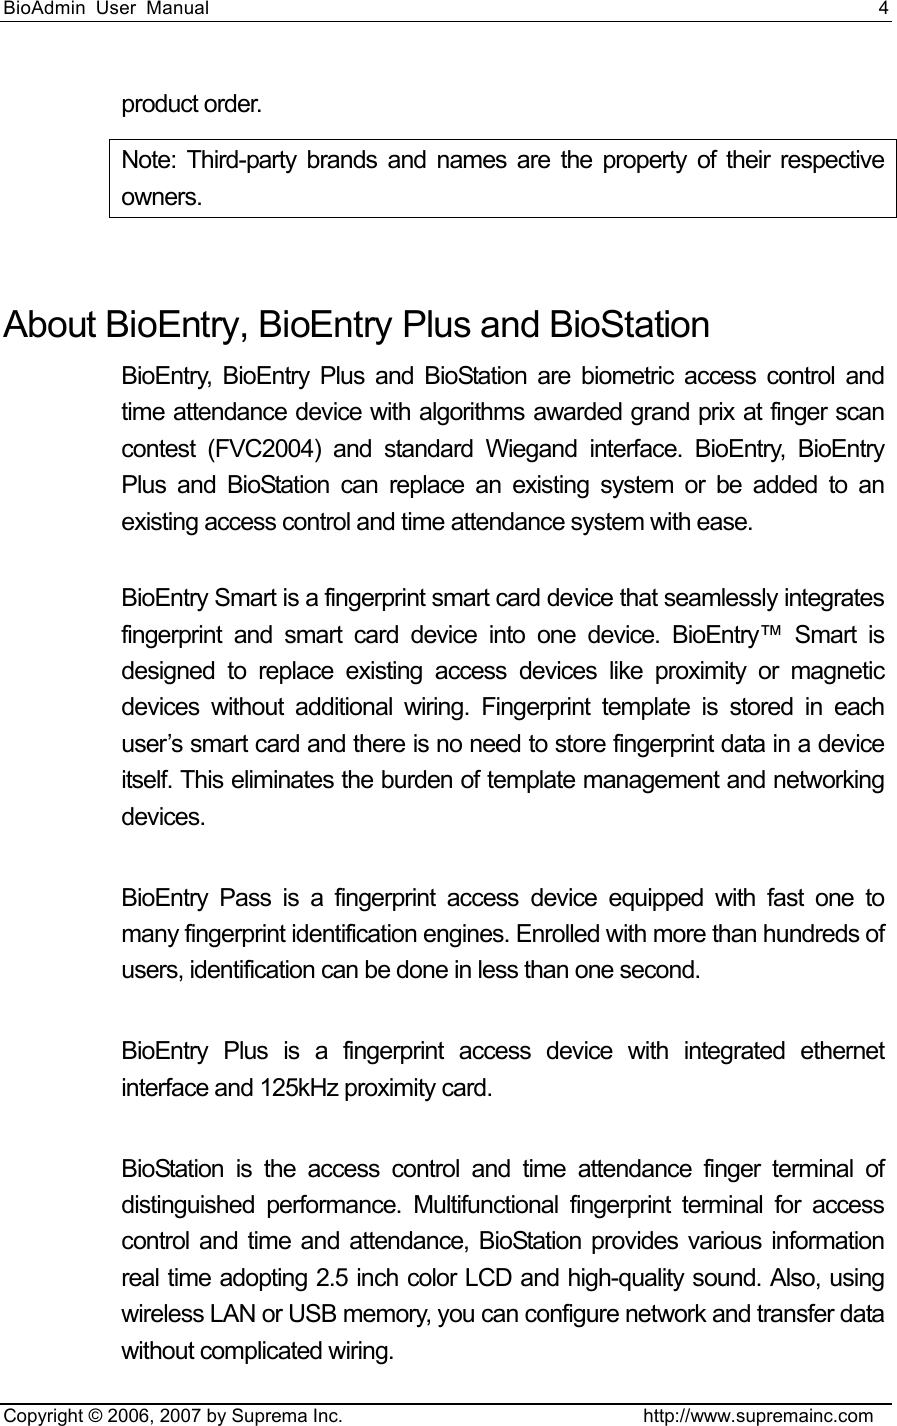
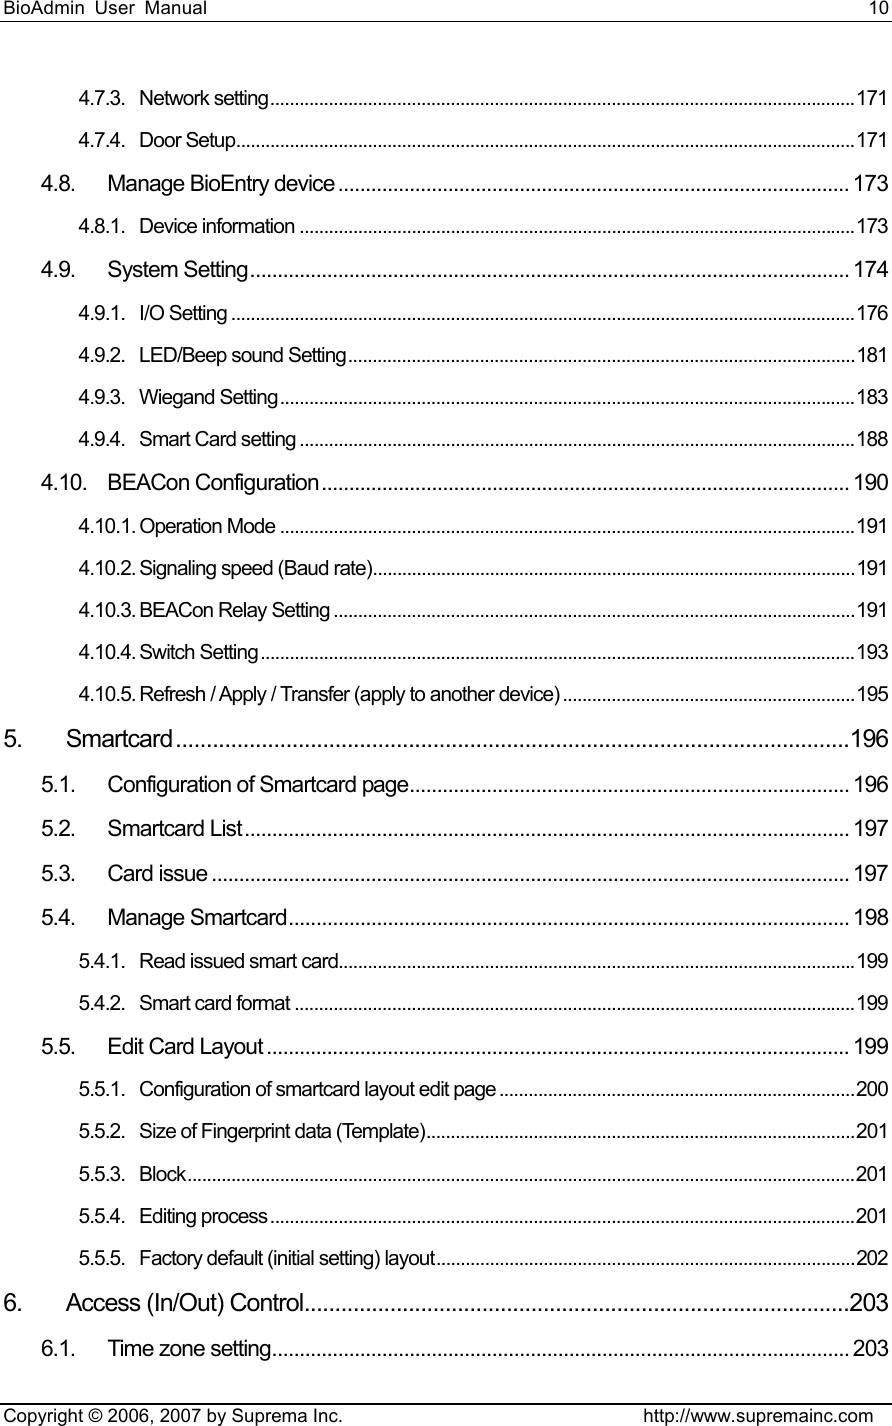
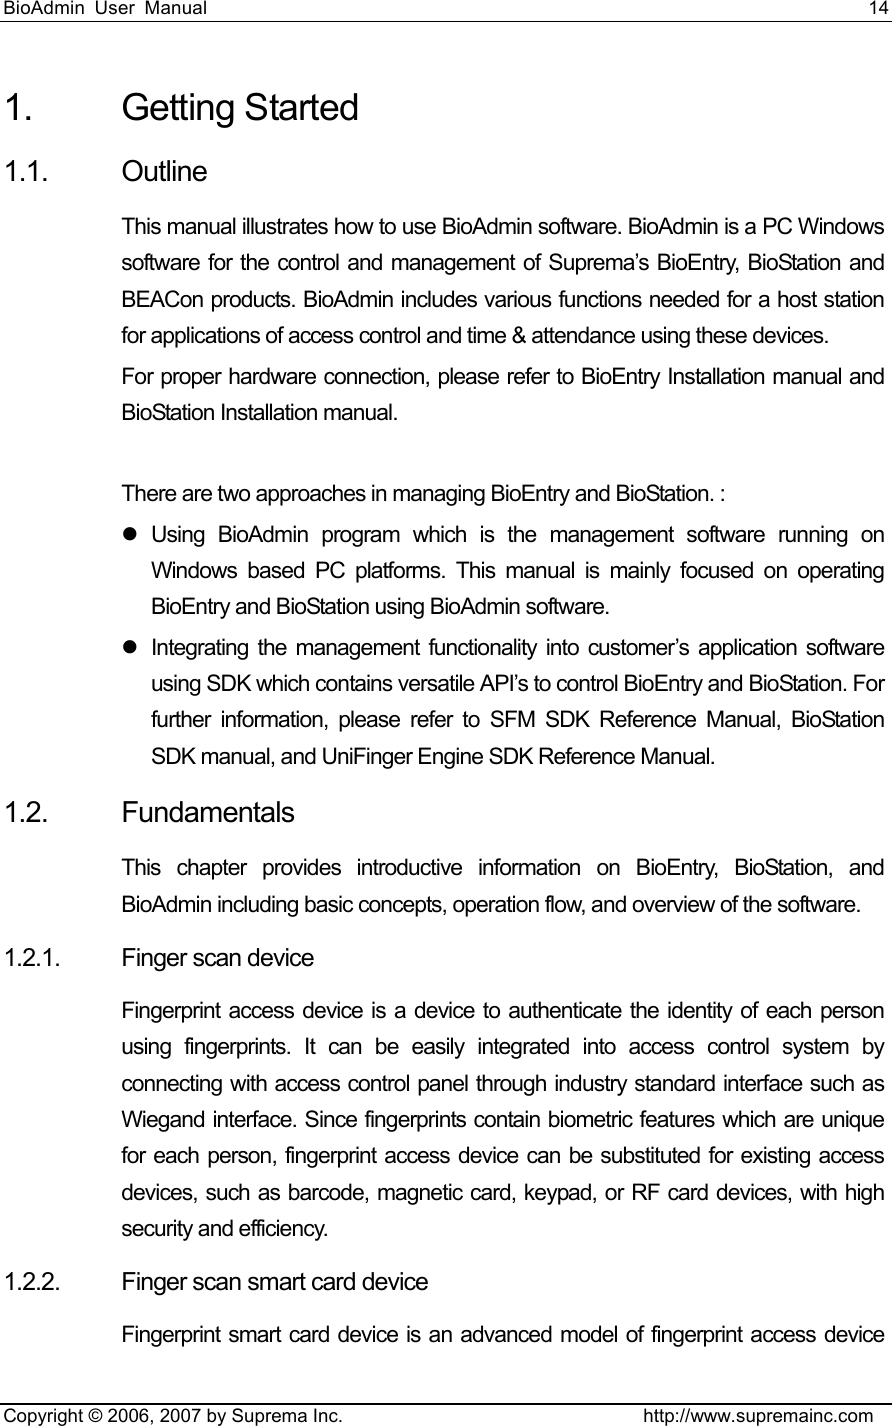
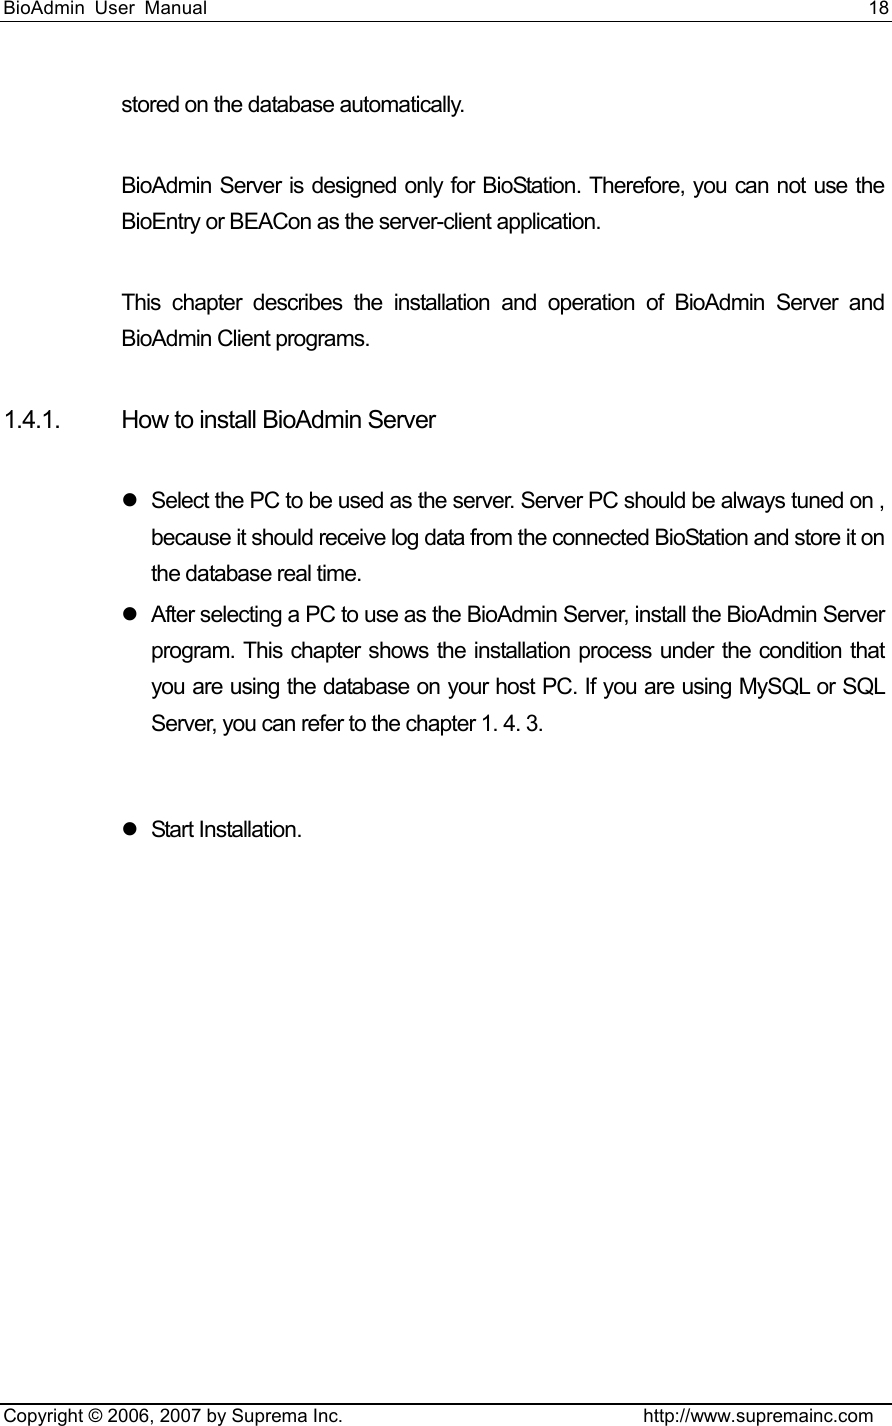
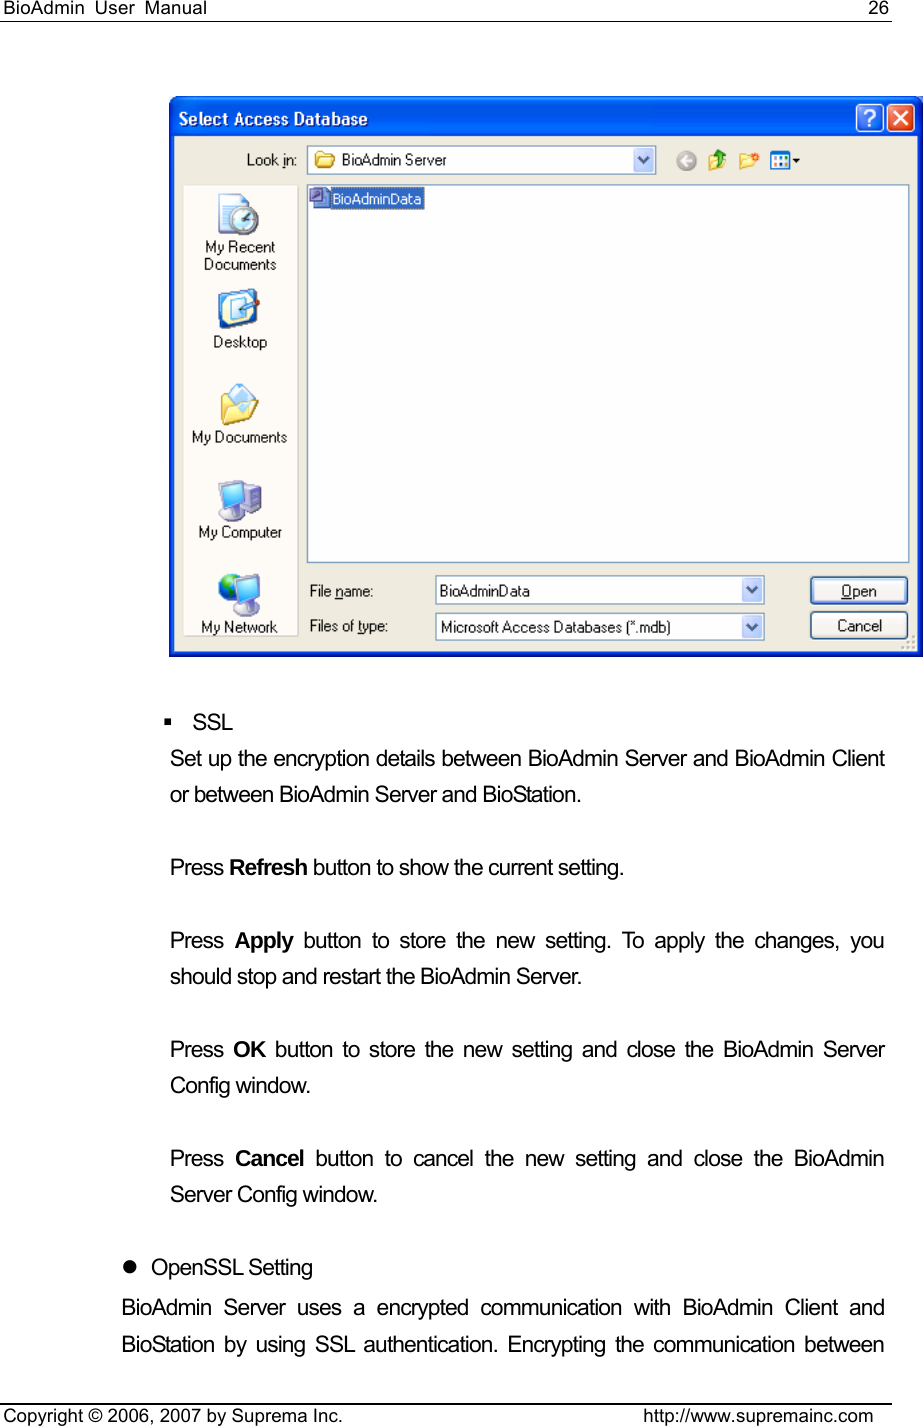
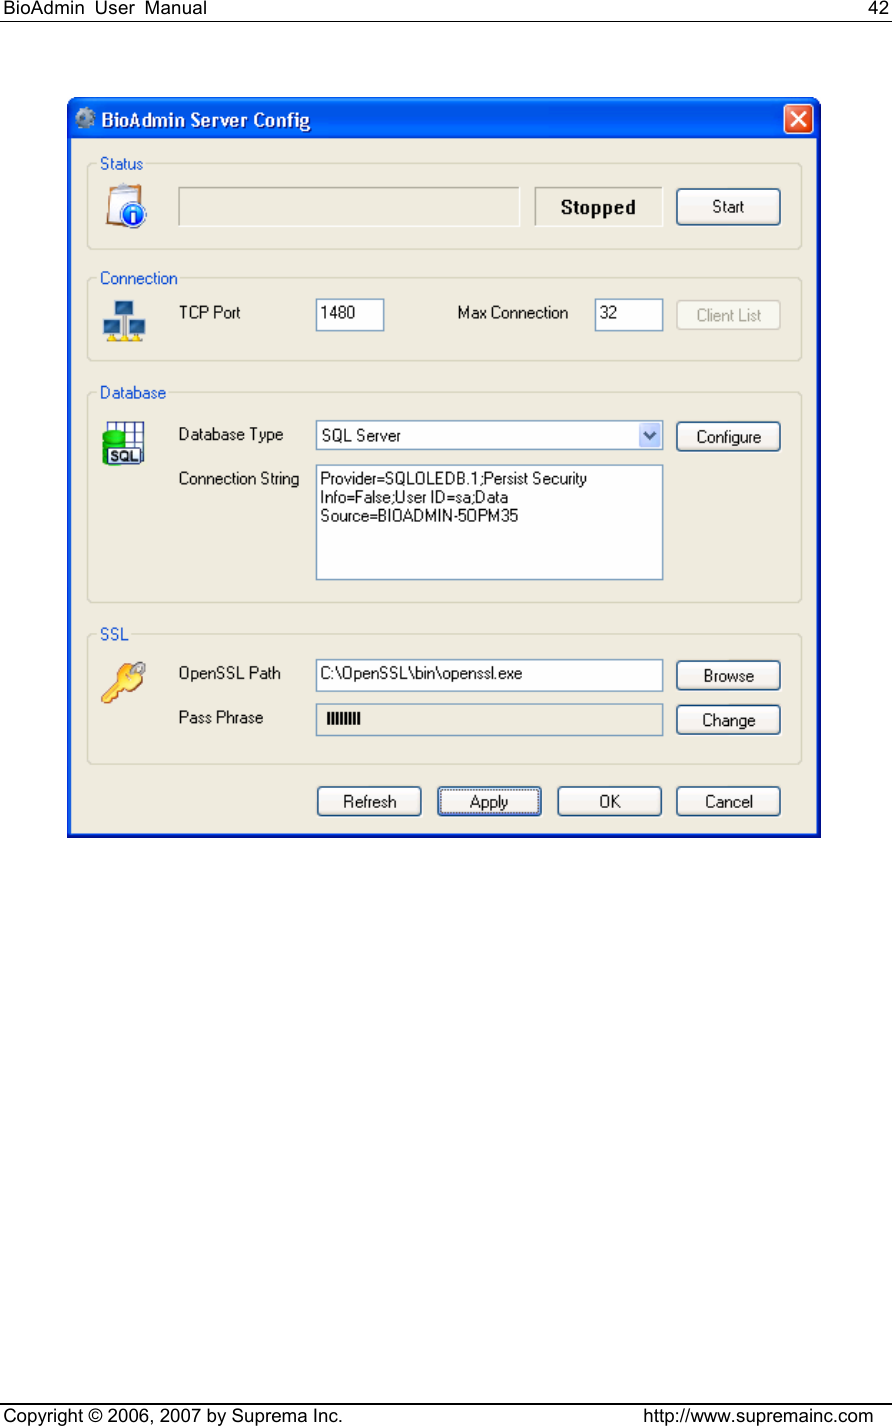
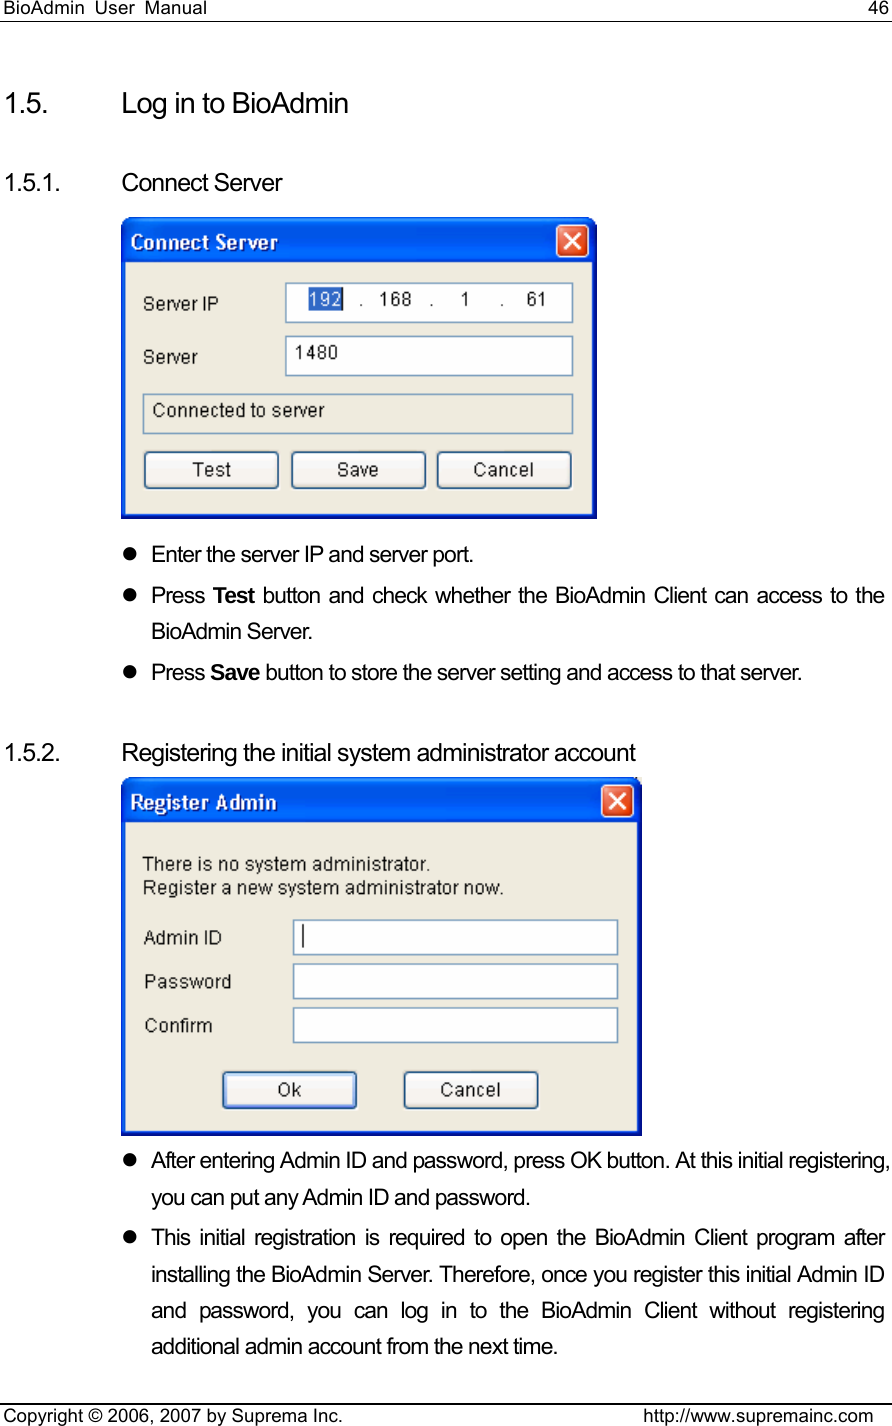
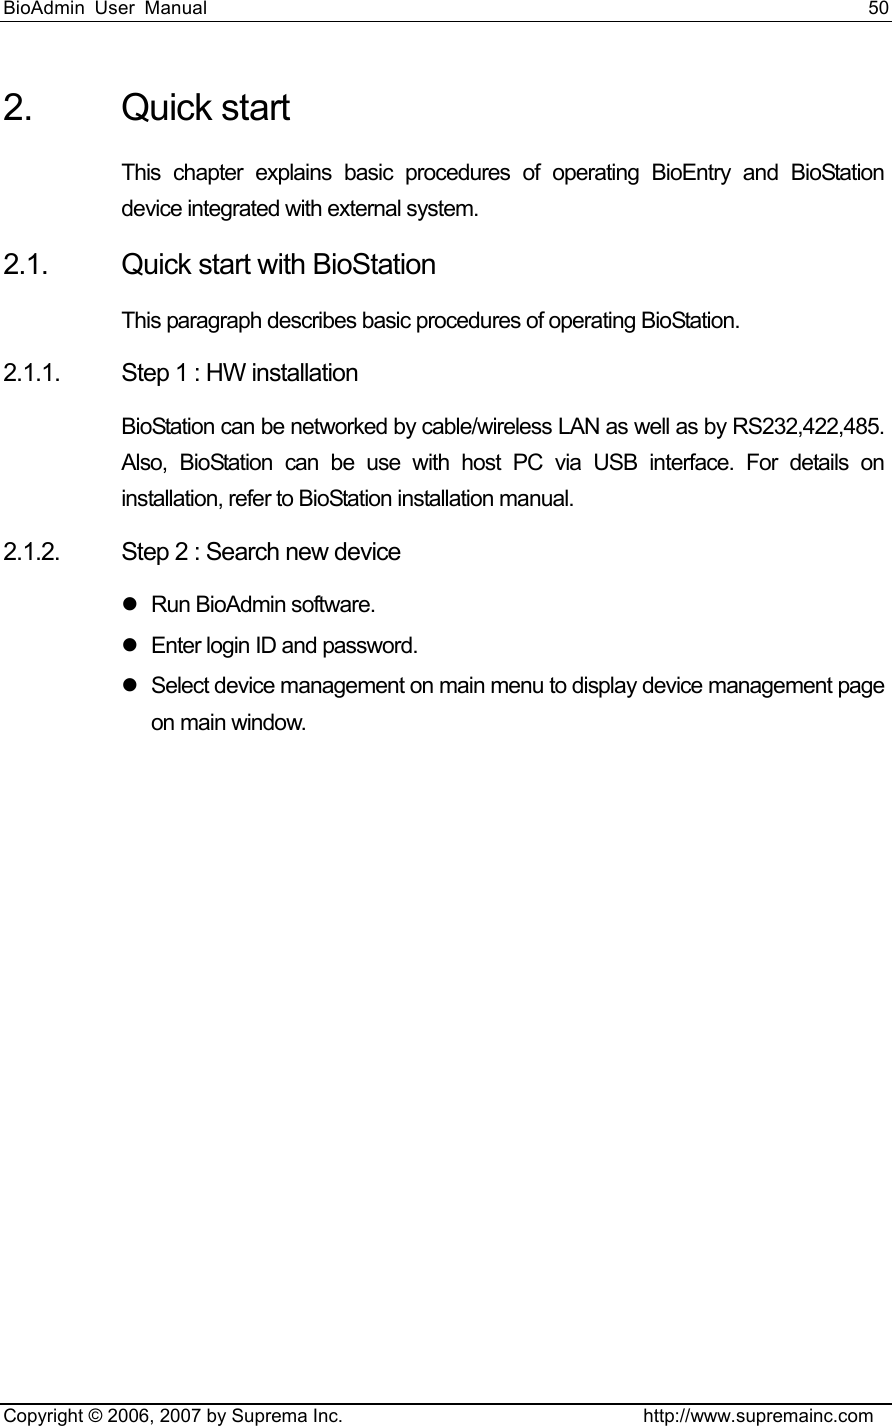
![BioAdmin User Manual 142 Copyright © 2006, 2007 by Suprema Inc. http://www.supremainc.com Press search button to display search result. Press ok button to display searched device on device list. The number in bracket [ ] ahead of searched device name is device ID. To change device name, place a cursor on applicable device and press the right button of the mouse to display a menu. Choose ‘change name’ then input window appears where a new name can be entered. 4.1.2. Ethernet In case device and host PC is connected by Ethernet, enter IP address and pot in TCP/IP field on add new device window. In case of BioStation and BEACon, IP address can be checked in device. For details, refer to manual of each device. In case of BioEntry, Ethernet interface is not supported but can be linked by Ethernet using Ethernet to Serial converter in host PC. Input IP address of mounted Ethernet to Serial converter. Input 1470 for all ports.](https://usermanual.wiki/Suprema/BIOENTRYPLUS/User-Guide-840626-Page-142.png)
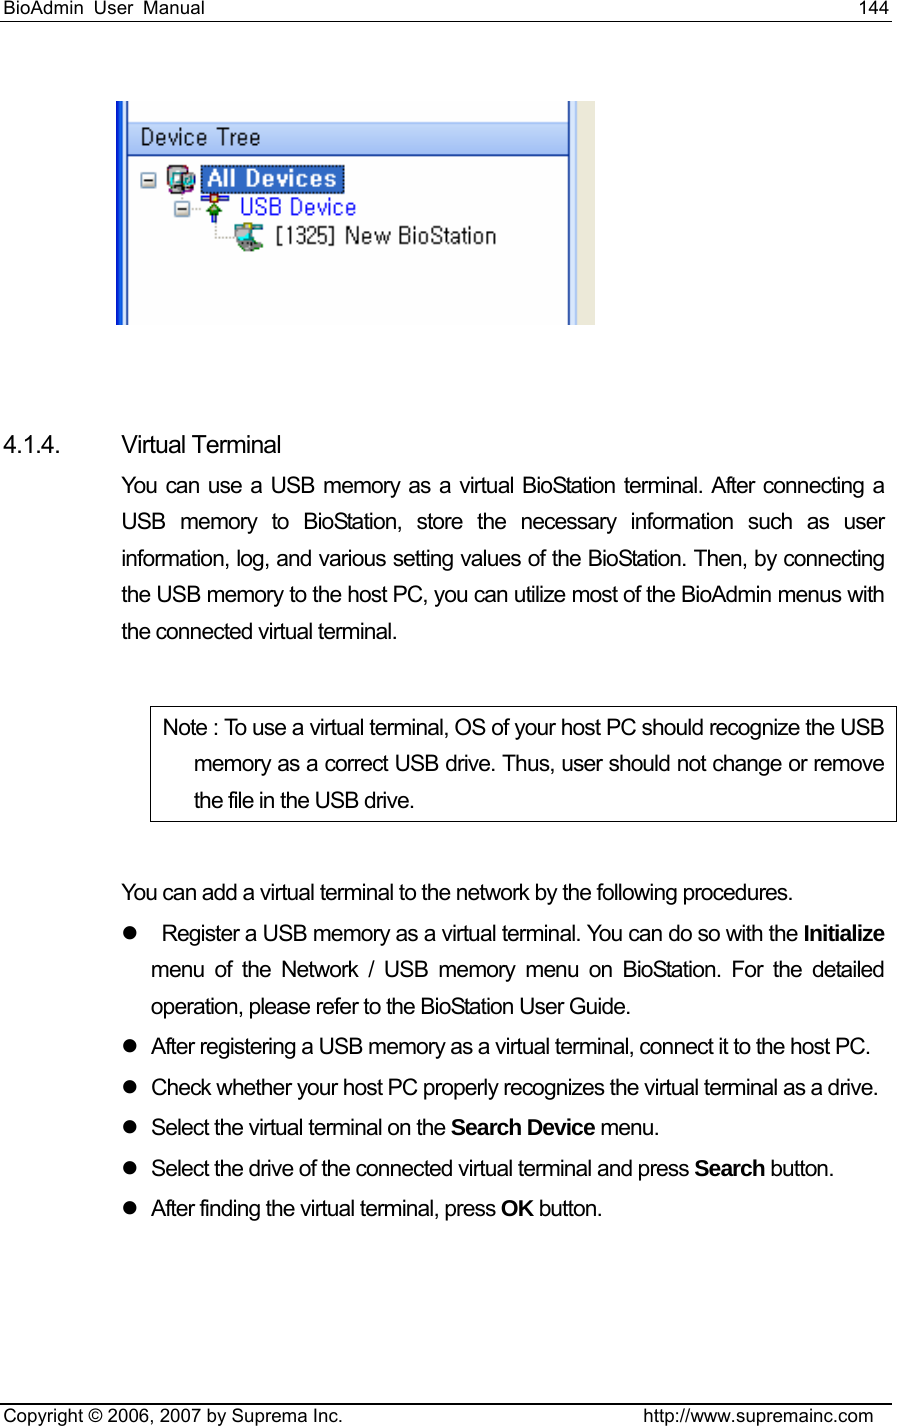
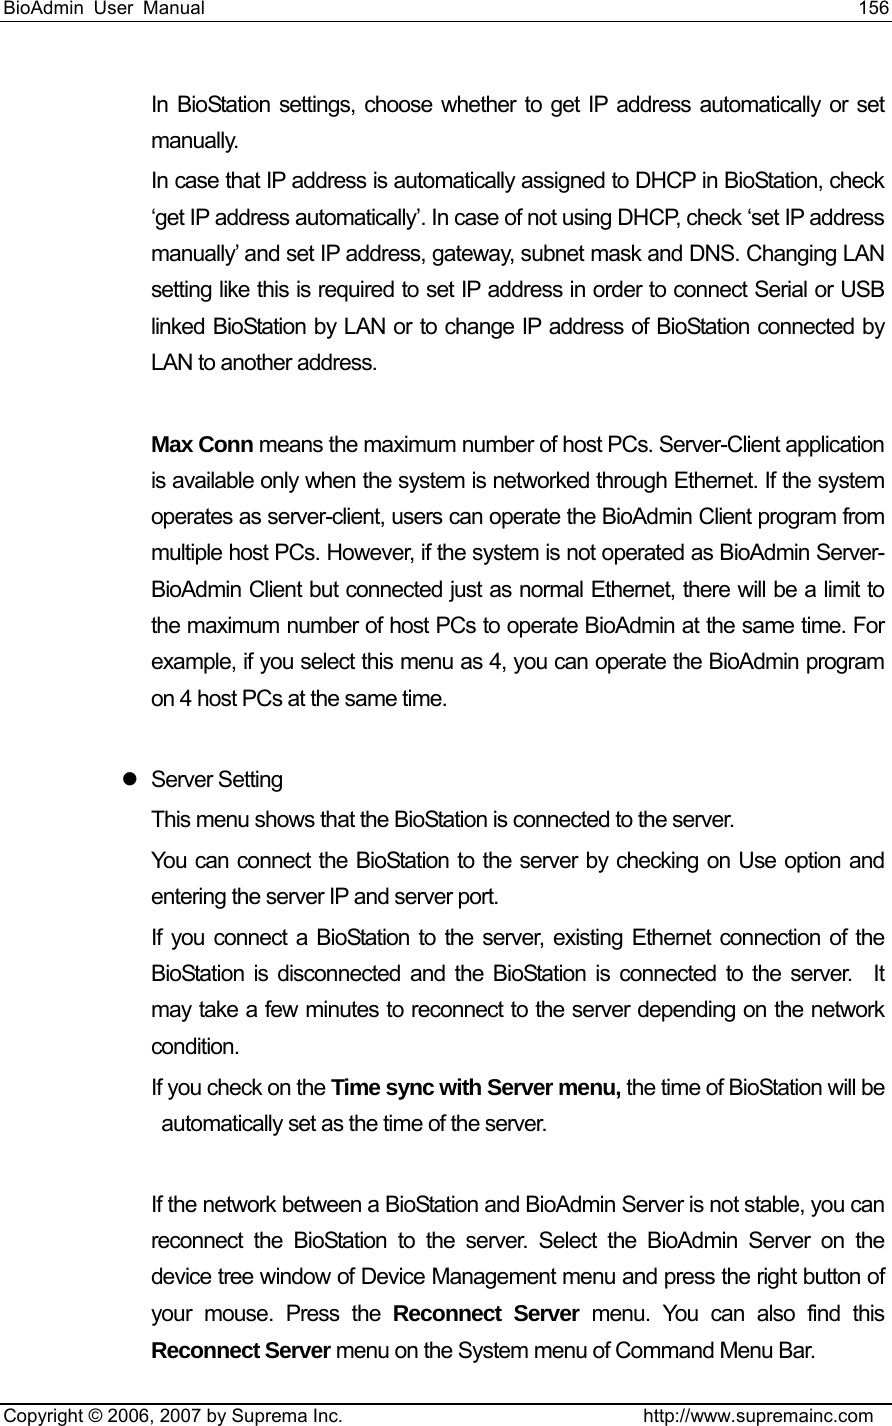
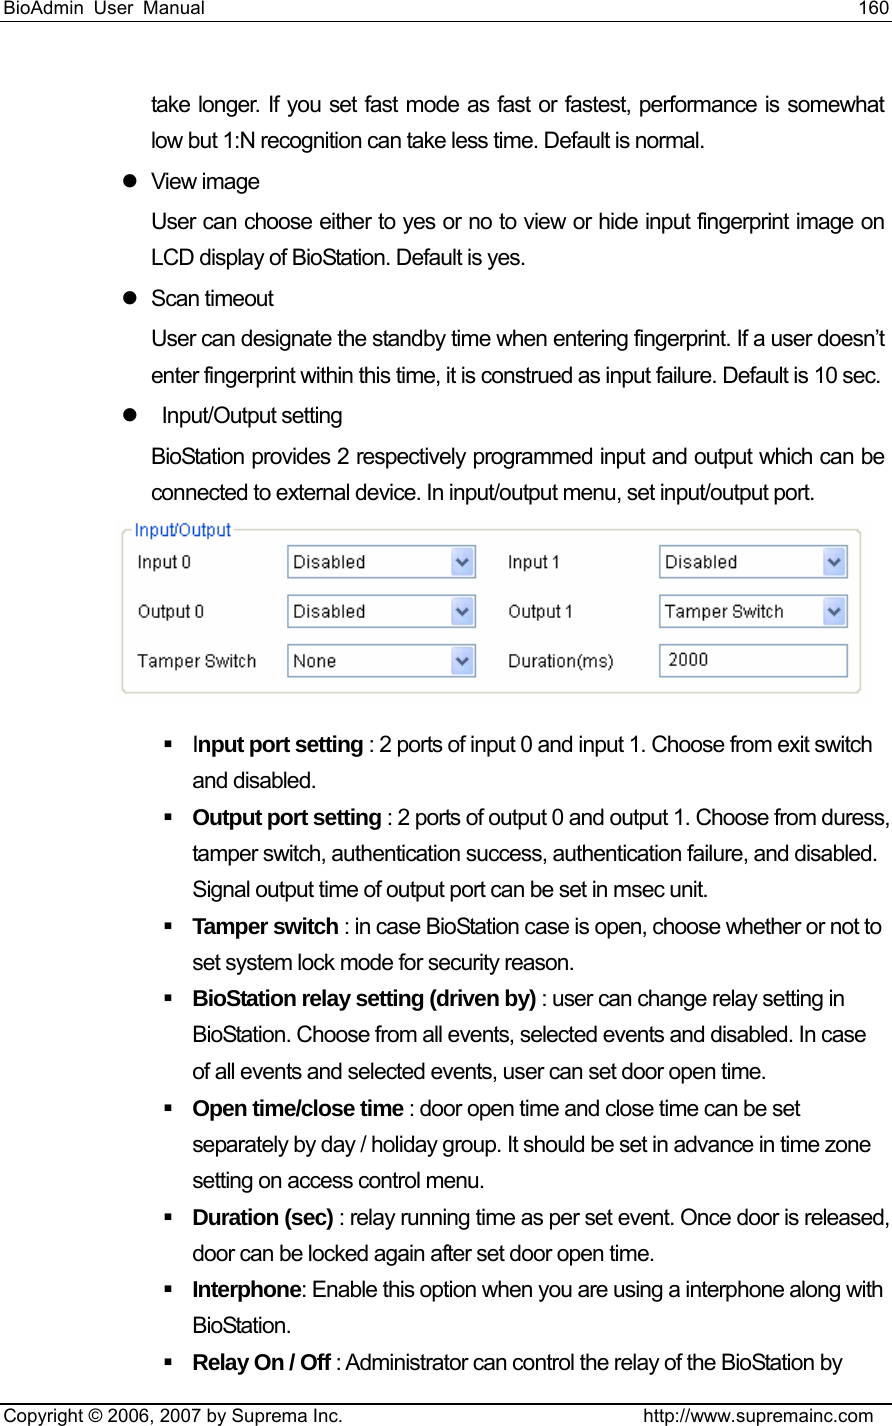
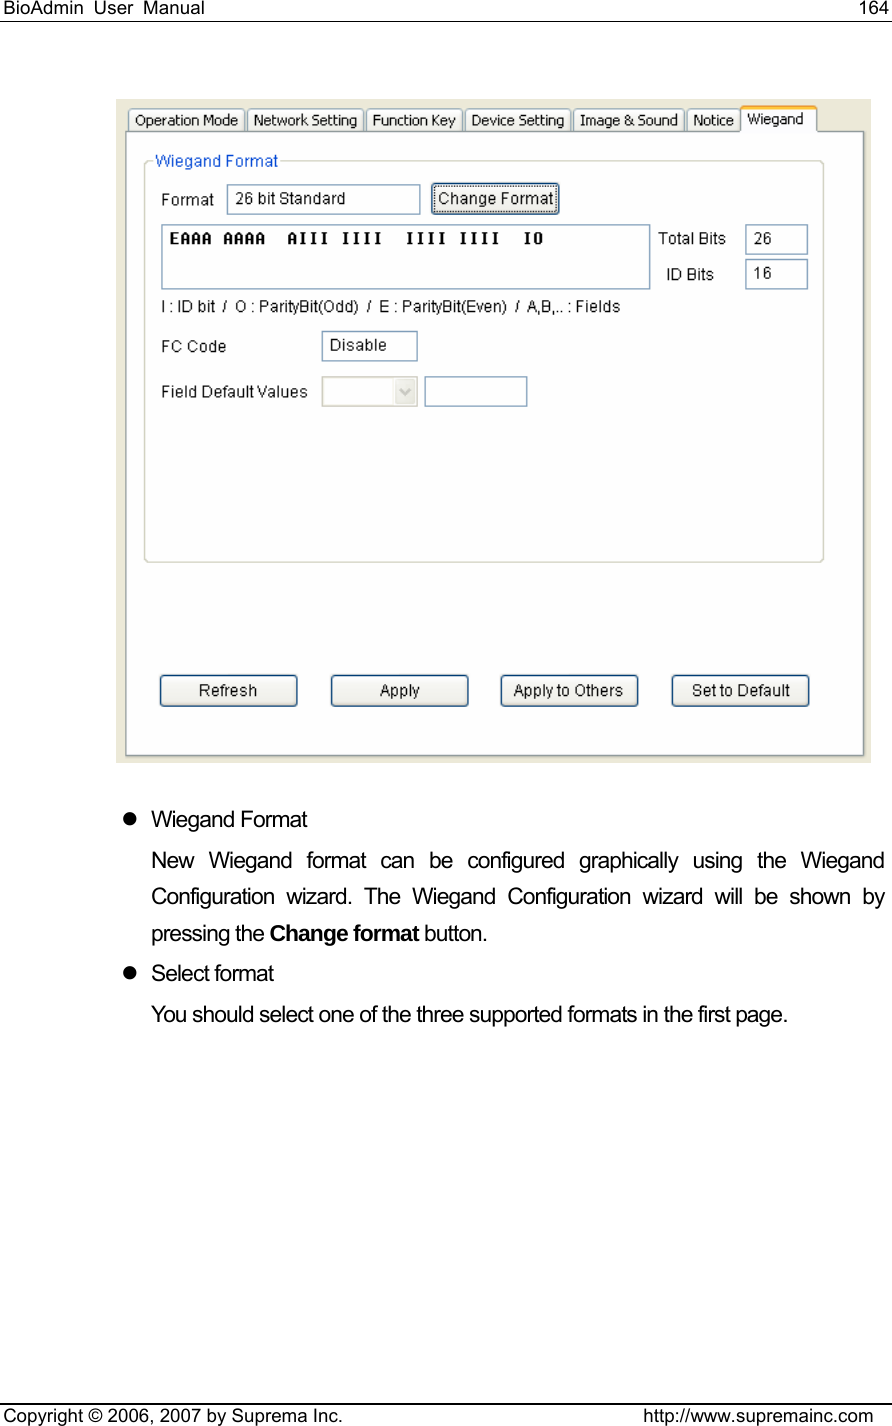
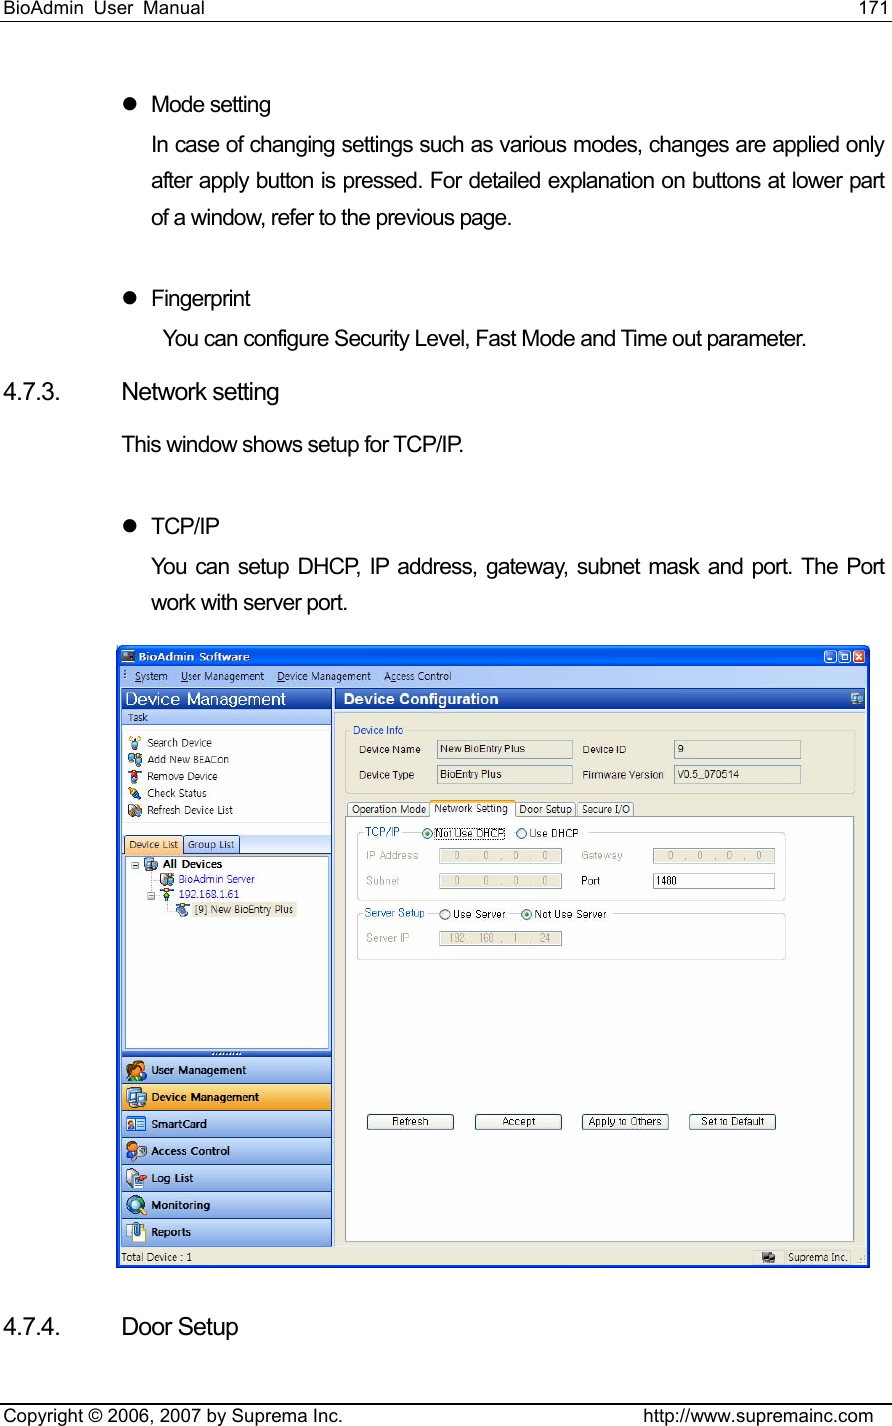
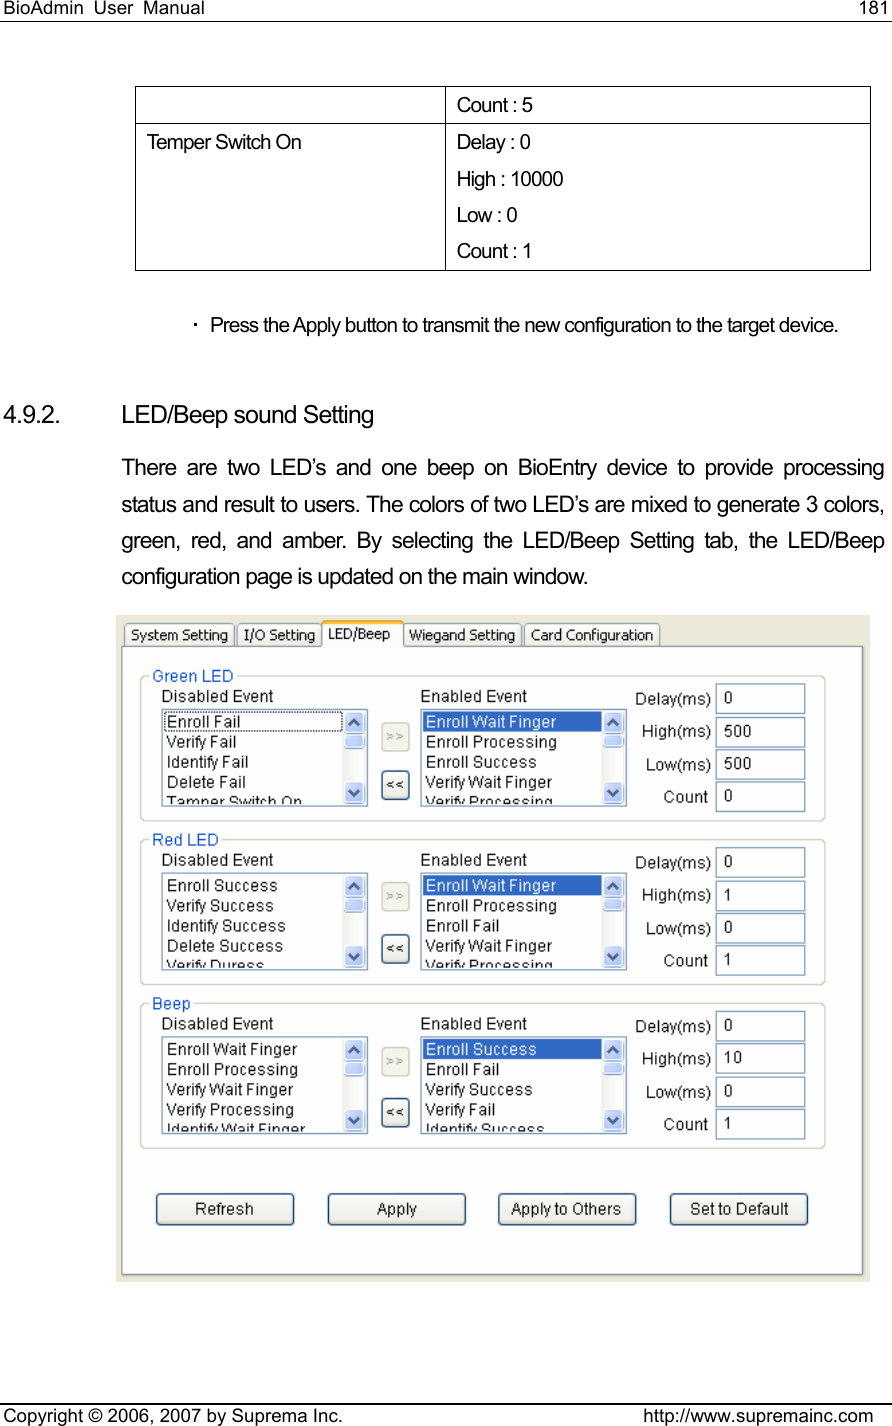
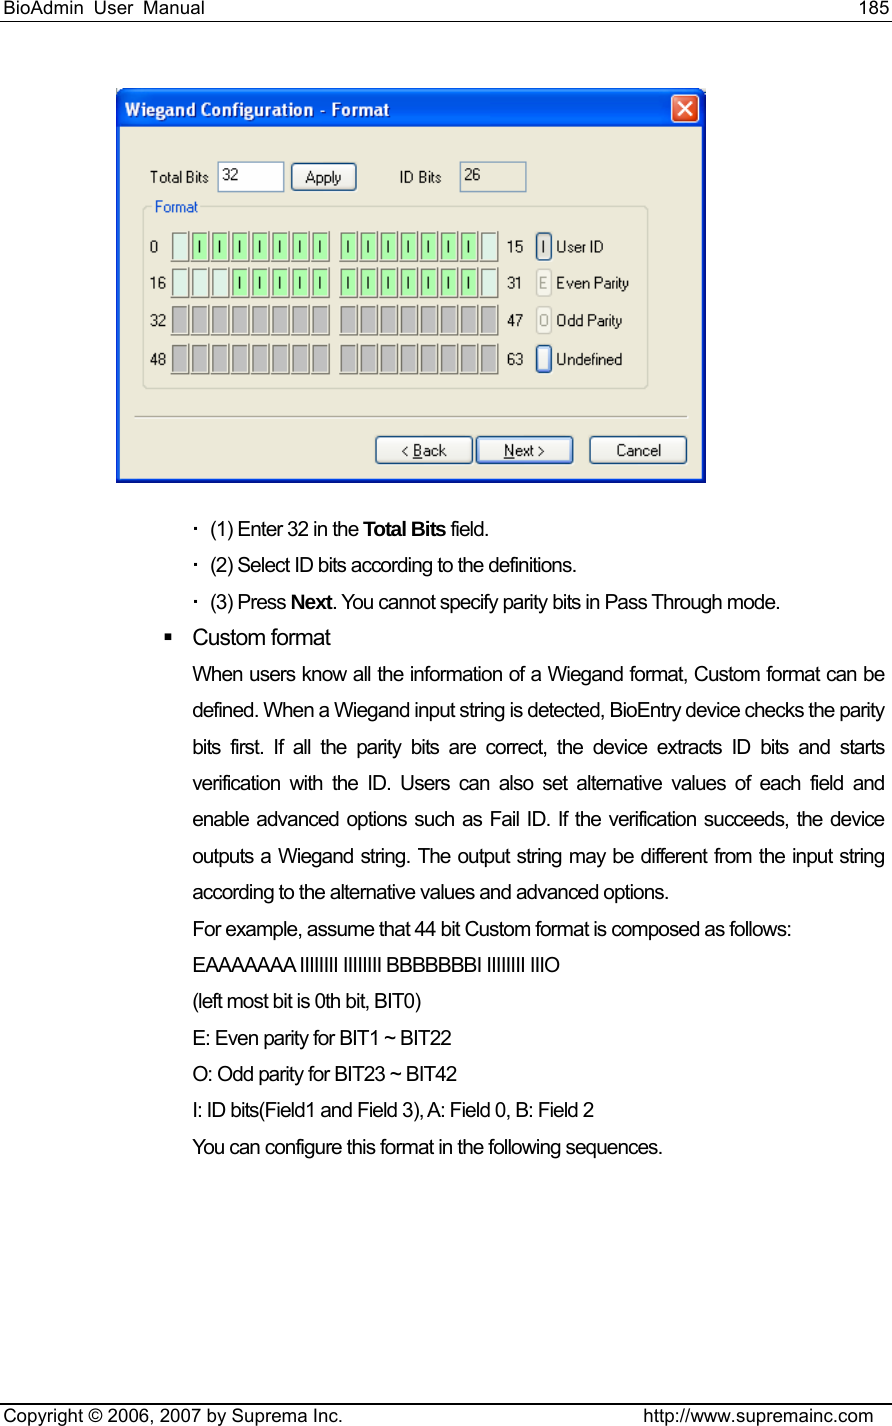
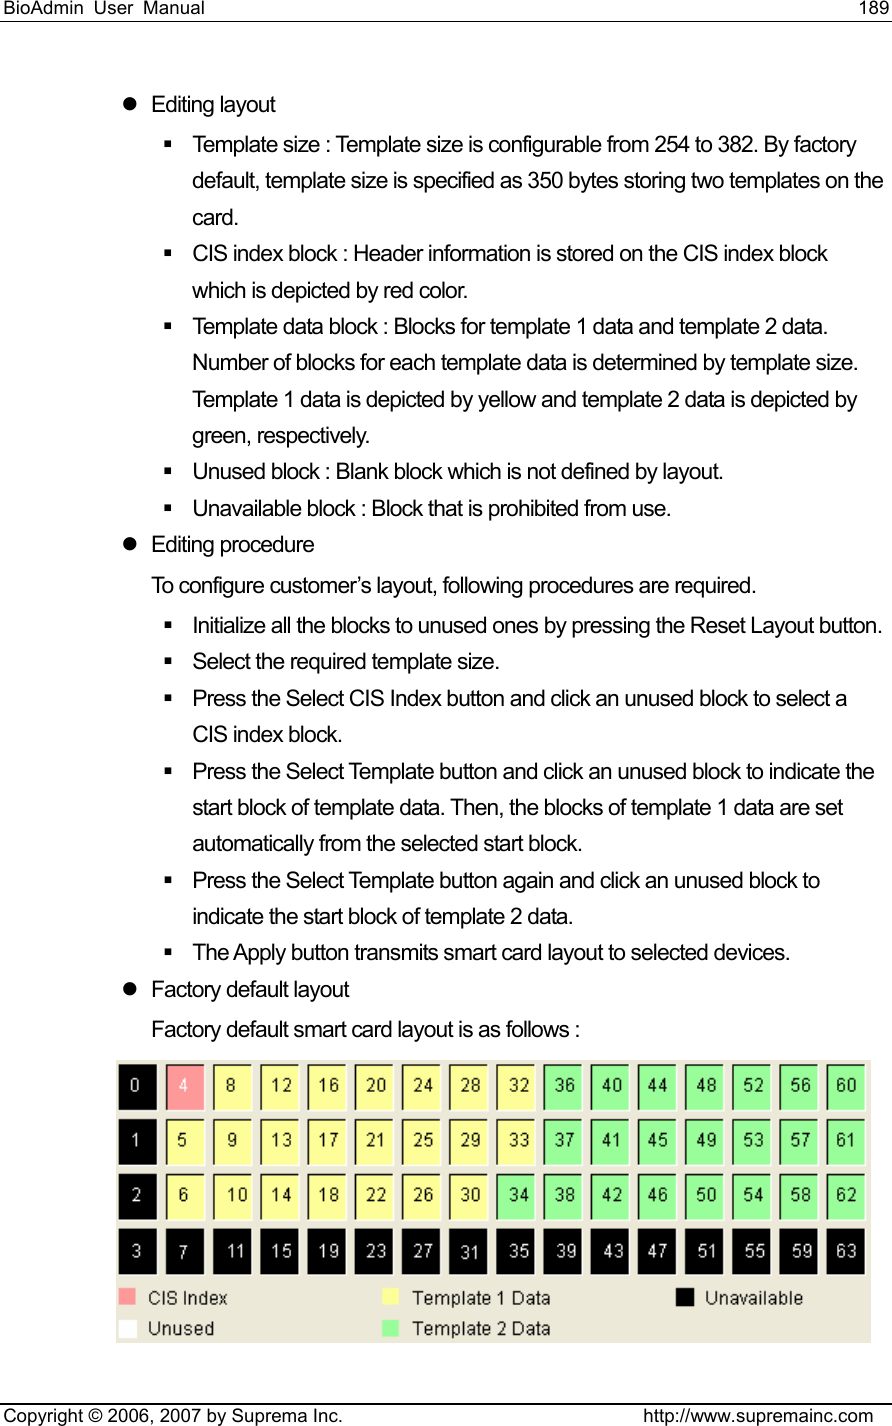
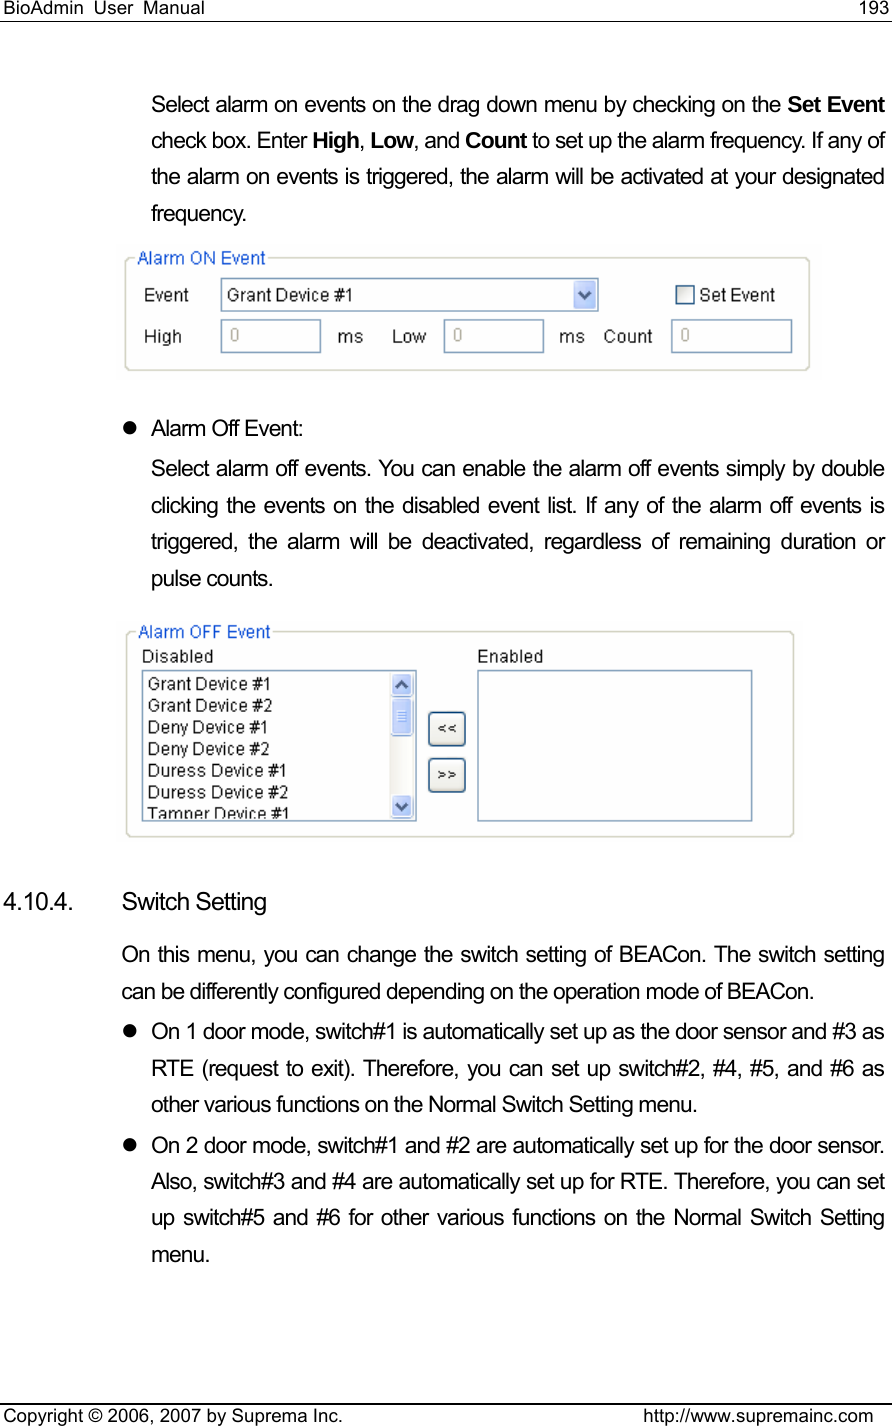
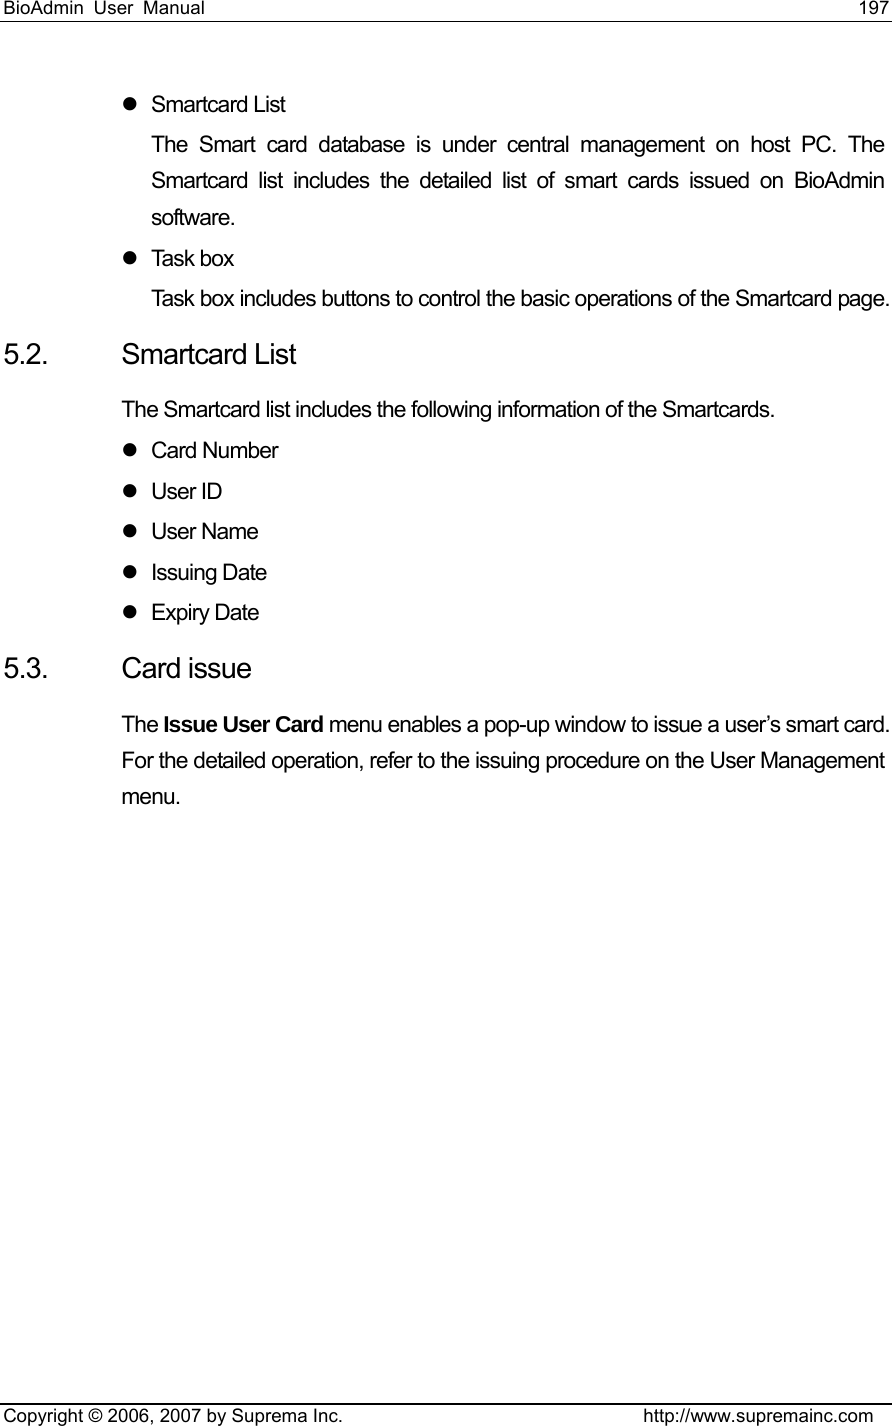
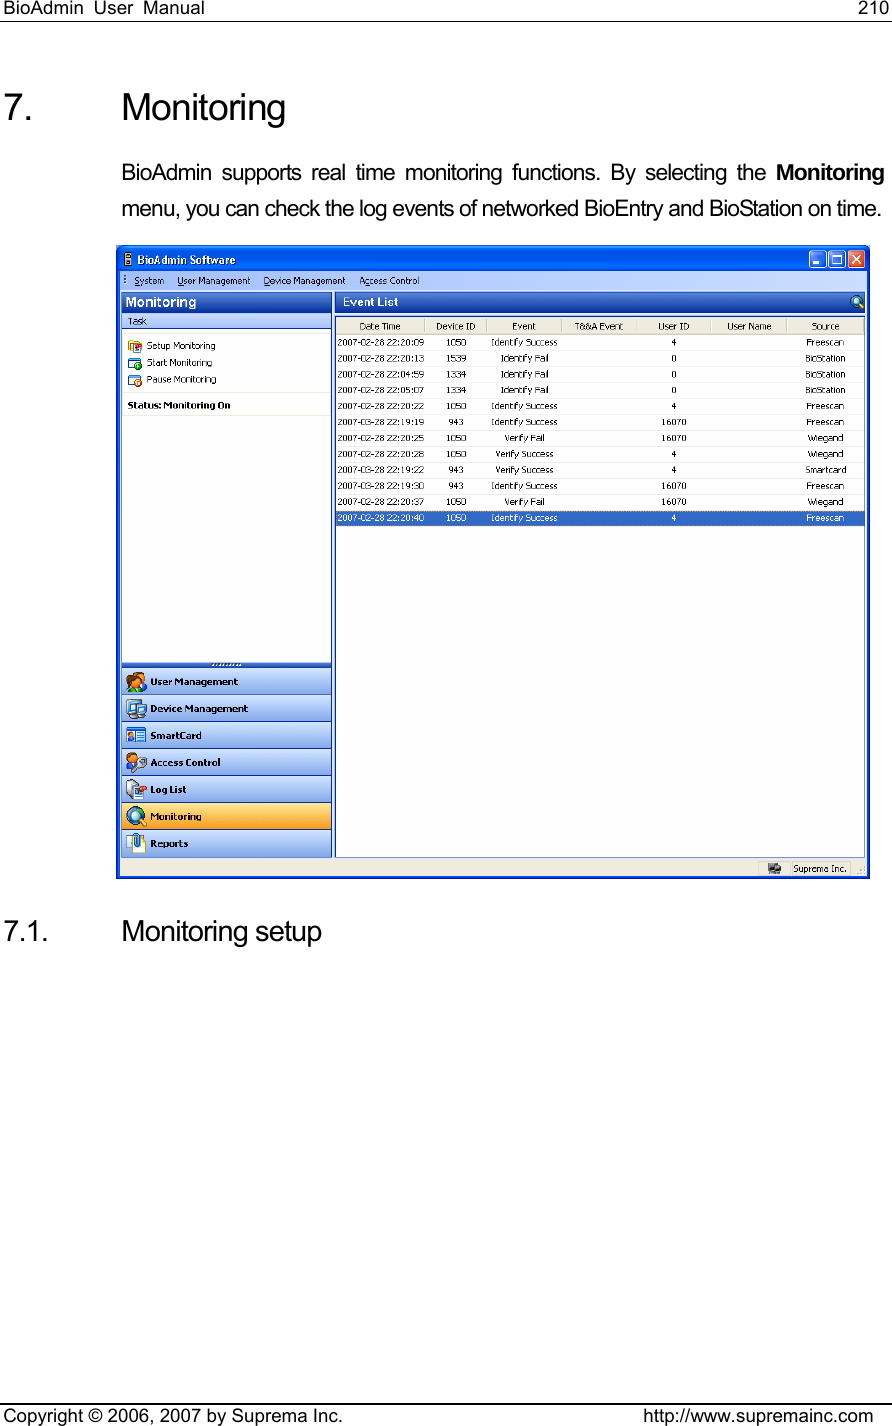
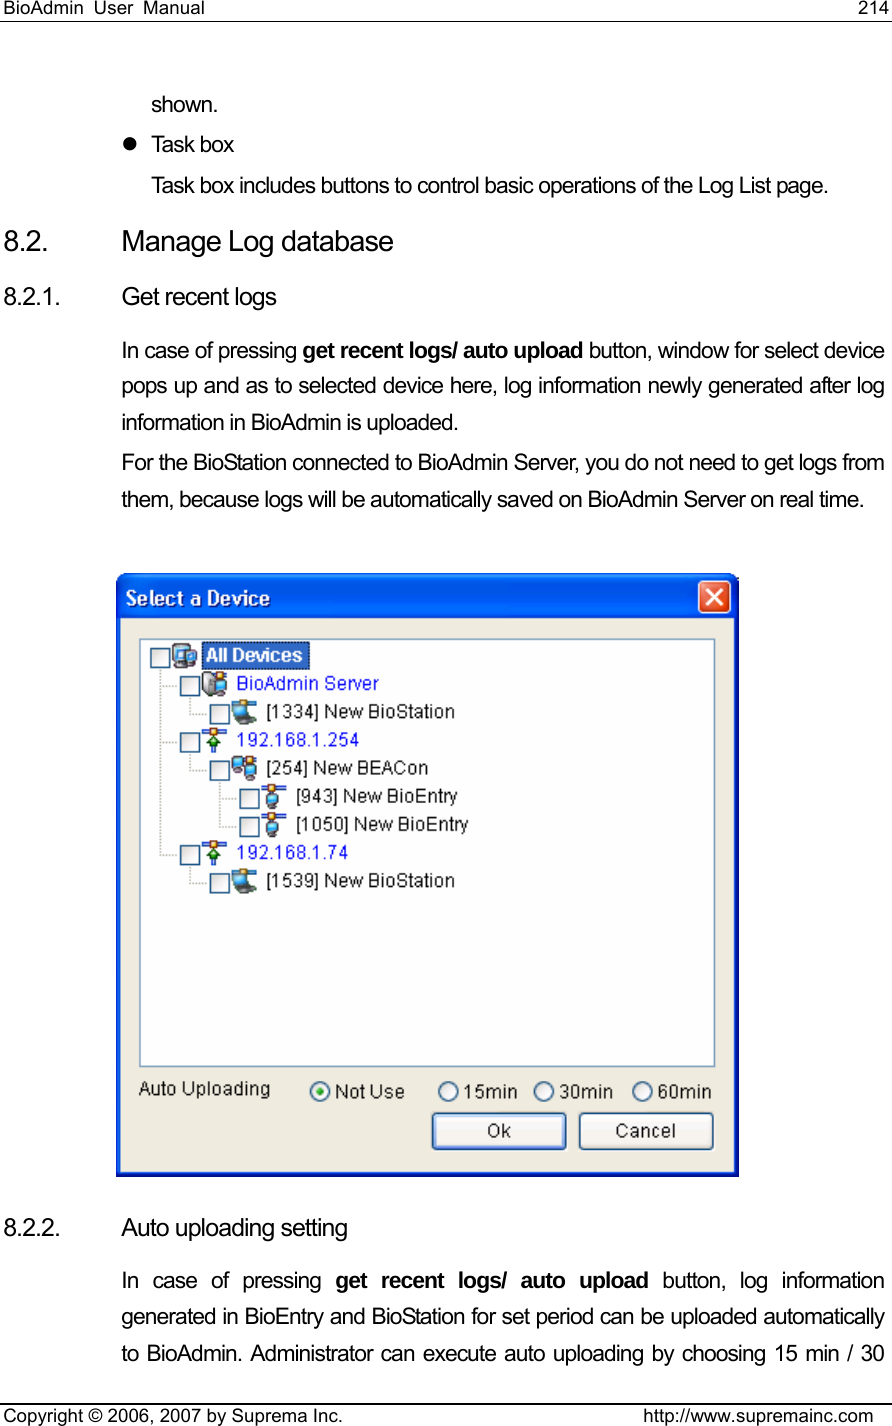
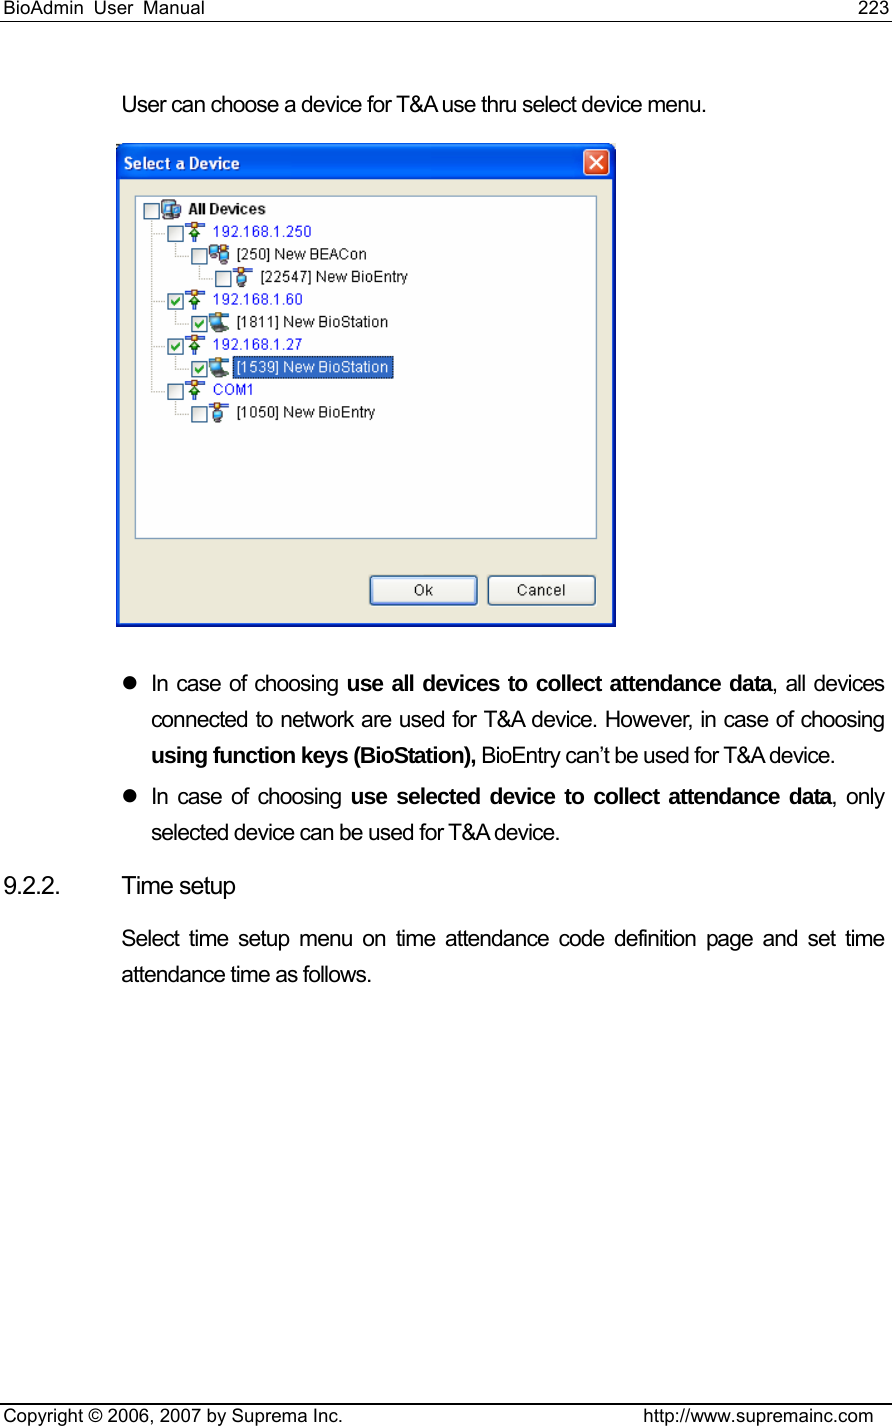
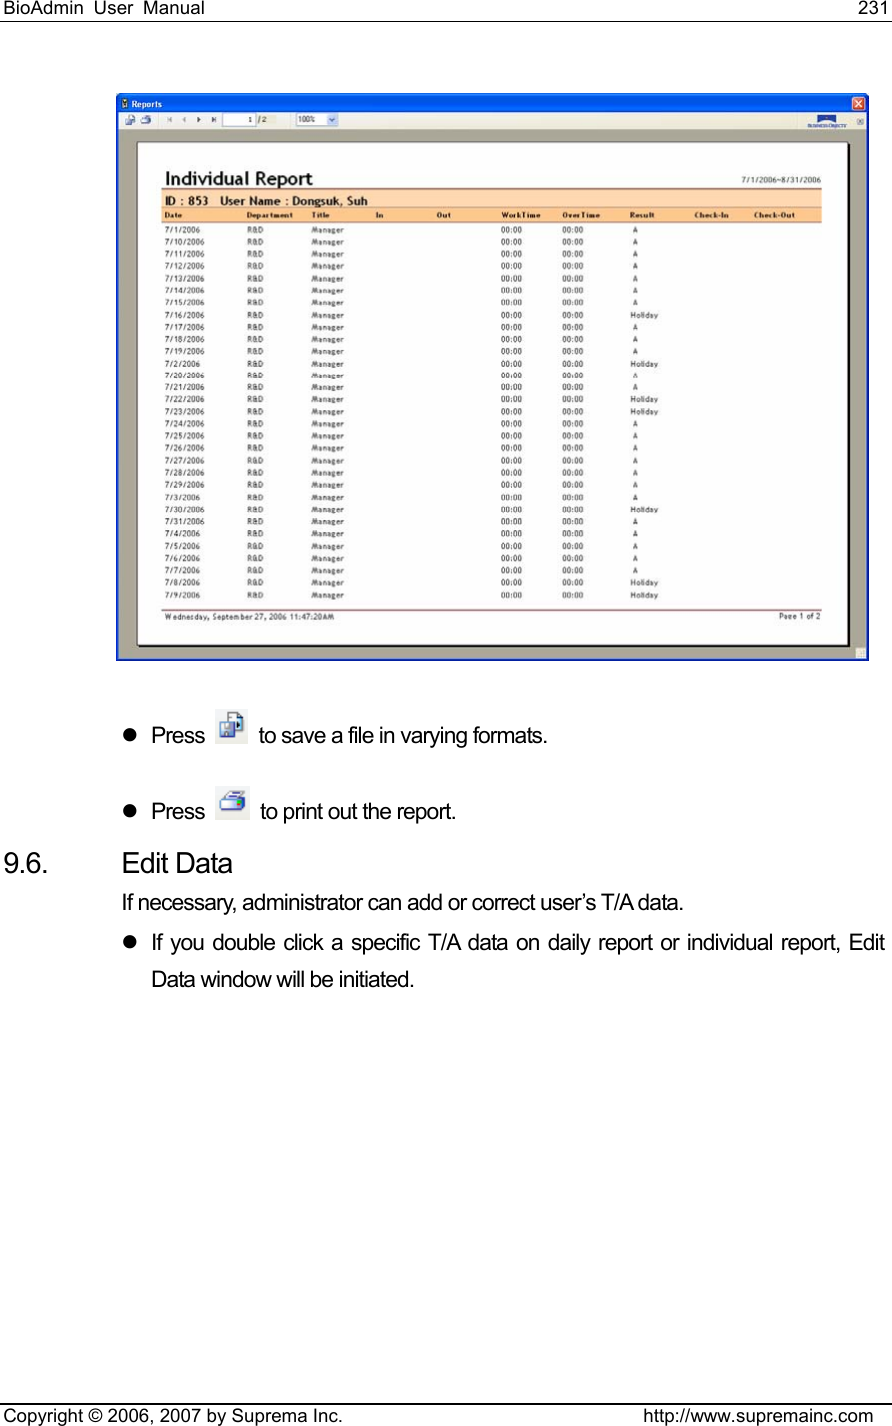
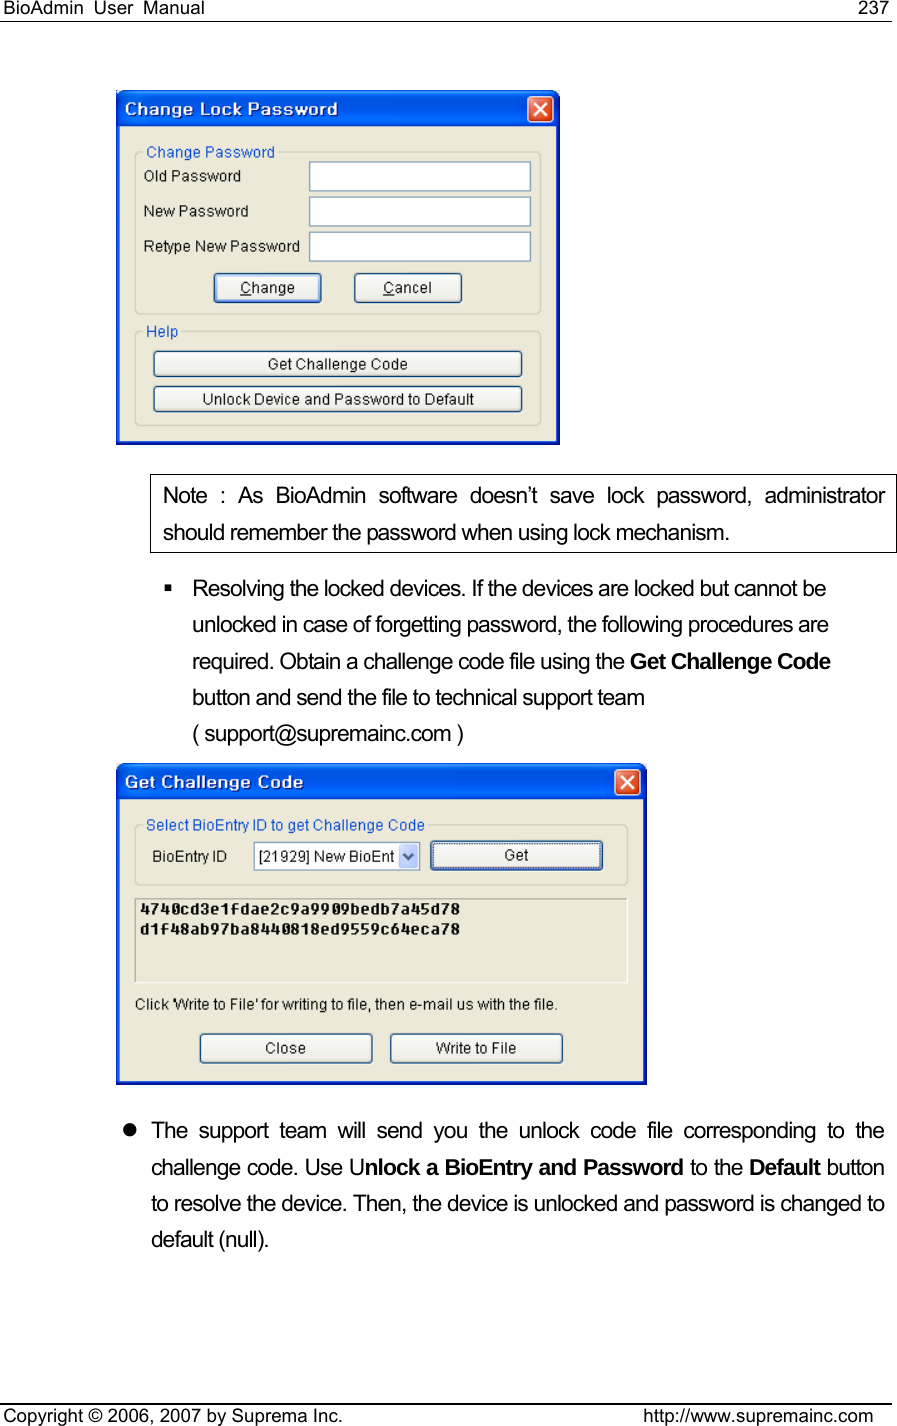
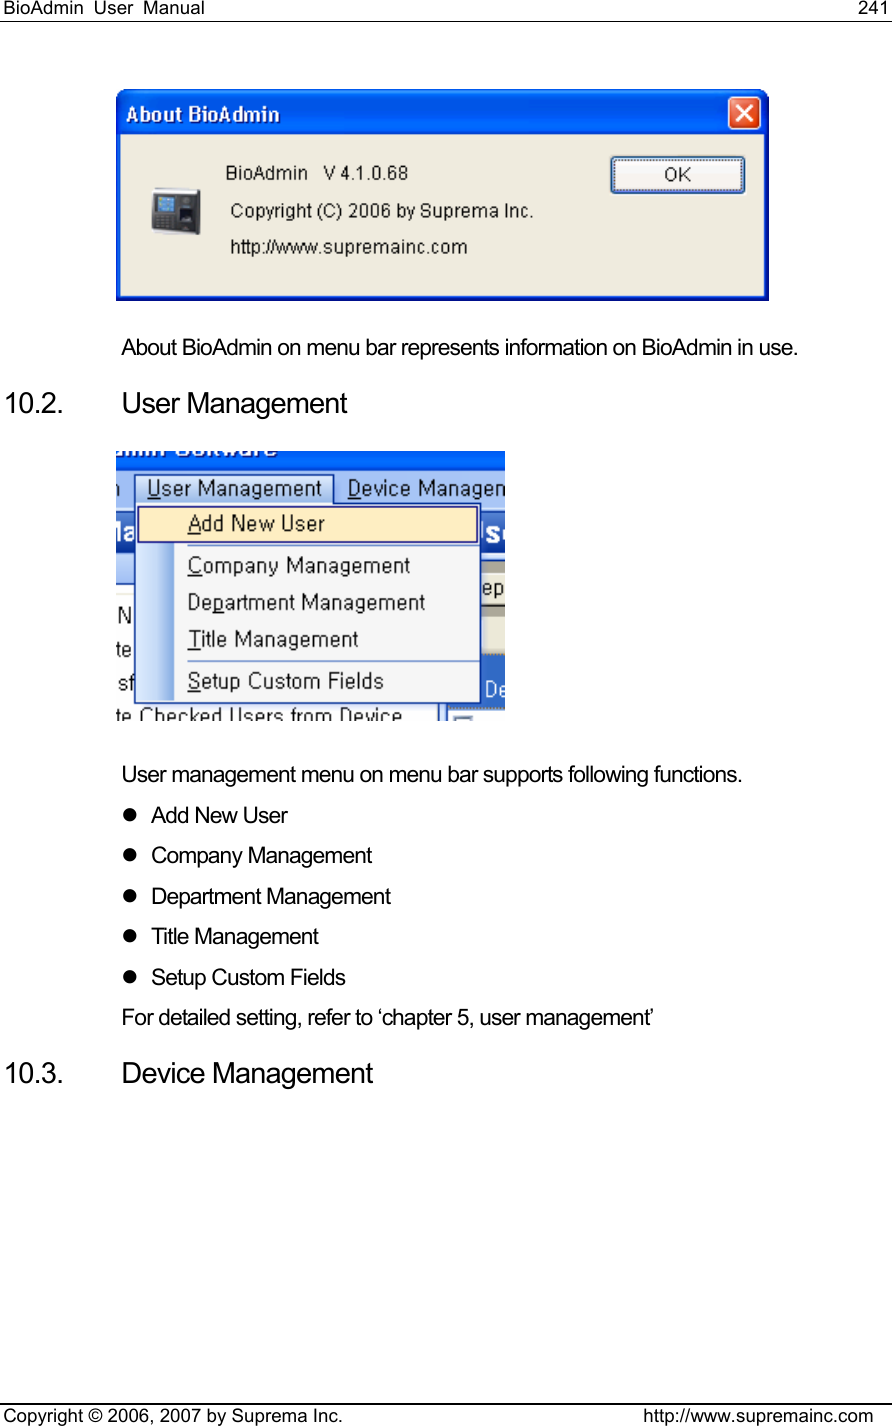
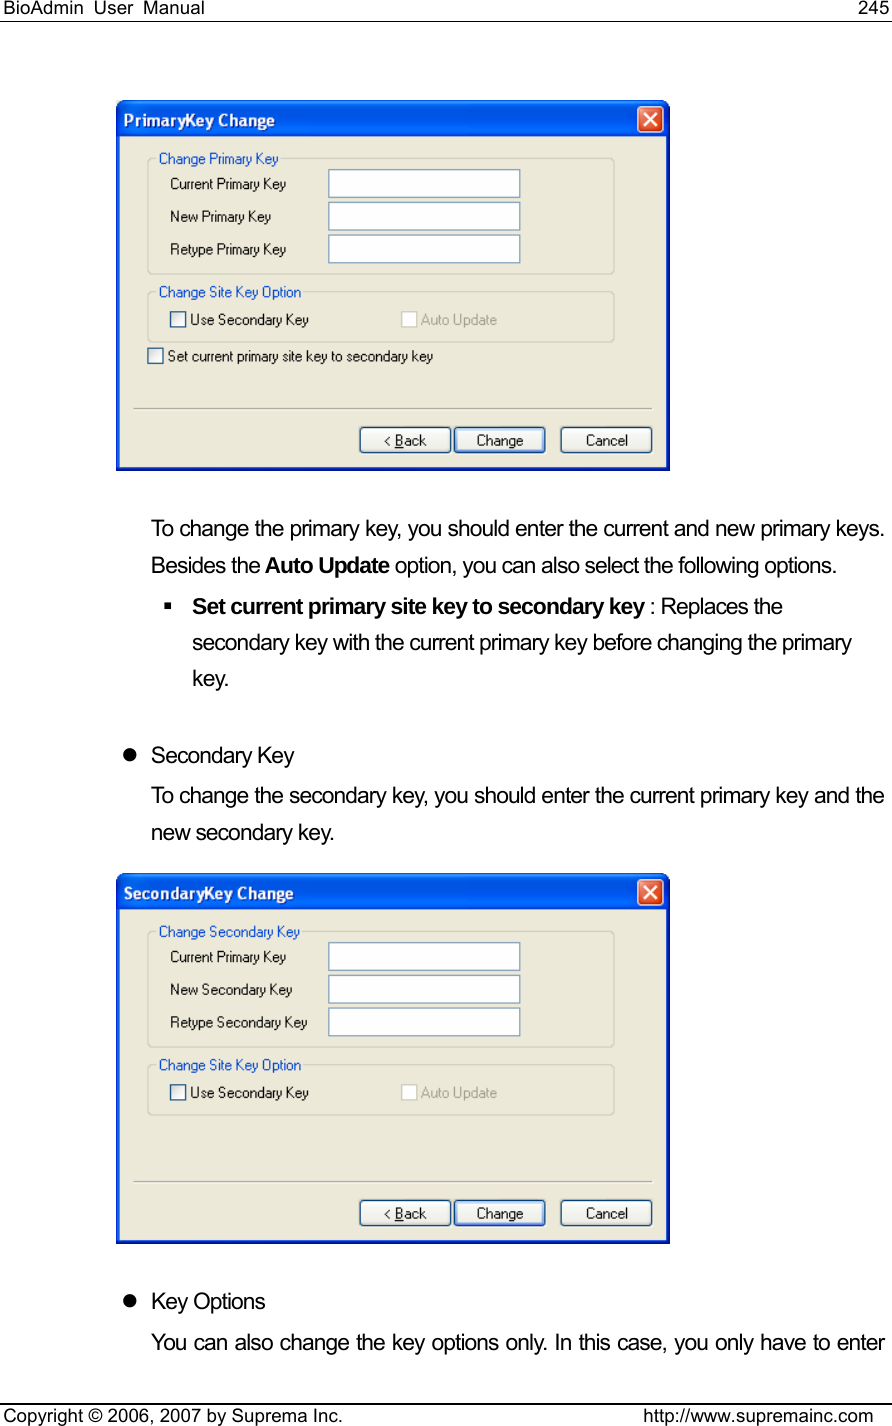
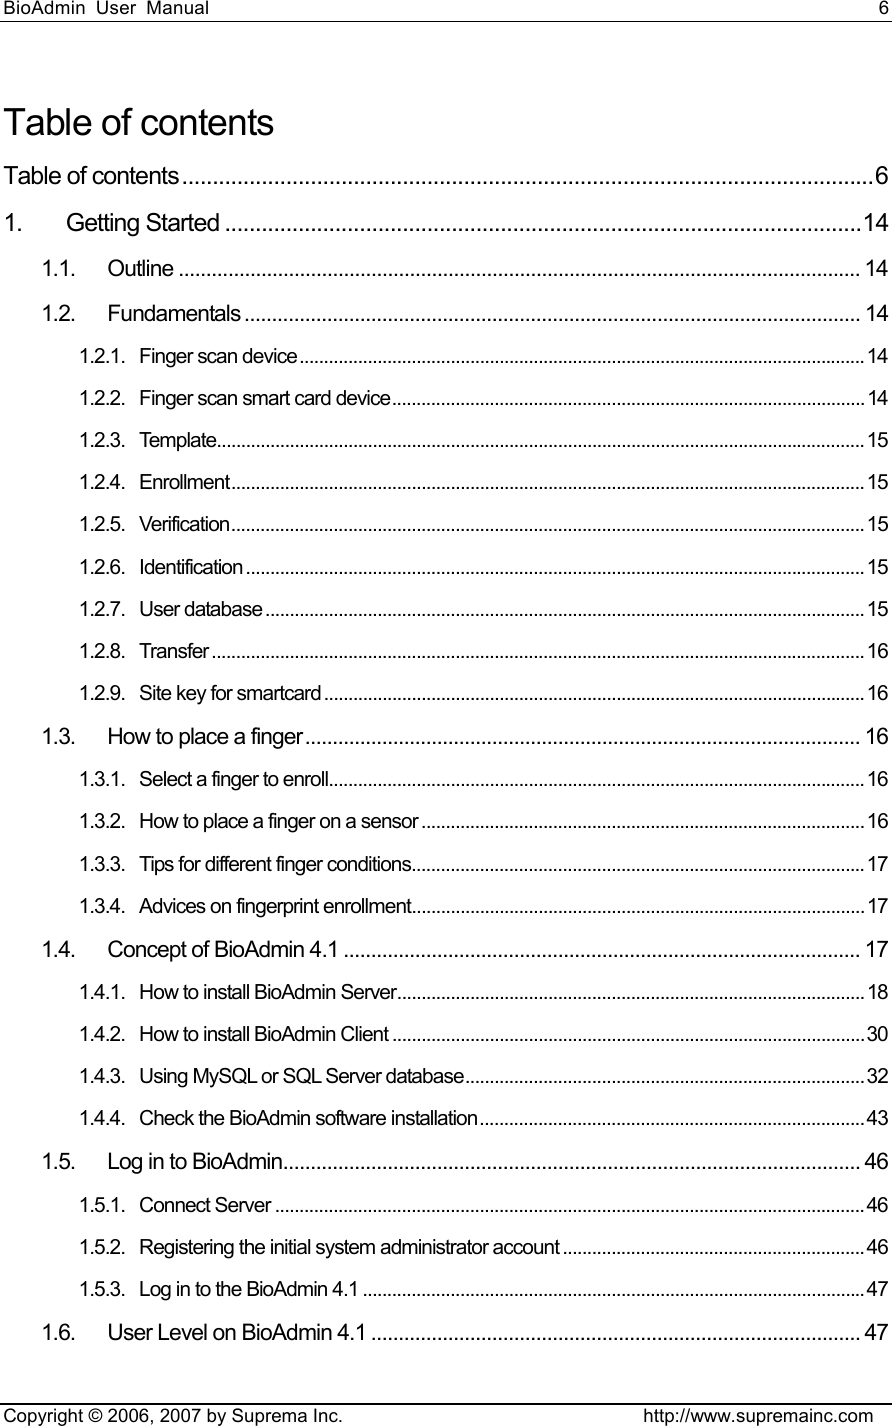
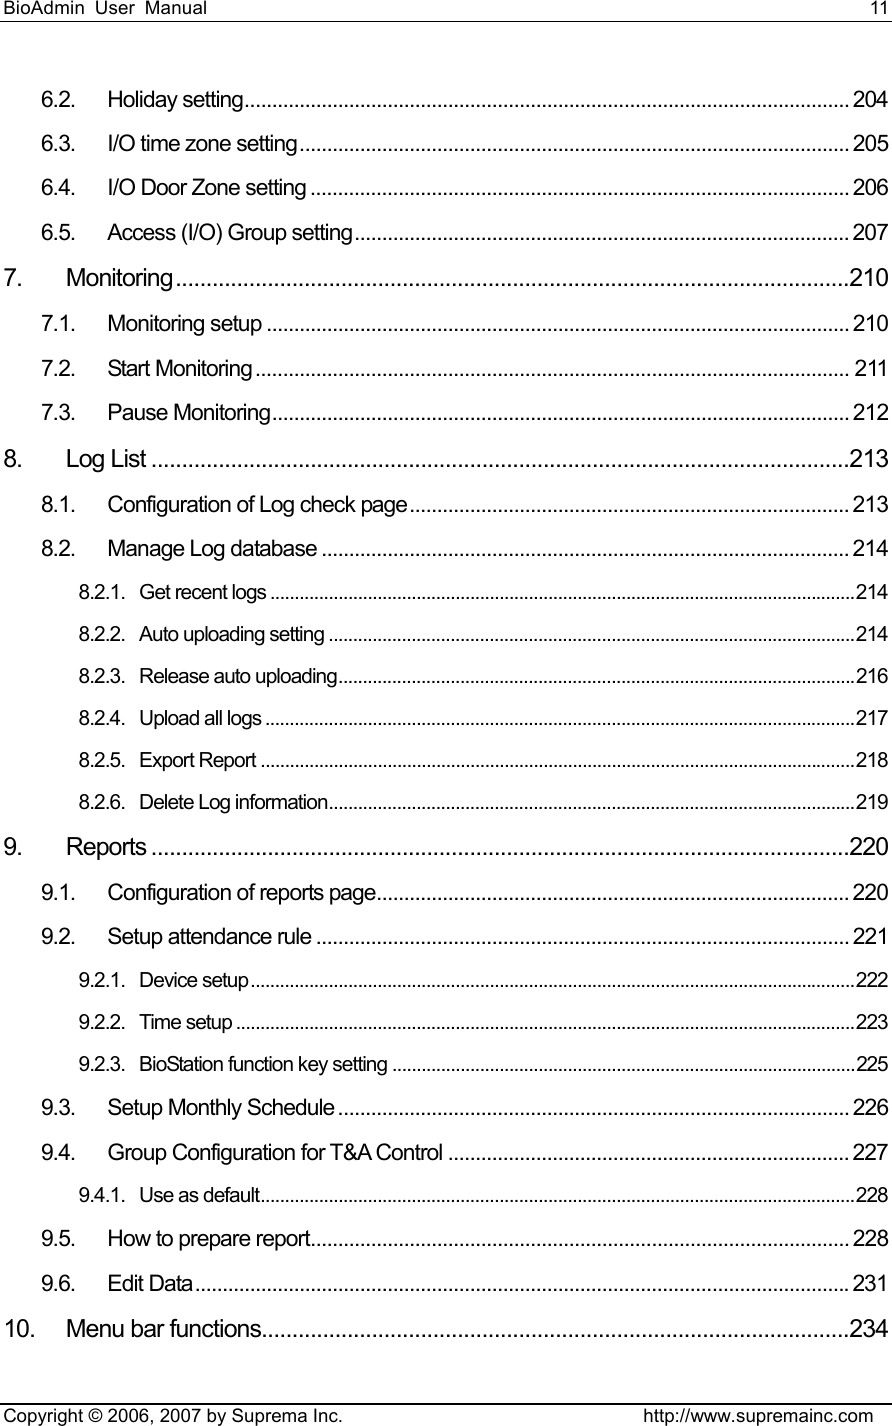
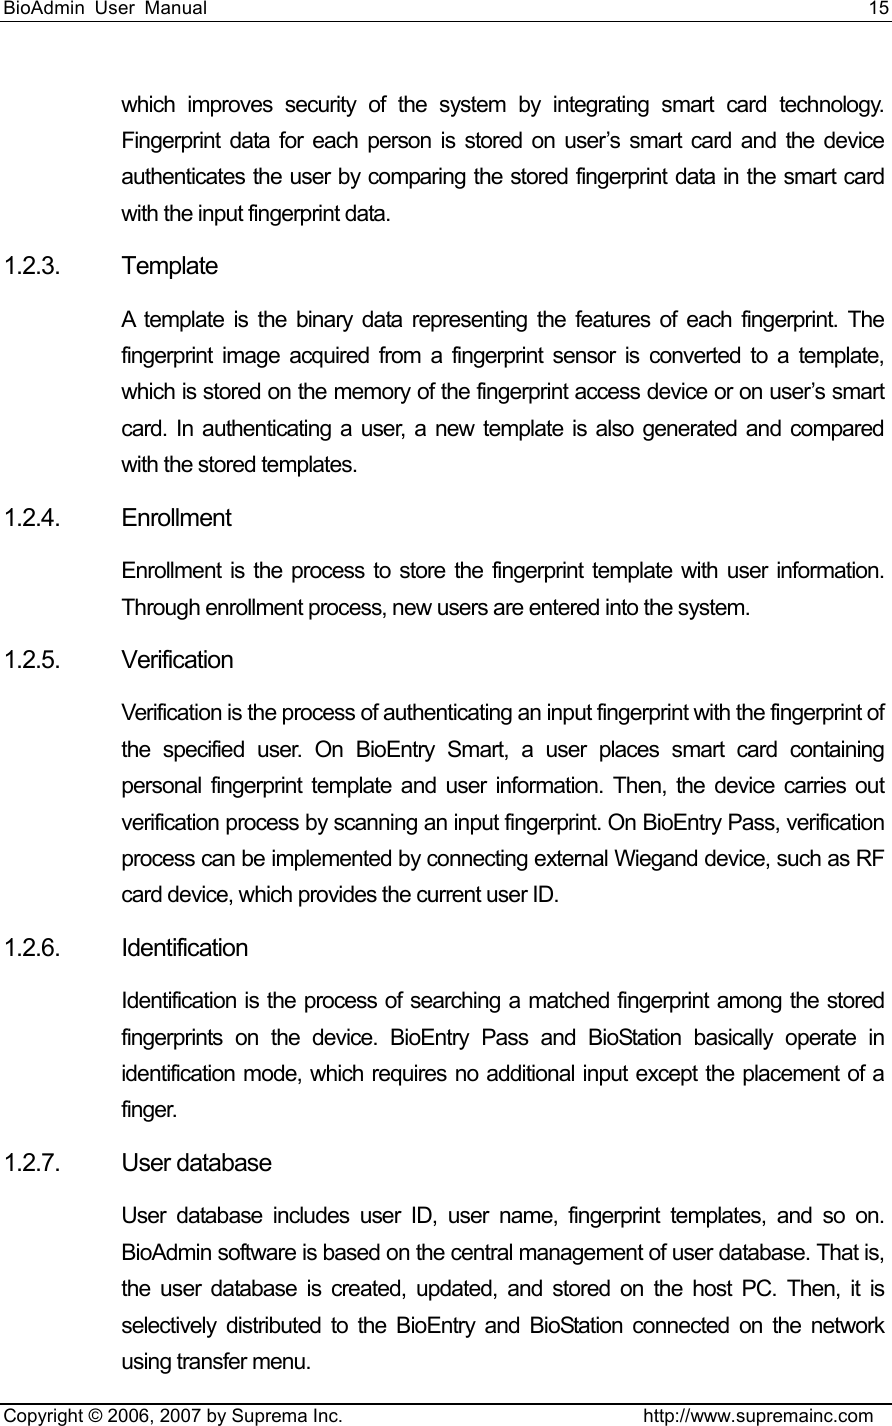
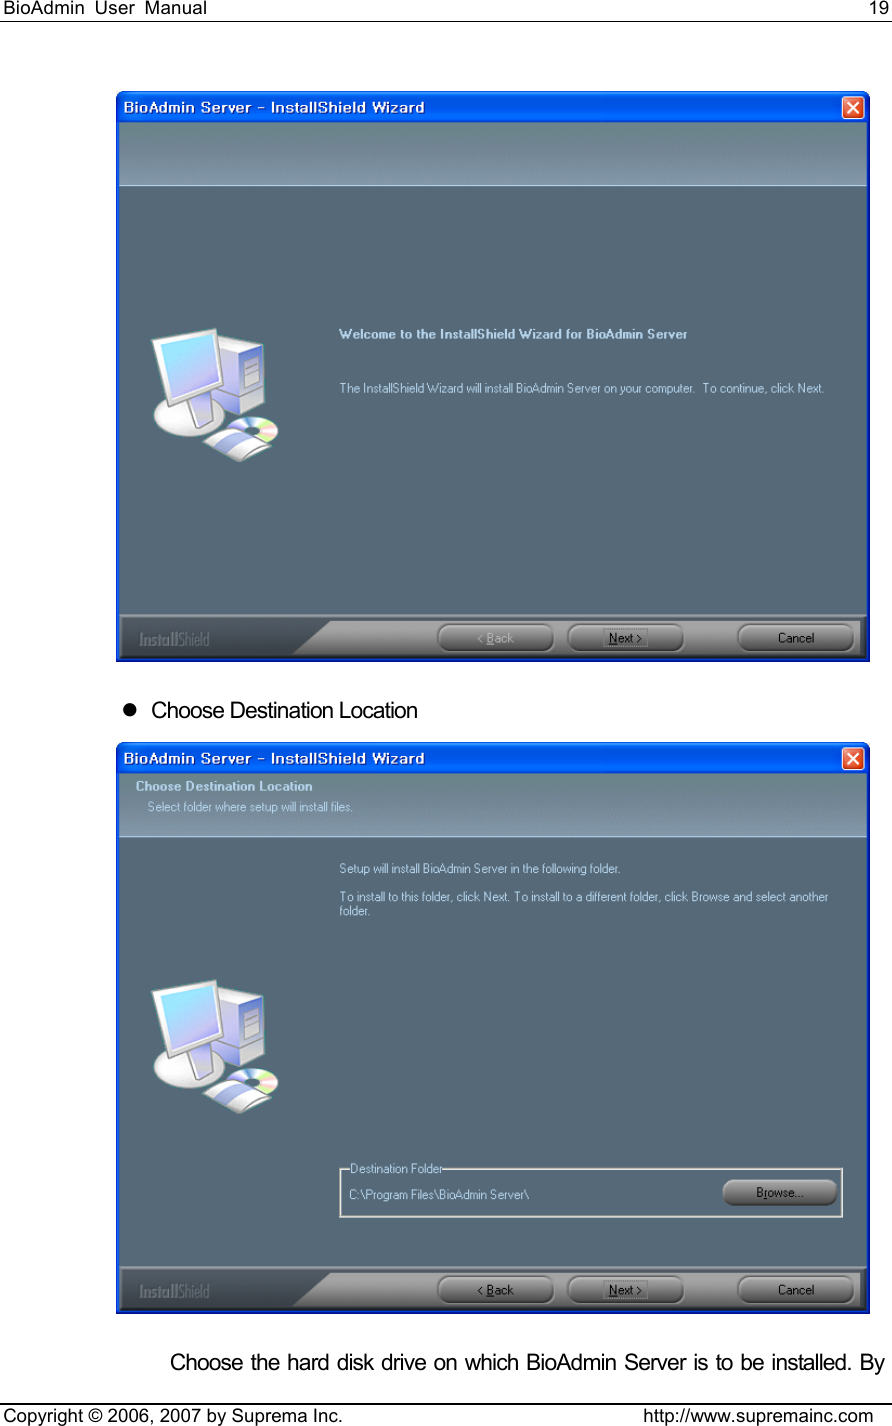
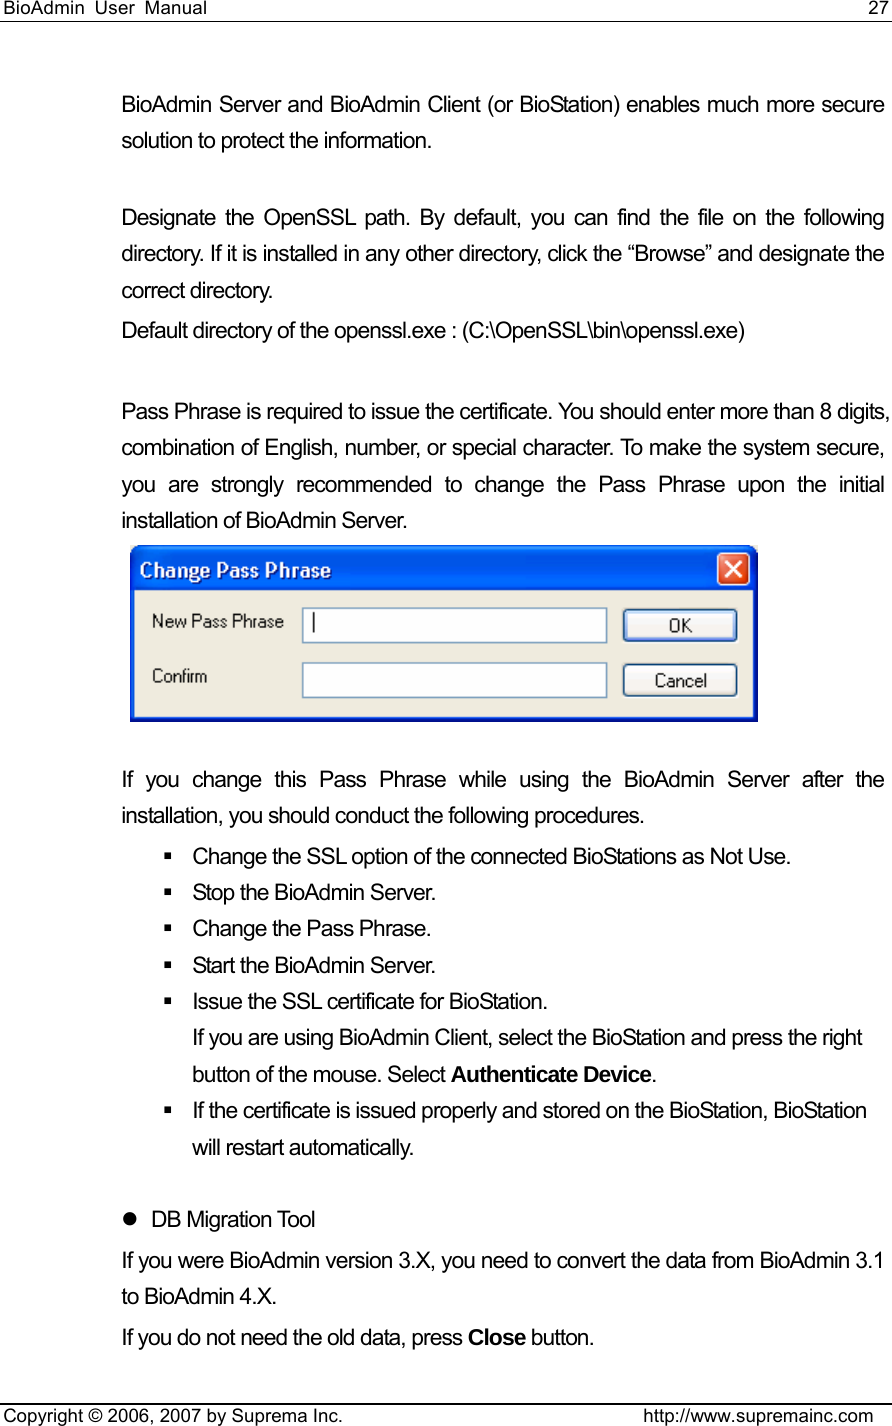
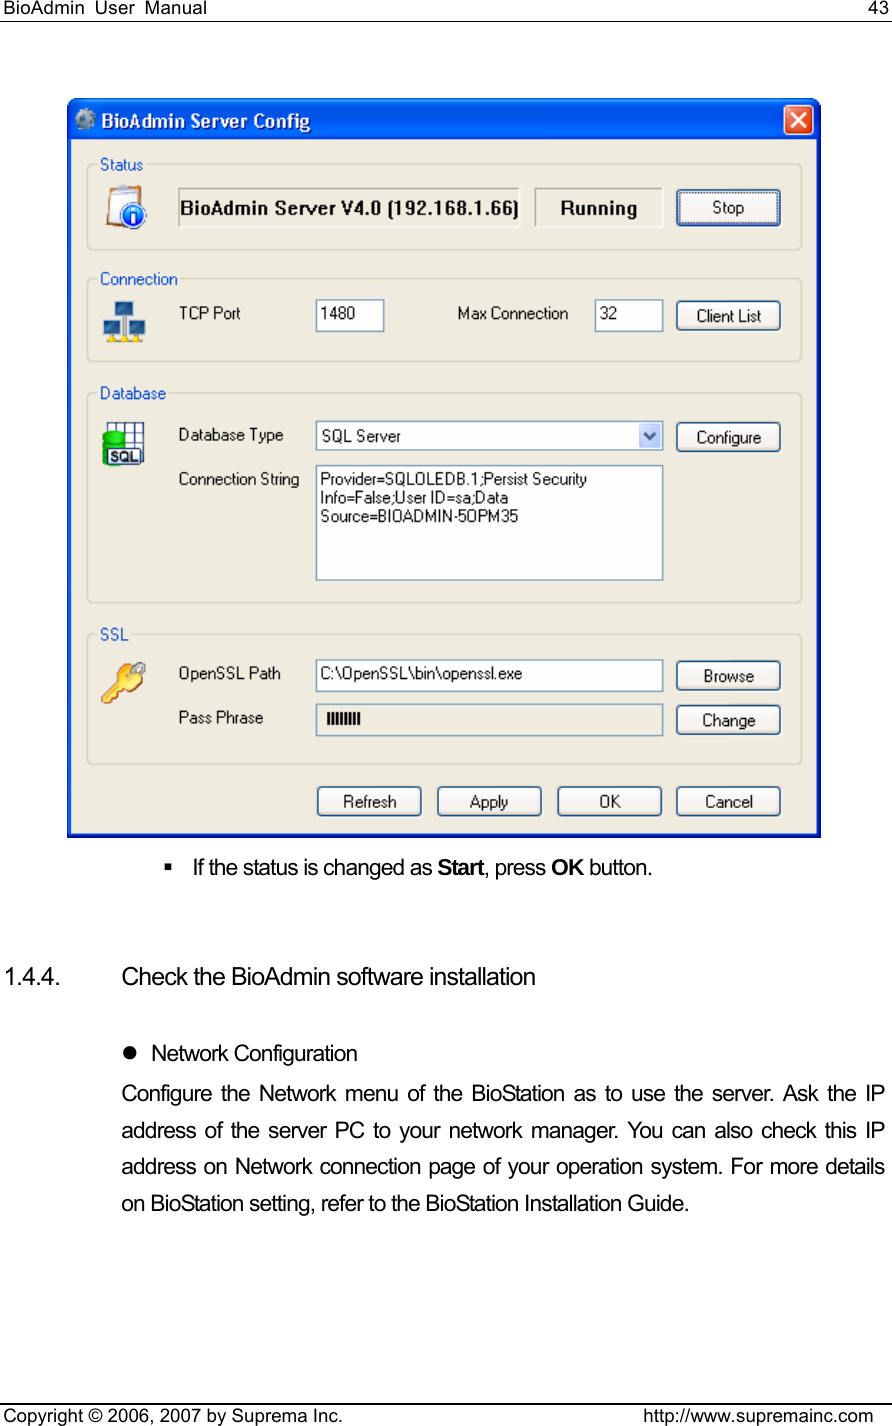
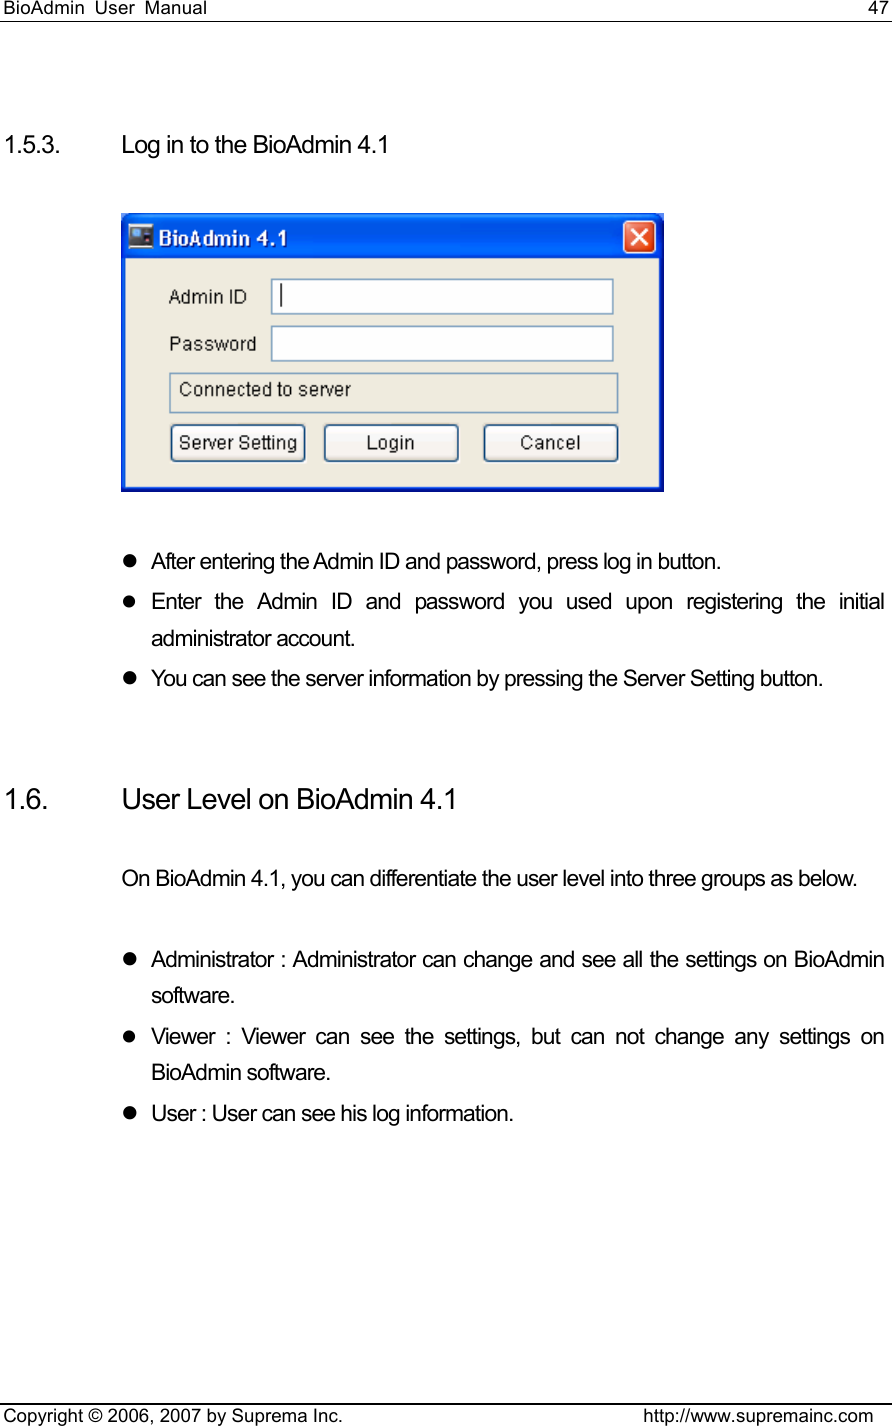
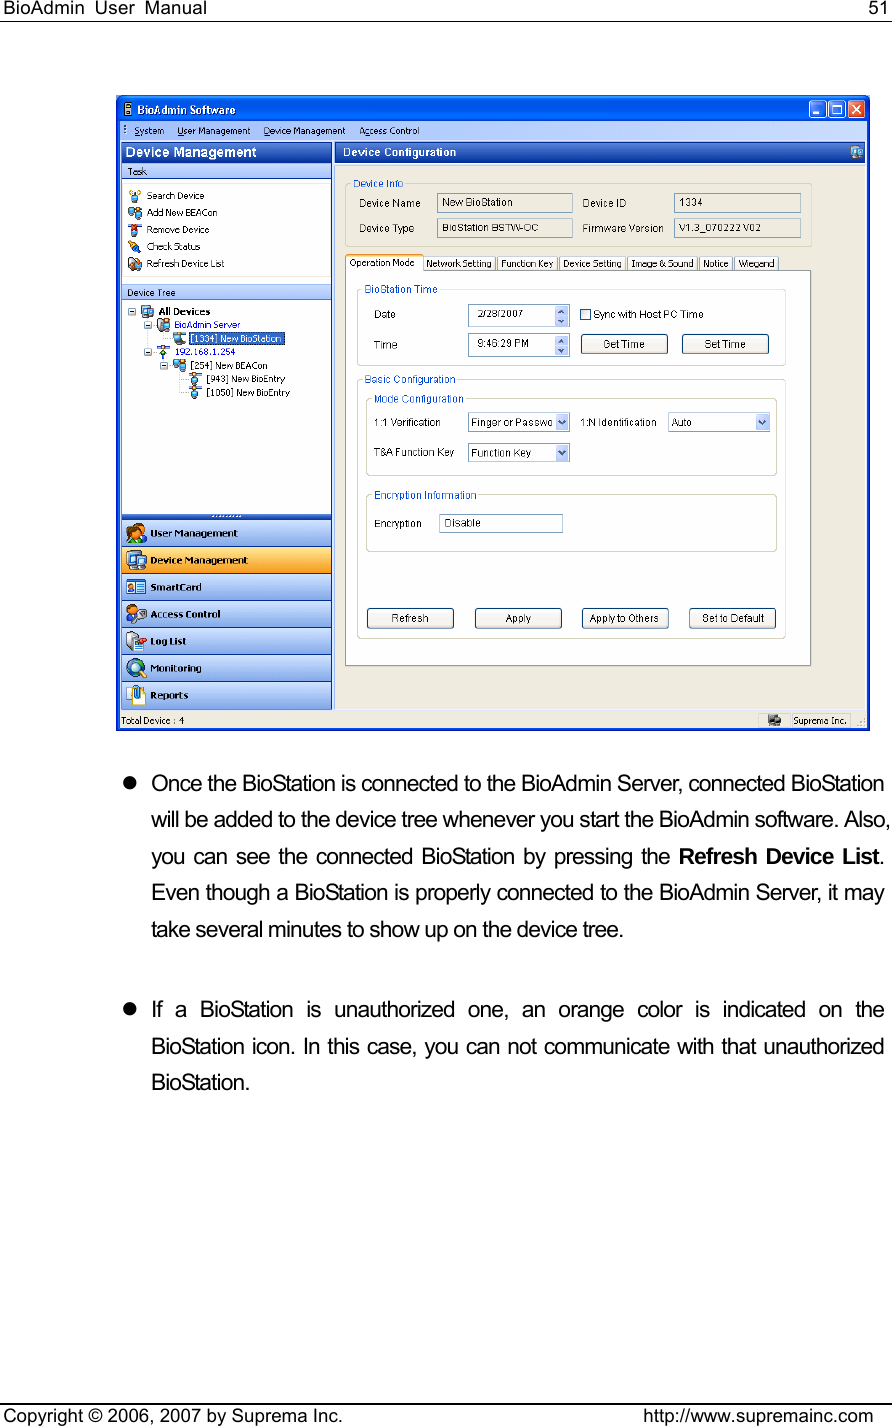
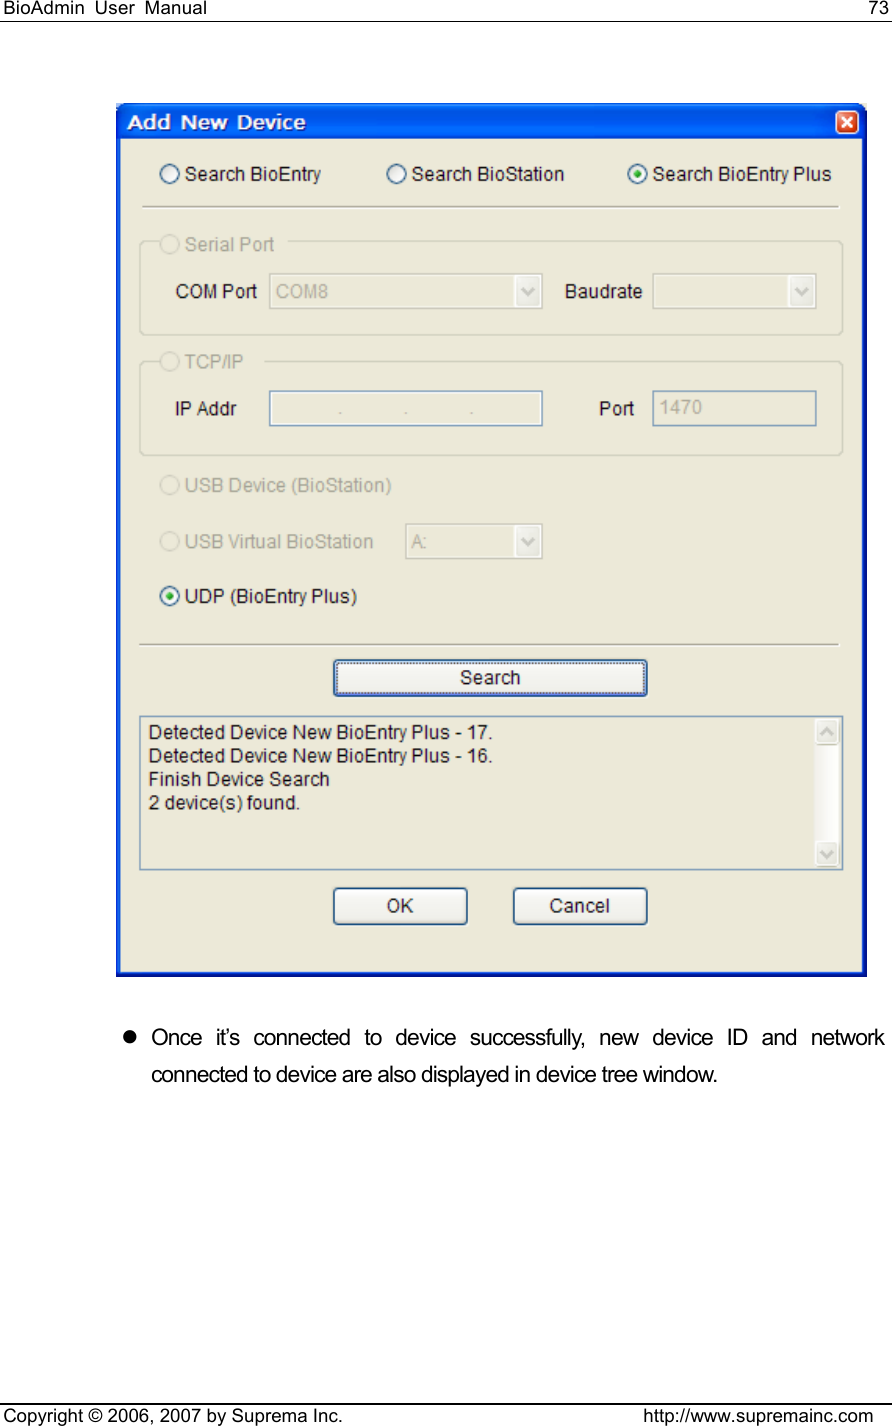
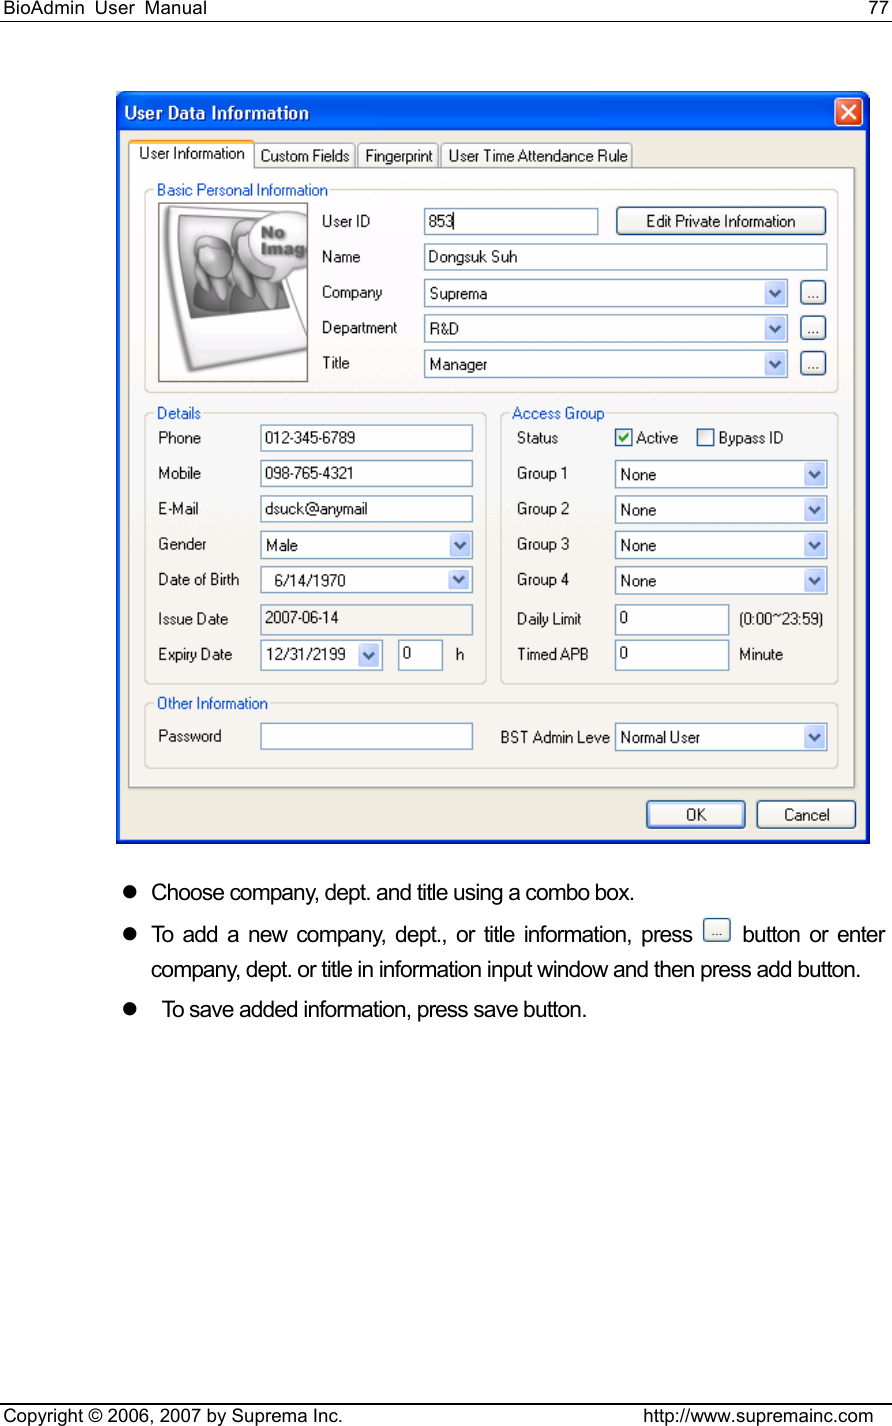
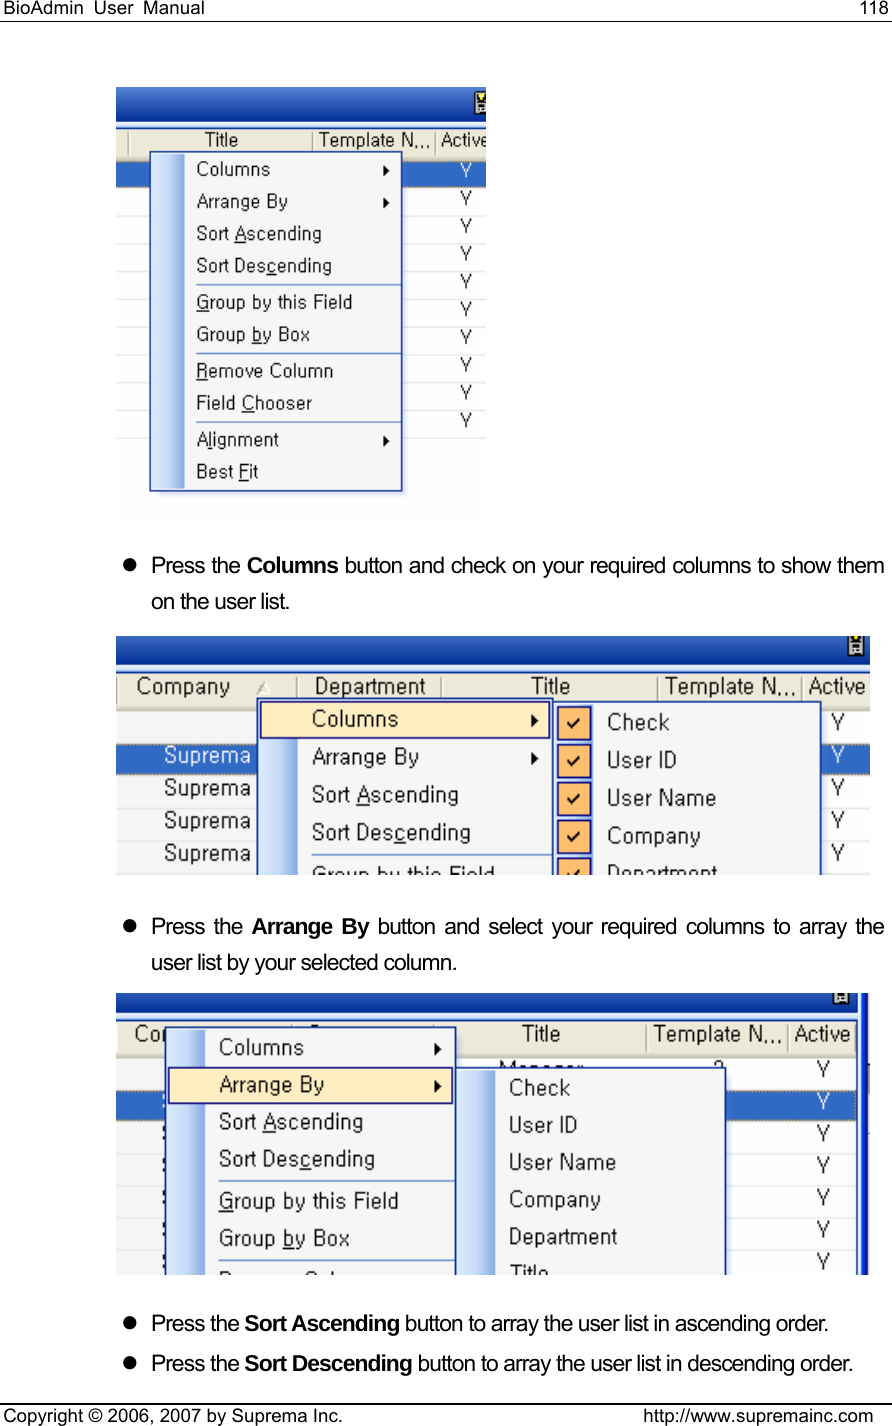
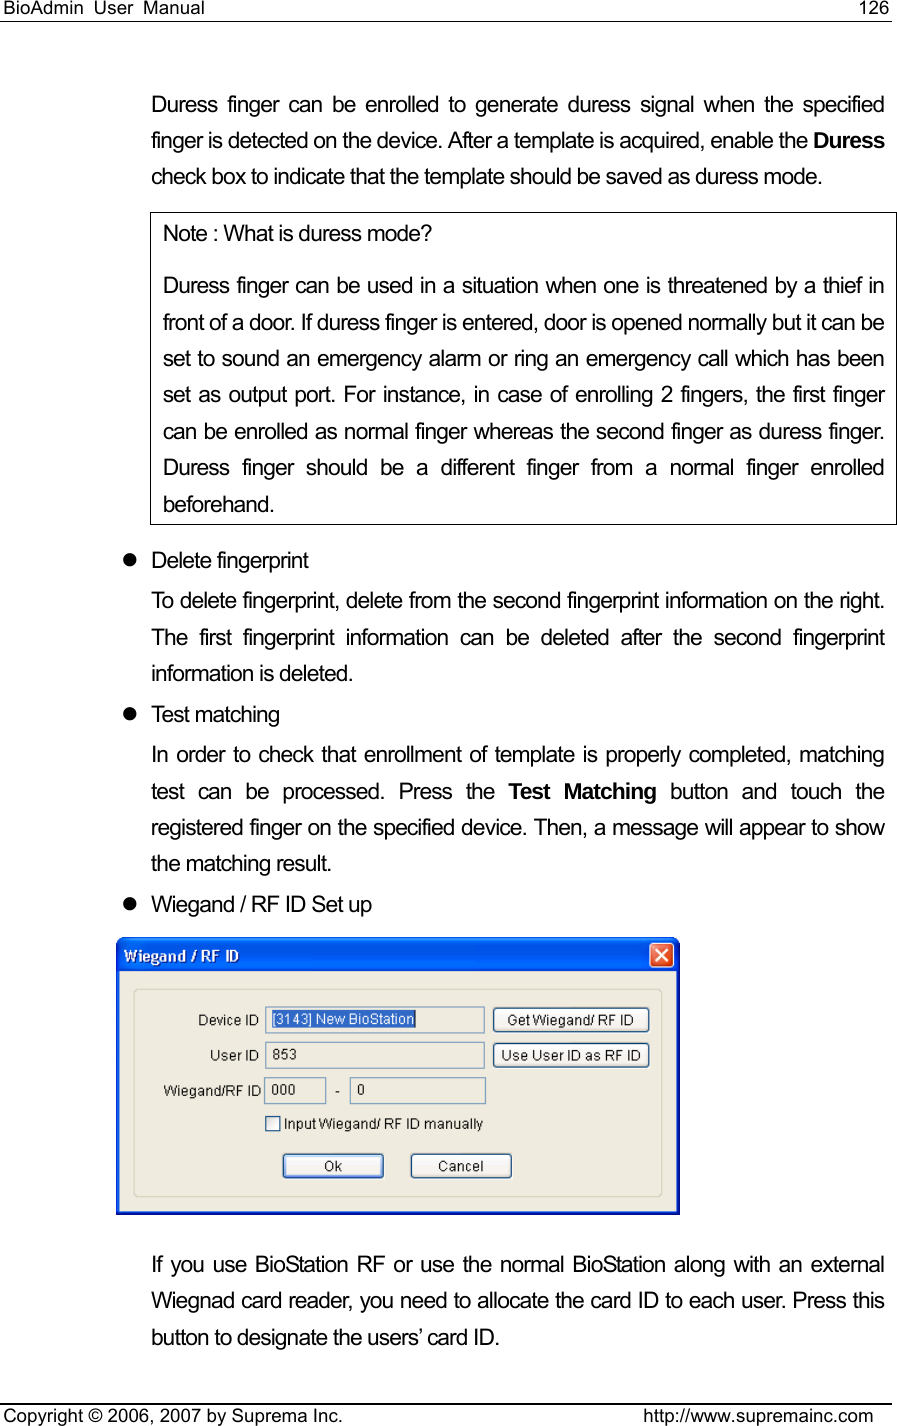
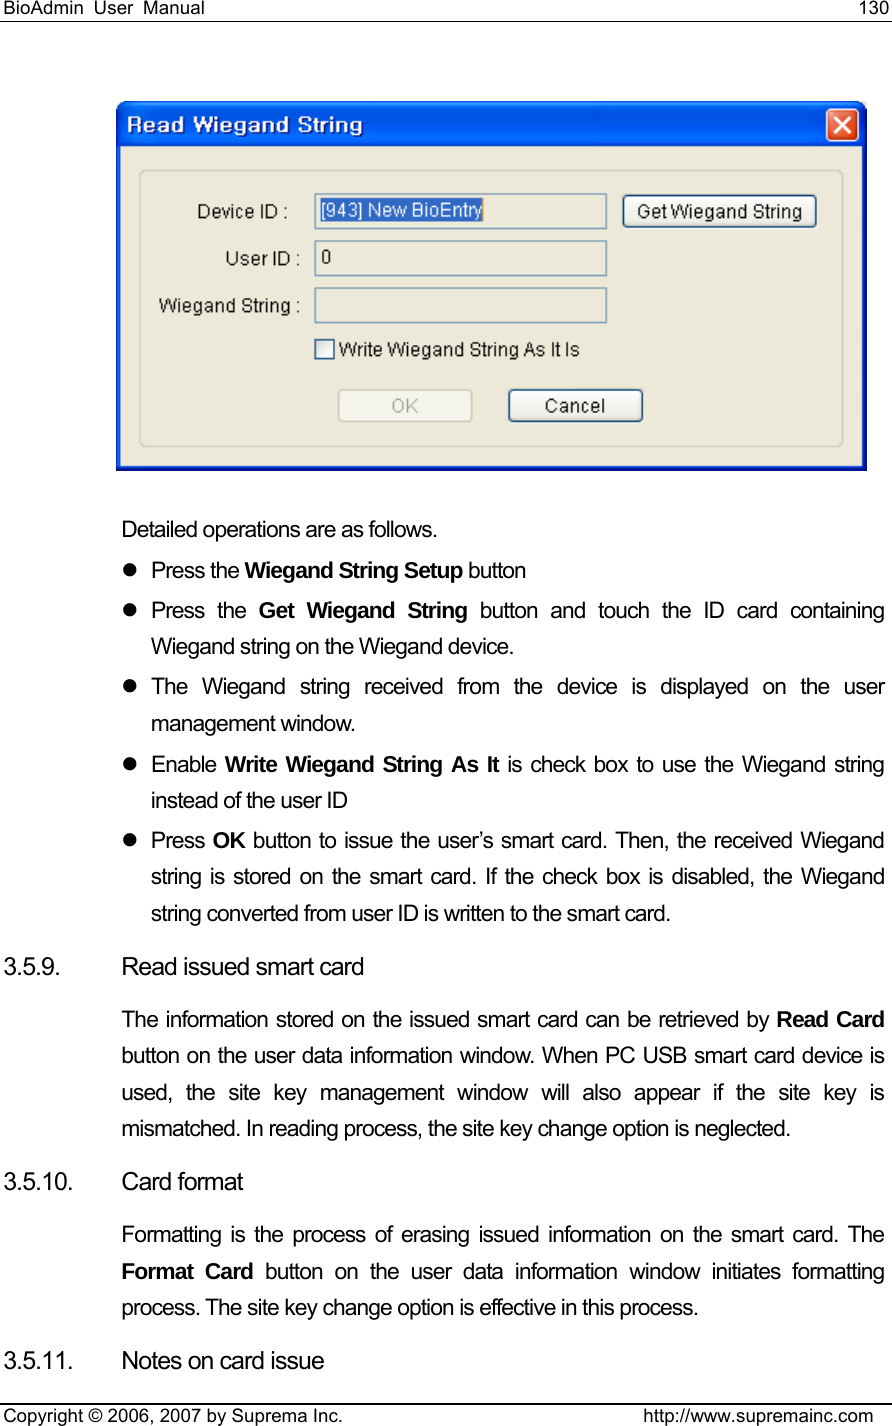
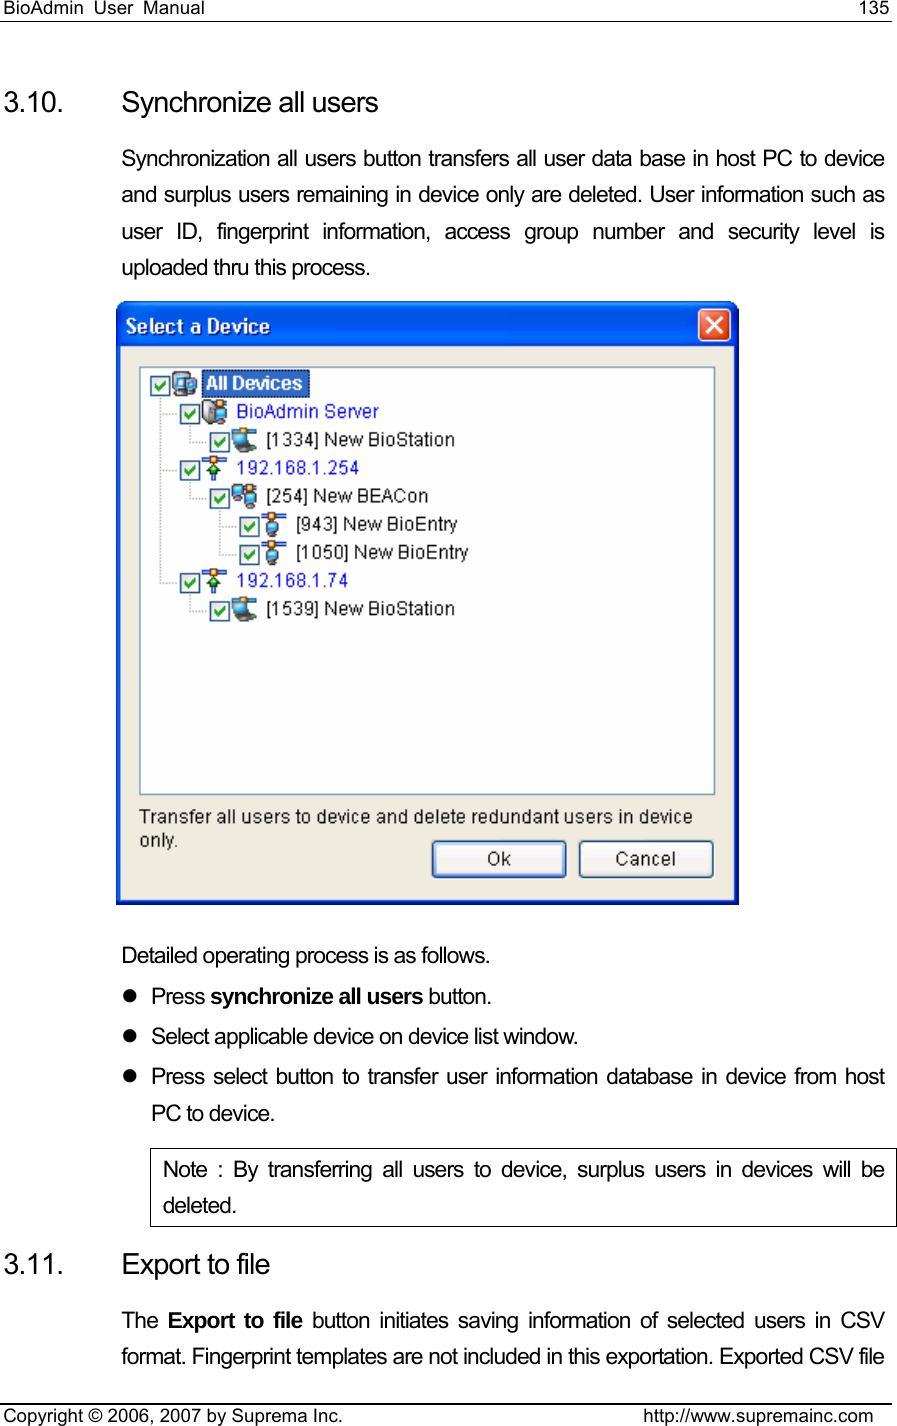
![BioAdmin User Manual 143 Copyright © 2006, 2007 by Suprema Inc. http://www.supremainc.com Once device is linked correctly with network, searched device ID appears with bracket [****] under port on device tree window. 4.1.3. USB device In case of connecting BioStation with host PC by USB, select USB device and search.](https://usermanual.wiki/Suprema/BIOENTRYPLUS/User-Guide-840626-Page-143.png)