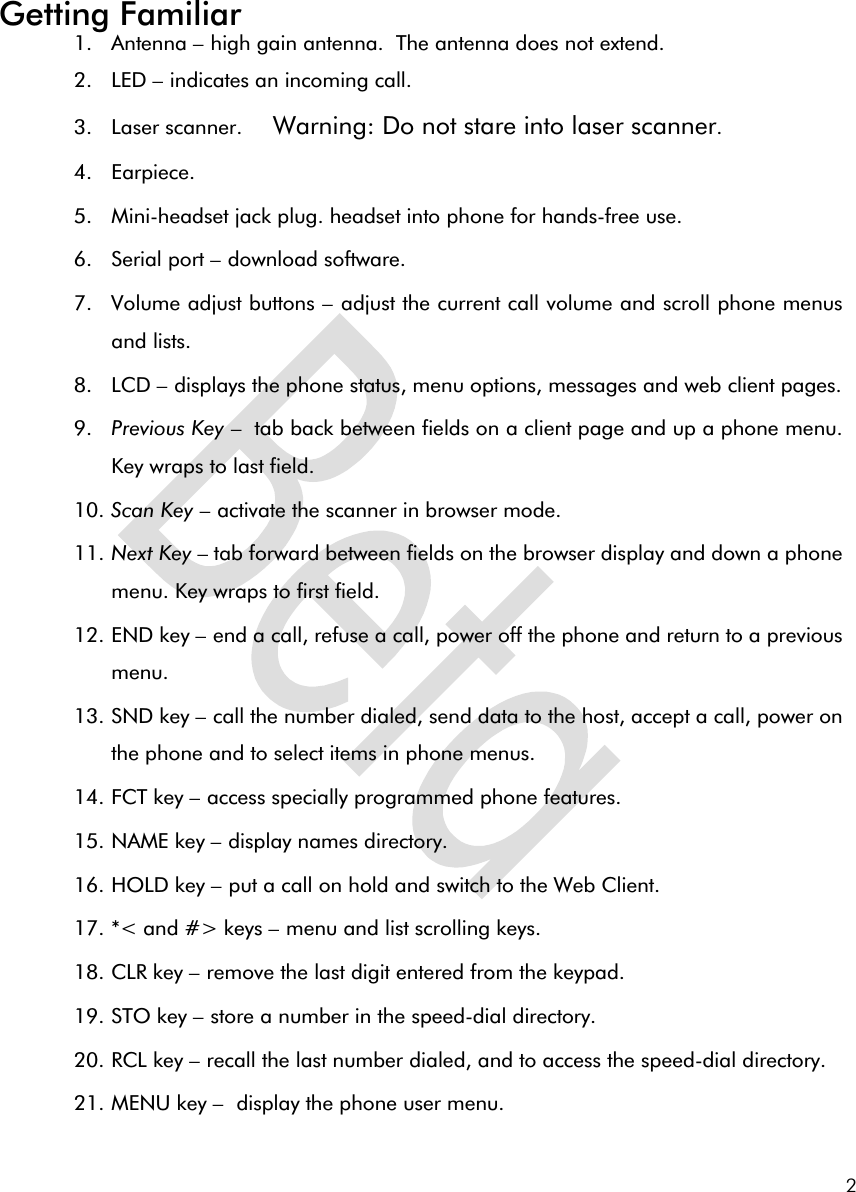
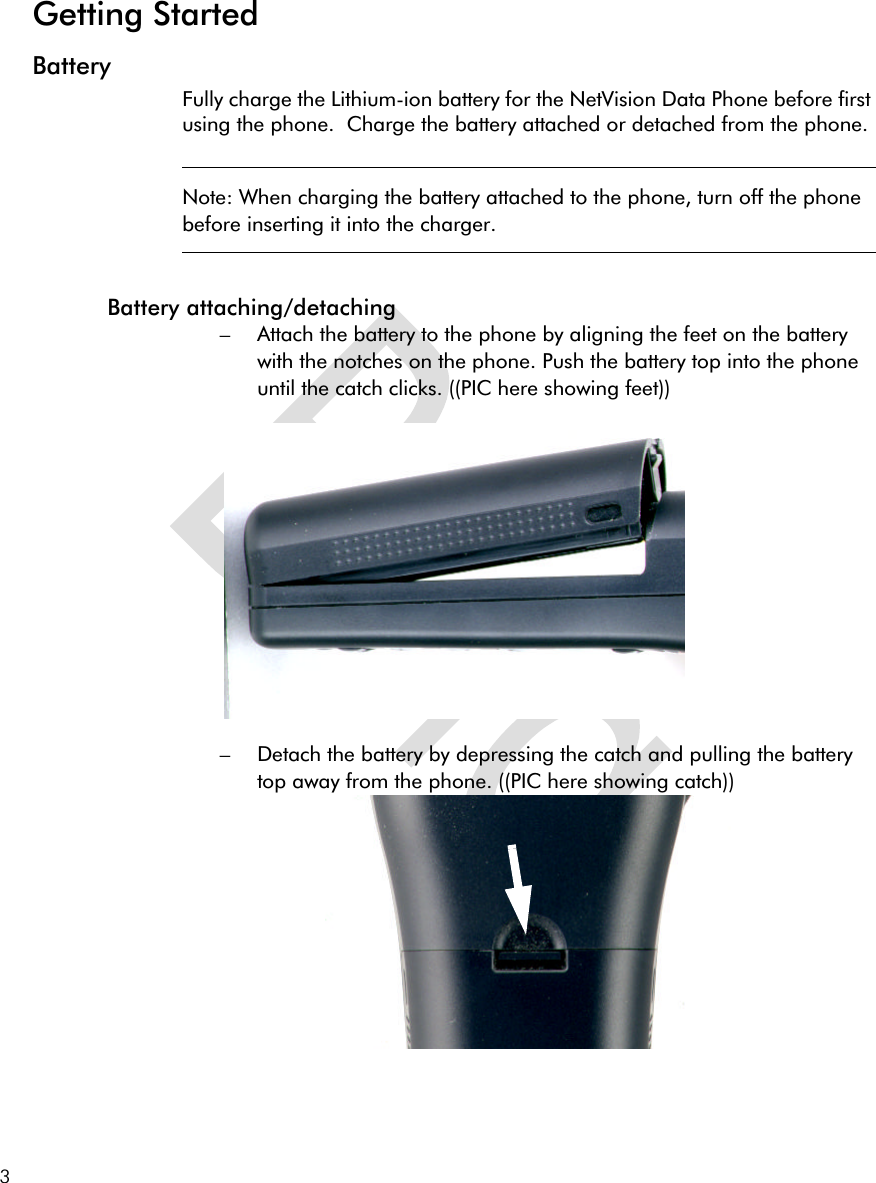
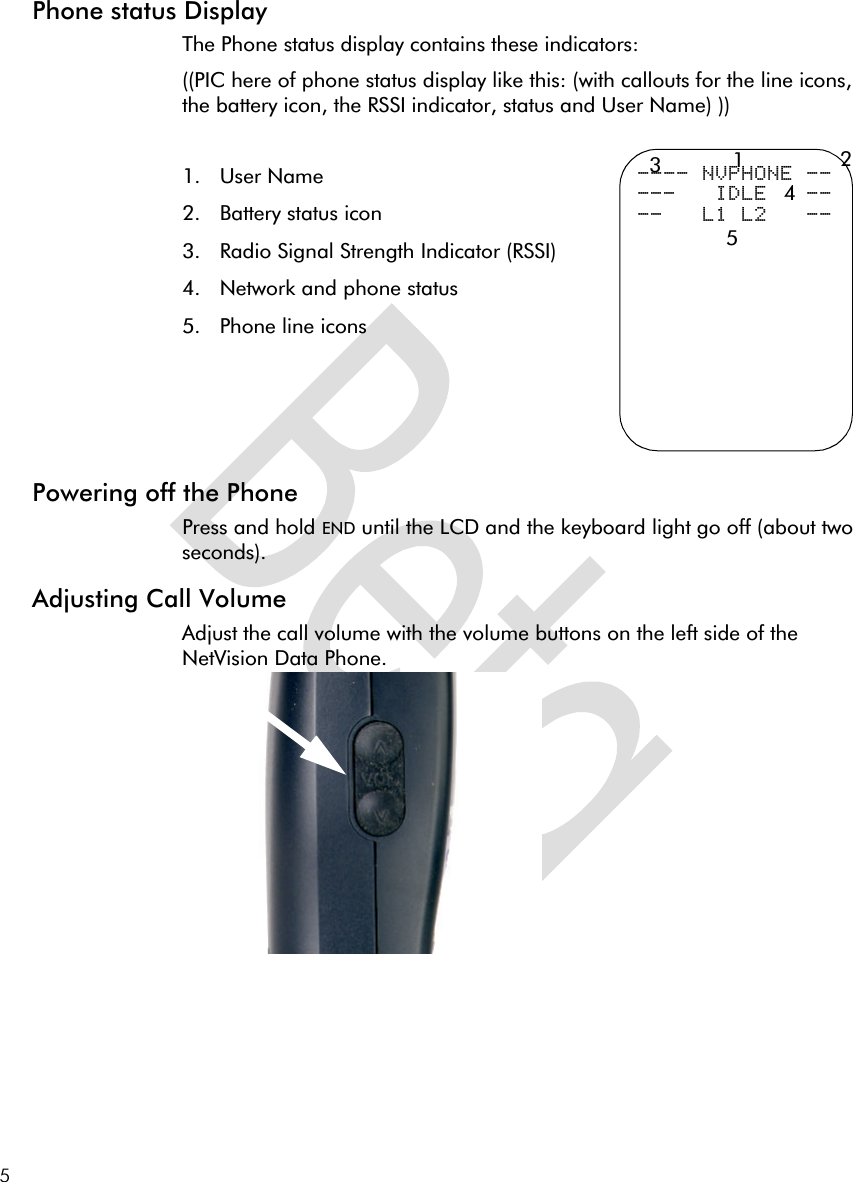
Symbol Technologies ND3010 User Manual UGBETA
Symbol Technologies Inc UGBETA
UserManual.wiki
>
Symbol Technologies
>
ND3010 User Manual
H9PND3010 Users Manual
Navigation menu
Upload a User Manual
Namespaces
Wiki Guide
HTML
PDF
Info
Views
User Manual
Discussion / Help
Navigation


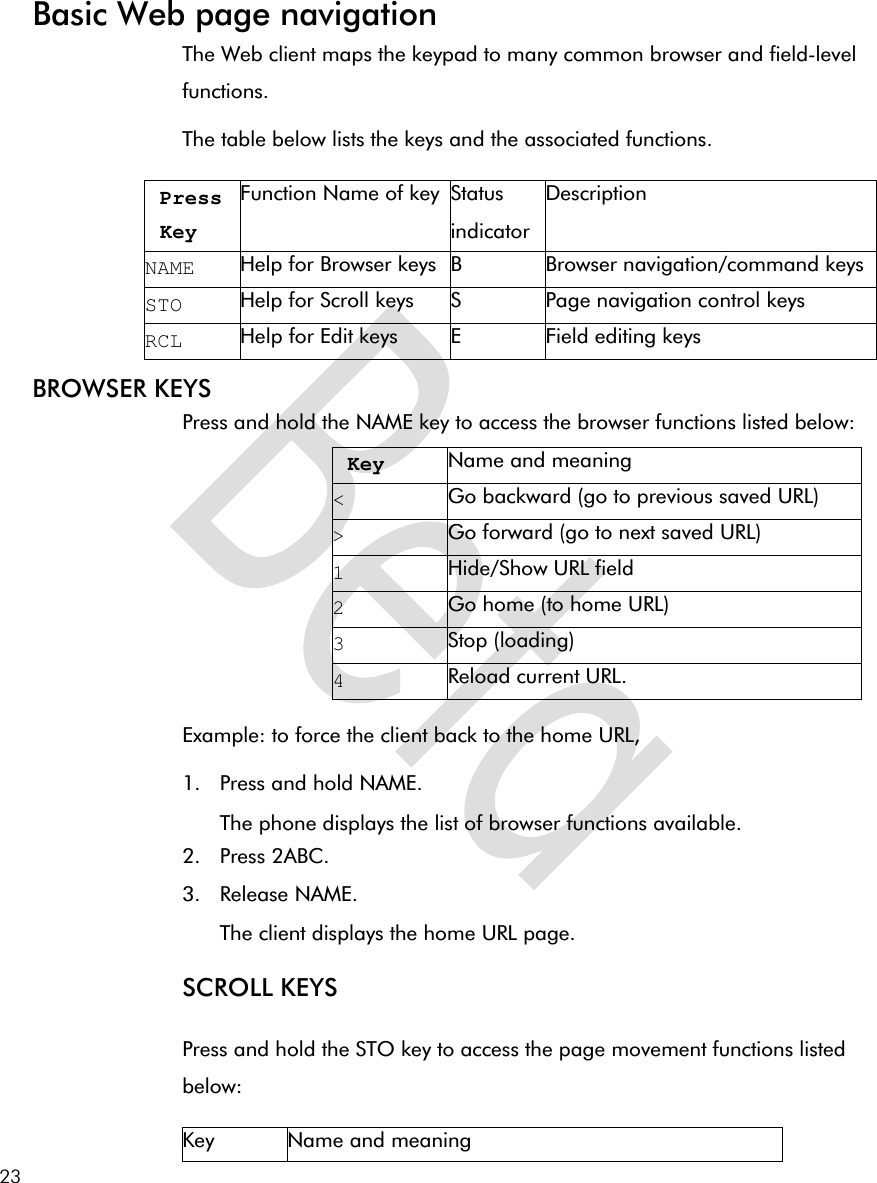
![16with a |. L H[-----|----]7. Scroll and select the desired volume level.8. Press SND to set the new volume level. Press END to cancel.Setting the Ring VolumeUsers can set the ring volume that signals an incoming call.To adjust the ring volume:1. Press MENU. The phone displays the Main menu.2. Use the *< and #> keys to scroll through the items.3. Select User Options and press SND. The phone displays the NetVision Data Phone user options.4. Scroll through the user options.5. Select Ring Volume and press SND. The phone displays a slider control with the current ring volume marked with a |.L H[-----|----]6. Scroll and select the desired volume level.7. Press SND to set the new volume level. Press END to cancel.Keypad Locking1. Lock the keypad to prevent accidental calls and unnecessary battery power consumption. To lock the keypad:2. Press MENU. Scroll the list to select User Options. 3. Press SND.4. Scroll the list to Keypad Lock.5. Press SND.6. Use scroll keys to toggle to Enabled.7. Press SND. 8. Press END to return to status display. After about five seconds the phone displays Locked for status. To unlock, press the SND key prior to entering any other keys once the phone enters power save mode. Pressing the SND unlocks the keypad and performs no telephony functions.](https://usermanual.wiki/Symbol-Technologies/ND3010/User-Guide-32958-Page-19.png)
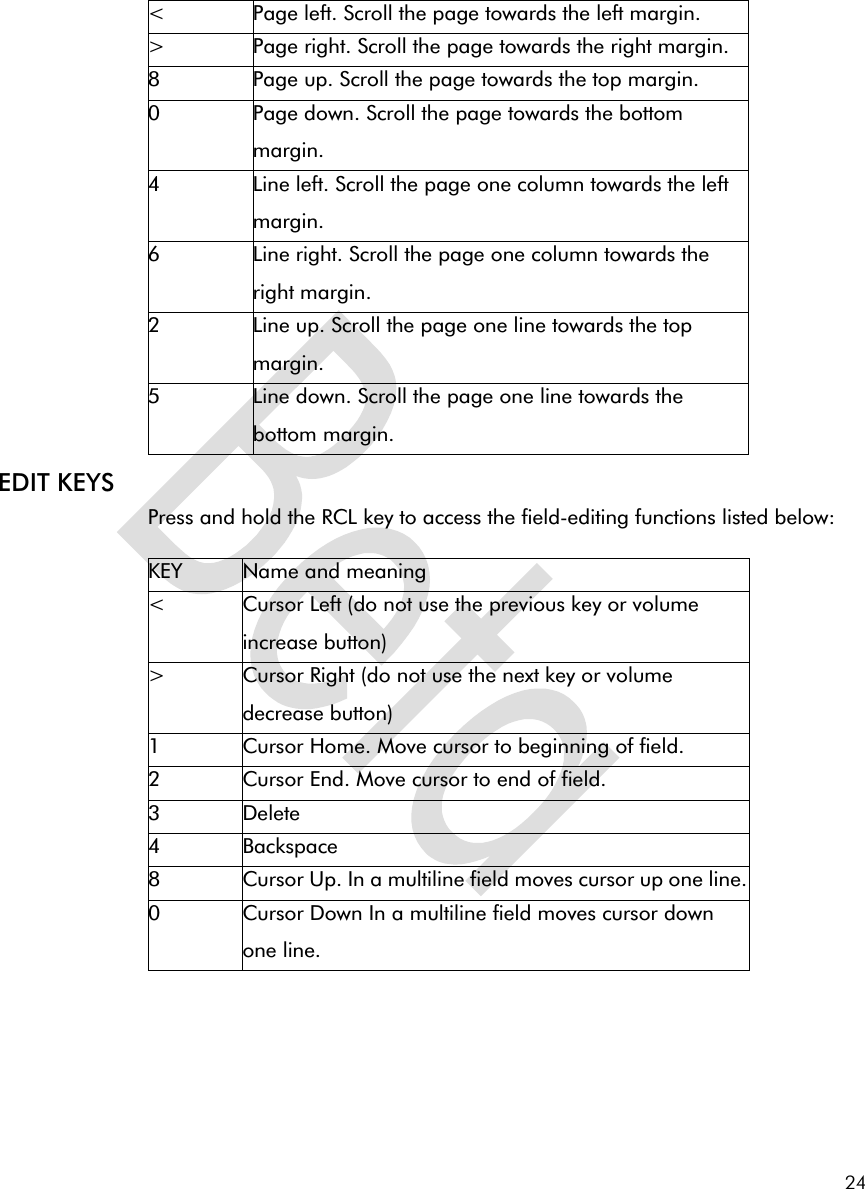
![17Any incoming call automatically unlocks the keypad, so that pressing SND (or other key in any key answer mode) answers the call. To unlock the keypad:1. Press MENU. Scroll the list to select User Options. 2. Press SND.3. Scroll the list to Keypad Lock.4. Press SND.5. Use scroll keys to toggle to Disabled.6. Press SND. 7. Press END to return to status display. After about five seconds the phone displays Locked for status. Setting the LCD ContrastUsers can configure the NetVision Data Phone LCD for different contrast (shading) levels.To adjust the contrast: 1. Press MENU. The phone displays the Main menu.2. Use the *< and #> keys to scroll through the items.3. Select User Options and press SND. The phone displays the NetVision Data Phone user options.4. Scroll through the user options.5. Select Contrast and press SND. The phone displays a slider control with current contrast value marked with a |.L H[-----|----]6. Scroll to select the desired contrast level. Use L for lighter and H for darker. The contrast changes as the user adjusts the slider.7. Press SND to set the contrast setting. Press END to cancel.](https://usermanual.wiki/Symbol-Technologies/ND3010/User-Guide-32958-Page-20.png)
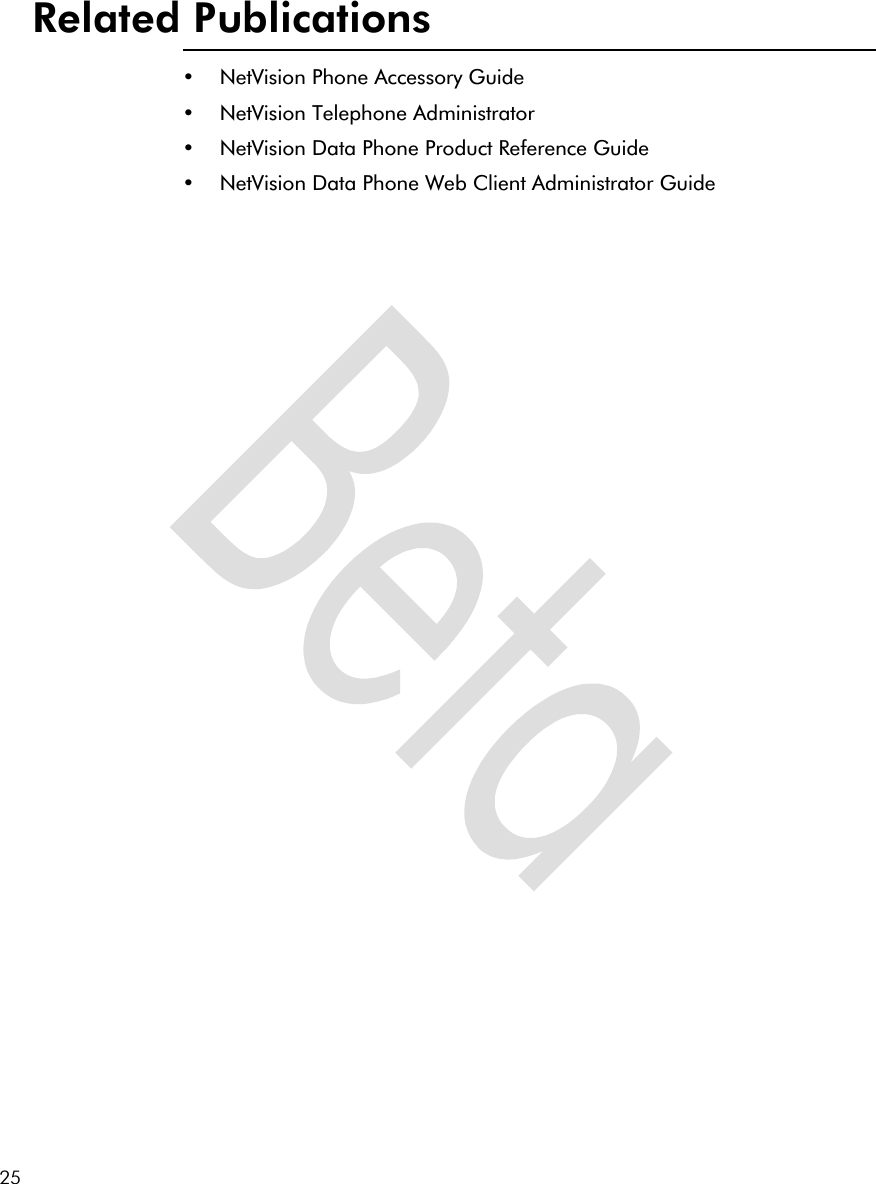
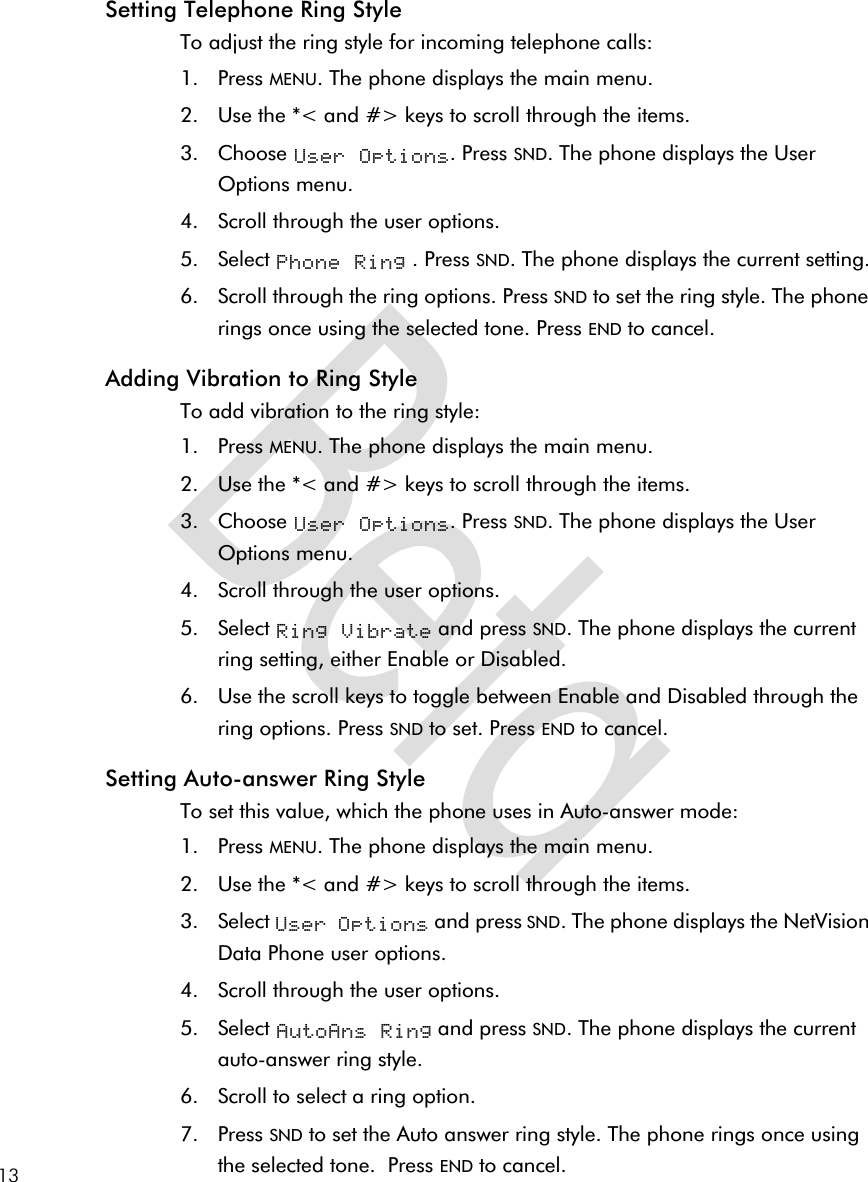
![22NUMERIC Data Directly enter numeric data using the keypad.Alphabetic Data Enter alphabetic data using the FCT key and the keys in the table below. Press and hold the FCT key, press a keypad key to display a list of characters associated with that key, press the corresponding key.For example, to enter the word “Phone,” follow these steps:1. Press and hold FCT until step 7.2. Press 7 to display list, press 1 for uppercase P.3. Press 4 to display list, press 5 for lowercase h.4. Press 6 to display list, press 6 for lowercase o.5. Press 6 to display list, press 5 for lowercase n.6. Press 3 to display list, press 5 for lowercase e.7. Release FCT.Key Characters associated with these keys:1 2 3 4 5 6 7 8 9 * 0 # 1Blank . / | : _ + - = ? < > 2A B C a b c À Á Â Ã Ä Å 3D E F d e f È É Ê Ë Ç 4G H I g h i Ì Í Î Ï 5J K L j k l 6M N O m n o Ñ Ò Ó Ô Õ Ö 7P Q R S p q r s 8T U V t u v Ù Ú Û Ü 9W X Y Z w x y z Ý ý *< [ ( { ¼ ½ ¾ 0? ¿ ¢ £ ¥ © µ Þ ß Æ æ #> ] ) }](https://usermanual.wiki/Symbol-Technologies/ND3010/User-Guide-32958-Page-25.png)