TAIDOC TECHNOLOGY 4111BBEM2 BLOOD GLUCOSE METER User Manual Ideal Blood Gluco Manual 08
TAIDOC TECHNOLOGY CORP. BLOOD GLUCOSE METER Ideal Blood Gluco Manual 08
Users Manual
INSTRUCTION MANUAL
Model GMM 0001
PLEASE READ
BEFORE USE
*NOTE: The IDEAL LIFE Gluco-Manager™ is intended for
use in the quantitative measurement of glucose in fresh
capillary whole blood from the finger and the following
alternative sites: the palm, the forearm, the upper-arm,
the calf and the thigh. It is intended for use by adults
with diabetes mellitus in a non-clinical environment
such as in the home, as an aid to monitoring the
effectiveness of a diabetes control program. It is not
intended for the diagnosis of, or screening for, diabetes
mellitus and not intended for use on neonates. The
alternative site testing can be used only during steady-
state blood glucose conditions. The system is intended for
information purposes only, for expert advice make sure to
consult a healthcare professional. Any instructions for change in
treatment and health related information or advice should only be
made directly with a healthcare professional.
Version 3.0 Jan 2009
MANAGEMENT SYSTEM
Blood Glucose
IDEAL LIFE
Gluco-Manager™
Wireless Remote Health and
Wellness Management™
Ideal Blood Gluco Manual FEB09:Ideal Blood Gluco Manual 08 4/5/09 11:01 AM Page 1
TableofContents
IDEAL LIFE Gluco-Manager™
2
Table of Contents
© 2009 - 001 IDEAL LIFE INC. All rights reserved. IDEAL LIFE is a registered trademark in the United States for weight scales,
blood glucose meters, blood pressure cuffs and meters, heart monitors. IDEAL LIFE BODY MANAGER, IDEAL LIFE BP MANAGER,
IDEAL LIFE GLUCO MANAGER, IDEAL LIFE POD, REALIZING THE VISION OF A BETTER TOMORROW, Leveraging the Power of
Communication, Real time health and wellness information on demand, wireless remote health and wellness management, and
Solutions for better healthcare through advanced communication technology, The IDEAL LIFE Interactive Communication
Technology Platform, the IDEAL LIFE Information Management System, and the IDEAL LIFE Health & Wellness Solution are all
proprietary trademarks of IDEAL LIFE INC. Contents are covered by one issued U.S. patent and one or more U.S. patents
pending. Manufactured for and Distributed by IDEAL LIFE INC., Toronto ON M4P 1G8, and made in Taiwan and China. Products
may vary from pictures shown.
TABLE OF CONTENTS 2
INTRODUCTION 3
Preface 3
Contraindications 3
Precautions 4
Important Information 4
ABOUT ALTERNATIVE SITE TESTING
(AST) 5
PACKAGE CONTENTS 6
REQUIREMENTS 9
IDEAL LIFE Pod™
LOCATION/INTERFERENCE 9
BEFORE YOU START 10
Your IDEAL LIFE
Gluco-Manager™ 10
Your IDEAL LIFE Pod™ 11
Test Strip Description 12
Important Test Strip
Information 12
INSTALLATION 13
Connecting Your
IDEAL LIFE Pod™ 13
Using an RJ11 Jack 13
Using an RJ45 Jack 14
Recharging your batteries with your
Ideal Life Pod™ 14
Powering Up Your IDEAL LIFE
Gluco-Manager™ 14
Installing the Batteries (included) 14
First Time Power Up and Activation 15
About Control Solution 16
Important Control Solution Test
Information 17
How to do a control Solution Test 17
FUNCTIONS 19
Main Screen 19
Taking Your Blood Glucose
Reading 20
Getting a drop of blood 20
When to obtaining blood from sites other
than the fingertip 21
Taking a reading 22
Looking at Previously Taken Readings 24
Looking at Messages 25
Looking at Graphics 26
Users 27
Select User 27
Add/Remove User 28
COMPARING METER AND
LABORATORY RESULTS 30
CARE AND MAINTENANCE 31
SPECIFICATIONS 32
PROBLEM SOLVING GUIDE 33
Troubleshooting 33
Error Message 34
SUMMARY OF OPERATION 35
FCC STATEMENT 36
CUSTOMER INFORMATION 37
SERVICE REQUIREMENTS 38
NOTES / READING VALUES 39
Ideal Blood Gluco Manual FEB09:Ideal Blood Gluco Manual 08 4/5/09 11:01 AM Page 2
311-4111200-001

Introduction
Preface
Thank you for purchasing the IDEAL LIFE Gluco-Manger™, or GMM 0001 and IDEAL LIFE Pod™, or ILP
0001. This completely automatic system measures your blood glucose, captures subjective
information and manages everything automatically so that you can better manage your blood glucose
with your care provider. Your measurement reading is clearly displayed on a large screen on the IDEAL
LIFE Gluco-Manager™ after each measurement, and later stored for a more detailed analysis in the
form of tables for easy viewing and graphs for easy interpretation. Your new IDEAL LIFE Gluco-
Manager™ provides you with accurate, whole blood test results for blood glucose. The system is
compact with convenient operation so it is simple to use.
The IDEAL LIFE Gluco-Manager™ is intended for use in the quantitative measurement of glucose in
fresh capillary whole blood from the finger and the following alternative sites: the palm, the forearm,
the upper-arm, the calf and the thigh. It is intended for use by adults with diabetes mellitus in a non-
clinical environment such as in the home, as an aid to monitoring the effectiveness of a diabetes
control program. It is not intended for the diagnosis of, or screening for, diabetes mellitus and not
intended for use on neonates. The alternative site testing can be used only during steady-state blood
glucose conditions.
The IDEAL LIFE Gluco-Manager™ can be used alone to measure your blood glucose.
If you would like to transmit blood glucose information for display on a personal computer, the
optional IDEAL LIFE Pod™ can be purchased.
CAUTION: Before using any product to test your blood glucose, read all instructions thoroughly
and practice the test. Do all quality control checks as directed and consult with a diabetes
healthcare professional. For proper interpretation of blood glucose measurements, make sure to
consult a physician.
Contraindications
**Warning: This system is designed for use outside the human body. It is not recommended for
use on infants and is not intended for and should not be used to try and measure the blood glucose
of infants as it may not be accurate and/or relied upon.
Do NOT use the device for purposes other than measuring blood glucose.
This unit does not serve as a cure of any symptoms or disease. The data measured are only for
reference. Always consult your physician to have the results interpreted.
Introduction
Instruction Manual 3
Ideal Blood Gluco Manual FEB09:Ideal Blood Gluco Manual 08 4/5/09 11:01 AM Page 3

Precautions
•Do not drop this unit. Please avoid strong impact. Disassembly or modification of the unit may
lead to permanent reading error.
•The device might not meet its performance specifications if stored or used beyond the specified
temperature and humidity ranges.
•Operating conditions: 50°F to 104°F (10°C to 40°C), below 85% RH.
•System storage: 39.2°F to 104°F (4°C to 40°C), below 85% RH.
•Be sure to keep this manual for future reference.
• NOTE: Before using any product to test your blood sugar (blood glucose), read all instructions
and practice the test. Do all quality control checks as directed and consult with a diabetes
healthcare professional.
Important Information
•Severe dehydration and excessive water loss may cause false low results. If you believe you are
suffering from severe dehydration, consult a healthcare professional immediately.
•Test results below 60mg/dL (3.3 mmol/L) indicate hypoglycemia, or low glucose. Test results
higher than 240 mg/dL (13.3 mmol/L) indicate hyperglycemia, or high glucose. Consult your
physician when one of these results is shown repetitively.
•If you are experiencing symptoms that are not consistent with your blood glucose test results and
you have followed all instructions described in this owner's manual, call your healthcare
professional.
•Inaccurate results may occur in severely hypotensive individuals or patients in shock. Inaccurate
low results may occur for individuals experiencing a hyperglycemic-hyperosmolar state, with or
without ketosis. Critically ill patients should not be tested with blood glucose meters.
•Please refer to your test strip package insert for additional important information.
•Always follow the operation procedures described in the manual in order to obtain correct results.
For any questions or comments, please call an IDEA LIFE customer
representative at 1-888-IDEAL-41 (888-433-2541)
Introduction
IDEAL LIFE Gluco-Manager™
4
Ideal Blood Gluco Manual FEB09:Ideal Blood Gluco Manual 08 4/5/09 11:01 AM Page 4
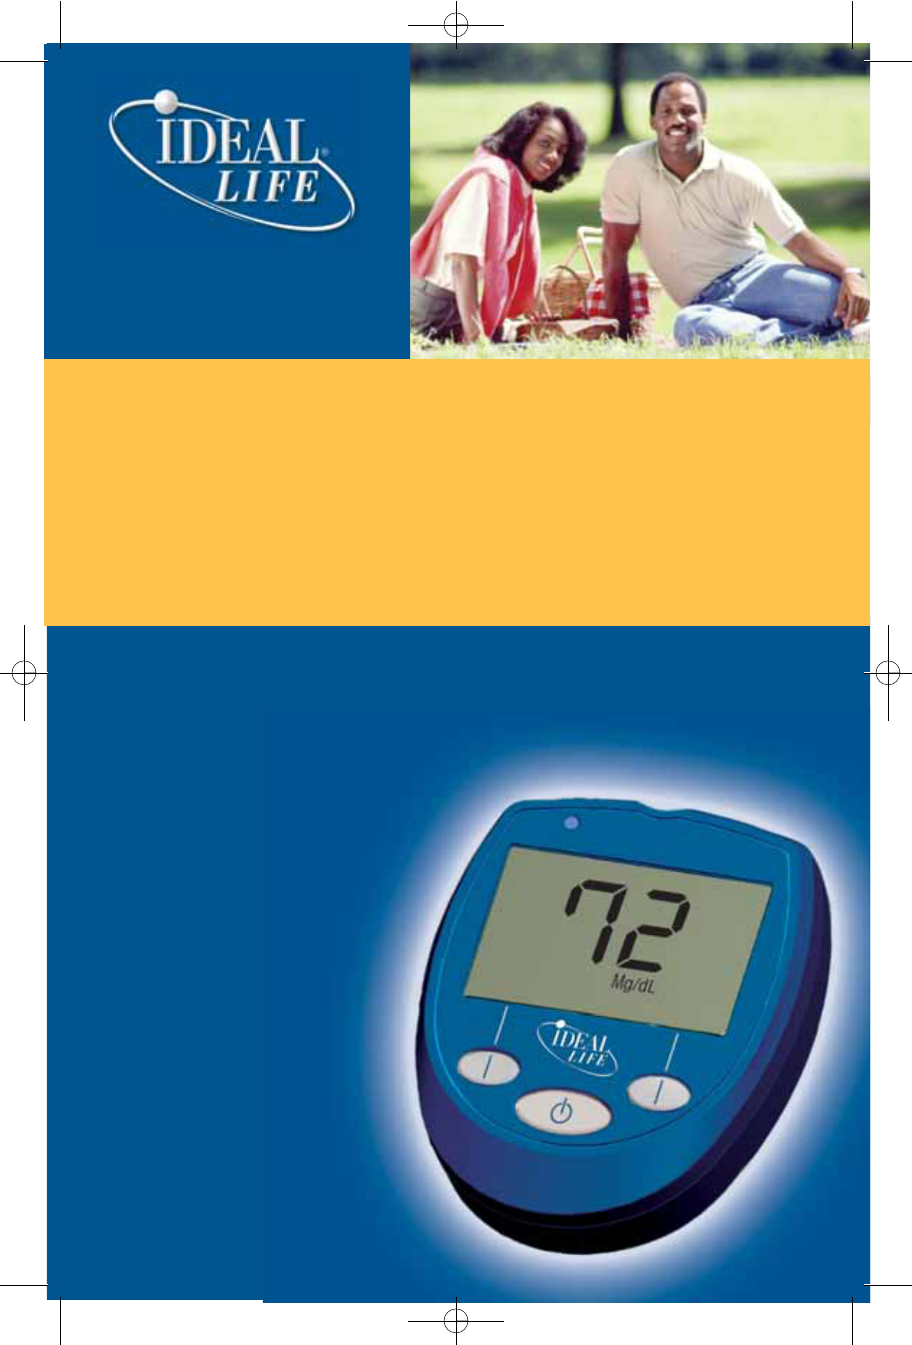
About Alternative Site Testing
(AST)
IMPORTANT: There are limitations for doing alternative site testing (AST).
Please consult your healthcare professional before you do AST.
What is AST?
Alternative site testing (AST) means that people use parts of the body other than fingertips to check
their blood glucose levels. This system provides you to test on your forearm, upper arm, calf, or thigh
with the equivalent results to fingertip testing.
What is the advantage?
Fingertips feel pain more readily because they are full of
nerve endings (receptors). At other body sites, since nerve
endings weren't so condensed, you won't feel as much
pain as at the fingertip.
When to use AST?
Food, medication, illness, stress and exercise can affect
blood glucose levels. Capillary blood at fingertip reflects
these changes faster than capillary blood at other sites.
Therefore when testing blood glucose during or
immediately after meal, physical exercise, or any other
event, take blood sample from your finger only.
We strongly recommend you do AST in the following intervals:
•In a pre-meal or fasting state (more than 2 hours since the last meal).
•2 hours or more after taking insulin.
•2 hours or more after exercise.
Do NOT use AST if:
•You think your blood glucose is low.
•You are unaware of hypoglycemia.
•Your AST results do not match the way you feel.
•You are testing for hyperglycemia.
•Your routine glucose results are often fluctuating.
•You are pregnant.
About Alternative Site Testing (AST)
Instruction Manual 5
Ideal Blood Gluco Manual FEB09:Ideal Blood Gluco Manual 08 4/5/09 11:01 AM Page 5

How to increase the accuracy?
Stimulating blood perfusion by rubbing the puncture site prior to blood extraction has a significant
influence on the glucose value obtained. Blood from the site without rubbing exhibits a measurably
different glucose concentration than blood from the finger. When the puncture site was rubbed prior
to blood extraction, the difference was significantly reduced.
Please follow the suggestions below before getting a drop of blood:
•Rub the puncture site about 20 seconds before penetration.
•Use a clear cap (included in the kit) instead while setting the lancing device.
Package Contents
Your IDEAL LIFE Gluco-Manager™ GMM 0001 Blood Glucose Monitoring System consists of three main
products: a blood glucose meter, test strips, and control solution. These products have been designed,
tested and proven to work together as a system to produce accurate blood glucose test results. Use
only the same brand-name test strips and control solution with the IDEAL LIFE Gluco-Manager™.
YOUR SYSTEM
INCLUDES:
GMM 0001 IDEAL LIFE
GLUCO-MANAGER™
About Alternative Site Testing (AST) / Contents
IDEAL LIFE Gluco-Manager™
6
25 TEST STRIPS
25 STERILE
LANCETS
INSTRUCTION
MANUAL
CARRYING BAG
Ideal Blood Gluco Manual FEB09:Ideal Blood Gluco Manual 08 4/5/09 11:01 AM Page 6
NOTE!
Check your system to be sure that it is unopened prior to use and that it
contains all parts listed above. If either of these conditions occurred, please
return your system to the place of purchase.
Contents
Instruction Manual 7
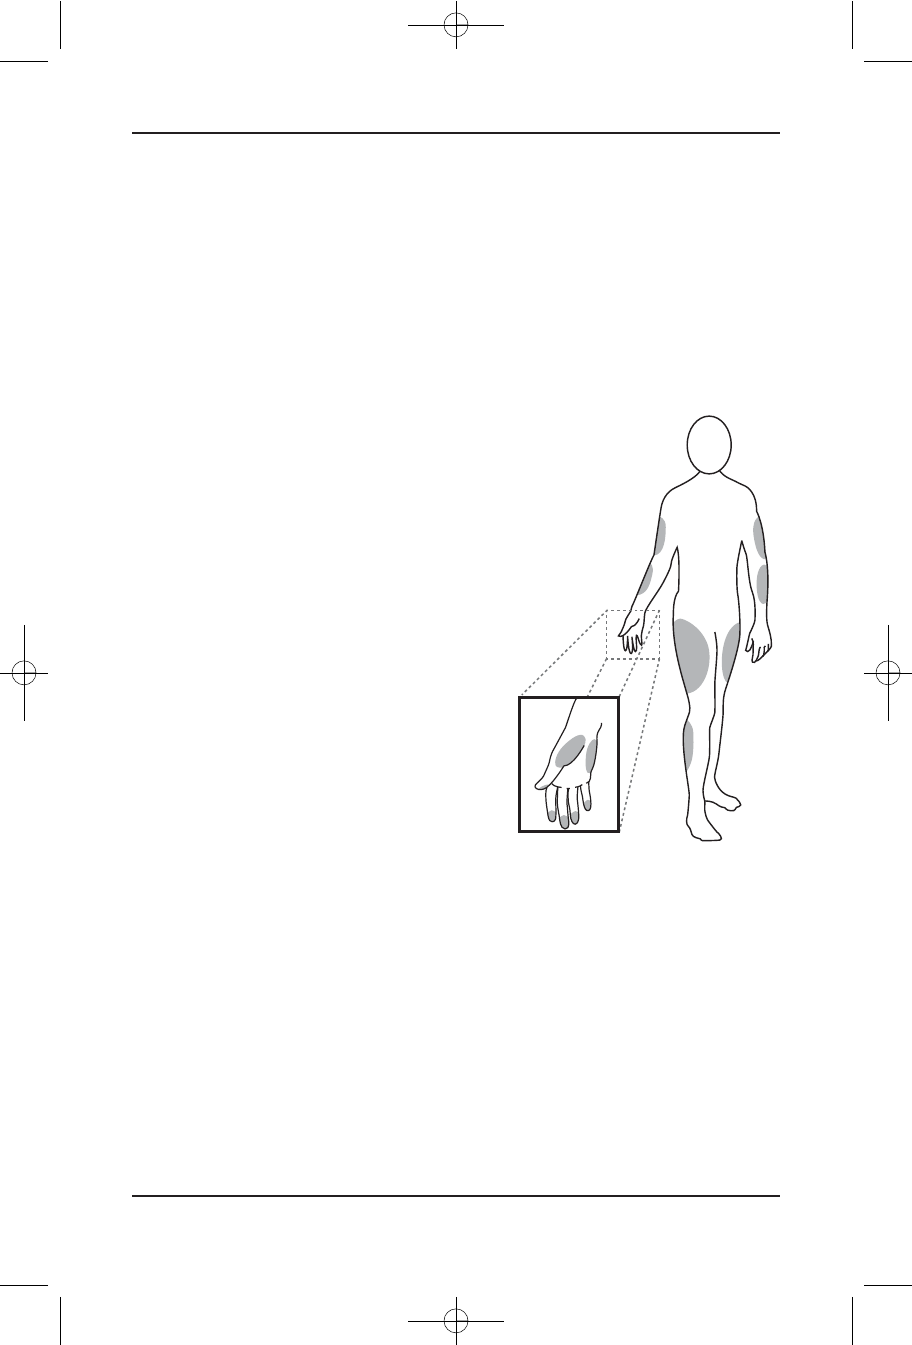
ILP 0001 IDEAL LIFE POD™
(*An optional accessory, sold separately)
AC ADAPTER
TELEPHONE LINE CORD
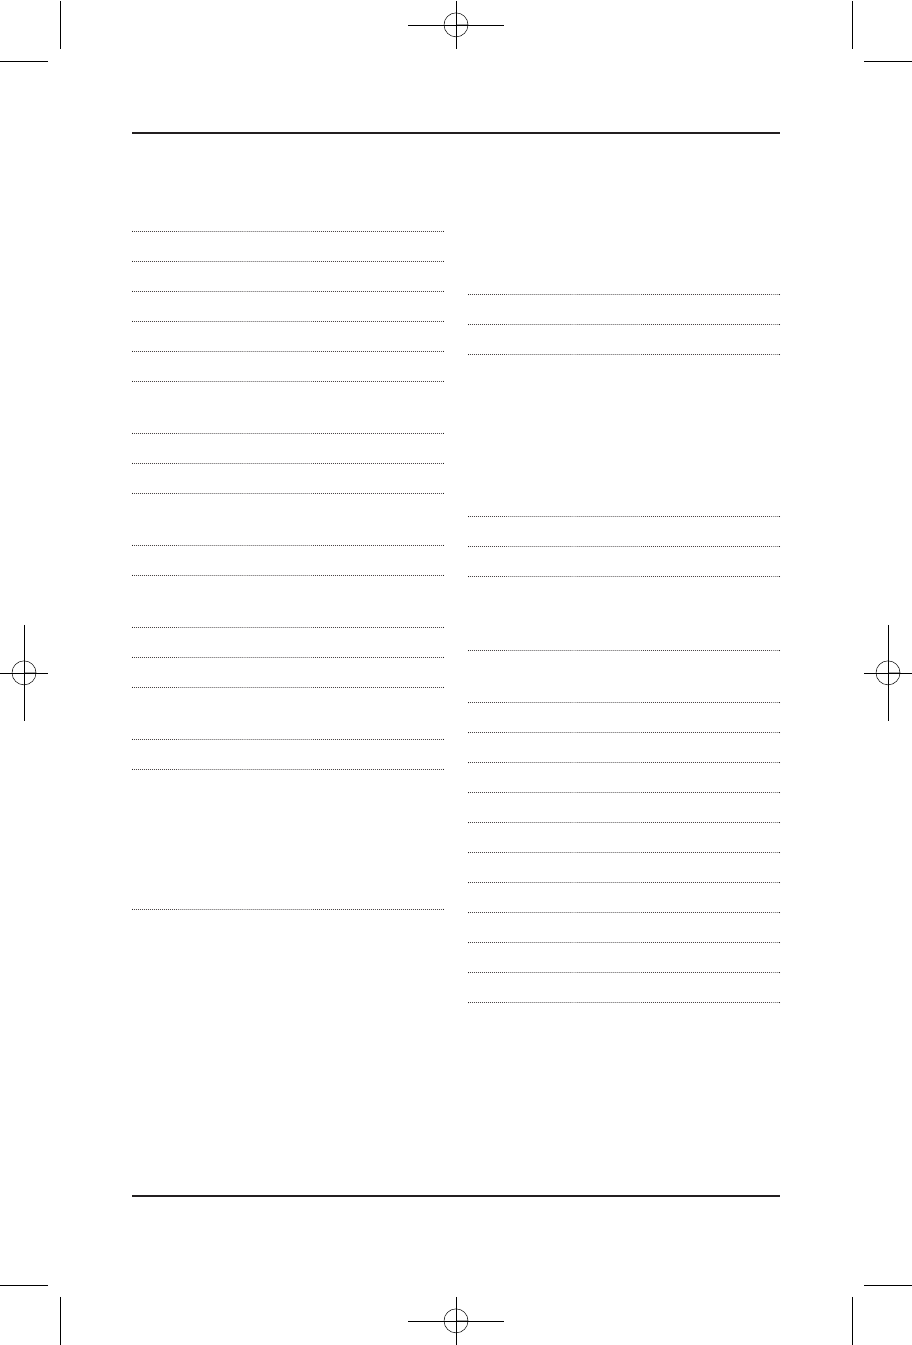
LANCING
DEVICE
1 CLEAR CAP
1 NORMAL LEVEL
OF CONTROL
SOLUTION
2 “AAA”
BATTERIES FOR
YOUR IDEAL
LIFE GLUCO-
MANAGER™
There are 3 levels for control solutions: low, normal and high. Please note that
the other two levels are optional and are not included in the standard kit.
Please call 1-888-IDEAL-41 (888-433-2541) for availability.
Ideal Blood Gluco Manual FEB09:Ideal Blood Gluco Manual 08 4/5/09 11:01 AM Page 7
Requirements
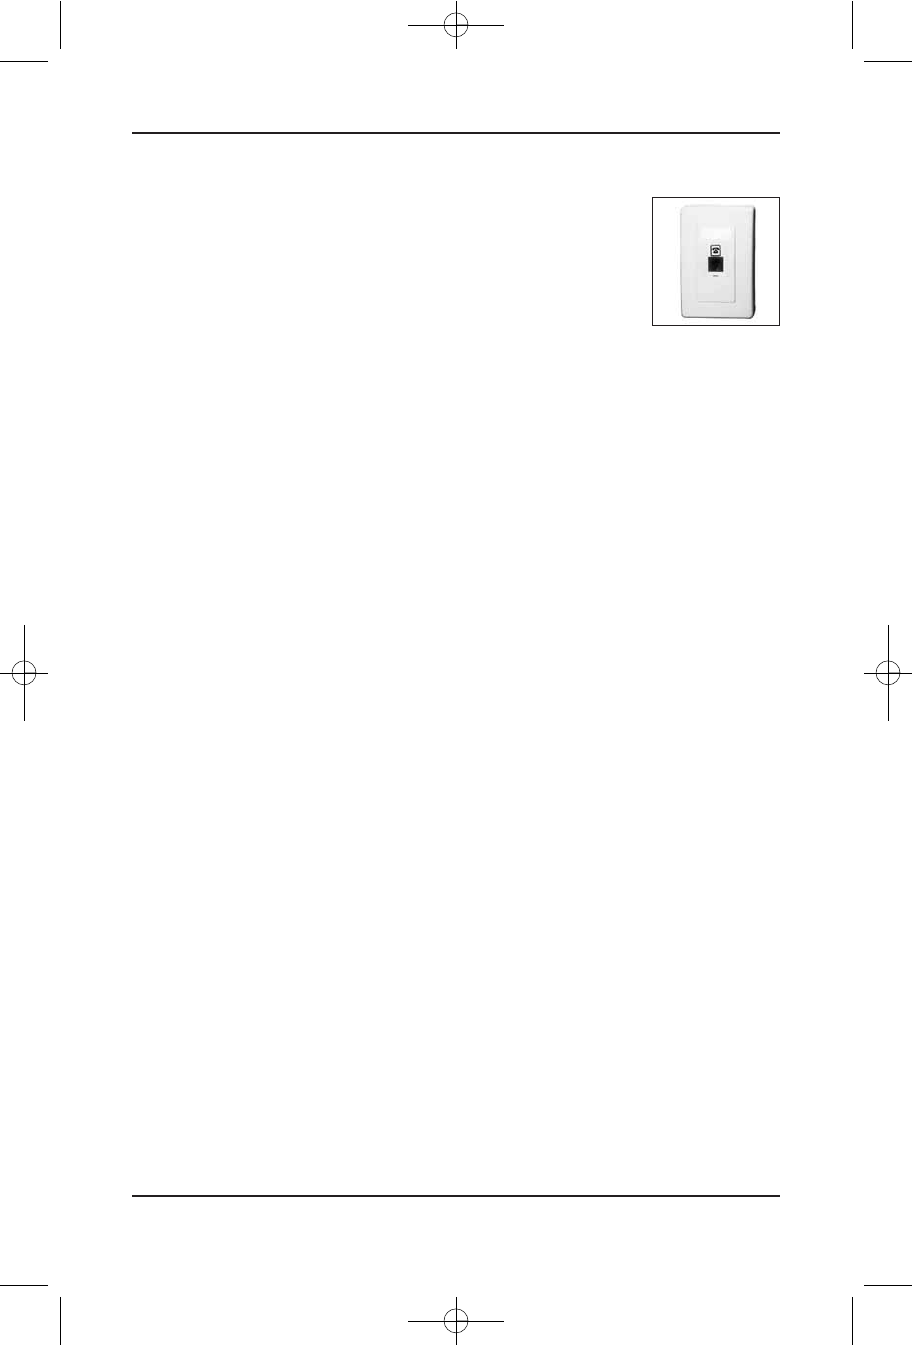
MODULAR JACK REQUIREMENTS
When using your IDEAL LIFE Gluco-Manager™ with an IDEAL LIFE Pod™, you will
need an RJ11 or RJ45 type modular jack, which is the most common type of
phone jack or Ethernet jack and might look like the one pictured here. If you
don’t have a modular jack, call your local phone company or Internet service
provider to find out how to get one installed.”
ADDITIONAL BATTERIES
You may wish to use rechargeable batteries in your IDEAL LIFE Manager™. The IDEAL LIFE Pod™ is
equipped to recharge batteries.
Requirements
IDEAL LIFE Gluco-Manager™
8
Ideal Blood Gluco Manual FEB09:Ideal Blood Gluco Manual 08 4/5/09 11:01 AM Page 8

IDEAL LIFE Pod™
Location/Interference
When using an IDEAL LIFE Pod™ to communicate information from your IDEAL LIFE Gluco-Manager™,
wireless radio waves are used. For maximum distance and interference-free operation, the
recommended IDEAL LIFE Pod™ location is:
NOTE:
While using an IDEAL LIFE Pod™, the telephone line will be in use. If the telephone line is in use
before using your IDEAL LIFE Pod™ and you wish to use your IDEAL LIFE Pod™ while the telephone line
is being used, the unit will not be able to make a connection and will store the information in your
IDEAL LIFE Gluco-Manager™ for later transmission.
IDEAL LIFE Pod™ Location/Interference
Instruction Manual 9
•In a HIGH and CENTRAL
location with no obstructions
such as walls
•Away from electrical
appliances such as a
TV, personal computer
or a cordless phone
Ideal Blood Gluco Manual FEB09:Ideal Blood Gluco Manual 08 4/5/09 11:01 AM Page 9
Before You Start
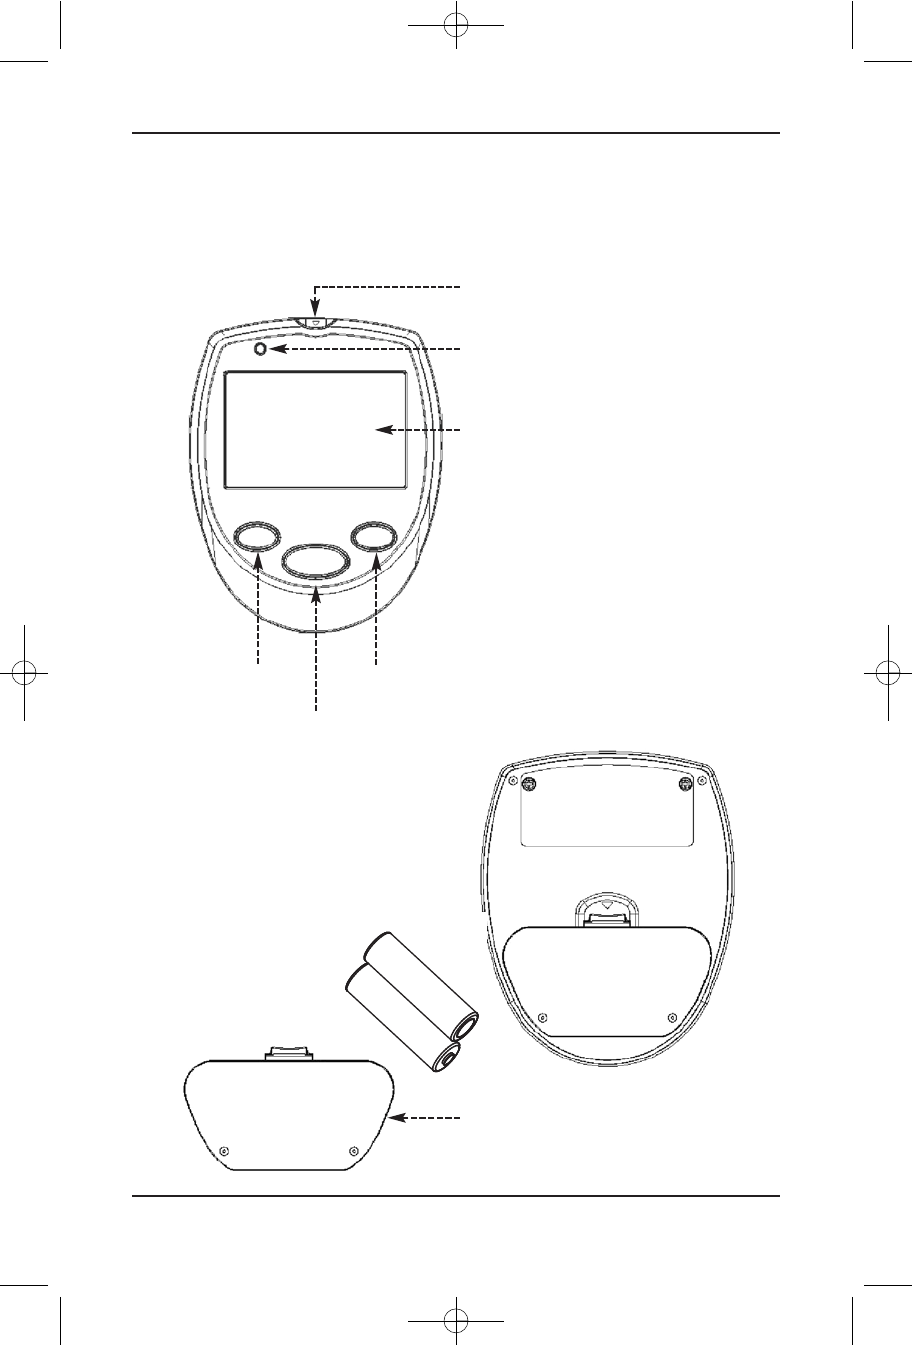
Your IDEAL LIFE Gluco-Manager™
Before You Start
IDEAL LIFE Gluco-Manager™
10
LCD Display
Test Port
Blue LED
Left “Soft” Button
START/ESCAPE
Button
Right “Soft” Button
Battery Cover
Ideal Blood Gluco Manual FEB09:Ideal Blood Gluco Manual 08 4/5/09 11:01 AM Page 10
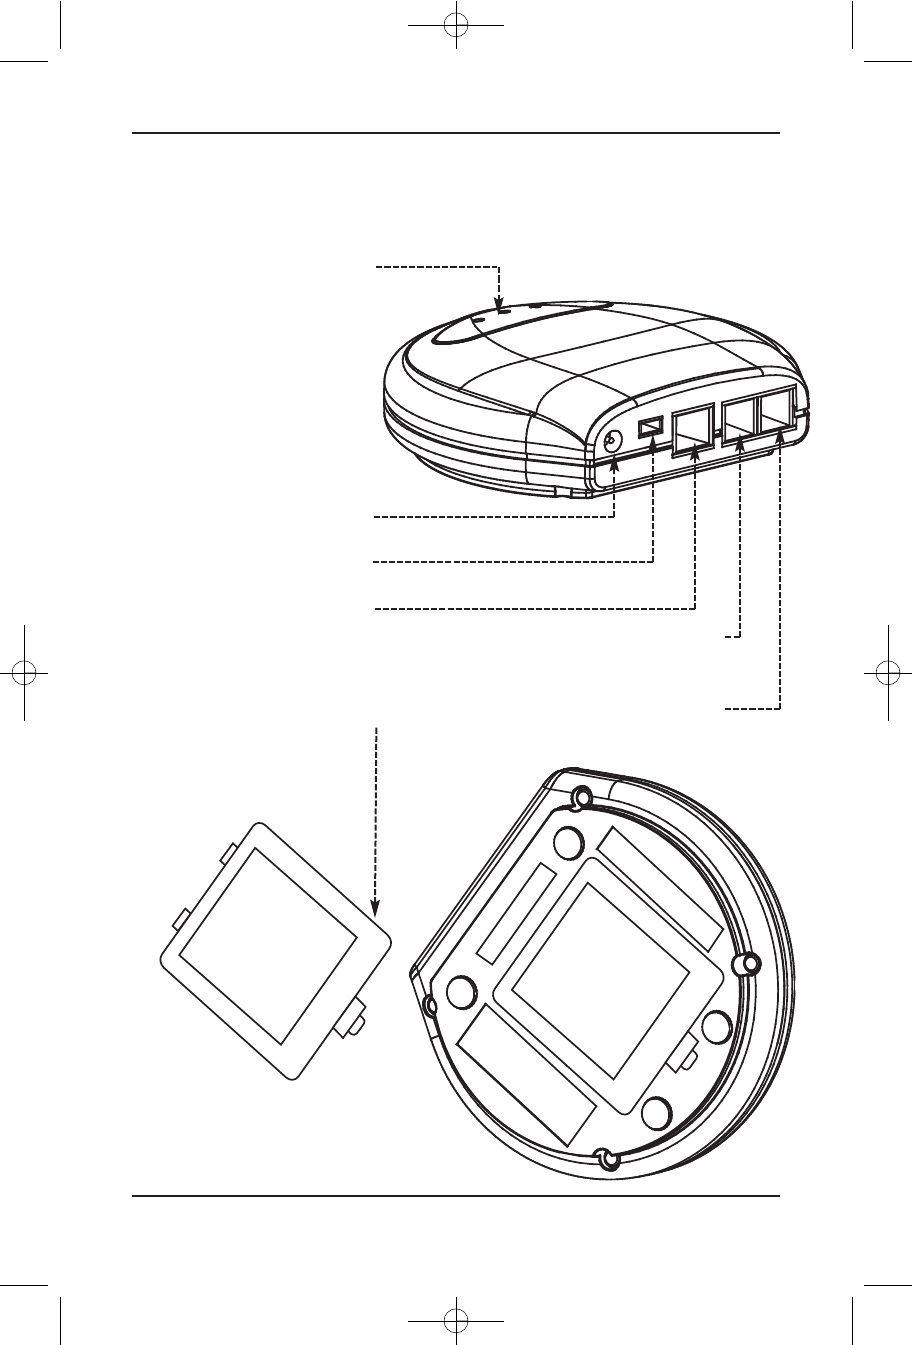
Your IDEAL LIFE Pod™
(*An optional accessory, sold separately)
Before You Start
Instruction Manual 11
LED Display
AC Adapter Jack
USB Port
Ethernet Cable RJ45 Jack
Connection
Battery Cover
Telephone Cord RJ11 Jack For
Telephone Connection
Telephone Cord RJ11 Jack For
Line Connection
Ideal Blood Gluco Manual FEB09:Ideal Blood Gluco Manual 08 4/5/09 11:01 AM Page 11
Test Strip Description
•Your system measures the amount of sugar (glucose) in whole blood. Blood is applied to the
absorbent hole of the test strip and is automatically drawn into the reaction cell where the
reaction takes place.
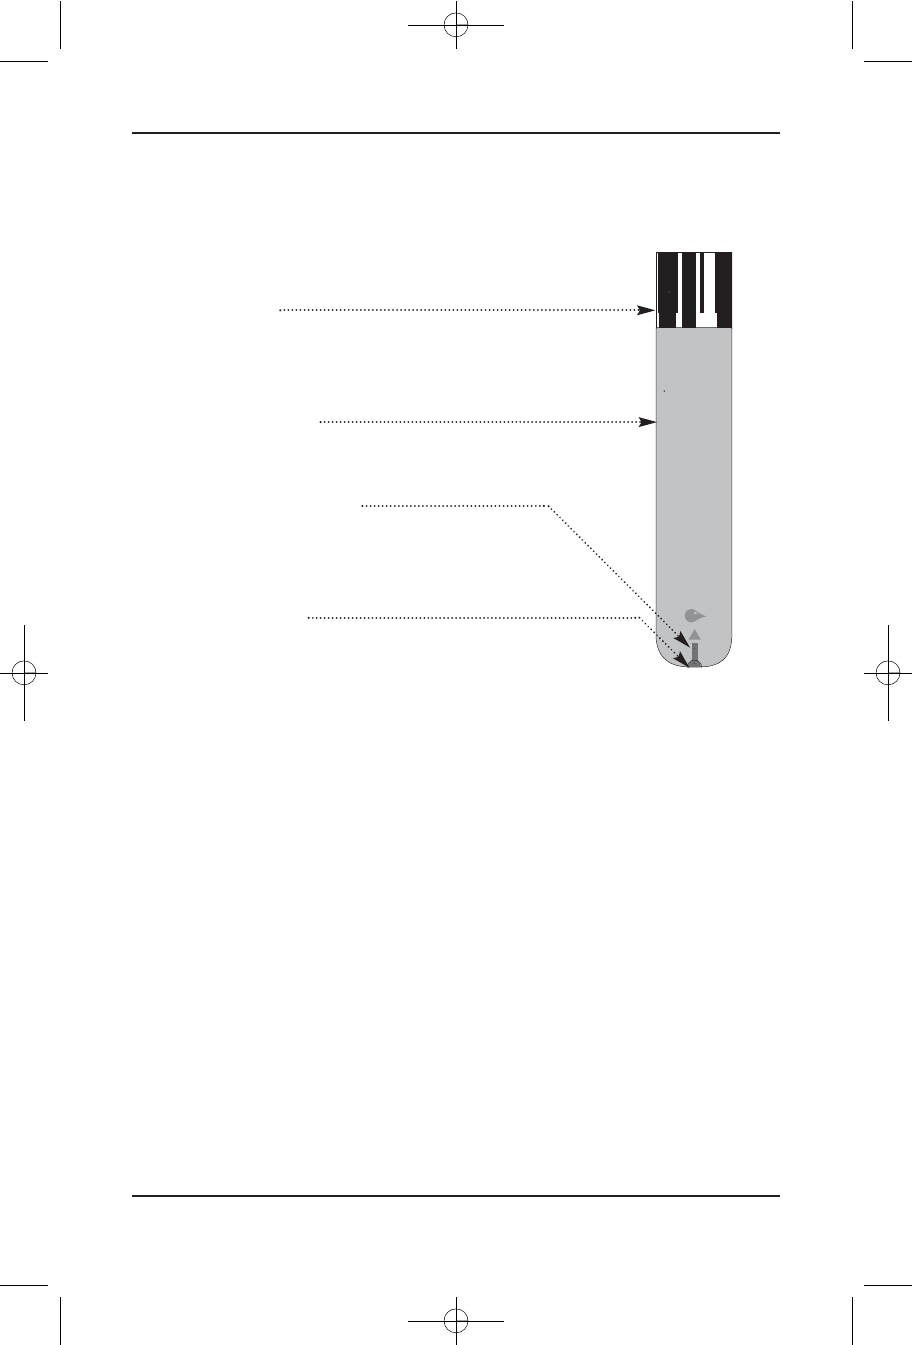
•The test strip consists of the following parts:
Contact Bars
Insert this end of the test strip into the meter.
Push it in firmly until it will go no further
Test Strip Handle
Hold this part to insert the test strip into the slot.
Confirmation Window
This is where you confirm if enough blood has been
applied to the Absorbent Hole of the strip.
Absorbent Hole
Apply a drop of blood here; the blood will be sucked automatically.
•Refer to the section below: “Taking Your Blood Glucose Reading,” for complete instructions.
Important Test Strip Information
•Store test strip packages in a cool, dry place from 39.2°F to 104°F (4°C to 40°C). Keep away
from direct sunlight and heat. Do not freeze.
•Store your test strips in their original vial only; do not transfer them to a new bottle or any other container.
•After removing a test strip from the vial, immediately replace the vial cap and close it tightly.
•With clean, dry hands, you may touch the test strip anywhere on its surface when removing it from
the vial or inserting it into the meter.
•Use each test strip immediately after removing it from the vial.
•Write the discard date on the vial label when you first open it. Discard remaining test strips and
the vial 90 days after first opening date.
•Apply only blood sample or control solution to the absorbent hole. Applying other substances to
the absorbent hole will cause inaccurate results.
•Do not use test strips beyond the expiration date printed on the package since they may cause
inaccurate results.
•Do not bend, cut or alter a test strip in any way.
Before You Start
IDEAL LIFE Gluco-Manager™
12
Ideal Blood Gluco Manual FEB09:Ideal Blood Gluco Manual 08 4/5/09 11:01 AM Page 12
Installation
! FOR YOUR IDEAL LIFE Pod™ !
Connecting your IDEAL LIFE Pod™
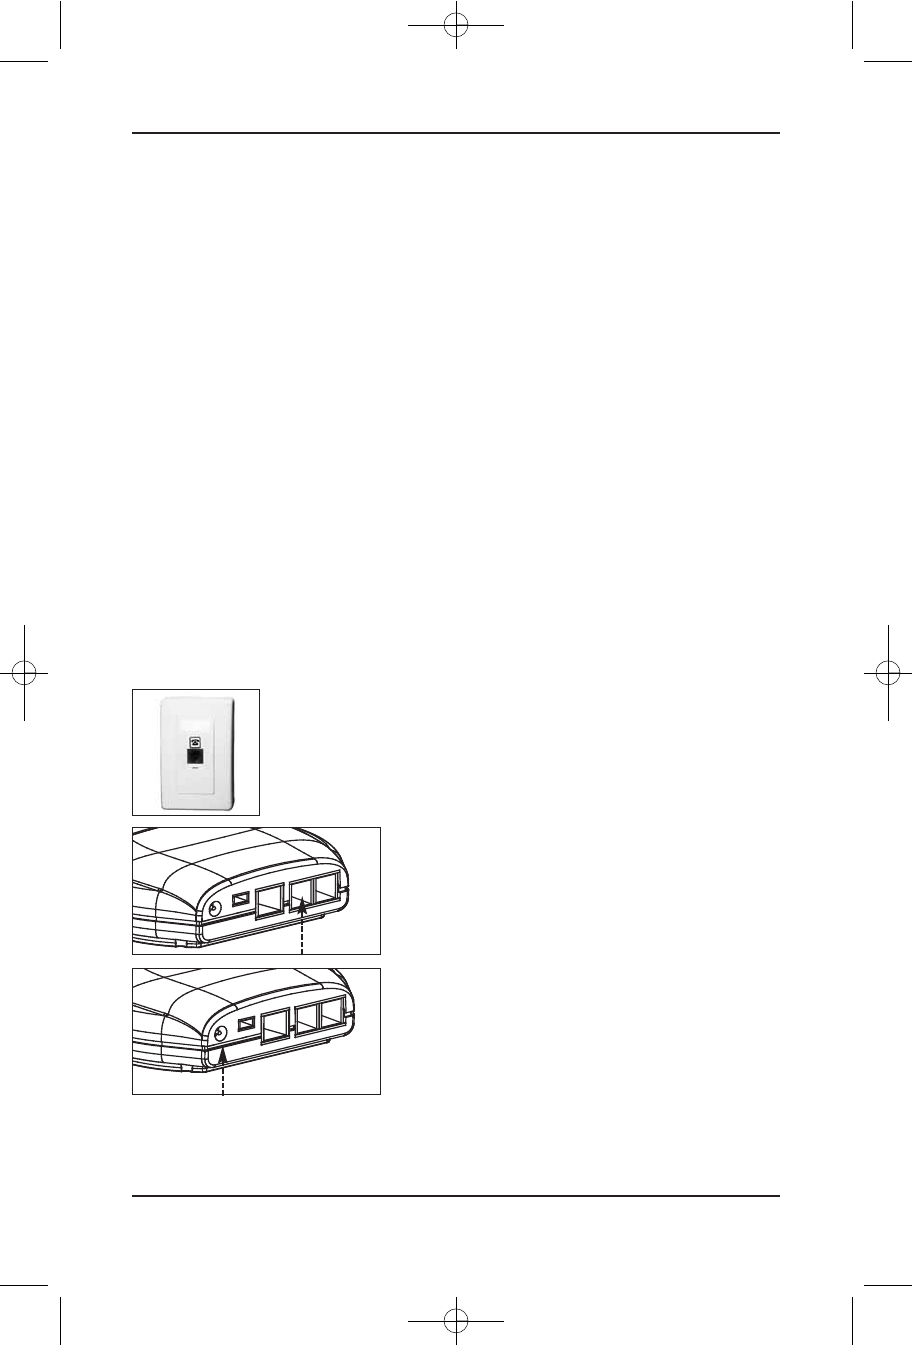
USING AN RJ11 JACK
CAUTION!
•Unplug phone cord from wall before installing, plugging in an external power source, or changing
batteries.
•Never install telephone wiring during a lightning storm.
•Never touch uninsulated telephone wire or terminals, unless the telephone line has been
disconnected at the network interface.
•Use caution when installing or modifying telephone lines.
Plug one end of the telephone line cord (provided) into the jack on the back of your IDEAL LIFE Pod™
marked LINE.
Note: The IDEAL LIFE Pod™ is designed not to draw power from the
batteries when the AC adapter is in use.
Plug the other end of the telephone line cord (provided)
into a modular wall jack.
If you wish to use the same modular wall jack for your
IDEAL LIFE Pod™ and your telephone, connect the telephone
line cord from your telephone into the jack on the back of
your IDEAL LIFE Pod™ marked PHONE.
Connect the small end of the power supply into the power
AC jack on the back of the IDEAL LIFE Pod™ marked
POWER. Plug the other end into an AC power outlet.
Your IDEAL LIFE Pod™ will automatically power up once it is
plugged in to an AC power outlet.
Installation
Instruction Manual 13
Ideal Blood Gluco Manual FEB09:Ideal Blood Gluco Manual 08 4/5/09 11:01 AM Page 13
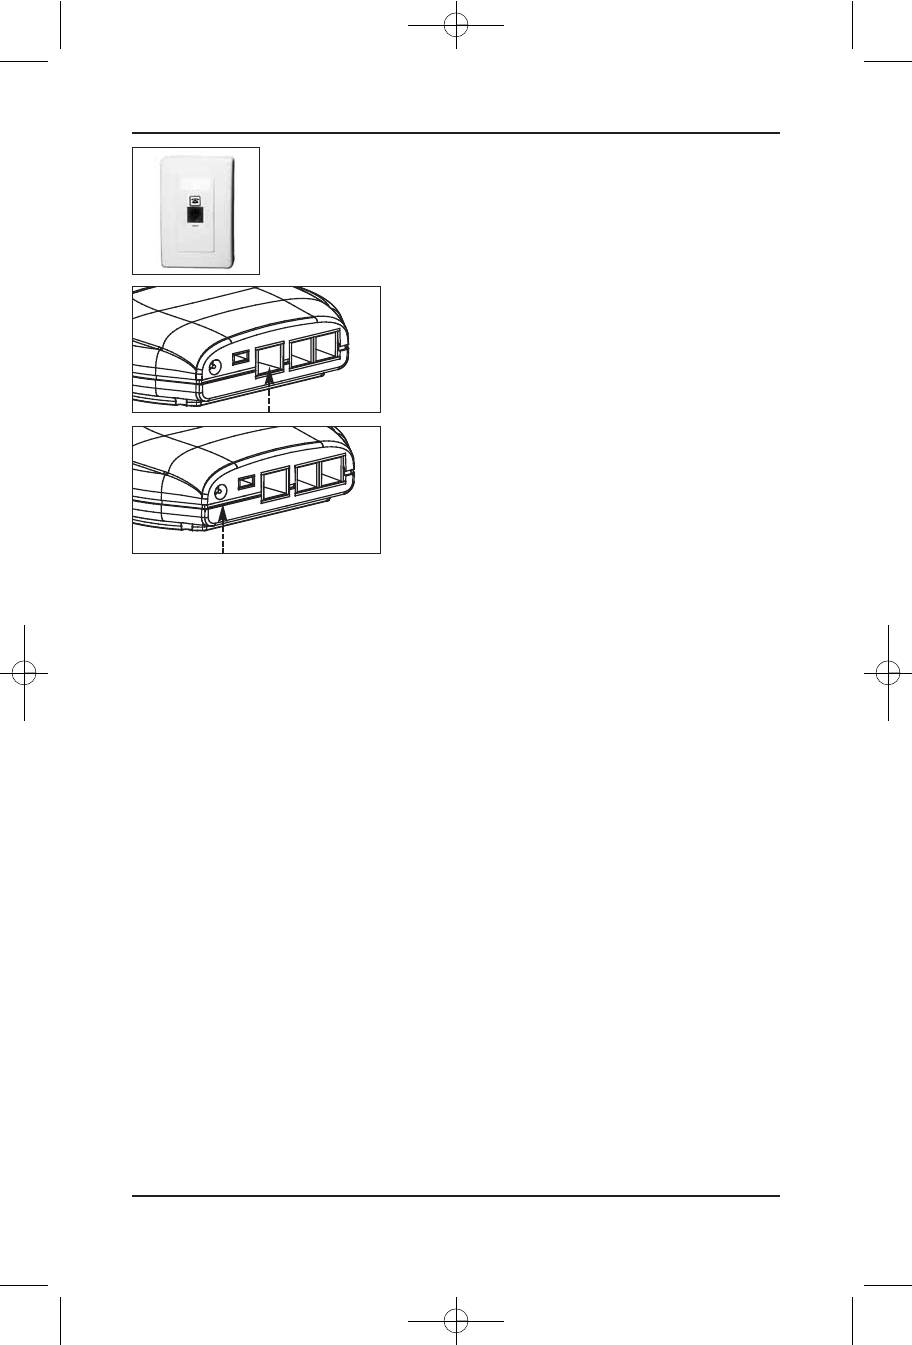
USING AN RJ45 JACK
Plug one end of the Ethernet cord (not provided) into a modular RJ45
wall jack.
Plug the other end of the Ethernet cord (not provided) into
the RJ45 jack on the back of your IDEAL LIFE Pod™.
Connect the small end of the power supply into the power
AC jack on the back of the IDEAL LIFE Pod™ marked
POWER. Plug the other end into an AC power outlet.
Your IDEAL LIFE Pod™ will automatically power up once it is
plugged in to an AC power outlet.
RECHARGING BATTERIES WITH YOUR IDEAL LIFE POD™:
•Remove the battery compartment door on the bottom of your IDEAL LIFE Pod™ by pushing gently
in the direction shown on the battery cover.
•Place the rechargeable batteries as marked.
•Replace the battery compartment door and push the compartment door shut in the opposite
direction shown on the battery cover.
•When using rechargeable batteries with your IDEAL LIFE Gluco-Manager™, simply place them in
your IDEAL LIFE Pod™ for 10 hours to recharge when battery status is low as indicated on your
IDEAL LIFE Gluco-Manager™
Powering Up Your IDEAL LIFE Gluco-Manager™
INSTALLING THE BATTERIES (INCLUDED)
•Remove the battery compartment door on your IDEAL LIFE Gluco-Manager™ by lifting the battery
door using the notch.
•Place the batteries as instructed on the device.
•Replace the battery compartment door and click into place.
•NOTE: Replacing the battery does not affect previous test results stored in memory of the meter.
However, the time and date settings may need to be updated if batteries are not in the device for
an extended period of time. Use only new batteries of the required size and the recommended.
Installation
IDEAL LIFE Gluco-Manager™
14
Ideal Blood Gluco Manual FEB09:Ideal Blood Gluco Manual 08 4/5/09 11:01 AM Page 14
type. For best performance and the longest life, alkaline batteries are recommended. Do not mix
different type, date or brand name batteries together. Be sure to follow the instructions when
installing the batteries. Since batteries can leak Chemicals that damages electronic parts, leaving
the battery in the housing for a long period without using the device may damage the main unit.
Please remove the batteries if you are not going to use the device for an extended period of time
(i.e., 3 months or more). The batteries should be kept away from small children as they pose a
choking hazard. If swallowed, promptly see a doctor for help.
FIRST TIME POWER UP AND ACTIVATION WHEN USING AN
IDEAL LIFE POD™ (*an optional accessory, sold separately)
To use the IDEAL LIFE Gluco-Manager™ with your IDEAL LIFE Pod™ you must call an IDEAL LIFE
customer representative to activate. Make sure to call IDEAL LIFE before you begin. Then make sure
that the IDEAL LIFE Pod™ is connected to a telephone line cord and RJ11 jack (or an Ethernet cord
and RJ45 jack), “Powered ON”!
Hold down any button on your IDEAL LIFE Gluco-Manager™
for 3 seconds to Power up.
READ THROUGH THE IDEAL LIFE INC. TERMS
AND CONDITIONS FIRST, THEN PROCEED
AND FOLLOW THE PROMPTS ON THE
SCREEN AS SHOWN HERE:
First select the appropriate language using the buttons labeled
and OK.
Then Answer the question on the following screen regarding
terms and conditions using the YES and NO labeled buttons.
To gain full advantage of all the features your IDEAL LIFE Gluco-Manager™ has to offer, using an IDEAL LIFE
Pod™ is recommended. To ensure that your IDEAL LIFE Gluco-Manager™ and IDEAL LIFE Pod™ are setup
properly you will need to call IDEAL LIFE directly to activate your system. You should ensure that the steps
are followed correctly, you should first setup your IDEAL LIFE Pod™, power it up, and then begin the steps of
powering up your IDEAL LIFE Gluco-Manager™. During your activation call with IDEAL LIFE, an IDEAL LIFE
customer representative will verify your IDEAL LIFE Gluco-Manager™ and IDEAL LIFE Pod™ ID numbers. and
you will be ready to take full advantage of all your IDEAL LIFE Gluco-Manager™ has to offer. For a detailed
description of all the features and functions continue to the FUNCTIONS section of this manual.
Installation
Instruction Manual 15
LANGUAGE
ENGLISH
ESPANOL
FRANCAIS
OK
Ideal Blood Gluco Manual FEB09:Ideal Blood Gluco Manual 08 4/5/09 11:01 AM Page 15

ABOUT CONTROL SOLUTION
Control solutions contain a known amount of glucose that reacts with test strips. By comparing your
control solution test results with the expected range printed on the test strip vial label, it is able to check
that the meter and the test strips are working together as a system and that you are performing the test
correctly. It is very important that you do this simple check routinely to make sure you get accurate results.
How often should the control solution test be performed?
•When you use this system to test your blood for the first time, practice the procedure using
control solution. When you can do three tests in a row that are within the expected range, you are
ready to test your blood.
•Routinely check the meter and test strips, so perform a single test for each level of control
solution at least once a week
When should the control solution test be performed?
•When you first get your IDEAL LIFE Gluco-Manager™.
•When you begin using a new vial of test strips.
•Whenever you suspect that the meter or test strips are not working properly.
•When your blood glucose test results are not consistent with how you feel, or when you think your
results are inaccurate.
•When your test strips are exposed to extreme environmental conditions (See “Important Test Strip
Information” below).
•When you want to practice running the test.
•If you drop the meter.
Installation
IDEAL LIFE Gluco-Manager™
16
Ideal Blood Gluco Manual FEB09:Ideal Blood Gluco Manual 08 4/5/09 11:01 AM Page 16

IMPORTANT CONTROL SOLUTION TEST INFORMATION
•Use the same branded control solutions as the test strips.
•Check the expiry date on the control solution vial. Do not use if expired.
•Control solution, meter, and test strips should come to room temperature
(20°C to 25°C / 68°F to 77°F) before testing.
•Shake the vial before use. Discard the first drop of control solution. After squeezing, wipe off the
dispenser tip to avoid contamination. The above tips ensure you get a good sample and an
accurate result.
•Use a period of 90 days from the date that you first open it. Record the discard date (date
opened plus 90 days) on the control solution vial. Discard after 90 days.
•Store the control solution tightly closed at temperature from 36°F to 86°F (2 to 30°C) and do
not freeze.
NOTE! The control solution range printed on the test strip vial is for
appropriately branded control solution only. It is used to test meter and
test strip performance. It is not the recommended range for your blood
glucose level.
HOW TO DO A CONTROL SOLUTION TEST?
Step 1. Power up Device
From the off position, press the power button to turn on the display. From the default screen, press
the power button once more. The display will instruct you to insert a strip at this time. Insert a test
strip with contact bars end first and facing up into the test slot. (Contact bars must be inserted all
the way into the meter or you may get an inaccurate test result.)
After the symbol appears on the display, you may now move to the STEP 2 and add the control
solution to the test strip. If you decide not to perform a control solution test, press Soft Button
labeled EXIT to return to the default screen.
Installation
Instruction Manual 17
Ideal Blood Gluco Manual FEB09:Ideal Blood Gluco Manual 08 4/5/09 11:01 AM Page 17
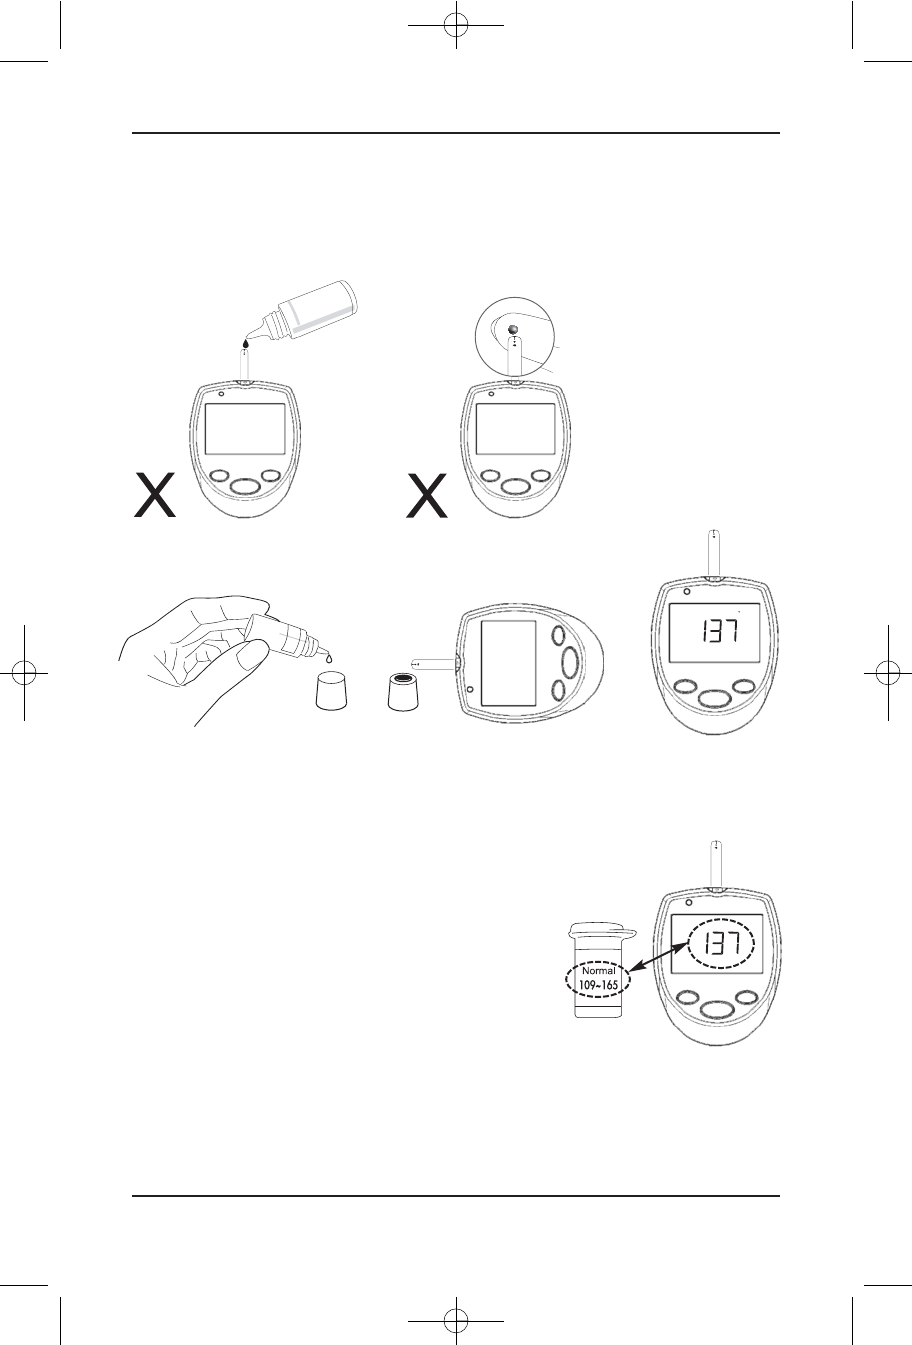
Step 2. Apply Control Solution
Shake the control solution vial well. Remove the cap from the control solution bottle. Place cap on
flat surface. Squeeze the vial, discard the first drop, and wipe off the dispenser tip to prevent
contamination. Squeeze the vial again to get another drop and apply the drop to the top of cap.
CAUTION! To avoid contaminating the control solution with the content of
the test strip, you have to place a drop of control solution on a clean
surface or on your finger tip first. Do not directly apply control solution
into a strip.
Step 3. Display test result
Compare the result with the range printed on the test strip vial.
The result should fall within this range.
Out of Range Results
If test results fall outside the range printed on the test strip vial,
check the “Problem Solving Guide,” below and repeat the test. IF you continue to get out of range
results, it means that the system may not be working properly. Do NOT test your blood. Contact an
IDEAL LIFE customer representative at 1-888-IDEAL-41 (888-433-2541) to resolve the issue.
Installation
IDEAL LIFE Gluco-Manager™
18
INCORRECT INCORRECT
Mg/dL
Mg/dL
Ideal Blood Gluco Manual FEB09:Ideal Blood Gluco Manual 08 4/5/09 11:01 AM Page 18
Functions
(when using the IDEAL LIFE POD™,
an optional accessory sold separately)
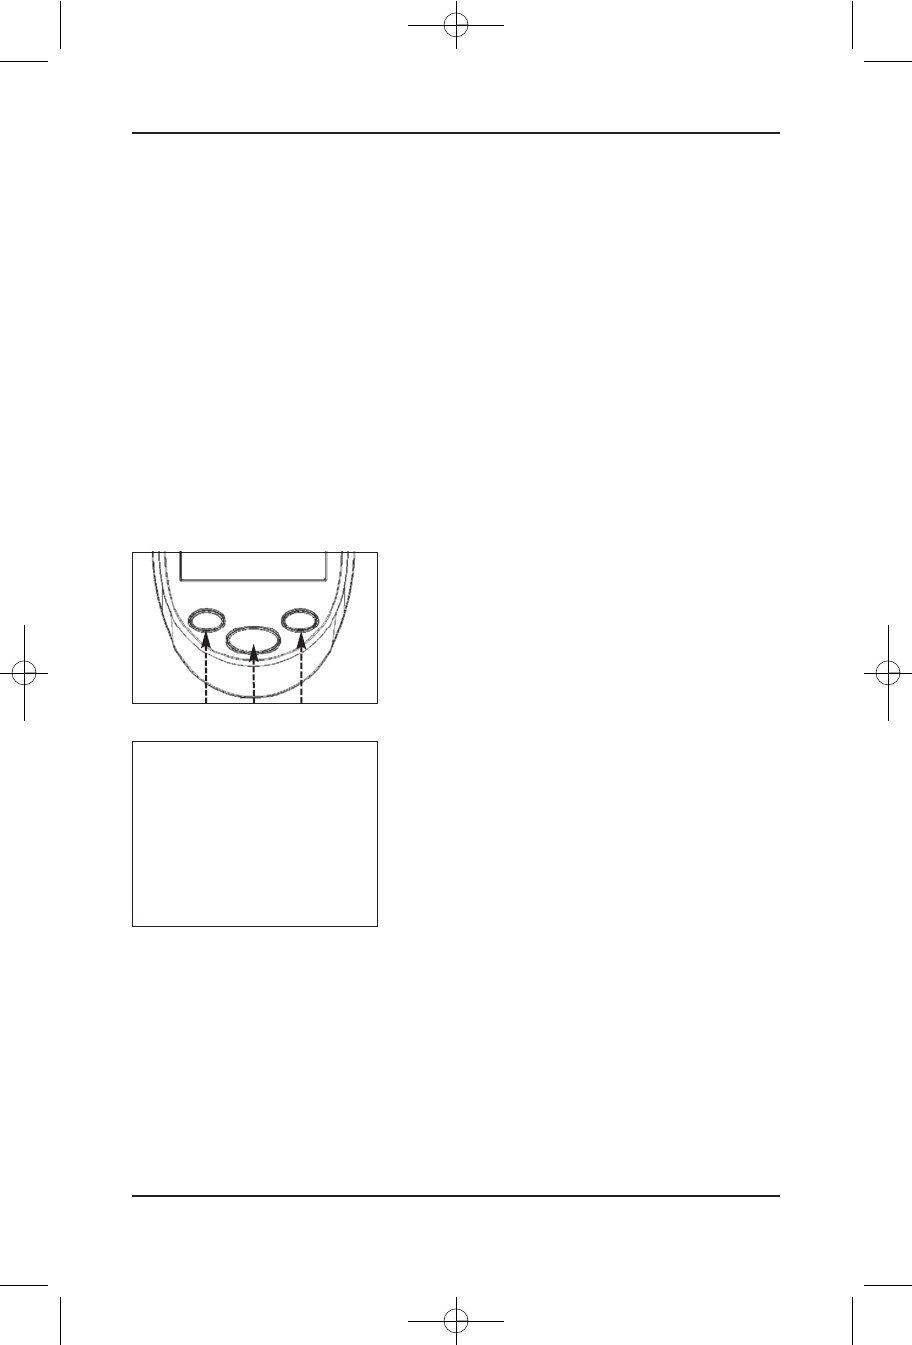
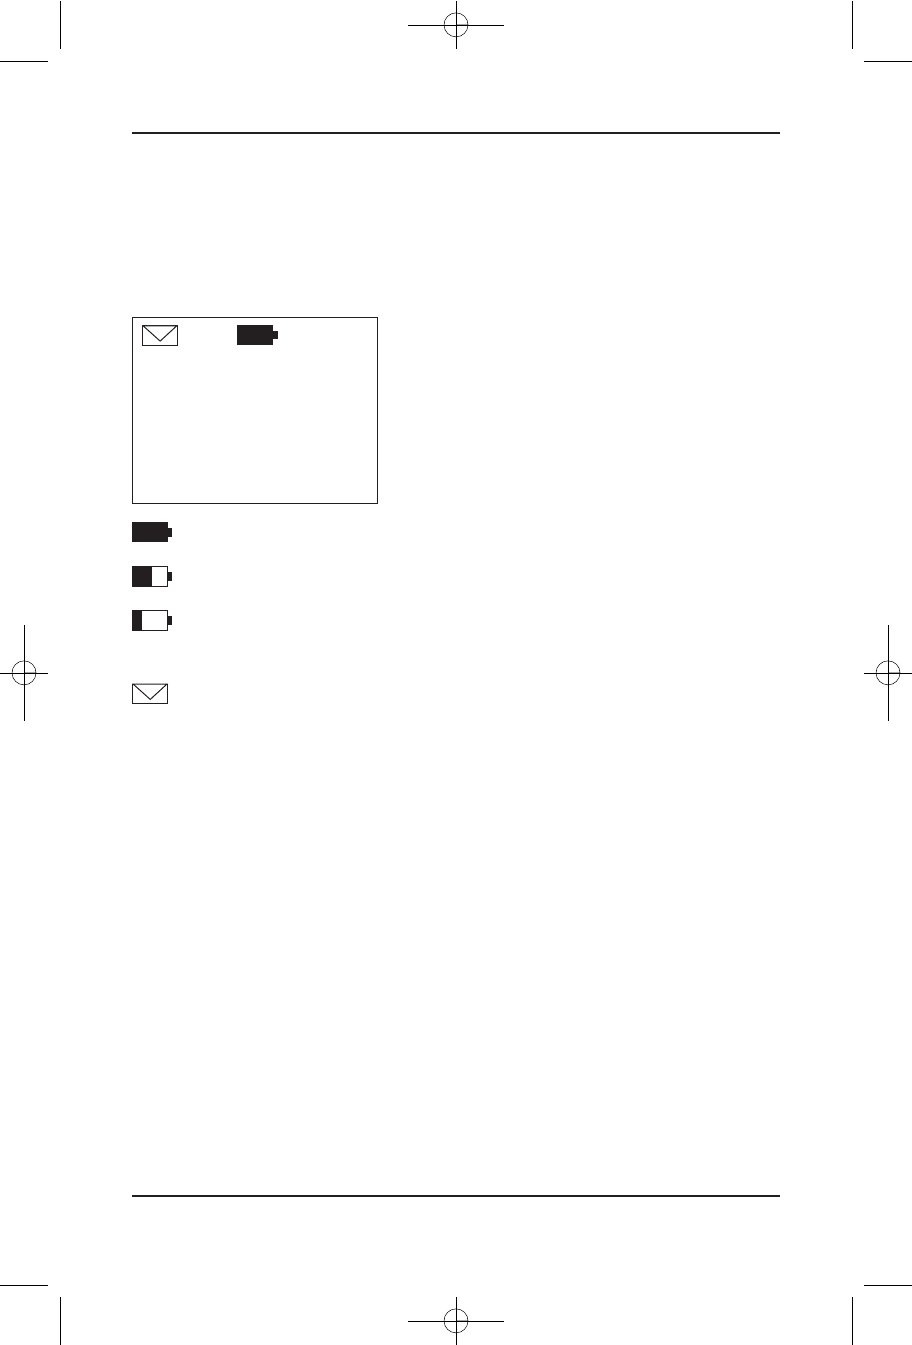
Main Screen
The Main Screen is your default screen. This is where you
will be directed to after completing functions and where
you will find status indicators for the functioning of your
IDEAL LIFE Gluco-Manager™.
In the upper middle portion of the display you will find a
battery icon, displaying power status of your IDEAL LIFE
Gluco-Manager™
Indicates full power
Indicates power is getting low, you should change your batteries
Indicates that your blood pressure measuring function has been turned off.
Replace your batteries immediately.
If you have unread messages, you will see an envelope icon on the upper left corner of the display.
Functions
Instruction Manual 19
IDEAL LIFE
MENU
Ideal Blood Gluco Manual FEB09:Ideal Blood Gluco Manual 08 4/5/09 11:01 AM Page 19
Taking Your Blood Glucose Reading
Be sure to read this section and any inserts found in the test strip box carefully before taking a
reading. Wash and dry your hands before starting.
GETTING A DROP OF BLOOD
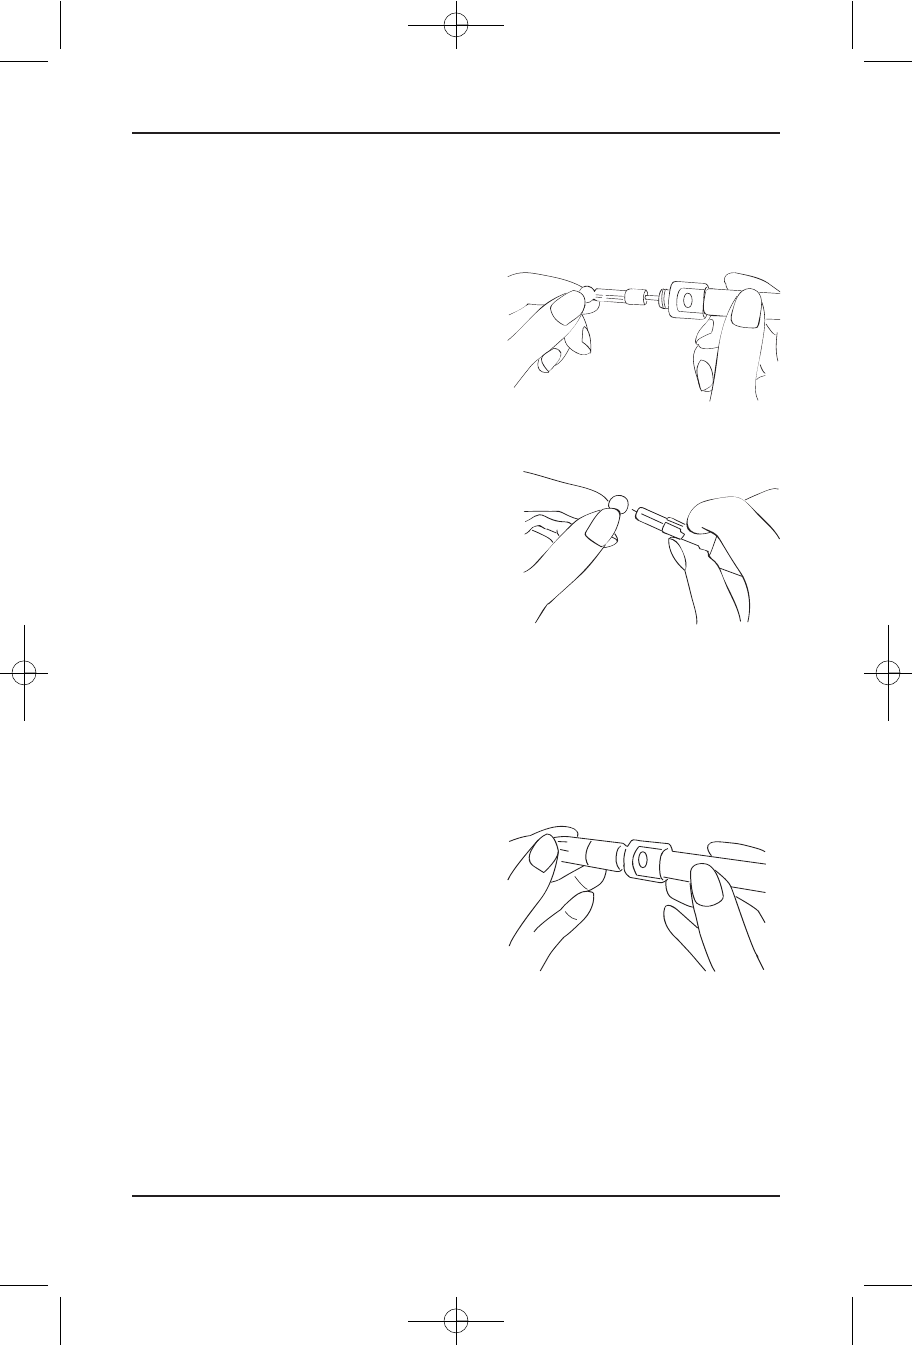
Step 1. Insert a Lancet in the
Adjustable Lancing Device
Twist the lancing device cap to remove it. Insert a
lancet into the lancet holder and push down firmly until
it is fully seated. Do not twist the lancet.
Twist the protective disk until it separates from the
lancet.
WARNING! To reduce the chance of infection:
•Never share a lancet or the lancing device with anyone.
•Always use a new, sterile lancet. Lancets are for single use only.
•Avoid getting hand lotion, oils, or debris in or on the lancets and the lancing device.
Replace and screw the lancing device cap until it is
snug but not too tight.
The adjustable tip offers 5 levels of skin penetration. To
select the desired depth, twist the adjustable tip in
either direction until the number lines up with the
Arrow. To select the best depth: 1-2 for soft or thin
skin, 3 for average skin, 4-5 for thick or calloused skin.
Functions
IDEAL LIFE Gluco-Manager™
20
Ideal Blood Gluco Manual FEB09:Ideal Blood Gluco Manual 08 4/5/09 11:01 AM Page 20
WHEN TO OBTAINING BLOOD FROM SITES OTHER THAN THE
FINGERTIP
A clear cap, together with the kit, makes it easier to get a drop of blood from AST. When you want to
obtain blood from sites except the finger, replace the clear cap instead of the lancing device cap.
Screw the clear cap onto the lancing device until it is snug, but not too tight, and then continue to
step 2.
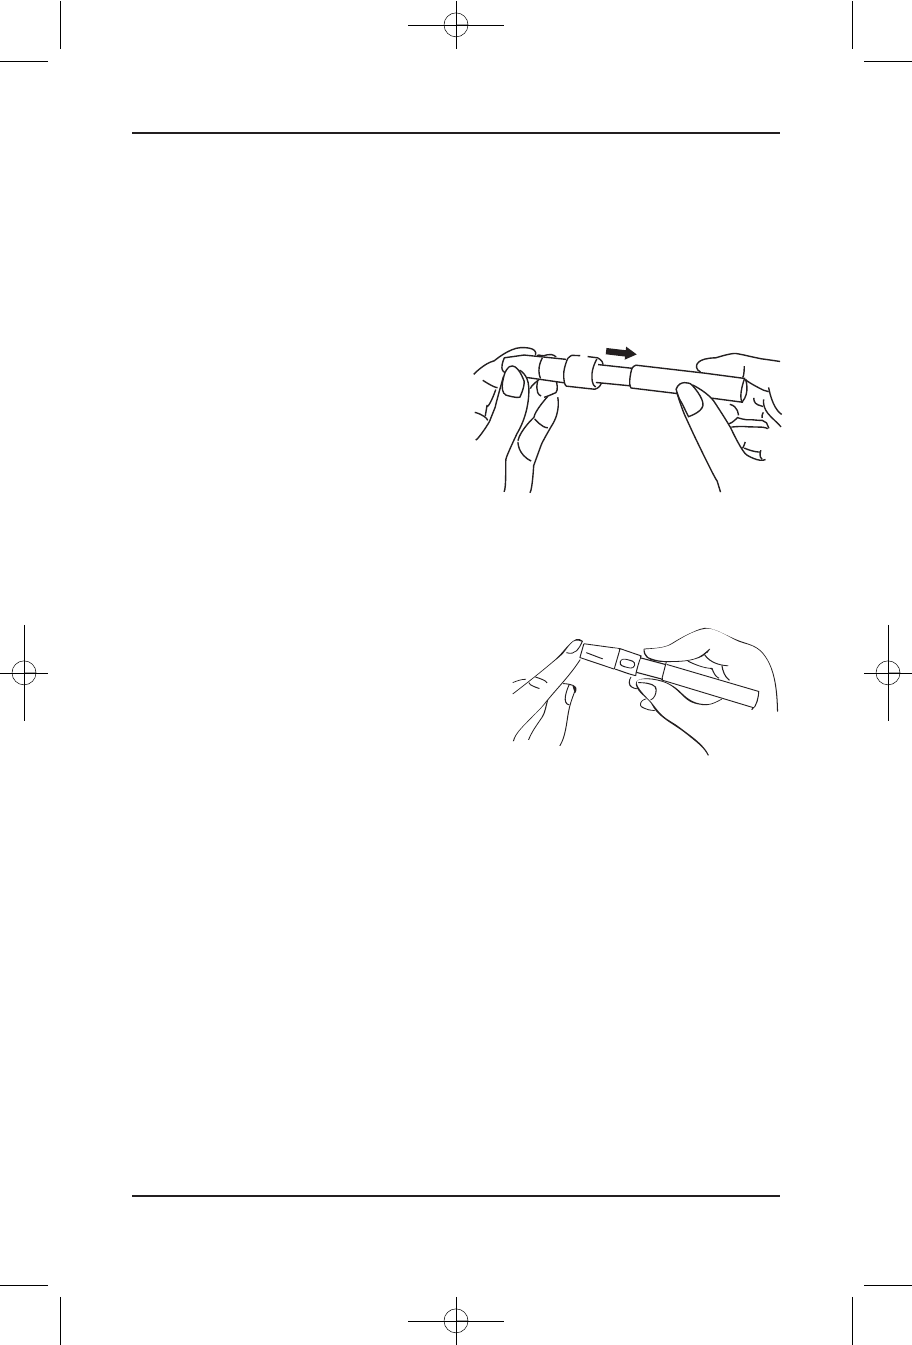
Step2.CocktheLancingDevice
Slide the ejection/cocking control back until it
clicks. If it does not click, the lancing device
may have been cocked when the lancet was
inserted.
Step 3. Wash your hands and the Puncture Site
Select the puncture site either in finger or in other parts (AST). Clean the puncture site with 70%
using cotton moistened with 70% alcohol and let it air-dry.
Step 4. Select and Lance a Puncture Site
•Fingertip
Hold the lancing device firmly against the side of
your finger. Press the release button. You will hear a
click, indicating that the puncture is completed.
• Sites other than a fingertip
Please refer to the section of “About Alternative Site Testing” above. Please consult your health
professional before obtaining blood from sites other than a fingertip.
WARNING! The system requires a very small blood drop to perform a test.
You can obtain it from a fingertip. Choose a different spot each time you
test. Repeated punctures in the same spot may cause soreness and
calluses. Before you decide to do palm testing, please consult your health
professional first.
Functions
Instruction Manual 21
Ideal Blood Gluco Manual FEB09:Ideal Blood Gluco Manual 08 4/5/09 11:01 AM Page 21
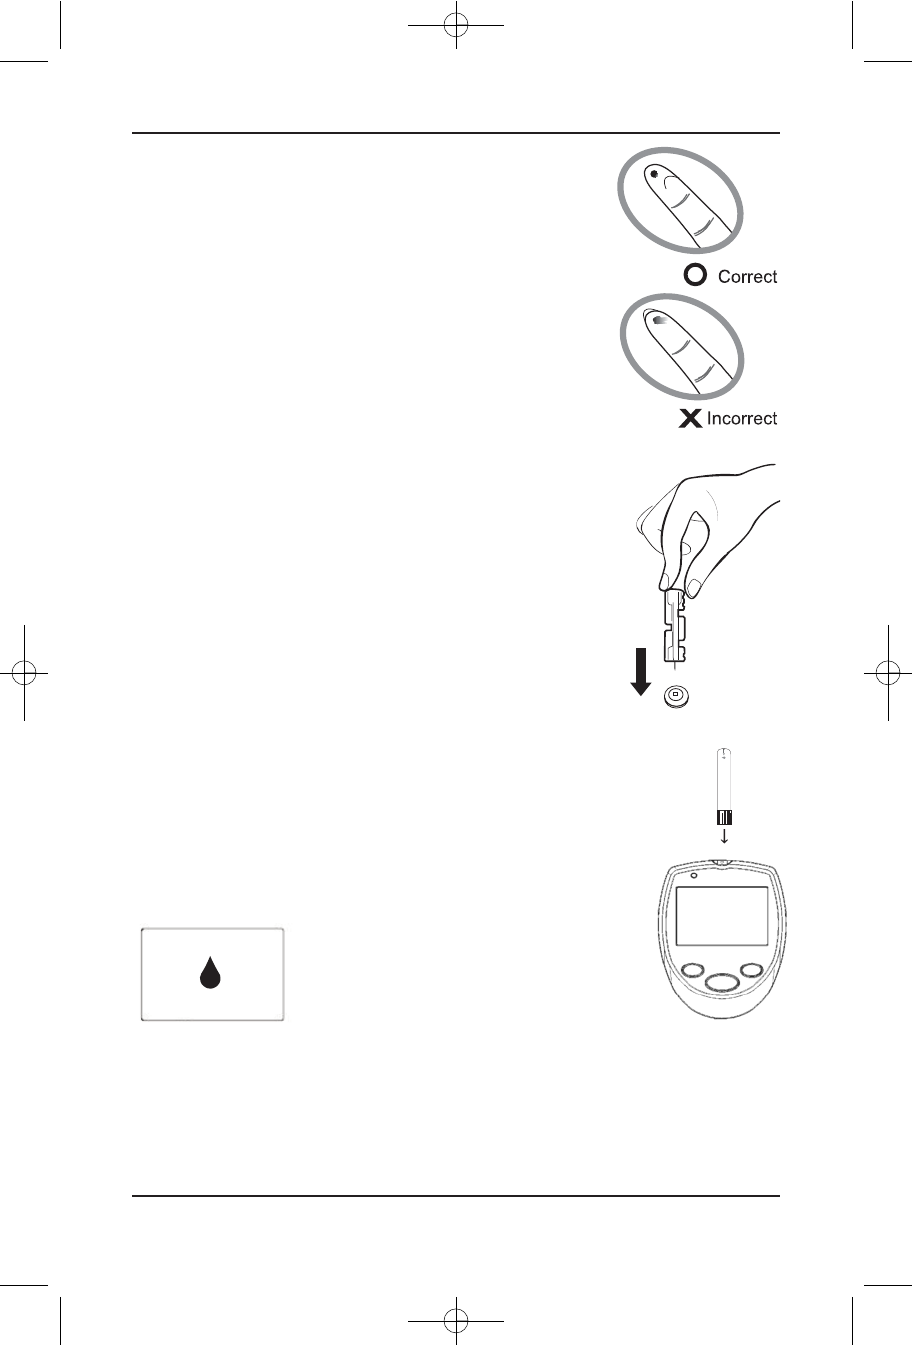
Step 5. Gently Massage the Area, Do NOT Smear
the Blood Sample
To obtain correct results, it is recommended that the first drop of
blood should be discarded with a clean tissue paper or cotton. Use
the second drop of blood for testing. The required blood sample is
0.7 microlitre in volume.
Step 6 Remove the Lancet
Take the lancet out carefully. Place the disk on a hard surface and
push the exposed tip into the protective disk. Always use caution
when removing the lancet. Discard lancets according to local
regulations.
WARNING! The first drop of blood usually contains
tissue fluid and serum, which may affect the test
result. It should be discarded.
TAKING A READING
Step 1. Insert the Test Strip
Insert a test strip with contact bars end first and facing up into the test
slot. (Contact bars must be inserted all the way into the meter or you may
get an inaccurate test result.) The meter turns on automatically and shows
the following messages:
Functions
IDEAL LIFE Gluco-Manager™
22
TD-4227
Ideal Blood Gluco Manual FEB09:Ideal Blood Gluco Manual 08 4/5/09 11:01 AM Page 22

Step 2. Apply Sample
Obtain a drop of blood using the adjustable lancing device. The blood
sample must be at least 0.7 microliter in volume or you may get an
inaccurate test result. When “ ” appears on the display, apply the blood
to the absorbent hole of the test strip where it meets the narrow channel.
Do not push your finger against the test strip or try to apply a smeared
sample. The blood should be completely fill the confirmation window
before the meter begins to count down. If not, do not try to add more
blood to the test strip. Discard the test strip and retest with a new one.
If you have trouble filling the test strip, please contact the dealer for
assistance.
Step 3. Display a Glucose Result
Your blood glucose test result will appear. After the reading is displayed you may
remove the test strip. Discard the used test strip carefully to avoid
contamination.
When the measurement is complete, your IDEAL LIFE Gluco-Manager™
will then display your reading automatically, and begin to communicate
when you are using your IDEAL LIFE Pod™. Your IDEAL LIFE Gluco-
Manager™ will notify you on the bottom of the display as to the status
of your connection. Connection times may vary depending on many
factors. Your reading will always be stored in your meter memory for
local lookup. After displaying your reading and automatically communicating the information, your
meter will automatically return to the default screen before going to sleep mode. Each time your
IDEAL LIFE Gluco-Manager™ communicates successfully to IDEA LIFE through your IDEAL LIFE Pod™
the time and date are set to ensure reliable date and time stamping of all readings.
NOTE! If you do not apply a blood sample within 2 minutes, the meter will
automatically turn off. You must remove the test strip and insert it back
again to restart the test procedure.
Functions
Instruction Manual 23
Ideal Blood Gluco Manual FEB09:Ideal Blood Gluco Manual 08 4/5/09 11:01 AM Page 23
LOOKING AT PREVIOUSLY TAKEN READINGS
Your IDEAL LIFE Gluco-Manager™ will store up to 575 of your latest readings.
Press Menu to view the feature list.
SCROLL to highlight READINGS (it should already be
highlighted as it is the first line item in the list).
Press SELECT to enter your selection.
You can now scroll through your readings, screen by screen
using the NEXT (and BACK) buttons.
If you have less than one page full of readings or have
reached your final screen you can press the button labeled
EXIT to return to the READINGS section (Remember you can
always press the START/ESCAPE button to return to the
default screen).
NOTE! Your meter can display test results in millimoles per litre (mmol/L) or
milligrams per deciliter (mg/dL). The mmol/L unit is standard in Canada.
The mg/dL unit is standard in the United States. Use of the wrong unit of
measure may cause you to misinterpret your blood glucose level, and may
lead to incorrect treatment.
Functions
IDEAL LIFE Gluco-Manager™
24
MENU
READINGS
MESSAGES
GRAPHICS
USERS
SCROLL SELECT
DATE TIME mg/dL
0210 06:25AM 108
0209 07:25AM 106
0208 06:25PM 101
0208 07:25AM 105
0207 06:25AM 104
NEXT
DATE TIME mg/dL
0206 06:25AM 108
0205 07:25AM 106
0204 06:25PM 101
0203 07:25AM 105
0202 06:25AM 104
BACK NEXT
Ideal Blood Gluco Manual FEB09:Ideal Blood Gluco Manual 08 4/5/09 11:01 AM Page 24
Looking at Messages
Your IDEAL LIFE Gluco-Manager™ is equipped for 2-way, interactive communication when using an IDEAL
LIFE Pod™. Messages can be sent remotely to your IDEAL LIFE Gluco-Manager™ and responded to
directly. When messages are transmitted to your IDEAL LIFE Gluco-Manager™, they are stored for
automatic display before your next blood glucose measurement. If you have unread messages in memory,
there will be an ENVELOPE icon located on the upper left corner of the default screen. You can also read
any unread messages in the MESSAGES section for later response.
•Press Menu to view the feature list.
•SCROLL to highlight MESSAGES.
•Press SELECT to enter your selection.
Messages will be displayed in order of time received
(oldest first). Responding to messages automatically stores
them for later transmission and automatically scrolls to the
next message if there is more than one unread message in
your IDEAL LIFE Gluco-Manager™.
There are 2 types of messages. The type of question will dictate the button labels. Simply press
the desired button shown on the screen.
For Example:
Free text messages allow for 2 possible responses, and are
displayed on one screen and may look like this:
Multiple Choice messages allowing for up to 6 possible responses are displayed on 2 screens, and
may look like this:
Functions
Instruction Manual 25
f: DAUGHTER
s: DINNER
When do you
want to go
to dinner?
NEXT
s: DINNER
7:00 PM
7:30 PM
8:00 PM
9:00 PM
SCROLL SELECT
f: SELF
s: KIDS
Reminder:
Pick up kids
at 4:00 PM.
OK
MENU
READINGS
MESSAGES
GRAPHICS
USERS
SCROLL SELECT
Ideal Blood Gluco Manual FEB09:Ideal Blood Gluco Manual 08 4/5/09 11:01 AM Page 25

Looking at Graphics
When using an IDEAL LIFE Pod™, your IDEAL LIFE Gluco-Manager™ will store different types of graphics
downloaded from the IDEAL LIFE website. (All the graphics can be altered through the IDEAL LIFE
website, refer to www.ideallifeonline.com for details).
Press Menu to view the feature list.
•SCROLL to highlight GRAPHICS.
•Press SELECT to enter your selection.
•You can now scroll through your graphics screen by screen
using the button labeled NEXT. While scrolling through screens,
you can always go to the previous screen by pressing the button
labeled BACK.
If you have only one graphic in memory, or have reached
your final screen you can press the button labeled EXIT to
return to the MENU section (Remember you can always
press the START/ESCAPE button to return to the default
screen).
Functions
IDEAL LIFE Gluco-Manager™
26
LATEST DAILY AVG
110
105
100
95
90
09 JAN – 09 FEB
BACK NEXT
MENU
READINGS
MESSAGES
GRAPHICS
USERS
SCROLL SELECT
BACK EXIT
☺
Ideal Blood Gluco Manual FEB09:Ideal Blood Gluco Manual 08 4/5/09 11:01 AM Page 26
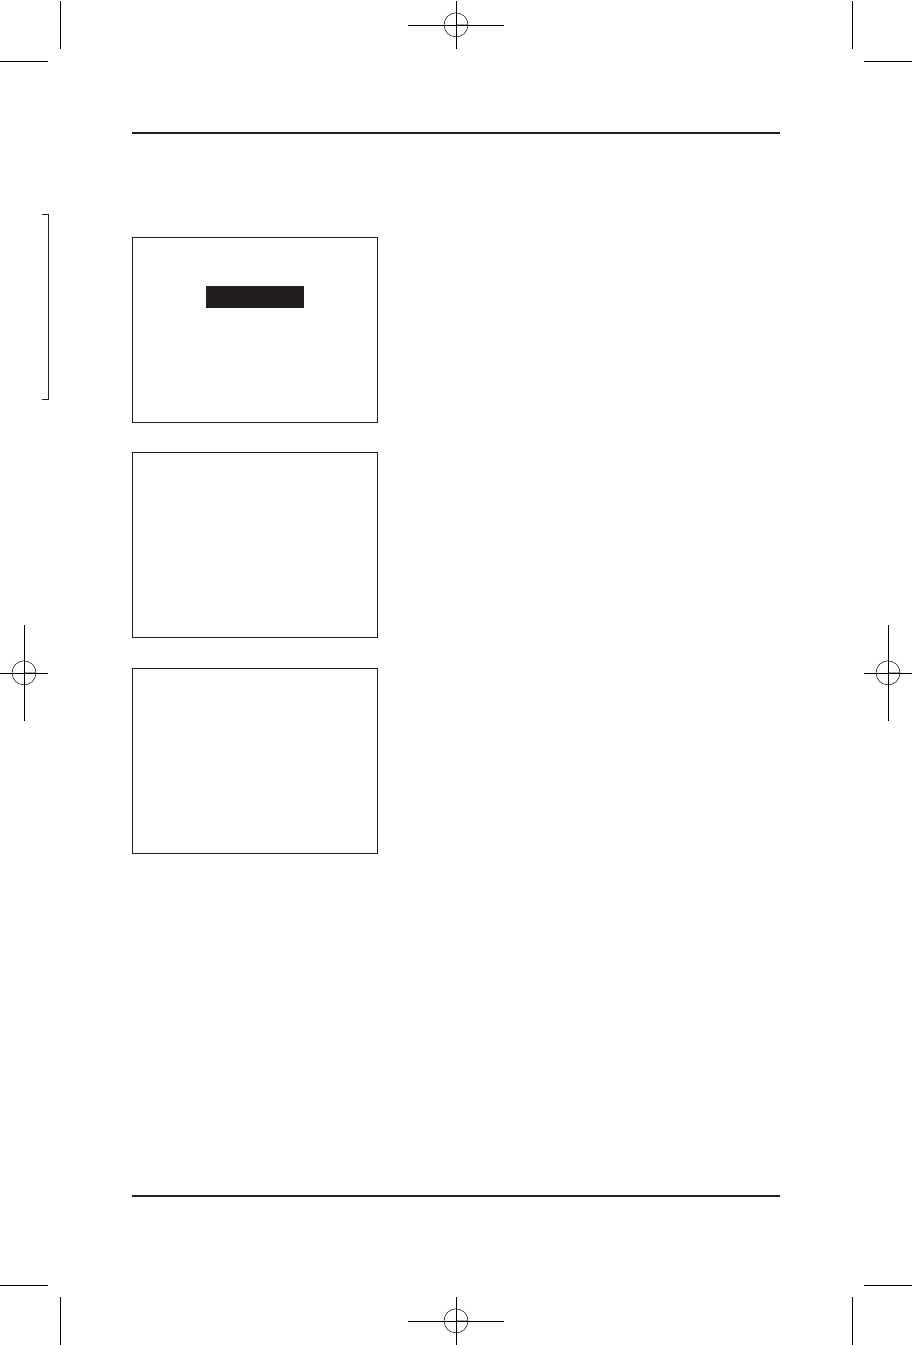
Users
The USERS section allows you to set-up your IDEAL LIFE Gluco-Manager™ with an option to allow 2
users to use the same device.
SELECT USER
•Press Menu to view the feature list.
•SCROLL to highlight USERS
•Press SELECT to enter your selection.
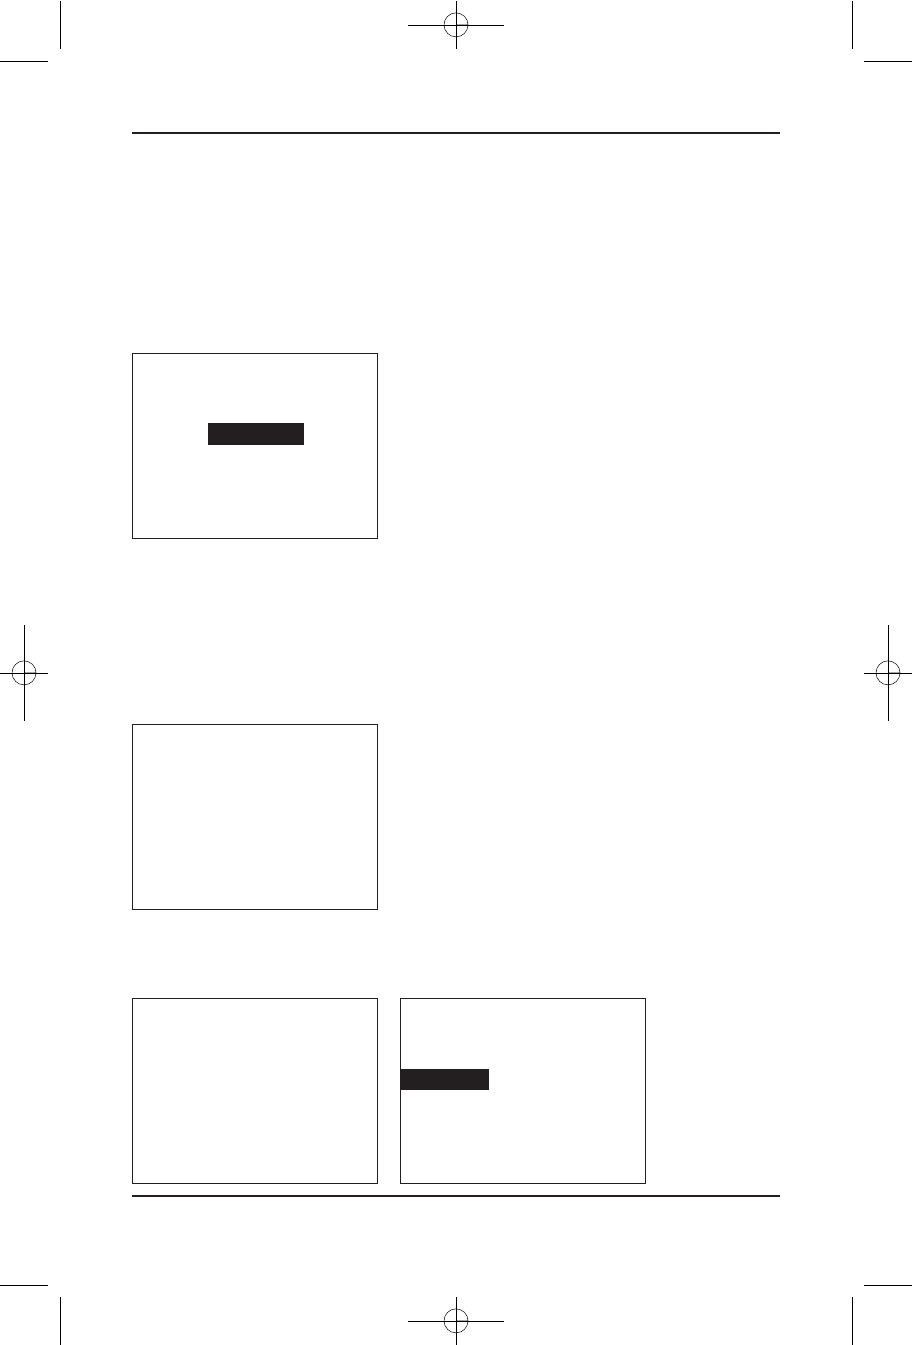
Using the Scroll and SELECT buttons, select the SELECT USER
option. When more than one user is setup in the device, the
SELECT USER function allows an individual to switch the
current user selected in the device. When selecting SELECT
USER, if only one user is selected in the device it will display
the current user in the device. If there are multiple users in
setup in the device, using the SCROLL and SELECT buttons a
user can switch between USER 1 and USER 2
Selecting USER 1 will set the device to USER 1. Selecting
USER 2 will set the device to USER 2.
Functions
Instruction Manual 27
MENU
READINGS
MESSAGES
GRAPHICS
USERS
SCROLL SELECT
USERS
SELECT USER
ADD/REMOVE USER
SCROLL SELECT
SELECT USER
USER 1
USER 2
SCROLL SELECT
Ideal Blood Gluco Manual FEB09:Ideal Blood Gluco Manual 08 4/5/09 11:01 AM Page 27
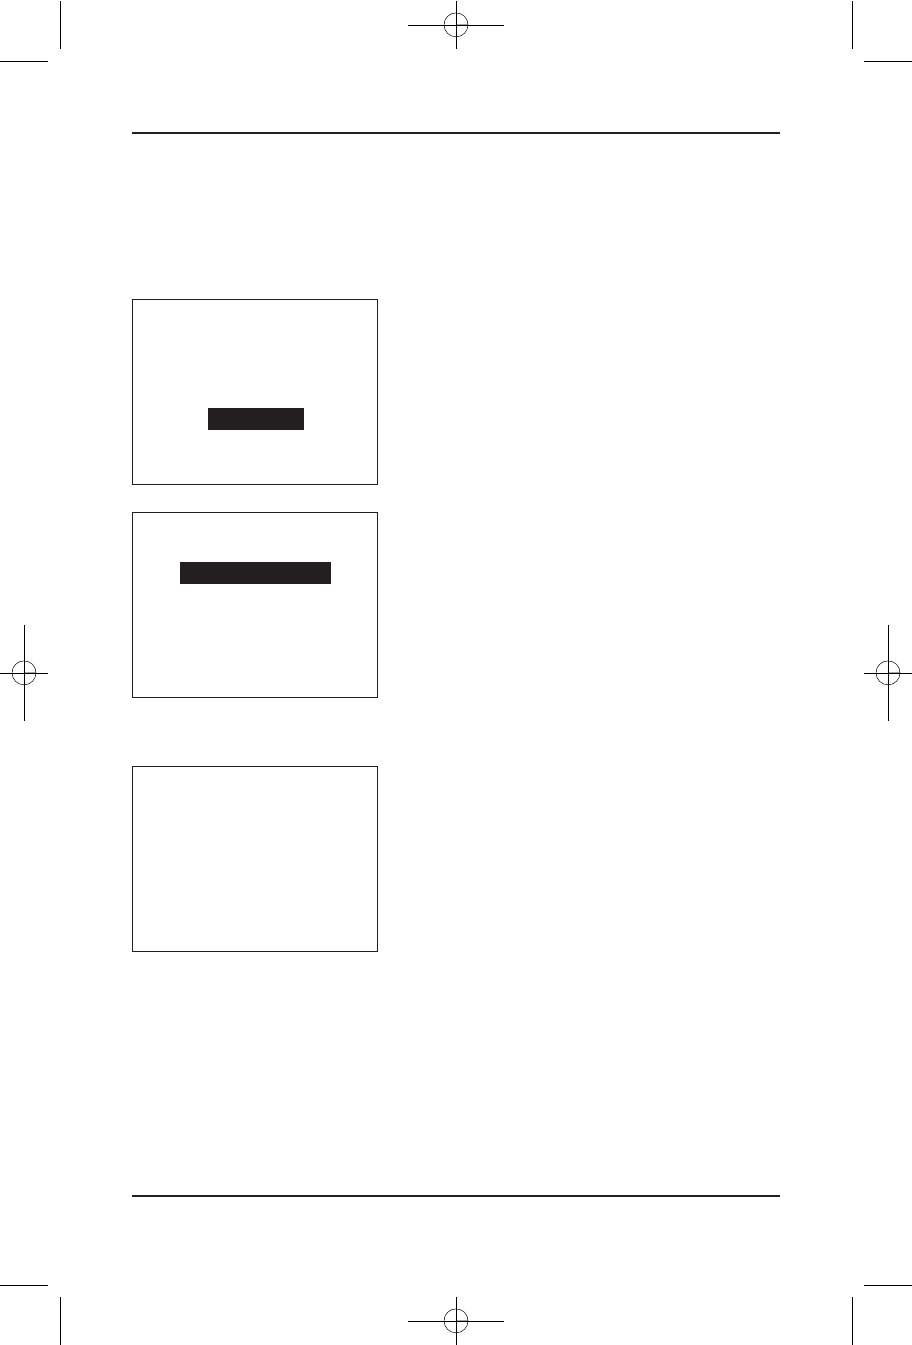
ADD/REMOVE USER
•Press Menu to view the feature list.
•SCROLL to highlight USERS
•Press SELECT to enter your selection.
•Press SCROLL to highlight ADD/REMOVE USER.
•Press SELECT to enter your selection.
When there is only one user setup in the device, the ADD USER function will be initiated.
Press the YES button to add an additional user in the
device. The next screen will walk the new user through the
user setup process. Press the NO button to exit the ADD
USER function and return the user to the main USERS
options screen.
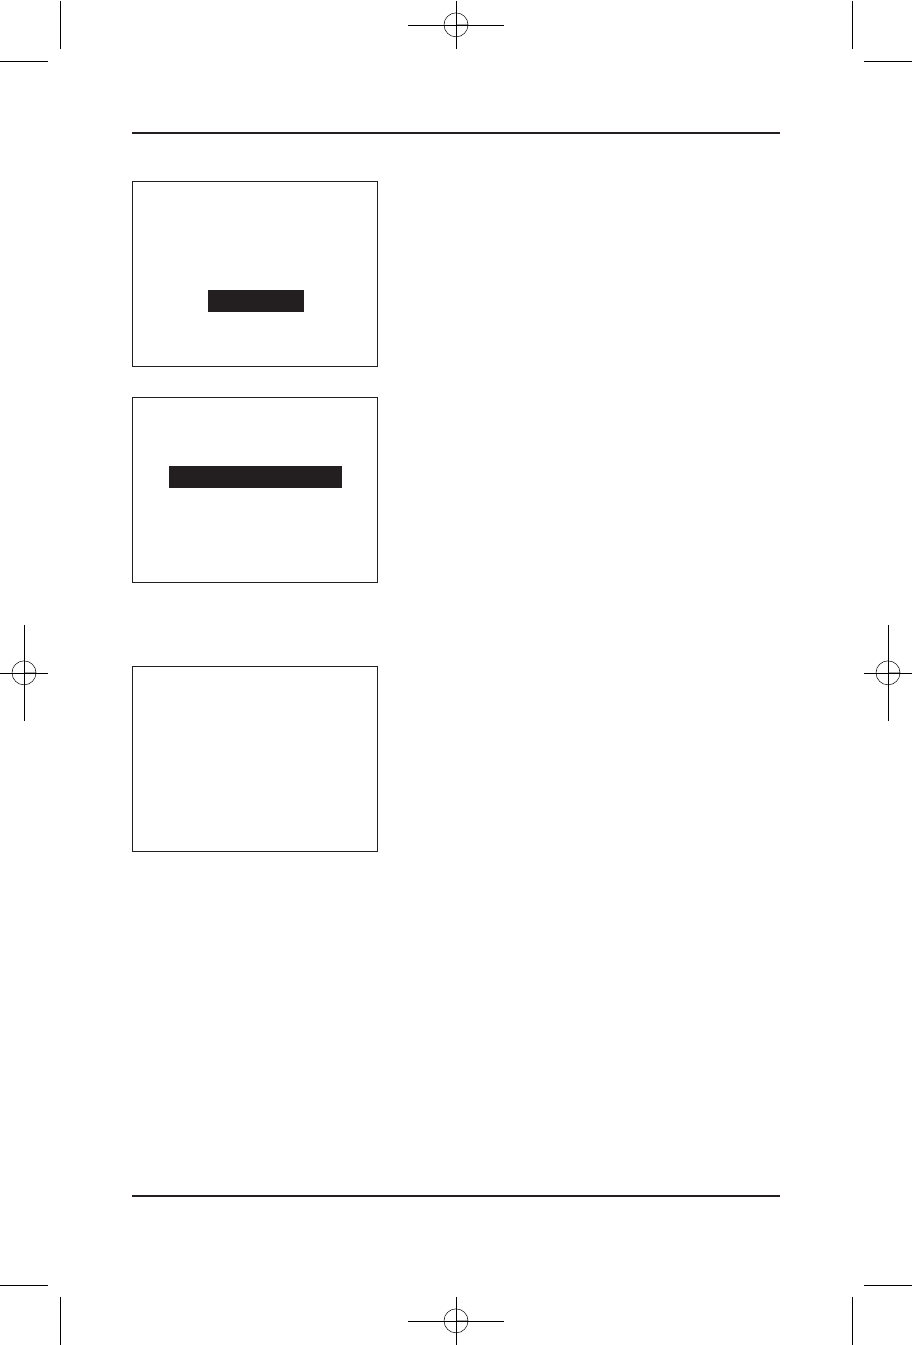
When there are two users setup in the device, the REMOVE USER function will be initiated.
Functions
IDEAL LIFE Gluco-Manager™
28
MENU
READINGS
MESSAGES
GRAPHICS
USERS
SCROLL SELECT
USERS
SELECT USER
ADD/REMOVE USER
SCROLL SELECT
ADD USER?
NO YES
Ideal Blood Gluco Manual FEB09:Ideal Blood Gluco Manual 08 4/5/09 11:01 AM Page 28

Using the SCROLL and SELECT buttons, a user can be
removed from the device. Selecting EXIT will take the user
to the USER options screen. When selecting a particular
USER, as for example REMOVE USER 2 (as shown in the
example below), that particular use will be displayed
requiring a confirmation to remove from the device.
Pressing NO will return the user to the USER options screen.
SELECTING YES will display an hour glass while the device
removes the selected USER from the device. When
complete, the device will return to the default screen.
Functions
Instruction Manual 29
REMOVE USER
REMOVE USER 1
REMOVE USER 2
EXIT
SCROLL SELECT
REMOVE USER 2
NO YES
Ideal Blood Gluco Manual FEB09:Ideal Blood Gluco Manual 08 4/5/09 11:01 AM Page 29

Comparing Meter And
Laboratory Results
The meter provides you with whole blood equivalent results. The result you obtain from your meter
may different somewhat from your laboratory result due to normal variation. Meter results can be
affected by factors and conditions that do not affect laboratory results in the same way (see test strip
package insert for typical accuracy and precision data and for important information on limitations).
To make an accurate comparison between meter and laboratory results, follow the guidelines below.
Before you go to the lab:
•Perform a control solution test to make sure that the meter is working properly.
•It is best to fast for at least eight hours before doing comparison tests.
•Take your meter with you to the lab.
While at the lab:
•Make sure that the samples for both tests (the meter test and the lab test) are taken and tested
within 15 minutes of each other.
•Wash your hands before obtaining a blood sample.
•Never use your meter with blood that has been collected in a gray-top test tube.
•Use fresh capillary blood only.
You may still have variation from the result because blood glucose levels can change significantly over
short periods, especially if you have recently eaten, exercised, taken medication, or experienced
stress1. In addition, if you have eaten recently, the blood glucose level from a finger stick can be up
to 70mg/dL (3.9 mmol/L) higher than blood drawn from a vein (venous sample) used for a lab test2.
Therefore, it is best to fast for eight hours before doing comparison tests. Factors such as the amount
of red blood cells in the blood (a high or low hematocrit) or the loss of body fluid (severe
dehydration) may also cause a meter result to be different from a laboratory result.
References
1. Surwit, R.S., and Feinglos, M.N.: Diabetes Forecast (1988), April, 49-51
2. Sacks, D.B.: “Carbohydrates. “Burtis, S.A., and Ashwood, E.R. (ed.), Tietz Textbook of Clinical
Chemistry. Philadelphia: W.B. Saunders Company (1994), 959.
Comparing Meter And Laboratory Results
IDEAL LIFE Gluco-Manager™
30
Ideal Blood Gluco Manual FEB09:Ideal Blood Gluco Manual 08 4/5/09 11:01 AM Page 30

Care And Maintenance
Your meter does not require special maintenance. As no blood or control solution comes in contact
with the meter, there is no special cleaning required. Take care to avoid getting dirt, dust, blood,
control solution or water inside the meter through the test port. Store the meter in its carrying case
after each use. A cloth dampened with water and mild detergent can be used to wipe down the
outside of the meter. Your meter is a precision instrument. Please handle it with care.
Care And Maintenance
Instruction Manual 31
Ideal Blood Gluco Manual FEB09:Ideal Blood Gluco Manual 08 4/5/09 11:01 AM Page 31
Specifications
IDEAL LIFE Gluco-Manager™
Model: GMM 0001 IDEAL LIFE Gluco-Manager™
Display: LCD Digital Display
Power Source: Two 1.5V AAA alkaline batteries
Battery Life: Over 200 determinants
Operating Temperature/Humidity: 50°F to 104°F (10°C to 40°C), below 85% R.H. (non-condensing)
Meter Storage Temperature/Humidity: -4°F to 140°F (-20°C to 60°C), below 95% R.H.
Weight: 103.5 g
Dimension: 97 mm (l) x 77.7 mm (w) x 24.8 (h)
Auto Electrode Inserting Detection YES
Auto Sample Loading Detection YES
Sleeping Mode Power Consumption Less than 500uA
Auto Shut Off After 2 minutes without action
Measurement Units mg/dL or mmol/L
Note: these specifications, to improve performance, are subject to change without notice.
IDEAL LIFE Pod™
Model: ILP 0001 IDEAL LIFE Pod™
Display: 3 LED’s
Power Source: AC adapter
Operating Temperature/Humidity: 50°F to 104°F (10°C to 40°C)/Below 85% relative humidity
Storage Temperature/Humidity 23°F to 122°F (-5°C to 50°C)/Below 90% relative humidity
Console Weight: Approx. 142 g without batteries
Outer Dimensions: Approx. 120 mm Width x 105 mm Depth x 30 mm Height
Note: These specifications are subject to change without notice.
Specifications
IDEAL LIFE Gluco-Manager™
32
Ideal Blood Gluco Manual FEB09:Ideal Blood Gluco Manual 08 4/5/09 11:01 AM Page 32

Problem Solving Guide
The following is a summary of potential problems in operation to help troubleshoot various issues.
Improper use may cause an inaccurate result without producing an error message or a symbol. In the
event of a problem, refer to the information under action.
If you follow the recommended instructions but a problem still exists, please contact an IDEAL LIFE™
customer representative at 1-888-IDEAL-41 (888-433-2541) to resolve the issue.
Trouble Shooting
Situation: The meter does not display a message after inserting a test strip.
PROBABLE CAUSE WHAT TO DO
Battery exhausted. Replace the battery.
Battery incorrectly installed or absent. Check that the battery is correctly installed.
Test strip inserted upside-down Insert the test strip correctly with the contact bars end
or incompletely. first and facing up.
Defective meter. Please call an IDEAL LIFE customer representative.
Situation: The test does not start after applying the sample.
PROBABLE CAUSE WHAT TO DO
Insufficient blood sample. Repeat the test using a new test strip with larger
volume of blood sample.
Defective test strip. Repeat the test with a new test strip.
Sample applied after automatic Repeat the test with a new test strip.
shutoff (3 minutes after last user action). Apply sample only when “ ” appears on the display.
Defective meter. Please call an IDEAL LIFE customer representative.
Problem Solving Guide
Instruction Manual 33
Ideal Blood Gluco Manual FEB09:Ideal Blood Gluco Manual 08 4/5/09 11:01 AM Page 33
Situation: If the control solution test result is out of range.
PROBABLE CAUSE WHAT TO DO
Error in performing the test. Read the instruction thoroughly
and repeat the test again.
Do not shake the control solution vial Shake the control solution vigorously
very well. and repeat the test again.
Expired or contaminated control solution. Check the expiry date or the discarded date of the
control solution.
Control solution that is too warm Control solution, monitor, and test strips should
or too cold. come to room temperature (68 to 77°F / 20 to 25 °C)
before testing.
Test strip deterioration. Repeat the test with a new test strip.
Meter malfunction. Please call an IDEAL LIFE customer representative.
Error Message
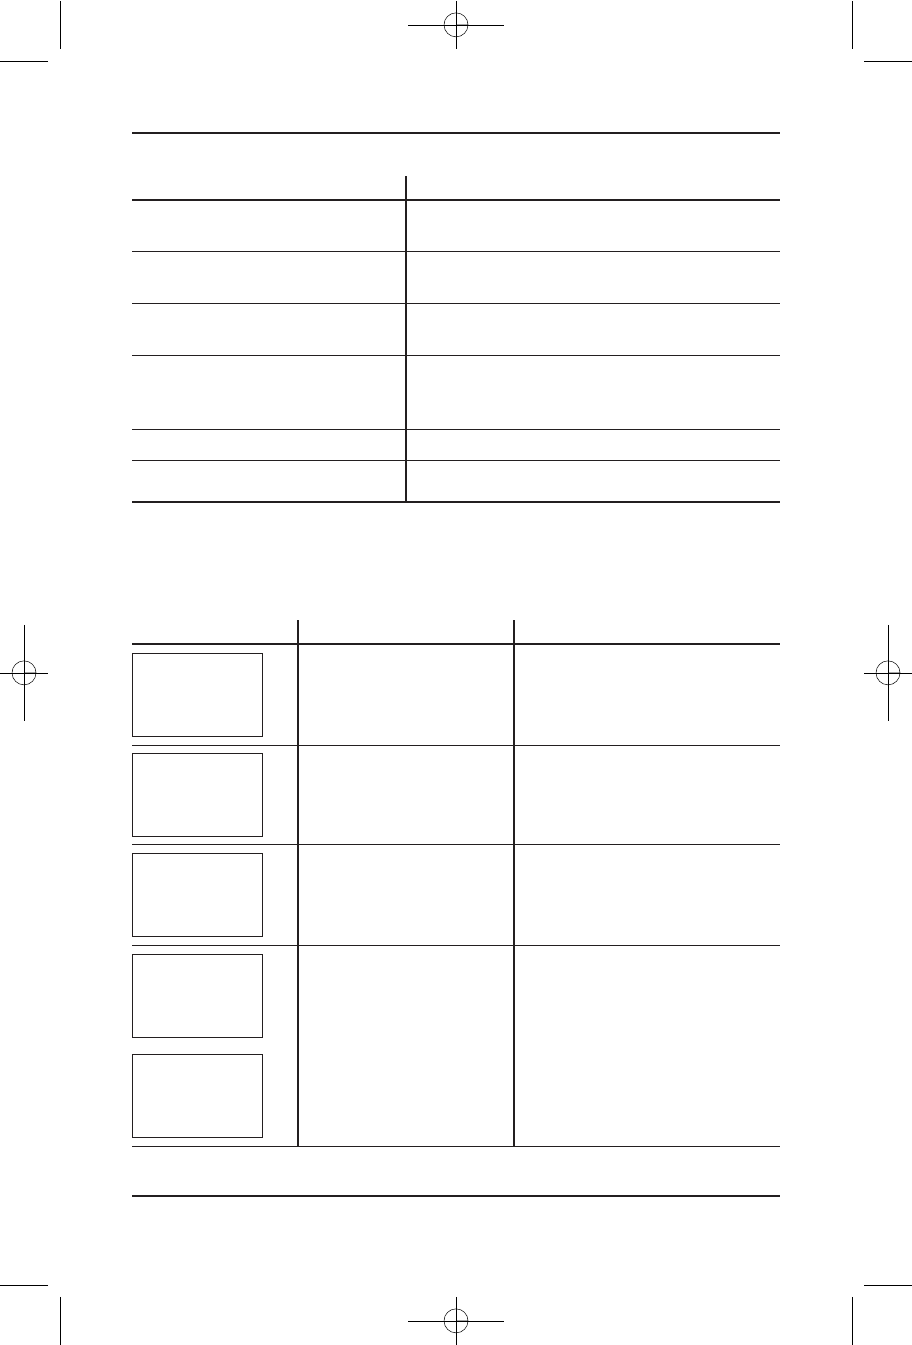
MESSAGE WHAT IT MEANS ACTION
Problem Solving Guide
IDEAL LIFE Gluco-Manager™
34
Appears when the batteries
can not provide enough
power for a test.
Appears when inserting a
used test strip.
Remove the strip after
applying blood to the
absorbent hole.
Problem with the meter.
Replace the batteries immediately.
Test with a new test strip.
Re-test with a new test strip.
Review the instructions and re-test with
a new test strip. If the above steps do
not work, please contact the Customer
Care Service for help.
LOW BATTERY
USED TEST STRIP
TEST STRIP
REMOVED PRIOR
TO READING
TECHNICAL ERROR
READING ERROR
Ideal Blood Gluco Manual FEB09:Ideal Blood Gluco Manual 08 4/5/09 11:01 AM Page 34
Summary of Operation
Instruction Manual 35
Summary of Operation
This summary is intended only for quick reference and not as a substitute for the instruction manual.
Please read the entire manual before you begin testing.
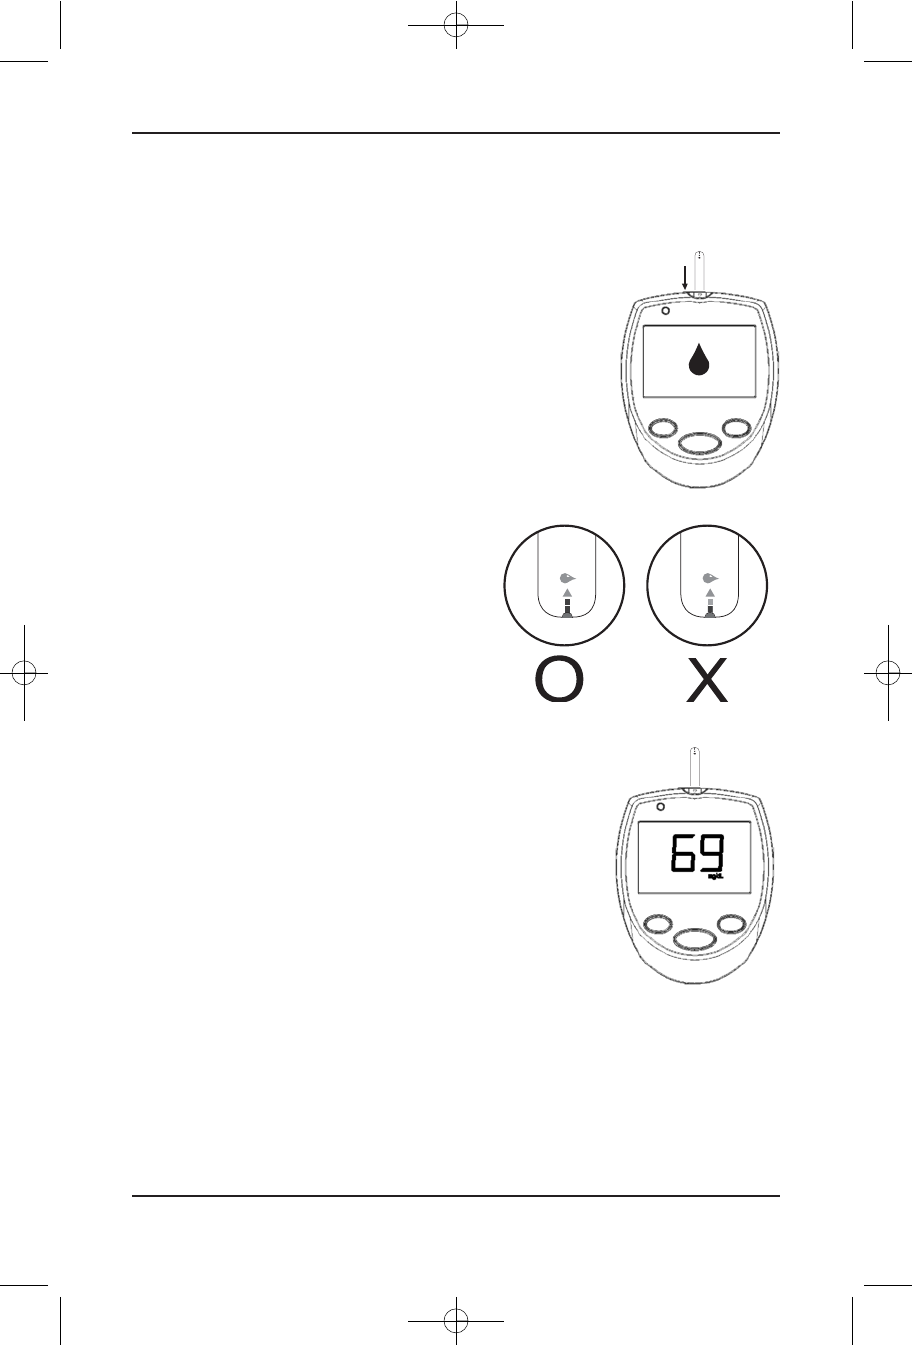
Step 1. Insert test strip
The meter is automatically turned on and displays the room temperature
and the code number
Step 2. Apply sample
Select and clean the puncture site. Touch and hold the
drop of blood to the absorbent hole of test strip until
the confirmation window is completely filled.
Step 3. Obtain accurate results
The meter will display an hour glass and then display the test result.
Ideal Blood Gluco Manual FEB09:Ideal Blood Gluco Manual 08 4/5/09 11:01 AM Page 35

Federal Communications
Commission (FCC) Statement
15.21
You are cautioned that changes or modifications not expressly approved by the part responsible for
compliance could void the user's authority to operate the equipment.
15.105(b)
This equipment has been tested and found to comply with the limits for a Class B digital device,
pursuant to part 15 of the FCC rules. These limits are designed to provide reasonable protection
against harmful interference in a residential installation. This equipment generates, uses and can
radiate radio frequency energy and, if not installed and used in accordance with the instructions, may
cause harmful interference to radio communications. However, there is no guarantee that interference
will not occur in a particular installation. If this equipment does cause harmful interference to radio
or television reception, which can be determined by turning the equipment off and on, the user is
encouraged to try to correct the interference by one or more of the following measures:
•Reorient or relocate the receiving antenna.
•Increase the separation between the equipment and receiver.
•Connect the equipment into an outlet on a circuit different from that to which the receiver is
connected.
•Consult the dealer or an experienced radio/TV technician for help.
OPERATION IS SUBJECT TO THE FOLLOWING TWO
CONDITIONS:
1) this device may not cause interference and
2) this device must accept any interference, including interference that may cause undesired
operation of the device.
FCC RF RADIATION EXPOSURE STATEMENT:
This equipment complies with FCC radiation exposure limits set forth for an uncontrolled environment.
End users must follow the specific operating instructions for satisfying RF exposure compliance. This
transmitter must not be co-located or operating in conjunction with any other antenna or transmitter.
FCC Statement
IDEAL LIFE Gluco-Manager™
36
Ideal Blood Gluco Manual FEB09:Ideal Blood Gluco Manual 08 4/5/09 11:01 AM Page 36

Customer Information
Instruction Manual 37
Customer Information
This equipment complies with Part 68 of the FCC rules and the requirements adopted by the ACTA.
On the bottom of this equipment is a label that contains, among other information, a product
identifier of [US: 5CQMM00BILP0001]. If requested, this number must be provided to the telephone
company. If this equipment [ILP 0001] caused harm to the telephone network, the telephone
company will notify you in advance that temporary discontinuance of service may be required. But if
advance notice isn't practical, the telephone company will notify the customer as soon as possible.
Also, you will be advised of your right to file a complaint with the FCC if you believer it is necessary.
The telephone company may make changes in its facilities, equipment, operations or procedures that
could affect the operation of the equipment. If this happens the telephone company will provide
advance notice in order for you to make necessary modifications to maintain uninterrupted service. If
you experience trouble with this equipment, you disconnect if from the network until the problem has
been corrected or until you are sure that the equipment is not malfunctioning. Please follow
instruction for repairing if any (e.g. battery replacement section) other wise do not alternate or repair
any parts of the device except specified. Connection to party line service is subject to state tariffs.
Contact the state public utility commission, public service commission or corporation commission for
information. If the telephone company requests information on what equipment is connected to their
lines, inform them of:
a) The telephone number that this unit is connected to,
b) The ringer equivalence number [0.0B]
c) The USOC jack required [RJ11C], and
d) The FCC Registration Number [US:5CQMM00BILP0001]
Items (b) and (d) are indicated on the label. The ringer equivalence number (REN) is used to
determine how many devices can be connected to your telephone line. In most areas, the sum of the
RENs of all devices on any one line should not exceed five (5.0). If too many devices are attached,
they may not ring properly.
Ideal Blood Gluco Manual FEB09:Ideal Blood Gluco Manual 08 4/5/09 11:01 AM Page 37

Service Requirements
In the event of equipment malfunction, all repairs should be performed by our Company or an
authorized agent. It is the responsibility of users requiring service to report the need for service to
our Company or to one of our authorized agents. Please refer to the location you purchased or
received your equipment for details of where service can be facilitated through.
Service Requirements
IDEAL LIFE Gluco-Manager™
38
Ideal Blood Gluco Manual FEB09:Ideal Blood Gluco Manual 08 4/5/09 11:01 AM Page 38
Notes / Reading Values
Notes / Reading Values
Instruction Manual 39
Ideal Blood Gluco Manual FEB09:Ideal Blood Gluco Manual 08 4/5/09 11:01 AM Page 39

© 2009 - 001 IDEAL LIFE INC. All rights reserved. IDEAL LIFE is a registered trademark in the United States for weight
scales, blood glucose meters, blood pressure cuffs and meters, heart monitors. IDEAL LIFE BODY MANAGER, IDEAL LIFE BP
MANAGER, IDEAL LIFE GLUCO MANAGER, IDEAL LIFE POD, REALIZING THE VISION OF A BETTER TOMORROW, Leveraging the
Power of Communication, Real time health and wellness information on demand, wireless remote health and wellness
management, and Solutions for better healthcare through advanced communication technology, The IDEAL LIFE Interactive
Communication Technology Platform, the IDEAL LIFE Information Management System, and the IDEAL LIFE Health &
Wellness Solution are all proprietary trademarks of IDEAL LIFE INC. Contents are covered by one issued U.S. patent and
one or more U.S. patents pending. Manufactured for and Distributed by IDEAL LIFE INC., Toronto ON M4P 1G8, and made
in Taiwan and China. Products may vary from pictures shown.
IDEAL LIFE INC.
55 Eglinton Avenue East, Suite 808, Toronto ON M4P 1G8
Between 9:00 am and 5:00 pm (EST): Tel 416-489-1494 Fax: 416-489-3009 www.IDEALLIFEonline.com
Our 24 hour customer support line is available at: 1-888-433-2541
At all other times, you should contact your healthcare professional for assistance.
Ideal Blood Gluco Manual FEB09:Ideal Blood Gluco Manual 08 4/5/09 11:01 AM Page 40