TAT Electronics T67 Action Camera User Manual T67 User manualx
Shenzhen TAT Electronics Co.,Ltd Action Camera T67 User manualx
User Manual
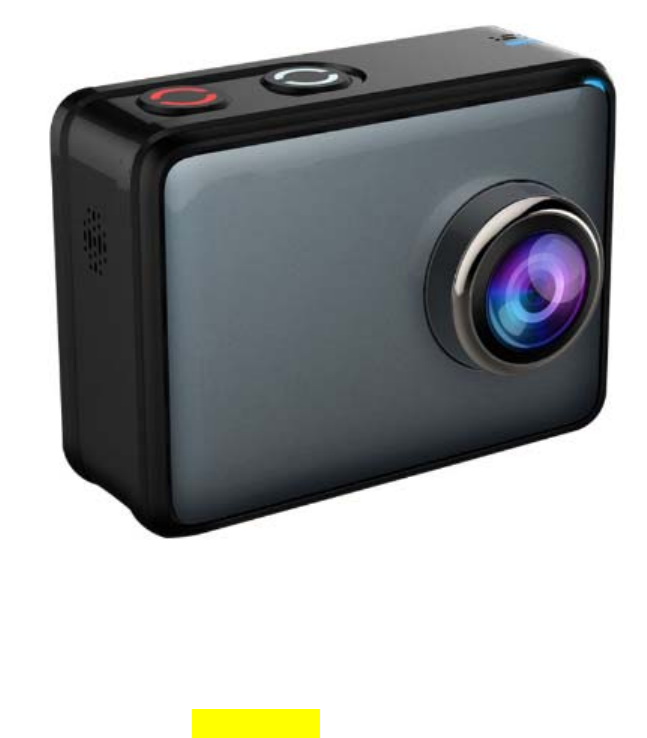
User Manual
Model: T67 Real 4K Action Camera with Touch Panel
Made by: Shenzhen TAT Electronics Co.,Ltd
Version: V1.01

1. Key Feature
Video Resolution: 4K@30FPS, 1080P@60FPS, 720P@120FPS
Image Resolution: 14MP
2’’ TFT touch panel
3.8V/1100mAh removable Lithium-ion battery
Support Wi-Fi connection, range up to 20 meters
Customized App: Android & iOS
Support 2.4G RF Remote Controller
Support EIS on 4K@30fps with good quality
Support Micro SD Card up to 32GB
Several Metal inner cabinets to spread heat
Bundle with waterproof case can support underwater 45 meters
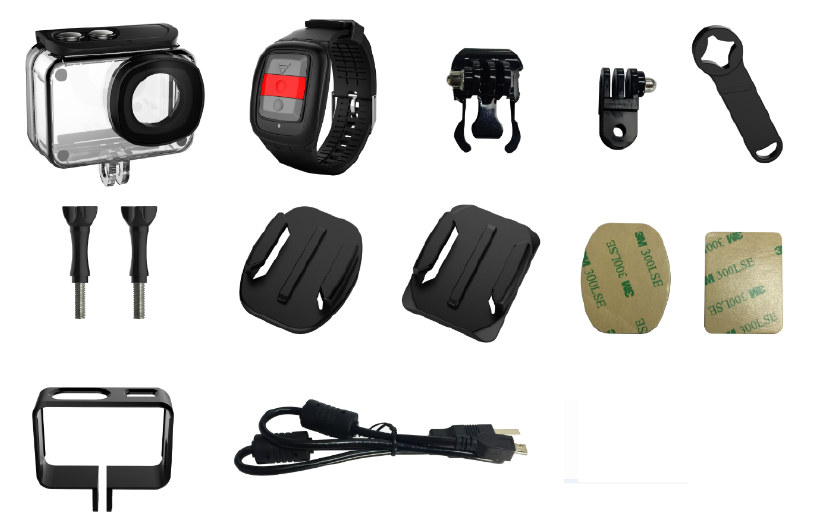
2. Accessories in standard package
Camera x 1 Spanner x 1
Waterproof case x 1 Lock bolt x 2
Remote controller x 1 3M adhesive for curved x 1
Quick release mount x 1 3M adhesive for flat mount x 1
Flat mount x 1 Portable case x 1
Curved mount x 1 USB cable x 1
Knuckle x 1
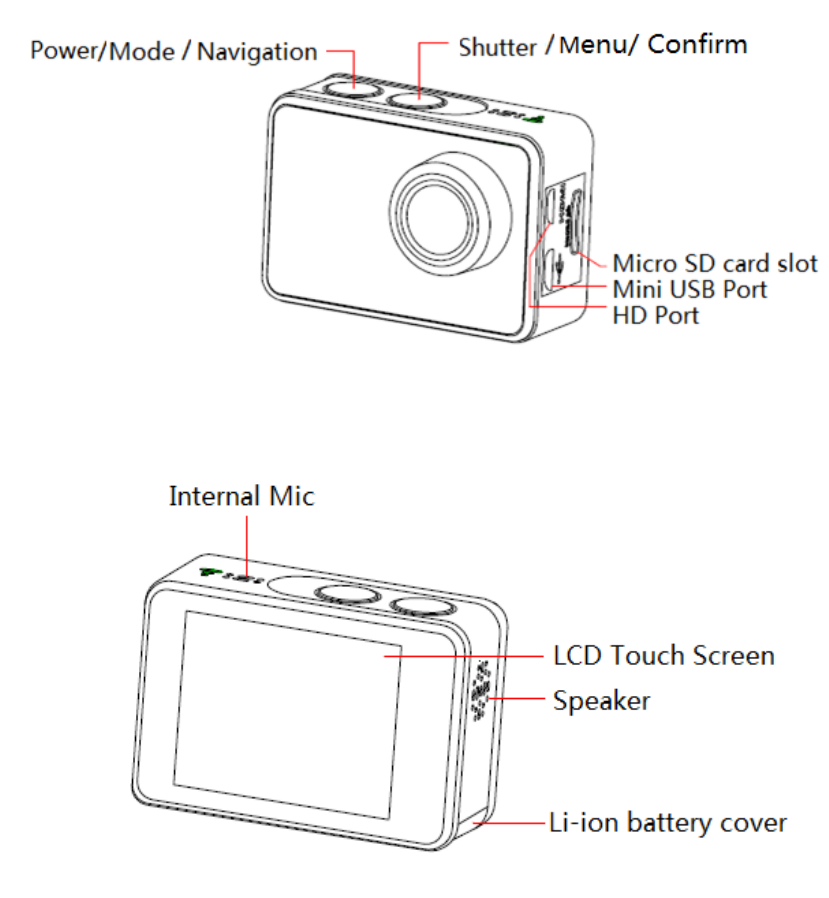
3. Camera Diagram
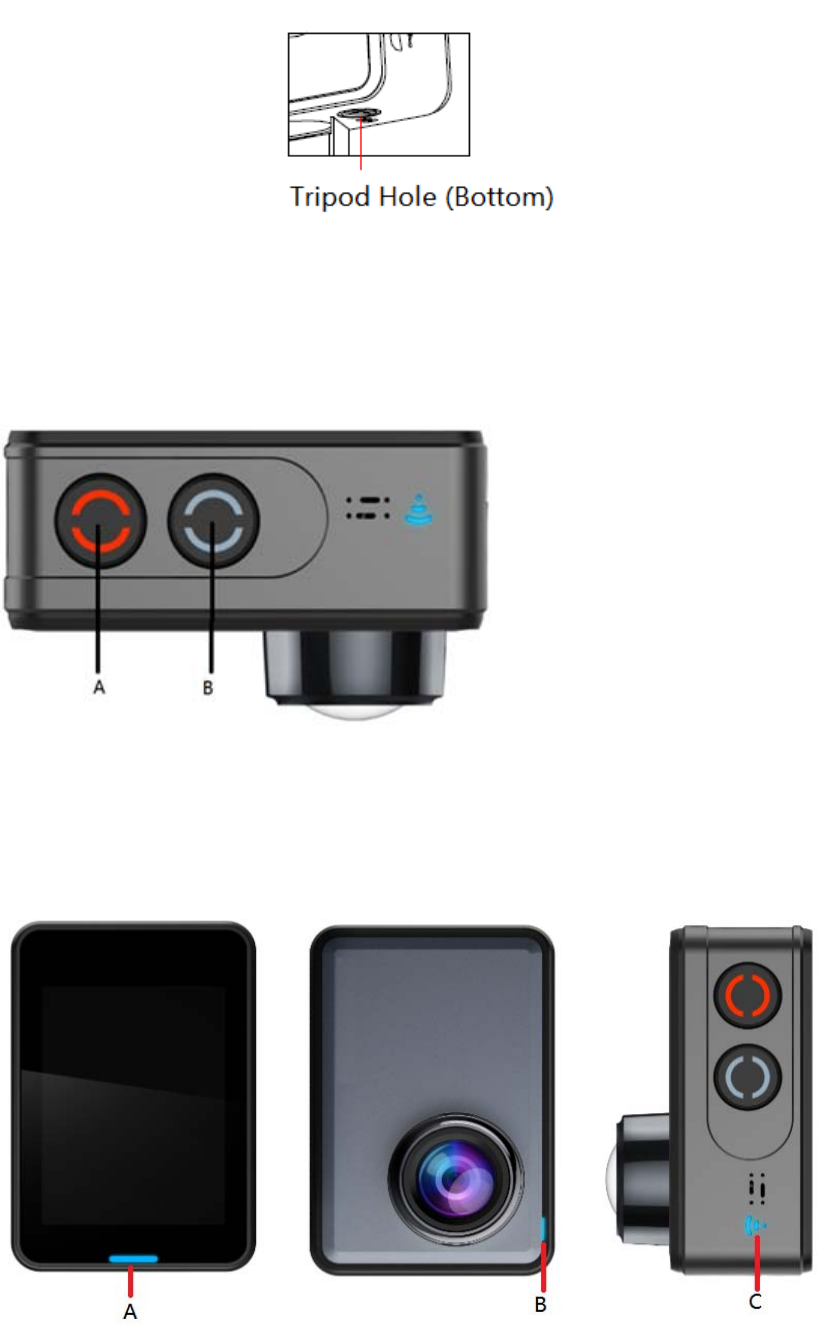
4. Using Your Camera
Indicators

4.1 Power on & Power off the camera
Turn on
Long press Power button (A) for 3 seconds to power on, indicator A turns blue.
Turn off
Long press Power button (A) for 3 seconds to power off, indicator A blinks and
then turn off.
4.2 Insert a Memory Card
Insert a Micro SD card into the SD card slot.
NOTE:
1. We suggest using Class 10 (or higher) Micro SD card for Smooth shooting
purpose. Lower Class of the Micro SD Card may cause the video blur or
unavailable.
2. There is only one correct direction to insert the SD Card into the slot. Do not
force the card into the card slot as it may damage both the SD Card and camera.
3. A new Micro SD Card should be formatted before using.
4.3 Charge the battery
Before using the T67 for the first time, please fully charge the battery .
Procedure:
1. Connect the T67 with a charger or device by Mini USB cable.
2. Charging Indicator B turns red during charging.
3. A complete flat battery takes around 2.5 hours to get fully charged.
The red indicator turns off after the battery fully charged.
4. When the battery is going to run flat, the red indicator B blinks twice a second.
5. Some functions such as Wi-Fi is unavailable if the battery is in low condition.
4.4 Insert camera into waterproof case
1. Ensure the case is dry and clean.
2. Insert the camera and make sure the lens fits neatly in the lens cavity.
3. Close the locking clamps.
4. T67 can be mounted using the accessories provided.
4.5 Shoot Video
Press Shutter button(B) when powered on, LED B turns green and keep blinking
twice a second; Press again to stop, and LED B light turns off.
4.6 Shoot a Single Picture
Press Shutter button(B) once to shoot a single picture, LED B flashes green.
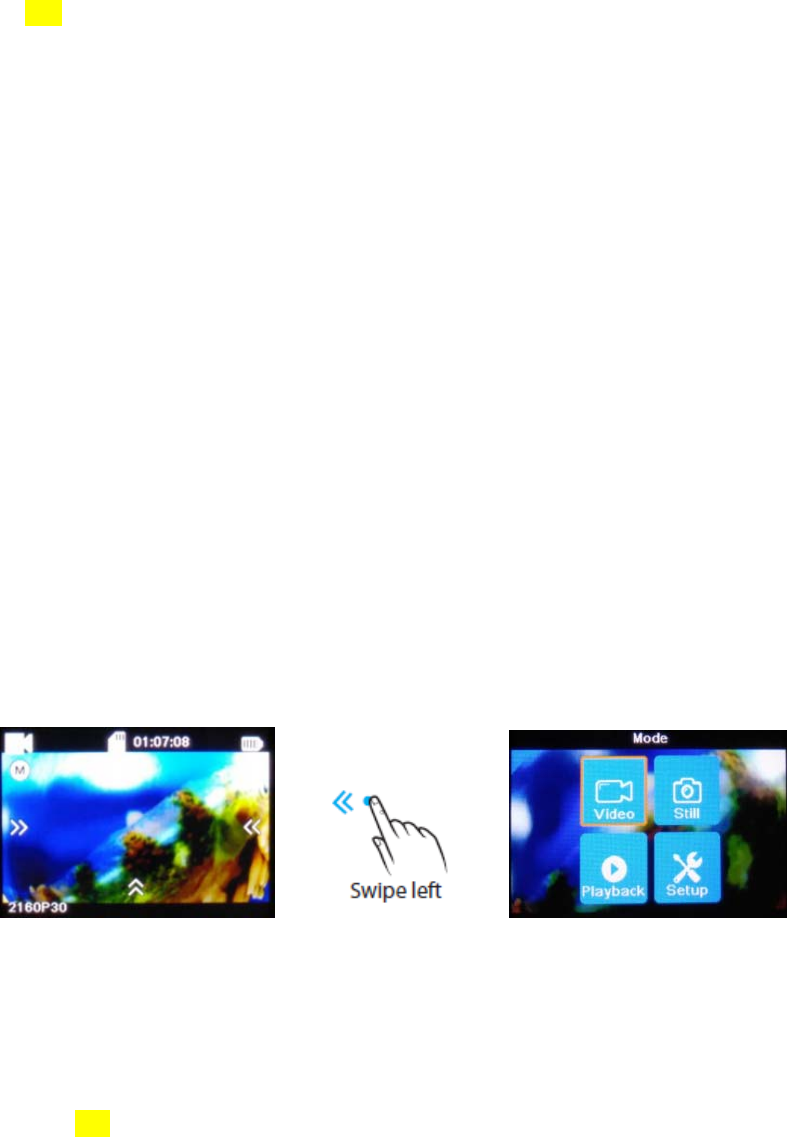
4.7 Mode Shift
1. Main mode shift (A)
When powered on, short press on button A to shift among Video Recording -
Photo Shot - Playback- Setting, pause to confirm on current mode.
You can easily access this menu with touch operation by swiping left.
2. Main mode shift (B)
When powered on, long press on button B for 3 seconds to enter Setup menu:
Video - Still - Effect - General.
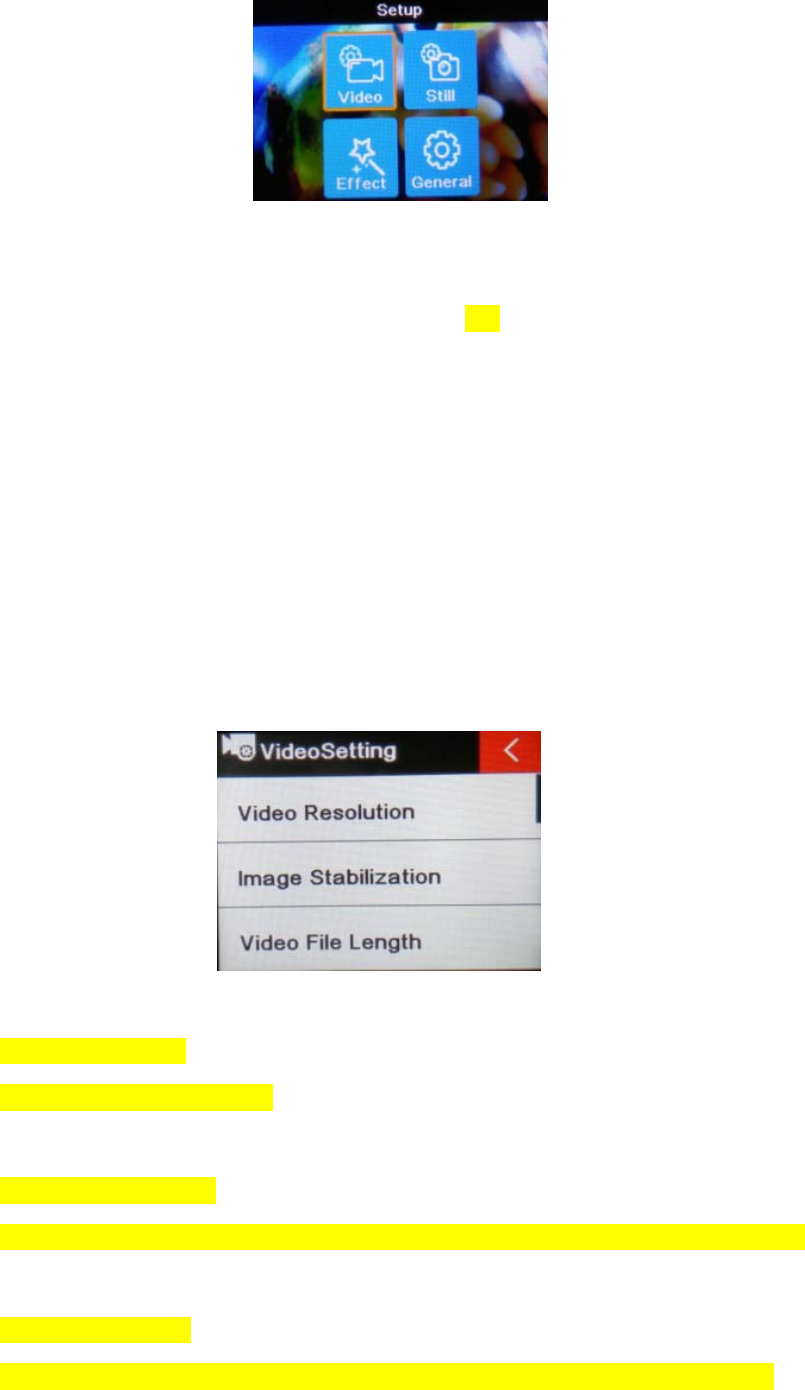
5. Setup your camera
Long press on Button B to enter Setup ”Video - Still - Effect – General”, press
Button A to navigate and press Button B to confirm. Long press on Button B again
will exit.
5.1 Video SETUP
Press Power Button (A) once to navigate, press Shutter Button (B) to Enter/Confirm
selection.
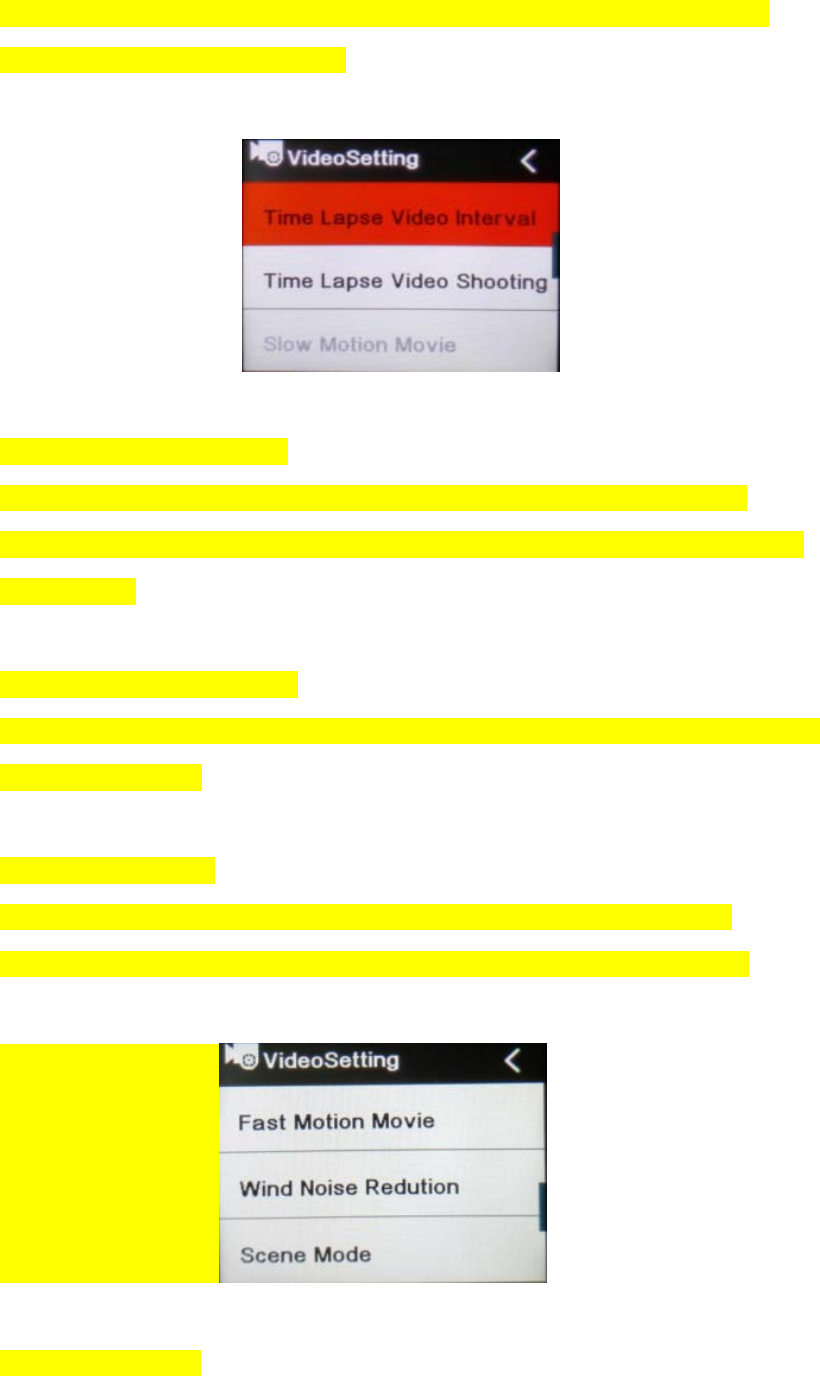
Video Resolution
To set the video resolution.
Image Stabilization
To set the digital image stabilization, can not be activated on 1280x 720p@120fps.
Video File Length
This allows to record continuously using footage intervals of Unlimited/1/5mins.
The camera will delete the oldest loop recording file and replace with the latest
recording when the Micro SD is full.
Time Lapse Video Interval
This allows to record one frame at the set time interval of Off/ 1 Sec/3 Sec/5
Sec/10 Sec/30 Sec/1 Min. The final video file in the currently selected video format
will be stored.
Time Lapse Video Shooting
To determine the video Timelapse duration of “Unlimited/5 Min/ 10 Min/ 15 Min/ 20
Min/ 30 Min/ 60 Min.
Slow Motion Movie
This allows to record the action at a faster rate than usual or replayed at a
slower rate than usual. This feature is only available on 1280x 720p@120fps.
Fast Motion Movie
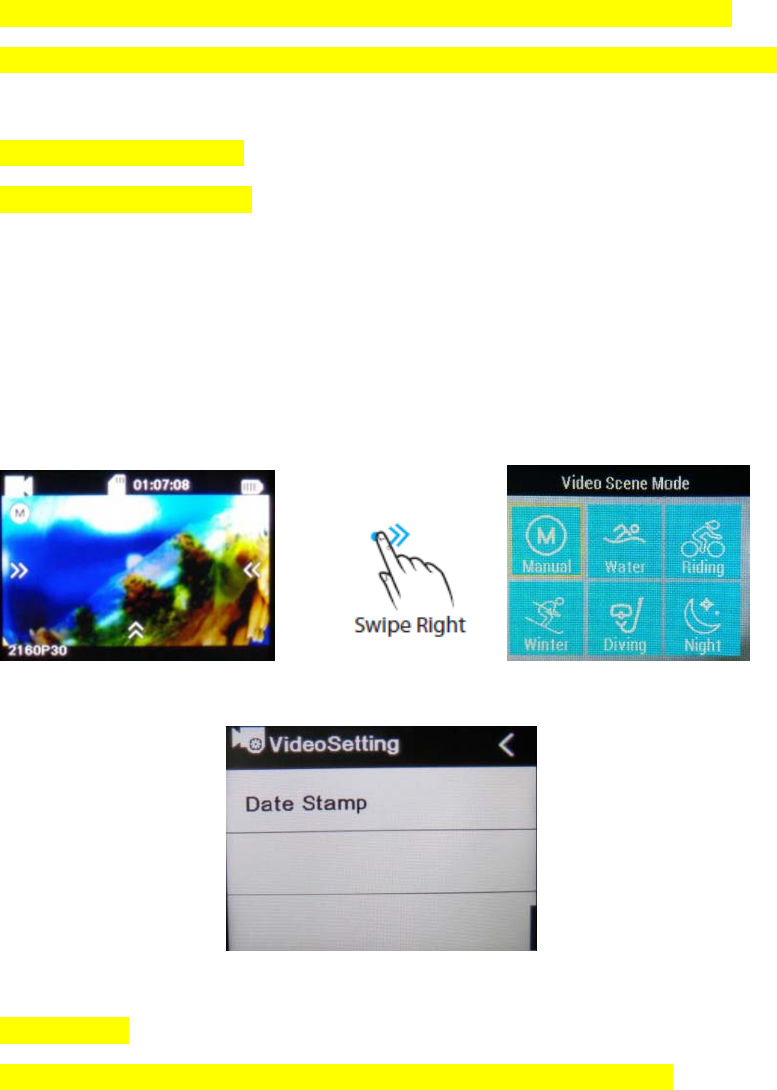
This allows to record the action at a slower rate than usual or replayed at a
faster rate than usual. This feature is not available when Timelapse is activated.
Wind Noise Reduction
To reduce the wind noise.
Scene Mode
To set different scene mode, Manual, Water, Riding, Winter, Diving, Night.
You can easily access this mode with touch operation by swiping right.
Date Stamp
To define if the Date/Time mark is displayed at the top of the videos.
5.2 Photo Setting
Press Power Button (A) once to navigate, press Shutter Button (B) to Enter/Confirm
selection.
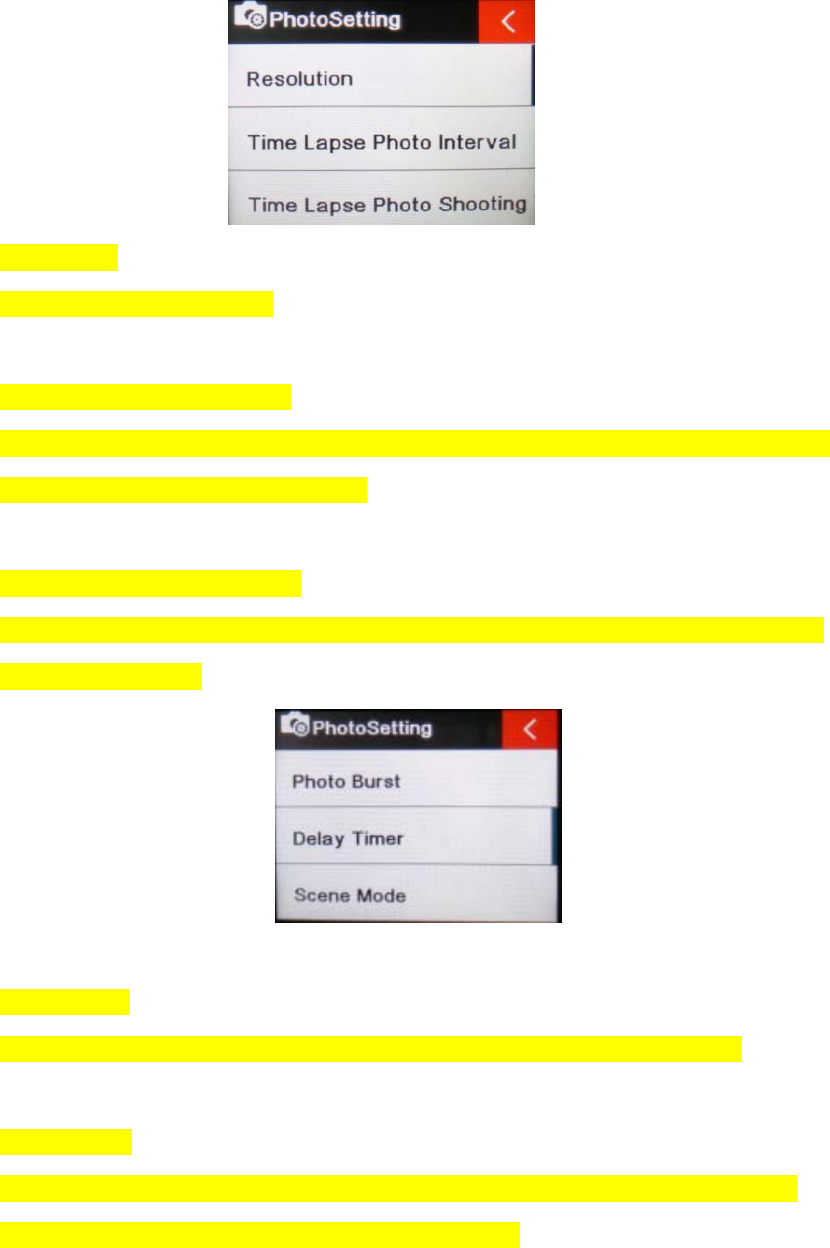
Resolution
To set the image resolution.
Time Lapse Photo Interval
This allows you to shoot a continuous sequence of photos with the following intervals
Off/3 Sec/5 Sec/10 Sec/30 Sec/1 Min.
Time Lapse Photo Shooting
To determine the photo Timelapse duration of “Unlimited/5 Min/ 10 Min/ 15 Min/ 20
Min/ 30 Min/ 60 Min.
Photo Burst
This allows you to shoot 3 shots/1s, 7 shots / 2s, 15 shots/ 4s, 30 shots/ 8s.
Delay Timer
When this mode is enabled, it lets you set intervals of Delay 2s, Delay 10s when a
single photo is taken after clicking the Record button.
Scene Mode
To set different scene mode, Manual, Outdoor, Indoor, Portrait, Landscape, Night.
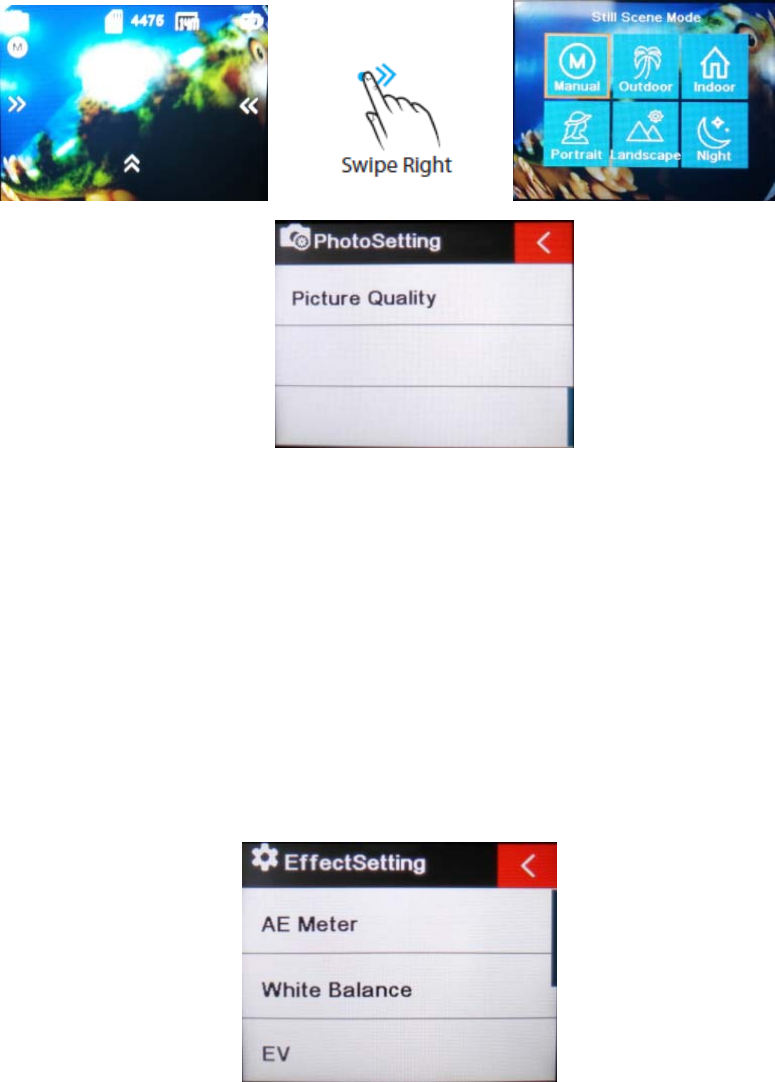
You can easily access this mode with touch operation by swiping right.
Picture Quality
To set the picture quality.
5.3 Effect Setting
Press Power Button (A) once to navigate, press Shutter Button (B) to Enter/Confirm
selection.
AE Meter
To define which image areas are used to calculate the correct exposure.
White Balance
Factory default is Auto. If you switch Auto OFF, remember to adjust
when lighting condition changes.
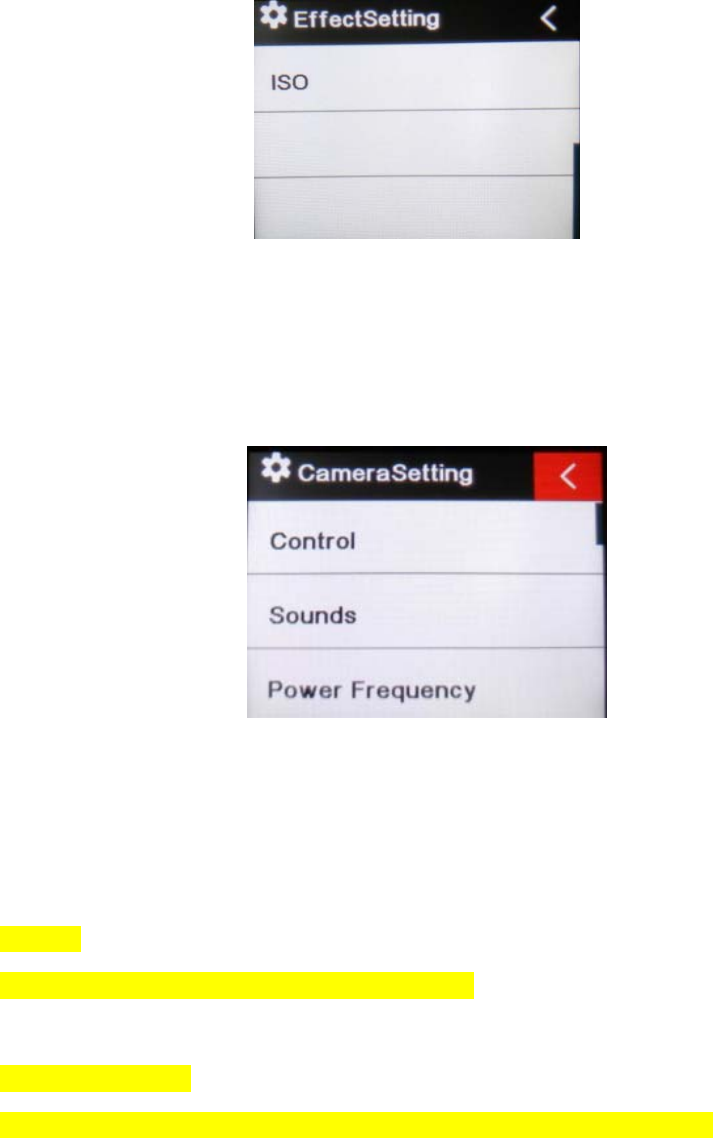
EV
This allows user to set the light exposure value.
ISO
This is the measurement of the sensor’s sensitivity to light.
5.3 GENERAL SETTING
Control
This allows user to set the microphone volume, Speaker volume, LCD Brightness.
Sounds
Turns off or on sound of Shutter, Boot-up, Beep.
Power Frequency
Selecting the correct light frequency will avoid the possibility for strobing.
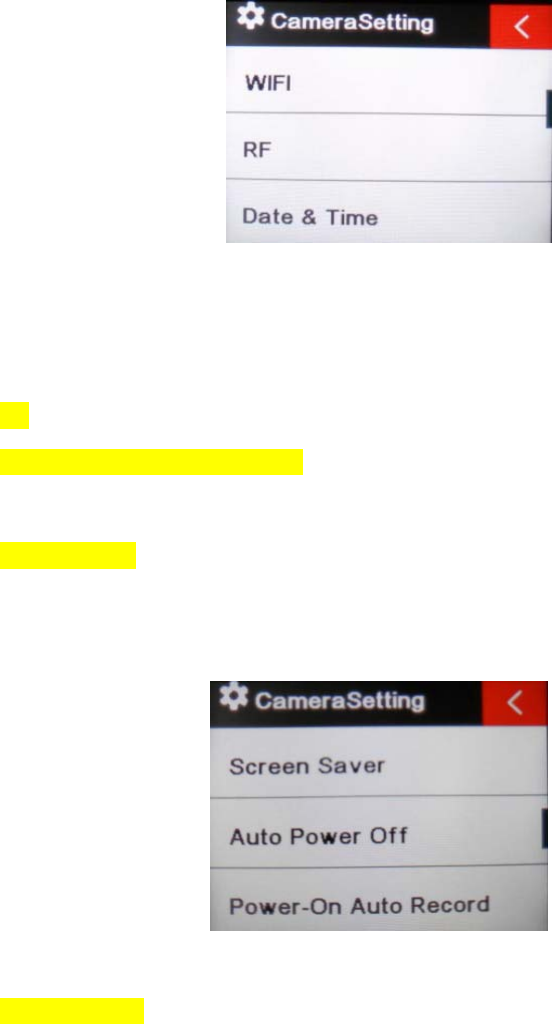
WIFI
Selecting to turn on or turn off the Wi-Fi function.
Date & Time
This allows user to adjust the date &time.
Screen Saver
This will determine if the LCD will turn off after 1 min, 3 min, 5 min. Press any
key to turn the screen on.
Select OFF to keep the screen always ON.
Auto Power Off
The camera turns off when not in use after specified time.
Power-On Auto Record
The camera records automatically once power on.
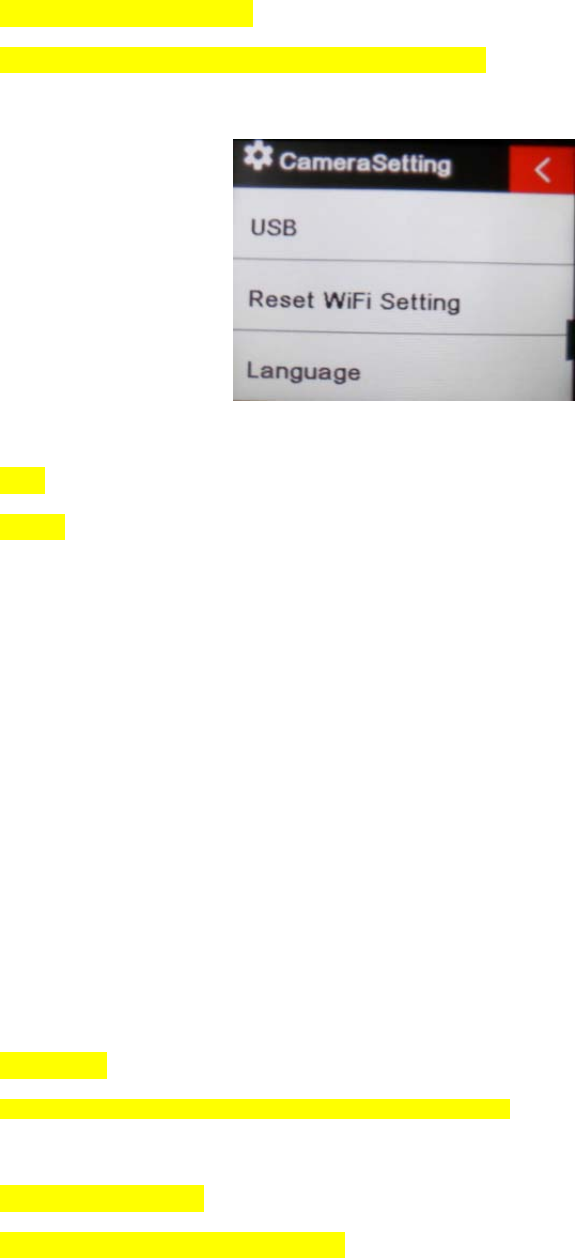
USB
MSDC
Use the USB cable to connect the camera on your computer, the camera
will turn on automatically, then enter into storage mode, that is to say, your camera
now is used as an external storage device. Alternatively you can remove the Micro
SD card and use a card reader (not included) to achieve the same result.
1. Select the file(s) you want to transfer to your computer by highlighting them.
2. Either drag the files to the desired place on your computer (this will make a copy
of the file on your computer) OR right-click the file, select “Copy” and right-click in
the desired place in your computer and select “Paste”.
Note: You can also transfer entire folders of pictures / videos to your computer.
UVCMJPG
The Camera can be used as a PC camera (webcam).
Reset WiFi Setting
To reset the WiFi in factory default.
LANGUAGE
To select the device language, total 3 different languages.
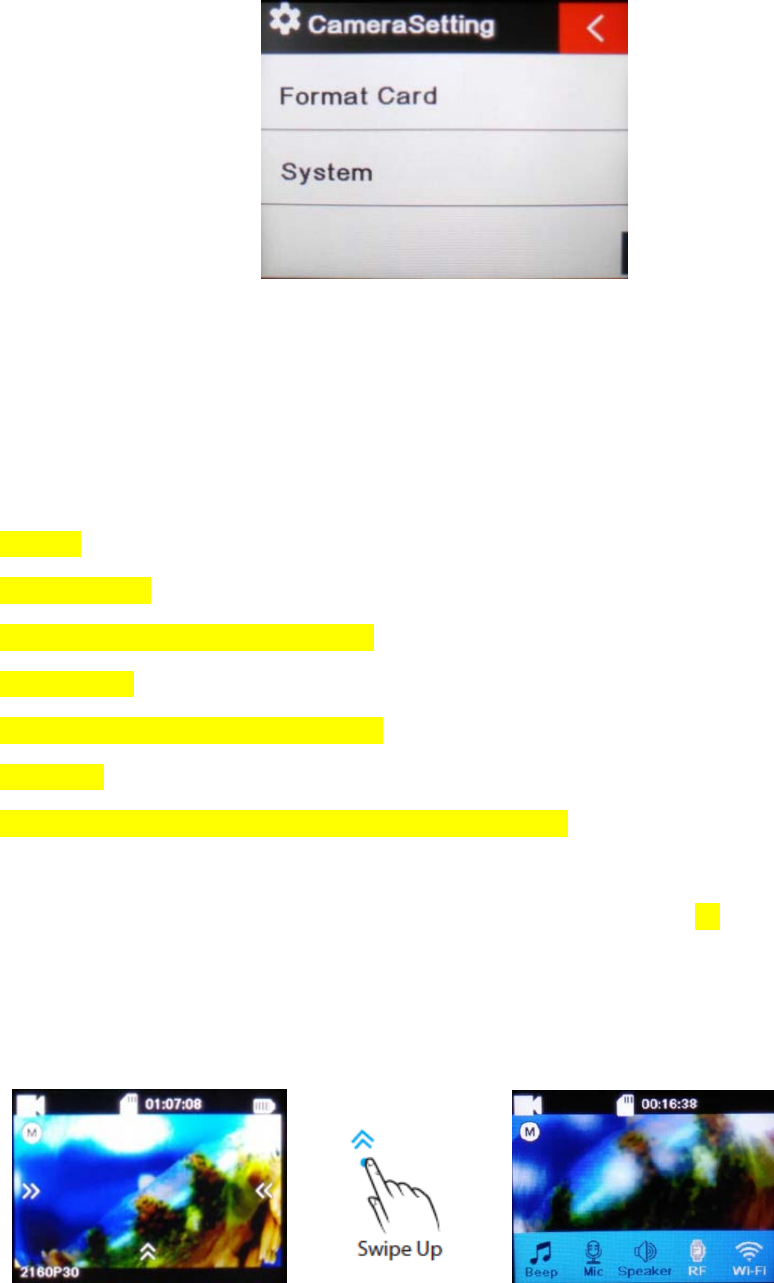
Format Card
This is to format the SD card. Choosing to format the card will permanently erase all
data on the card.
System
Factory Reset
To reset the camera in factory default.
System Info
To show the information of the system.
Card Info
To show the capacity and free space of the Micro SD card.
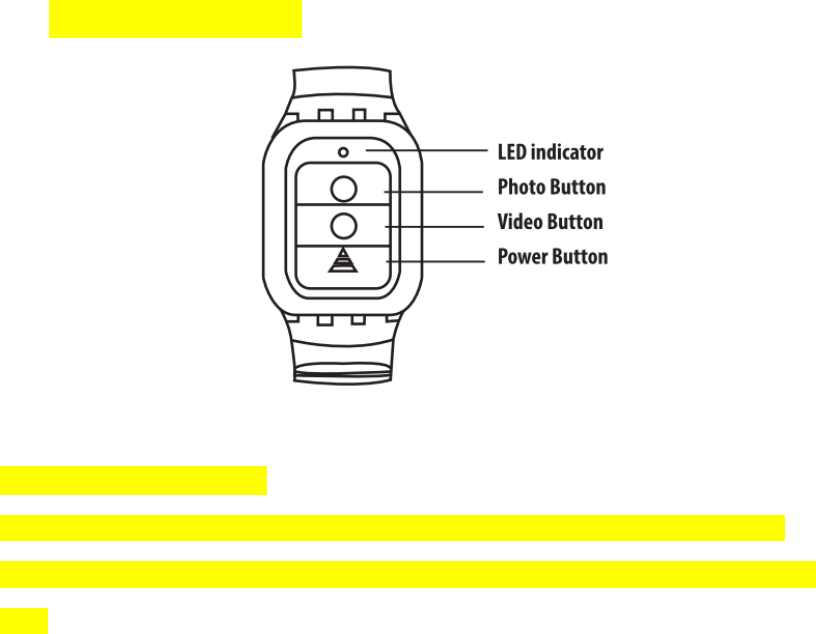
Note: You can easily access some settings such as Beep, Mic, Speaker, RF and
Wi-Fi with touch operation by swiping up.
6. Playback Mode
Press Power button (A) to navigate, long press Shutter button (B) to enter the
selection, short press Shutter button (B) to play, short press Shutter button (B) again
to exit the play control panel.
You can operate it more easily by tap the screen.
7. Remote Control
7.1 Paring Procedure
Turn on the RF in camera setting menu, press power Remote Control button and
hold on for 3 seconds to turn on the controller and pair. The LED Indicator will blink
blue.
7.2 Using your remote
Photo Shot
Press the Photo button once to shoot a single picture, the LED indicator of remote
flickers twice.
Video Record
Press the video button once to start recording, the LED indicator flickers twice also,
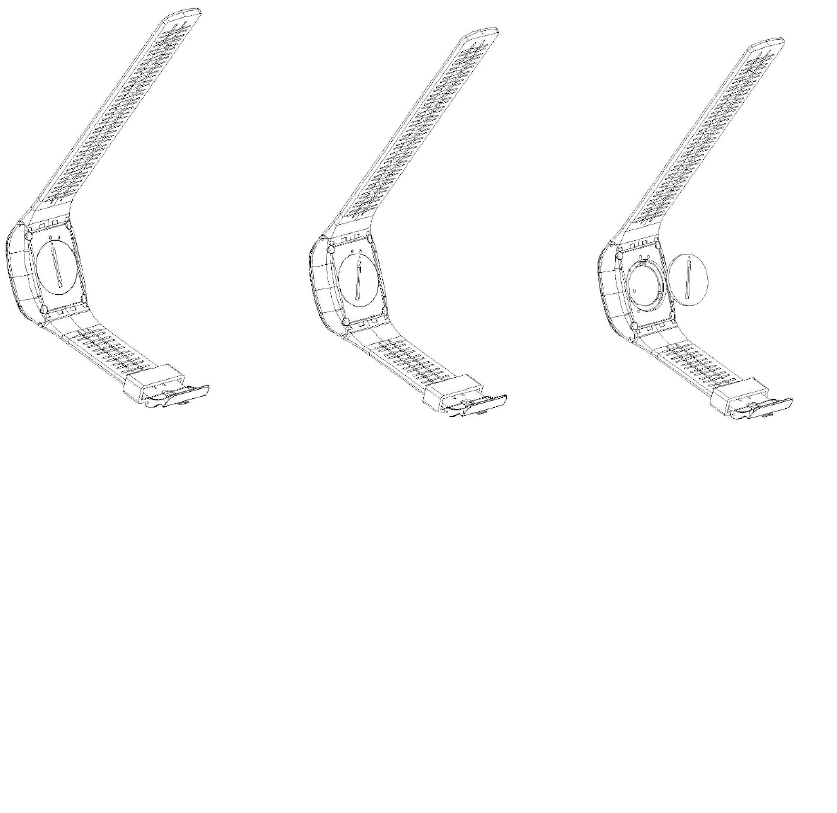
press the Video button again to stop.
Power OFF button
Press the Power OFF button and hold on for 3 seconds to turn off the camera, the
LED indicator turns off accordingly.
7.3 Replace a new button battery
Like any battery, the one in the T67’ remote will eventually die. When it does, the
red LED indicator flickers once per second. You need to replace with a new button
battery.
How to replace a button battery?
Step 1 --- Step 2 --- Step 3
1. Begin by purchasing a replacement battery for your remote. You need a button
battery with model No. CR2032.
2. Screw the round cap at the bottom of remote, see above pictures for reference.
3. Remove the old battery.
4. Insert the new battery into the slot where the old battery was, with the flat
surface up.
8. Wi-Fi Setup

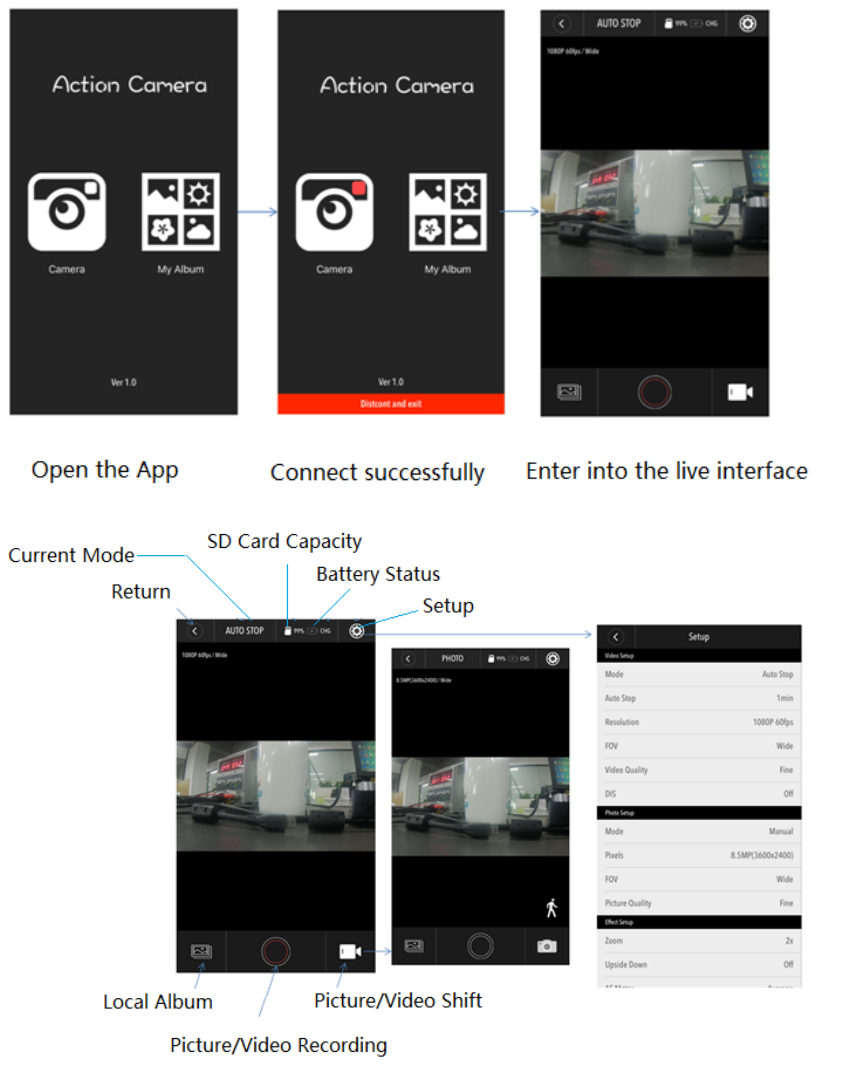
The T67 allows full camera control, live previewing and playback of photos/videos on
most Smart phones and Tablets.
a. Download the App “iSmart Pro” from “Google Play” or from the Apple “App
Store”.
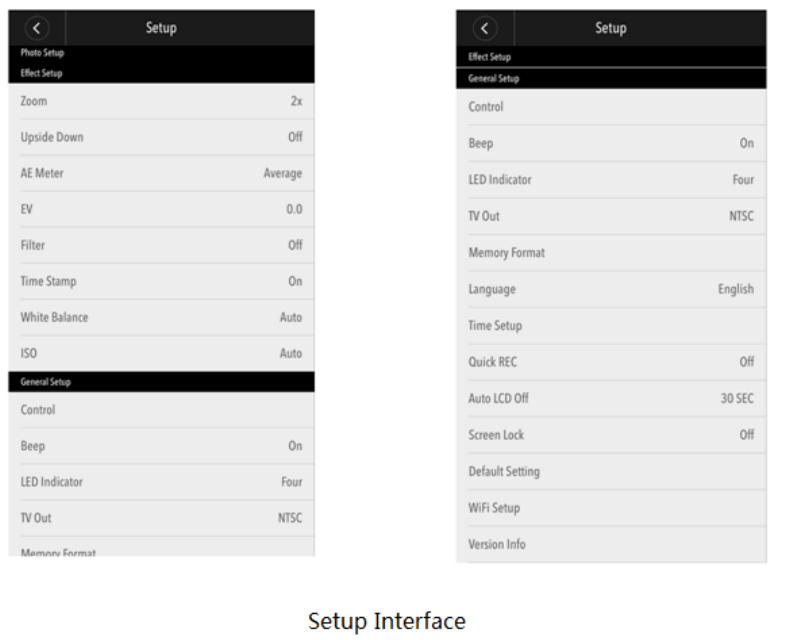
b. Activate Wi-Fi in the GENERAL SETUP MENU.
Note: You can easily access the Wi-Fi setting with touch operation by swiping up
c. Go to the Wi-Fi settings on your Phone, you will see “SBC_xxxxxx” in the list of
available Wireless networks.
Note: You can change the Wi-Fi name in the menu setting.
d. Connect your Phone to the “SBC_xxxxxx” via Wi-Fi.
The default Wi-Fi Password for the T67 is: 1234567890.
Note: You can change the Wi-Fi password in the menu setting.
e. Open the app “iSmart Pro”
Important: Before connecting camera via Wi-Fi, you need to download the
“iSmart Pro” App on your smart phone or tablet.
9. Saving and Viewing Options
Connecting to TV
You can display the camera LCD screen on a TV screen.
Note: You will need an extra Mini HDMI to HDMI cable, which is not included in the
standard package.
Turn the camera on;
Connect Mini HDMI end to the port on camera and HDMI end to HDMI port on
the TV;
Select the right source on the TV.
Cautions
Do not drop the camera.
Do not place heavy objects on the camera.
Keep the camera away from water and liquids (unless equipped with waterproof
case).
This may cause the camera to malfunction.
Recharge the battery via the USB cable.
The camera should not be in heat over 55℃.
Do not use the camera when it is low power.
Do not use the camera while it is in charging.
Do not attempt to open the case of the camera or modify it in any way. If the
camera has been detached, the warranty will be void. Maintenance and repairs
can only be performed by TAT.
FCC Warning:
This equipment has been tested and found to comply with the limits for a Class B
digital device, pursuant to part 15 of the FCC Rules. These limits are designed to
provide reasonable protection against harmful interference in a residential installation.
This equipment generates, uses and can radiate radio frequency energy and, if not
installed and used in accordance with the instructions, may cause harmful interference
to radio communications. However, there is no guarantee that interference will not
occur in a particular installation. If this equipment does cause harmful interference to
radio or television reception, which can be determined by turning the equipment off
and on, the user is encouraged to try to correct the interference by one or more of the
following measures:
•Reorient or relocate the receiving antenna.
•Increase the separation between the equipment and receiver.
•Connect the equipment into an outlet on a circuit different from that to which the
receiver is connected.
•Consult the dealer or an experienced radio/TV technician for help.
Caution: Any changes or modifications to this device not explicitly approved by
manufacturer could void your authority to operate this equipment.
This device complies with part 15 of the FCC Rules. Operation is subject to the
following two conditions: (1) This device may not cause harmful interference, and (2)
this device must accept any interference received, including interference that may
cause undesired operation.
The device complies with RF specifications when the device used at 0mm from
your body.