TCL Communication B053 CDMA/LTE/GSM/UMTS mobile phone User Manual Spirit UG 5027B EN 20160418
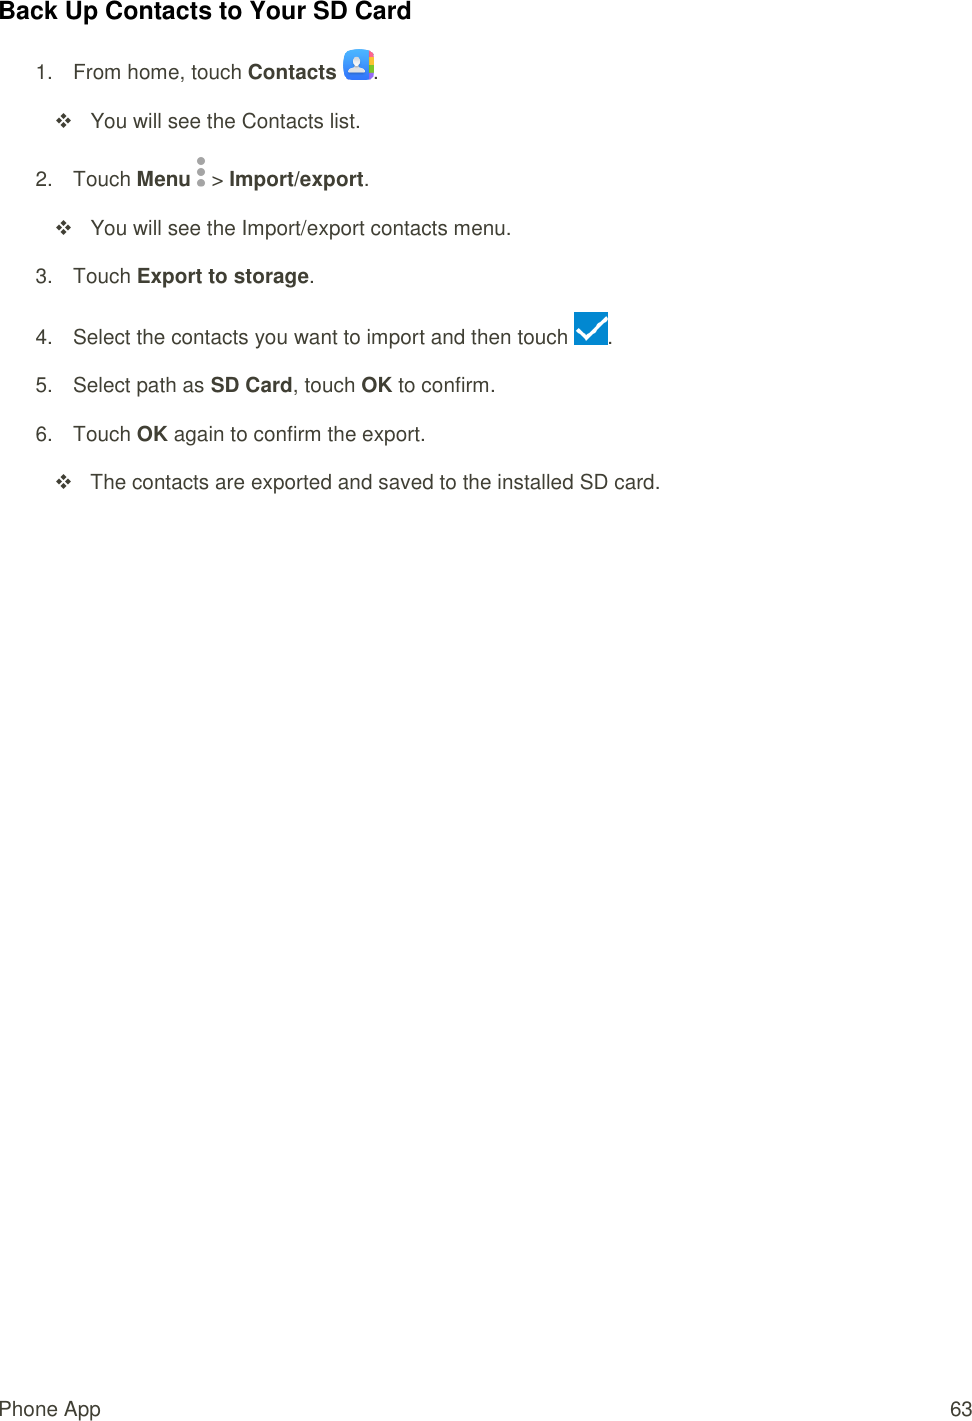
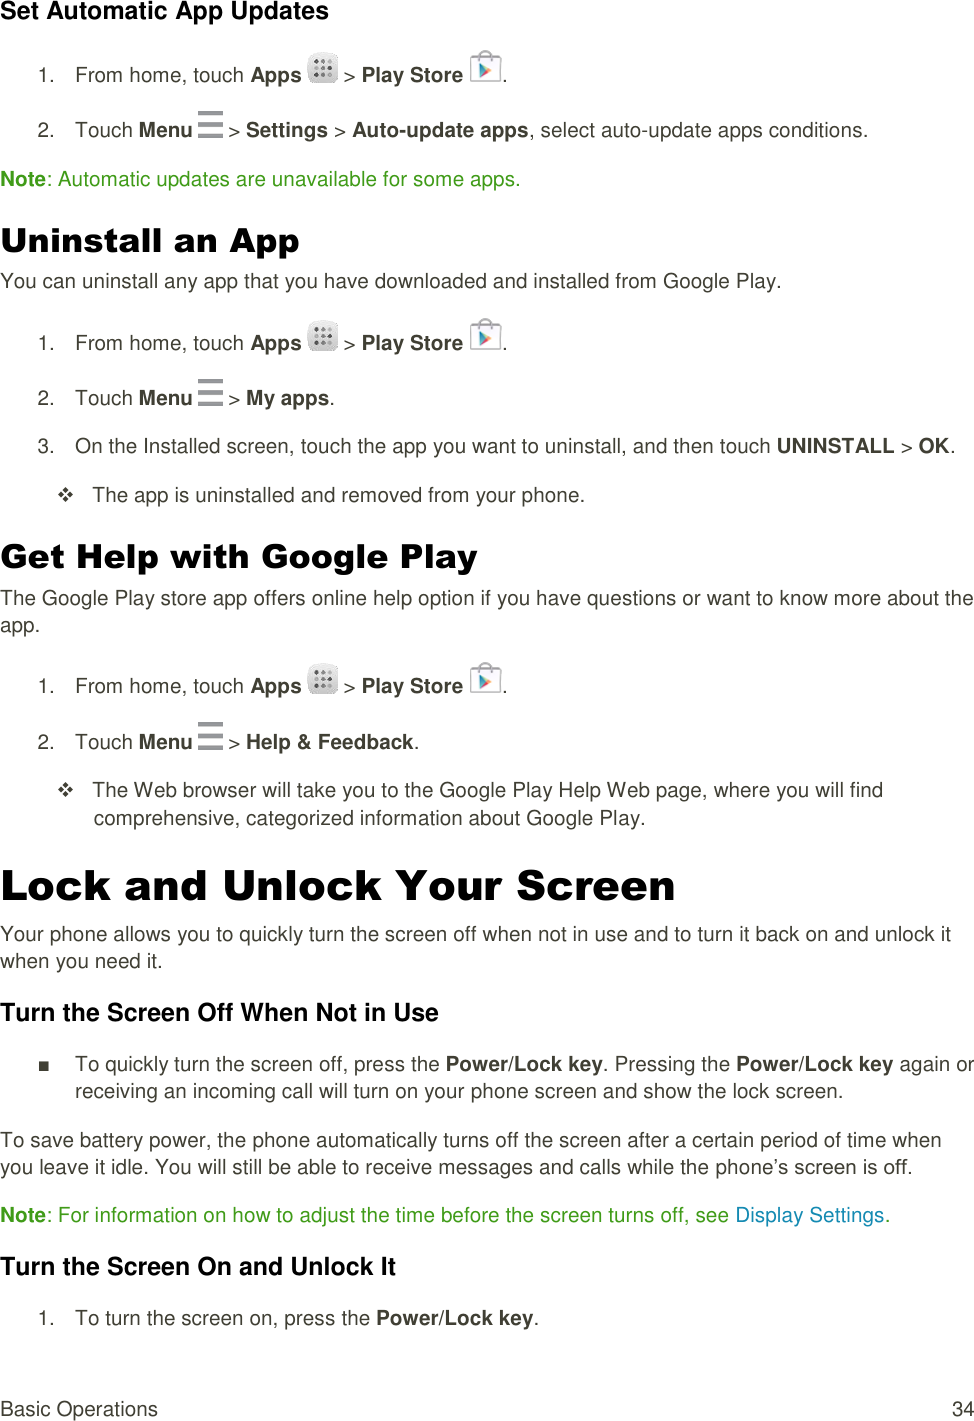
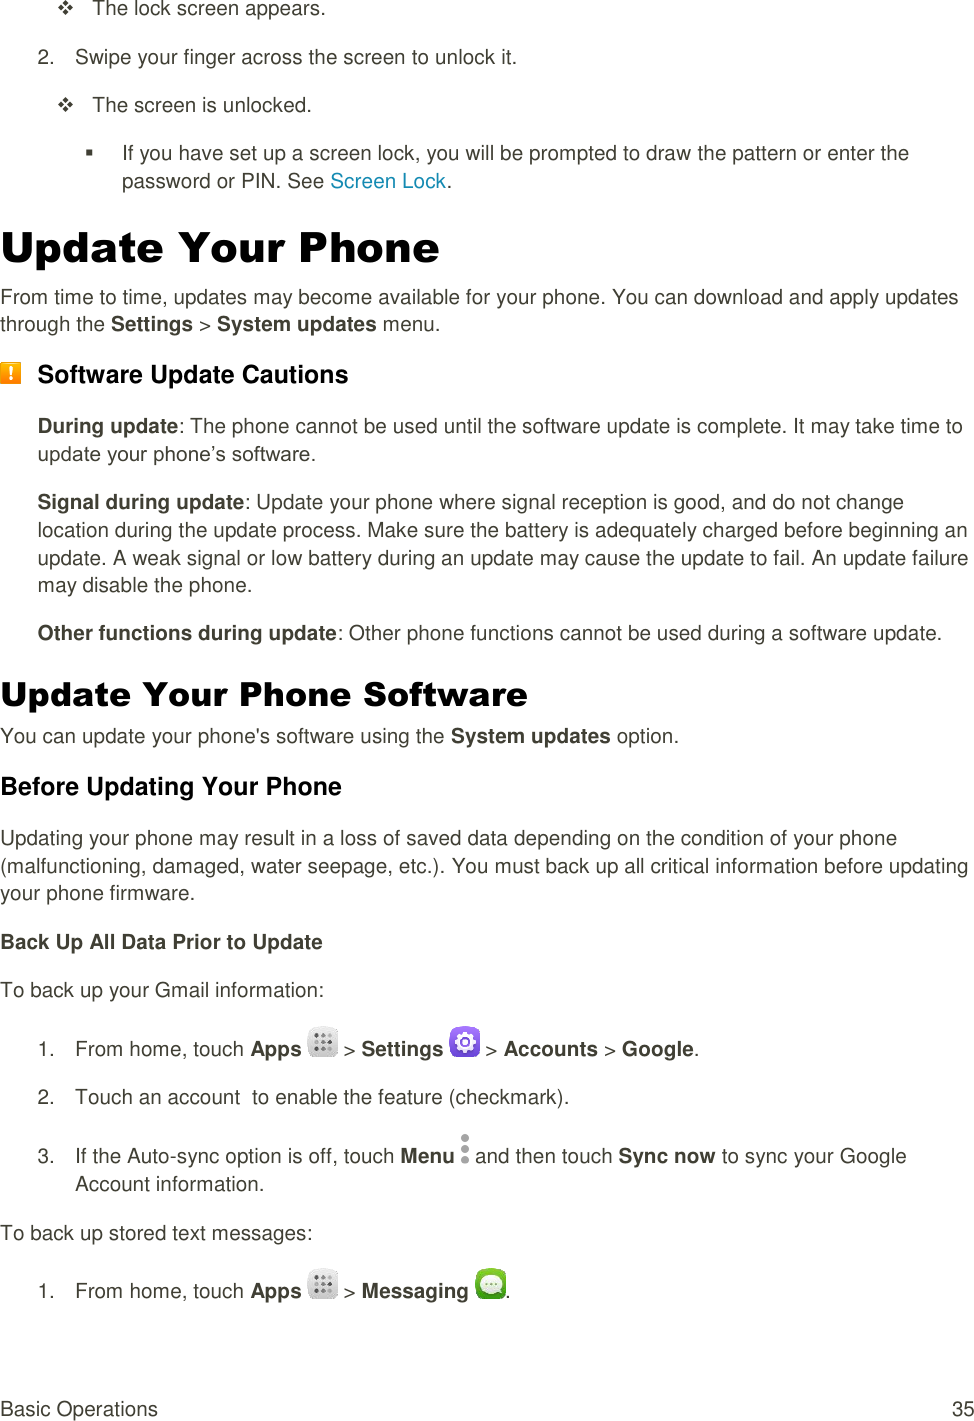
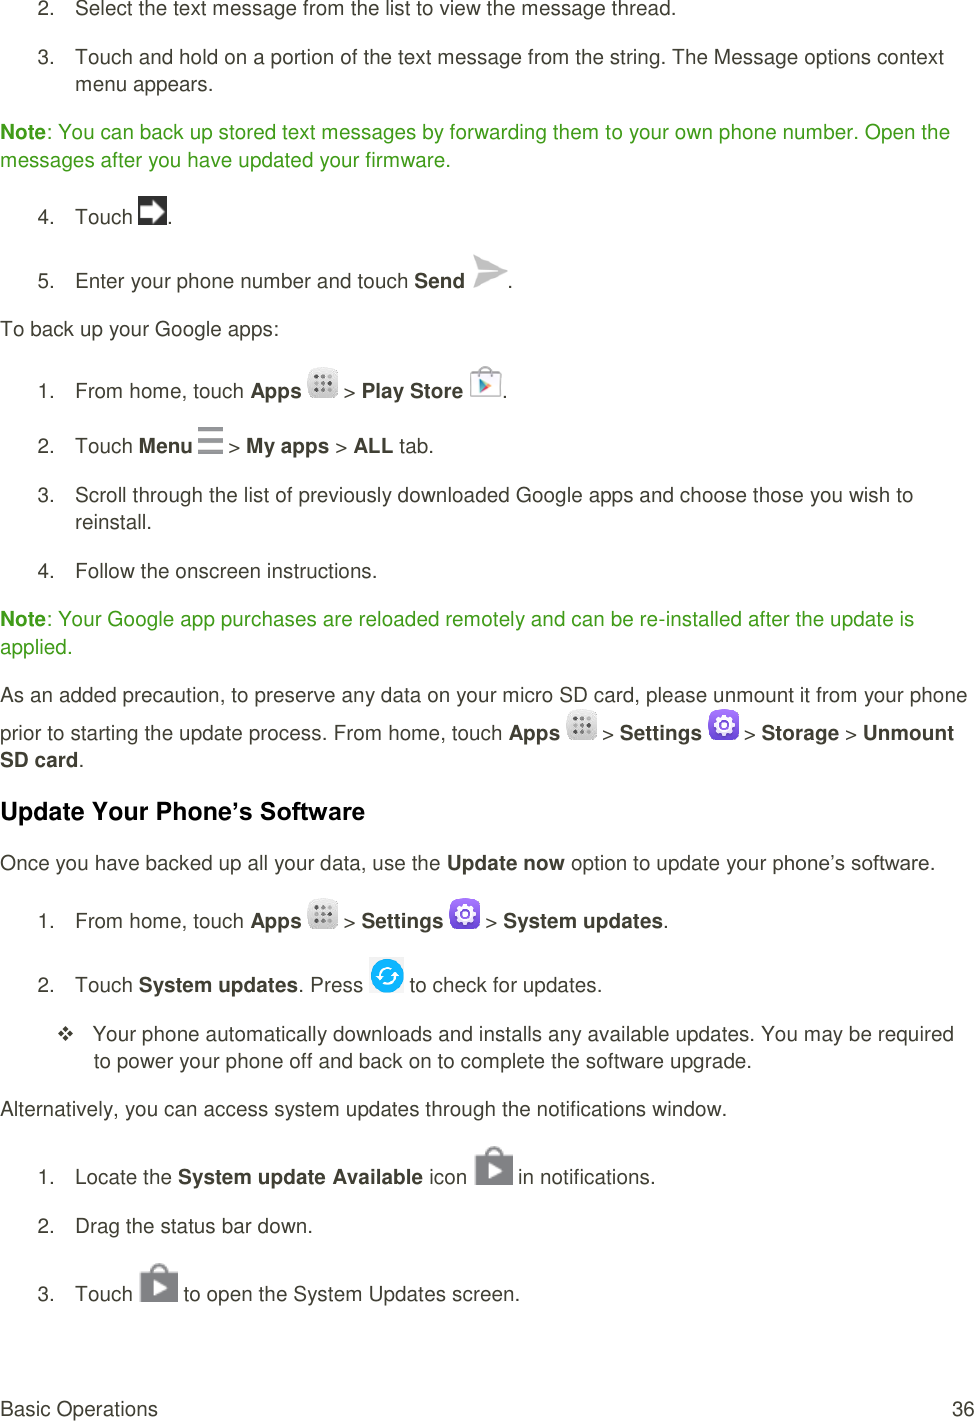
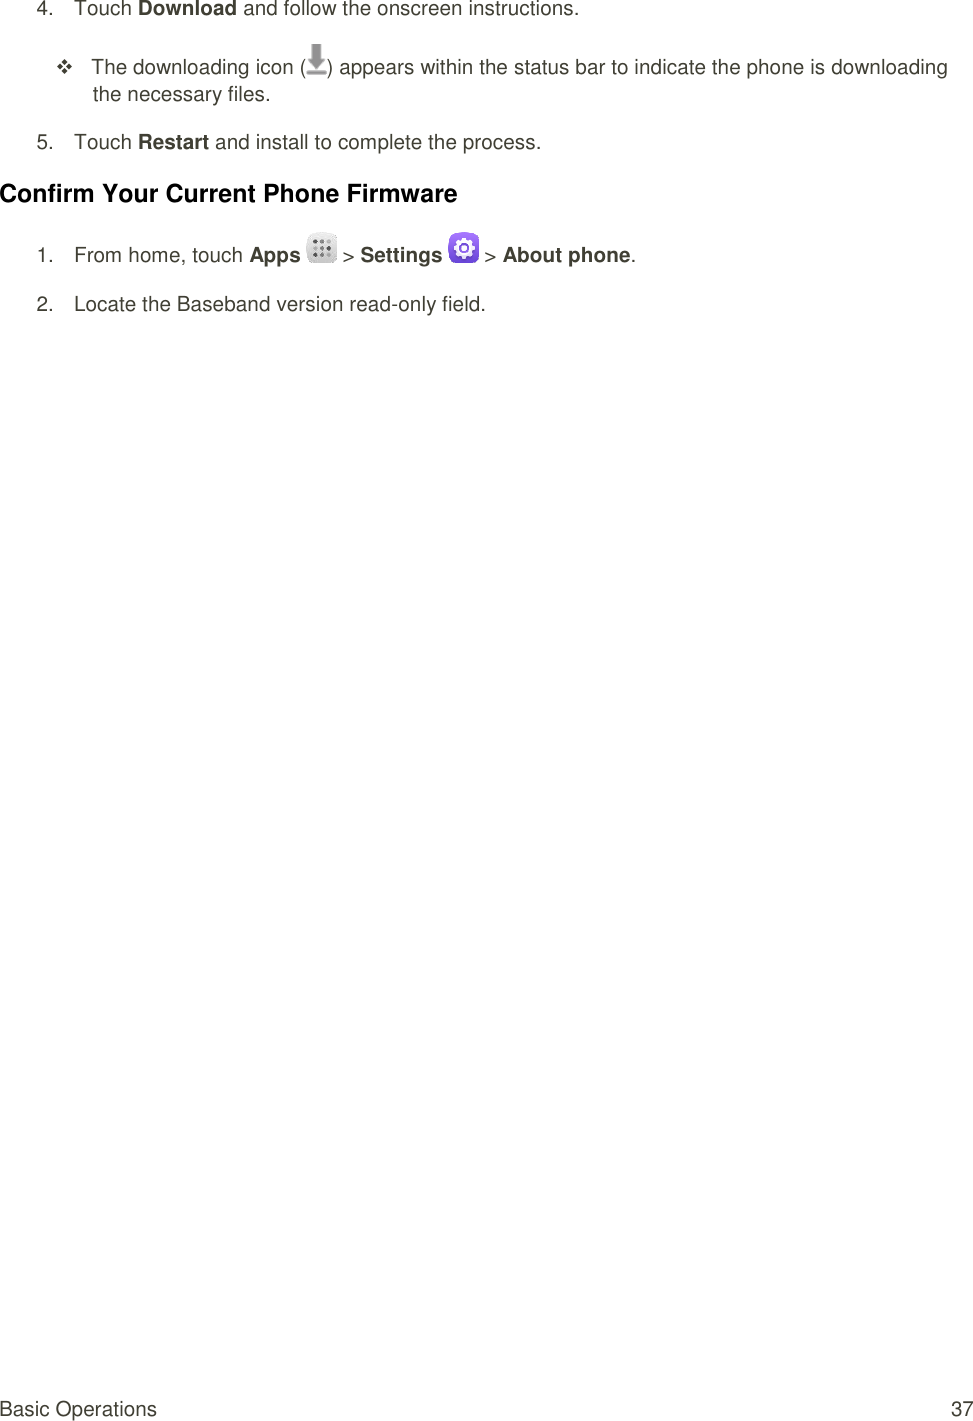
TCL Communication Ltd. CDMA/LTE/GSM/UMTS mobile phone Spirit UG 5027B EN 20160418
UserManual.wiki
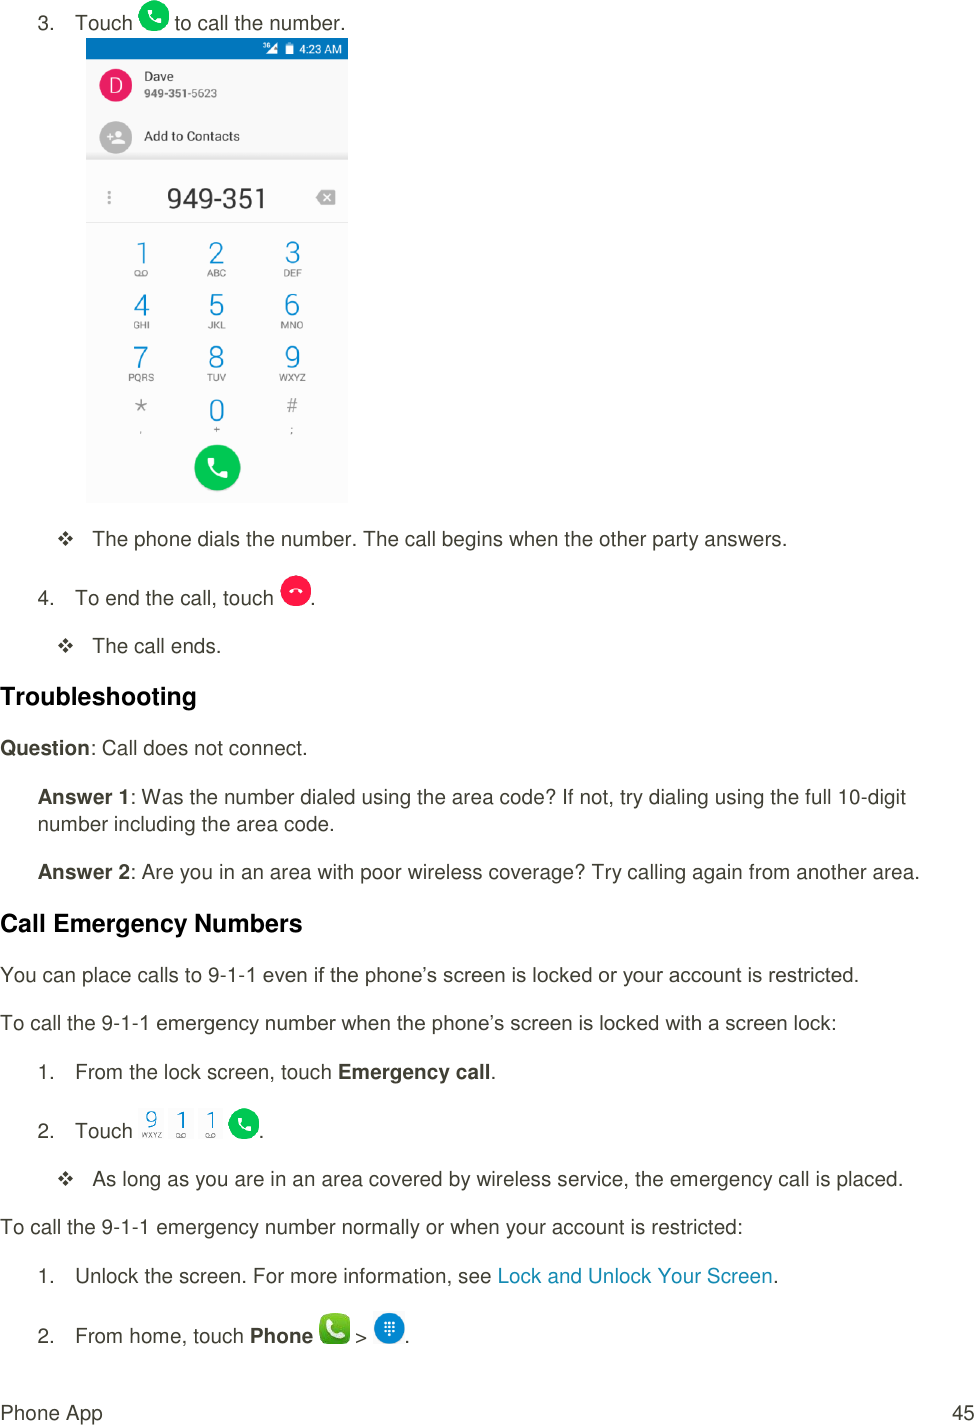
>
TCL Communication
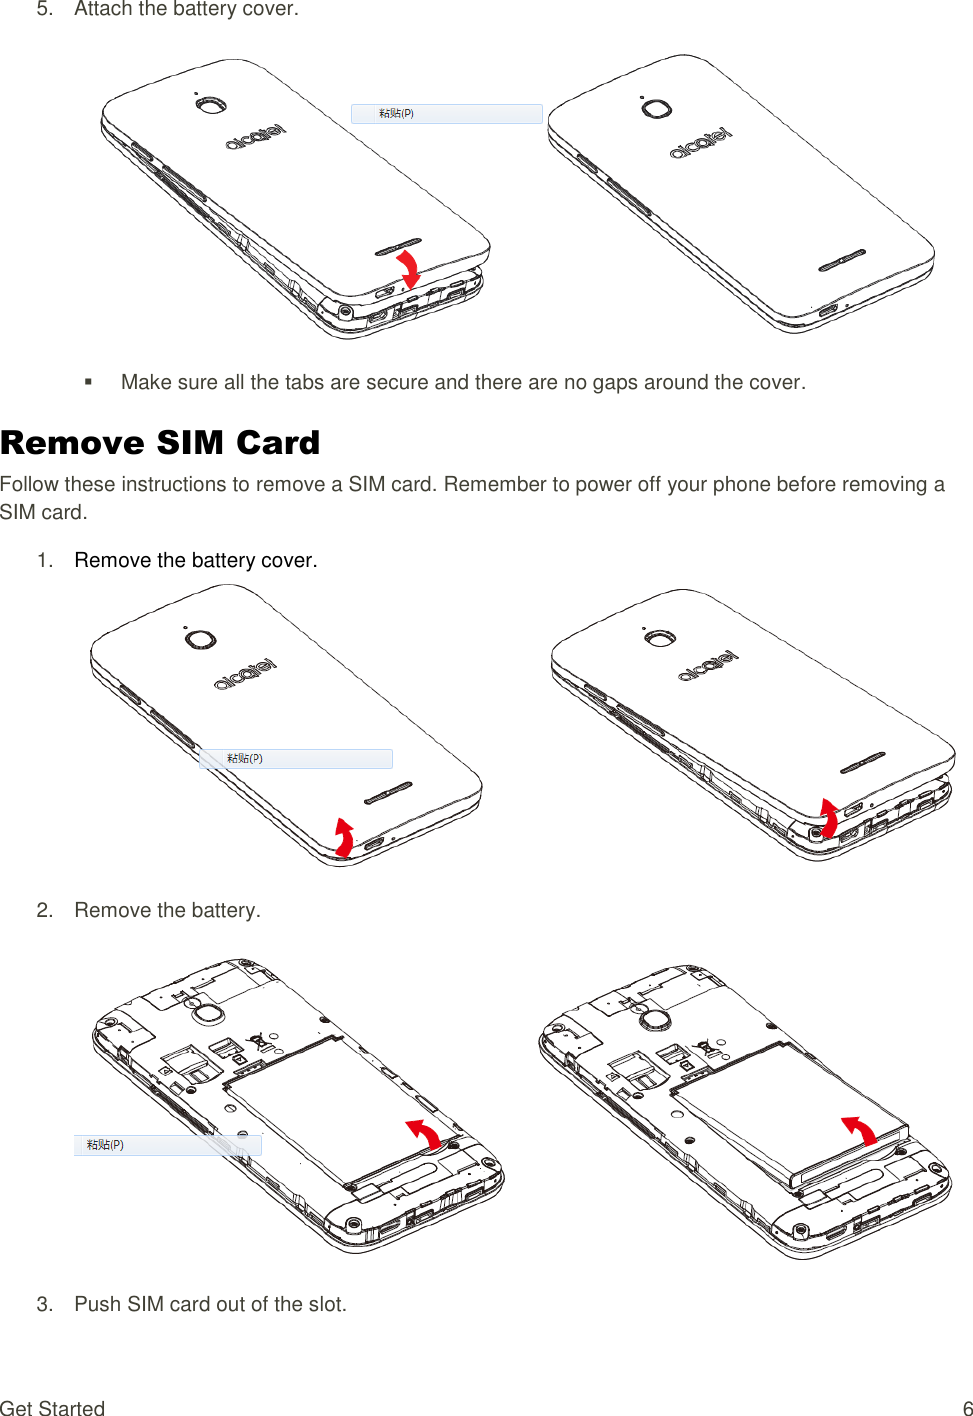
>
B053 User Manual
Spirit UG-5027B-EN-20160418
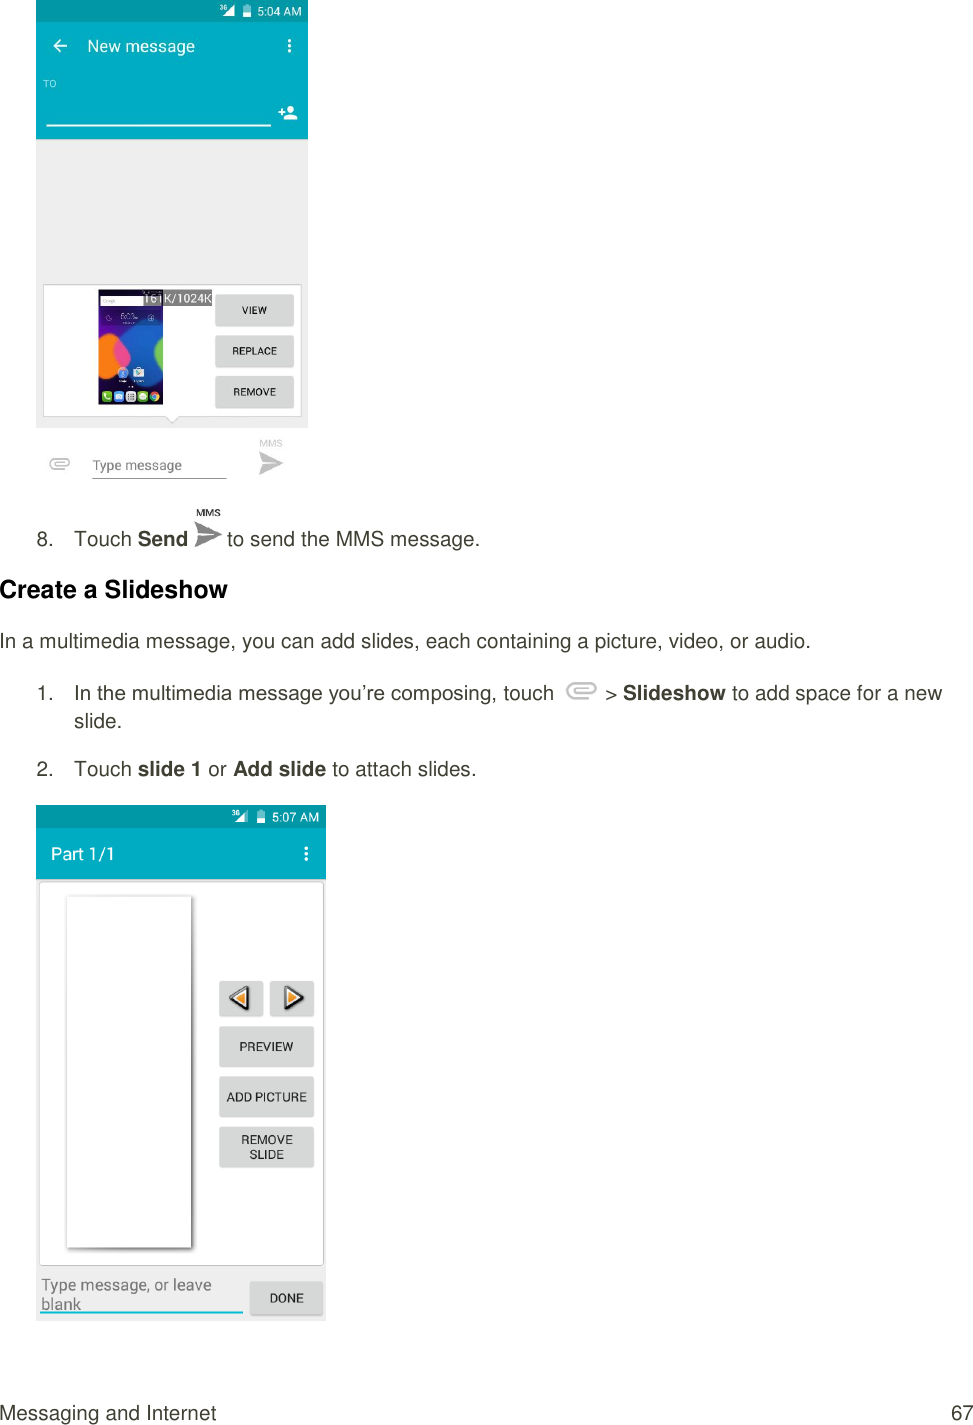
Navigation menu
Upload a User Manual
Namespaces
Wiki Guide
HTML
PDF
Info
Views
User Manual
Discussion / Help
Navigation
![User Guide [UG template version 15a] [Sprint_ALCATEL_5027B_UG_EN_20160303_Draft1]](https://usermanual.wiki/TCL-Communication/B053/User-Guide-2962255-Page-1.png)


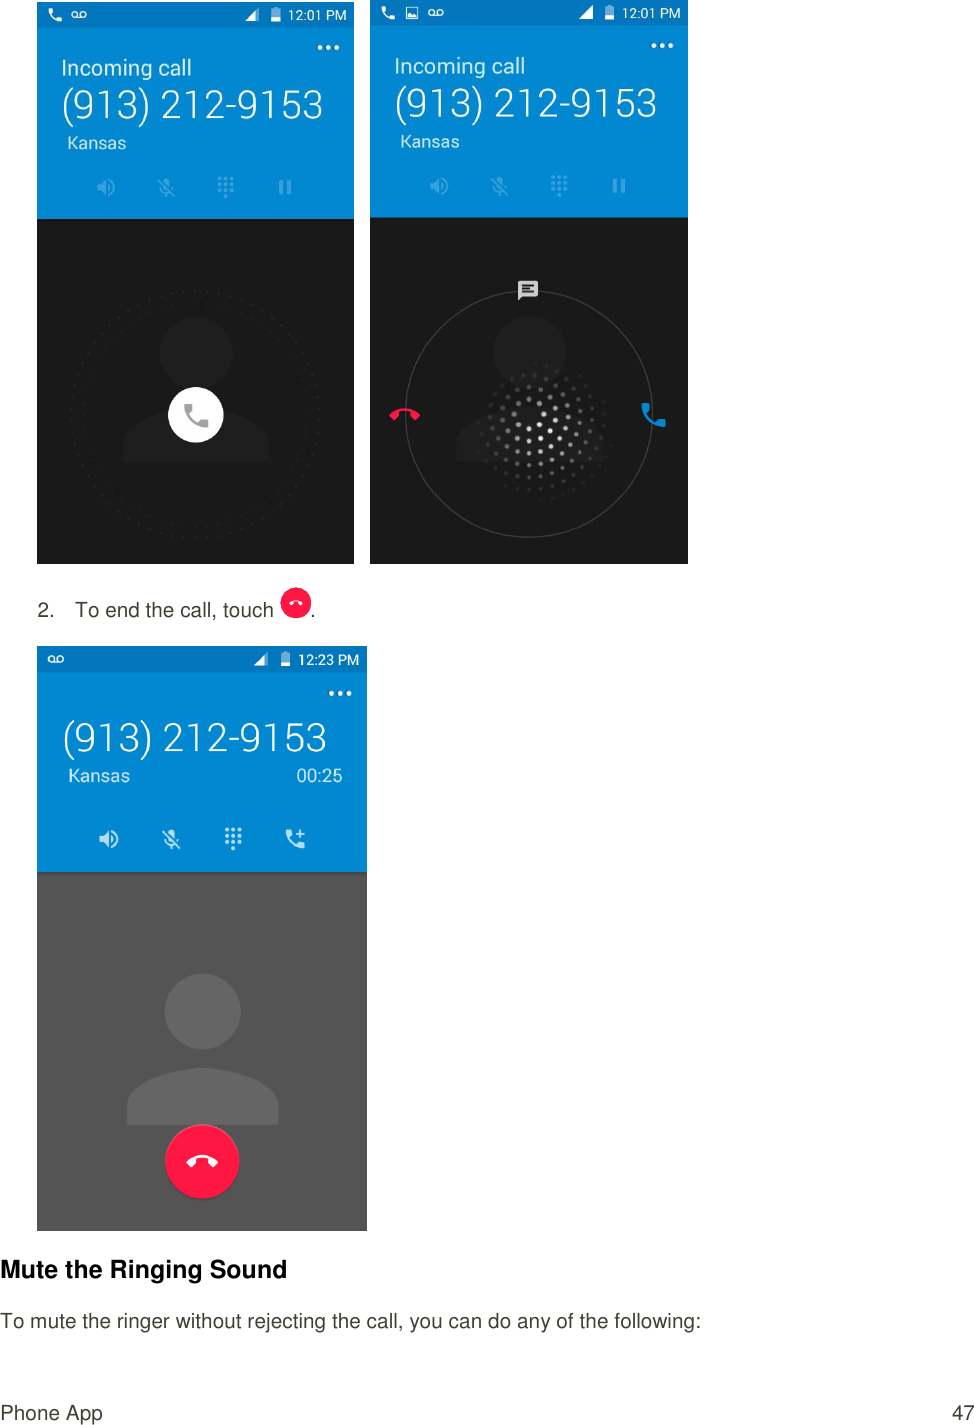


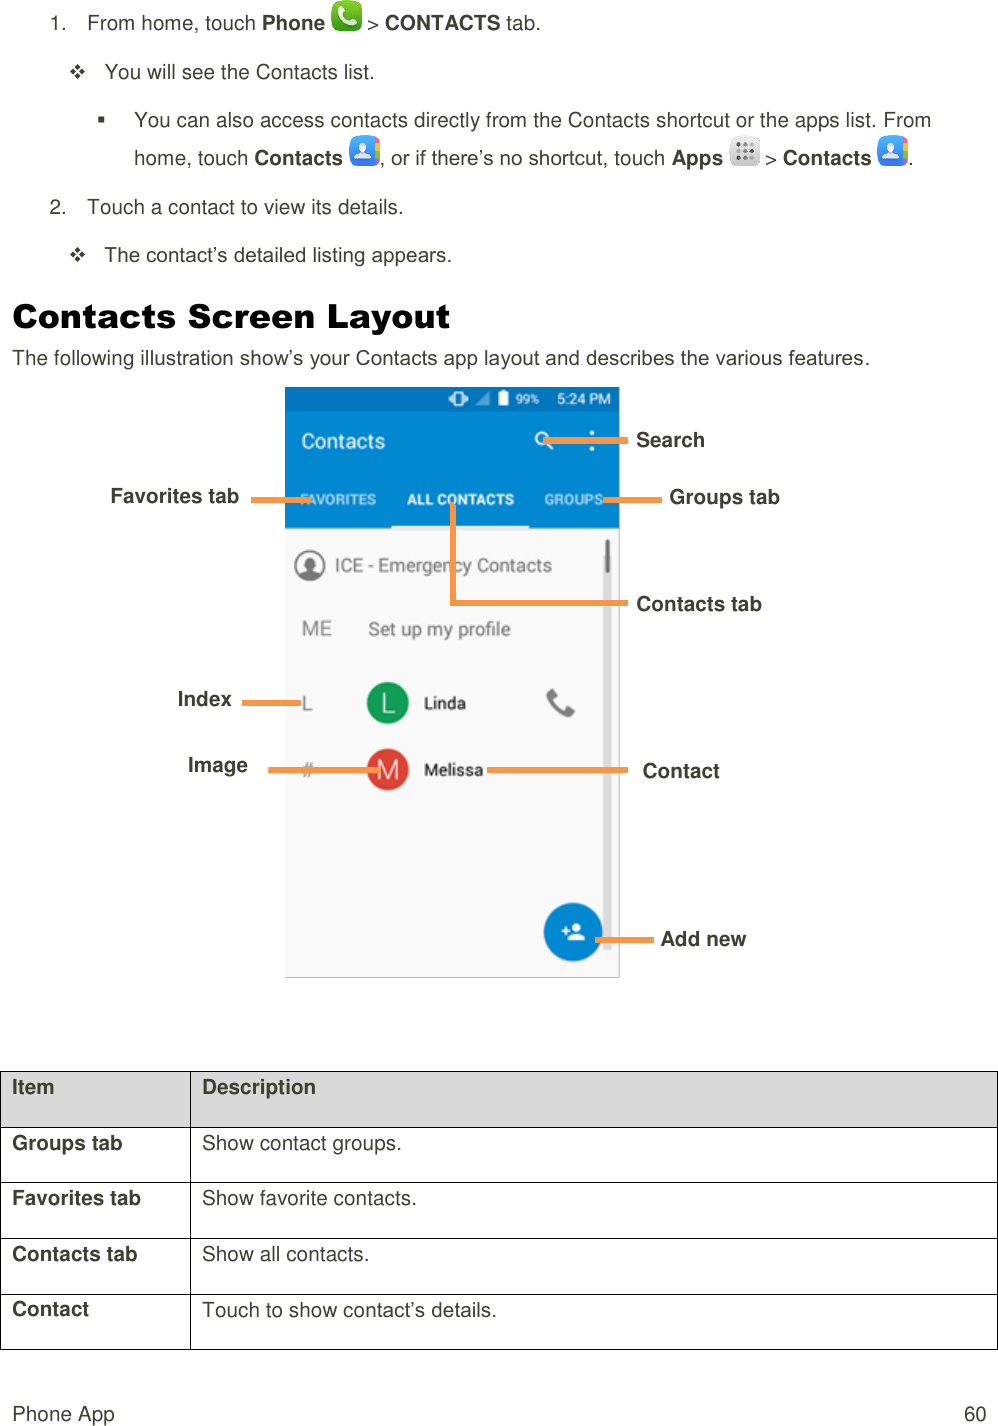
![Phone App 58 You can also access contacts directly from the Contacts shortcut or the apps list. From home, touch Contacts , or if there’s no shortcut, touch Apps > Contacts . 2. Touch to add a contact. The Add Contact screen appears. 3. If you have multiple account types associated with your phone, select a contact type. Select Google if you want to save contacts to your Google Account; these will be synced automatically with your Google Account online. Select PHONE as the sync account if you want your contacts on your phone only; they will not be synced with your Google Account. 4. Use the keyboard to enter as much information as you want. [Picture]: Touch the picture icon to assign a picture to the contact. Name PHONE EMAIL ADDRESS SPECIAL DATES GROUPS Add another field: Touch ADD ANOTHER FIELD to include additional information such as IM address, Notes, Nickname, Website, etc. Note: To select a type (label) for a phone number, email address, or postal address (such as Mobile, Home, Work, etc.), touch the type to the left of the field and select the appropriate type. Note: To add more phone numbers, email addresses, etc., touch Add new on the right side of the entry field.](https://usermanual.wiki/TCL-Communication/B053/User-Guide-2962255-Page-65.png)