TCL Communication N010 HSUPA/HSDPA/UMTS Quad Band/GSM Quad Band/LTE Tri Band/CDMA EVDO Tri Band mobile phone User Manual TempConfidential Gflip2 SPR 4044T Virgin EN UG rev2
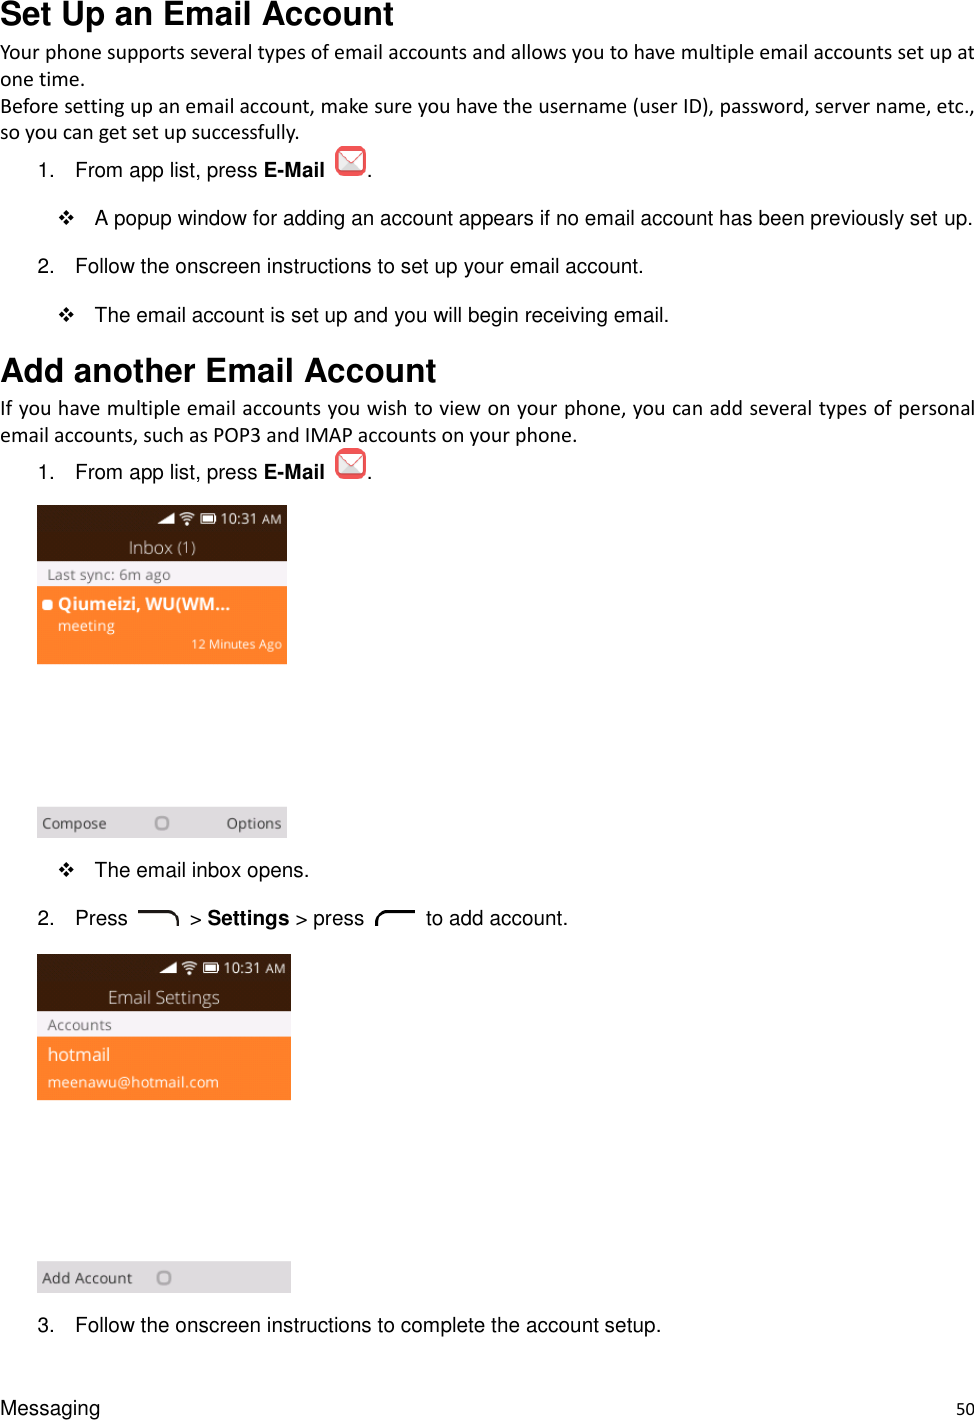
TCL Communication Ltd. HSUPA/HSDPA/UMTS Quad Band/GSM Quad Band/LTE Tri Band/CDMA EVDO Tri Band mobile phone TempConfidential Gflip2 SPR 4044T Virgin EN UG rev2
Contents
- 1. TempConfidential_5704277_folded GSG
- 2. TempConfidential_Gflip2 SPR 4044T Virgin EN UG rev2
TempConfidential_Gflip2 SPR 4044T Virgin EN UG rev2
![User Guide [Gflip2_sprint_4044T_ug_en_20161122_d1]](https://usermanual.wiki/TCL-Communication/N010.TempConfidential-Gflip2-SPR-4044T-Virgin-EN-UG-rev2/User-Guide-3255739-Page-1.png)


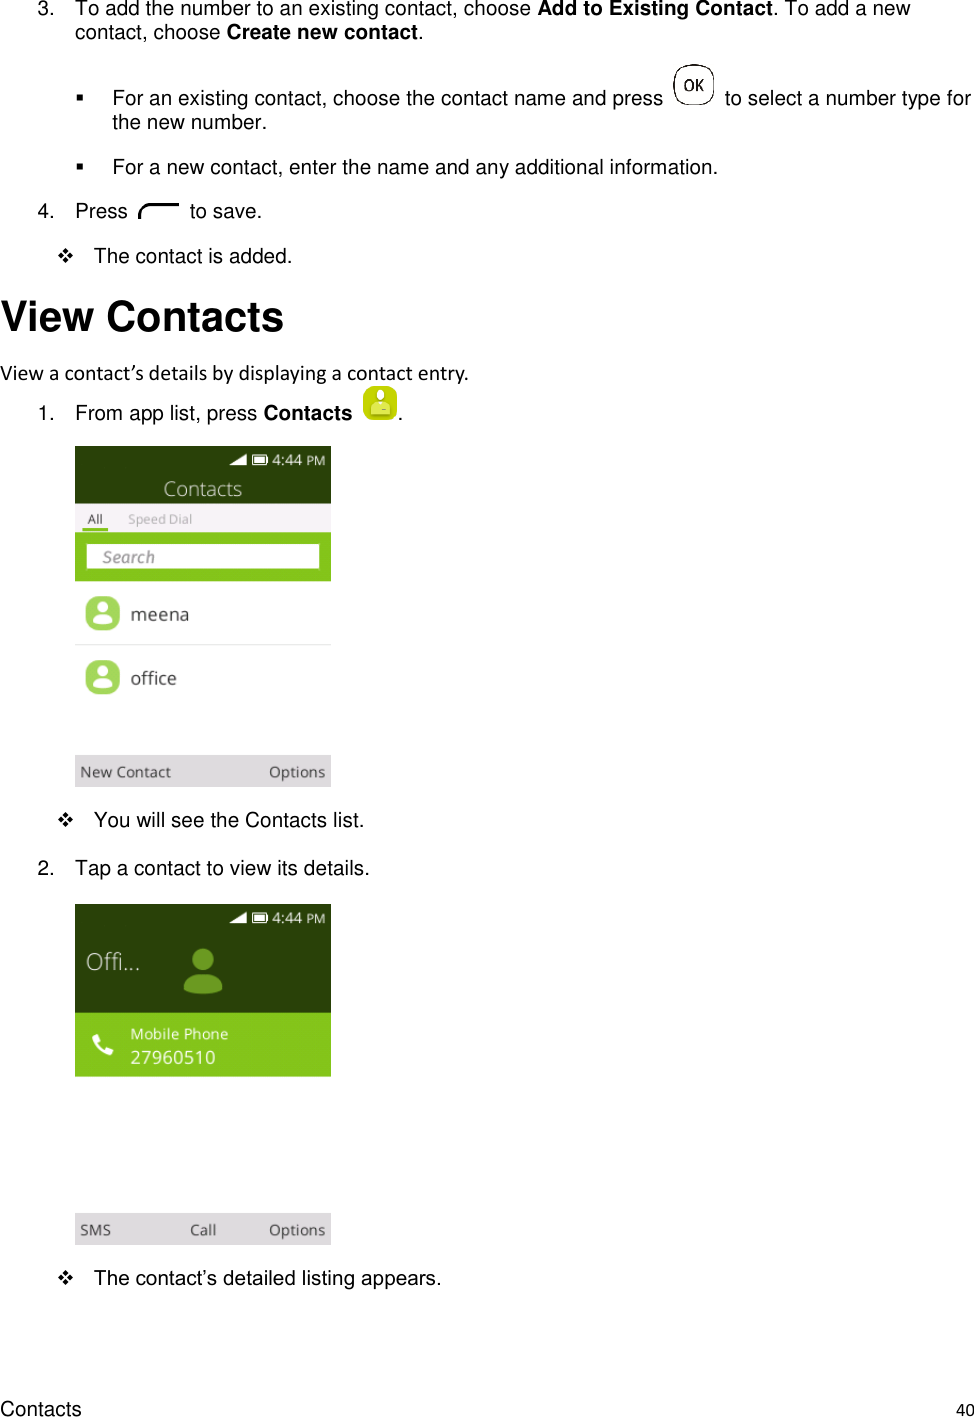
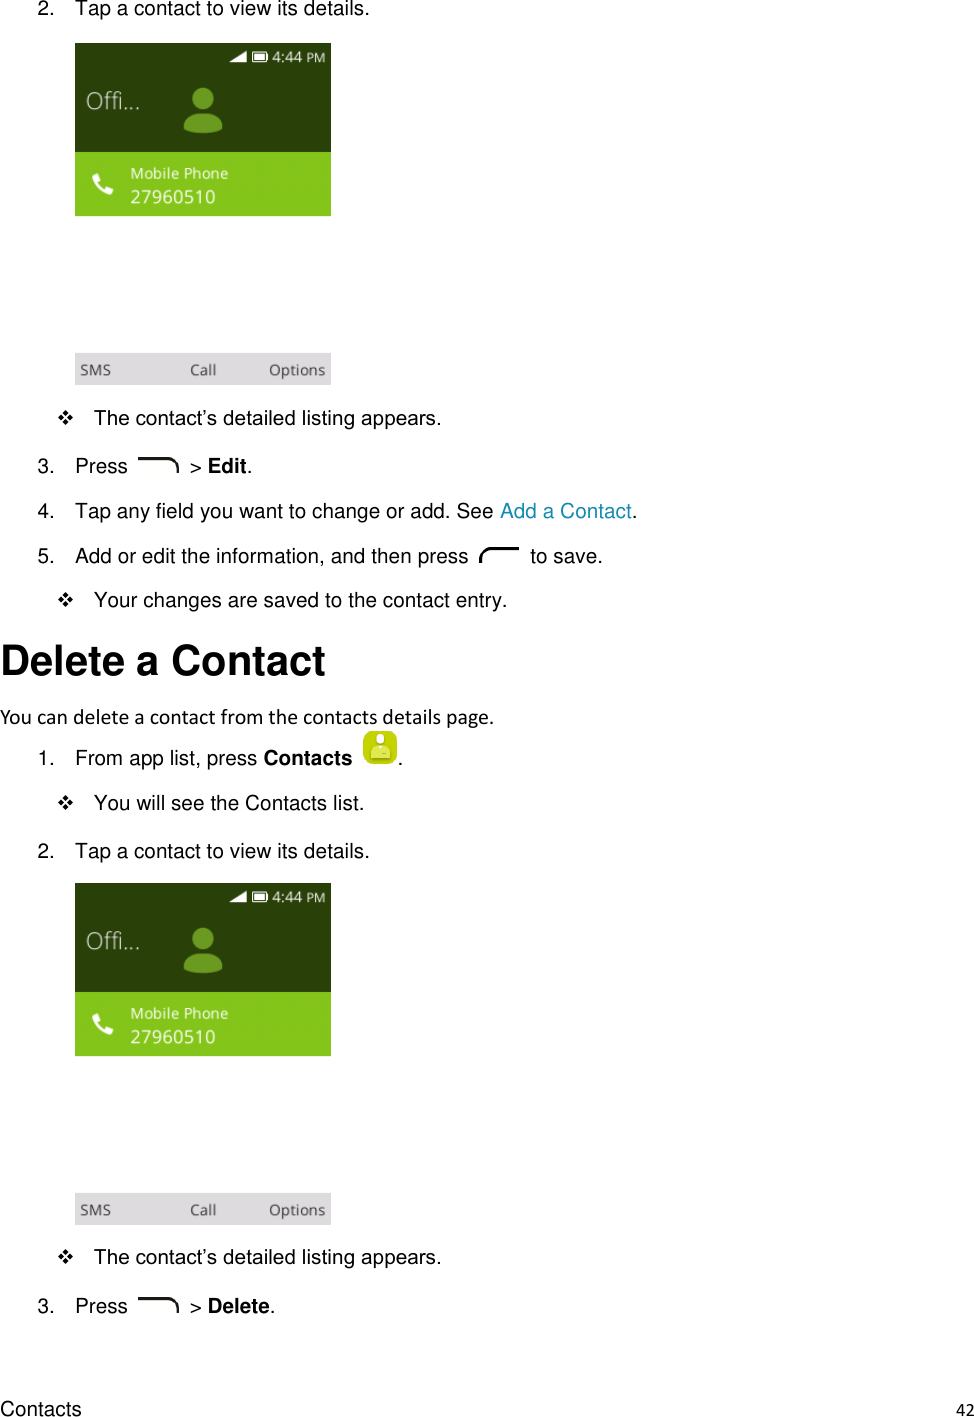
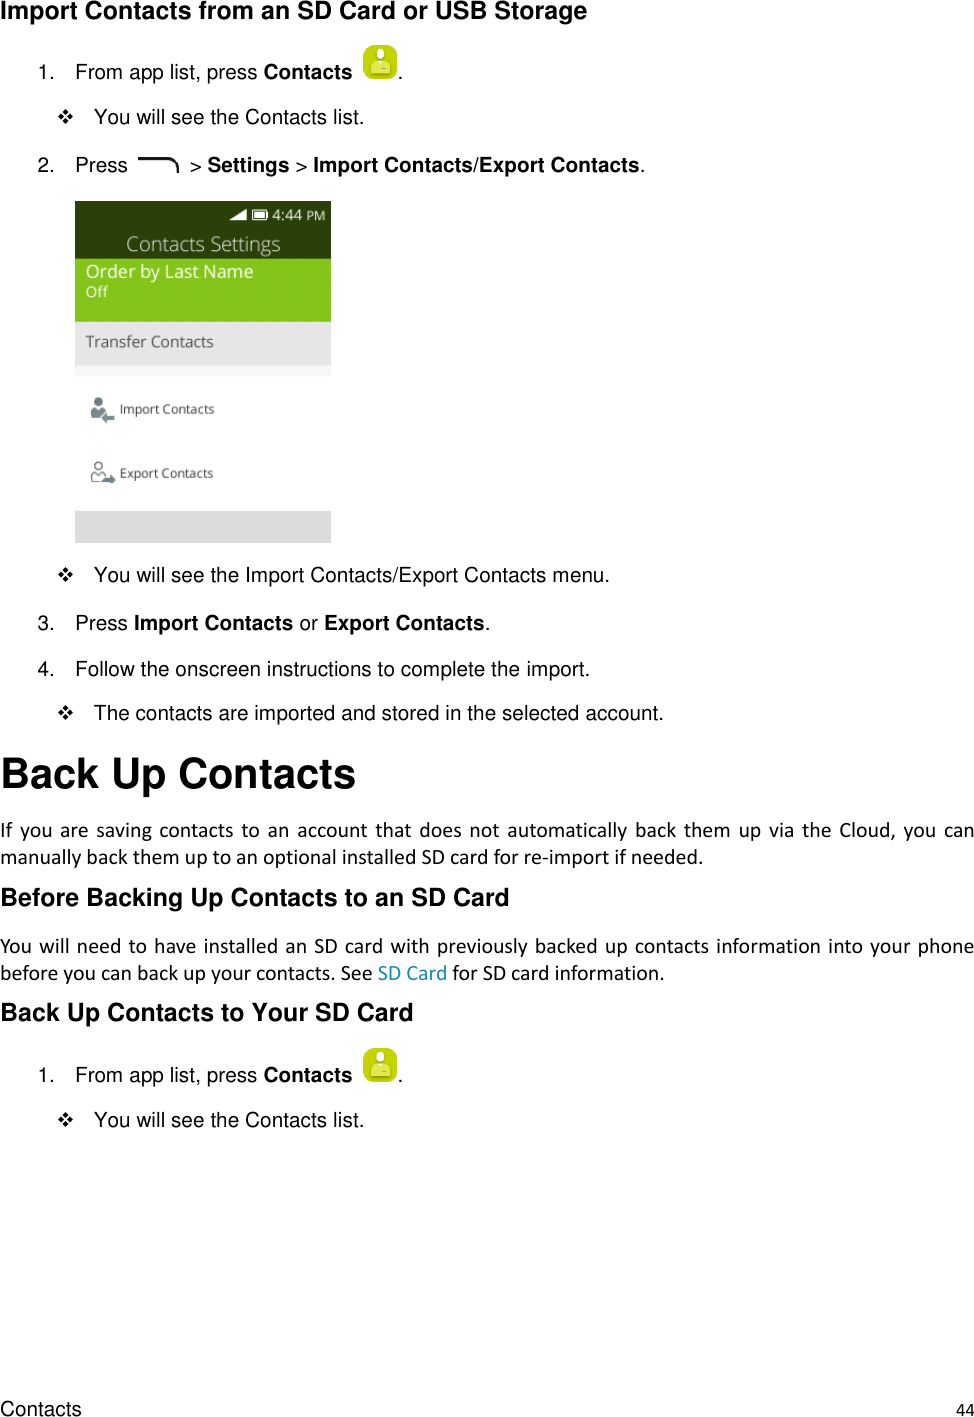
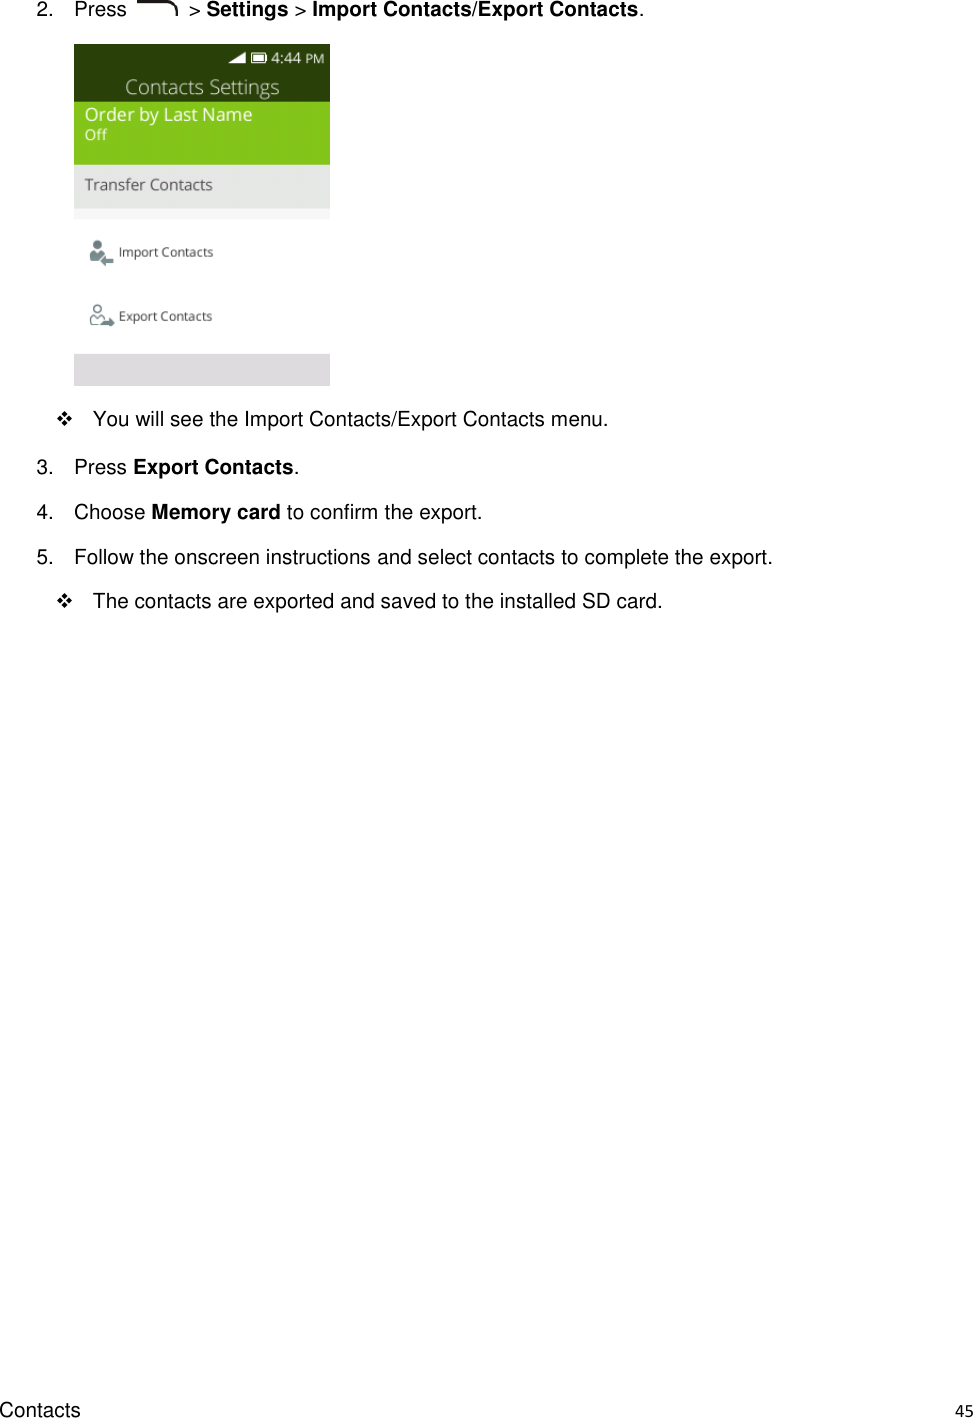
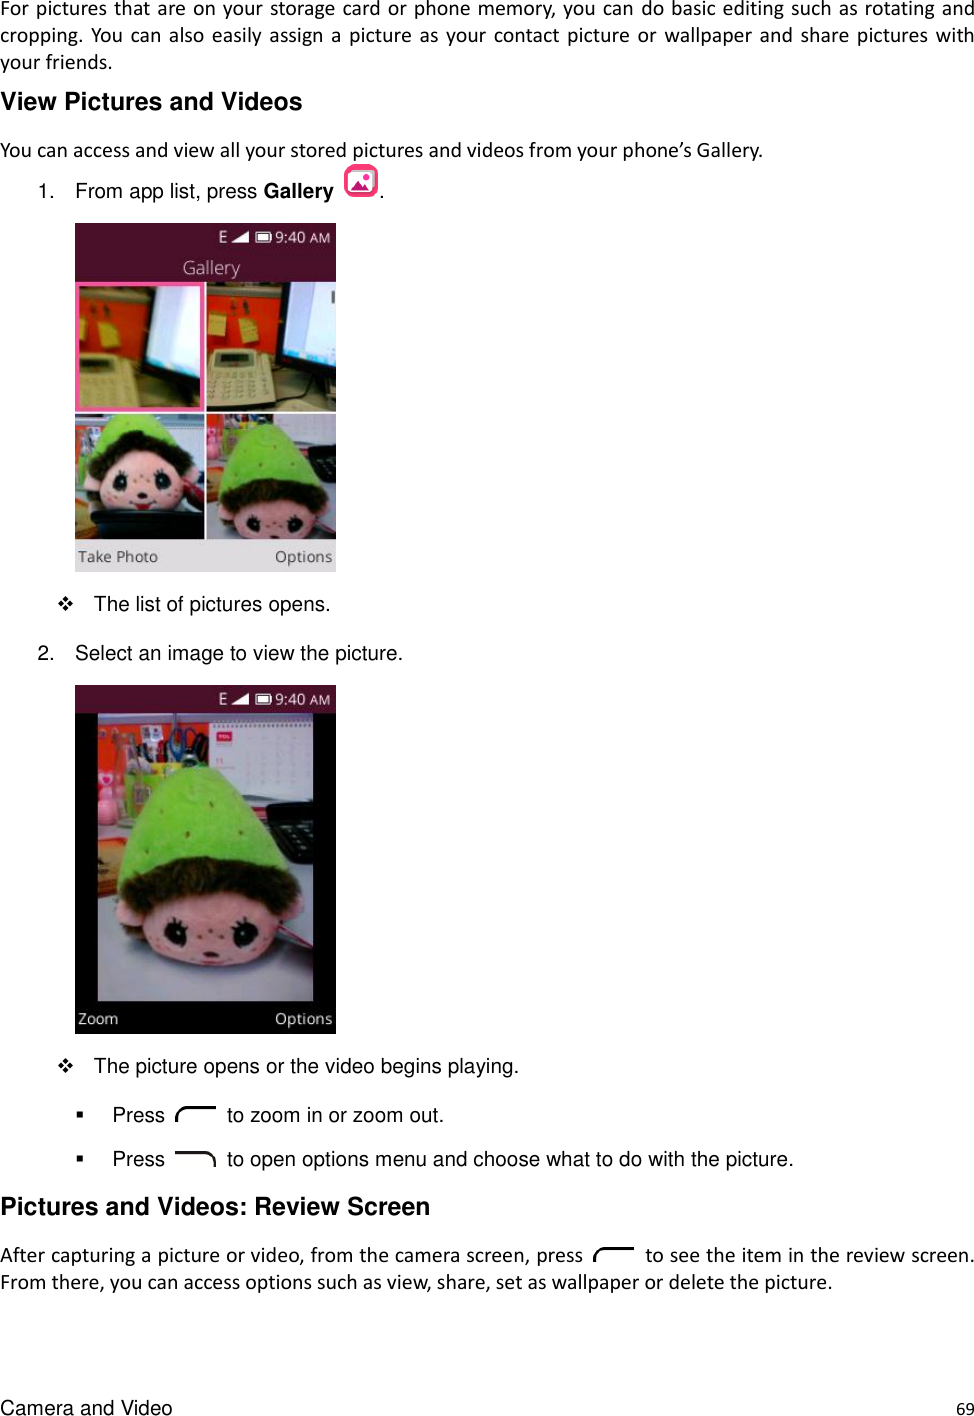
![Contacts 39 The New Contact screen appears. 3. Use the keyboard to enter as much information as you want. Name Last name Company Mobile Phone Personal Email [Ringtone]:Press to change or delete ringtone for particular contact. [Add Picture]: Press the Add Picture icon to assign a picture to the contact. [Add Phone]: Press to add more phone numbers to the contact. [Add Email]: Press to add more Email address to the contact. [Add Address]: Press to add more address to the contact. [Add Date]: Press to add Birthday or anniversary to the contact. [Add Ringtone]: Press to add ringtone to the contact. [Add Note]: Press to add note to the contact. 4. When you have finished adding information, press . The contact is added. Save a Phone Number You can save a phone number to Contacts directly from the phone keypad. 1. From app list, press Phone . 2. Enter a phone number and choose Create New Contact.](https://usermanual.wiki/TCL-Communication/N010.TempConfidential-Gflip2-SPR-4044T-Virgin-EN-UG-rev2/User-Guide-3255739-Page-45.png)