TEAC CR-H500NT CD Receiver User Manual EN CR H500NT T C indb
TEAC Corporation CD Receiver EN CR H500NT T C indb
UserManual.wiki
>
TEAC
>
CR H500NT User Manual
User Manual
Navigation menu
Upload a User Manual
Namespaces
Wiki Guide
HTML
PDF
Info
Views
User Manual
Discussion / Help
Navigation


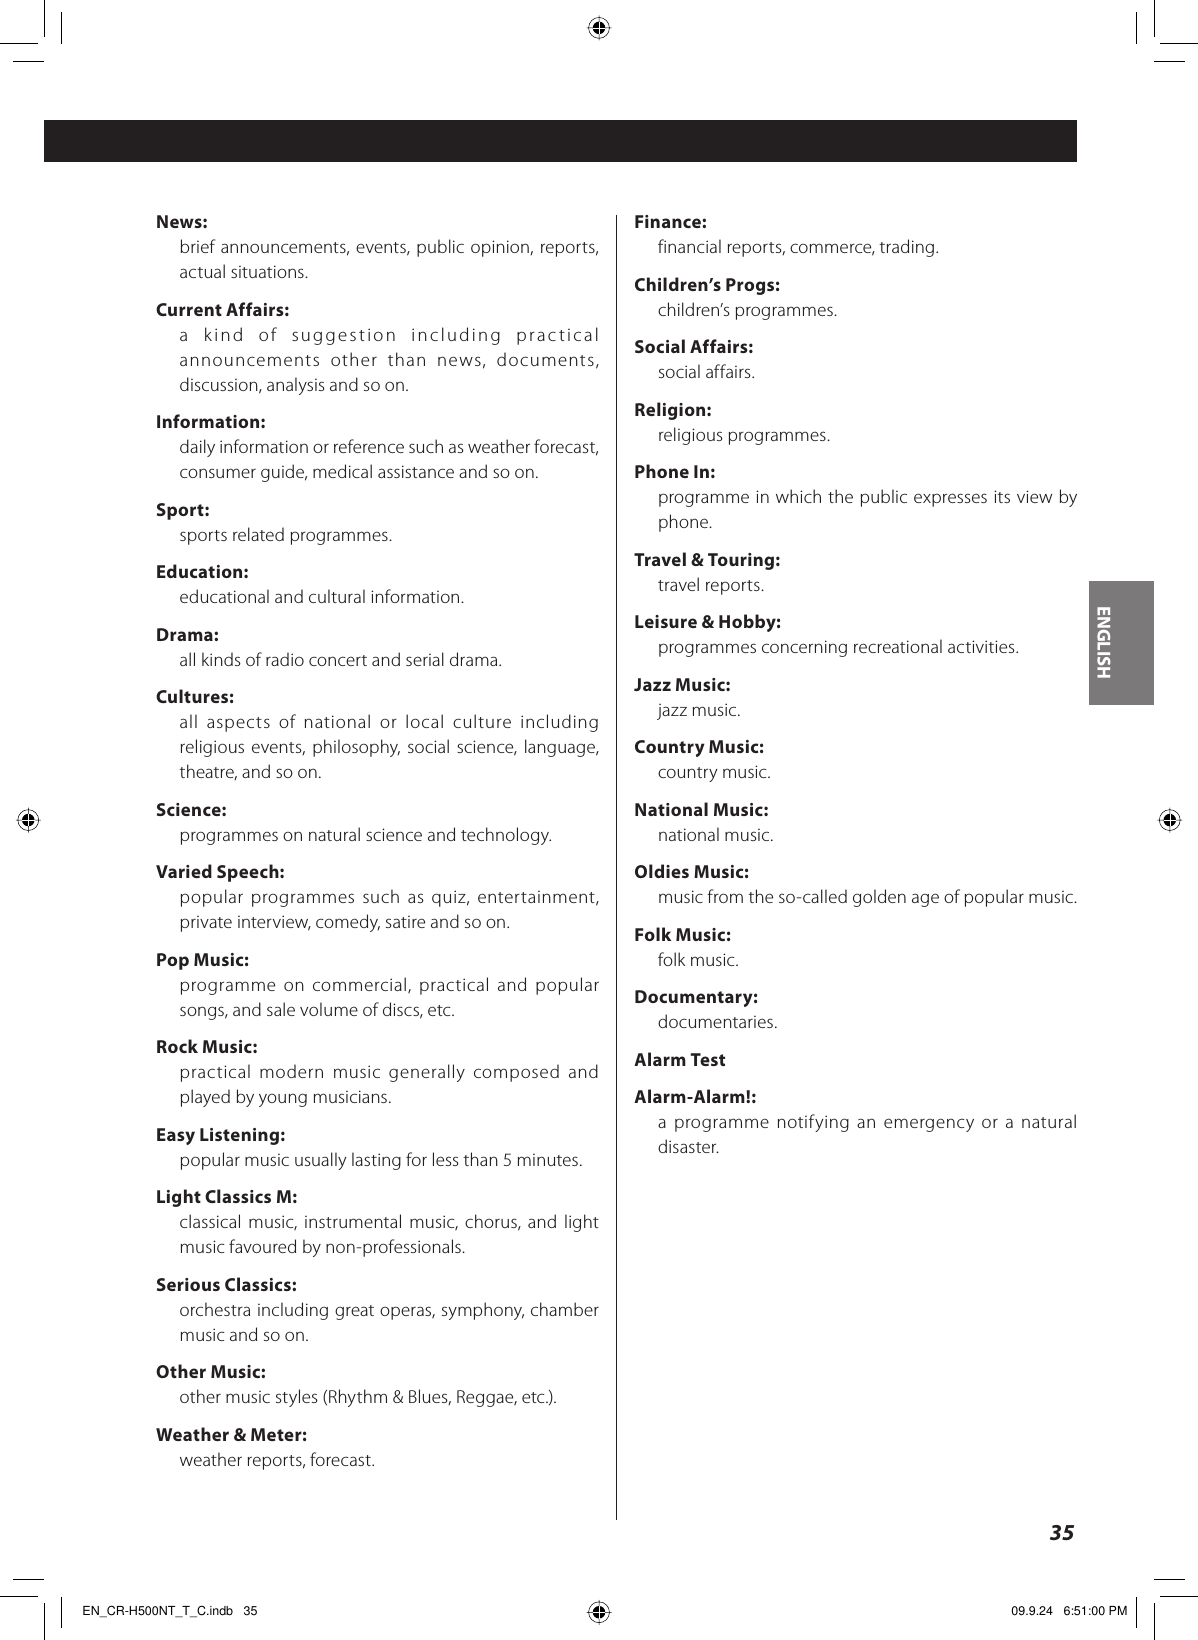
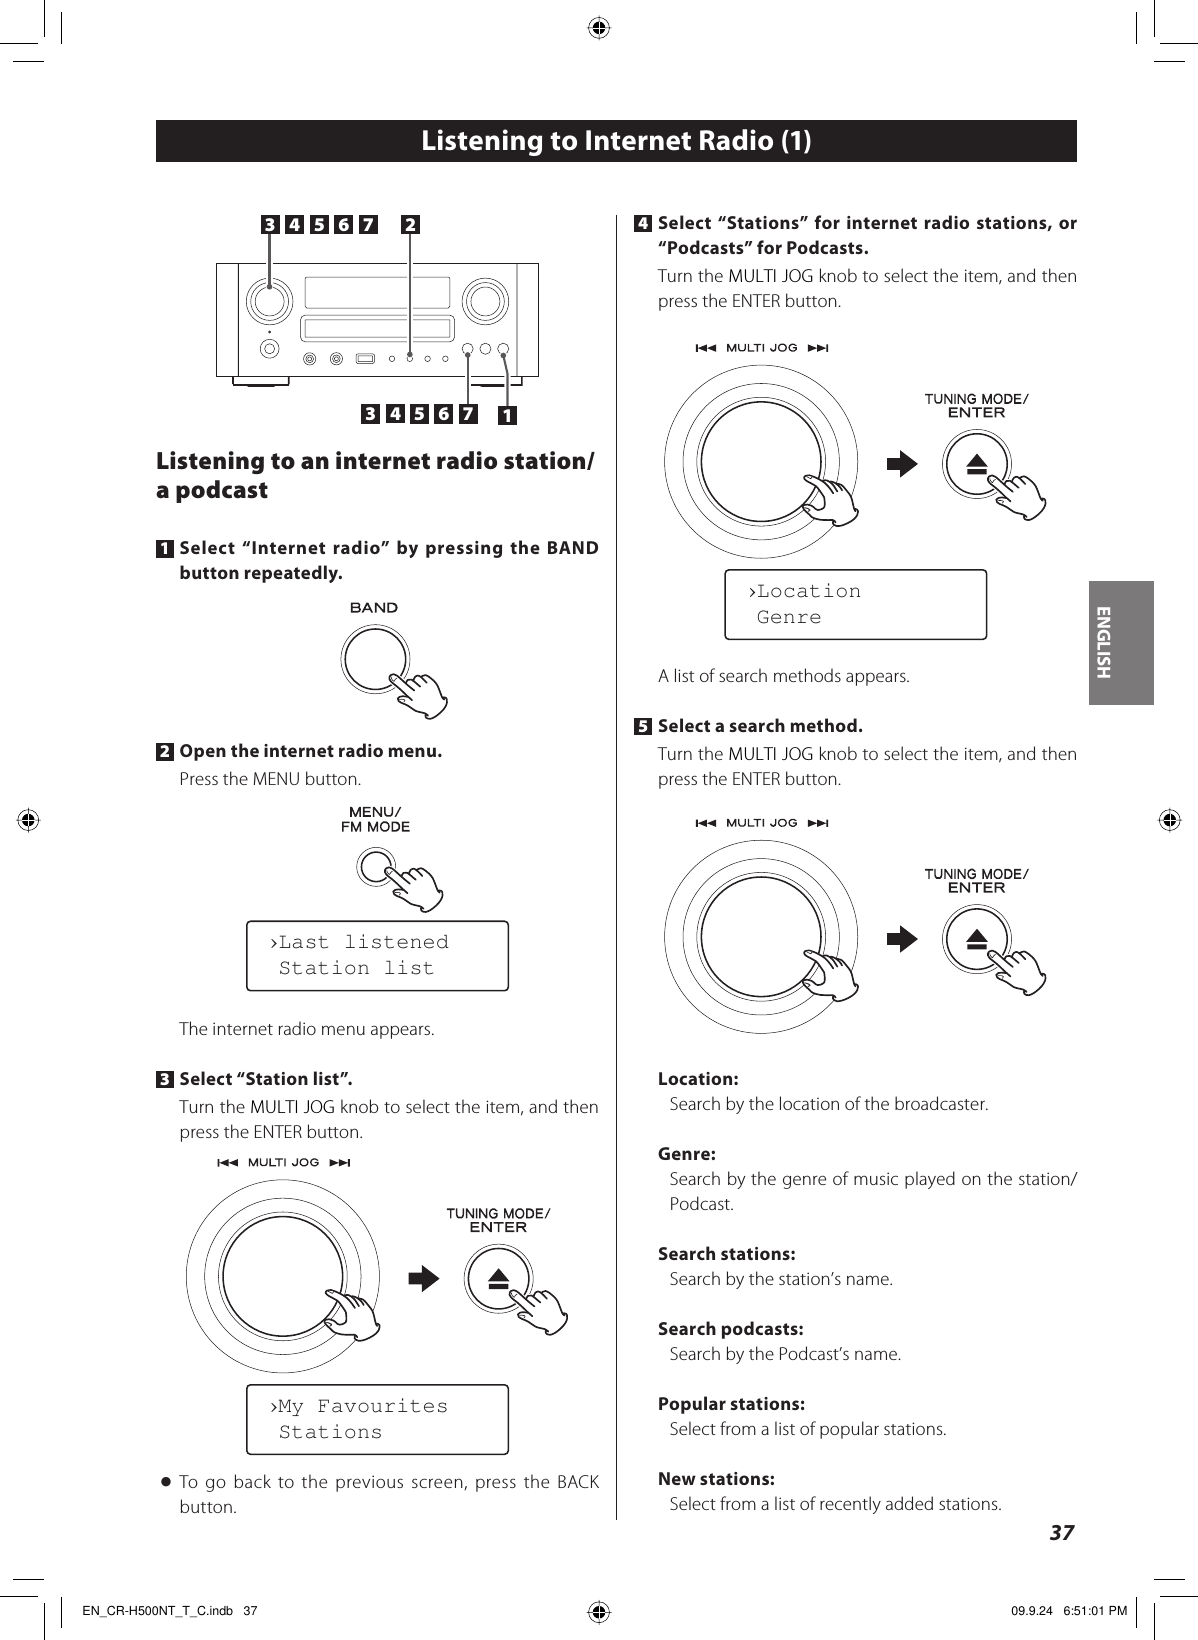
![36Internet Radio Initial SetupWhen you use the internet radio function for the first time, the unit starts an initial setup procedure to connect to the Internet.1 Select “Internet radio” by pressing the BAND button repeatedly.Initial setup wizard starts.2 Select your country/area.Turn the MULTI JOG knob to select the item, and then press the ENTER button.›Most of Europe USA< To go back to the previous screen, press the BACK button.3 Select a network name you want to use.Turn the MULTI JOG knob to select the item, and then press the ENTER button.›005AD904JM2 [Rescan]< To use a wired Internet connection, select “[Wired]”.4 Enter the correct password for the network if required.< See “How to input characters” below.Now the unit starts to connect to the Internet.When connection is established successfully, the internet radio menu is displayed. See the next page to select a station.< If you have a problem connecting to the Internet, see page 53.How to input characters1. Turn the MULTI JOG knob to select a set of characters.2. Press the BACK button and the FWD button to select the character you want to input.3. Press the ENTER button to input the selected letter.Repeat steps 1 to 3 to input next characters.<: Deletes the last character.E: Enters your input.C: Cancels the operation and goes back to the previous screen.Characters you can input0123456789ABCDEFGHIJKLMNOPQRSTUVWXYZabcdefghijklmnopqrstuvwxyz(space)!”#¤%&’()*+,-./:;<=>?@[\]–_||`{|}¯123Key: Ge0123456789<ECBACK FWDENTERMULTI JOGEN_CR-H500NT_T_C.indb 36EN_CR-H500NT_T_C.indb 36 09.9.24 6:51:00 PM09.9.24 6:51:00 PM](https://usermanual.wiki/TEAC/CR-H500NT/User-Guide-1188841-Page-36.png)