TECHCity Technology LC-330C CURTAIN CONTROLLER User Manual LC 330C 20130109
TECHCity Technology Co., Ltd. CURTAIN CONTROLLER LC 330C 20130109
User Manual

1
Product Name: Contact Driving Controller
Model No. : LC-330C
P/N: LC-330C_20130109
Specification:
z RF : 433.92 MHz
z Power: AC - 110V ~ 240V
z AC Max. Power loading: 2A (~1/4HP)
z Use remote to set ID & position.
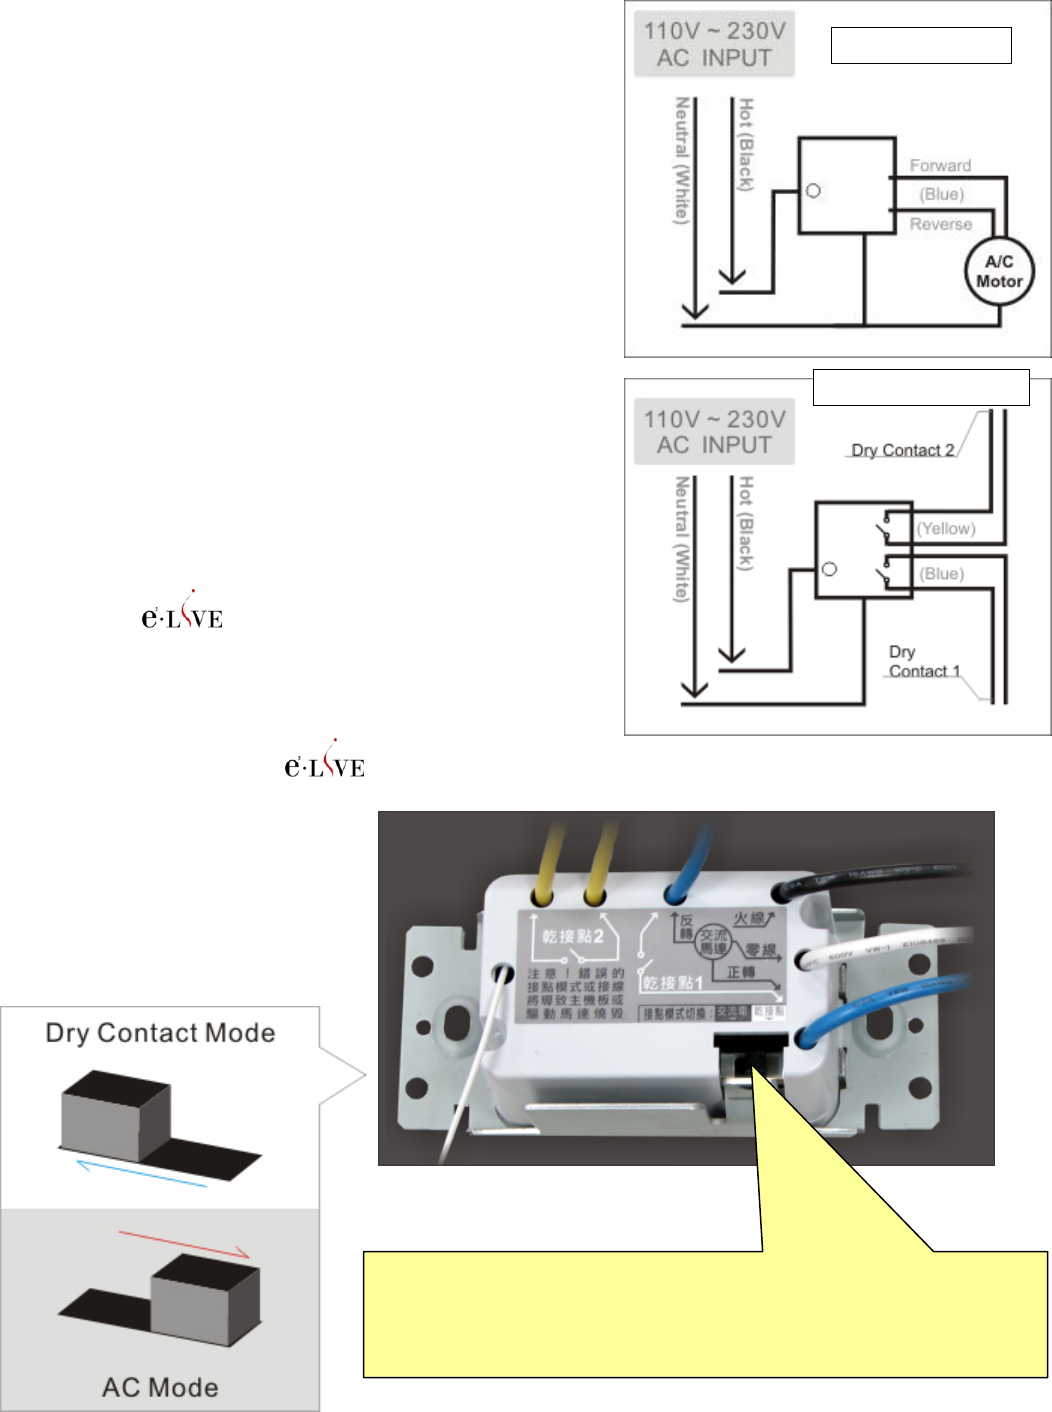
AC Mode
Dr
y
Contact Mode
Application:
Integrate various motor curtain, gas valve,
door, lock…, etc. with control system.
Features:
z Touch, RF Remote, Power Control 3 in 1 design.
z RF wireless receive function
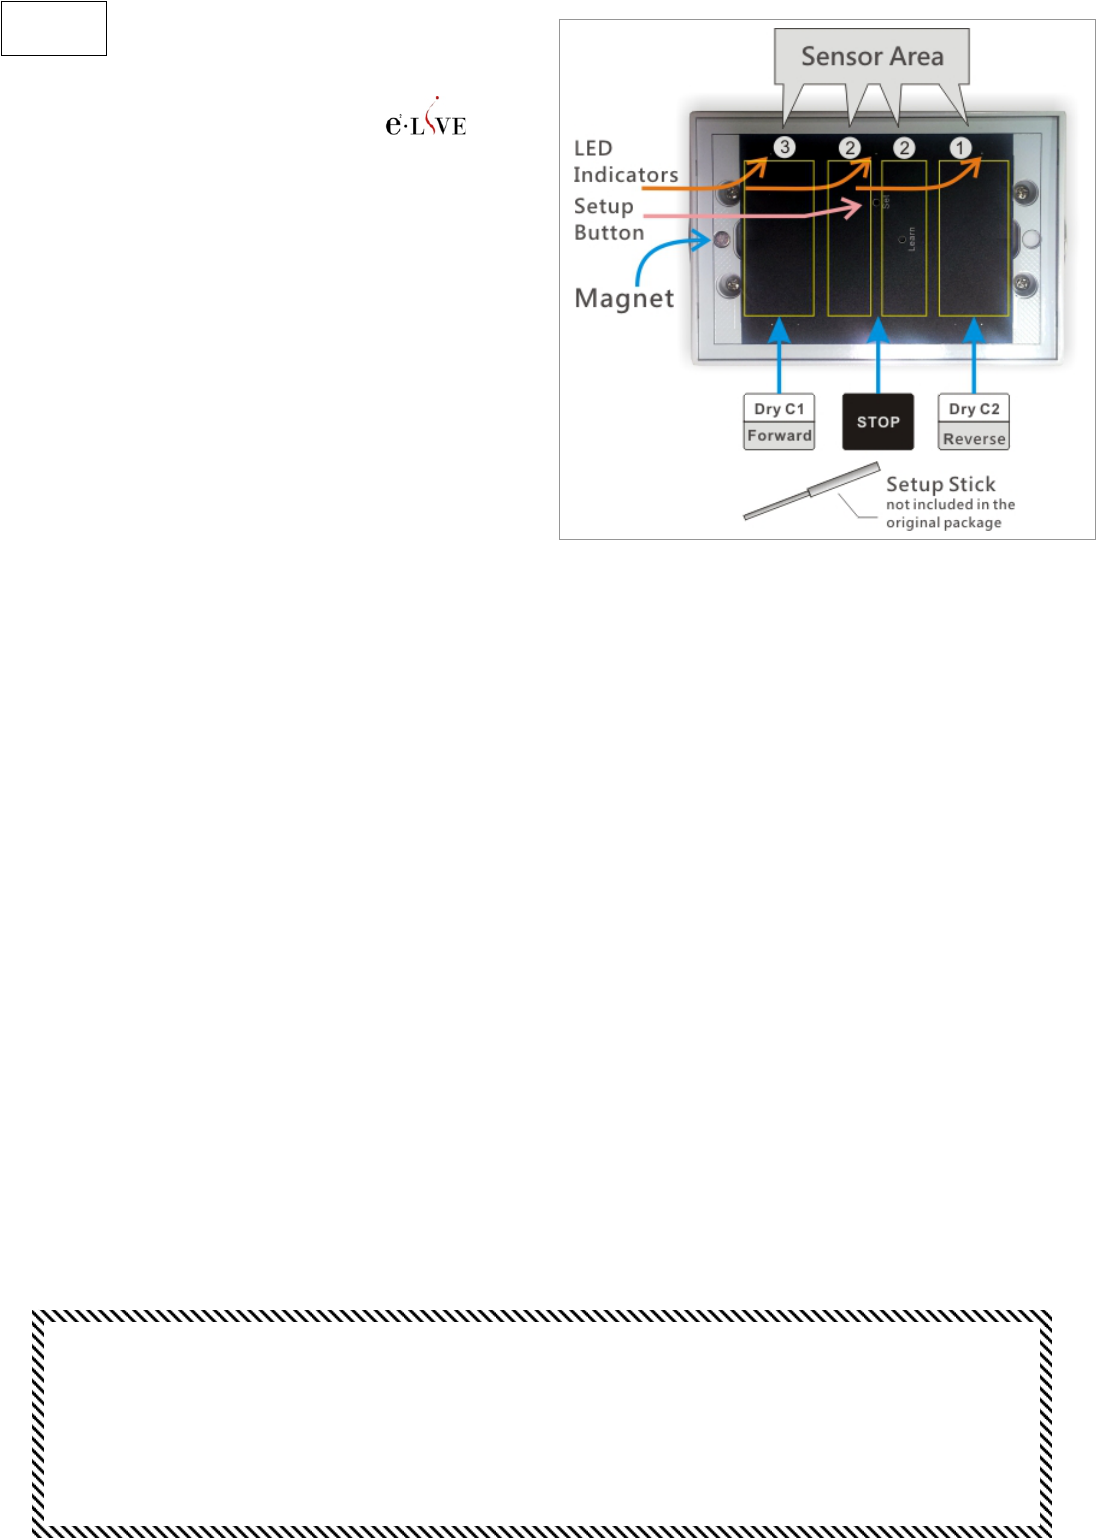
z Induction touch control: Open(Up), Stop, Close(Down)
z Detachable Panel, self-expression under paper design.
z Control Output ( Alternative )
- AC 100V~240V, forward/reverse control
- DO dry contact output x 2 suites
z Programmable route for power saving.
z Installation: Standard European in-wall gang box
Note! Please make sure the control mode of your equipment
before installation to avoid from burning down CS-330C or
your equipment.

2
Setting
A. Set ID & Position
1. You may use any remote controller of to input
(set) ID & position to LC-330C
2. Use haptor to remove the panel.
(Please check appendix for the details)
3. Use setup stick to push & let go SET button, buzzer
Bi a sound, LED indicator blink 3 times & turn off.
Now it’s under learning mode
4. Pick up a remote controller, press a NO. key then press
ON. (ex. Press Zone 1, No.1 & ON)
5. LC-330C will record the ID & position of the remote
controller, buzzer Bi twice, LED indicator blink twice then
goes off – the learning is done.
6. If you don’t press any button within 10 second, buzzer will
make a long Bi then exit the learning mode.
B. Route Setting:This is the way to control the period of motor spinning forward/reverse for the reason of power saving.
1. Enter Learning Mode: Use setup stick to push & let go SET button, buzzer Bi a sound, LED indicator blink 3 times &
turn off. Now it’s under learning mode
2. Enter Route Learning Mode: Use setup stick to push & let go SET button again. At this moment, all LEDs are ON.
3. Touch Key 1(forward) once, buzzer will start to count the timing with Bi in every second & 3 LEDs blink. (The count
will be going till 255 seconds Max.)
4. When the count reach the timing of you need, press STOP.
Buzzer will Bi twice & LEDs stop blinking – the route is set.
[Ex. 1] Set the route of curtain
a. Enter Learning Mode
b. Zero the curtain: Press key2 (Reverse) till the curtain completely open/close.
b. Enter Route Learning Mode
c. Start to set the route: Touch Key 1(forward) once, buzzer & LED will start to count. Touch STOP as the curtain
completely close/open.
[Ex. 2] Trigger other device – relay touch 1 second & recover (open)
a. Enter Learning Mode
b. Enter Route Learning Mode
c. Set Relay Touch Time: Touch Key 1(forward) once, buzzer & LED will start to count. While LED blinks & buzzer
Bi one time, touch STOP to stop the count.
C. Set Relay Always Close (Cancel Route Time)
a. Enter Learning Mode
b. Enter Route Learning Mode
c.Touch Key 1(forward) once & touch STOP before Buzzer & LED start to count.
Note: This setting will makes the relay always close as you touch Forward/Reverse, unless you touch [STOP].
REMARK!
1. The Route Time is 1~255 second, the default is 90 second.
2. The Route Time of Forward /Reverse is same.
3. We strongly suggest LC-330C should be collocated with those product obtains limit switch function.
4. When all settings are completed. There are 30 seconds window for the touch sensor re-scan after
front panel mount on. After 30 seconds, you may touch & control the panel normally.

3
--------------------------------------------------------------------------------------------------------------------------------
1. Forward/Reverse: Touch [Forward]/[Reverse] the relay will close according the time you’ve set.
2. Press [Forward]; while the relay is still closing, touch [STOP] or [Reverse], relay will open.
3. Press [Reverse]; while the relay is still closing, touch [STOP] or [Forward], relay will open.
4. Follow [2.] & [3.], touch [Forward] or [Reverse], LC-330C will restart route counting till the action is interrupted
or the time is up & the relay is recovered to the open mode.
5. Reverse Code control: some of e2-LiVE’s remote controllers can transmit reverse code to control
LC-330C(ex. BT-100, CS-330T, MS-X0T, LS-X0T…, etc.) which can use only one key to control LC-330C.
For example, One press the remote button, LC-330C the [Forward] relay is closed, will act reversely. Press
the same remote button again, the relay will open. Press the same remote button, [Reverse] relay will close…
6. Control with an e2-LiVE remote controller: a.) choose Zone b.) choose position c.) press ON/OFF to control.
Note: Remote controller has no STOP button, we use ON/OFF to remote control LC-330C.
Ex.: Press ON – LC-330C’s the Forward relay is closing, press OFF the relay will open. Press OFF
again the Reverse relay will close…
Operation
Annex A:Install / uninstall Panel
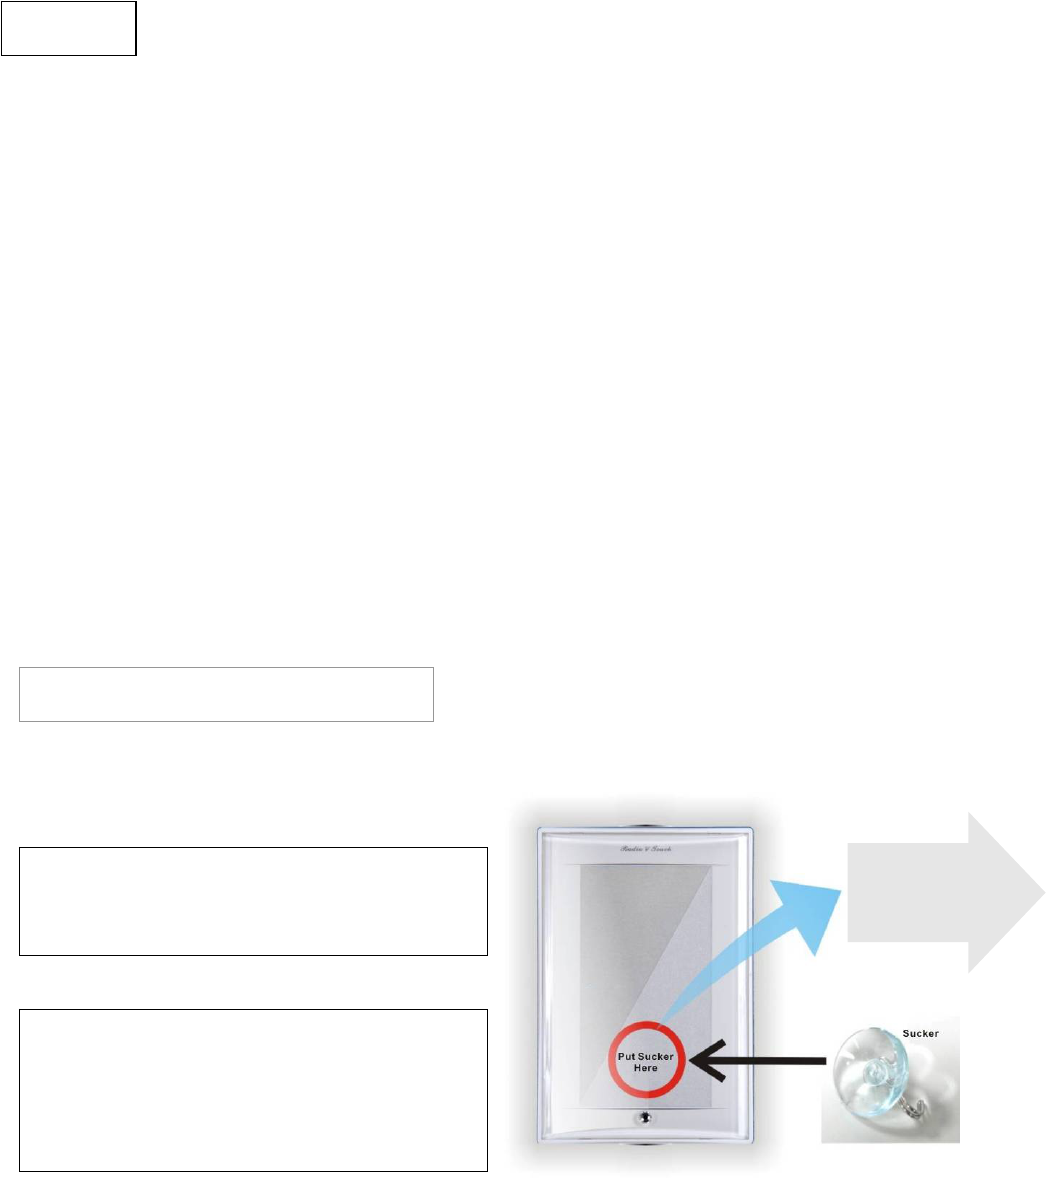
[Uninstall]
Put the sucker on the marked spot, press to squeeze out air
& make sure the sucker is fixed, then pull out of the panel.
[Install]
There are 2 latches on the top of the panel, & a crystal in the
buttom. there is 2 slot for those 2 latches & a magnet for
crystal. PLS make sure the direction correctly. Slide latches
into slots first then press the crystal side into the magnet side
till the panel sink completely.
Pull!
FCC WARNING
This device complies with Part 15 of the FCC Rules. Operation is
subject to the following two conditions:
(1) This device may not cause harmful interference, and
(2) this device must accept any interference received, including interference that may cause
undesired operation.
NOTE 1: Any changes or modifications to this unit not expressly approved by the party
responsible for compliance could void the user's authority to operate the equipment.