TENDA TECHNOLOGY D1201 Wireless AC1200 ADSL2+ Dual Band Modem Router User Manual
SHENZHEN TENDA TECHNOLOGY CO., LTD. Wireless AC1200 ADSL2+ Dual Band Modem Router
UserManual.wiki
>
TENDA TECHNOLOGY
>
D1201 User Manual
User Manual.pdf
Navigation menu
Upload a User Manual
Namespaces
Wiki Guide
HTML
PDF
Info
Views
User Manual
Discussion / Help
Navigation

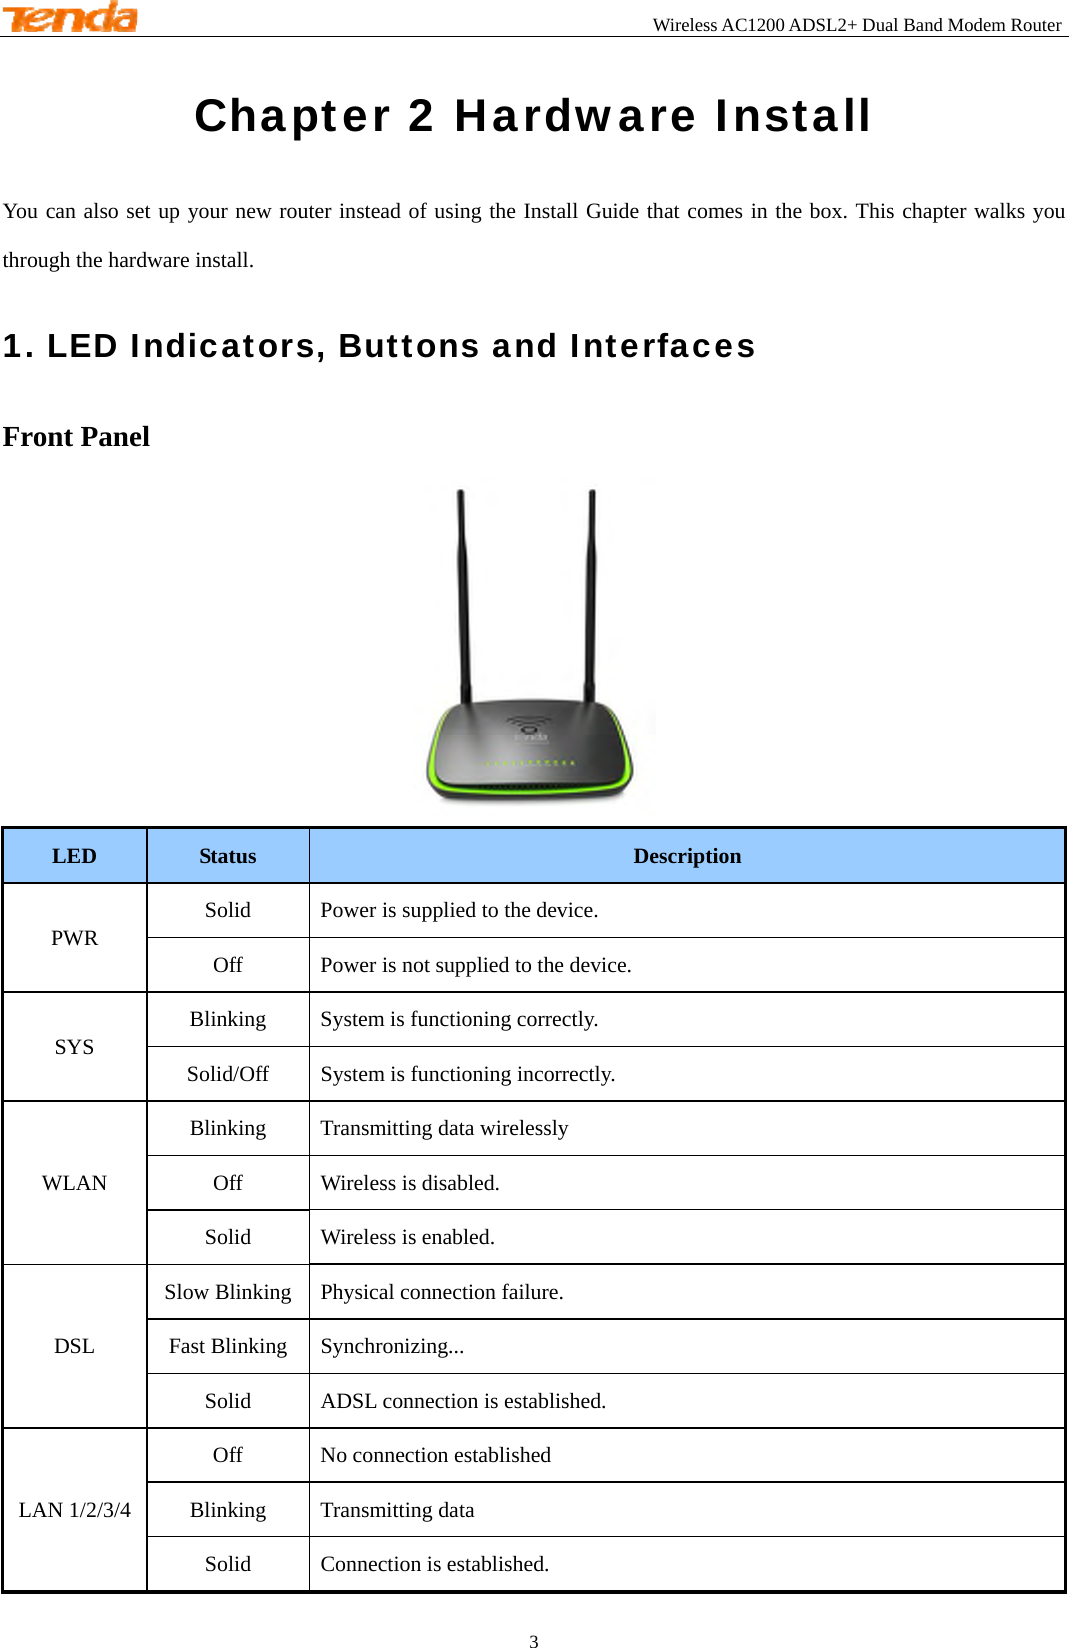
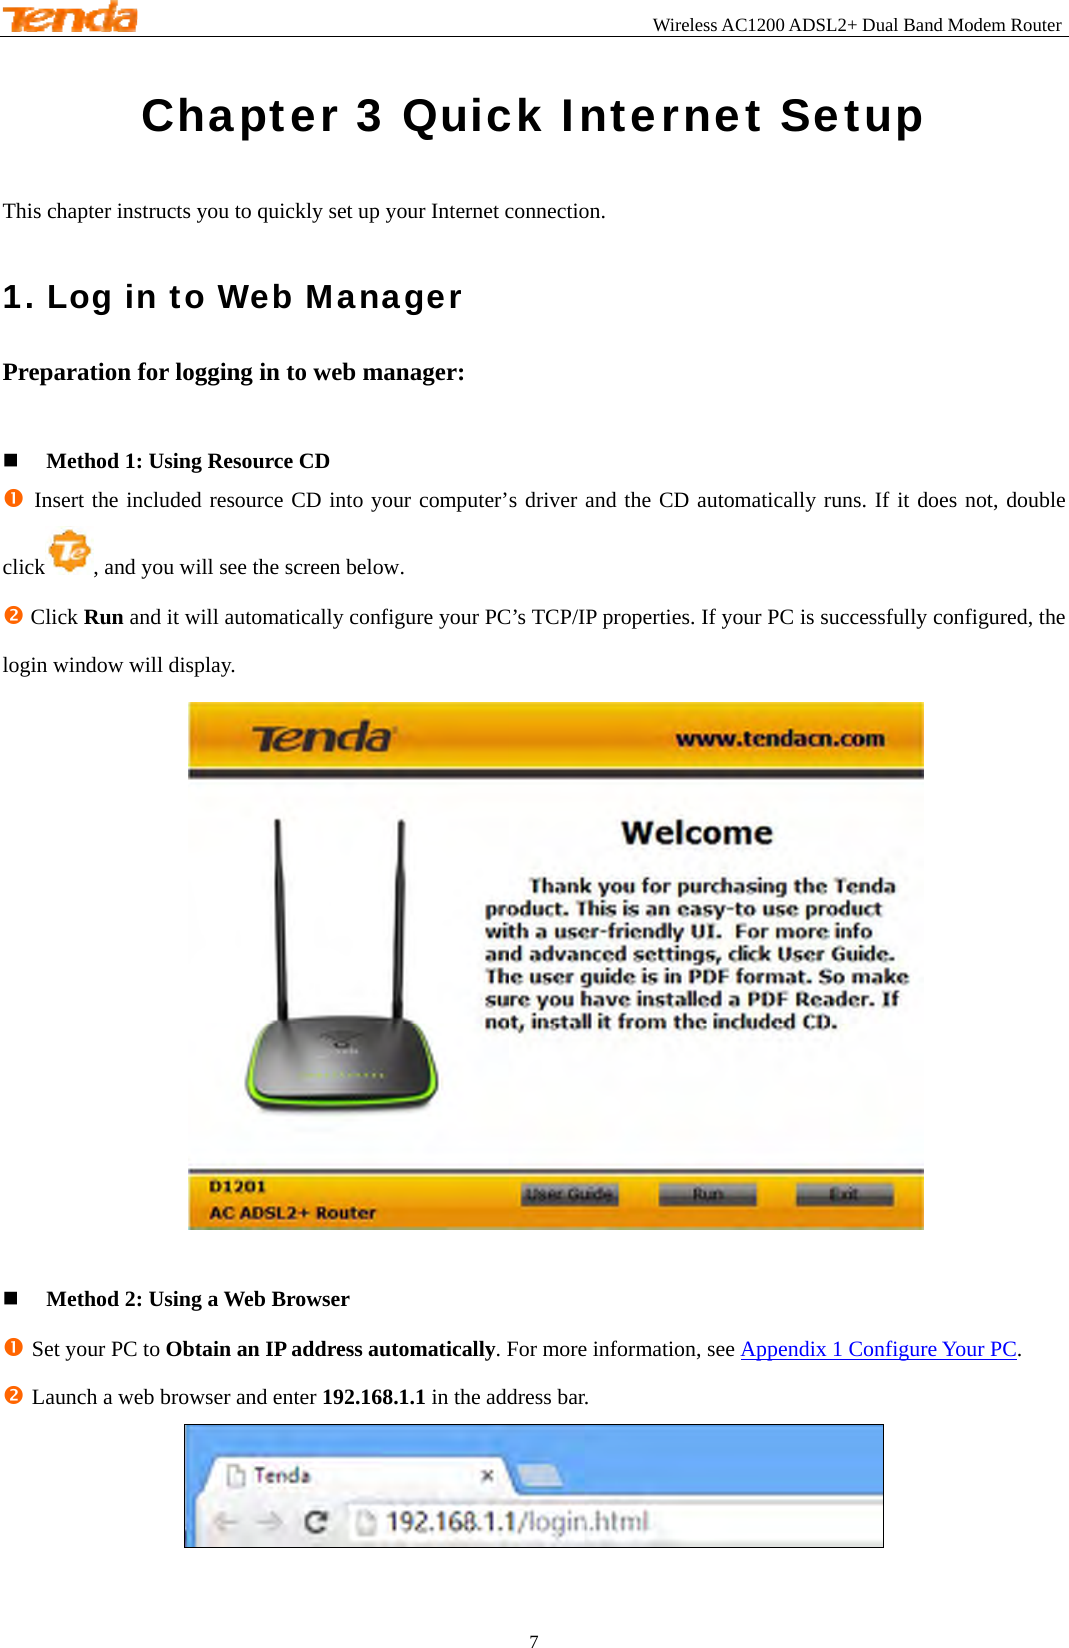
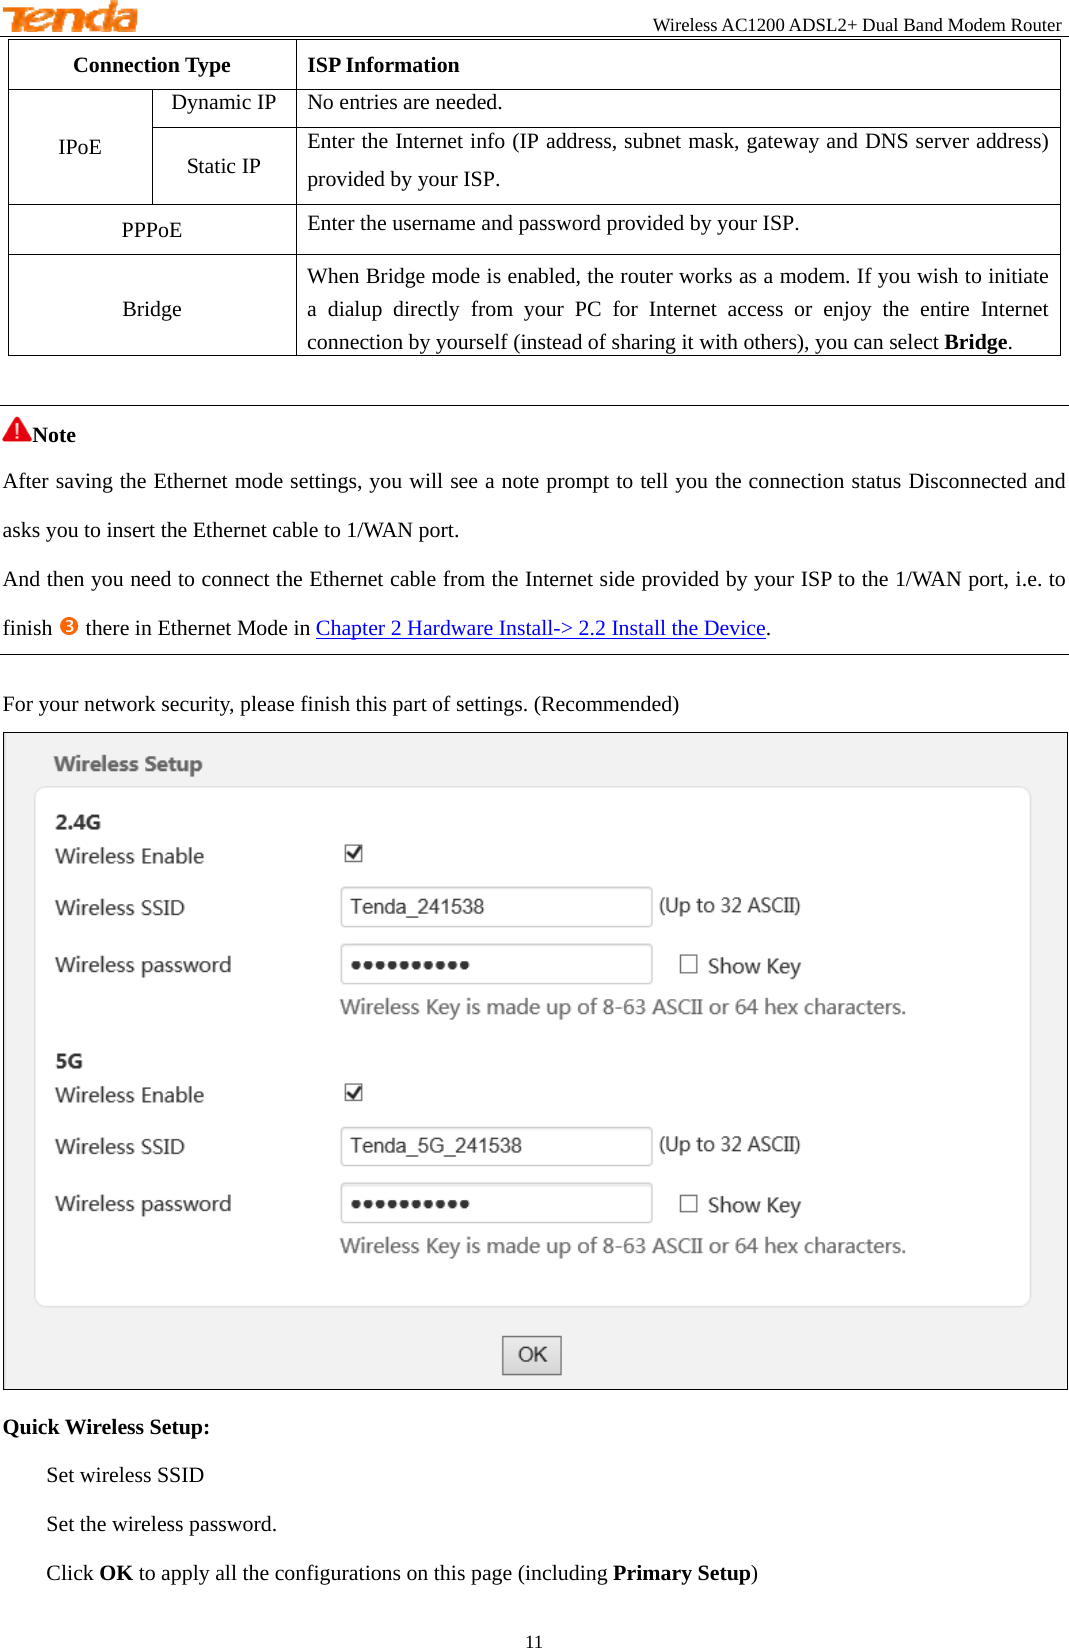
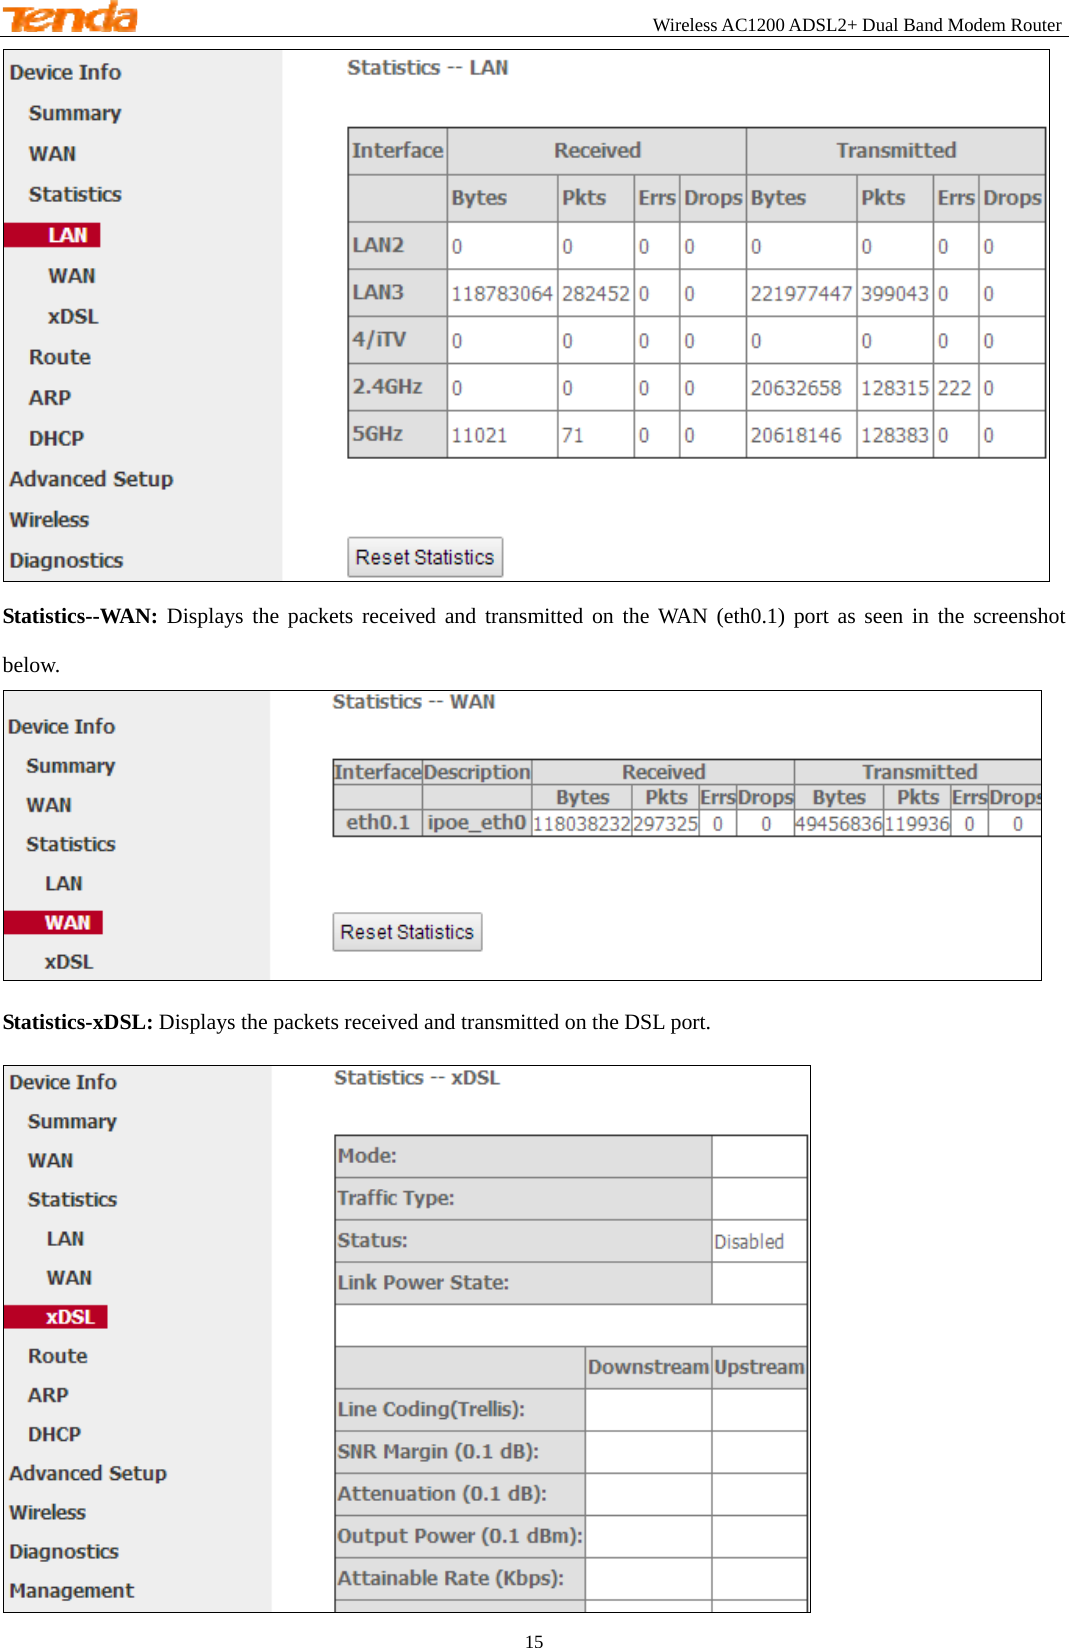
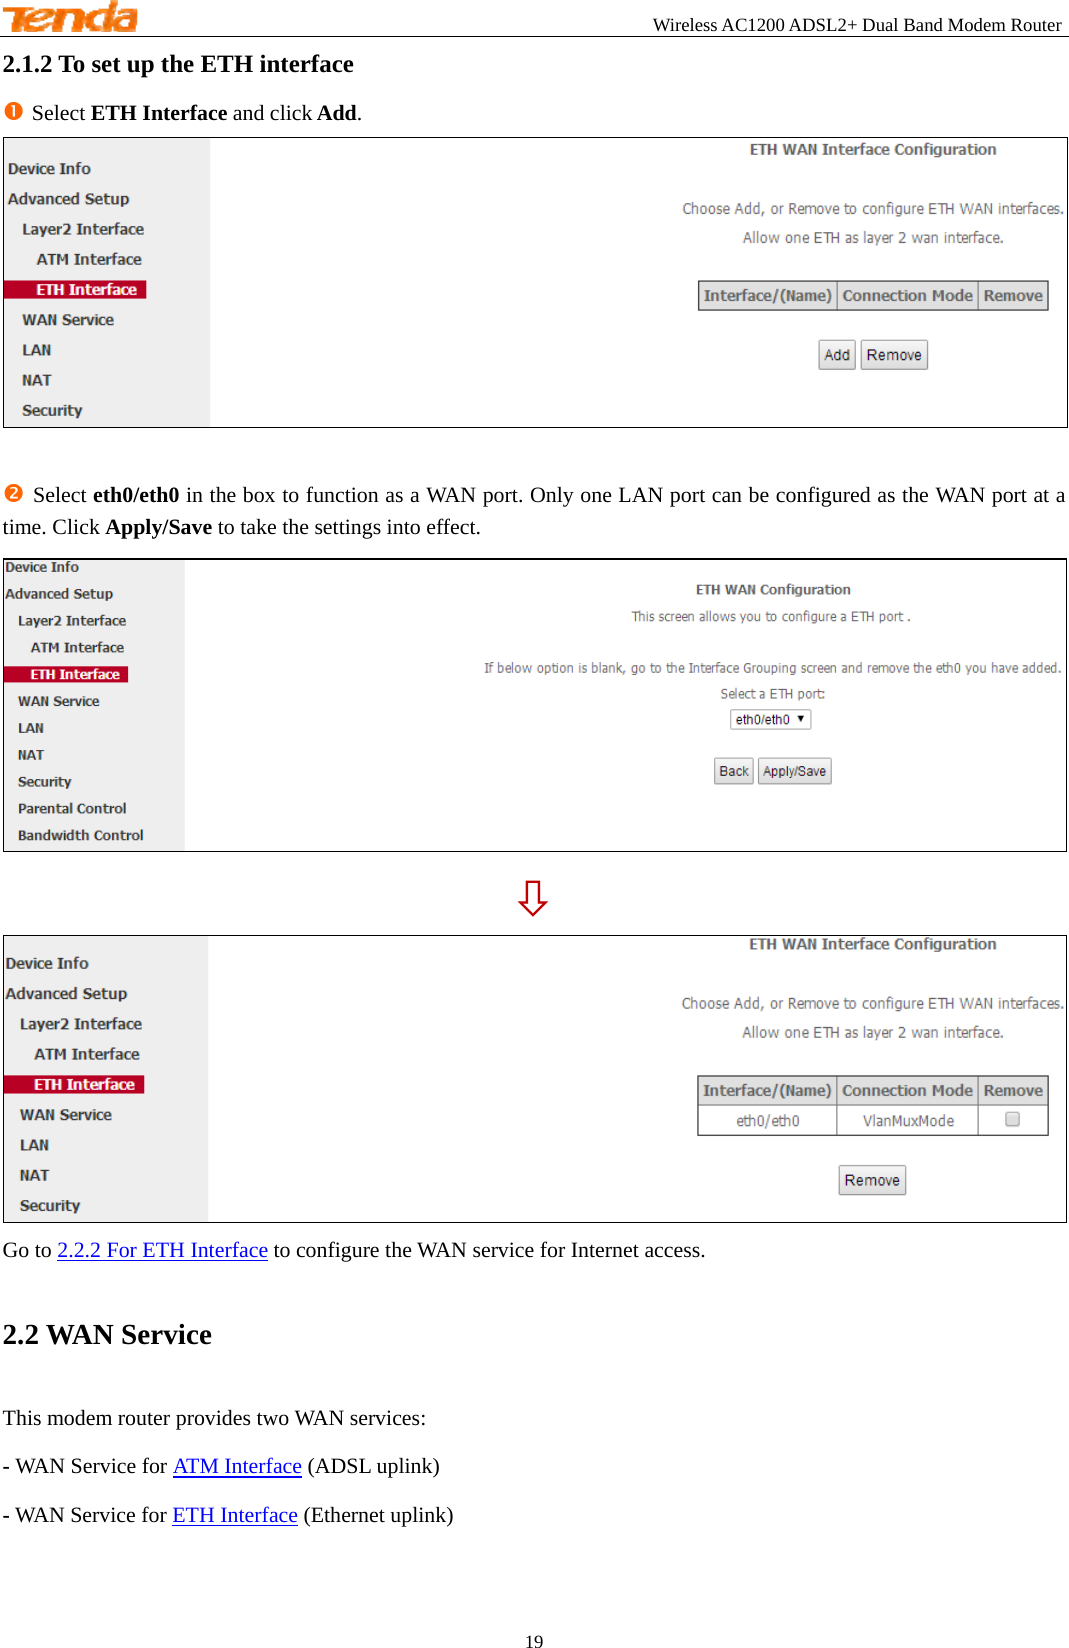

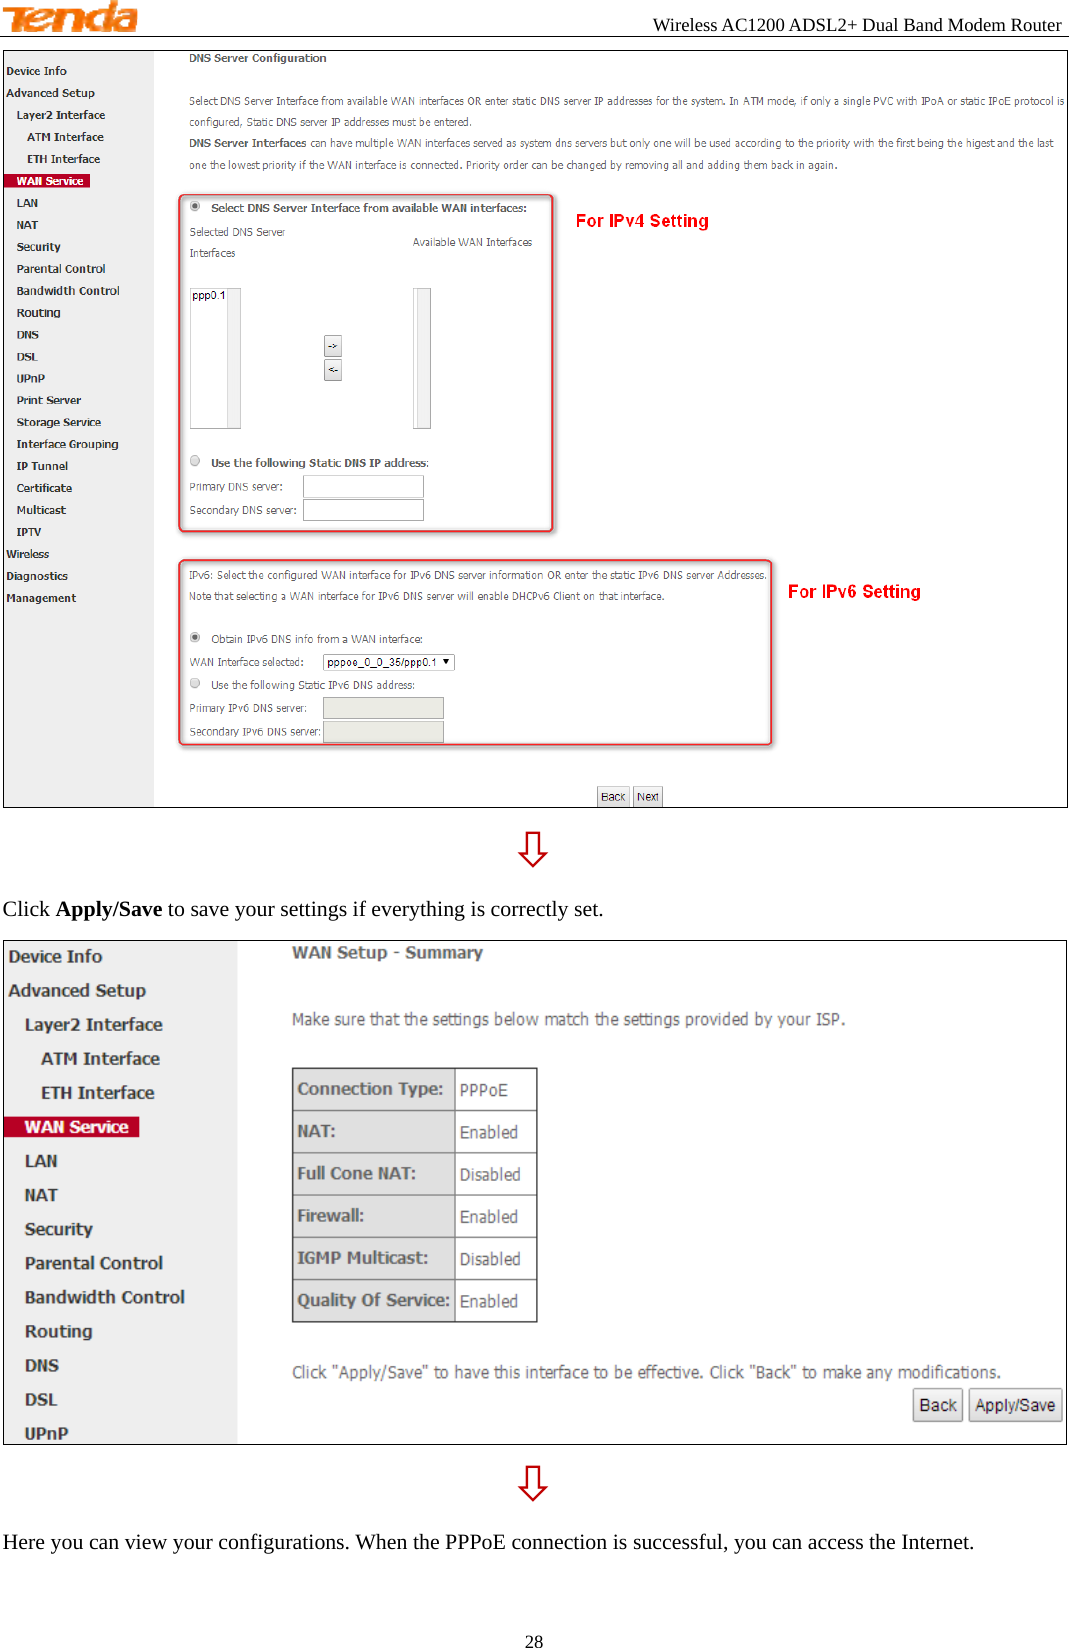

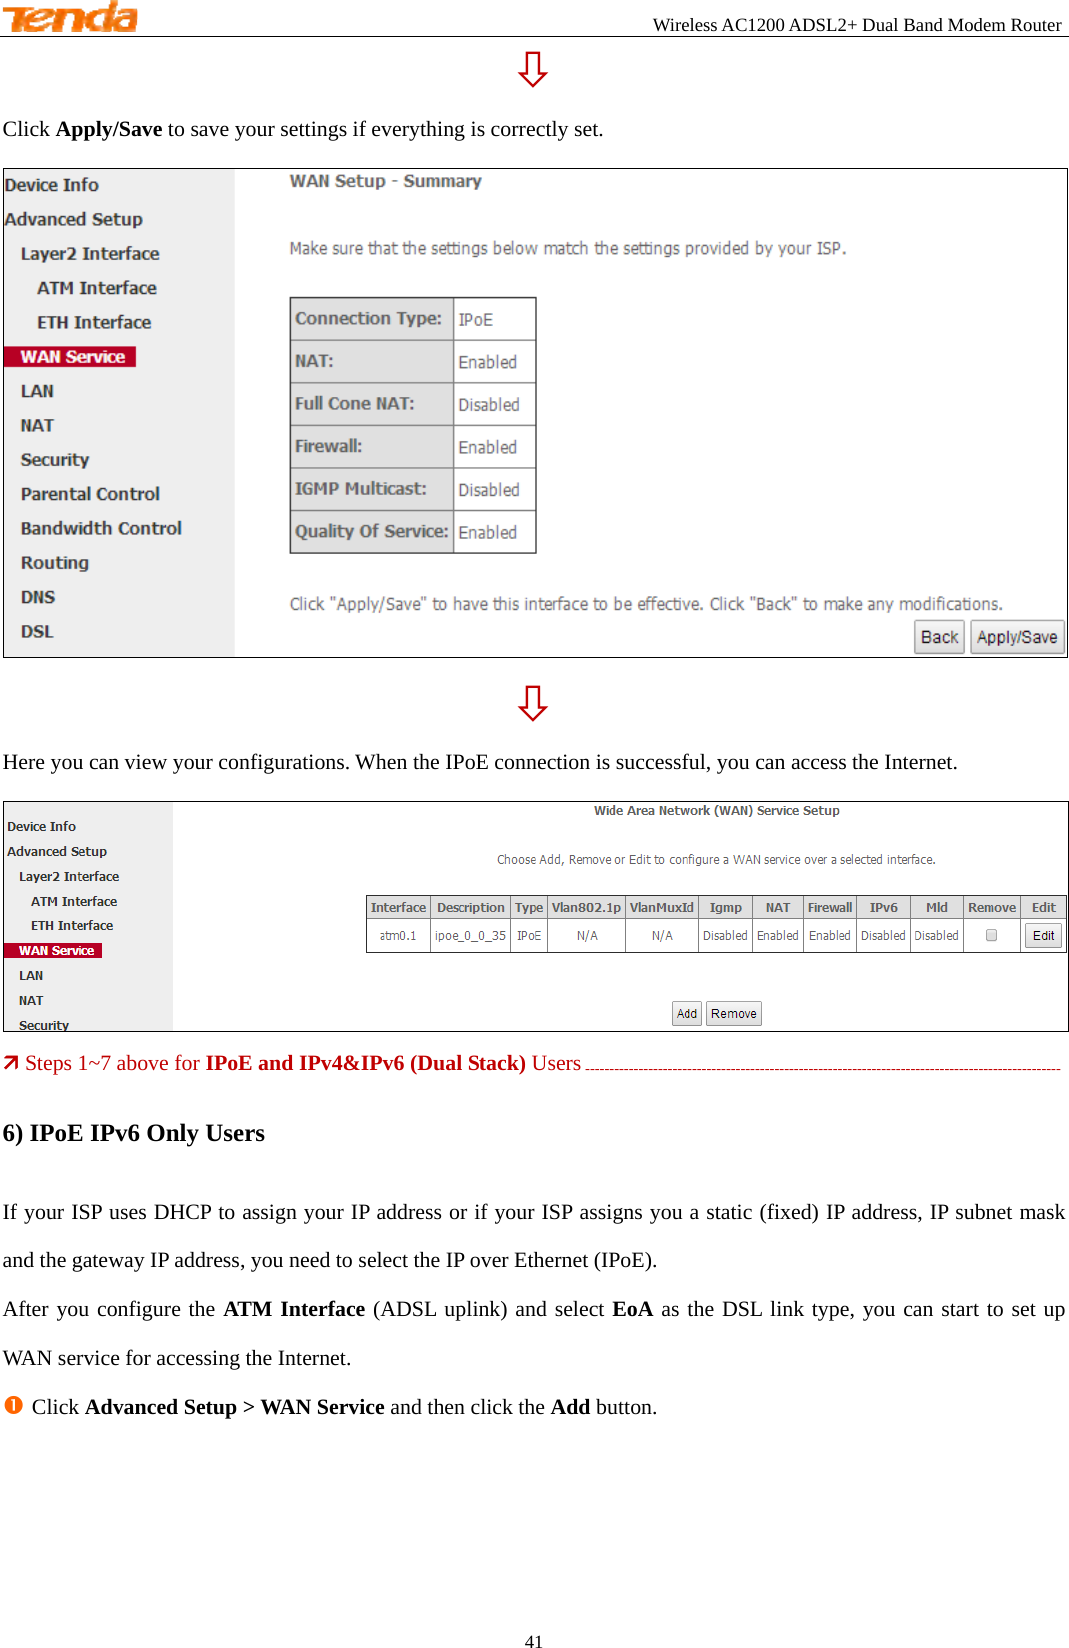


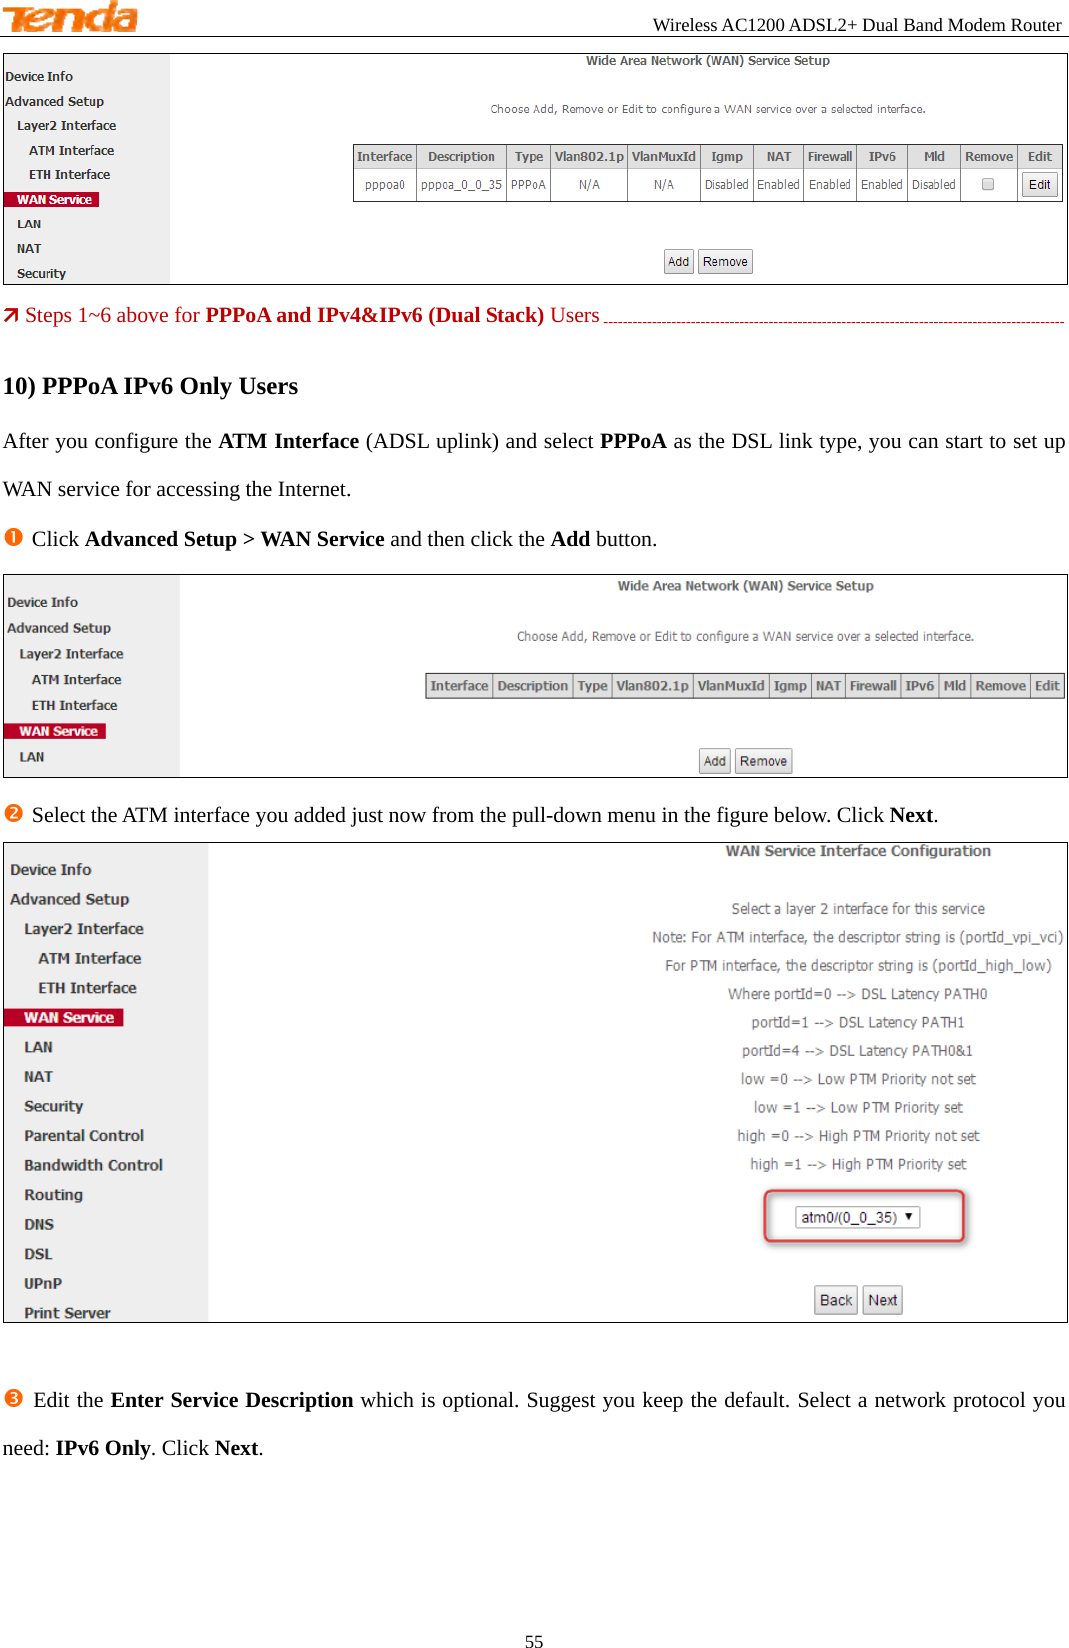
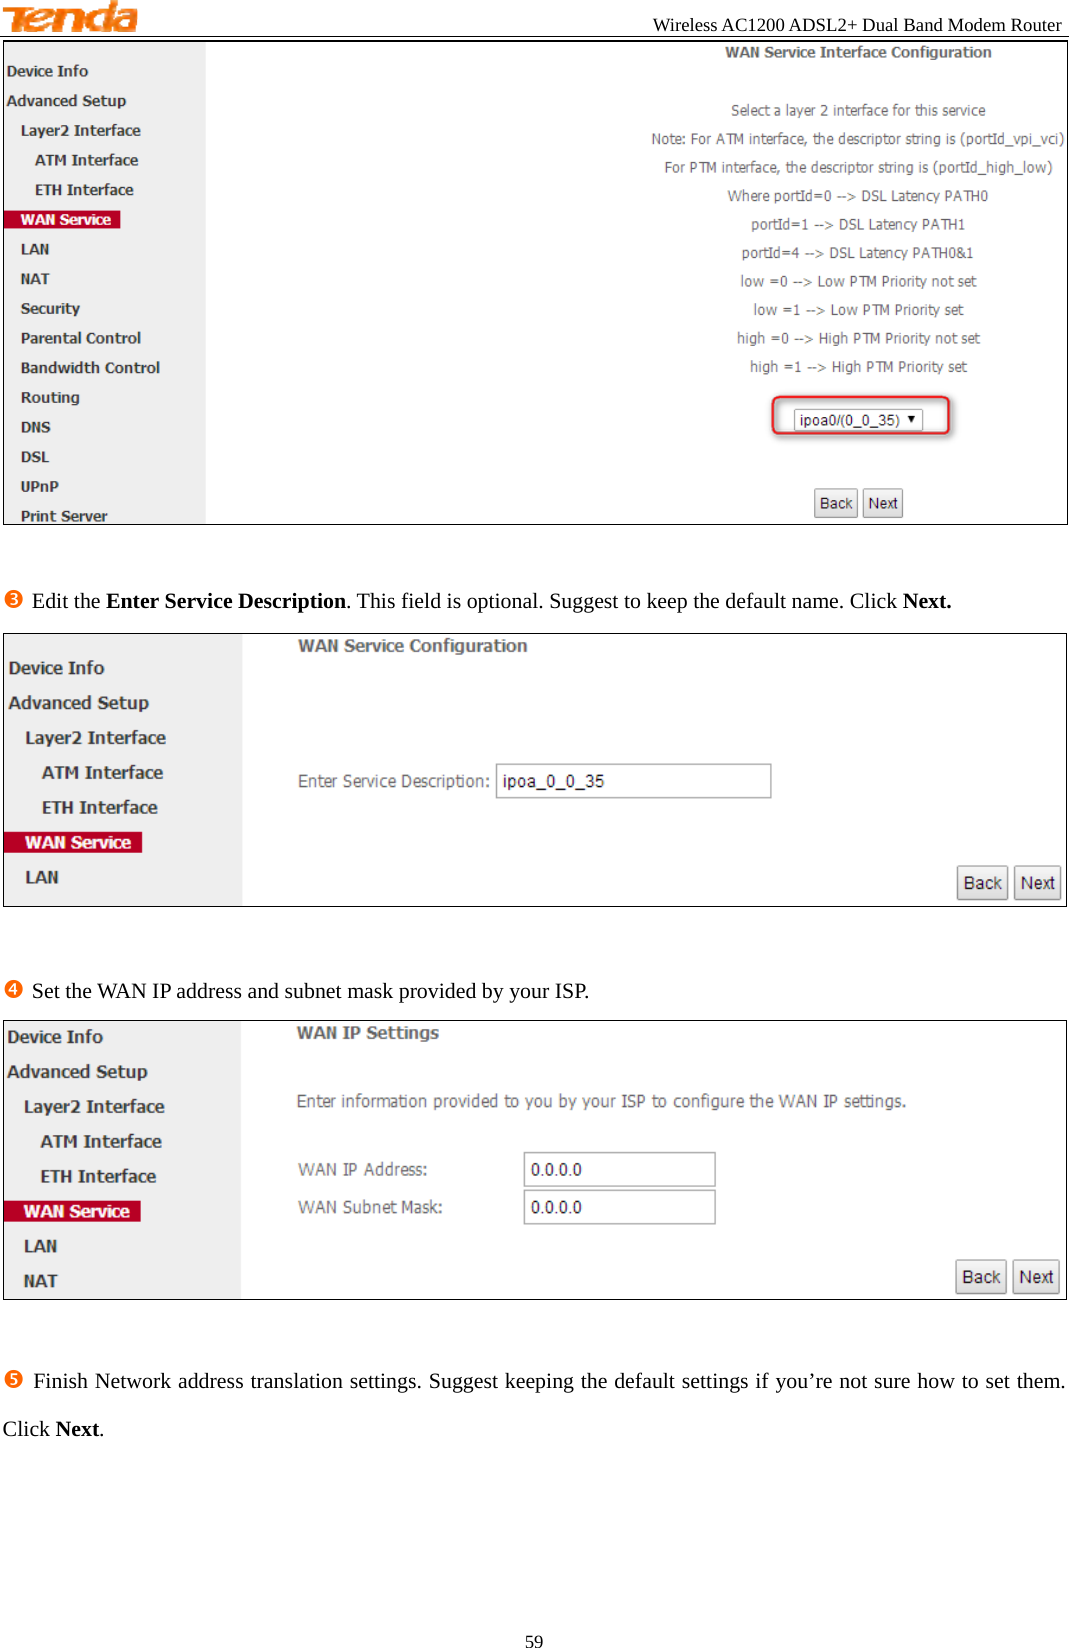
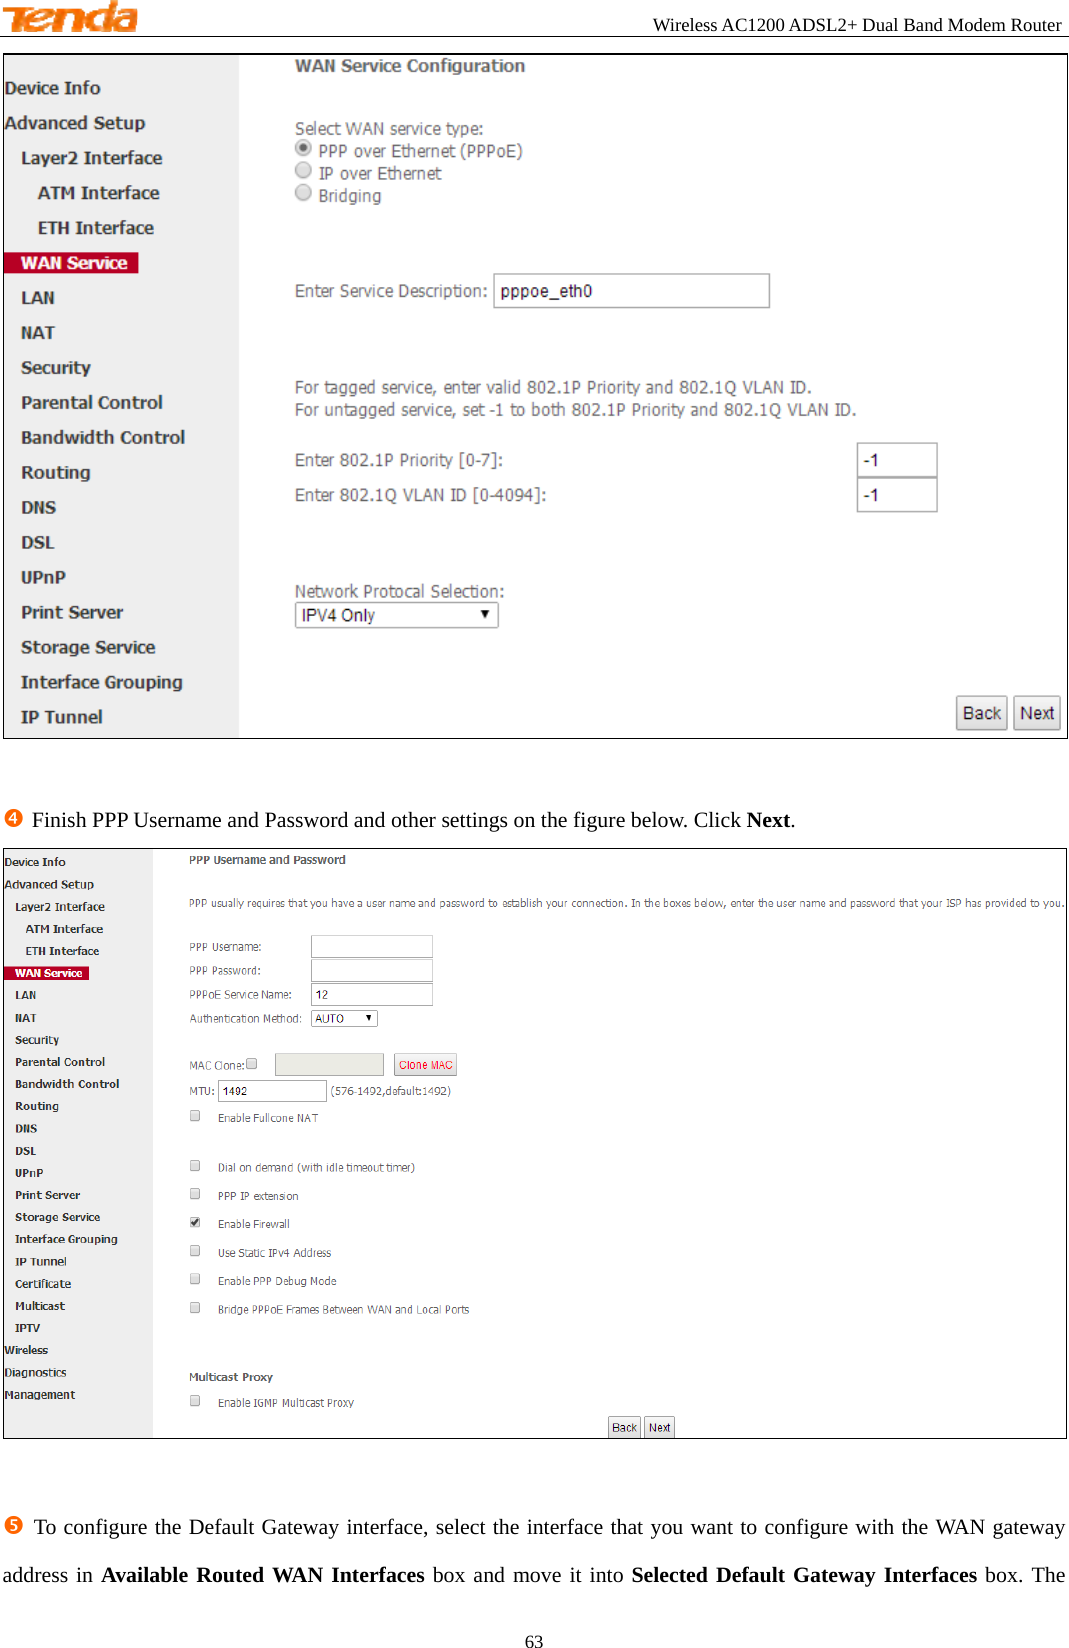


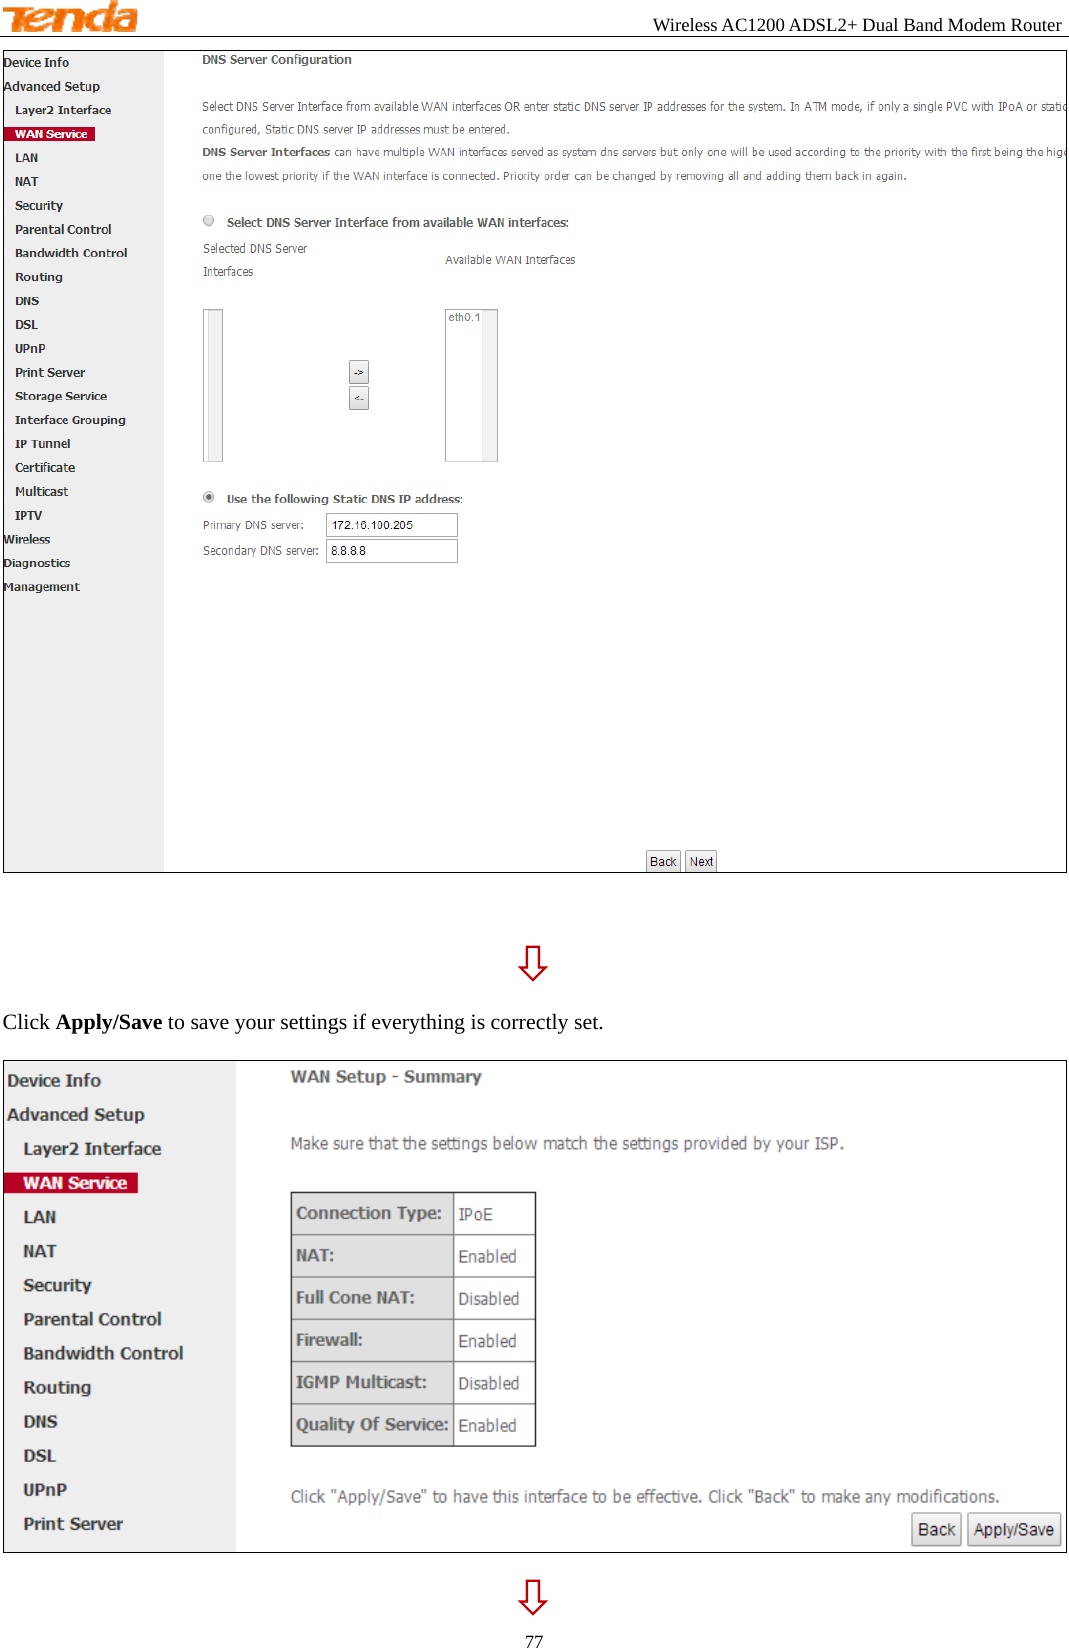
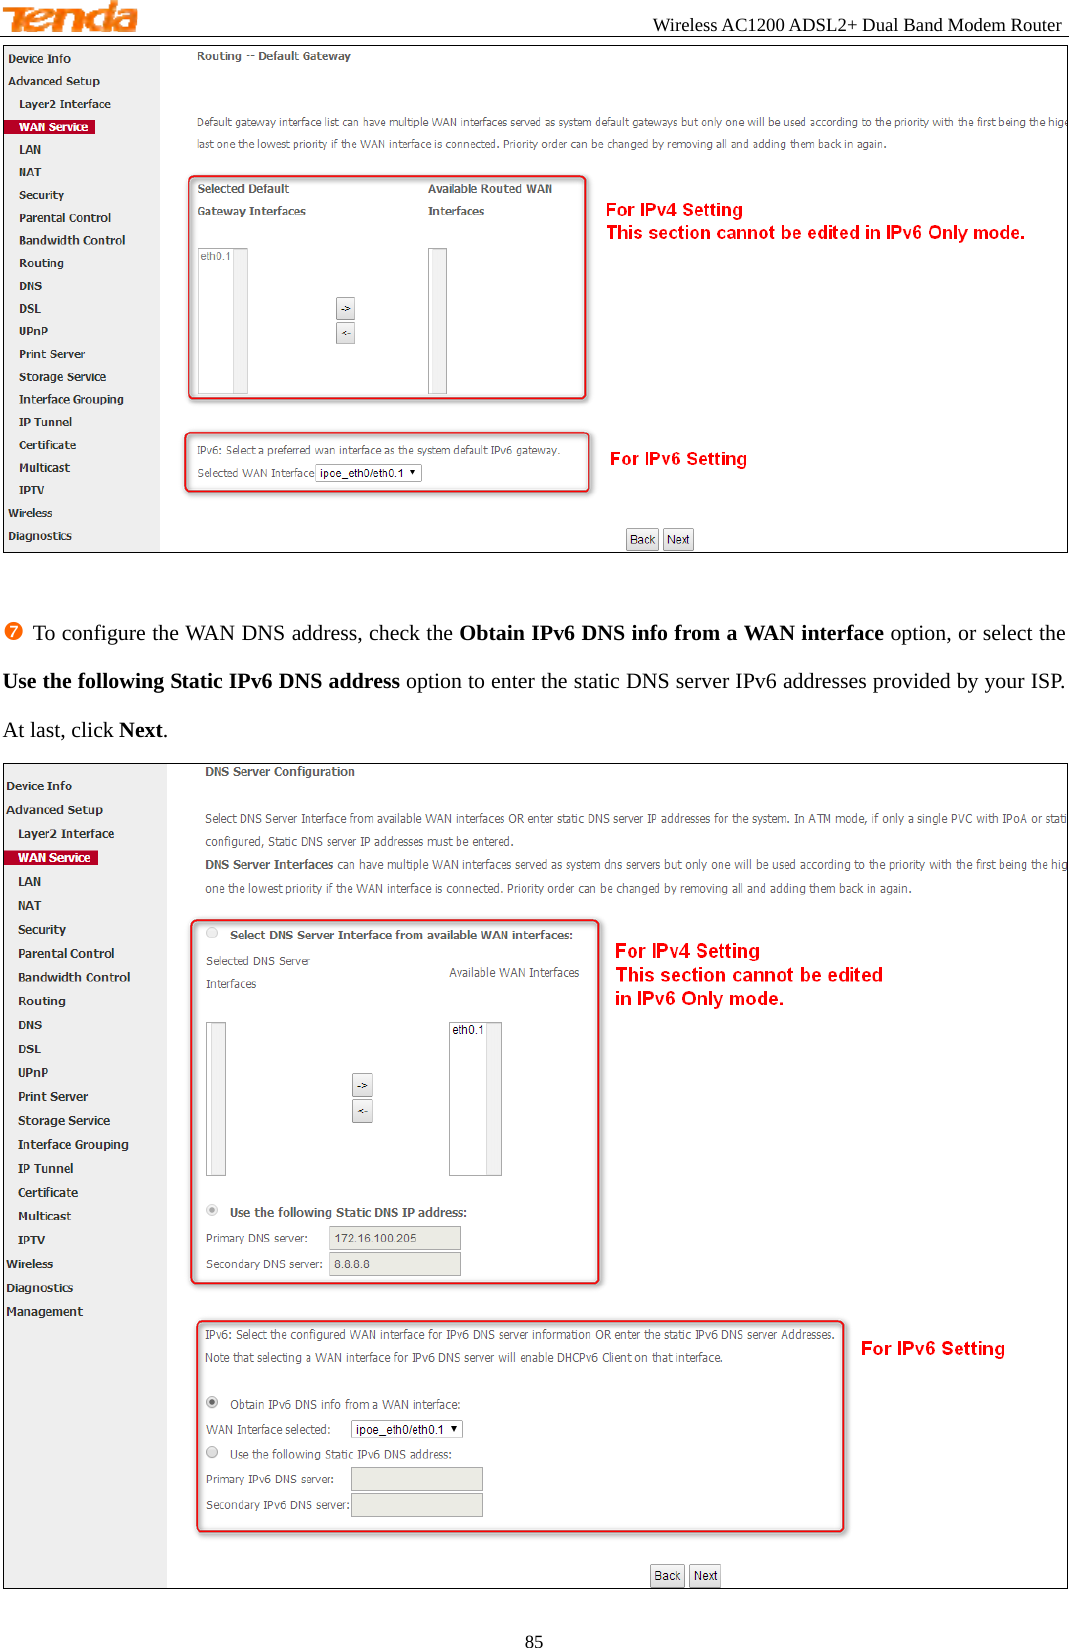

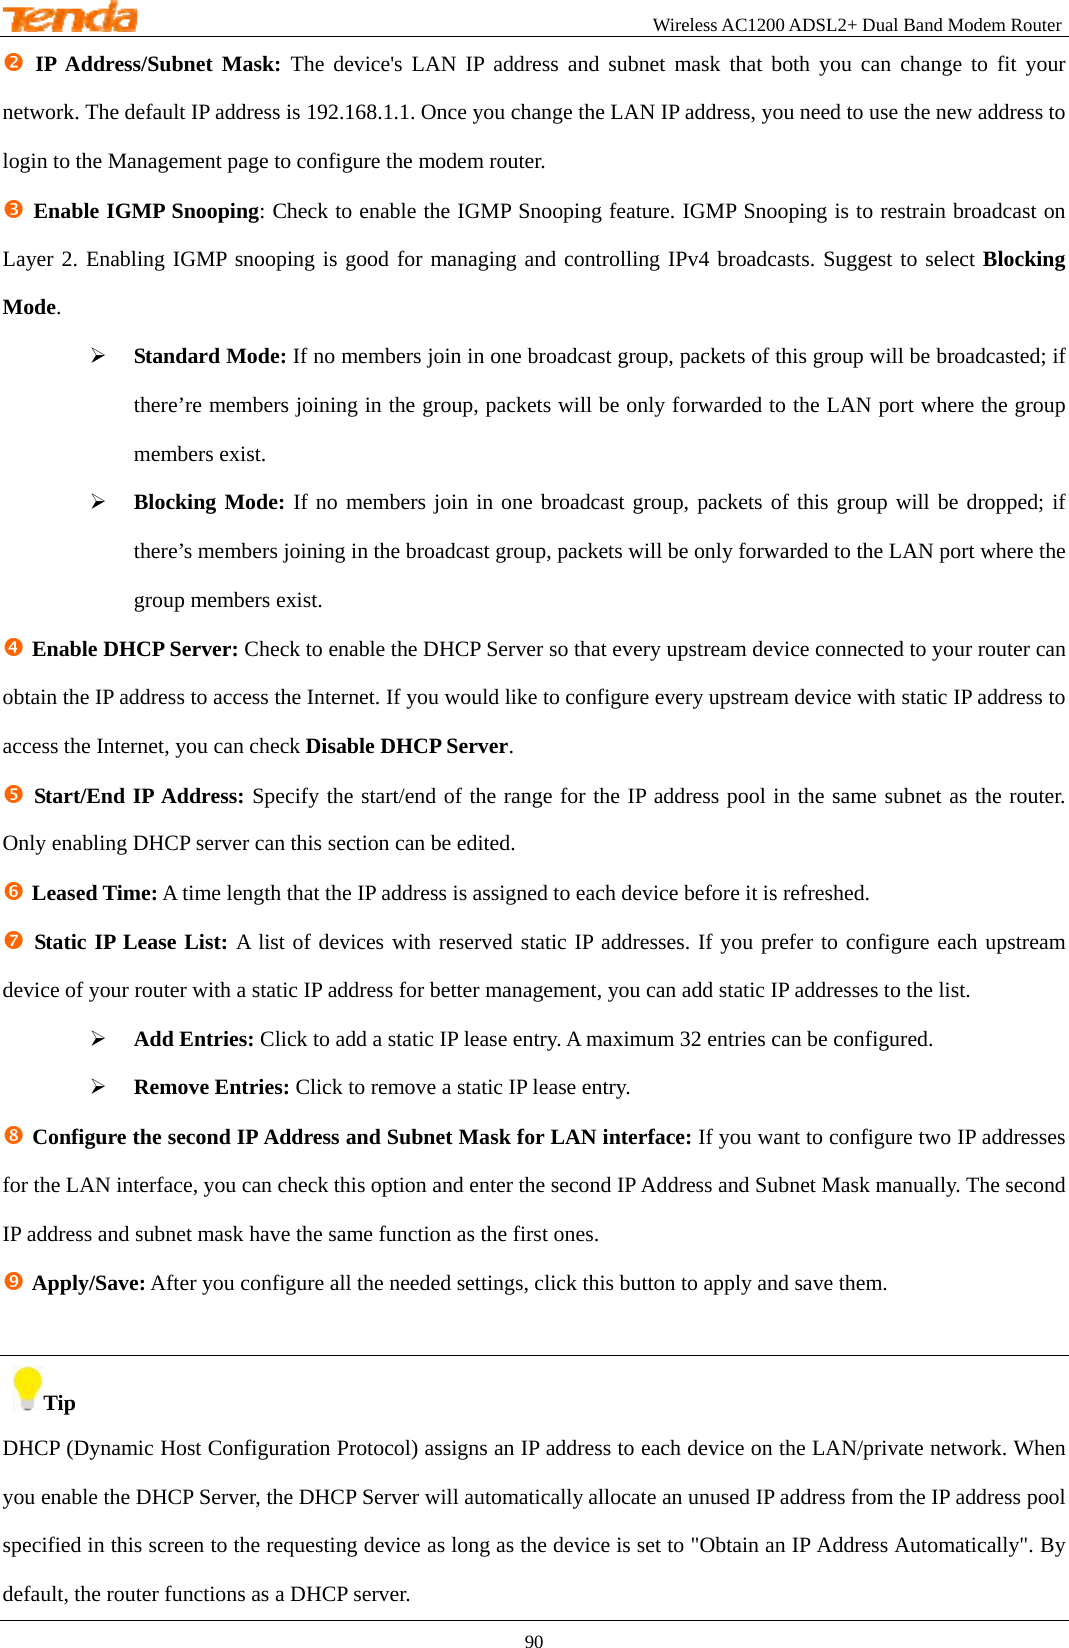
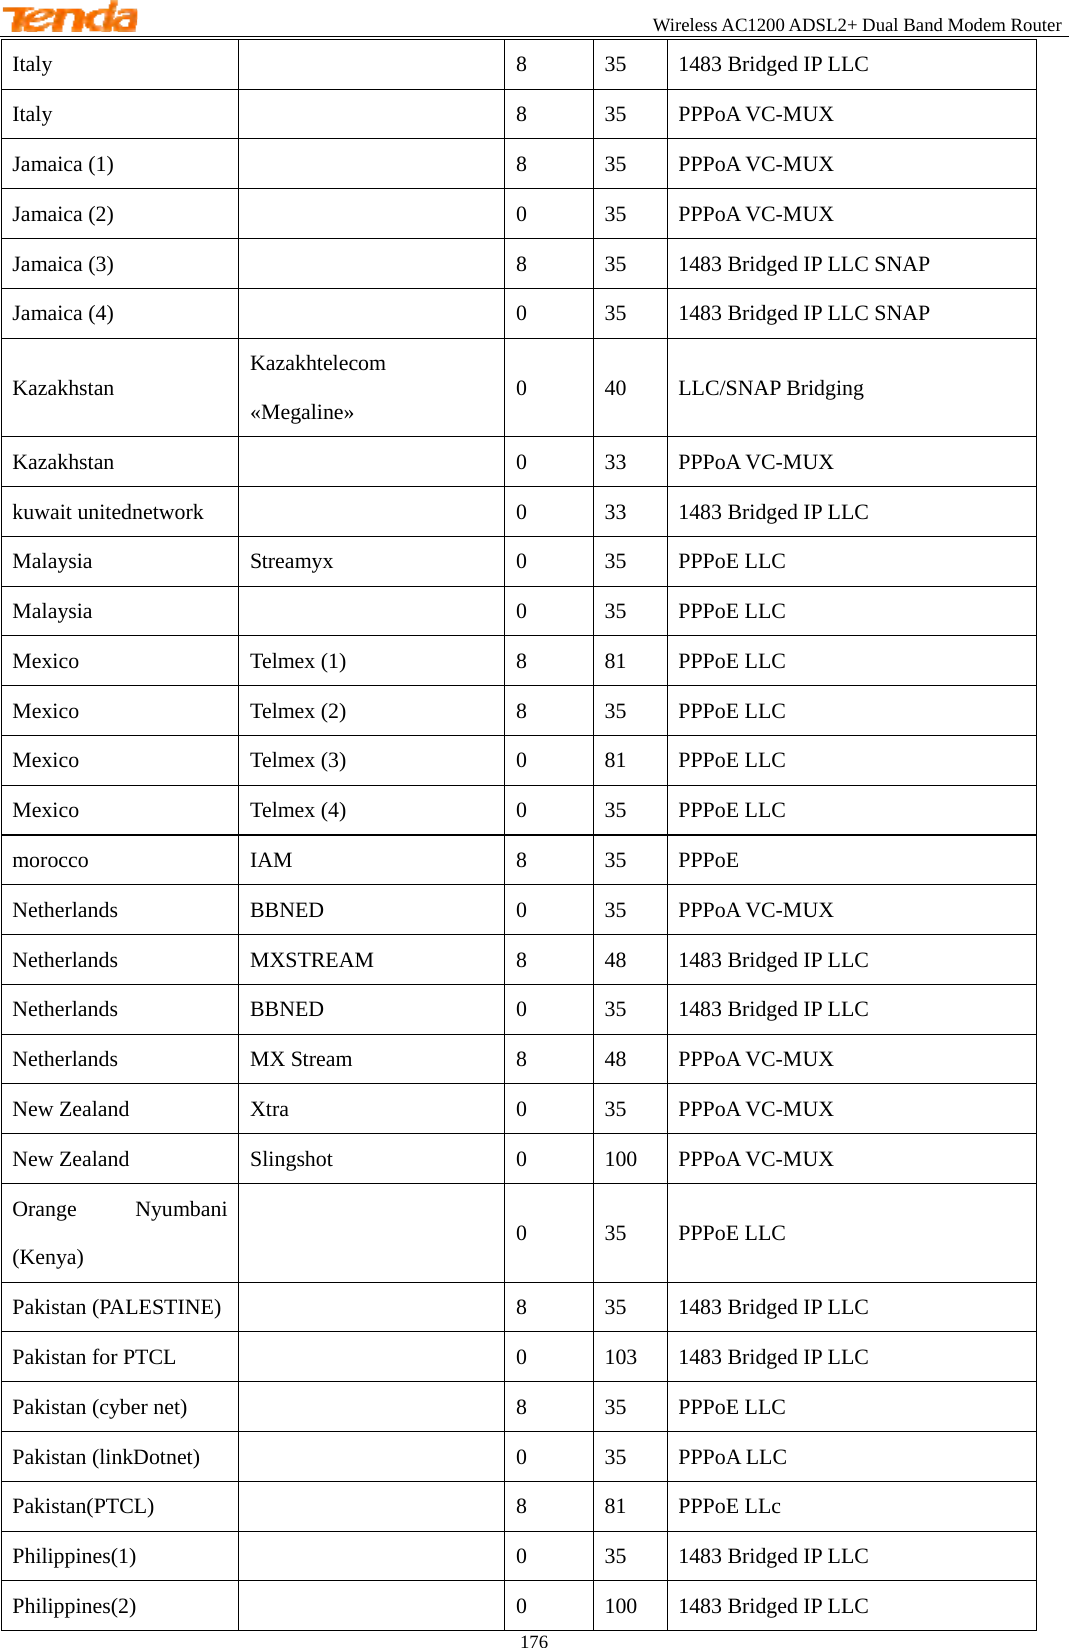
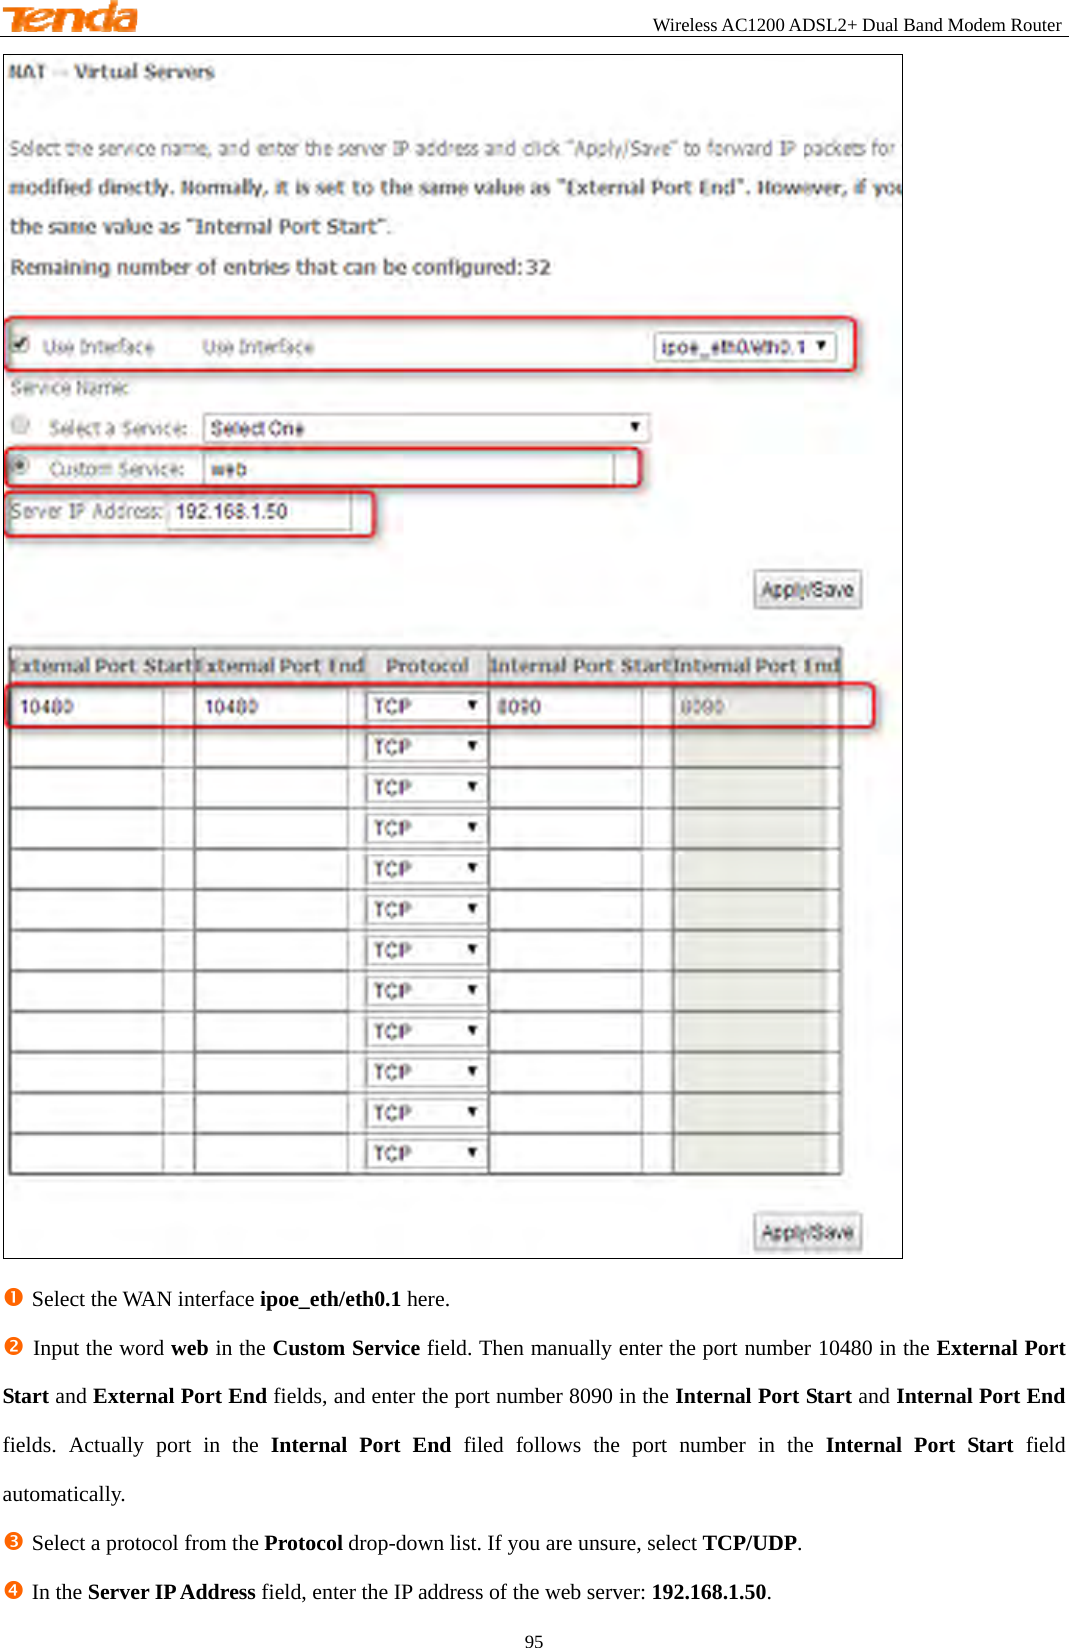
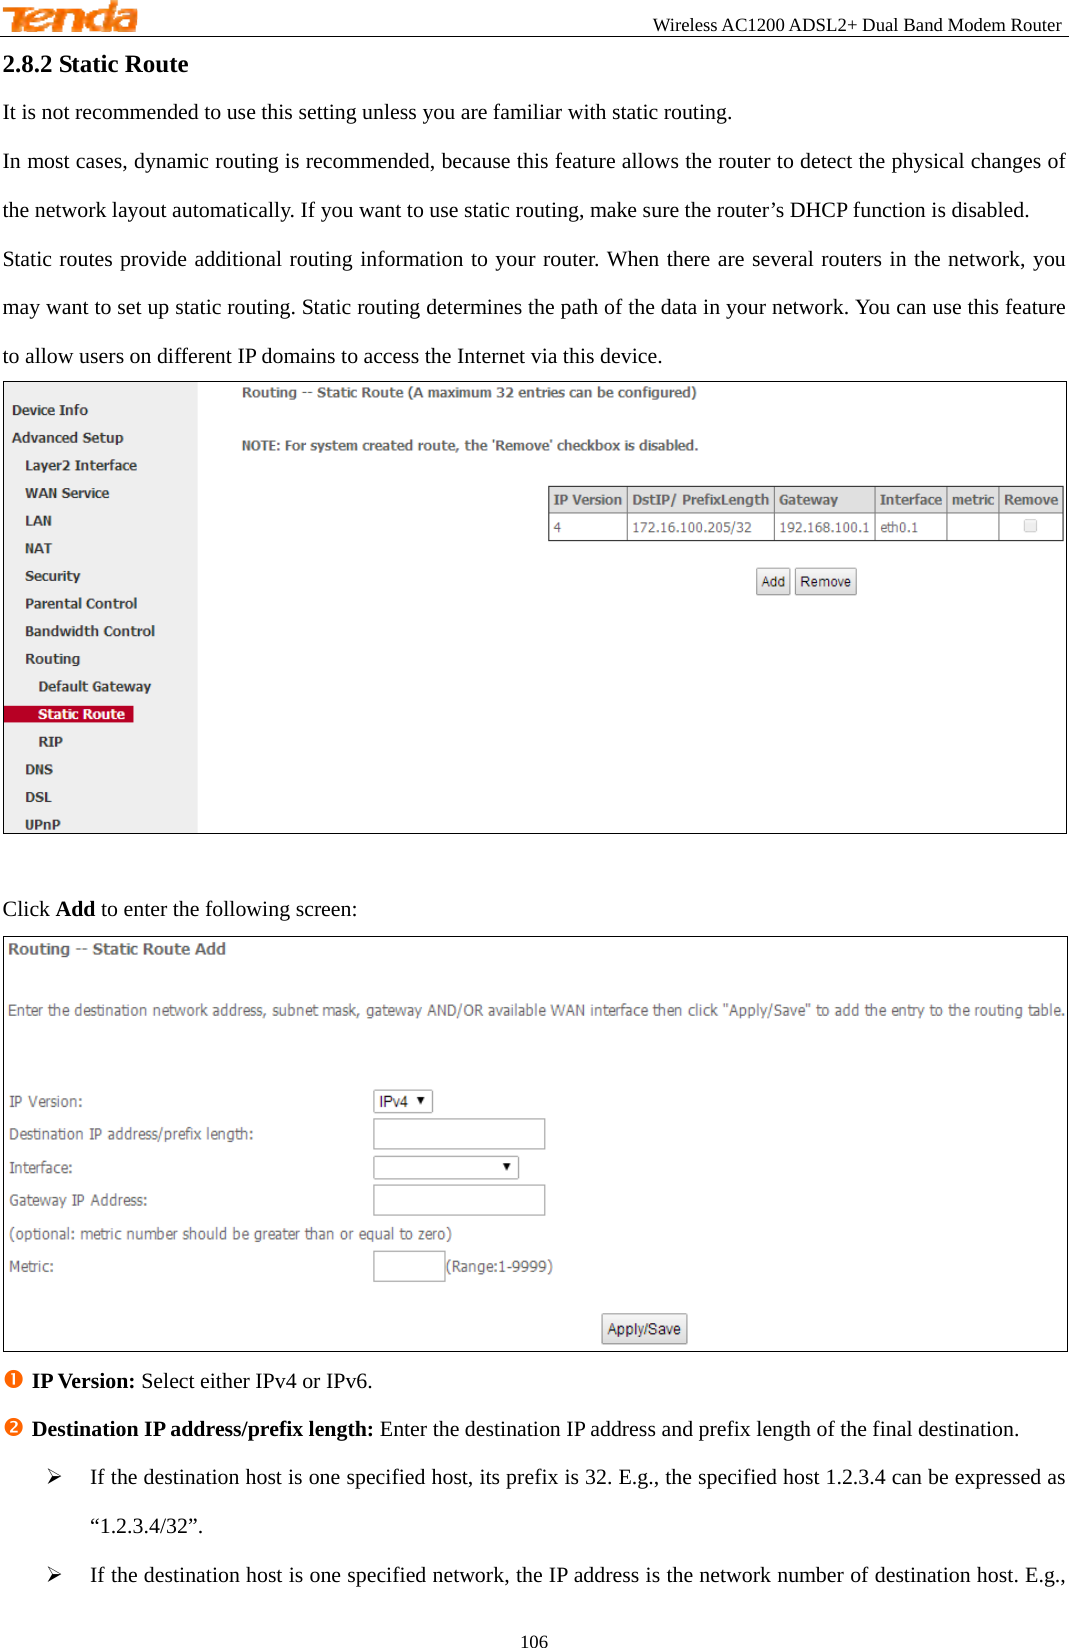
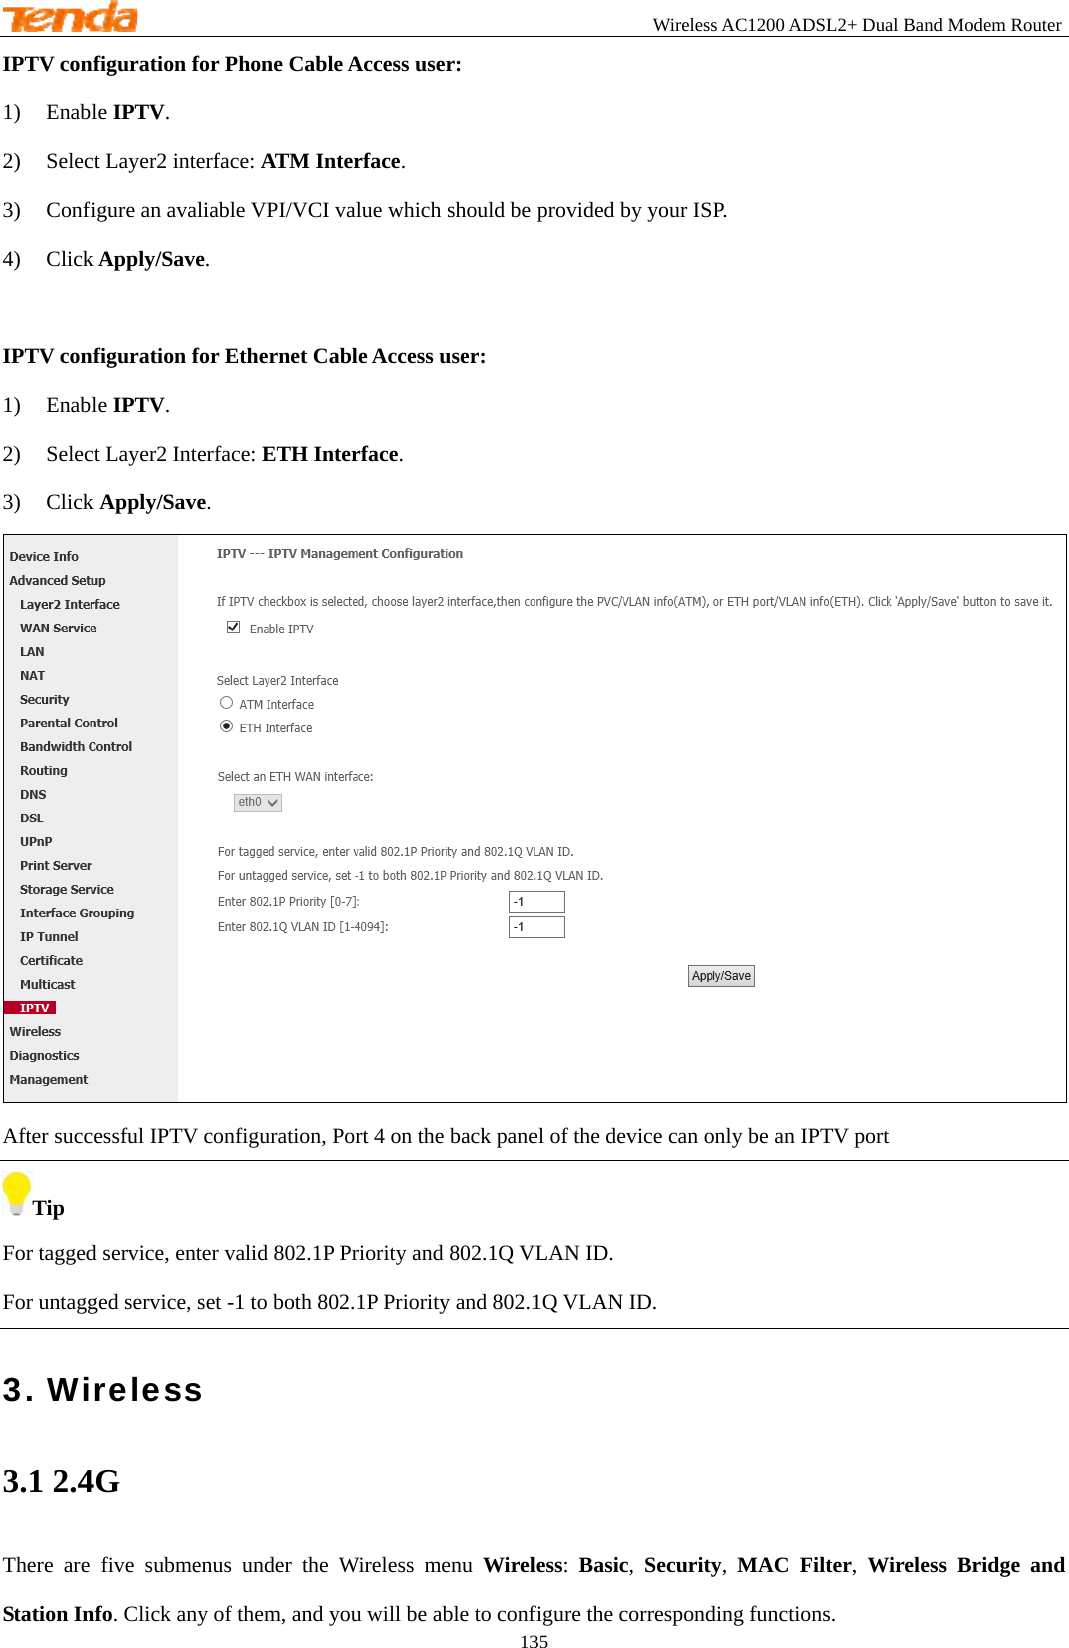
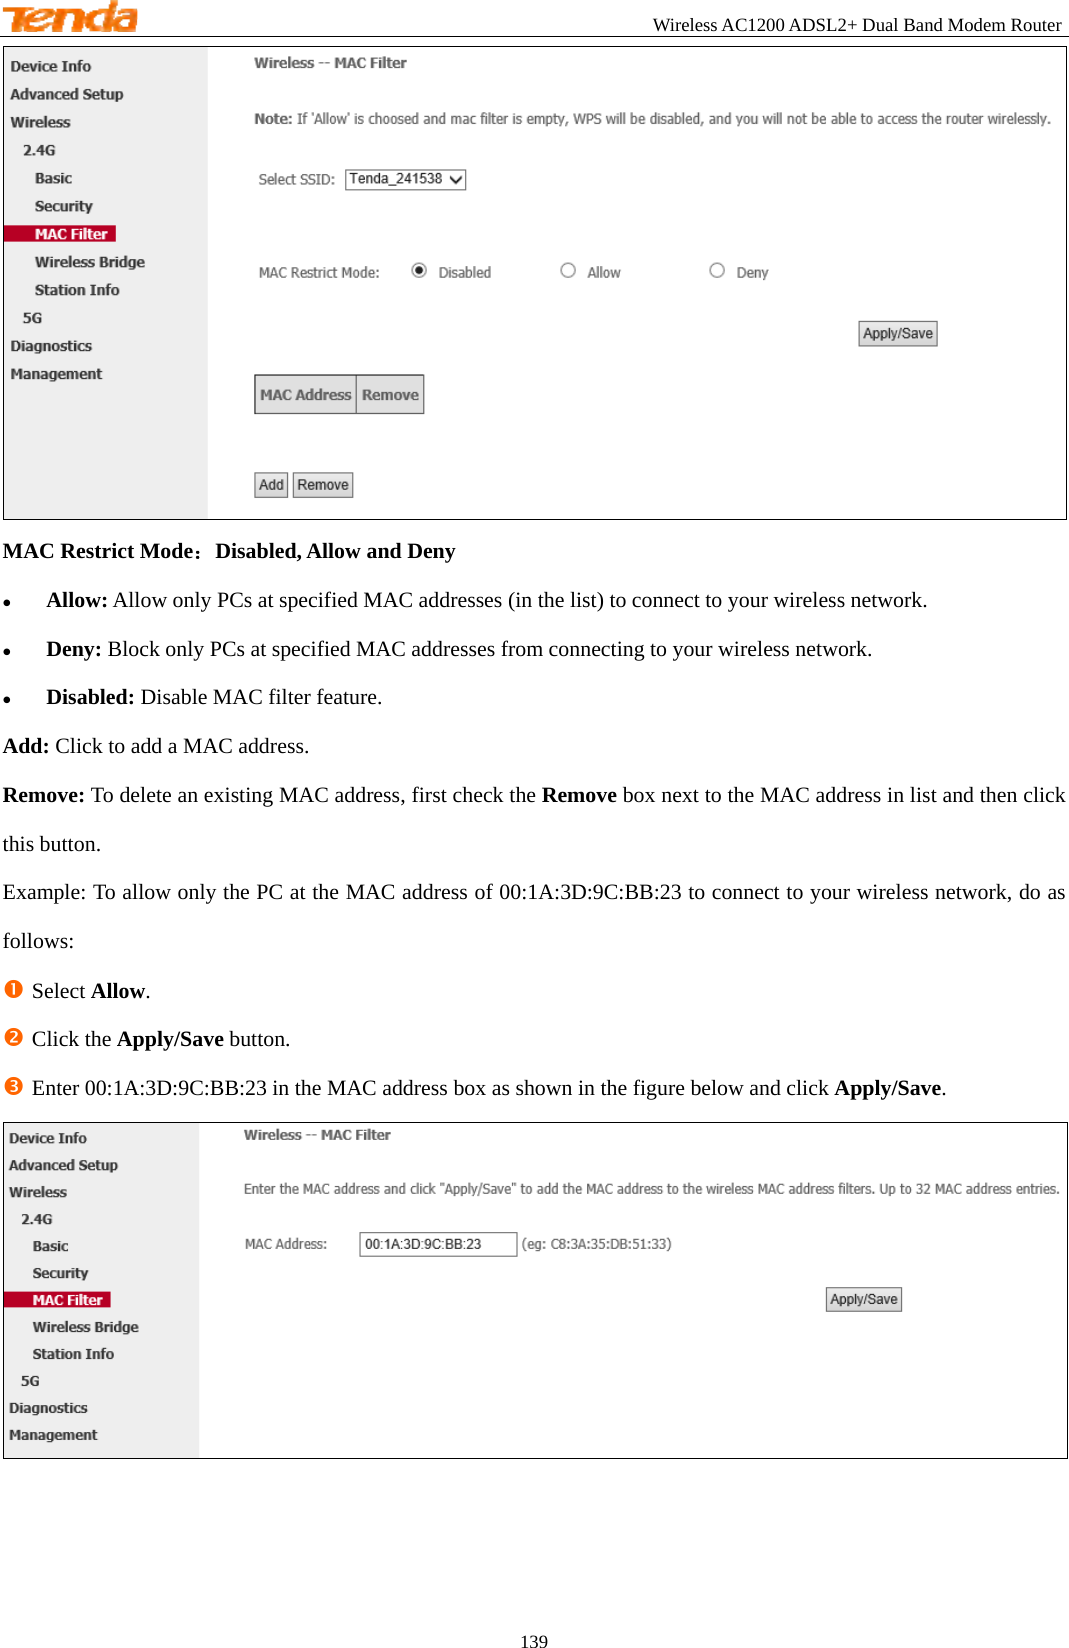
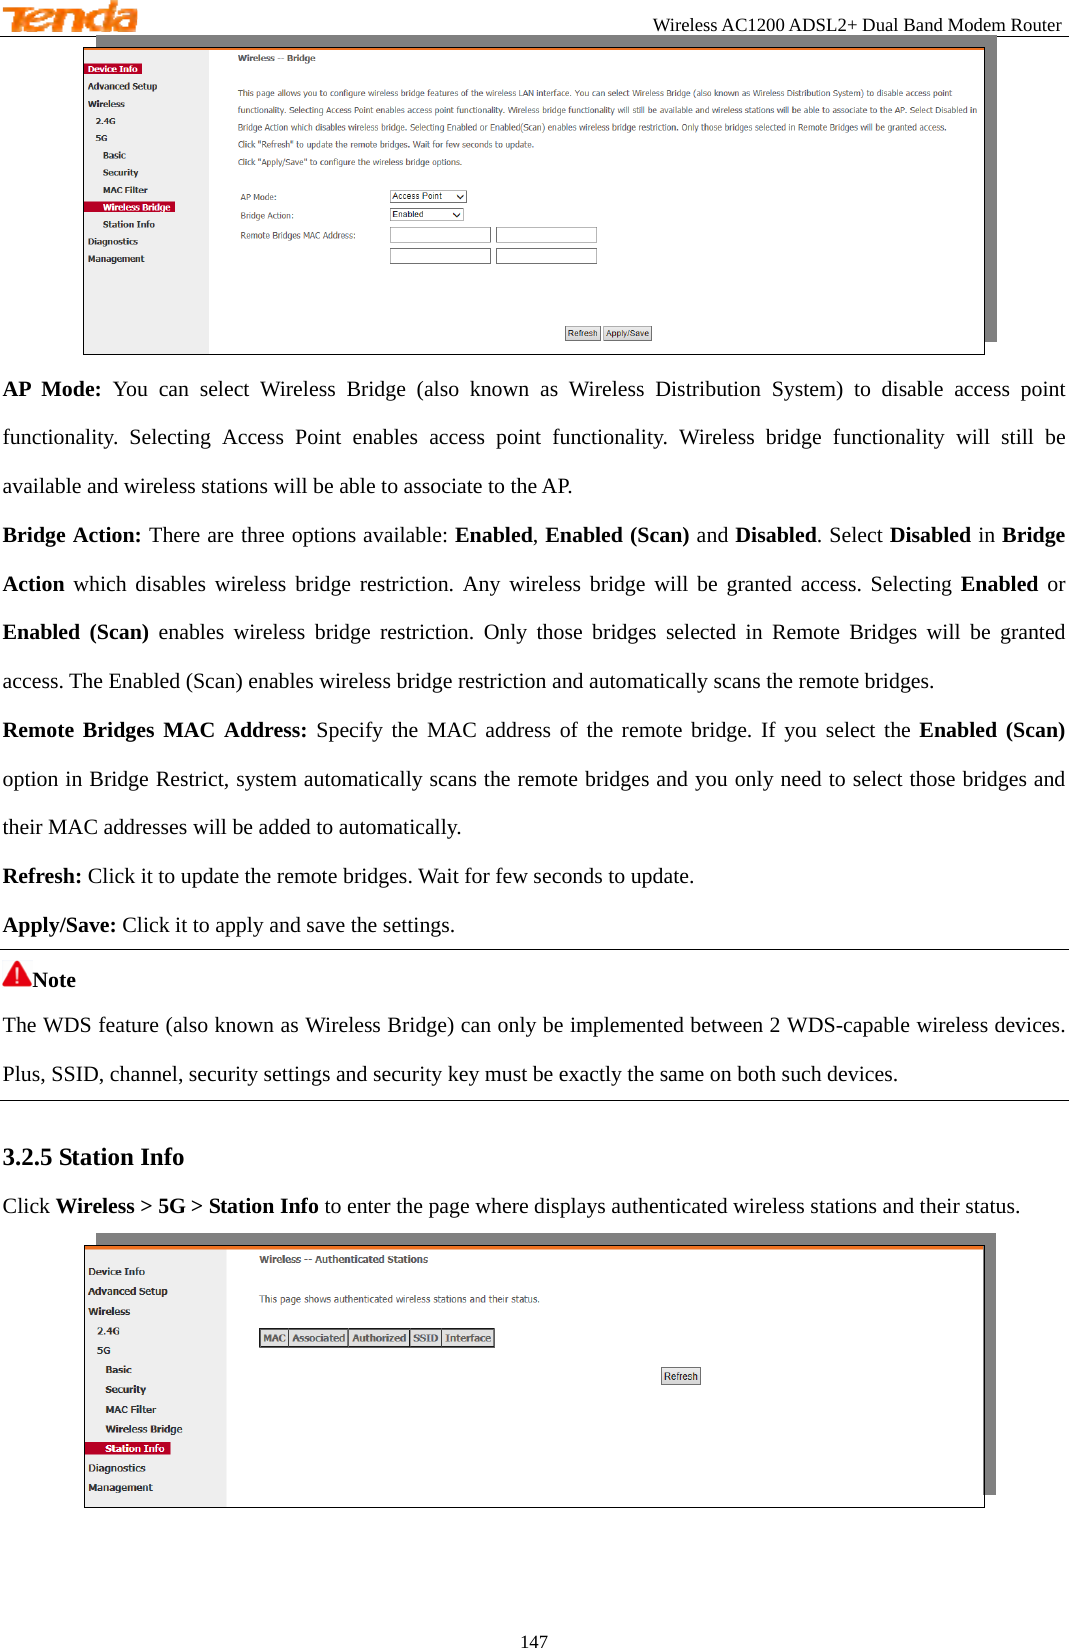
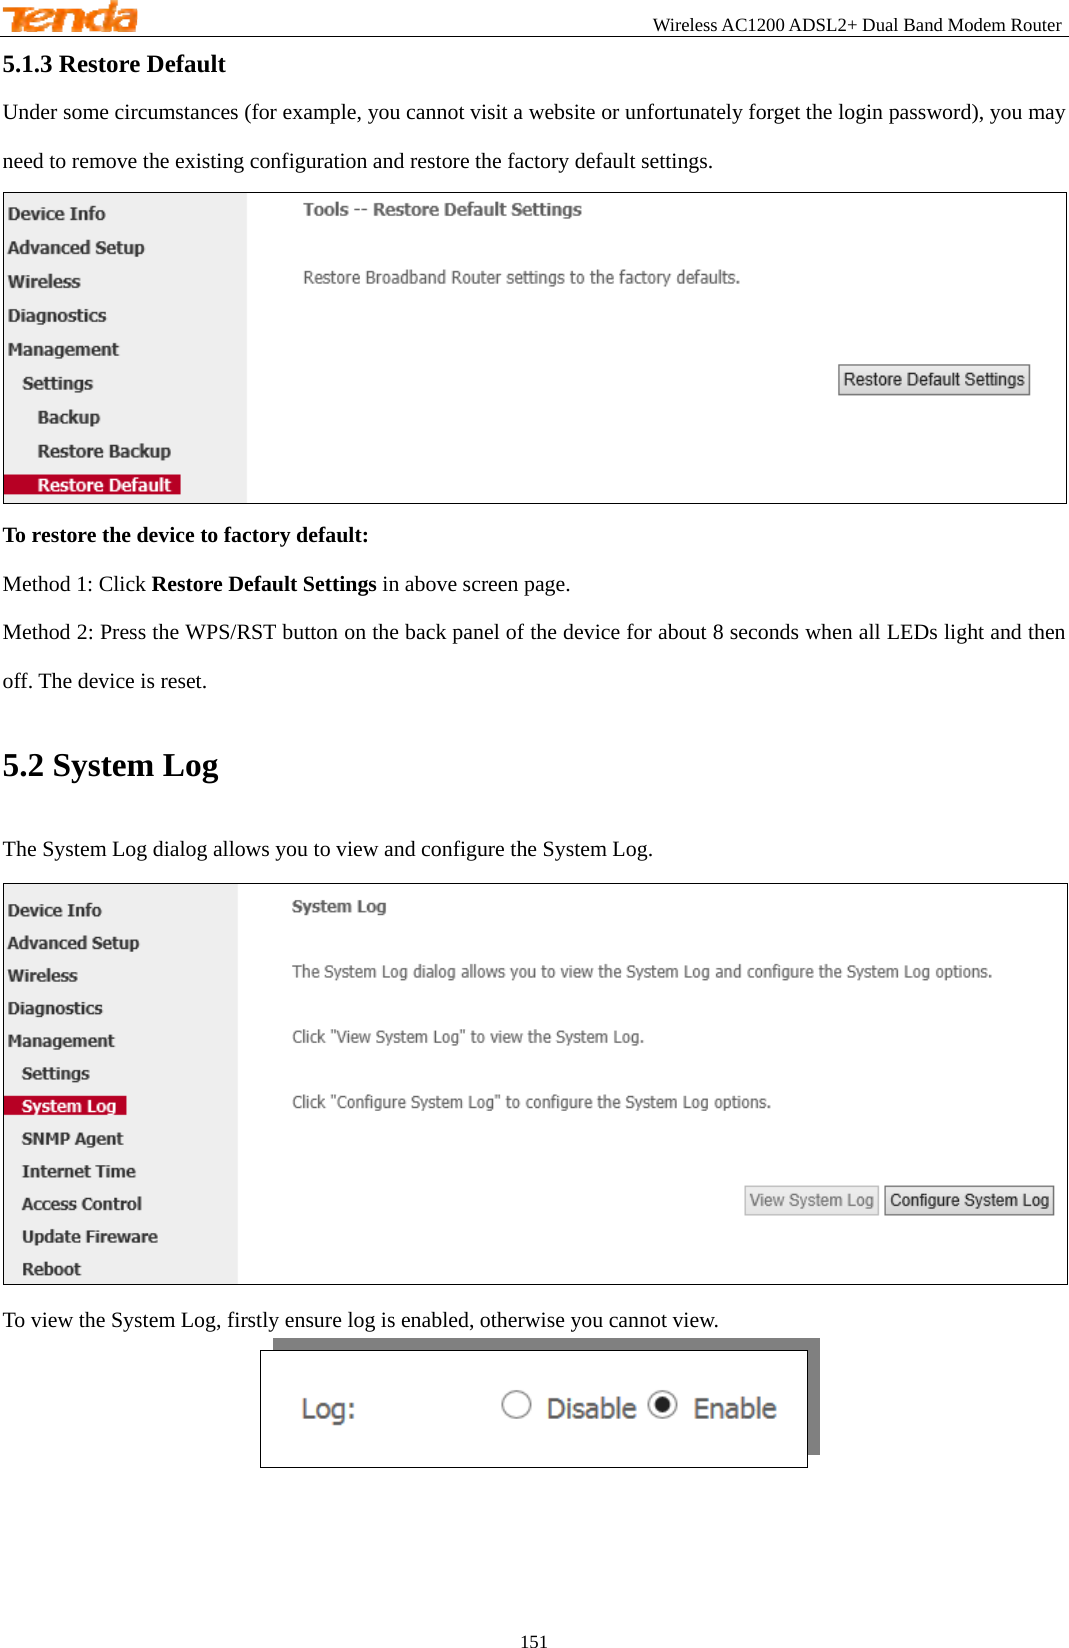
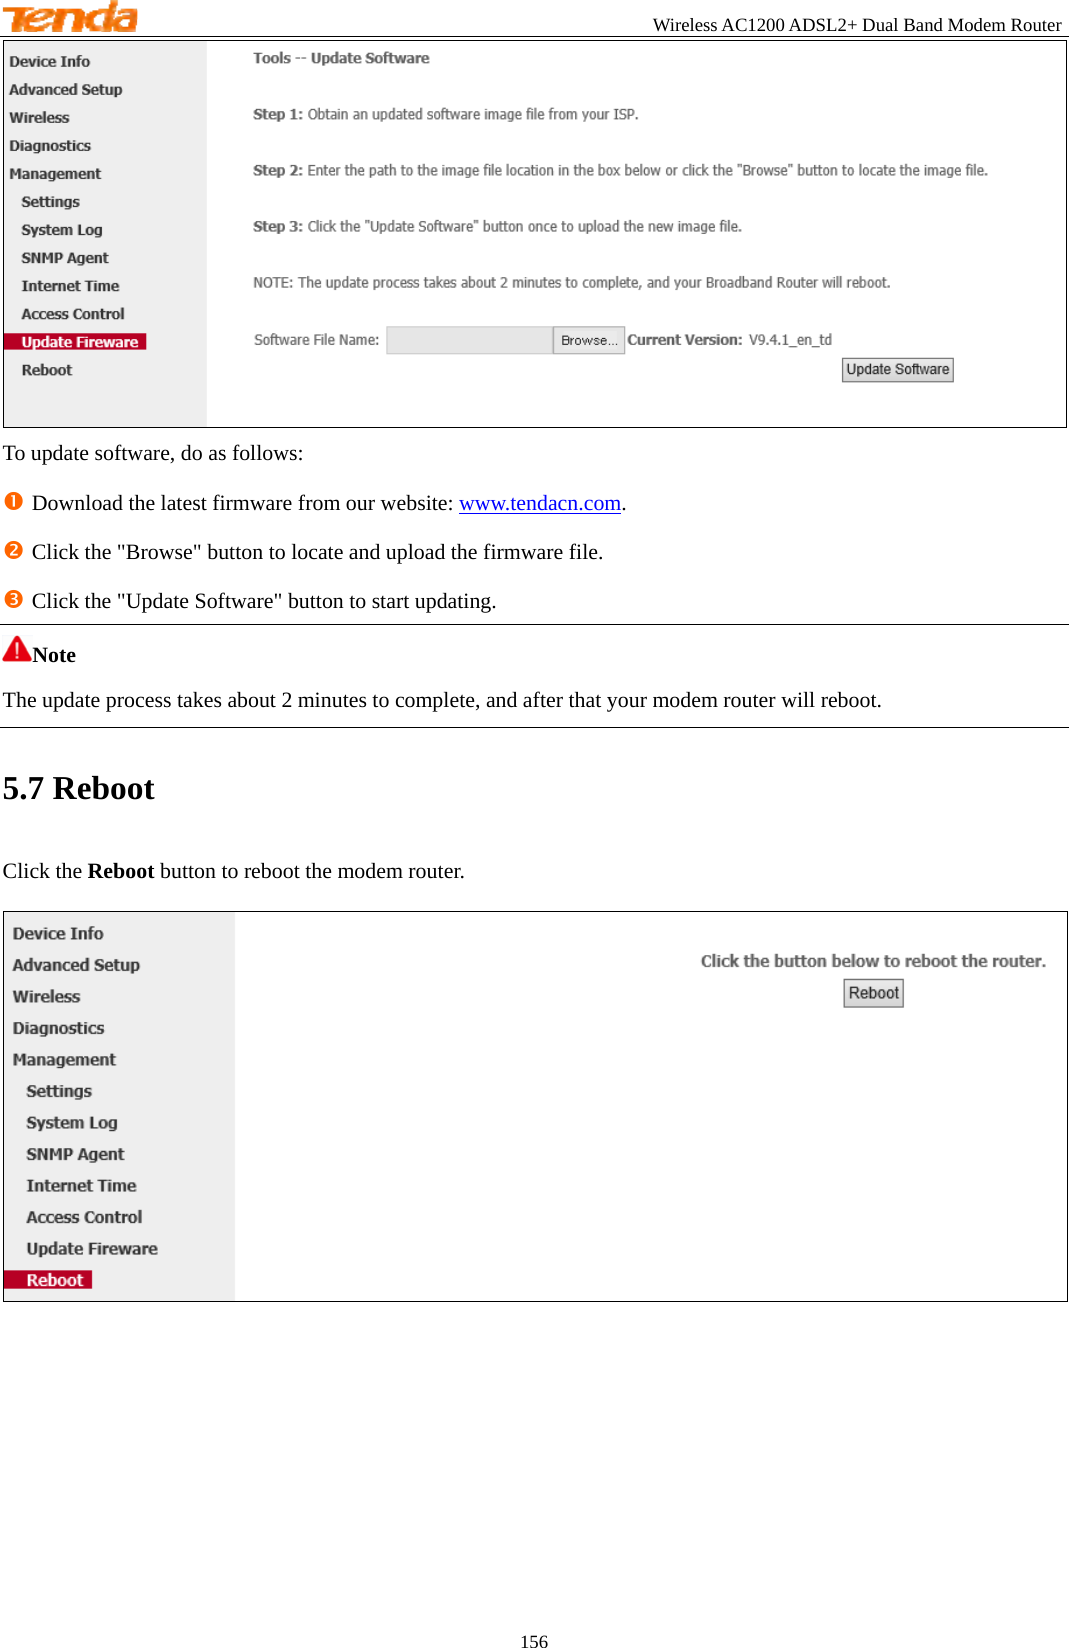
![Wireless AC1200 ADSL2+ Dual Band Modem Router 91 2.3.2 IPv6 Autoconfig IPv6 address can only be Aggregatable Global Unicast Addresses and Unique Local Address. Link-Local Unicast Addresses and Multicast Addresses are not permitted. Click Advanced > LAN > IPv6 Autoconfig to enter the IPv6 address setting page. n Interface Address: Enter the interface address with prefix length. E.g., the interface address is “2000::1/64”, then you need to input “http://[2000::1]”. o Enable DHCPv6 Server: Check to enable the DHCPv6 Server. p Check Stateless or Stateful as you need. ¾ Stateless: If selected, IPv6 clients will generate IPv6 addresses automatically based on the Prefix Delegation's IPv6 prefix and their own MAC addresses. ¾ Stateful: Stateful DHCPv6 is supported based on the assumption of prefix length less than 64. Select this option and configure the start/end interface ID and leased time. The router will automatically assign IPv6 addresses to IPv6 clients. q Enable RADVD: Check it to enable the RADVD for informing computers in the LAN of your router’s existence.](https://usermanual.wiki/TENDA-TECHNOLOGY/D1201/User-Guide-2337720-Page-95.png)
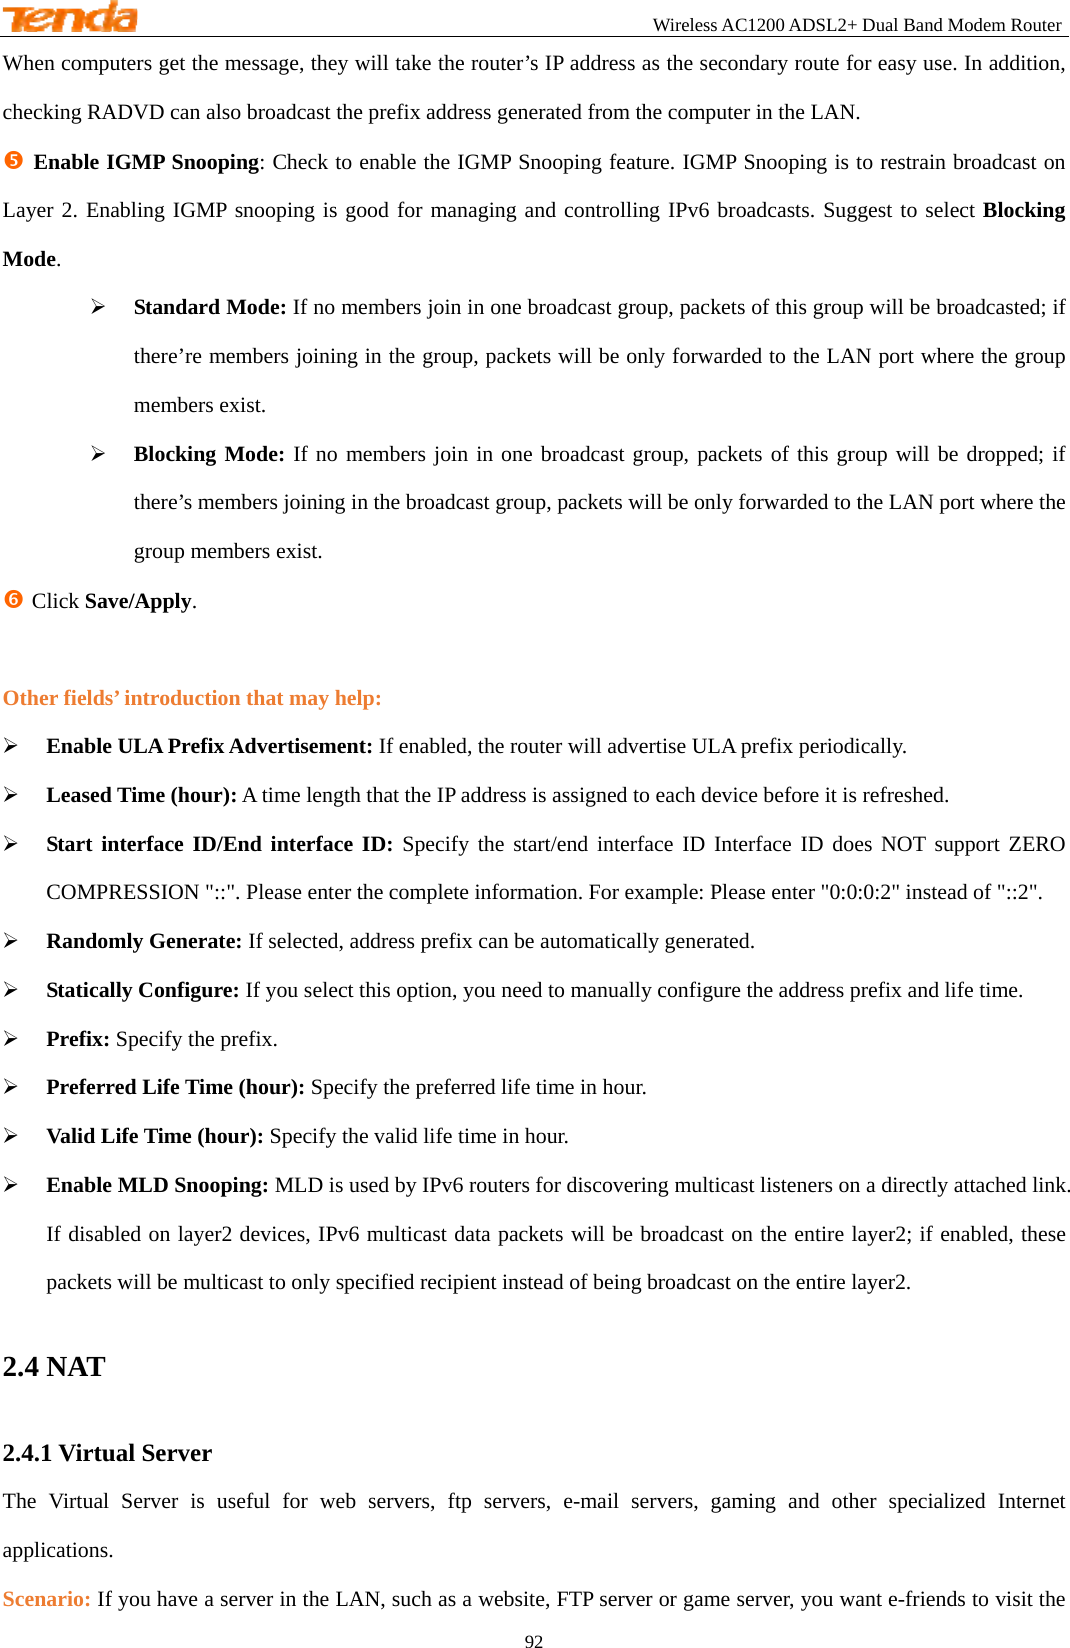

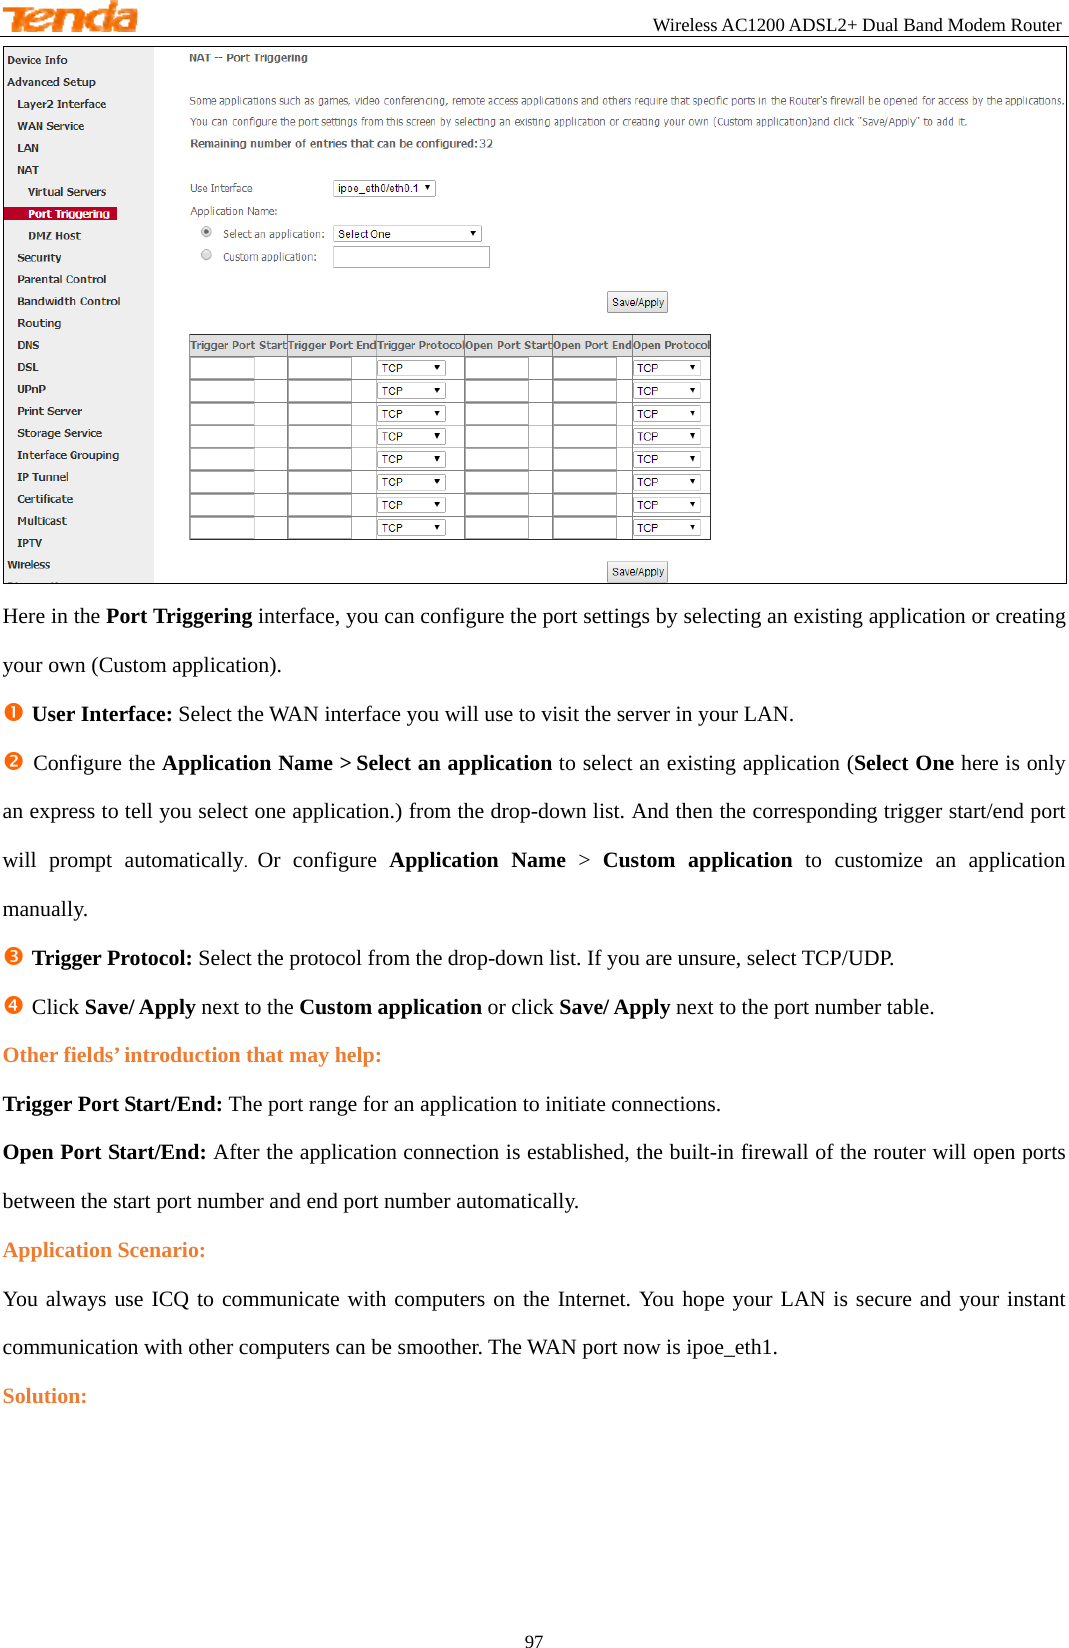
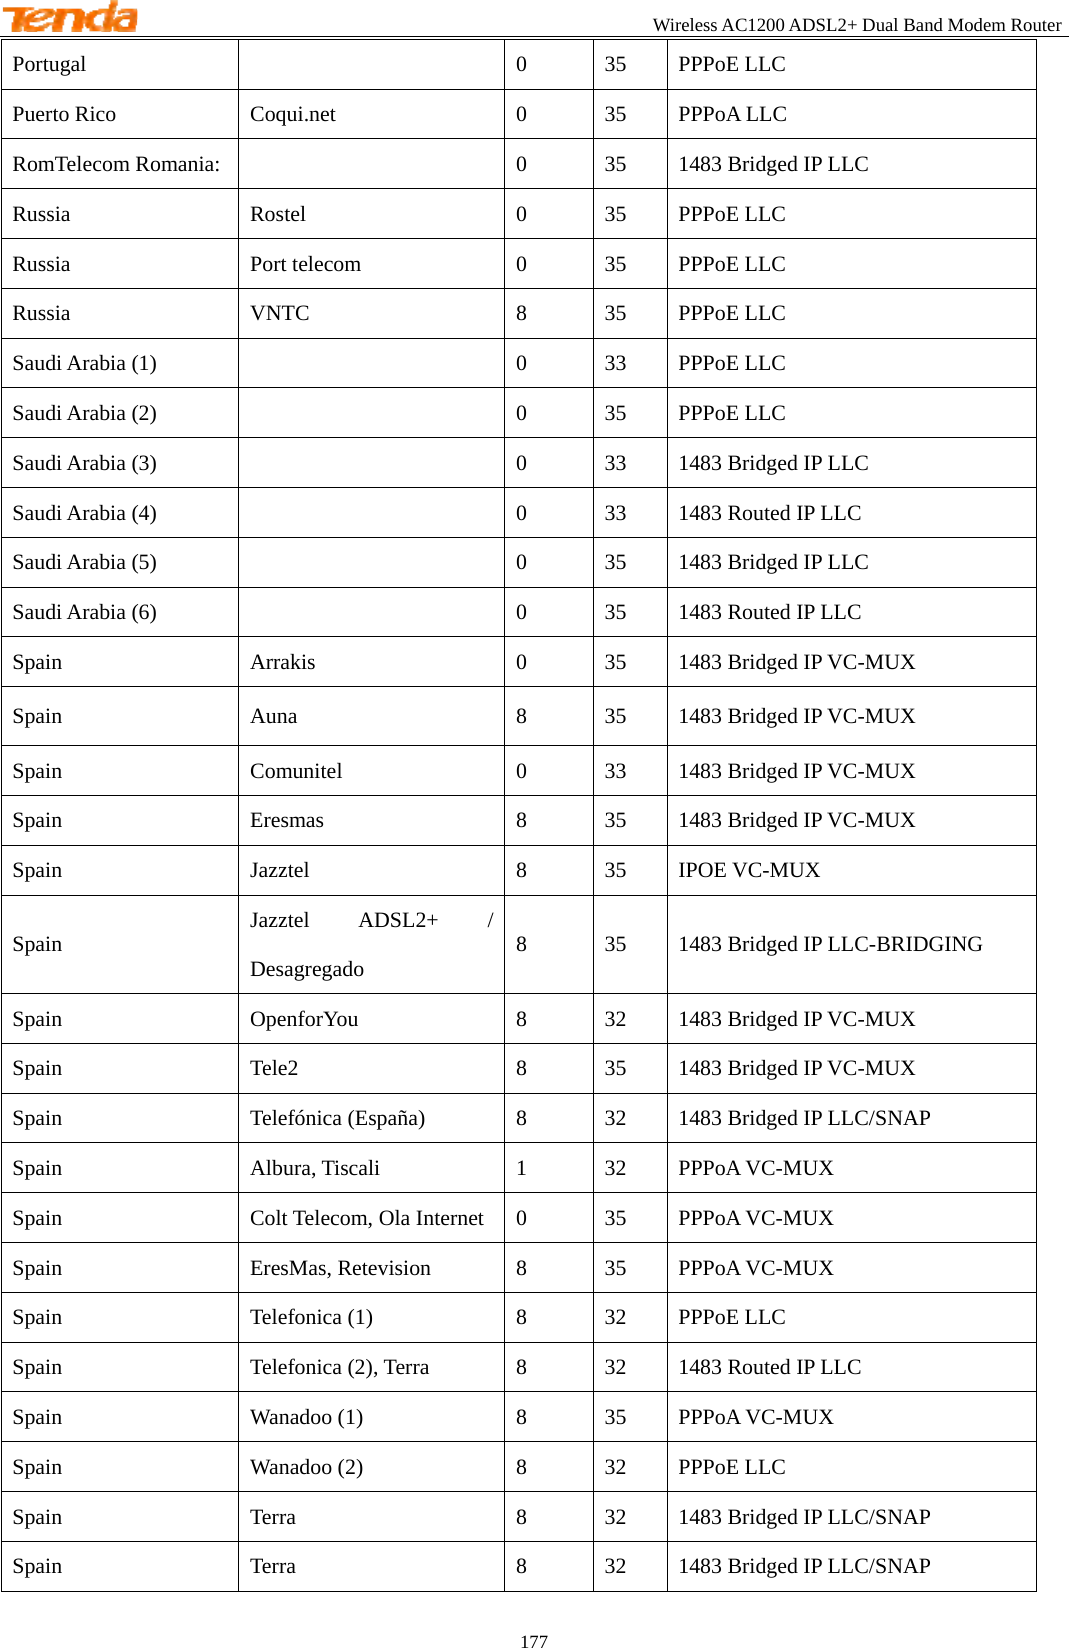
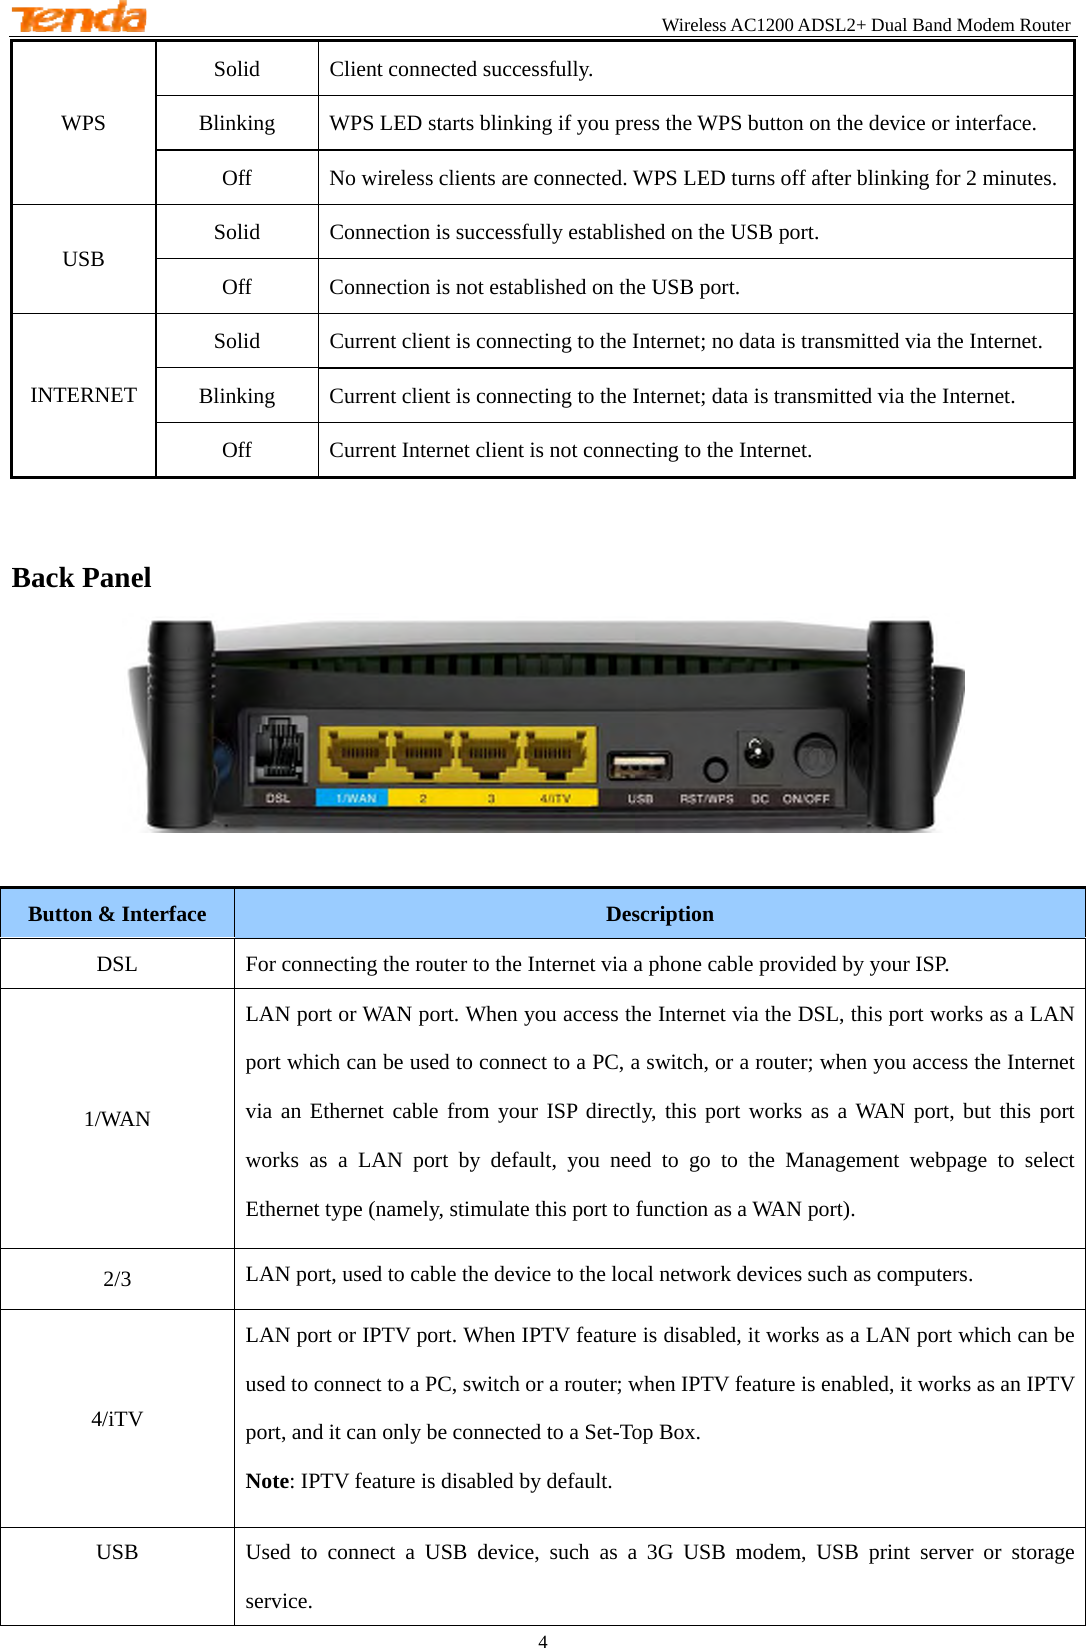
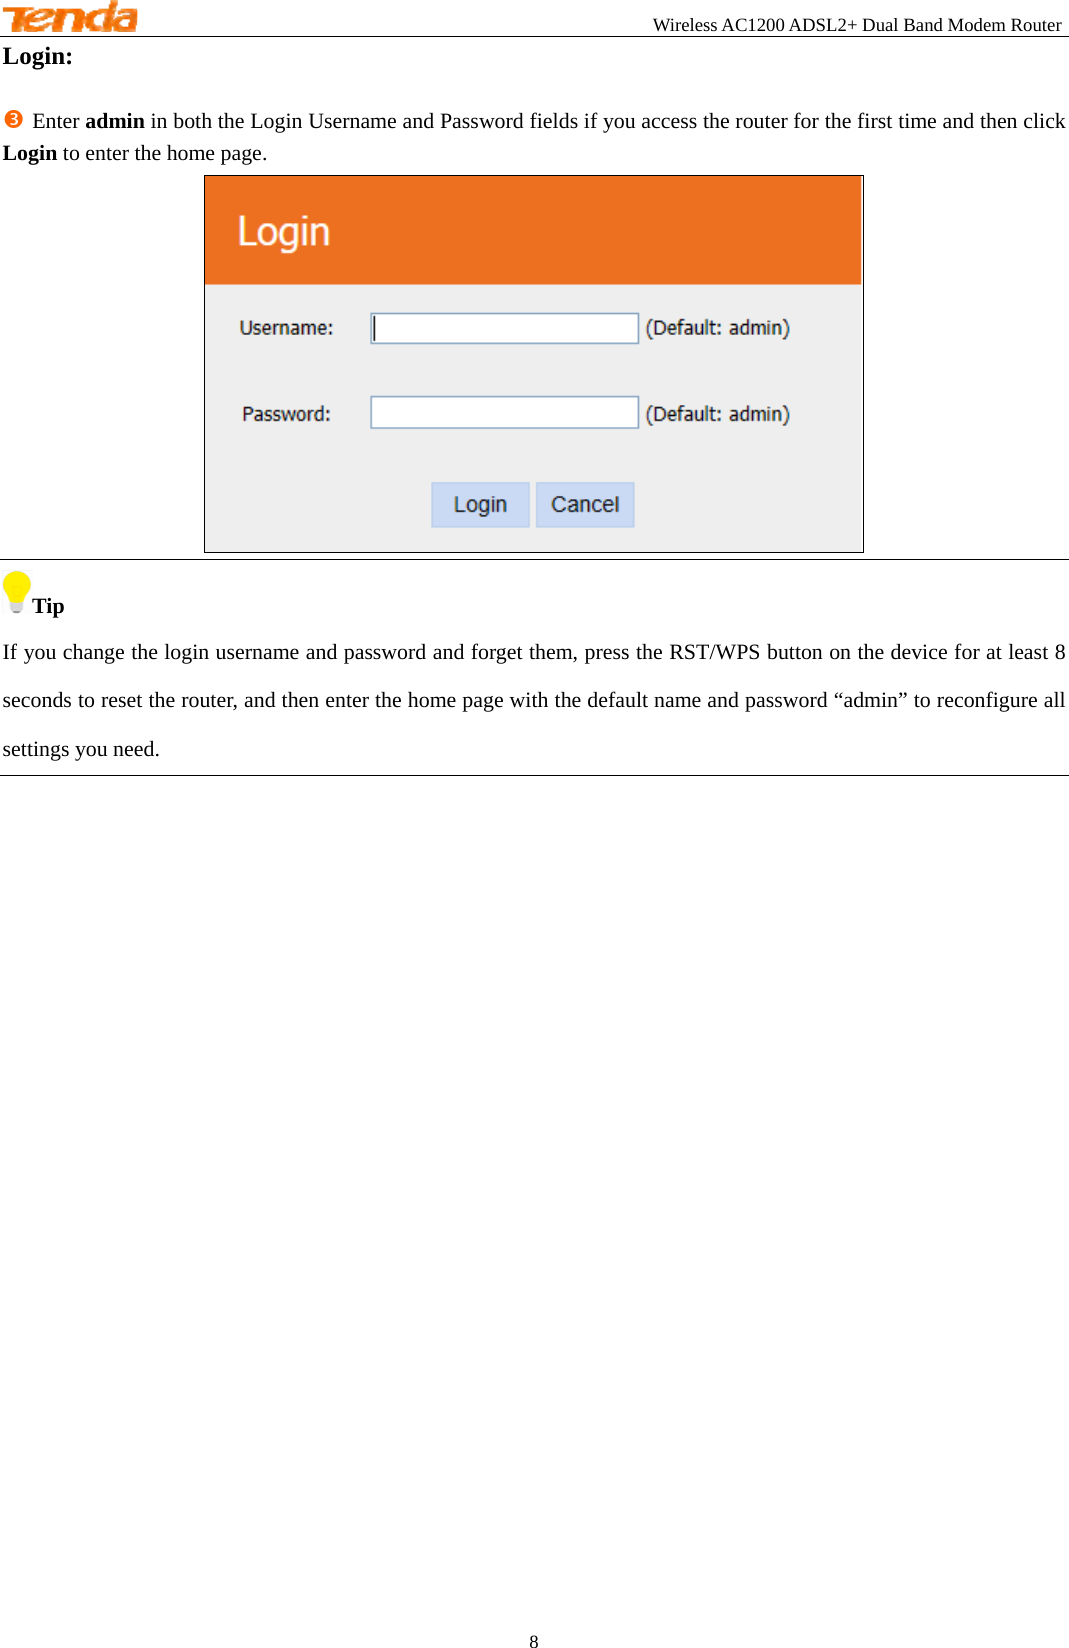
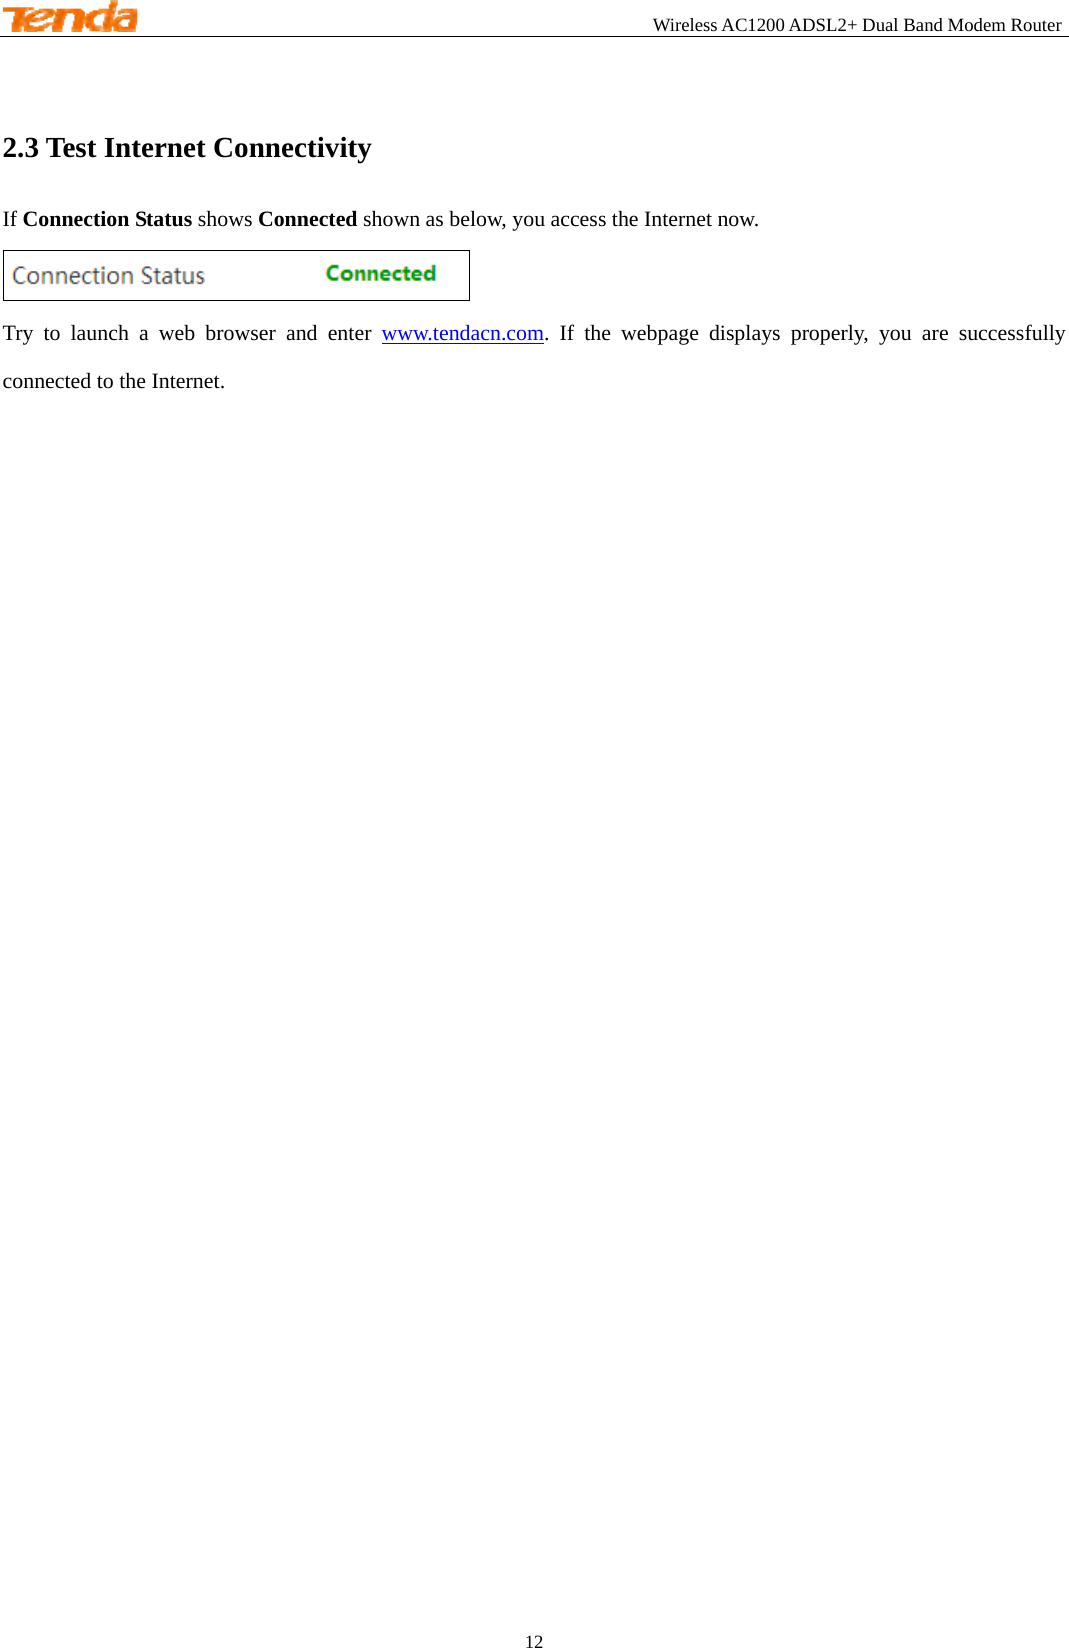
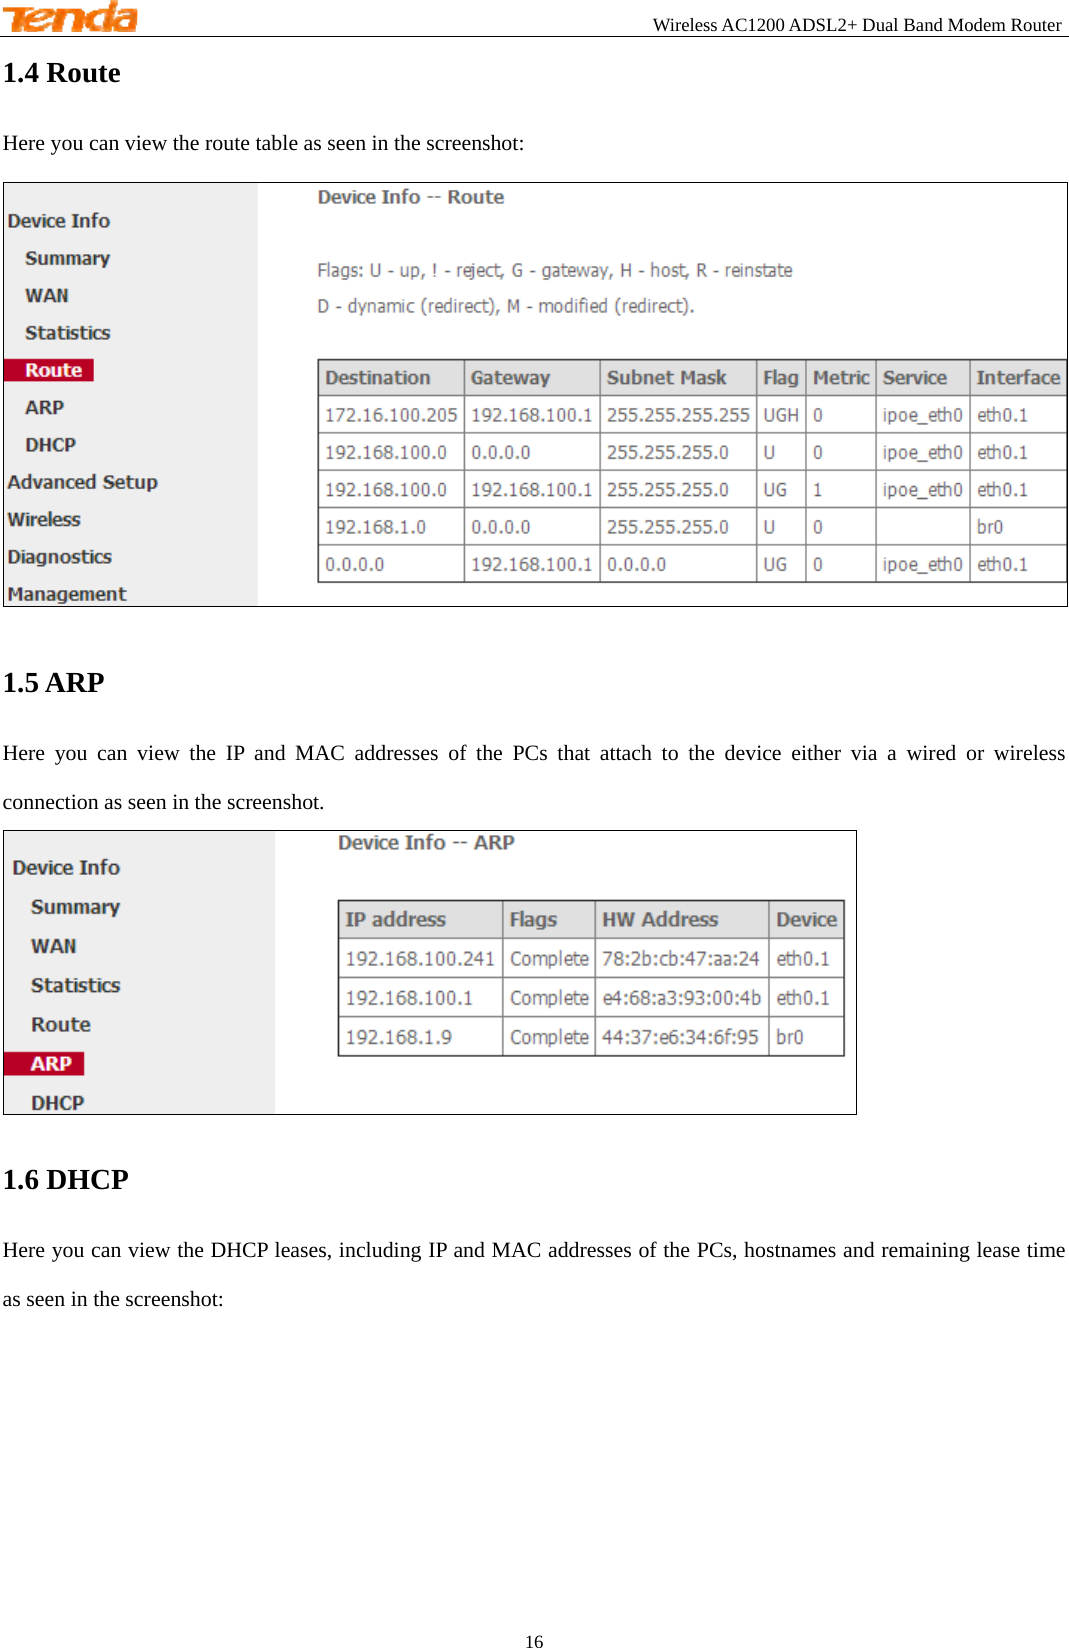
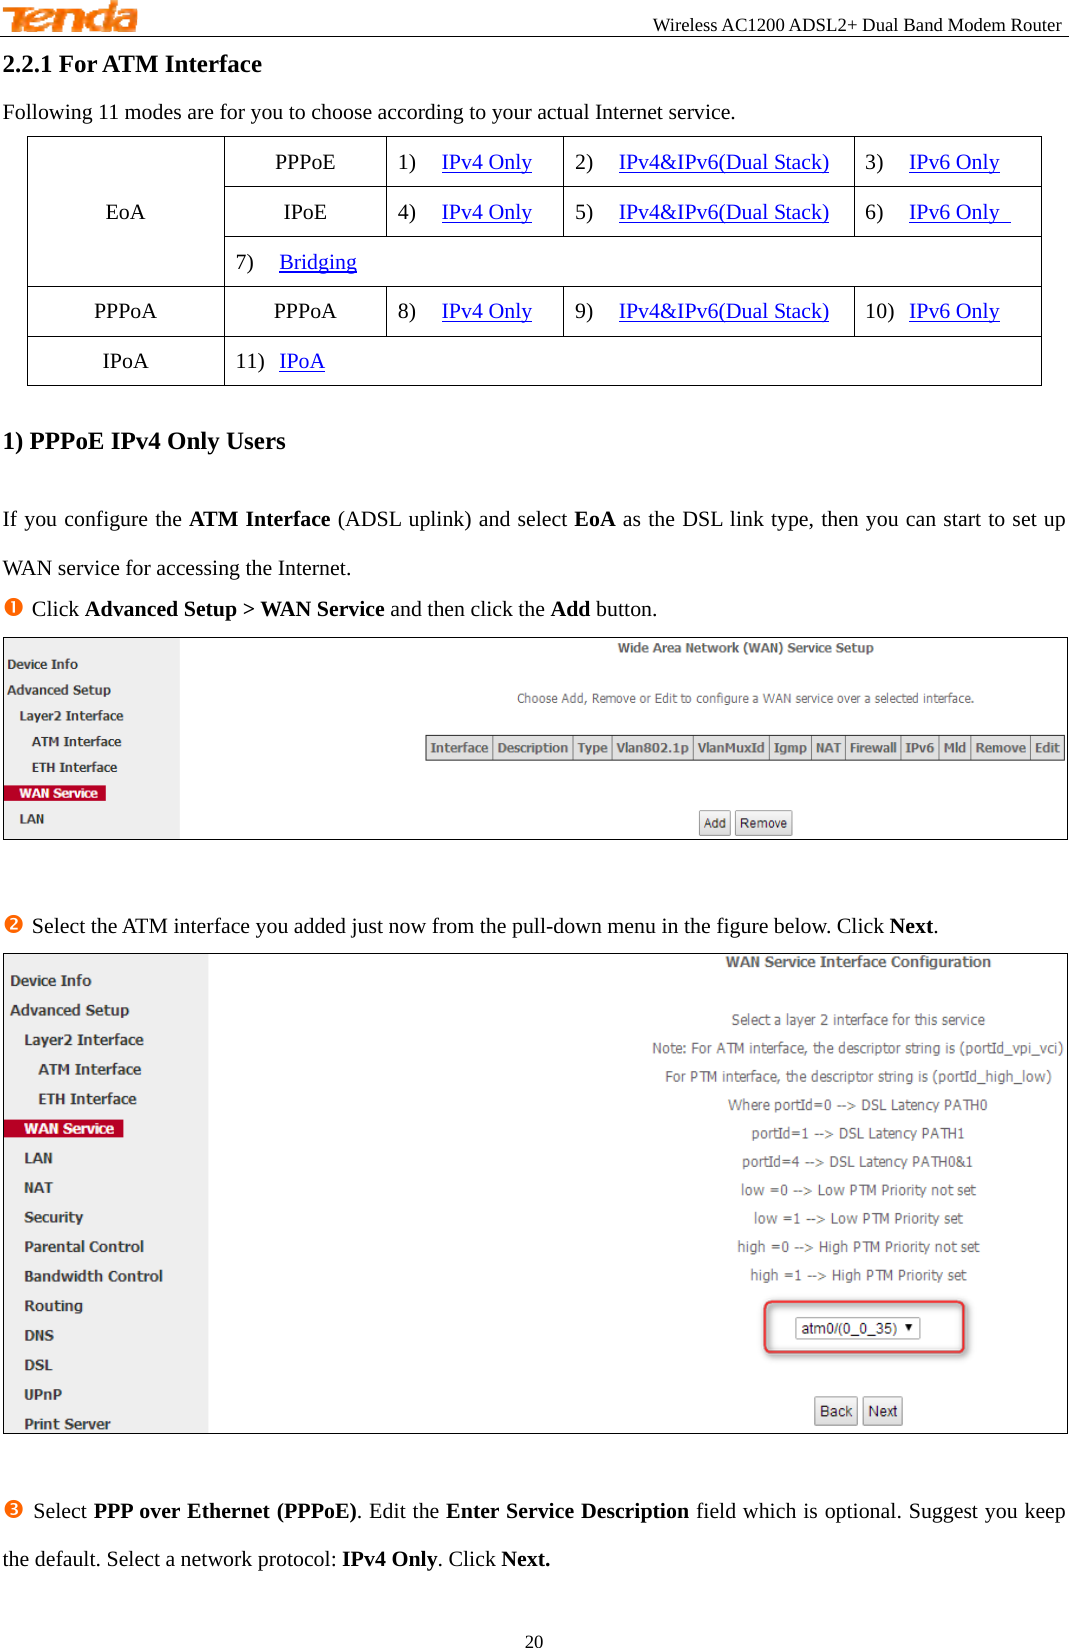
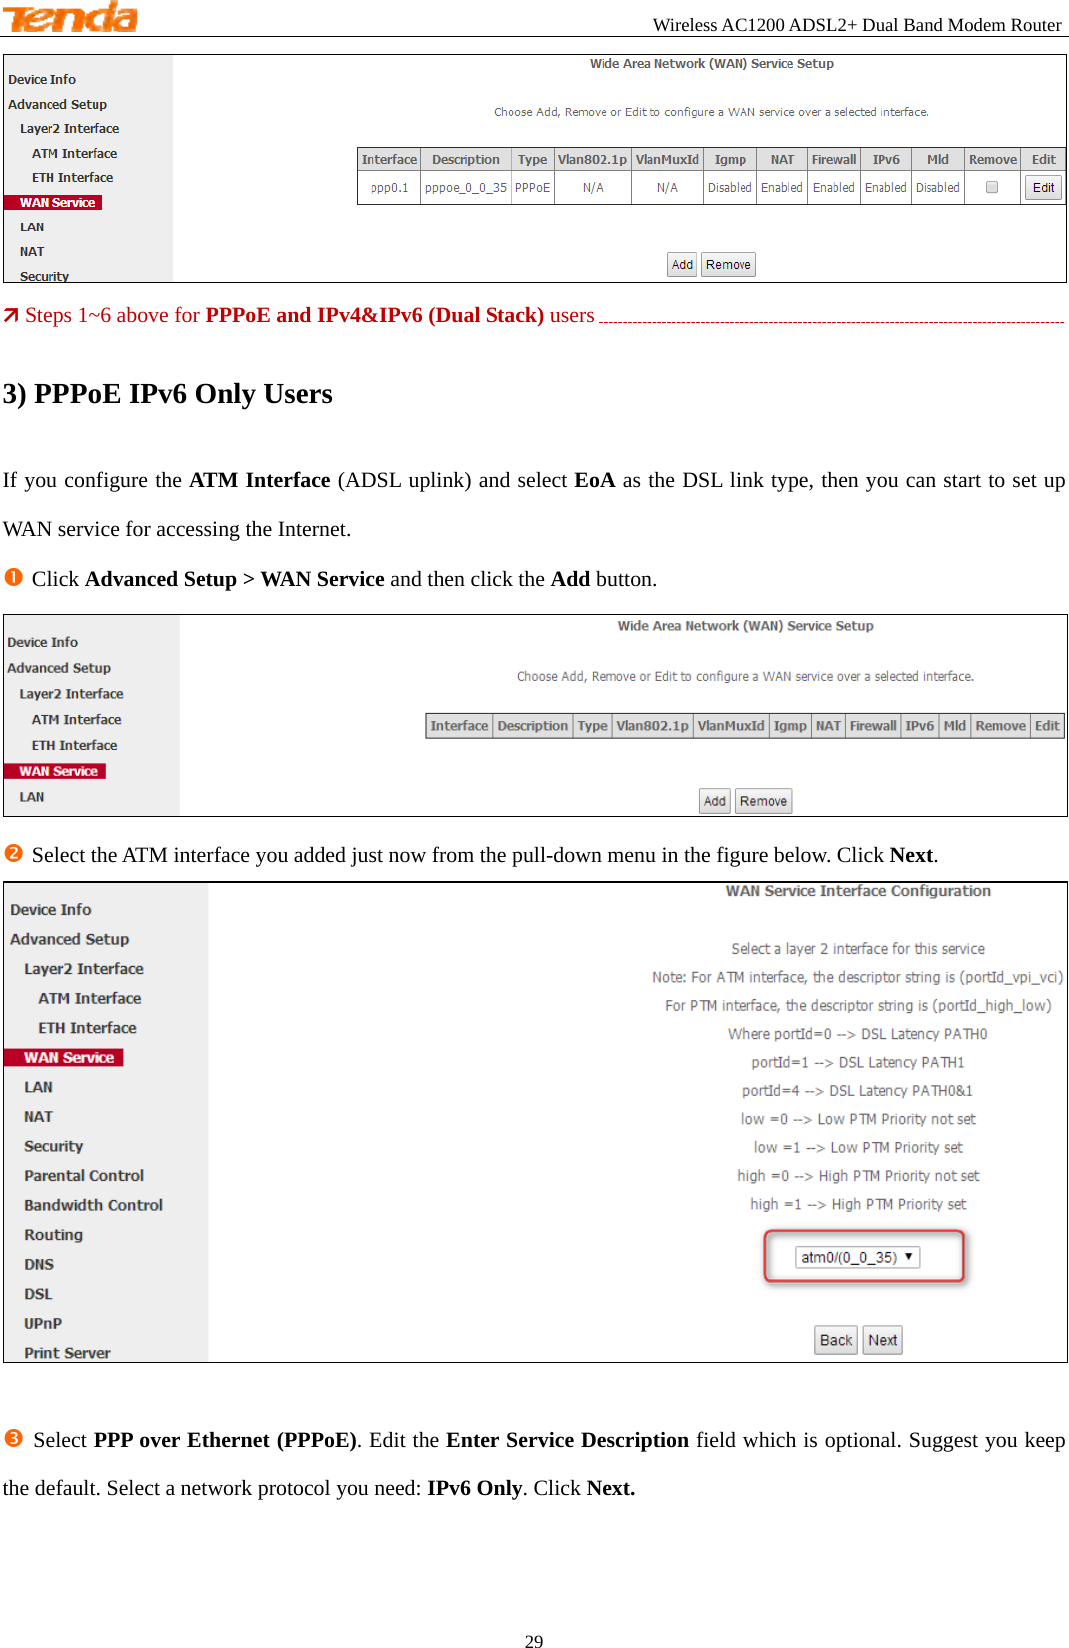
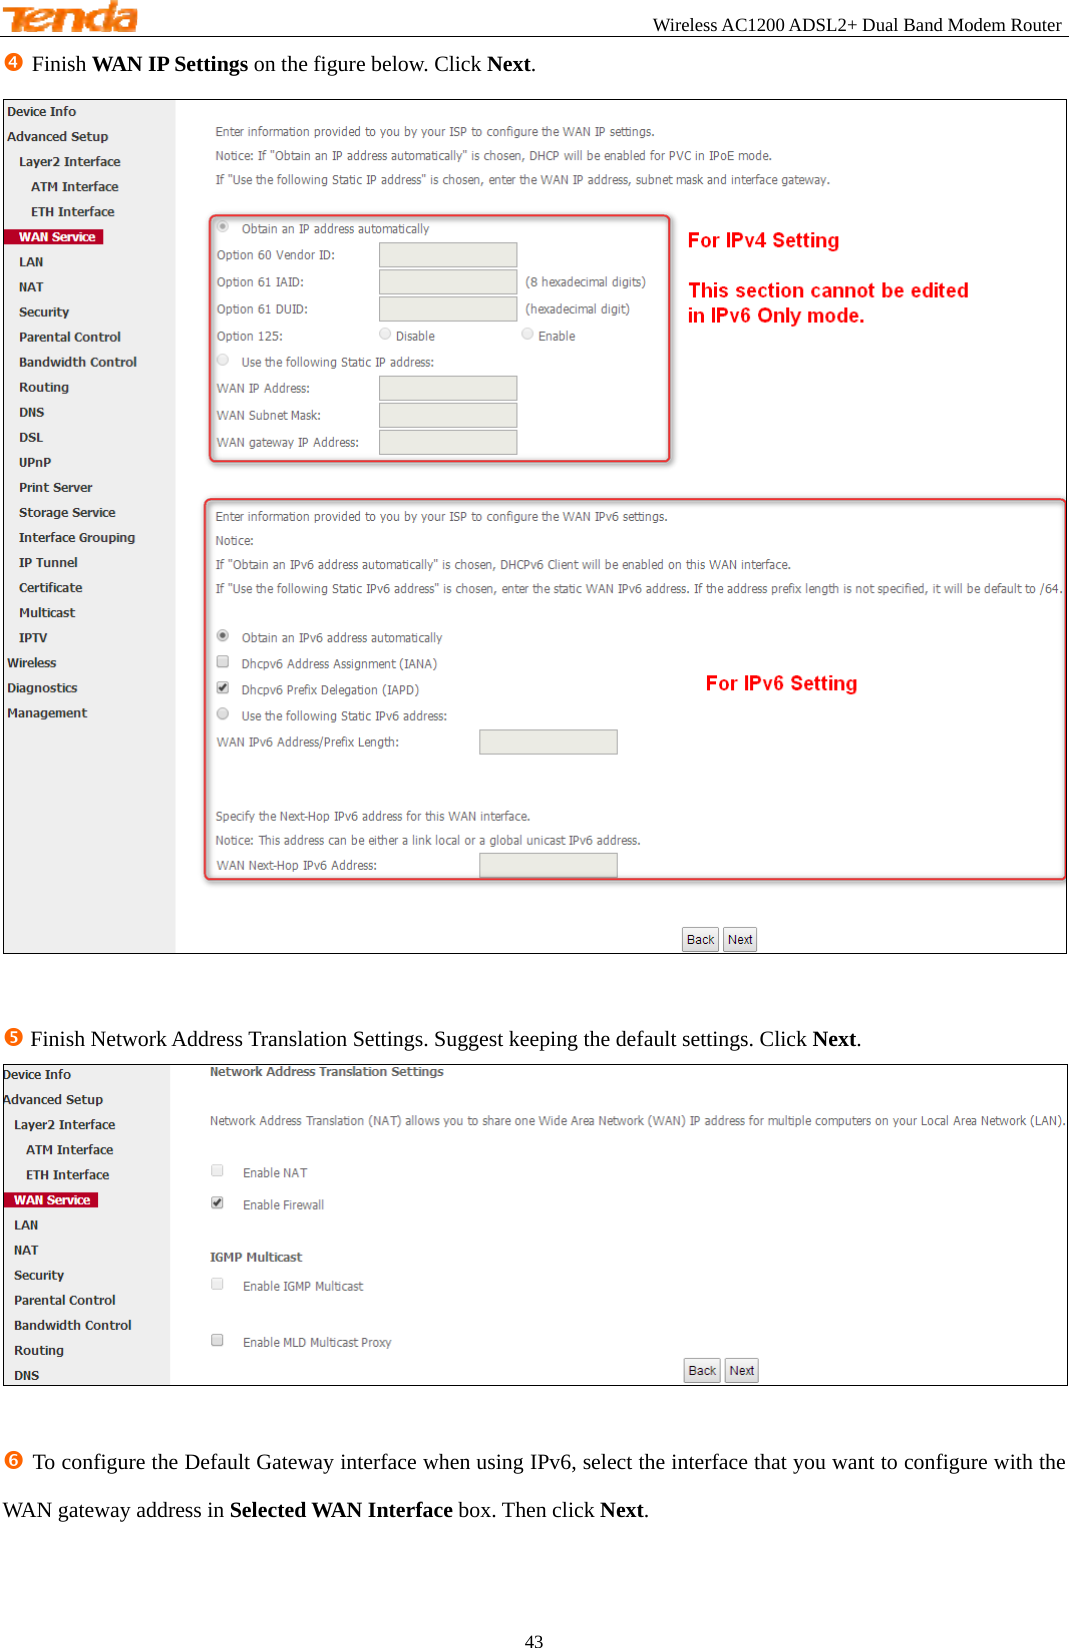
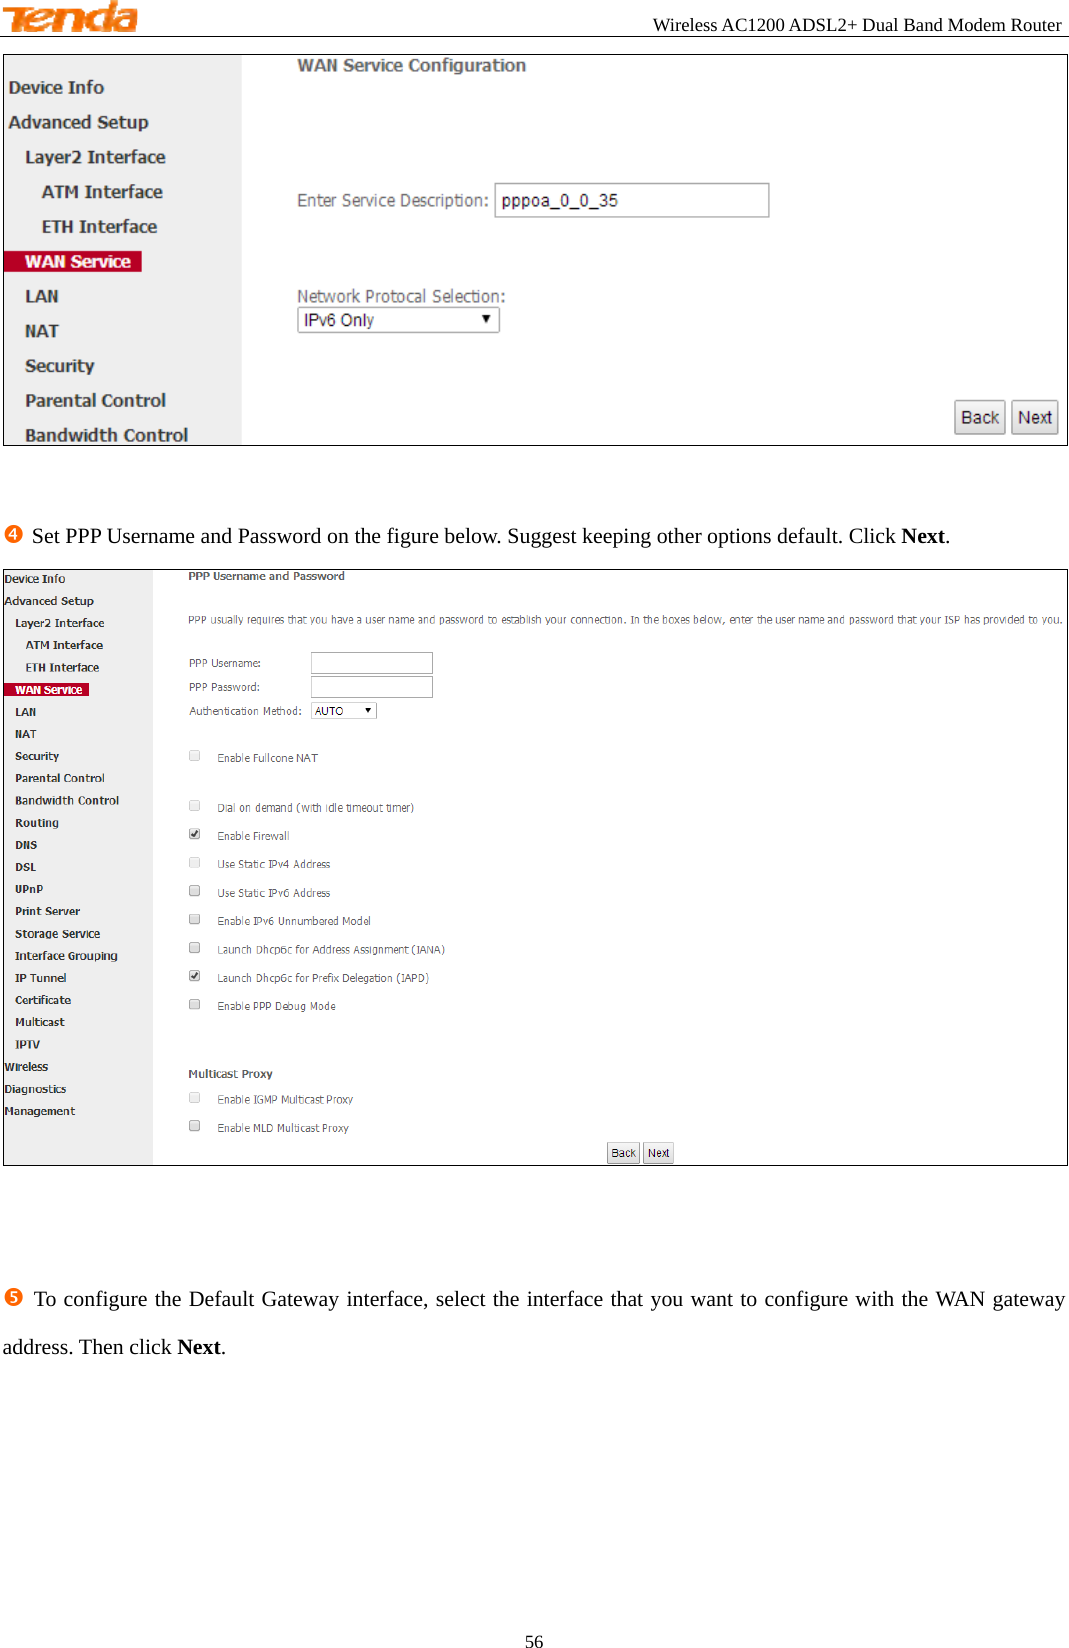
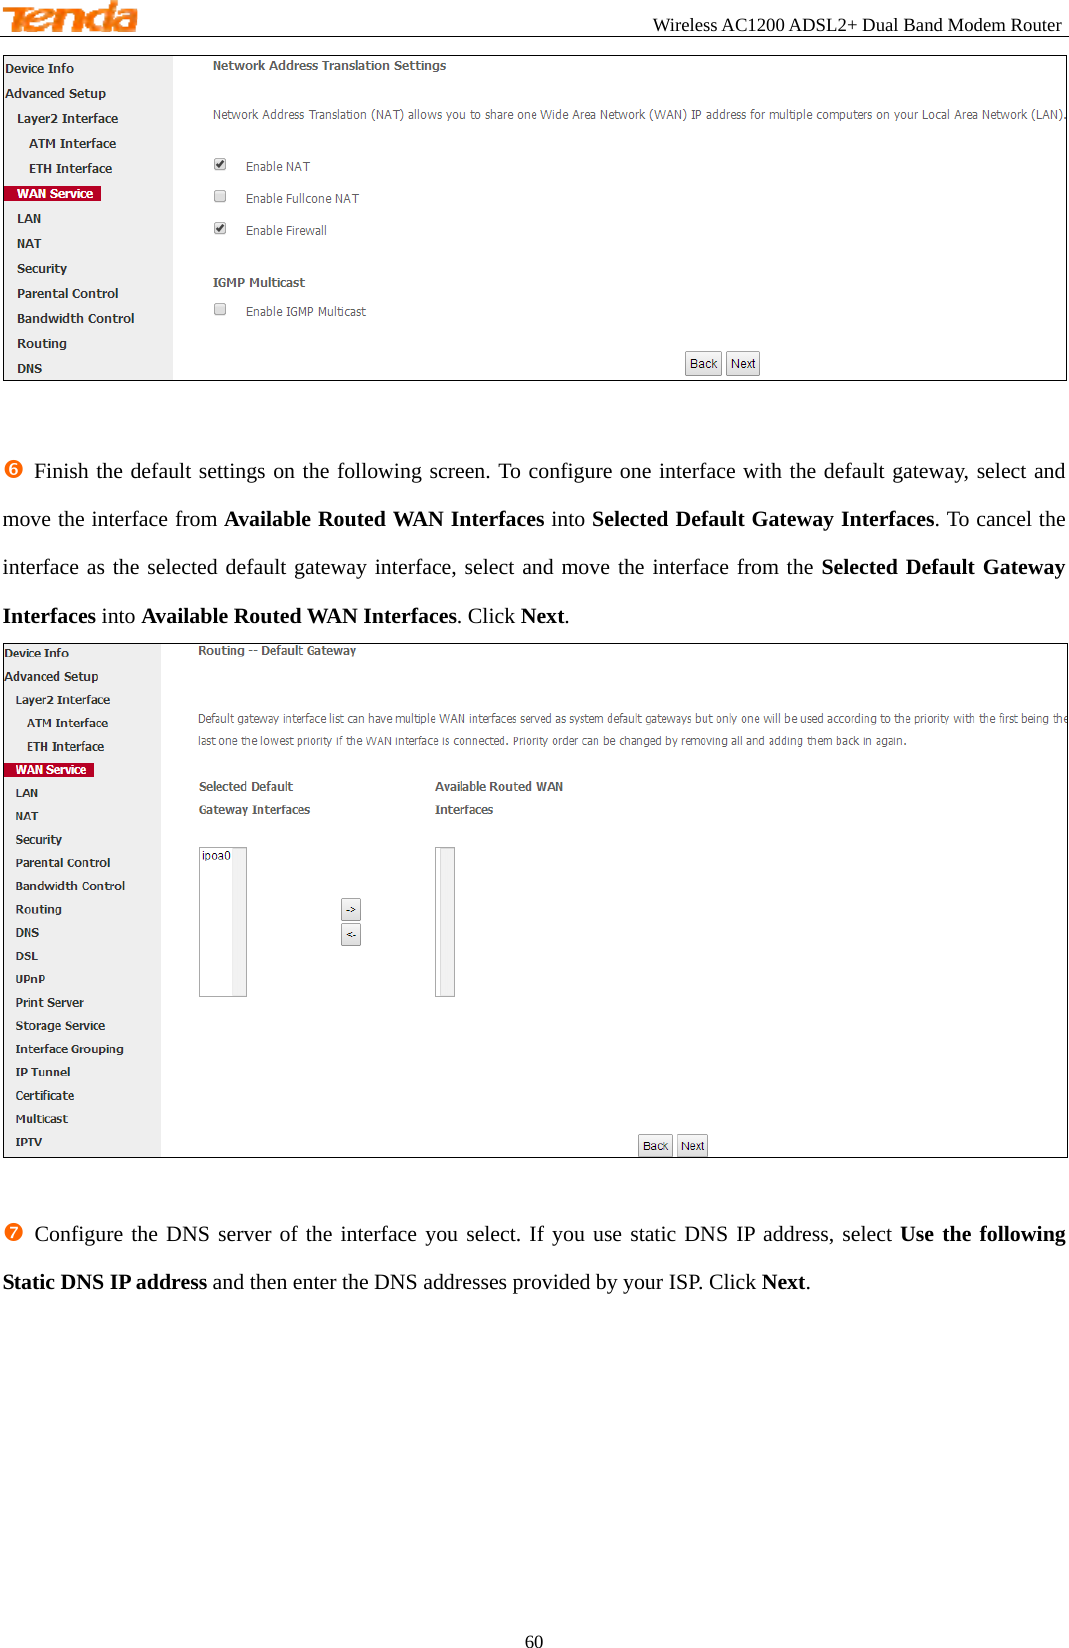
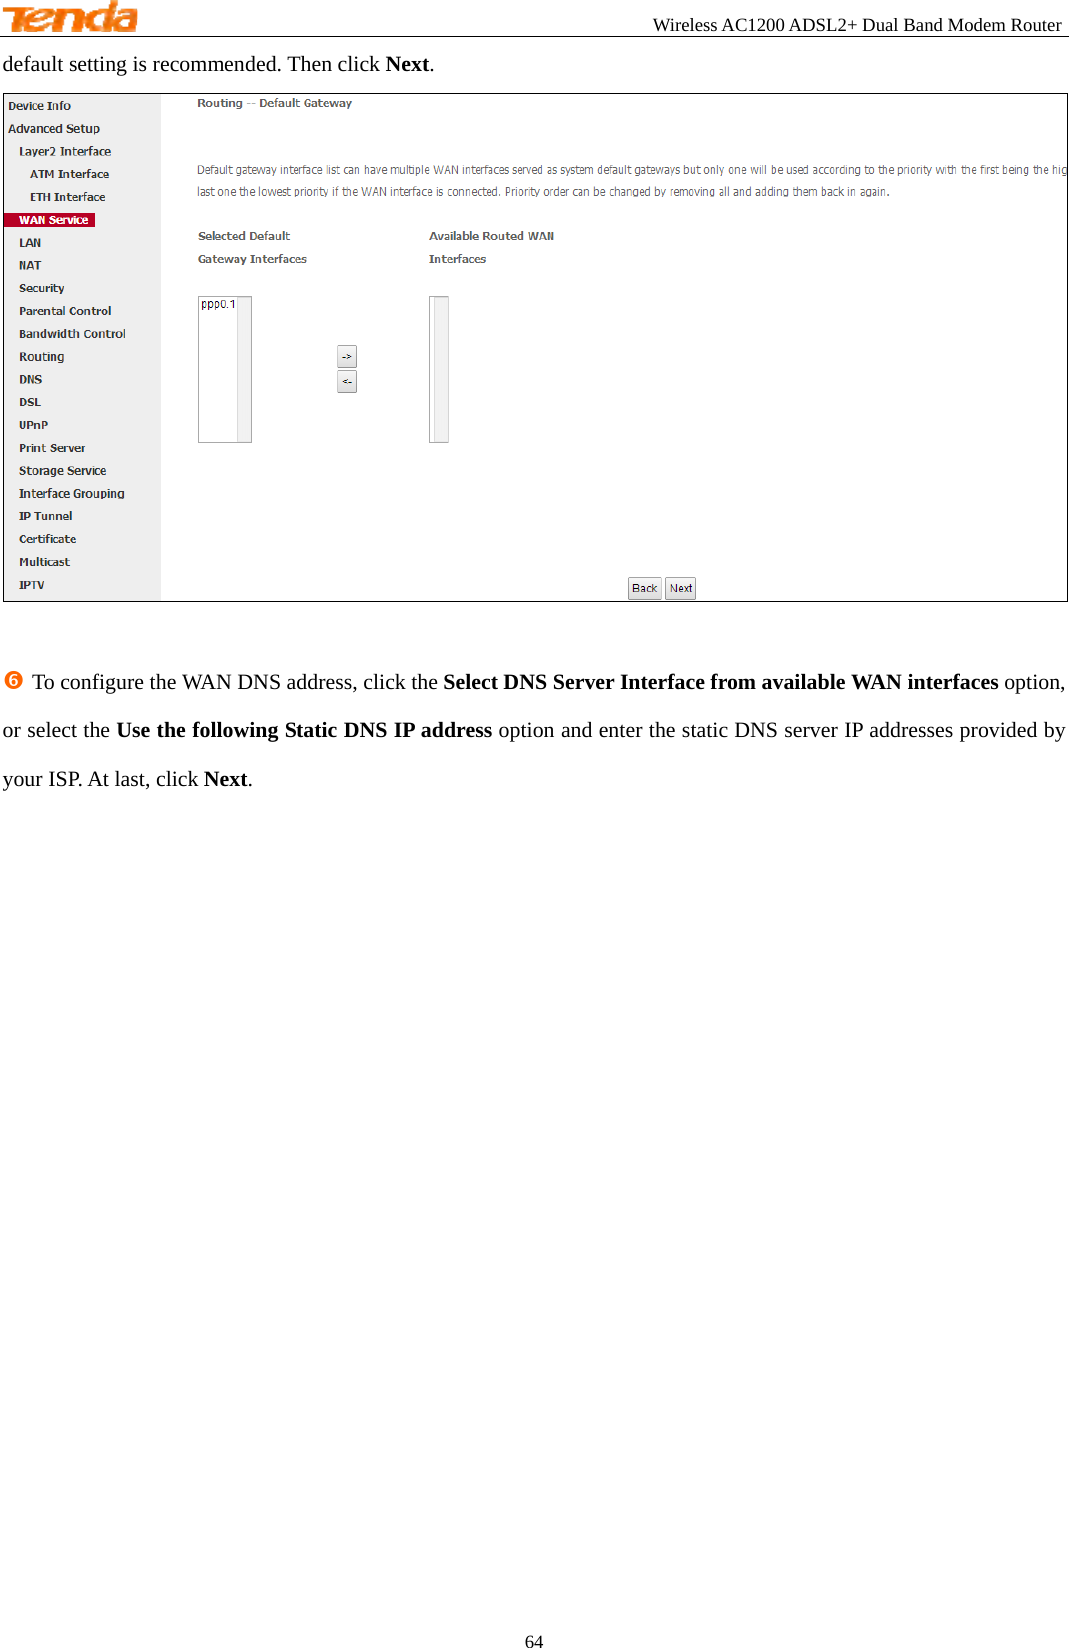
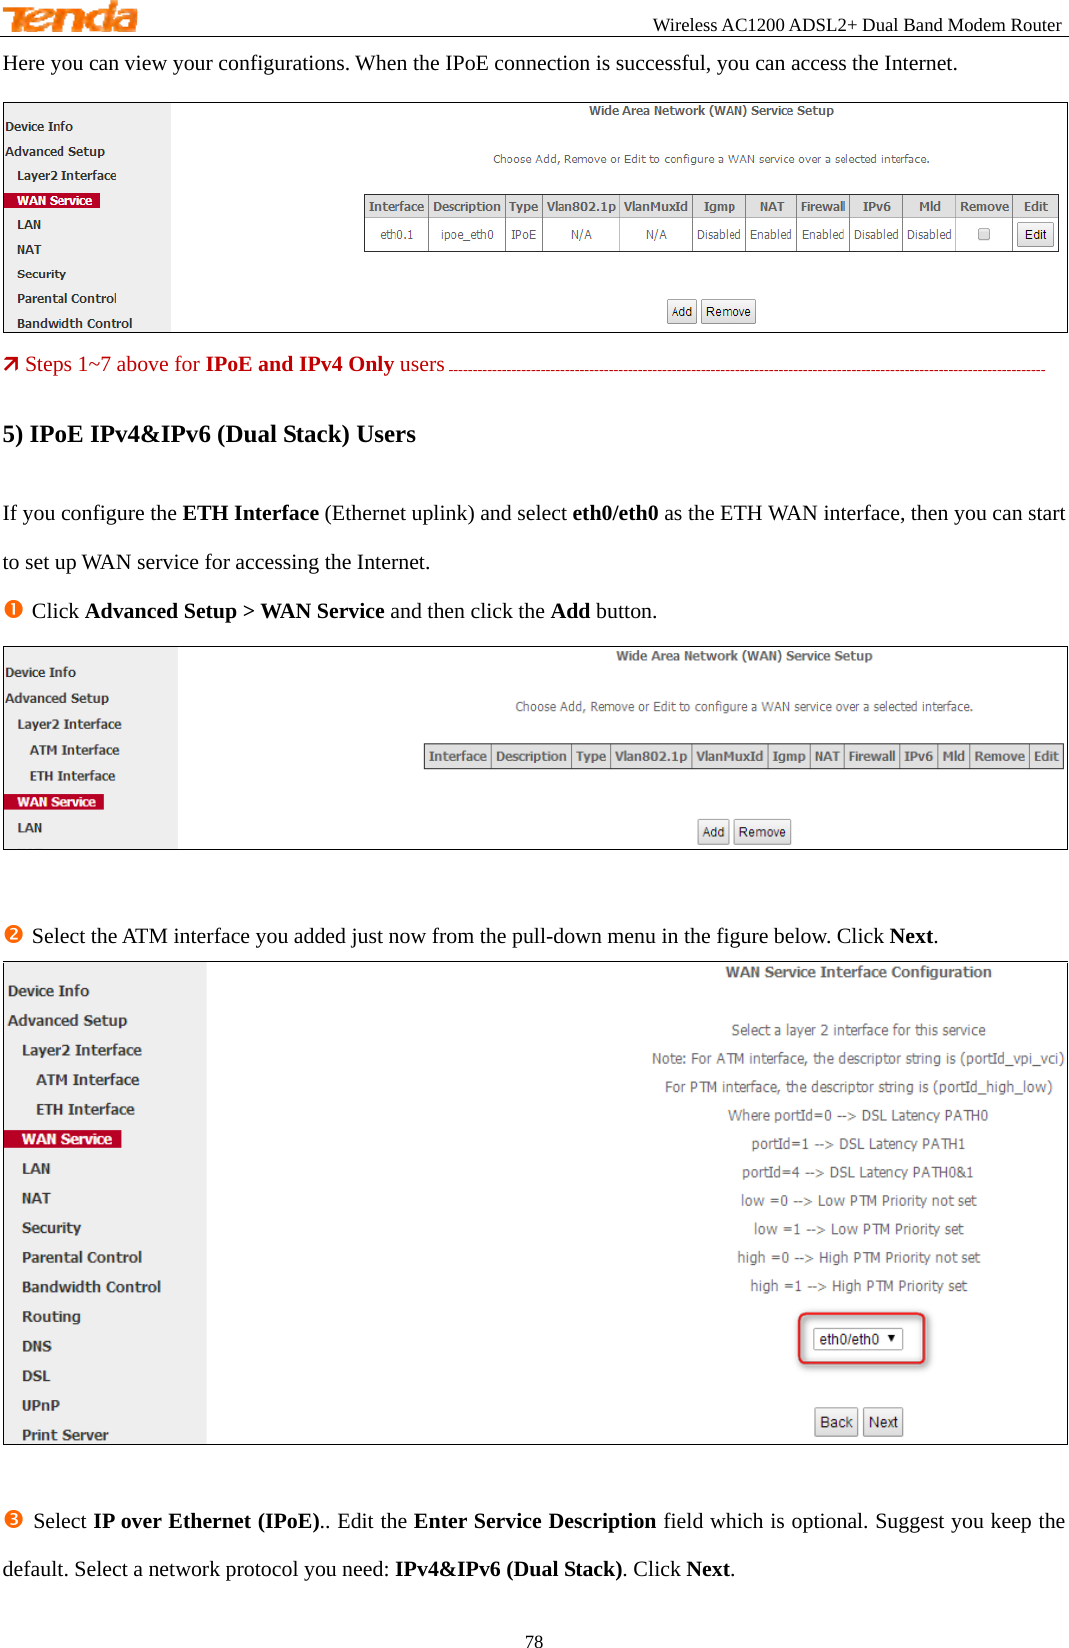
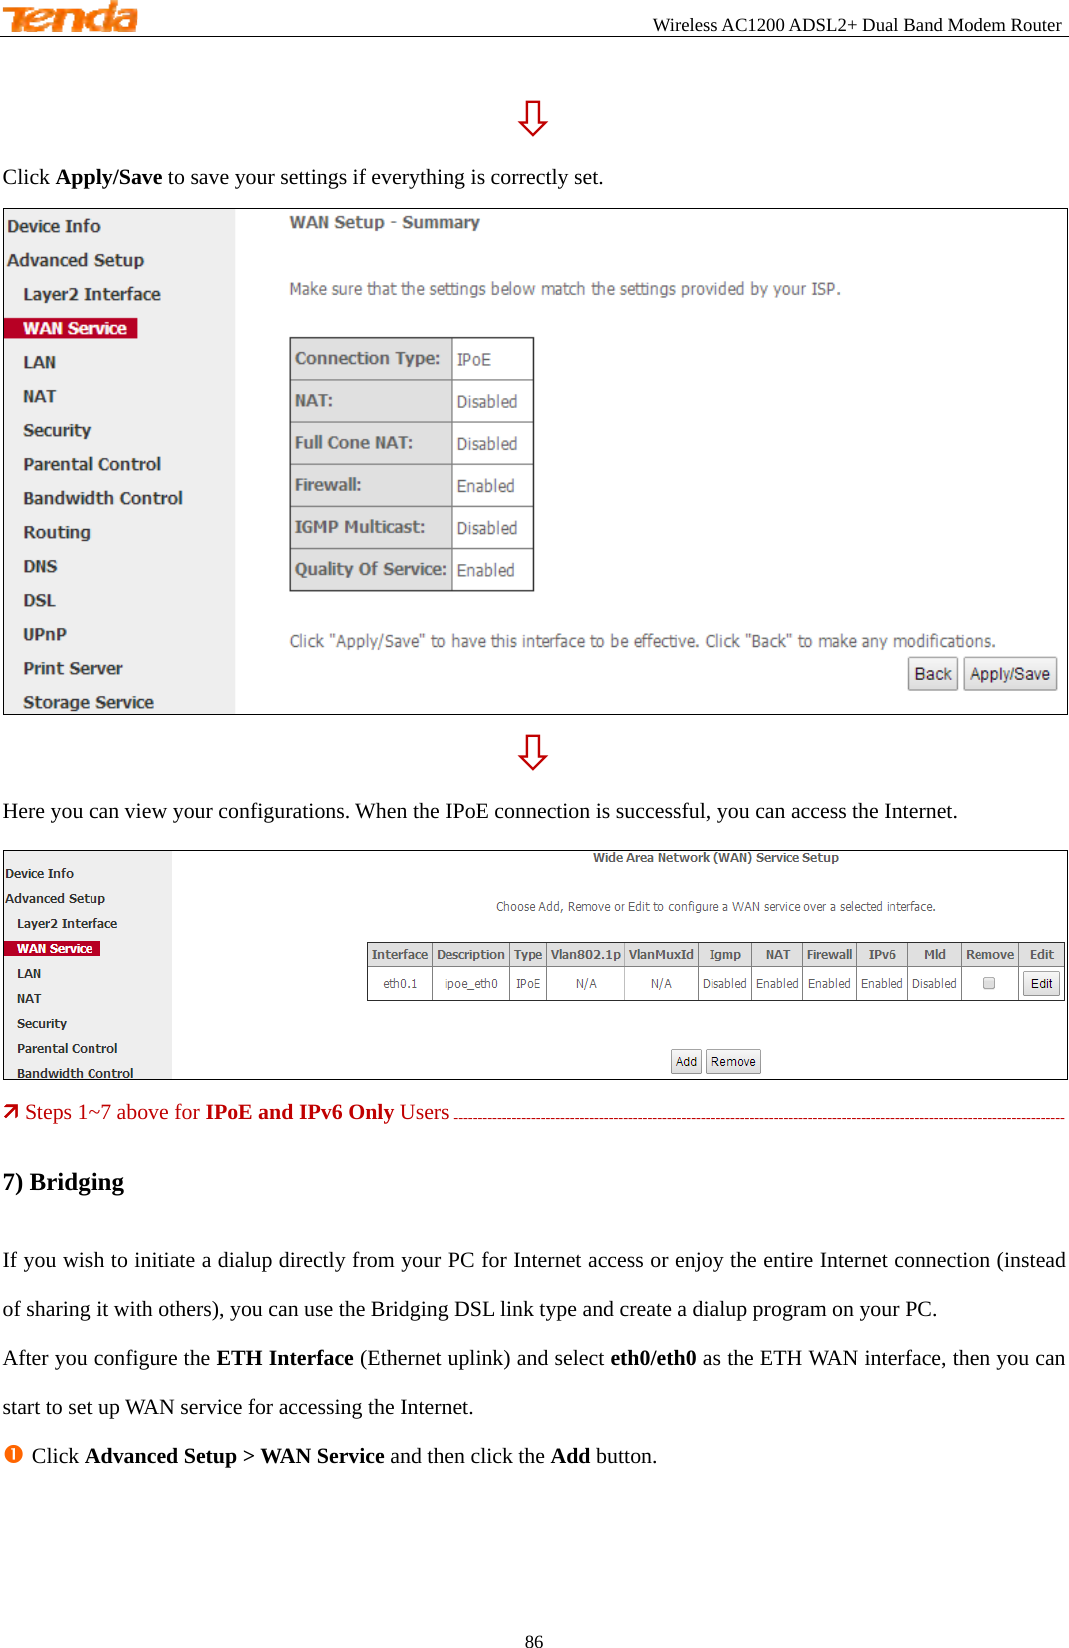
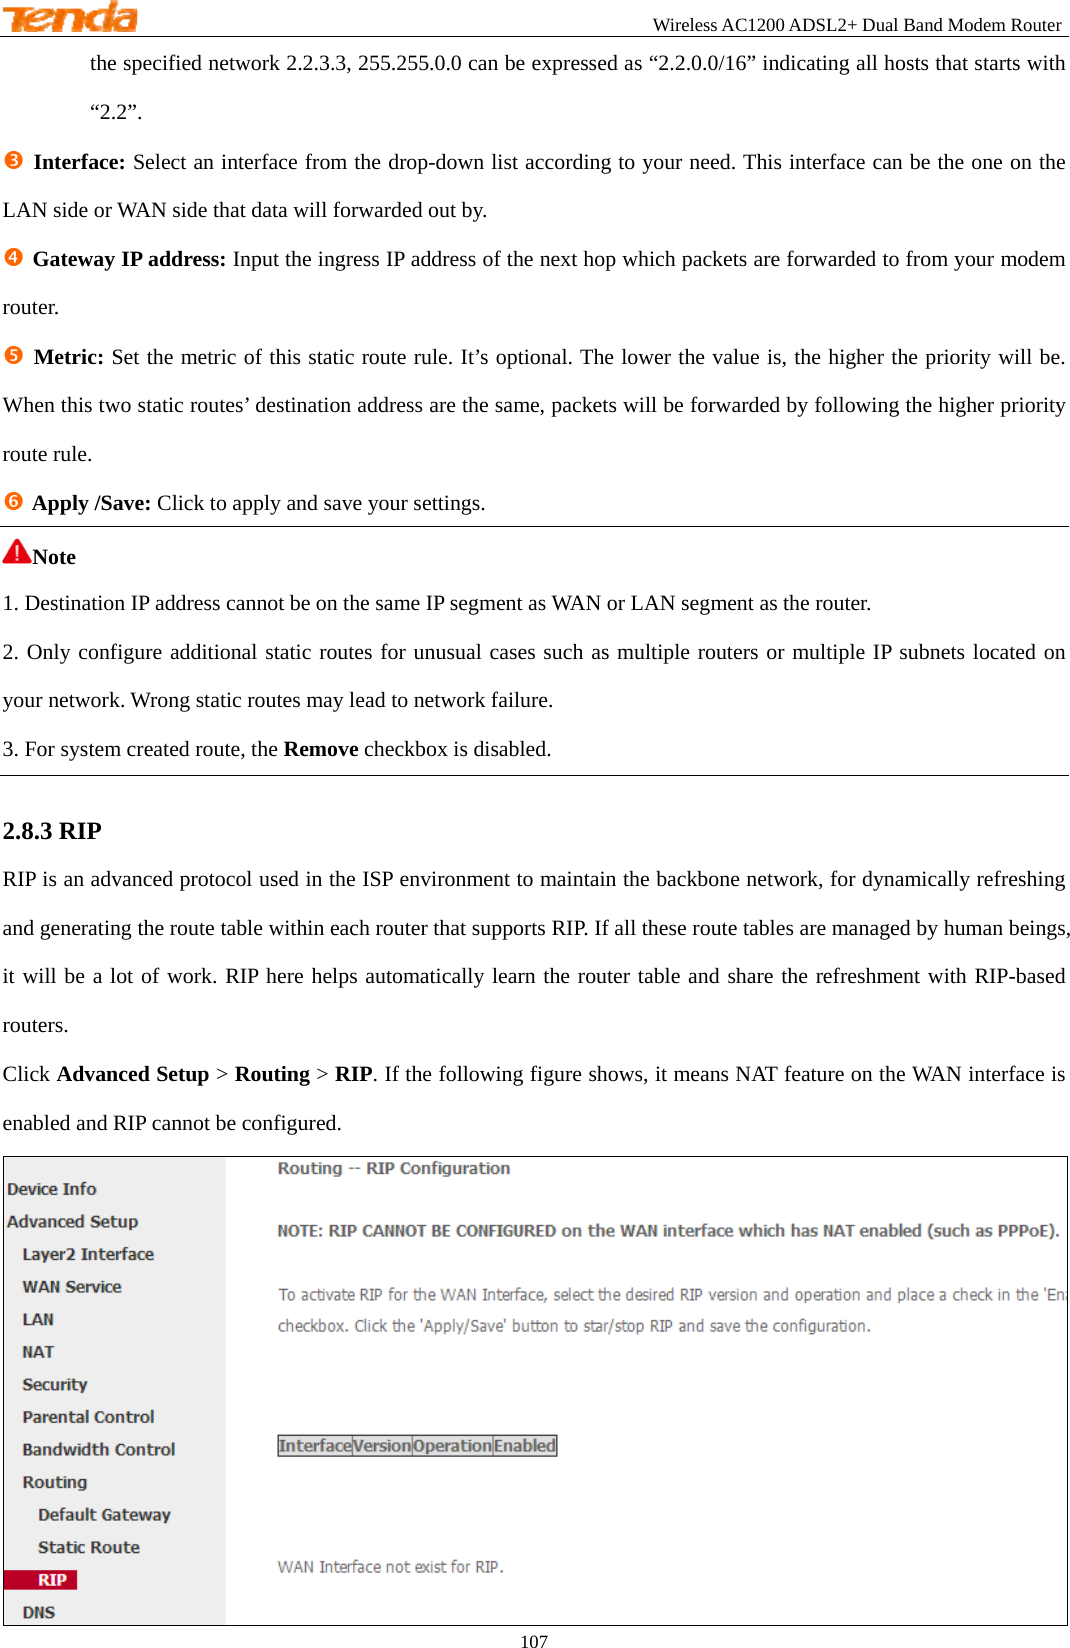
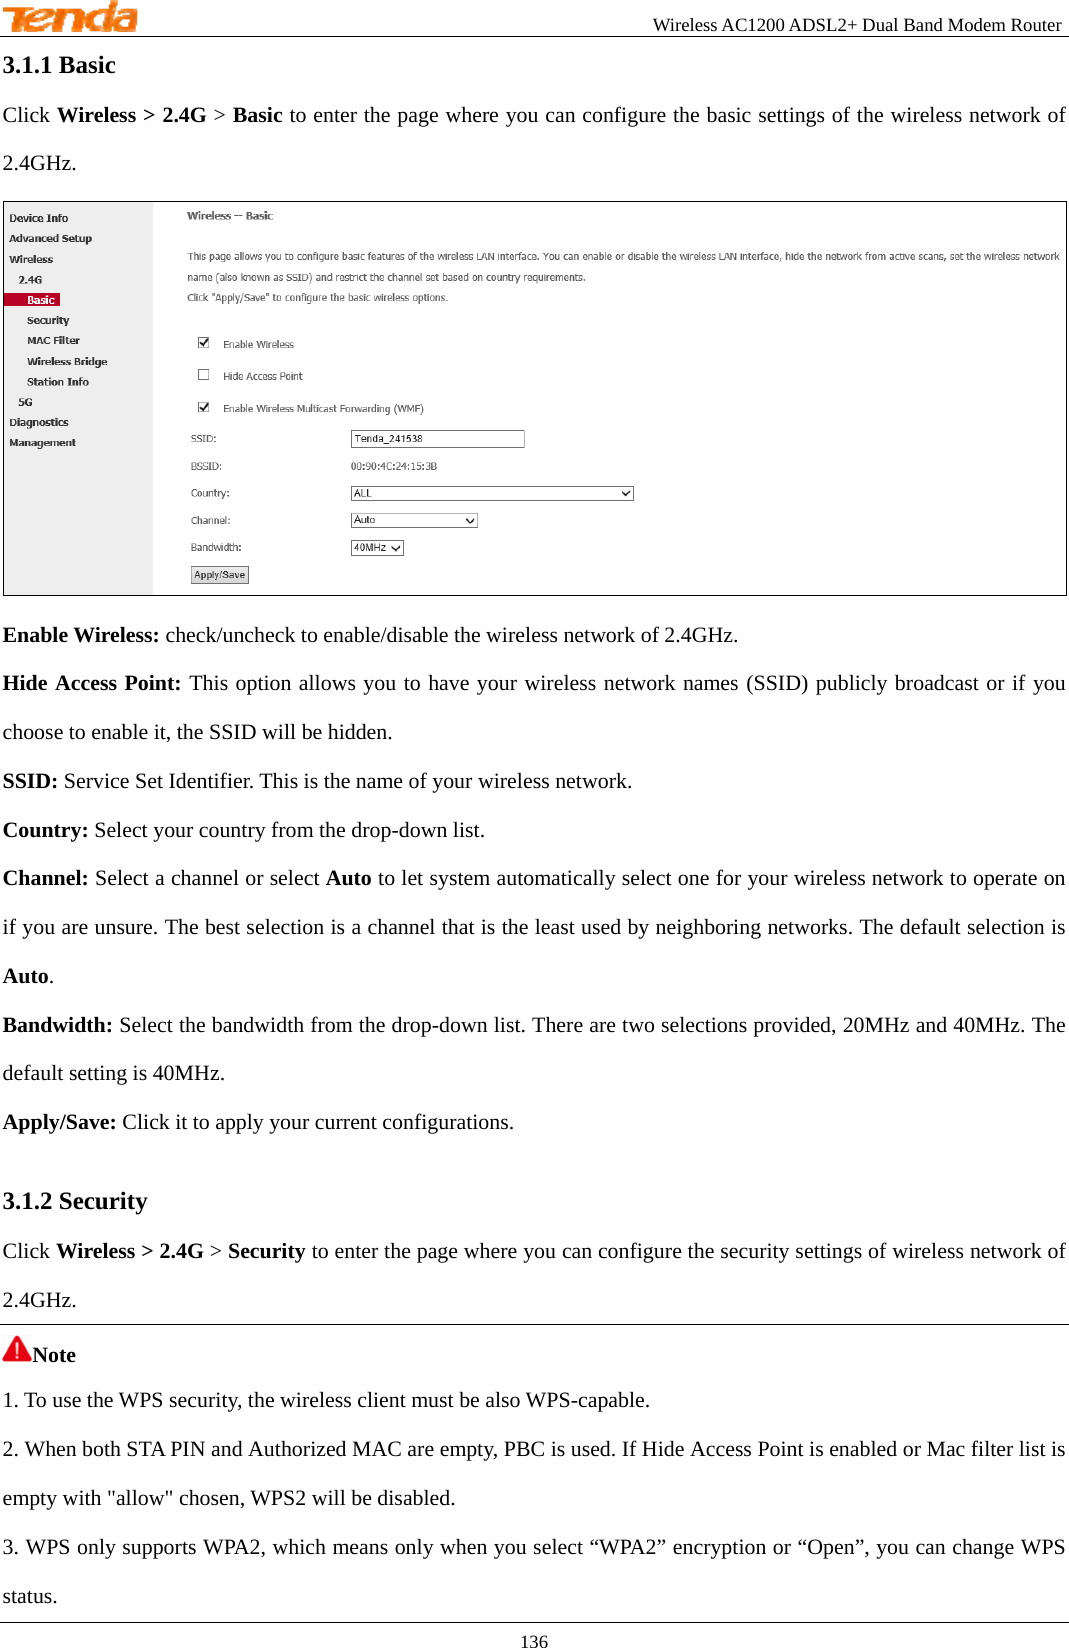
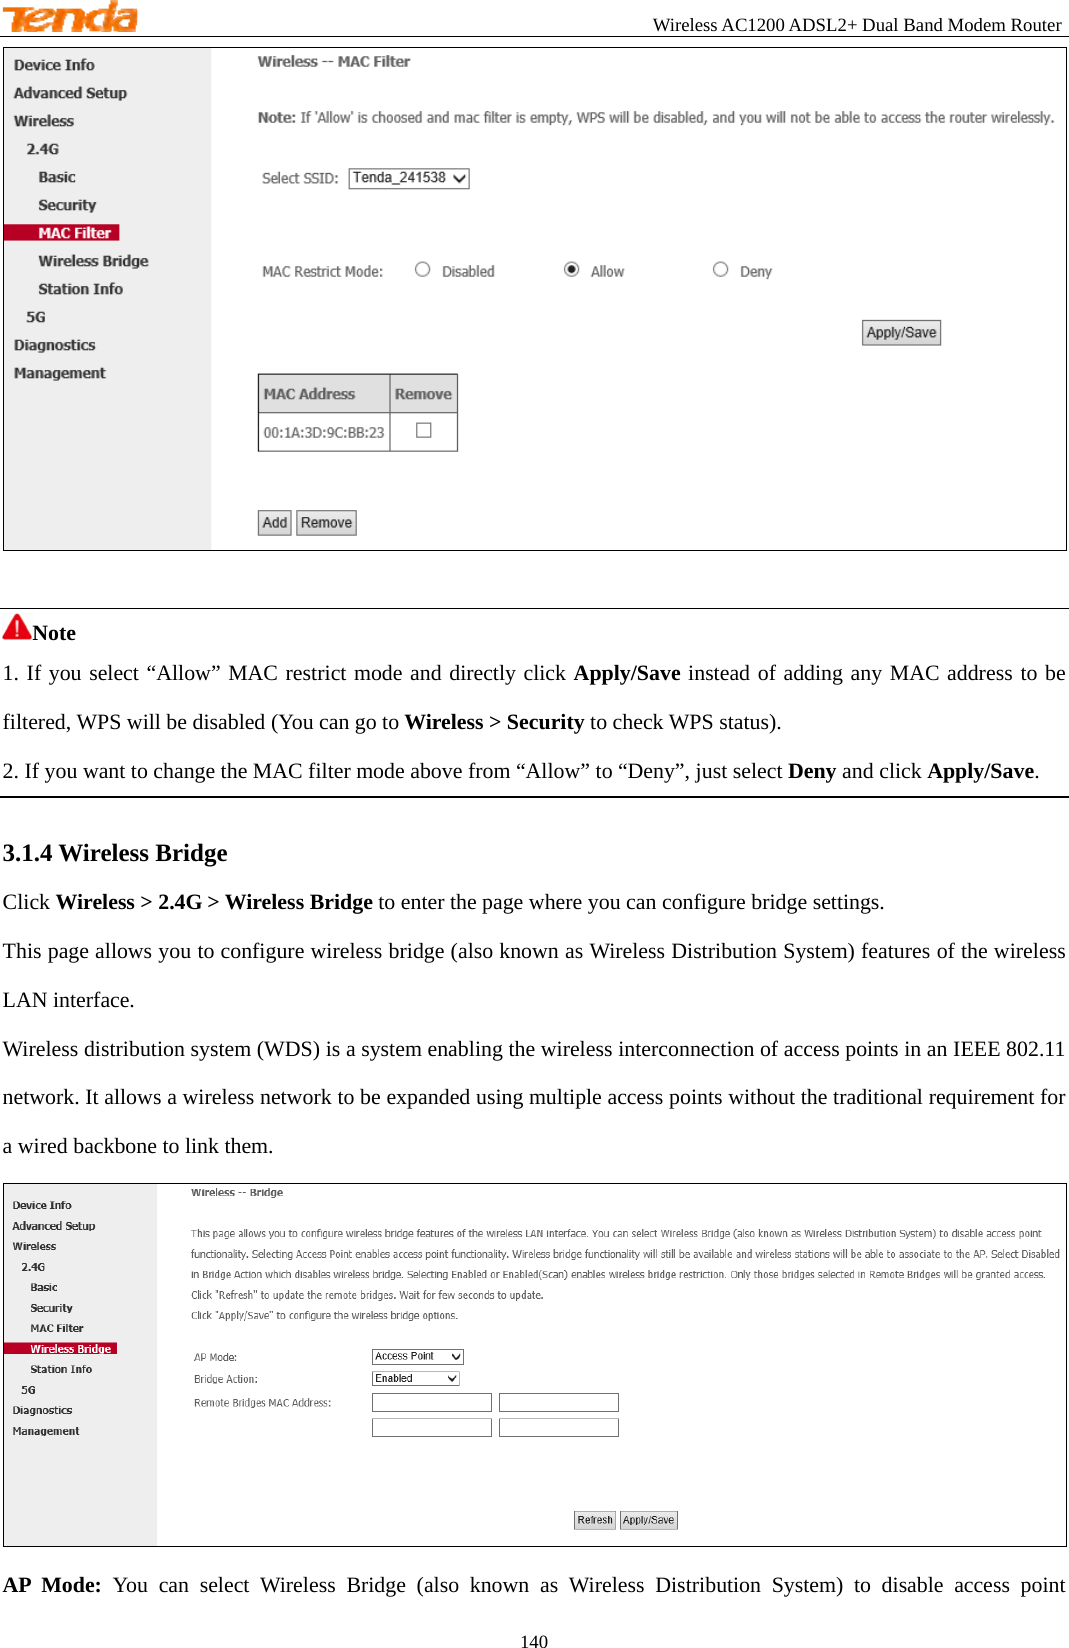
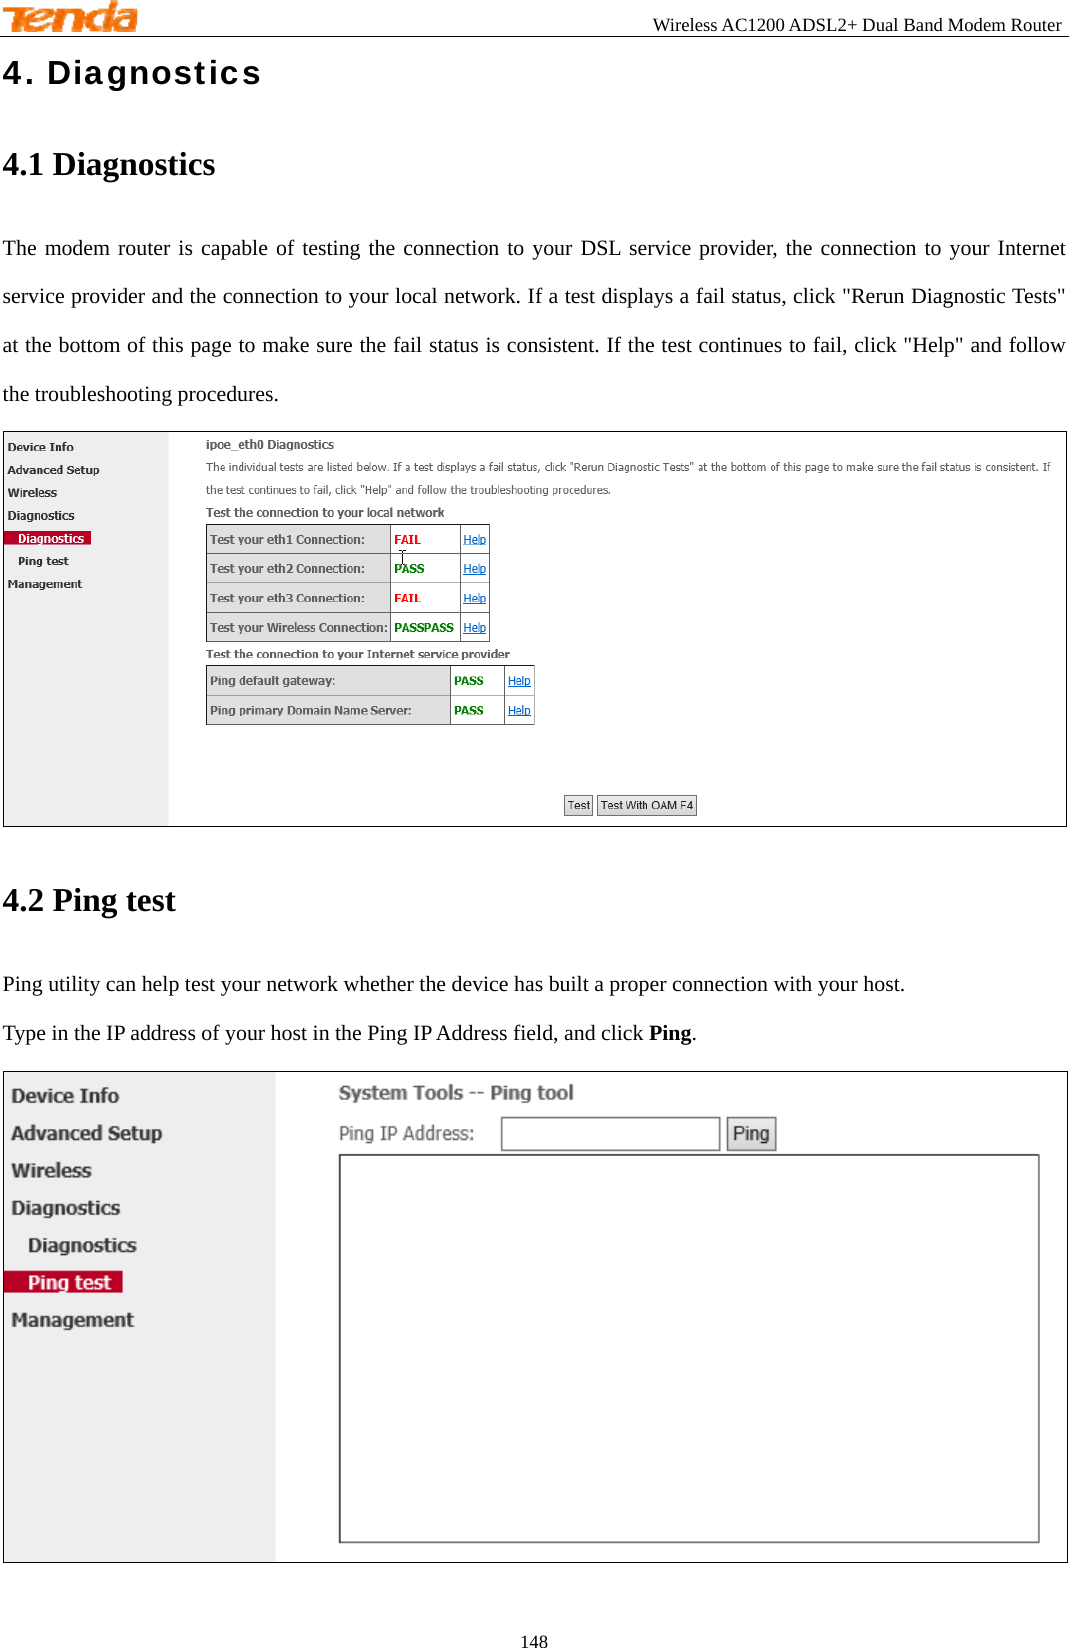
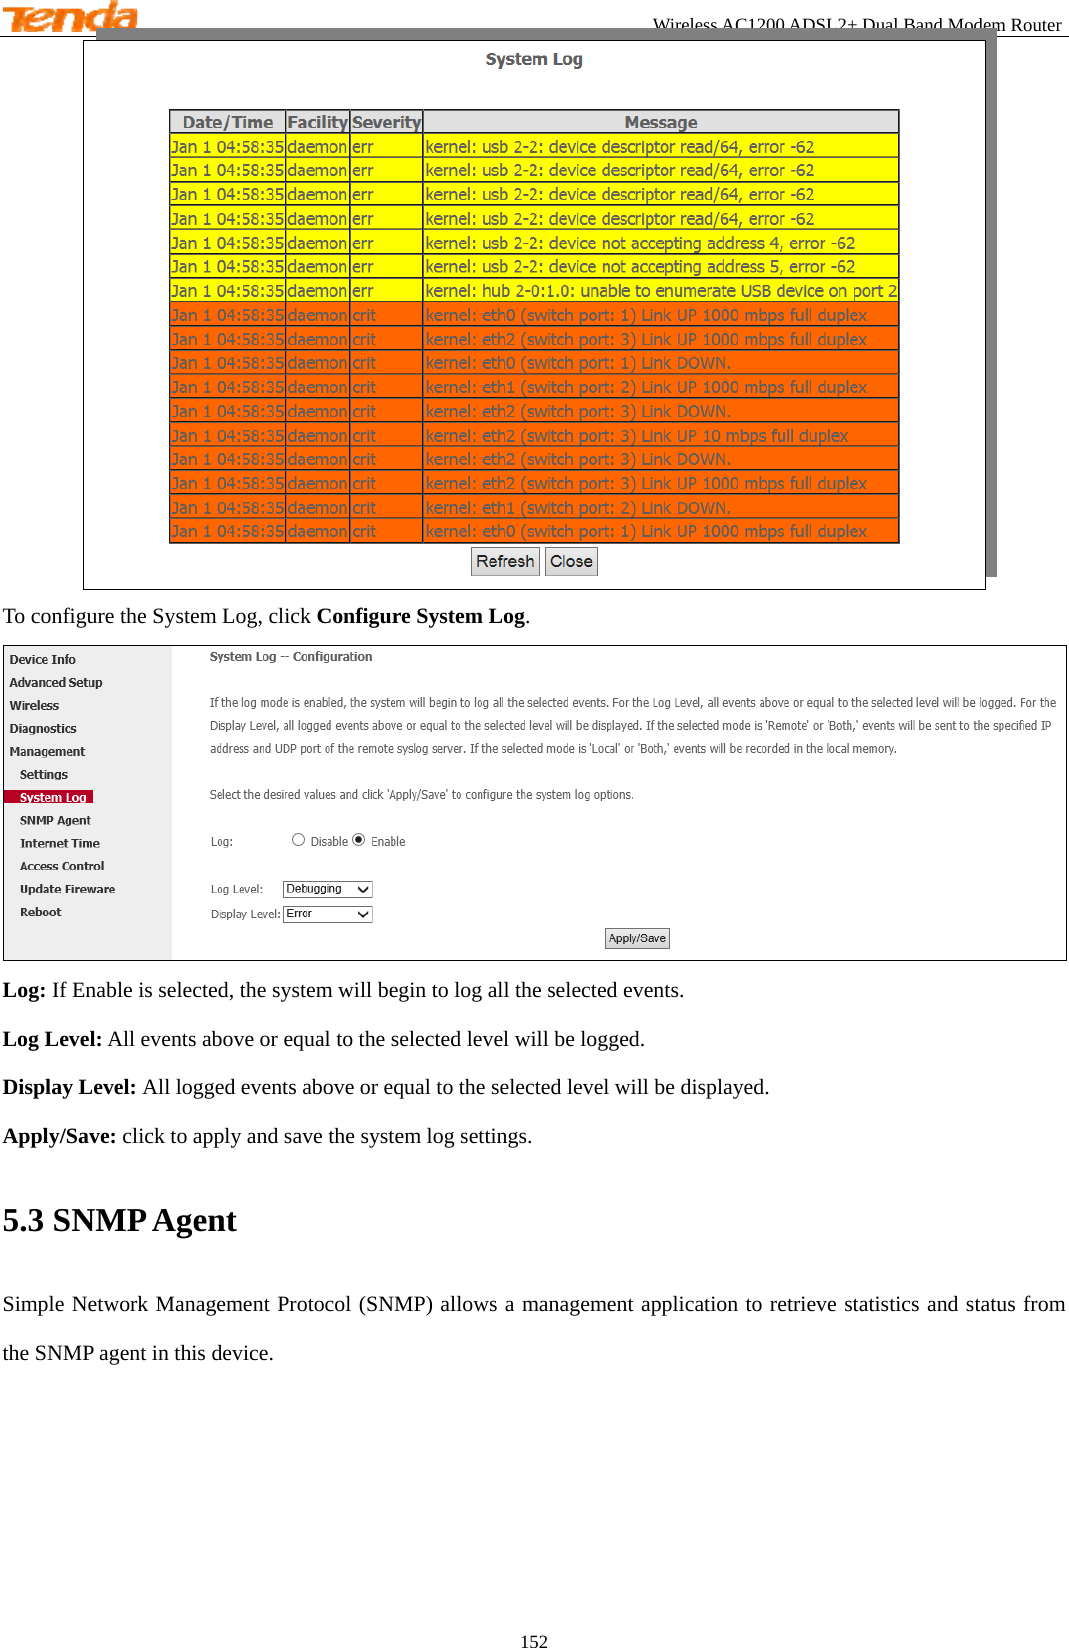
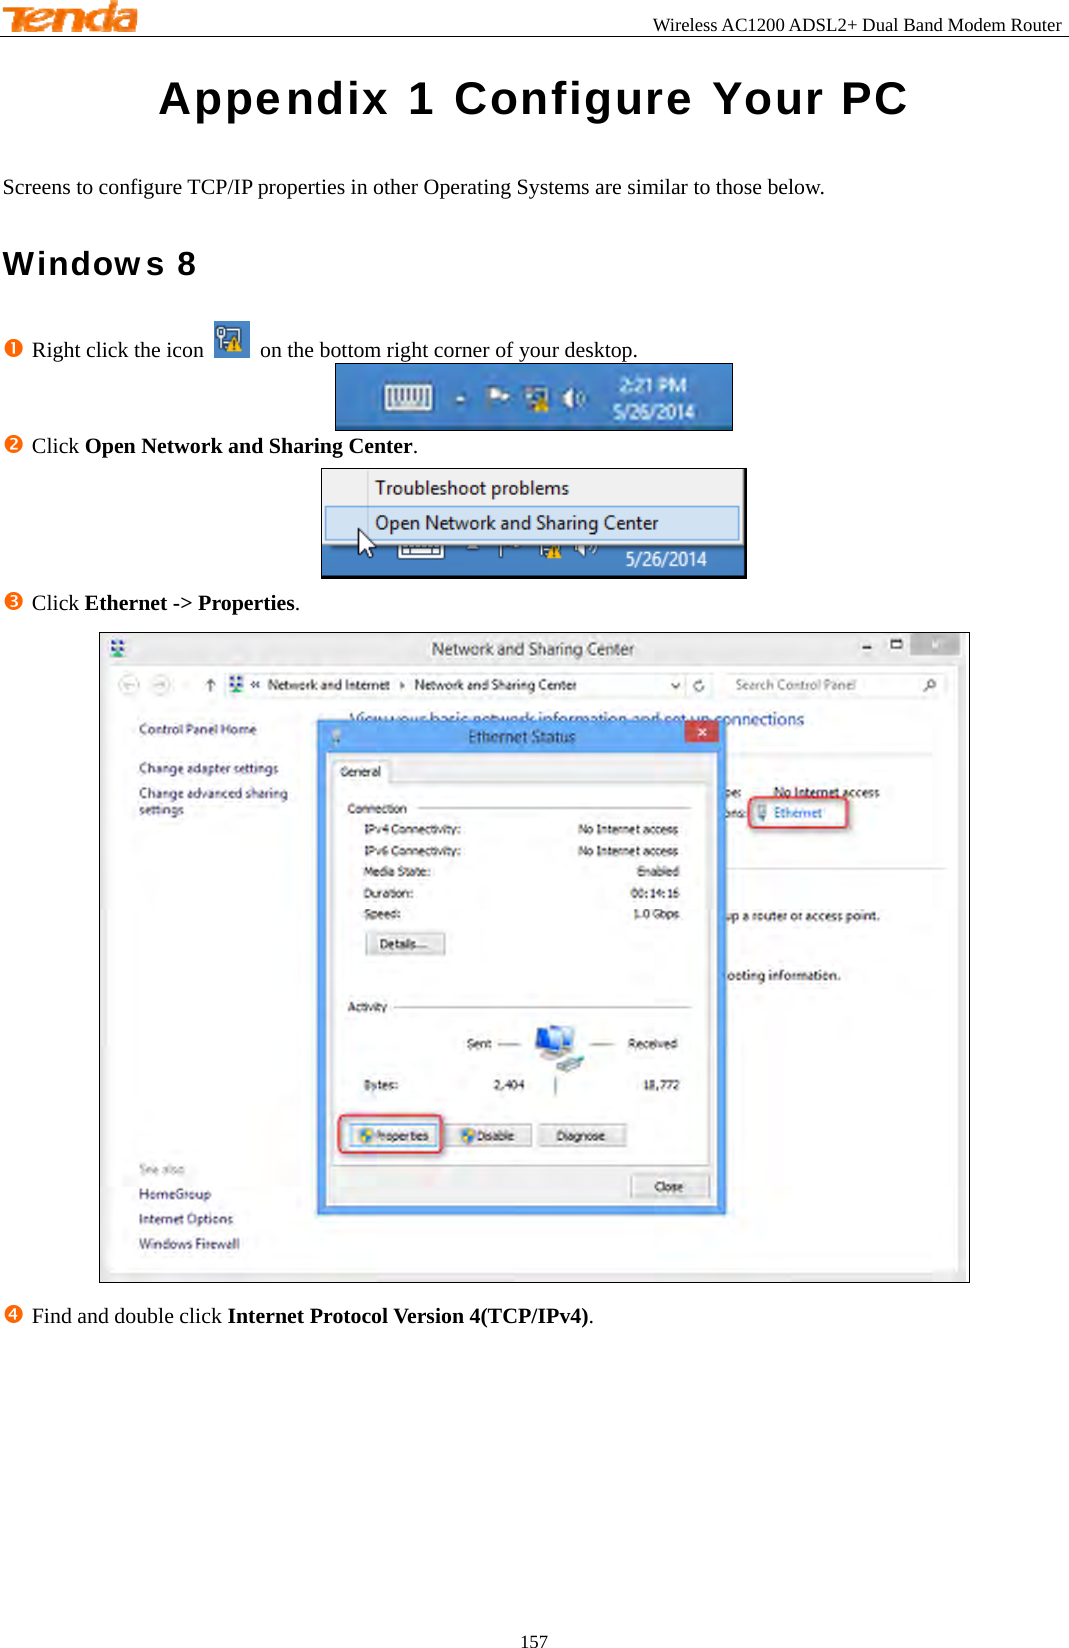
![Wireless AC1200 ADSL2+ Dual Band Modem Router 100 q Source IP address [/prefix length]: Enter the LAN IP address to be filtered. r Source Port (port or port: port): Specify a port number or a range of ports used by LAN PCs to access the Internet. If you are unsure, leave it blank. s Destination IP address [/prefix length]: Specify the external network IP address to be accessed by specified LAN PCs. t Destination Port (port or port:port): Specify a port number or a range of ports used by LAN PCs to access external network. u Click Apply/Save to save and activate the filter. Incoming IP Filtering Setup Click Advance Setup > Security > IP Filtering > Incoming, and then click Add to configure incoming IP filters. Ø](https://usermanual.wiki/TENDA-TECHNOLOGY/D1201/User-Guide-2337720-Page-104.png)
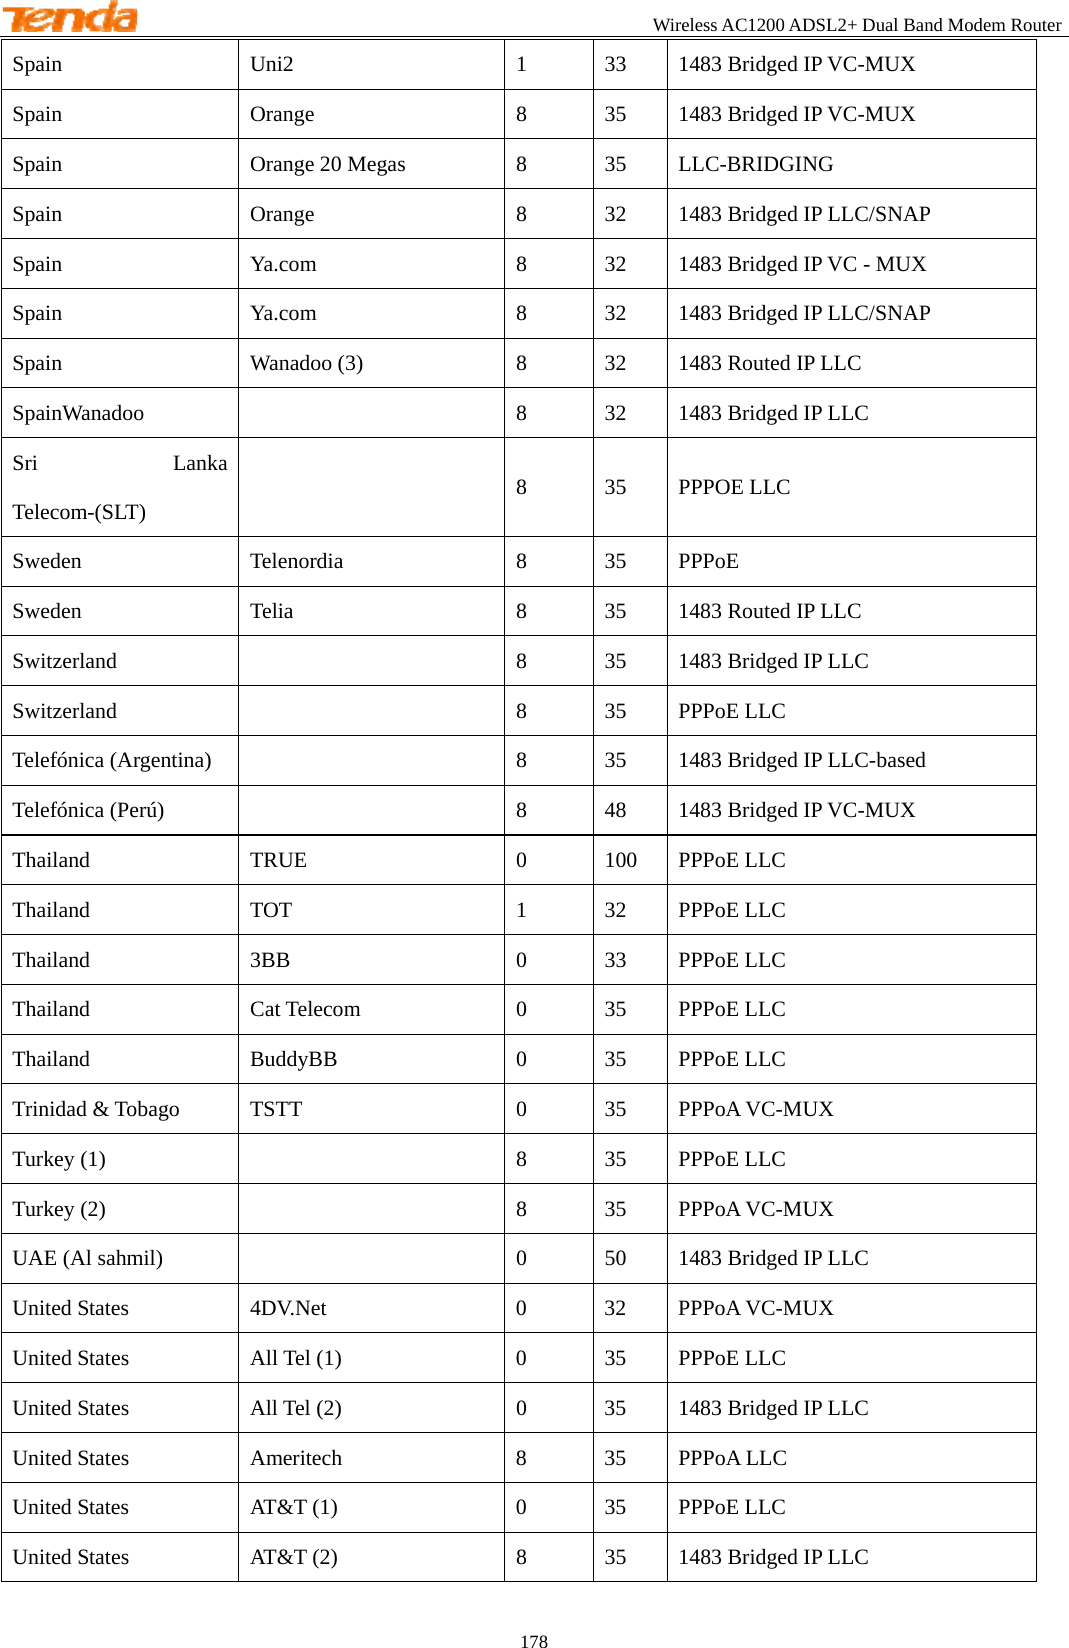
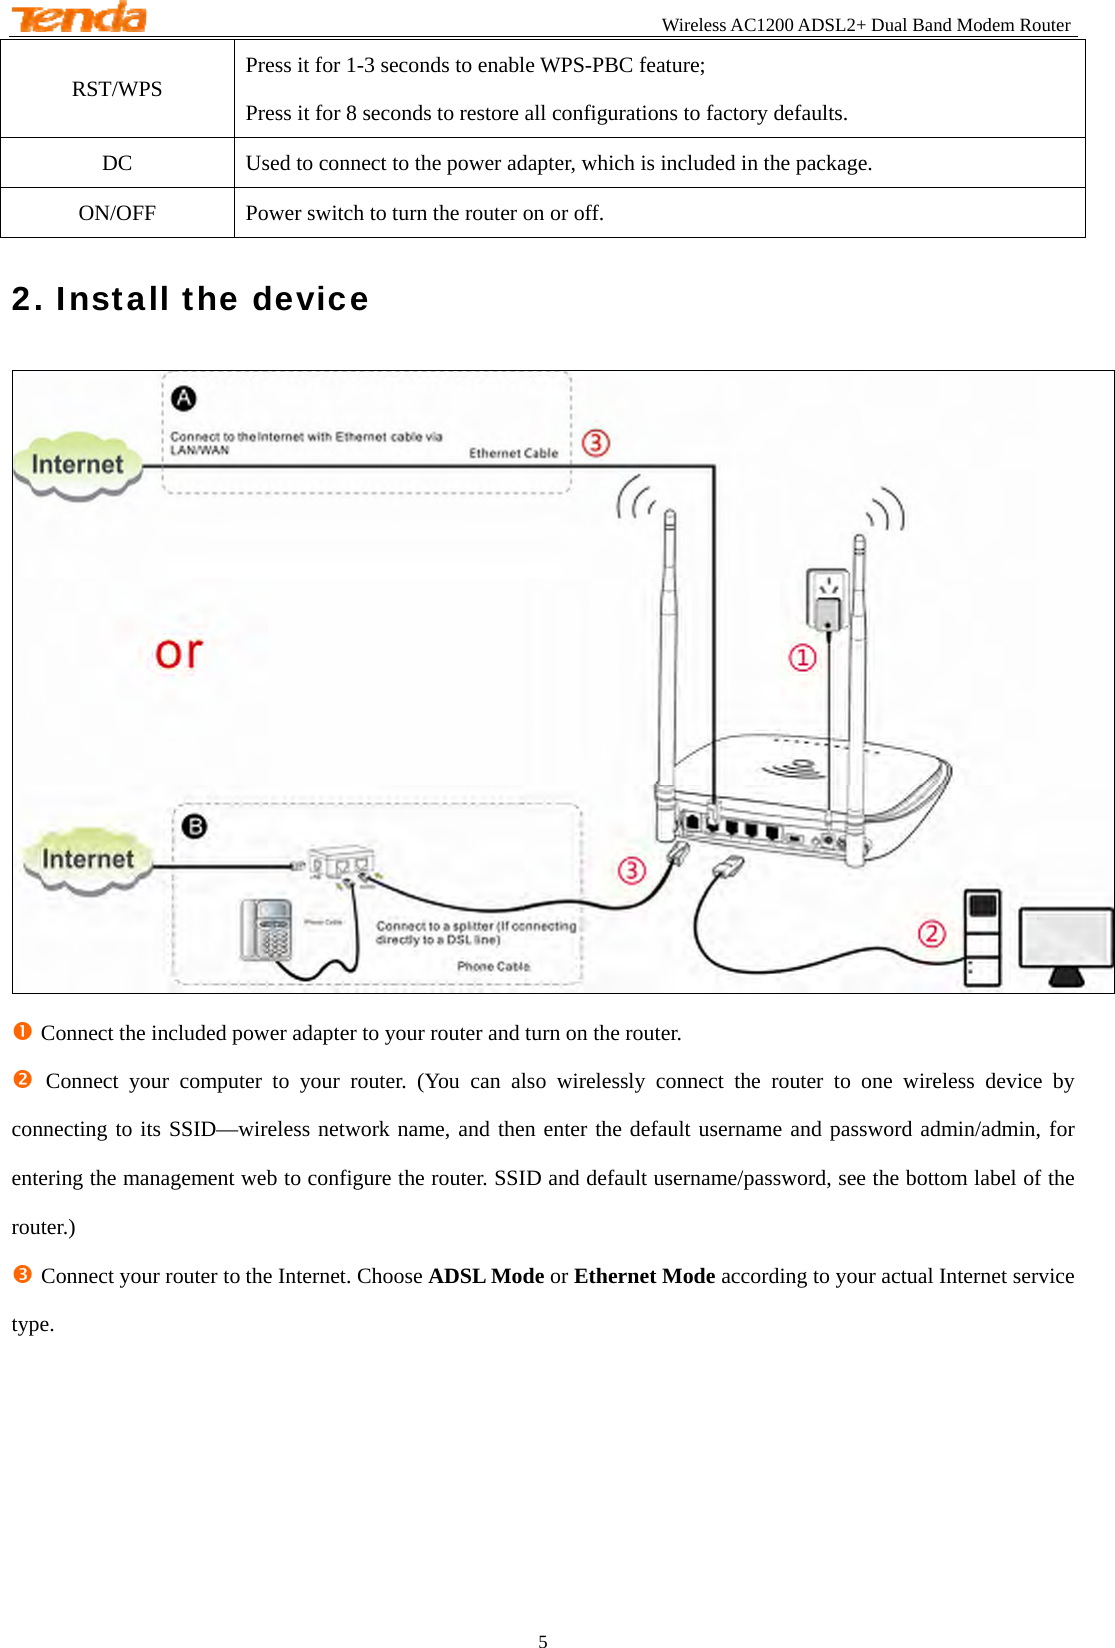
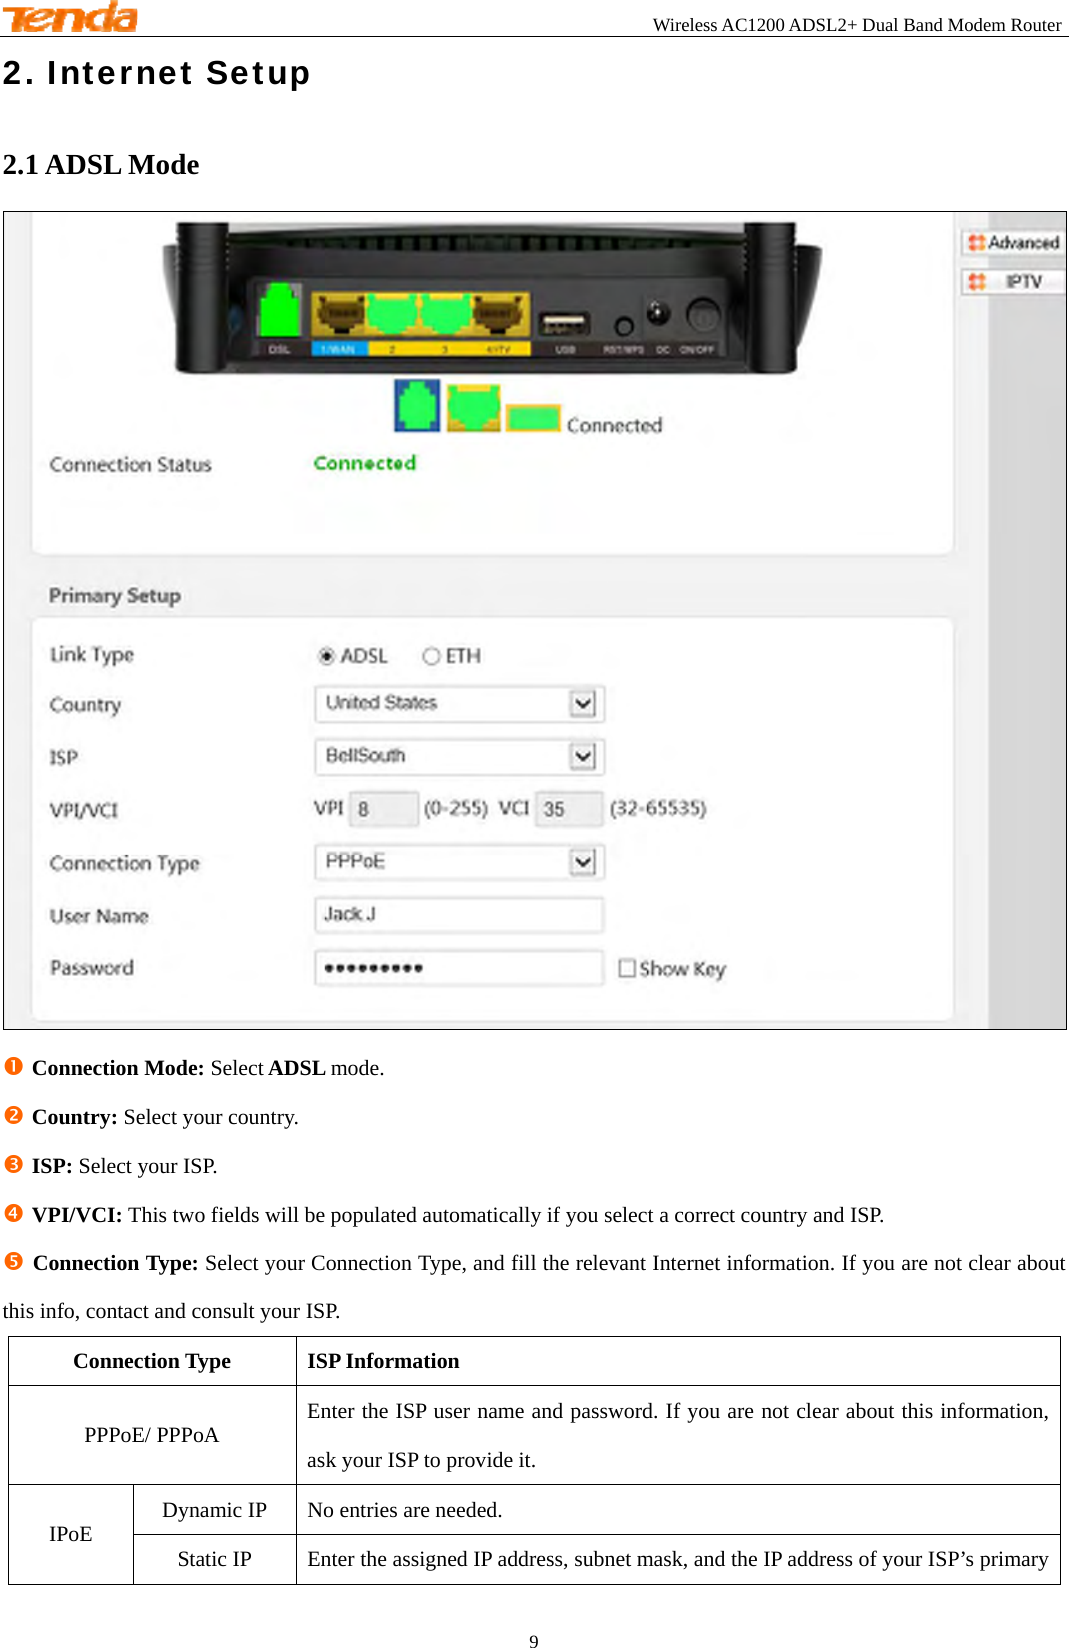
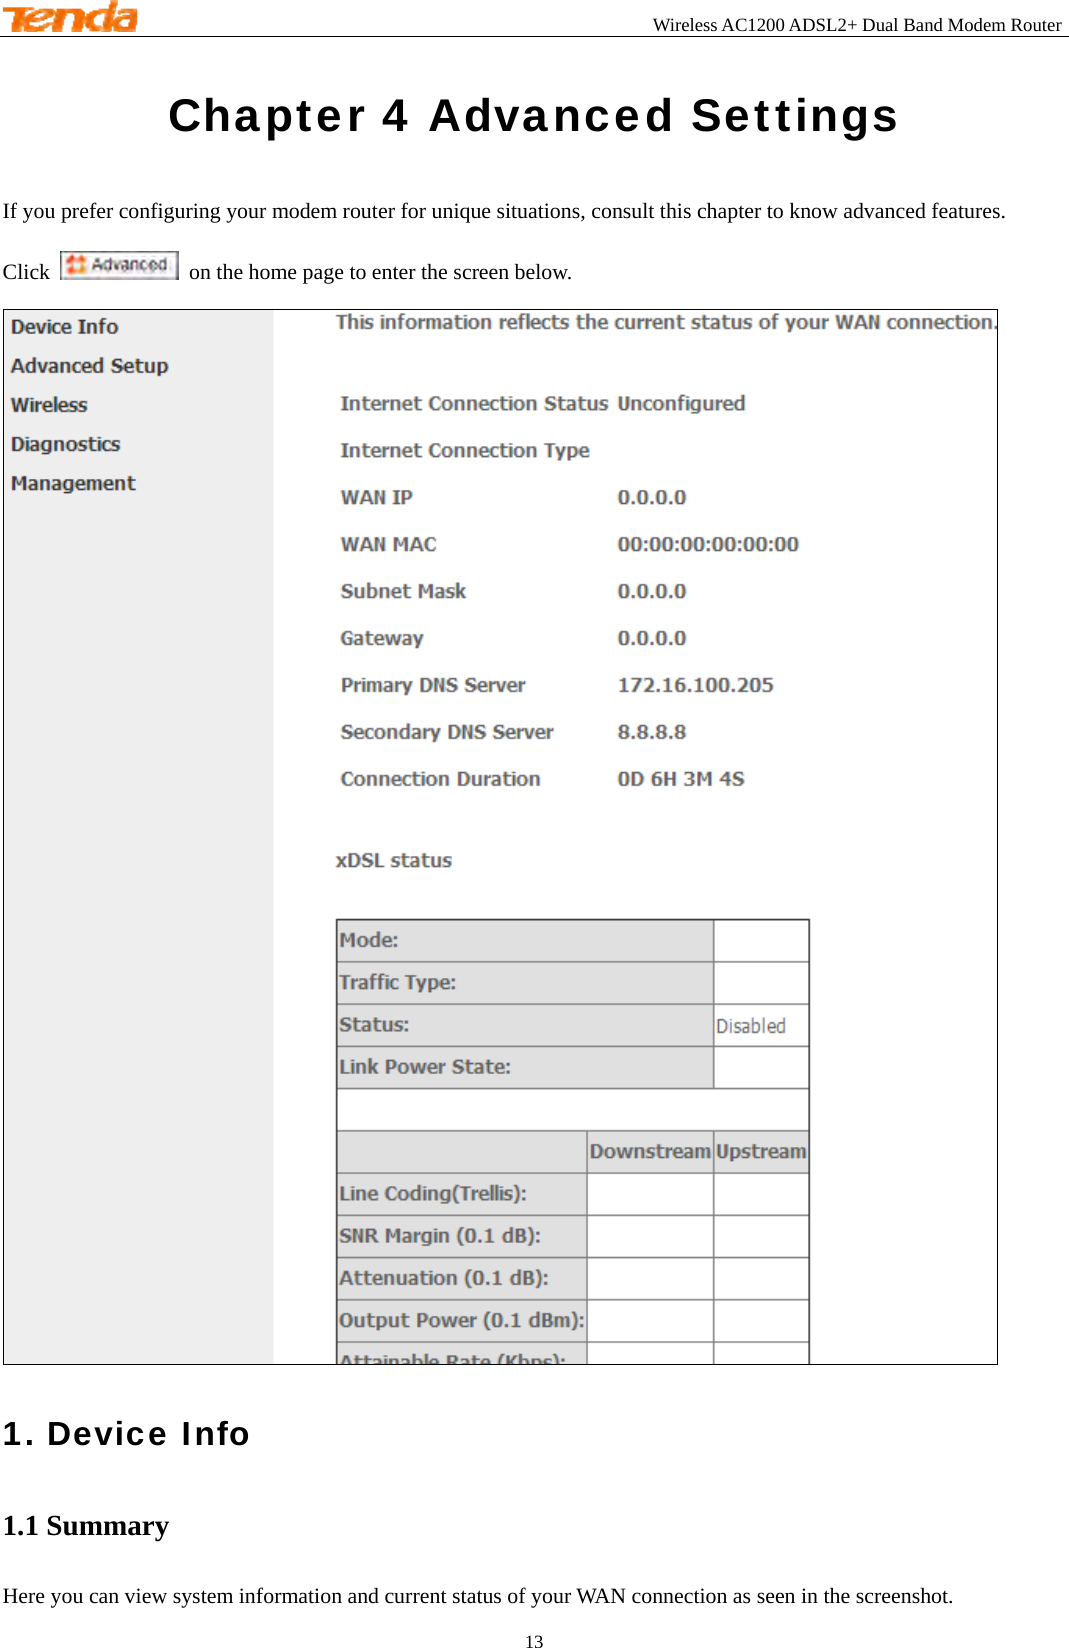
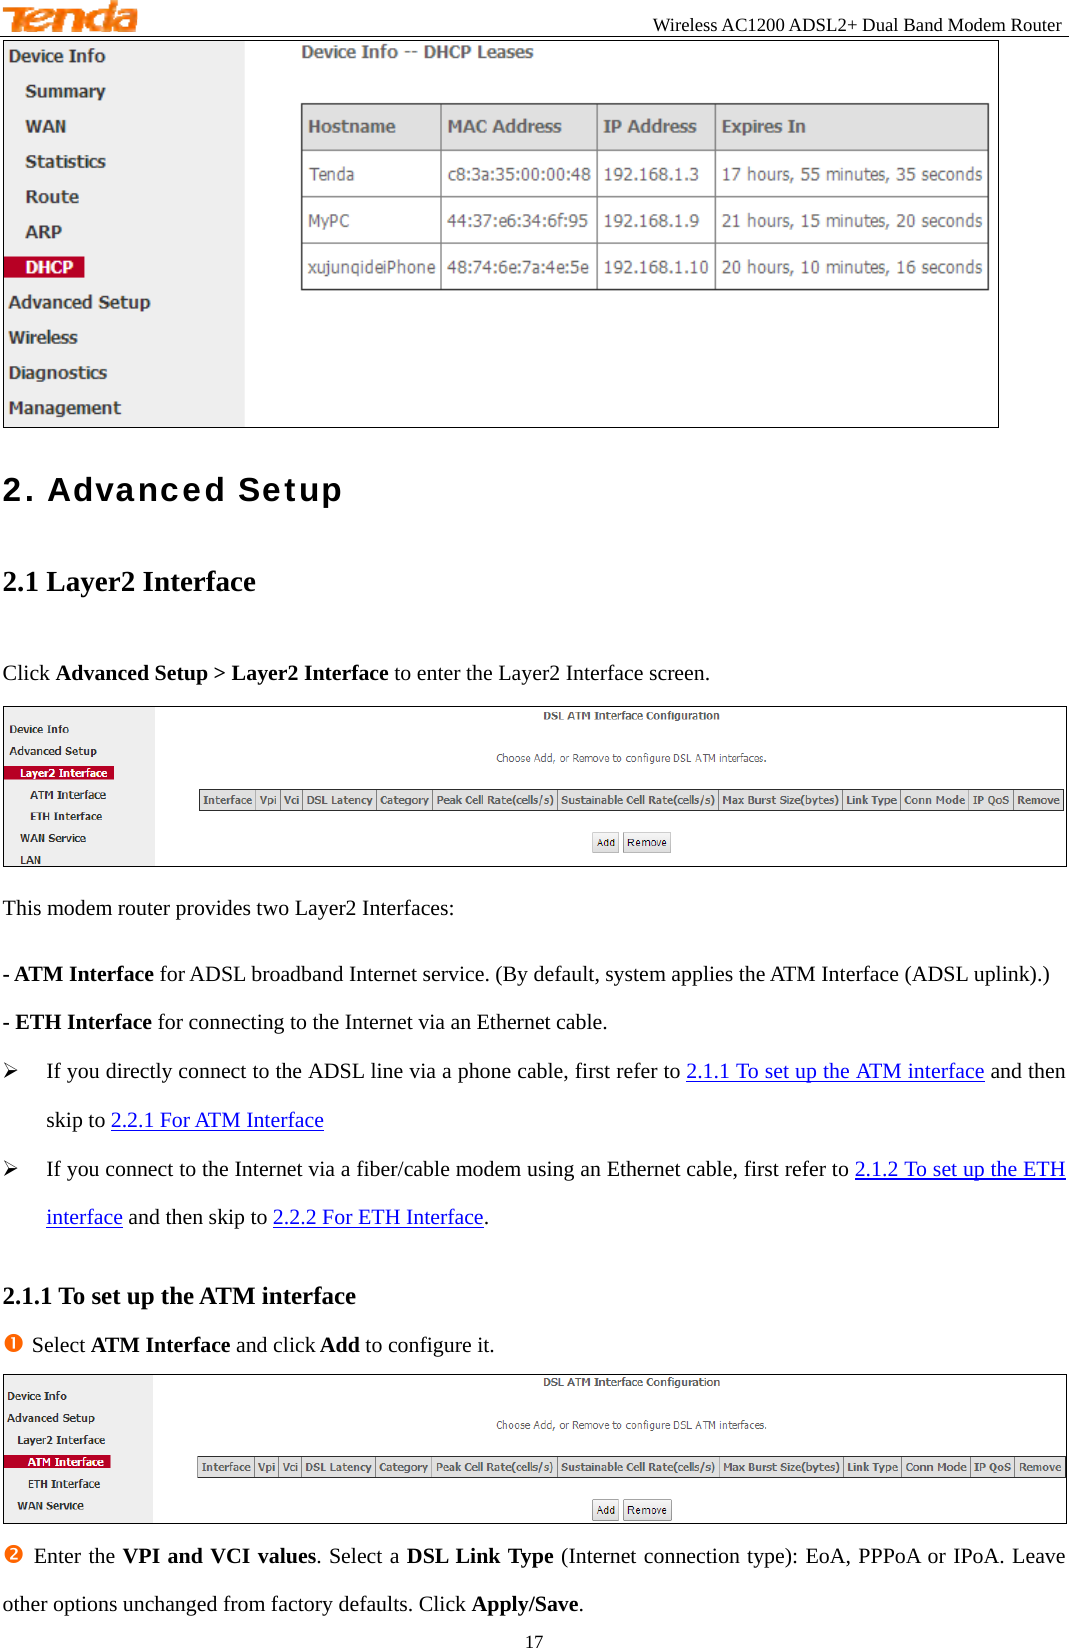
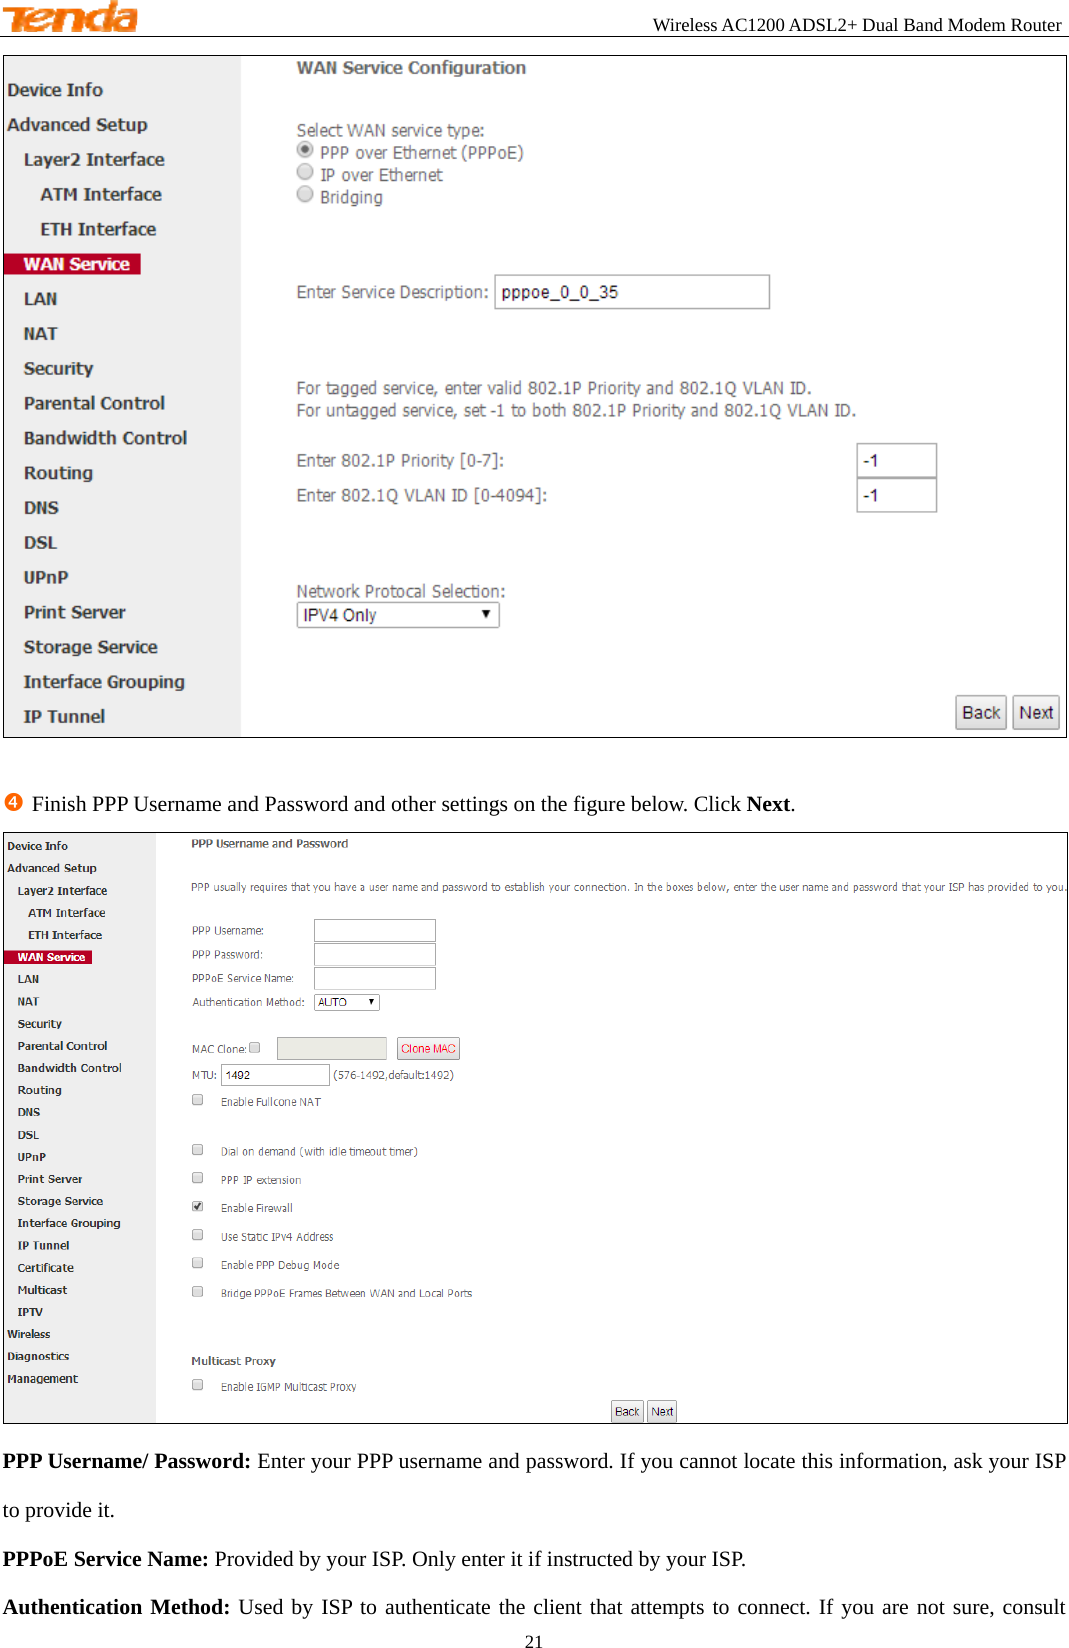
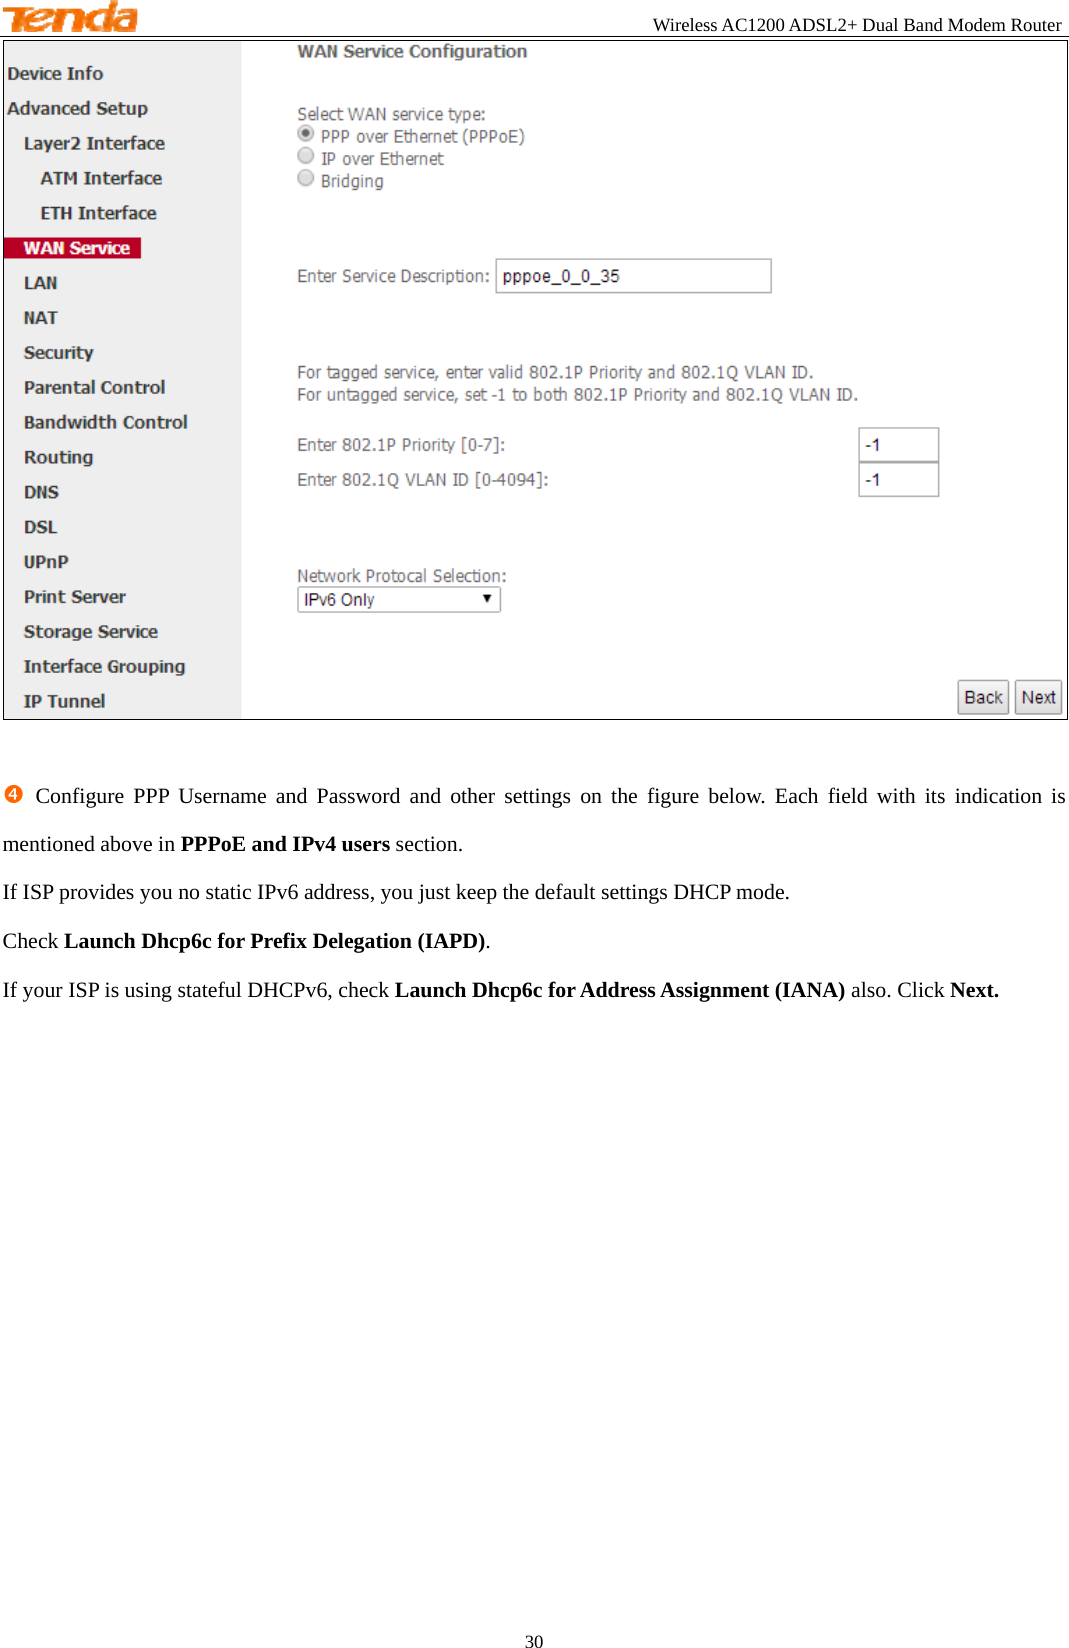
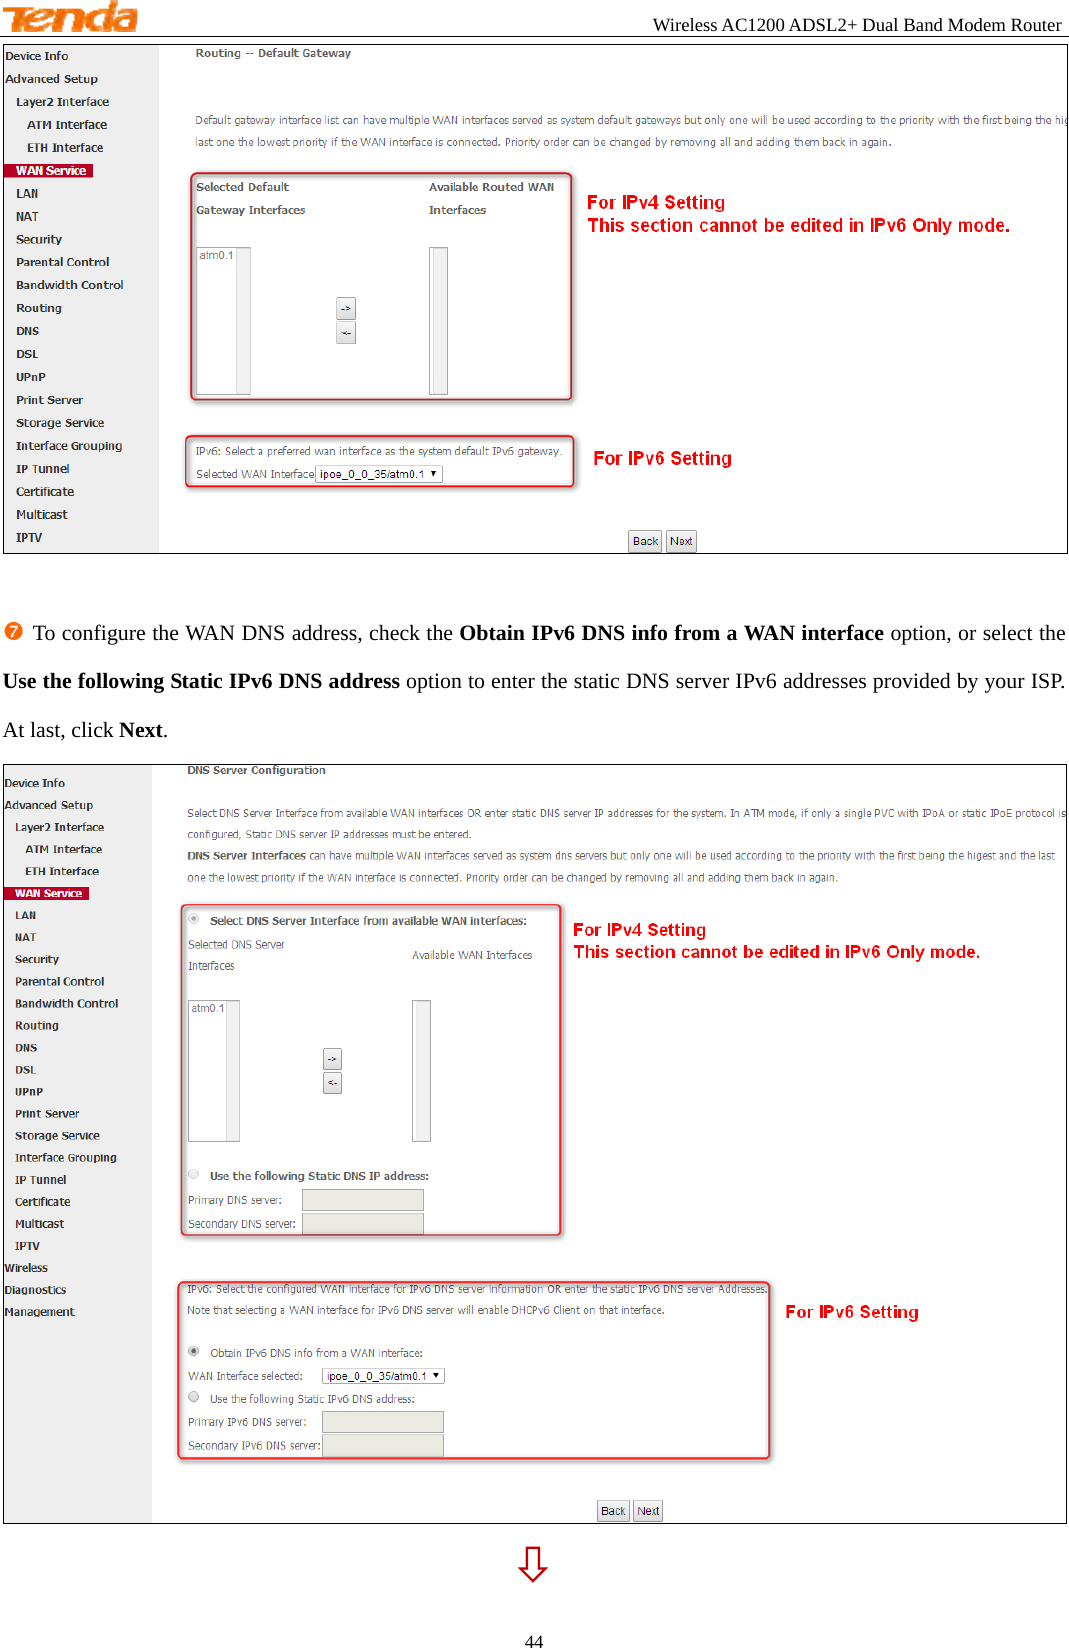
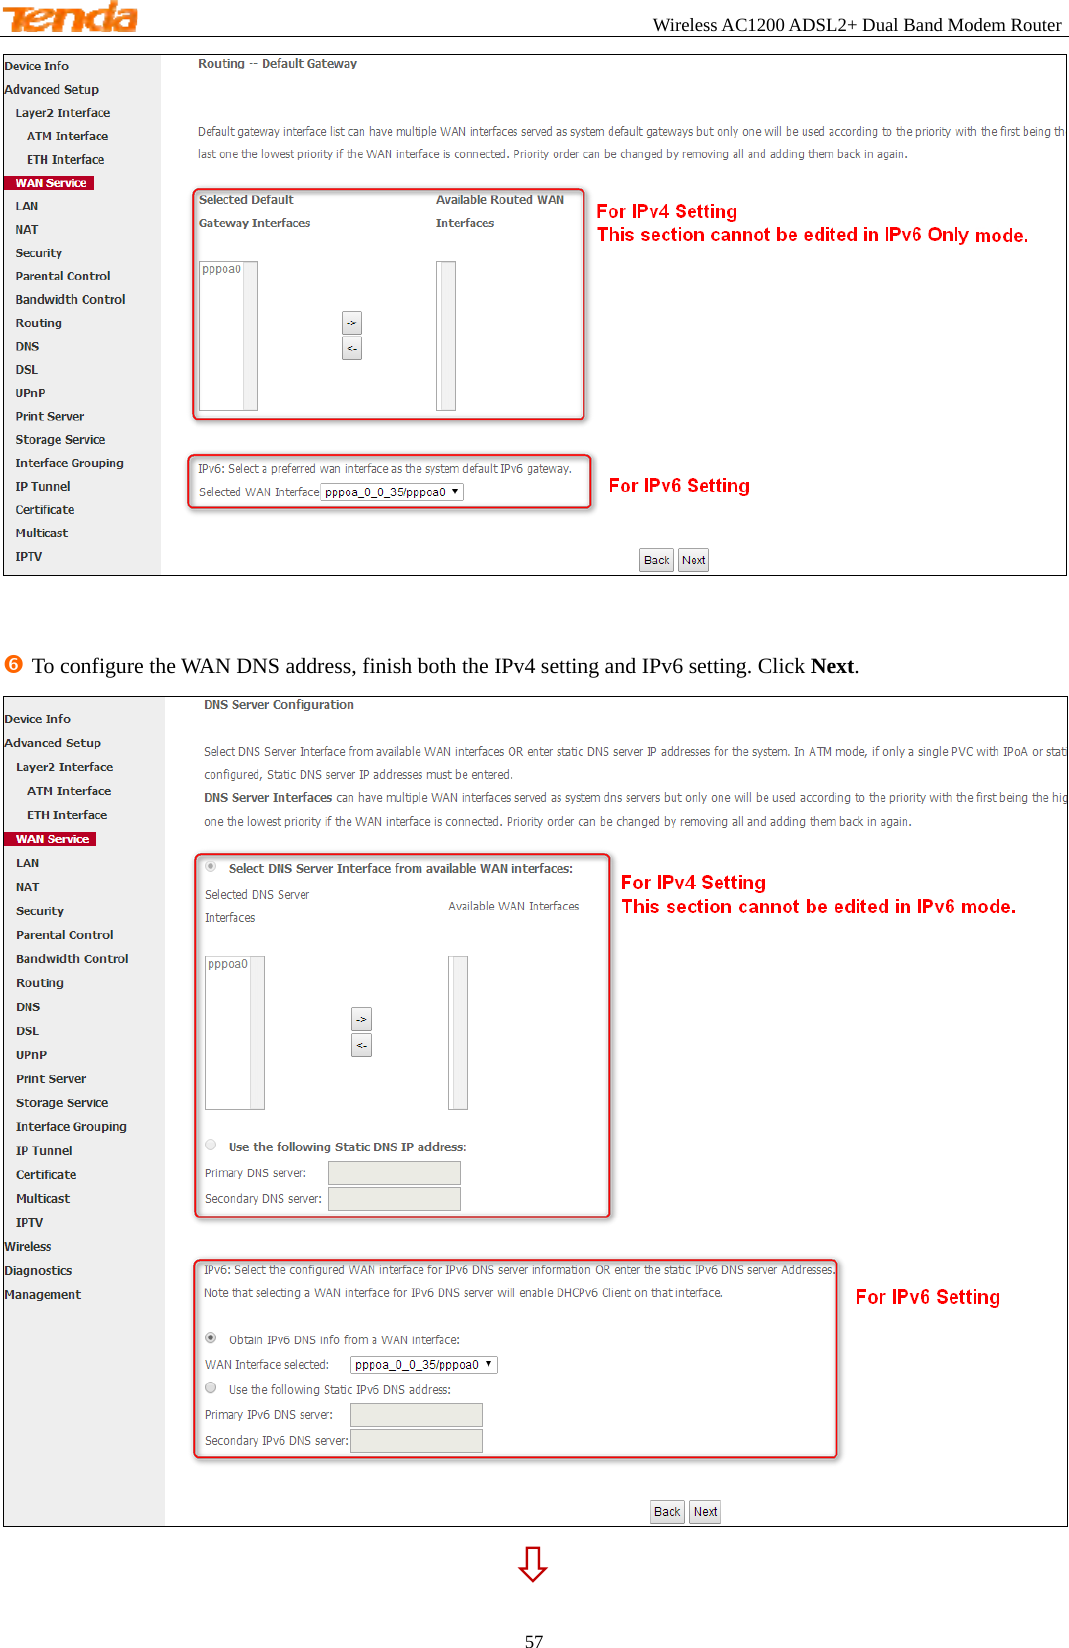
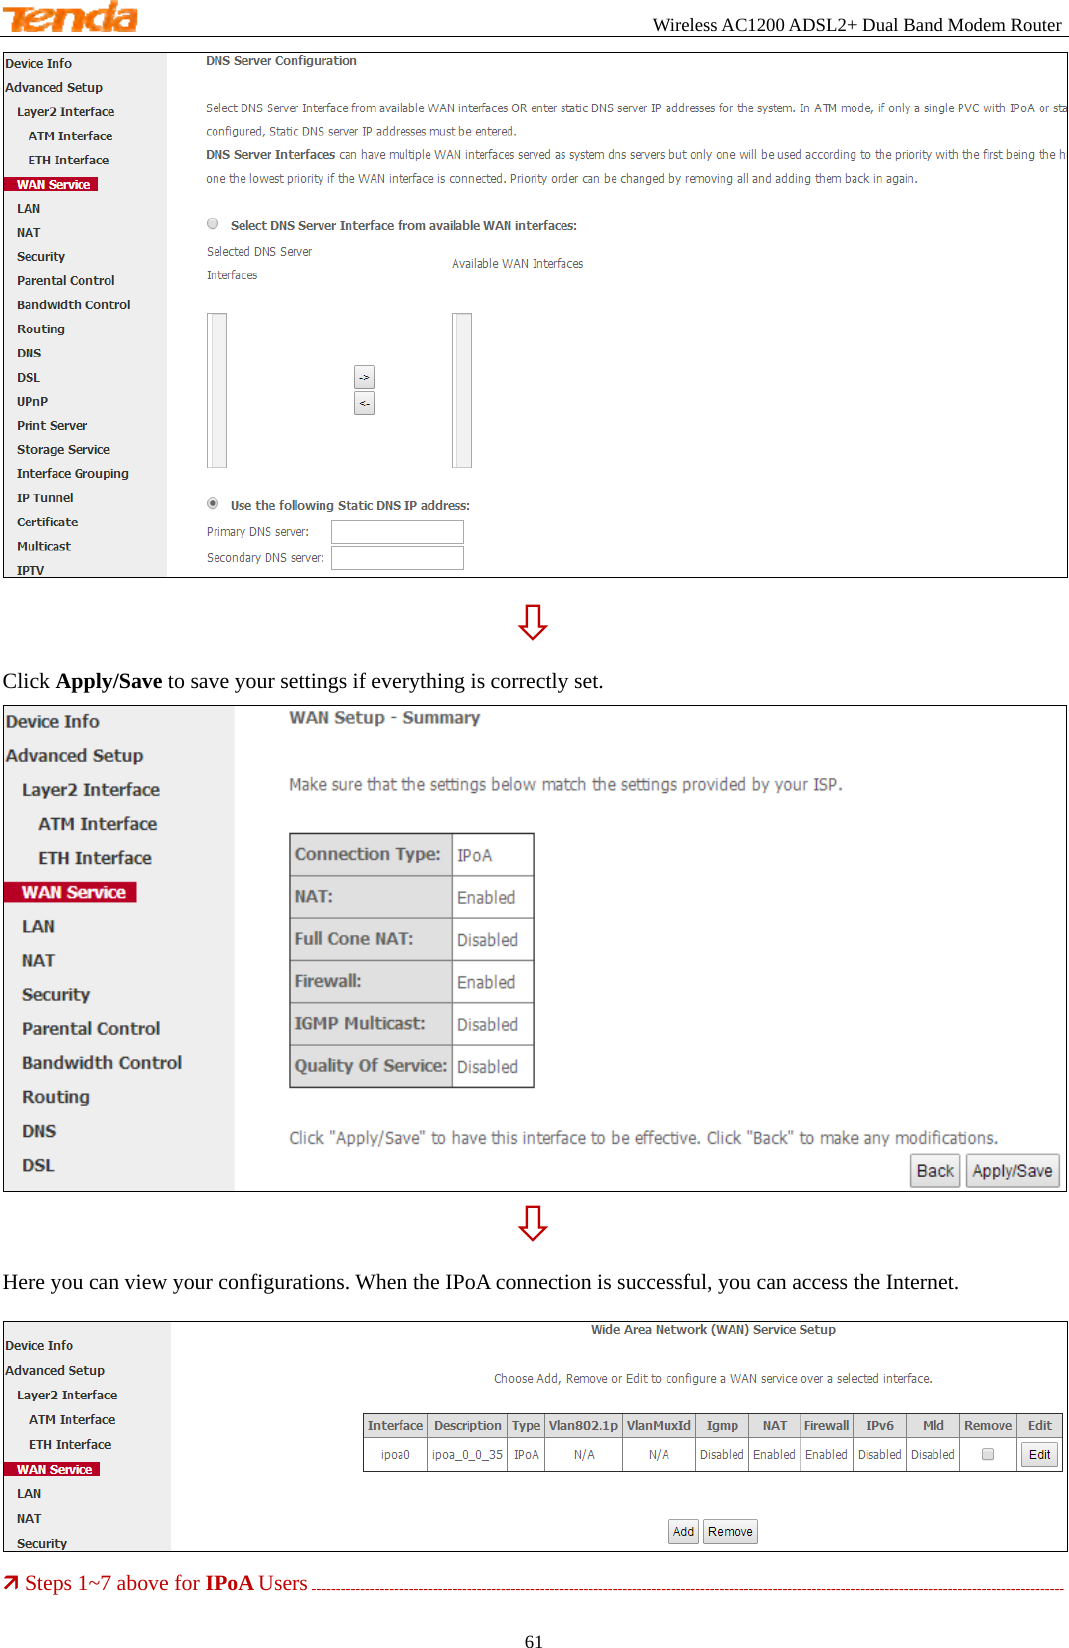
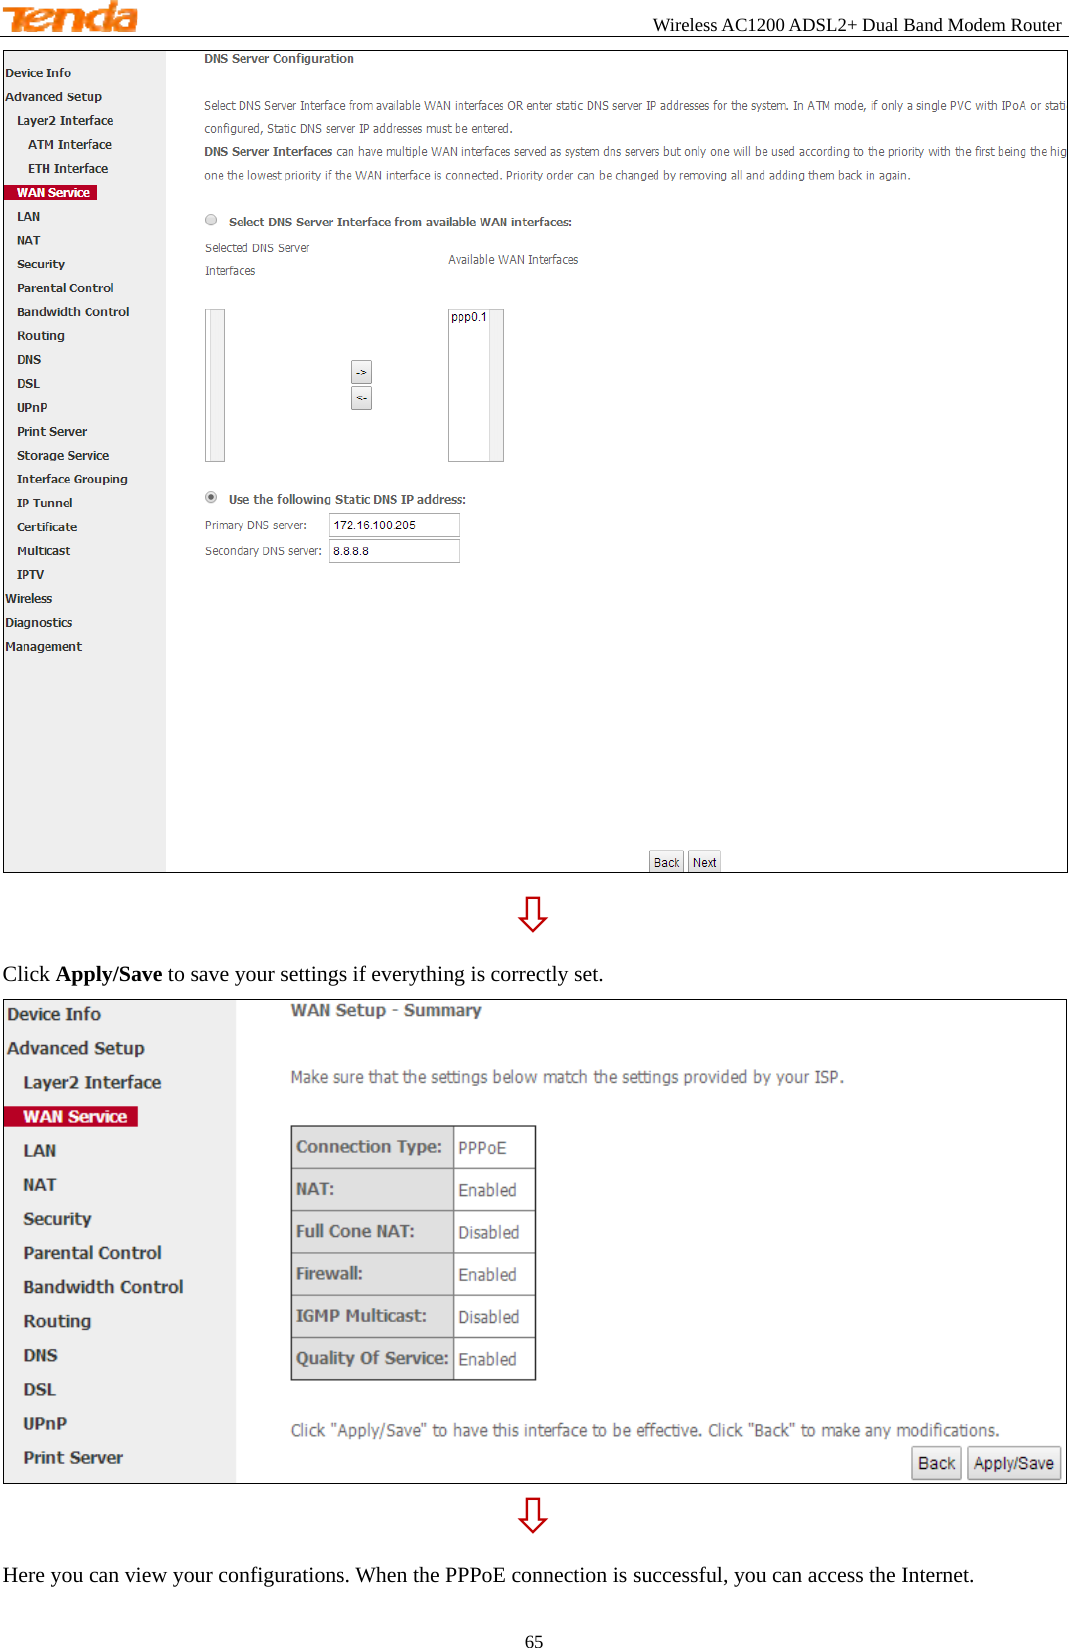
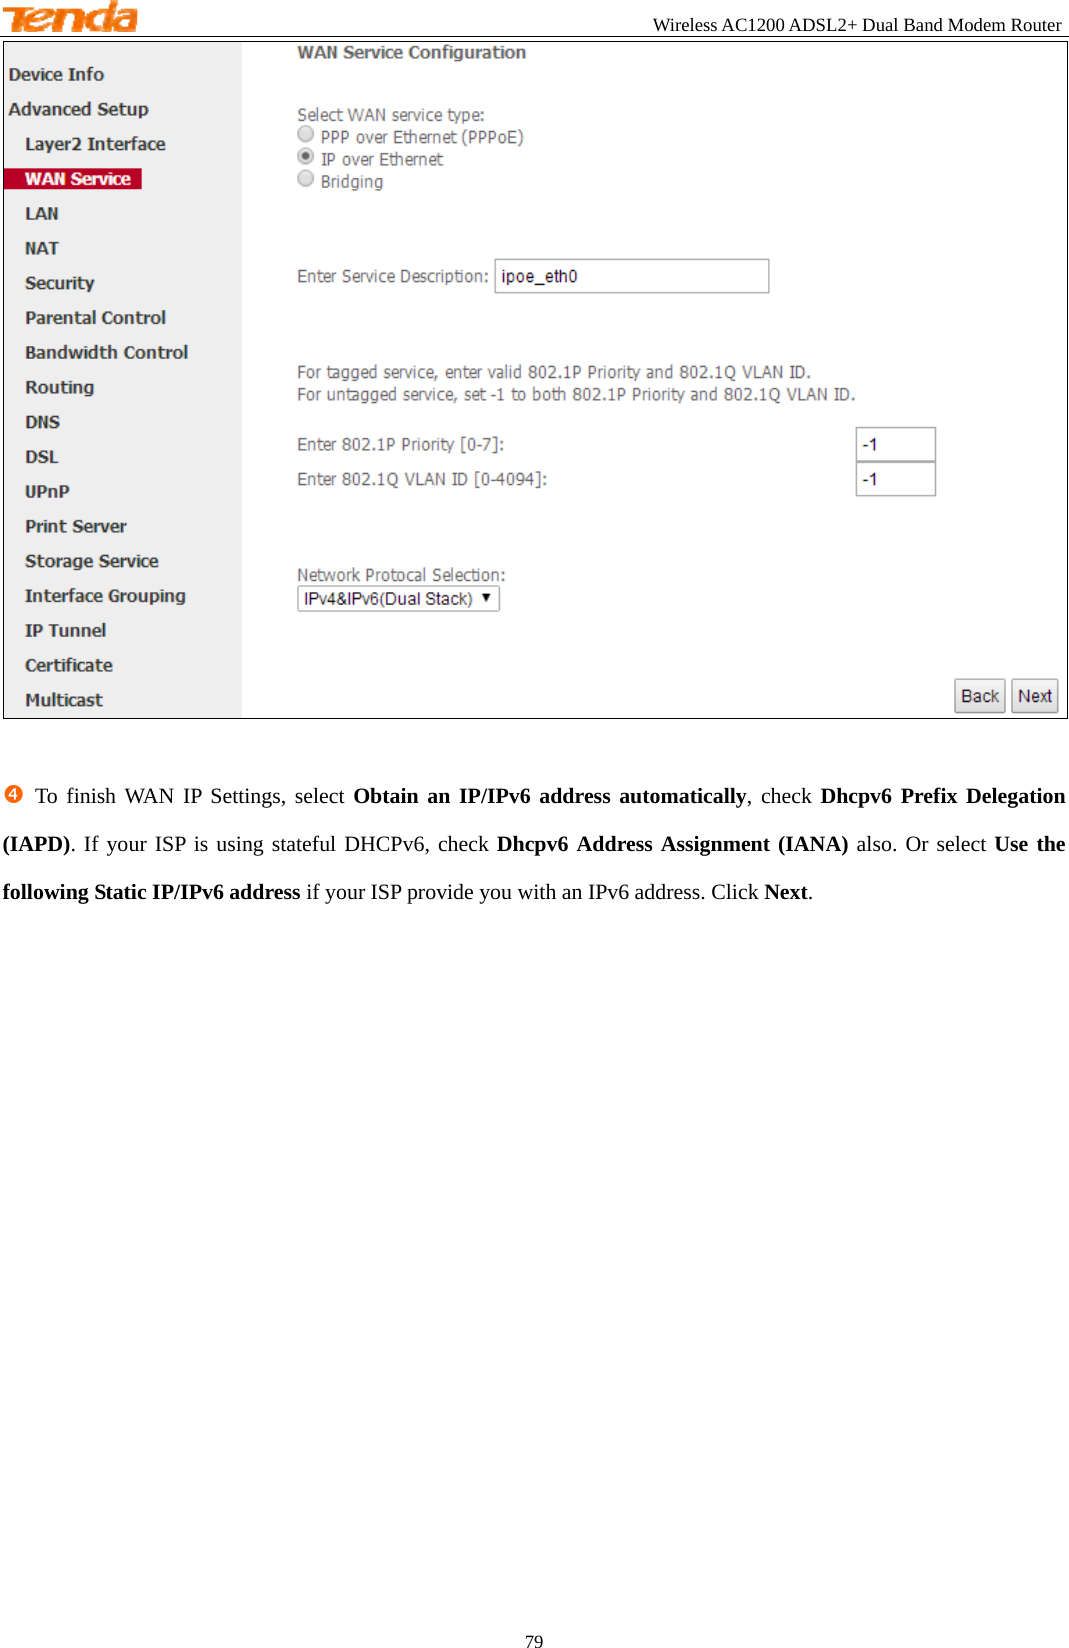
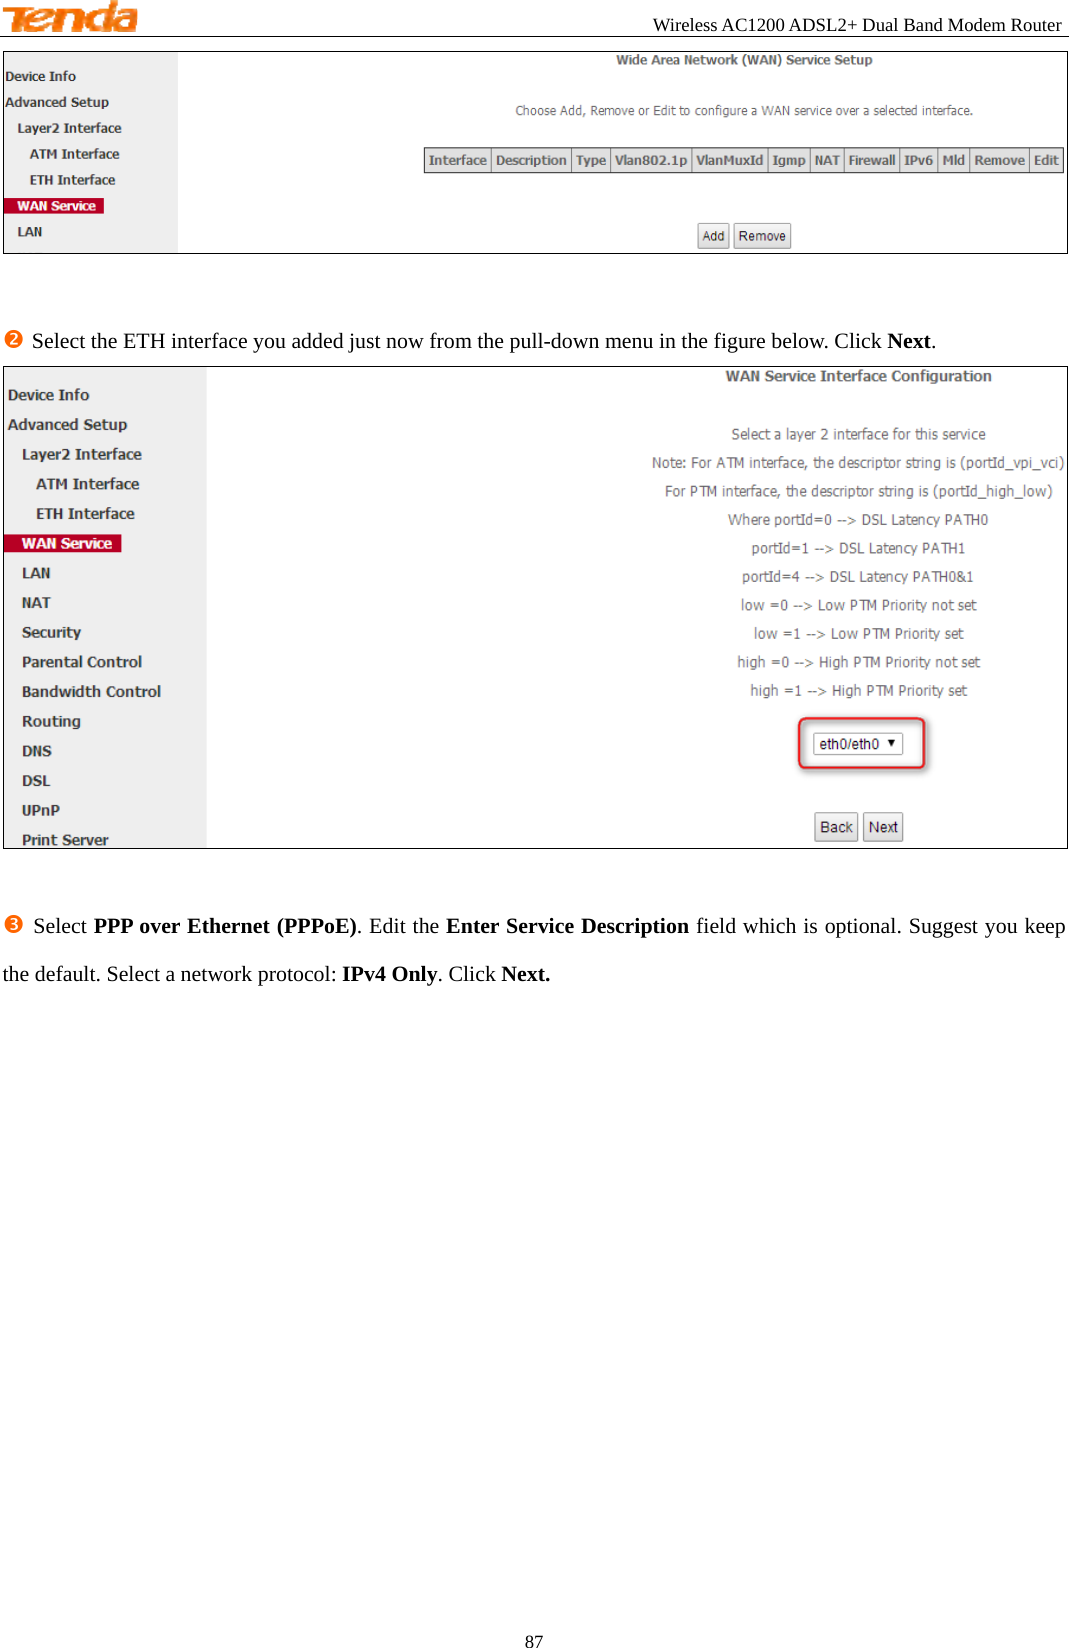
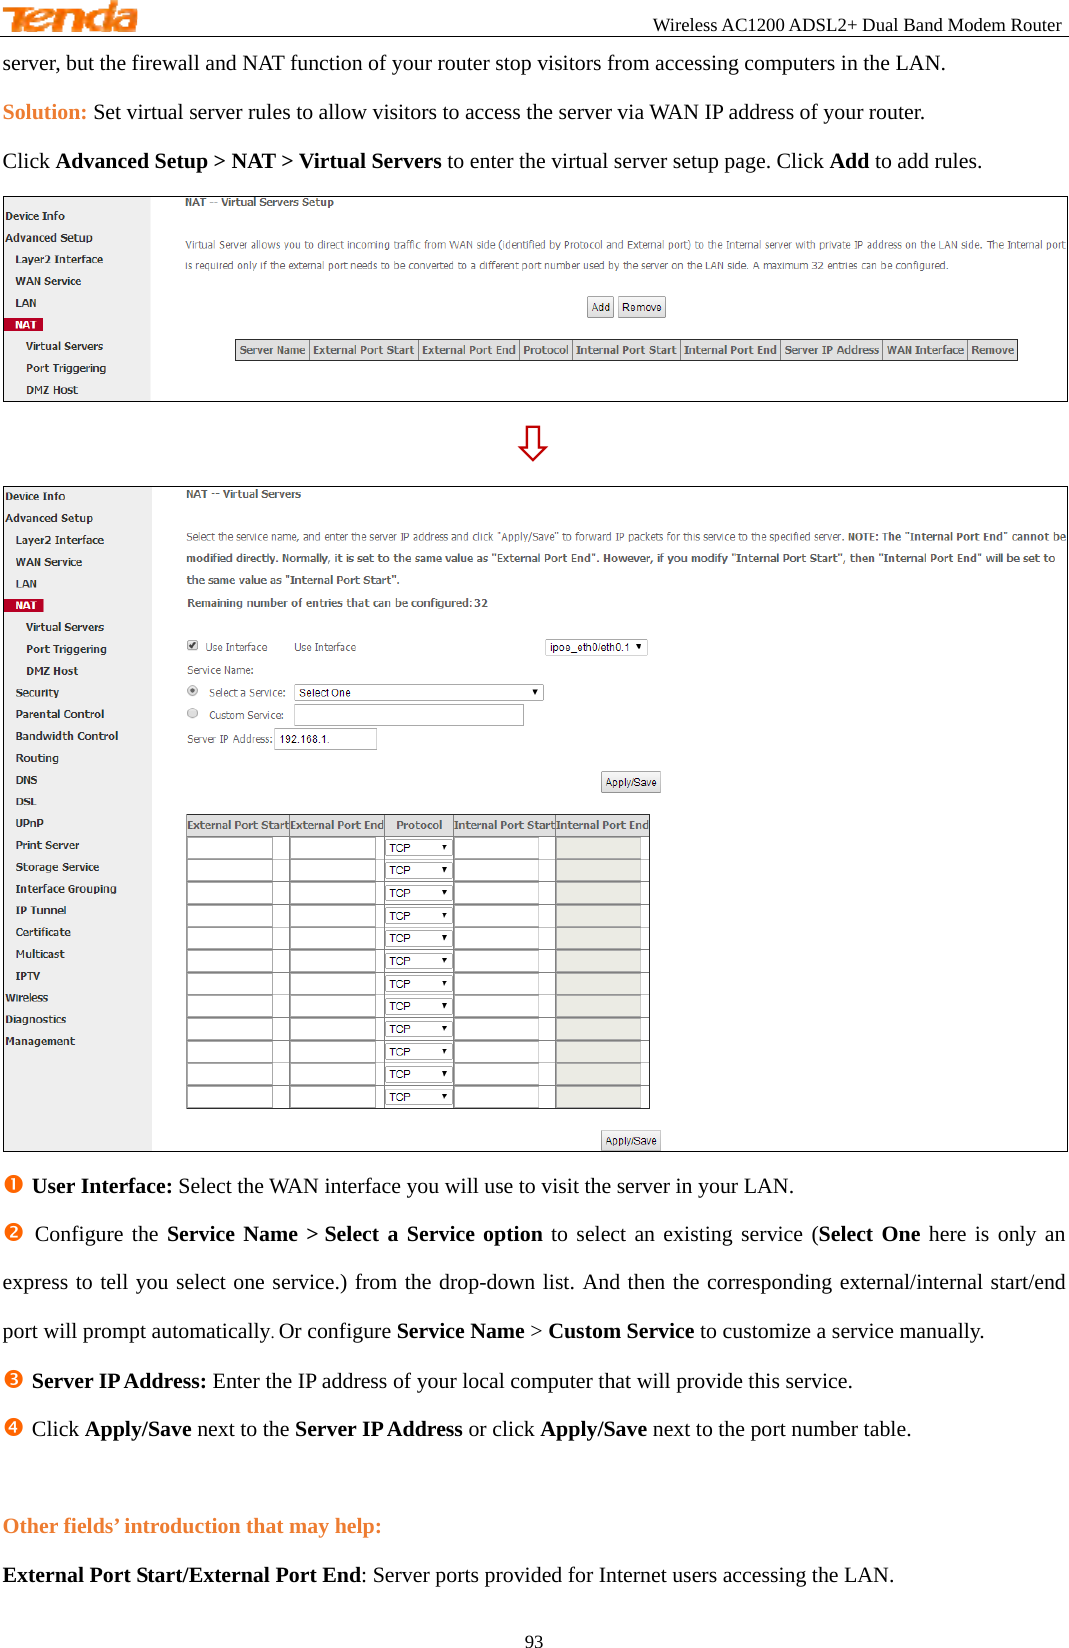
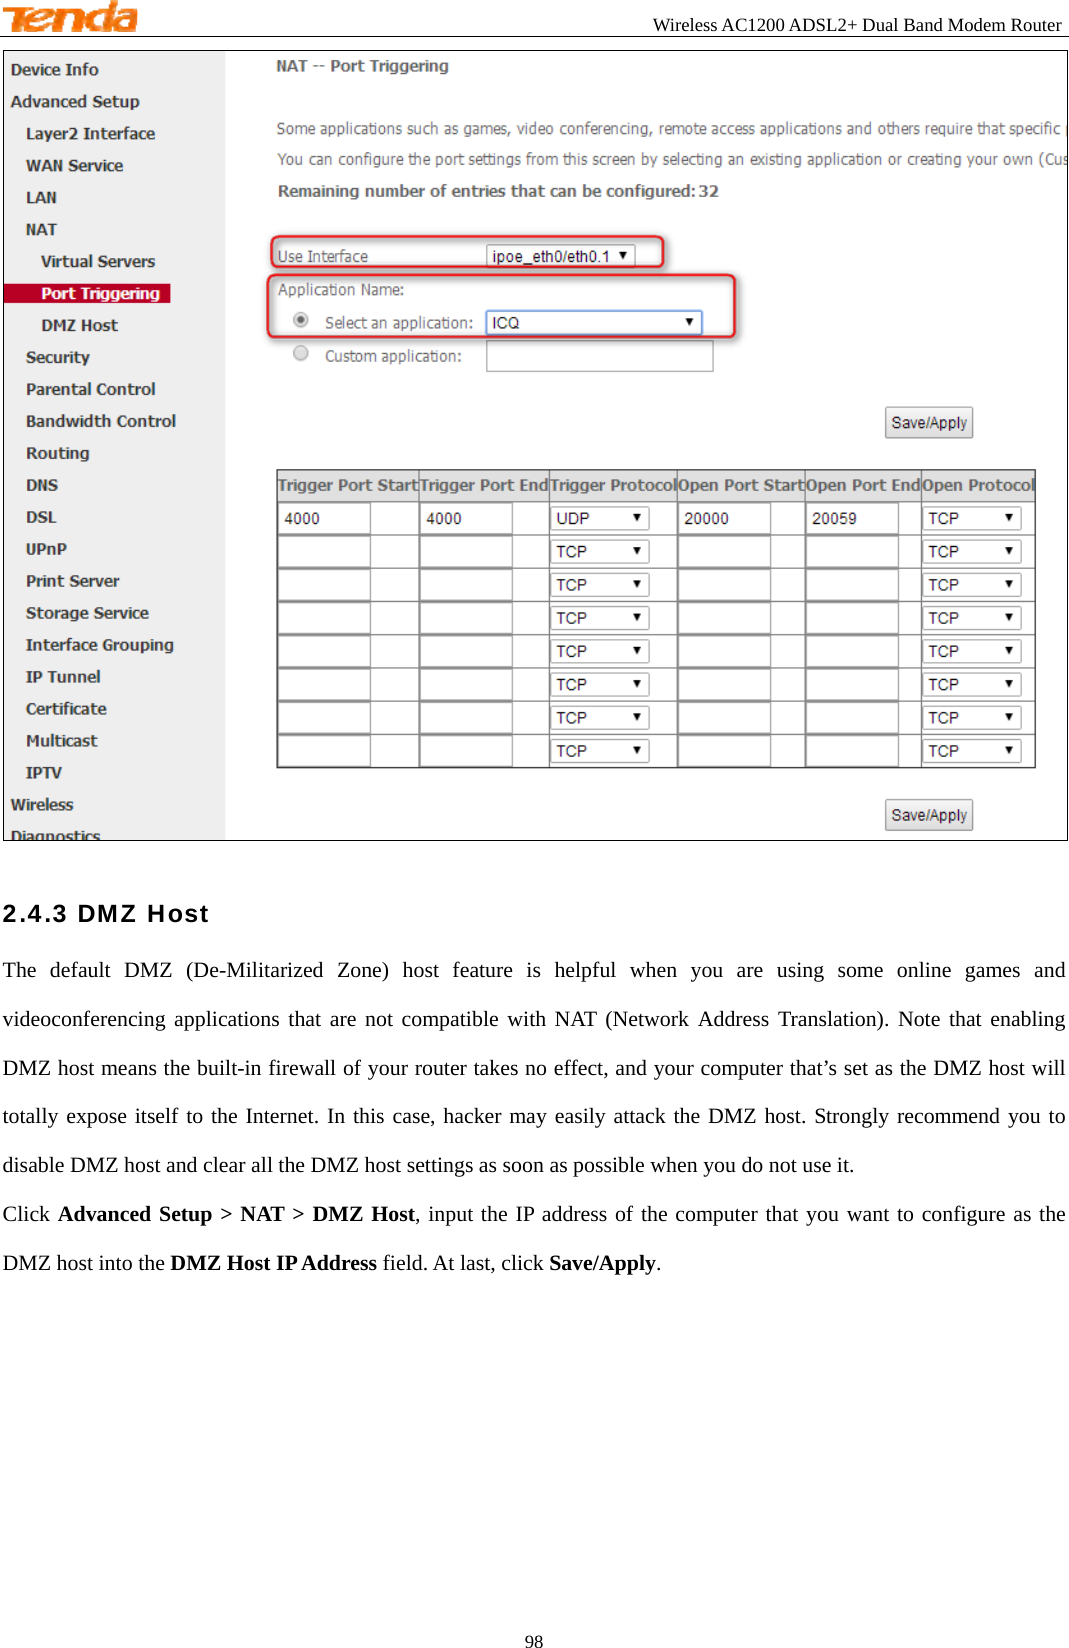
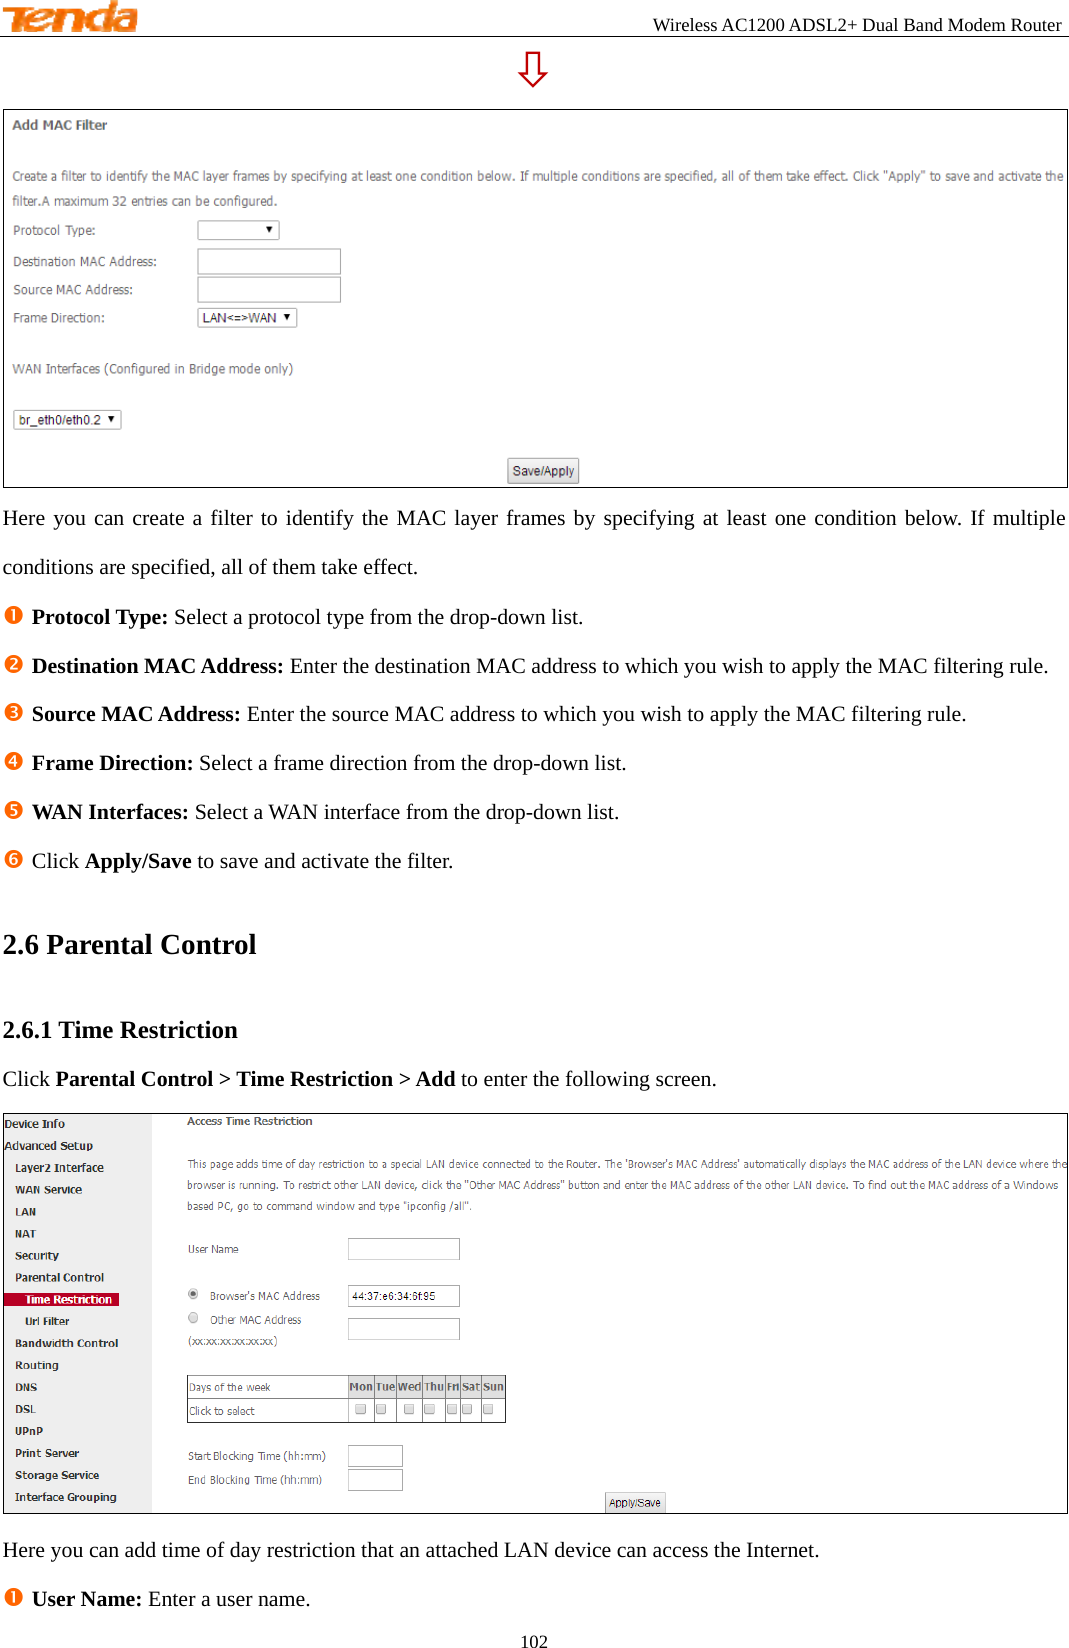
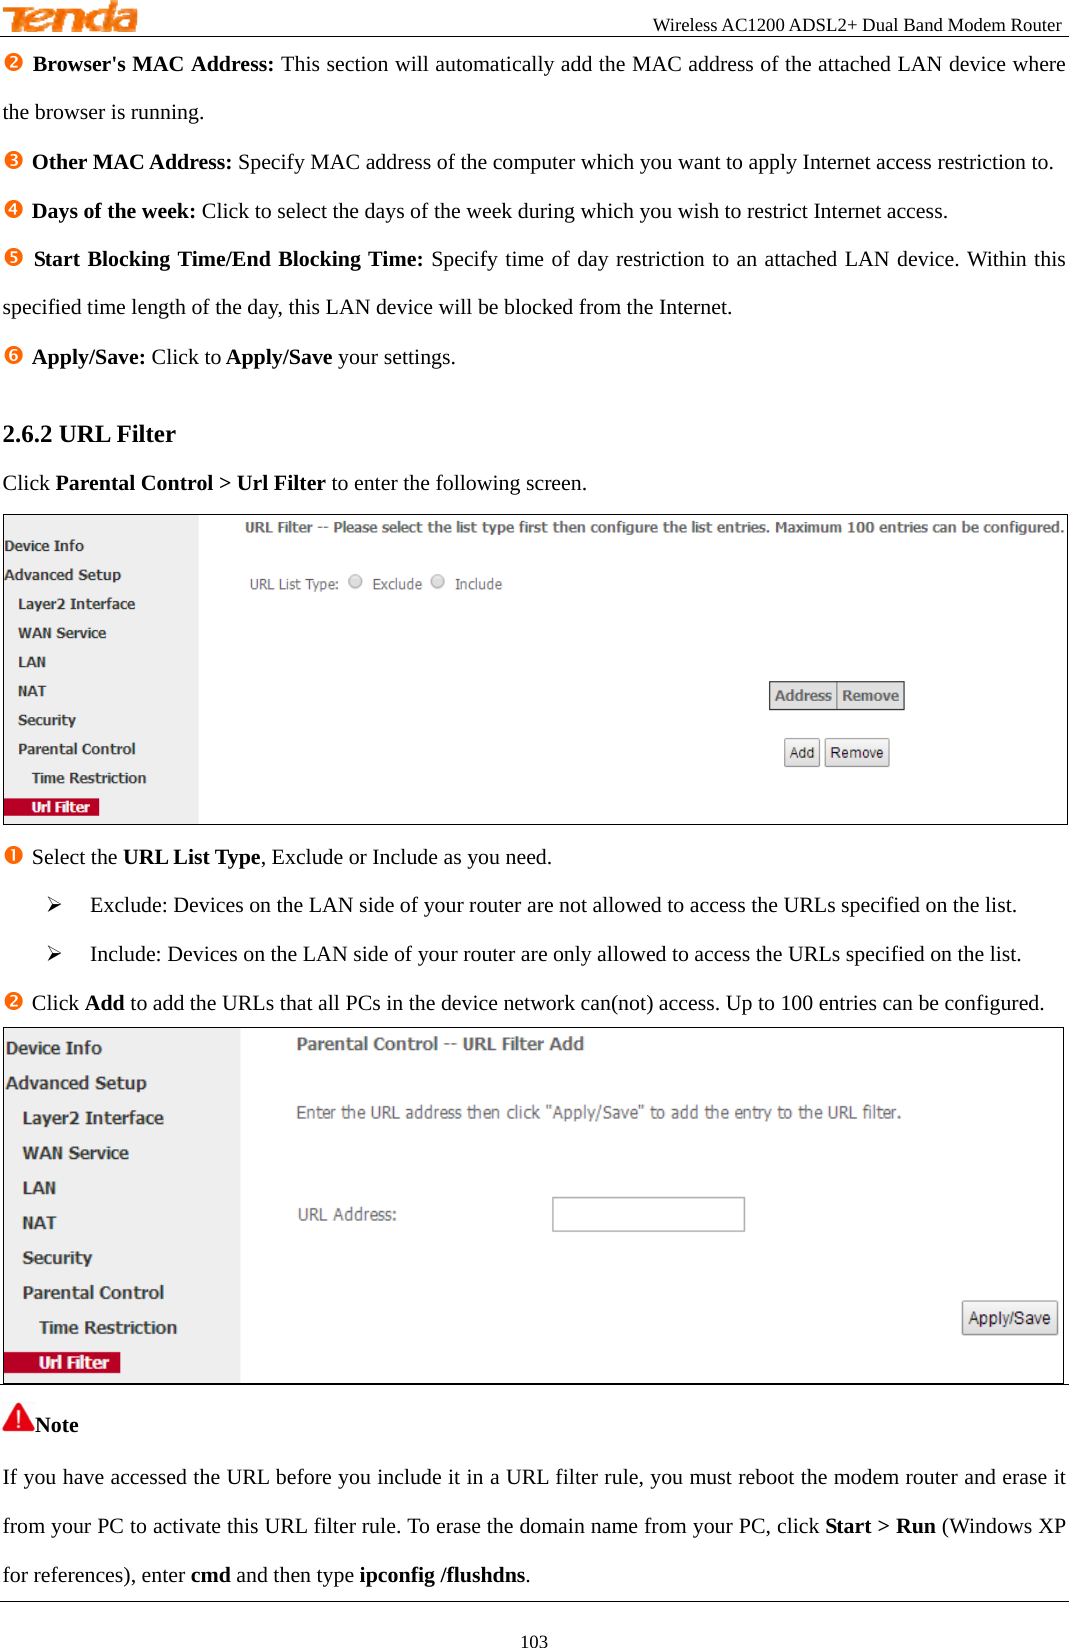
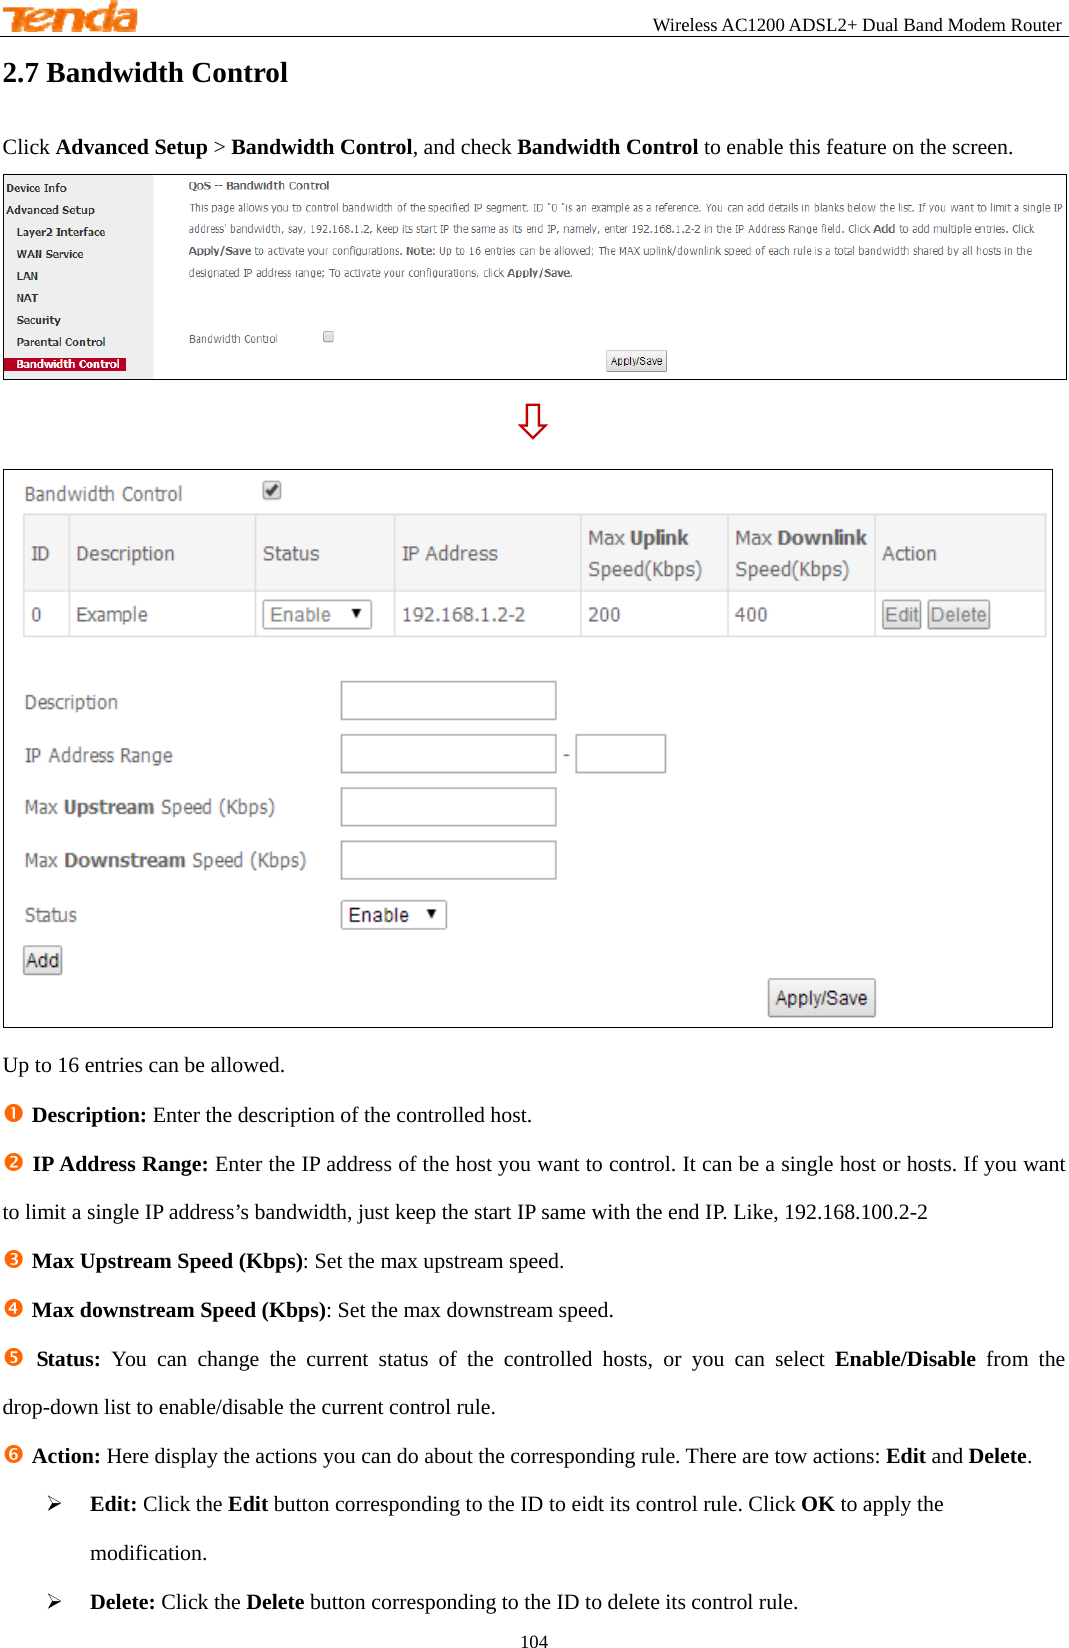
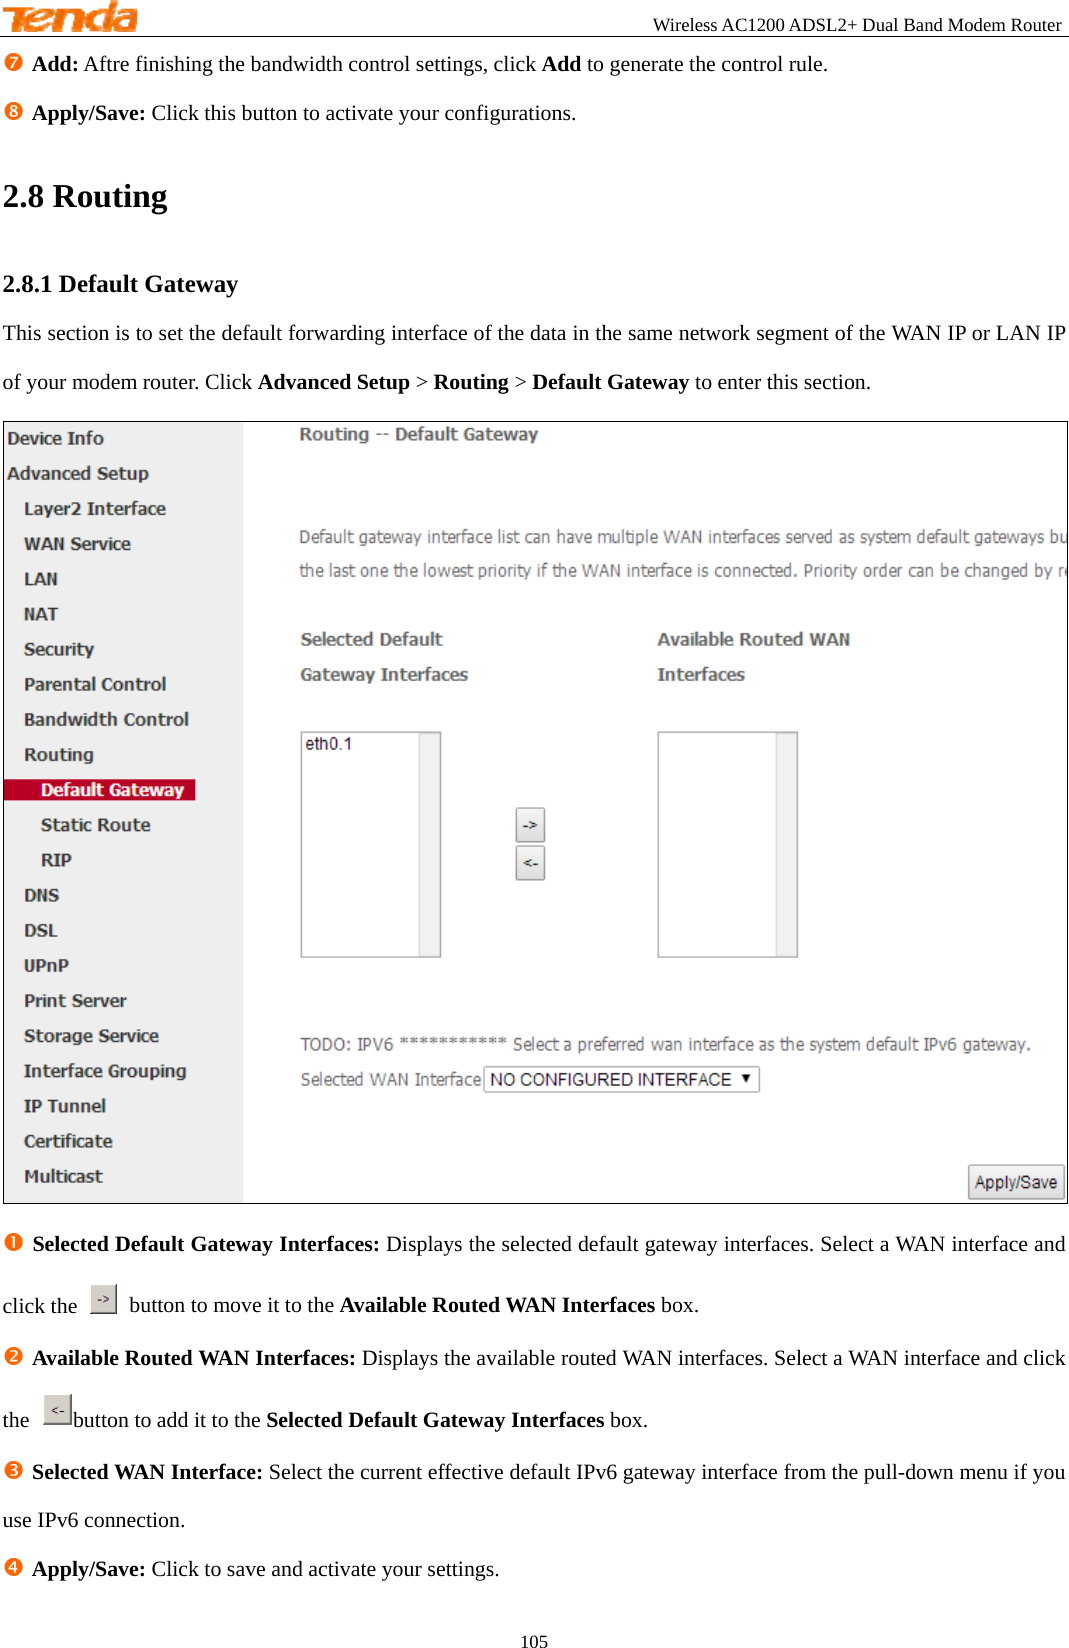
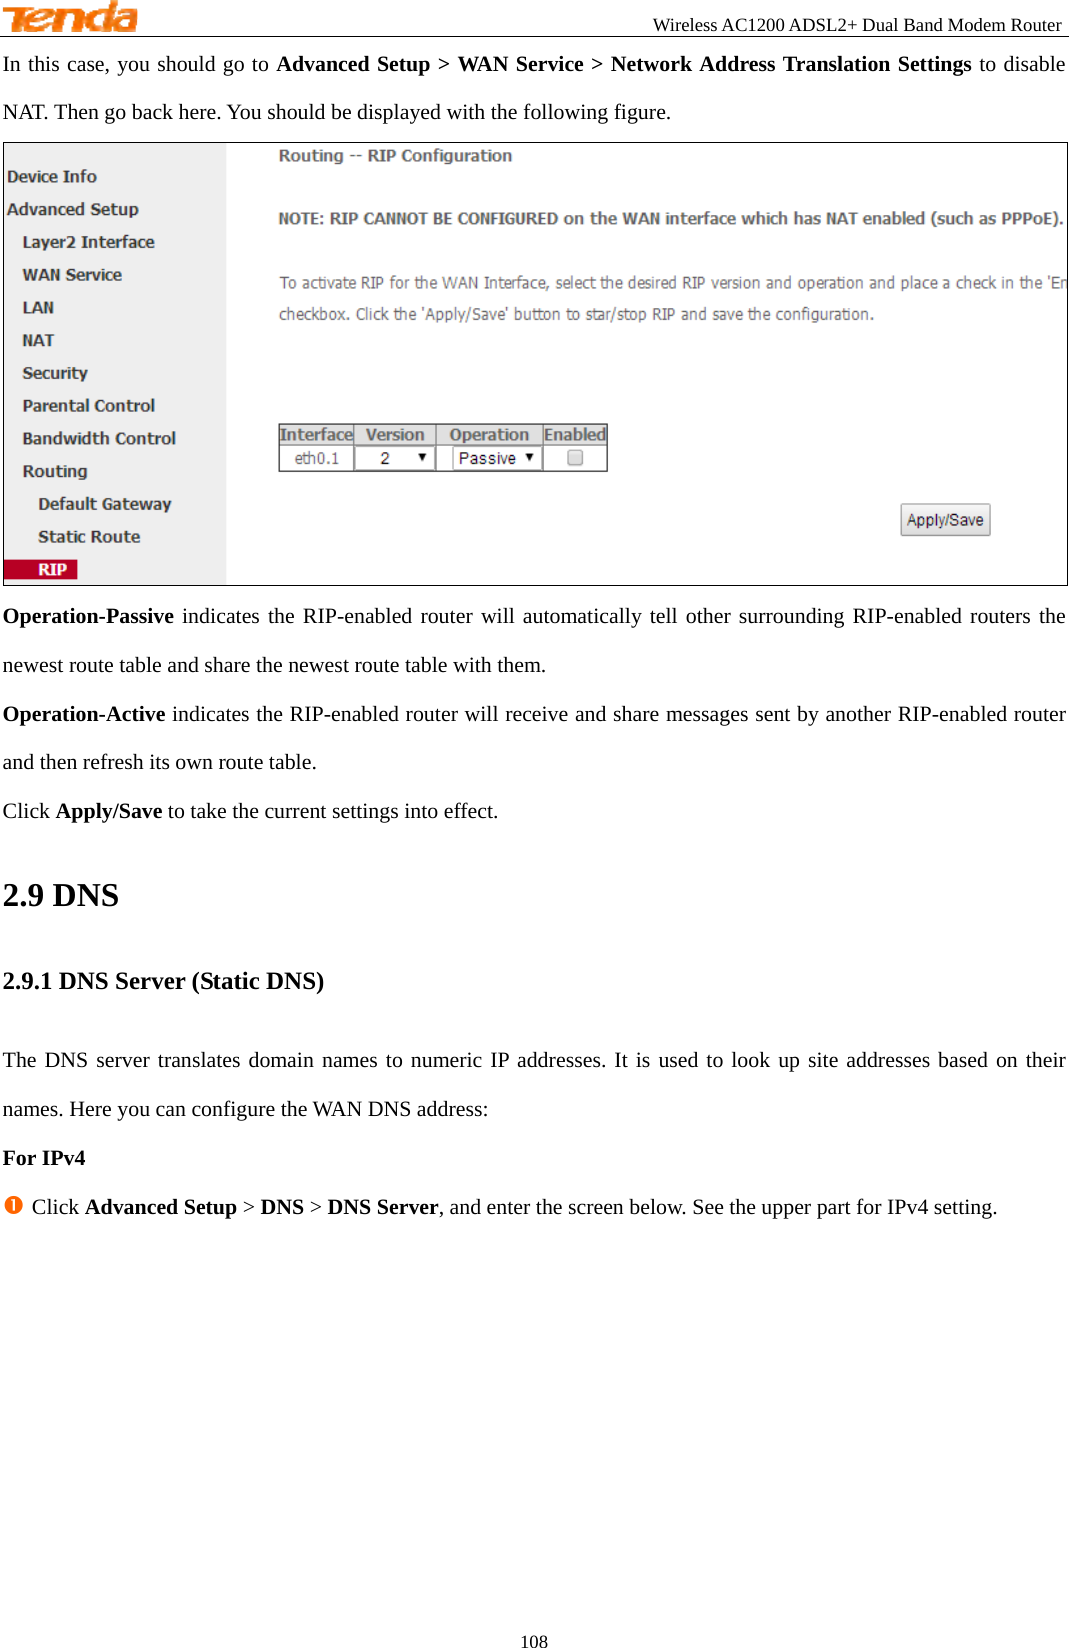
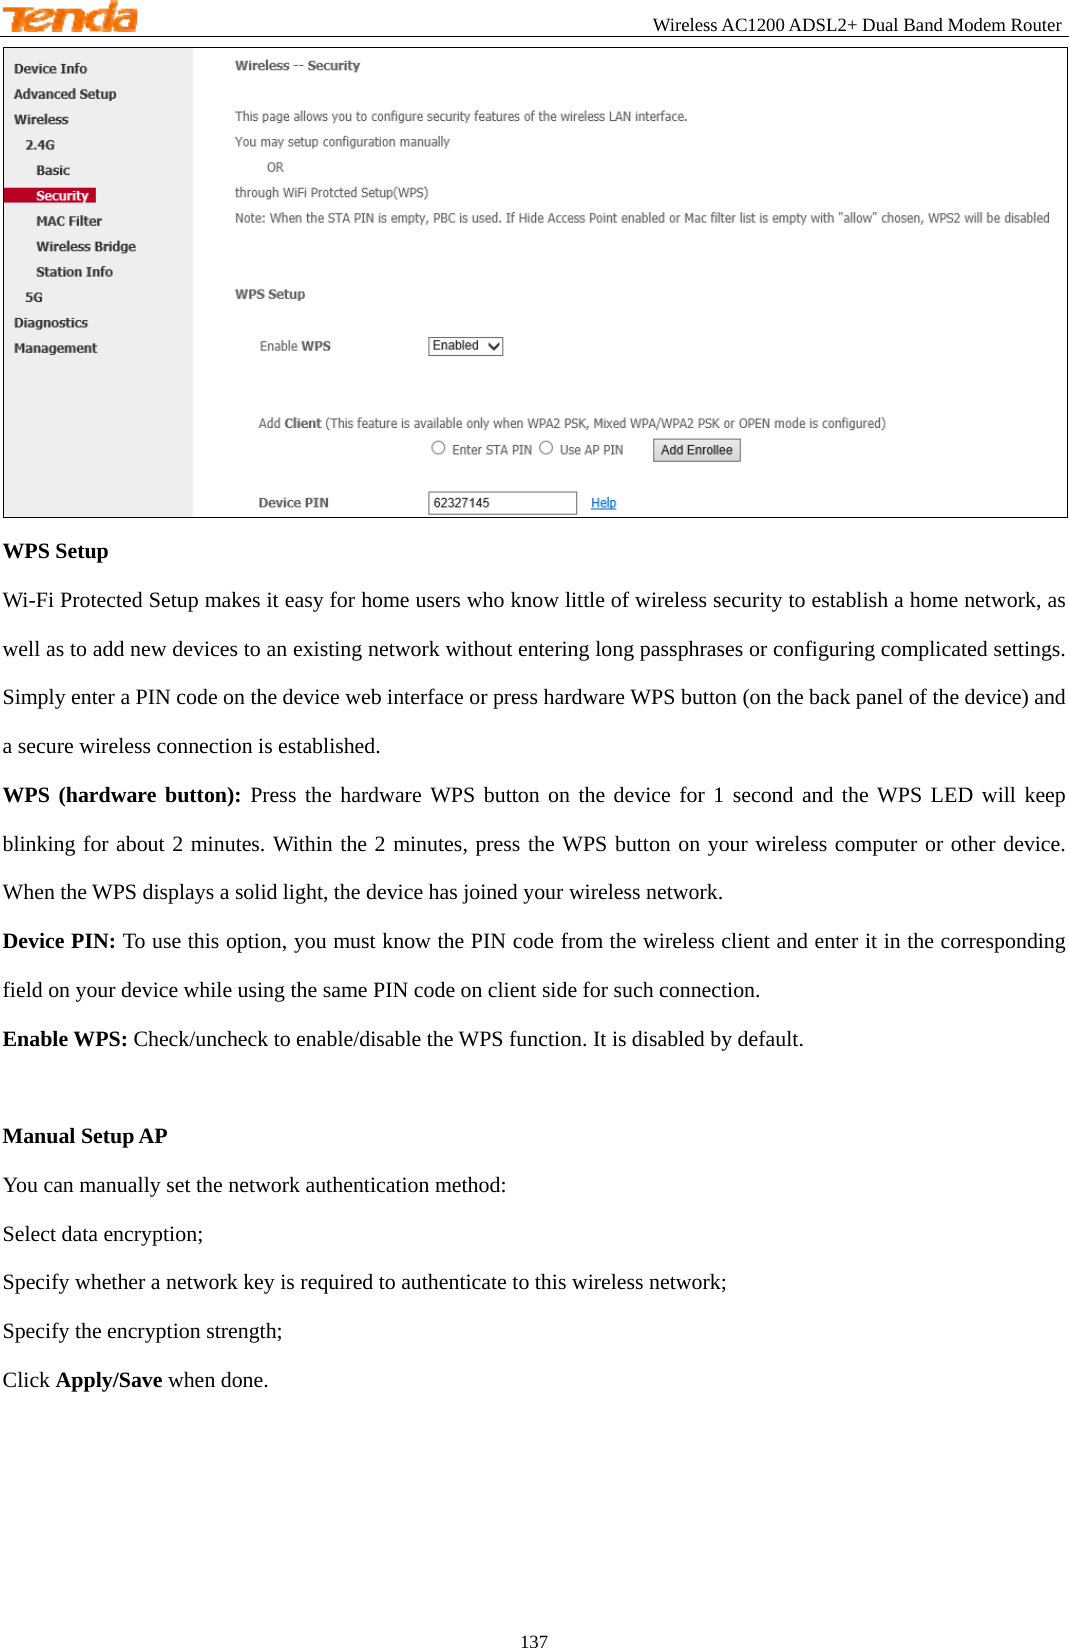
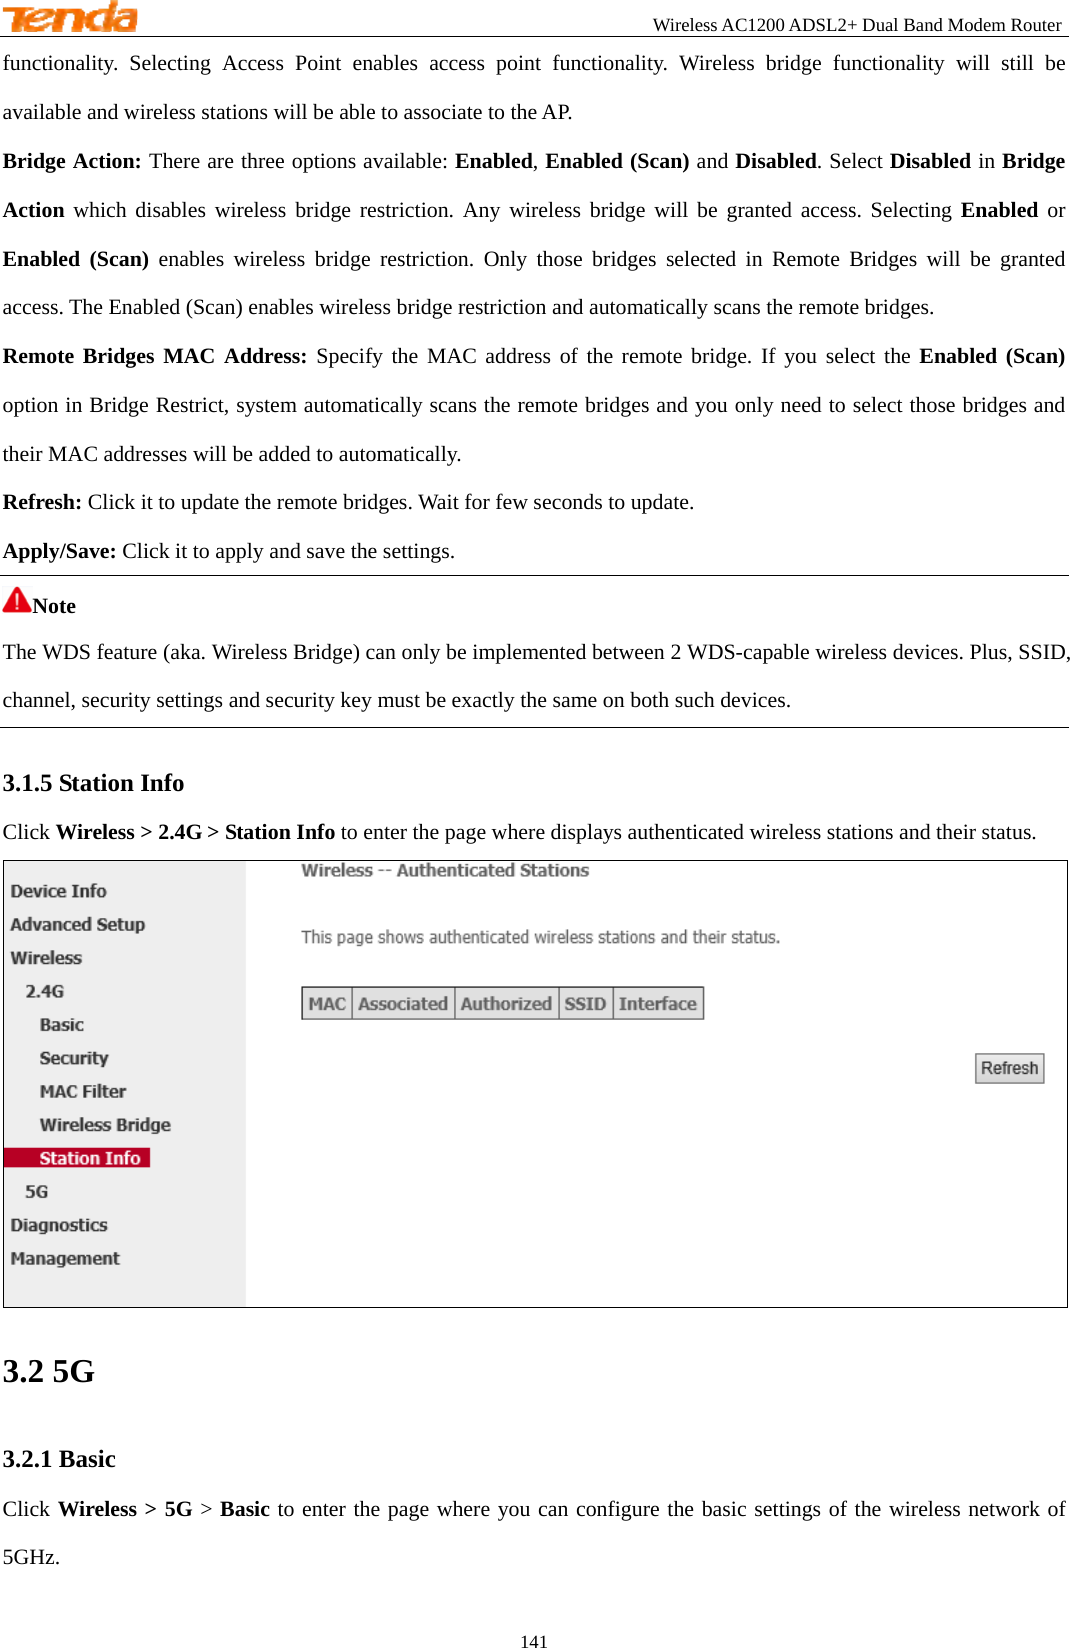
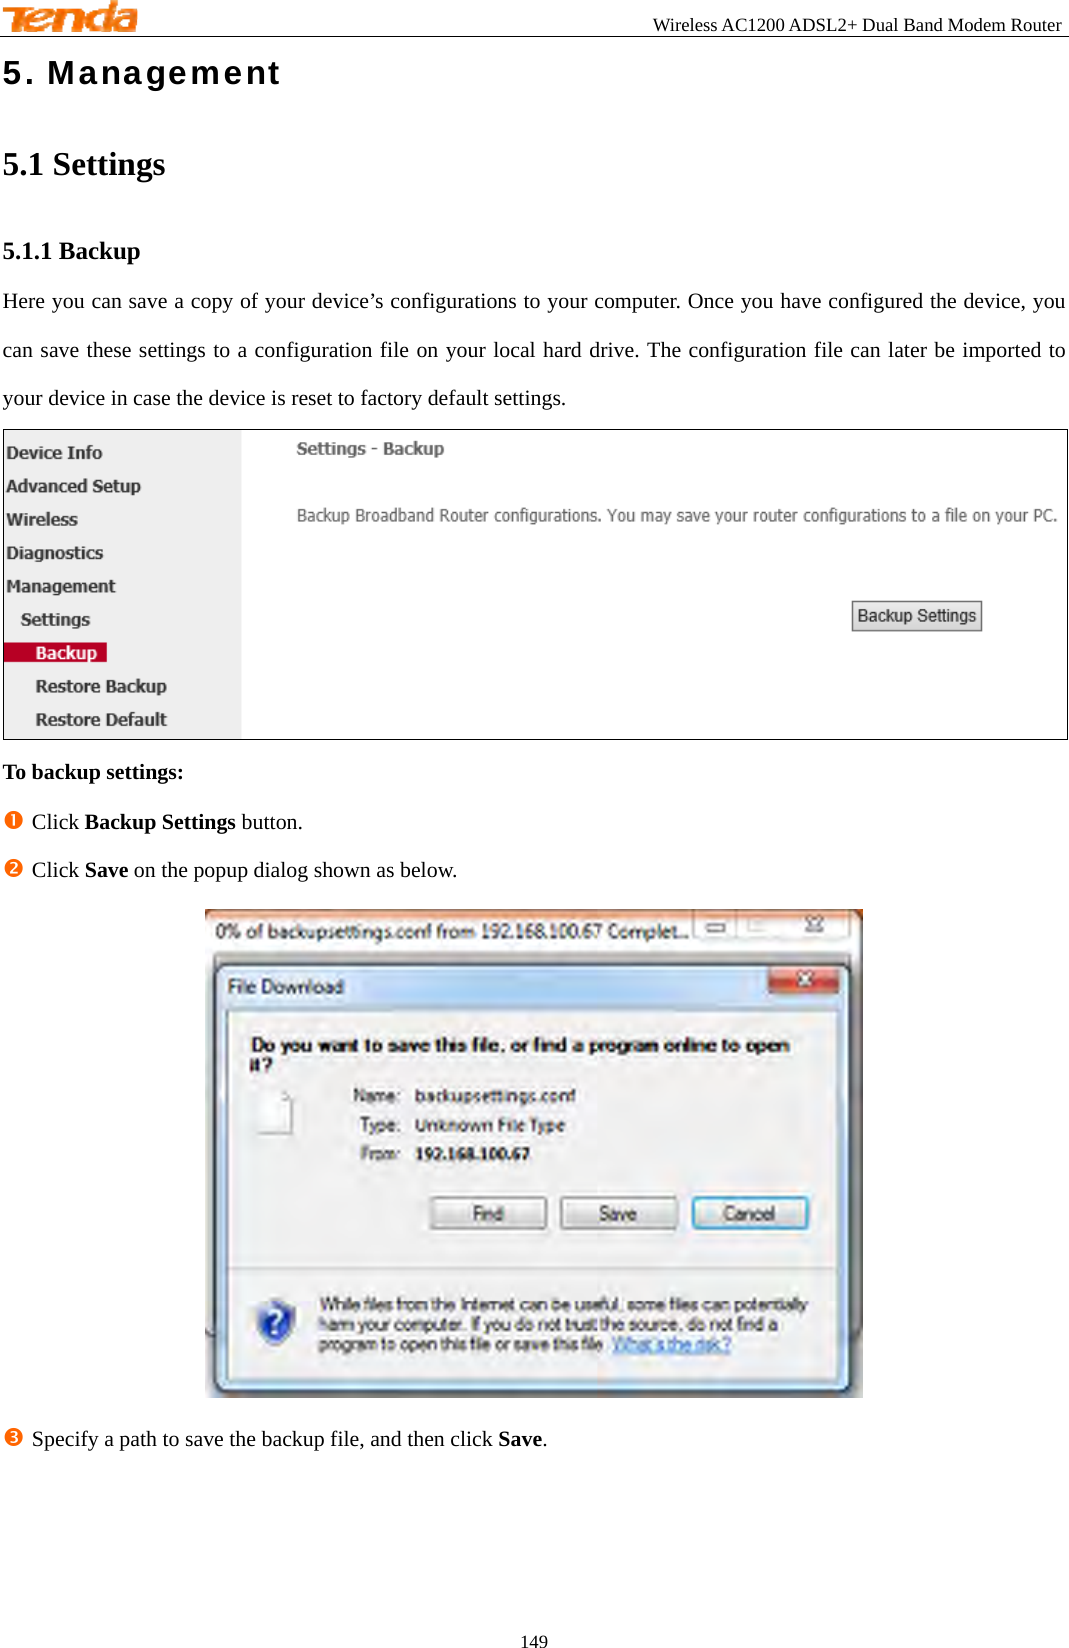
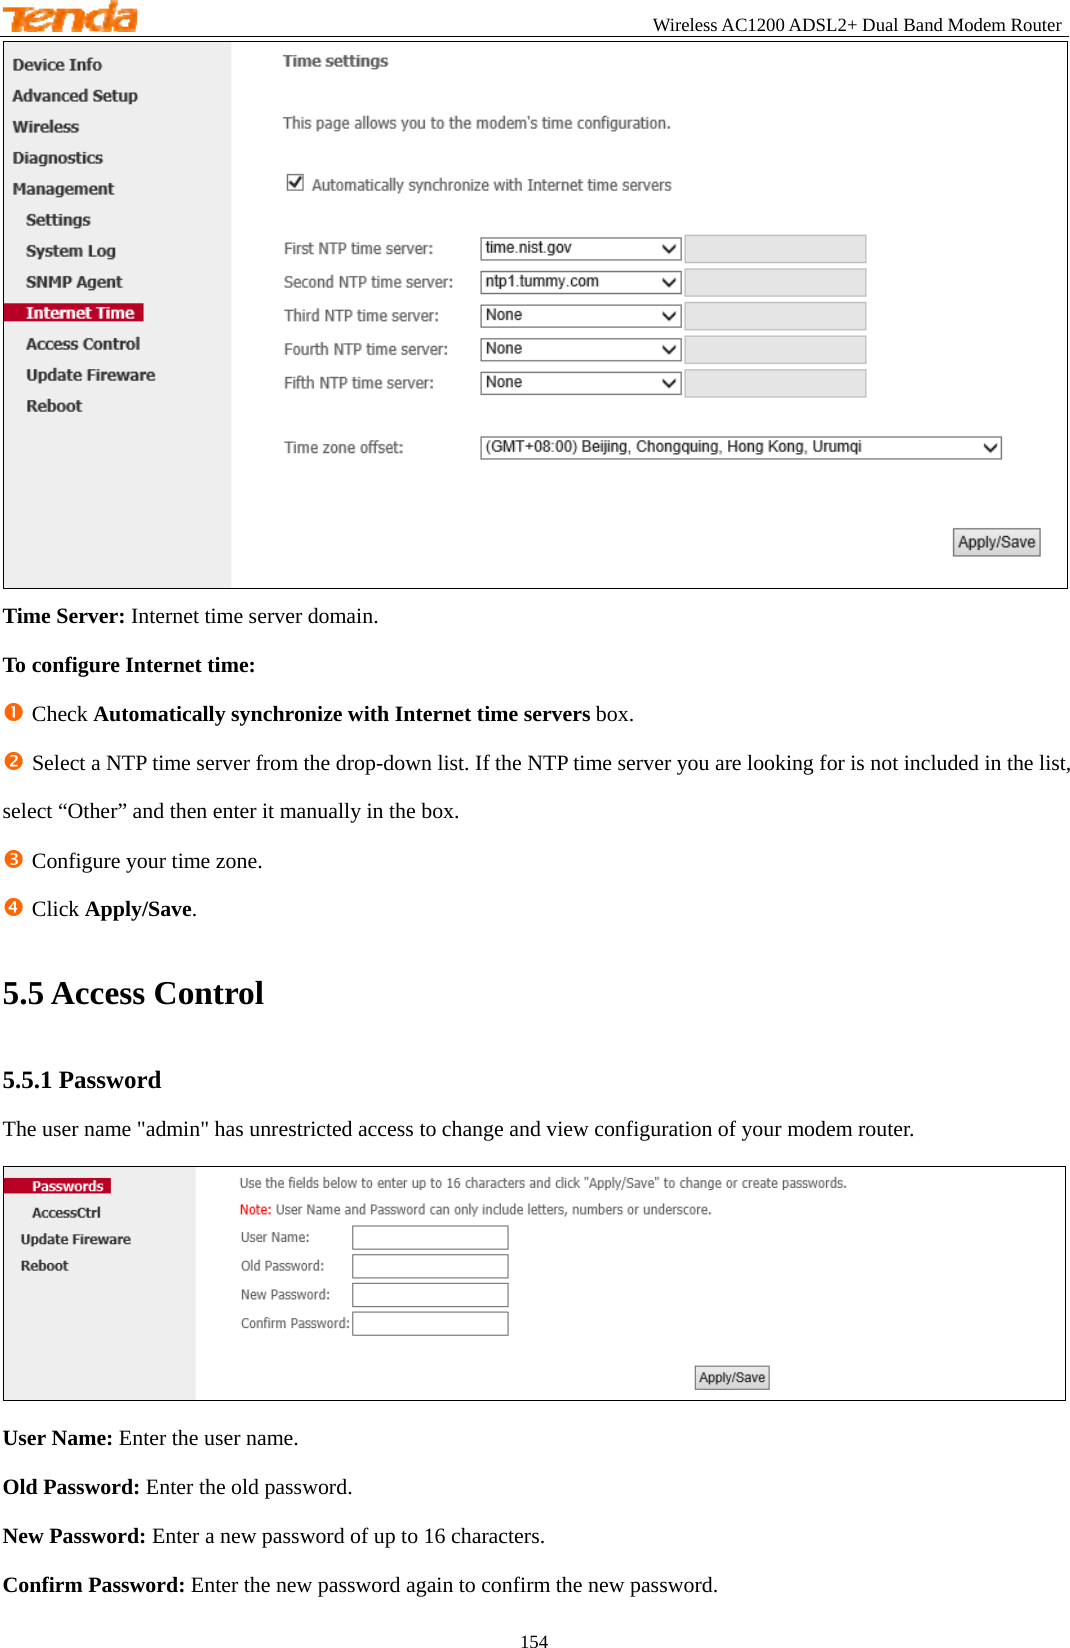
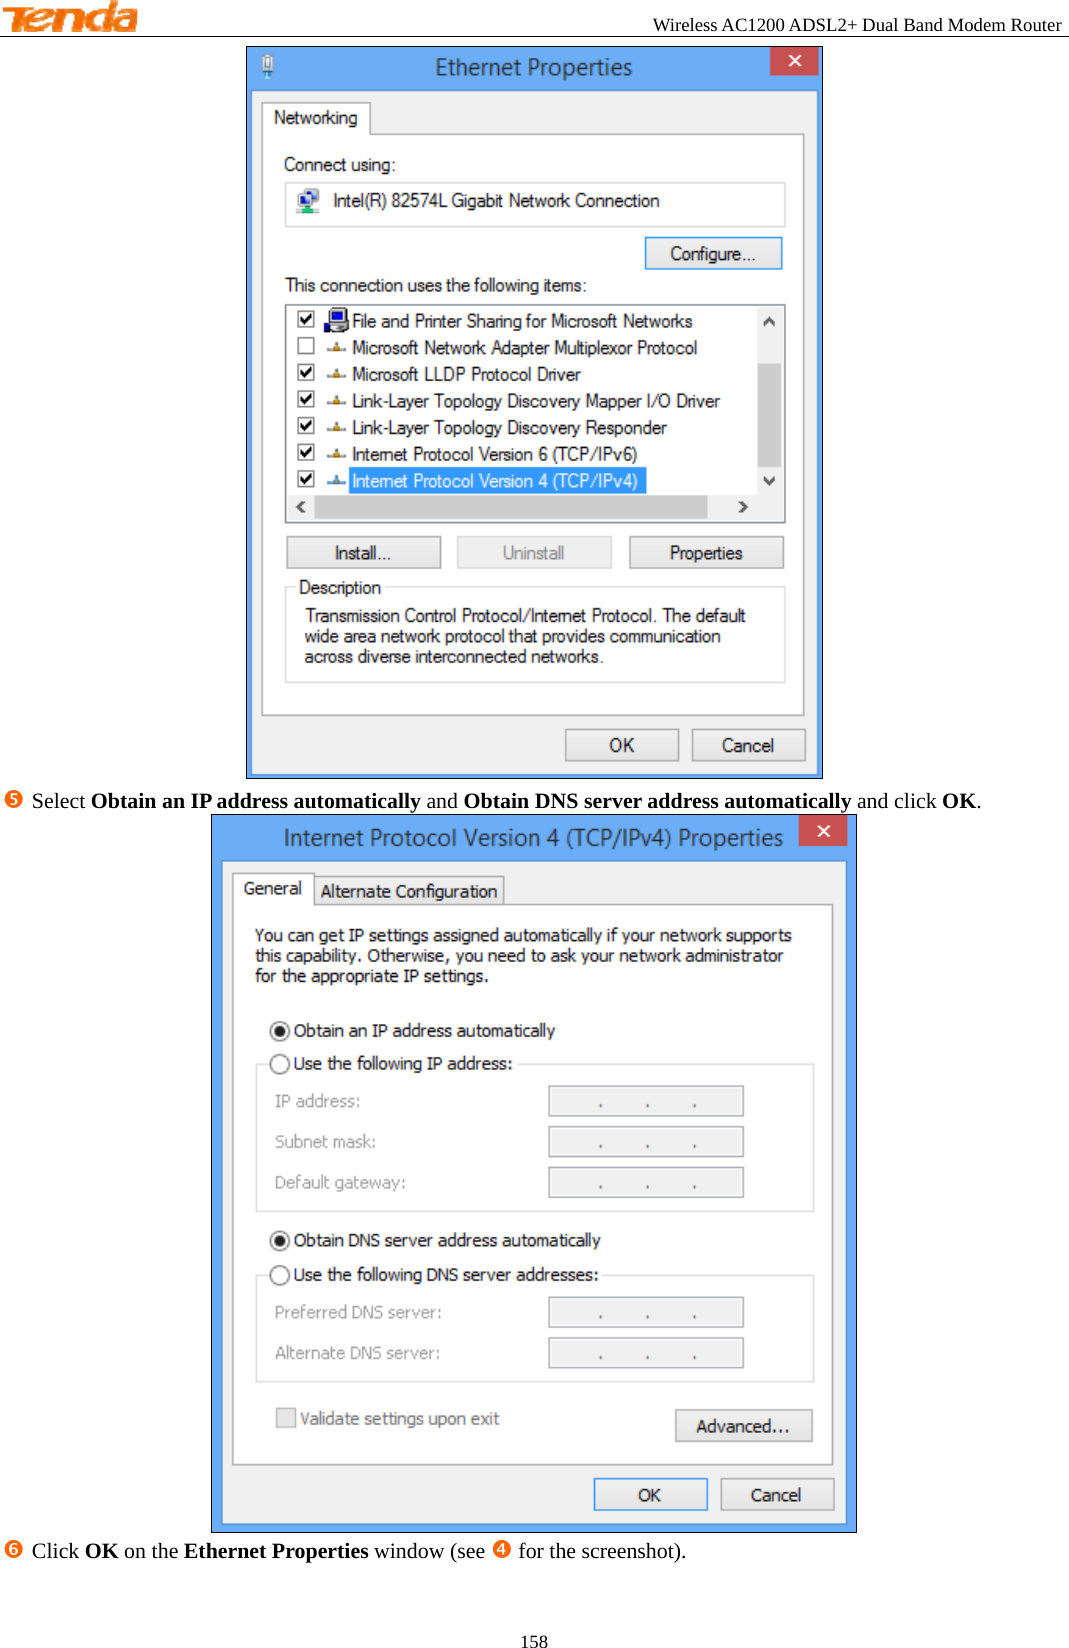
![Wireless AC1200 ADSL2+ Dual Band Modem Router 101 n Filter Name: Specify a new filter name for identifying the incoming IP traffic. o IP Version: Select either IPv4. p Protocol: TCP/UDP, TCP, UDP and ICMP are available for your option. q Source IP address [/prefix length]: Enter the Internal IP address [/prefix length] to be filtered. r Source Port (port or port:port): Specify a port number or a range of ports used by PCs from external network to access your internal network. s Destination IP address [/prefix length]: Specify the internal network IP address [/prefix length] to be accessed by the specified PCs from external network. t Destination Port (port or port:port): Specify a port number or a range of ports used by PCs from external network to access your internal network. u Click Apply/Save to save and activate the filter. 2.5.2 MAC Filtering A bridge WAN service is needed to configure this service. MAC Filtering is only effective on ATM PVCs configured in Bridge mode. FORWARDED means that all MAC layer frames will be FORWARDED except those matching with any of the specified rules in the following table. BLOCKED means that all MAC layer frames will be BLOCKED except those matching with any of the specified rules in the following table. Choose Add enter the following screen. (Note that changing from one policy to another of an interface will cause all defined rules for that interface to be REMOVED AUTOMATICALLY! You will need to create new rules for the new policy.)](https://usermanual.wiki/TENDA-TECHNOLOGY/D1201/User-Guide-2337720-Page-105.png)
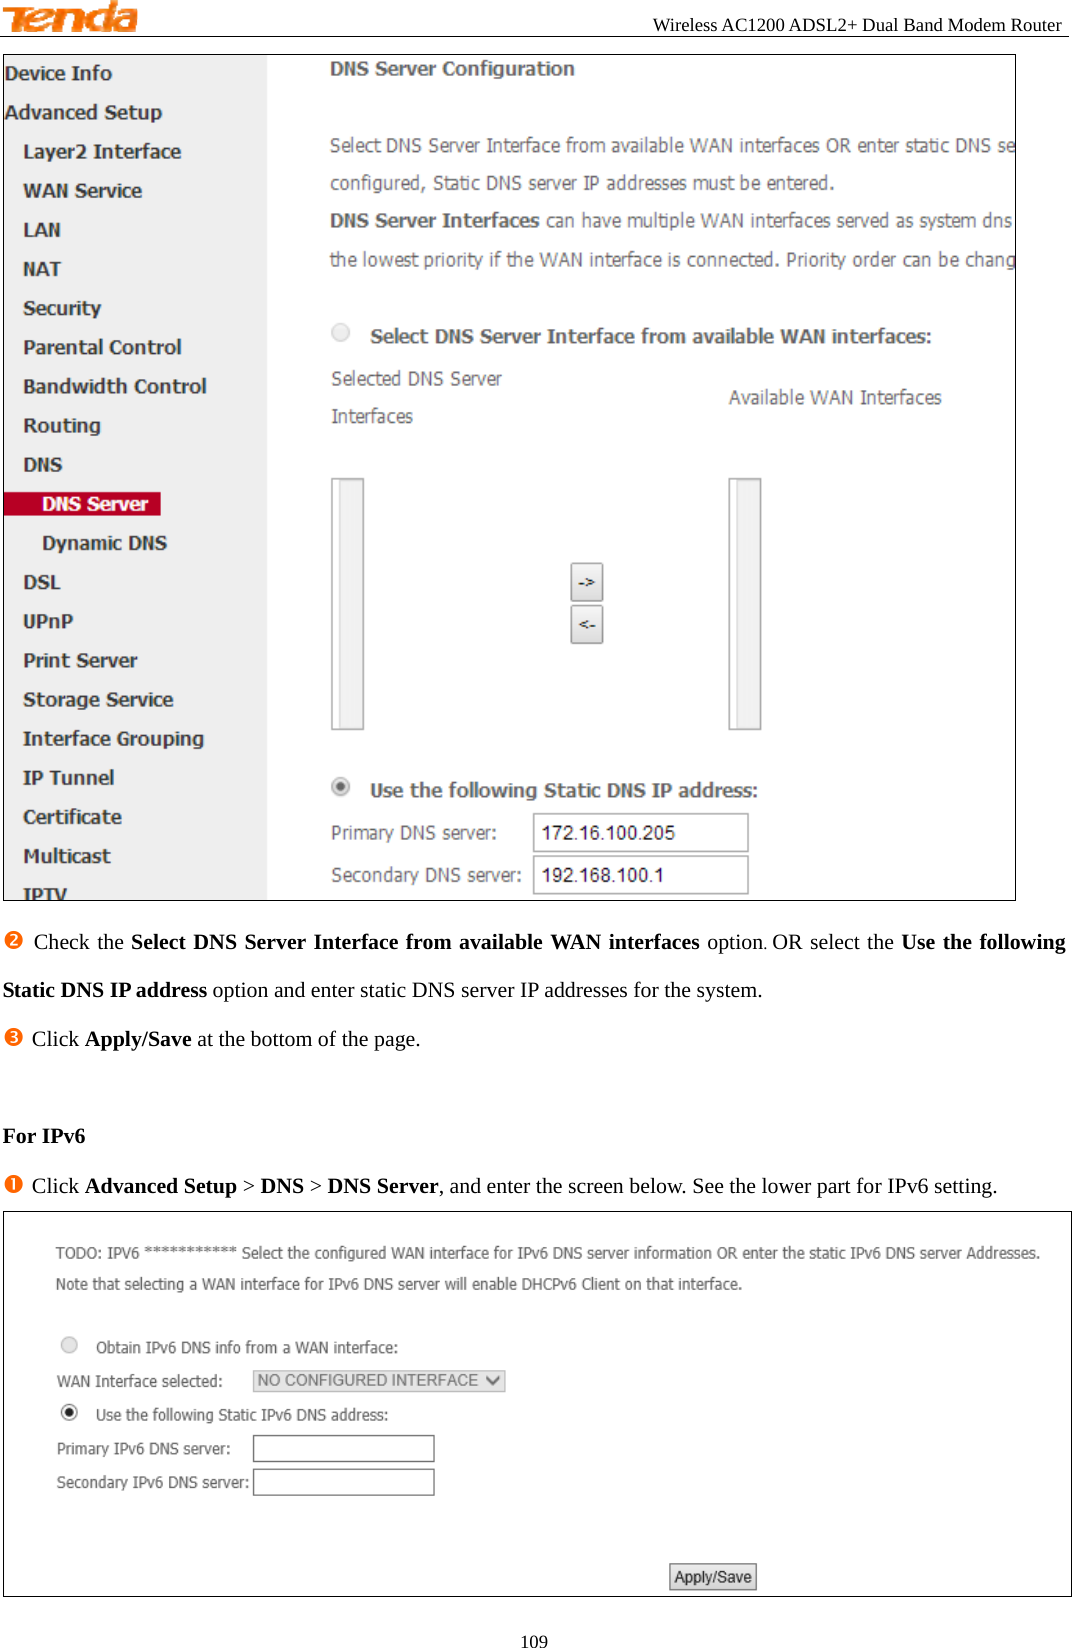


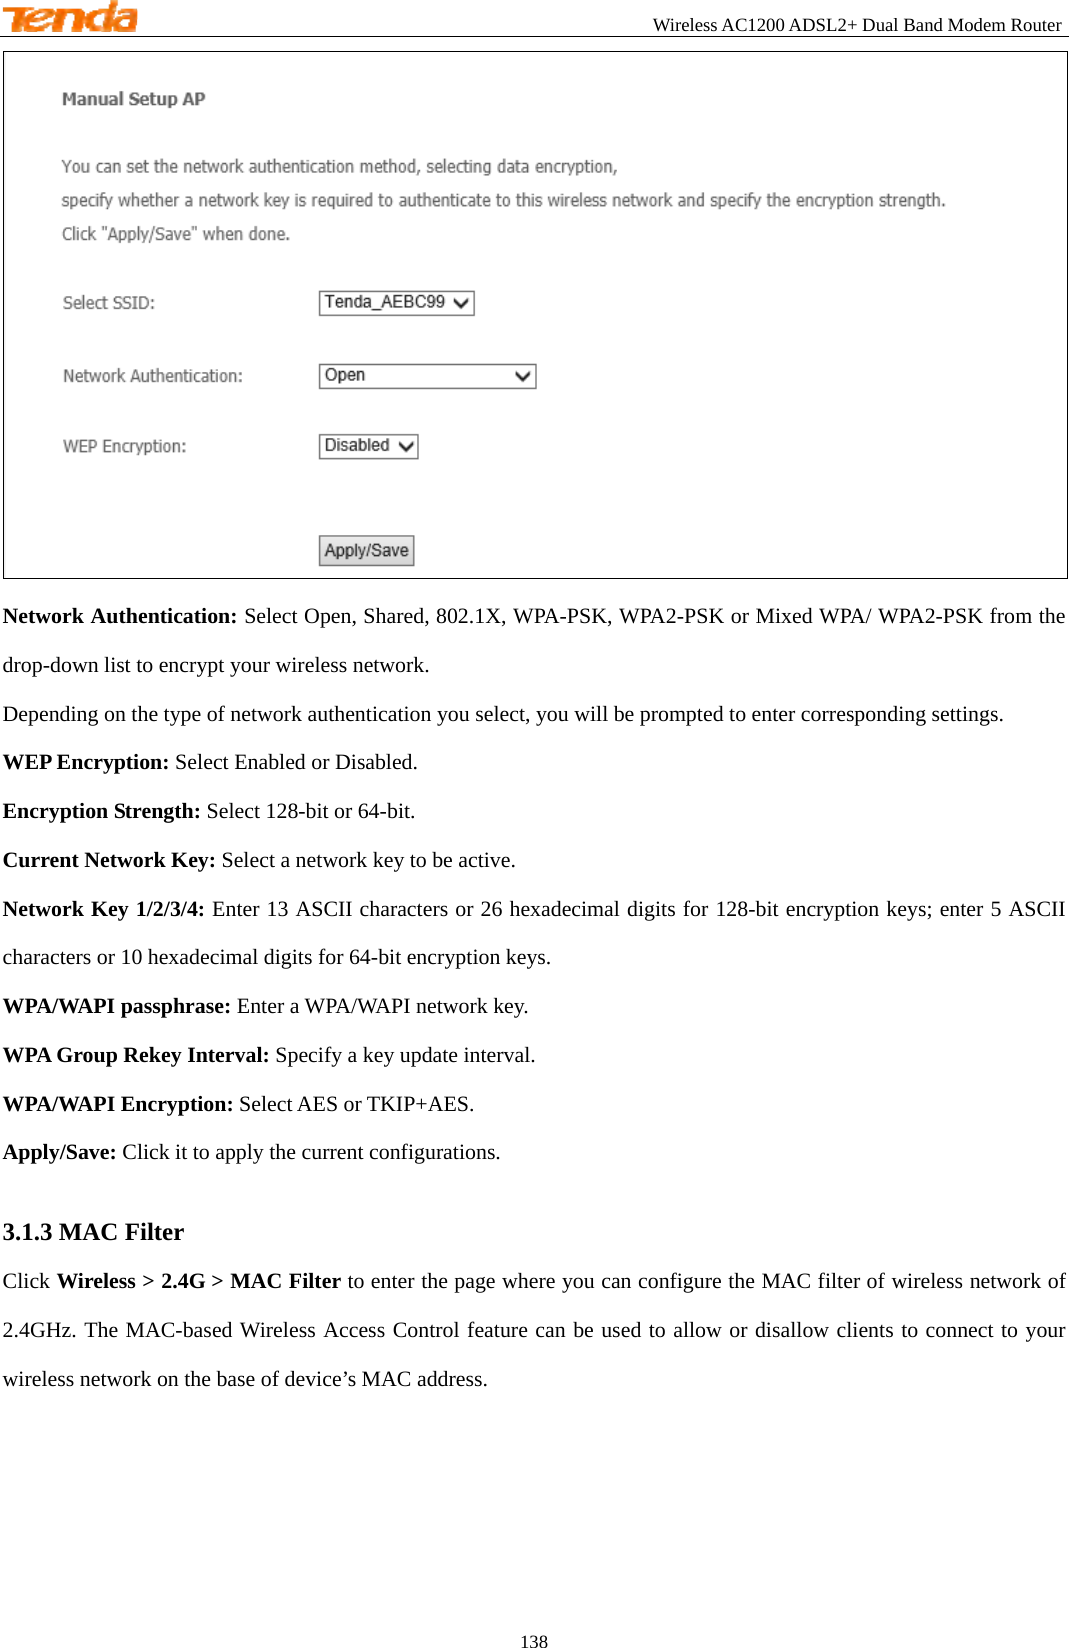
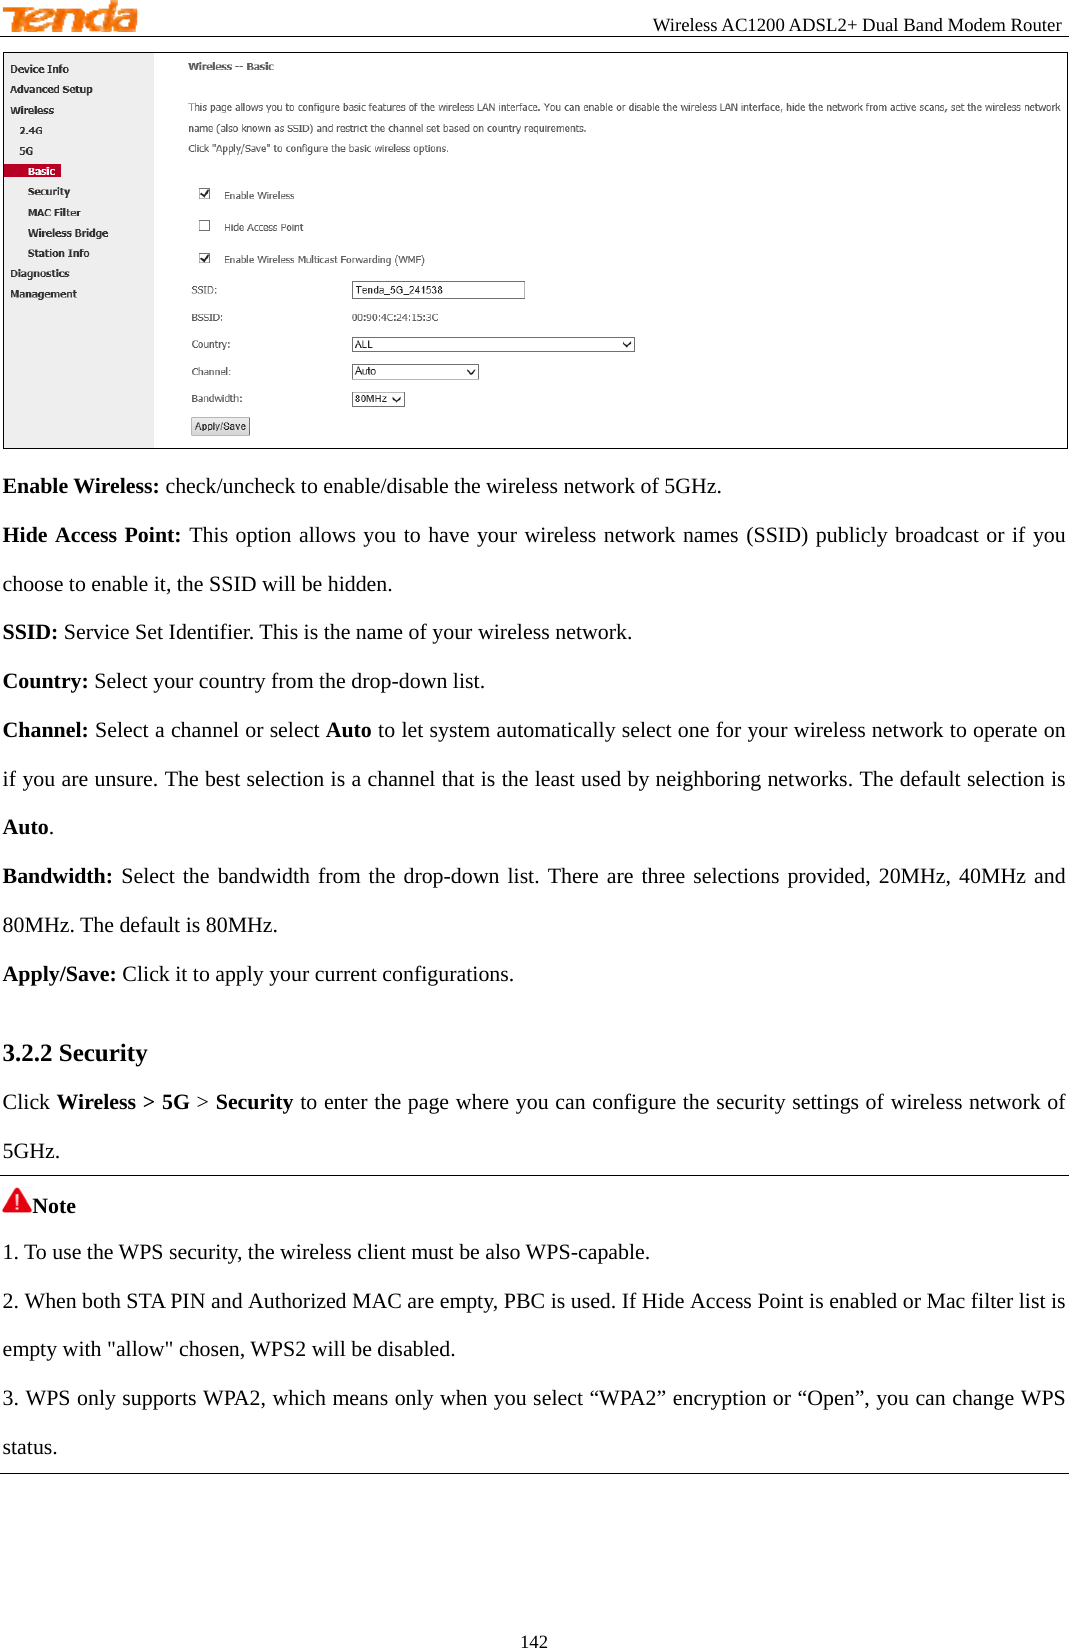
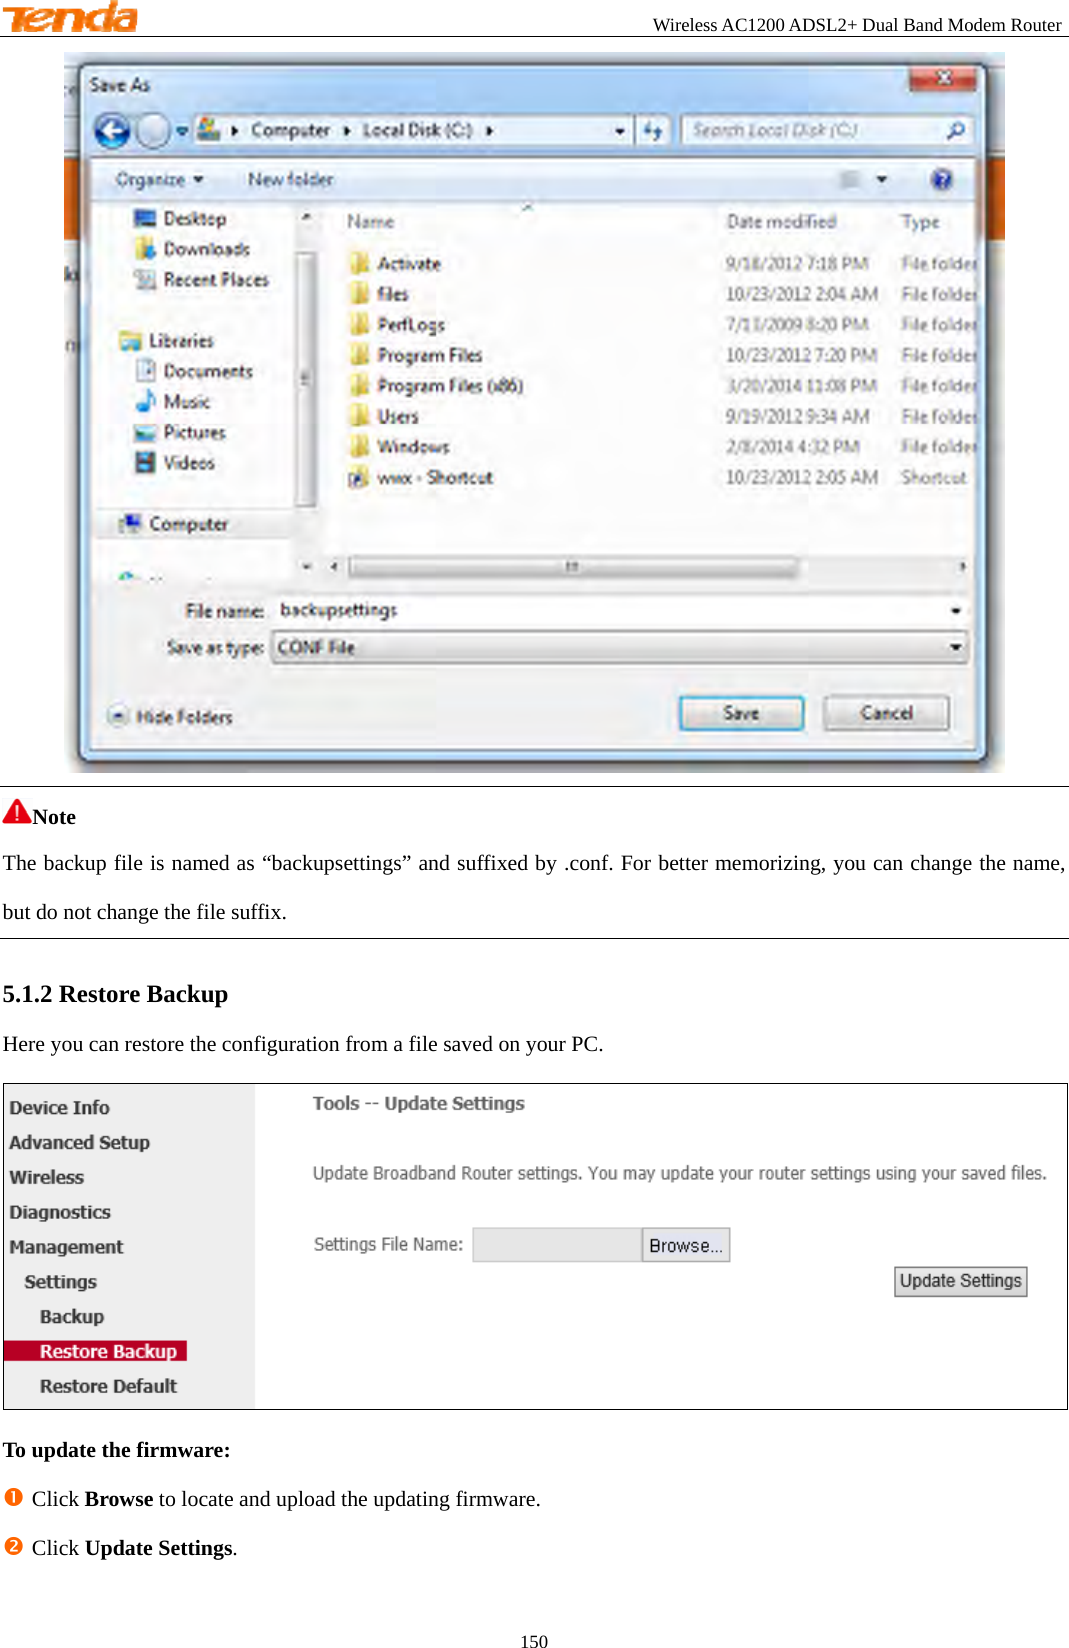

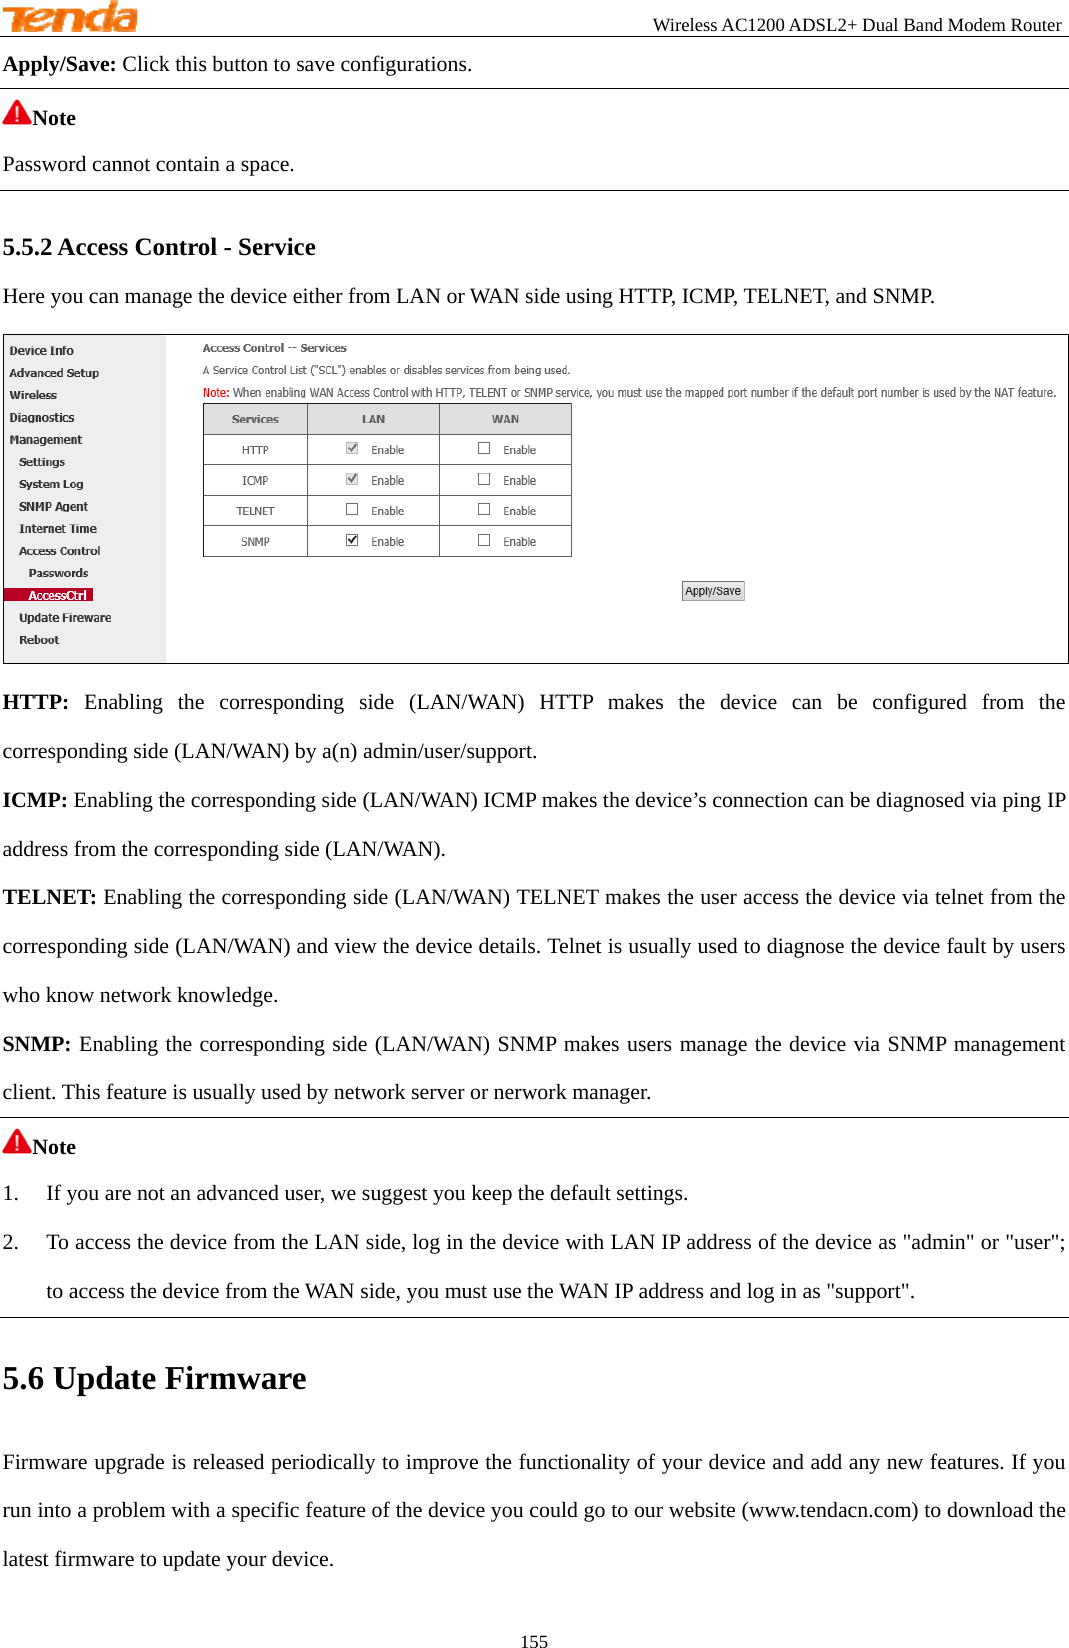
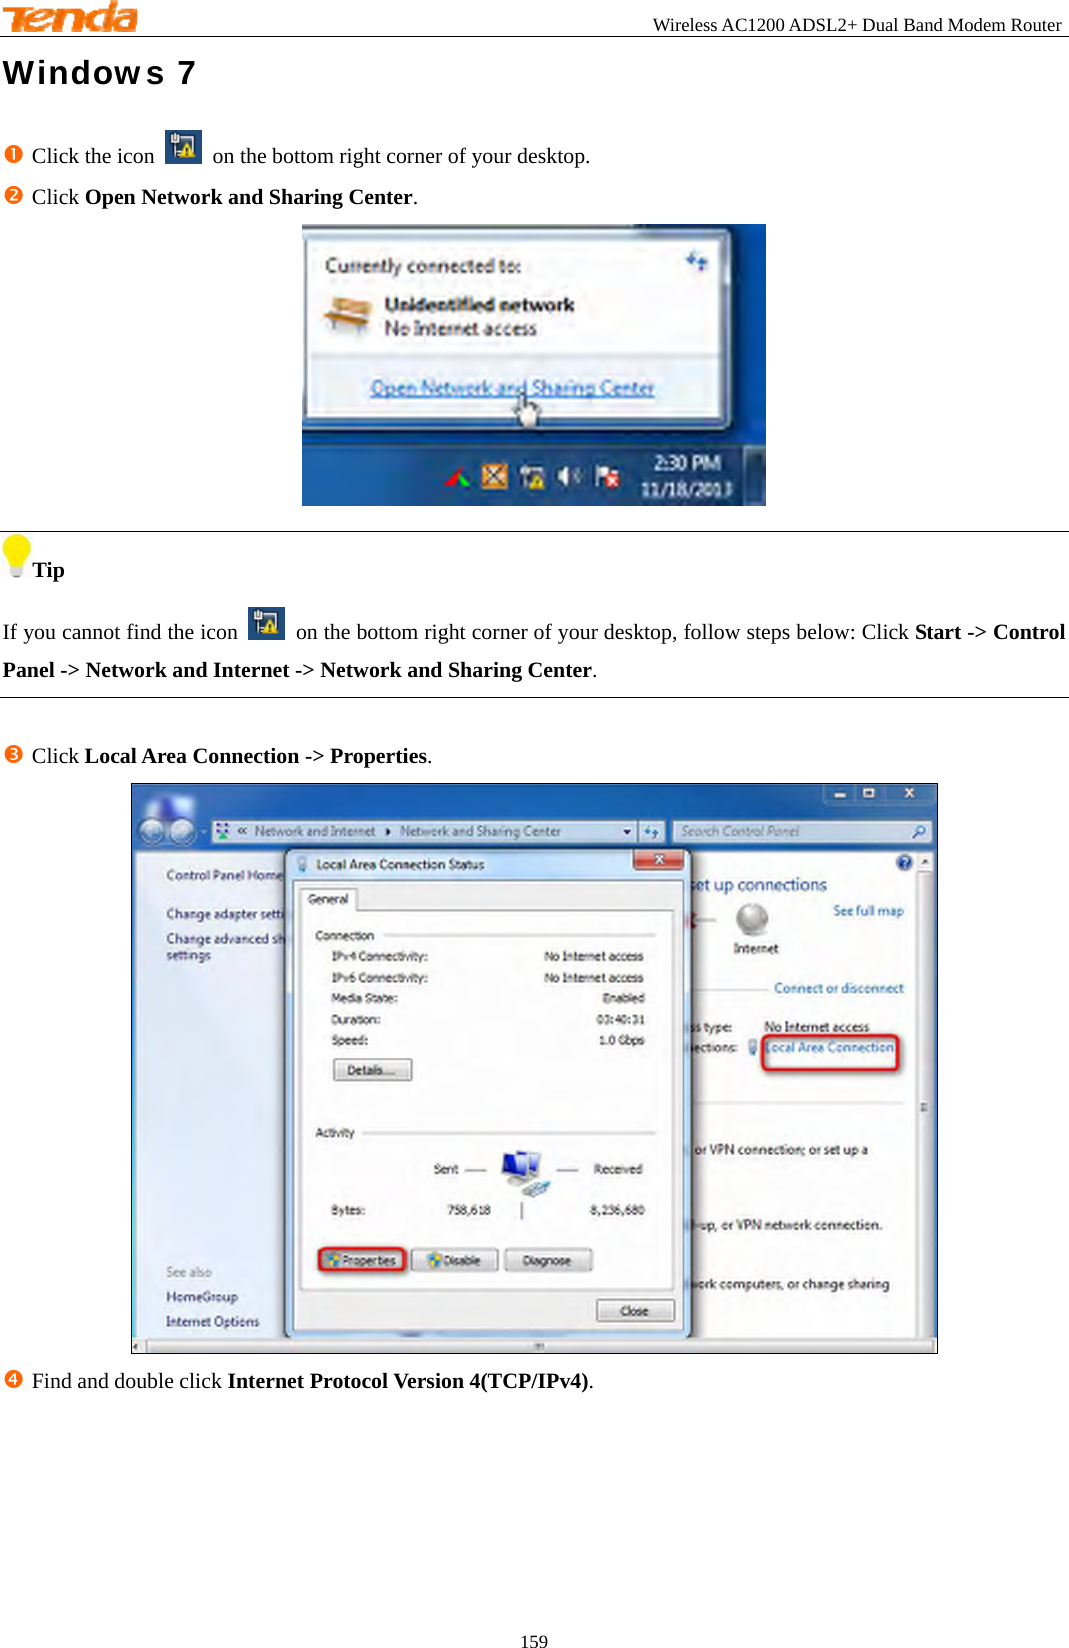

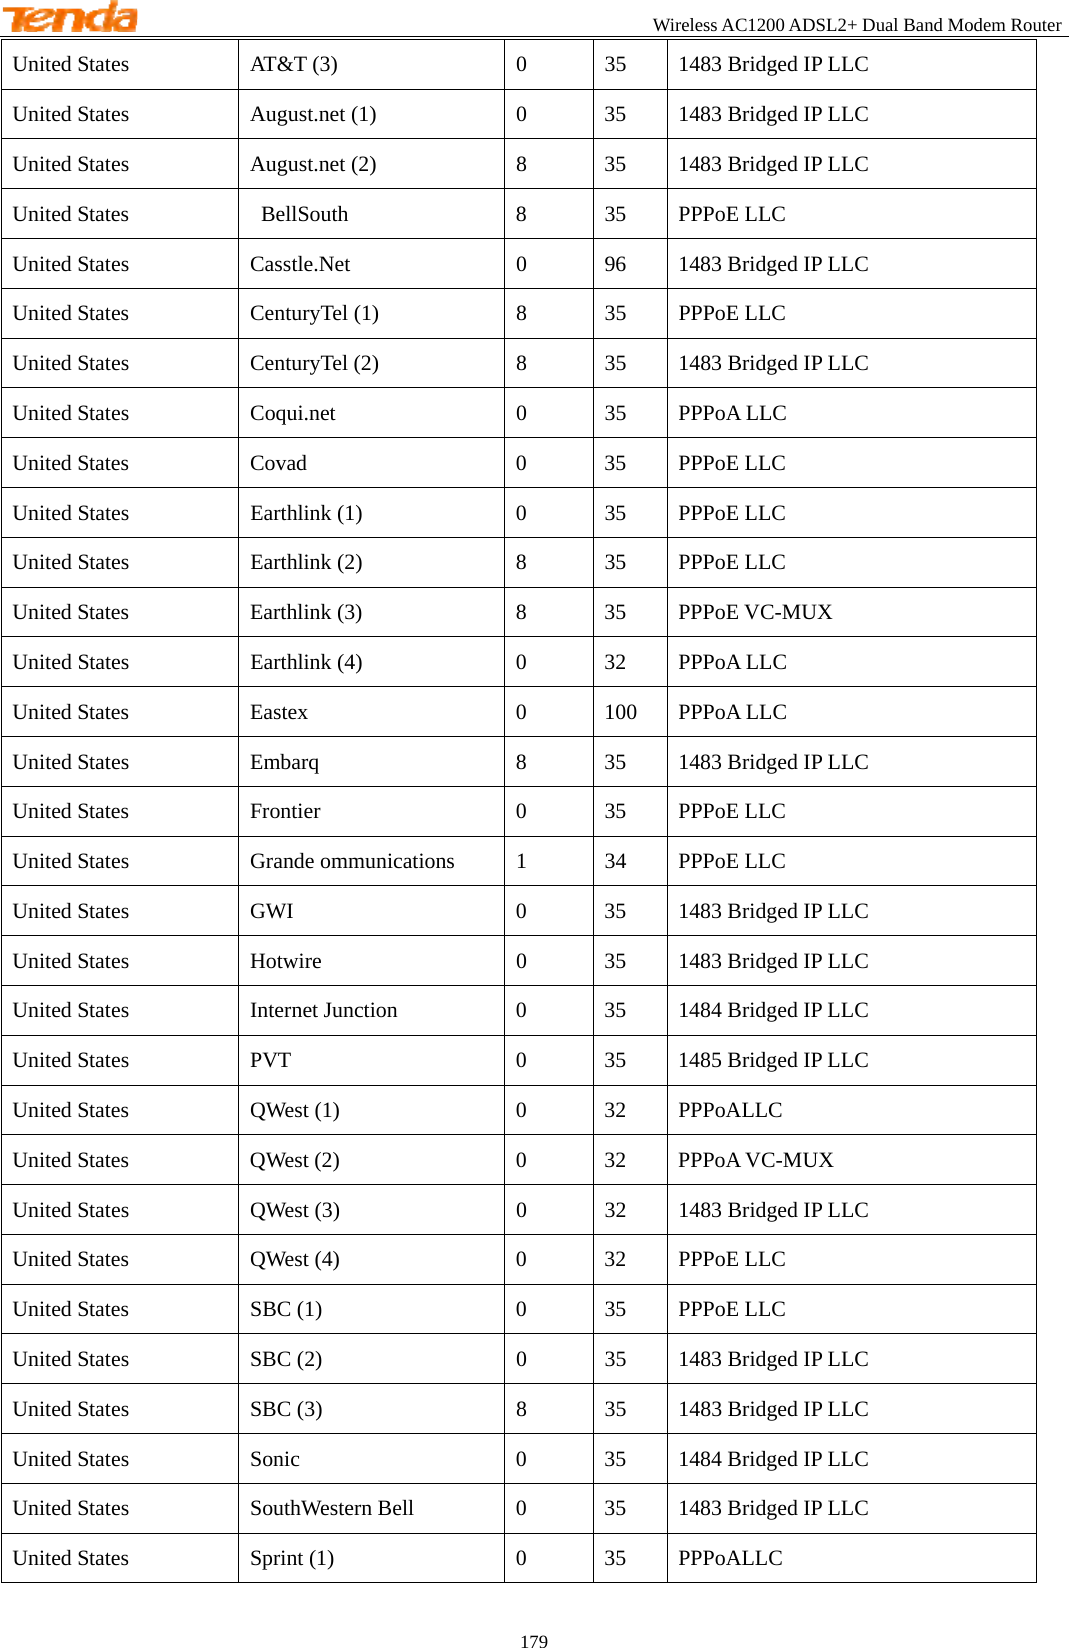
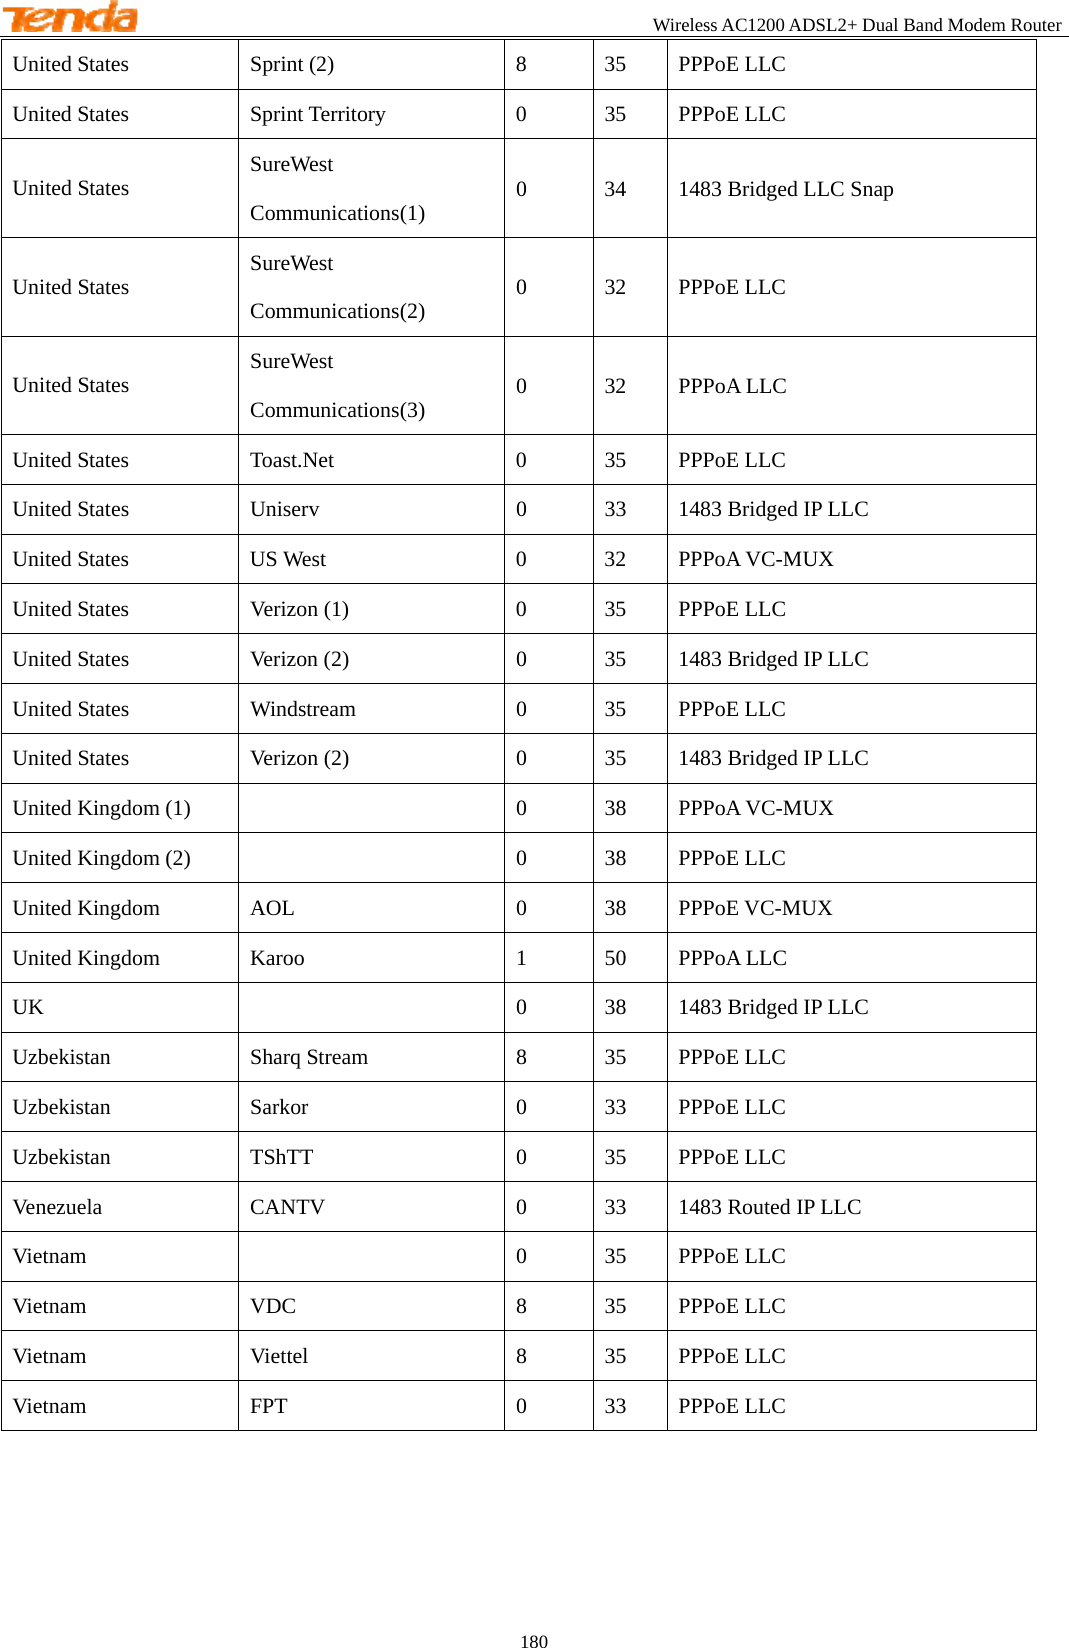
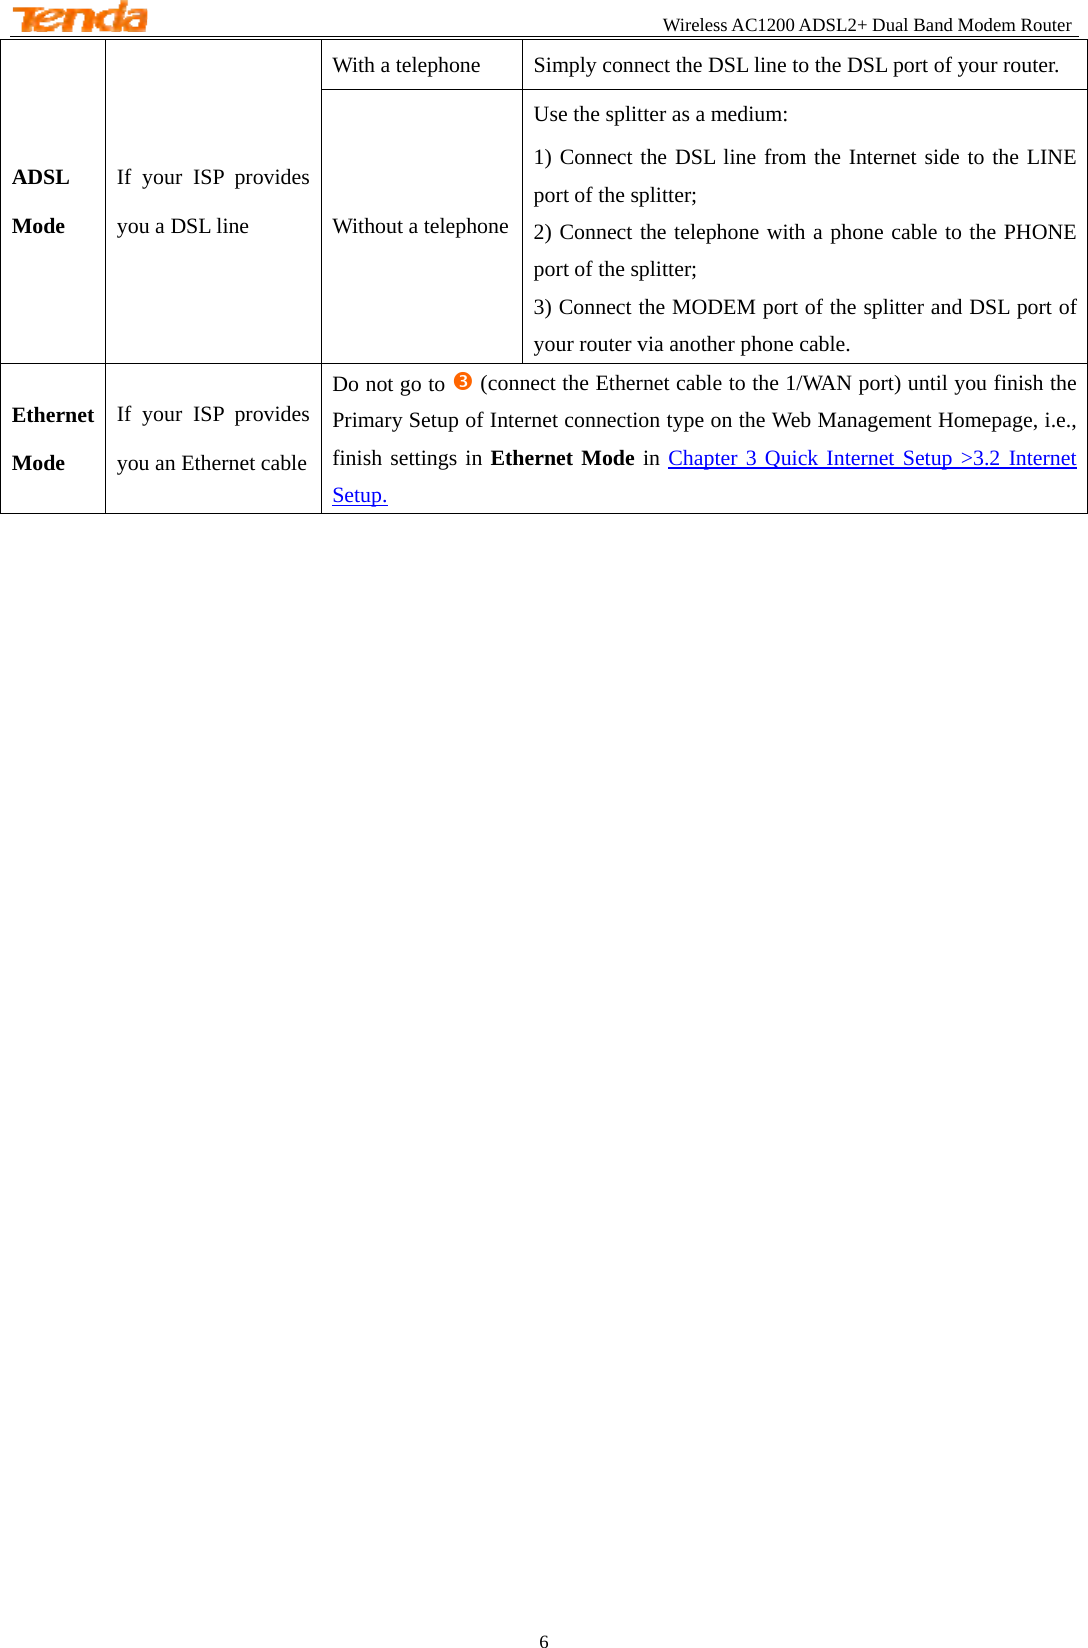
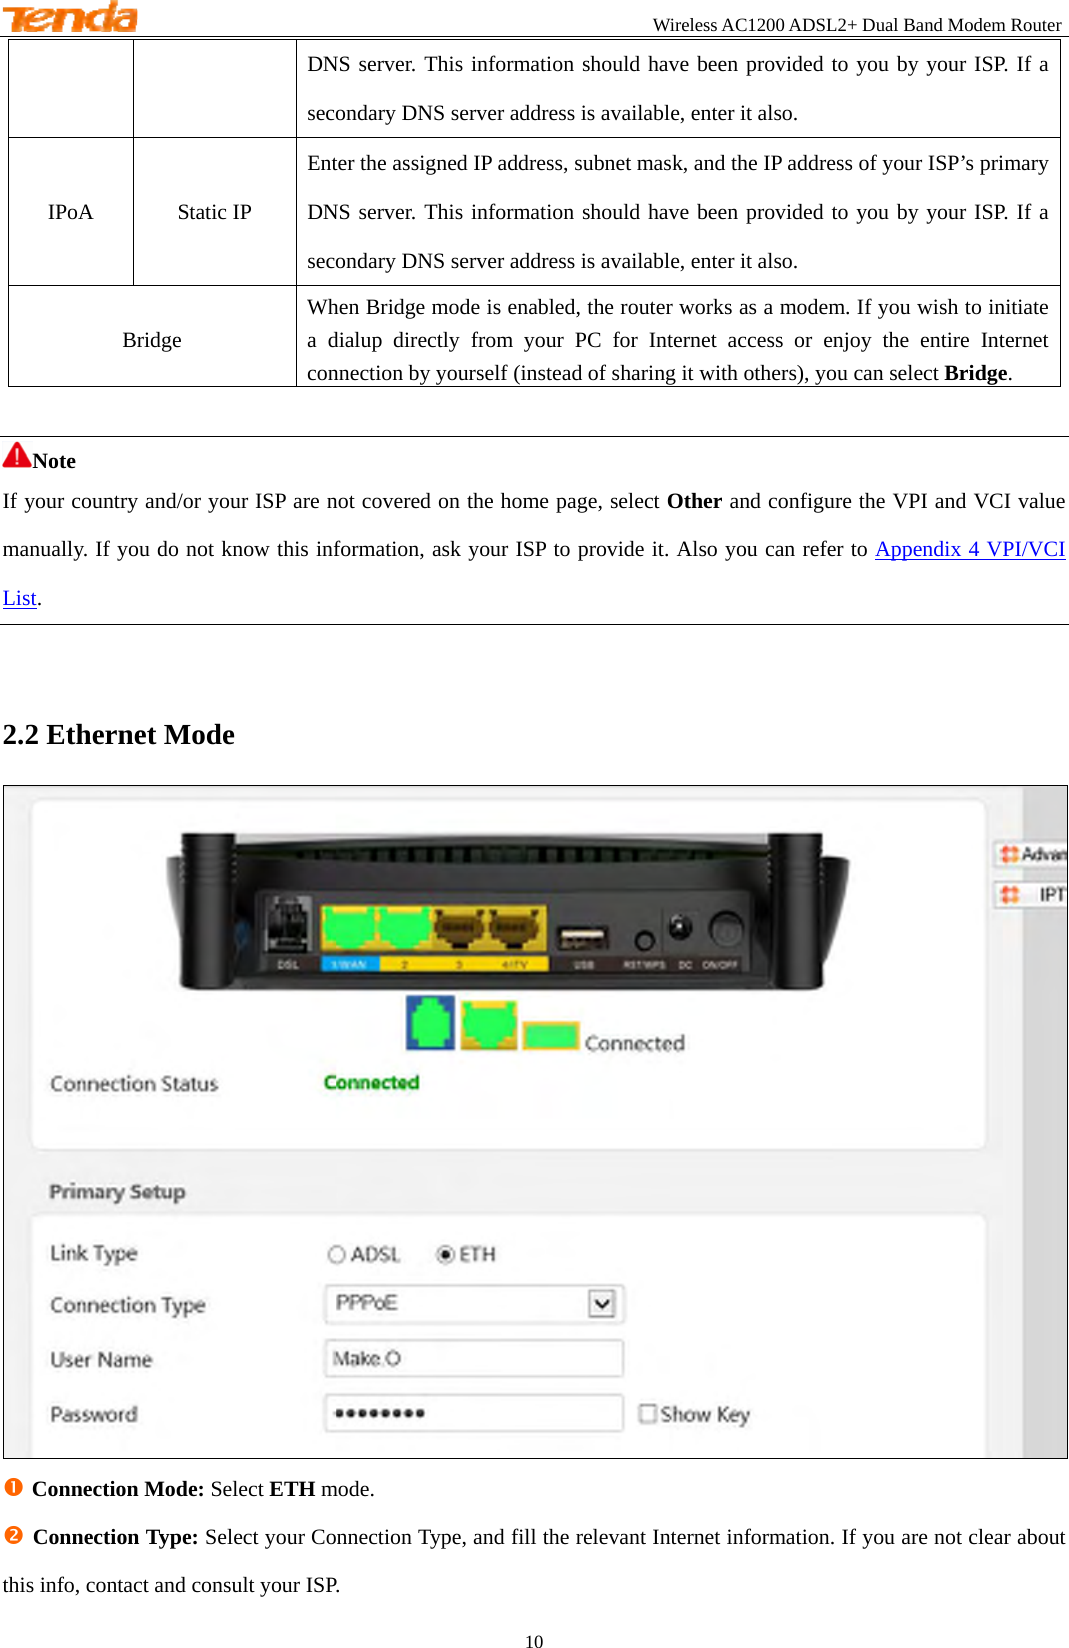
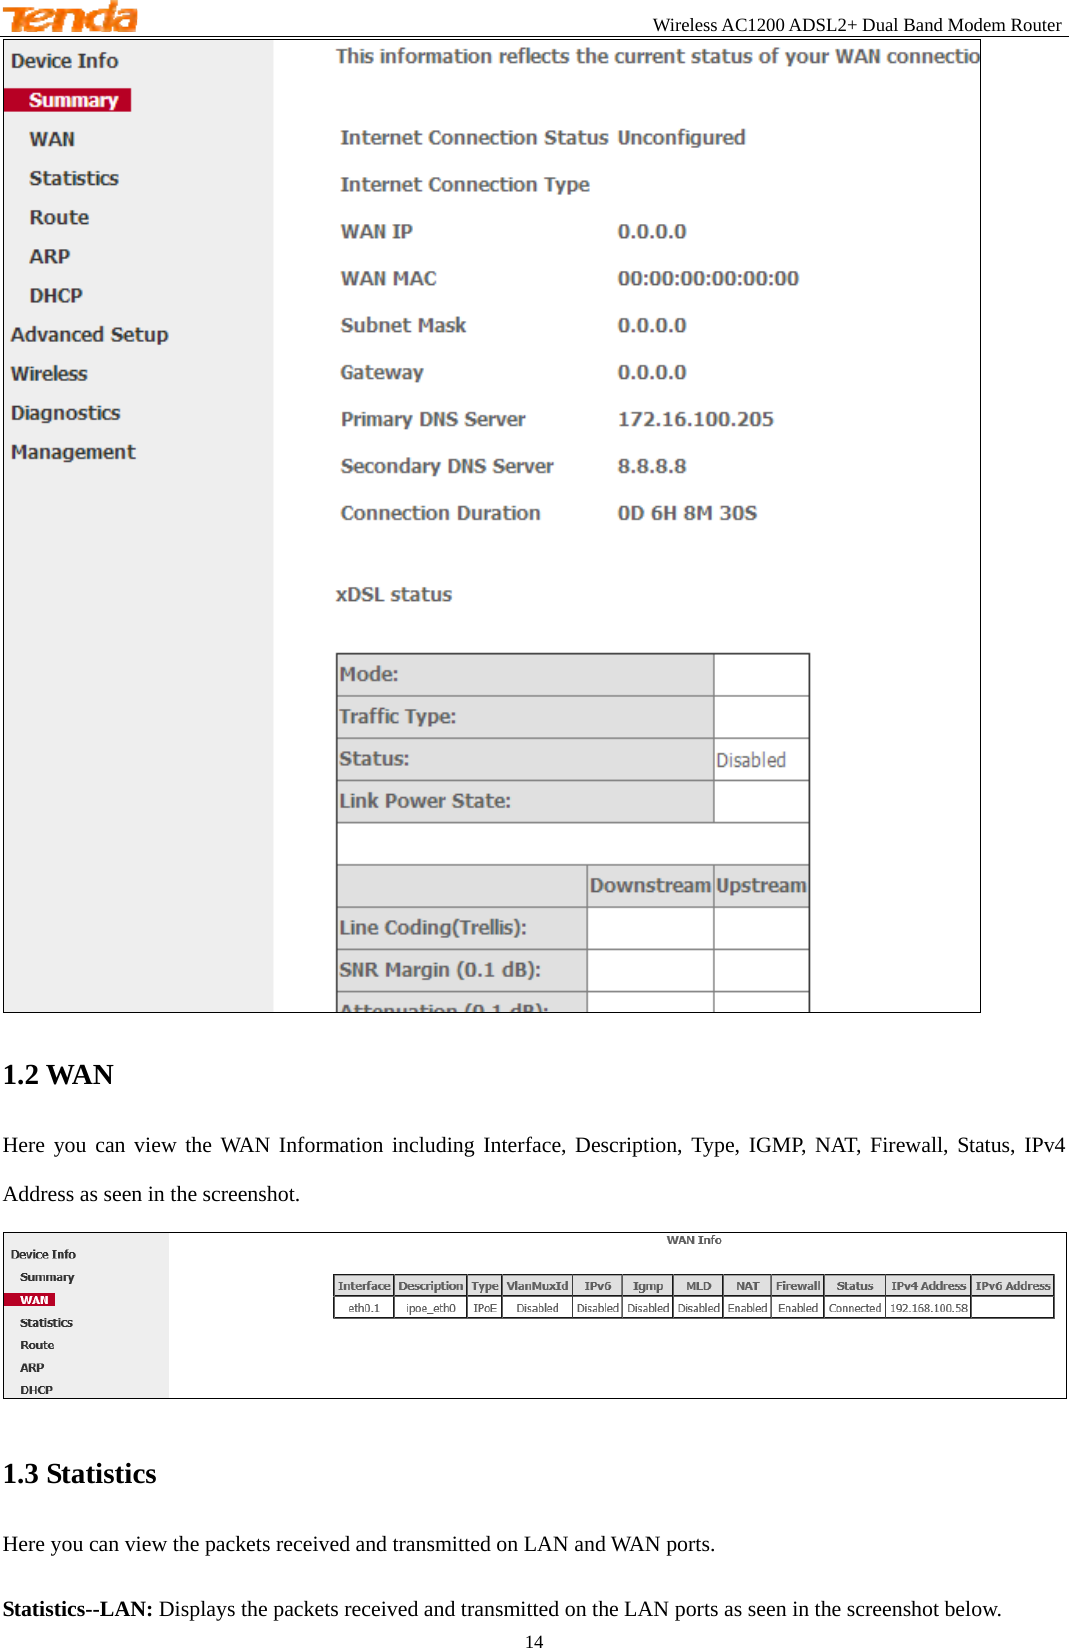
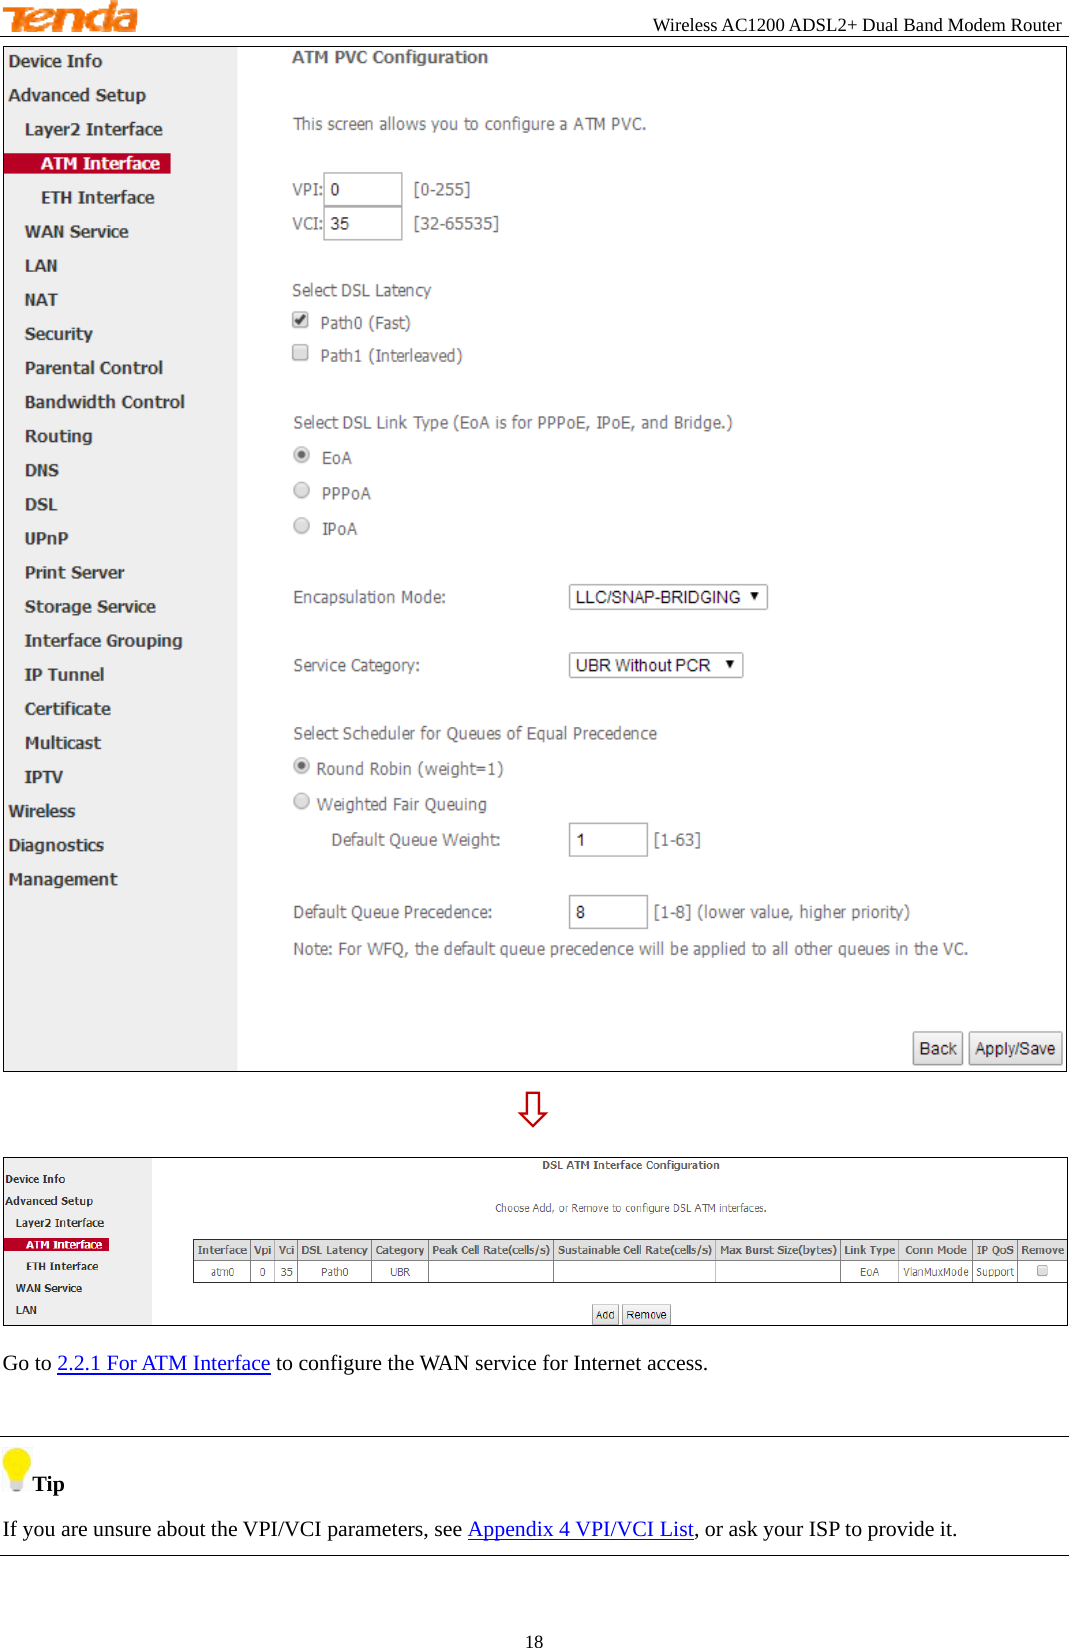
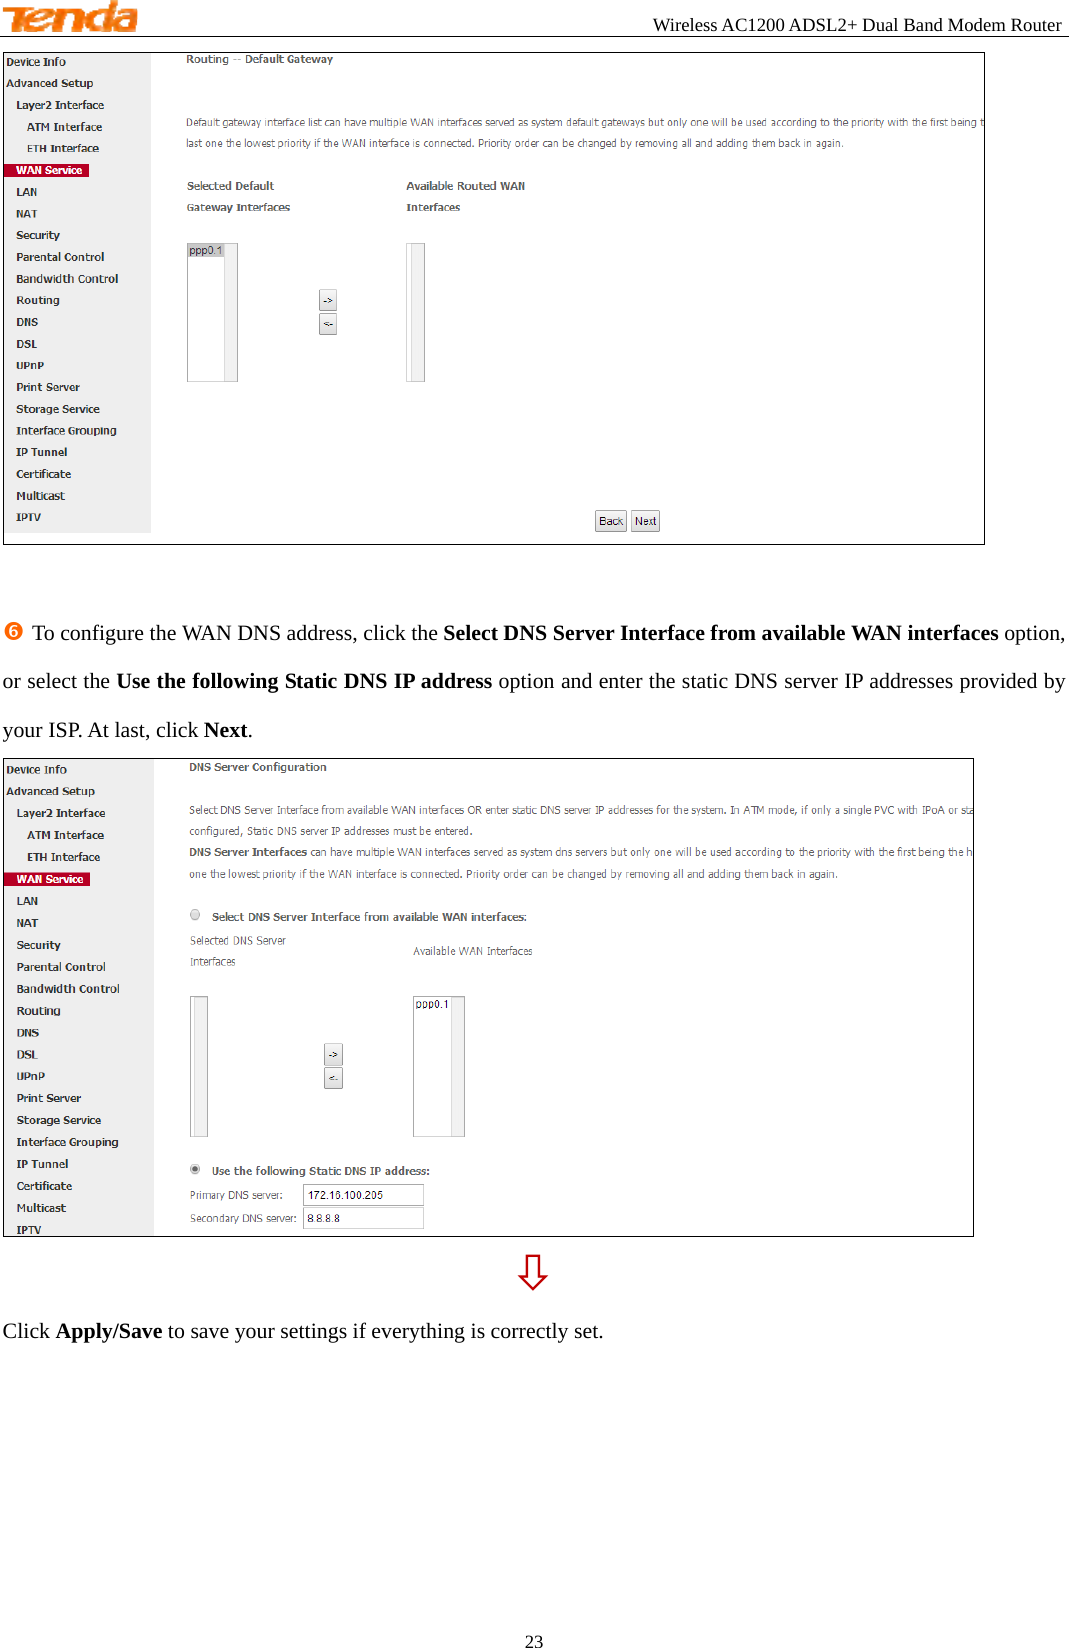
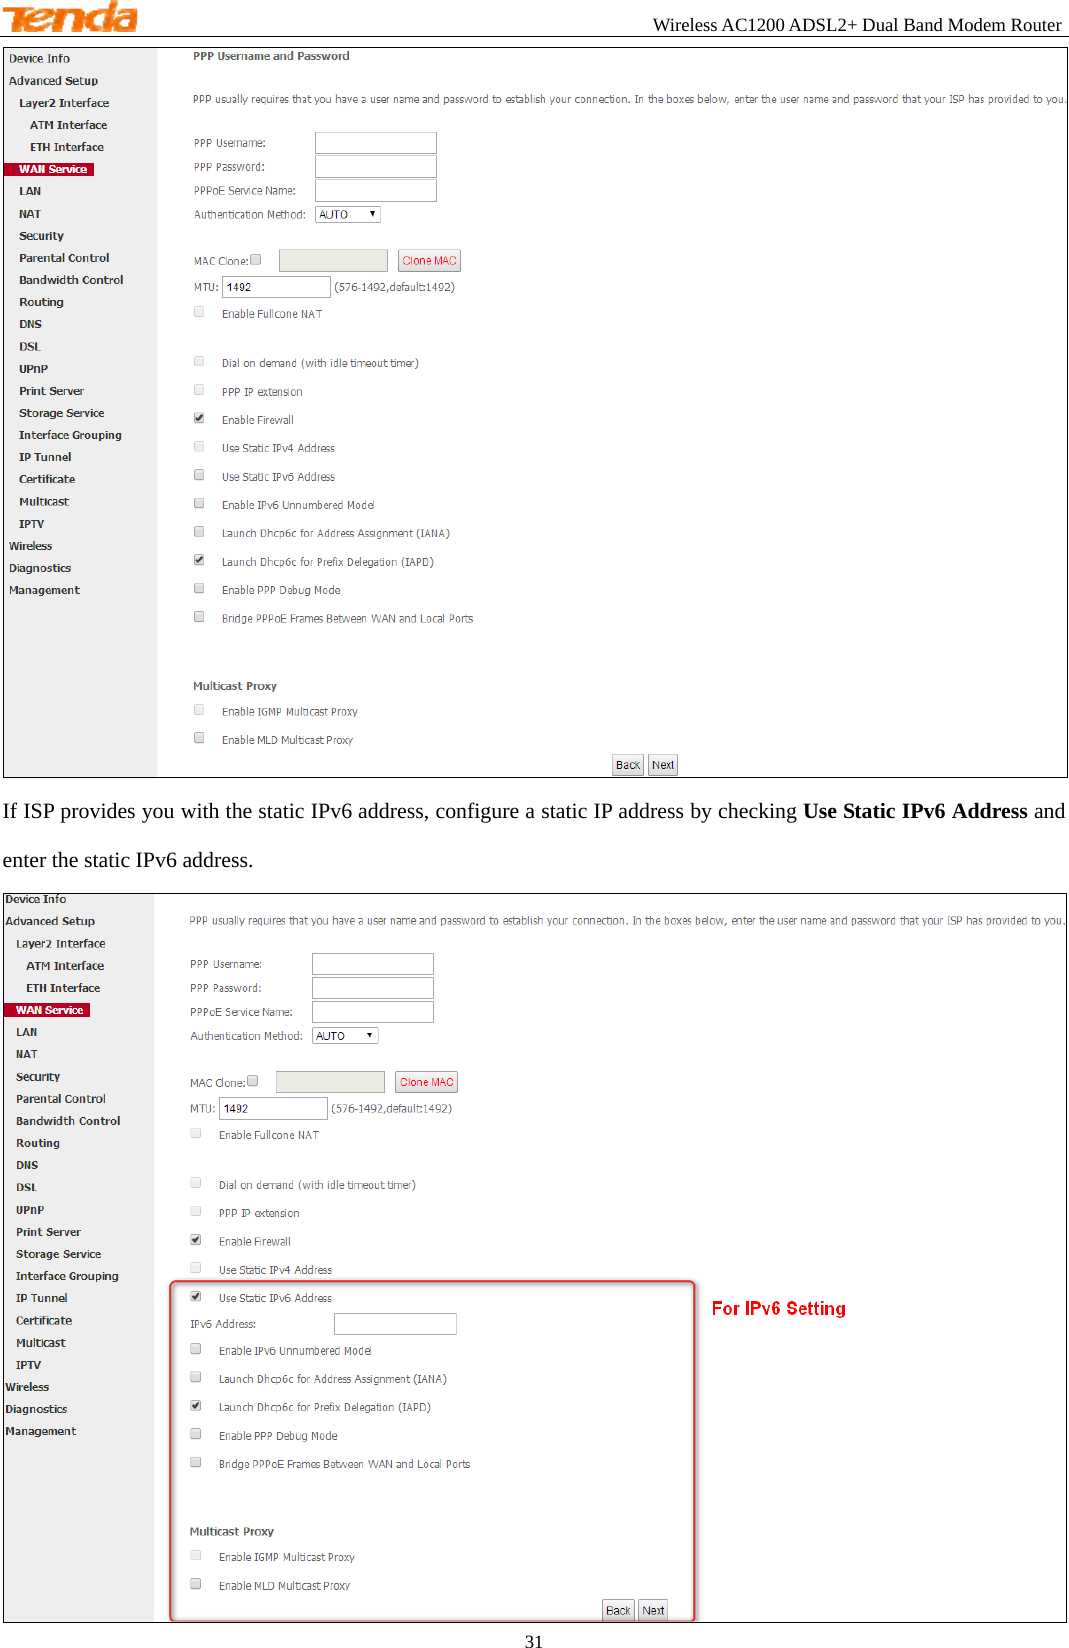
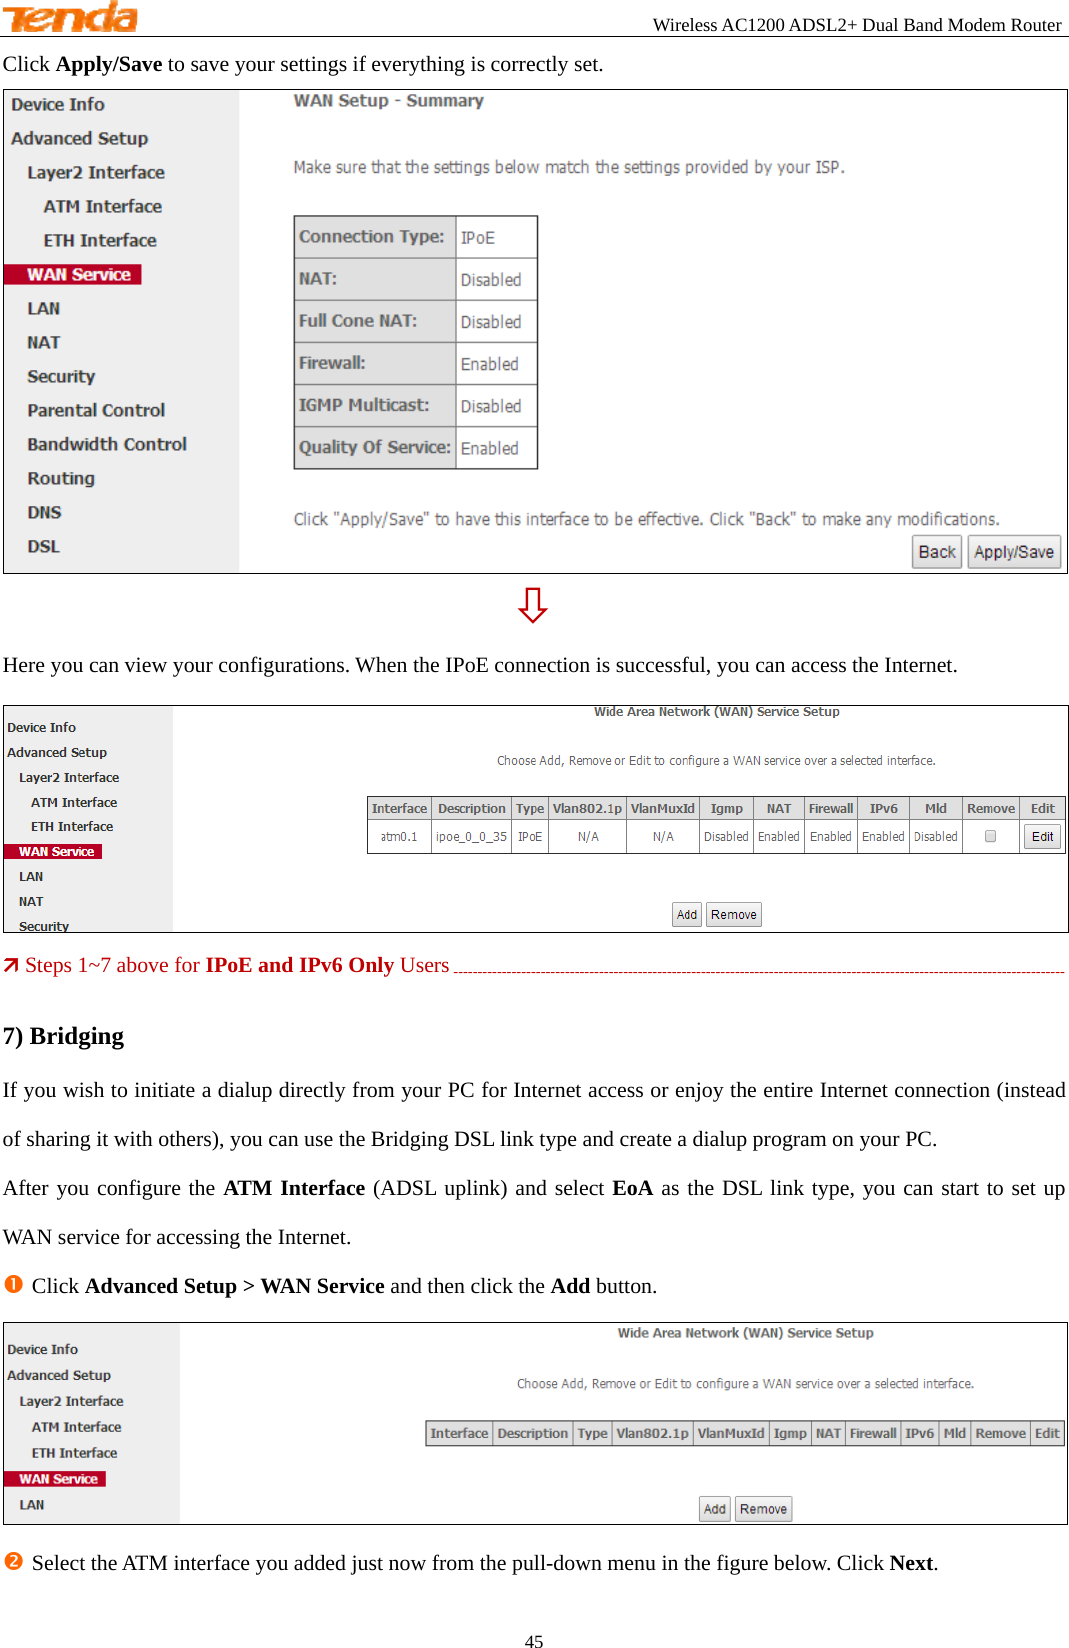
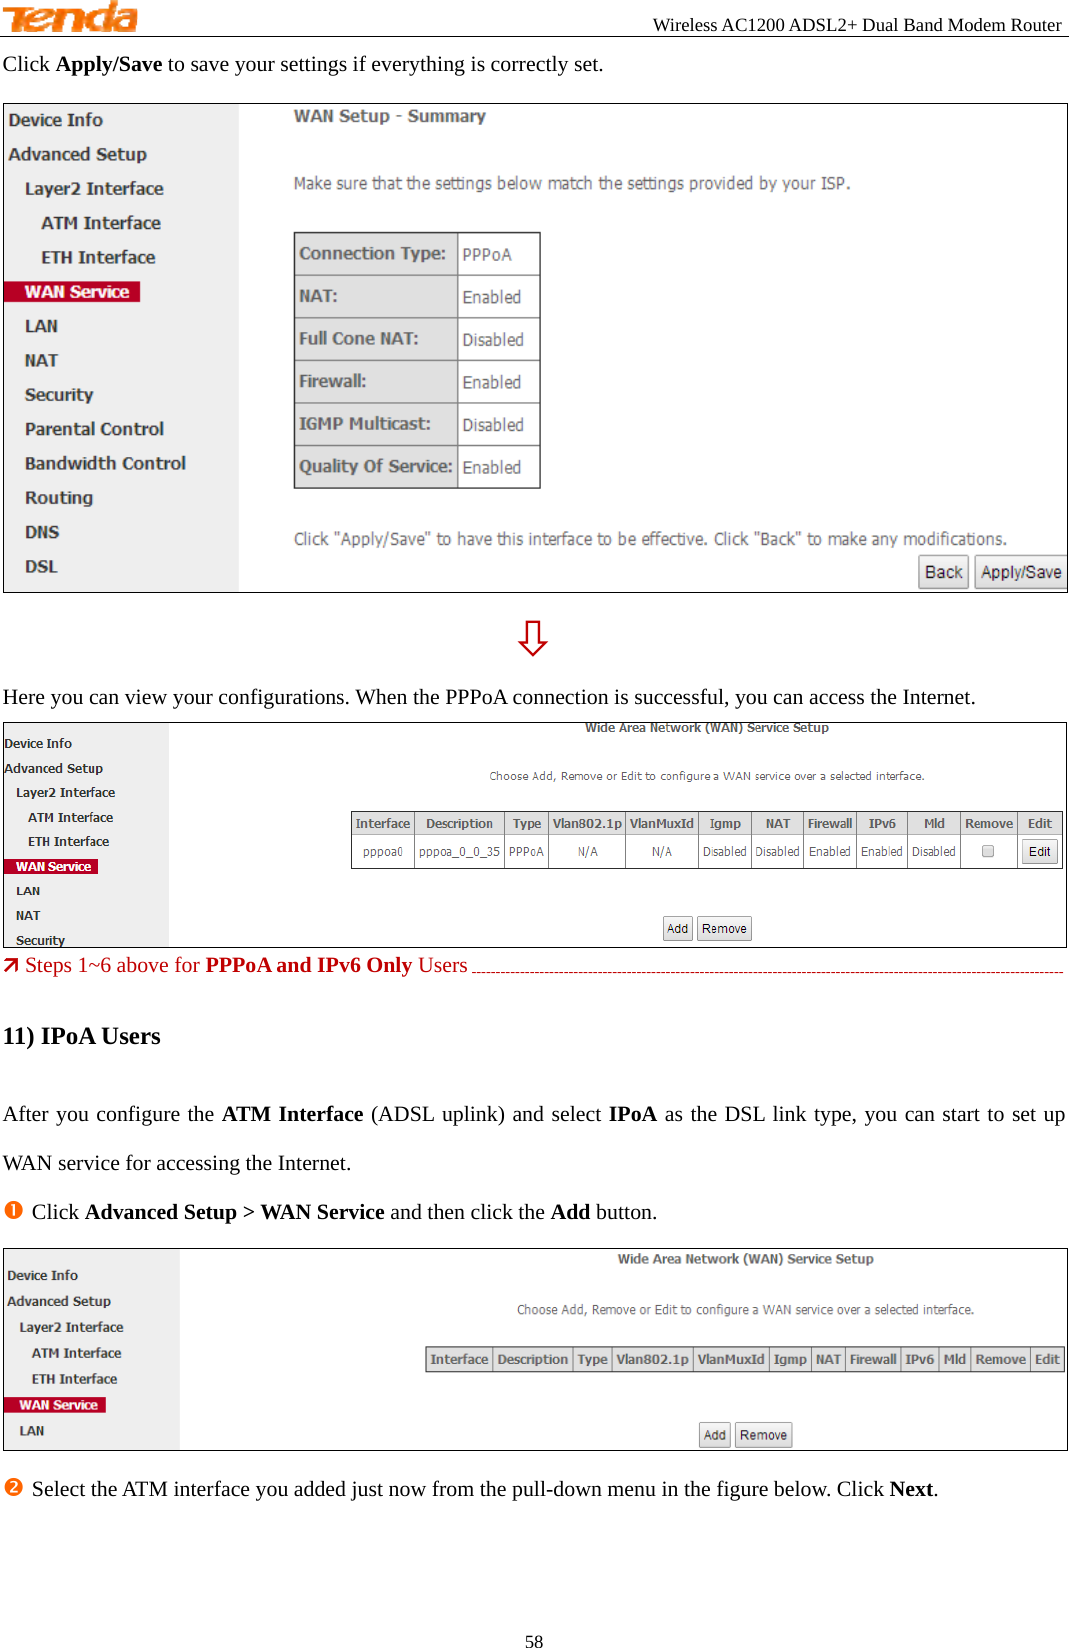
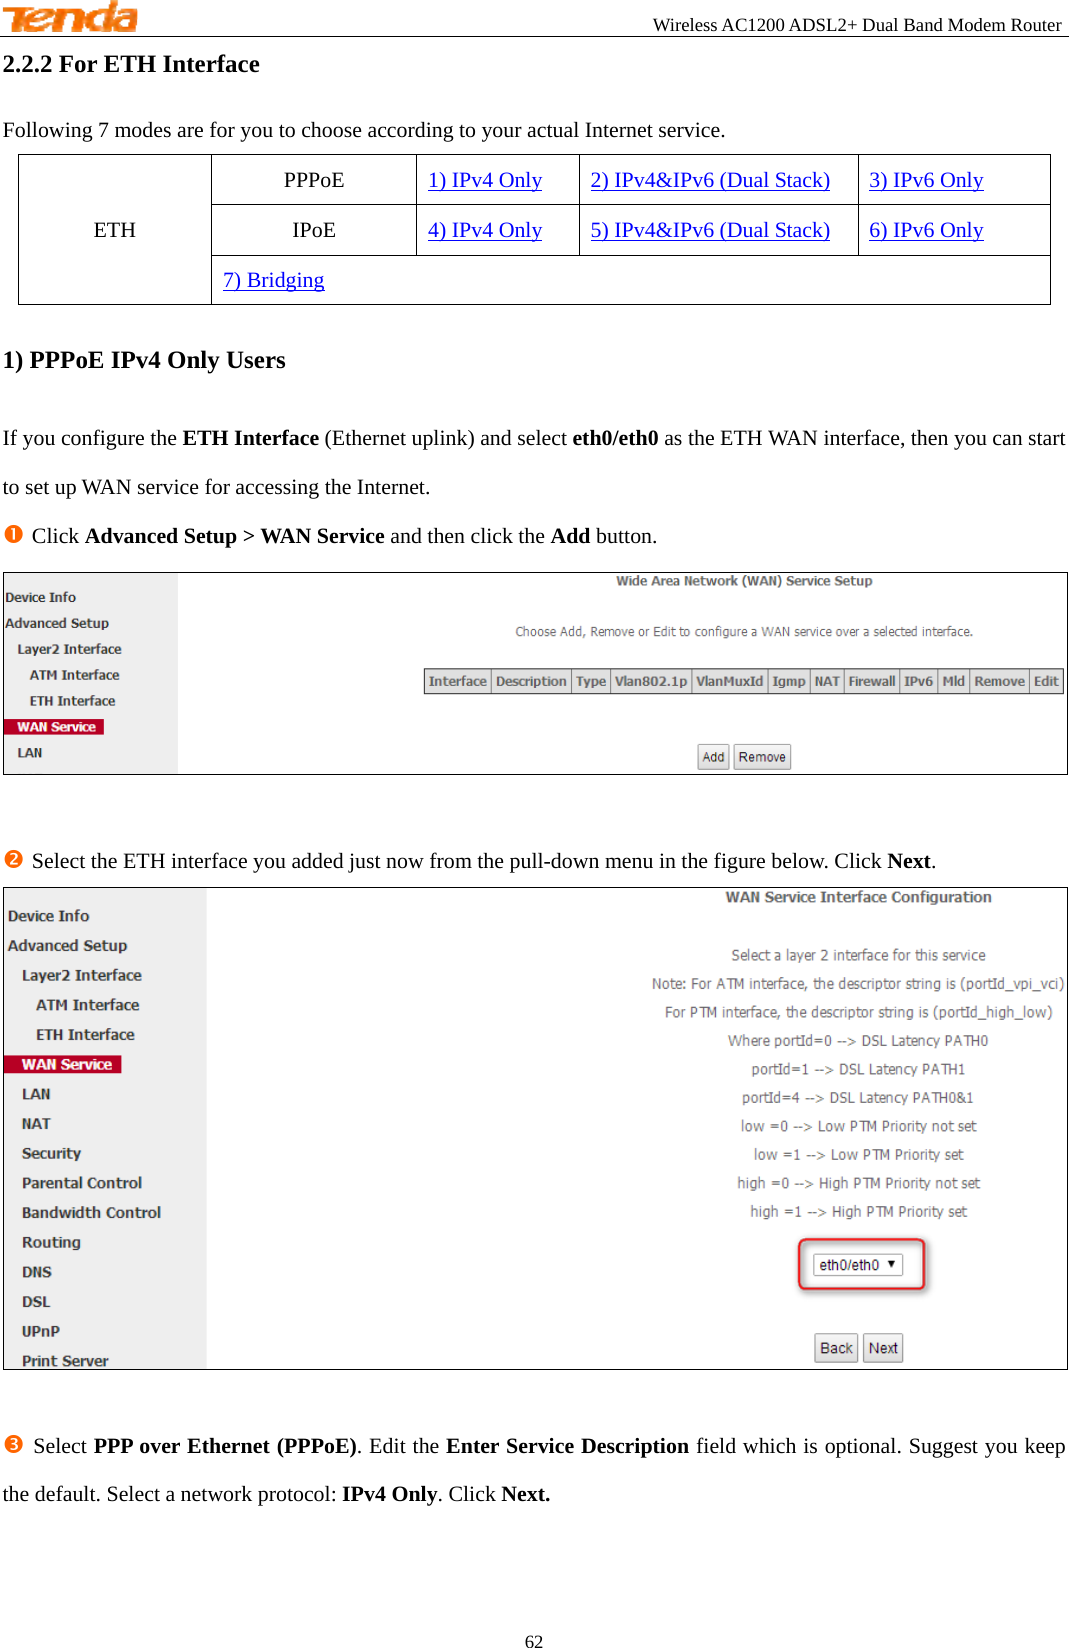
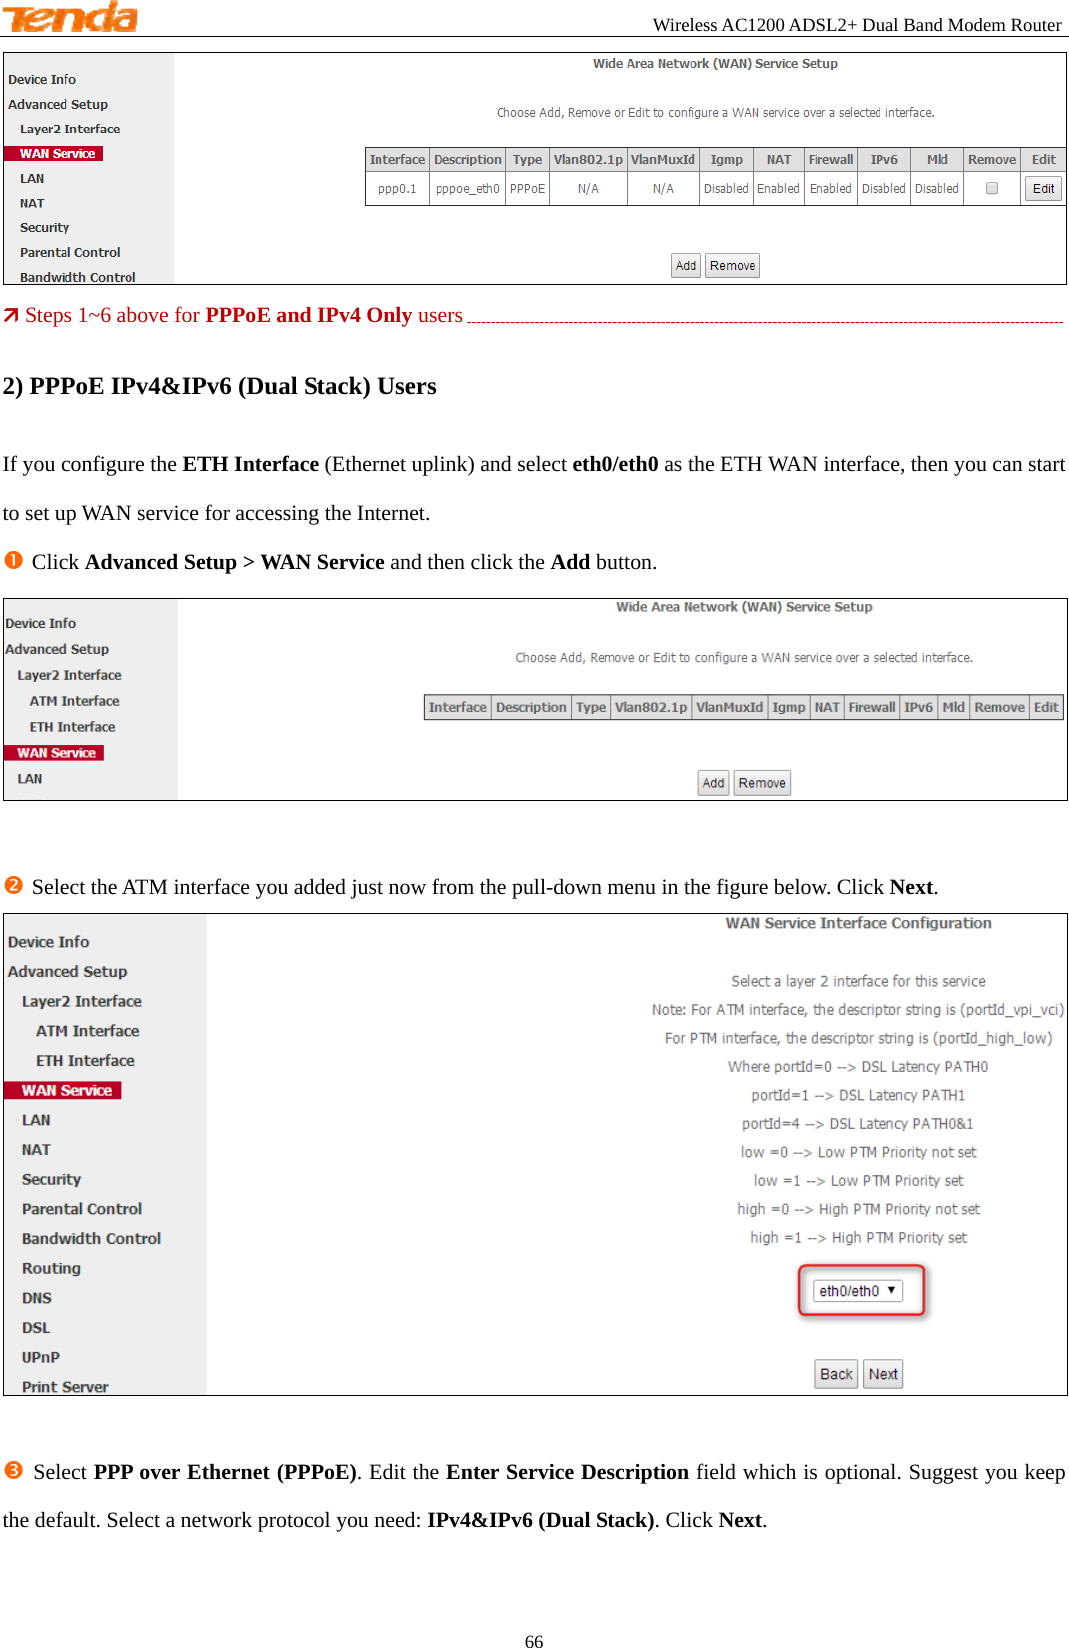
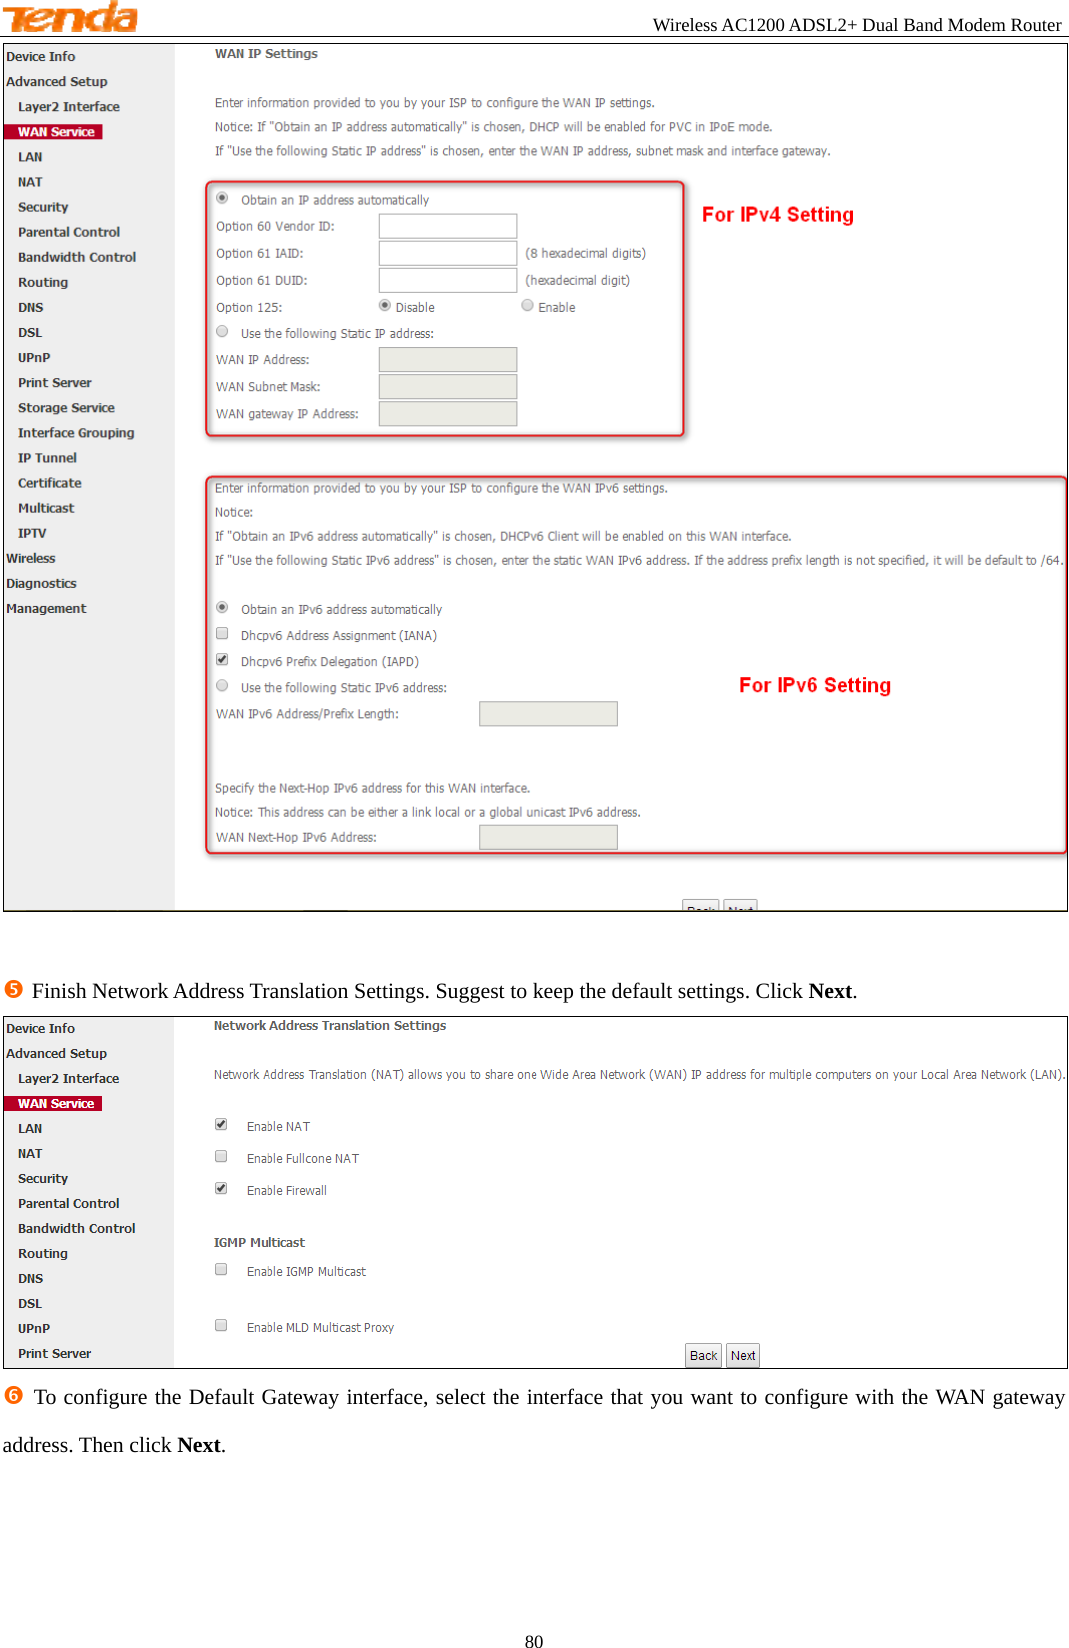
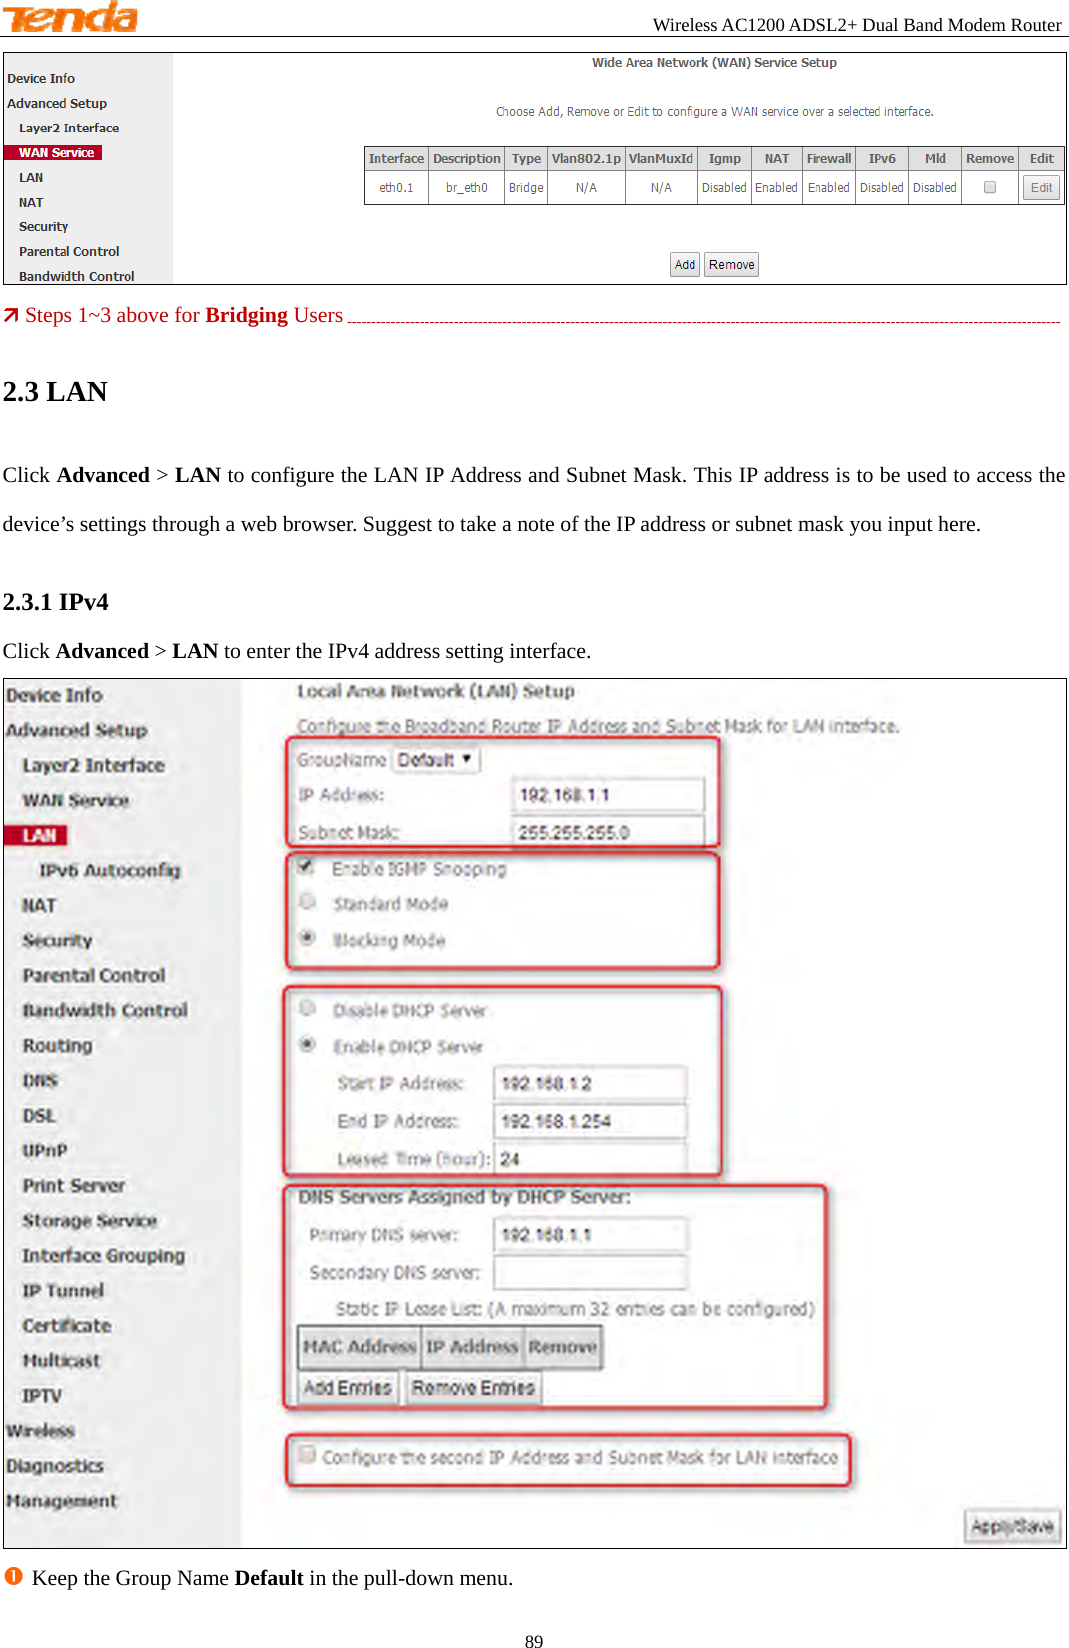
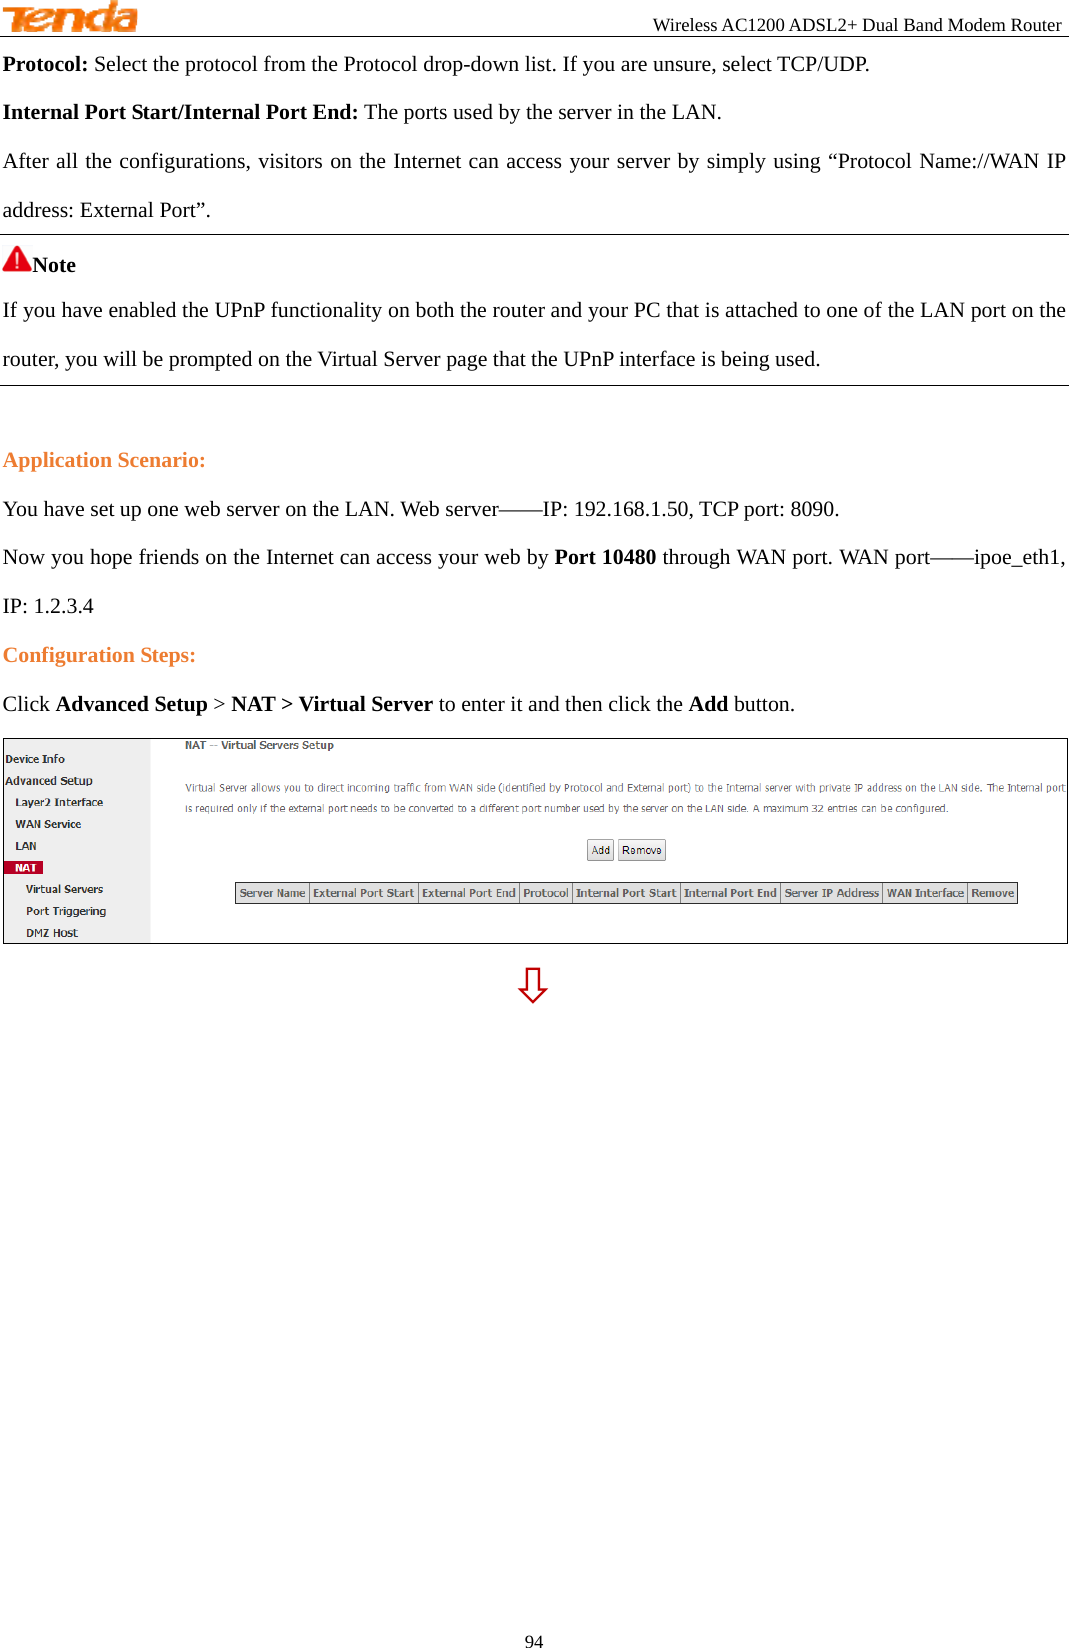
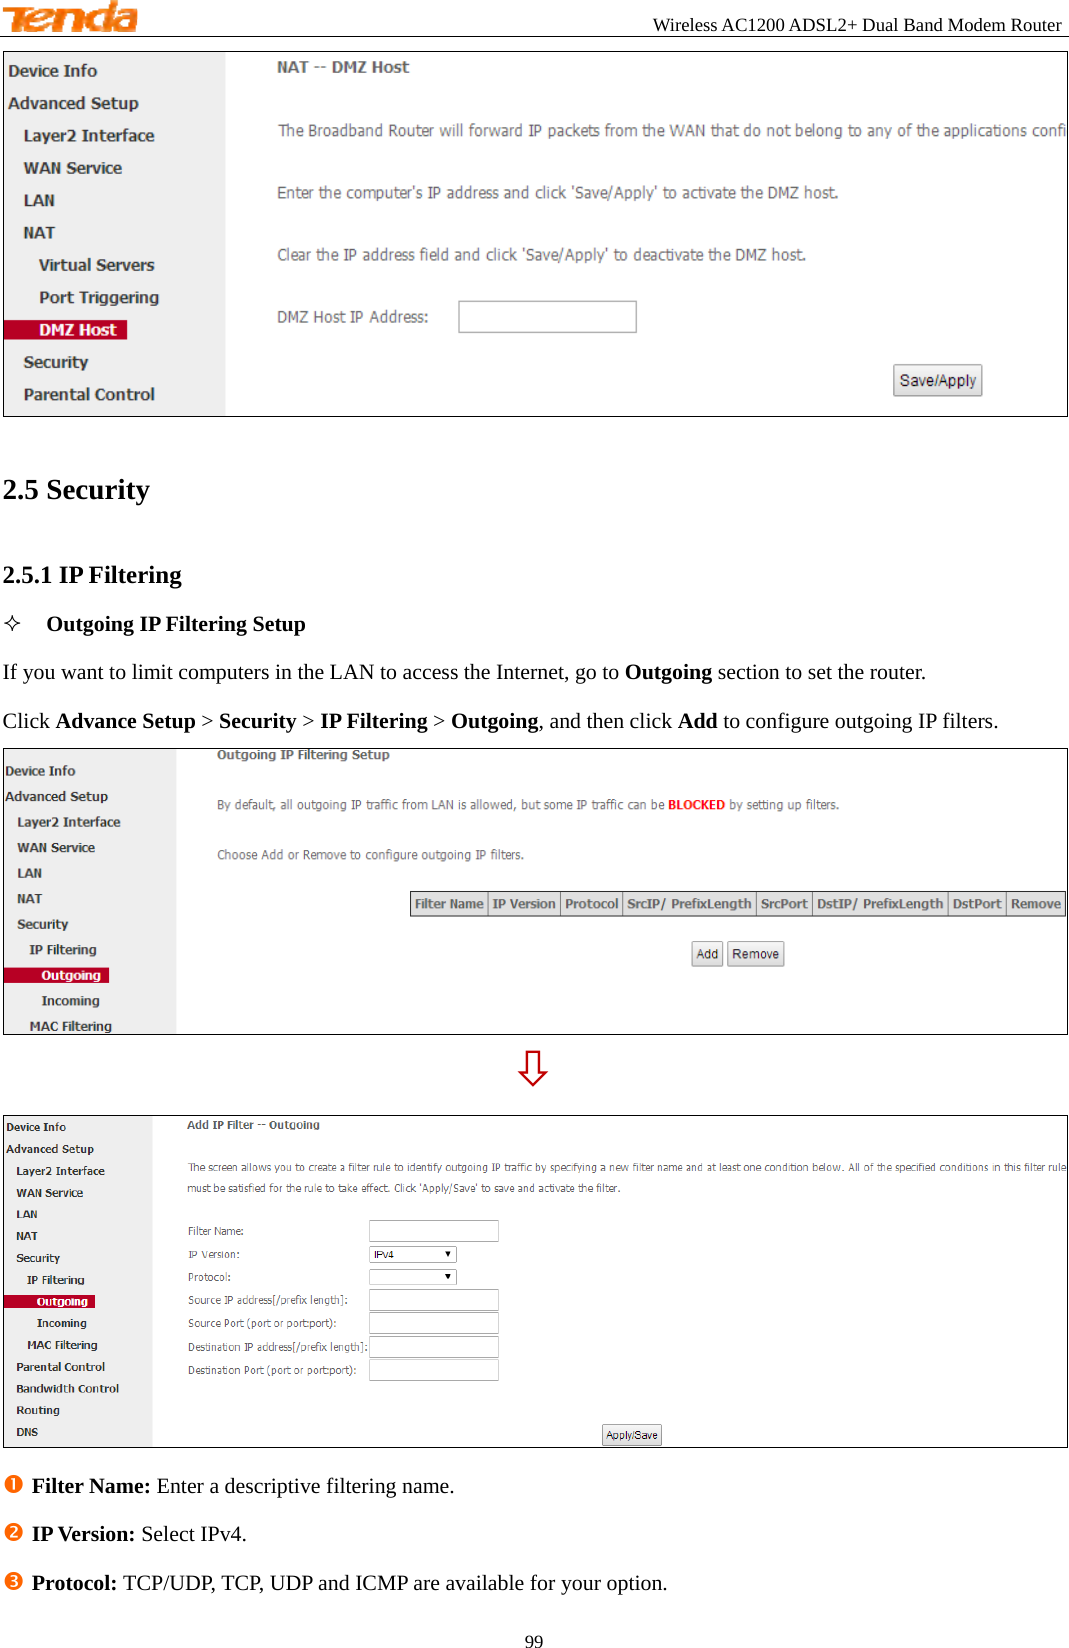
![Wireless AC1200 ADSL2+ Dual Band Modem Router 175 Hungary Sci-Network 0 35 PPPoE LLC Iceland Islandssimi 0 35 PPPoA VC-MUX Iceland Siminn 8 48 PPPoA VC-MUX India Airtel 1 32 1483 Bridged IP LLC India BSNL 0 35 1483 Bridged IP LLC India MTNL 0 35 1483 Bridged IP LLC India RELIANCE COMMUNICATION 0 35 PPPoE LLC India TATA INDICOM 0 32 PPPoE LLC India CONNECT 1 32 PPPoE LLC Indonesia Speedy Telkomnet 8 81 PPPoE LLC Iran [Shatel] Aria-Rasaneh-Tadbir 0 35 PPPoE LLC Iran Asia-Tech 0 35 PPPoE LLC Iran Pars-Online (Tehran) 0 35 PPPoE LLC Iran Pars-Online (Provinces) 0 59 PPPoE LLC Iran [Saba-Net] Neda-Gostar-Saba 0 35 PPPoE LLC Iran Pishgaman-Tose 0 35 PPPoE LLC Iran Fan-Ava 8 35 PPPoE LLC Iran Datak 0 35 PPPoE LLC Iran Laser (General) 0 35 PPPoE LLC Iran Laser (Privates) 0 32 PPPoE LLC Iran Asr-Enteghal-Dadeha 8 35 PPPoE LLC Iran Kara-Amin-Ertebat 0 33 PPPoE LLC Iran ITC 0 35 PPPoE LLC Iran (1) 0 35 PPPoE LLC Iran (2) 8 81 PPPoE LLC Iran Dadegostar Asre Novin 0 33 PPPoE LLC Israel 8 35 PPPoA VC-MUX Israel(1) 8 48 PPPoA VC-MUX](https://usermanual.wiki/TENDA-TECHNOLOGY/D1201/User-Guide-2337720-Page-179.png)