TENDA TECHNOLOGY N60 Concurrent Dual Band Wireless N600 Gigabit Router User Manual Copyright Statement
SHENZHEN TENDA TECHNOLOGY CO., LTD. Concurrent Dual Band Wireless N600 Gigabit Router Copyright Statement
Contents
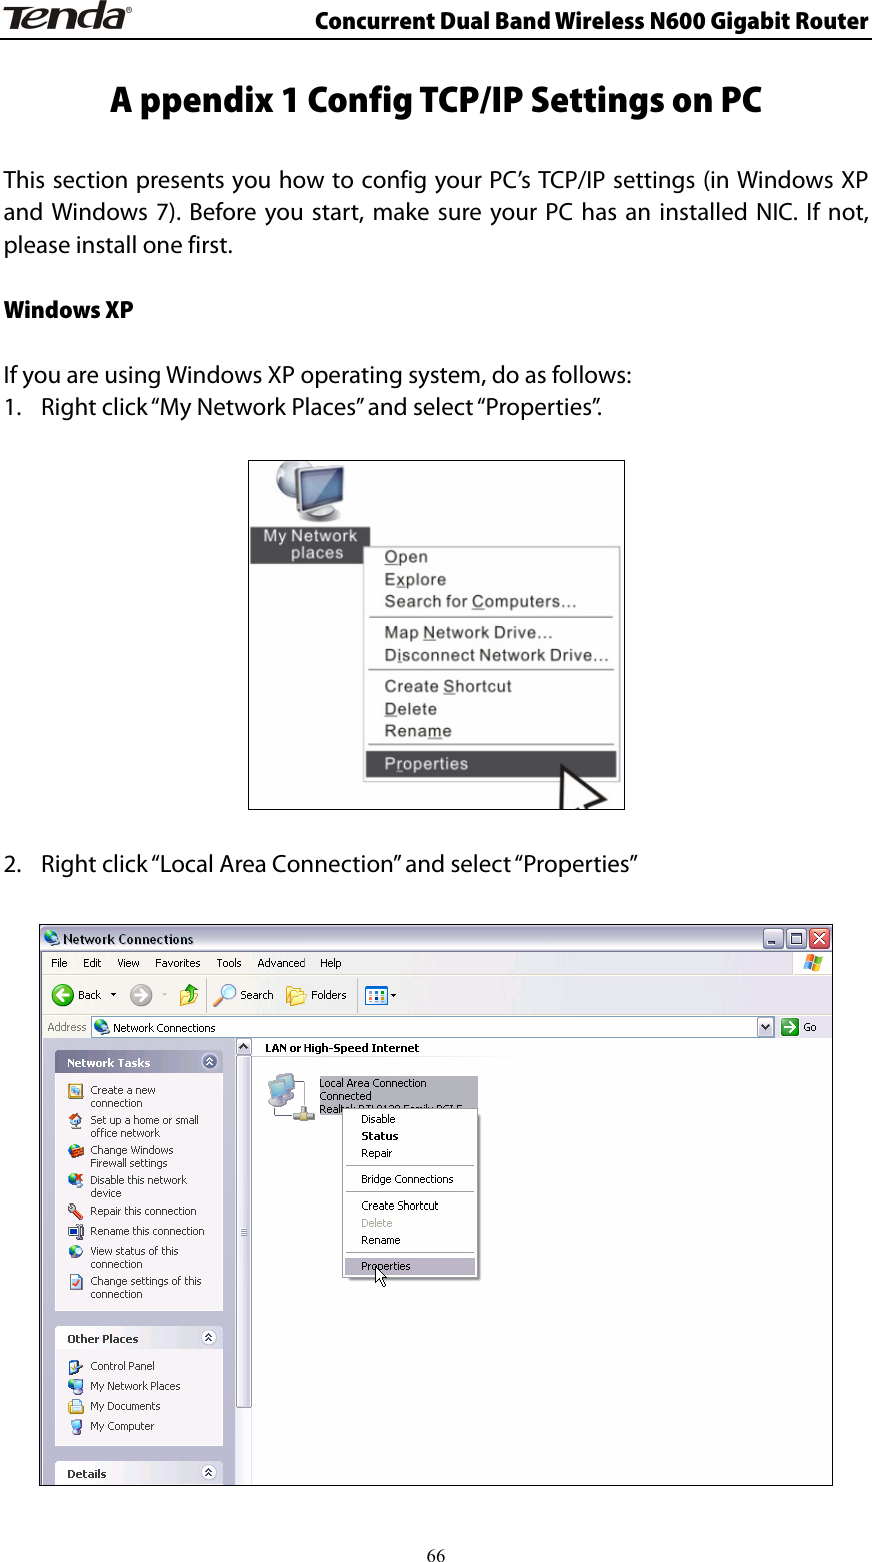
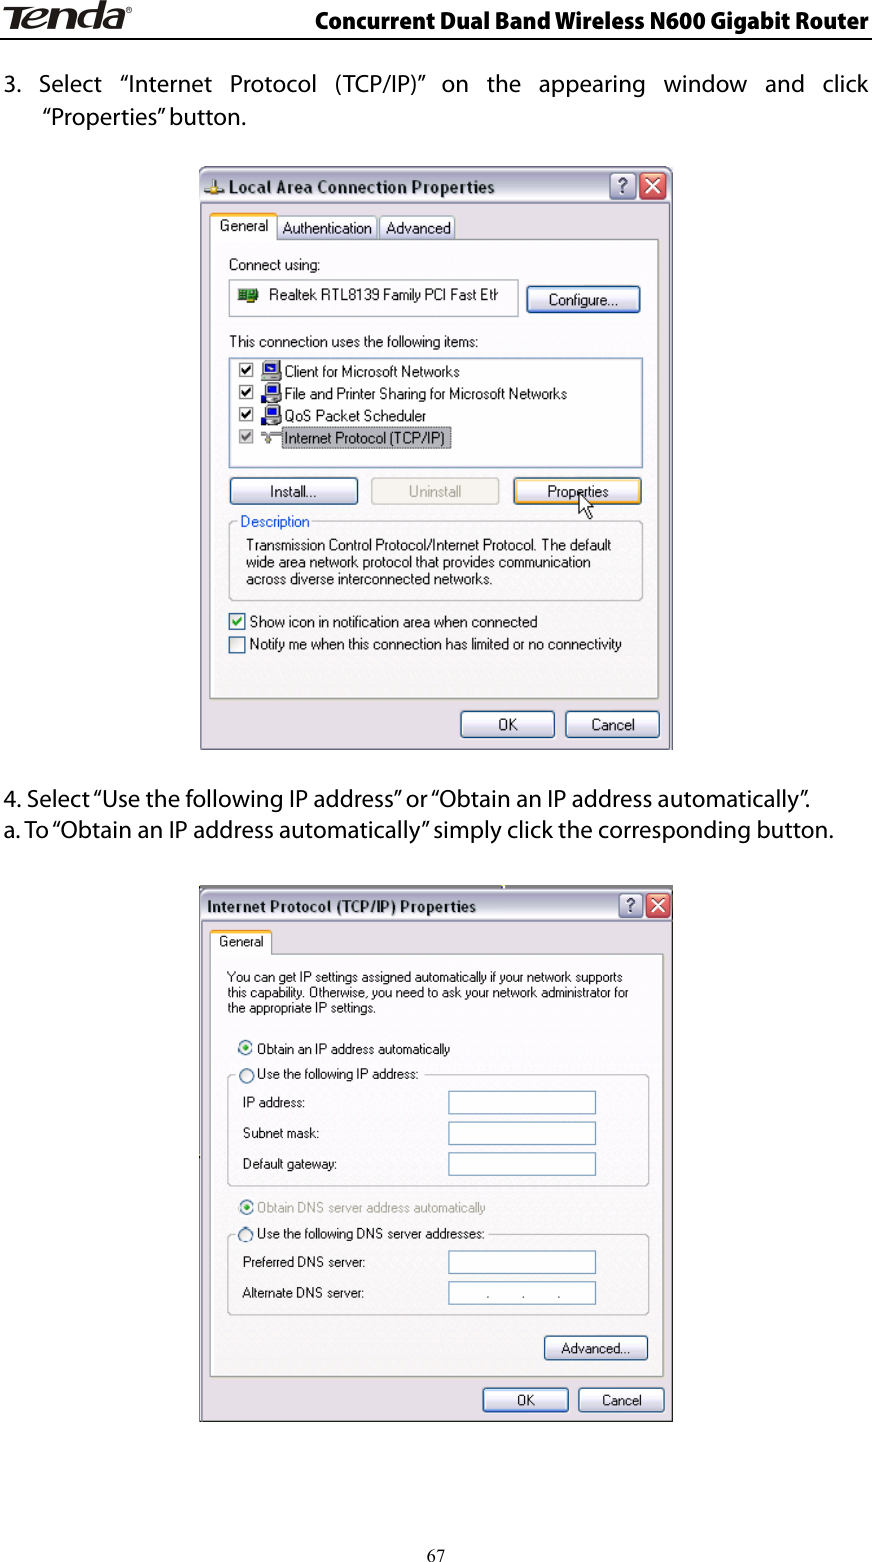
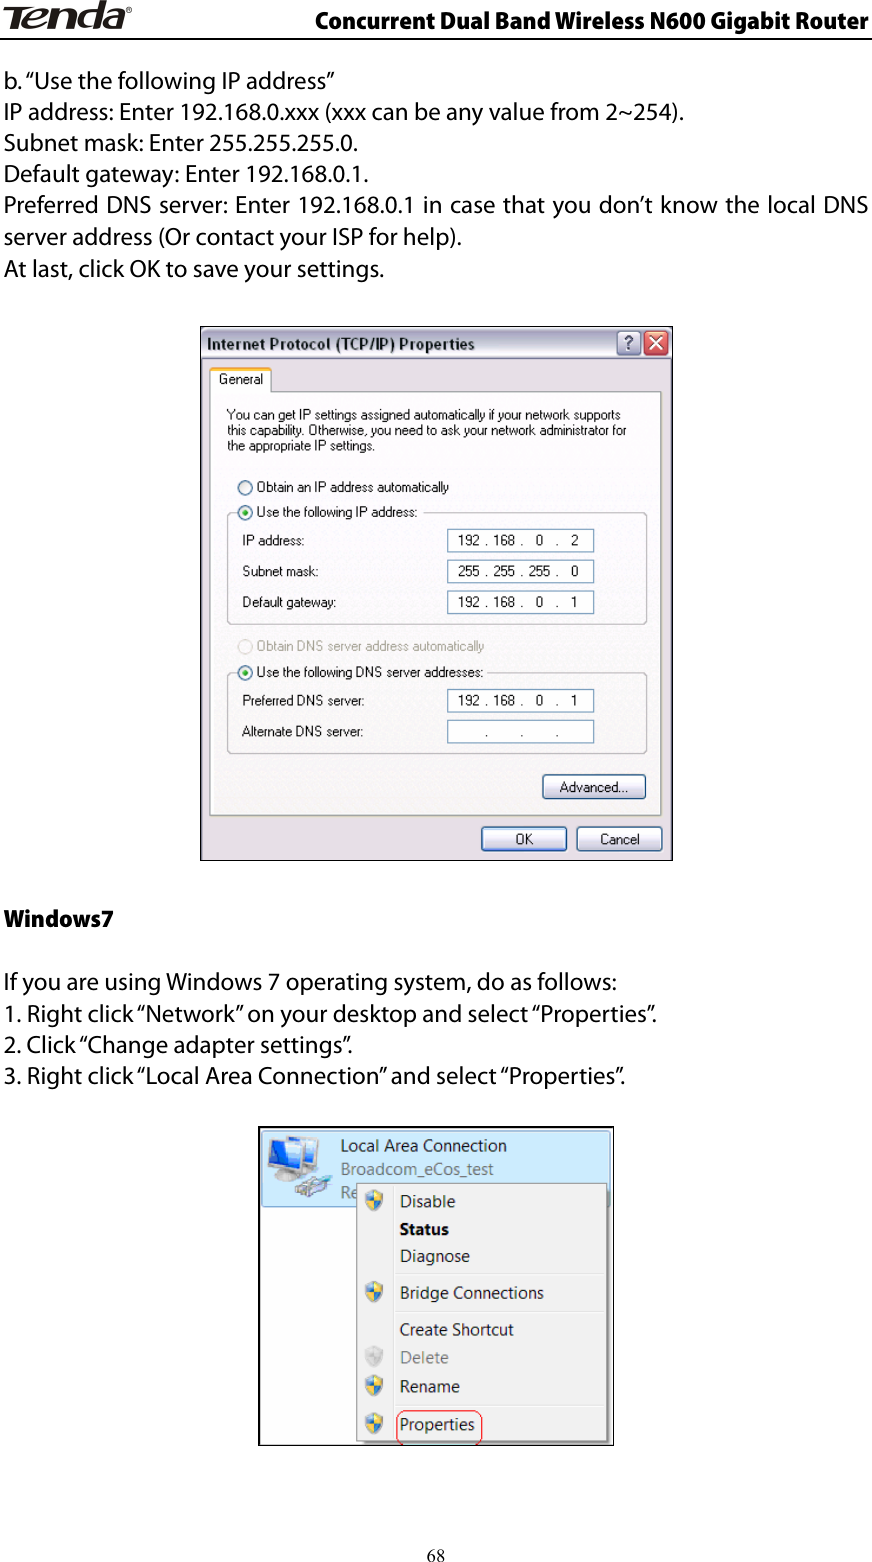
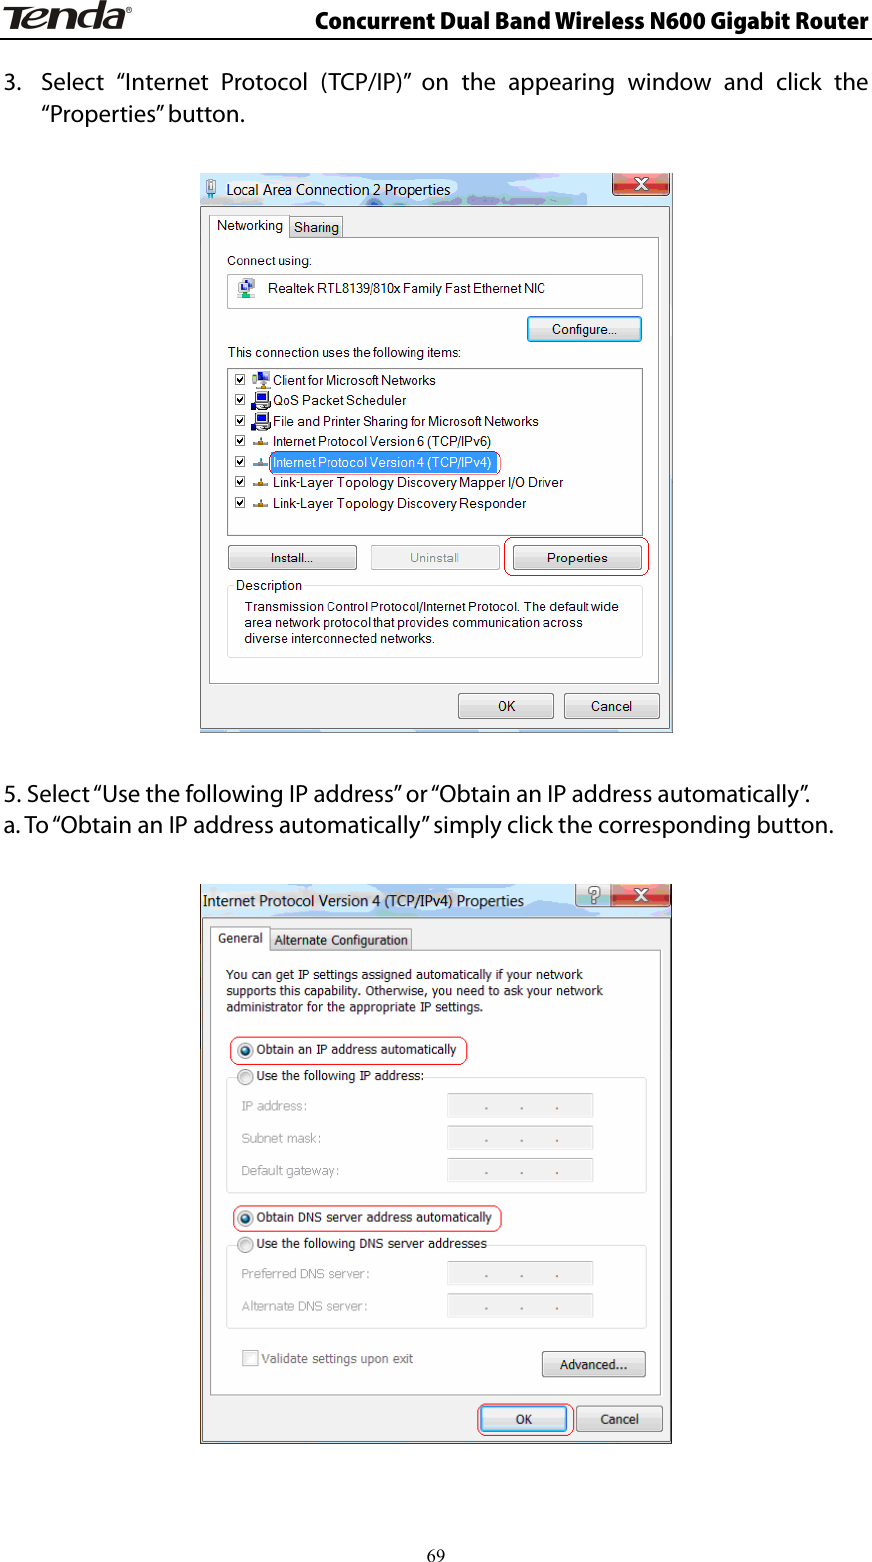
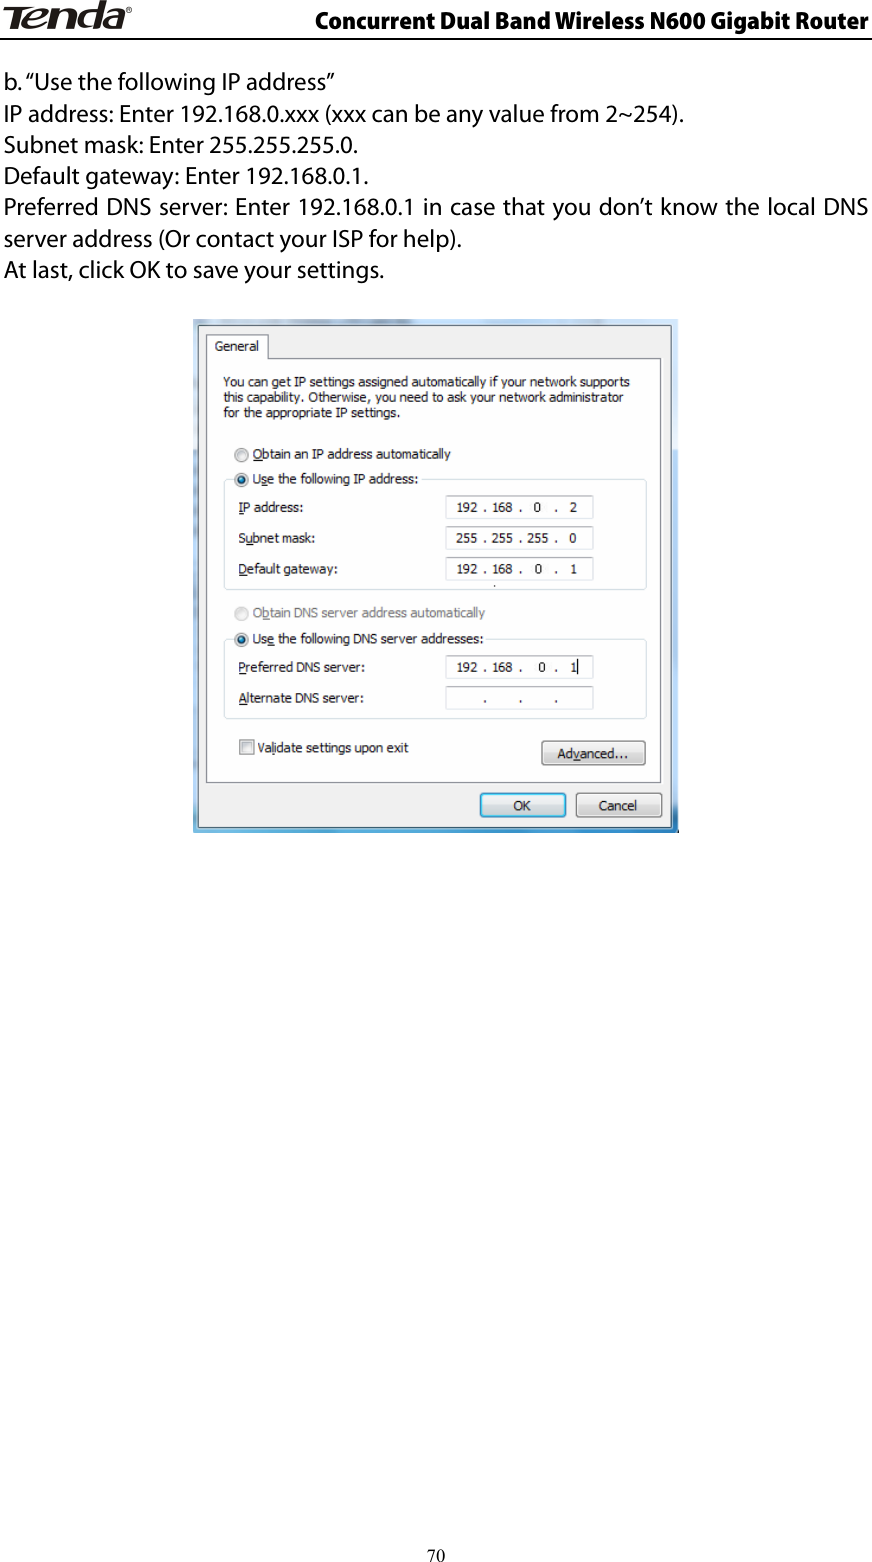
- 1. Users Manual
- 2. Users manual
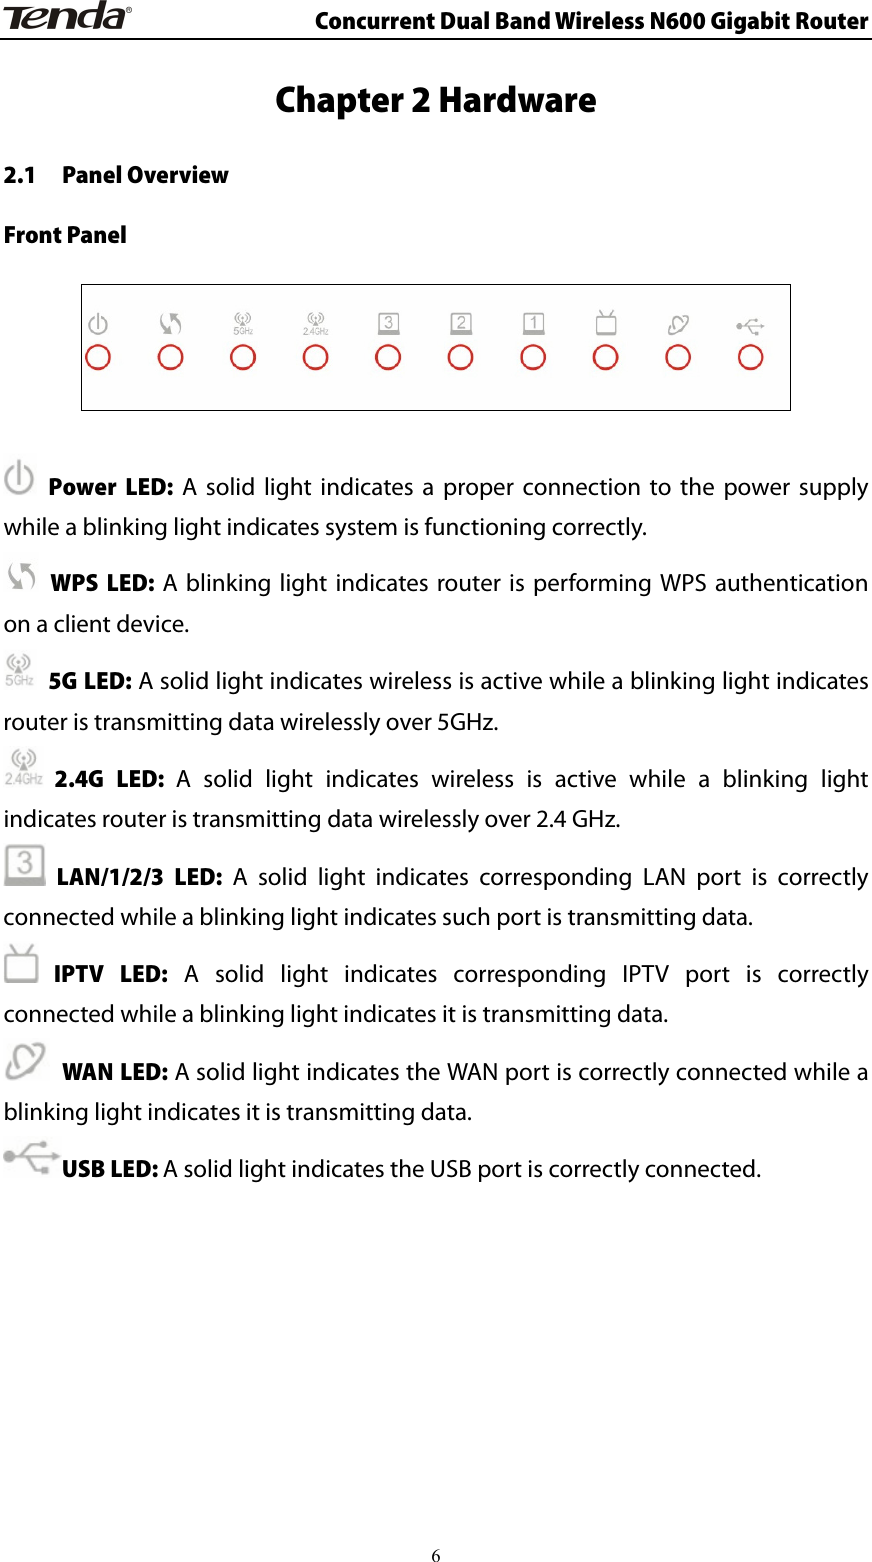
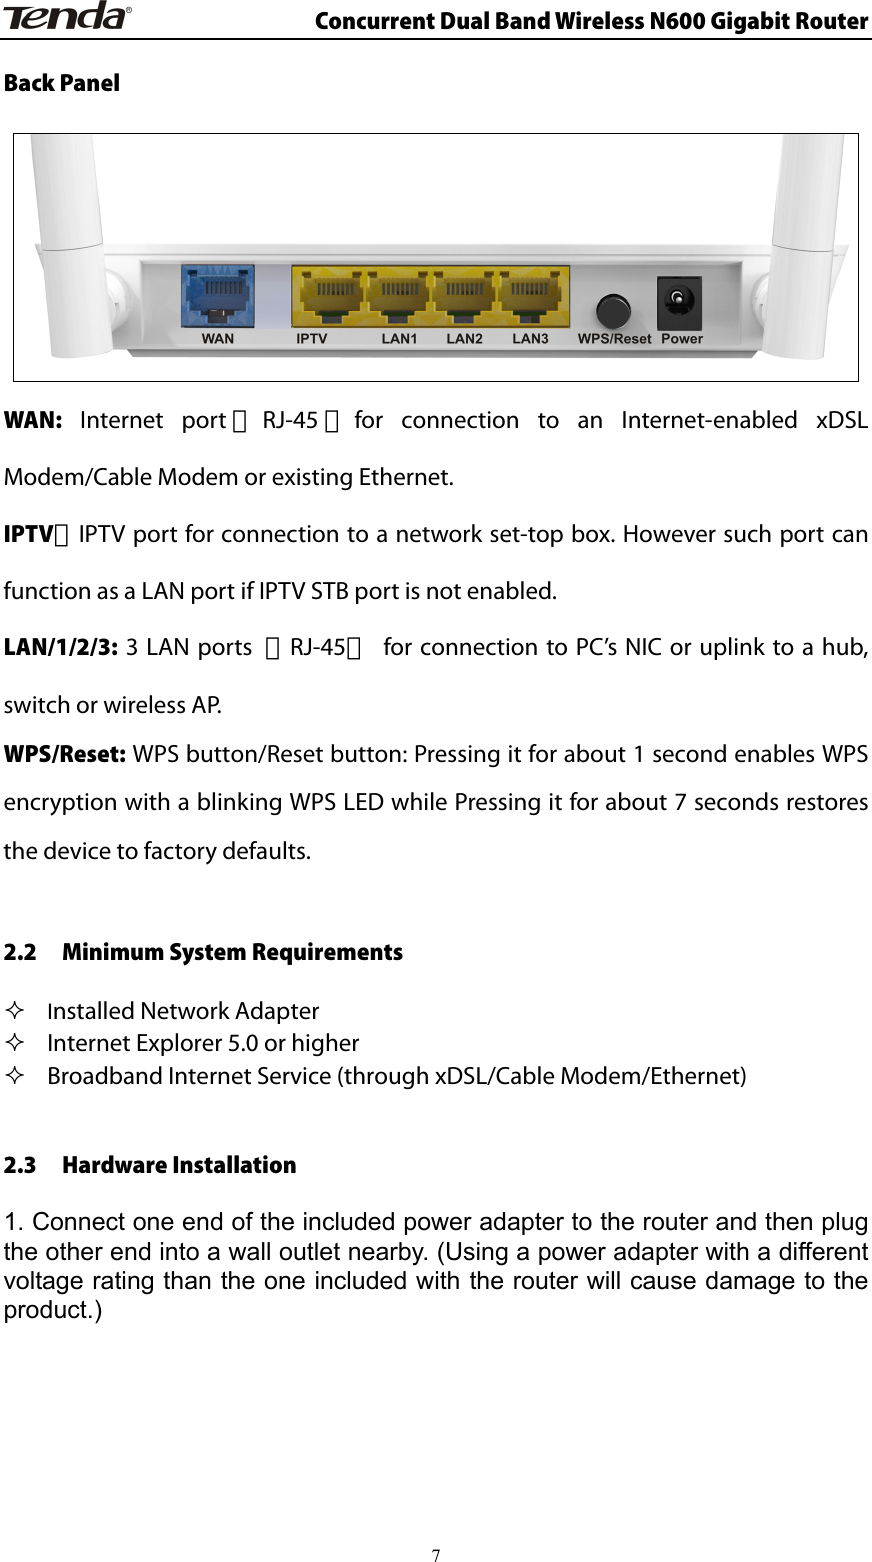
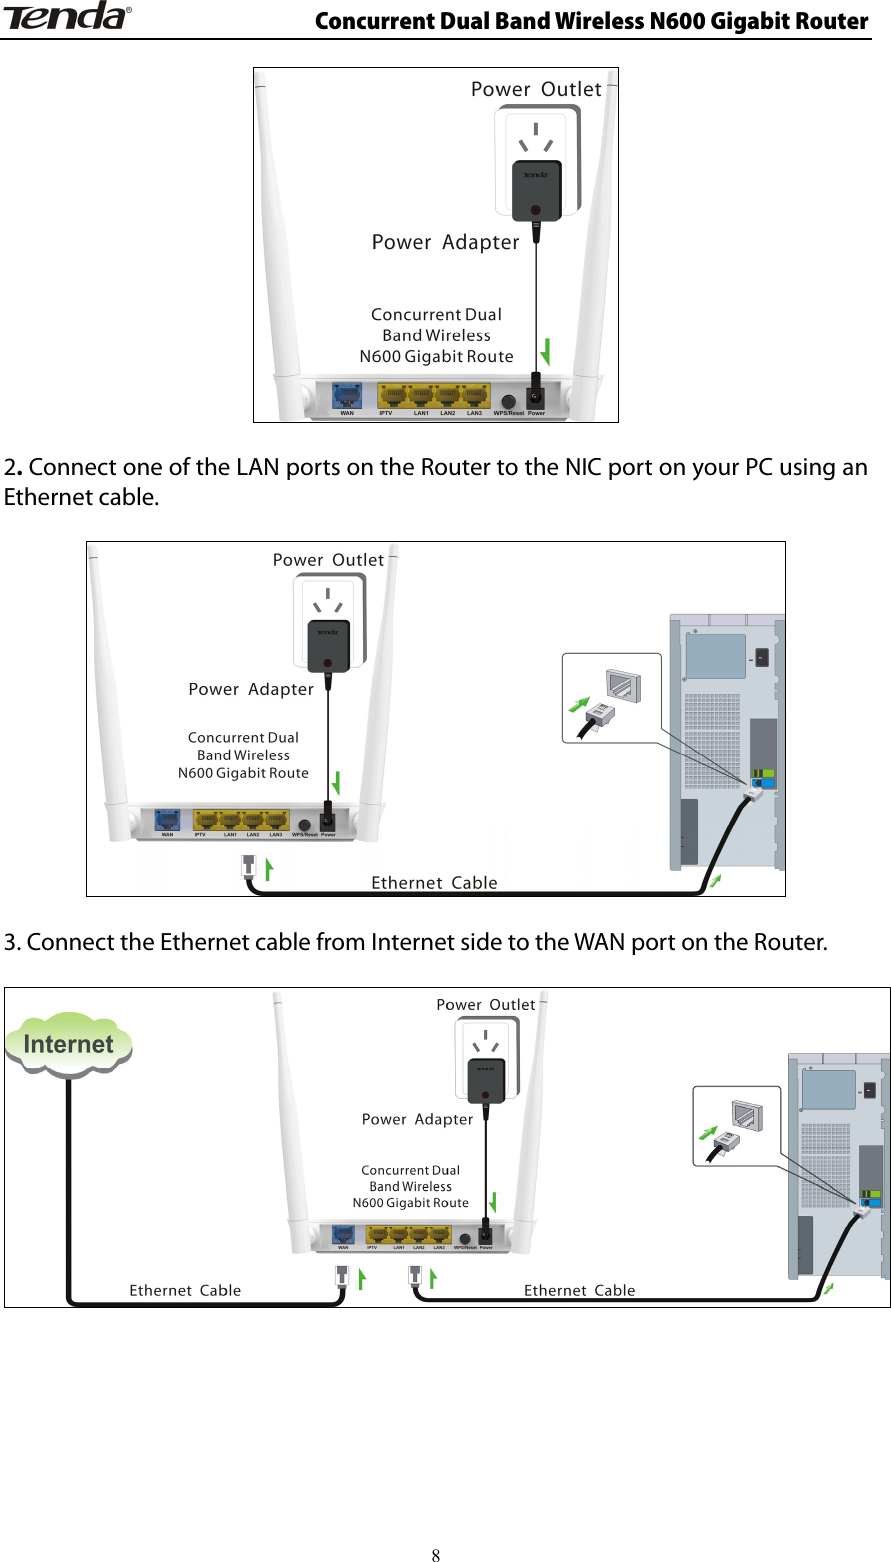
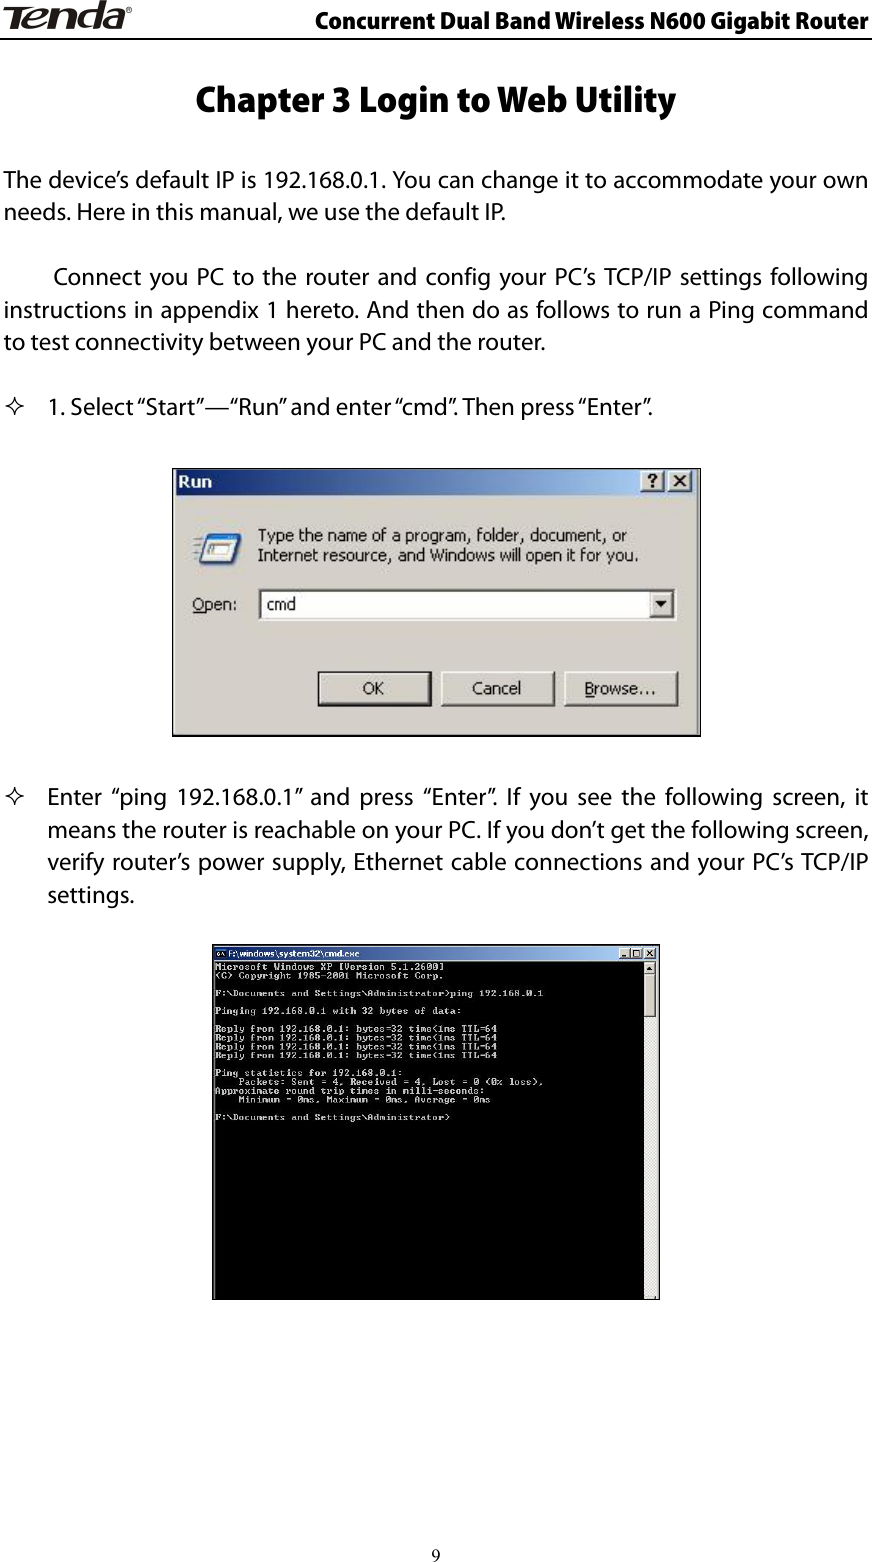
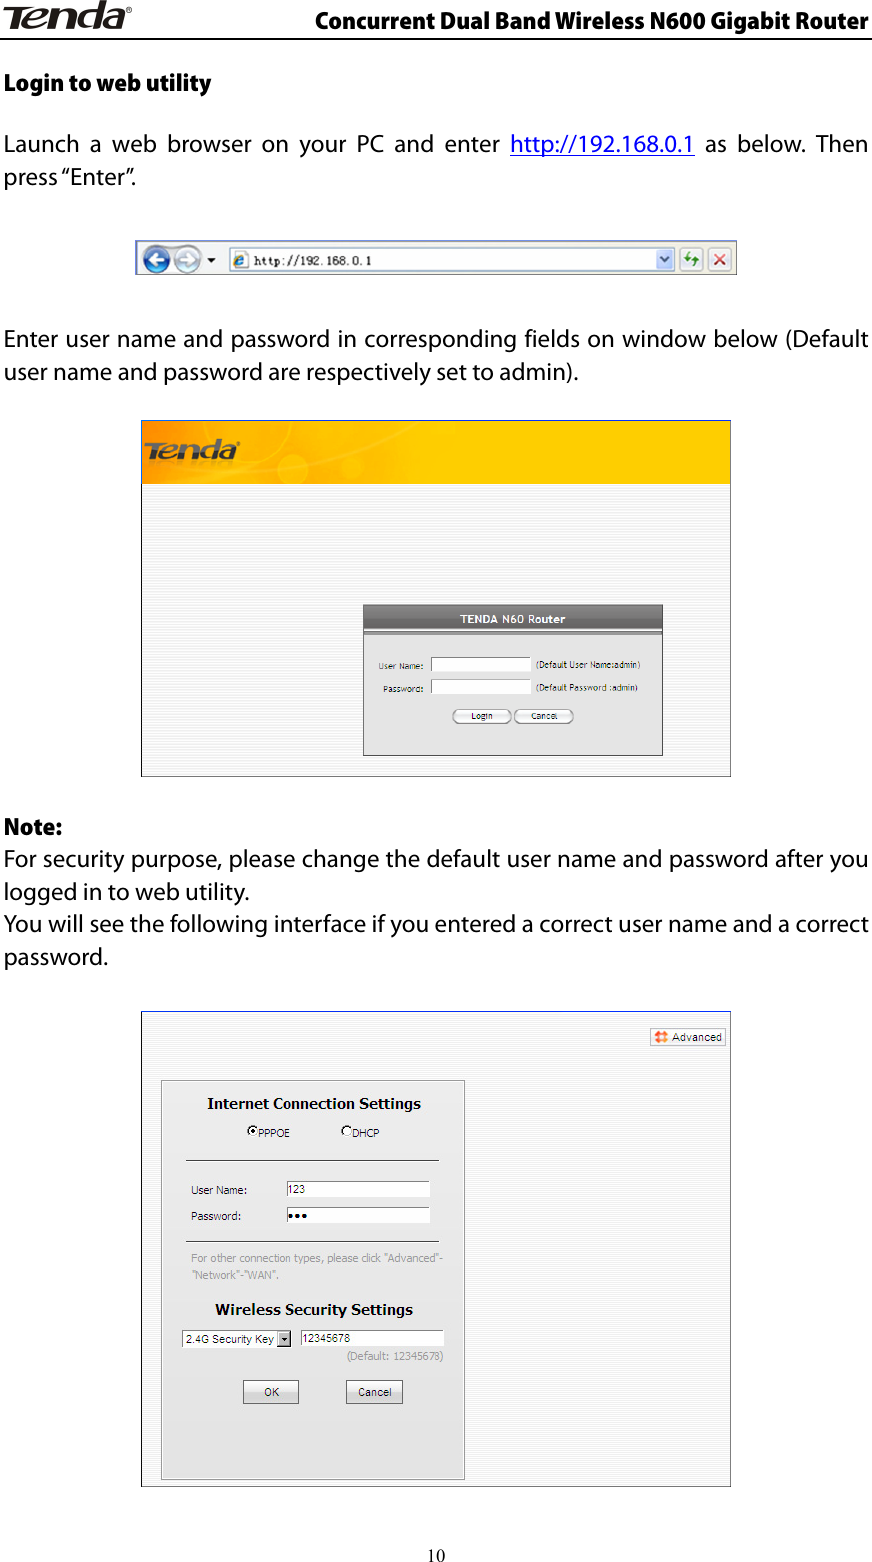
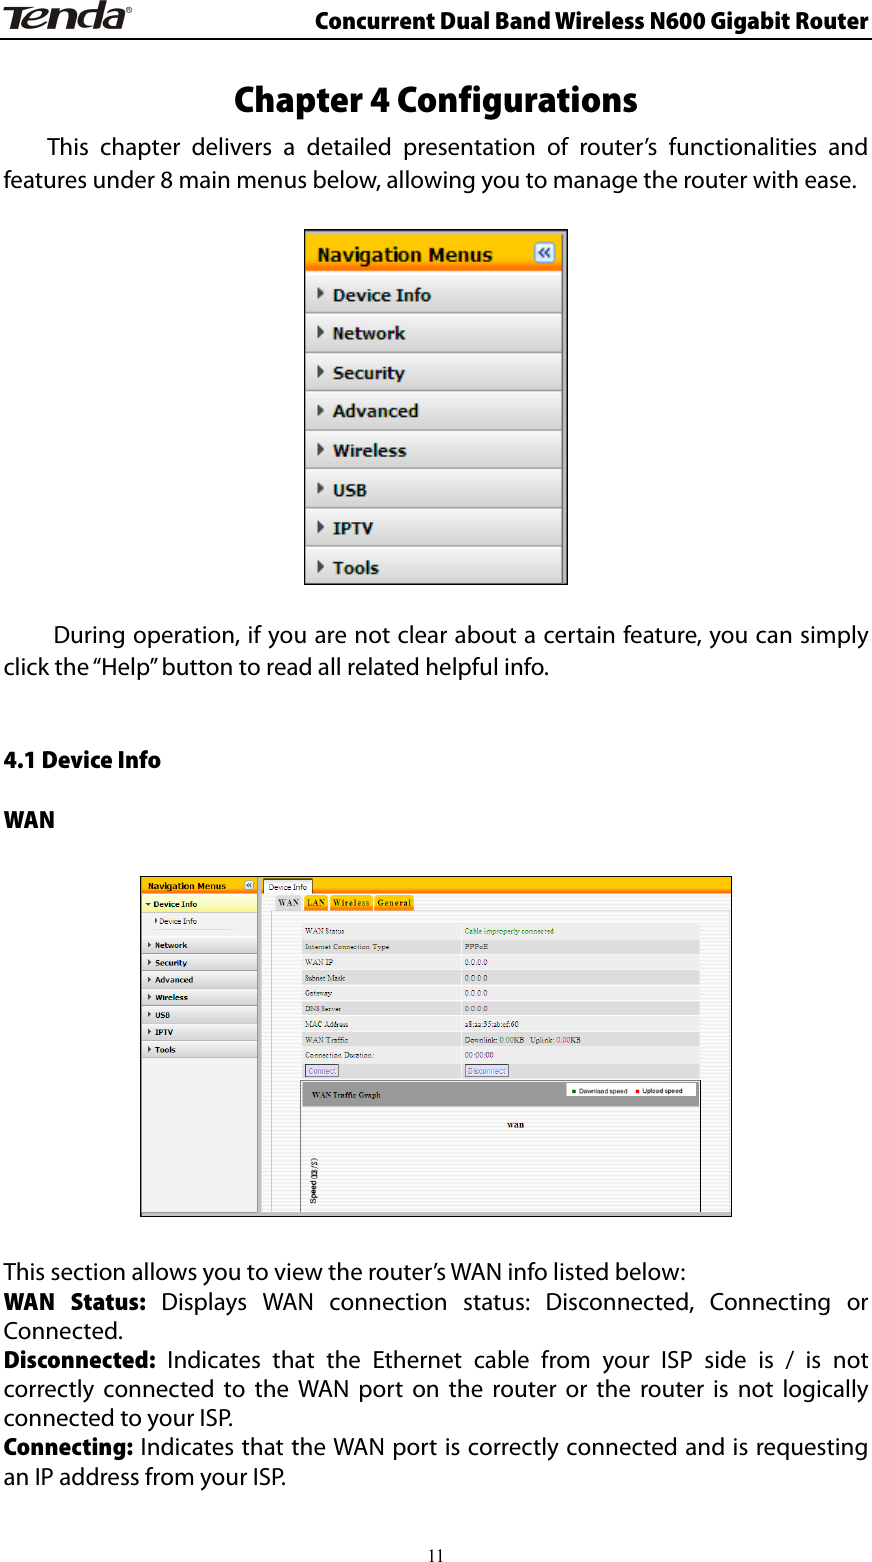
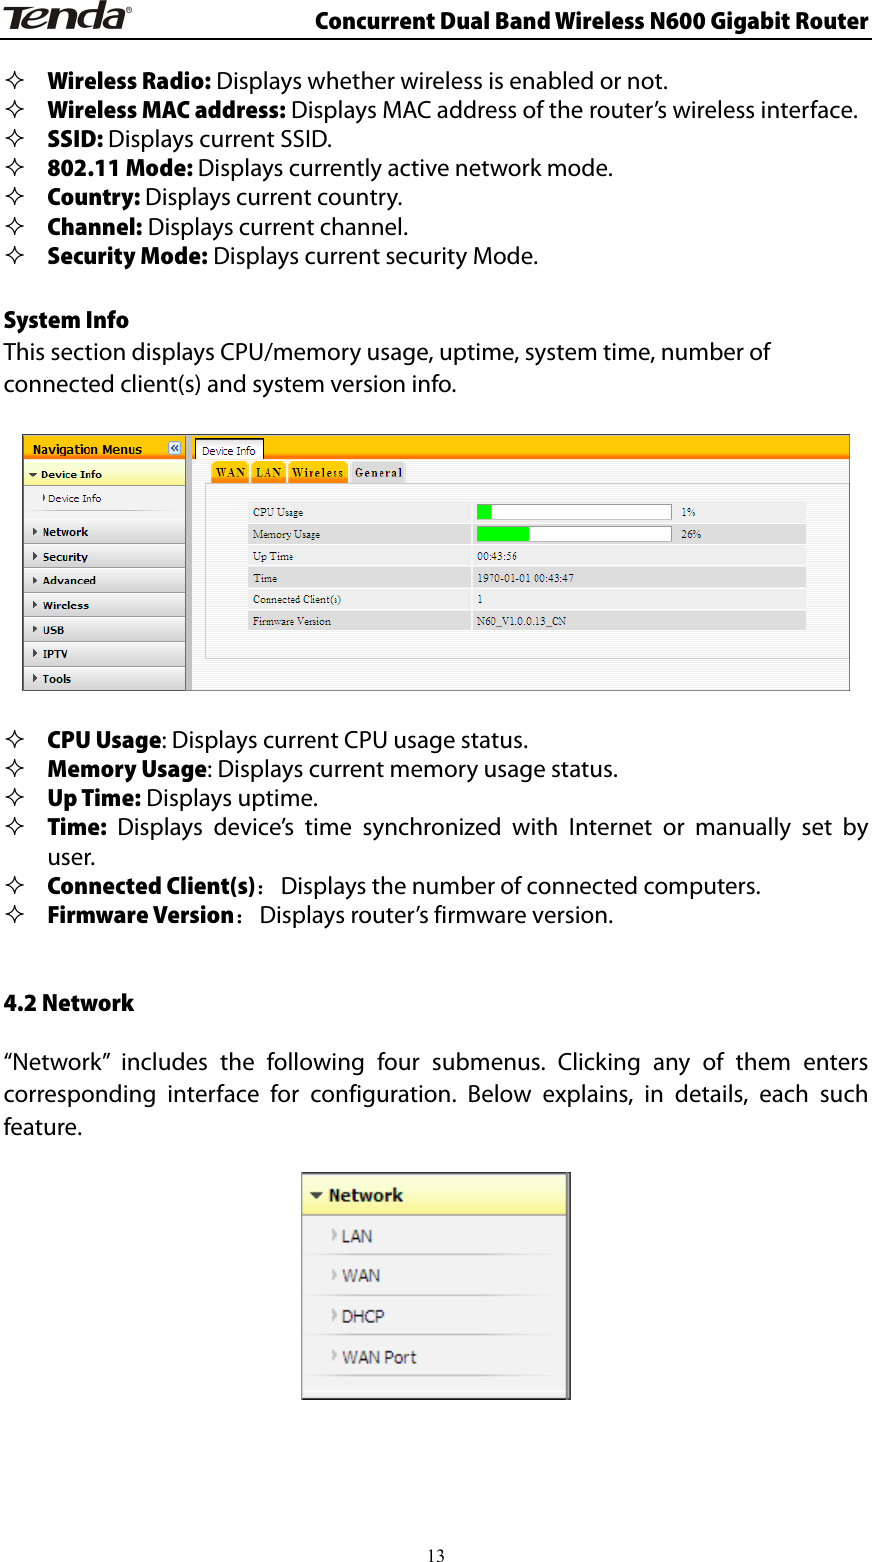
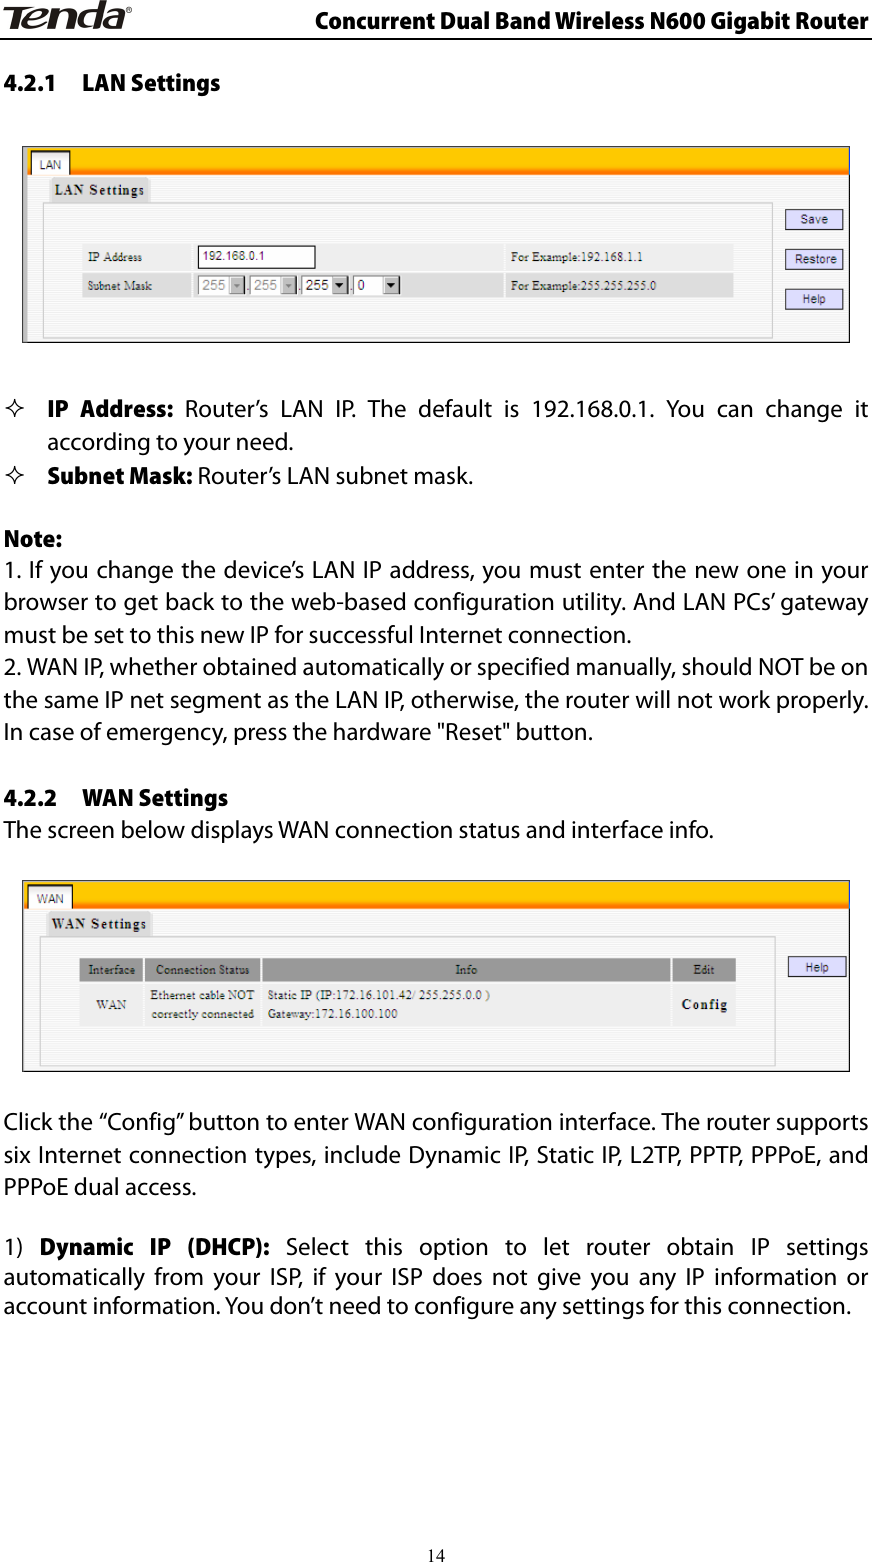
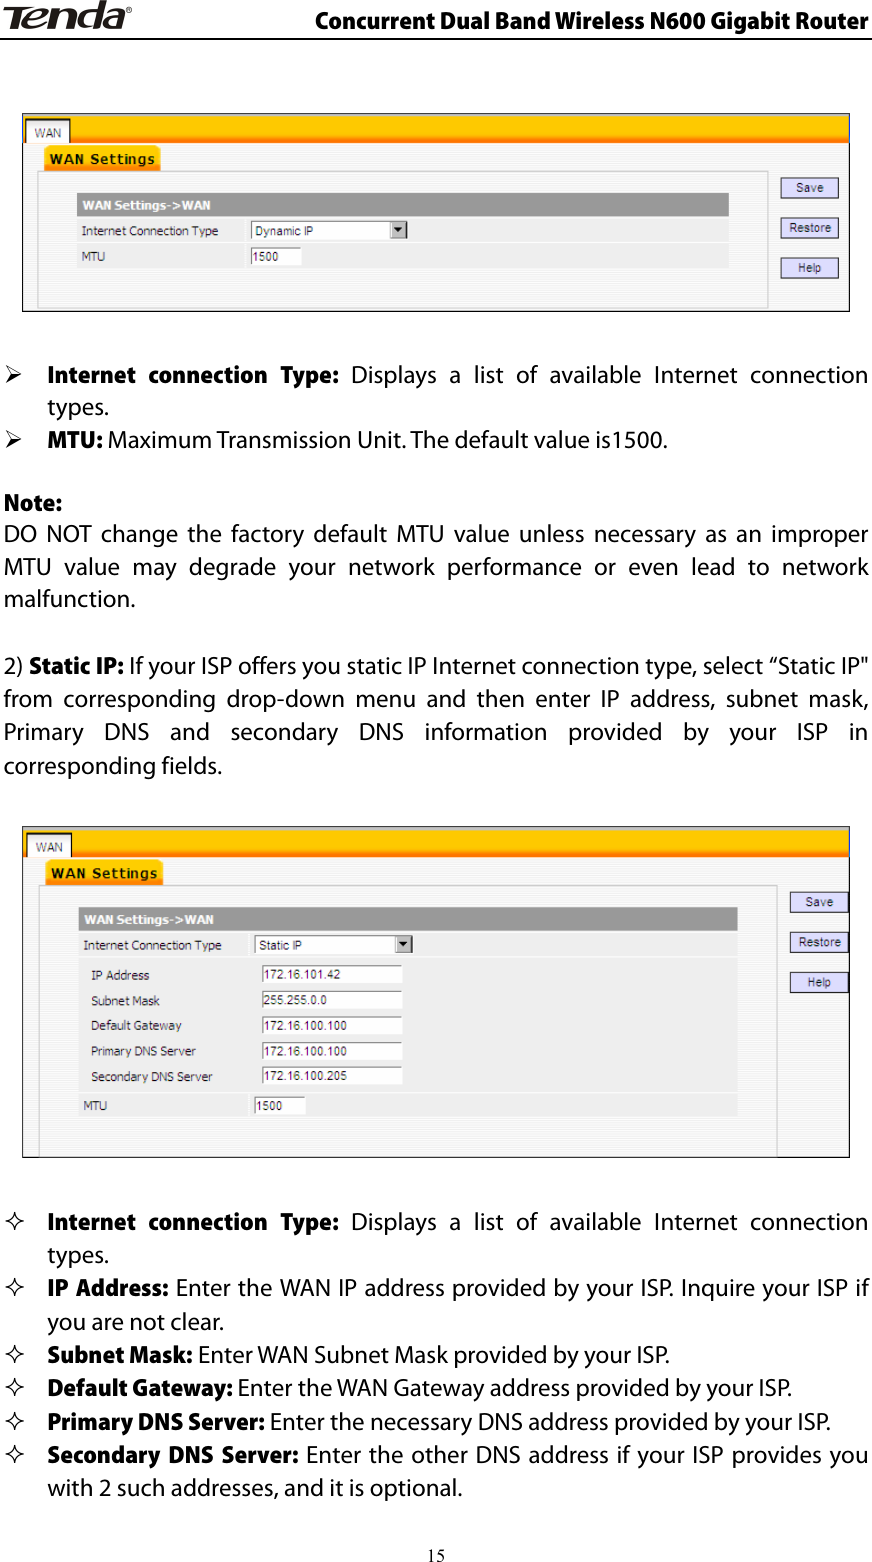
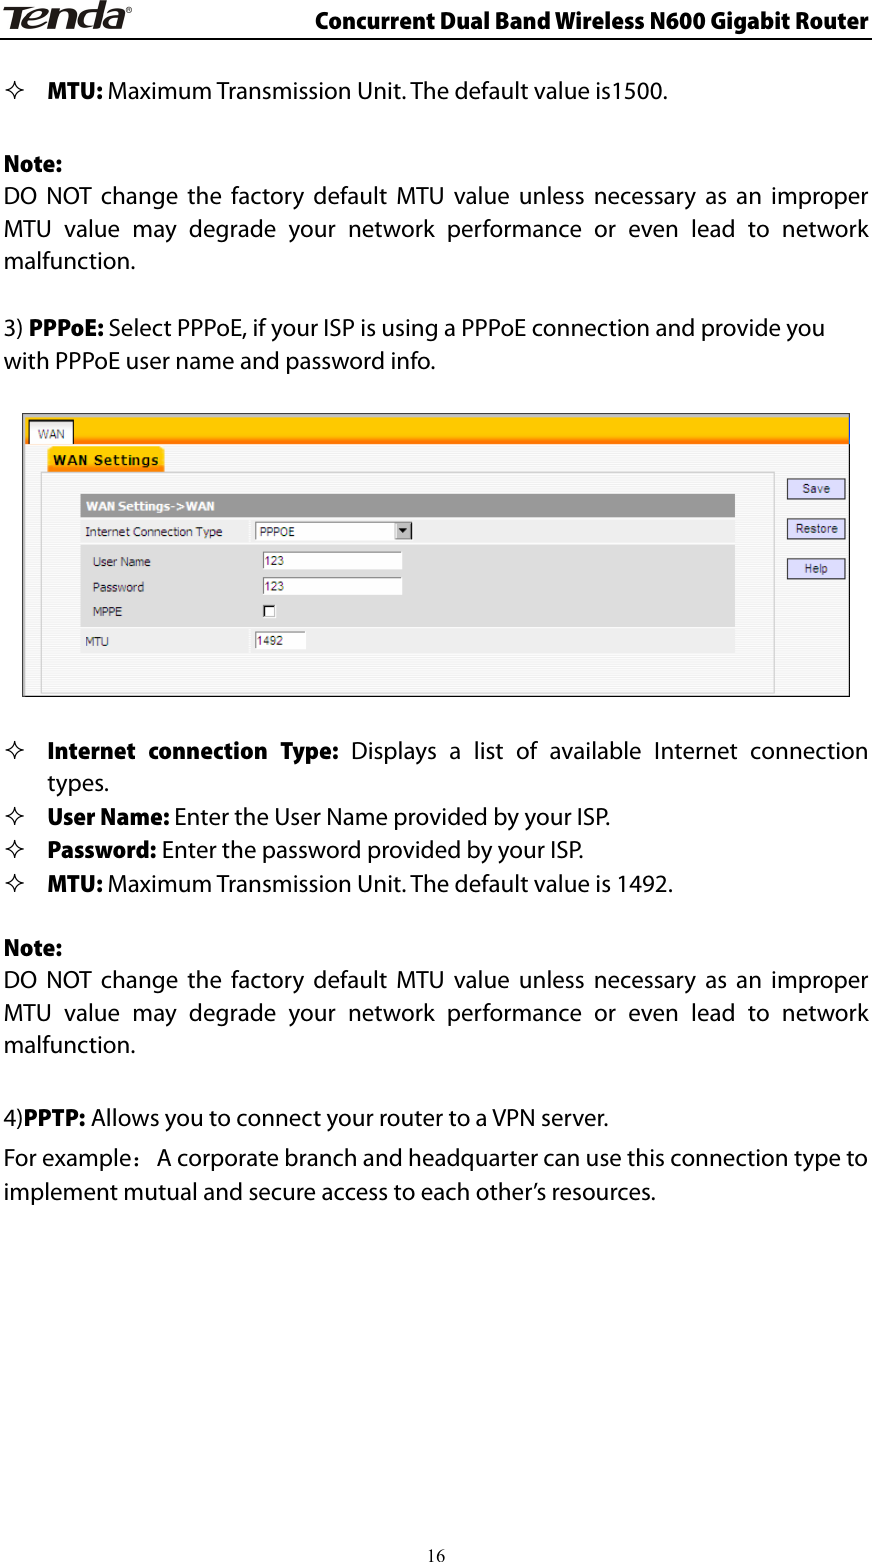
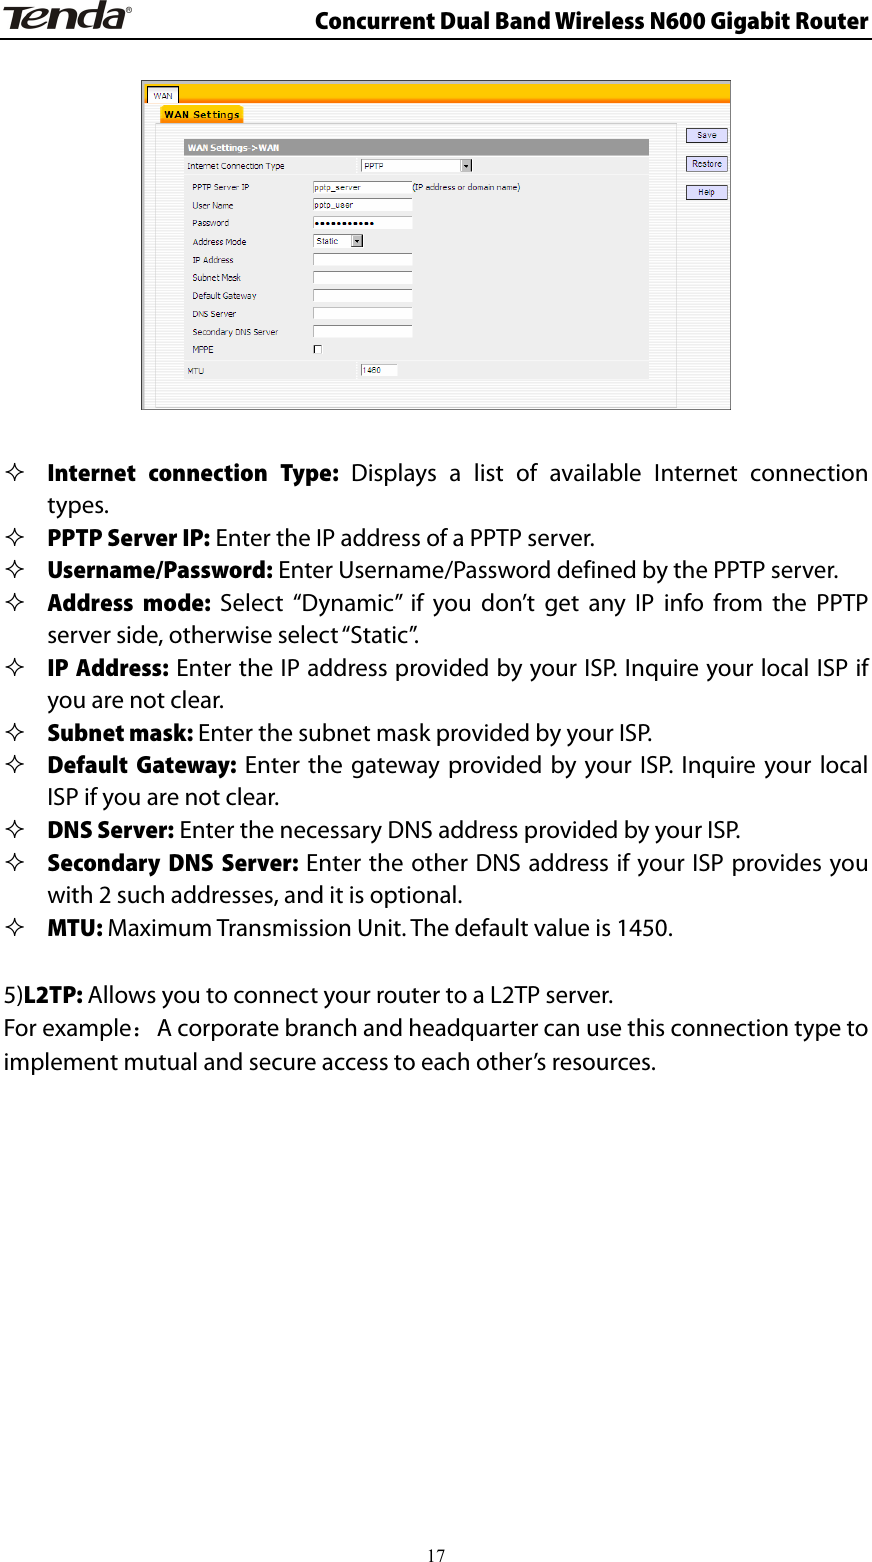
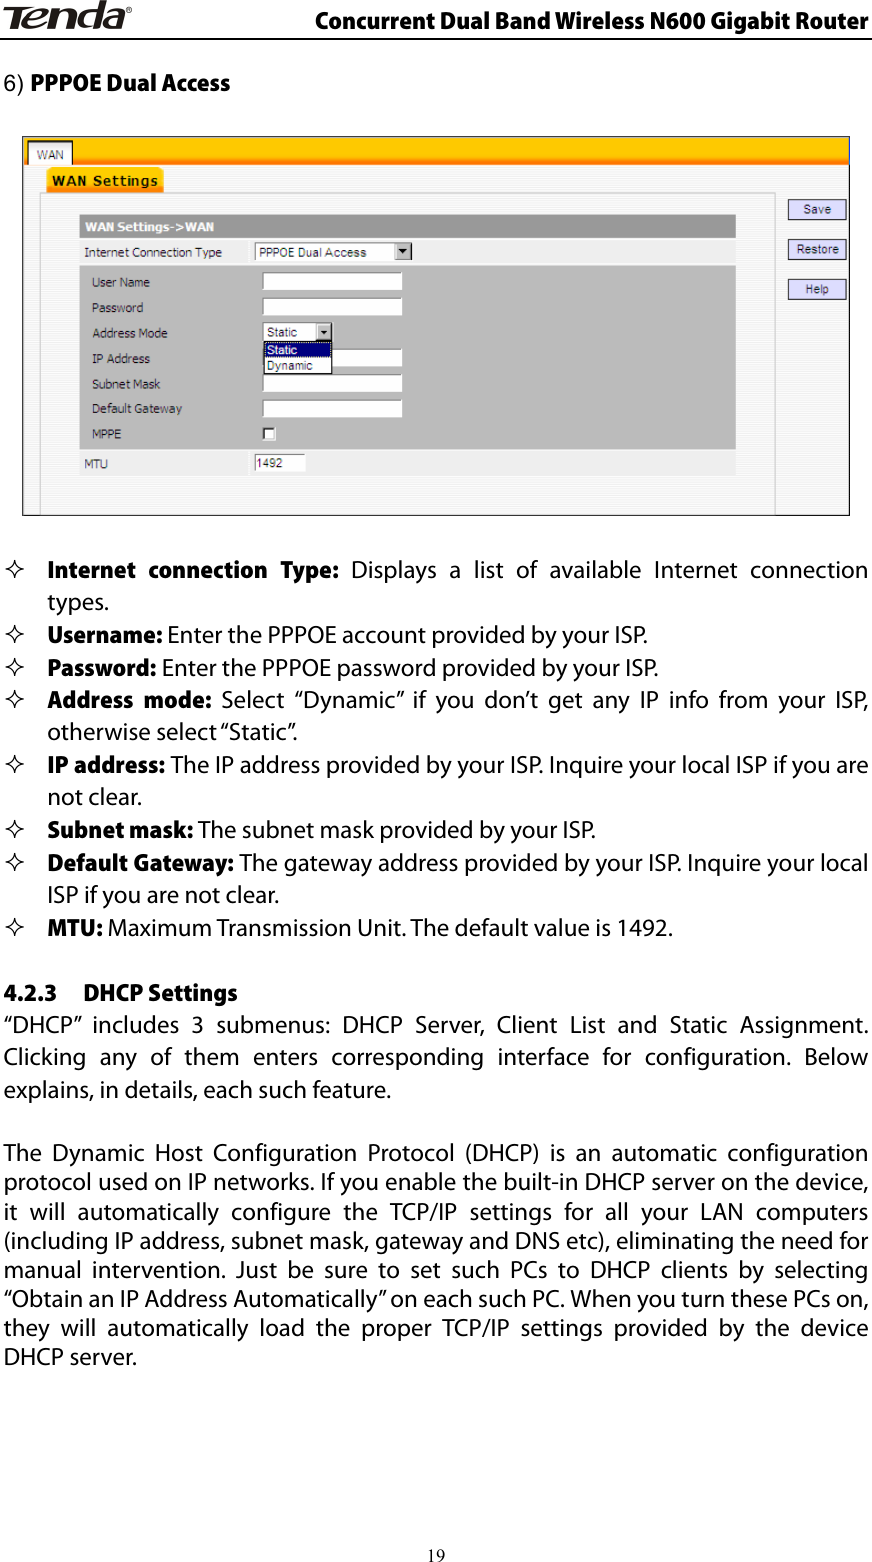
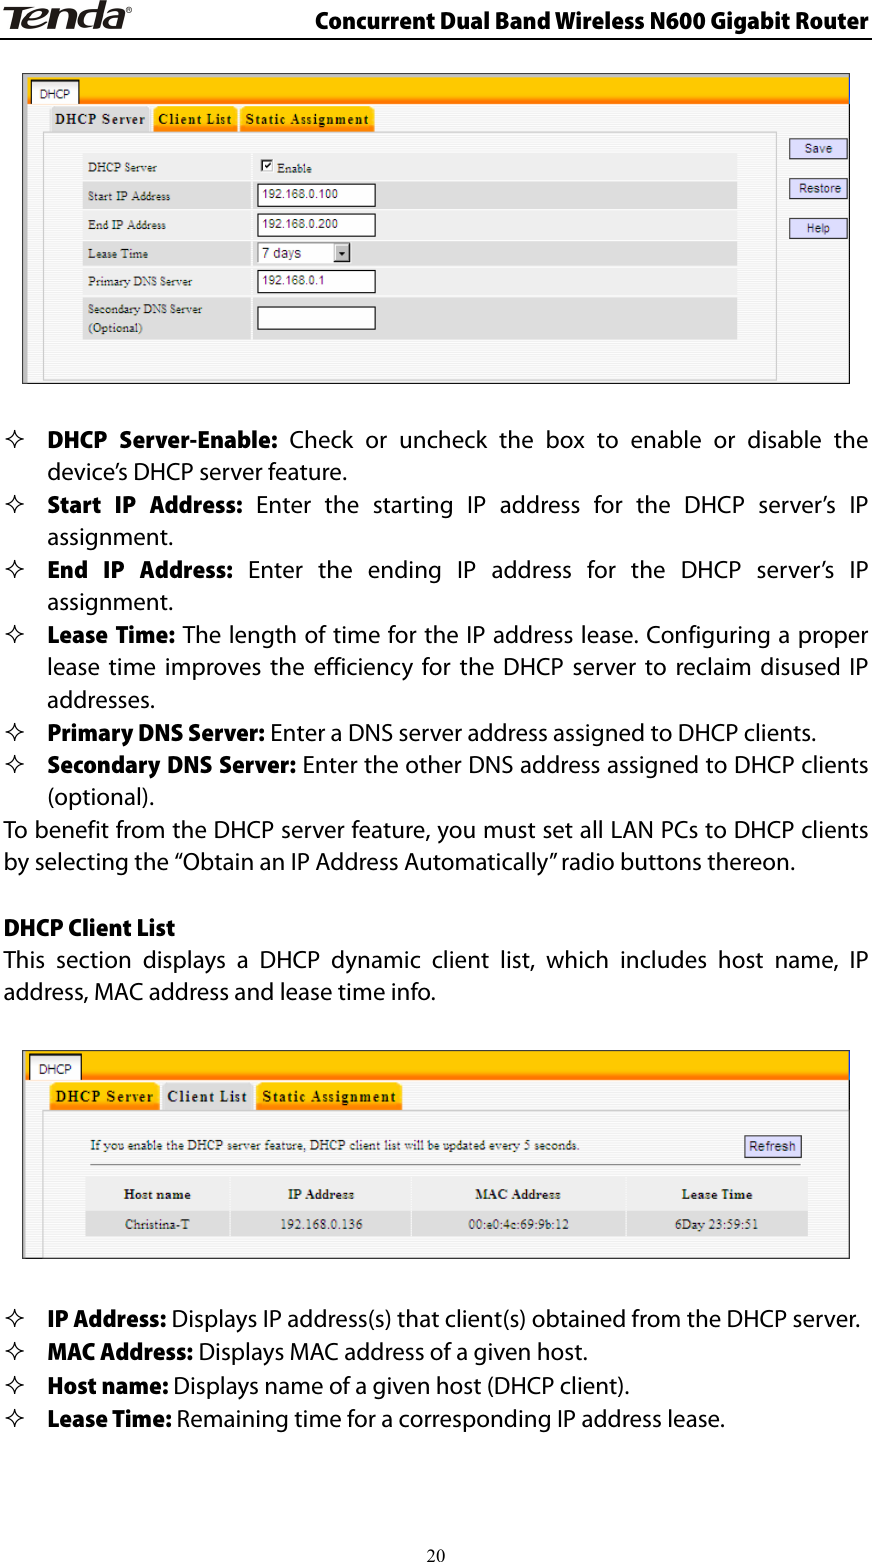
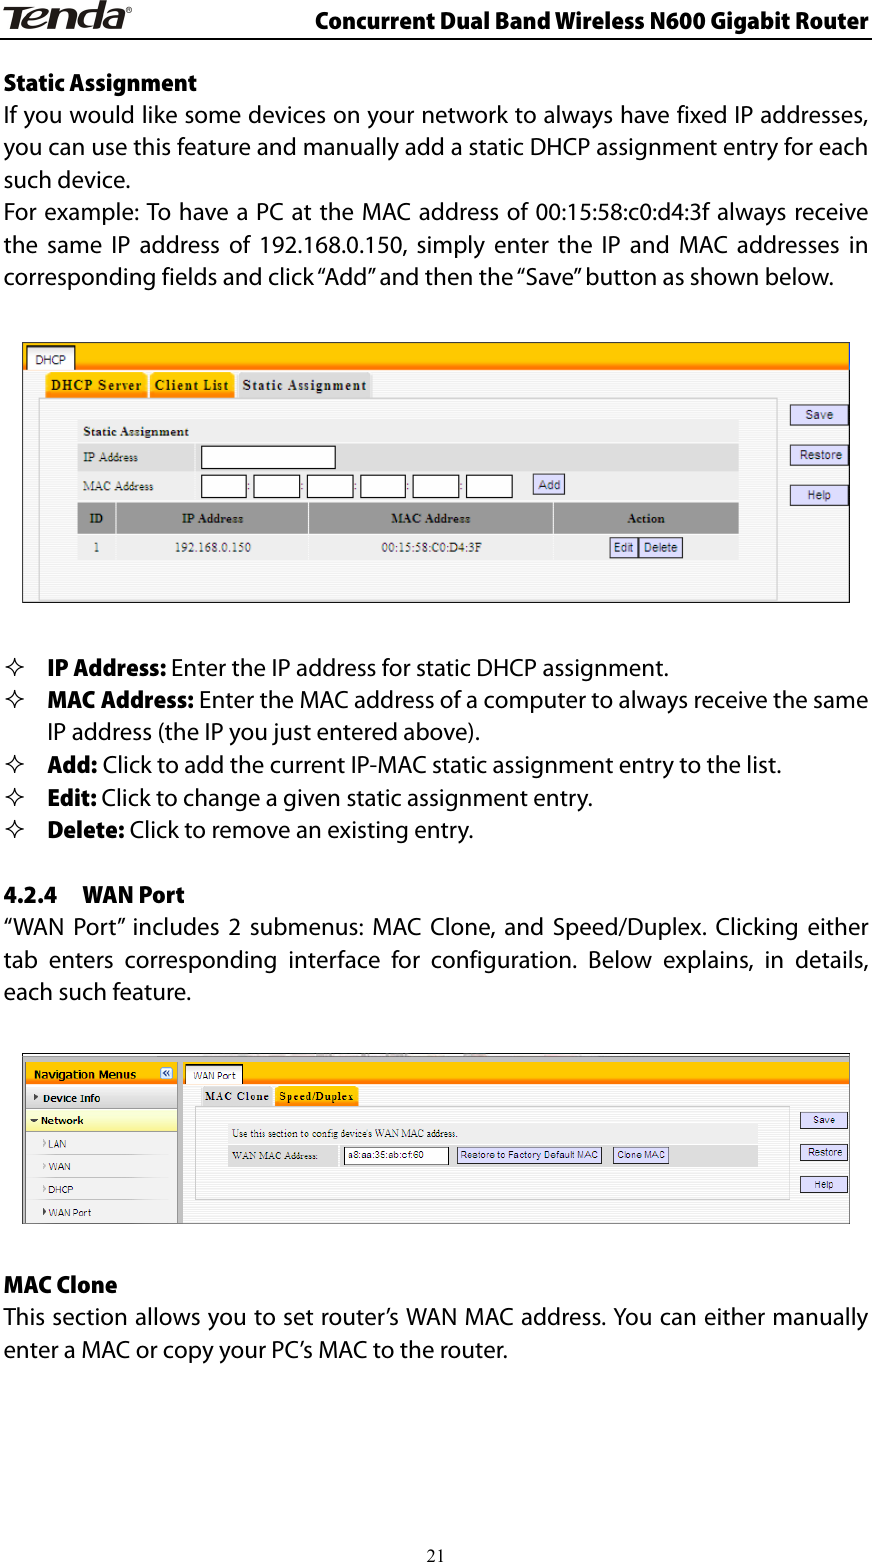
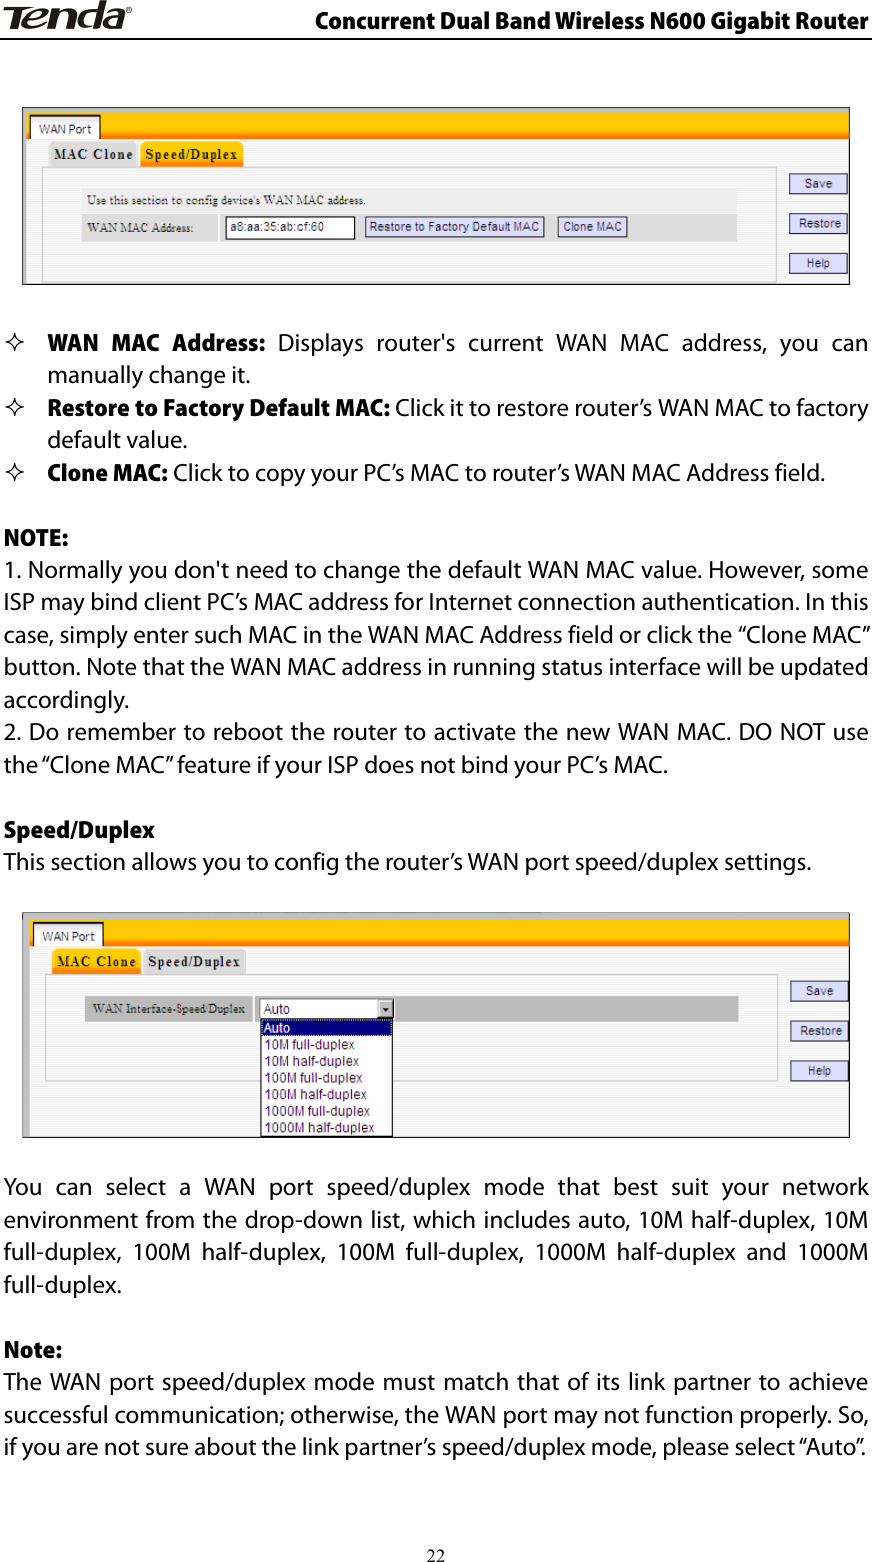
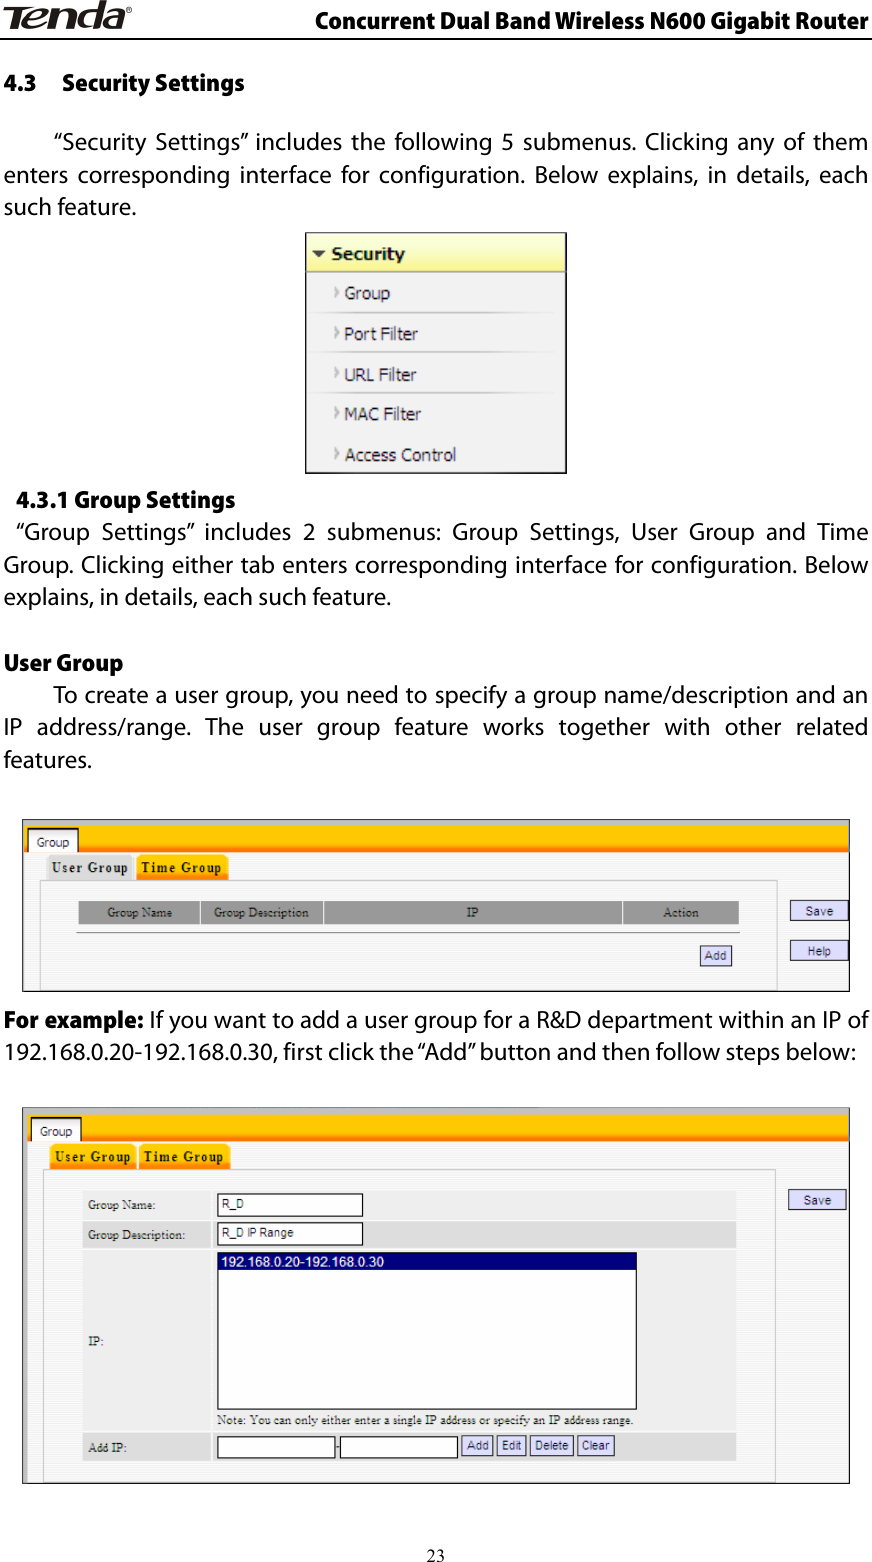
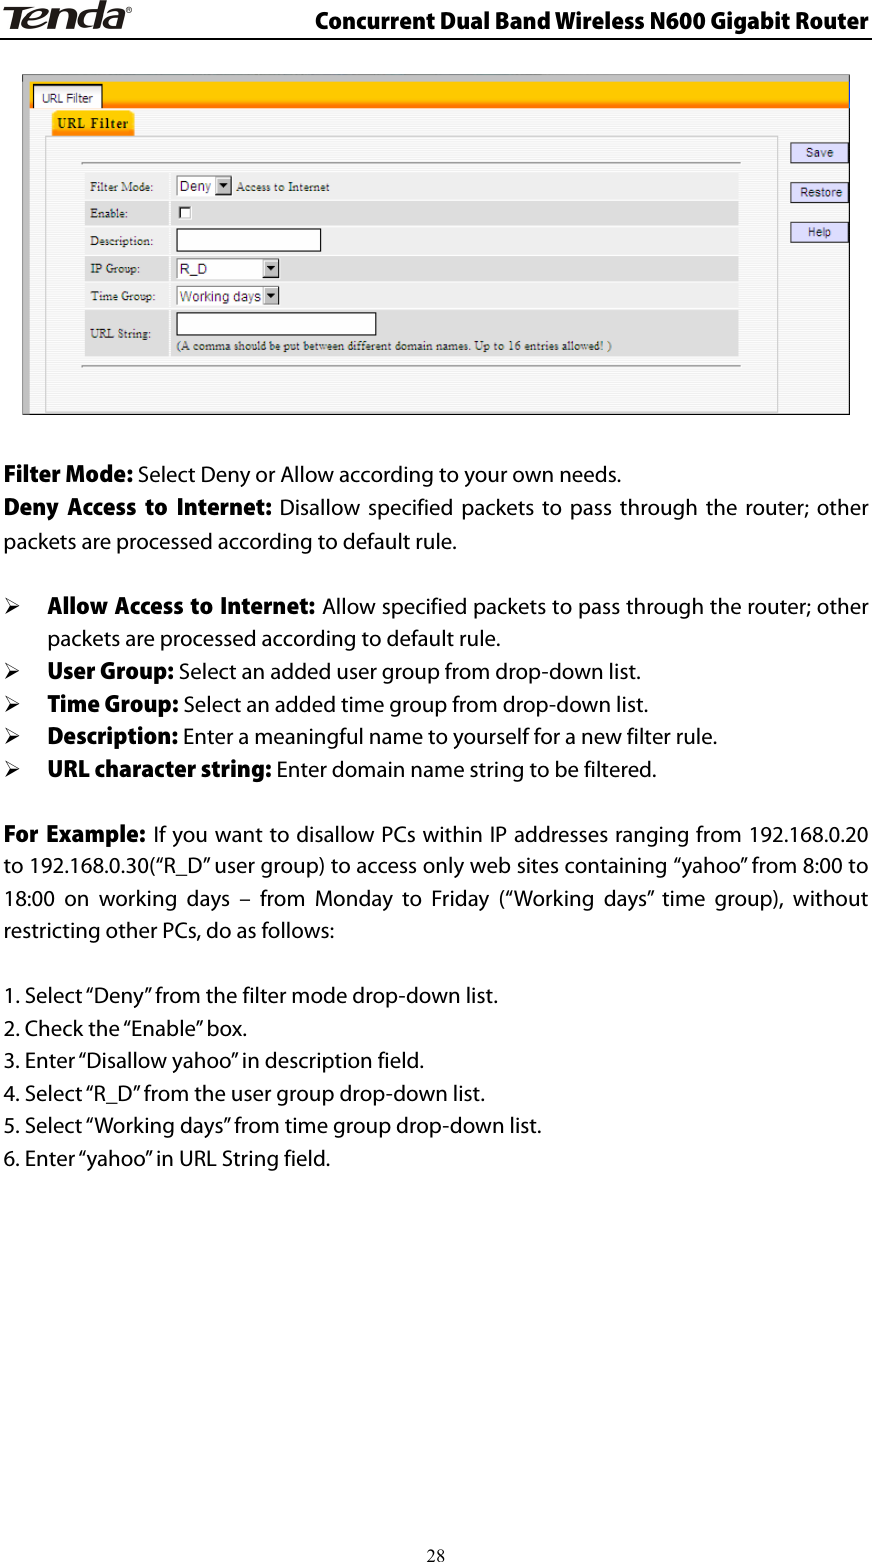
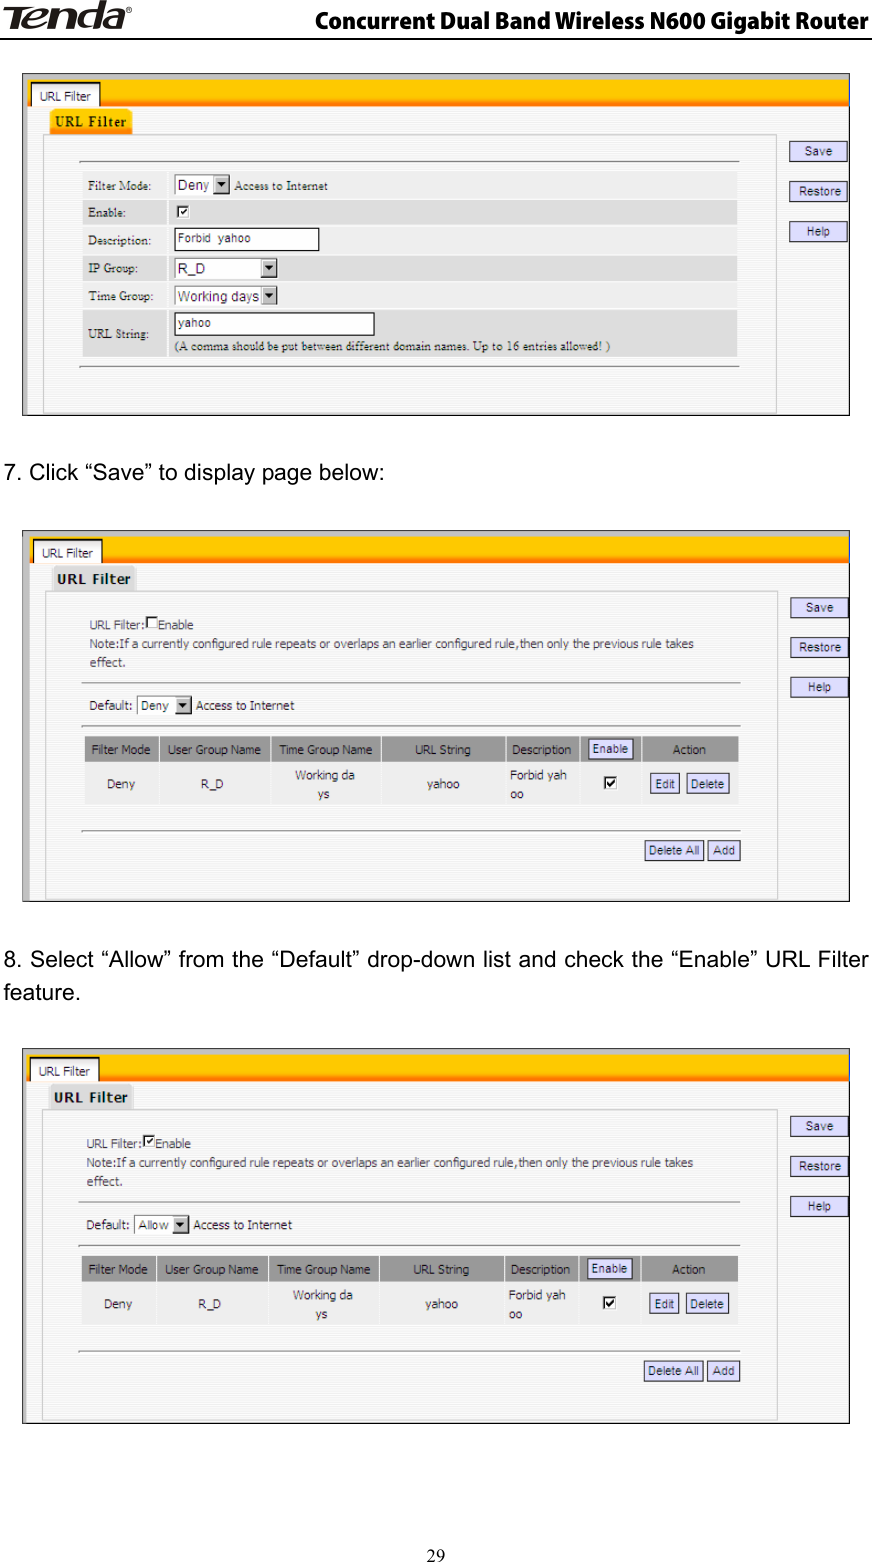
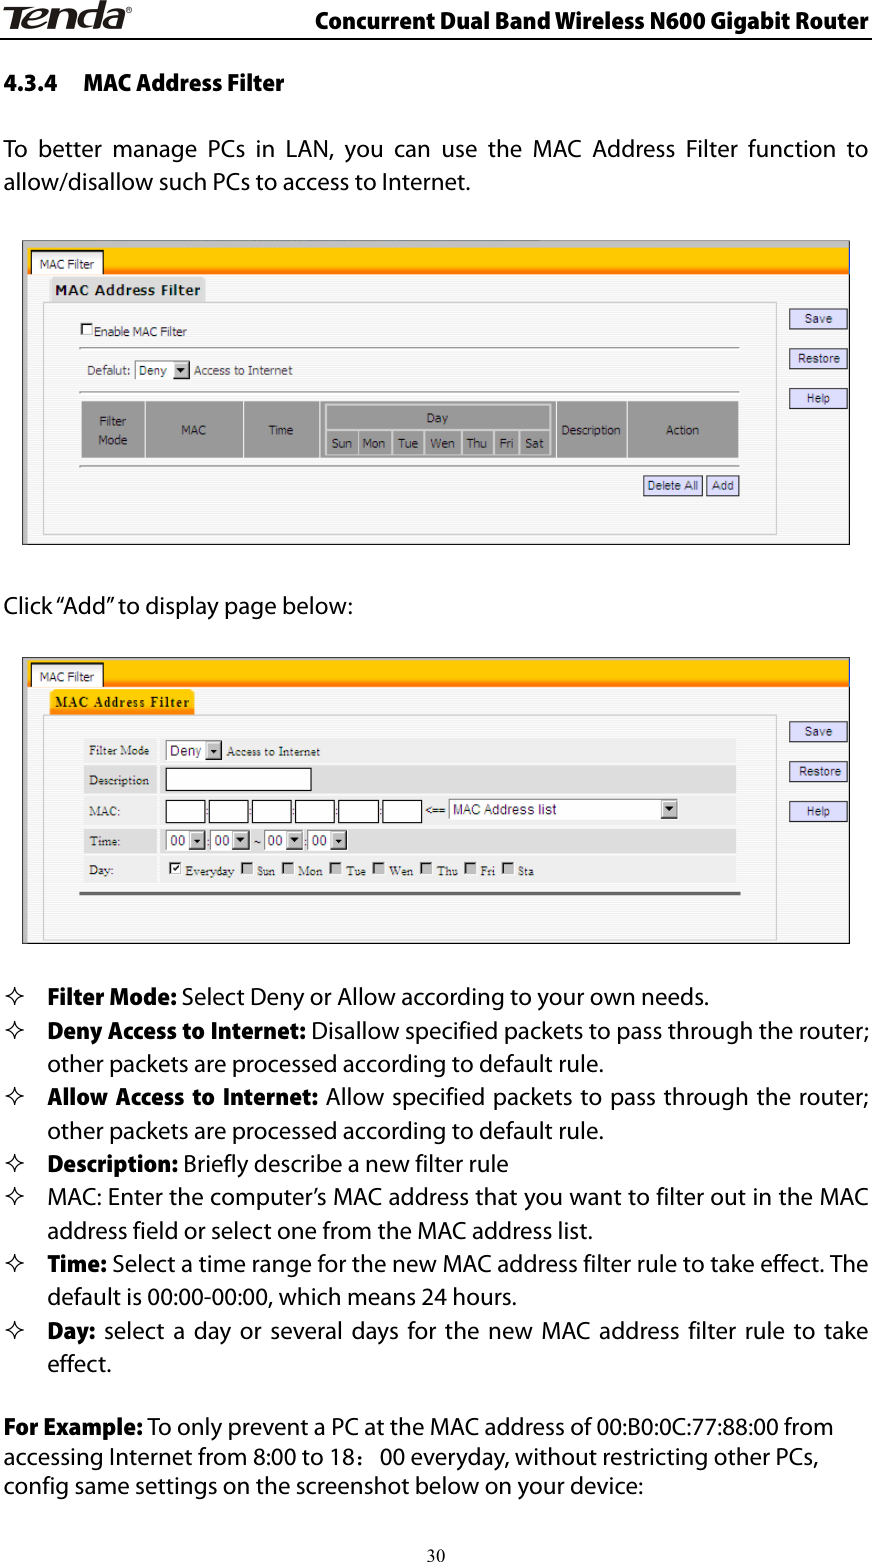
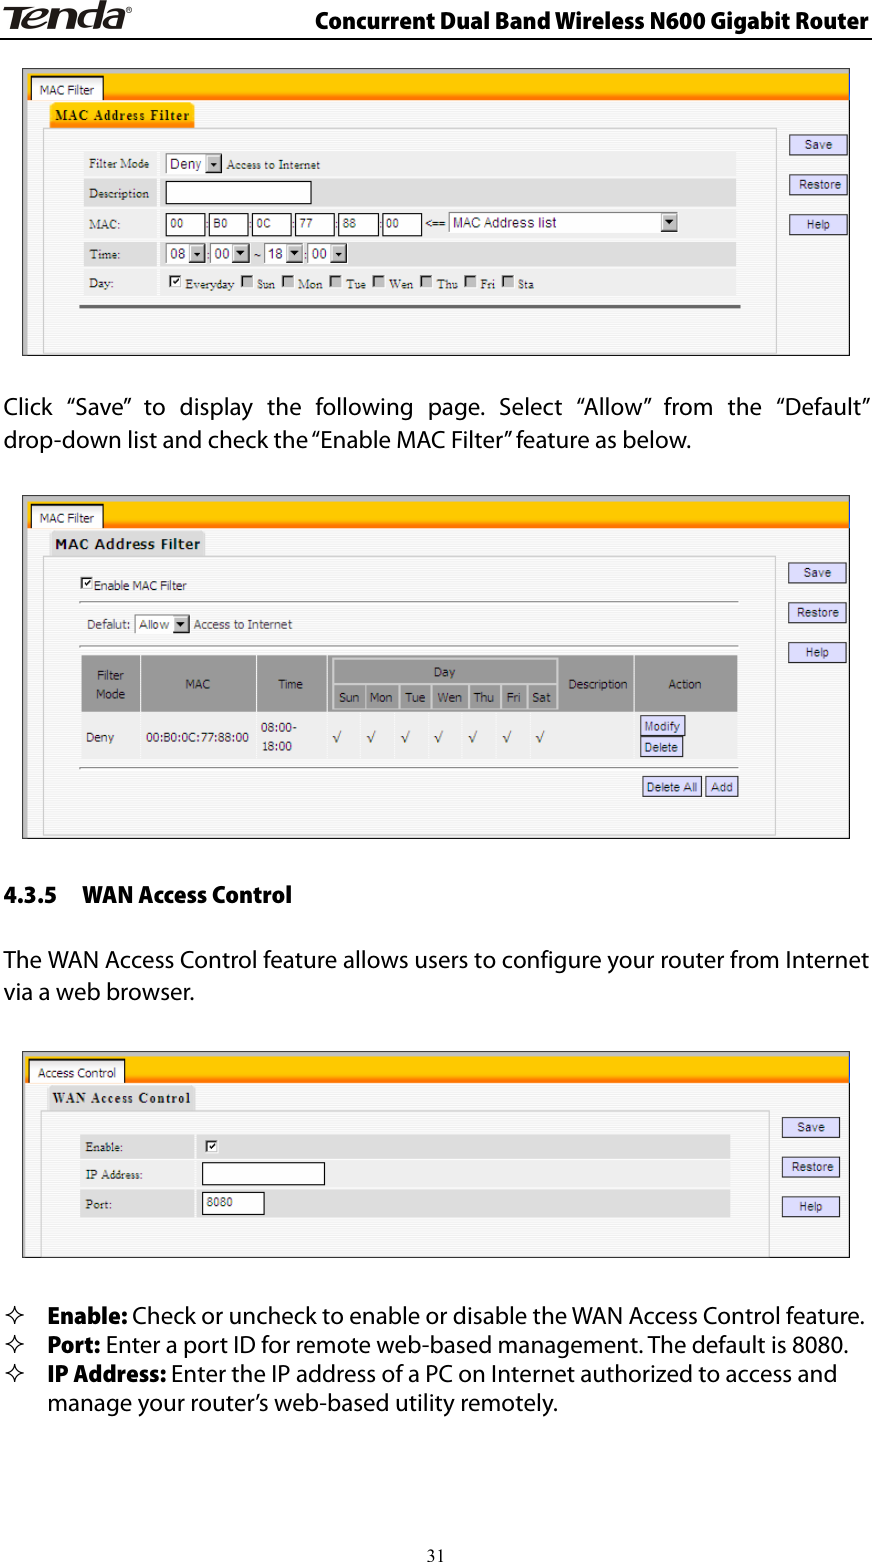
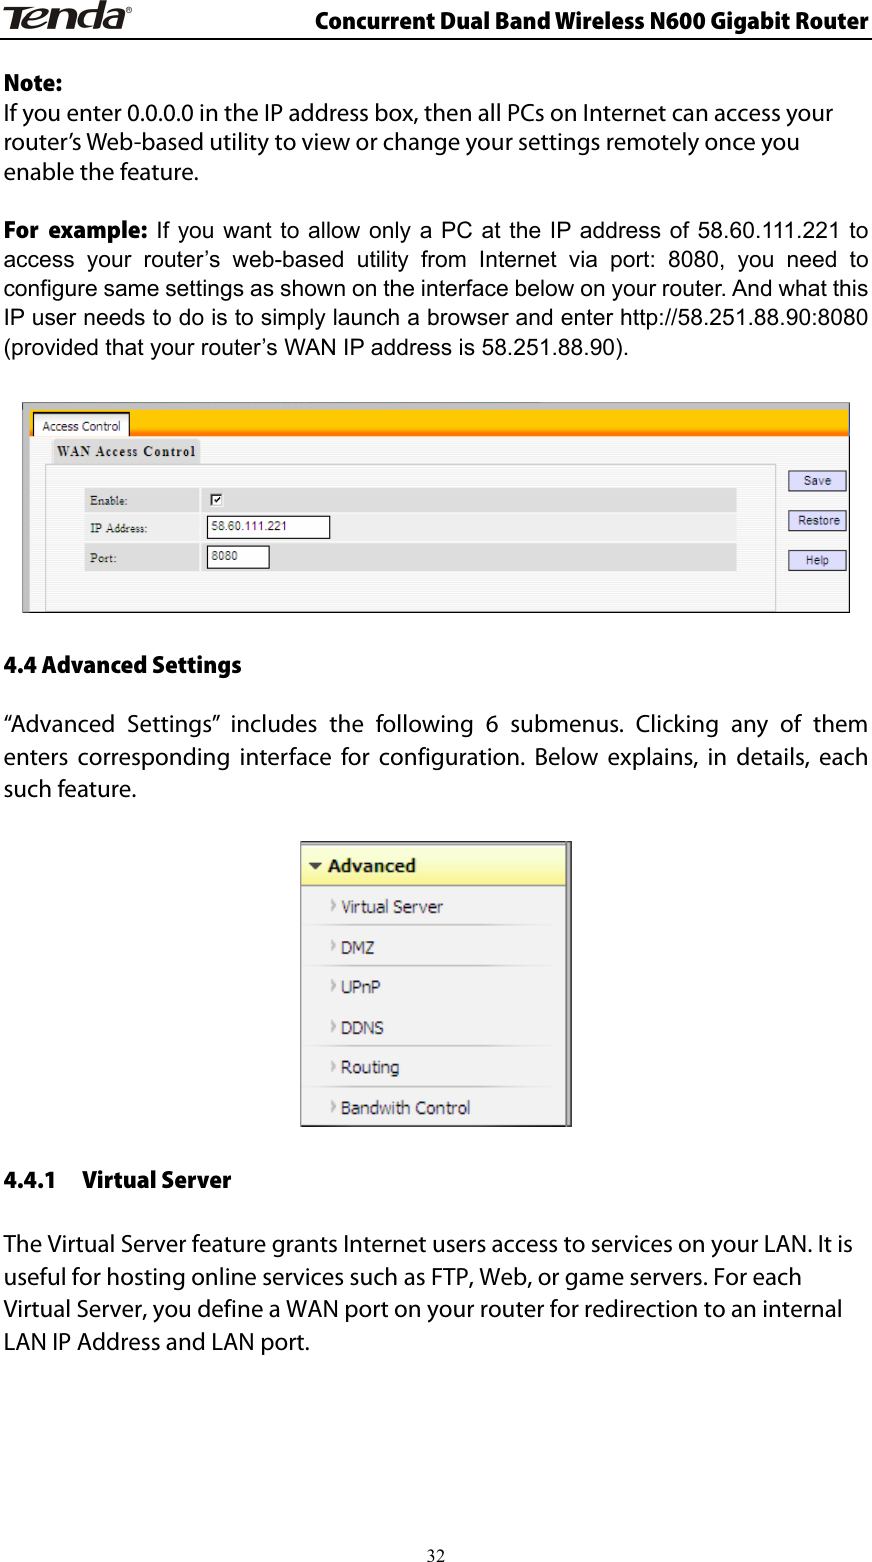
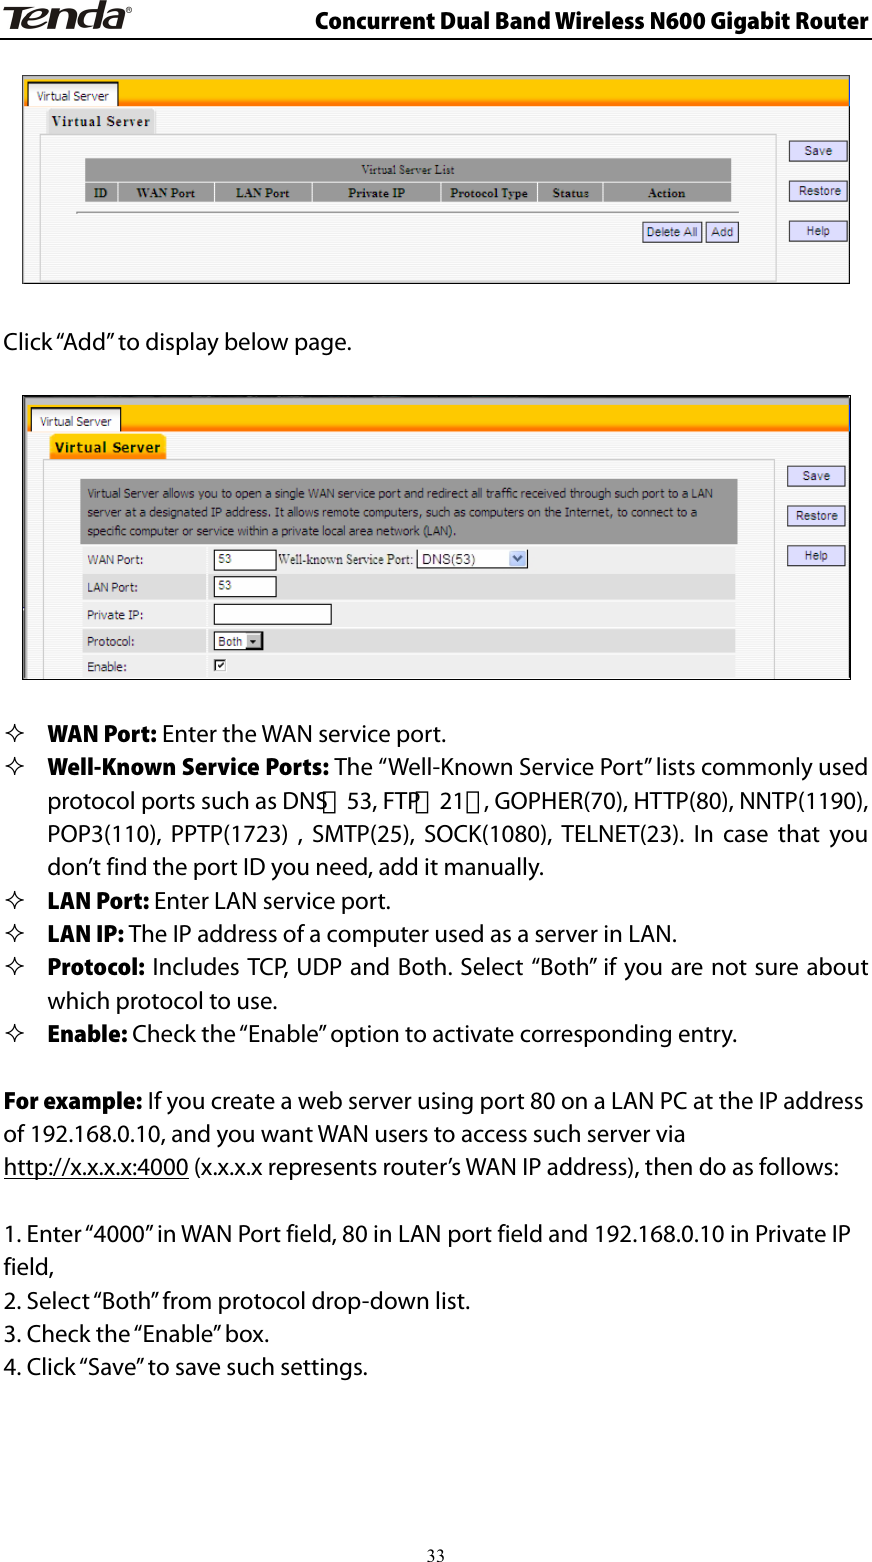
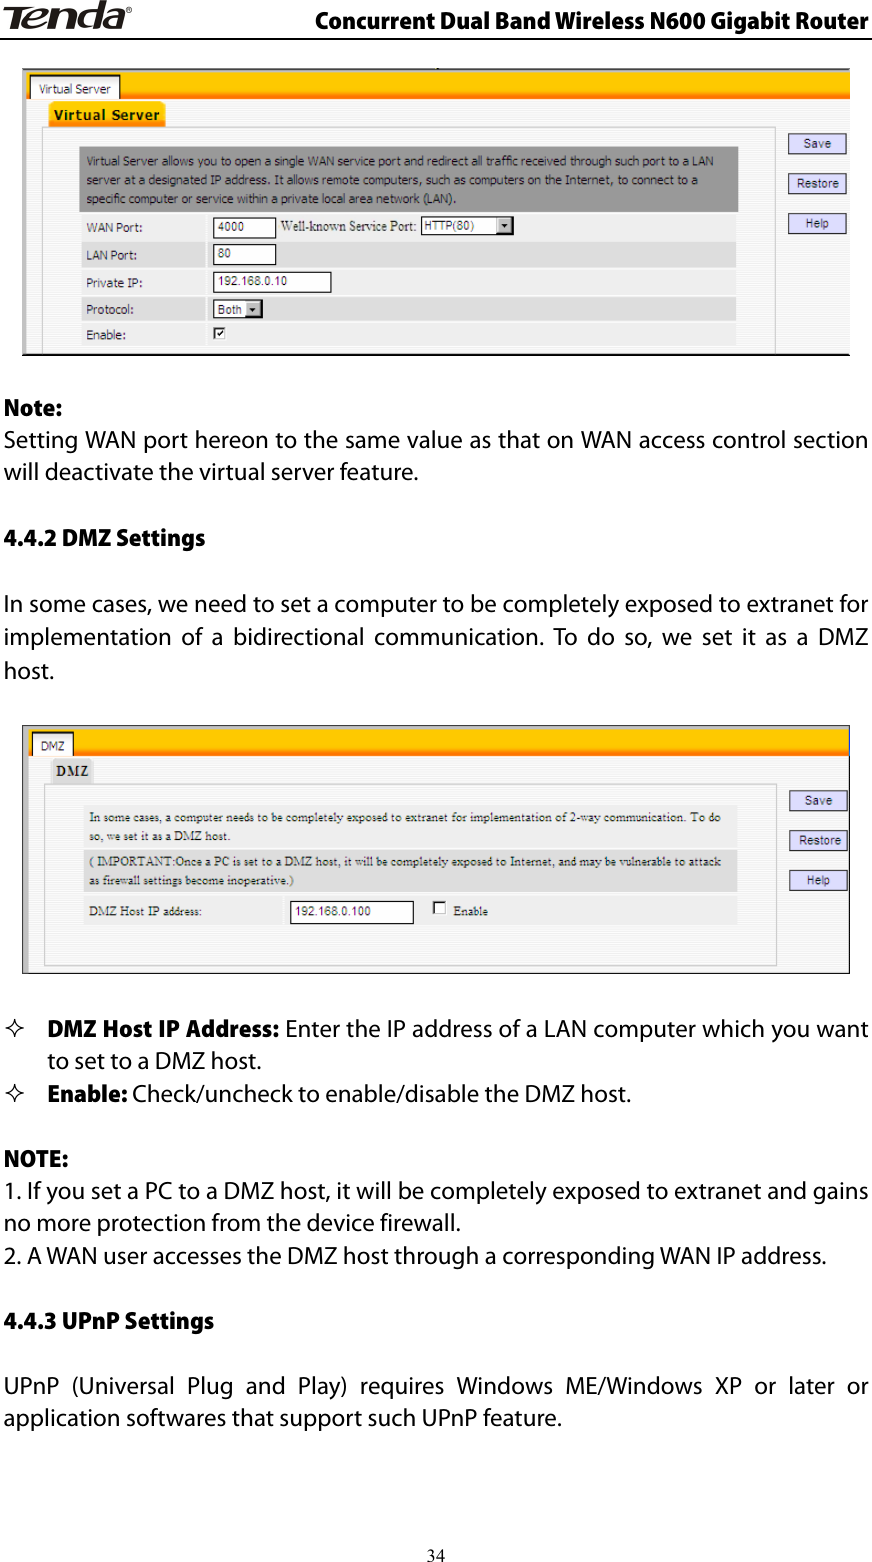
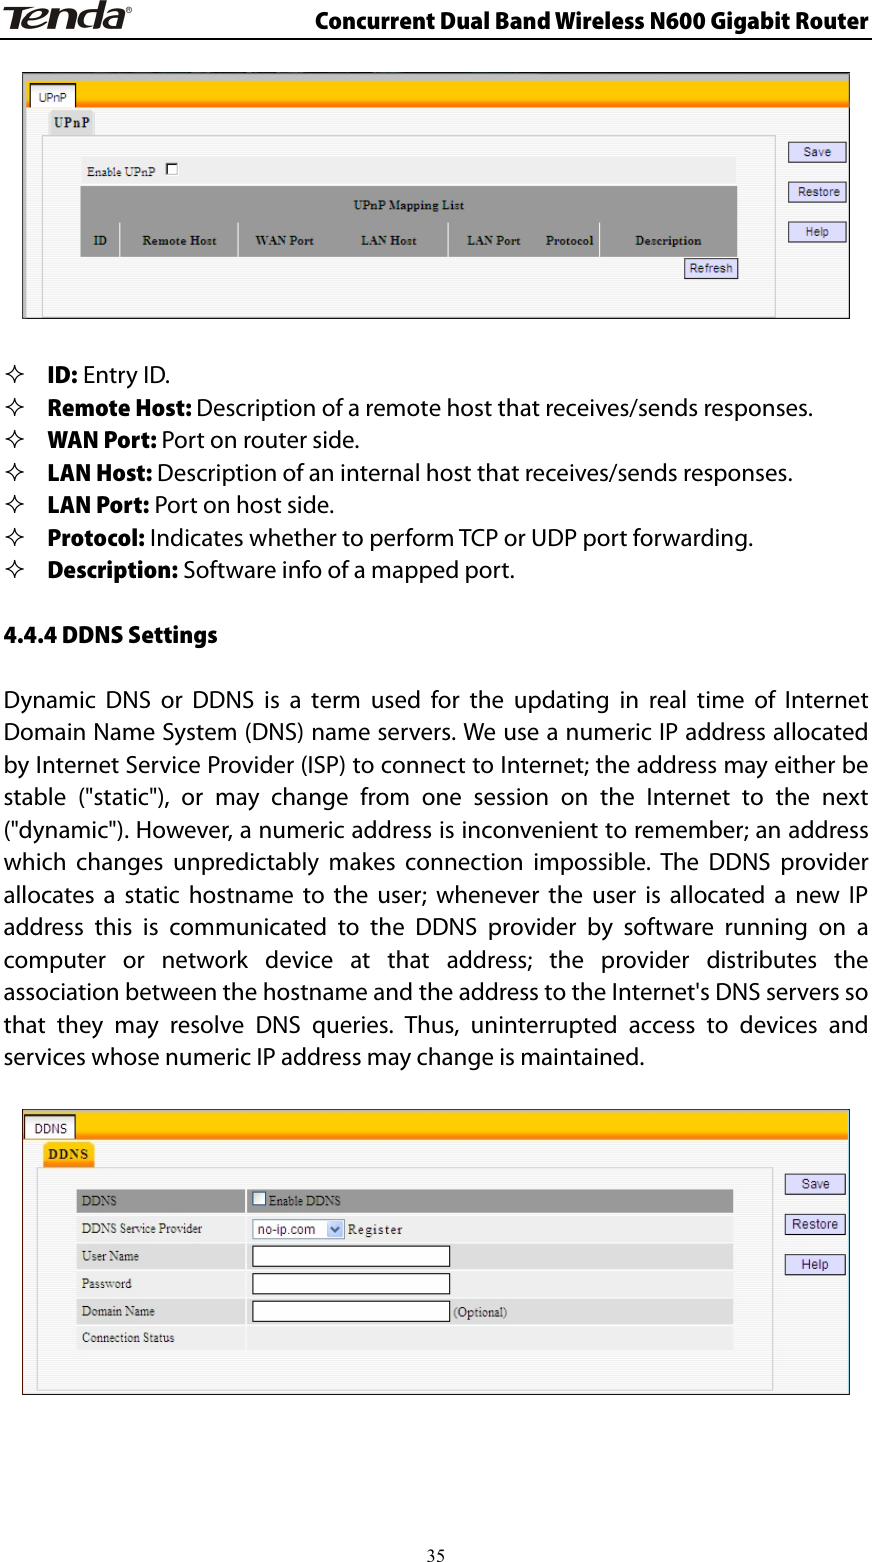
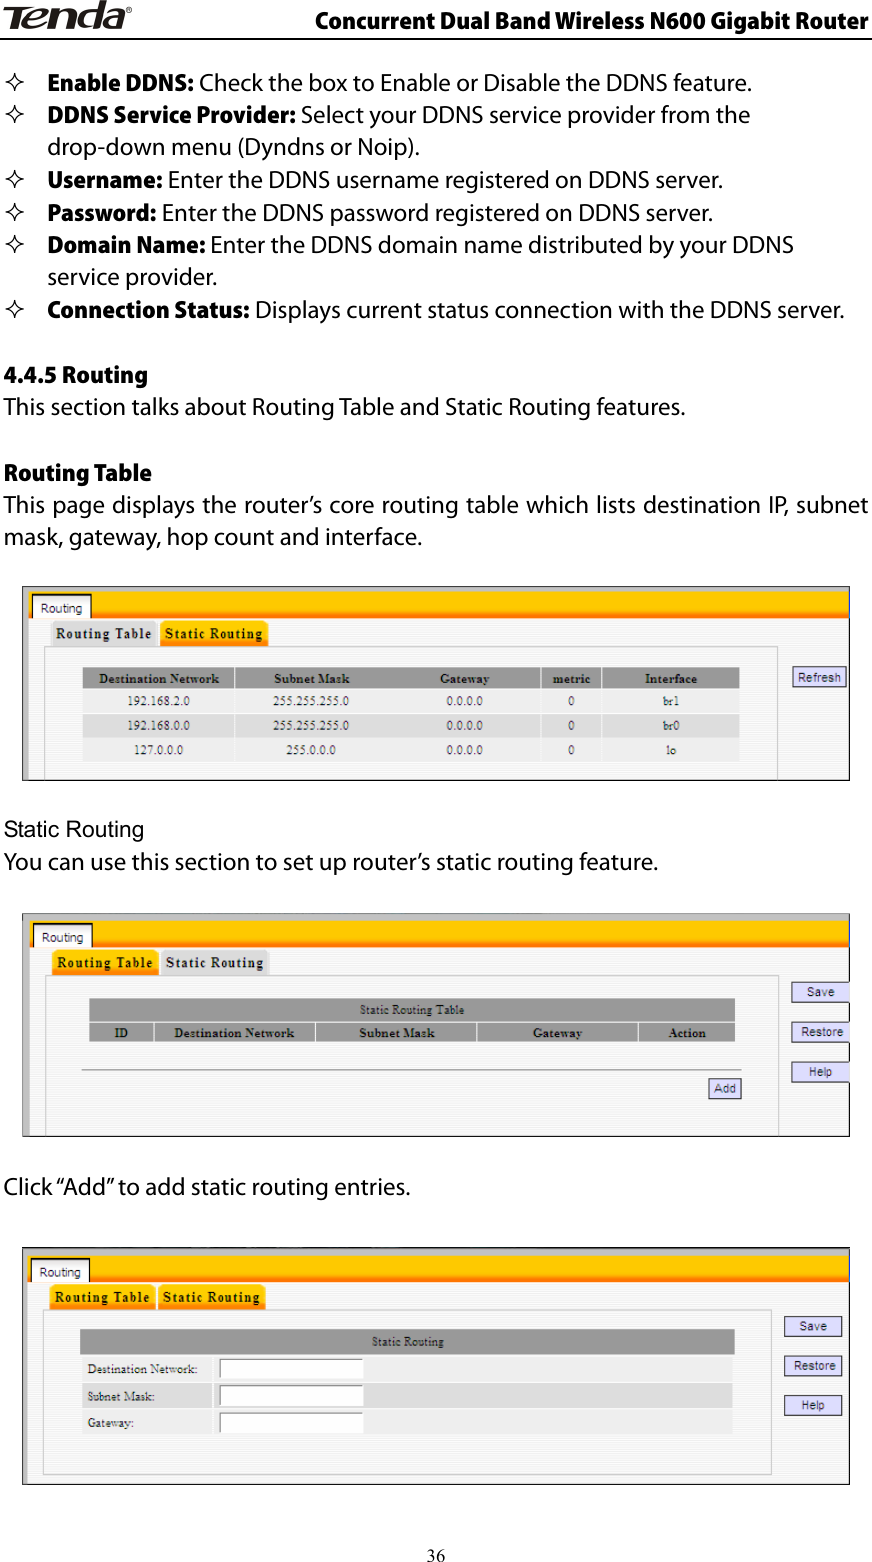
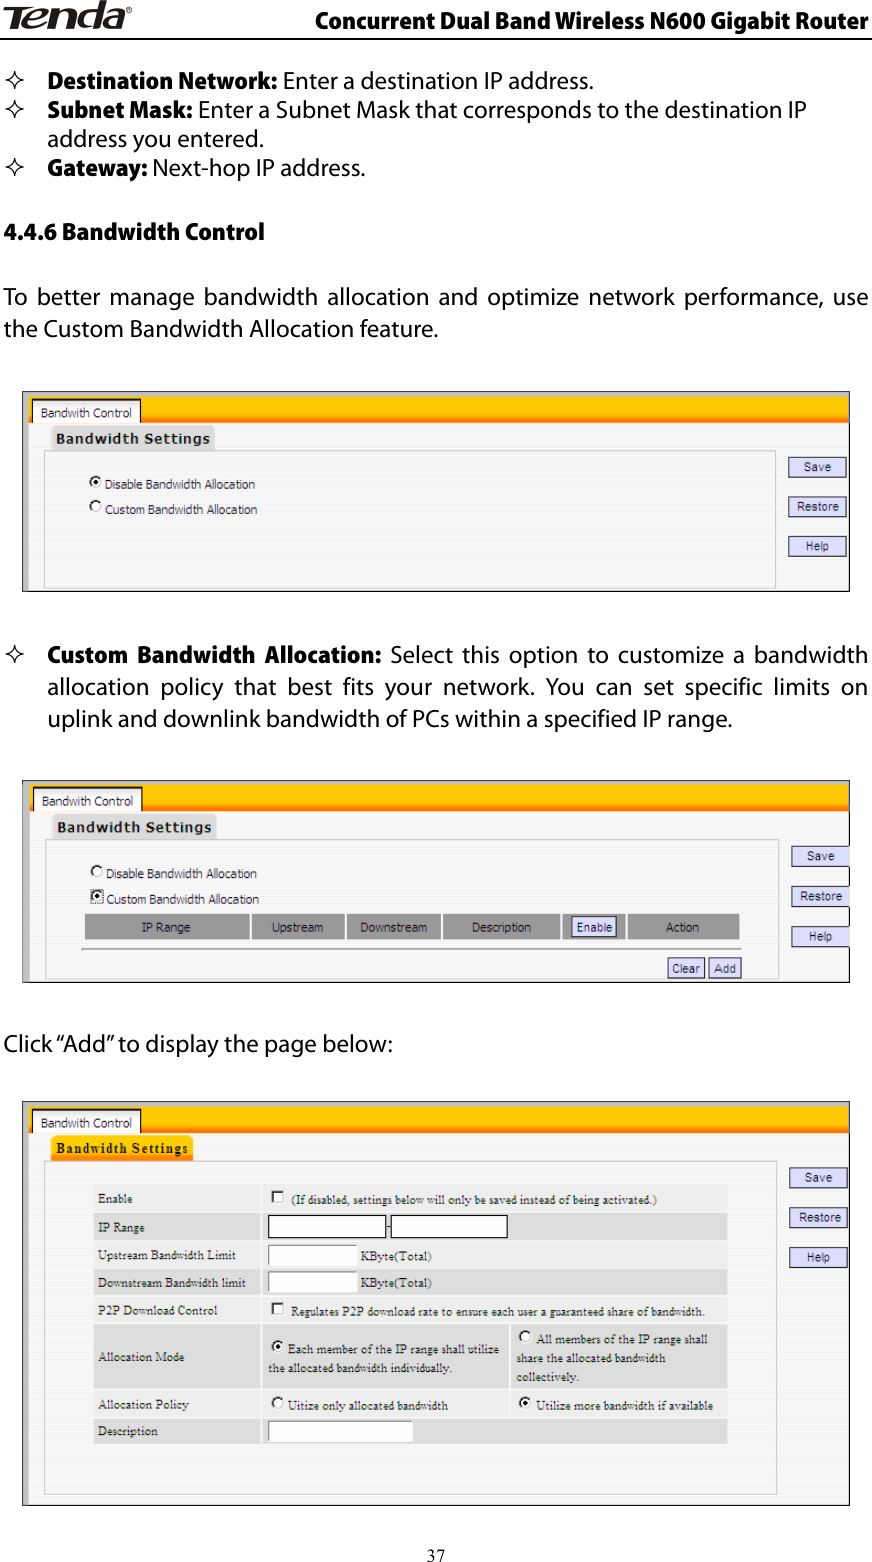
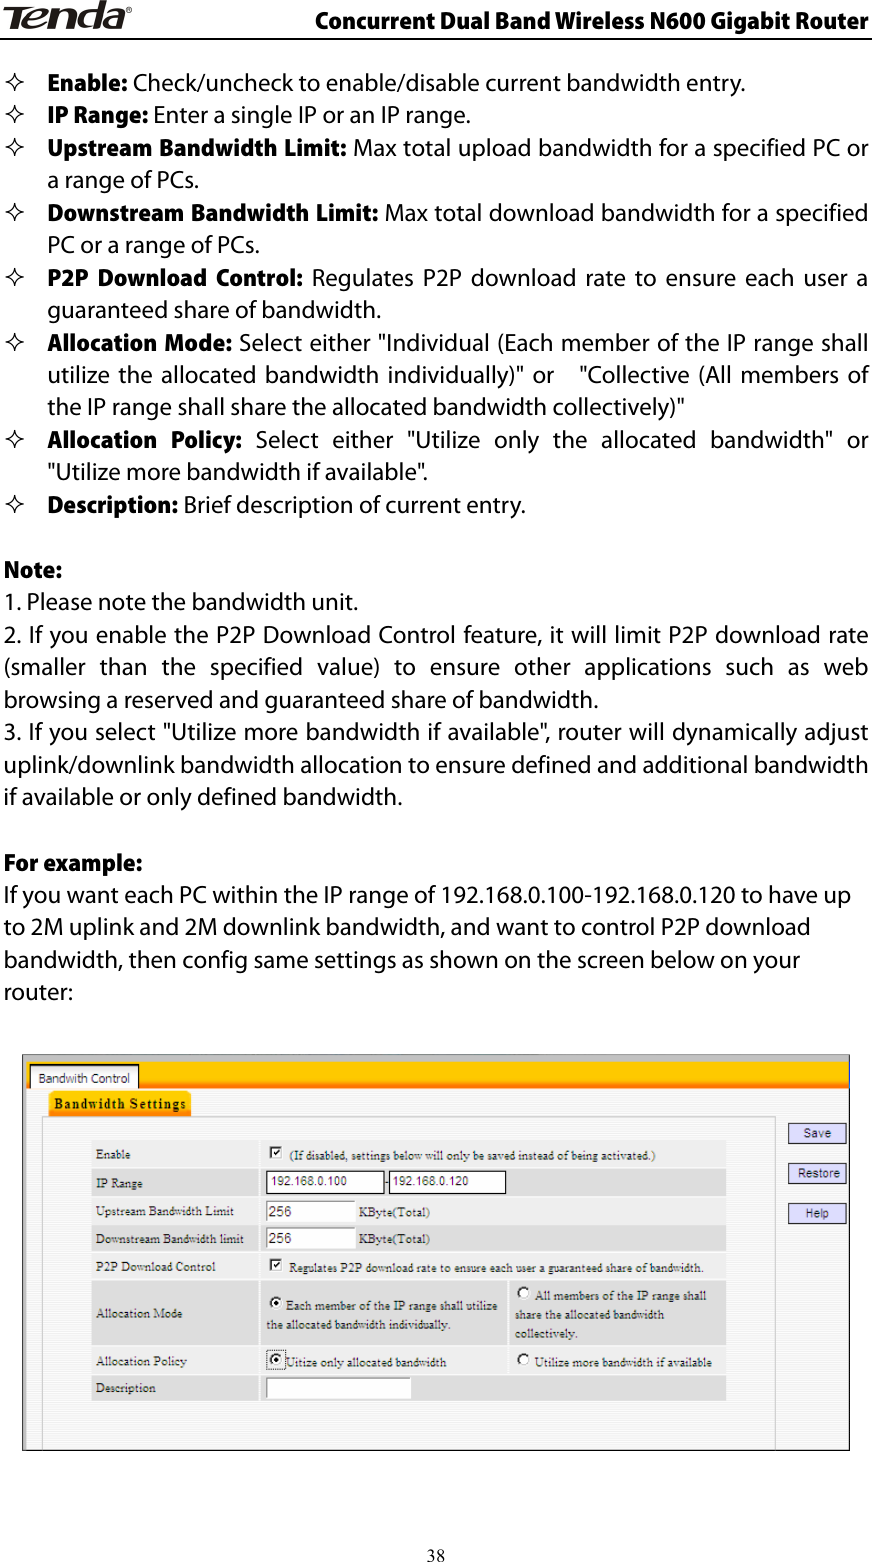
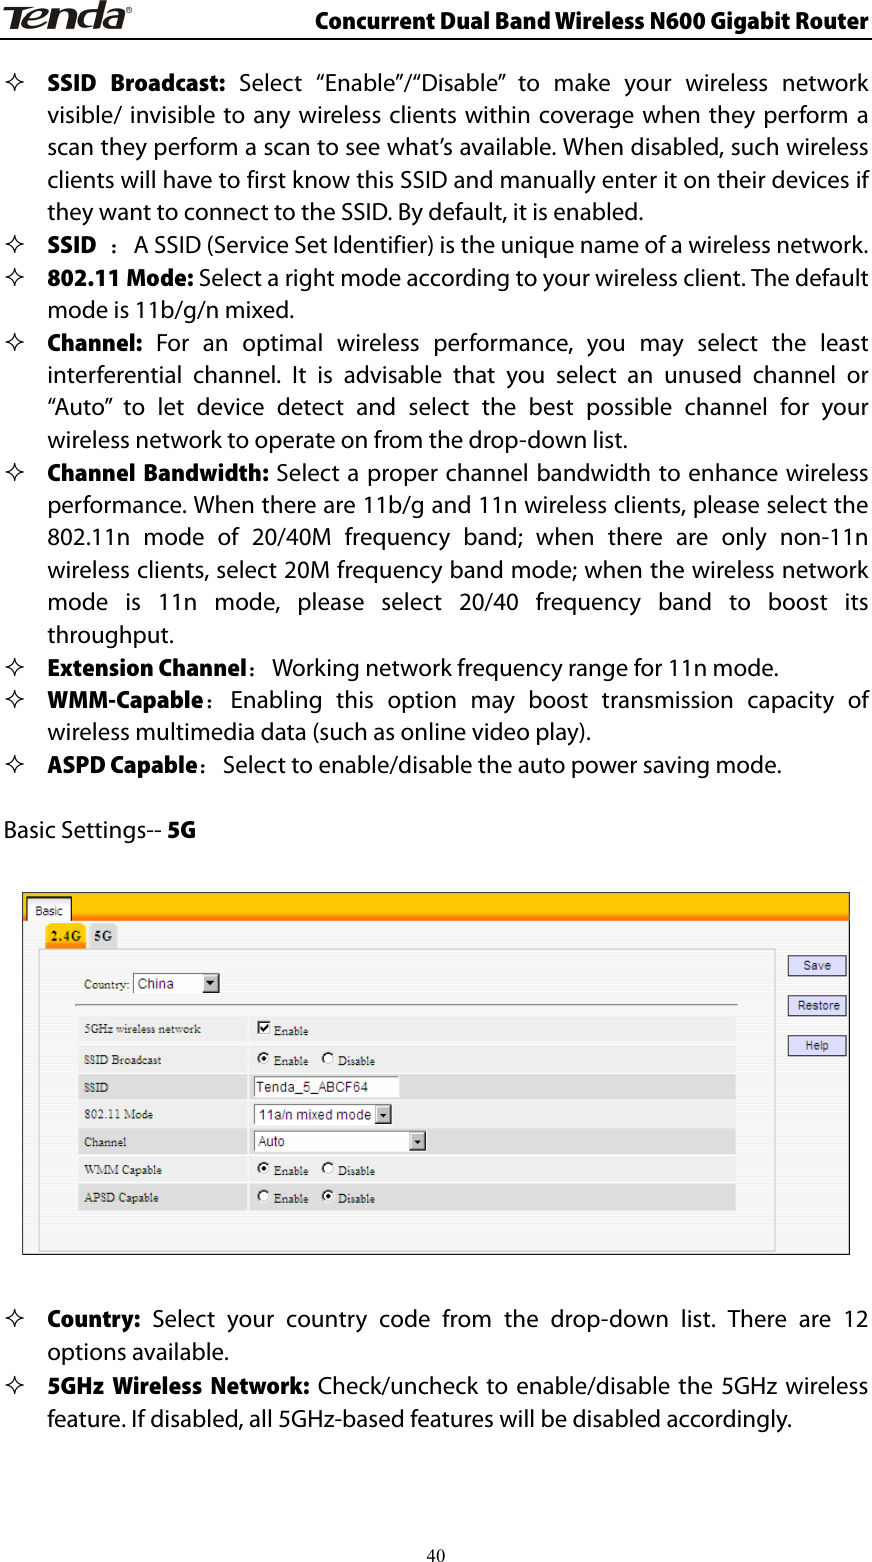
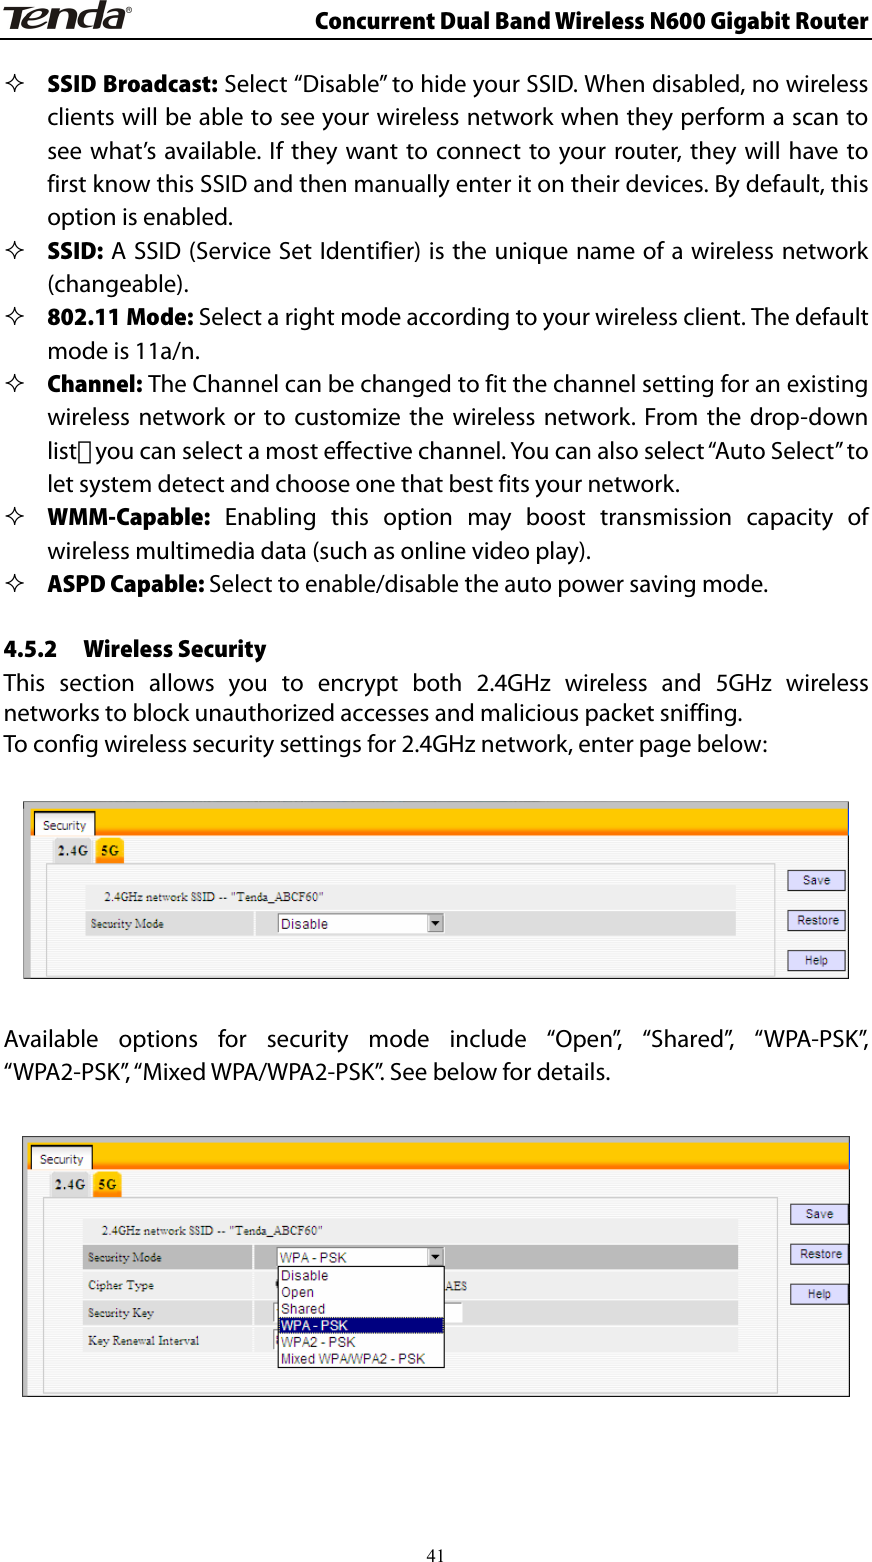
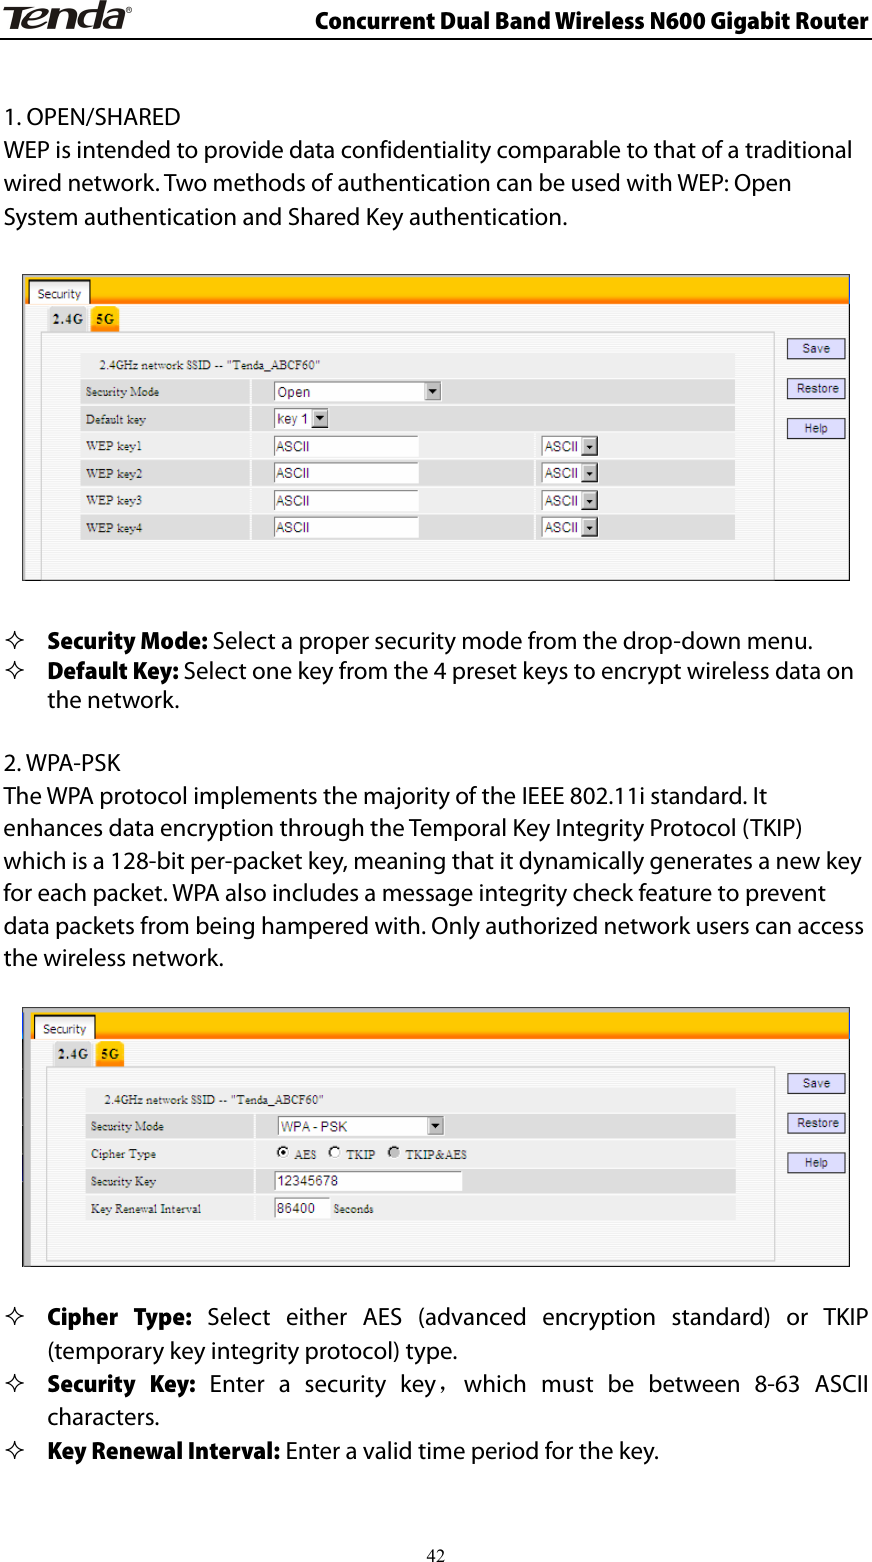
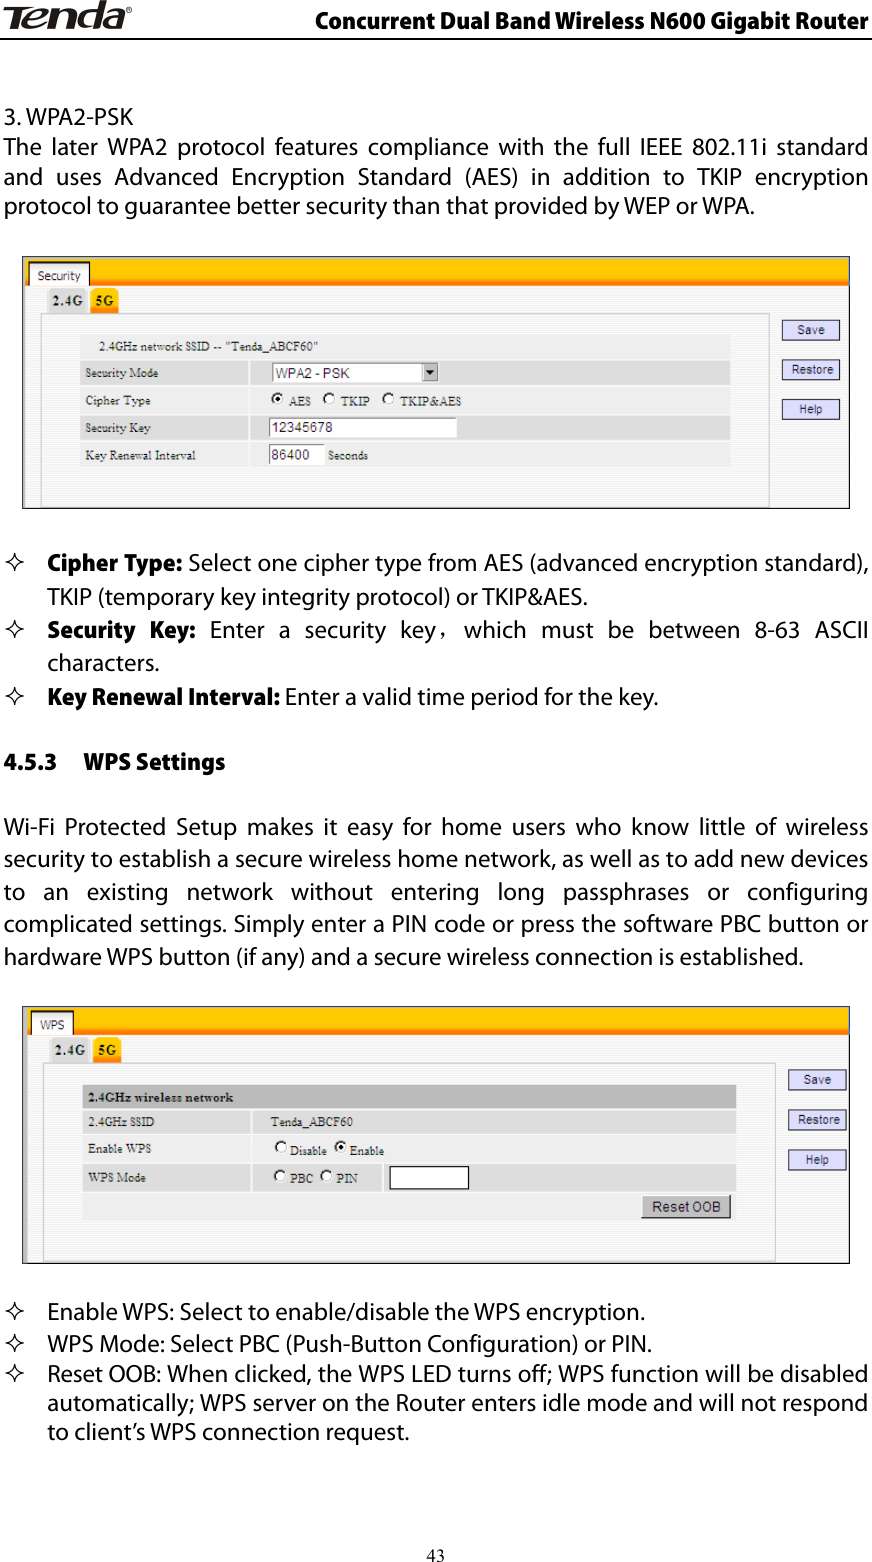
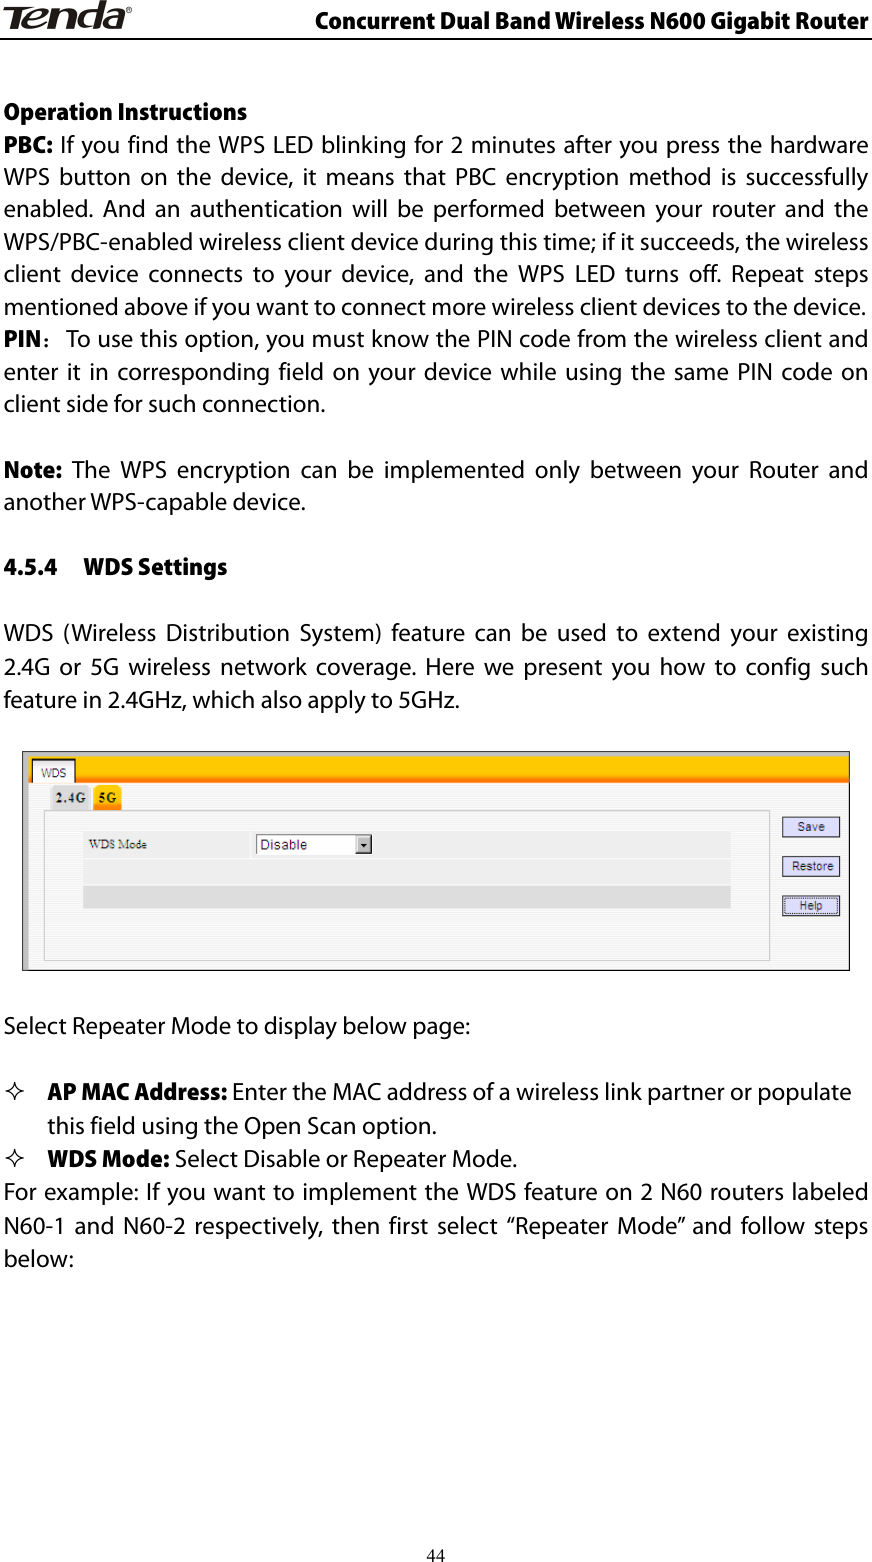
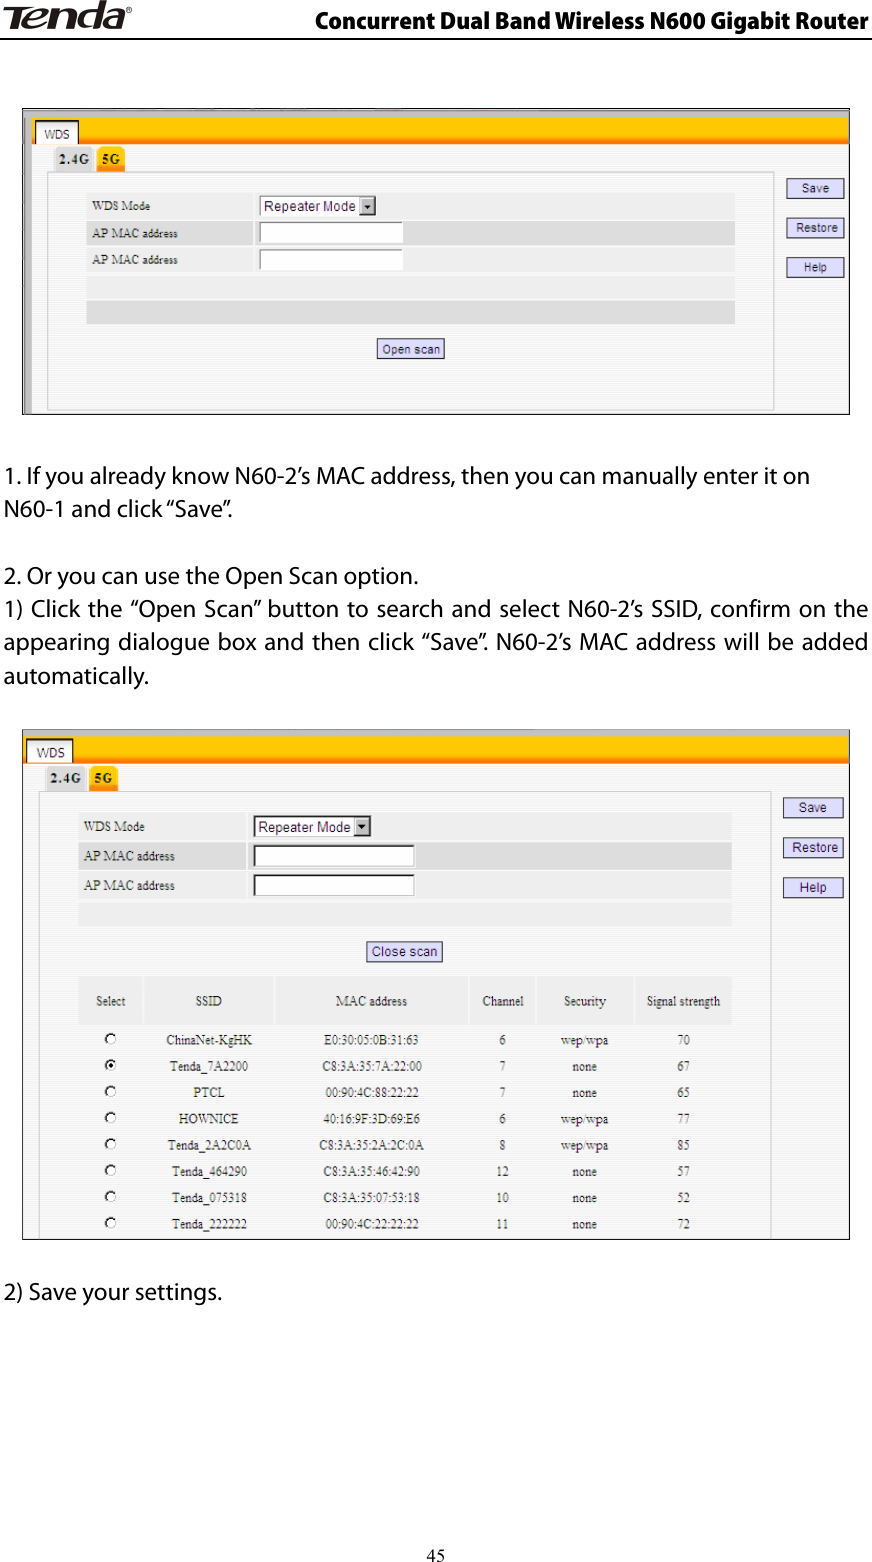
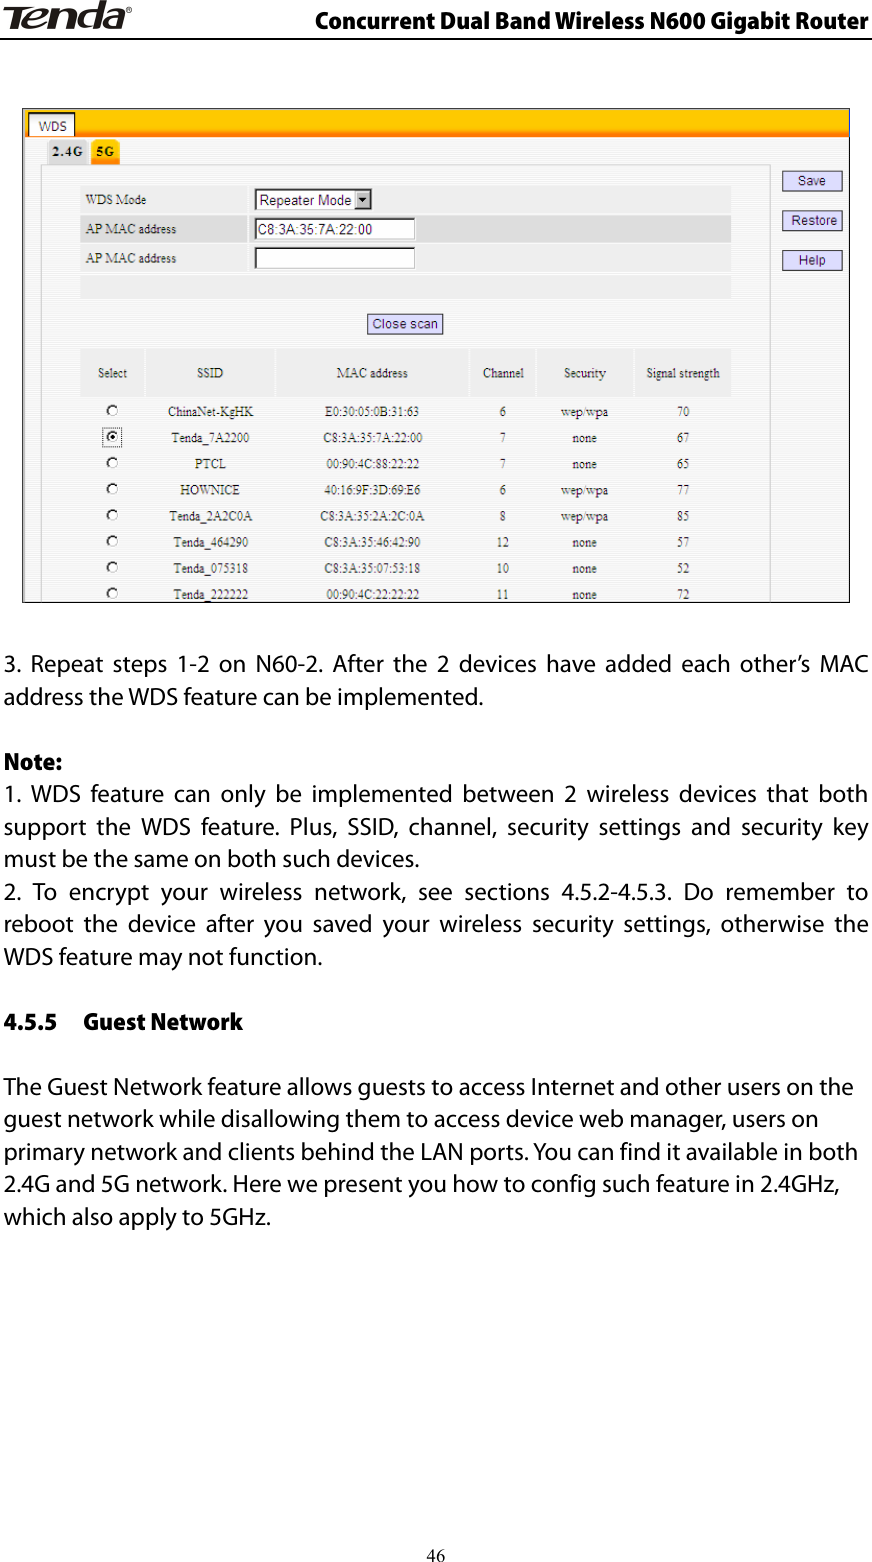
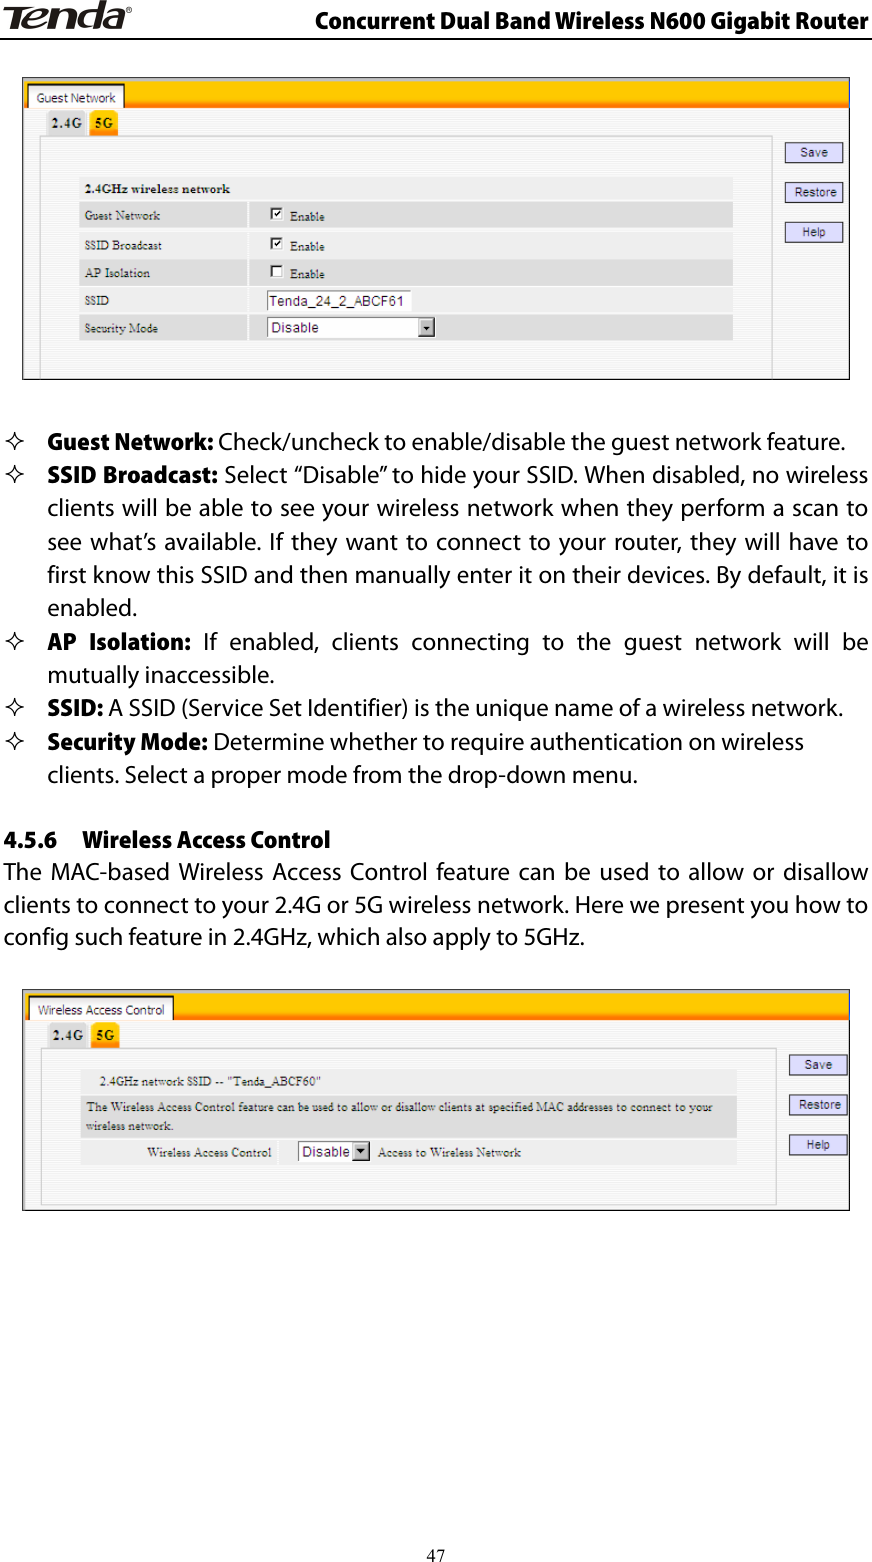
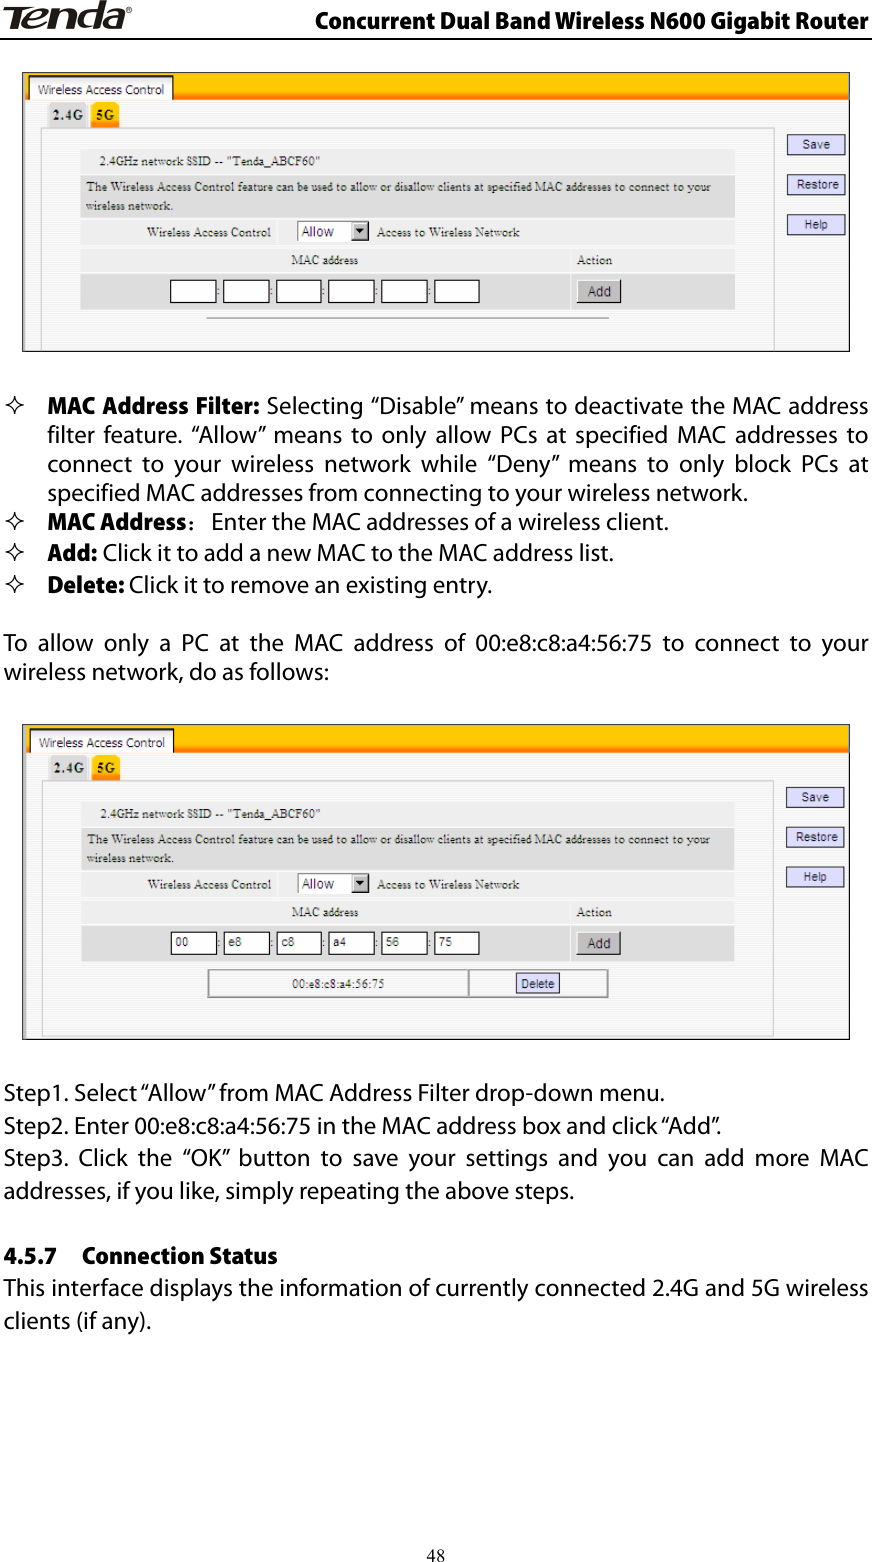
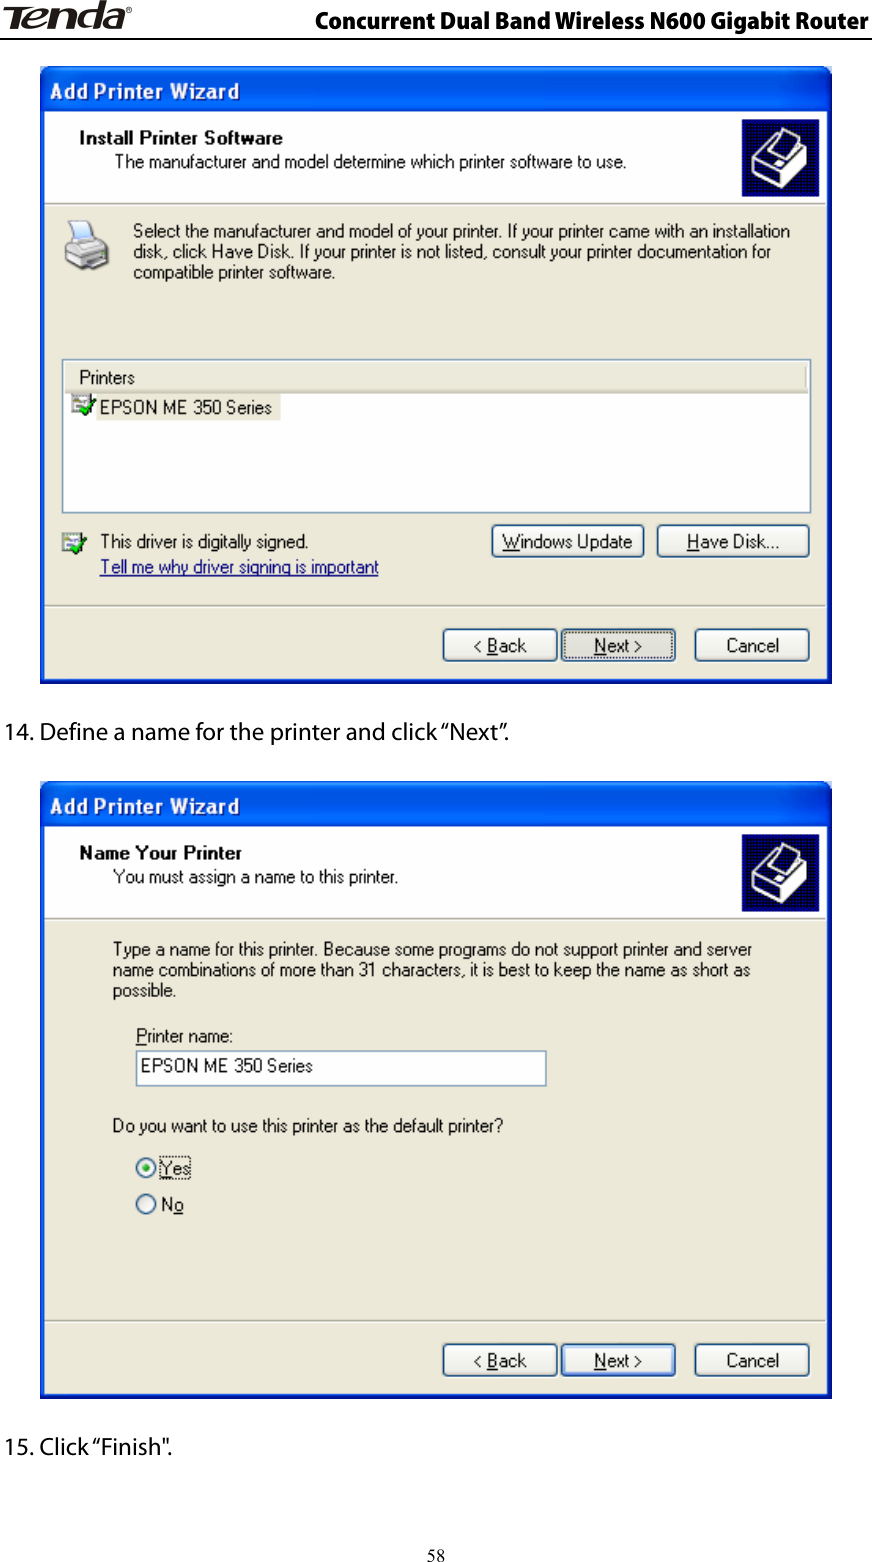
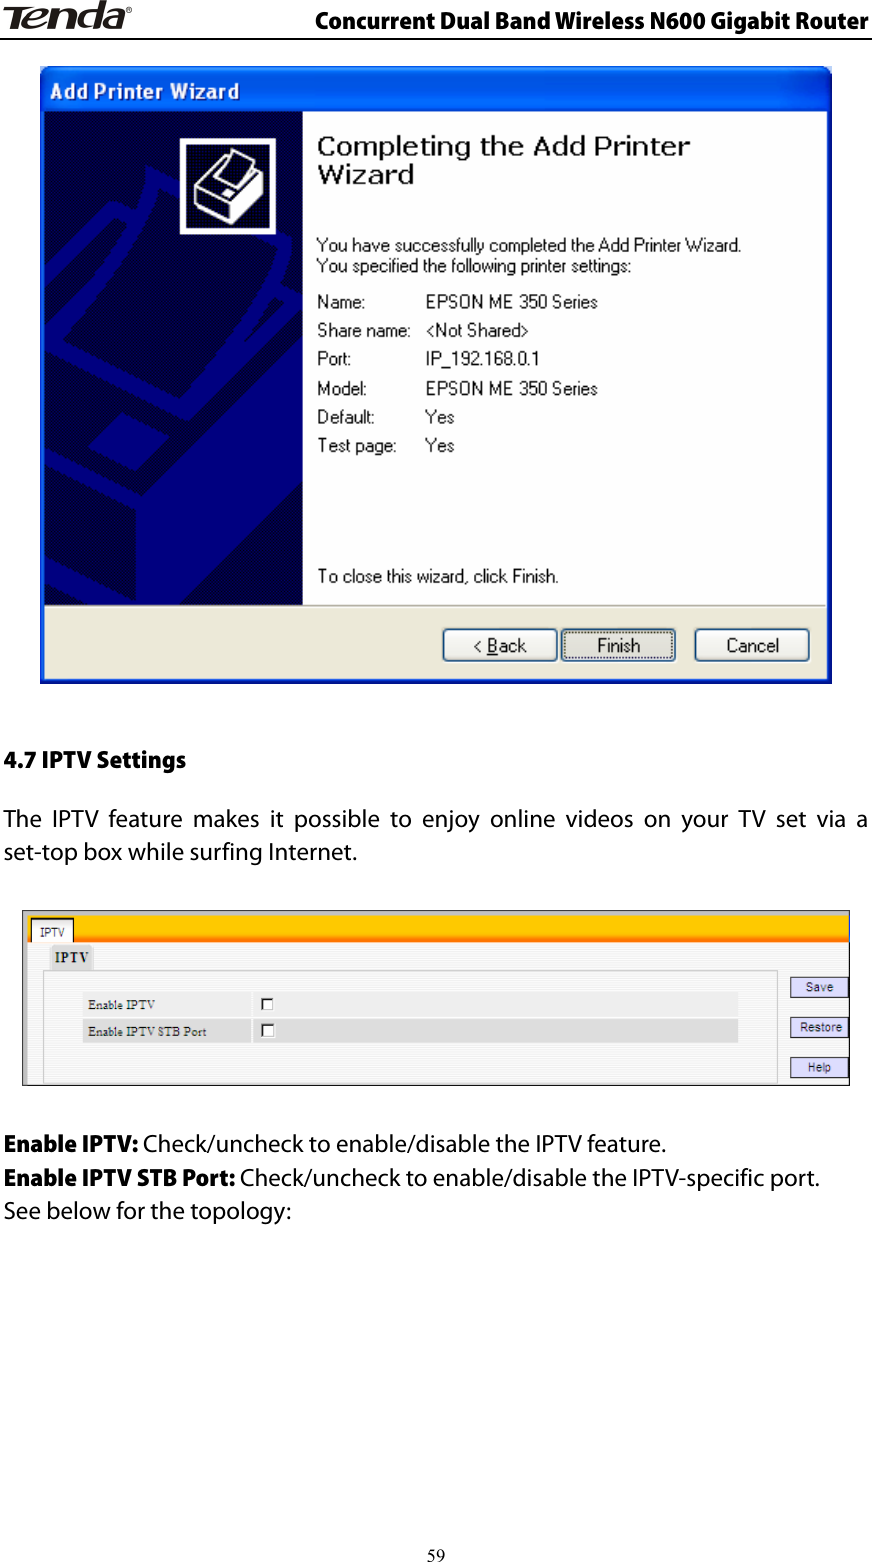
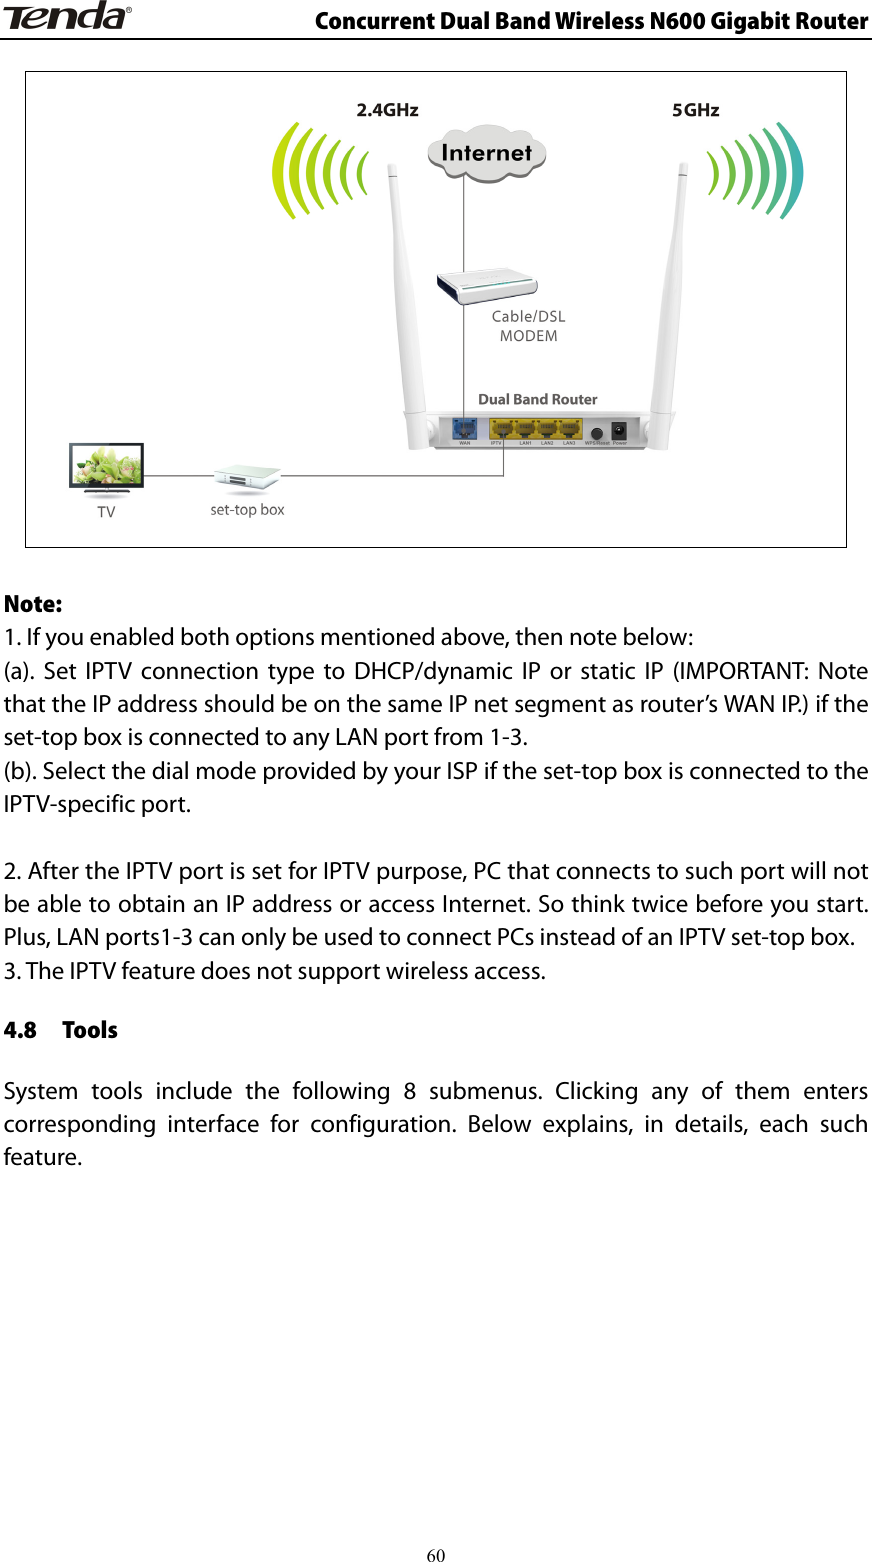
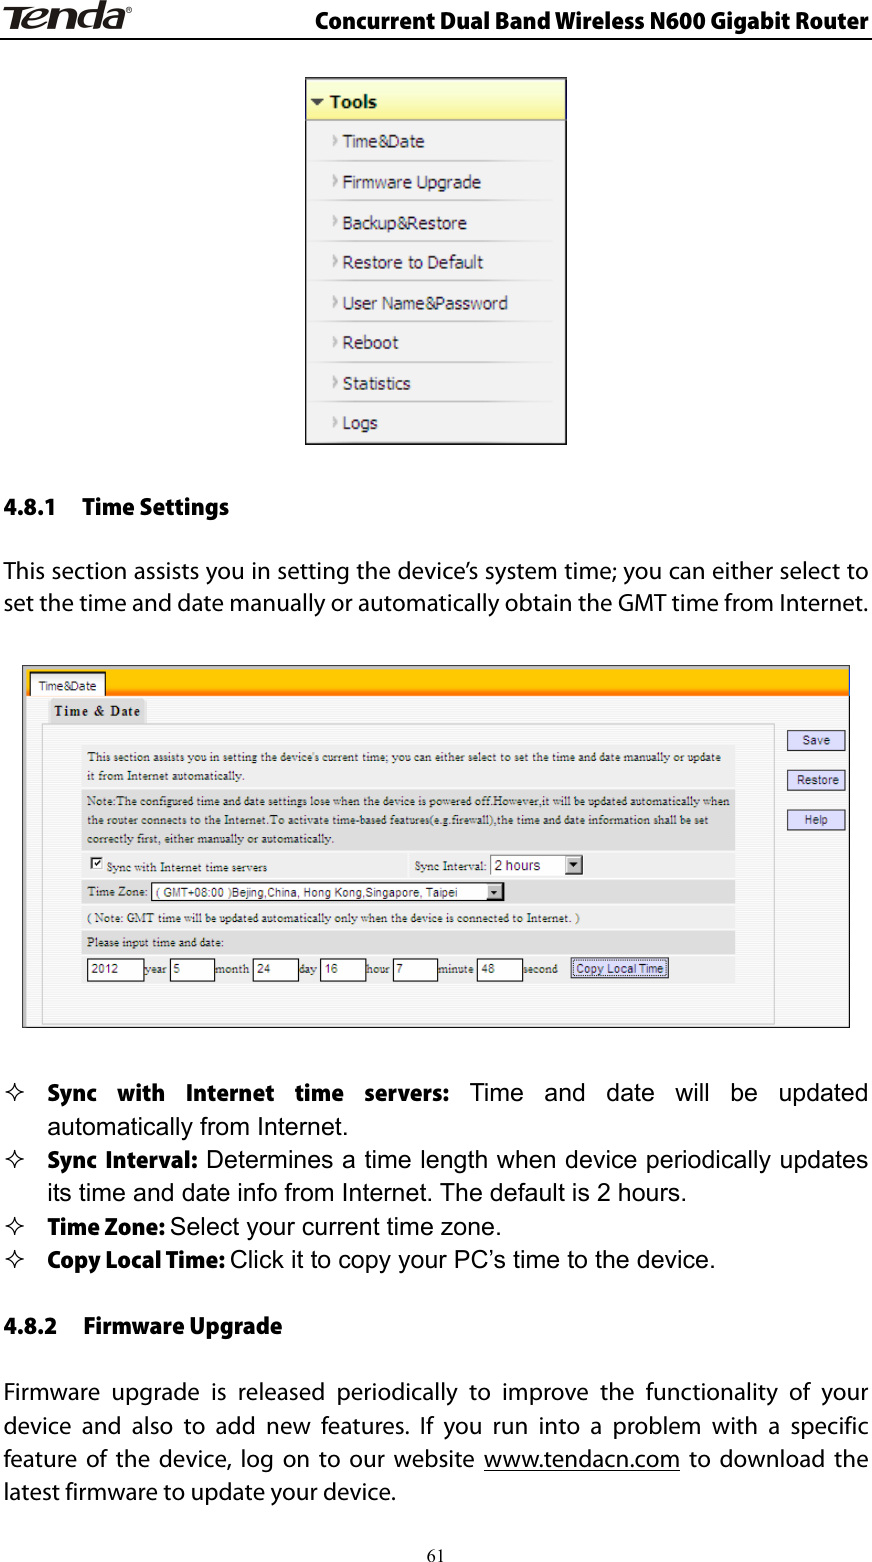
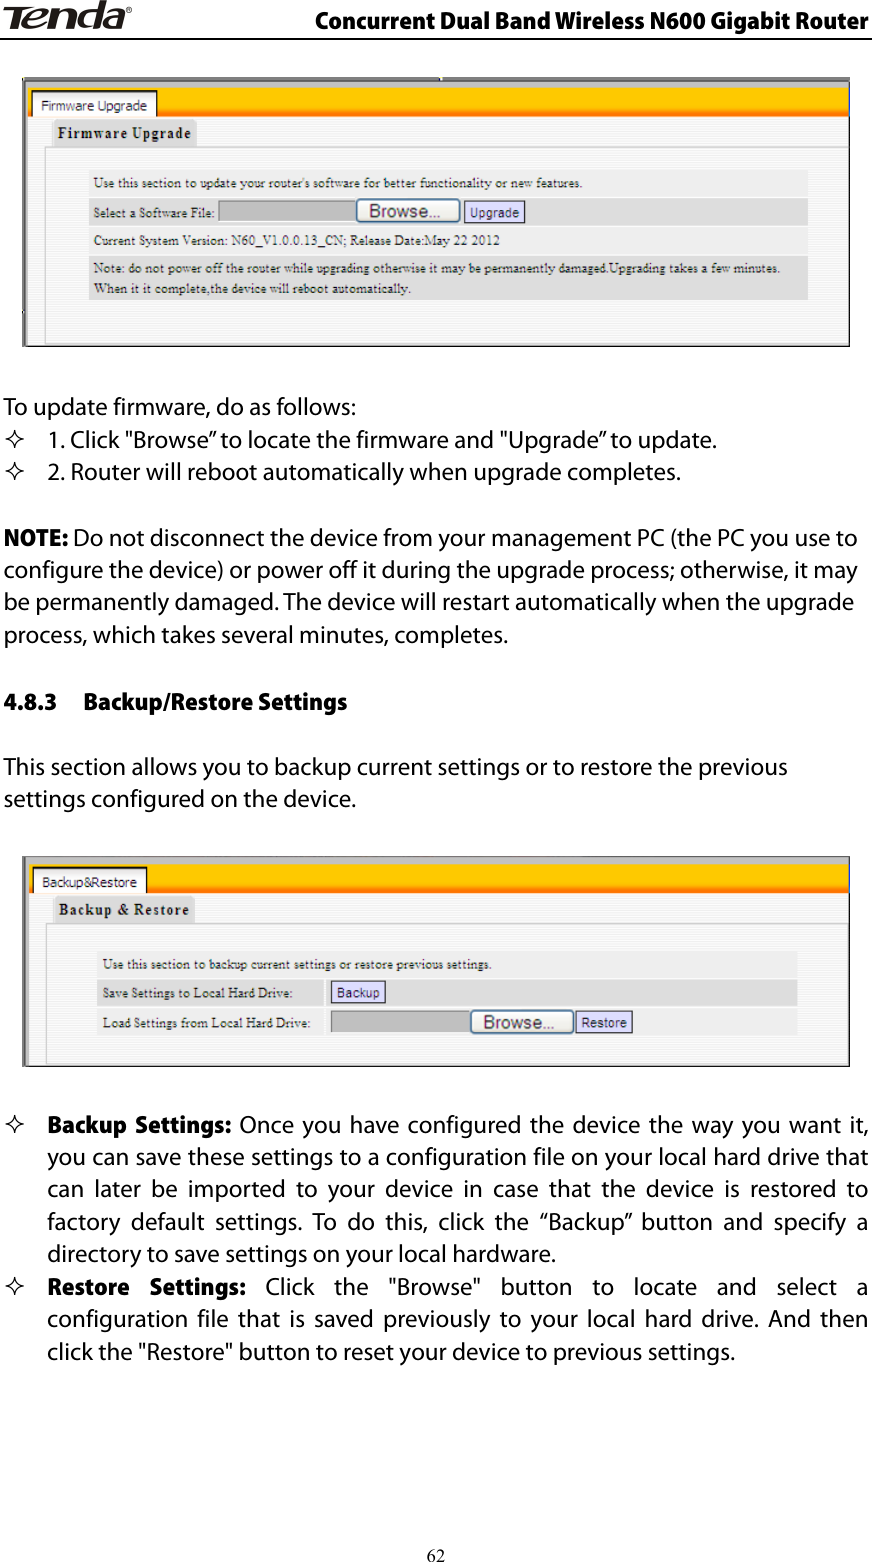
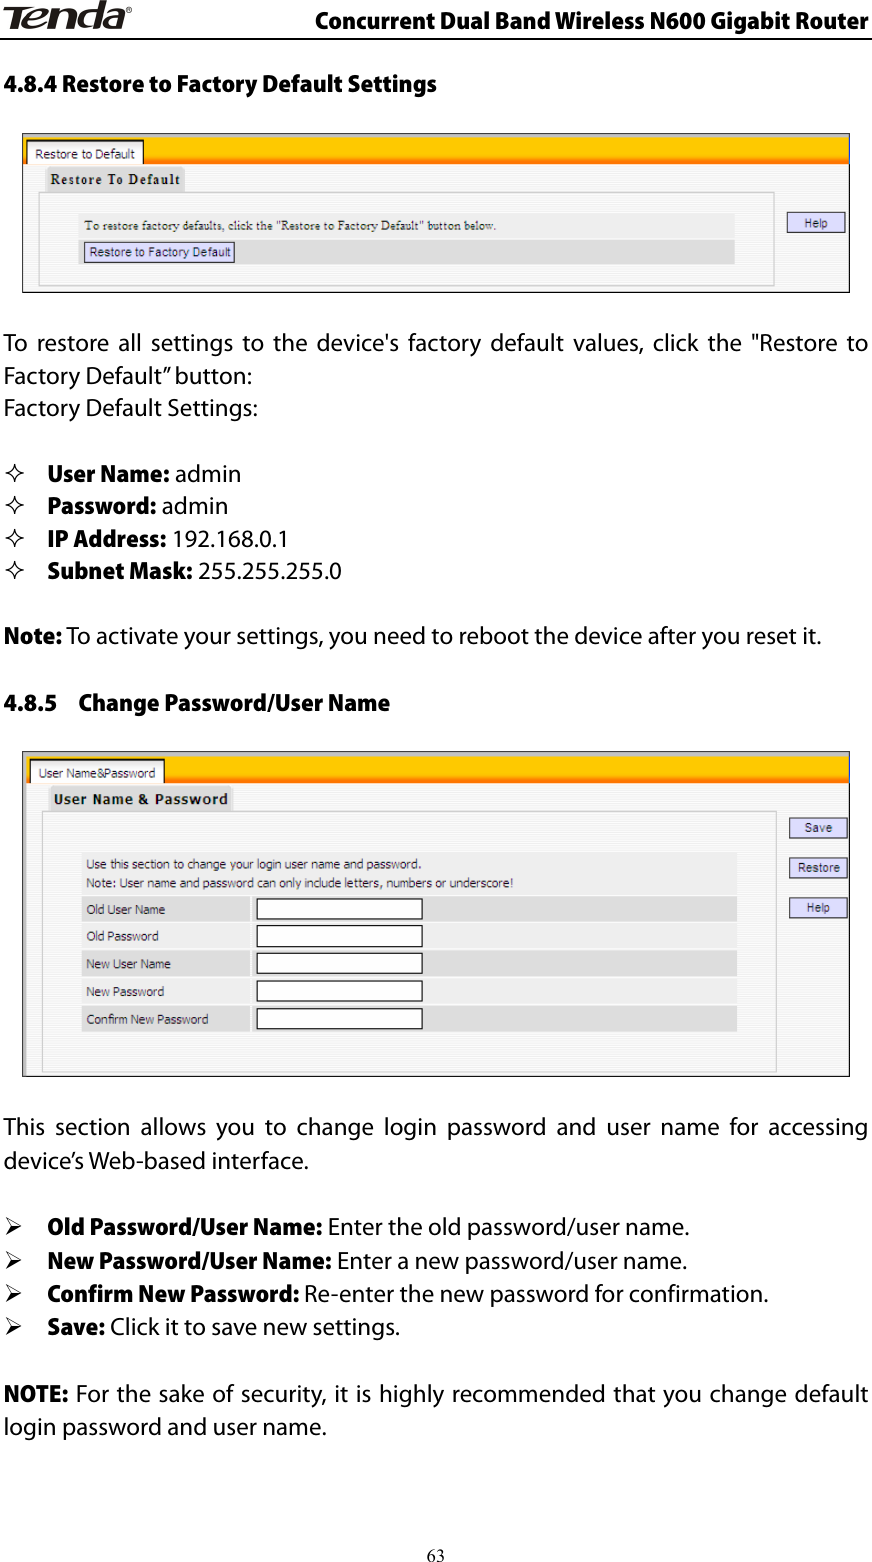
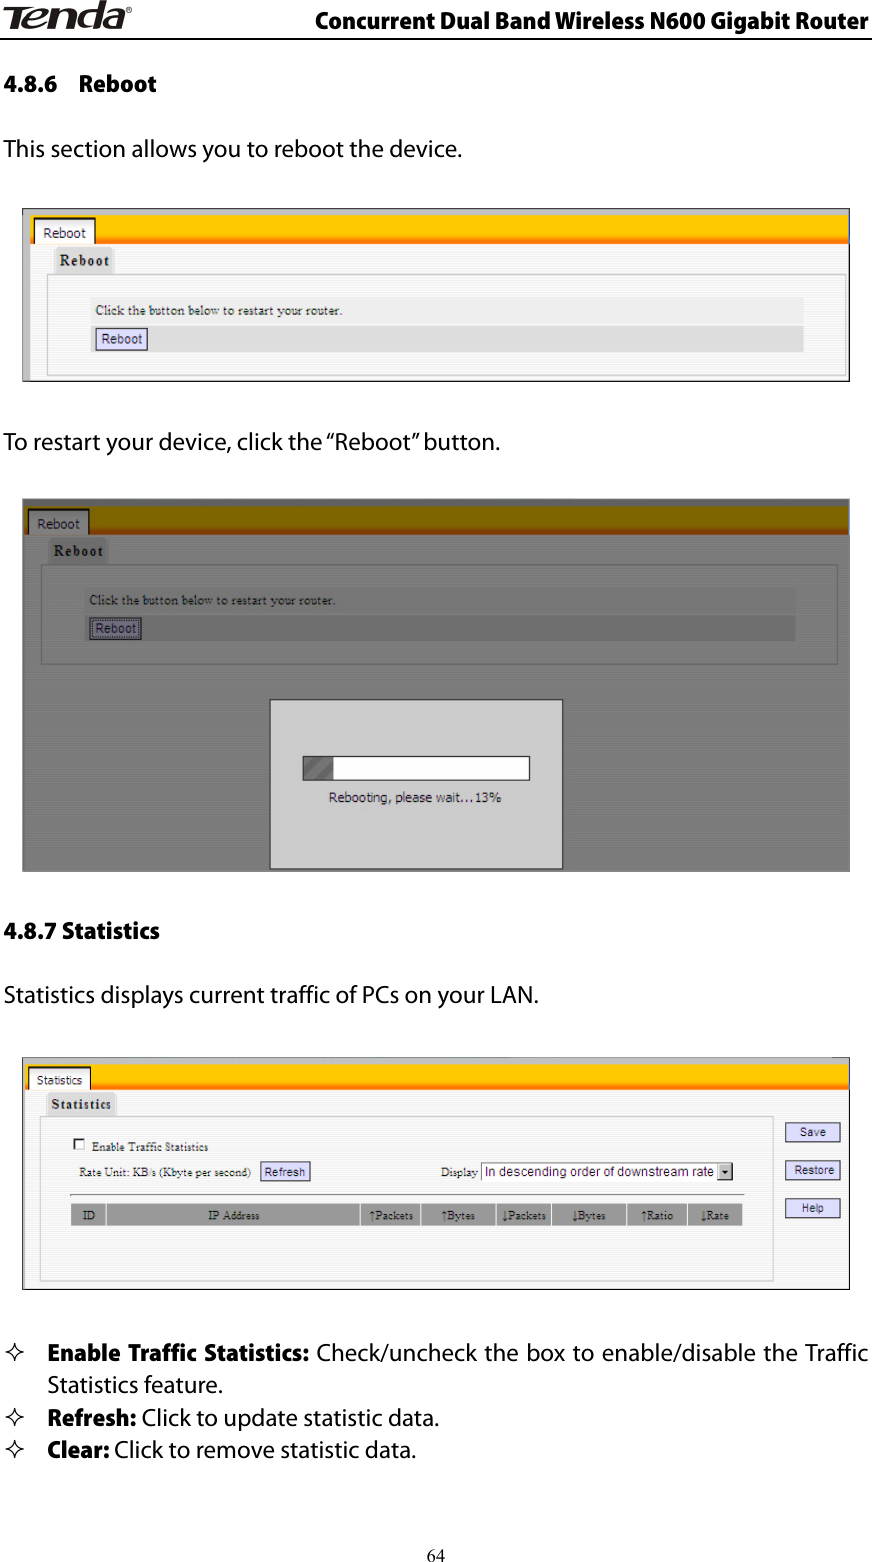
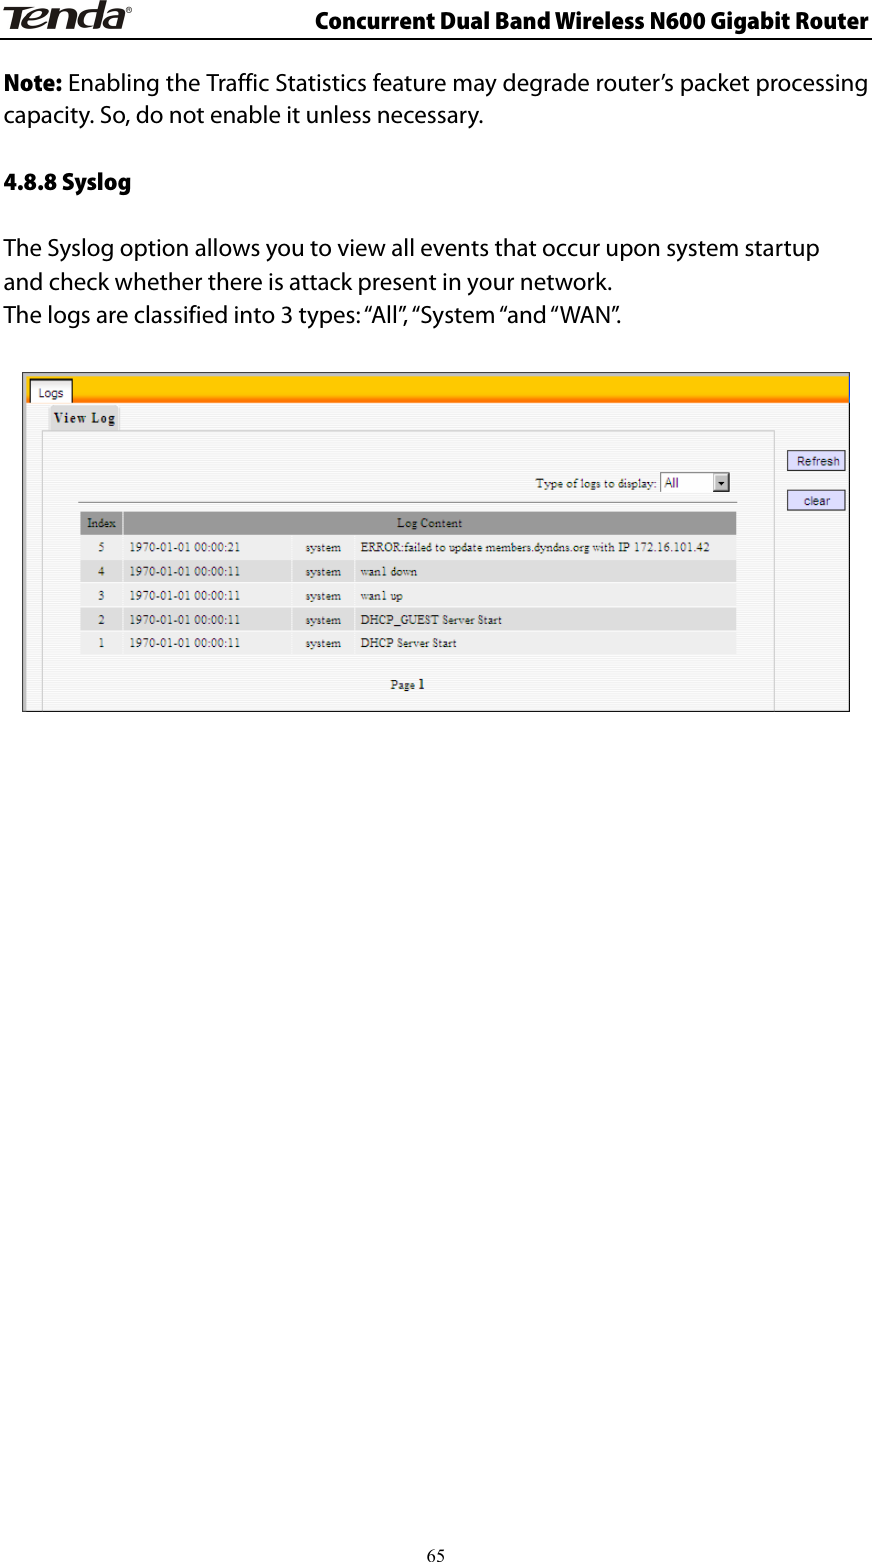
Users Manual