TOKWA PRECISION TECHNOLOGY KSD7890 Car Radio User Manual SD726MB Eng manual0805
SHENZHEN TOKWA PRECISION TECHNOLOGY CO., LTD. Car Radio SD726MB Eng manual0805
UserManual.wiki
>
TOKWA PRECISION TECHNOLOGY
>
KSD7890 User Manual
User Manual
Navigation menu
Upload a User Manual
Namespaces
Wiki Guide
HTML
PDF
Info
Views
User Manual
Discussion / Help
Navigation
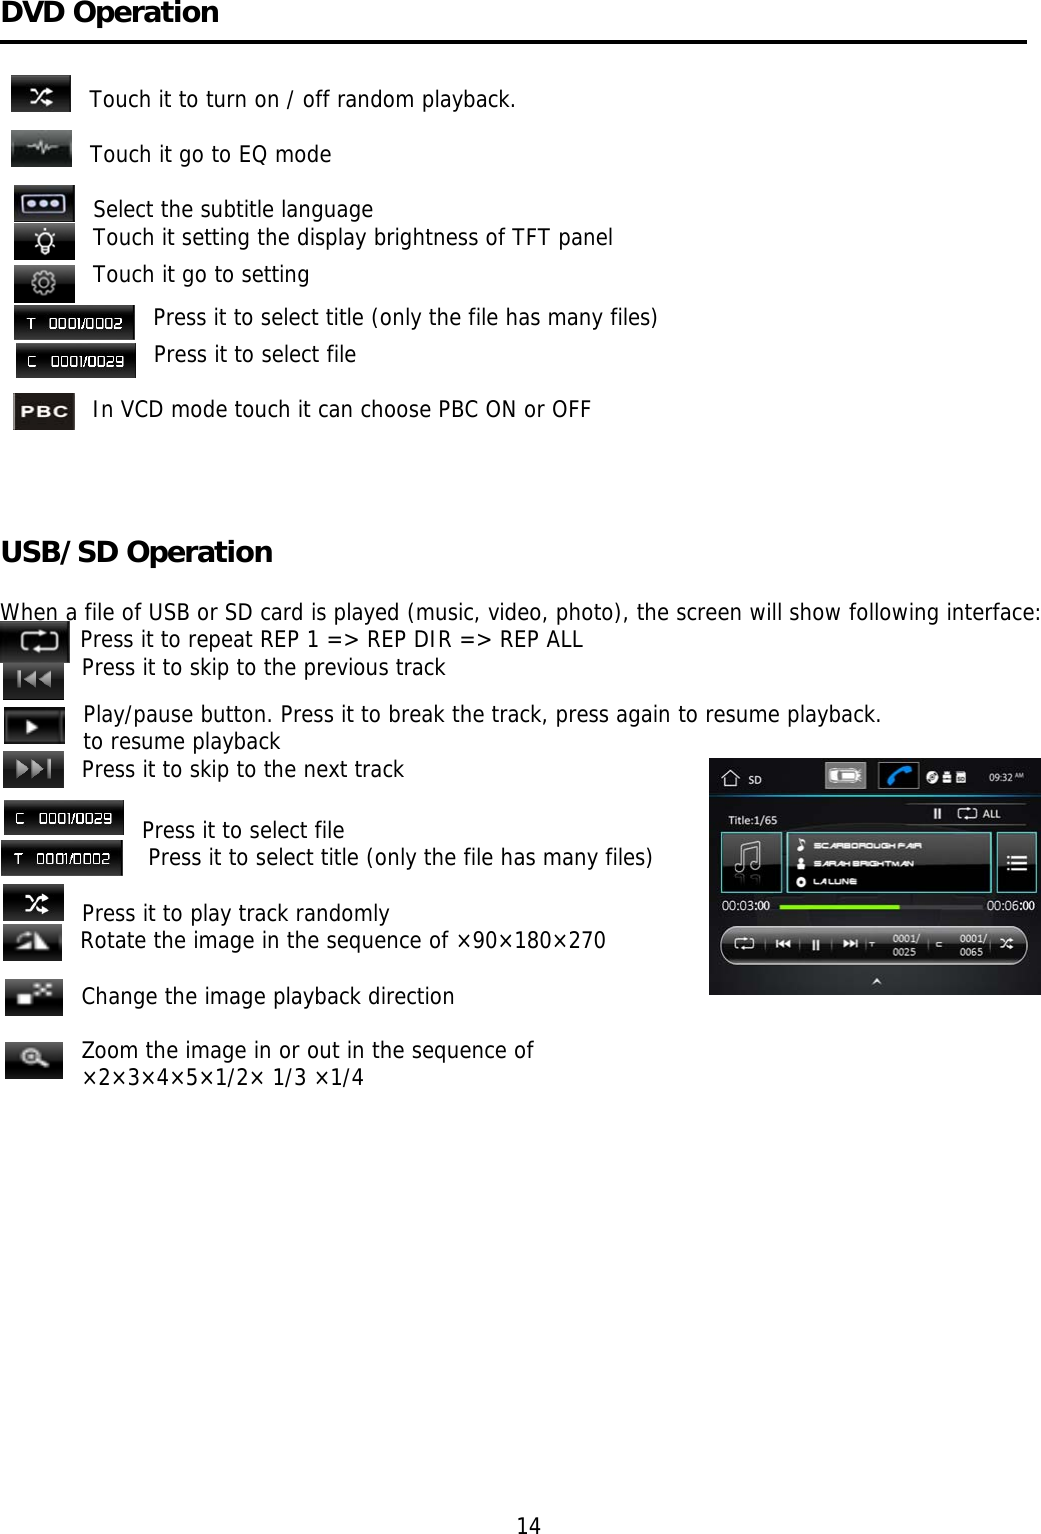
![Settings Operation Tap time setting button to setup time Tap SWC item to program SWC 1) First check whether the car has steering wheel button. 2) The steering wheel and the unit must be connected on the line. 3) While holding down the button on the steering wheel and the corresponding button on the SWC interface it will display complete setting. When all the buttons on the steering wheel and the corresponding button on the SWC interface complete setting, you can use the steering wheel button to operation the unit, such as in radio mode, press button or button to search station backward or forward; In DVD mode, press button or button to select the previous or next track and activate fast reverse (REW) search or fast forward in a track, press VOL+ button or VOL - button to adjust the volume. Note: 1. The “Enter” button and the “reset” button are not included in steering wheel, press the “enter” button to confirm the select, press the “reset” button to clear the former select. 2. The restriction of use SWC is the voltage between the adjacent buttons are above 0.2V that can be identified. DVD Setup Menu [1].Subtitle Lang setting: With this option you can select the preferred language for the subtitles. When the selected language is recorded on the disc then this language will automatically be shown. If not, the first language recorded on the disc is displayed. [2].Audio Lang setting: With this option you can select the preferred language for the audio output. When the selected language is recorded on the disc (not all discs have multiple languages recorded) then this language will automatically be played. If not, the first language recorded on the disc is played 16 Audio Language : select desired language Subtitle Language :select desired language Menu Language :select desired language Password Rating There are 3 wires for SWC function, connect to SWC1(white), SWC2 (Brown), GND (Black)](https://usermanual.wiki/TOKWA-PRECISION-TECHNOLOGY/KSD7890/User-Guide-3660334-Page-16.png)
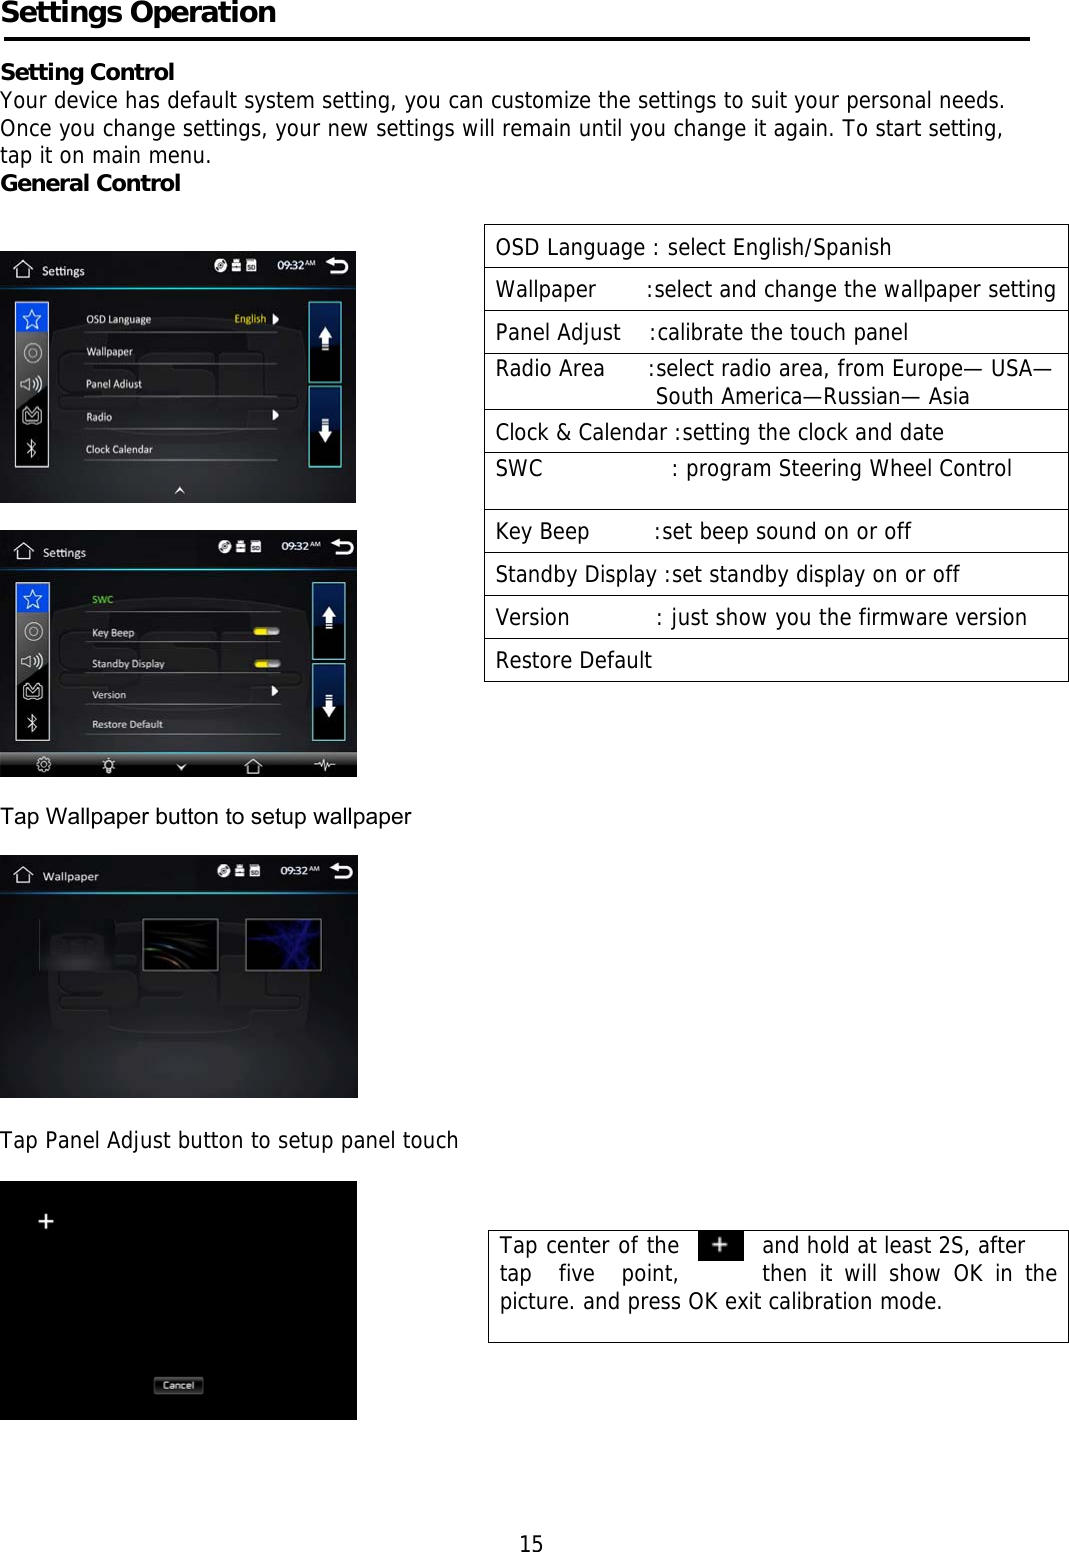
![Settings Operation [3]. DVD Menu Lang setting:. With this option you can select the preferred language for the disc menu. When the selected language is recorded on the disc then this language will automatically be selected. If not, the first language recorded on the disc is displayed. Sound Control Tap Sound Tap Sound Effect button to show following interface TV Type Set TFT screen mode to the correct ratio: Three screen ratio modes are available, Normal/PS (4:3 Pan Scan) and Normal/LB (4:3Letterbox) Different disc formats will display different images depending this setting and the screen size used. Note: additional wide 16:9 only for DVD player. 17 Sound Effect Subwoofer Loudness : select on/off Loud Cut off Freq: EQ : select User—Classic—Rock—Pop—Jazz—Electric—Flat Reset Aspect ratio : select 4:3PS/4:3LB /16:9 Adjust : adjust screen brightness/contrast/Hue/Saturation/Sharpness Panel :setting backlight time](https://usermanual.wiki/TOKWA-PRECISION-TECHNOLOGY/KSD7890/User-Guide-3660334-Page-17.png)