TOKWA PRECISION TECHNOLOGY VR-651B Car Radio User Manual
SHENZHEN TOKWA PRECISION TECHNOLOGY CO., LTD. Car Radio
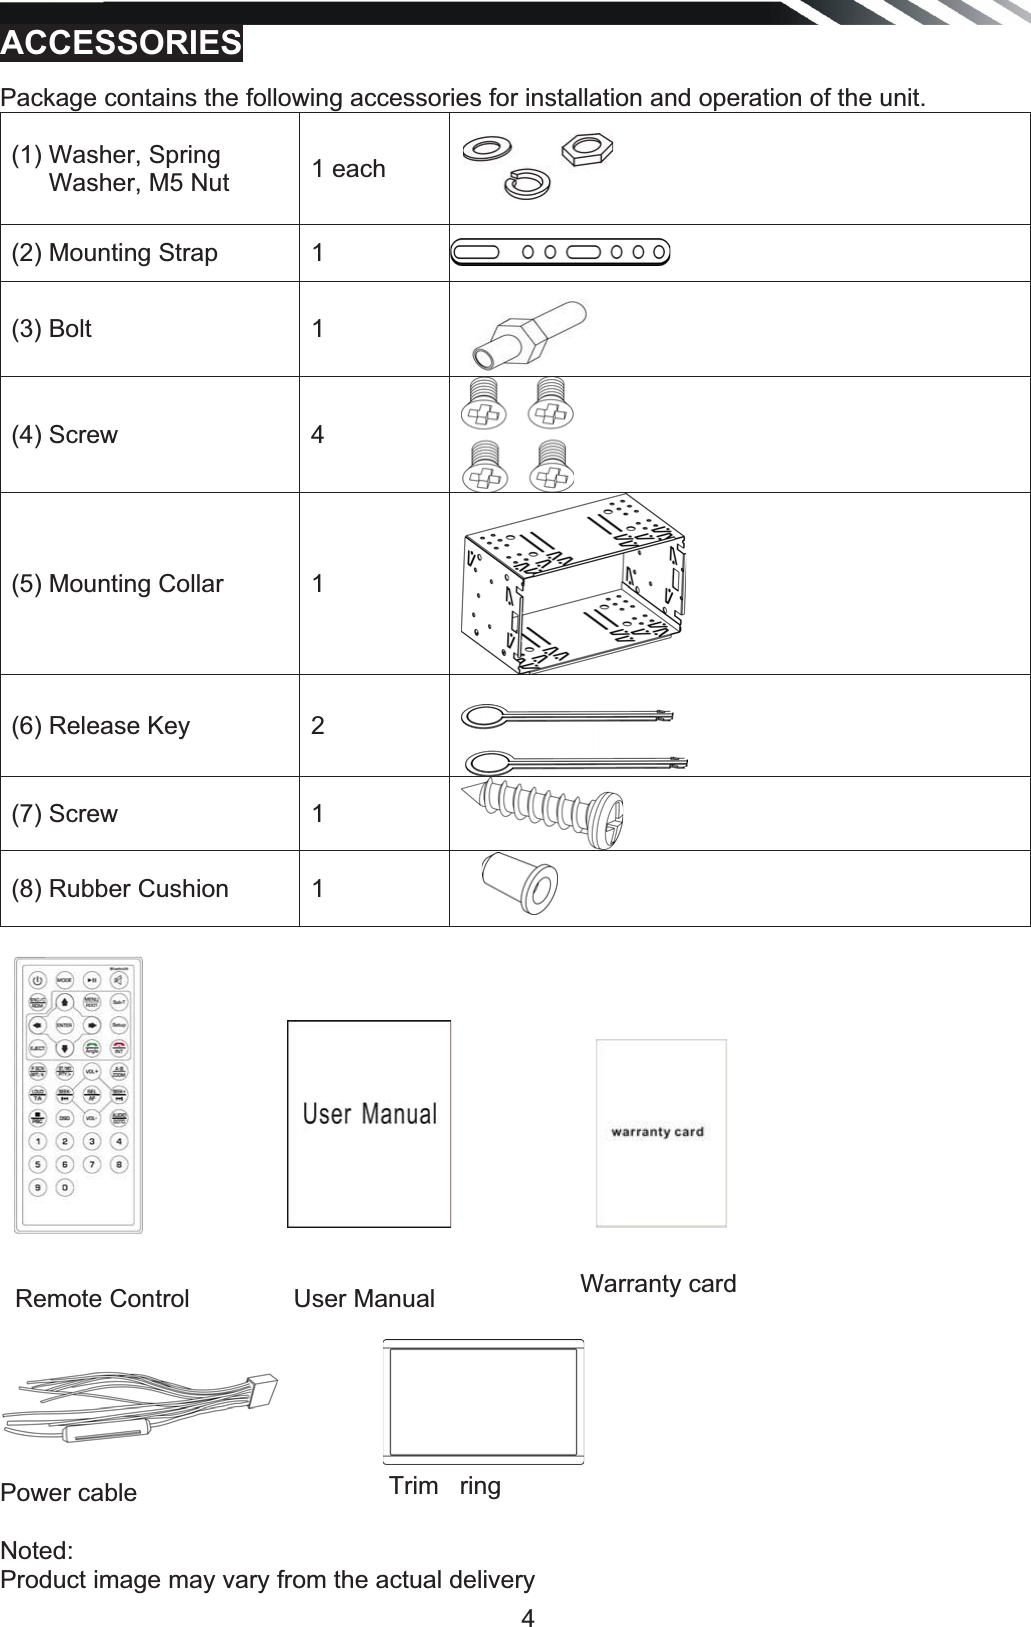
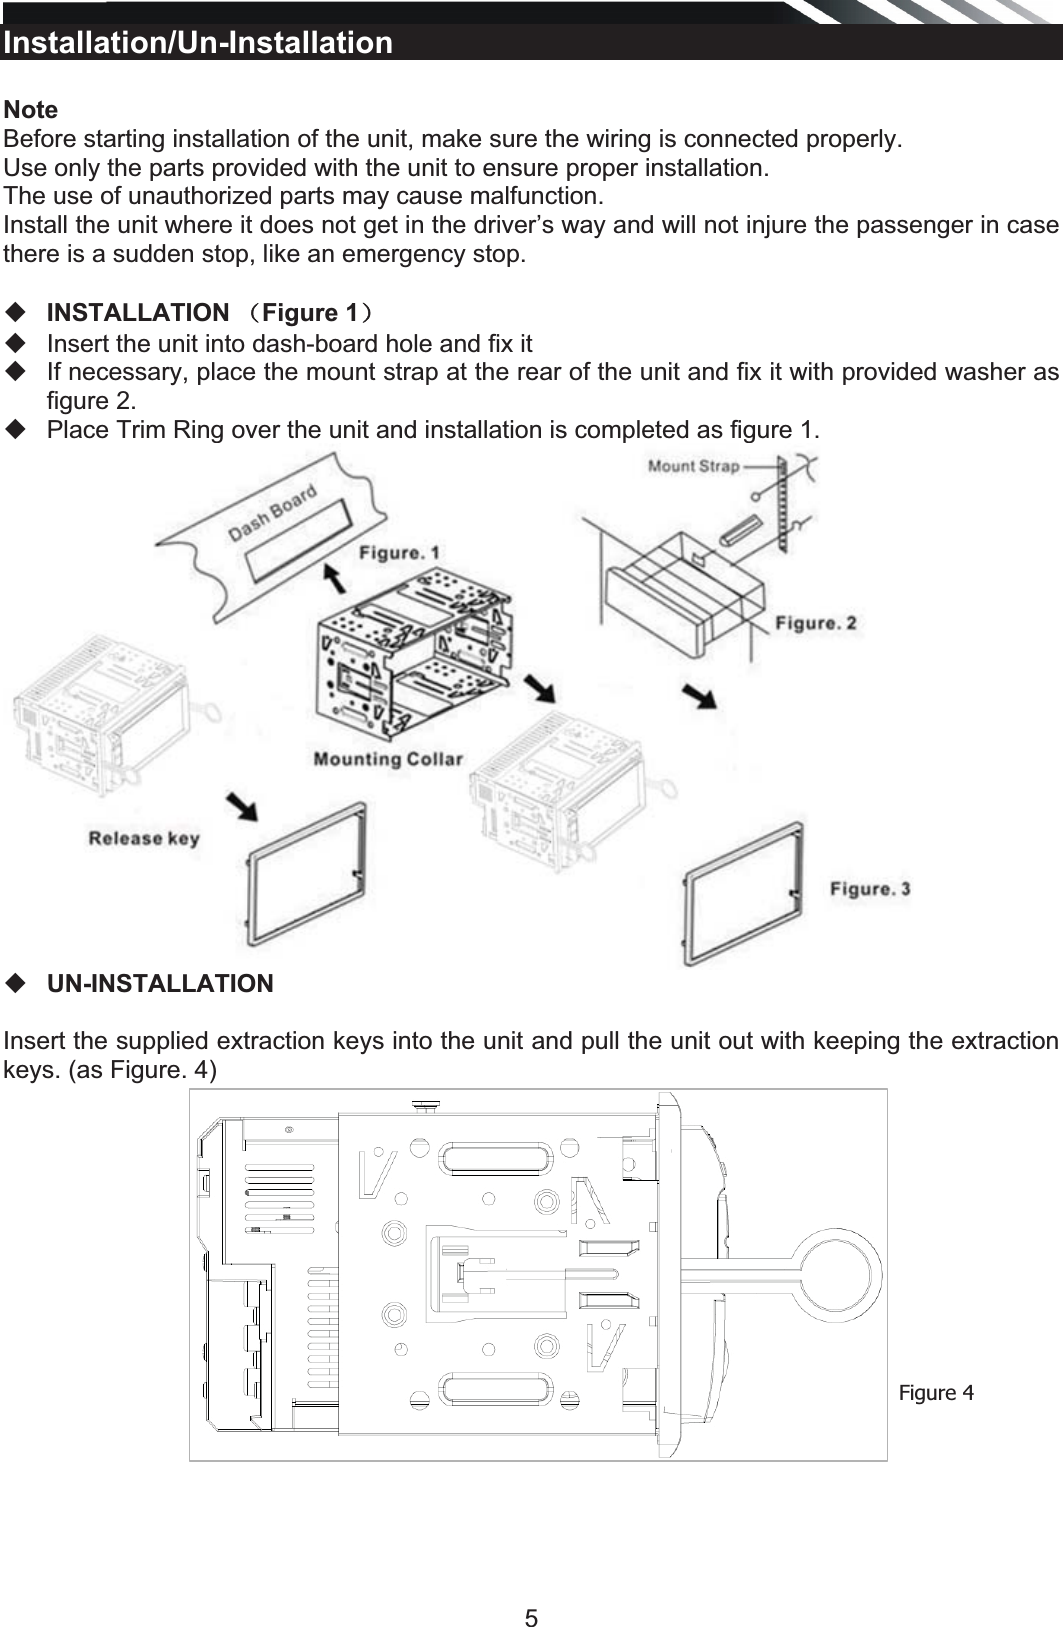
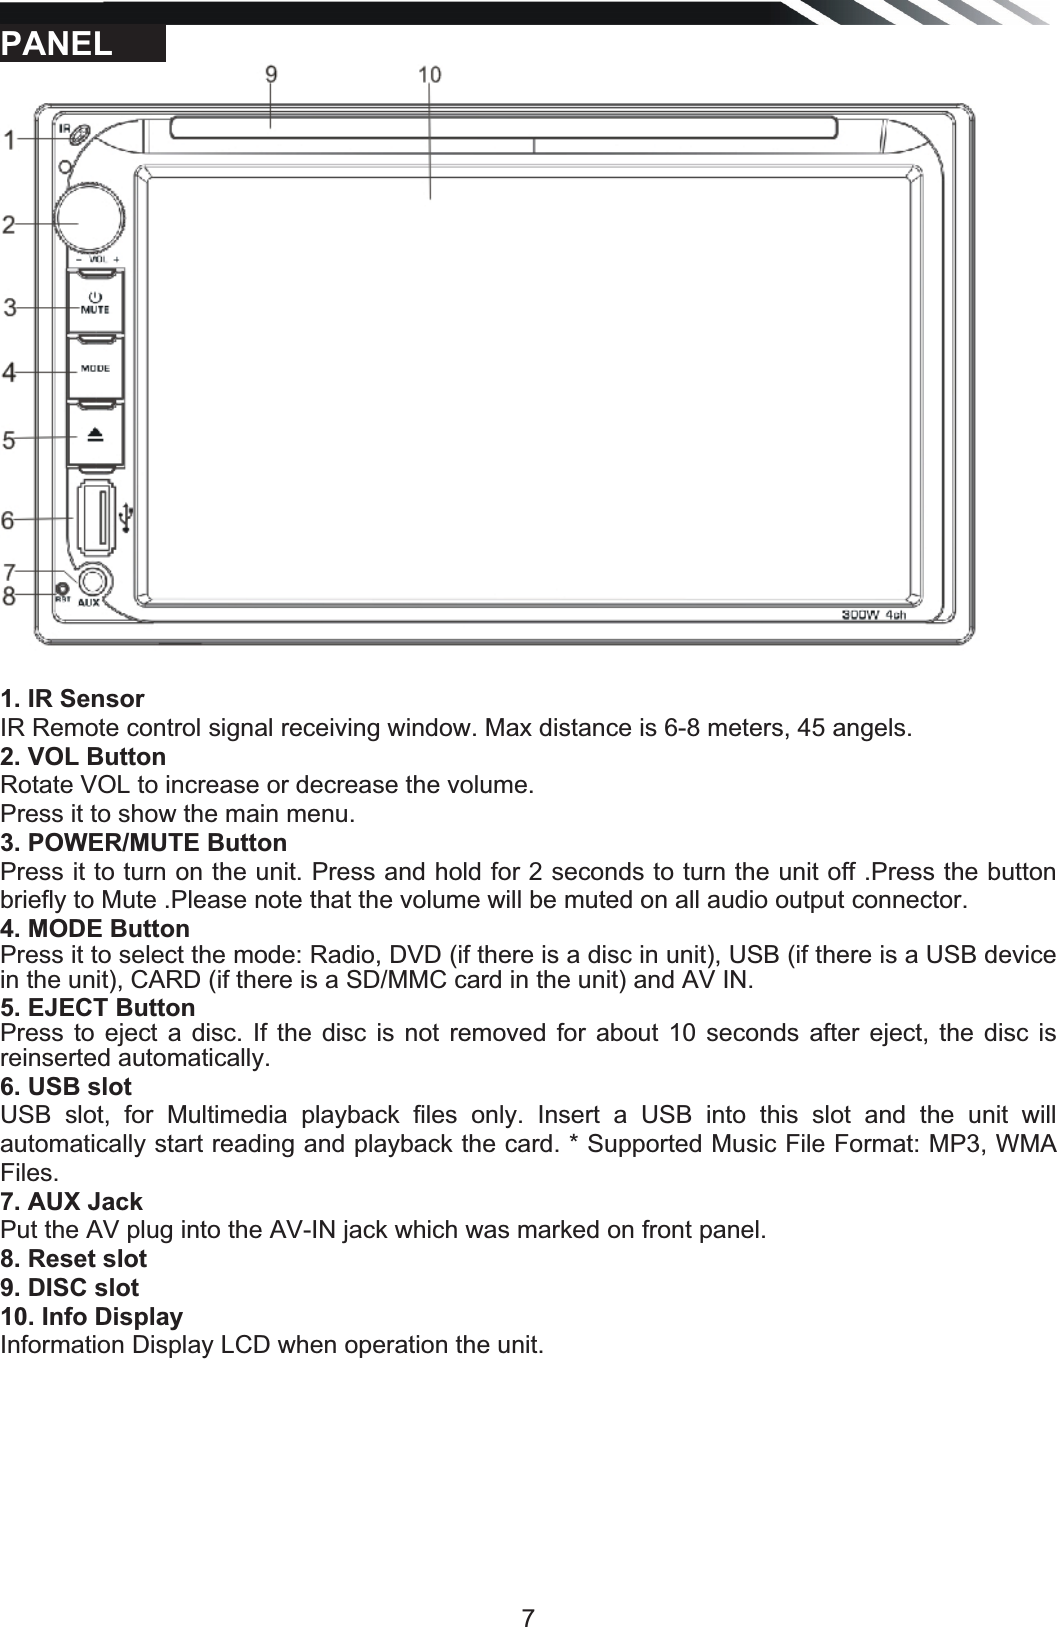
UserManual.wiki
>
TOKWA PRECISION TECHNOLOGY
>
VR 651B User Manual
User Manual
Navigation menu
Upload a User Manual
Namespaces
Wiki Guide
HTML
PDF
Info
Views
User Manual
Discussion / Help
Navigation

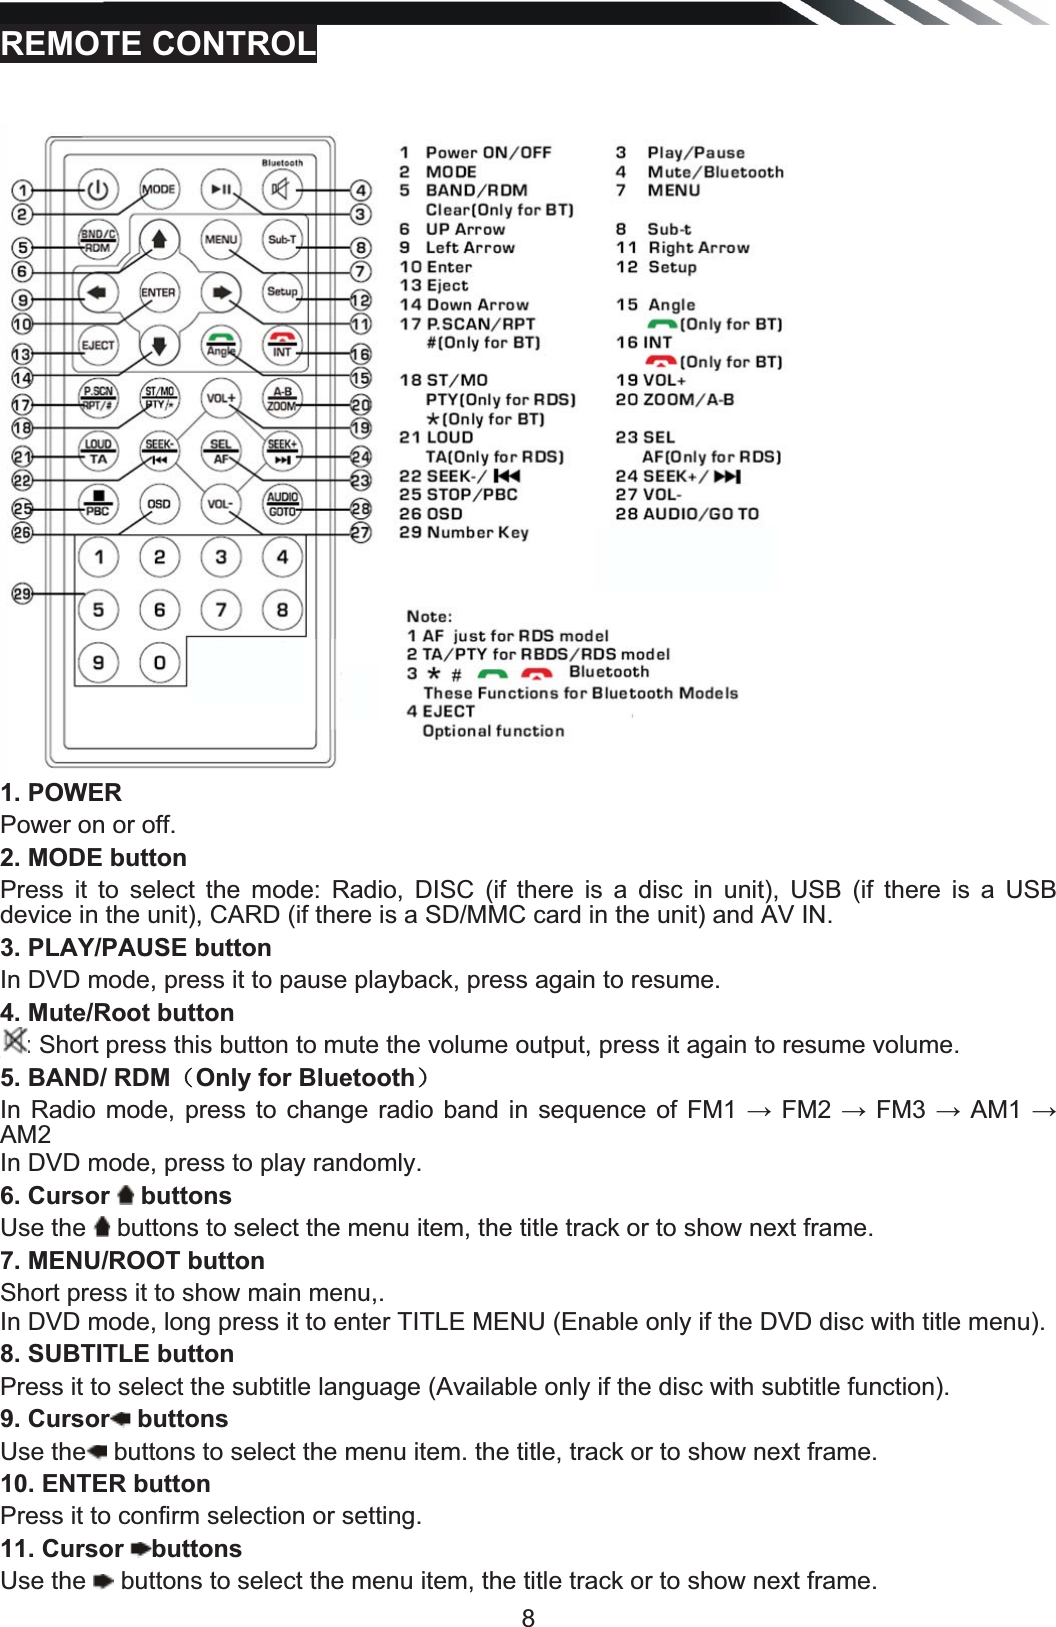

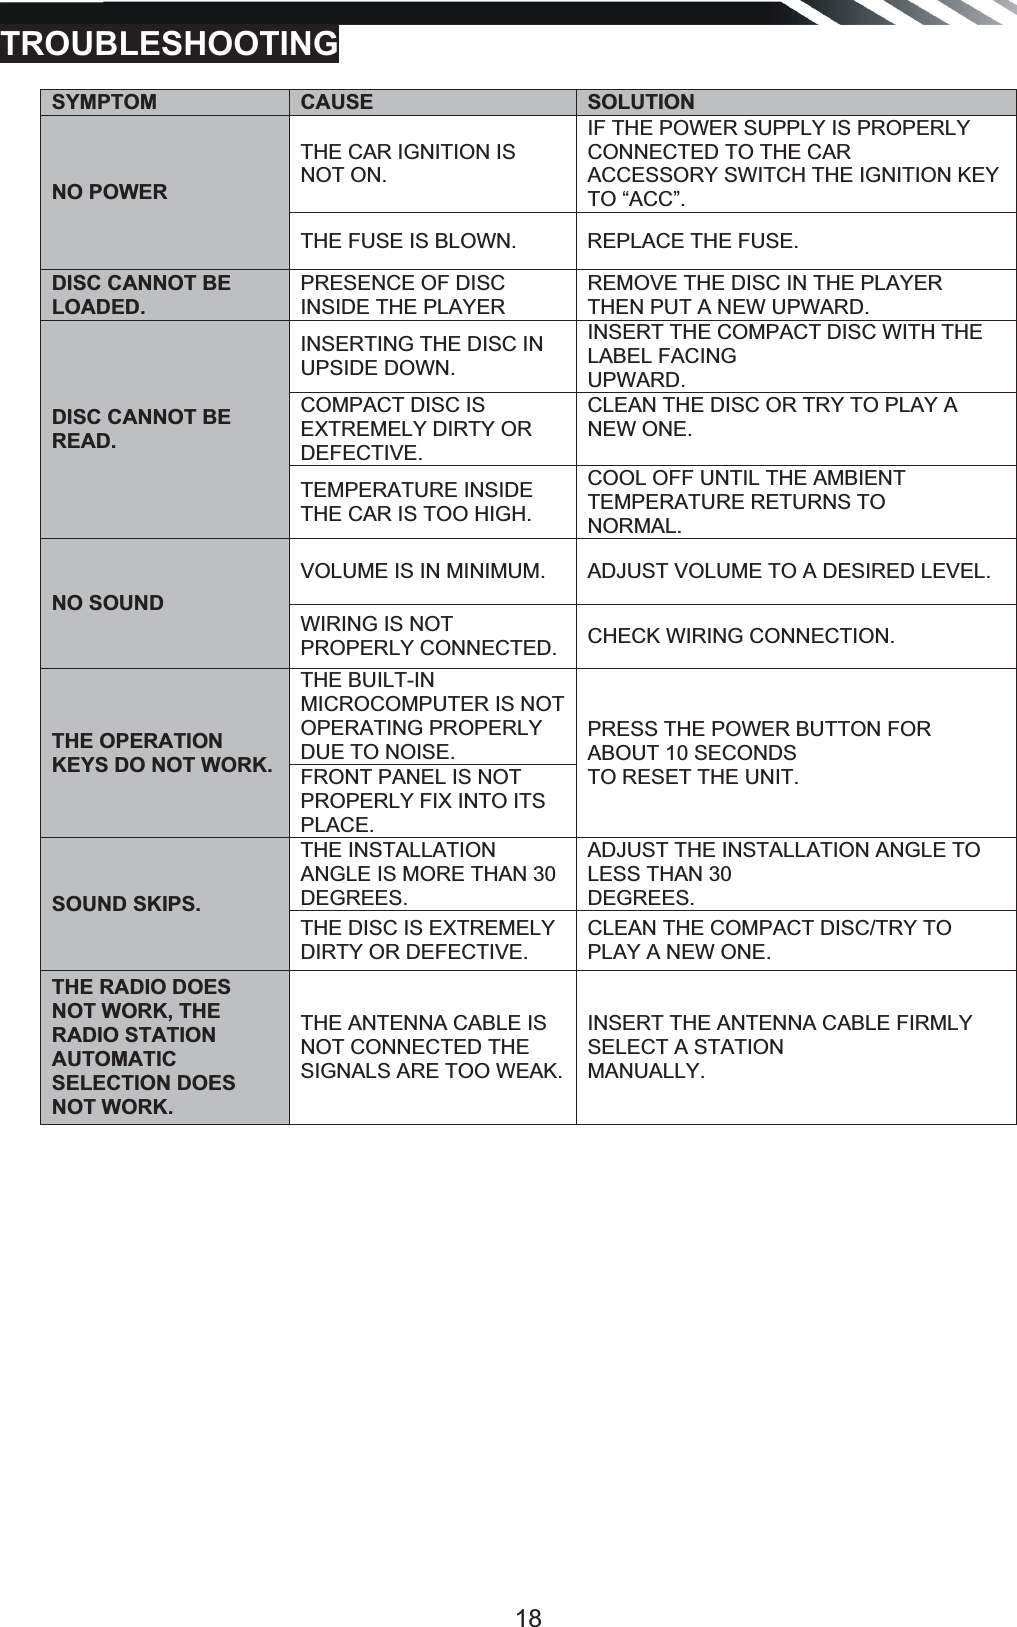
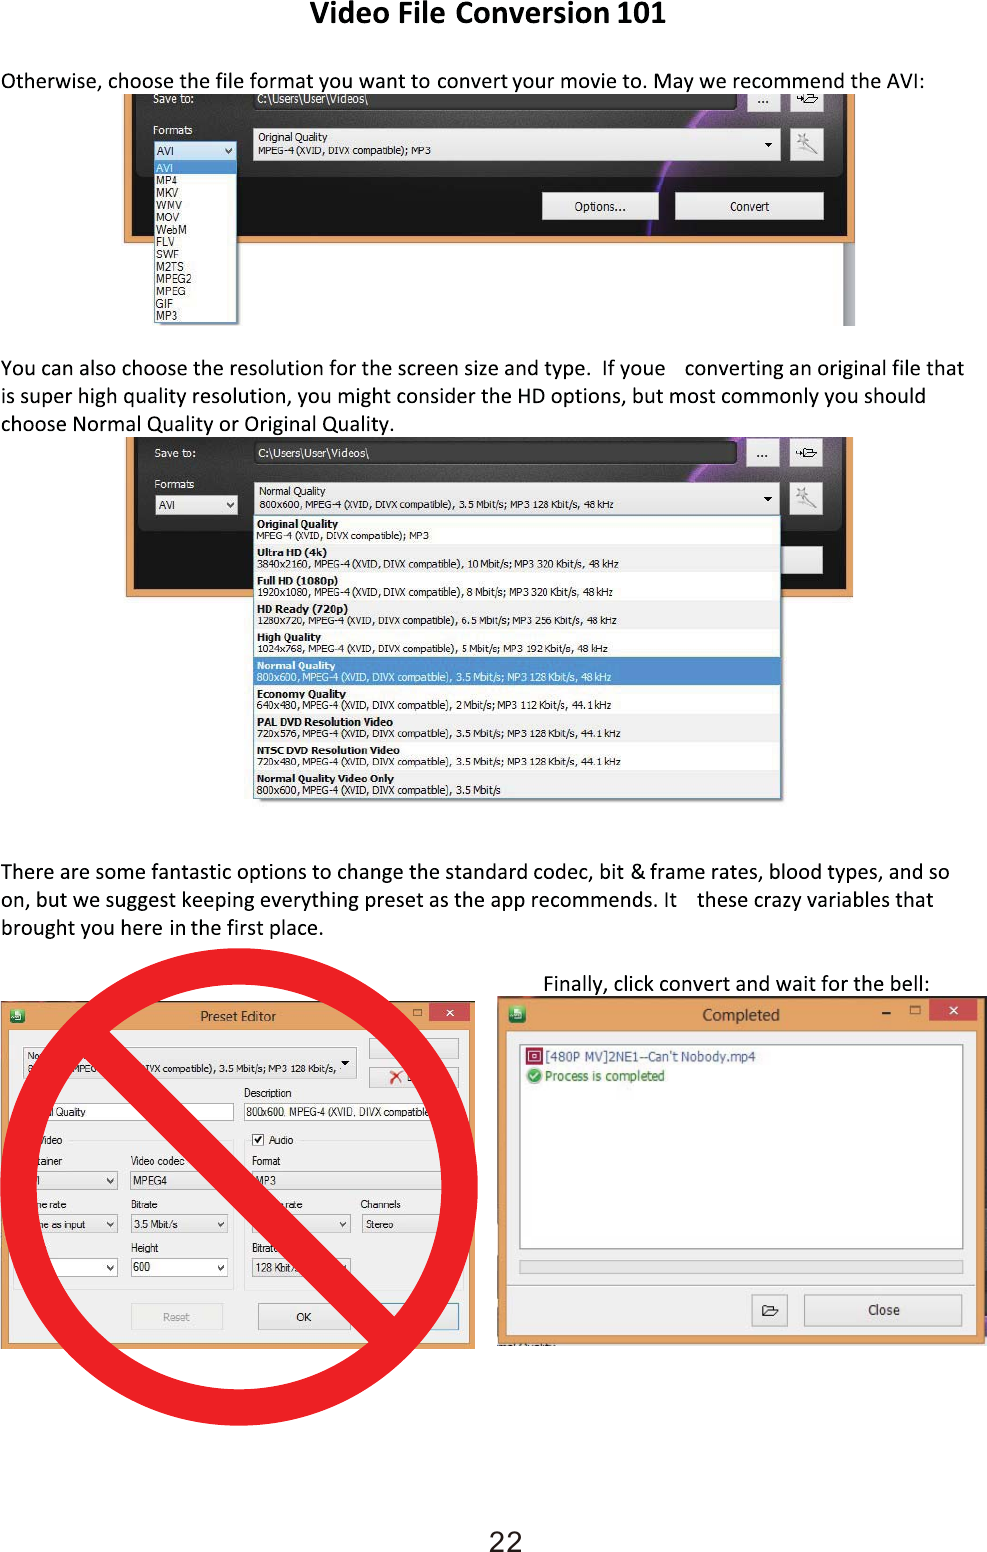
![17TROUBLESHOOTING Symptom Cause Remedy General Power does not turn on. (No sound is produced.) Fuse is blown Replace with fuse of the same amperage. If the fuse blows again, consult your store of purchase In correct wiring Consult your local retailer. No sound output when operating the unit with amplifiers or power antenna attached. Power antennal lead is shorted to ground excessive current is required or remote on the amplifiers or power antenna. 1. Turn off the unit. 2. Remove all wires attached to the power antenna lead. Check each wire for a possible short to ground using an ohm meter. 3. Turn on the unit. 4. Reconnect each amplifier remote wire to the power antenna lead one by one. If the amplifiers turn off before all wires are attached, use an external replay to provide remote-on voltage (excessive current required). Nothing happens when buttons are pressed. Display is not Accurate The microprocessorhas malfunctioned due to noise, etc. Turn off the power, Then press the [no open] button and remove the DCP. Press the reset button for about 2 seconds with a thin rod. Panel or main unit Connectors are dirty Wipe the dirt off with a soft cloth moistened with cleaning alcohol. CD Sound is bad directly after power is turned on. Compact disc is dirty Clean the compact disc without scratchesCompact disc is heavily scratched or warped Replace with a compact disc without scratches. Sound is bad directly after power is turned on. Water droplets may form on the internal lens when the car is parked in a humid place Let it dry for about 1 hour with the power on. LCD Small LCD display error massage When deck mechanism error, it show ERROR 1 Reset the unit. When disc or servo error, it show ERROR 2 Change the disc or reset the unit. When USB error, it show ERROR 3 1.Remove the USB/SD and insert it again2. File errorˈplease check the file. 3. Reset the unit. When SD error, it show ERROR 4](https://usermanual.wiki/TOKWA-PRECISION-TECHNOLOGY/VR-651B/User-Guide-2971823-Page-17.png)