TONGFANG 9560NG Intel Wireless-AC 9560 User Manual 9560NGW UserMan
TONGFANG HONGKONG (SUZHOU) LIMITED Intel Wireless-AC 9560 9560NGW UserMan
UserManual.wiki
>
TONGFANG
>
9560NG User Manual
>
9560NGW- UserMan
Contents
1.
9560NGW- UserMan_20180914
2.
9560NGW- UserMan
9560NGW- UserMan
Navigation menu
Upload a User Manual
Namespaces
Wiki Guide
HTML
PDF
Info
Views
User Manual
Discussion / Help
Navigation

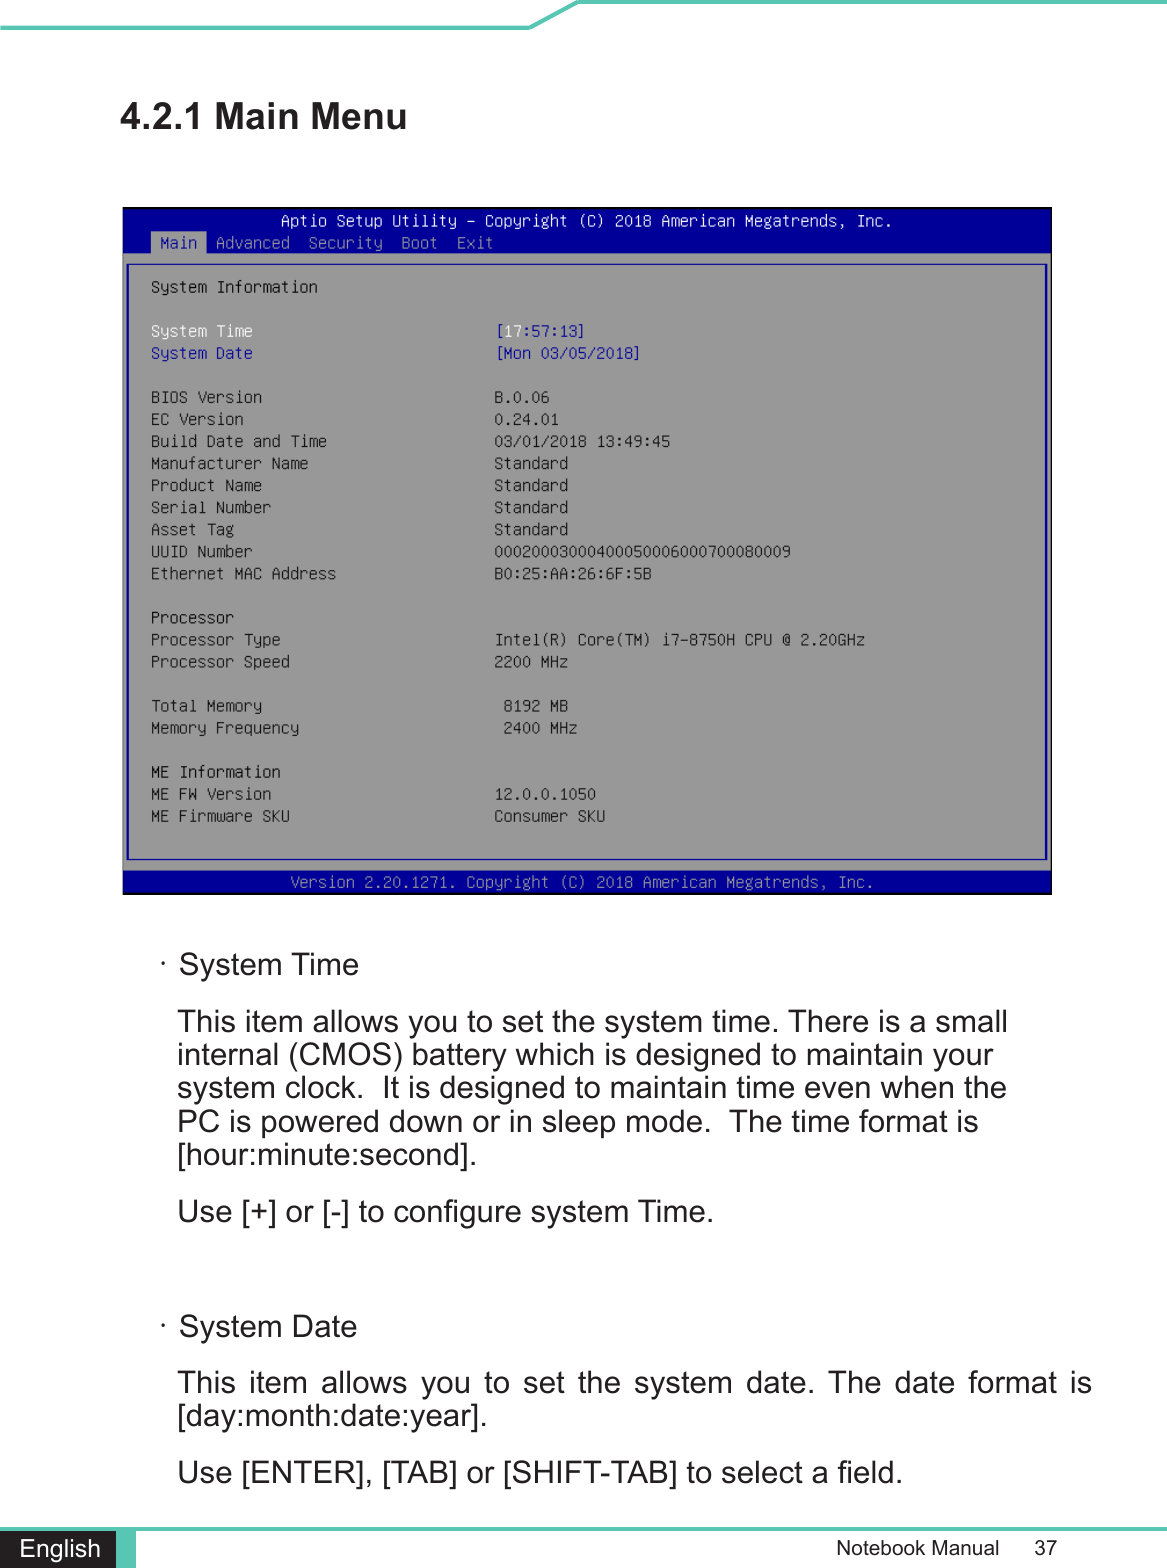
![Notebook Manual 35English may vary by models and are subject to change without notice.4.1 About BIOS Setup4.1.1 When to Use BIOS Setup ?4.1.2 How to Run BIOS Setup ?・ An error message appears on the screen during the system booting up and is requested to run SETUP.・ You want to change the default settings for customized features.・You want to reload the default BIOS settings.To run the BIOS Setup Utility, turn on the notebook and press the [Del] key during the POST procedure.If the message disappears before you respond and you still wish to enter Setup, either restart the system by turning it OFF and Be noted that the screen snaps and setting options in this chapter are for your references only.The actual setting screens update.The setup function only can be invoked by pressing [Del] or [F2] key during POST that provide a approach to change some system rebooted. The setup uses a menu interface to allow the as follow.Press [F7] key for Boot Menu.](https://usermanual.wiki/TONGFANG/9560NG.9560NGW-UserMan/User-Guide-4155129-Page-35.png)

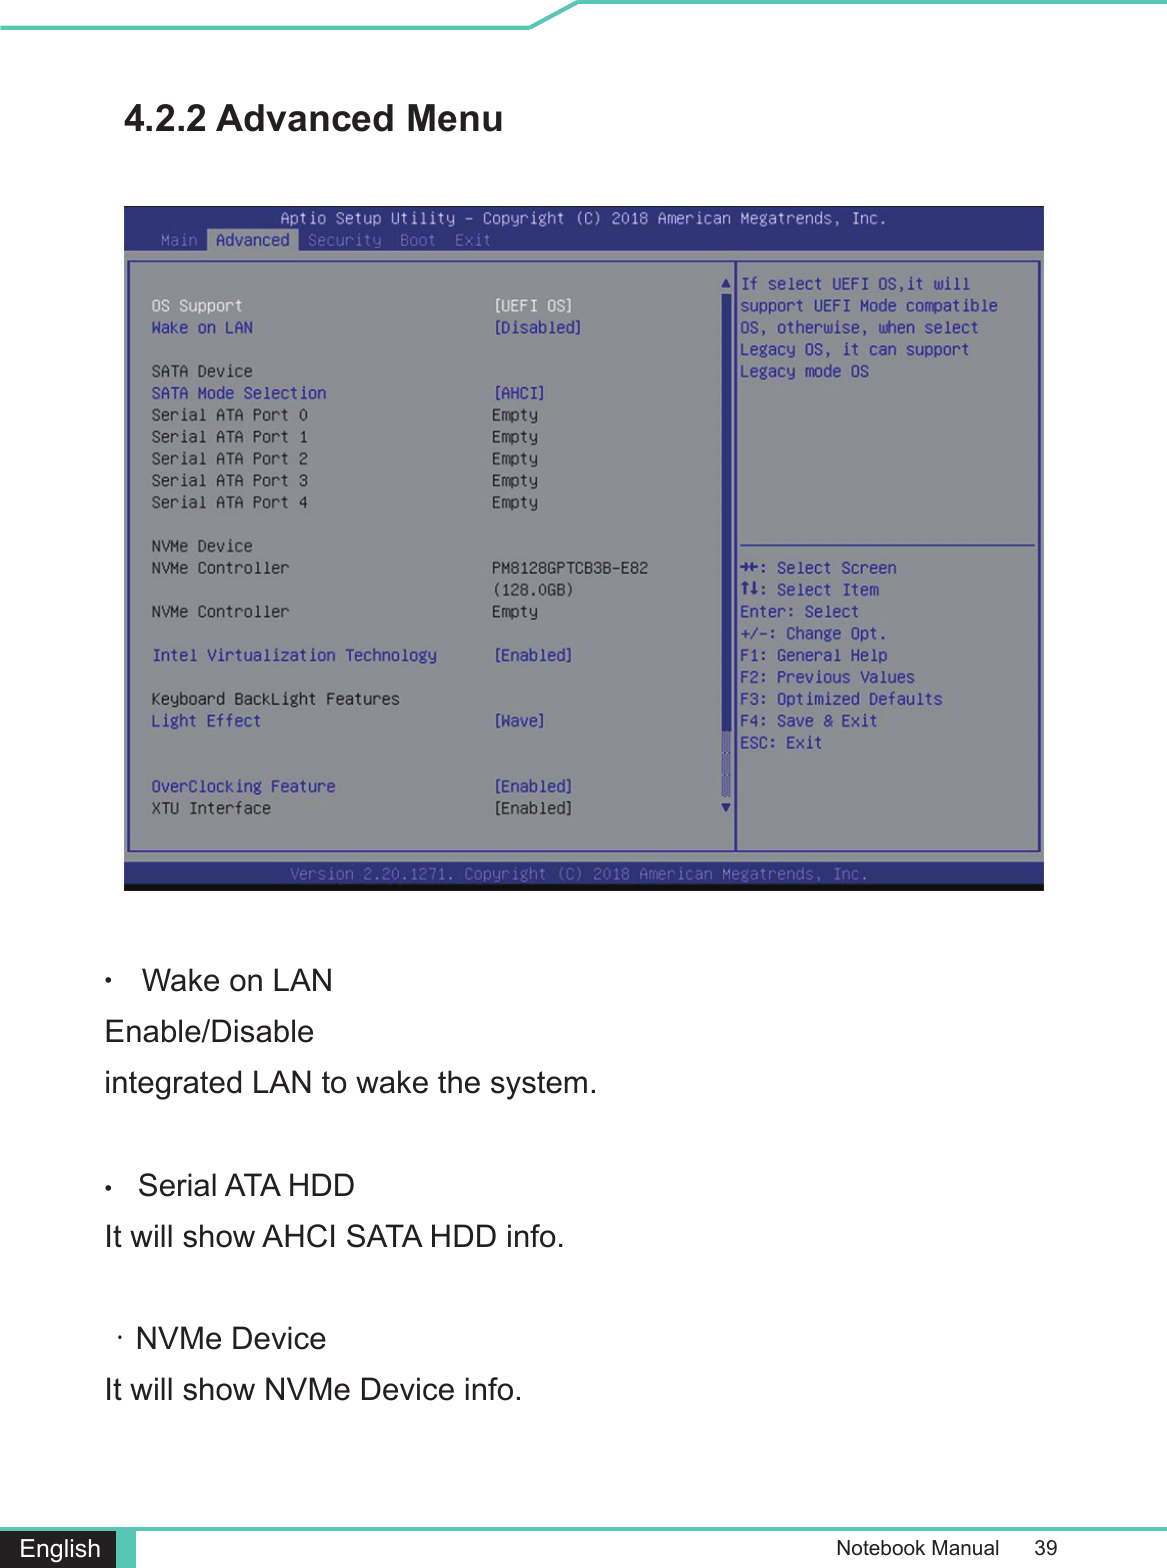
![Notebook Manual 41English・Change Administrator PasswordWhen this item is selected, a message box shall appear on the Enter New Password4.2.3 Security MenuThe password typed now will replace any previously set password from CMOS memory. You may also press [ESC] to abandon new password setting. It is extremely important to keep record for any BIOS password which is set as it can not be reset even with the removal of a CMOS battery for the security of your PC.](https://usermanual.wiki/TONGFANG/9560NG.9560NGW-UserMan/User-Guide-4155129-Page-41.png)
![42 Notebook Manual EnglishSelect Change User Password to give or to abandon password setting same as Change Administrator Password item above.change the settings of the BIOS SETUP UTILITY, while User without having the authorization to make any change.The Password Check item is used to specify the type of BIOS password protection that is implemented.To clear a set Administrator Password/ User Password, just press [Enter] under Change Administrator Password/ Change User Once the password is disabled, the system will boot and user can enter setup without entering password.](https://usermanual.wiki/TONGFANG/9560NG.9560NGW-UserMan/User-Guide-4155129-Page-42.png)