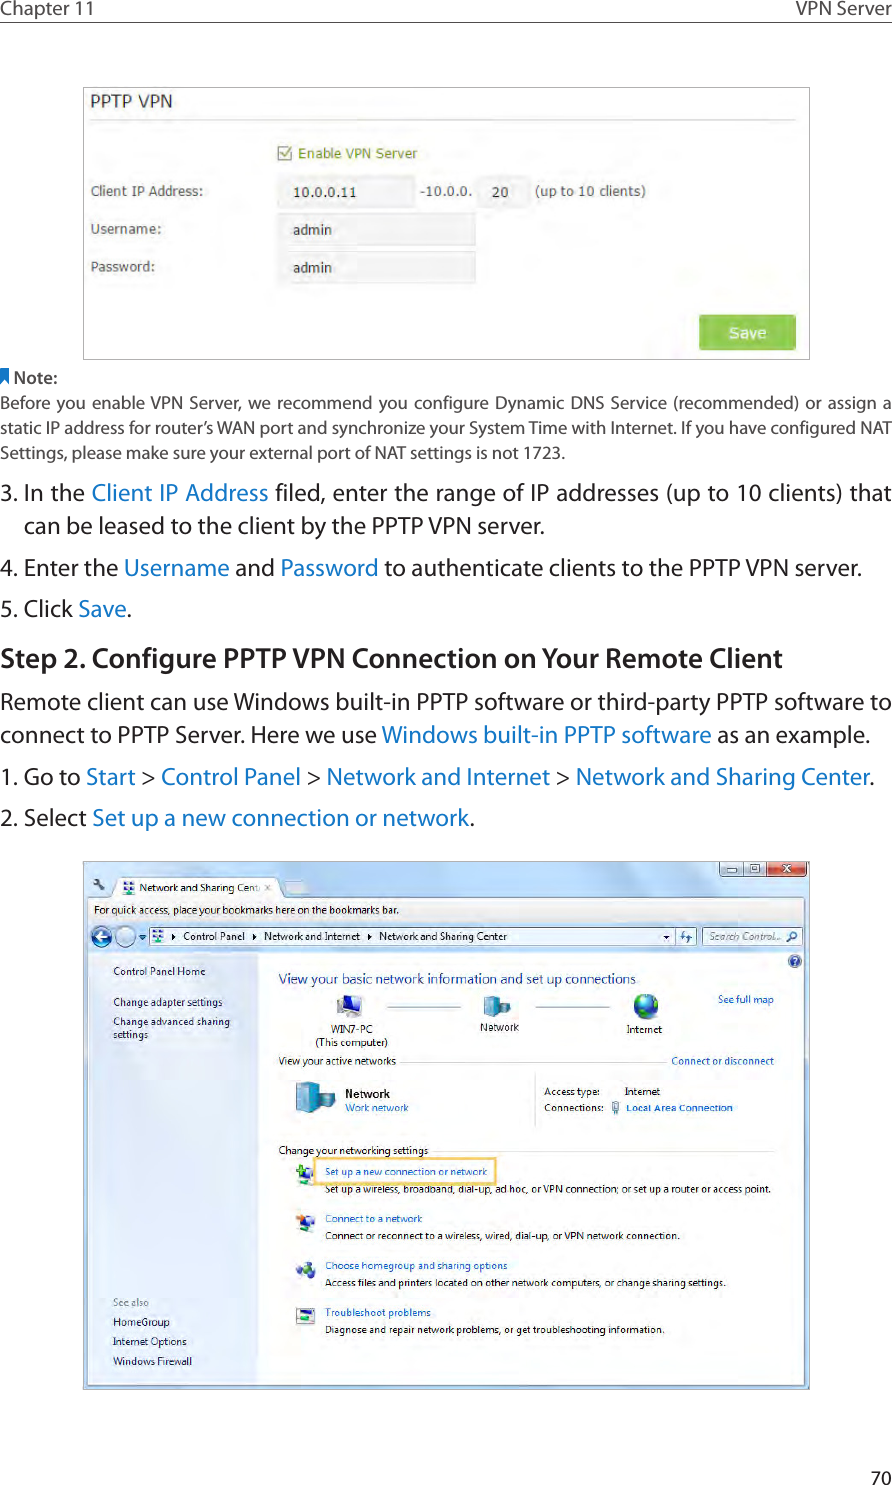
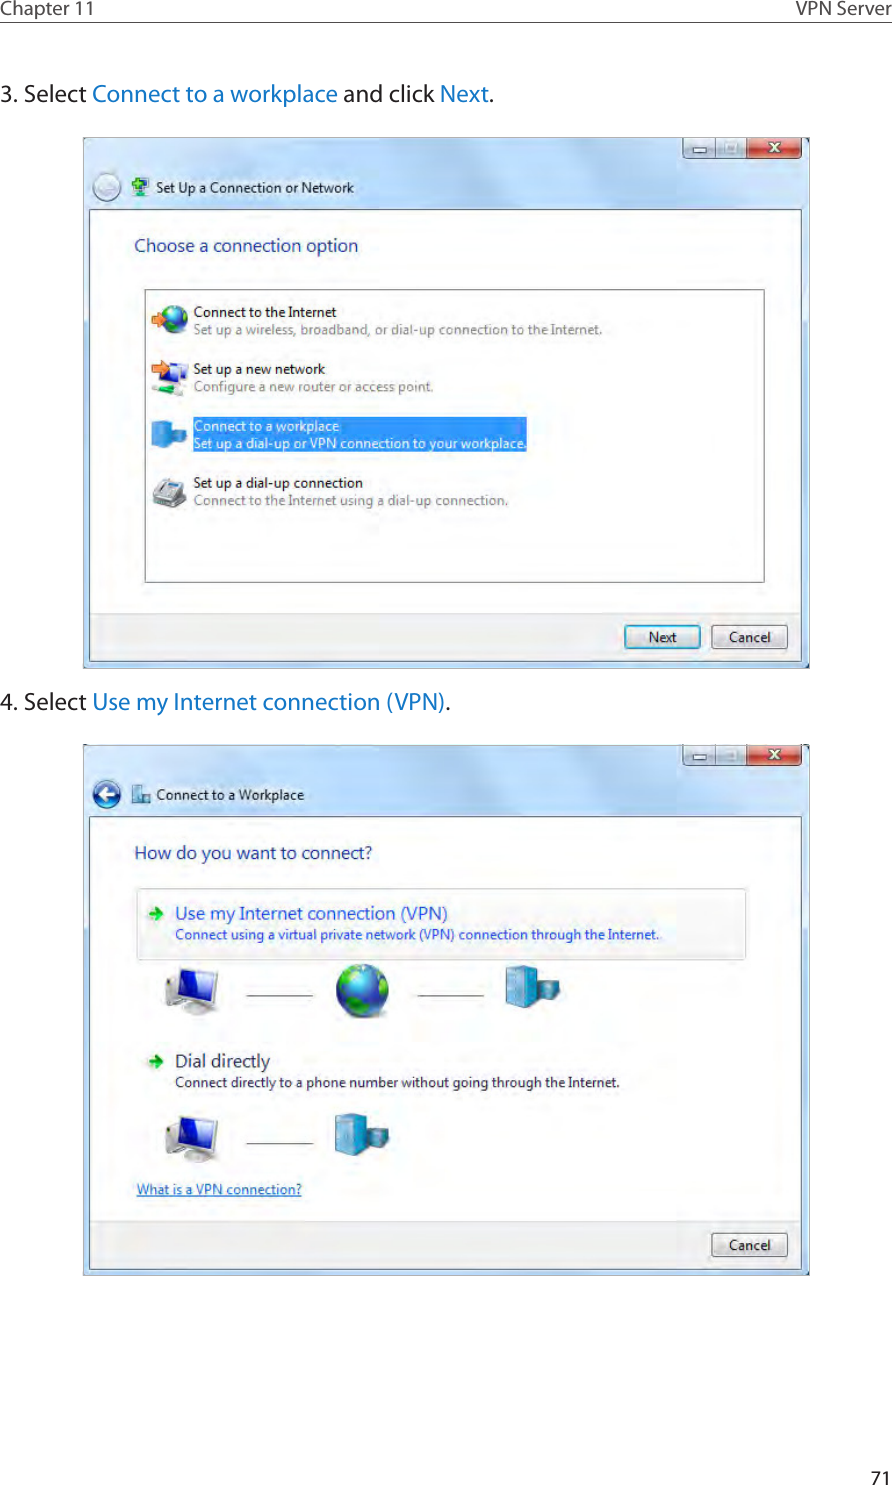
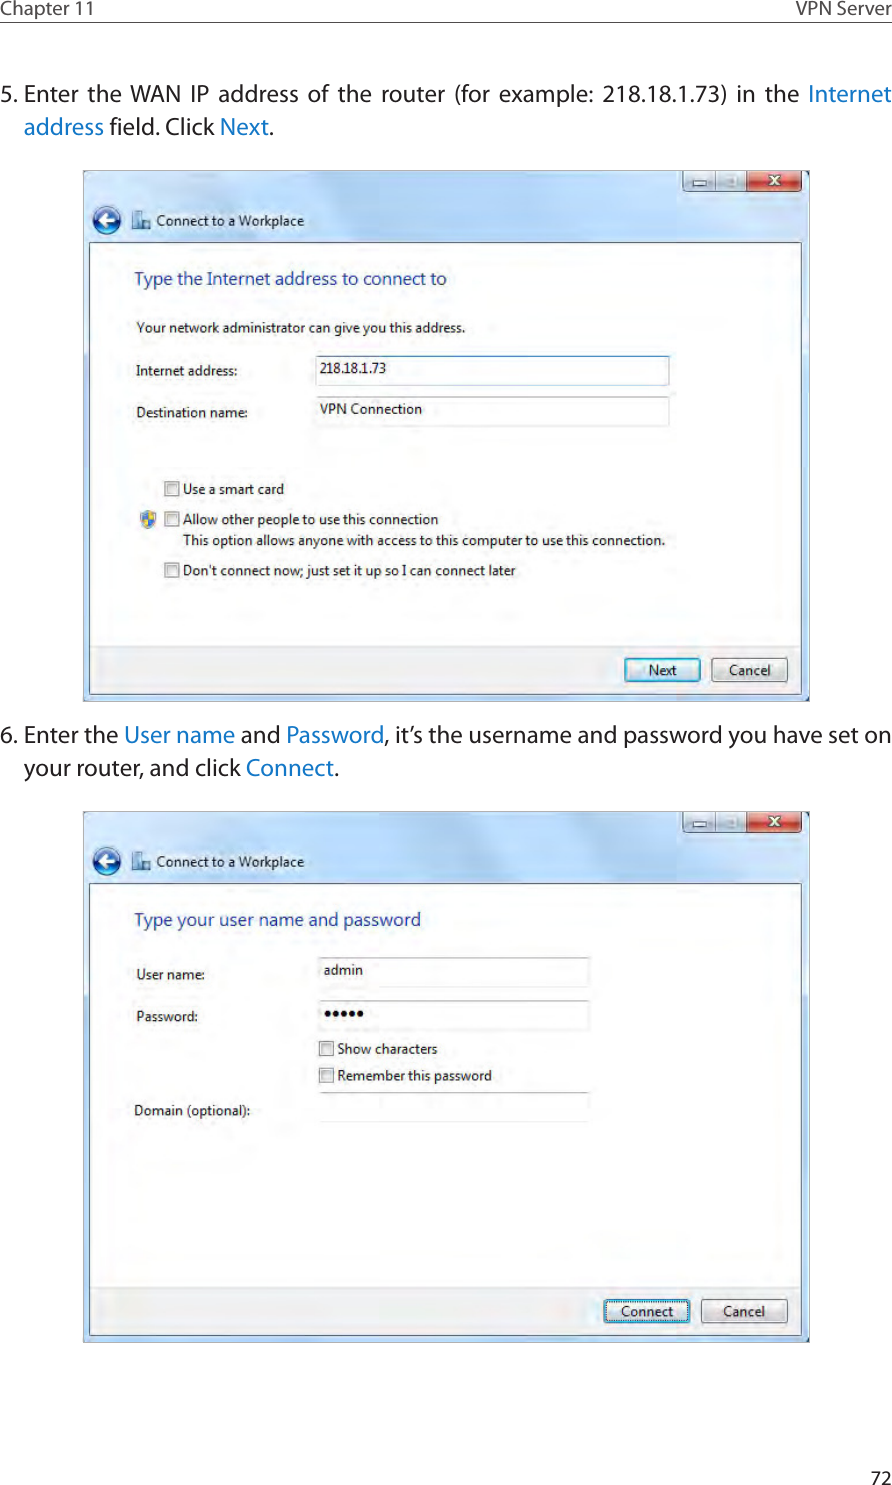
TP Link Technologies C5400 AC5400 Wireless Tri-Band MU-MIMO Gigabit Router User Manual
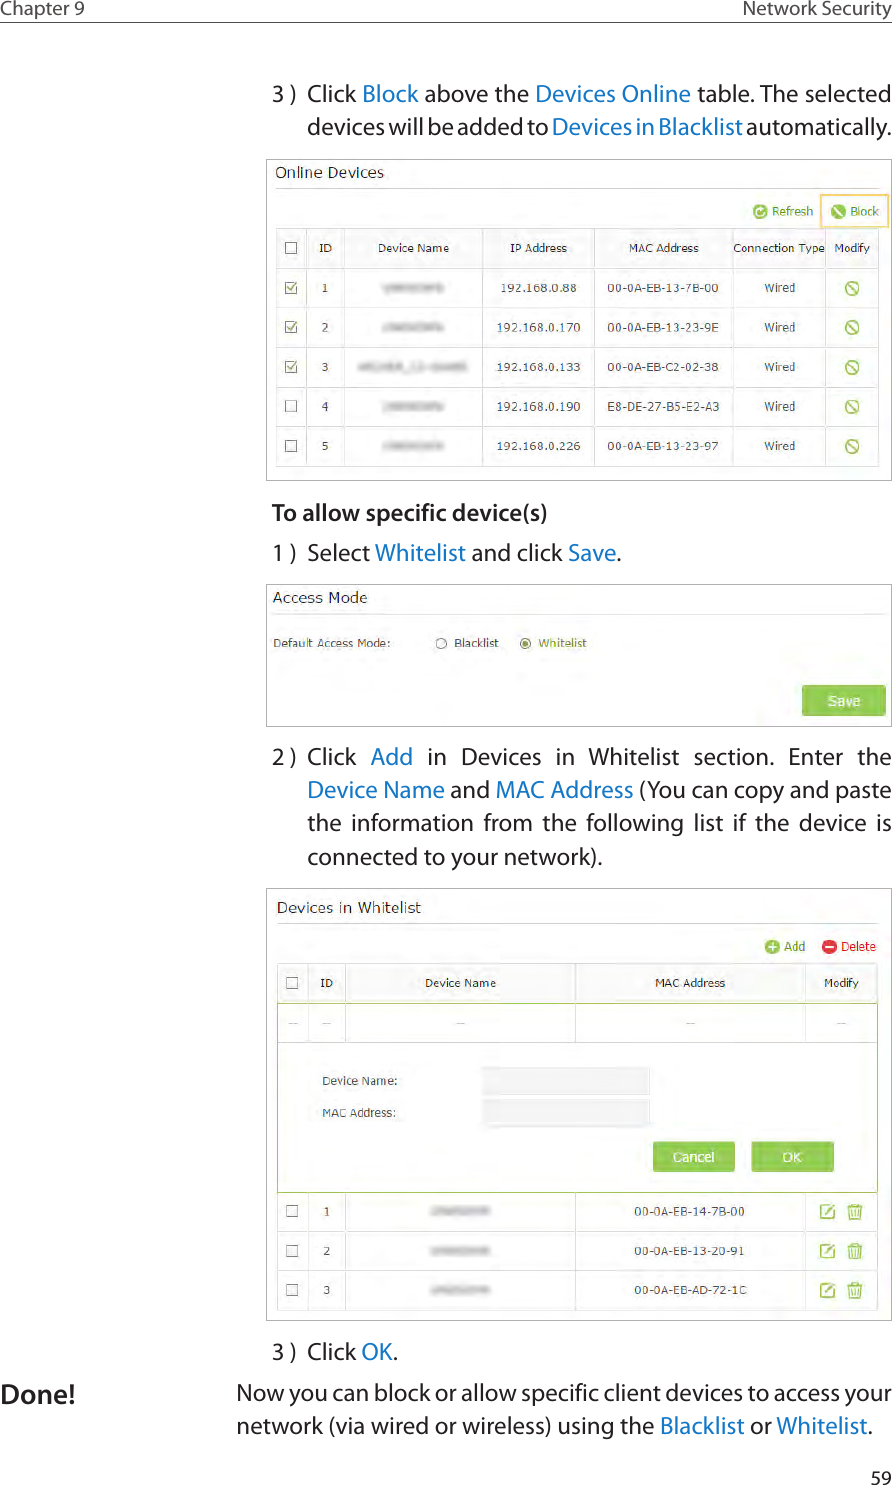
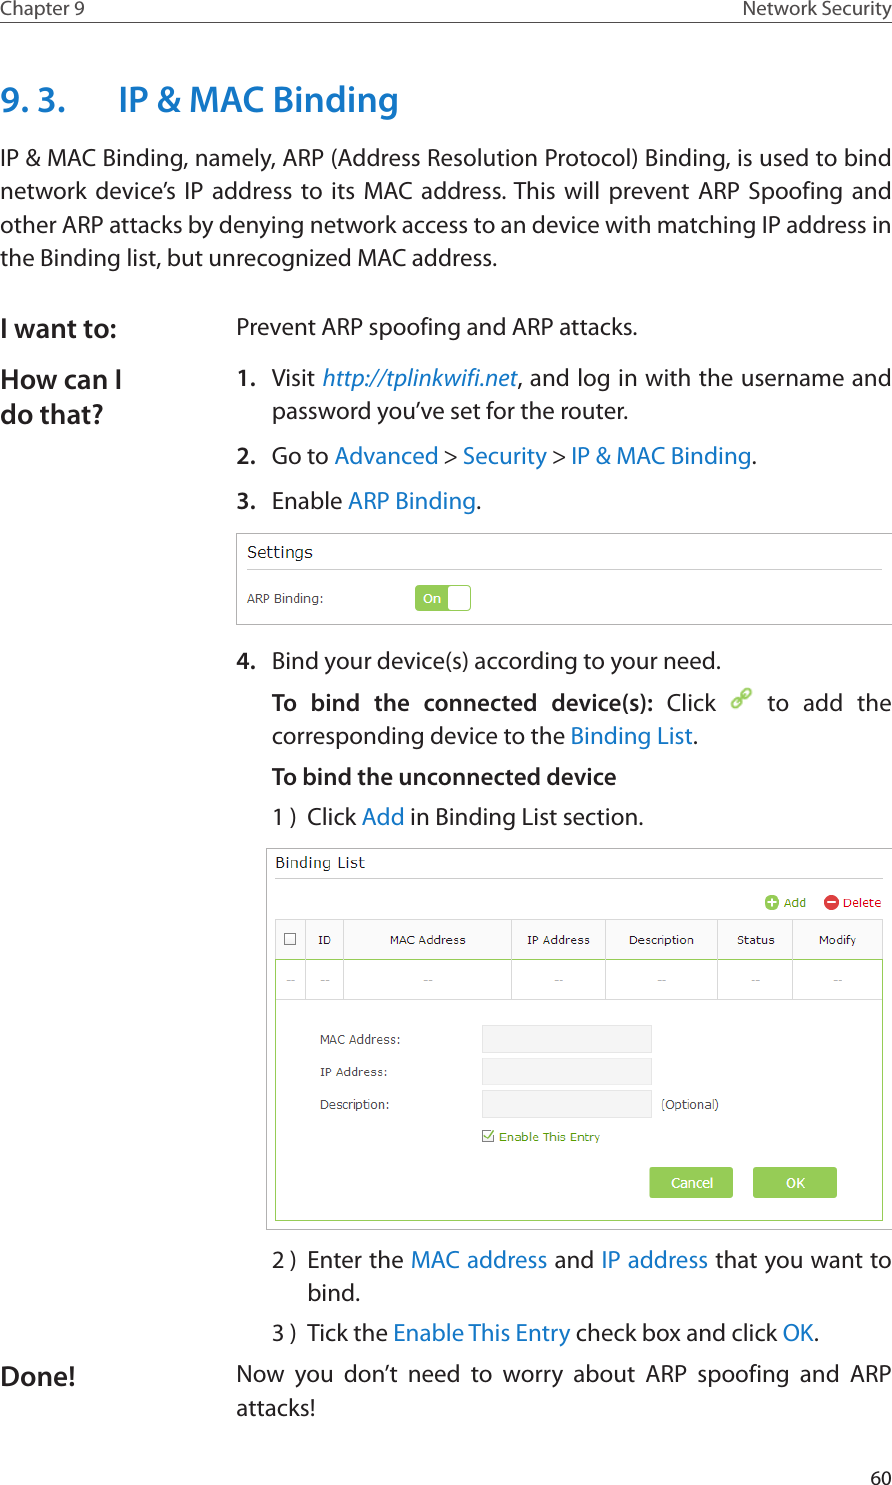
TP-Link Technologies Co., Ltd. AC5400 Wireless Tri-Band MU-MIMO Gigabit Router Users Manual
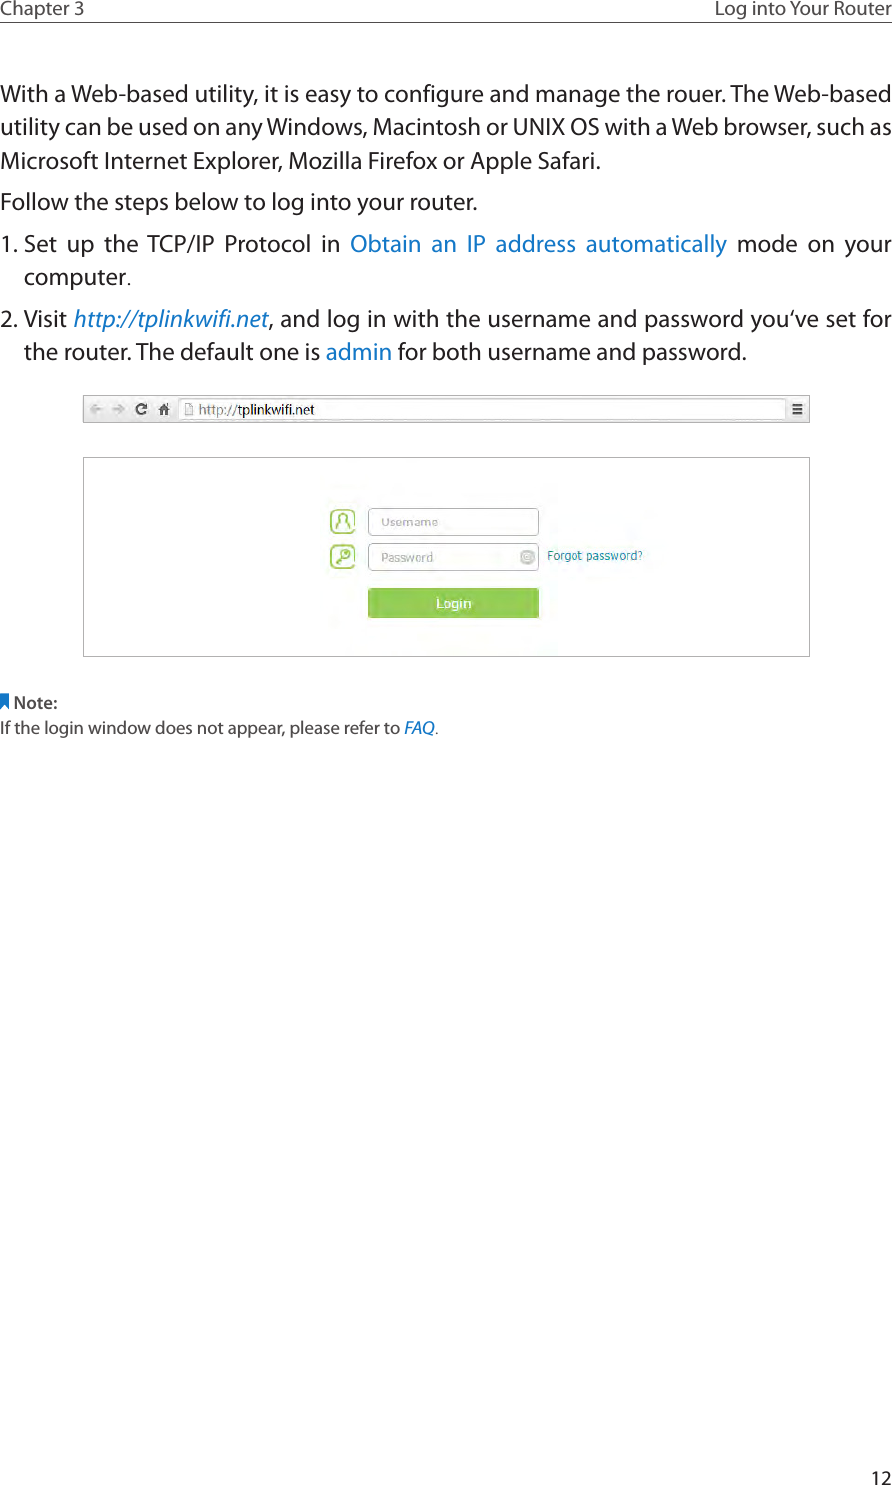
UserManual.wiki
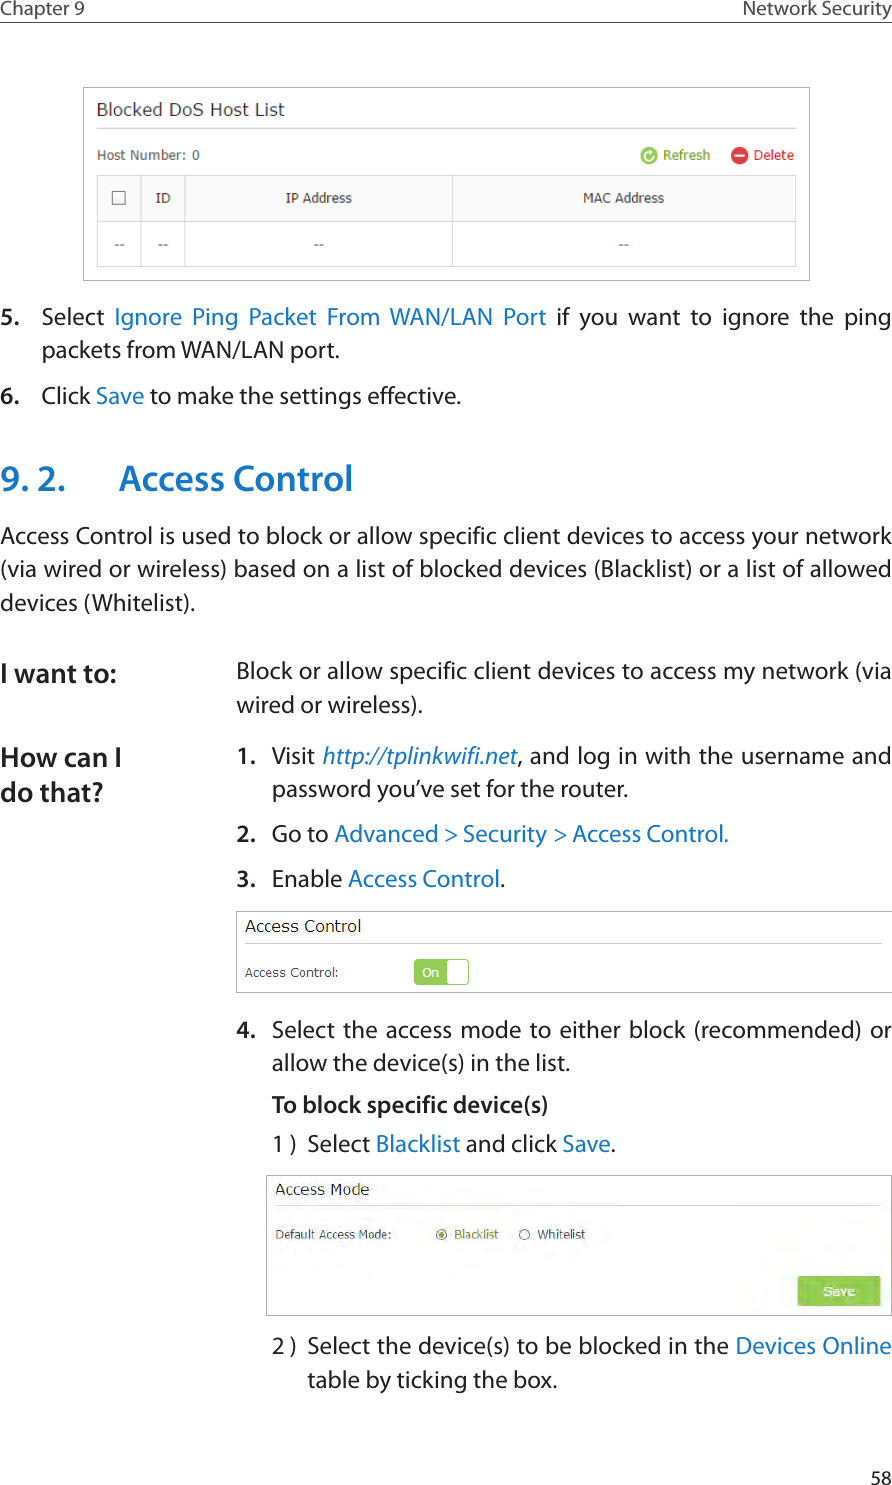
>
TP Link Technologies
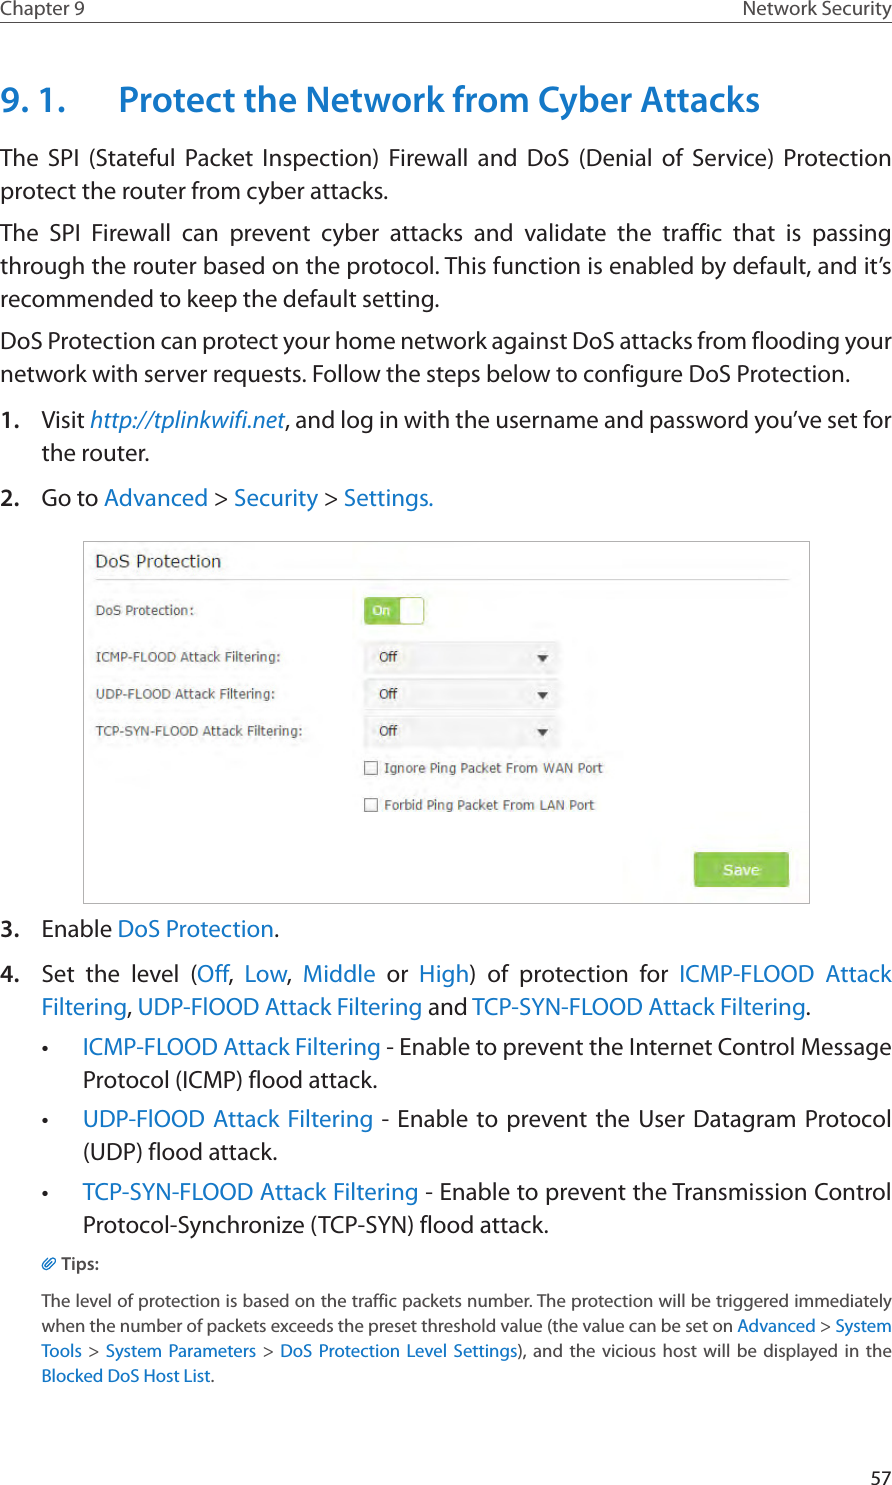
>
C5400 User Manual
Users Manual
Navigation menu
Upload a User Manual
Namespaces
Wiki Guide
HTML
PDF
Info
Views
User Manual
Discussion / Help
Navigation

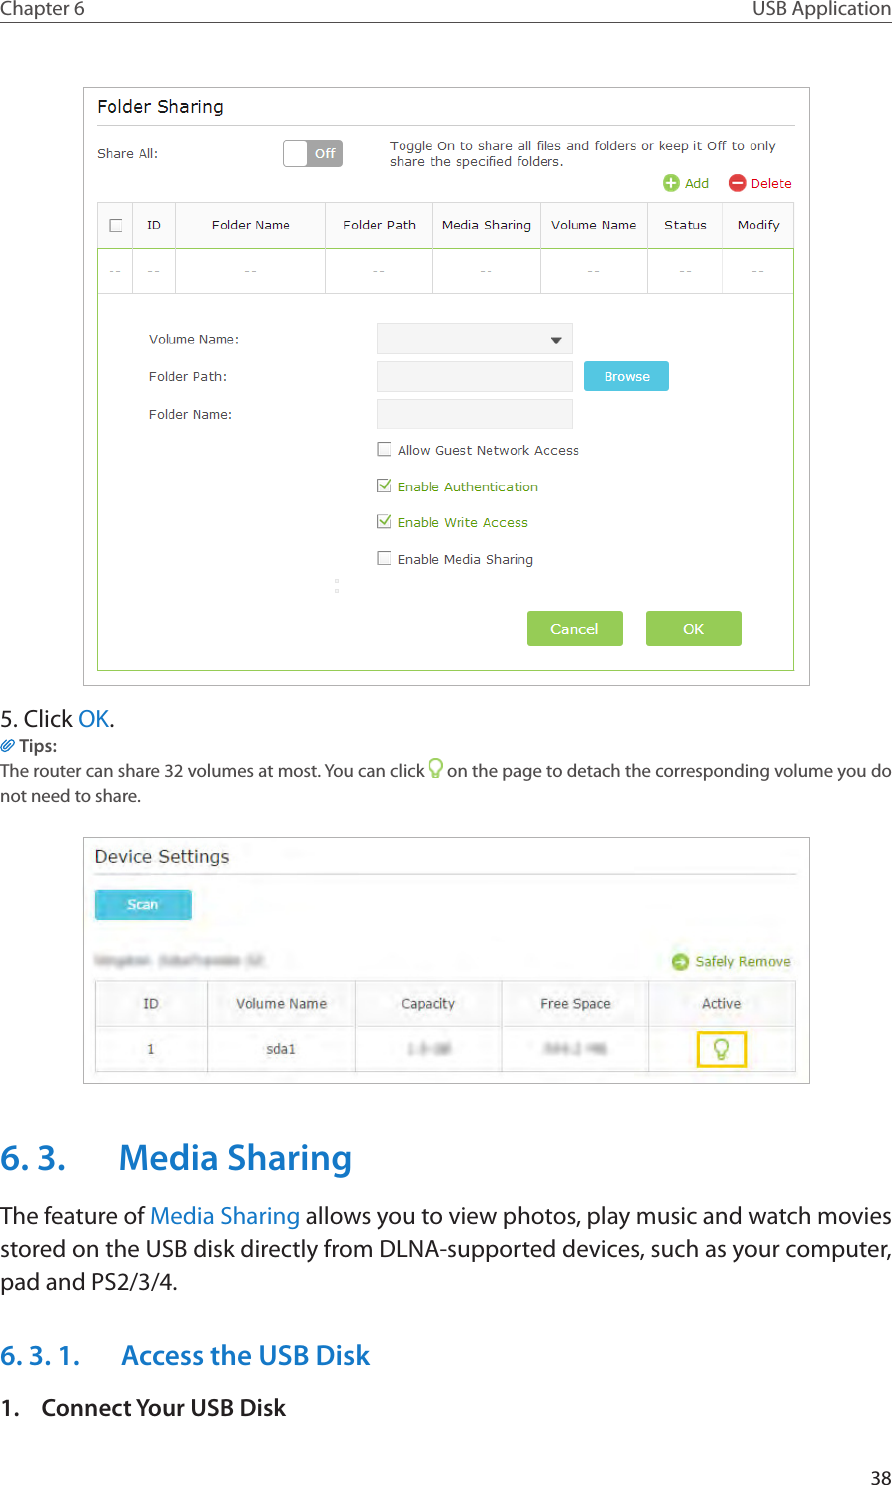
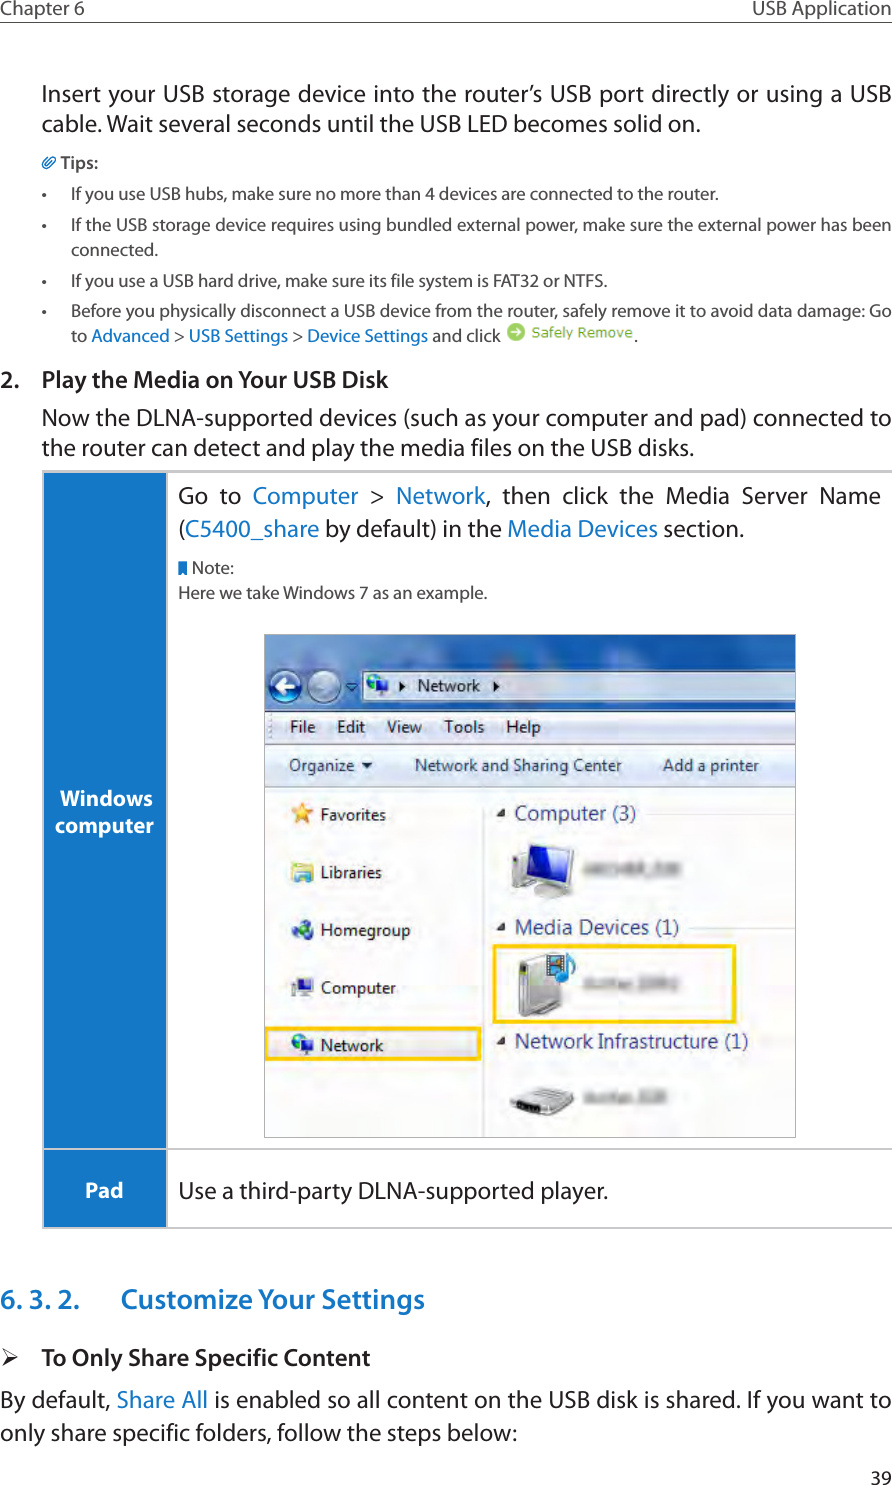
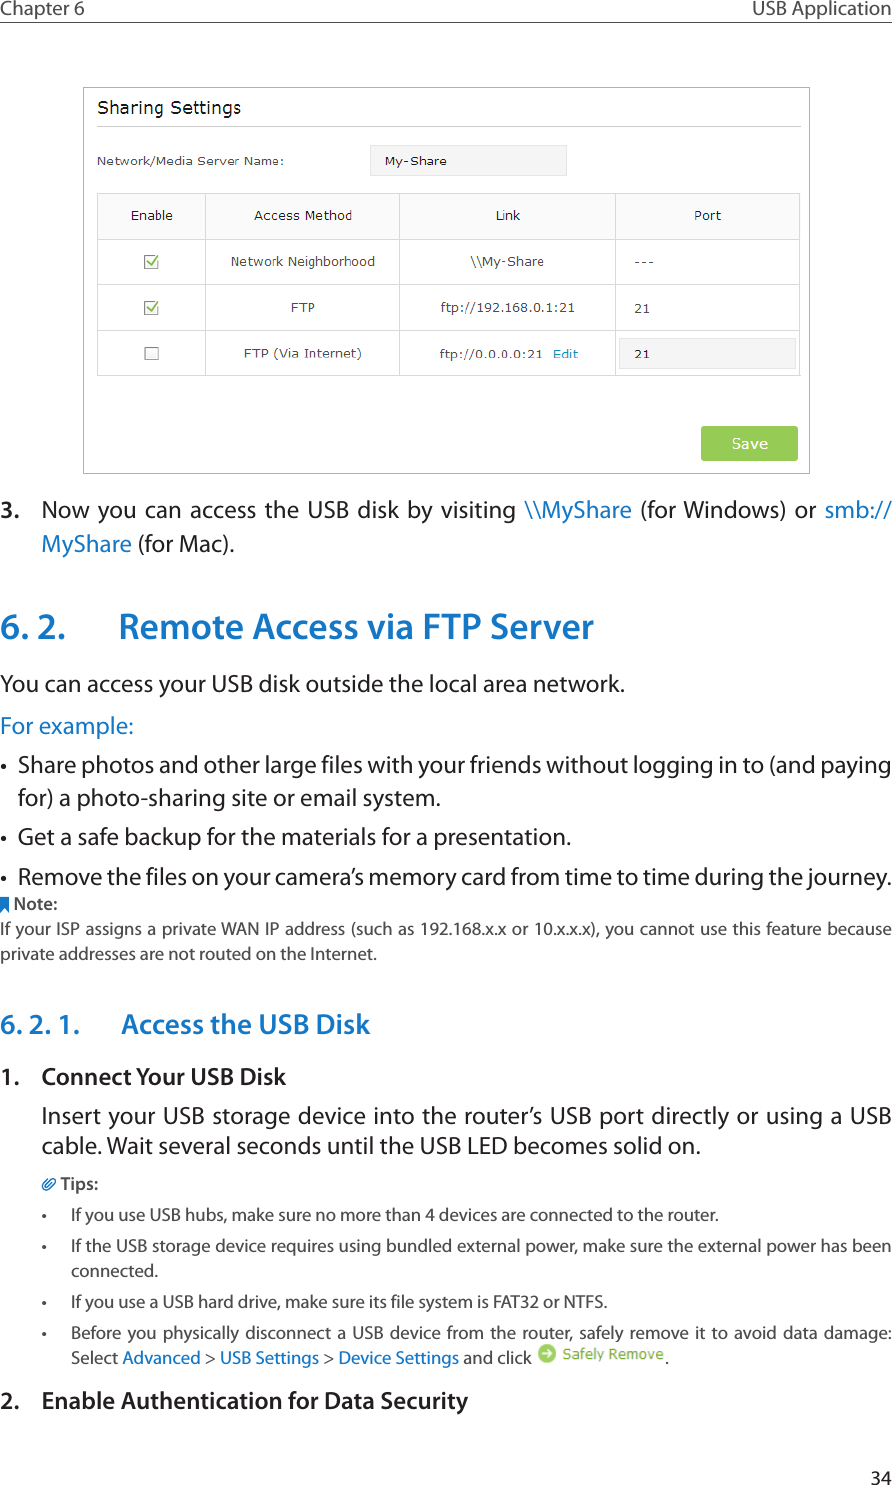
![30Chapter 6 USB ApplicationWindows computer ¾Method 2:Open the Windows Explorer (or go to Computer) and type the server address \\tplinkwifi.net or ftp://tplinkwifi.net in the address bar, then press [Enter].Mac1 ) Select Go > Connect to Server2 ) Type the server address smb://tplinkwifi.net 3 ) Click Connect.4 ) When prompted, select the Guest radio box. (If you have set up a username and a password to deny anonymous access to the USB disks, you should select the Registered User radio box. To learn how to set up an account for the access, refer to To Set up Authentication for Data Security.)Pad Use a third-party app for network files management.Tips:You can also access your USB disk by using your Network/Media Server Name as the server address. Refer to To Customize the Address of the USB Disk to learn more.](https://usermanual.wiki/TP-Link-Technologies/C5400/User-Guide-2816632-Page-34.png)

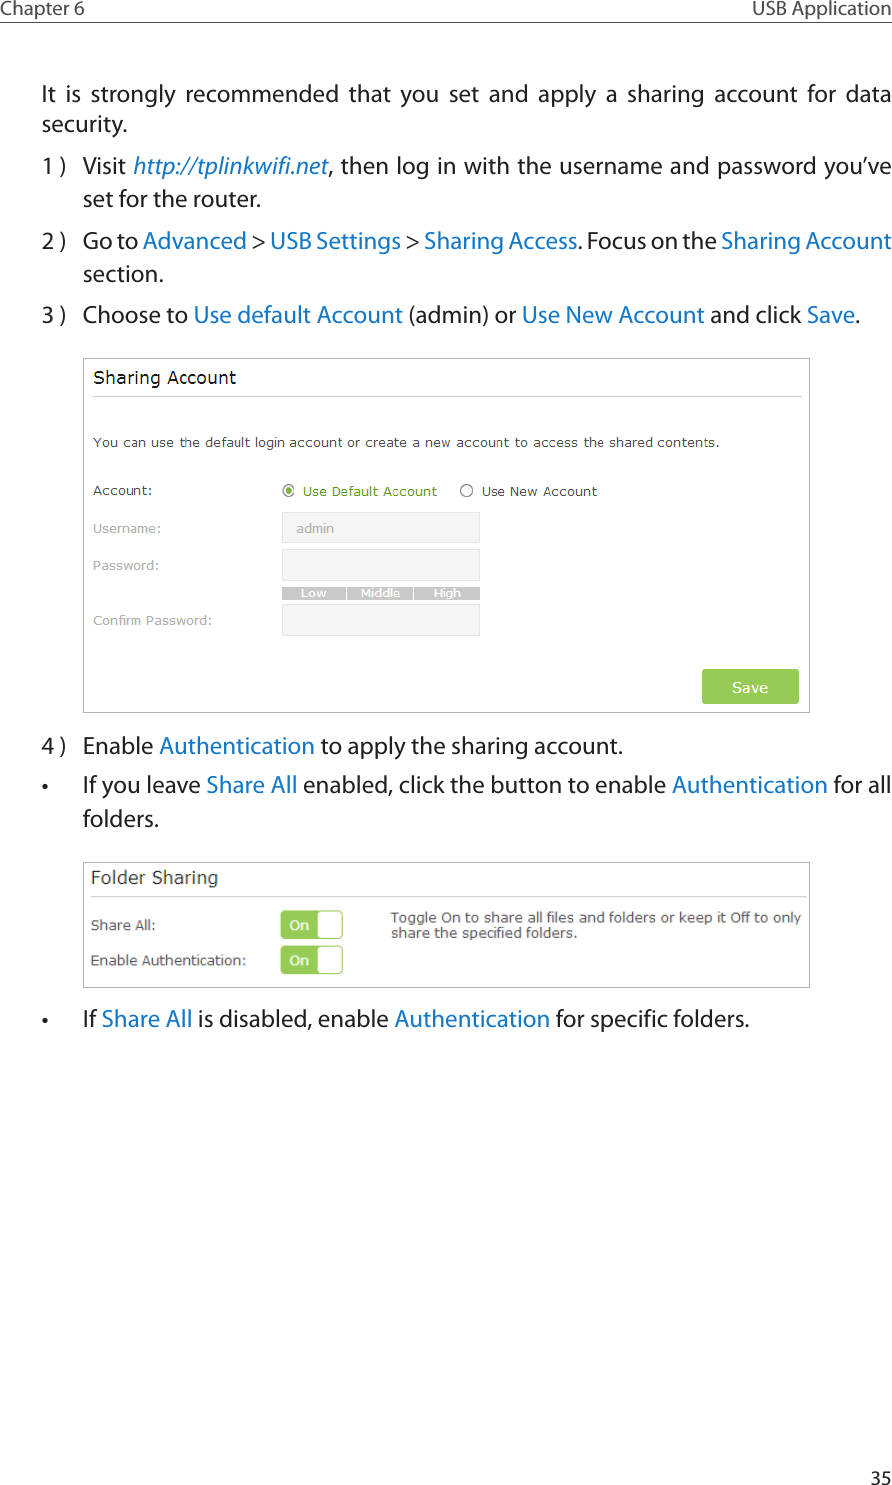
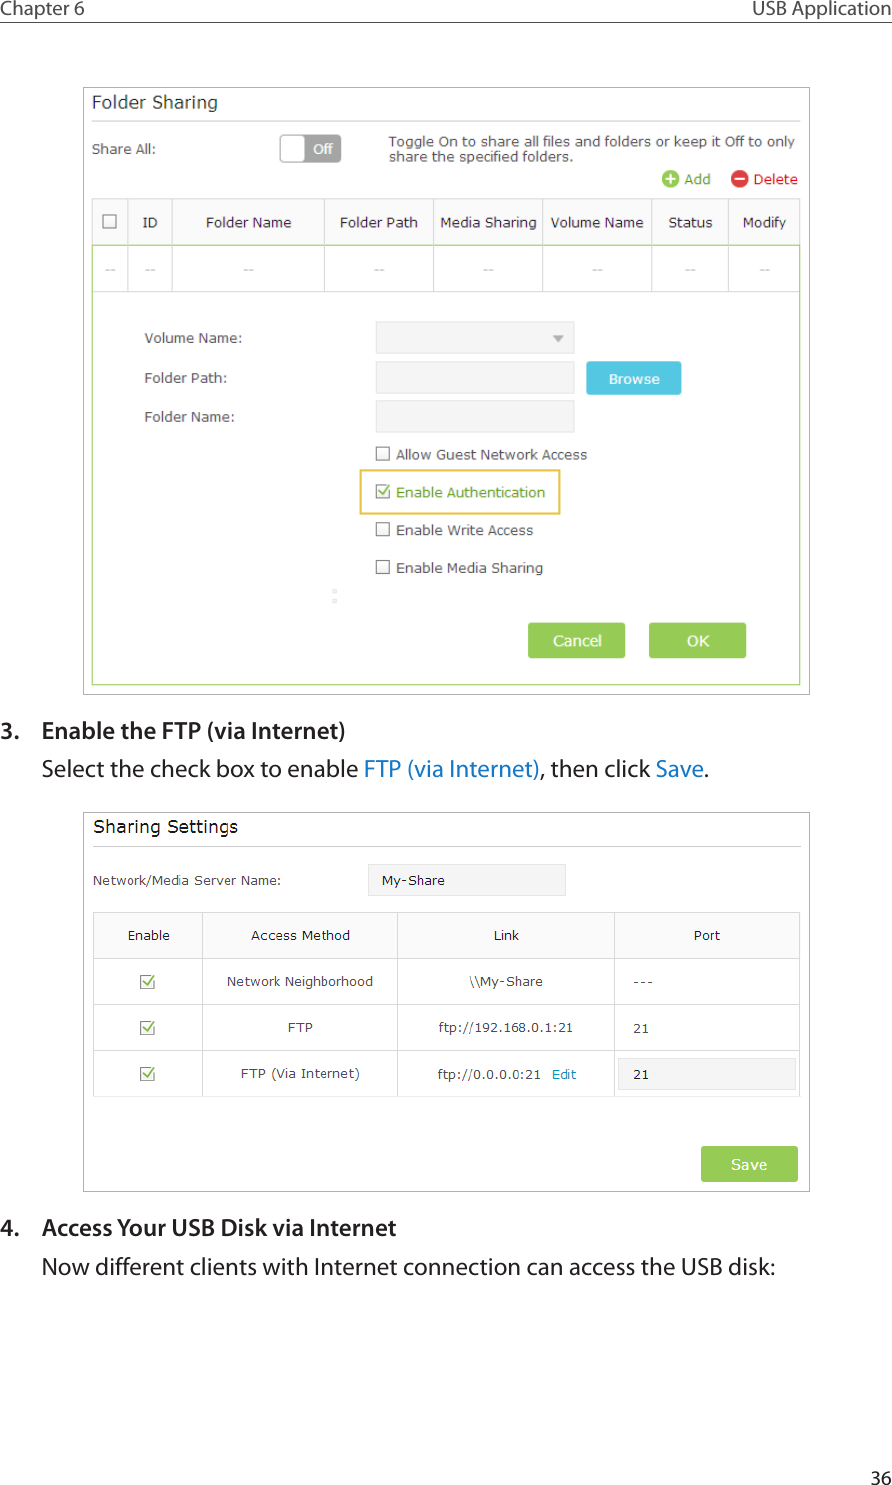
![37Chapter 6 USB Application Computer1 ) Open the Windows Explorer (or go to Computer, only for Windows users) or open a web browser.2 ) Type the server address in the address bar:Type in ftp://<WAN IP address of the router>:<port number> (such as ftp://59.40.2.243:21). If you have specified the domain name of the router, you can also type in ftp://<domain name>:<port number> (such as ftp://MyDomainName:21)The Address Bar of the Windows Explorer (Windows 7)3 ) Press [Enter] on the keyboard.4 ) Access with the username and password you’ve set in Step 2 Enable Authentication for Data Security.Tips:You can also access the USB disk via a third-party app for network files management, which can resume broken file transfers. Pad Use a third-party app for network files management.Tips:Refer to Set Up a Dynamic DNS Service Account to learn how to set up a domain name for you router.6. 2. 2. Customize Your Settings ¾To Only Share Specific ContentBy default, Share All is enabled so all content on the USB disk is shared. If you want to only share specific folders, follow the steps below:1. Visit http://tplinkwifi.net, then log in with the username and password you’ve set for the router.2. Go to Basic > USB Settings > Sharing Access. Focus on the section of Folder Sharing. Click the button to disable Share All, then click Add to add a new sharing folder.3. Select the Volume Name and Folder Path, then specify the Folder Name as you like.4. Tick Enable Authentication. If you allow network clients to modify this folder, Tick Enable Write Access.](https://usermanual.wiki/TP-Link-Technologies/C5400/User-Guide-2816632-Page-41.png)