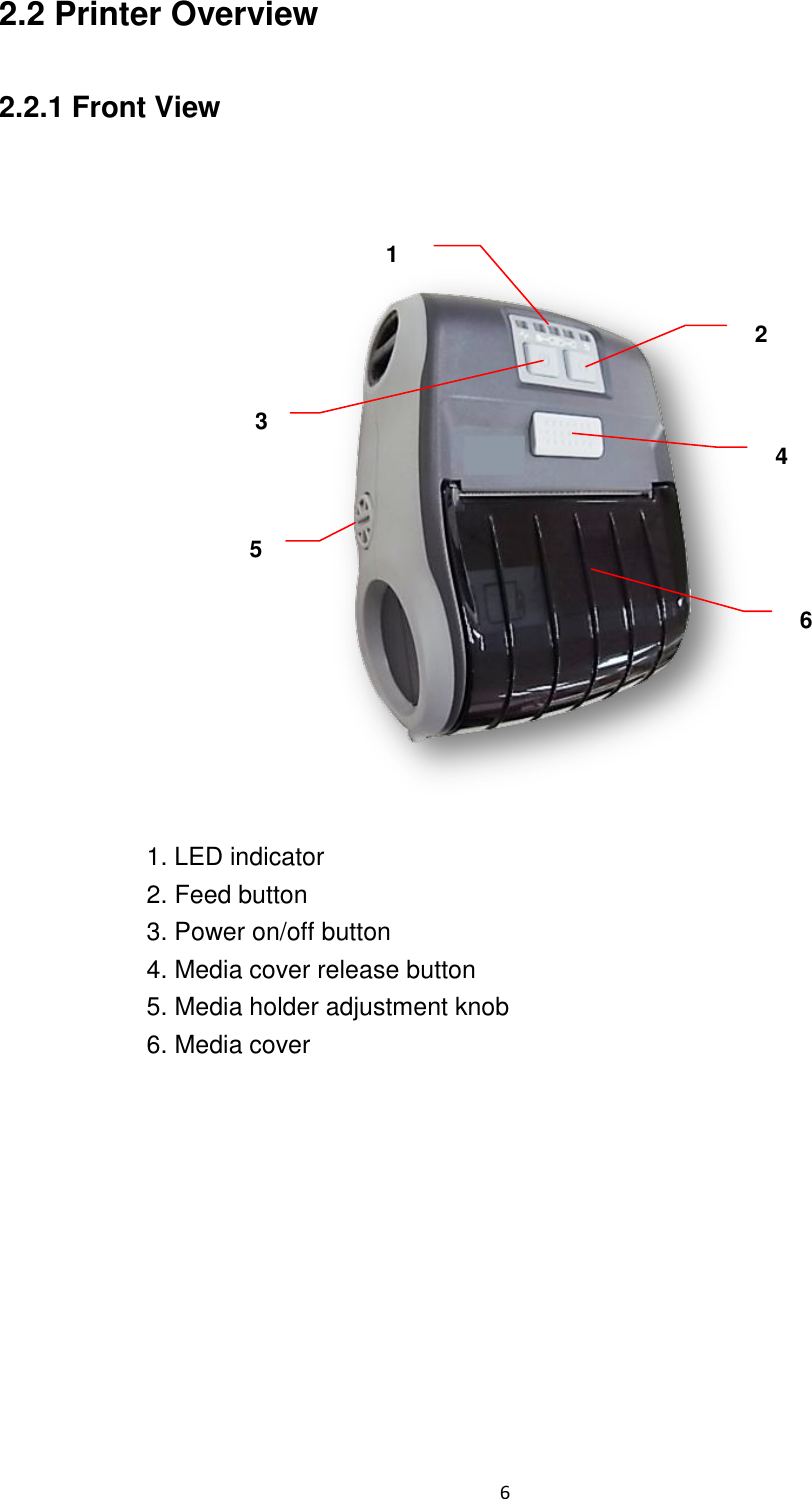
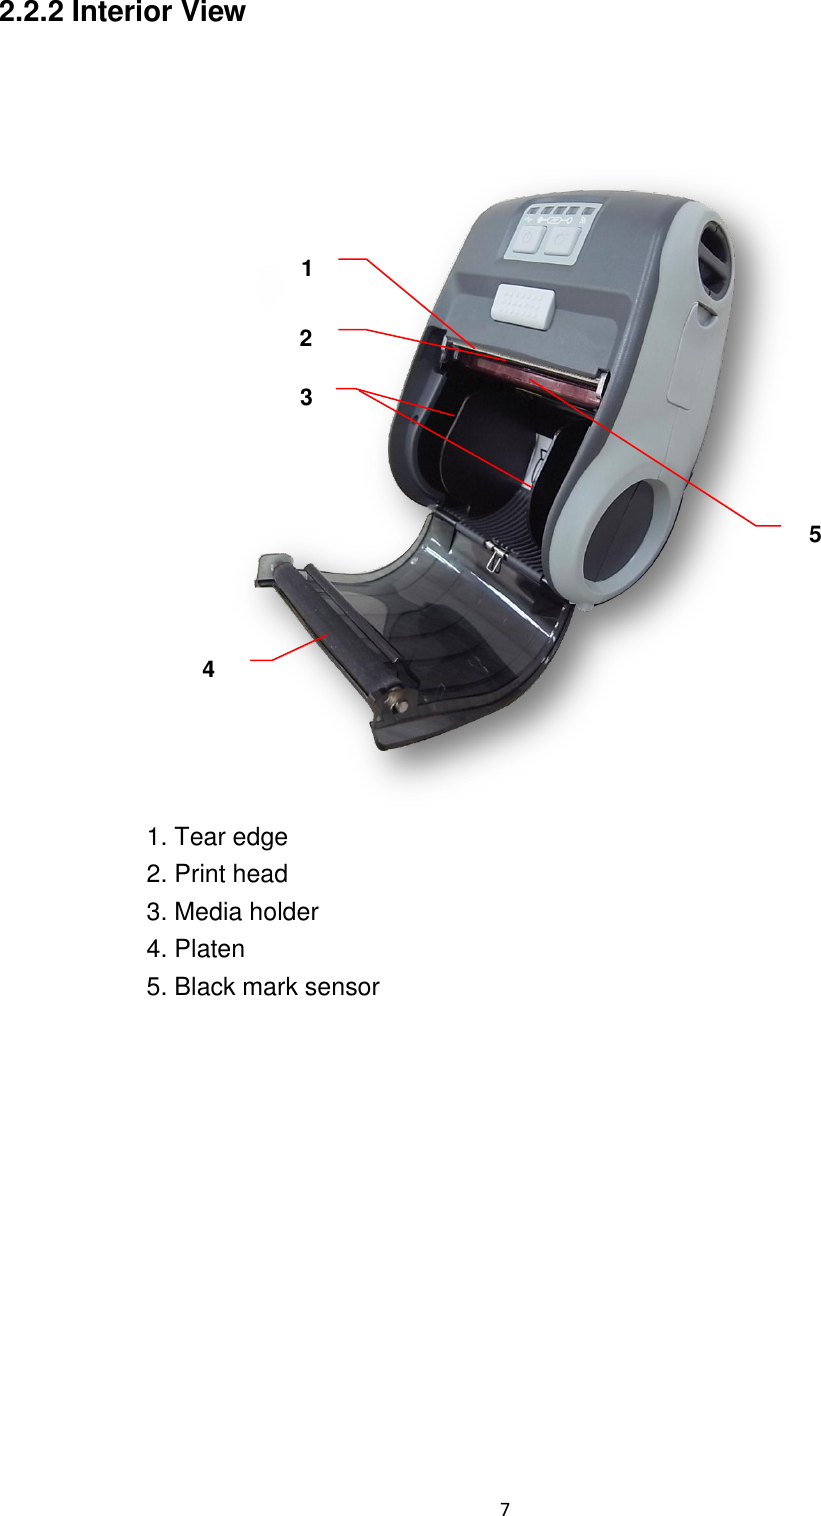
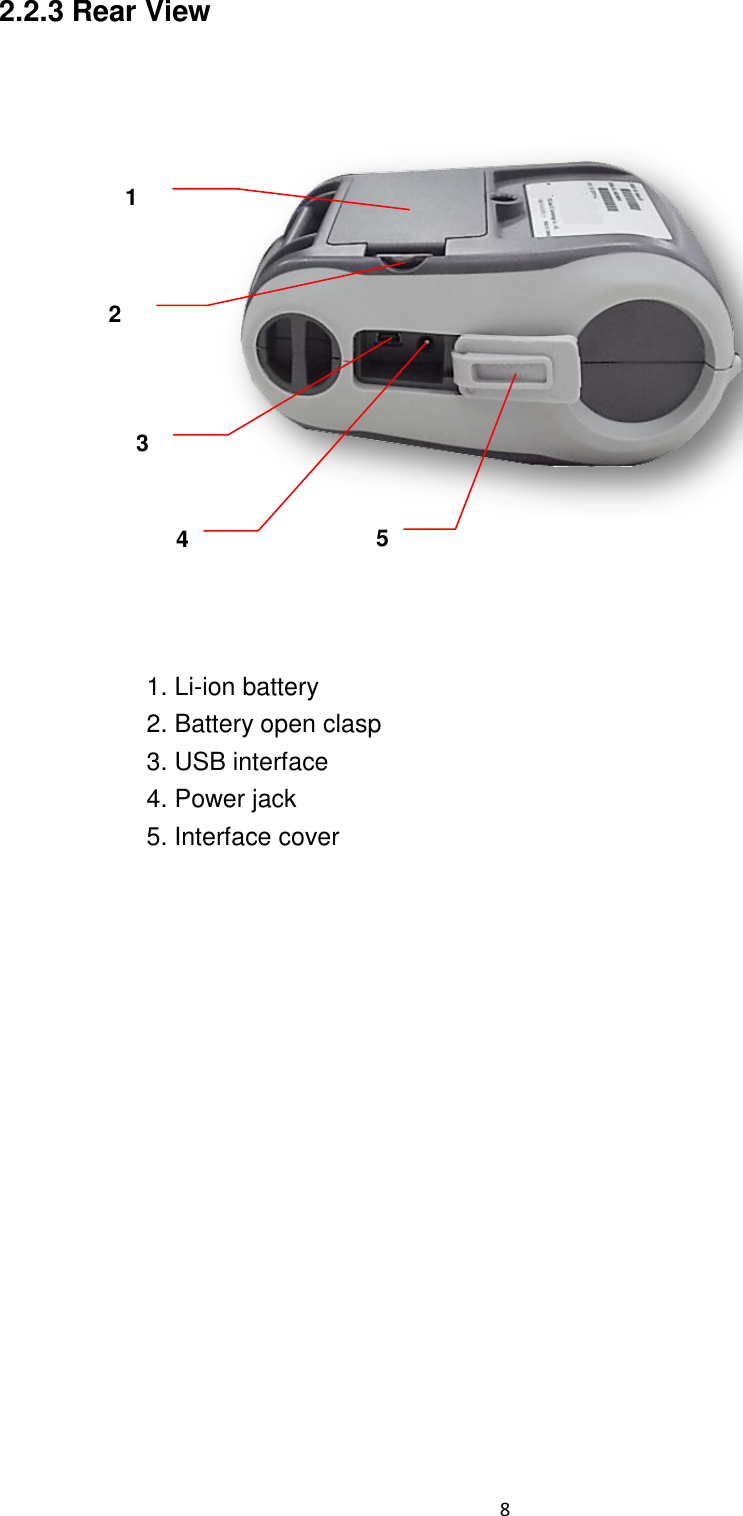
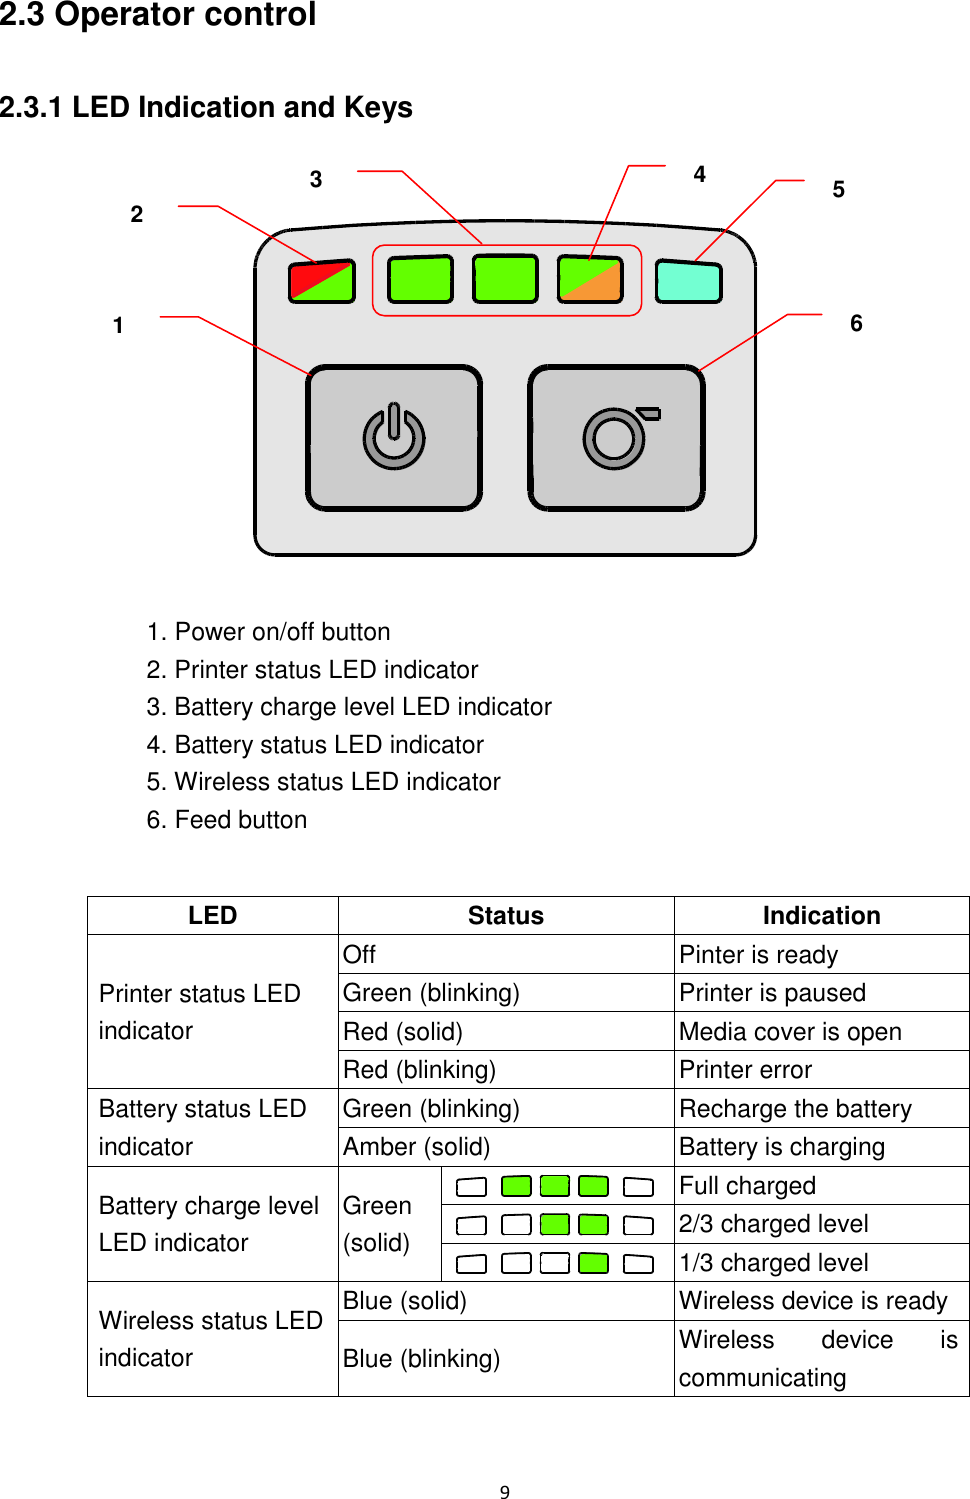
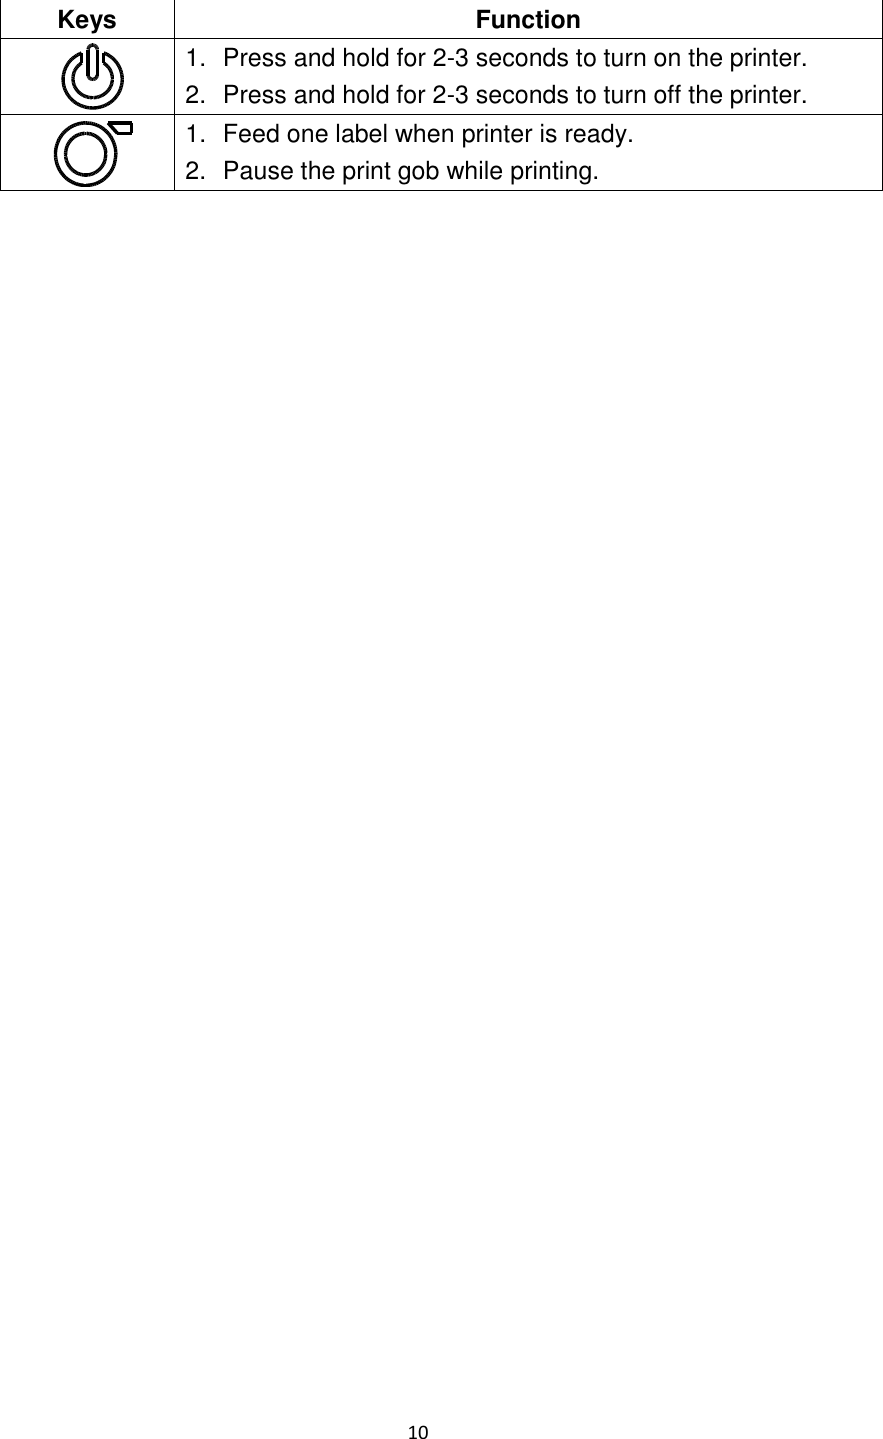
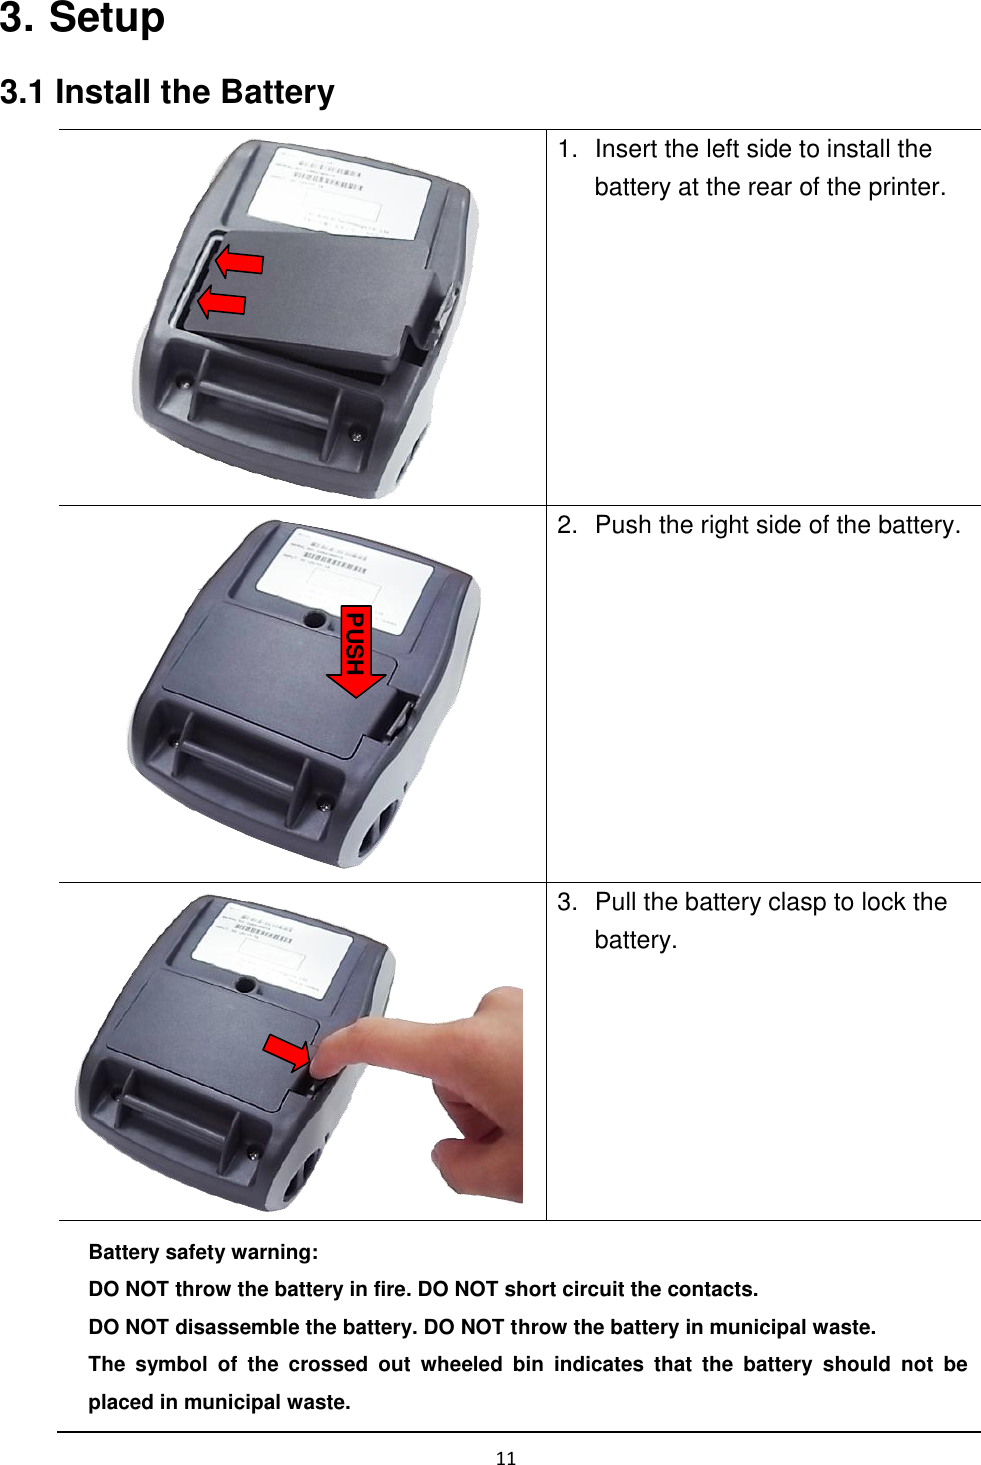
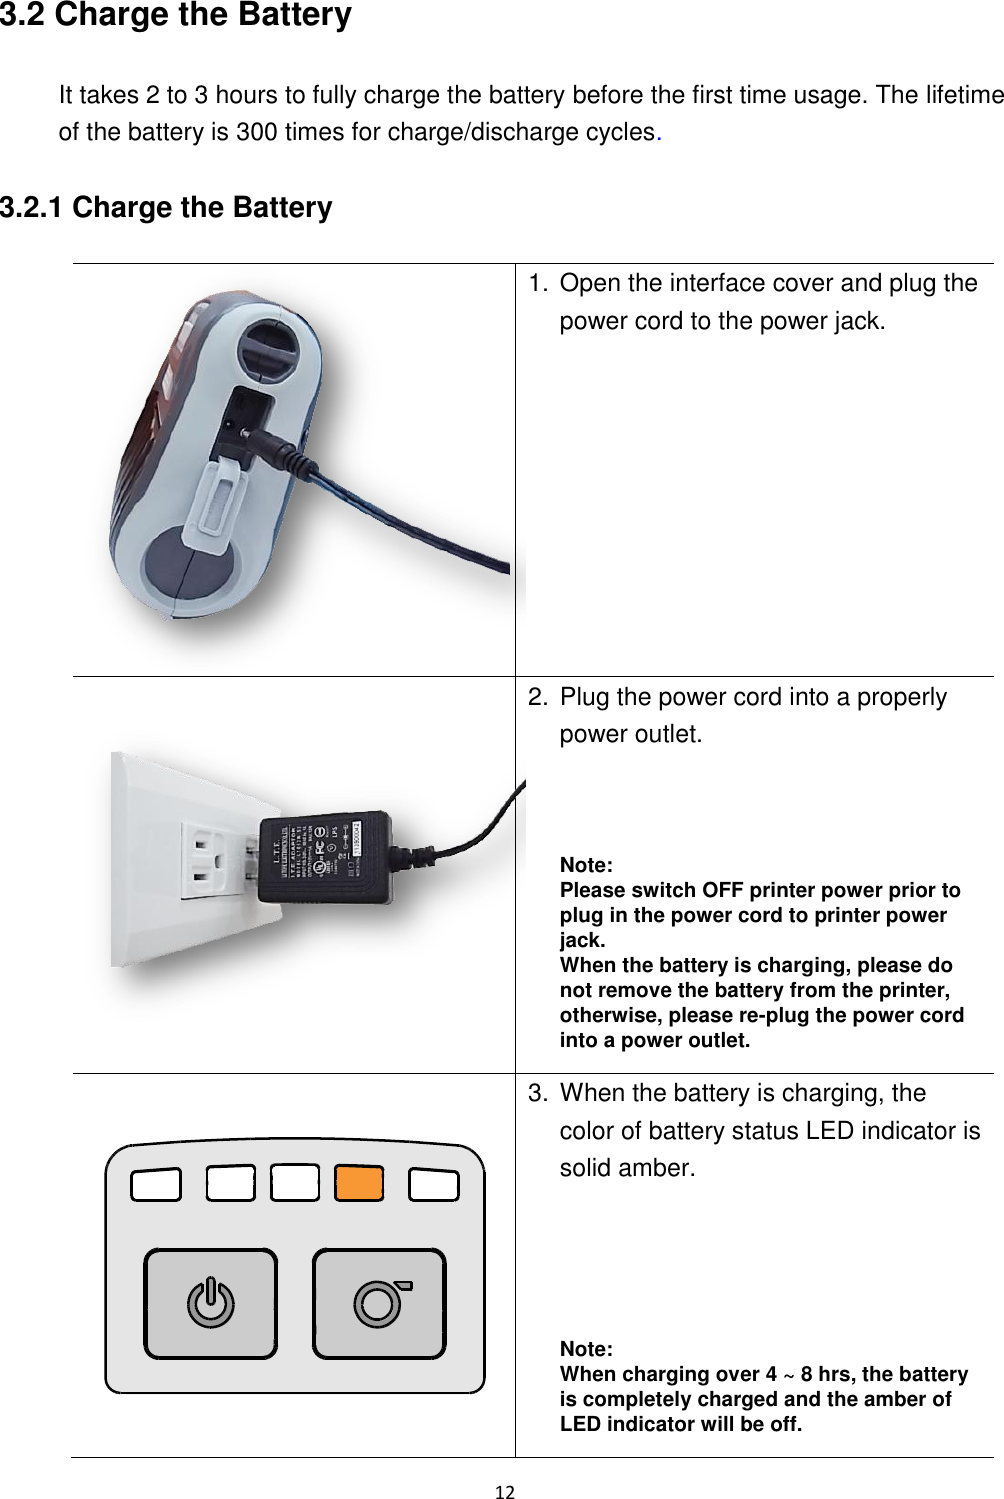
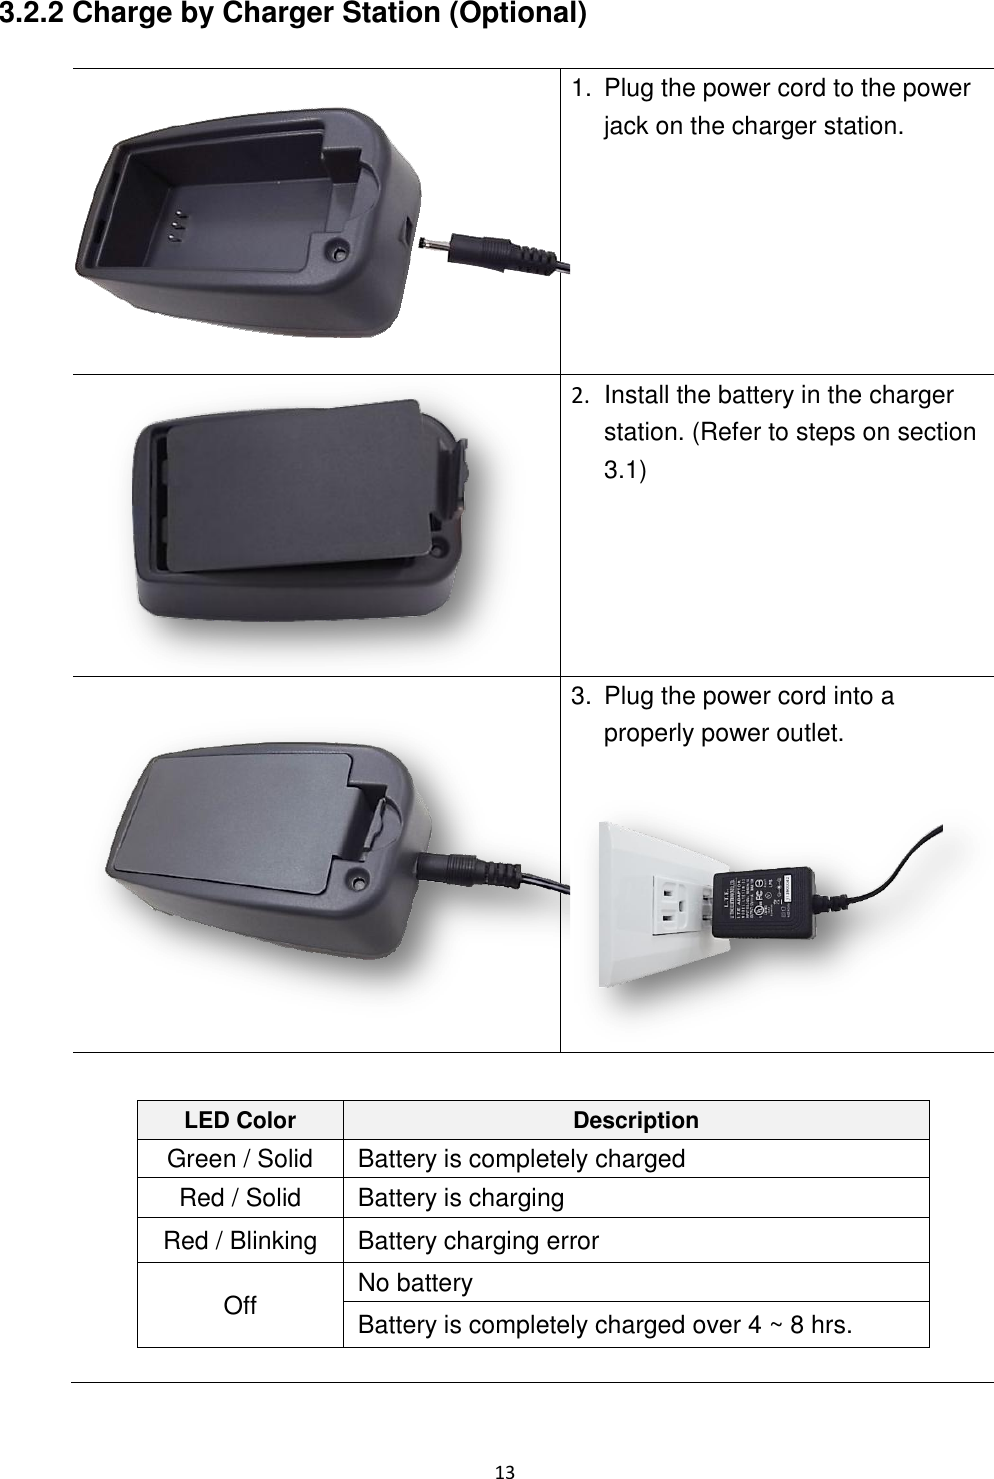
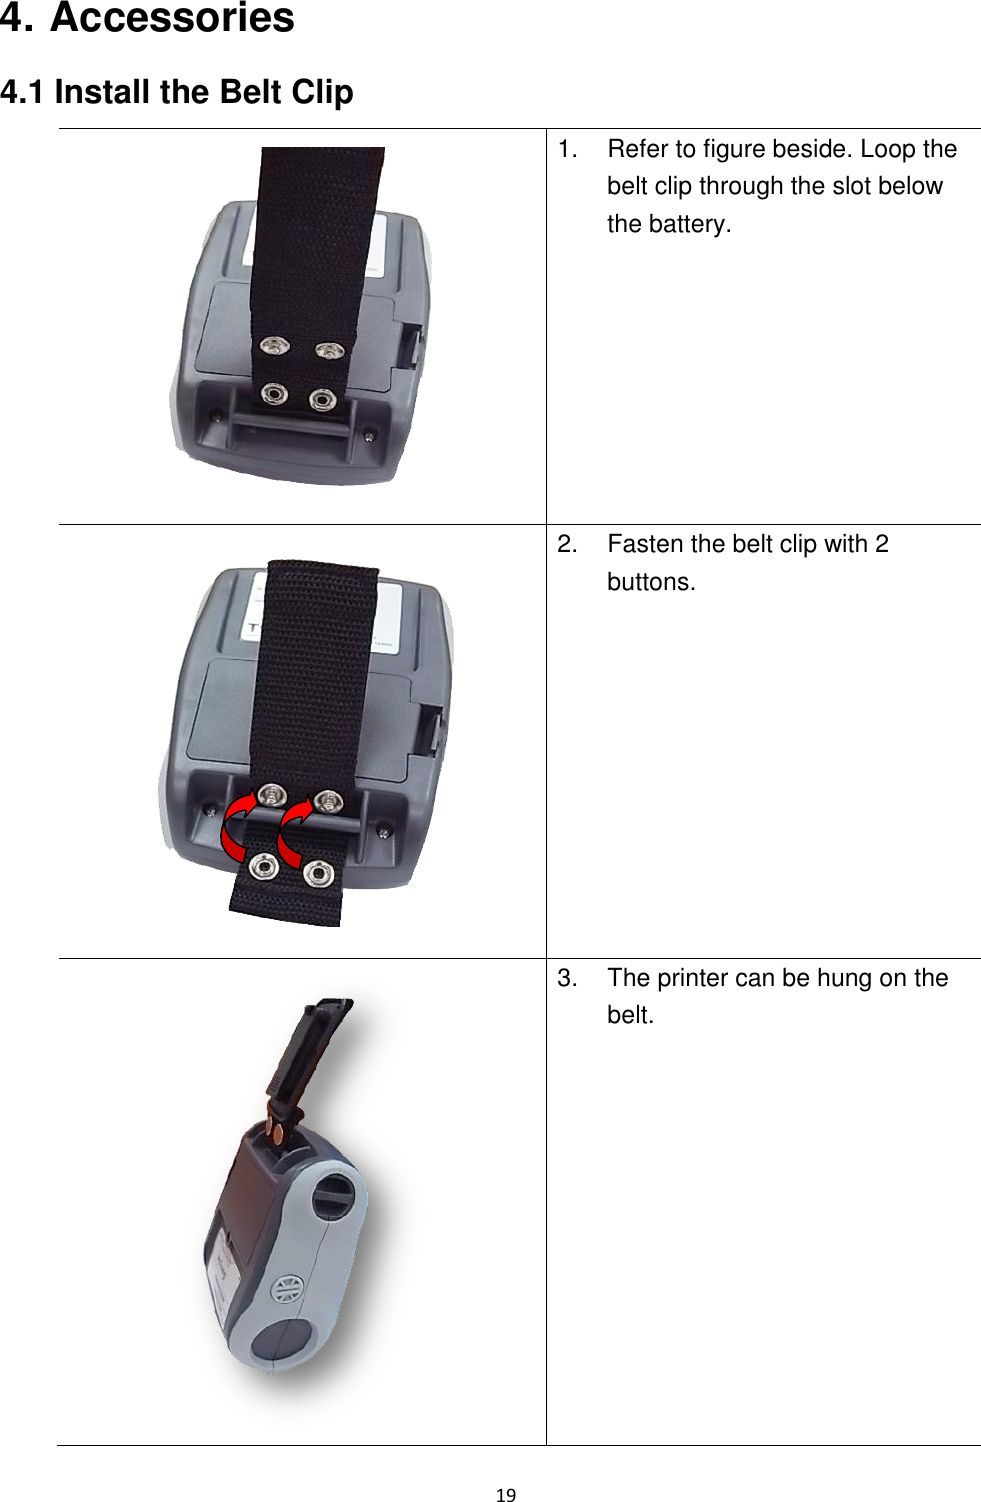
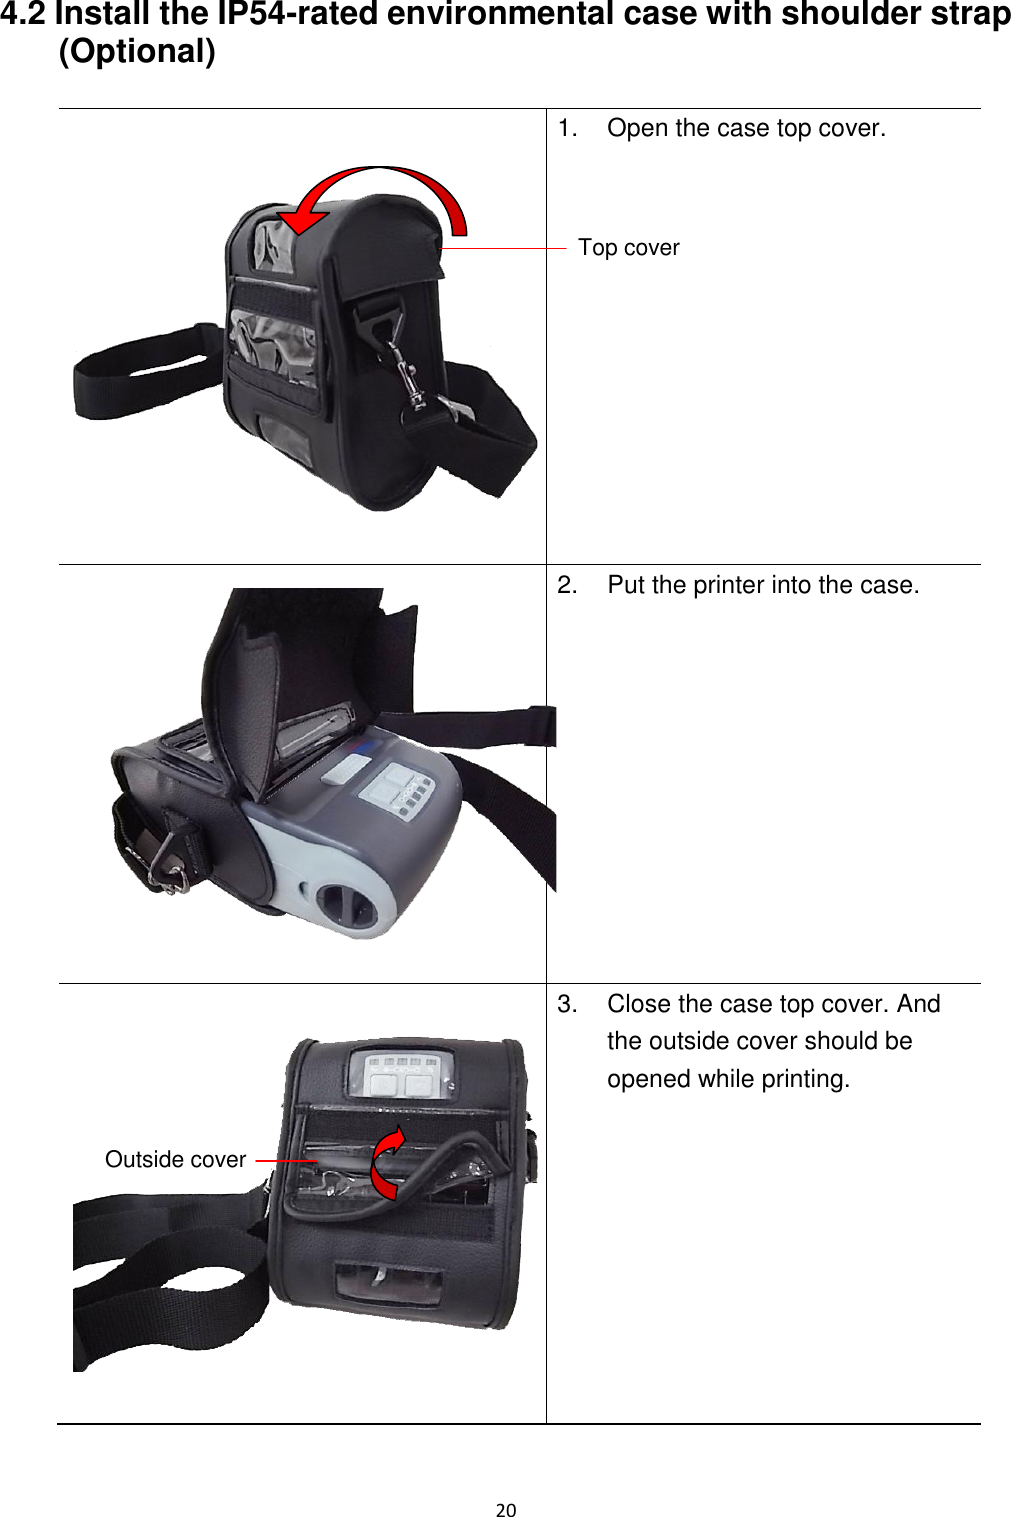
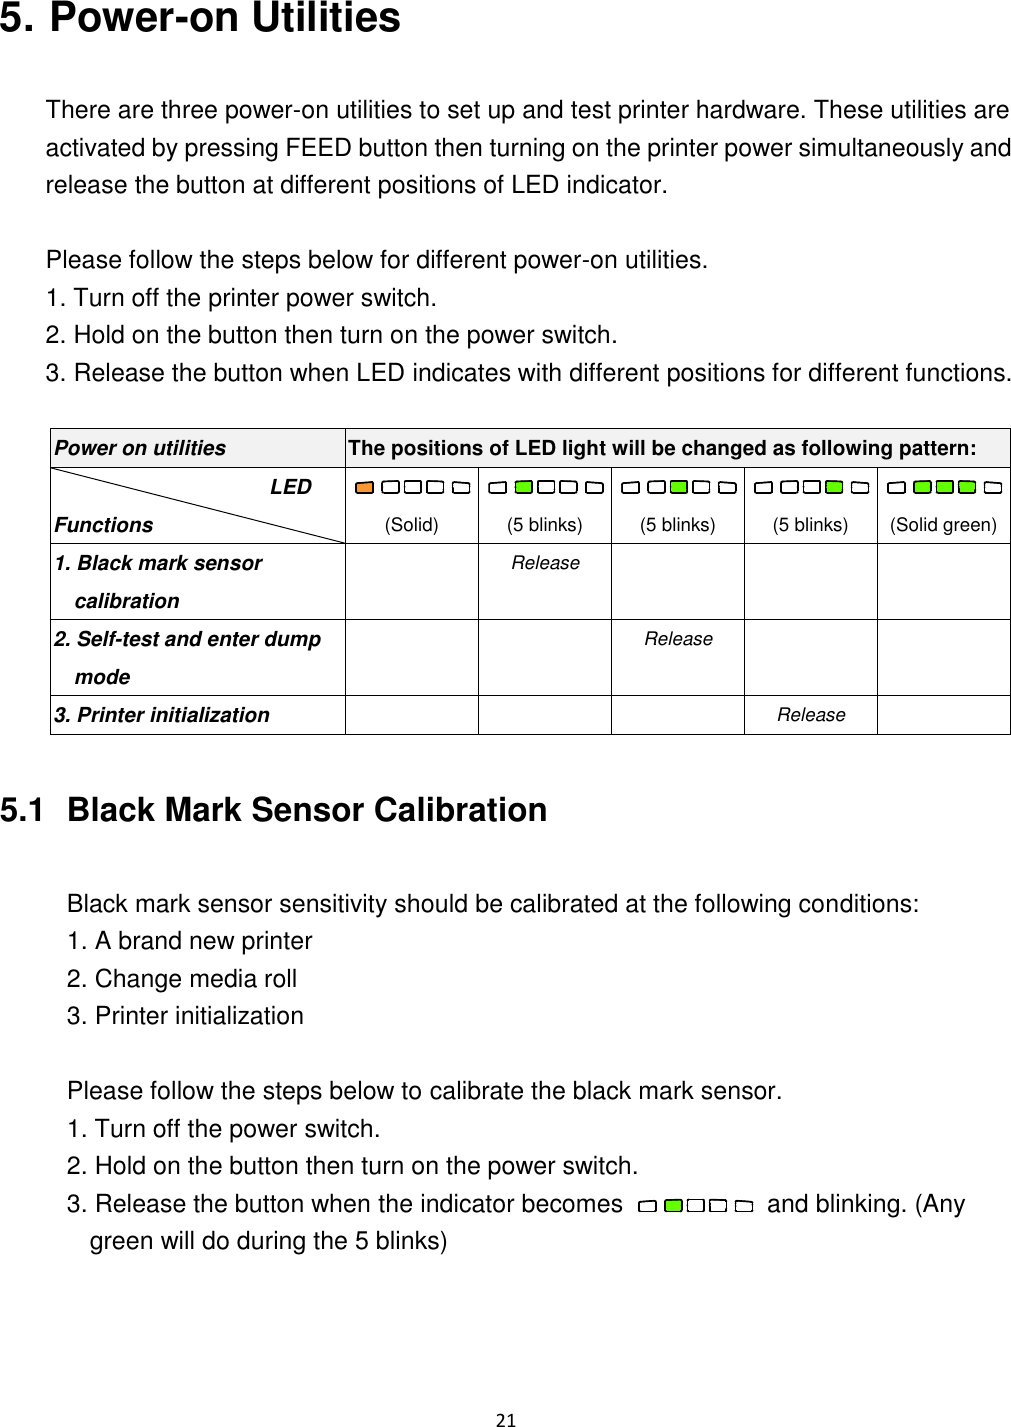
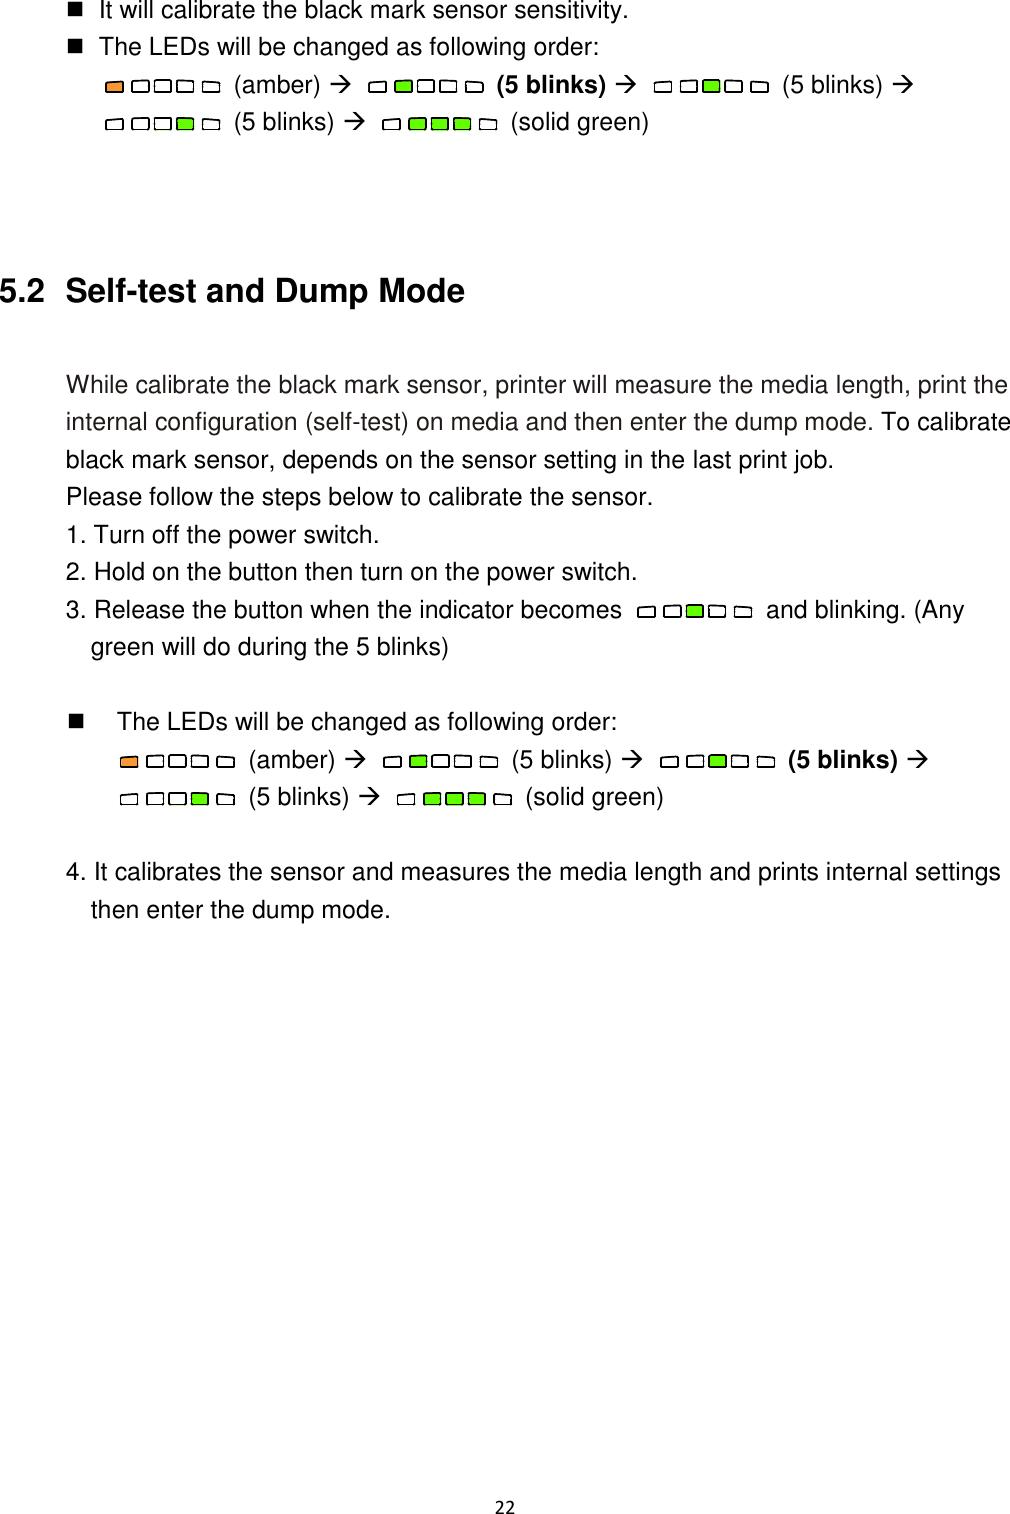
TSC Auto ID Technology 0481202 Printer User Manual TSC 30W UserMan 3 0903
TSC Auto ID Technology Co., Ltd. Printer TSC 30W UserMan 3 0903
Contents
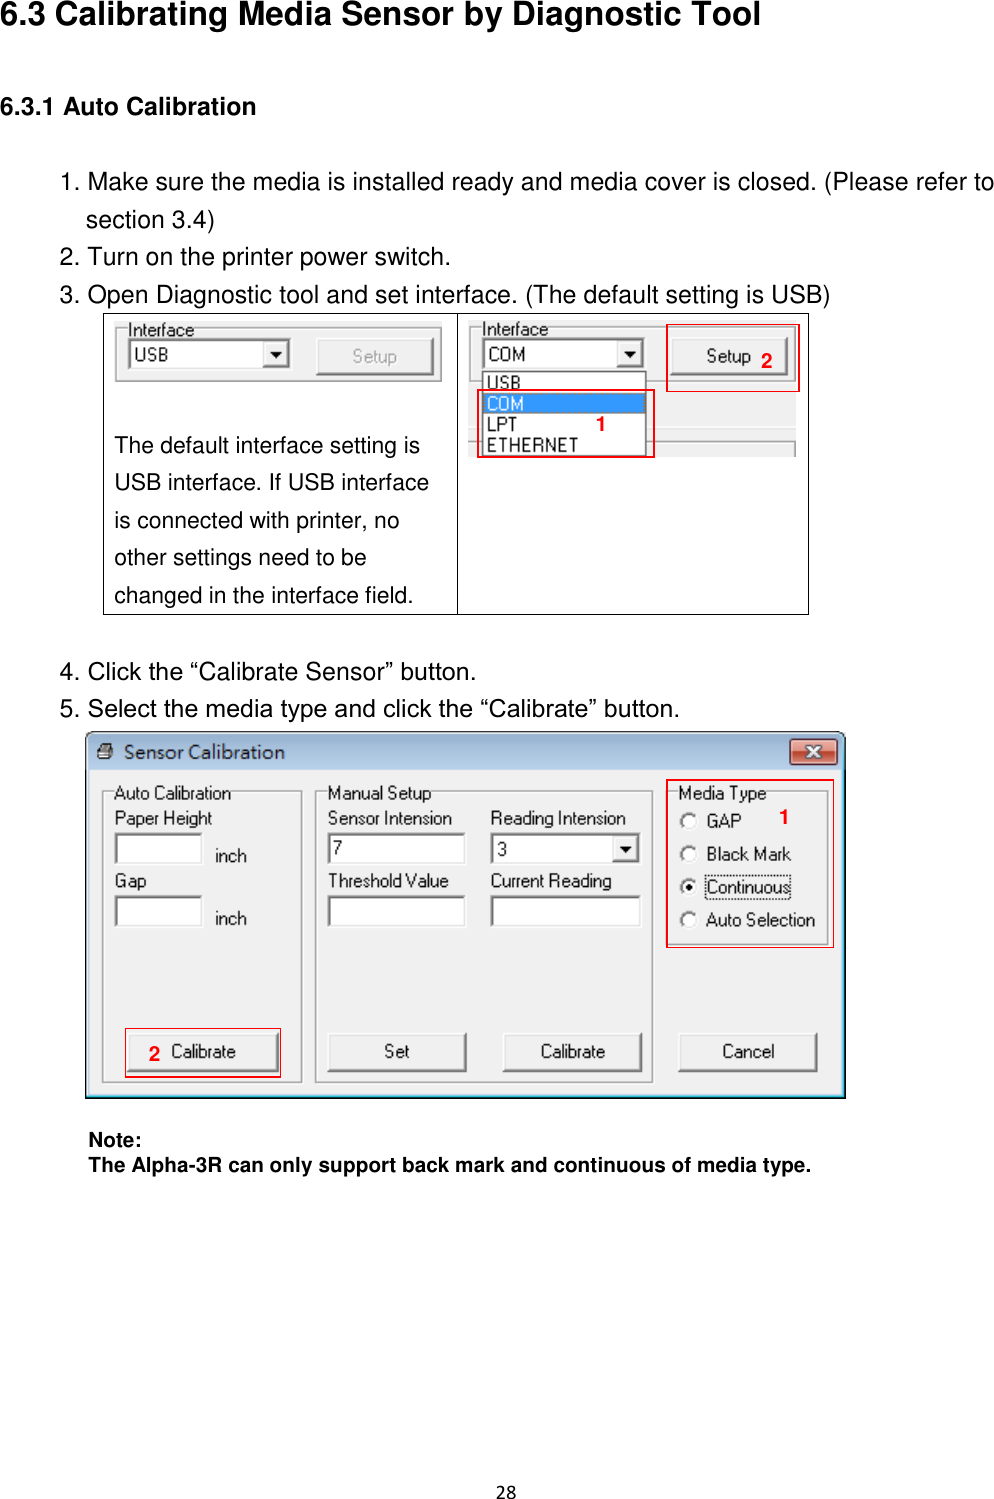
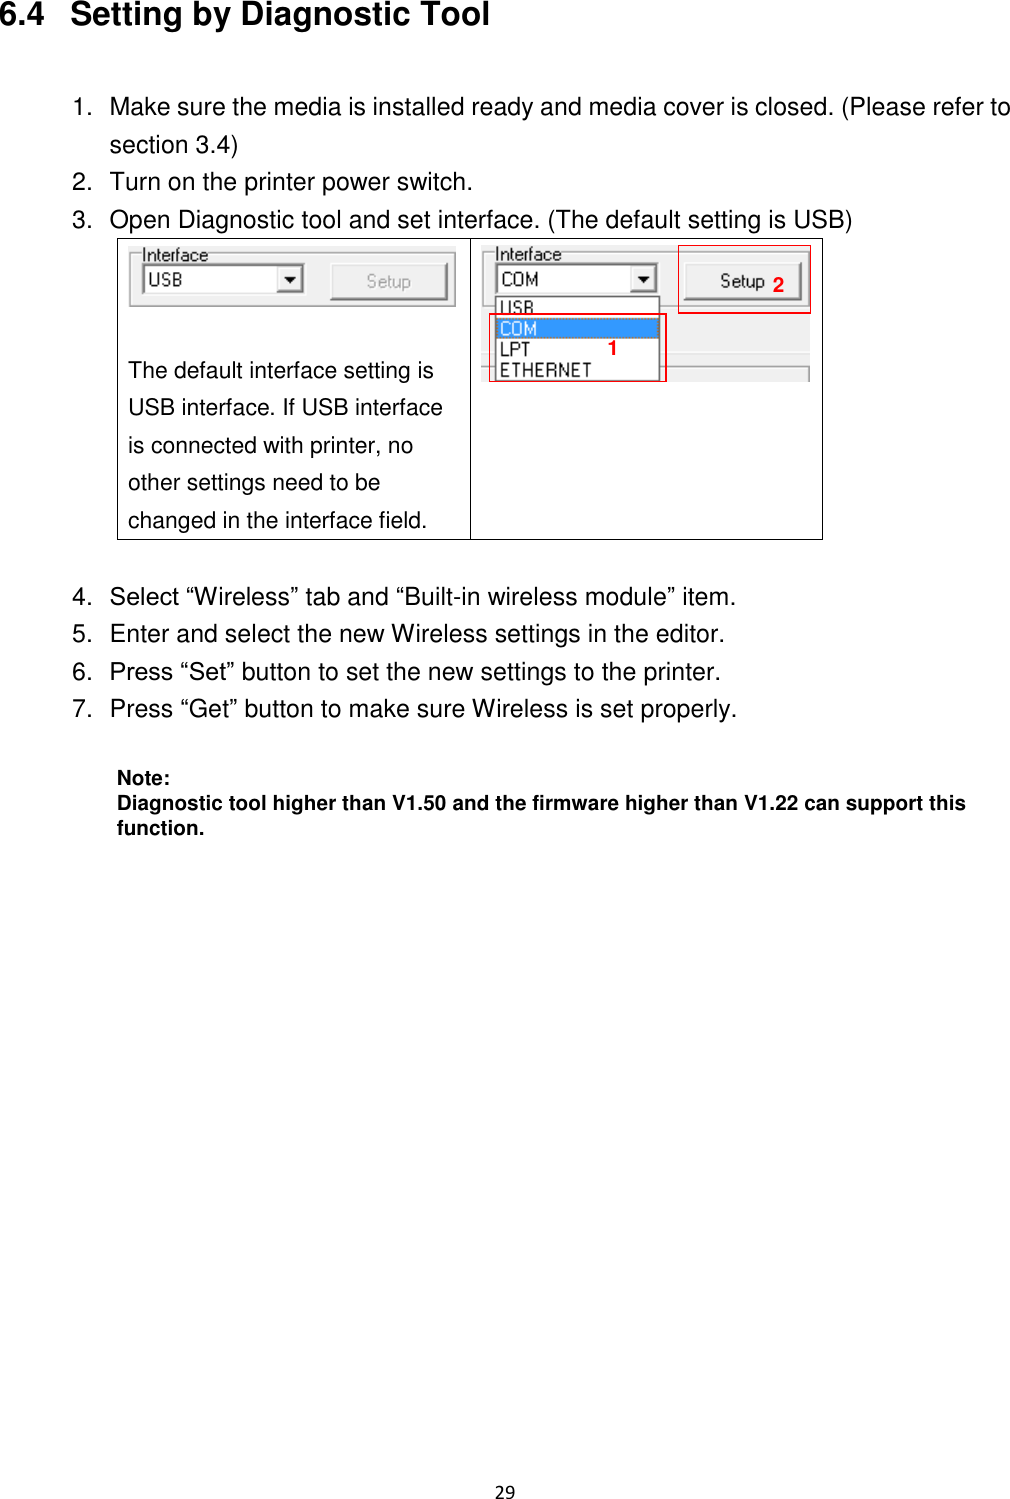
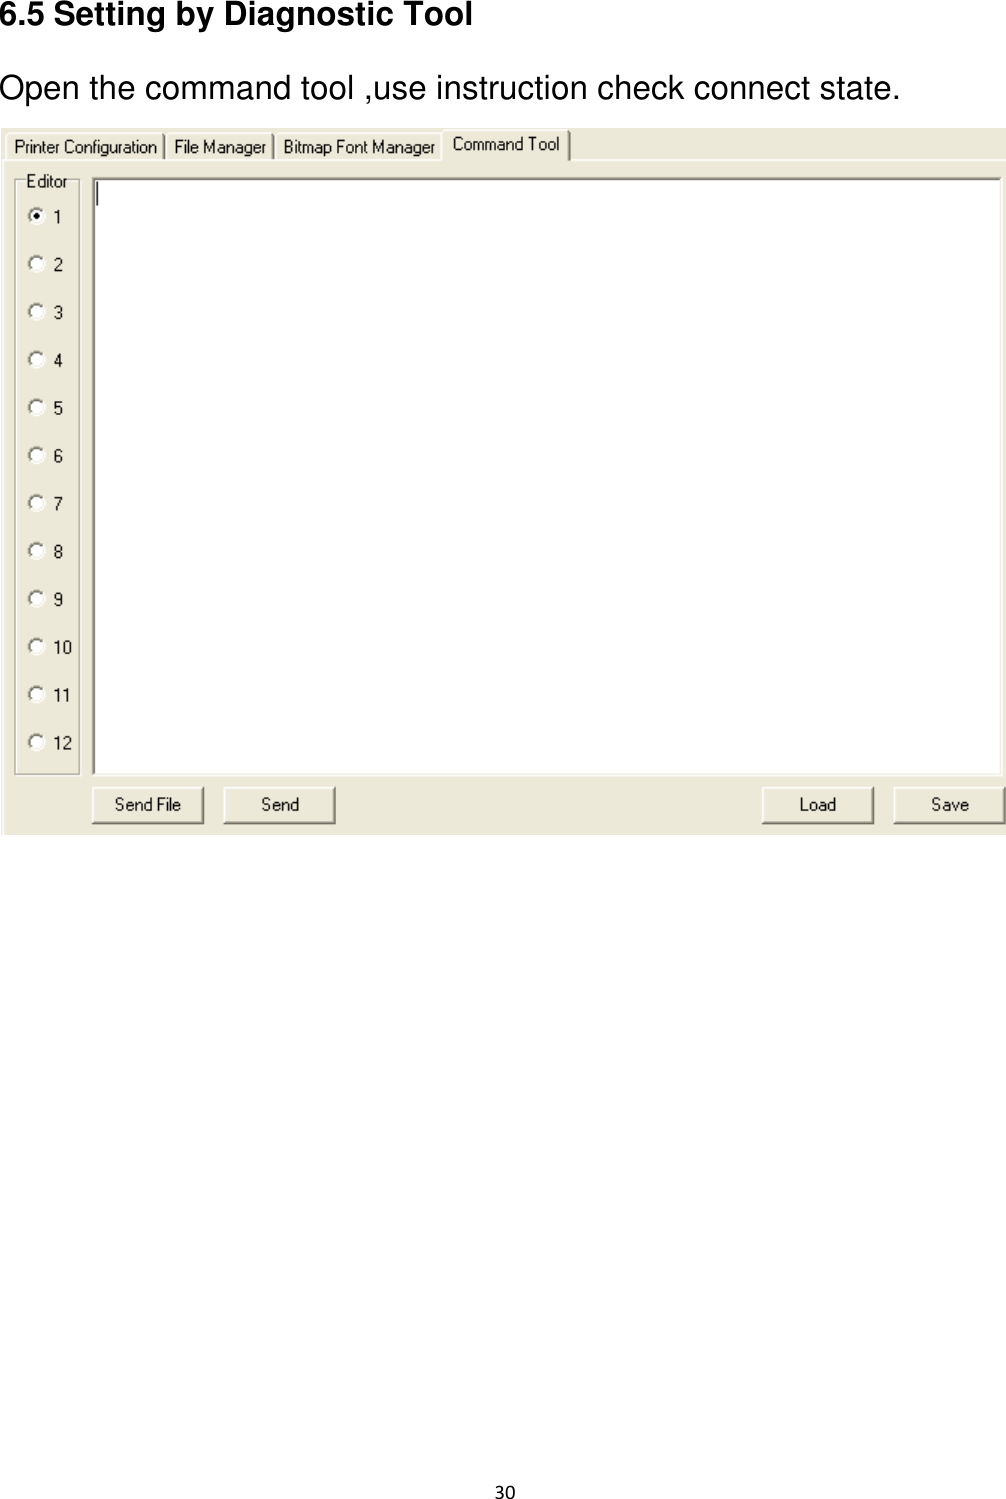
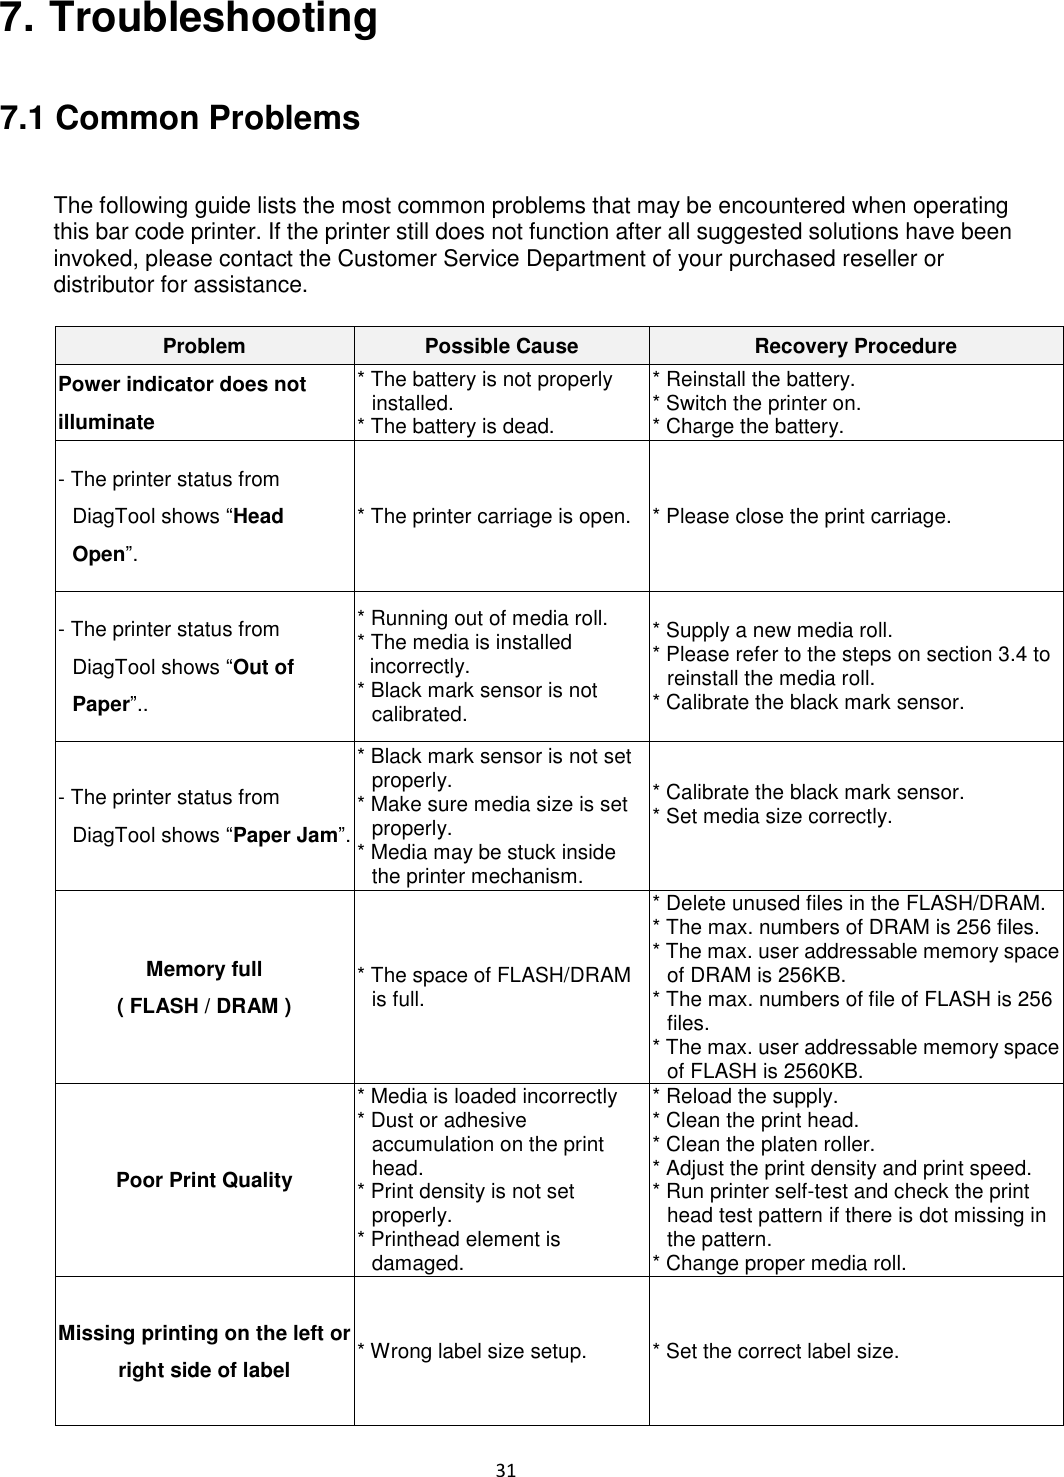
- 1. (TSC-30W) UserMan_1_0903
- 2. (TSC-30W) UserMan_2_0903
- 3. (TSC-30W) UserMan_3_0903
(TSC-30W) UserMan_3_0903