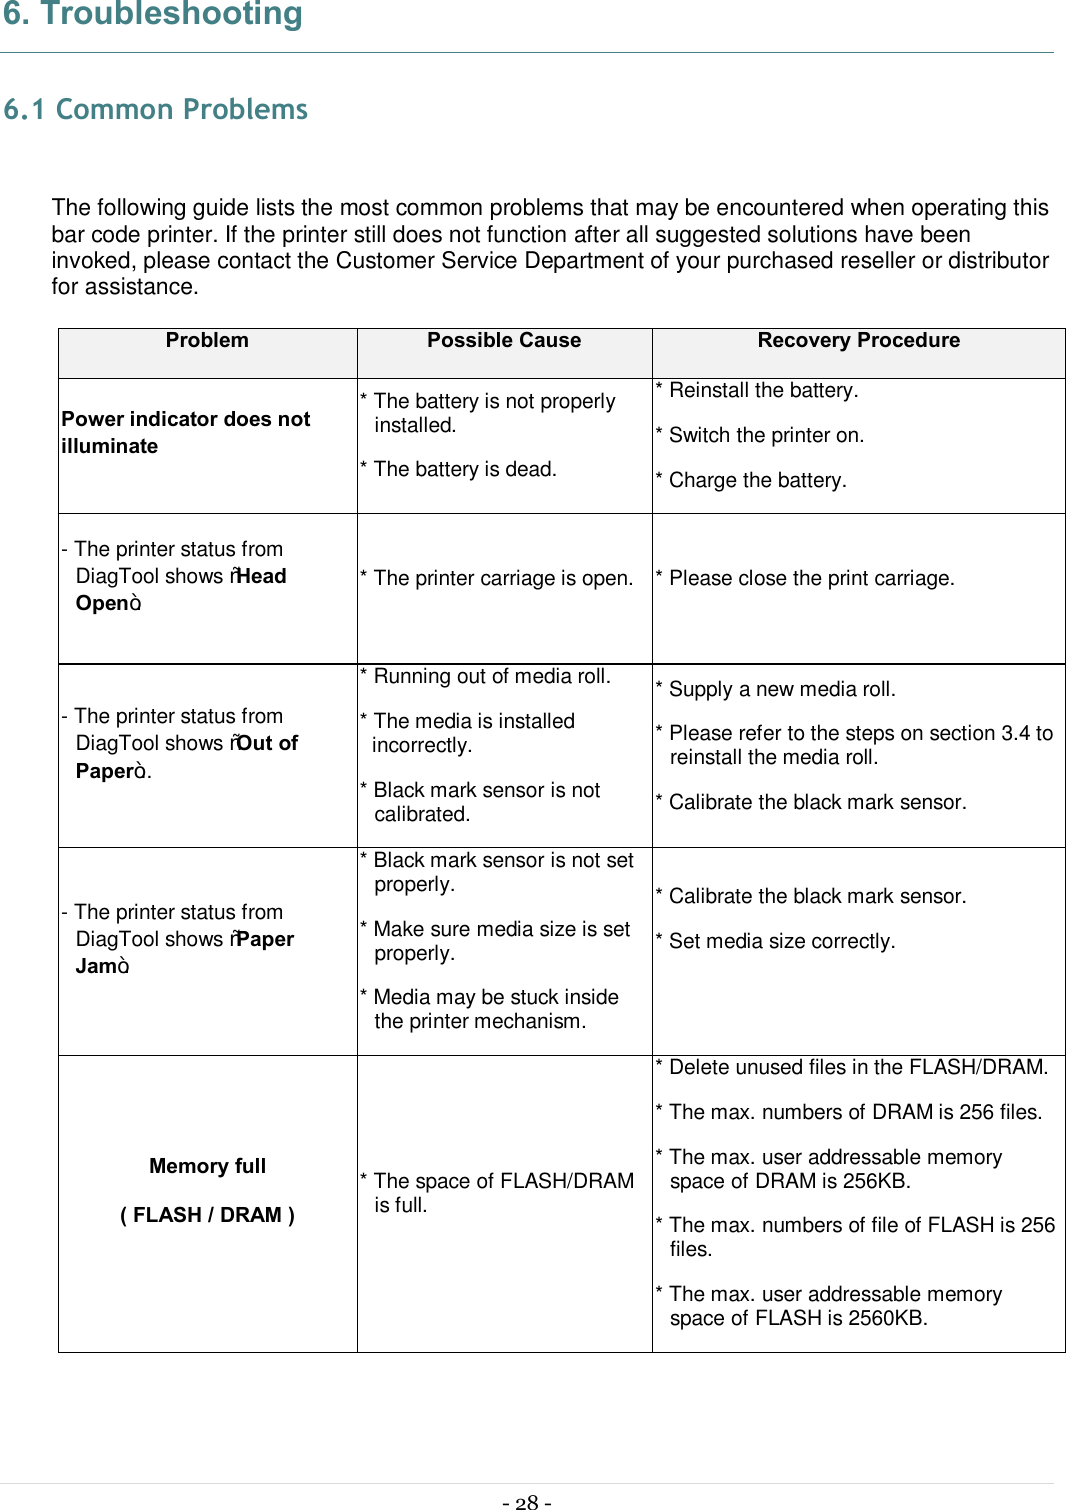
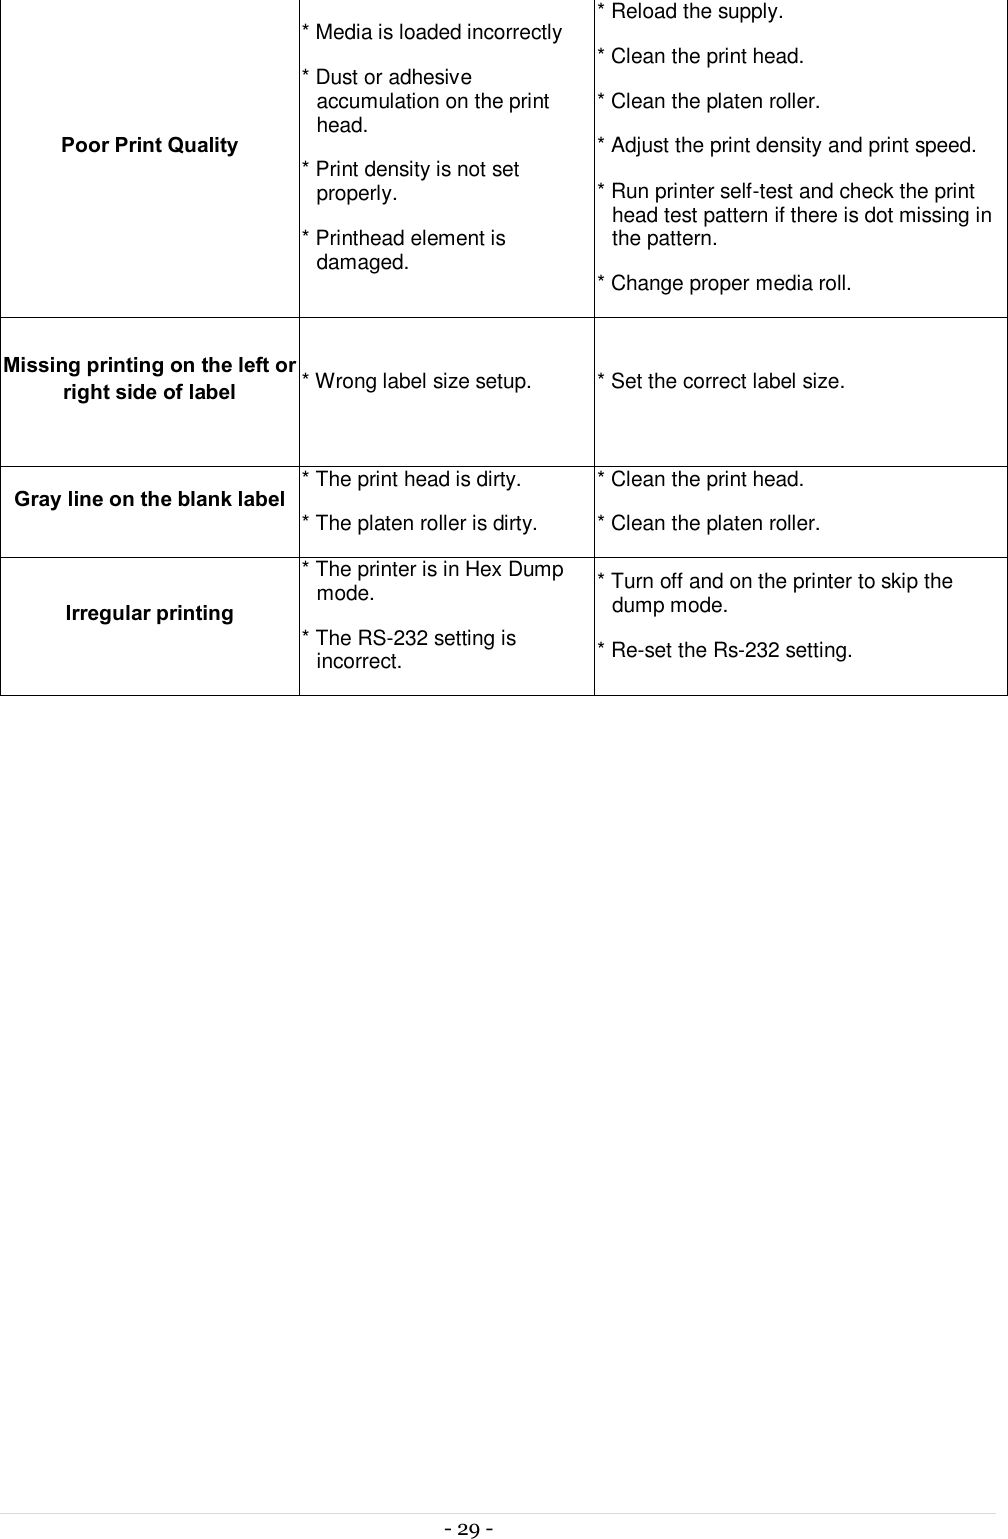
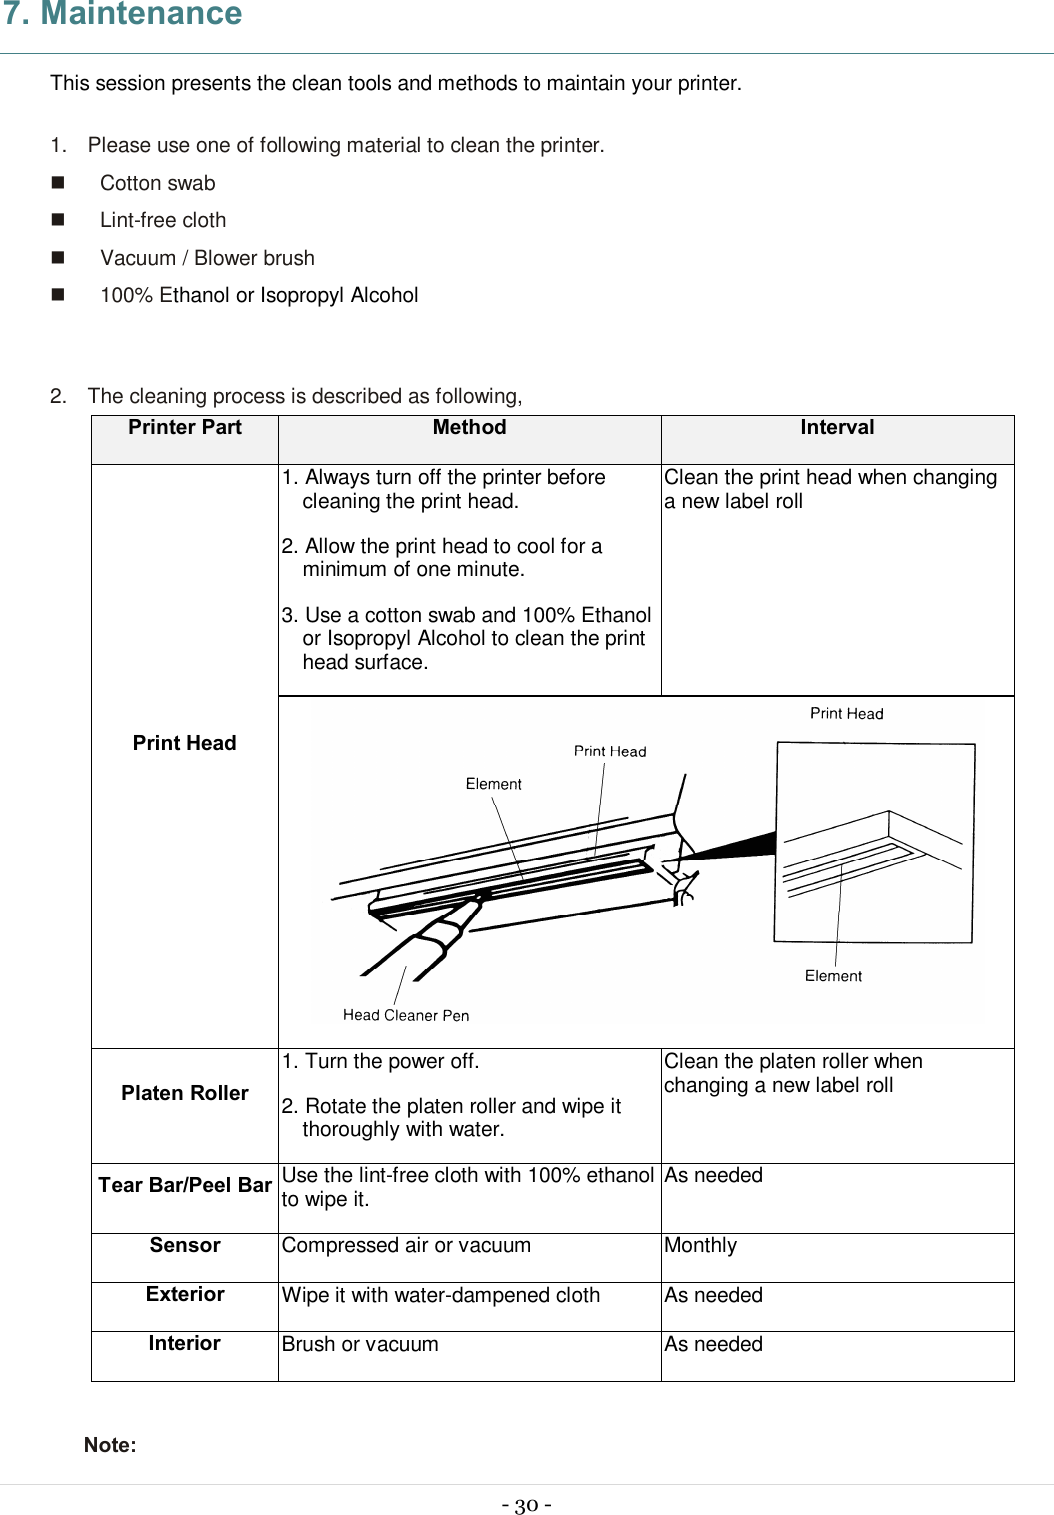
TSC Auto ID Technology 0521301 Bar Code Printer User Manual Alpha 4L UserMan 2013 05 20
TSC Auto ID Technology Co., Ltd. Bar Code Printer Alpha 4L UserMan 2013 05 20
UserManual.wiki
>
TSC Auto ID Technology
>
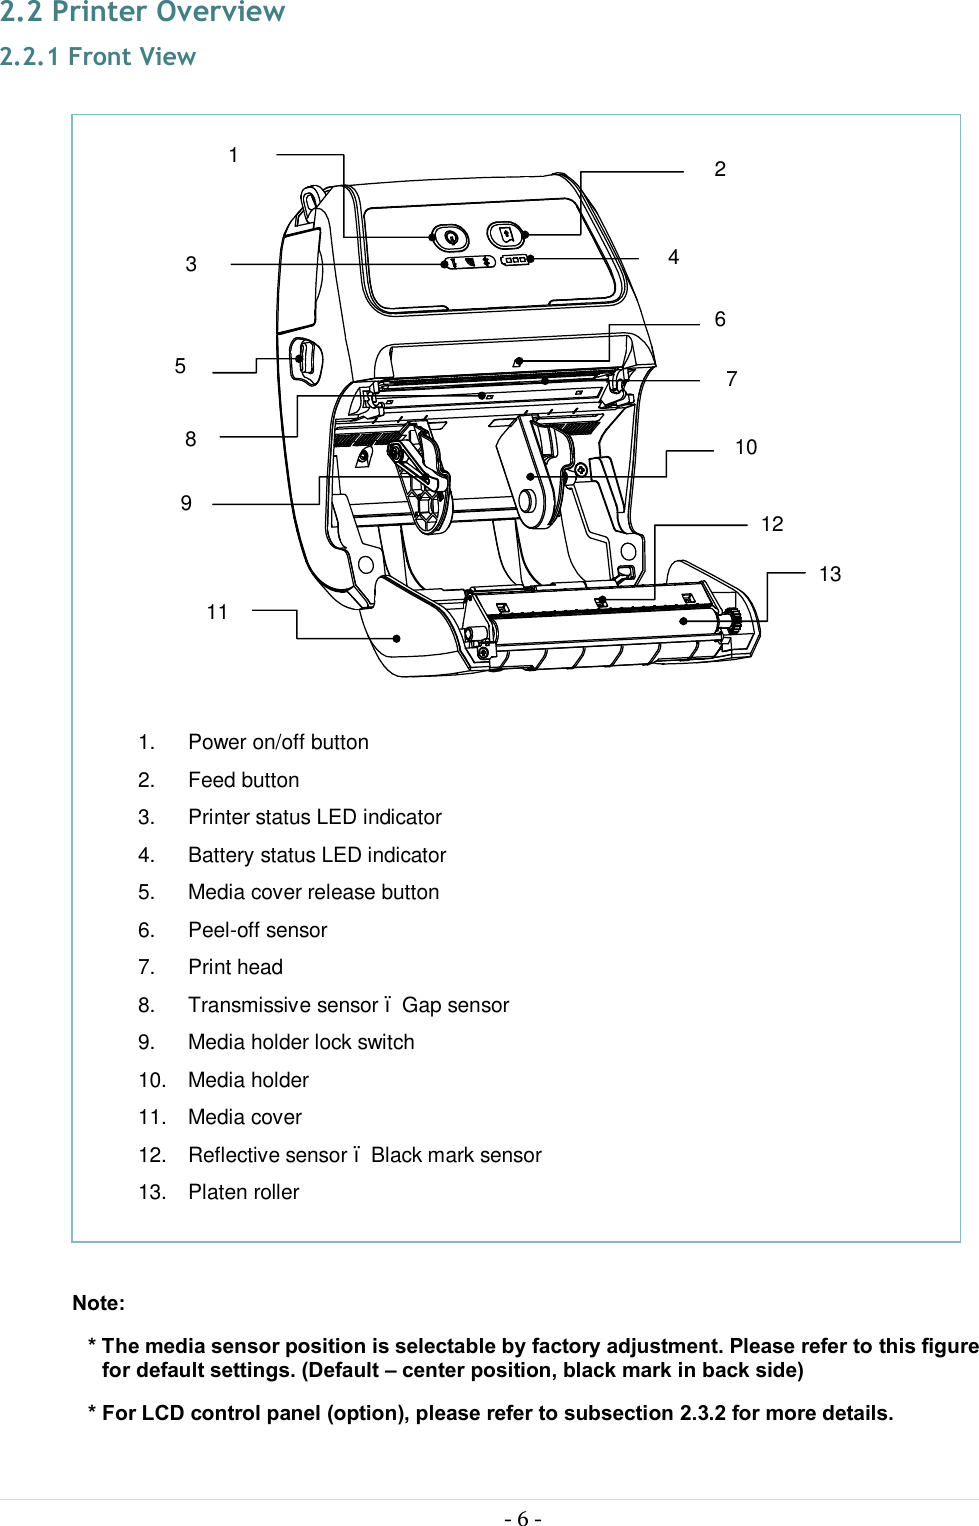
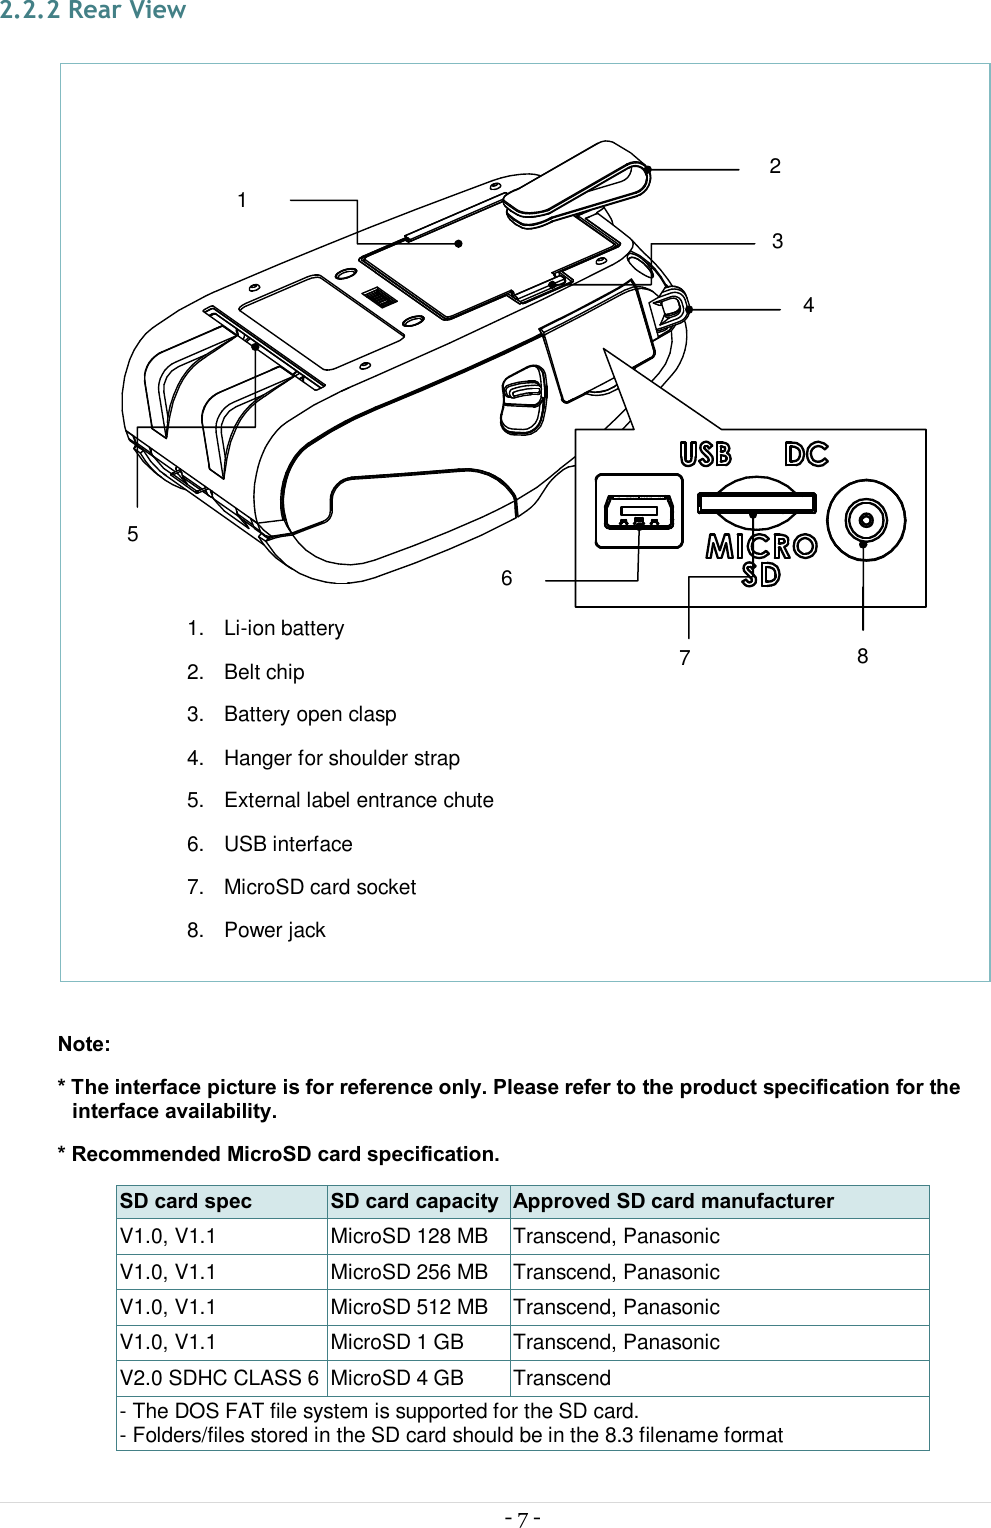
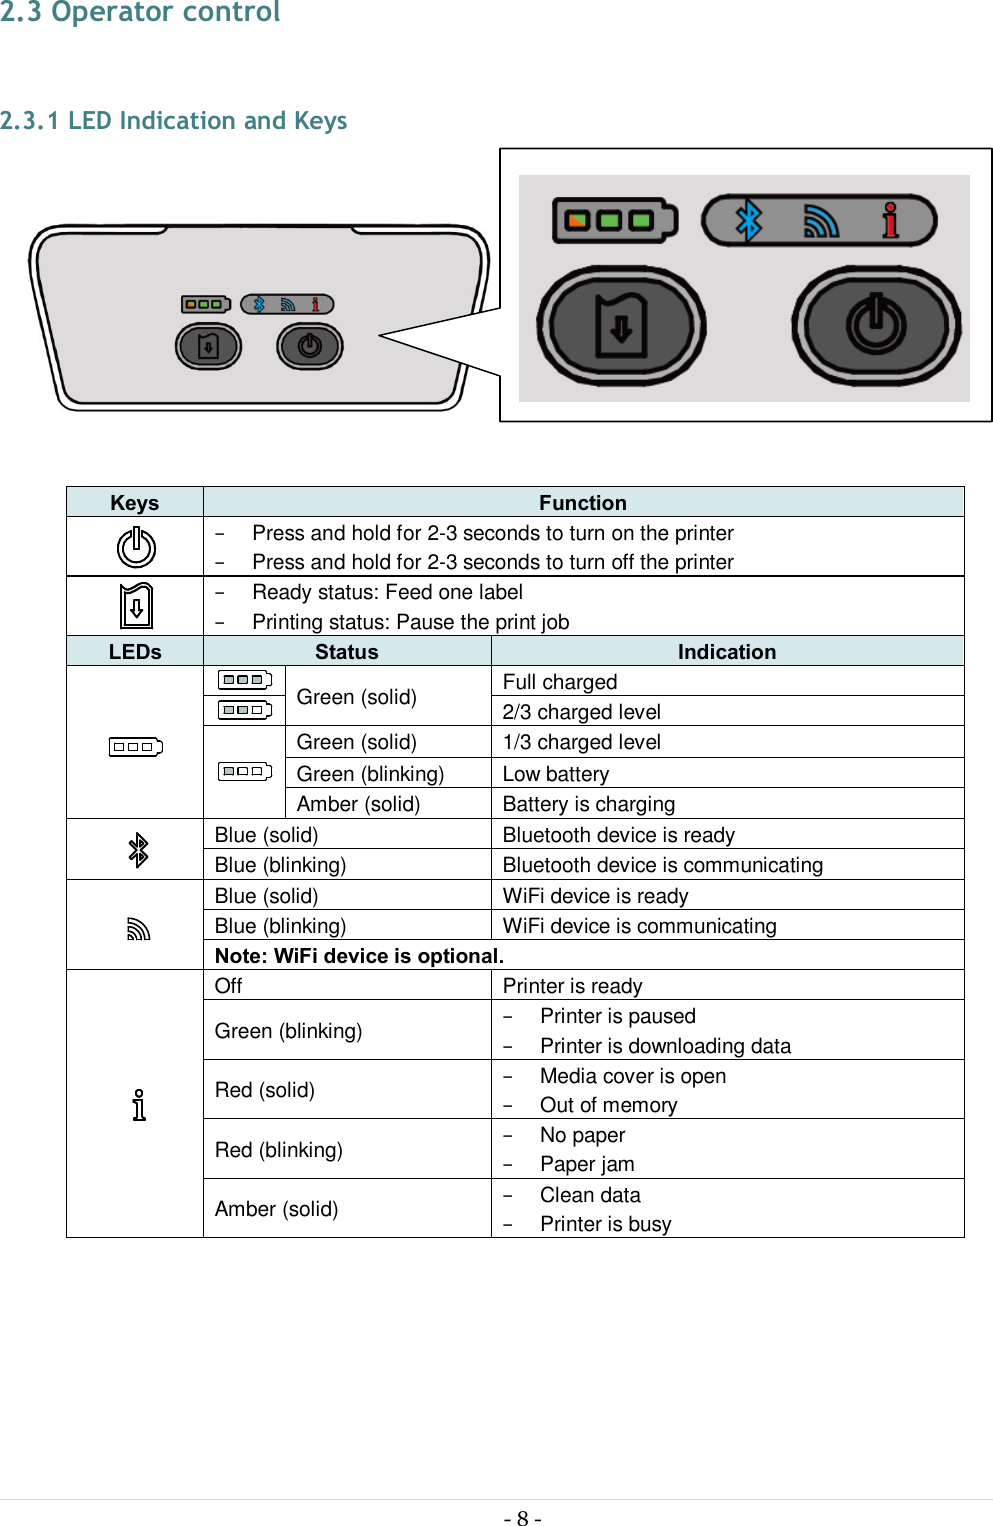
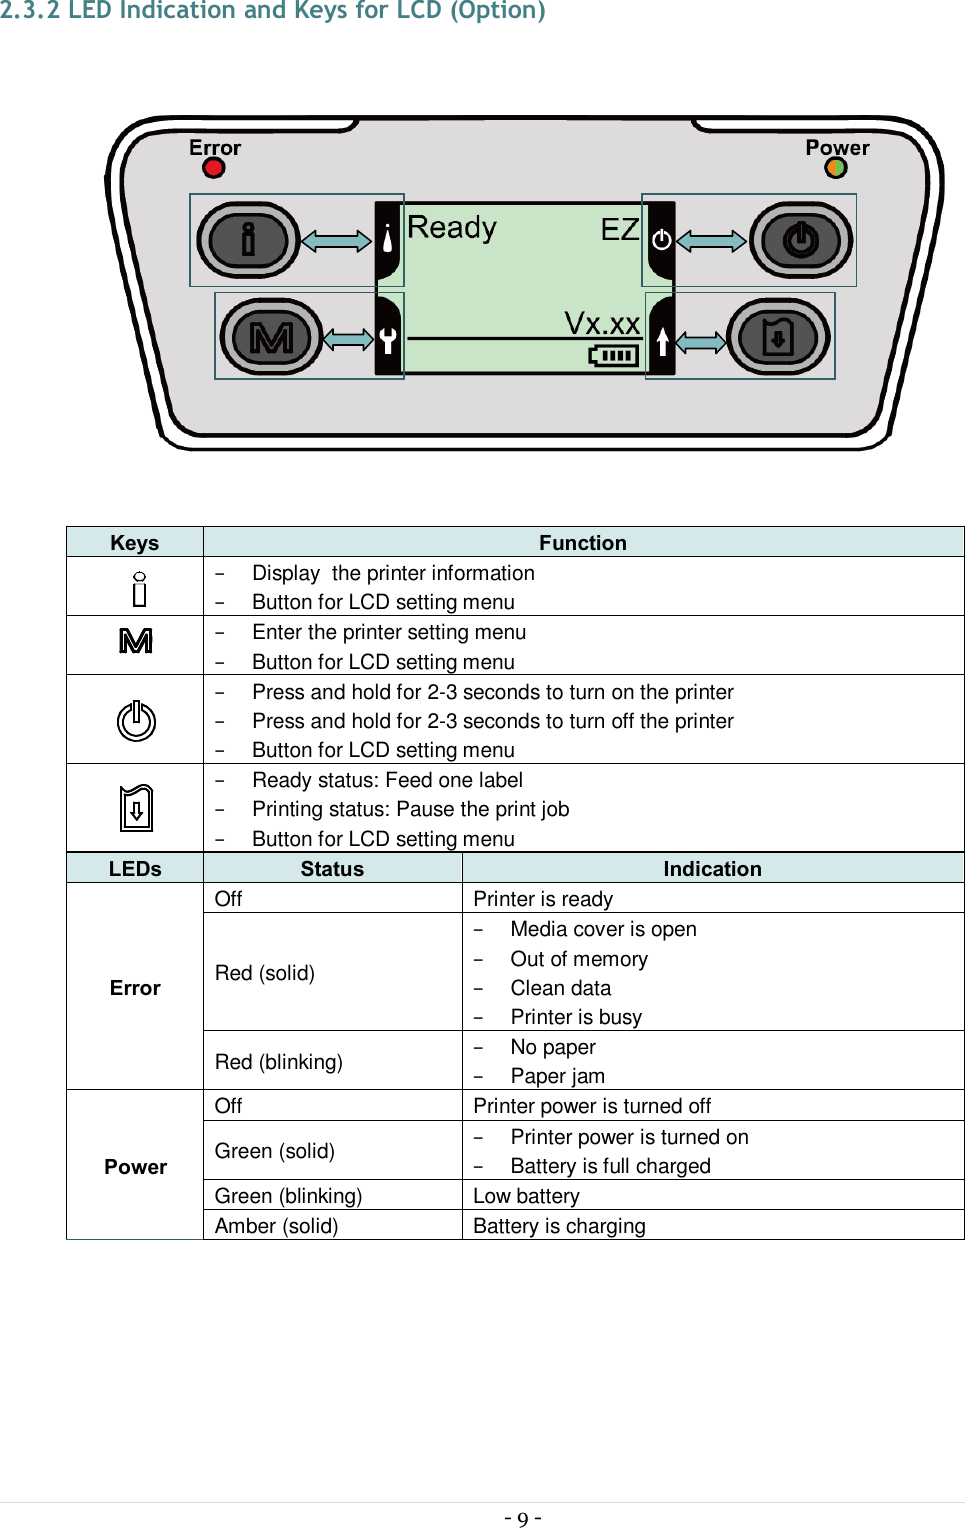
0521301 User Manual
(Alpha-4L) UserMan_2013-05-20
Navigation menu
Upload a User Manual
Namespaces
Wiki Guide
HTML
PDF
Info
Views
User Manual
Discussion / Help
Navigation