TTI Tech GMRS6000 FRS/GMRS COMBINATION User Manual 1286674 p65
TTI Tech Co., Ltd. FRS/GMRS COMBINATION 1286674 p65
UserManual.wiki
>
TTI Tech
>
GMRS6000 User Manual
USERS MANUAL
Navigation menu
Upload a User Manual
Namespaces
Wiki Guide
HTML
PDF
Info
Views
User Manual
Discussion / Help
Navigation
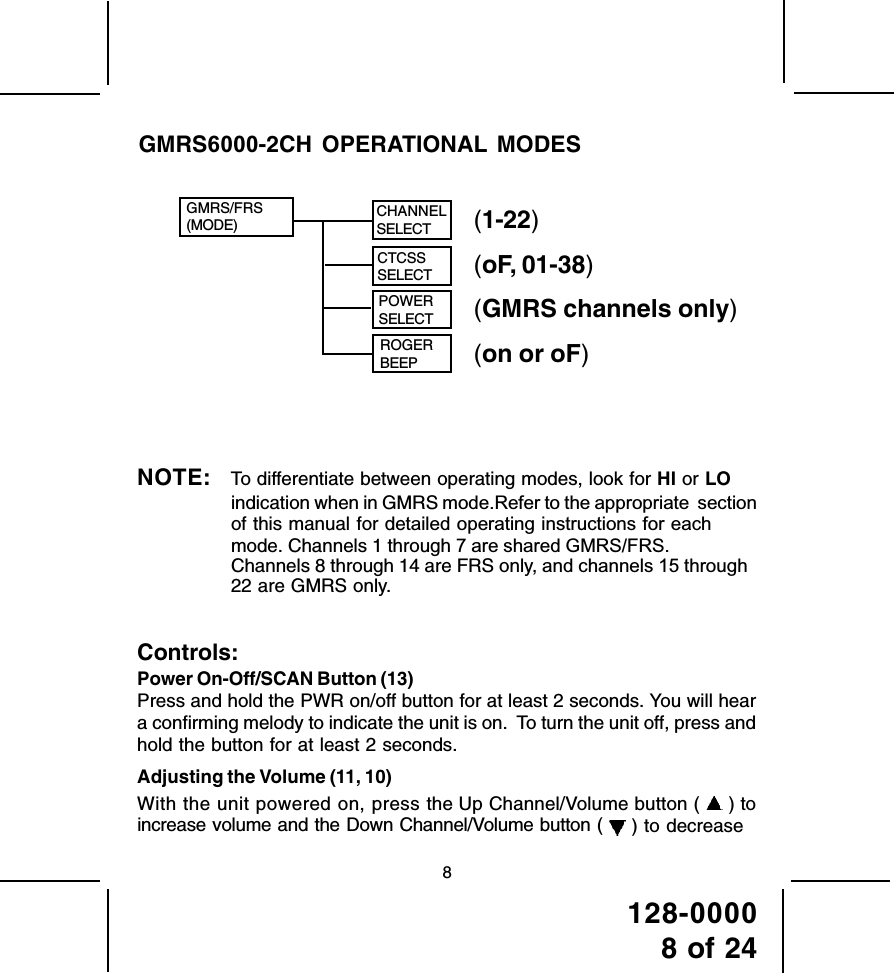
![[RF EXPOSURE STATEMENT : PDHGMRS6000 / TTI TECH CO., LTD.] - CAUTION! - IMPORTANT SAFETY INFORMATION Your wireless hand-held portable transceiver contains a radio frequency transmitter. When the PTT button is pushed, the transmitter sends out RF signals. The device is authorized to operate at a transmit duty factor not exceeding 50% using alkaline “AAA” size batteries to comply with Federal Communications Commissions (FCC) RF exposure safety level guidelines for hand-held wireless devices. For body-worn operation, this device has been tested for SAR (Specific Absorbtion Rate) and meets the FCC RF exposure guidelines when used with the accessories supplied or designated for this device by the manufacturer. Use of other accessories may not ensure compliance with FCC RF exposure guidelines. Use the manufacturer-supplied antenna only. Unauthorized antennas, modifications, or attachments could damage the transmitter and may violate FCC regulations. To maintain compliance with the FCC’S RF exposure guidelines, hold the transceiver at least 1 inch (2.5 centimeters) from your face and speak in a normal voice, with the antenna pointed up and away. GMRS License : Use of GRMS radios within the United States requires a FCC GMRS license. An individual of 18 years of age or older, who is not a representative of a foreign government is eligible to apply for a GMRS system license. You will need two forms from the FCC - FCC FORM 159 and FCC Form 605 Main Form and Schedule F. You can find the forms online at http://www.fcc.gov/formpage.html or call 1-800-418-3676.](https://usermanual.wiki/TTI-Tech/GMRS6000/User-Guide-395261-Page-3.png)