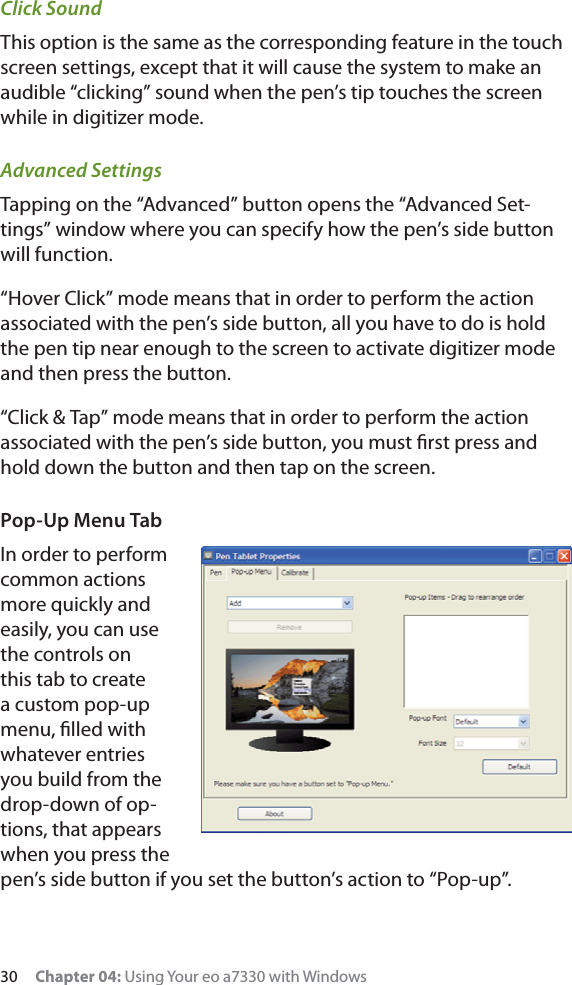
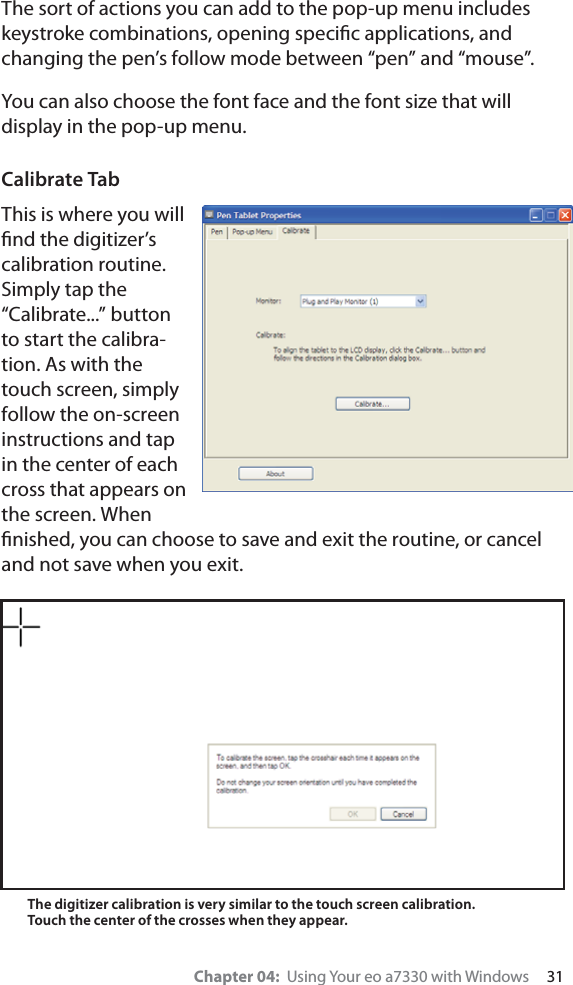
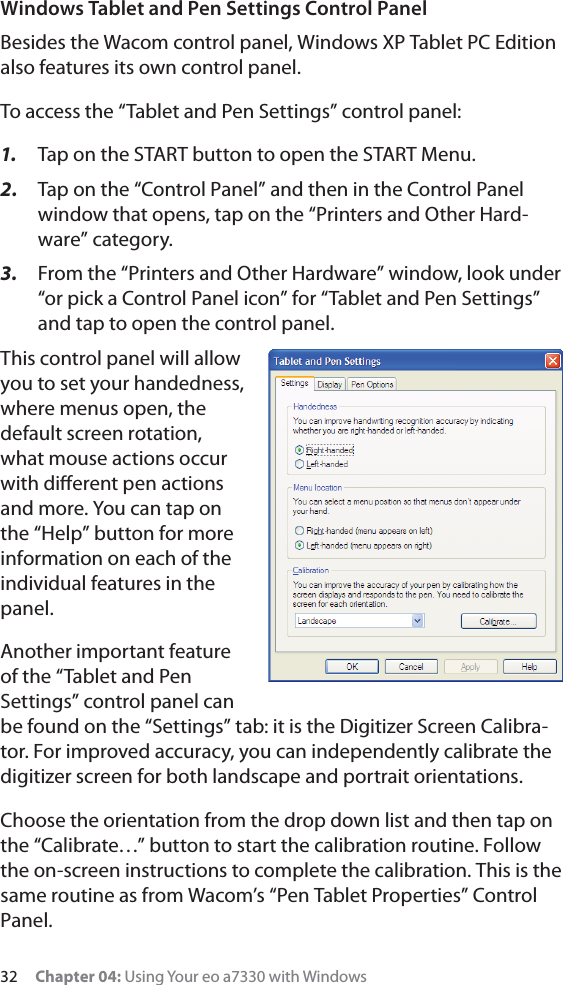
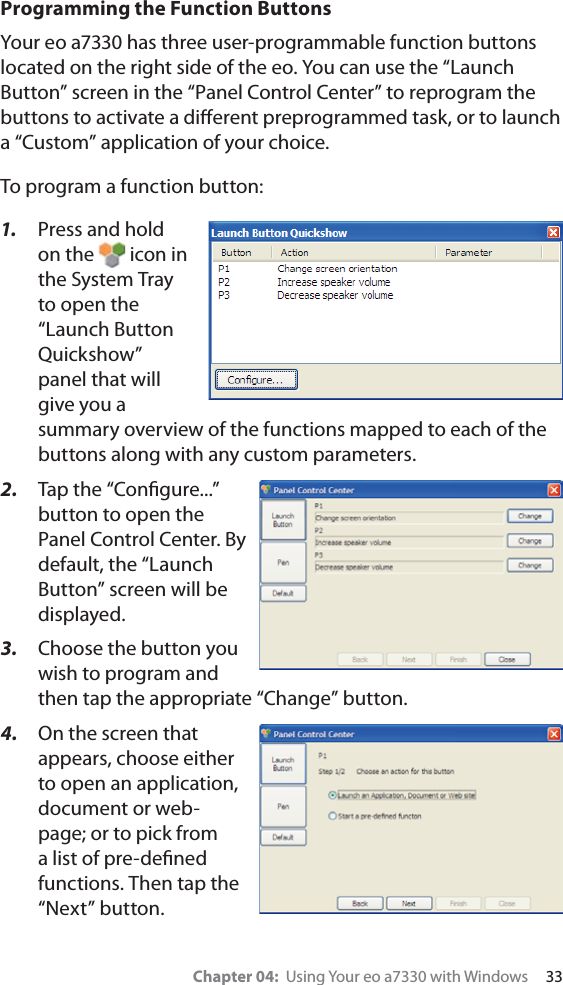
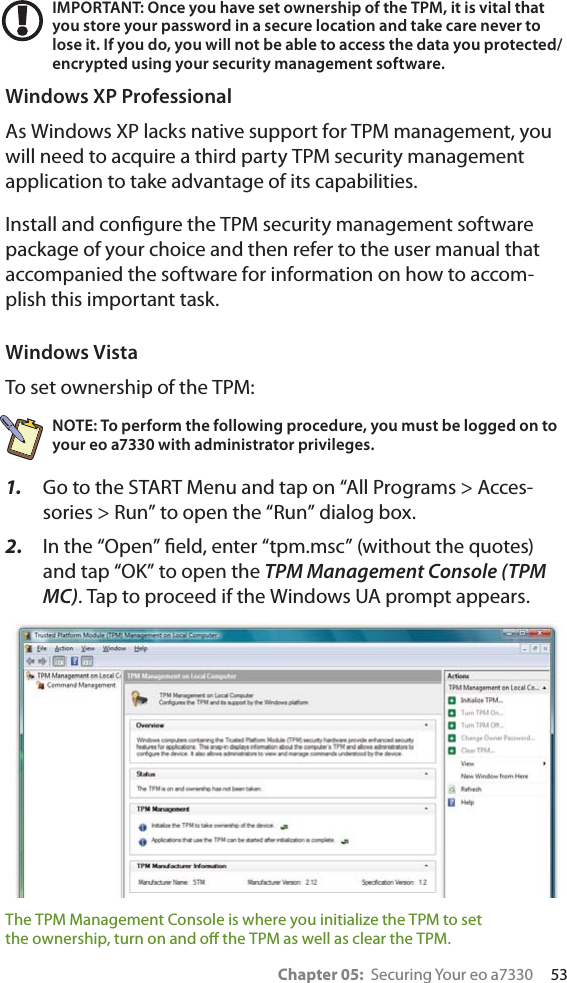
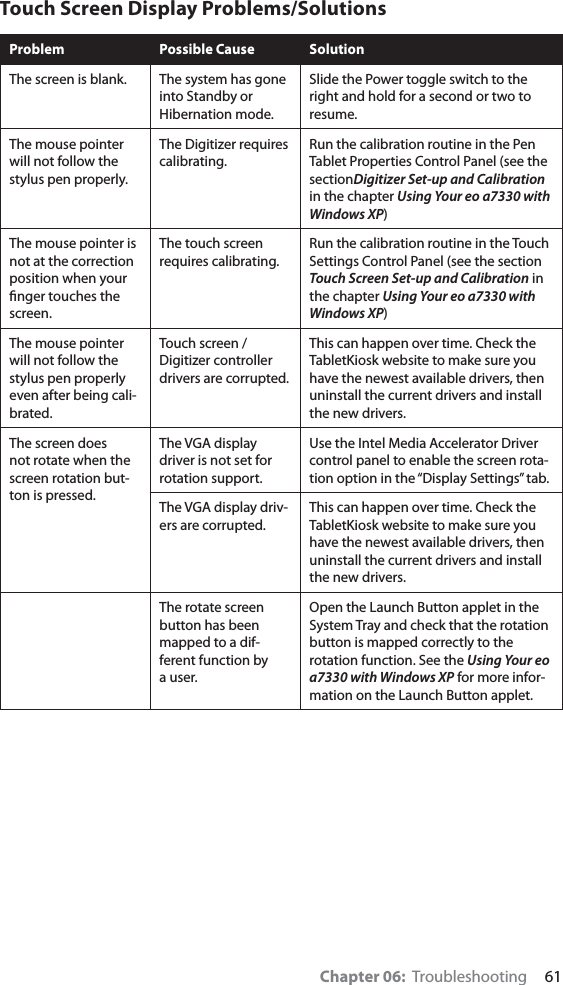
Tabletkiosk A7300TK71 7” UMPC User Manual TK a7330 Users Guide Eng01 0827
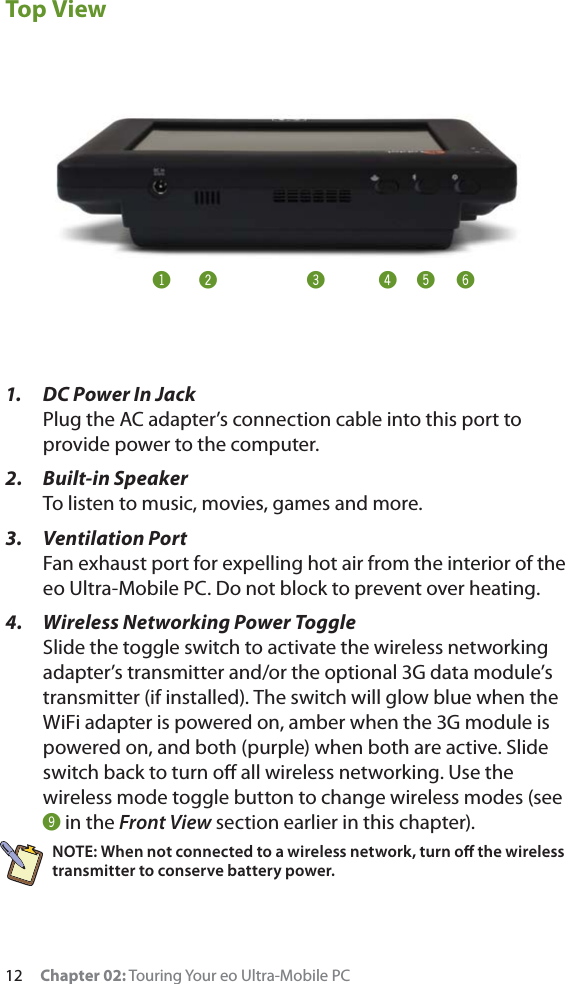
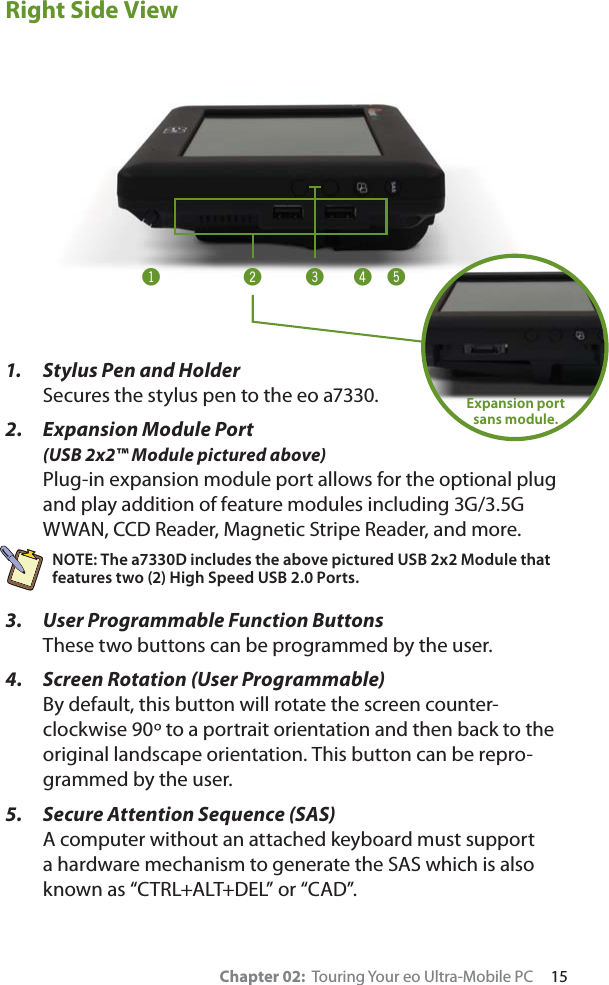
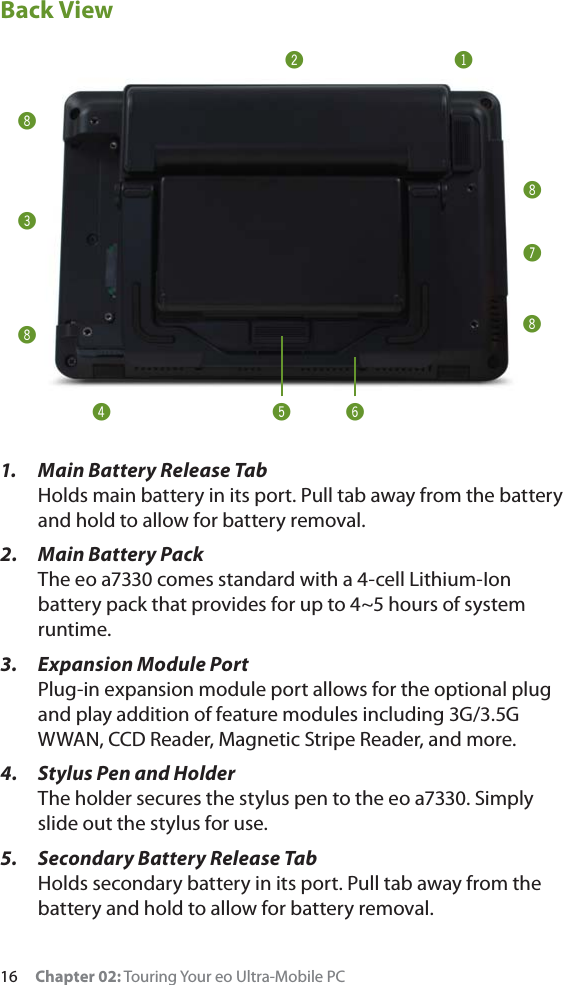
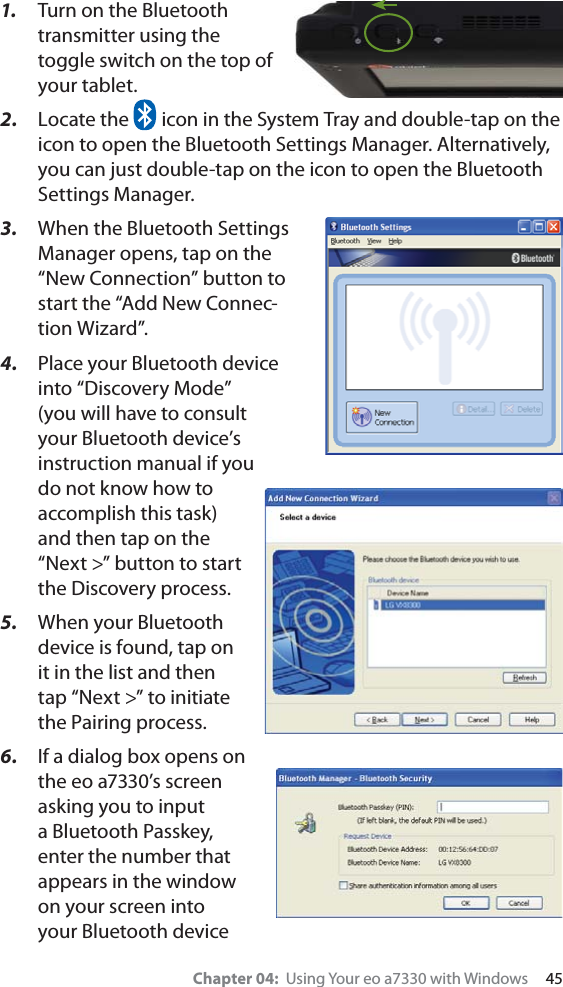
Tabletkiosk 7” UMPC TK a7330 Users Guide Eng01 0827
UserManual.wiki
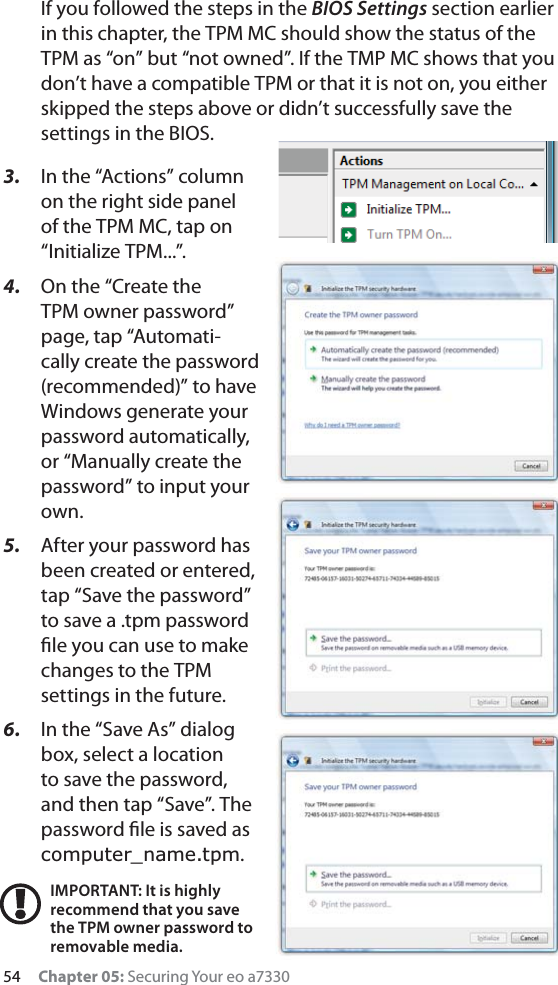
>
Tabletkiosk
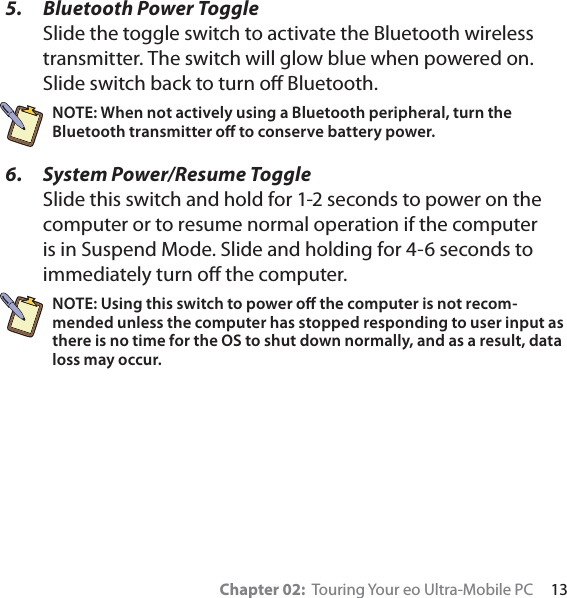
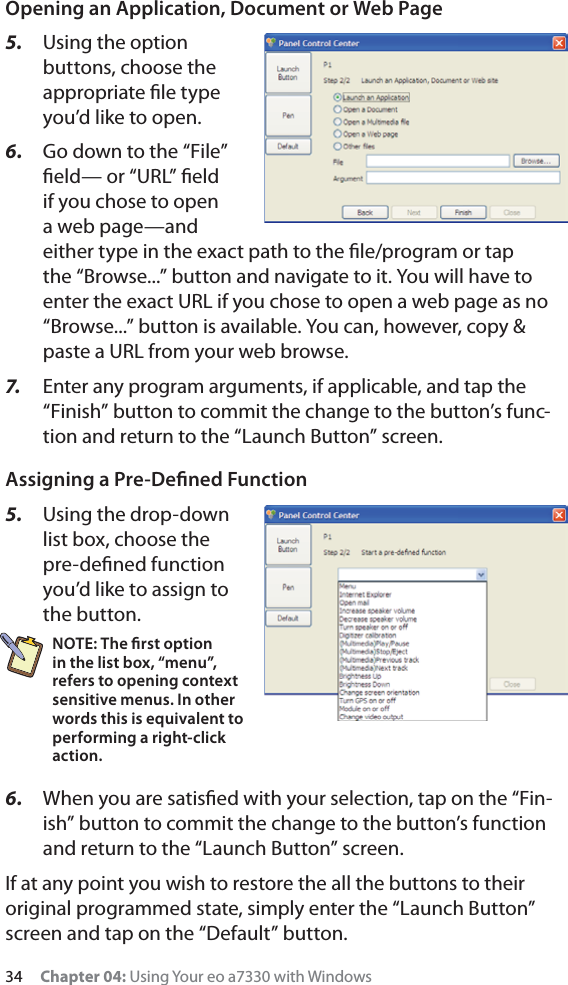
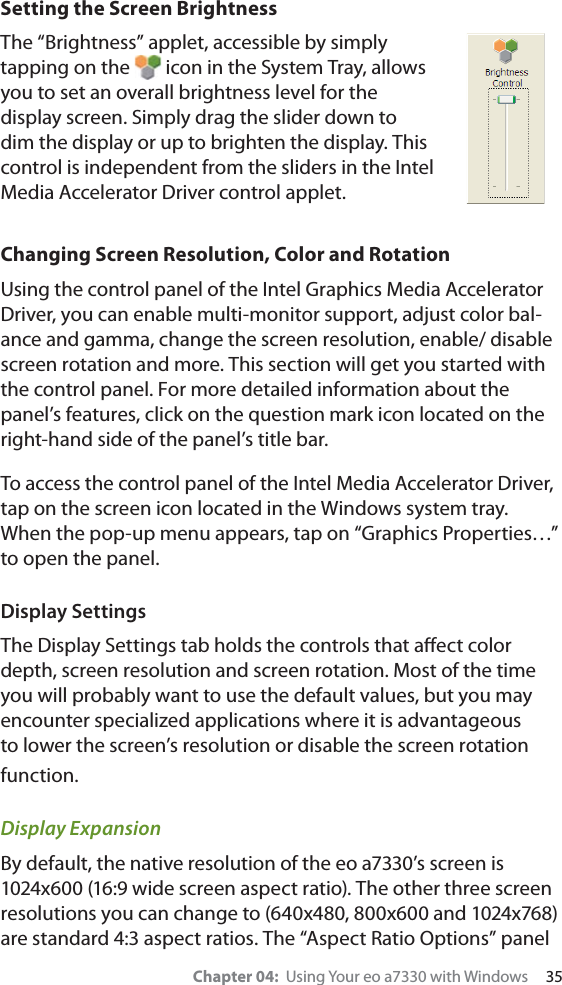
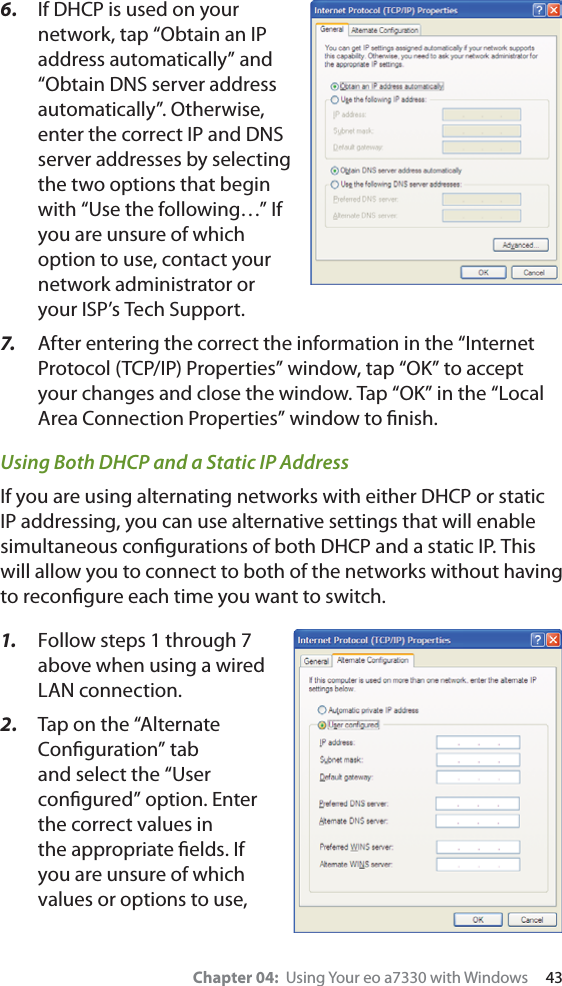
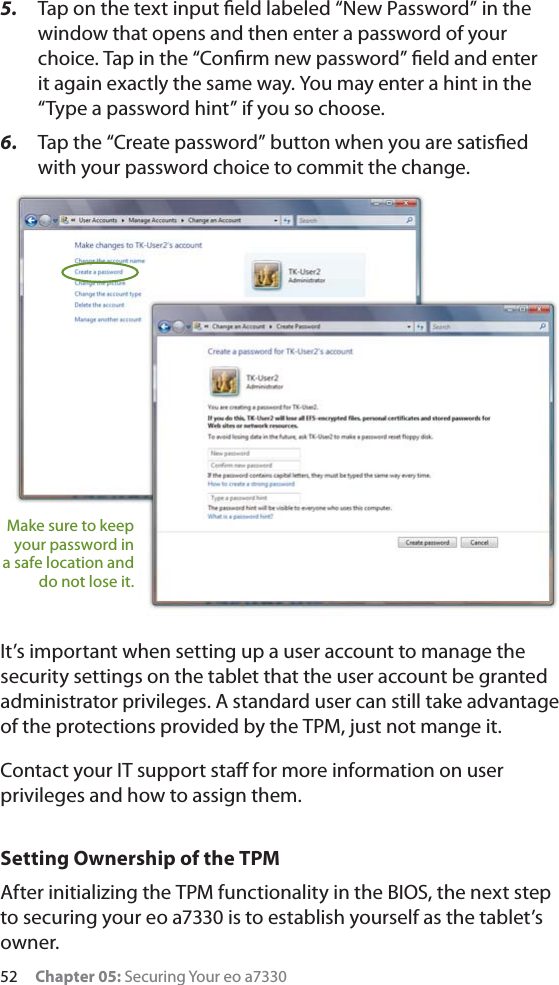
>
A7300TK71 User Manual
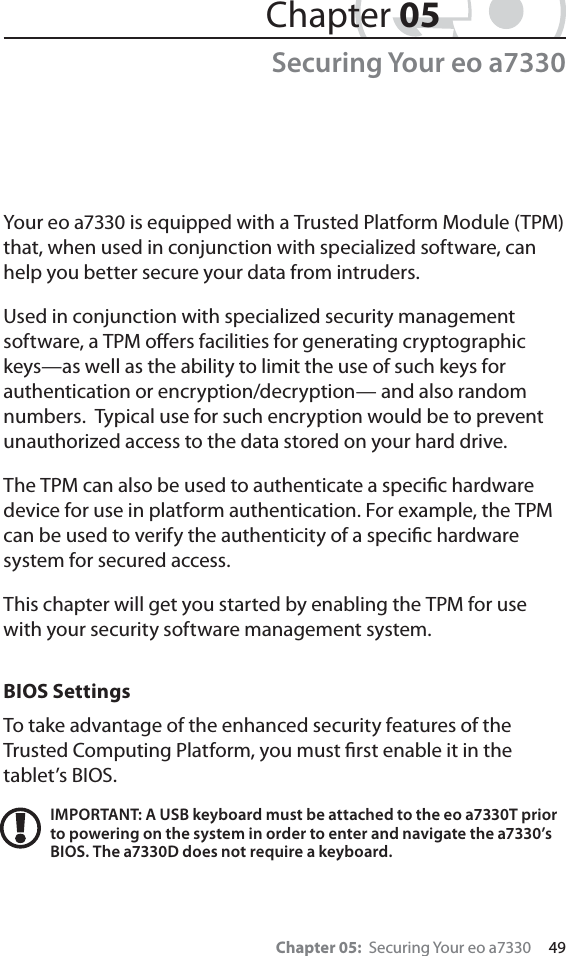
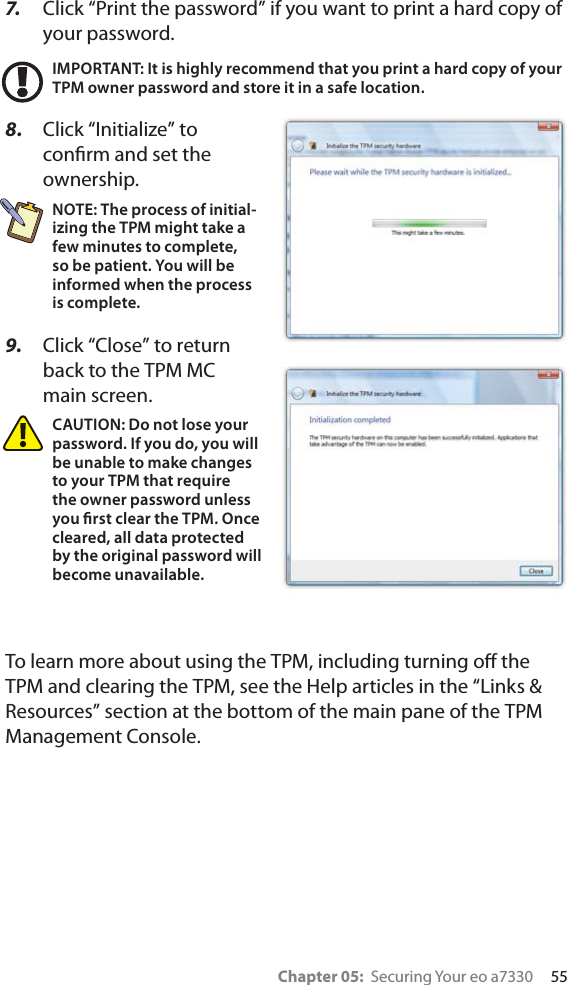
Users Manual
Navigation menu
Upload a User Manual
Namespaces
Wiki Guide
HTML
PDF
Info
Views
User Manual
Discussion / Help
Navigation


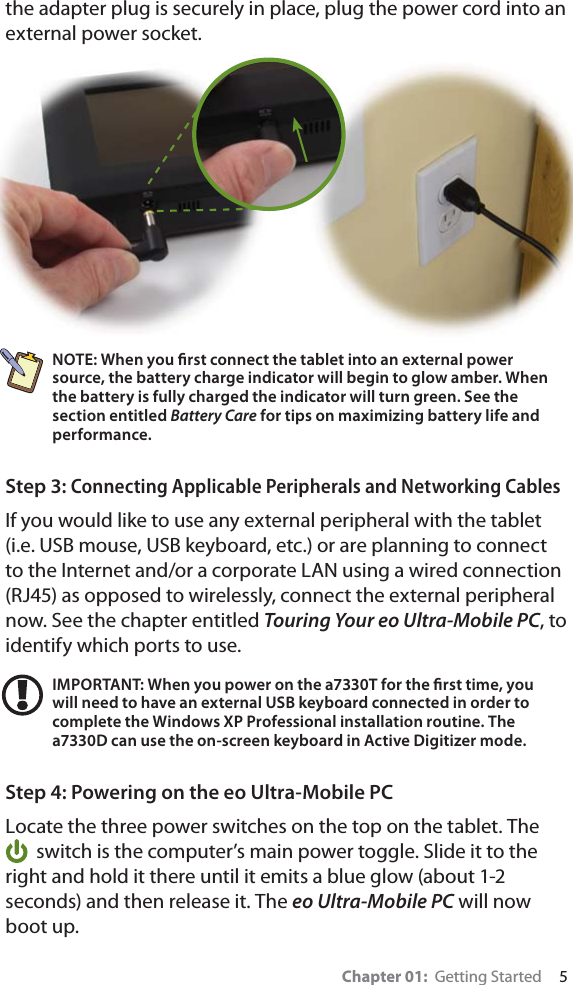


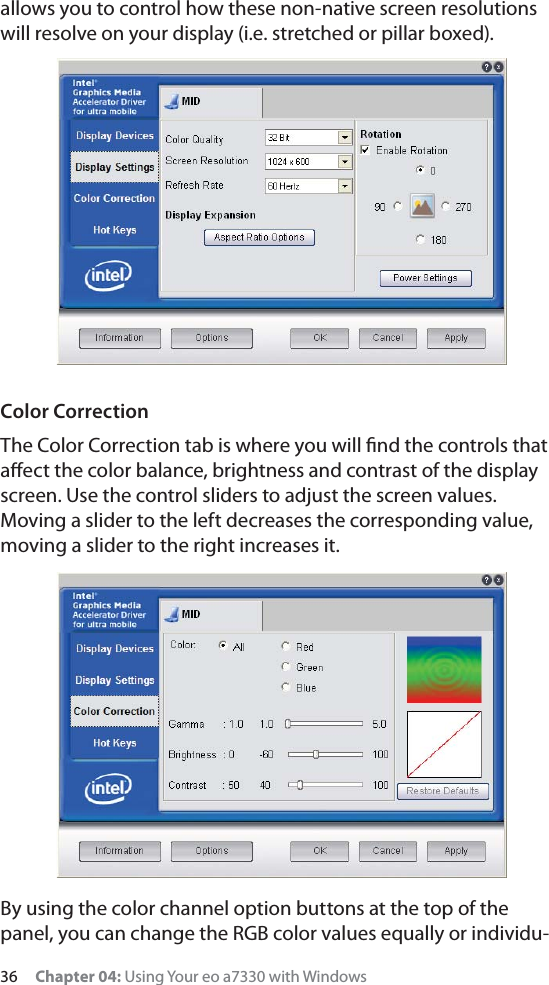
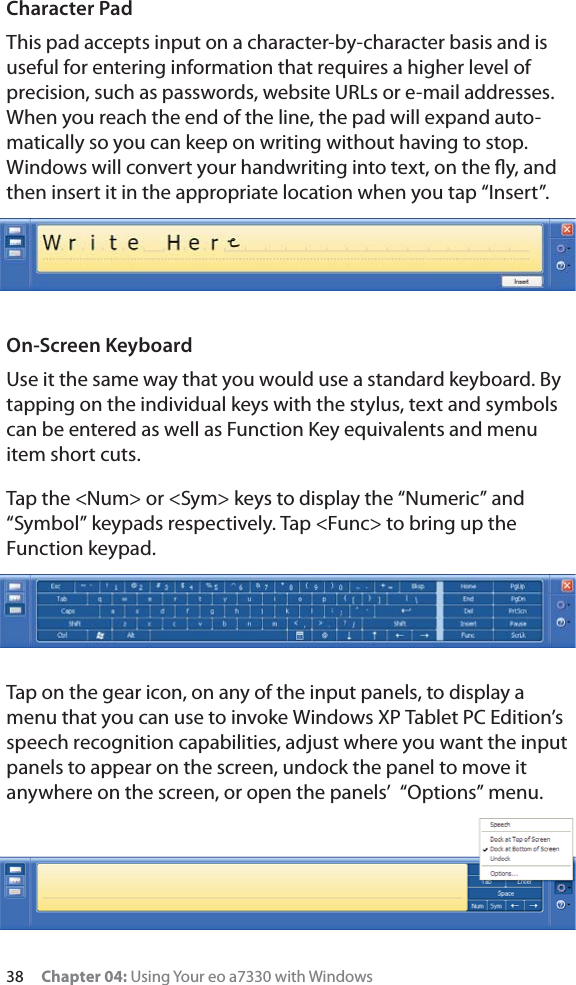


![72 Chapter 07: Specifications 2+2 channel 16/20/24-bit / 44.1KHz/48KHz/96KHz/192KHz sampling rate output (DAC) 4 channel 16/20/24-bit / 44.1KHz/48KHz/96KHz sampling rate input (ADC) EAX™ 1.0 & 2.0, DirectSound 3D™, A3D™, and I3DL2 compatible HRTF 3D Positional Audio in Windows XP Built-in Stereo Speakers and Dual Digital Microphone Array for added fidelity and accuracy 3.5 mm Headphone & Microphone Plug ‘n Play JacksWiFi Wireless Intel® WiFi Link 5100 PCIe Half Mini Card with Power ON/OFF Switch MIMO (Multiple Input, Multiple Output) support 802.11n with 1x2 MIMO Dual-Band/Quad-Mode support (IEEE 802.11a/b/g/n), compatible with IEEE 802.11d /e (Quality of Service [QoS]), 802.11h, and European Telecommunication Standards Institute [ETSI] specifications), and IEEE 802.11i (pre-authen-tication) Reduced power consumption in idle associated (25mW) EIT v4.0 support Automatic switching between the two bands (2.4 GHz and 5.0 GHz) Uses the 5.170 to 5.825-GHz Industrial, Scientific, and Medical (ISM) frequency band as defined by the IEEE 802.11a specification Uses the 2.412- to 2.497-GHz ISM frequency band defined by the IEEE 802.11b/g specifications Can operate on a 40MHz wide channel Provides 128- and 64-bit WEP encryption, hardware AES (support for key sizes of 128 bits, 192 bits, and 256 bits)](https://usermanual.wiki/Tabletkiosk/A7300TK71/User-Guide-1171771-Page-87.png)