Tactical Technologies 2K1V Law Enforcement Surveillance Voice Transmitter User Manual CST 2001V
Tactical Technologies Inc Law Enforcement Surveillance Voice Transmitter CST 2001V
Operators Manual
CST2001/V
SYNTHESIZED
VOICE TRANSMITTER
OPERATING
INSTRUCTIONS
© 2000 by Tactical Technologies Inc
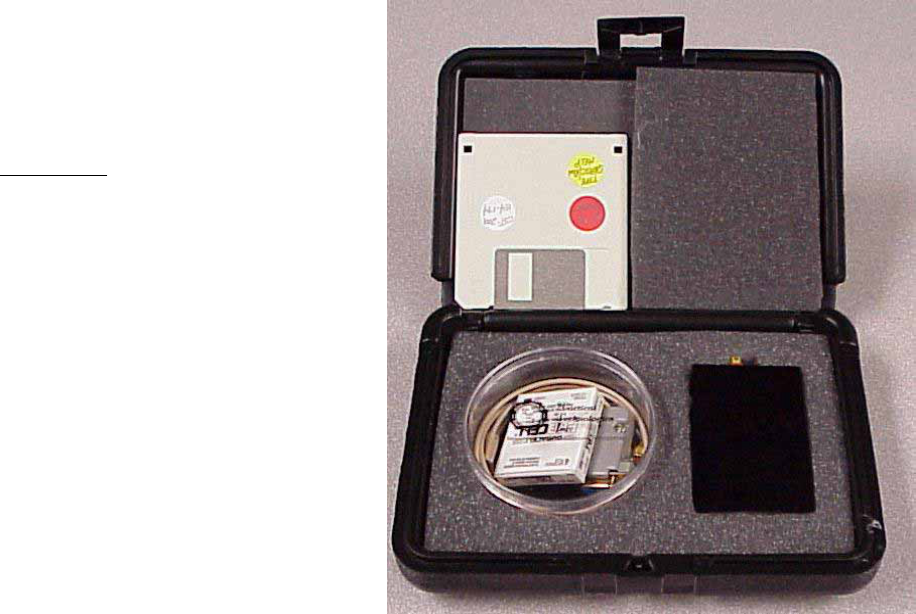
CST-2001 Series
Covert Voice Transmitter
DESCRIPTION
The Tactical Technologies Inc. Model CST-2001/V
series is a 1 or 2 channel 250 mW VHF-FM
synthesized voice transmitter.
The transmitter utilizes 4 "AA" Alkaline Batteries for
its power supply, and is designed to utilize a specially
built combined microphone/antenna unit. The CST-
2001 is programmed via an open serial port on an IBM
compatable PC. The transmitter's firmware is
compatable with ANY vintage IBM compatable PC's
communications program - such as Hyperterminal or
Terminal.
The supplied instructions are for the Window 95 or 98
operating systems.
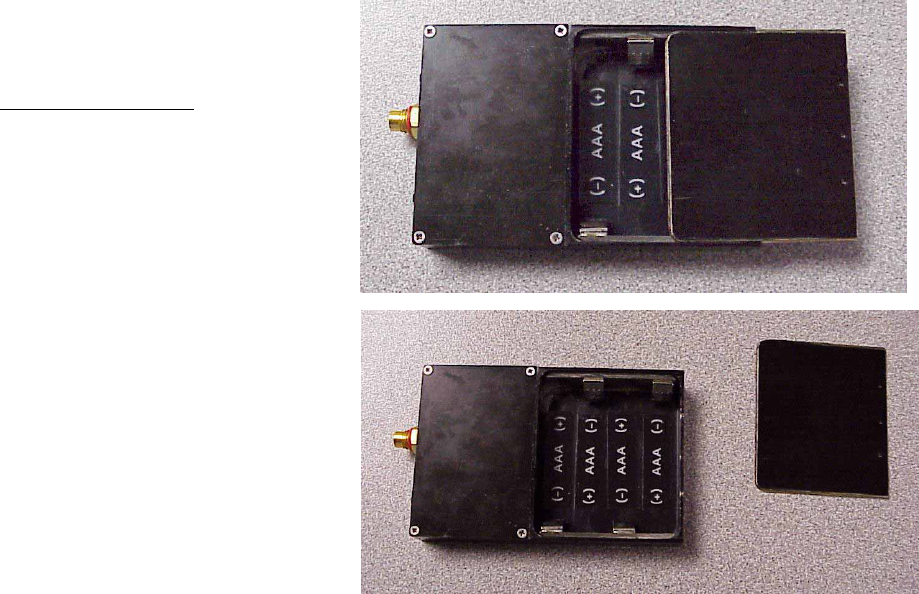
BATTERY INSTALLATION
1.) Remove battery cover off unit by gently sliding
the battery compartment cover down and away
from the transmitter housing. Slight pressure may
be needed to release the small dimples found near
the bottom of the cover.
2.) Install 4 each standard AAA Alkaline batteries
- Make sure you observe polarity as indicated
inside battery compartment.
3.) Replace battery cover. Be sure to insert both
sides of cover into the grooves on each side of the
battery compartment. Cover slides easily up
towards the top of the housing.
NOTE: It is important to keep the cover aligned
perpendicular with the transmitter housing when
removing or replacing it.
Slide Lid
-------- >
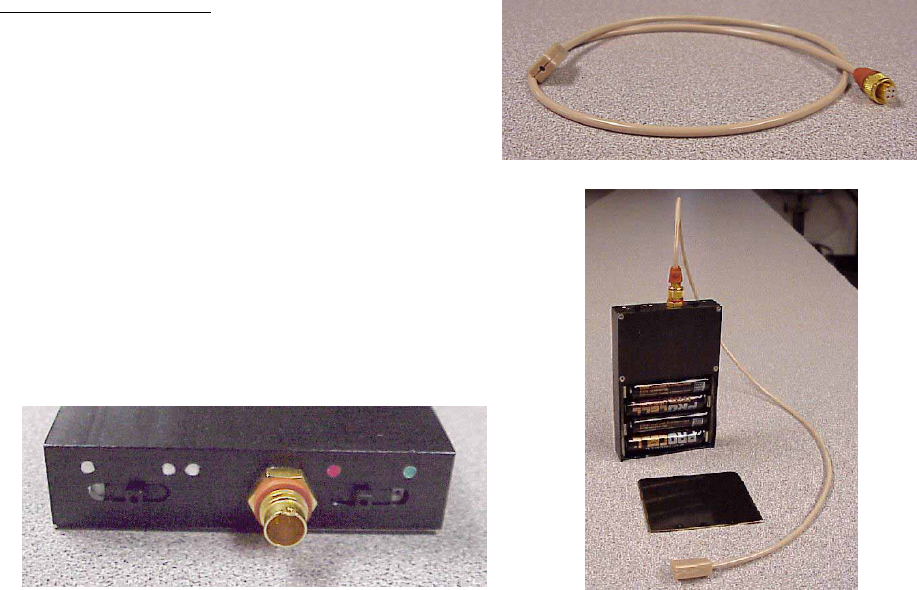
TRANSMITTER OPERATION
1.) CST-2001 comes with a single external, integral
microphone/antenna component. Install microphone/
antenna to its appropirate connector on top of
transmitter. The four pin connector is keyed for
proper installation. Be sure to lock down the
connector by twisting the screw ring clockwise until
it snugs up to the panel connector. DO NOT
OVERTIGHTEN.
2.) Select frequency to operate on by positioning
frequency select slide switch:
Single white O is frequency 1
Double white OO is frequency 2.
3.) Turn on/off switch to ON position
Red O is OFF
Green O is ON
4.) Test Operation using appropriate receiver.
F1 F2 OFF ON
INSTALLING YOUR SOFTWARE
1.) The computer program supplied to install the frequencies into your
CST-2001 transmitter is a module written for Microsoft's Hyper-
Terminal. HyperTerminal is supplied with Windows 95 and 98.
If HyperTerminal is installed, you can proceed. If you have not
installed this program onto your computer, please do so at this time.
Installing HyperTerminal:
a.) Select "START" from the Windows Task Bar
b.) Select "Settings" - "Control Panel" from the Start Menu
c.) Select "Add/Remove Programs" from the Control Panel
d.) Select the "Windows Setup" tab at the top of the window
e.) Double-click on "Communications" in the 'components' window.
f.) Click the box next to "HyperTerminal". This puts an X in the box.
g.) Click "OK" at the bottom of the window.
h.) Click "OK" at the bottom of the new window.
i.) Follow the on - screen insturctions about insterting you Windows
Installation disks or CD.
4.) Install the HyperTerminal TTI Transmitter Programming Module:
a.) Insert the supplied 3 1/2 inch floppy disk into you computer's disk
drive.
b.) Select "START" from the Windows Task Bar.
c.) Select "RUN" from the Start Menu
d.) Type "a:\setup" in the white bar
e.) Select "OK"
f.) Follow the on screen insturctions.
g.) Remove disk when finished.
PROGRAMING YOUR
FREQUENCIES
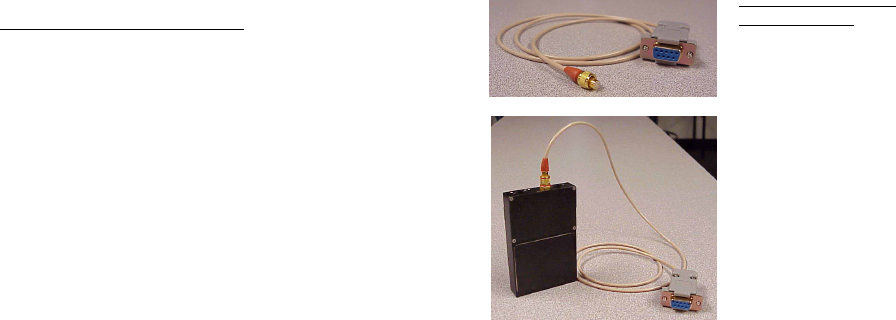
1.) Connect the 2001 program-
ming cable to the top of the
transmitter via the round four
pin connector. This connector
is keyed for proper installation.
Be sure to lock down the
connector by twisting the screw
ring clockwise until it snugs up
to the panel connector. DO
NOT OVERTIGHTEN.
2.) Connect the D style 9 pin
female connector to an open
serial port on your IBM
compatable computer. If your
computer's serial port is a 25 pin
connector, you will need to use a DB25 to DB9 serial adaptor (not
included).
3.) Start the "TTI Transmitter Programming" software by clicking it's
icon located on the Windows Desktop.
4.) You must know the number of the Serial (Com) Port you have
attached the transmitter to. The software comes ready to work with
Com 1. If you are using Com 2, 3, or 4, you must perform the
following:
a.) Select "File" - "Properties" from the HyperTeminal Task Bar
b.) From the "Phone Number" tab, select your Com Port in the

IMPORTANT:
1.) If computer interface is not COM 1, you must select the correct
Com port as described in the instruction.
2.) If you only program one frequency - program it into BOTH
channels.
3.) The separation between the two transmit channels must be:
Greater than or equal to 12.5 kHz
4.) Frequencies must be in 12.5 kHz steps.
Your frequency must end in any of the following configura-
tions: xxx.0000
xxx.1250
xxx.2500
xxx.3750
xxx.5000
xxx.6250
xxx.7500
xxx.8750
5.) The transmitter must be ON in order to program it.
6.) Turn OFF the transmitter when finished programming.
OPERATING NOTES:
1.) Microphone/Antenna combination should always be kept
vertical for best operation.
2.) Always use fresh batteries at the beginning of each operation.
"Connect Using" pull down menu. Select the "Direct to Com ___"
line that corrolates to your Com Port.
c.) Select "OK" from the bottom of the window
d.) Your Com Port selection is automatically saved.
5.) Turn ON your Transmitter. At this time, the transmitter will report
its serial number and the frequencies programmed into it onto the
HyperTerminal screen.
6.) Entering your frequencies is very easy. Just remember to use all
lower case letters, and follow the same letter/punctuation/and space
sequence that the transmitter reported to you on the screen. For the
first frequency, you start by entering f1=. For the second frequency,
you start by entering f2=. If at any time you make a mistake, you
simply backspace to erase and type again. The program will also tell
you if you have made an erroneous entry by reporting invalid as a
response. If you want to see what frequencies are in the transmitter,
type fv, for 'frequency validate'. Your frequency entries should look
like this: f1=xxx.xxxx, or f2=xxx.xxxx (where 'xxx.xxxx' is your
frequency), or fv to validate entries . You do not have to type 'MHz'.
If you type anything other that these phrases, the program will report
'invalid', and you can start again.
7.) After you have finished validating your entry, turn off your
transmitter, disconnect the cables, and close the computer program.
Tactical Technologies Inc
1701 Second Ave
PO Box 91
Folsom, Pennsylvania 19033
USA
TEL: 610-522-0106
FAX: 610-522-9430